Leaderboard


Popular Content
Showing content with the highest reputation on 06/17/2017 in Posts
-
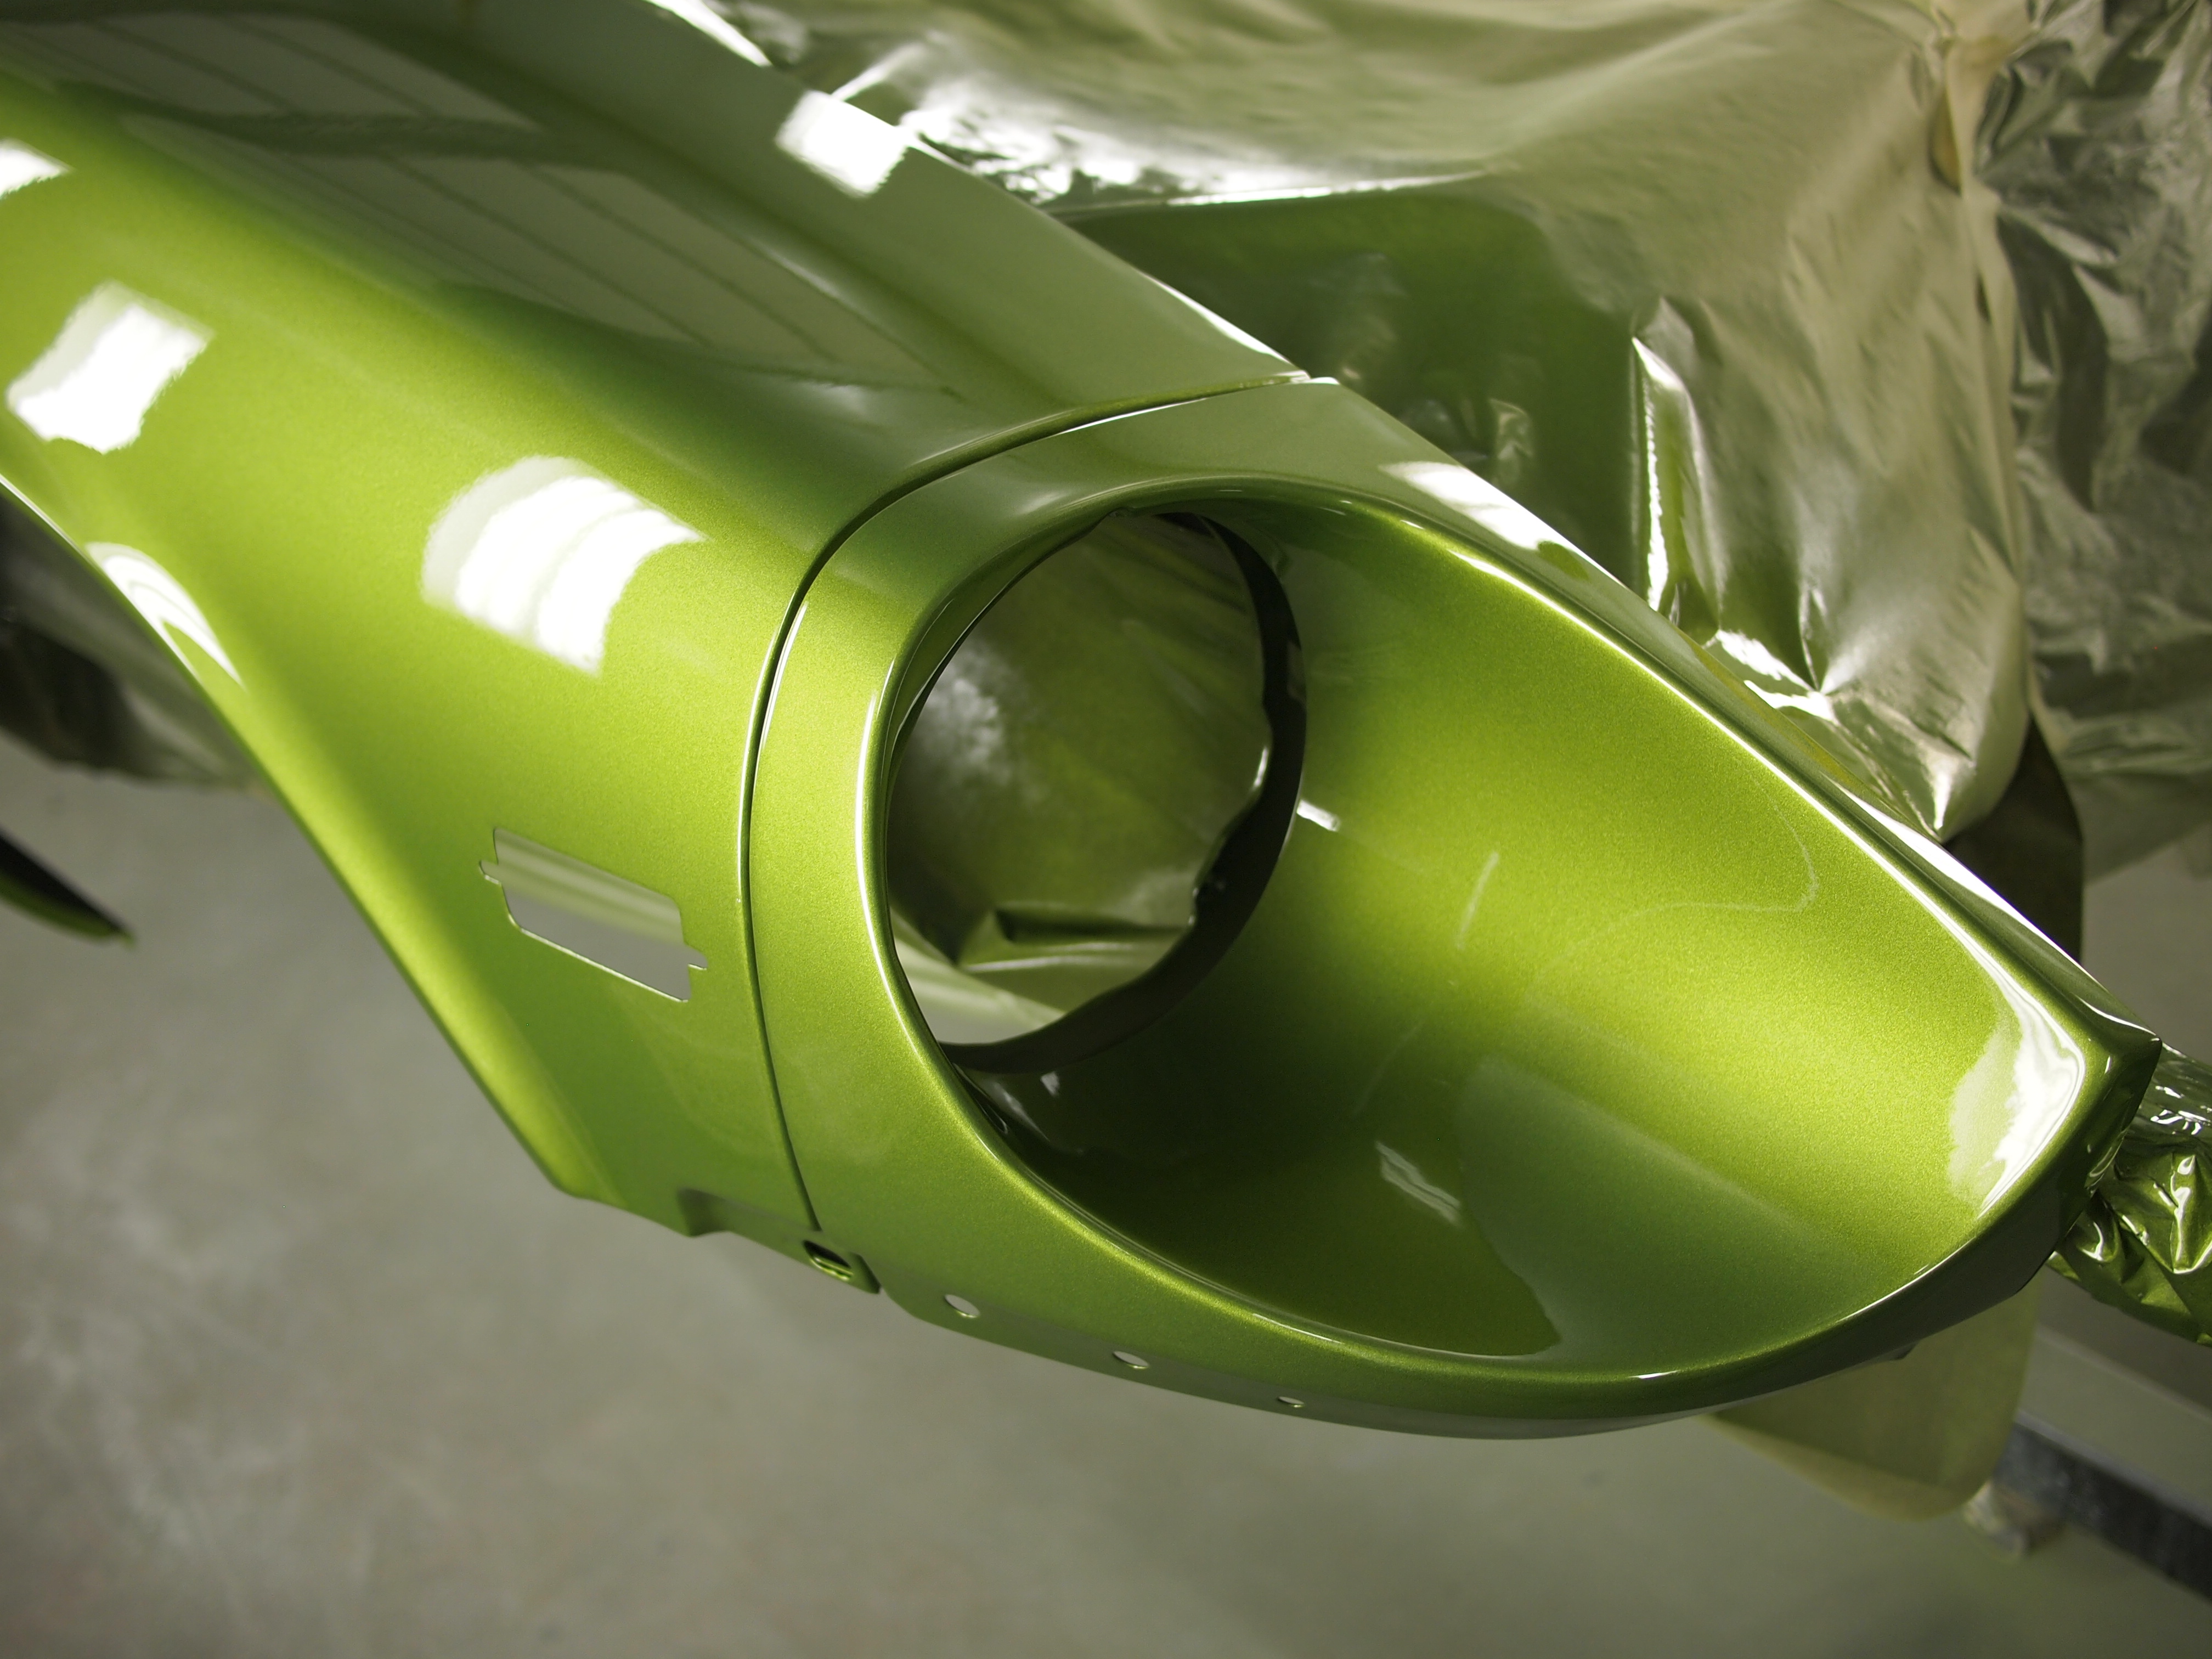
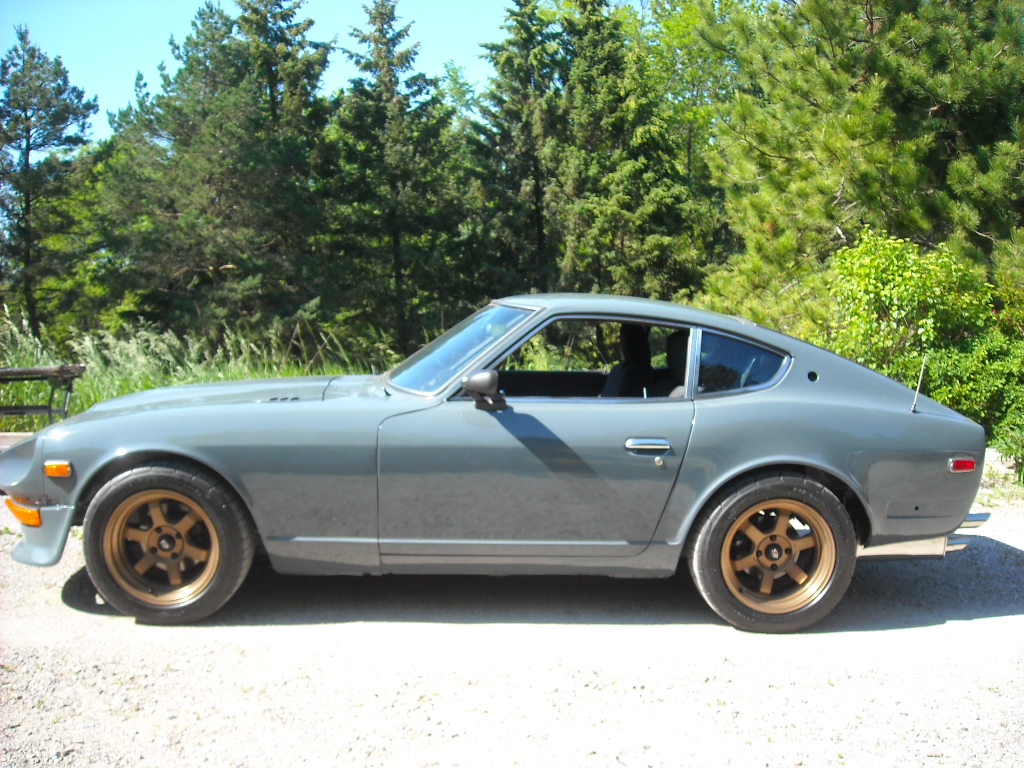
2 pointsAs a thread update, I wasn't happy with some parts of the paint, just some of the finish. Next week its off have the engine bay media blasted to bare metal then a general going over. I've been spending the past year researching and collecting parts to put it together. I'd like it rolling in the next 3 months. These should help Nice long springs, full stroke dampers, all just nicely done. The suspension is one area i'm really worried about as it will make the car, I value the feel and handling over anything else. It was lots of research and traveling to see various companies/options. For me intrax from VA motorsport was the best option as a higher quality, tested and proven setup. very high quality dampers. https://www.va-motorsport.com/ http://en.intraxracing.nl/merken/datsun/datsun-240z-260z-280z-(nissan-fairlady-z)/dat5503rsa/2 points
-
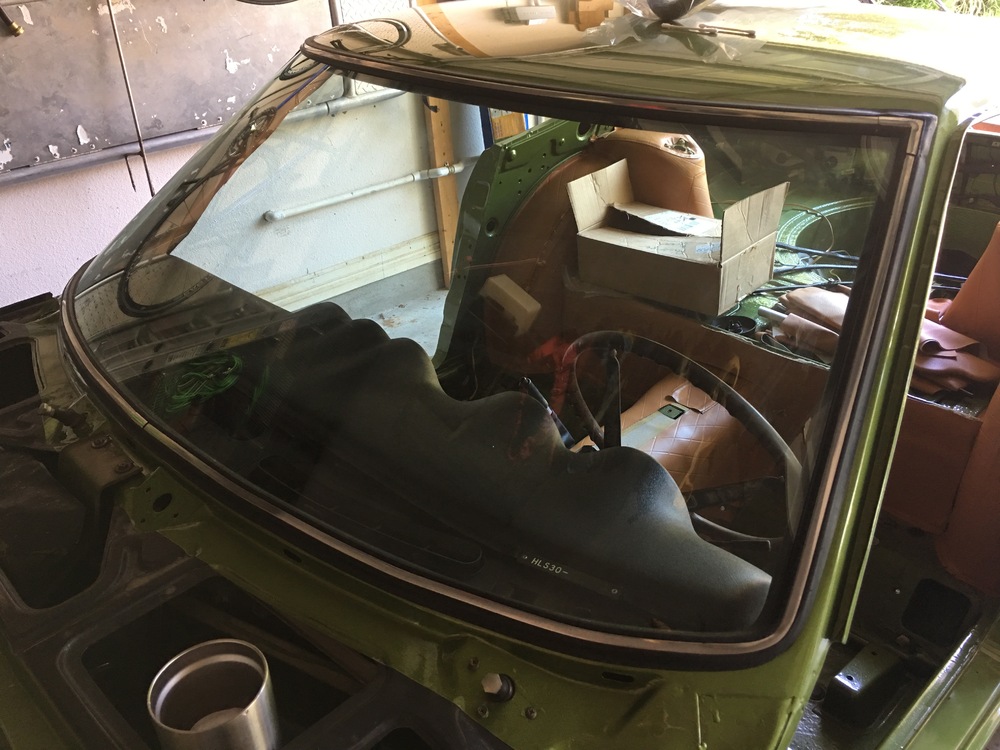
2 pointsAbsolute Auto Glass in Austin for the win! The precision gasket of that vintage was about perfect, no need to tape like @240260280 had to do.
 2 points
 -
1 pointWell I spent the morning doing my best to align the new outer tie rod ends with some string and measuring tapes. I think I got it pretty close, obviously I should take it to a shop, but I'd like to replace a couple more suspension components first. I'm happy to say that 99% of my steering wheel "death wobble" is gone. I still get it when I brake hard, so my next mission will be to address the brakes. Thanks for all of the replies and comments, but special thanks to siteunseen and esmit208. Siteunseen has routinely replied and offered good advice, and without esmit208 's advice on adjusting the tie rods, my dumb self would've been taking the tie rod ball joint out and turning it every time haha.1 point
-
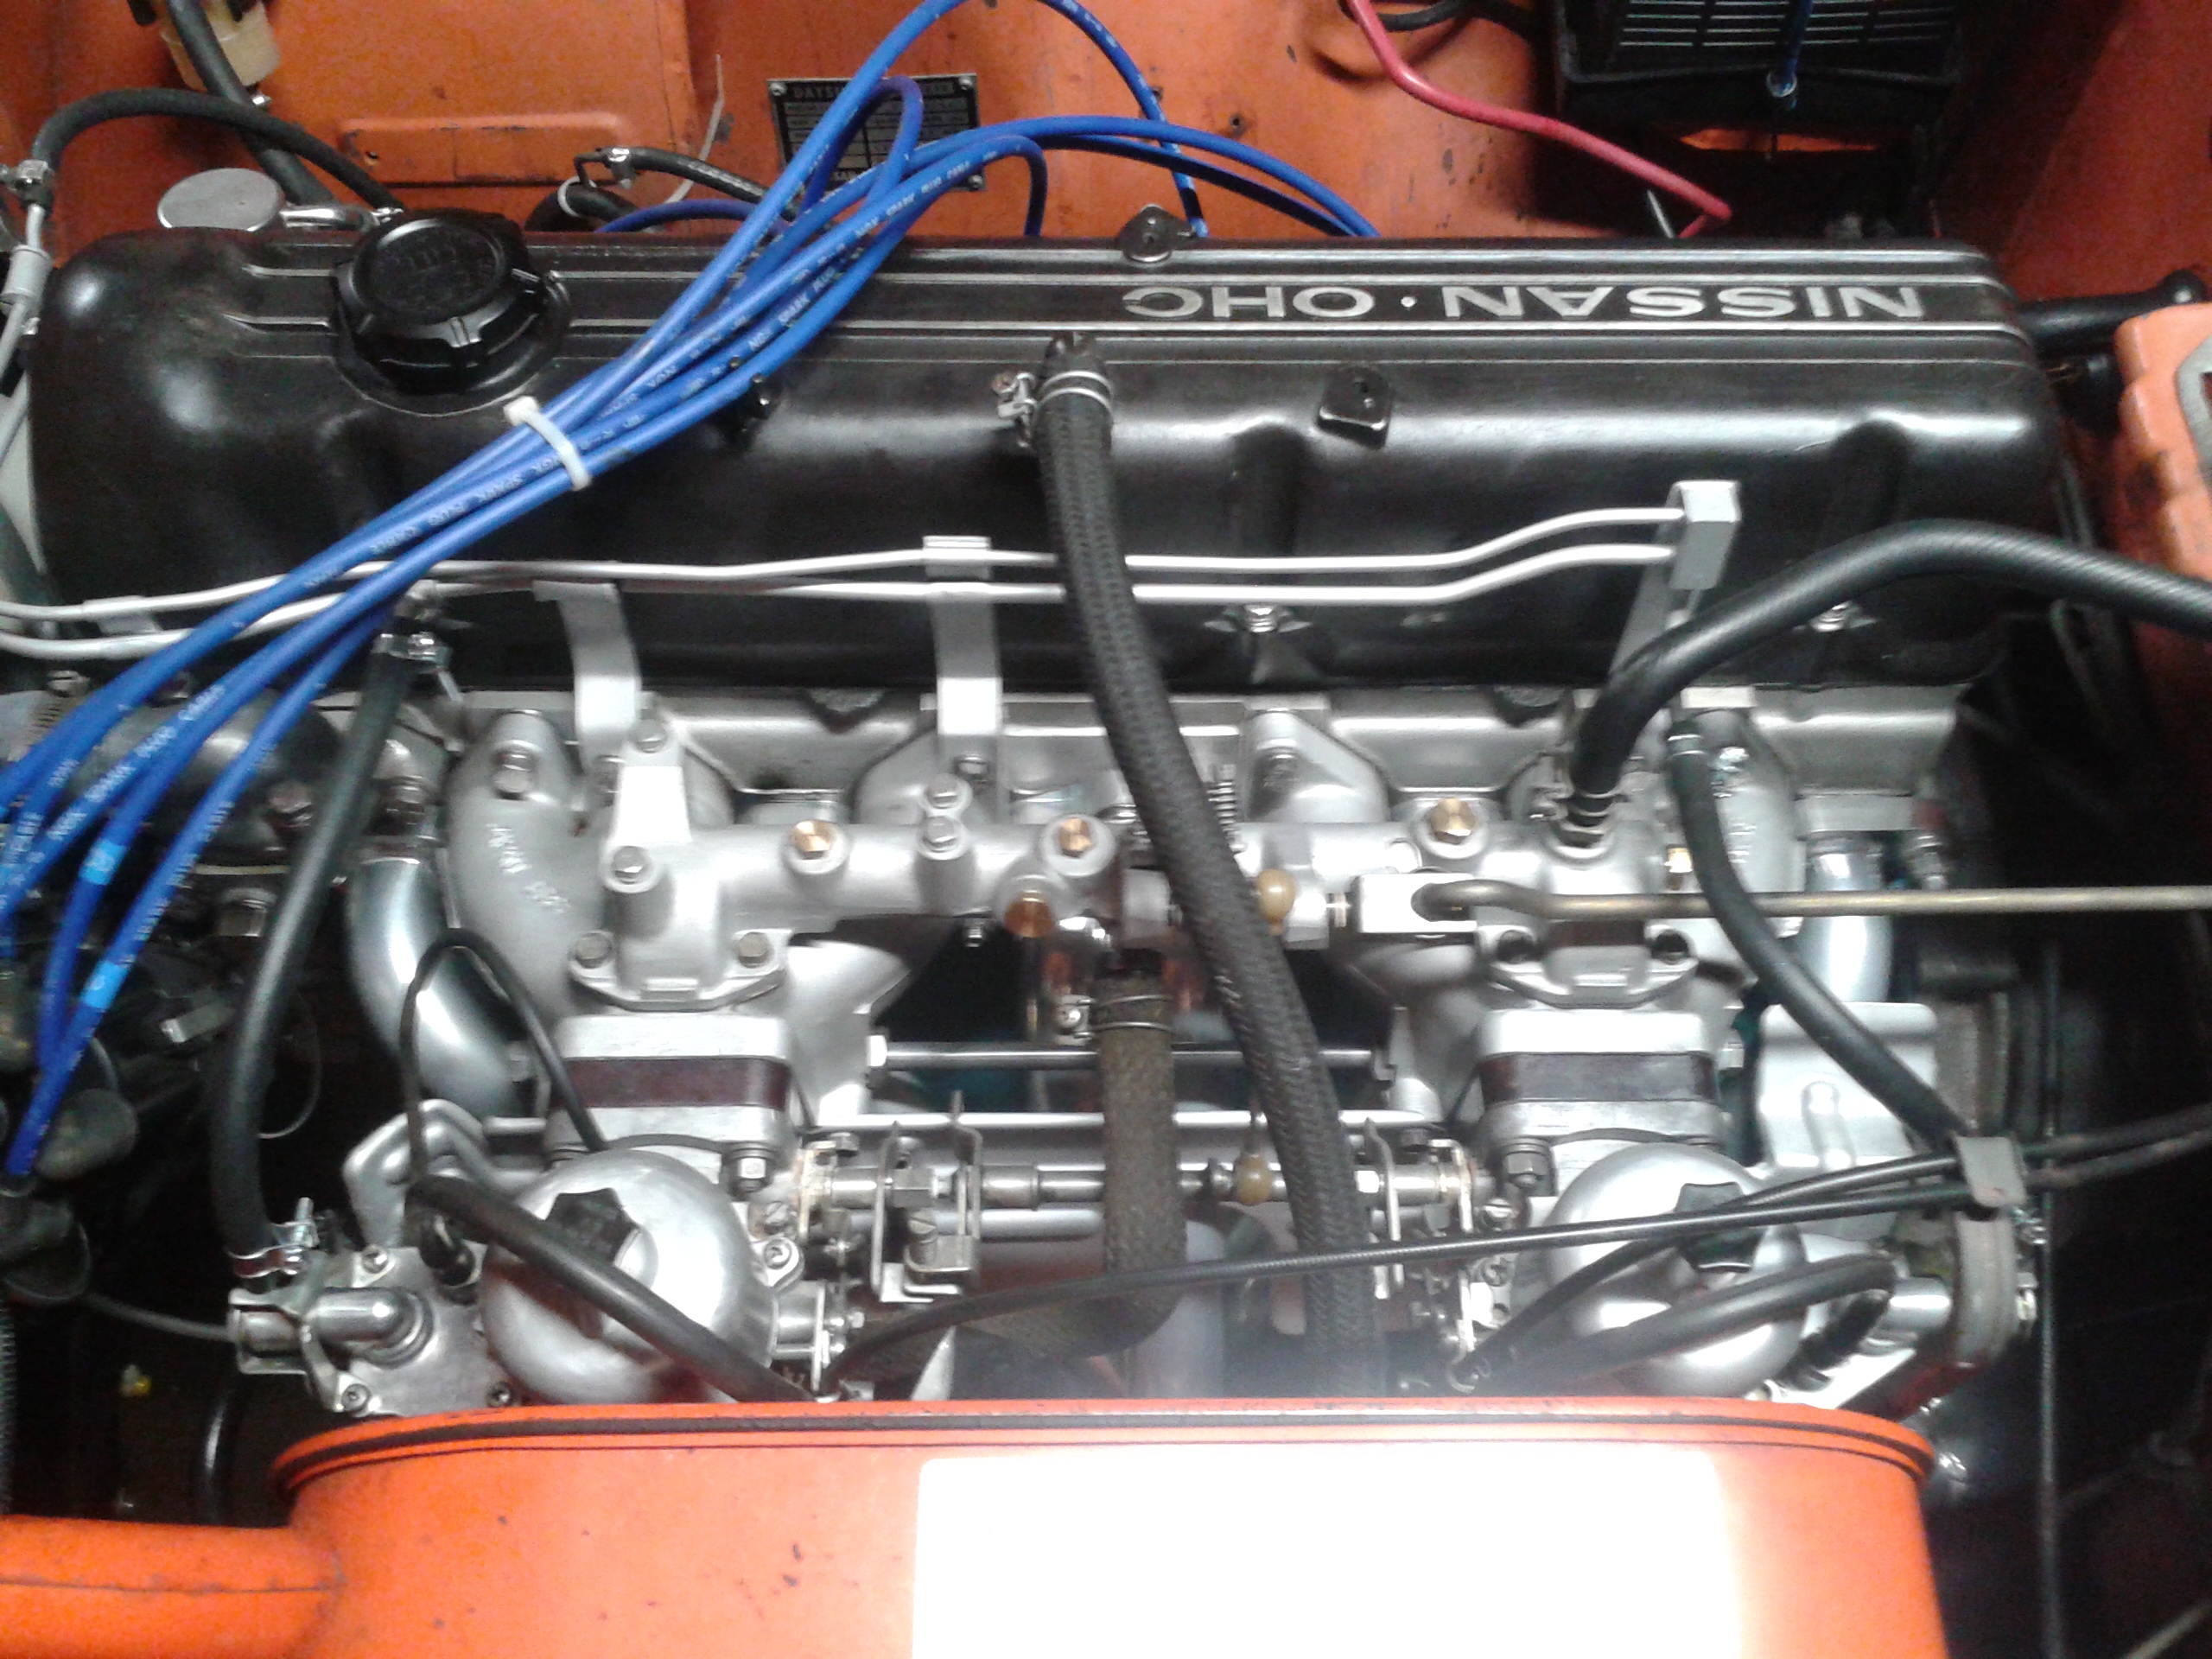
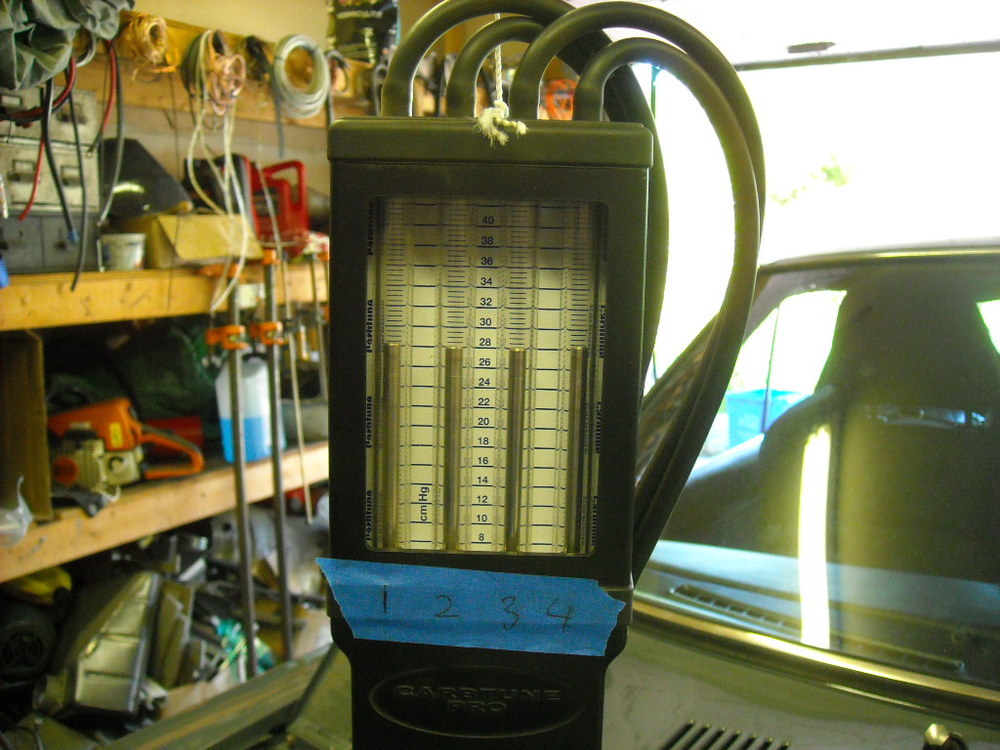
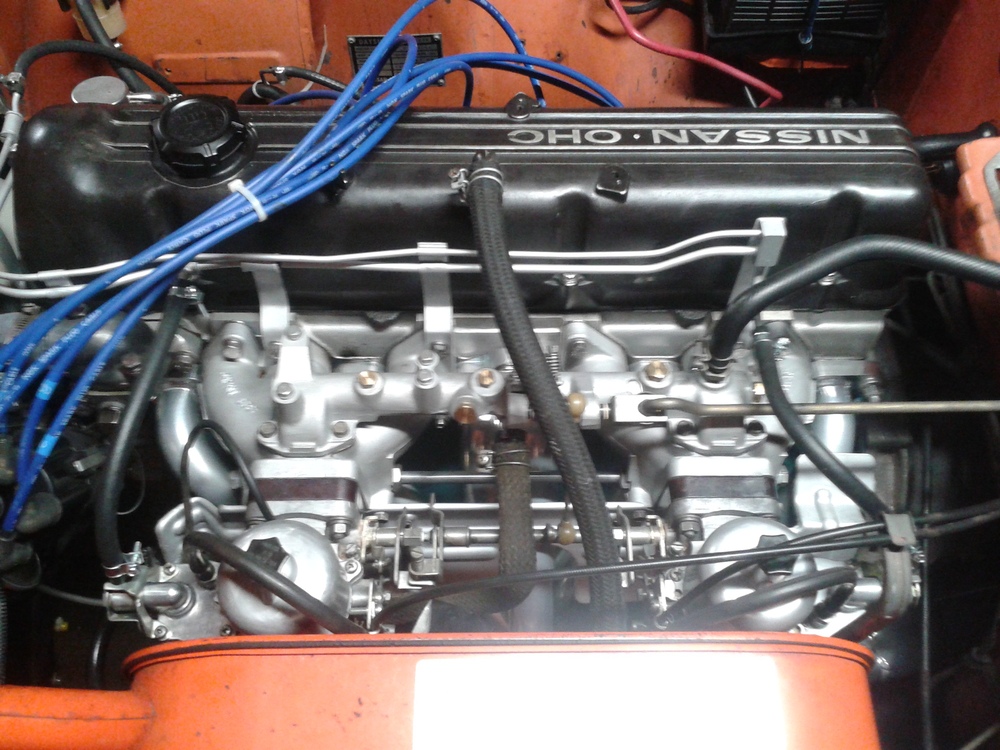
She is on the road! first time in about 20 yrs, Matt tuned it from idle to about 3200 rpm so I'm trying not to push it too hard until I can get down to his shop this week and finish the tune on the highway. Got the TB's balanced using my old motorcycle manometer, evened out TB 123 and 4 then pulled the tubes from 1&2 and put the on 5&6 and balanced them with 3&4. I'm leaving as much outside trim and badging off until Jody gets the cut & buff done at the end of the month. Years ago I read somewhere that you must do a second torquing of the wheel nuts after a few miles when you have installed new wheel studs, that came flooding back into my head after I heard some clicking happening on the front wheels, I was only a mile from home so headed back. Two nuts were loose and all the rest of them needed re torquing That's one of the reasons I never let myself get too far from home when shaking out the bugs, I had a list of 8 things to work on before I even got out of the driveway. But the thing I have been most concerned about was the 1.75" drop of the steering rack, that the car wasn't going to have that great handling anymore, very pleased to report that the TTT off set tie rods and the bumpsteer spacers did the trick, the handling is spot on, nothing strange, it all feels very familiar. No bad sounds coming from the LSD OBX rear end and I did lay a little patch just to make sure both tires were leaving rubber on the road, the braking isn't as good as I hoped for but there is still room for tweaking. So far it is feeling very good, very much like the old Z but a lot more power and NO squeaks, pretty sure that is the stitch welding. Going to try and get the rest of the tuning and window tints done this week and I guess it is time for another appraisal.


 1 point
 -
1 pointI'm here waiting guys! Janet and I arrived at noon and took in the sites.1 point
-
I see a lot more opportunity in that collection than I see depression. I could spend a day looking and letting my mind fantasize about the possibilities. Oh I wish I were in the land of cotton, Old times there are not forgotten. Look away, Look away, Look away DixZie Land.1 point
-
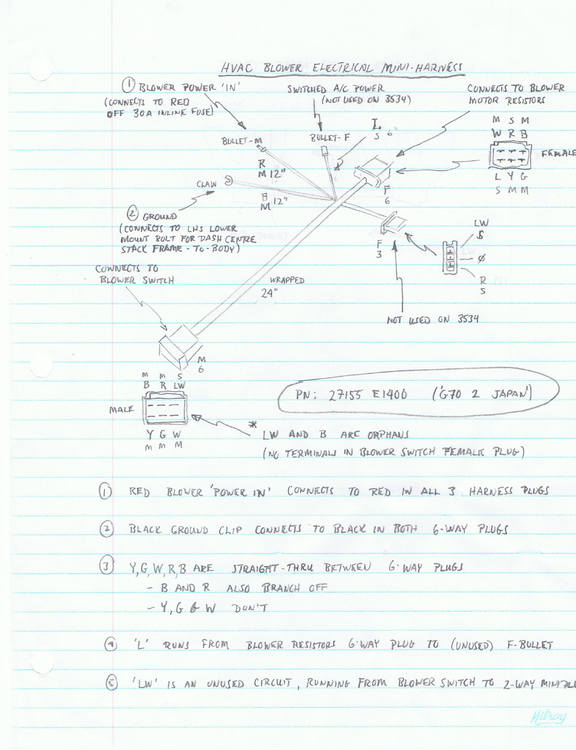
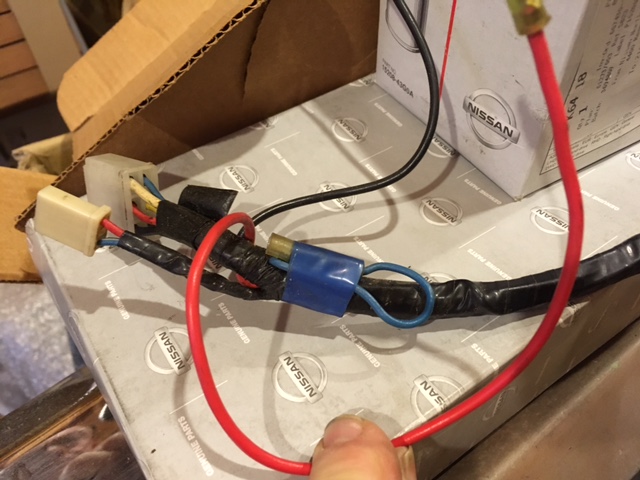
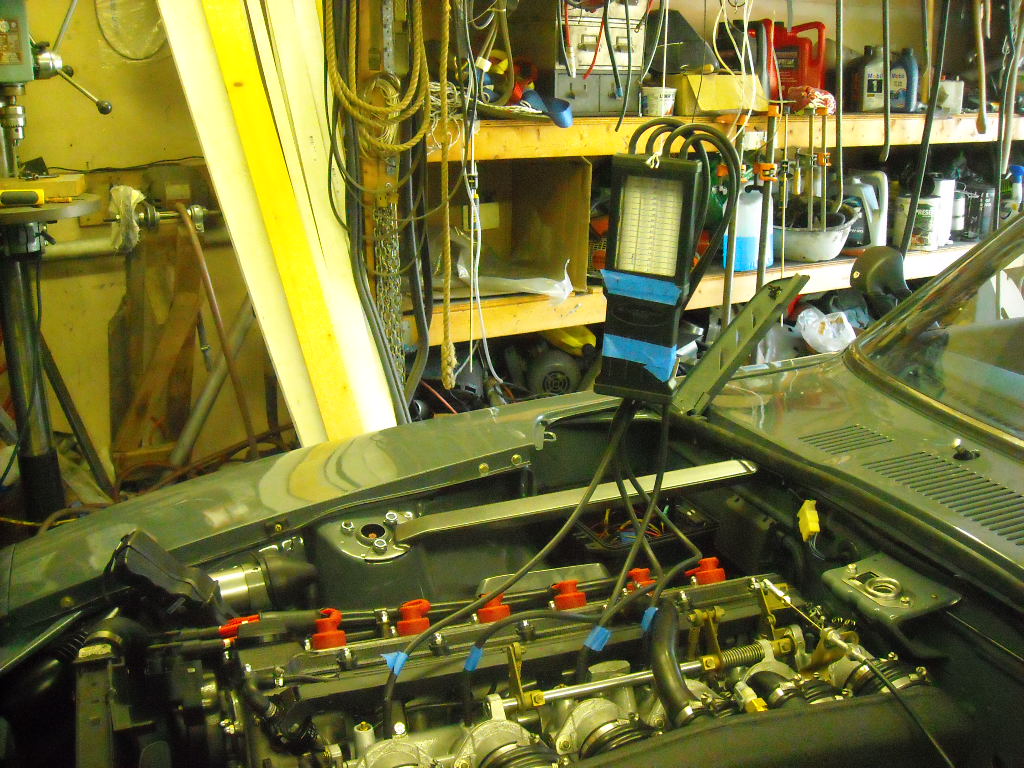
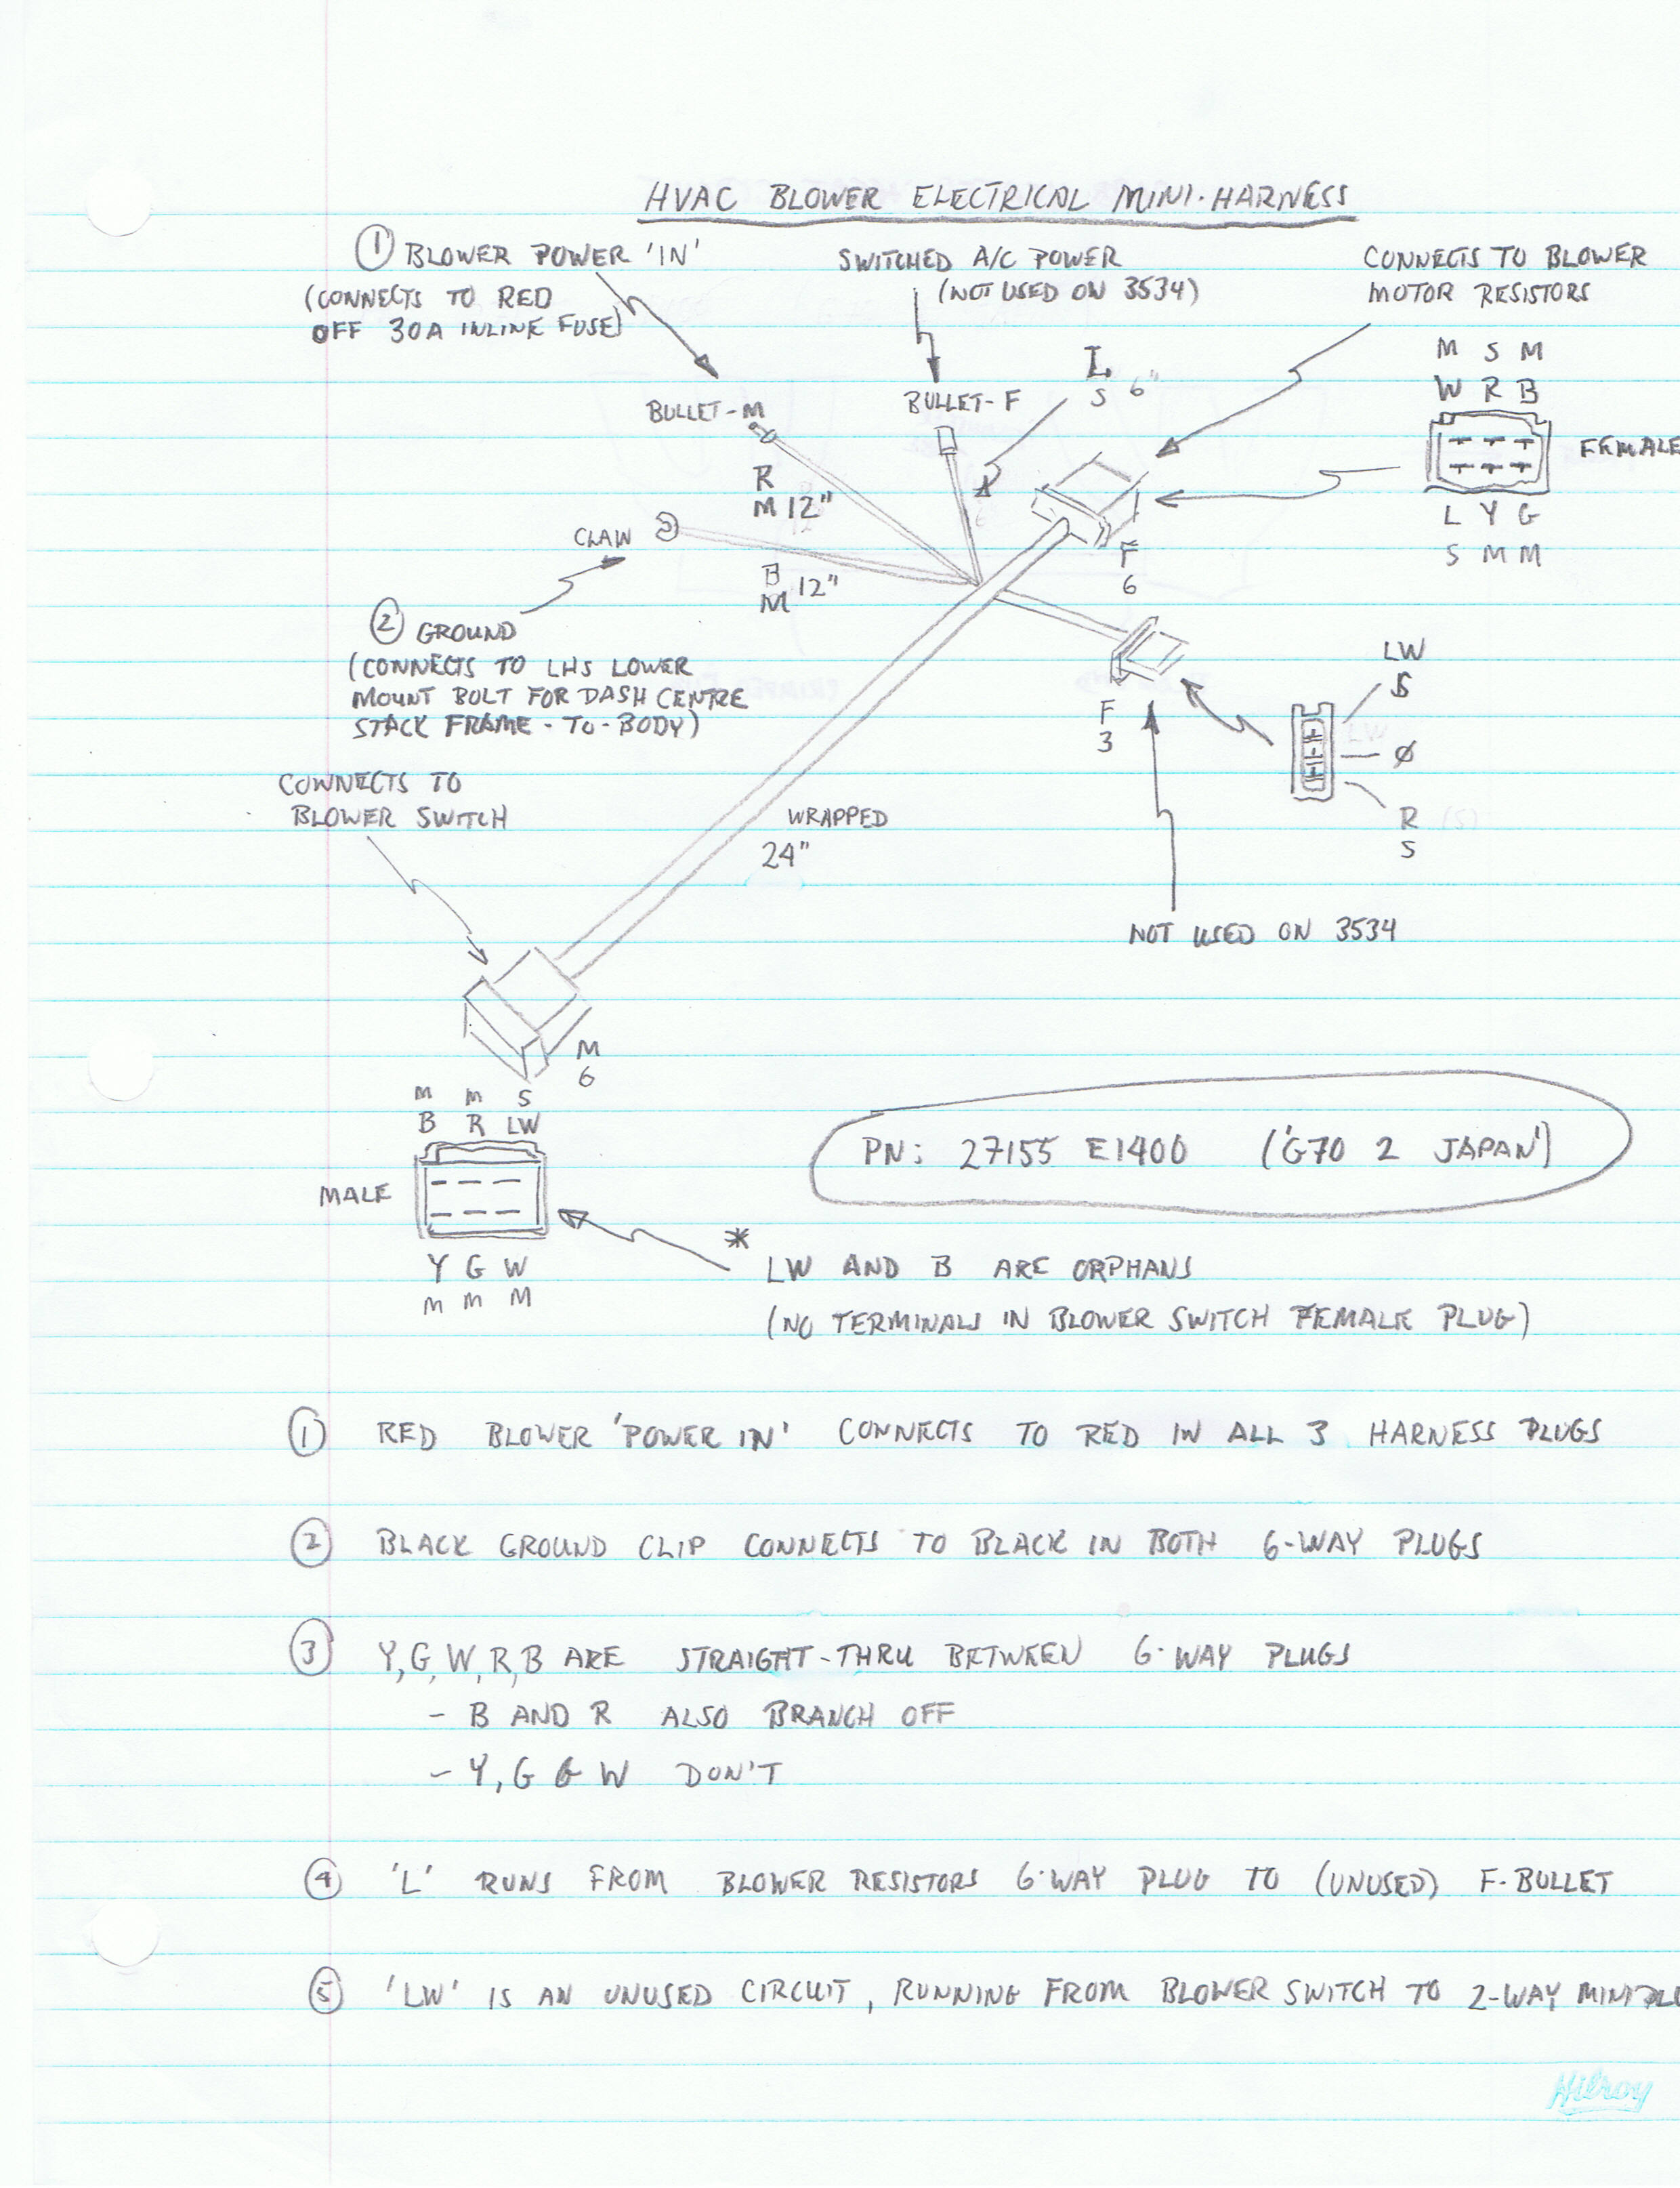
1 pointThe elusive HVAC mini-harness is lurking in the bottom right corner of Fig. 1.2 in the FSM Supplement that CO has posted. It also appears in the bottom right corner of Figure VI-1 at the end of the FSM Supplement, complete with some labeling and a legend with some wire color coding to (sort of) tell you where some of its connections connect to. The blue wire is, according to the legend, there to provide a power signal to the A/C system... which was, of course, available only as a dealer-installed option, meaning that for many Z's the blue wire never ended up being connected to anything over the life of the car. When it came from the factory, the blue wire ended in a female 'bullet' connector. I've scanned the notes I made for the HVAC mini-harness and they appear below... (note: everything you see in my notes is specific to a 1970 Z with manual trans):
.thumb.jpg.65ad2d812299c8f3b47c81ea70cad6f1.jpg) 1 point
1 point -
1 pointNot sure why, but the early service manuals didn't include the HVAC stuff on the wiring diagrams. From what I can tell, they didn't put the HVAC system on the wiring diagrams until 1974 for the 260. However, I believe I found some reference to the wire in question in a document titled "S30 Supplement Chassis Manual", and that wire is exactly what you thought it is... Power to the blower motor. That's the high side supply, and then the speeds are controlled by grounding the other side of the motor through one of the speed limiting resistors. Here's a link (I think this will work), to a copy of the document in which I found the info. It's not on the wiring diagrams, but they do mention it in a few of the harness descriptions. Take a look at page 2, and again on pages 26-27: http://www.classiczcars.com/applications/core/interface/file/attachment.php?id=656281 point
-
1 pointTHAT BABY LOOKS SWEEEEEEEEEET! I wanna go, I don't eat much, I'm clean, I have my own money, please take me!1 point
-
I'm thinking that Elite Auto is just using eBay for free advertising. Their name and web site address is in the picture. Probably no real intention of selling the car on eBay.1 point
-
TRUST, my friend is something one puts in a parachute, not a 50 year old car!1 point
-
1 pointKats, I bet you could sell reproductions of that manual on Ebay for $100!! One way to raise funds for your race parts.1 point
-
Take the tie rod down to ACE Hardware. They have a ton of fasteners. I suggest stainless steel nuts. It can be the same width or wider you have plenty space. Be sure to count the turns as you remove the tie rods. It should be about 21.5 turns to remove it. Same amount going back on. Have a proper alignment done when you can. Also a good time to replace steering rack boots if needed. Good luck.1 point
-
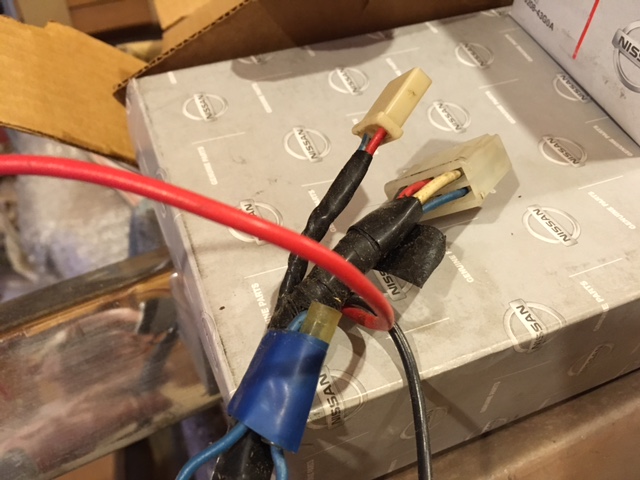
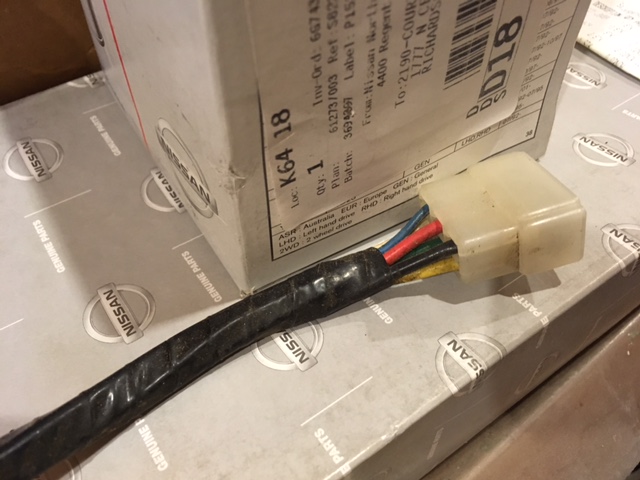
1 pointThis is a correct harness, I have a number of them. They range for an early 1970 to 1973 model years. The blue wire is taped off on this one. I can pull out some more if you need to see some others. .
 1 point
 -
1 point
-
$15K wouldn't even cover the bodywork and welding needed. A serious restoration on this car with correct parts will be in the $40-$50K range easy1 point
-
Yup! Brass plugs from Lowes worked for me. I'll look and see if I still have the wrappers with the sizes. But you can google it. At least that's what I did.
 1 point
 -
So another project during this off season was to do something better with my brake booster. I took both the newly purchased "rebuilt" unit, and my old failed original boosters apart and reassembled one unit using the best parts from the two, plus a couple new parts I made to replace some rusty bits. Here's the final unit. Reassembled, painted, and ready to put back in the car: Some of the internal parts were really crappy, so I made some stainless replacements. I used stainless steel for everything with the exception of the threaded output shaft tip. I reused the original tip because it's hardened and I didn't feel like dealing with the heat treating. Besides, it doesn't ride against the vacuum seal, so even if it's not perfect, it doesn't affect operation. Here's what I made: Here's a pic of the smooth stainless output shaft sticking through the vacuum seal. This has GOT to seal better than the rusty crusty versions I had from both the boosters. My idle will thank me: As a bonus... My PO had painted the booster that came with the car, and I found the original sticker hiding under a thick coat of paint. Thankfully the paint didn't stick too well to the plastic sticker, and I was able to chip most of it off. It's not perfect, but it looks "appropriate" for the rest of the car. I haven't put it back on yet. Anyone have a good reference pic showing the location of where the sticker should go?1 point
-
1 pointThanks for the link Chas! I will check the reflector again. I think ALL the metal is gone though.... Just the plastic left. Sent from my iPizzle ringy dingy device....1 point


.jpg.ea68db7982521082c66f98df5f3b9454.jpg)