Leaderboard
-
AZ-240z
Free Member2Points956Posts -
jfa.series1
 Subscriber
 2Points2,733Posts
 -
JSM
Free Member2Points1,253Posts -

Mike
Administrator2Points23,065Posts


Popular Content
Showing content with the highest reputation on 01/28/2017 in Posts
-
2 points
-
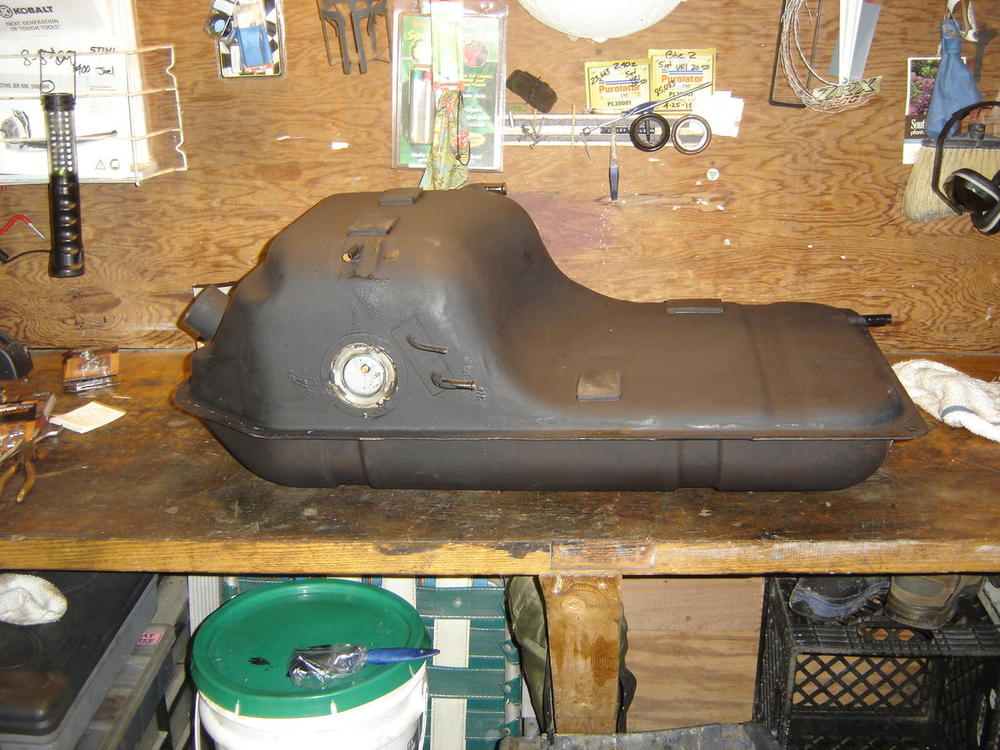
Well, it's been a while, but I want to revisited this subject with another possible solution to inaccurate fuel gauge readings. My gauge would read about three needle widths below the full mark after filling the tank (like forever), and would still have a lot of gas remaining when reading well below empty. I drained my tank of the 2.5 gals remaining and removed the sending unit. Outside the tank, I hooked up the sender to the wiring harness, grounded the earth wire to the chassis, and turned the ignition key to on. I then manually moved the sender arm through its full range of movement causing the pickup contact to slide on the resistance windings full scale from empty to full. The gauge readings remained unchanged as when installed in the tank. the reasons I narrowed my focus to the sender as the culprit are: 1. I removed my fuel gage and hooked up another spare gauge. There was no change in fuel readings. 2. The fuel sender sub-harness is new and properly grounded to the chassis. 3. The sender is NOS, and replaced a NOS sender installed a few years ago with the same issues. 4. The fuel tank has been restored to as-new condition with all of the correct fittings. I had previously spoken about possibly "bending" the float arm on the sender to change the gage reading. Well, after taking a closer look at the sender, I noticed a set screw on the pivot arm of the sender float arm. I also noticed that the contact on the sender was not near the top of the resistance winding scale when the arm was moved to full tank position. With nothing to loose, I loosened this set screw and rotated the pickup contact up to the top of the windings while holding the float arm against the full stop position. this set screw was then retightened and finger were crossed. Someone else may have already tried this, but, none the less, I'm feeling pretty excited about my discovery and anxious to try it out. Again, outside the tank the sender was wired up and grounded and, with the ignition switch on, the sender was manually moved to full stop causing the gauge to move to The full mark for the first time in years. Looking very promising, I reinstalled the sender and dumped the 2.5 gallons of gas back into the tank. I have always thought that, at the empty mark, there was probably 2 to 2.5 gallons of reserve fuel remaining, or maybe I read that somewhere. Anyway, almost afraid to try it out, I cranked up the engine to see if anything changed. The fuel gauge worked its way up to the empty mark and stabilized there with 2.5 gallons of fuel. Success, at least for now. I couldn't get to the gas station fast enough to try a full tank on my gauge. When the station pump clicked off automatically signaling a full tank, I switched the ignition on and the gauge indicator needle slowly moved to and stabilized EXACTLY on the full mark. I am definitely a happy camper right now. Since I don't drive my car frequently, something that I have to keep in mind is, the gage will move toward the half full mark more rapidly due to the shape of our gas tanks. The sender is mounted in the deeper (fatter) end of the tank. When the float on the sender arm reaches the halfway point, there is much more than half a tank of gas left, if that makes sense. Thereafter, the gauge needle will move more slowly to be consistent with the actual amount of fuel remaining in the tank. Also, something I failed to mention. With the sender out of the car, I used a Q-tip with some wax and grease remover to clean the resistance windings of any gas varnish buildup, and a piece of 220 sandpaper to burnish the pickup contact for a more positive contact. Not sure if this contributed to my success or not. I hope this may help those with similar issues. Dan Also, I plagurized a photo of a gas tank from one of siteunseen's posts to help with the above explanations.
 2 points
 -
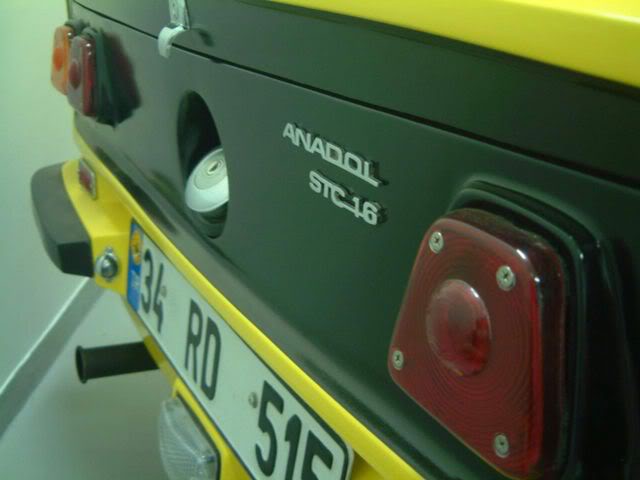
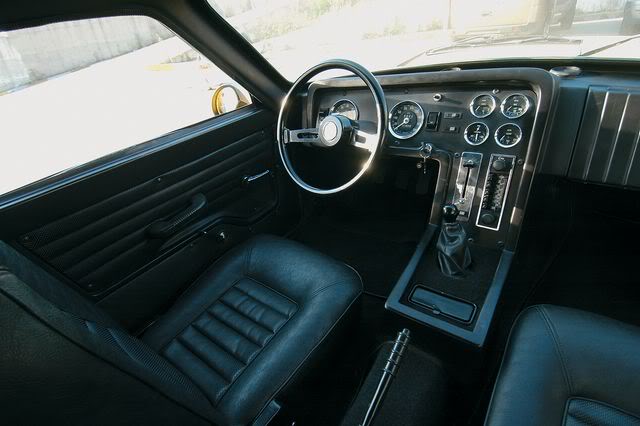
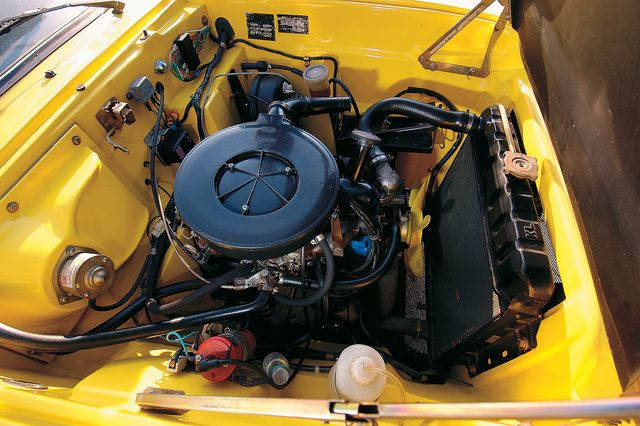
It was the abomination of an experimental mating between a GT-R's front and a mash-up of the A to D Prototypes. The Z-like beast then went on to terrorize Turkey for 2 years! Anadol STC-16 Designed by: Eraip Noyan of Turkey Produced in Turkey from 1973-1975 68 HP I hope you can sleep tonight after thinking what might have been. Scroll if you dare!!! BOO!


 1 point
 -
1 point
-
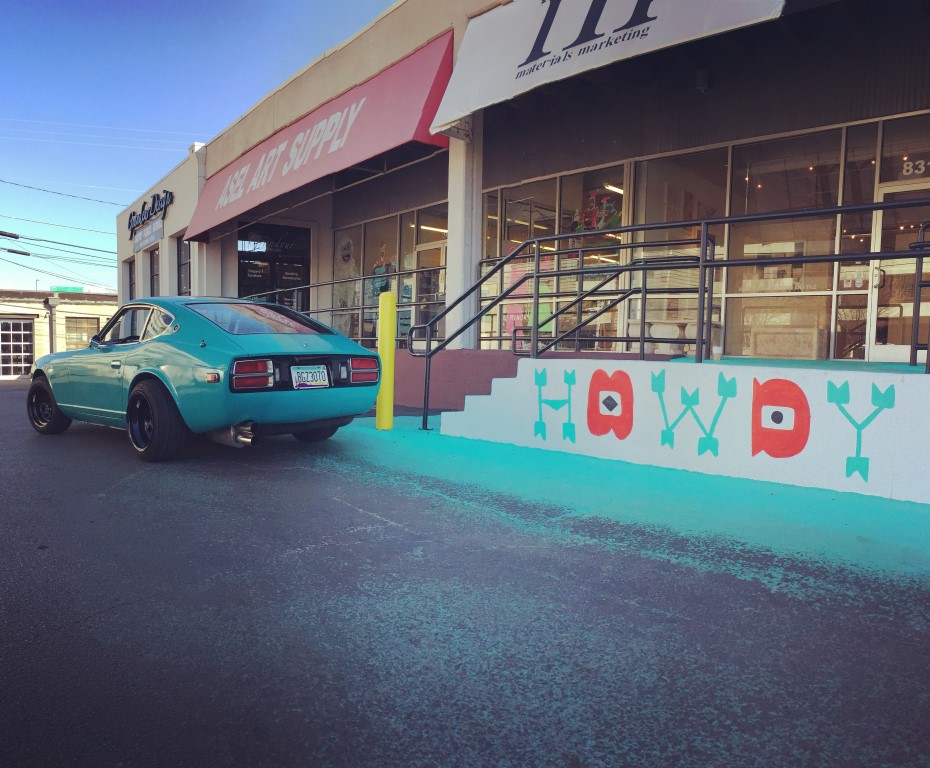
1 pointHere's one more welcome to the group - very nice looking car! If you have not already done so, look up the Cowtown Z Club on FB. Really a nice group of folks who enjoy fun things with their Z's.1 point
-
1 point
-
1 pointFirst day cruising around Funkytown... ran great, got a few thumbs up and talked to a couple other Z owners. also got its first bath. headin to the FWSSR (Fort Worth Stock Show & Rodeo) - cheers y'all!
 1 point
 -
1 pointUh oh, in today's world hiring a hostess would have to include all minorities, and the entire LGBT and the like communities to be politically correct!1 point
-
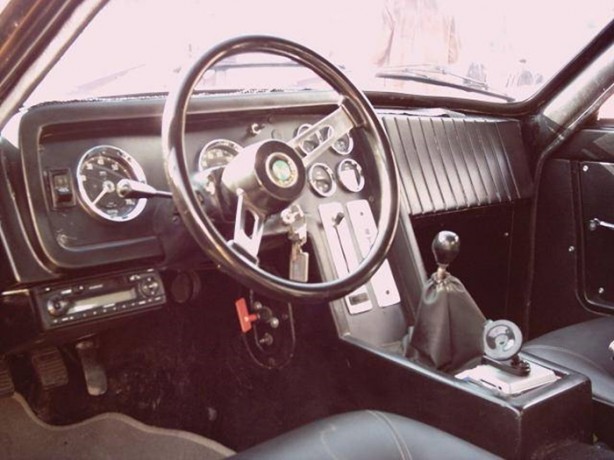
For the Discriminating few. Yeah, very very few..... I typically would not tease about appearance, but in this case BUTT and UGLY come to mind. Same sap that must of penned the Chevy Vega. Also but ugly. I do like the dash/console however. That flat plywood box with Fabric Land vinyl stapled on. I think I'll incorporate that into the 510. Did I mention I like Butt Ugly?1 point
-
1 pointCool, check out the dash restoration video at Just Dashes....its a Z dash1 point
-
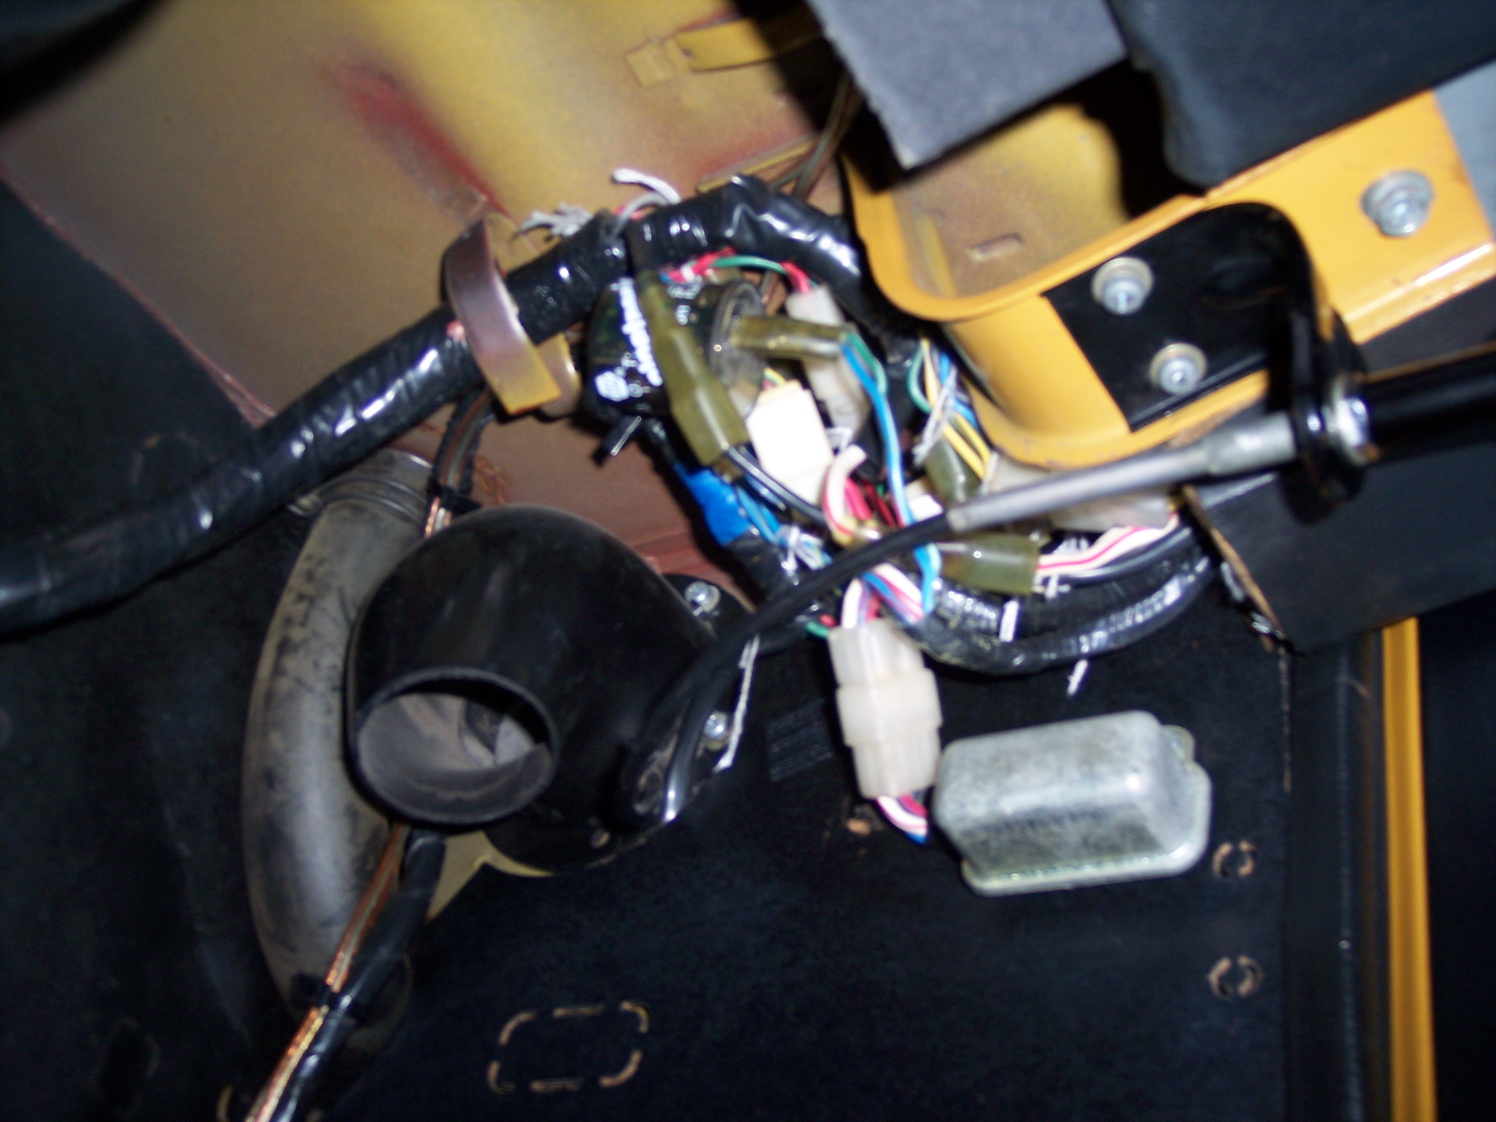
These might help - mind you my car is 12/70 so there are likely some changes by the time we get to your build date. The OE flasher on my car mounted to the steering column above the pedals. I have since replaced it with an electronic flasher, it does not have the tab for a mounting screw. I've also replaced the 4-way flasher with the same electronic unit - its tucked up into the wiring bundle on the second pic immediately below the tape wrapped harness.

 1 point
 -
Thank you so much!! I had it just how you had it but I thought, no way can it go like this the colors are different. Also those brake wires were all the way tucked away by my speedometer, I must of not brought it down. I had to remove my tachometer and reach over and bring it down, now the brake lights work. Last thing, I jumped some connections at the headlight switch and got the headlights and the rest of the lights to come on. Everything should be good too go once I get the switches back.1 point
-
Yep thanks. Temp gauge is working fine. I was trying to remember what the black wire was for.1 point
-
1 pointRight TS quit months ago. Tried sandpaper and VOM but no luck, no time to delve into it. Been using hand signal and being extra careful changing lanes. Now it's working again. Maybe the gremlins have seen the error of their way and are trying to make amends. A "new dawn" in the way mechanical things interact with us, maybe. There might be an explanation, but I've got nothing.1 point
-
1 pointTire Fix In A Can, the aerosol type, also doesn't last long here in the desert. I learned that the hard way when a can blew up in my hot car on a typical 120º summer day - goo everywhere! Our Infiniti G37 didn't come with a spare tire, just a jug of shoe goo type leak stop, and I ordered a spare tire & wheel. Still, nothing beats a AAA card - light weight and packs easy on a trip. Dennis1 point
-
1 pointI've had one for a year, but haven't had the need to use it. Available from Amazon and places like Costco and Sam's Club. Reasonably priced around $50 give or take $10. Hooks up to a dead battery just like jumper cables or plug it into your cigarette lighter socket to slowly charge the car's battery. My only concern is the warning on storing in a hot place. Temperatures inside cars left outside in the summer where I live exceed the warning level for battery damage or fire. Shelf life is six months to a year. Recharge from a 110 outlet. As you mentioned, you can also recharge USB devices. Nice to have, just like a AAA card. Dennis1 point
-
1 pointa little progress this past week. we had a cold front move in, so its a bit hard to get motivated when i can only get the shop up to about 55* battery tray area fixed and sealed seam sealer applied epoxy sealed1 point


.thumb.JPG.21f1724e227b22b6d5306af2d3267f40.JPG)