Leaderboard
-
Chickenman
Free Member2Points1,210Posts -

siteunseen
Free Member1Points15,115Posts -
rossiz
Free Member1Points1,109Posts -
Namerow
Free Member1Points1,551Posts


Popular Content
Showing content with the highest reputation on 02/21/2016 in all areas
-
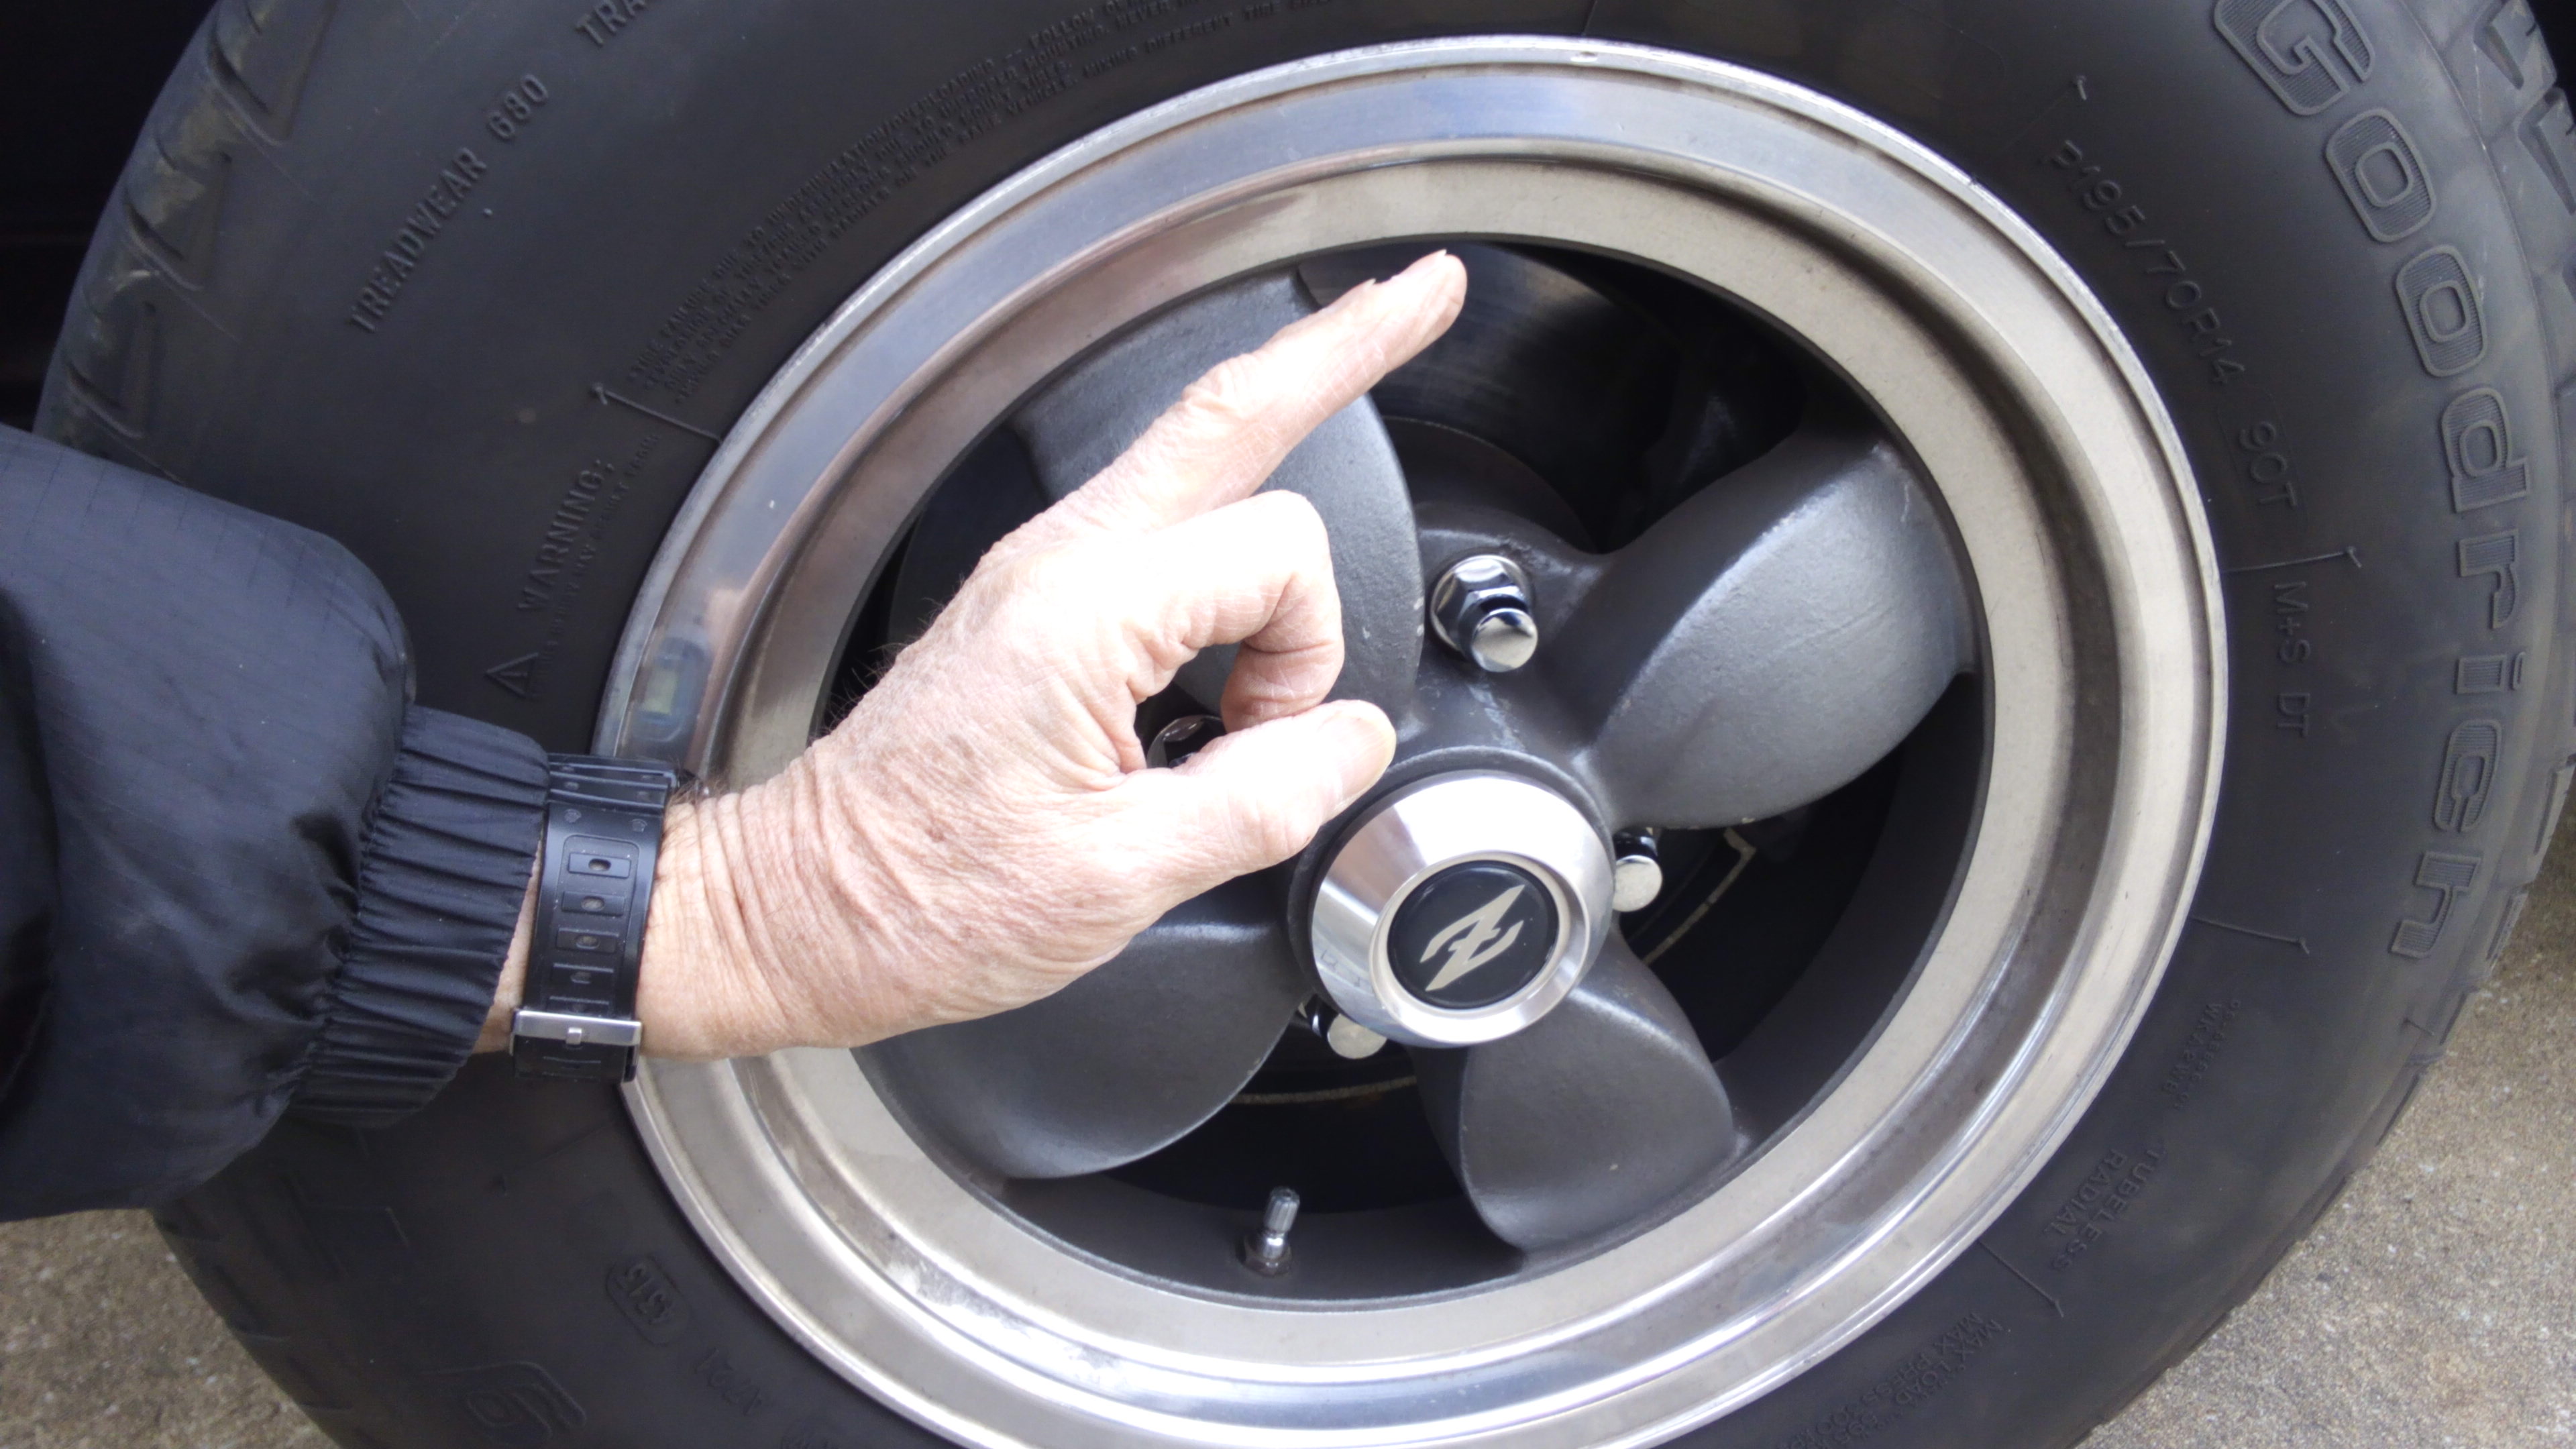
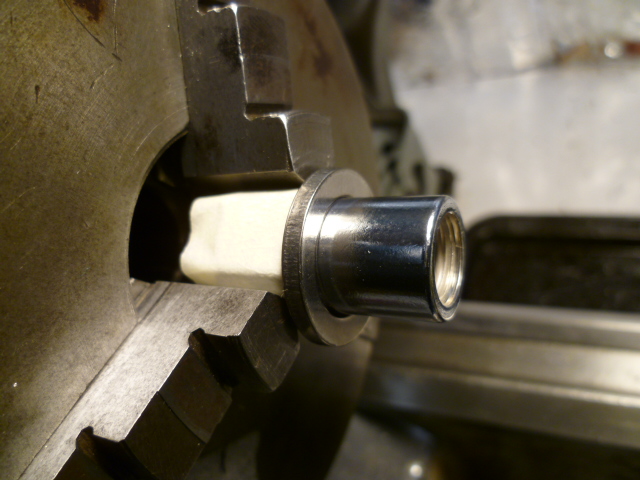
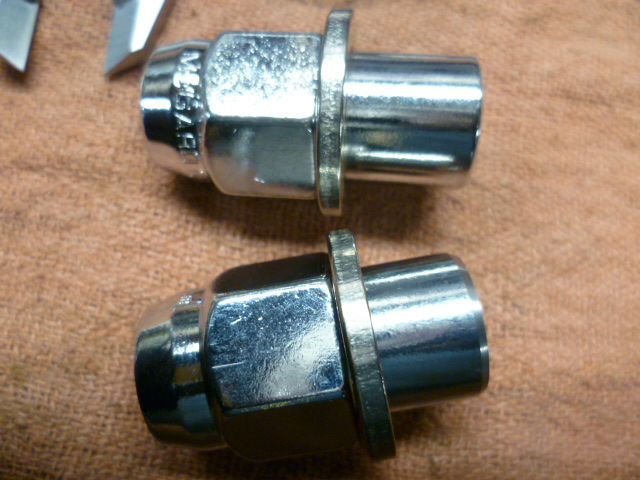
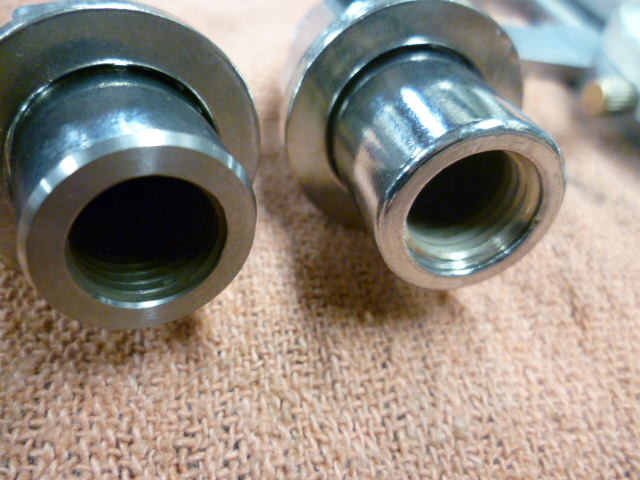
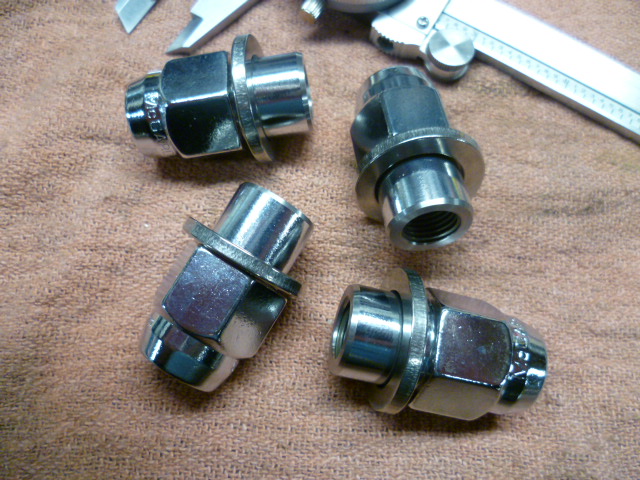
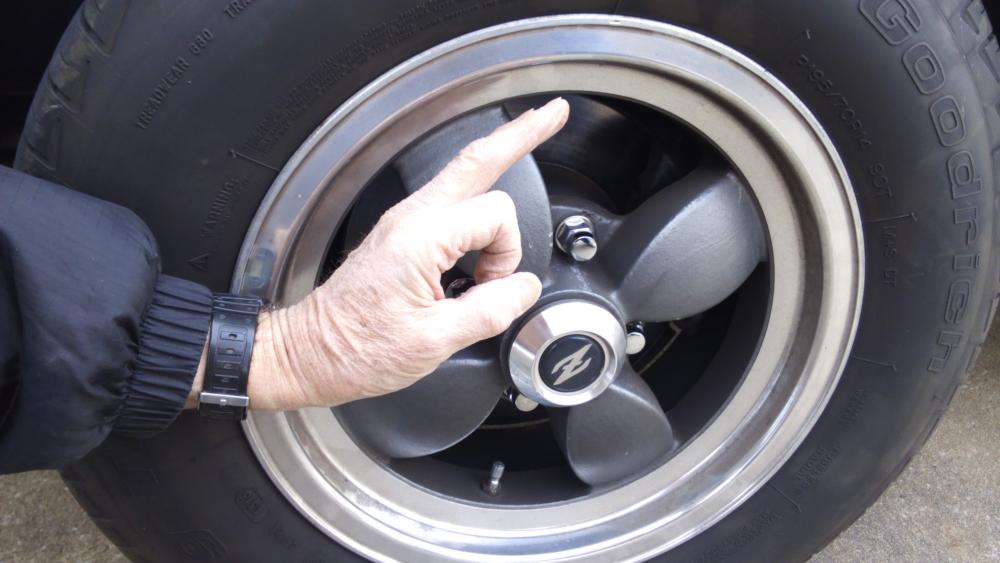
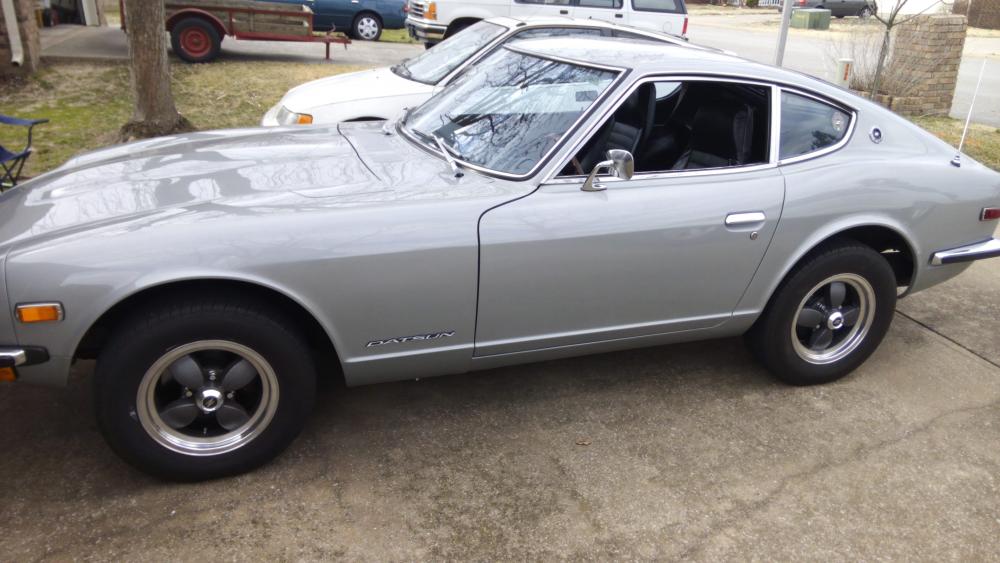
1 pointNo, it's not about driving up a steep hill at 20mph in 4th gear ... It's about replacement lug nuts for the authentic Libre wheels on Zup's immaculate silver 73 240z. In looking at his car, my eye was always drawn to the deteriorating condition lug nuts on the wheels. I became determined to find a quality set for him that would do justice to such a nice car. I quickly found that it is not so easy to source the correct lug nuts for those lug centric wheels. The standard M12 x 1.25 spec is no problem but in the correct shank & washer style with the all important shank length is difficult. I found a quality set of Mcgard tuff nuts that met all the specs except for the shank length being too long, they would bottom out against the hub before the wheel was seated and tightened. The solution it seemed, was to machine the shank length of the nuts down to the optimum length for the wheels. It then became obvious to me that the answer was to recruit the assistance of a highly skilled forum member ..... Captain Obvious. After discussing the details of the secret project with him, he very generously agreed to assist with machining the new Mcgard nuts to Libre specs. I ordered & shipped the new nuts to him and in the meantime, made careful measurements of Zup's Libre wheels to determine optimum length. The end result we agreed upon was .460 effective shank length after the washer is installed. The Captain completed one set & shipped it to me for test & verification of fitment. They were perfect and so was the quality of his lathe work! The final 4 completed sets were delivered Saturday, I drove up to his house & presented them to him, we did the final installation, and he was extremely happy with the results. A very big thanks thanks to you Bruce for making this Obvious / Driver joint project possible. He was very busy working on a complete top end job with his son's new Subaru but still took the time to work on the nuts. Nut in the chuck Original vs Machined End view Captain's lathe at work Zup's Ok Job done Inspector # K9 gives final approval ...

 1 point
 -
More treasure hunting! I picked up a new dash this afternoon from a guy who's doing a full build around an LS1 swap. It's heavily cracked, but the cluster above the console is in much better shape than mine, so it should be easier to rebuild. Plus, now I can work on this dash and keep the car on the road.1 point
-
1 point
-
1 pointsite has it - smoke check. with the original motor i was having issues with oil consumption and poor AFR due to the efi system. during troubleshooting i was checking to see how much carbon was blowing out during an "italian tune up" every so often. after 5,500 RPM i couldn't see much out of the rear view mirror. the balanced/lightened motor spins up to 7K quite quickly (and makes an awesome sound in the process). it's quite addictive ;} site has it again - w/the new motor, since there's no smoke at all, i find myself glancing nervously in the rear view looking for flashing lights...1 point
-
1 pointI never put it in an oven but I can say this, it worked great during the rebuilding. All the oil and assembly lube wiped right off. Through my mistakes I had to pull the head and the front cover off. They got dirty but after a wipe down they look like new again. That's the Eastwood bare metal clear coating. I don't think they'll ever get yellow, just a feeling of mine though. I sandblasted the aluminum and it soaked it up like a sponge, I quit applying it when it would just lay on top so it's penetrated down into the aluminum. Fingers crossed!1 point
-
What Jim said. The forty-year-old copper wiring will often be coated with a hard black tarnish. In fact, out of curiosity I completely stripped off all the insulation from one of my harness-to-headlight wires and found that the surface corrosion on the wire strands extended over pretty much the whole length of the wire. Doesn't impair the actual conductivity of the strands, but it will create high resistance at a mechanical connection (and it won't take solder, either). FWIW, I've had good results cleaning up the wire ends, pre-crimp, using a wire wheel (steel works faster than brass) in my Dremel rotary tool. Orient the wire wheel so that it spins along (rather than across) the wire strands.1 point
-
1 pointAlso, check out this gem of a page with a bunch of data on gear ratios that I was missing: http://newprotest.org/projects/510/gearRatios.pl /M1 point
-
That's good news so far. Yes, I would continue to monitor her and report back in a few days. Really hope this is it for you.1 point
-
Another tip, if you really want to make things neat and tidy, is to use a Nylon braided wire covering to bundle the new wires( or old wires ) I use products from TechFlex. Normally their " Clean Cut " sleeving as it can be cut with scissors and doesn't " unravel " like normal Nylon braid. I normally use https://www.wirecare.com/ They also have a large selection of specialty sleeving and foil sheeting for extreme heat protection, Deutsch connectors ( Luv these ) Shrink wraps, Tools ( including crimpers and heat guns and all sorts of nifty products that can be used in Automotive applications. One of the cheaper places to get Volcano wrap for headers. . Shipping is a bit expensive from them though.1 point
-
1 pointThe stock EFI Engine: Engine out of the car: New Engine out of the Car: New Engine in the Car (Pardon the mess from the oily hands!):1 point
-
Ugggghhhh! I'm sorry to hear you still have a leak Steve. Depending on how the prep on my 260Z race car goes, I might be able to make the 16th. I'm building a new motor and I have a bunch of other mods to do as well. The plan is to have it ready for a track day at Grattan at the end of May. If we get it ready in time and that testing goes well, June will be pretty quiet, but if it needs additional work, I'll be thrashing to get it ready for our 12 hour July race at Nelson Ledges. I hope to get my street Z out of the garage pretty soon too. Last year, it stayed in the corner of the garage with the cover on it all summer.1 point