Leaderboard
-
rcb280z
 Subscriber
 4Points2,392Posts
 -
charliekwin
Free Member2Points664Posts -
rossiz
Free Member2Points1,109Posts -

siteunseen
Free Member1Points15,115Posts


Popular Content
Showing content with the highest reputation on 02/06/2016 in all areas
-
Hi Jai, my missing ECU has been found. When I told a Z friend of mine about my missing parts he said to me, I quote, "you mean the one you loaned me?" all I could do was laugh. I completely forgot I loaned it to him. So its available to you if needed. I still cant find my Ignition module though. Anyway, let me know. I'll be glad to send it to you. If you decide you want it send me a PM with your address.2 points
-
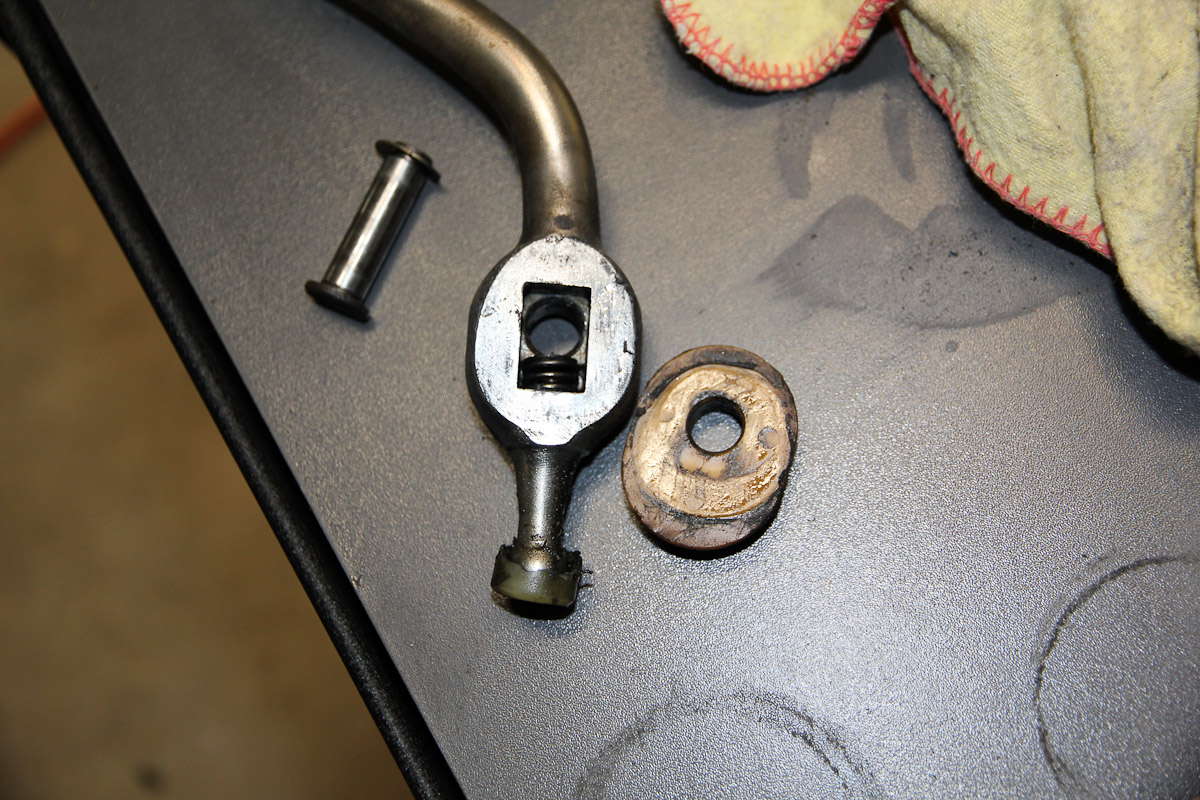
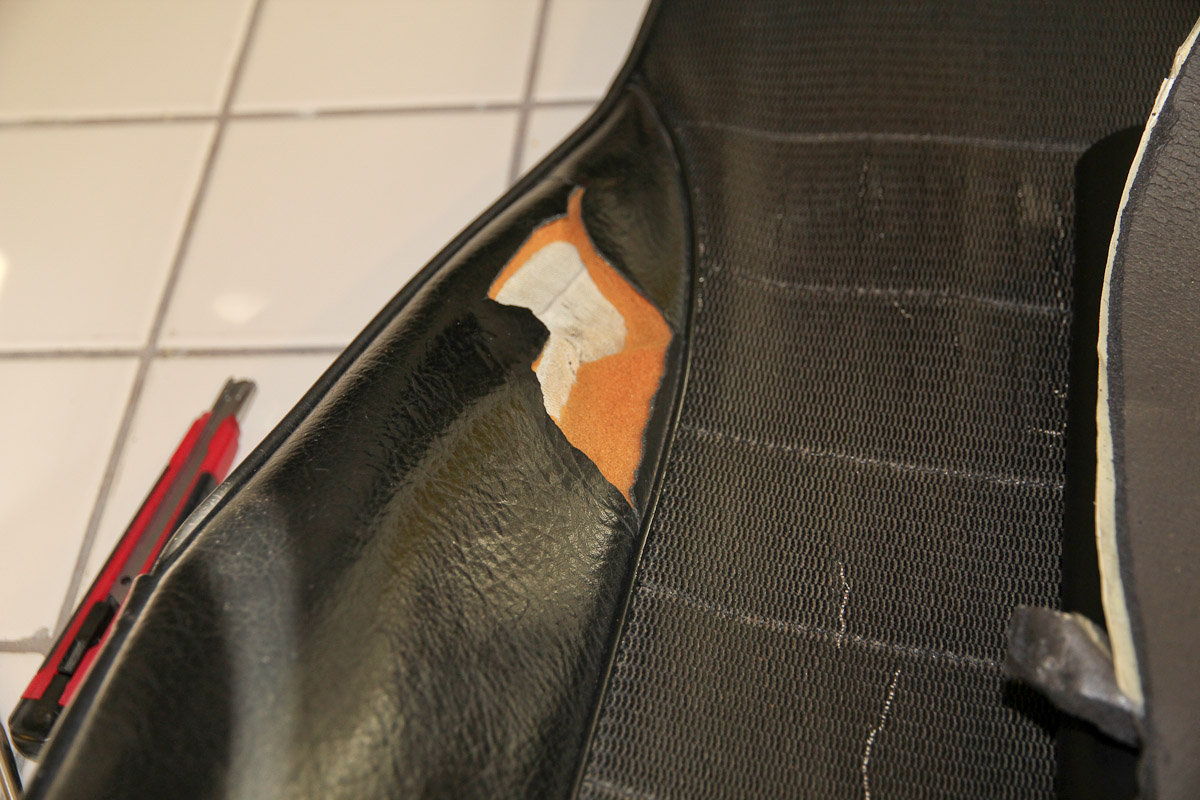
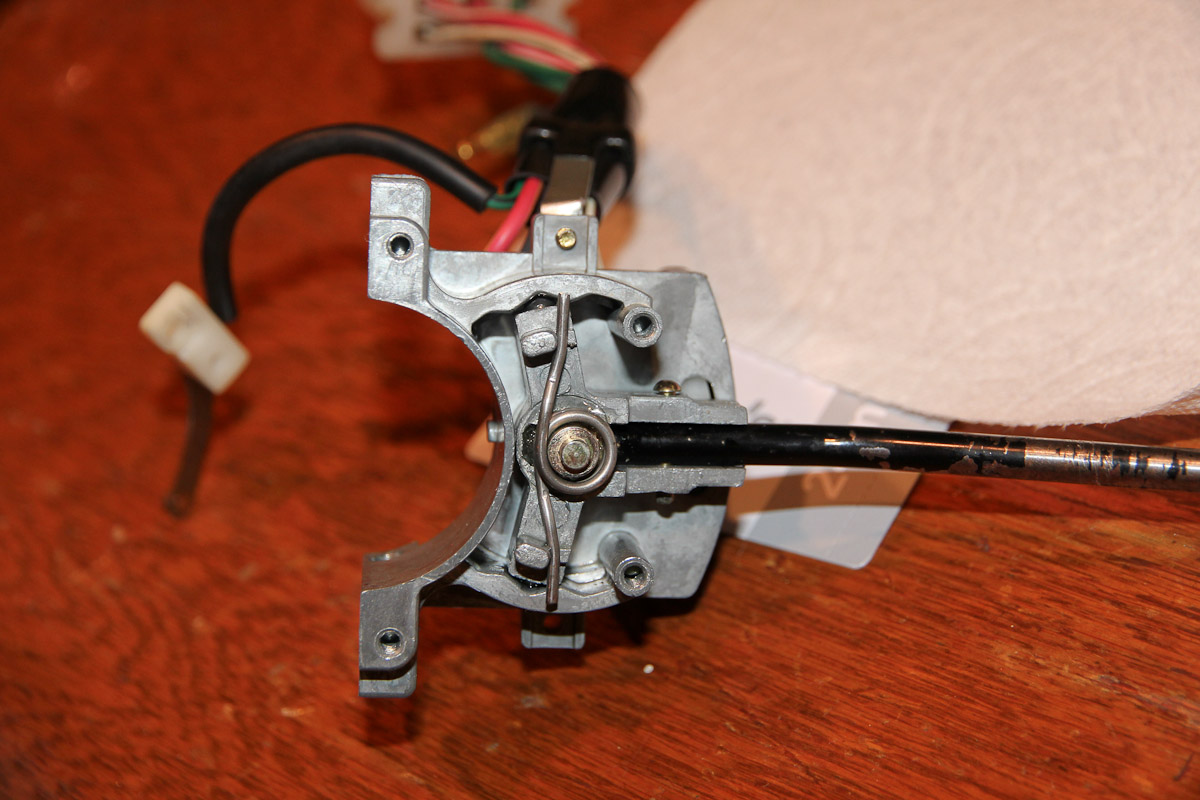
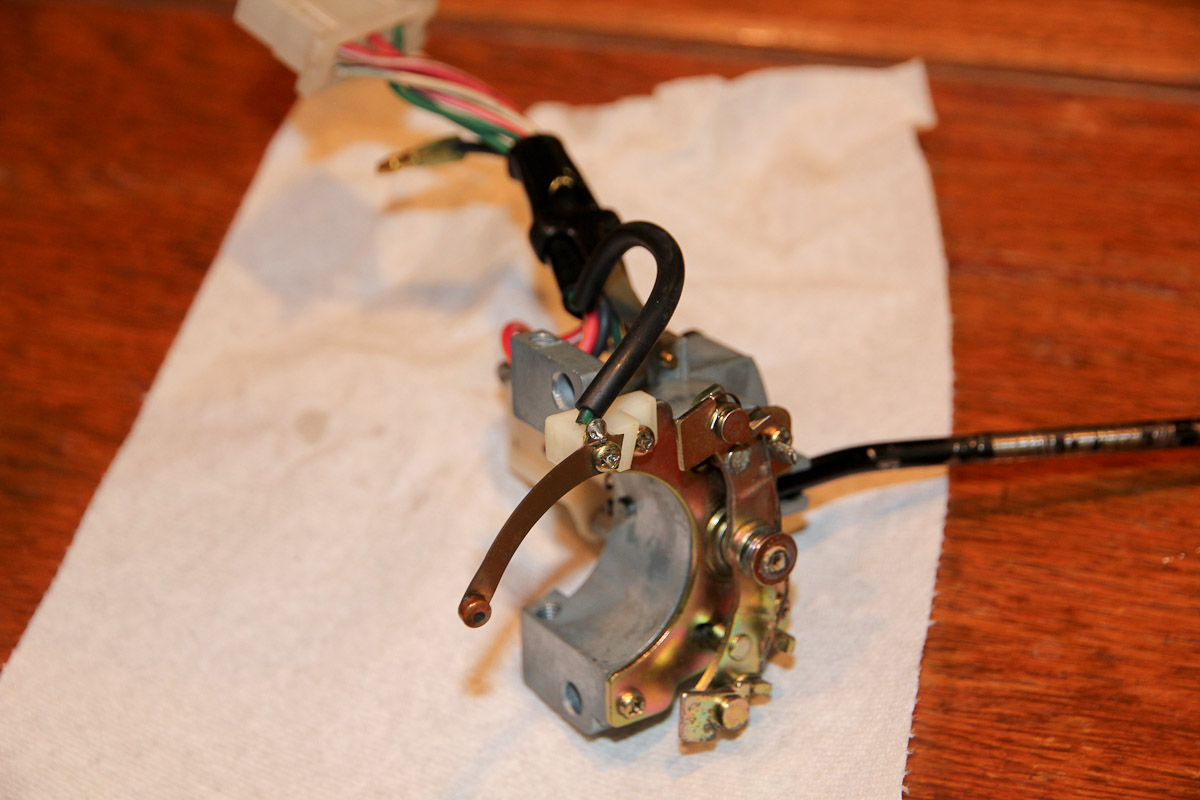
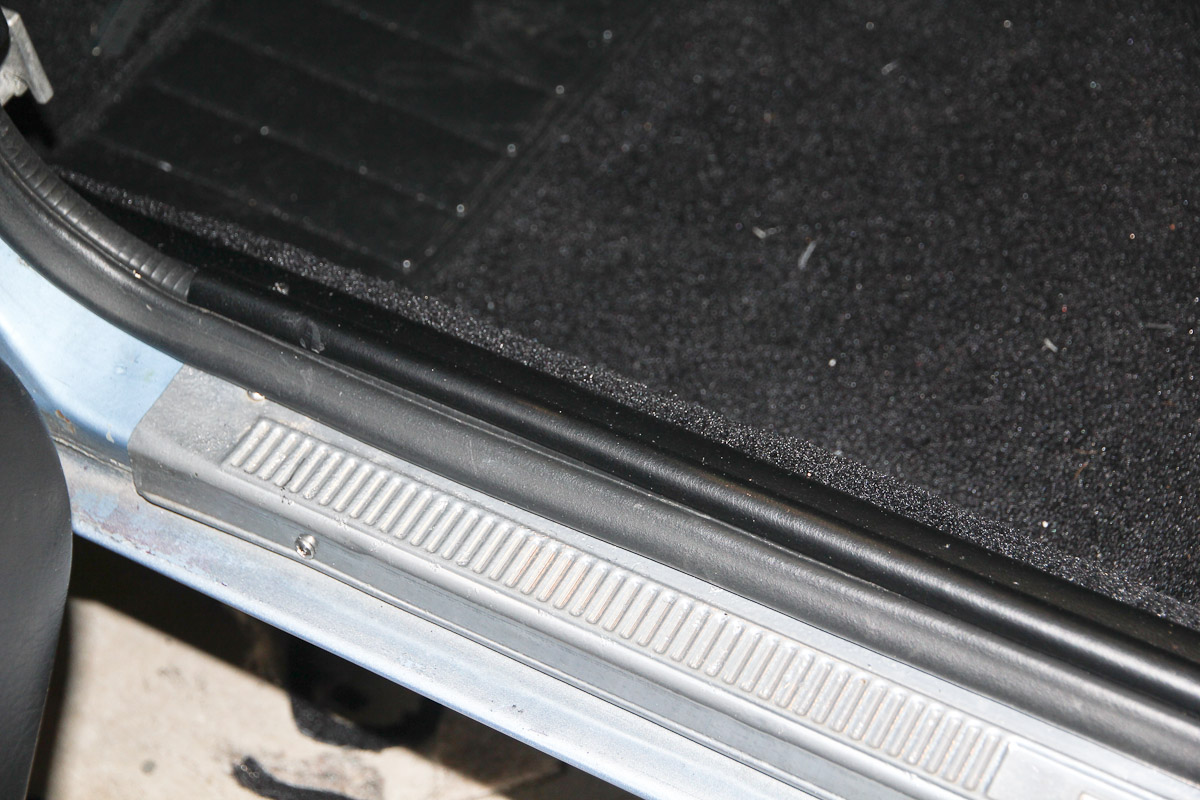
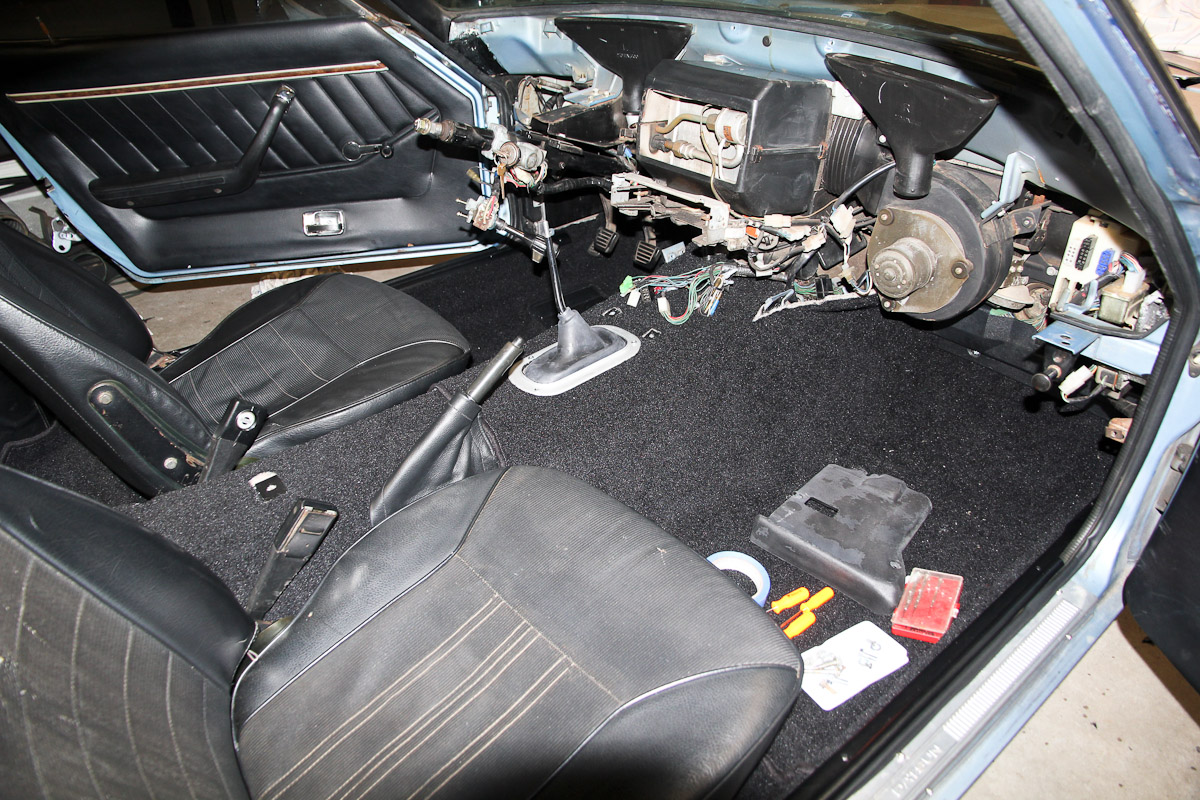
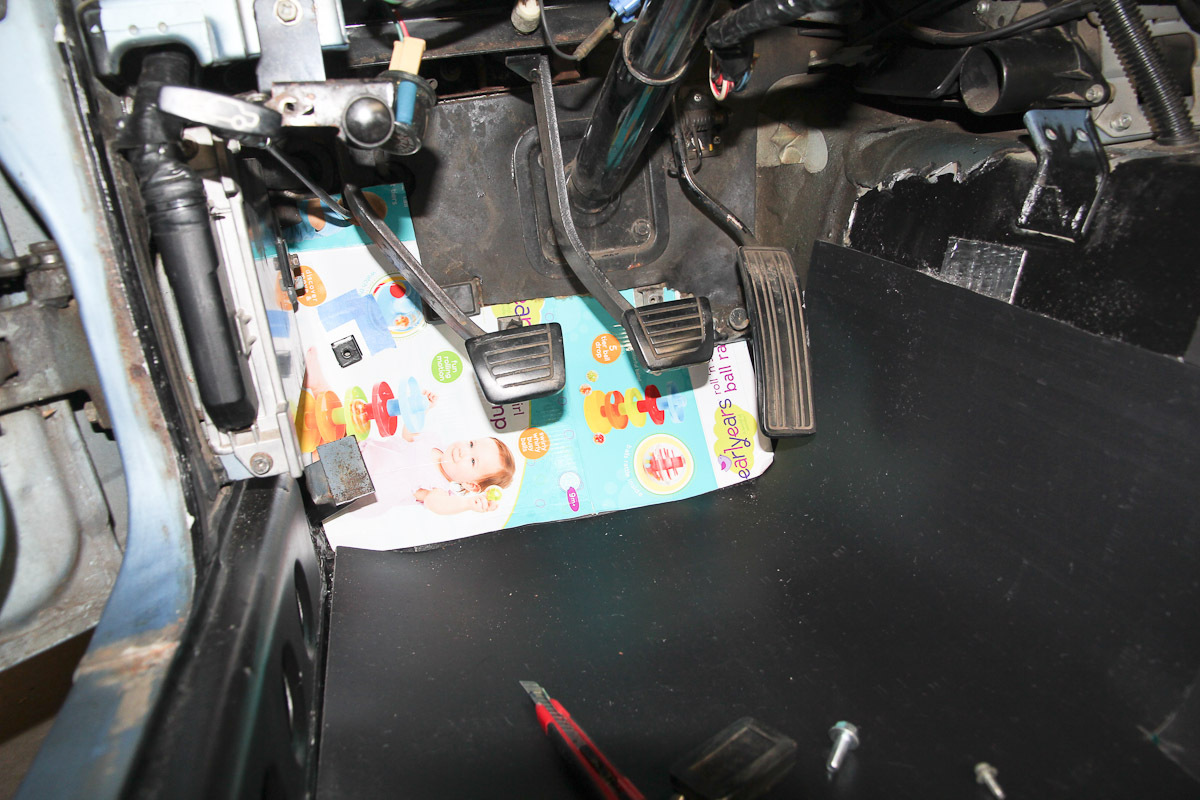
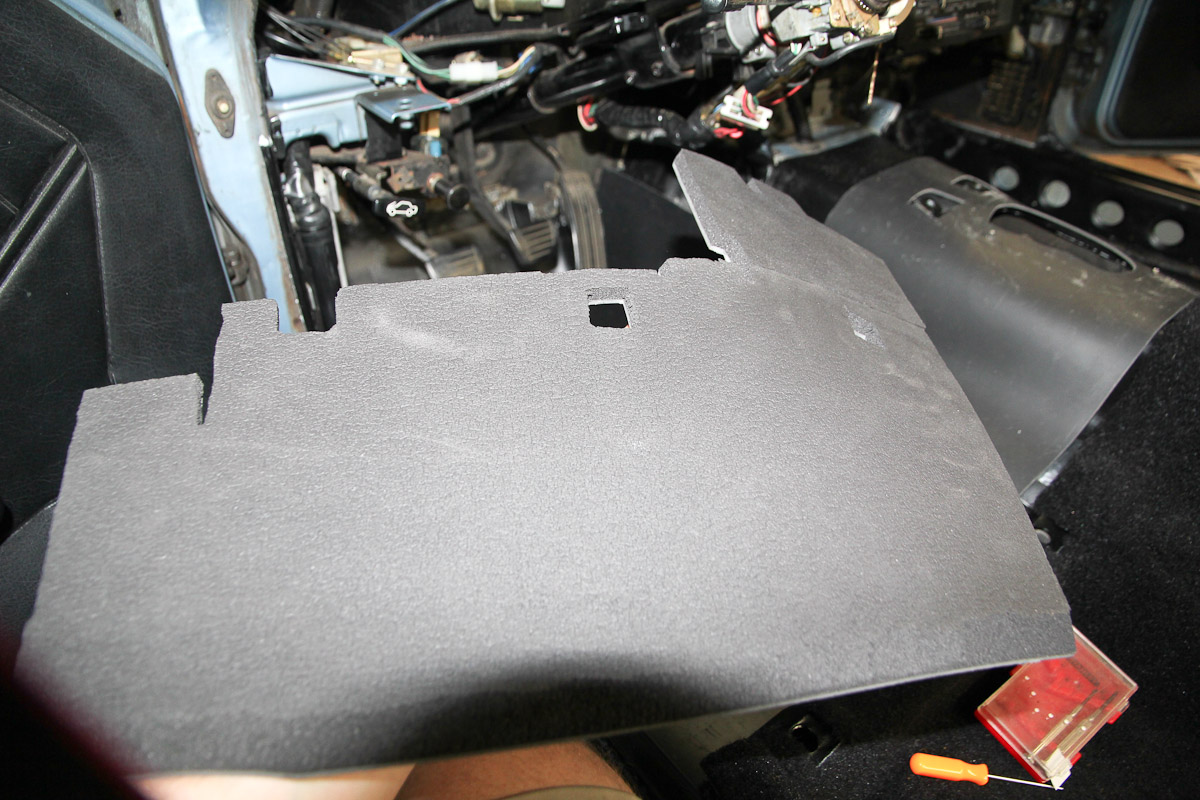
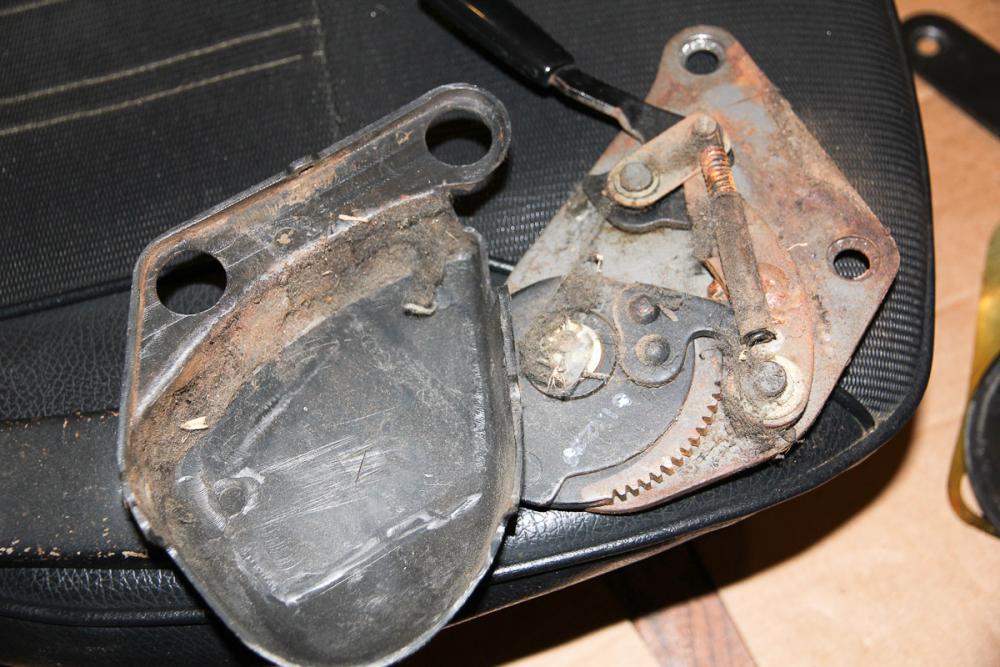
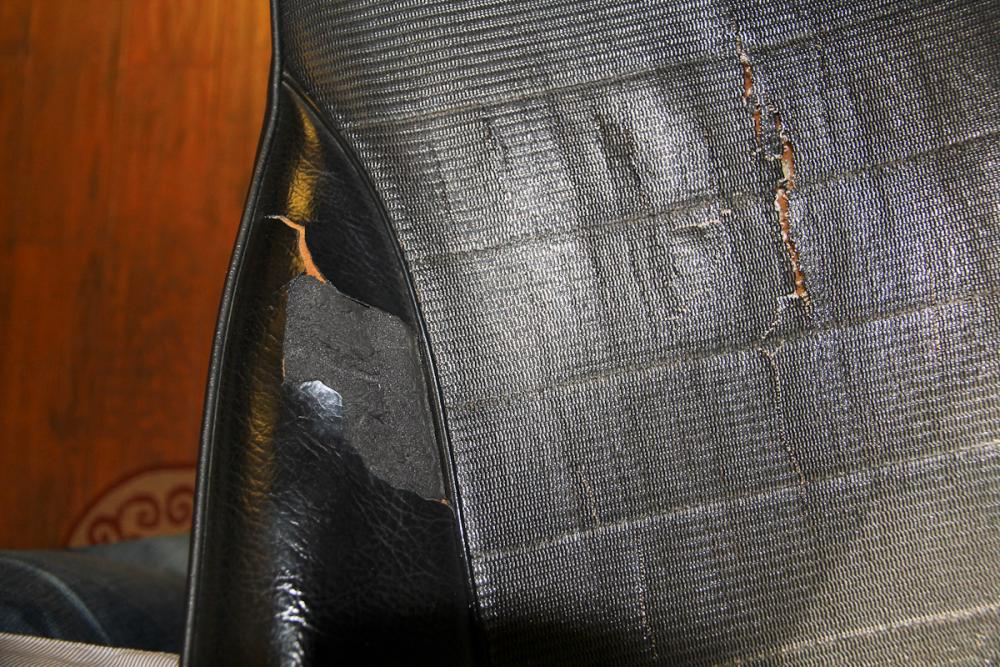
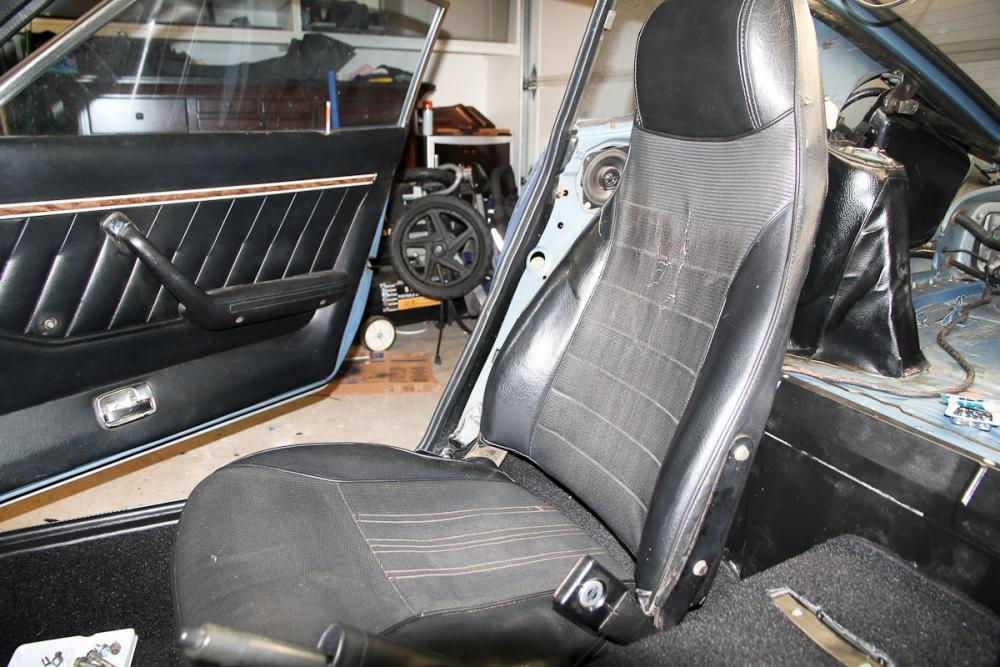
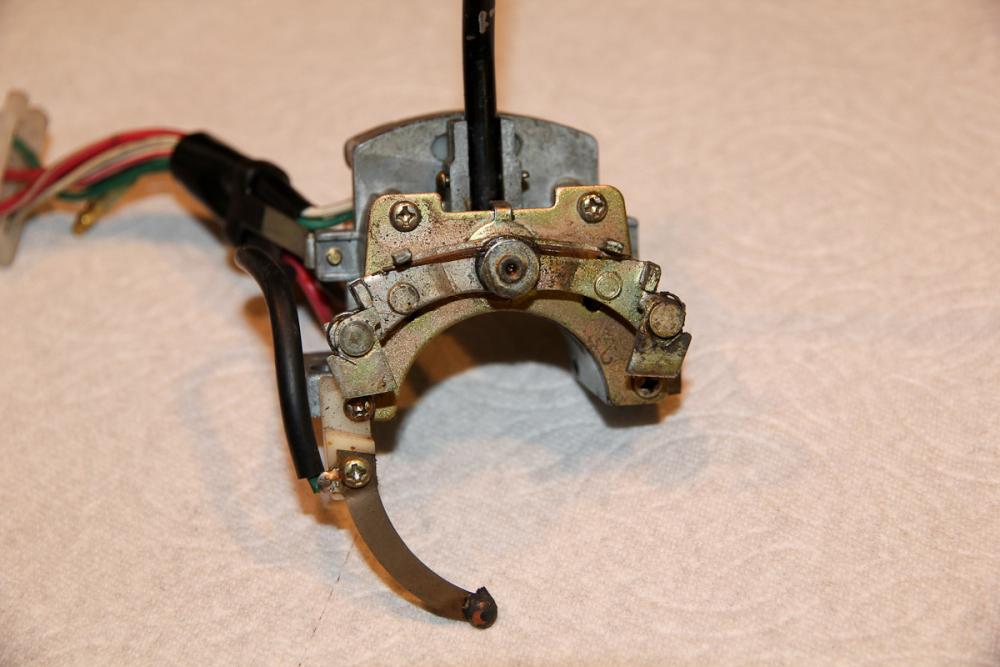
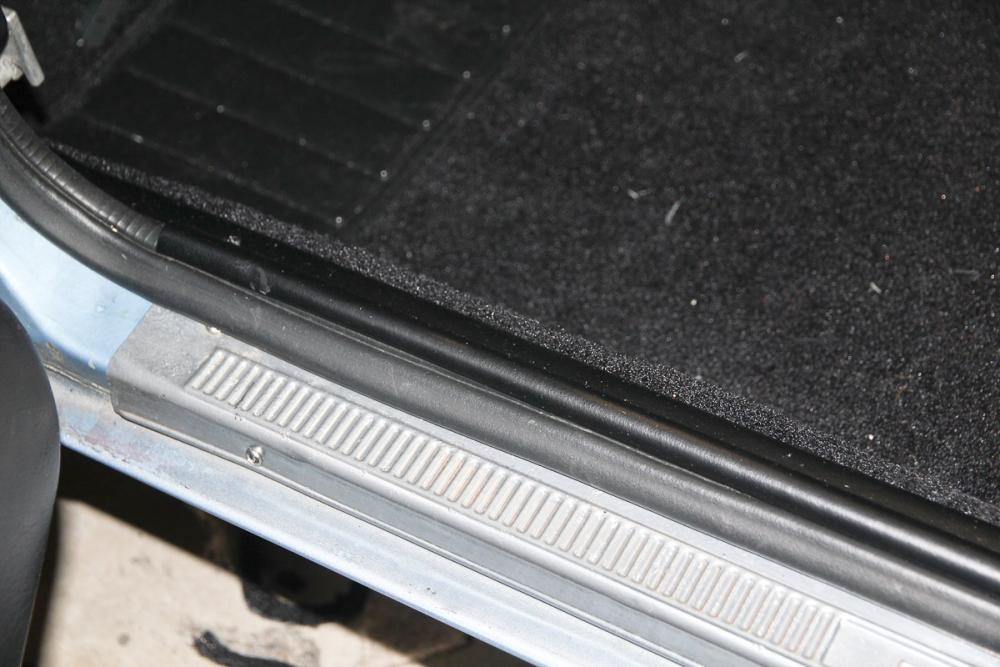
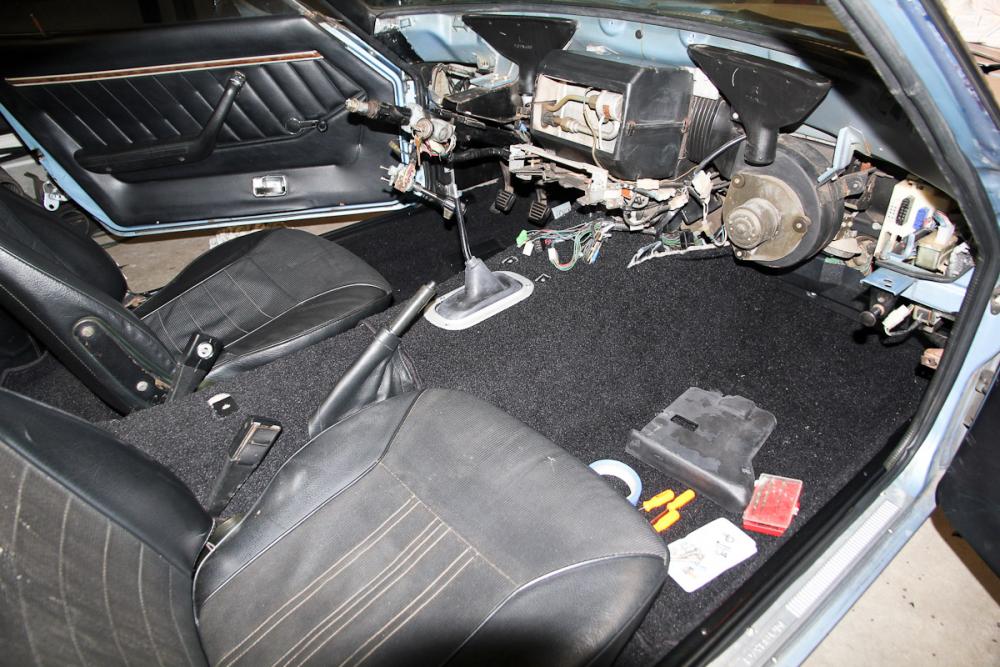
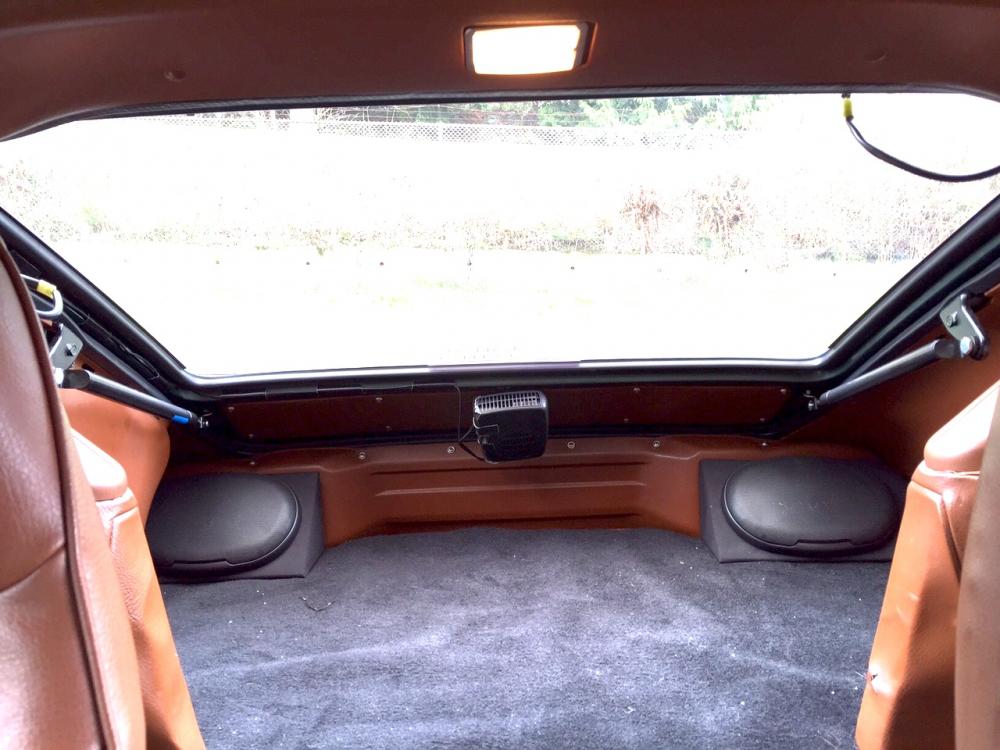
It's been a while, but things are actually starting to come back together. Lots of little projects here and there, of which I was apparently better at photographing the before than the after. Put new bushings (used the Chrysler door hinge ones) in the new shift lever, and that's made a huge improvement. No surprise considering the shape the old one was in. The seats will get a full restoration, but in the meantime I gave them a good cleaning, including all the mechanisms. I had the bright idea of swapping the driver and passenger seat cushions, then realized they aren't interchangeable after taking them apart. Whoops. Also put a band-aid on the one especially bad chunk that was missing from one seat back by stuffing in some closed cell foam and gluing vinyl over it with contact cement. It's a good-enough job to last until I get to the seats in the next few months. The turn signal has always been mushy and right only worked half the time, so that was disassembled and cleaned and the loose spring pivot epoxied into place, then given a light spray with lithium grease. A big thanks to Hardaway and Capt. O for their detailed posts on fixing the turn signal, they were very helpful. The carpet is in! A big chunk of the firewall insulation was bad and had to be removed when I did the floors, so I finally got around to making a patch for the missing piece. Now there's only a bit of final trimming left under the dash and at the bottom just behind the doors that'll get addressed when the dash and trim pieces go back in. Fitting wasn't quick or easy, but my patience was rewarded and I'm rather pleased with the end result. Also trimmed and fit the Kia weatherstripping and put the scuff plates back. I suppose I'll get to cleaning and painting the sill trim eventually. At the moment, I'm working on cleaning up the dashboard, the last bit keeping the car off the road.


 2 points
 -
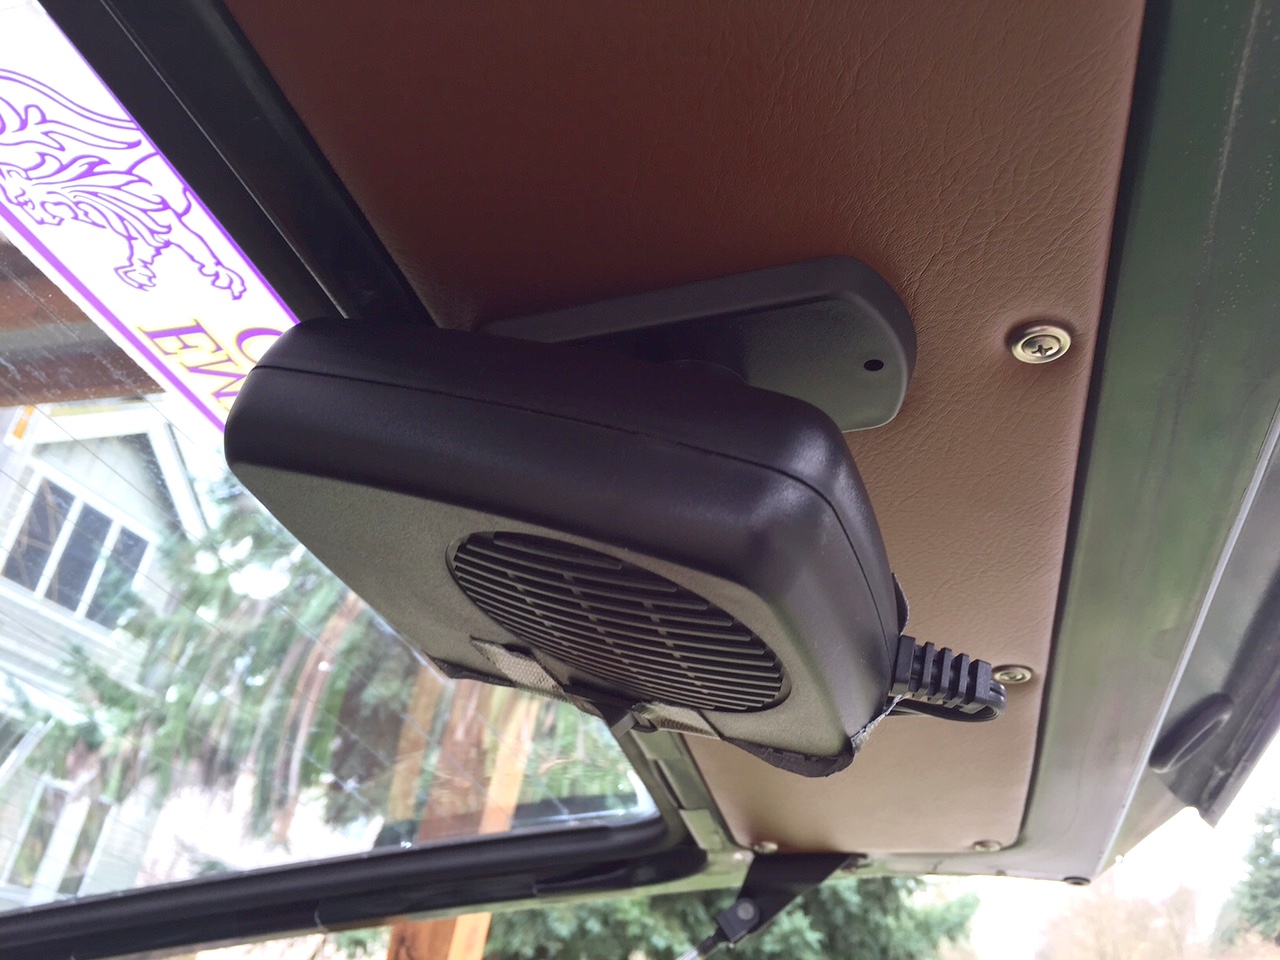
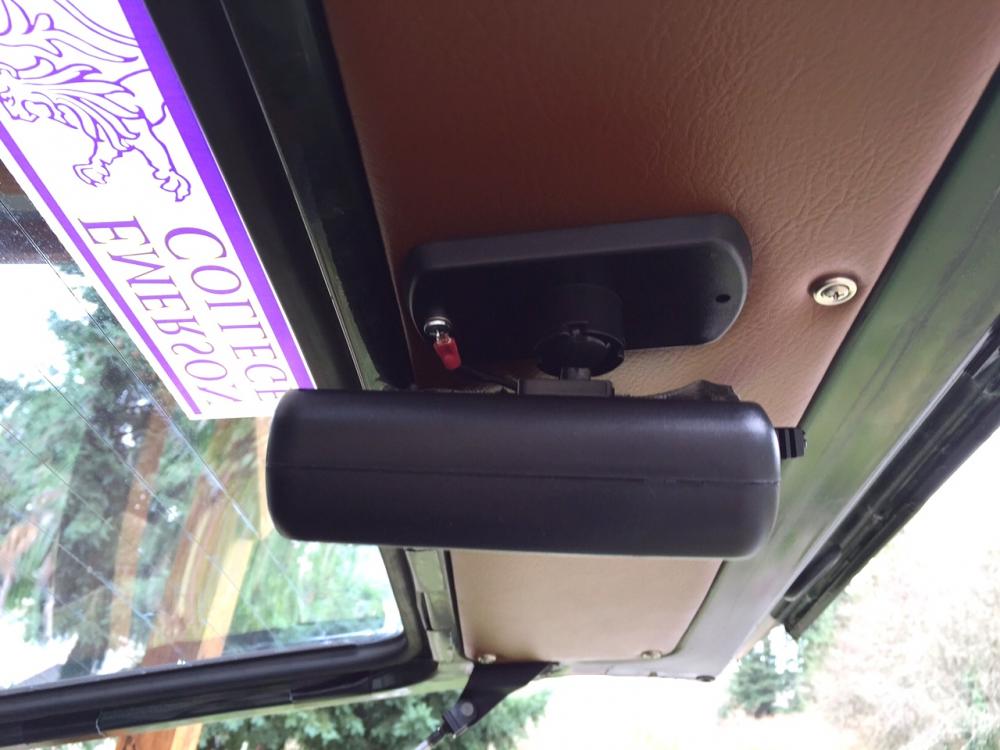
some pics of the lovely mod-o-the-day: mounted using existing panel fastener hole and longer screw - used this as the ground connection fancy wire path with black tape - concours guys close your eyes. pretty invisible though... there's tape on the side of the fan because i removed the silly little fold-out handle that recesses into the body on one side - it converts it to a mini-hair dryer which, in theory would allow you to go around the car and defrost. total waste of time because it's really not powerful enough for that. i took off the handle just to reduce the weight by a couple of ounces out of fear the swivel base might not hold it in position every time i opened/closed the hatch. turned out to be not necessary, it stays in place just fine - hasn't moved a bit to date.
 1 point
 -
1 pointre: using the stock head then swapping in the new one - i've always liked incremental upgrades vs. the "all at once" approach. for example in the bike world, you know that with a new bike you're going to swap pipes, re-map the ecu, do head work, fiddle w/timing to get the most ponies, and a lot of guys will have that all done at the dealer before they pick it up. but then you only get one shot, and no matter how hot the motor is you always wind up wanting more in 6 months, and the next stages of performance get much more expensive. i prefer to ride it stock, then in 6 months swap the pipes, enjoy the nice boost, then in a few months do some head work, enjoy the nice boost, then in a few months do the timing/tuning... you get the idea - kinda like opening xmas presents one-a-week vs. all on xmas morning. so if you run the stock head, enjoy your lovely new motor, tune it really well, then in a month or two do an afternoon head swap it's a free kick in the pants that you get to enjoy. also, you will have a nice butt-dyno comparison to measure the new head improvement. i did my f54-p79 build w/stock cam for this reason - been driving it and loving it for the past six months knowing that i'm gonna put in a hot cam later and i'm looking forward to the extra kick. after all, the LAST thing i want is to be "done" working on it, right? where's the fun in that??1 point
-
Figured I should add that I know its a good unit. I pulled it from a wrecked car about 15 years ago and ran it in my 77 for a couple months. So its good to go.1 point
-
Also, if your car is a California car, which I believe it is, it has the "altitude switch" and catalytic converter. The ECU I have is from a California car.1 point
-
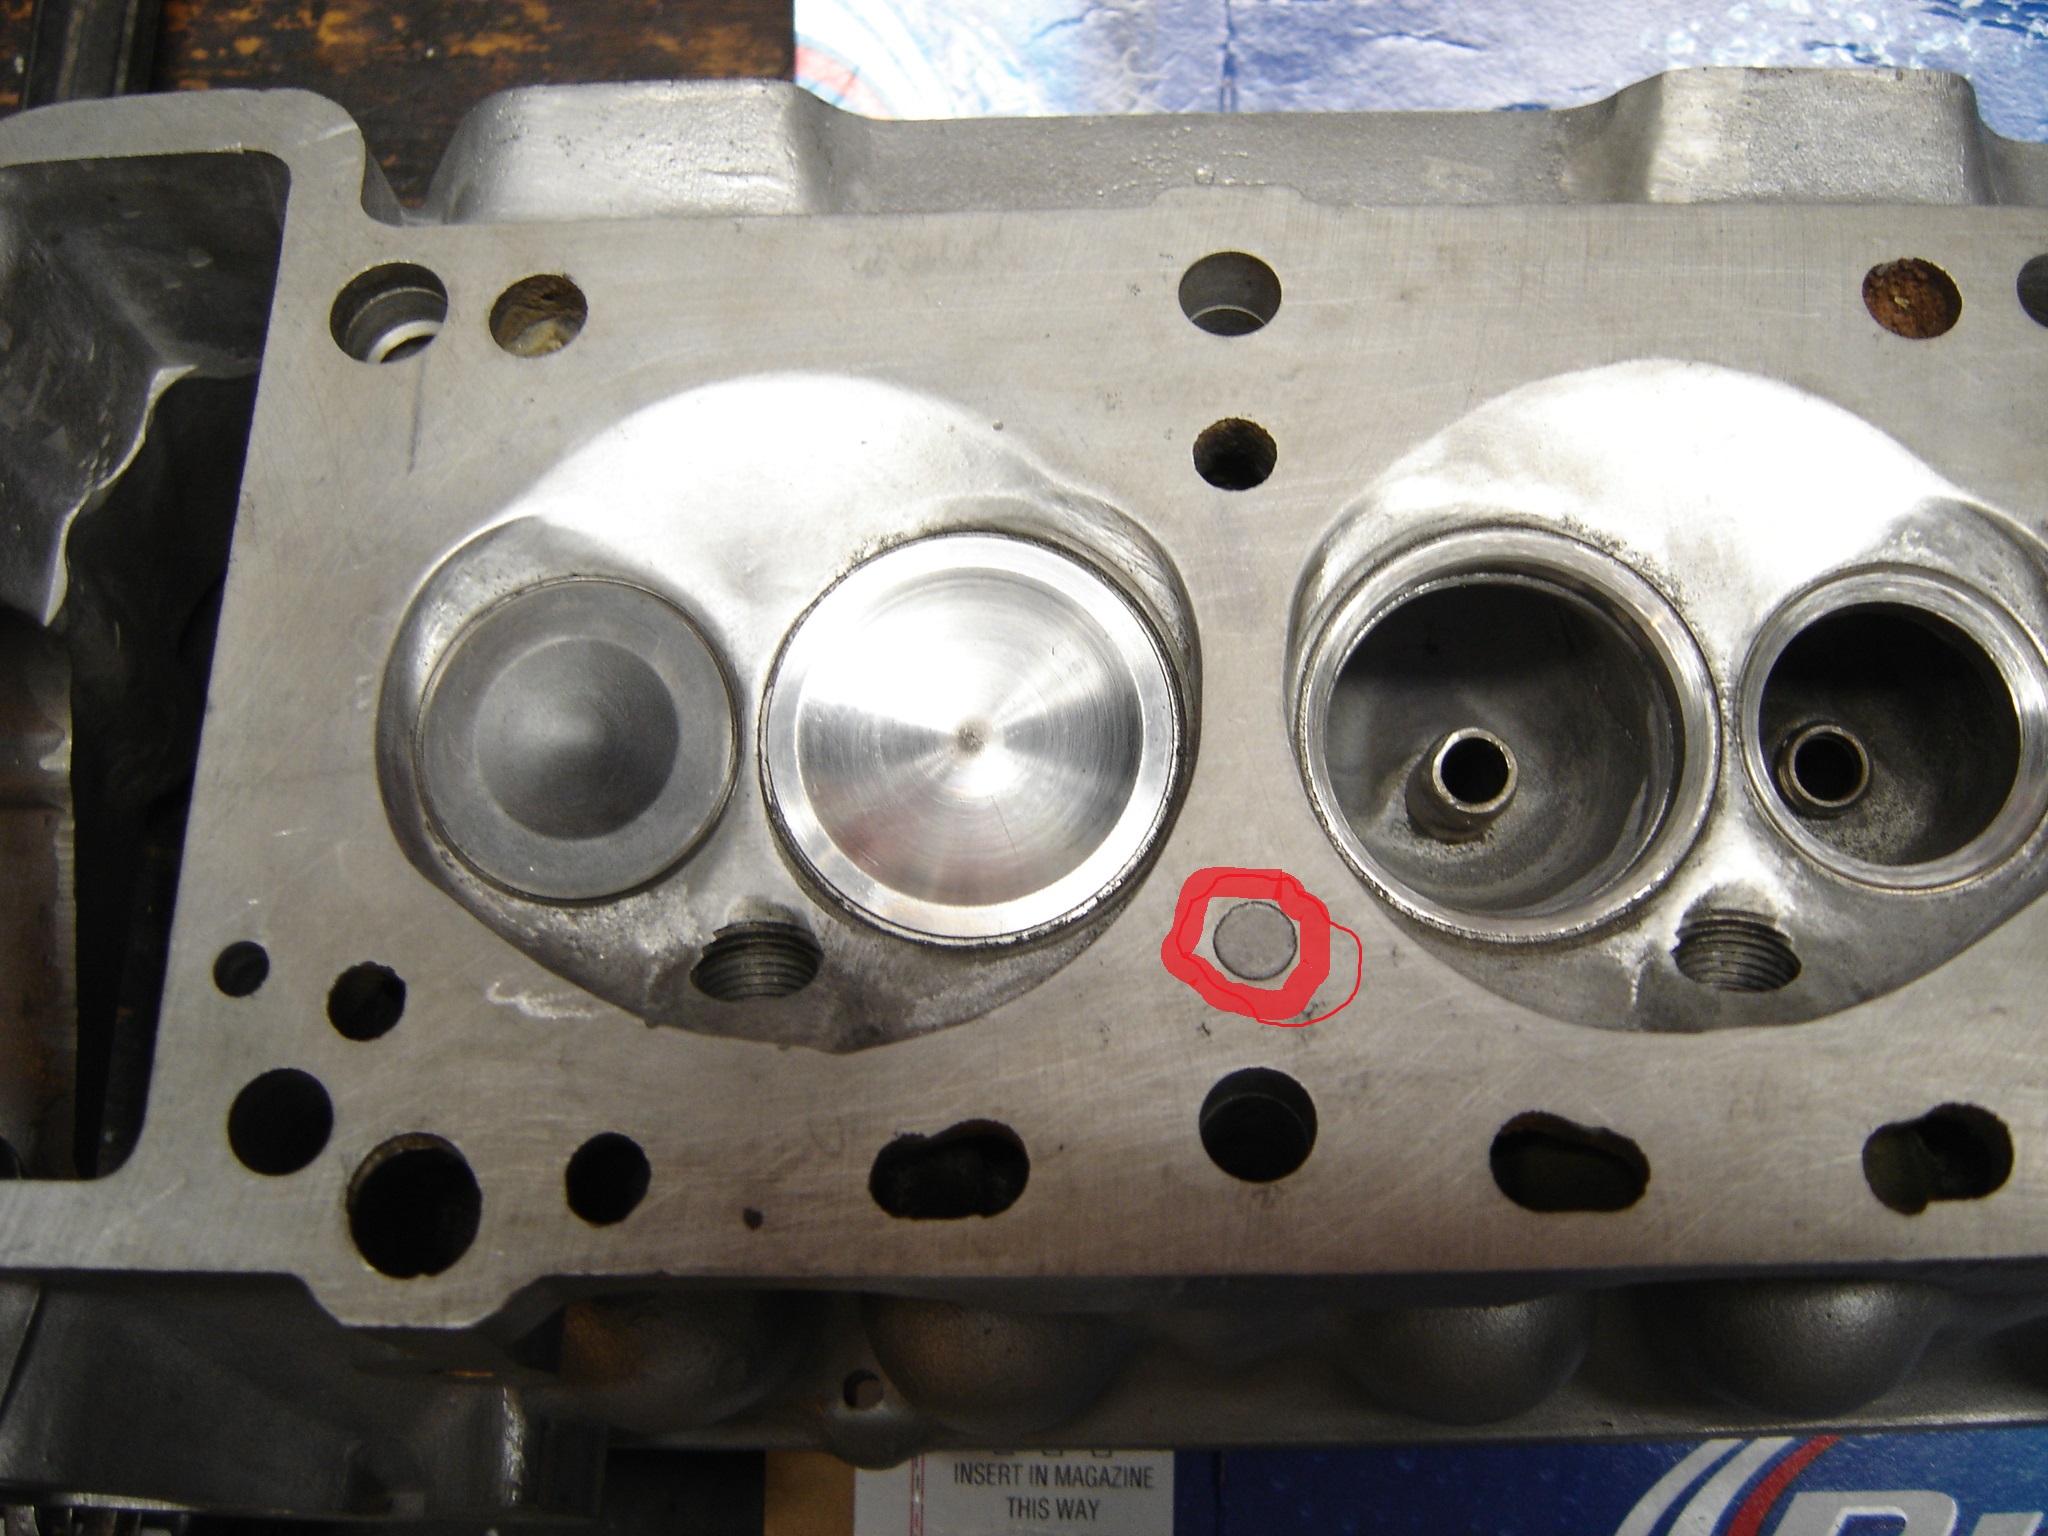
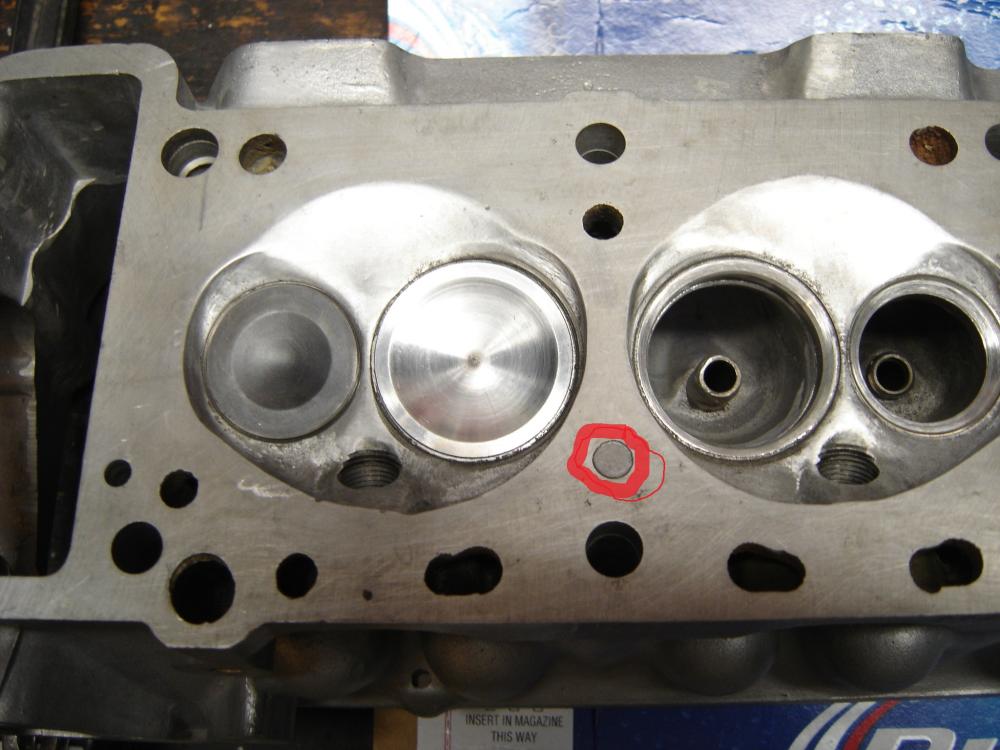
1 pointSomeone had asked about this earlier but I don't remember who and it has probably been answered, BUT I'm excited and wanted to post! The little circles on the bottom are markers of how much has been removed, I think there's 3 across the bottom. My machinist friend finally got my E31 finished and he was telling me it was nice and flat, it had been cut before and I could cut it again. He pointed to those circles and said they were indicators of how much had been removed and when you couldn't go any further without shims. Just thought I'd share this as I was curious myself when someone mentioned it earlier.
 1 point
 -
1 pointI had asked about this in a previous thread. I thought that is what they might indicate. I just didn't know how deep those were. I read to start shimming after .015 cut. I thought those looked deeper than .015 uncut but they could be .015. I would have to measure.1 point
-
1 pointI like your utilization of essential household items to rest the head on. Must be Bud Lite on hand for Sundays big game.1 point
-
I mentioned loose engine and transmission mounts. One of the obvious signs there is if the gear shift lever is moving. If it's solid, the problem's probably in the back.1 point
-
. Your before cleaning looks like my after cleaning.1 point