All Activity
- Past hour
-
 Un restored I would guess about $375-425. Ron
 - Today
-
 I replaced a headliner in a Toyota a few years ago and passed on the Weldwood Contact Adhesive because of the price and quantity. I used 3M Headliner and Fabric Adhesive. It comes in a spray can and was easier (more forgiving) to use than contact adhesive. The 3M has held up well, and I'd definitely use it again.
 -
 I agree. I bought a couple of pints of the regular stuff when I first started my upholstery work and quickly went through those (brushed everything on, no spraying) so I bought a gallon of the HHR and will likely have half of that leftover when finished with everything. Maybe I should rebuild another Z just to use it up? Oh wait, I have one of those...
 -
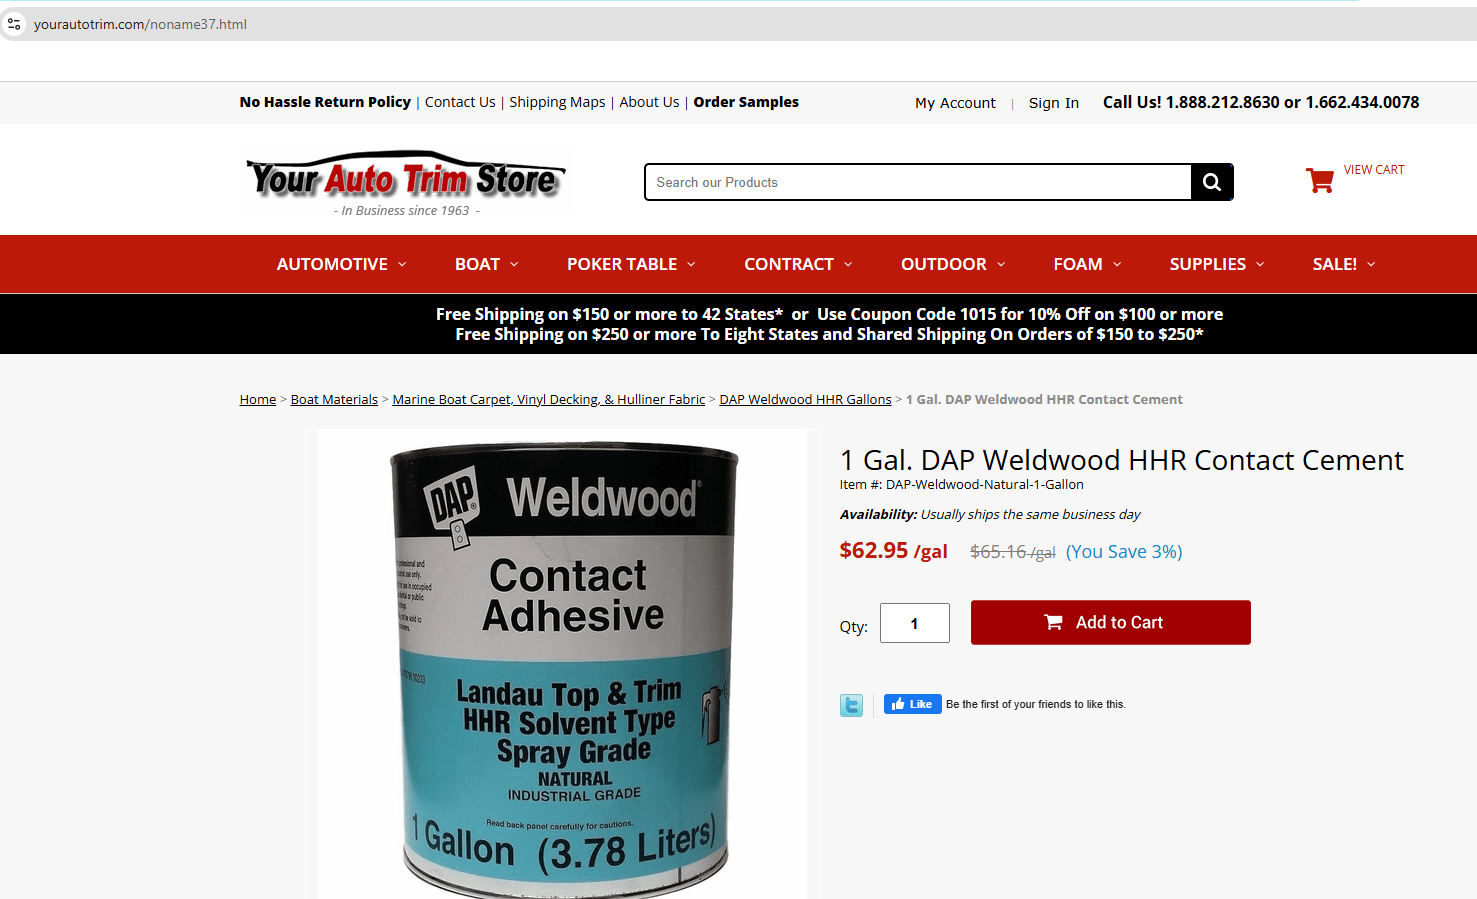
 Adhesive type matters. I have found contact adhesive available at local stores isn't good enough for high heat (automotive) applications. With interior temperatures going well north of 100 degrees repeatedly, it let's go. This stuff does not. It is only available by the gallon, and has a relatively short shelf life (a year or so), but I find it to be amazing, and crucial for any adhesive application in our cars.
-
Thanks for your reply, inline6. Here is that portion of your build thread. Excellent pix. Very helpful. I'll check out Grainger, McMaster-Carr and others for thin neoprene foam. As and aside, I tried searching just the "S30 Interior" portion of the forums for this specific topic before posting this new thread, but "vent" returns over 500 hits and I didn't want to spend the time investigating each one's summary to see if it was germane. I know, I'm just plain lazy. But I remember spending countless hours in the departmental library "stacks" tracking down references in Chemical Abstracts back in the pre-computer days. Probably added 6 months to my graduate degree program doing that. March 19, 2024 Author comment_663237 This past weekend, I rebuilt the side vents - the ones that are opened/closed via the knob underneath either side of the dashboard. The rubber parts that seal around the edges of the disc that moves to close/open were dry rotted, but intact. I thought about installing them as they were, but when I poked at the rubber, it crumbled easily. These vent mechanisms are actually pretty difficult to remove/install, so I decided to rebuild them. I have some thin rubber sheet I got from McMaster-Carr some time ago. It comes in handy for making gaskets, and applications like these. For each vent, I had to first remove all the old rubber material. Then, I cut two semi-circular pieces a little over size so that the edge would fold over seal against the ID of the housing. I then used the contact adhesive I have been using to glue them into place, one on one side, and one on the other. To finish up, I cut some 1/8" this open cell foam which seals the vent housing to the car body.
-
 What would be the price for a unrestored clock like that with a single knob calendar clock that is in my "collection" and IS running fine? It's for sale..
 -
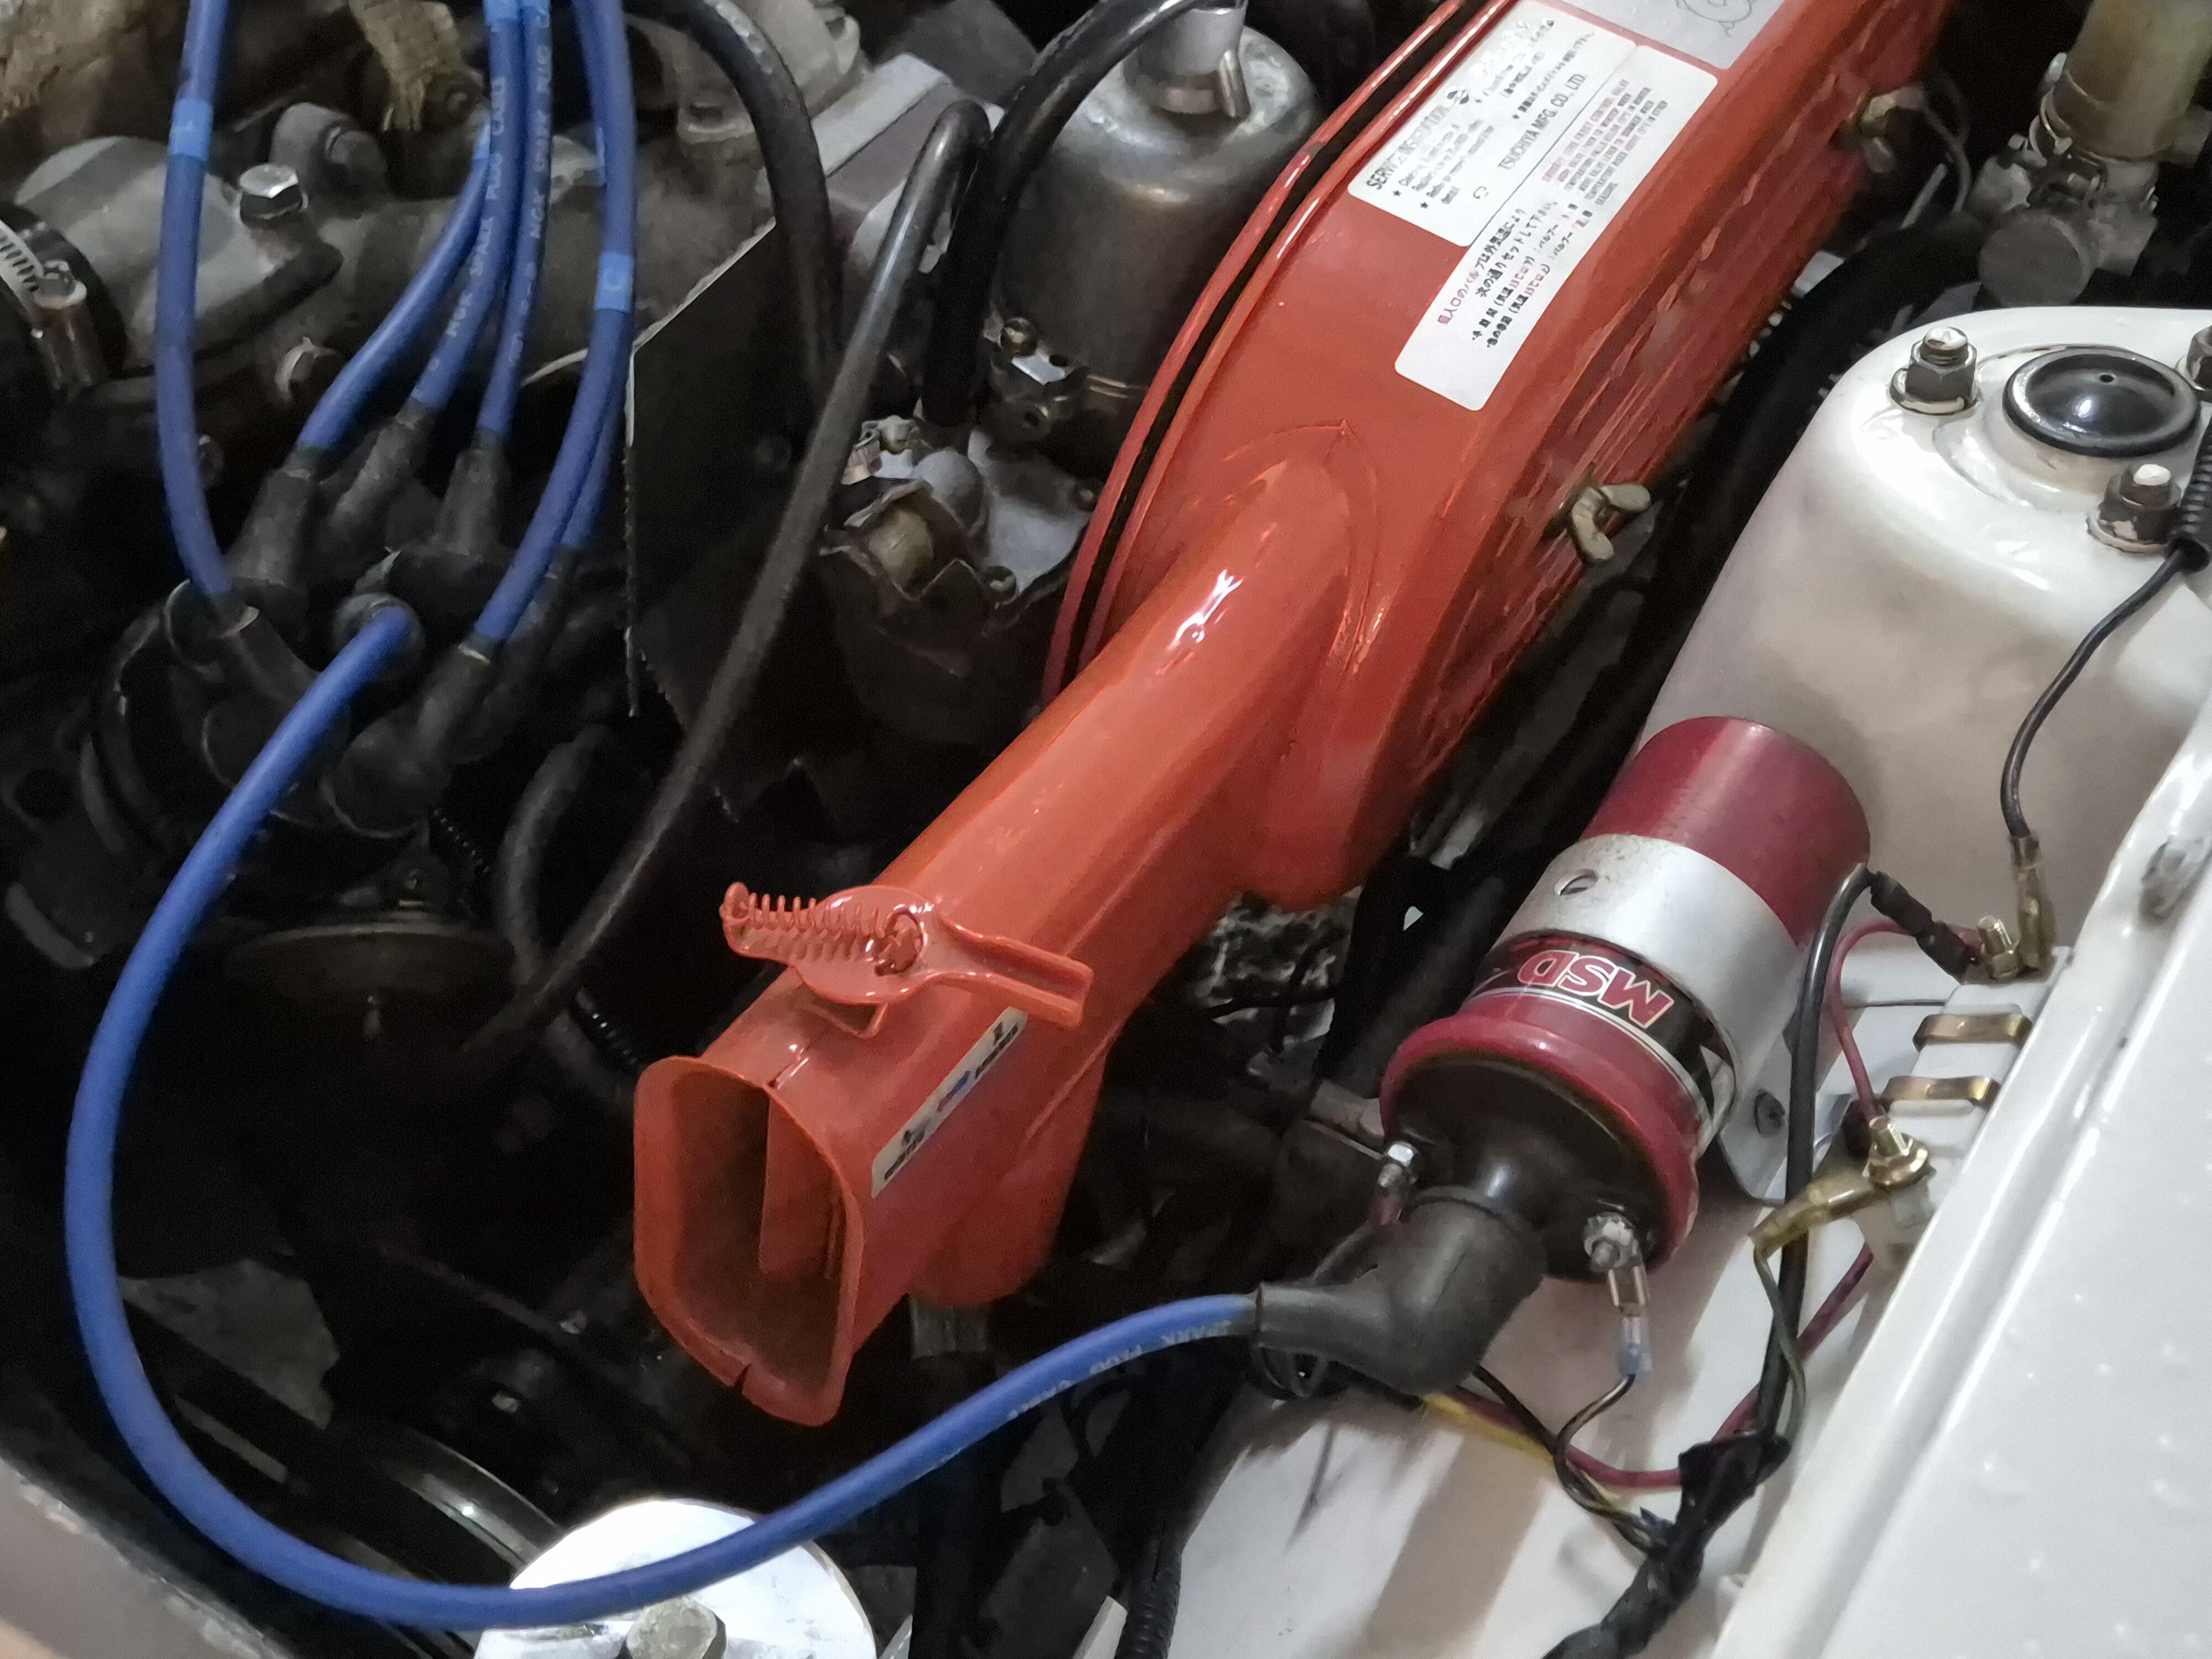
 This is how the msd blaster 2 got wired to the tach, distributor and ballast. Hope im not missing anything. Tach is working but plug 4 is still getting fouled at idle.
-
Here is a post showing a bit about what I did to redo mine: https://www.classiczcars.com/forums/topic/63087-restoration-of-bringatrailer-240z-hls30-35883/page/63/?&_rid=2858#findComment-663237. I can't find it now, but someone found a material that I thought may be a better choice. It may have been @Patcon. The rubber I used is very durable, but it is rubber sheet. I found it to be less "shapeable" than the original foam like material. If I had to do it again, I'd look for a very thin neoprene or more foam like material, as I think this material would folder around the edges of the flap better.
-
 I redid that foam on mine but decided disassembly was a bad idea. I bought some thin foam off amazon. Glued it on an closed the flap to hold it. Trimmed to fit after it cured
 - Yesterday
-
 What year is your car? How about a description? Stock, modified, round tops, flat tops... @Patel Homes
 -
 I get that question a lot, but no I’m not a home building company. My focus is more on real estate solutions helping people with smooth transitions when it comes to property. Sometimes that means working with homeowners who are moving on from a place quickly or buyers who are looking for the right opportunity in a competitive market. Whether it’s relocation downsizing or buying house in connecticut the goal is always to simplify the process and make it less stressful for everyone involved.
 -
@Patel Homes Are you a home building company?
-
It sounds like you’ve really put Seafoam to the test and proven its reliability compared to other stabilizers That kind of long term success story with both your 620 and Z gives a lot of confidence to anyone debating fuel storage products Also good to know Z Specialties is still active and running strong even in a smaller setup.
-
Patel Homes joined the community
-
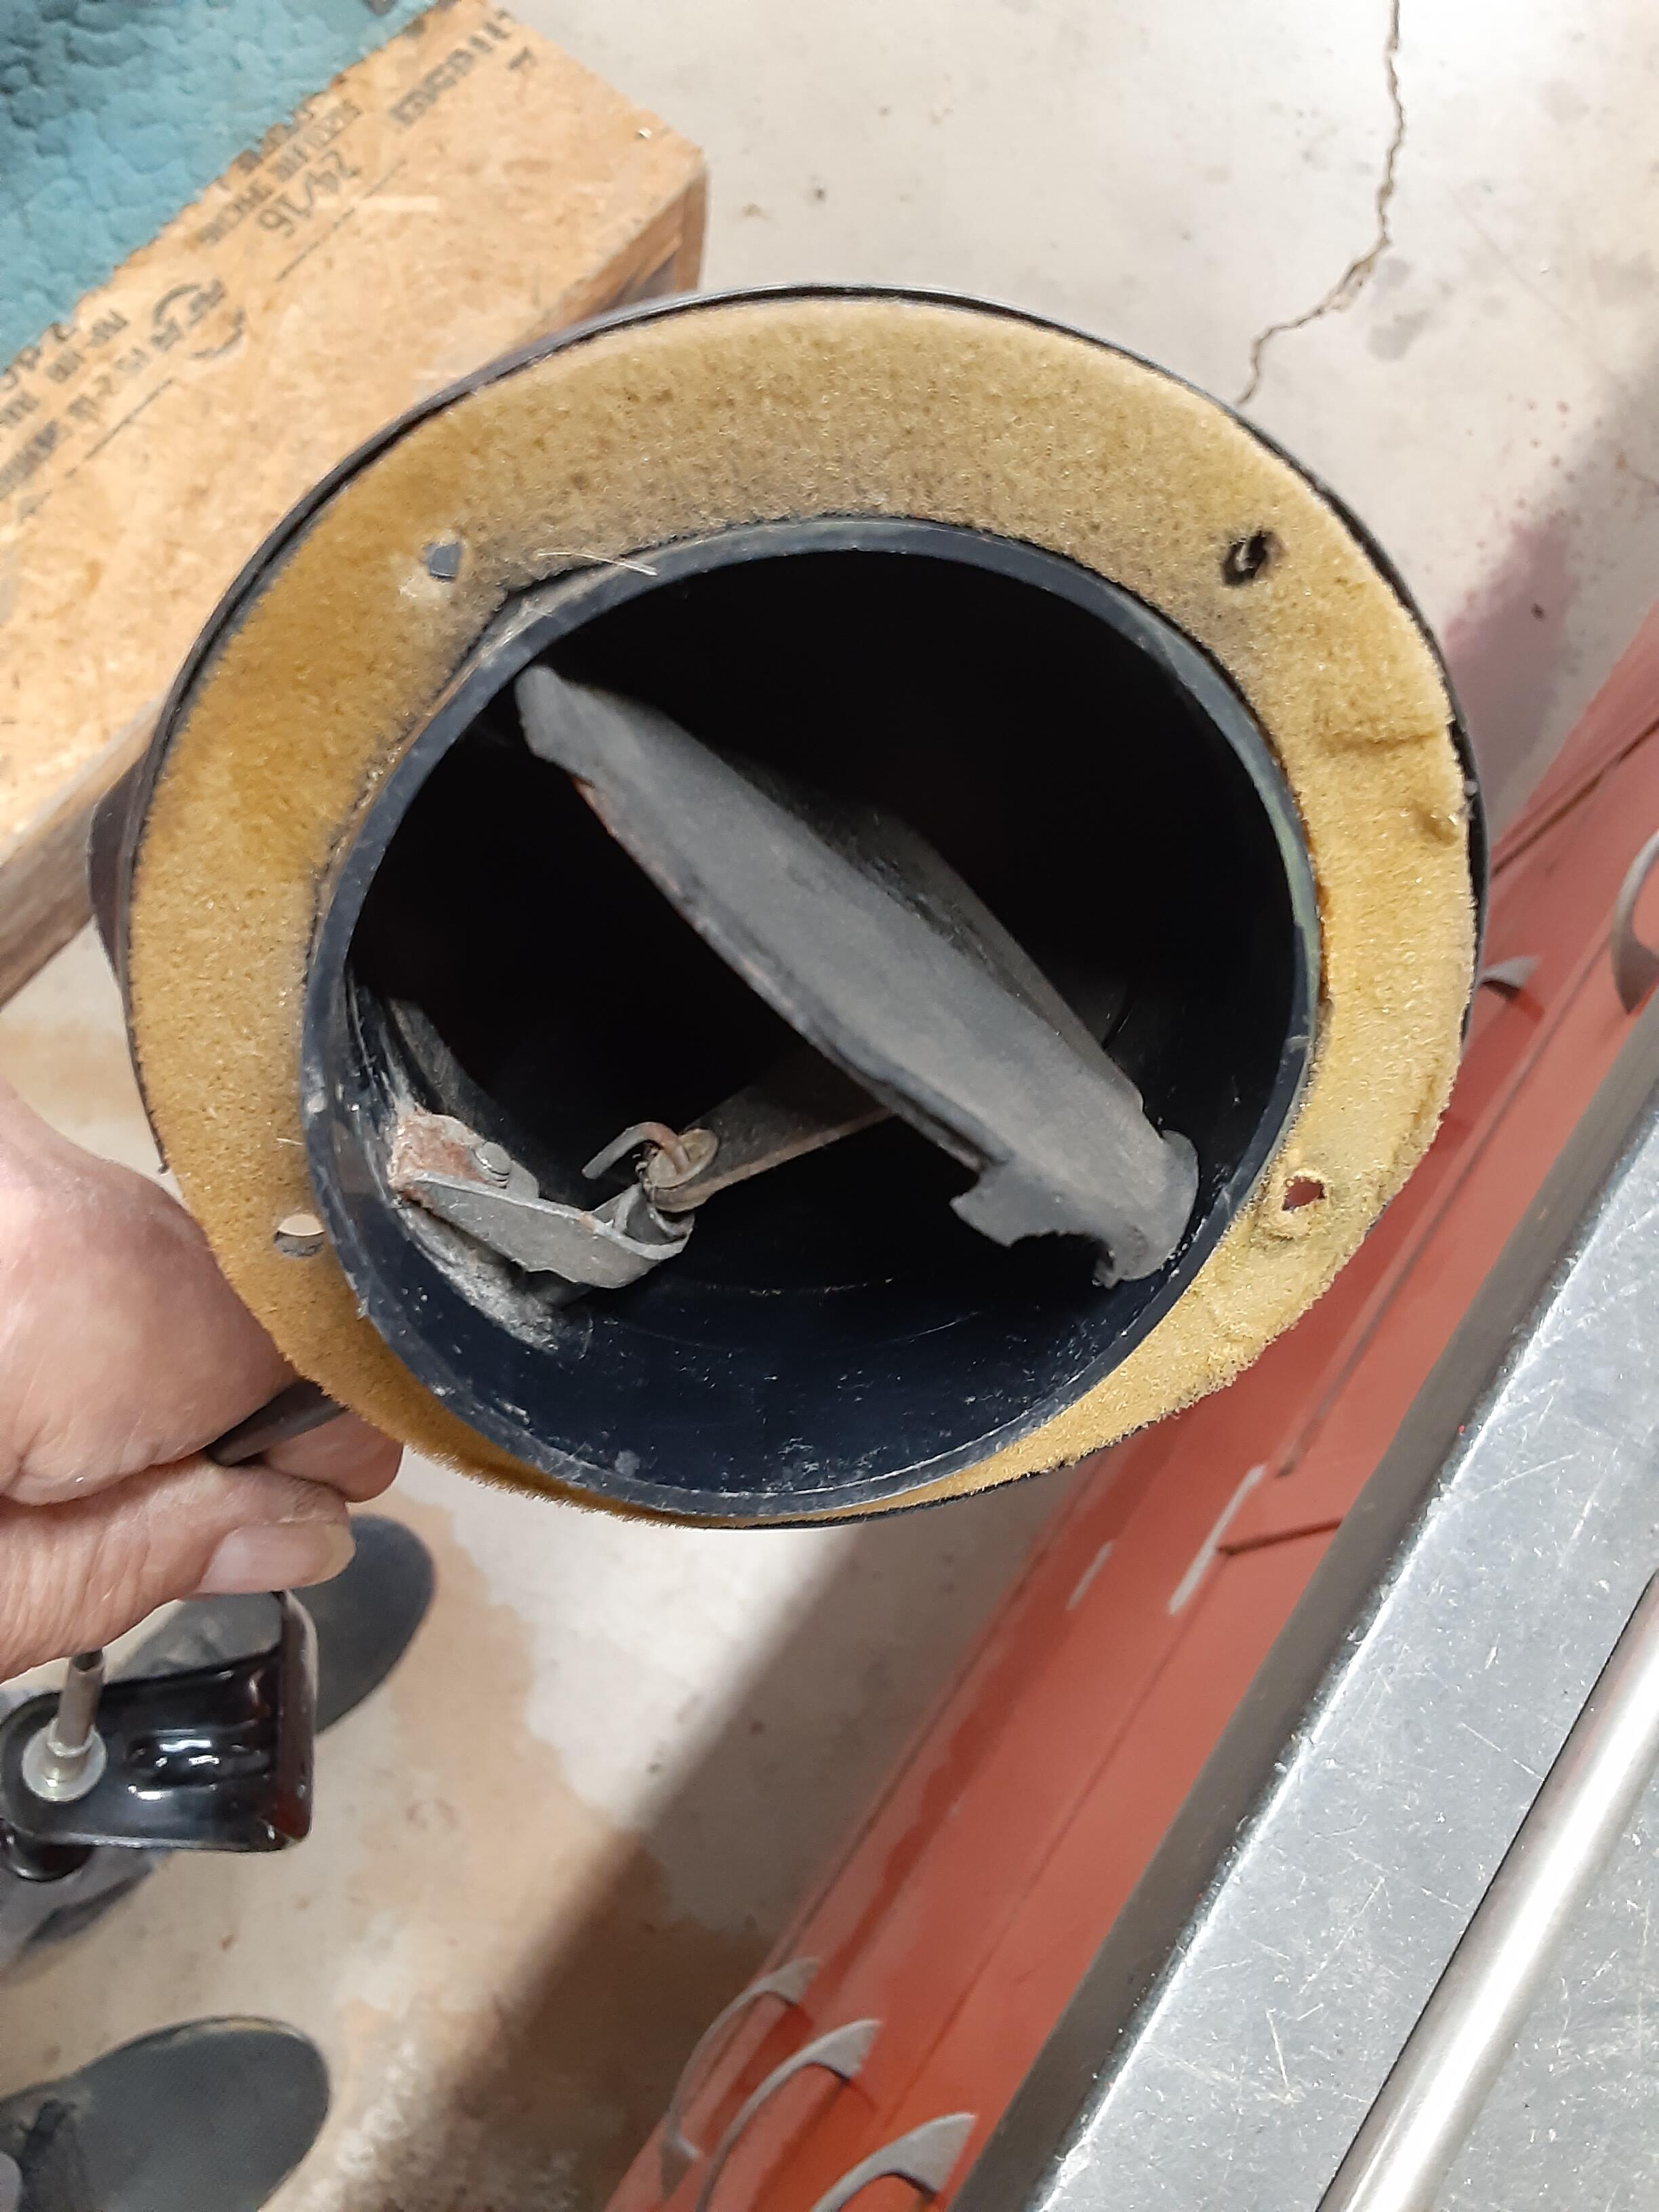
Has anyone ever rebuilt or otherwise repaired the floor vents on their S30, the ones operated by the pull knobs under the dashboard? I'm starting to reattach all my interior bits and pieces, I noted that after only 54 years, the "rubber" that seals the vents closed has cracked and broken off in a few places which is plainly evident in the photo. That will make for some drafty driving in cool weather. I estimate the material thickness at about 1 mm (1/25" or 0.040"). I see 0.040", 60A durometer, adhesive-backed, transparent silicone rubber sheeting (about 1/2 square foot) on Amazon for $11 so that's my target material at the moment as the silicone should never "dry out" and get brittle. Anyone have an alternative? Also, the movable flap looks to be held in place by and pivots on two pins that protrude into the air horn and look to be retained by plastic, friction-fit washers. Has anyone disassembled one of these and determined if everything survives the process to then get reassembled?

-
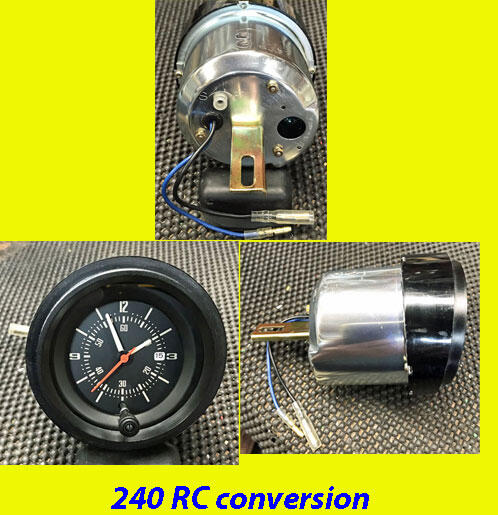
Up for sale is a single knob RC calendar clock that is completely refurbished and converted to fit the 240Z. This is a plug and play install. Price : $550 Plus tax and shipping. If interested please contact me: ron@zclocks.com
-
The company known as SPAL no longer sells trinkets like the units you and Dave Irwin used back then. But the current units - there appear to be two basic designs, what I call the "separated drive system" like you, Dave and I have and the "combined drive system" where there is only one connector between the drive motor and the actuator that goes on the door handle spline shaft. You pay your money and you take your choice.
-
I have rebuilt circuit boards for the 75-78 280 OEM clocks and single knob RC (calendar clock) . Your core circuit board is required and the cost is $78 plus shipping and taxes . If you are interested or have questions please contact me, ron@zclocks.com Thanks for looking


-
I've read that the mixture screws raise or lower the nozzles 1mm per revolution. One can raise the nozzles to the top and lower them 10 turns. At ten turns, the fuel level should be near the top of the nozzles.
-
 LBS joined the community
 -
 Cliff, you can buy a lot of Powerball tickets for $12,000 😎.
 -
 I really needed one more week to work on the OG before I left for Zcon. Just one more week would have made the whole drive so much less stressful. I would have known that I had a radiator problem and I would have mitigated it before I left. But I lost that week waiting for struts because Amazon screwed up. So here's where I am today. I took the leaky radiator I got at the show to a local radiator shop. They sealed up the leaks and pressure tested it. I swapped it into the car, and.... Driving around with no thermostat, it wouldn't even reach proper temperature!! Way better than what was in there! So just to see where the gauge would land, I put a 160 degree thermostat and went for a drive. It stabilized about here: So next chance I get, I will swap out the 160 for a 180 thermostat and check again to see where the gauge lands. But the bottom line is I'm a whole lot better off than I was with the previous radiator! I blame Amazon. And photobucket.
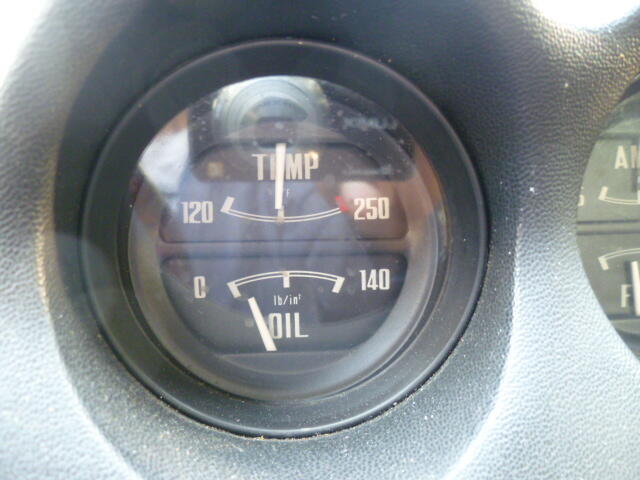
-
 Your saying $12k for a new driveway with those measurements? Not digging up the old asphalt and hauling it off? Thank you Charles, I've just guessed at the price of concrete. One of my neighbors with a smaller drive paid $15k for concrete but that included breaking up and hauling off the old concrete. I'm just going to wait on my Powerball winnings. For the time being it's gonna be patched and possibly sealed. If I do a good job the next owner's will buy the concrete.😁
 -
My calculation is about $12,000 for concrete Not including any demo
-
Joles Asphalt 2.6 Google review Not enough crush and run then not enough asphalt. They used enough to make it level and look good for maybe a year. What I dug up yesterday was mainly dirt with very little stone under the 2" of asphalt. I got screwed dude. But when it started to show they were long gone. So now I get to fix it. They charged me $3,000 in '03 or '04 now another guy quoted me "around $10,000 but it'll be right when I'm done". I think it will do the same thing if I use asphalt but concrete...WOW that stuff has gone through the roof. My driveway is 20 to 25 feet wide and 125 deep. You could land an airplane on my driveway, the kids in the neighborhood think it's a skateboard park, I could put a Christmas tree up and have my own dragstrip. It's long and wide, concrete would be $20K
-
 I decided to go through all 14 pages of this thread. I spent many hours trying to get my fuel level in the bowl correct, whatever "correct" is. I even fabricated a plexiglass model of the fuel bowl so I could actually test the float in combination with the needle valves, which I know are NOT grose valves. I also found I was totally wasting my time by measuring the distance from the top lid of the fuel bowl to the top of the float, which we now believe was meant for grose valves. The critical measurement I've learned is the actual fuel level in the nozzle, not the bowl. Either .426" or 10mm would be the level of fuel below the carburetor bridge. That level happens to be based on the fuel level in the bowl, which is determined by how one bends the tabs on the float itself. Some of us have discovered that to get the proper fuel level, the float is actually too high in the bowl and is dangerously approaching the lid of the float bowl. As you can see, CO has fabricated some brass screws that when inserted into the float will help the float attain the proper angle when the fuel level is correct. I have fabricated similar screws and will drill and tap holes in the float as CO did, and hopefully after re-adjusting the tabs will finally have the proper level. I will report back with my findings, but from I've read from CO, I am expecting good results. Jim
 -
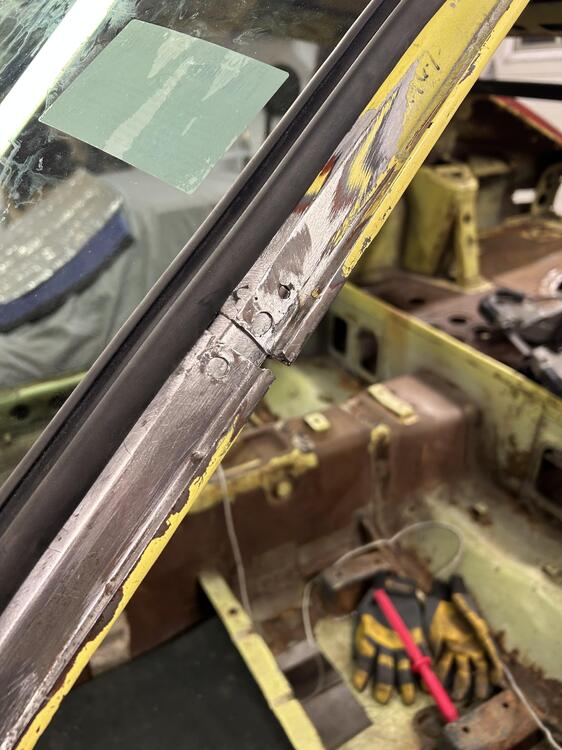
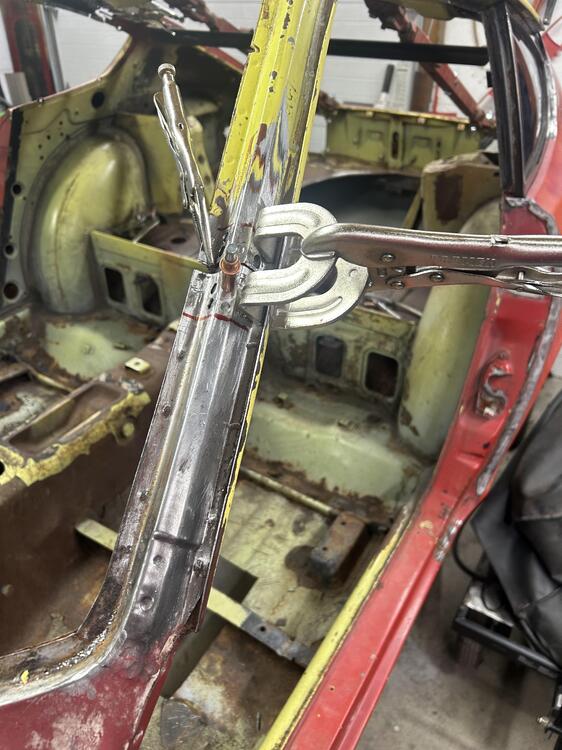
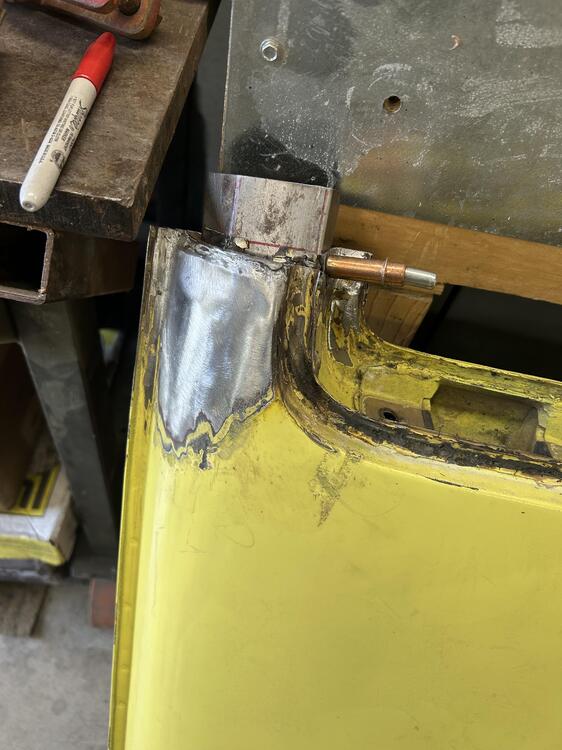
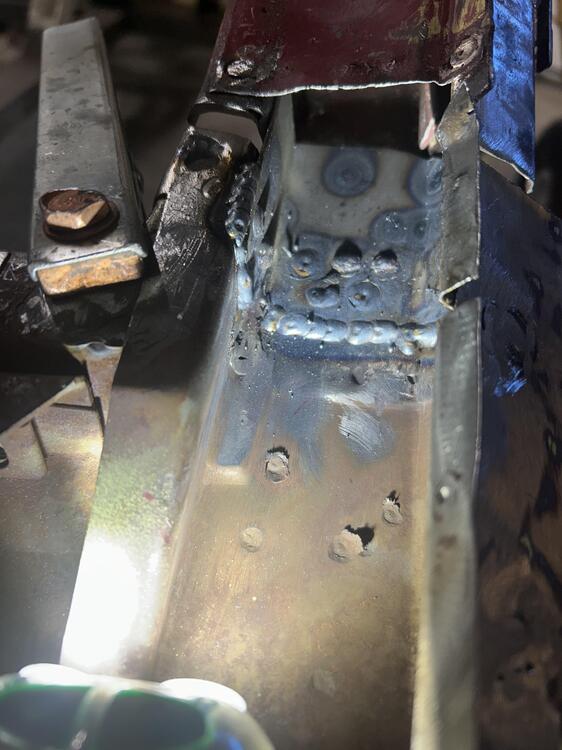
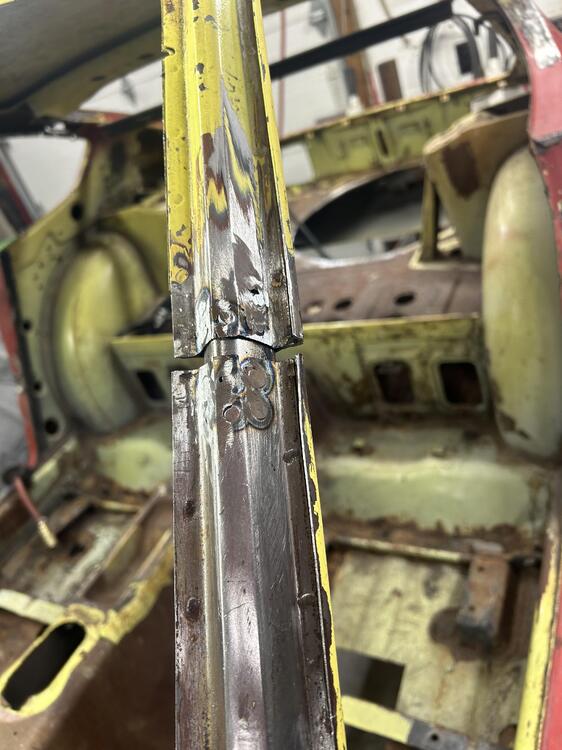
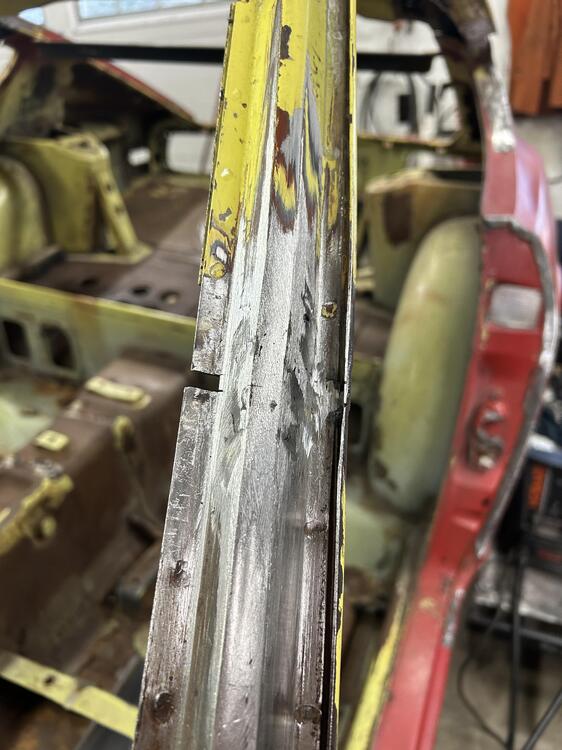
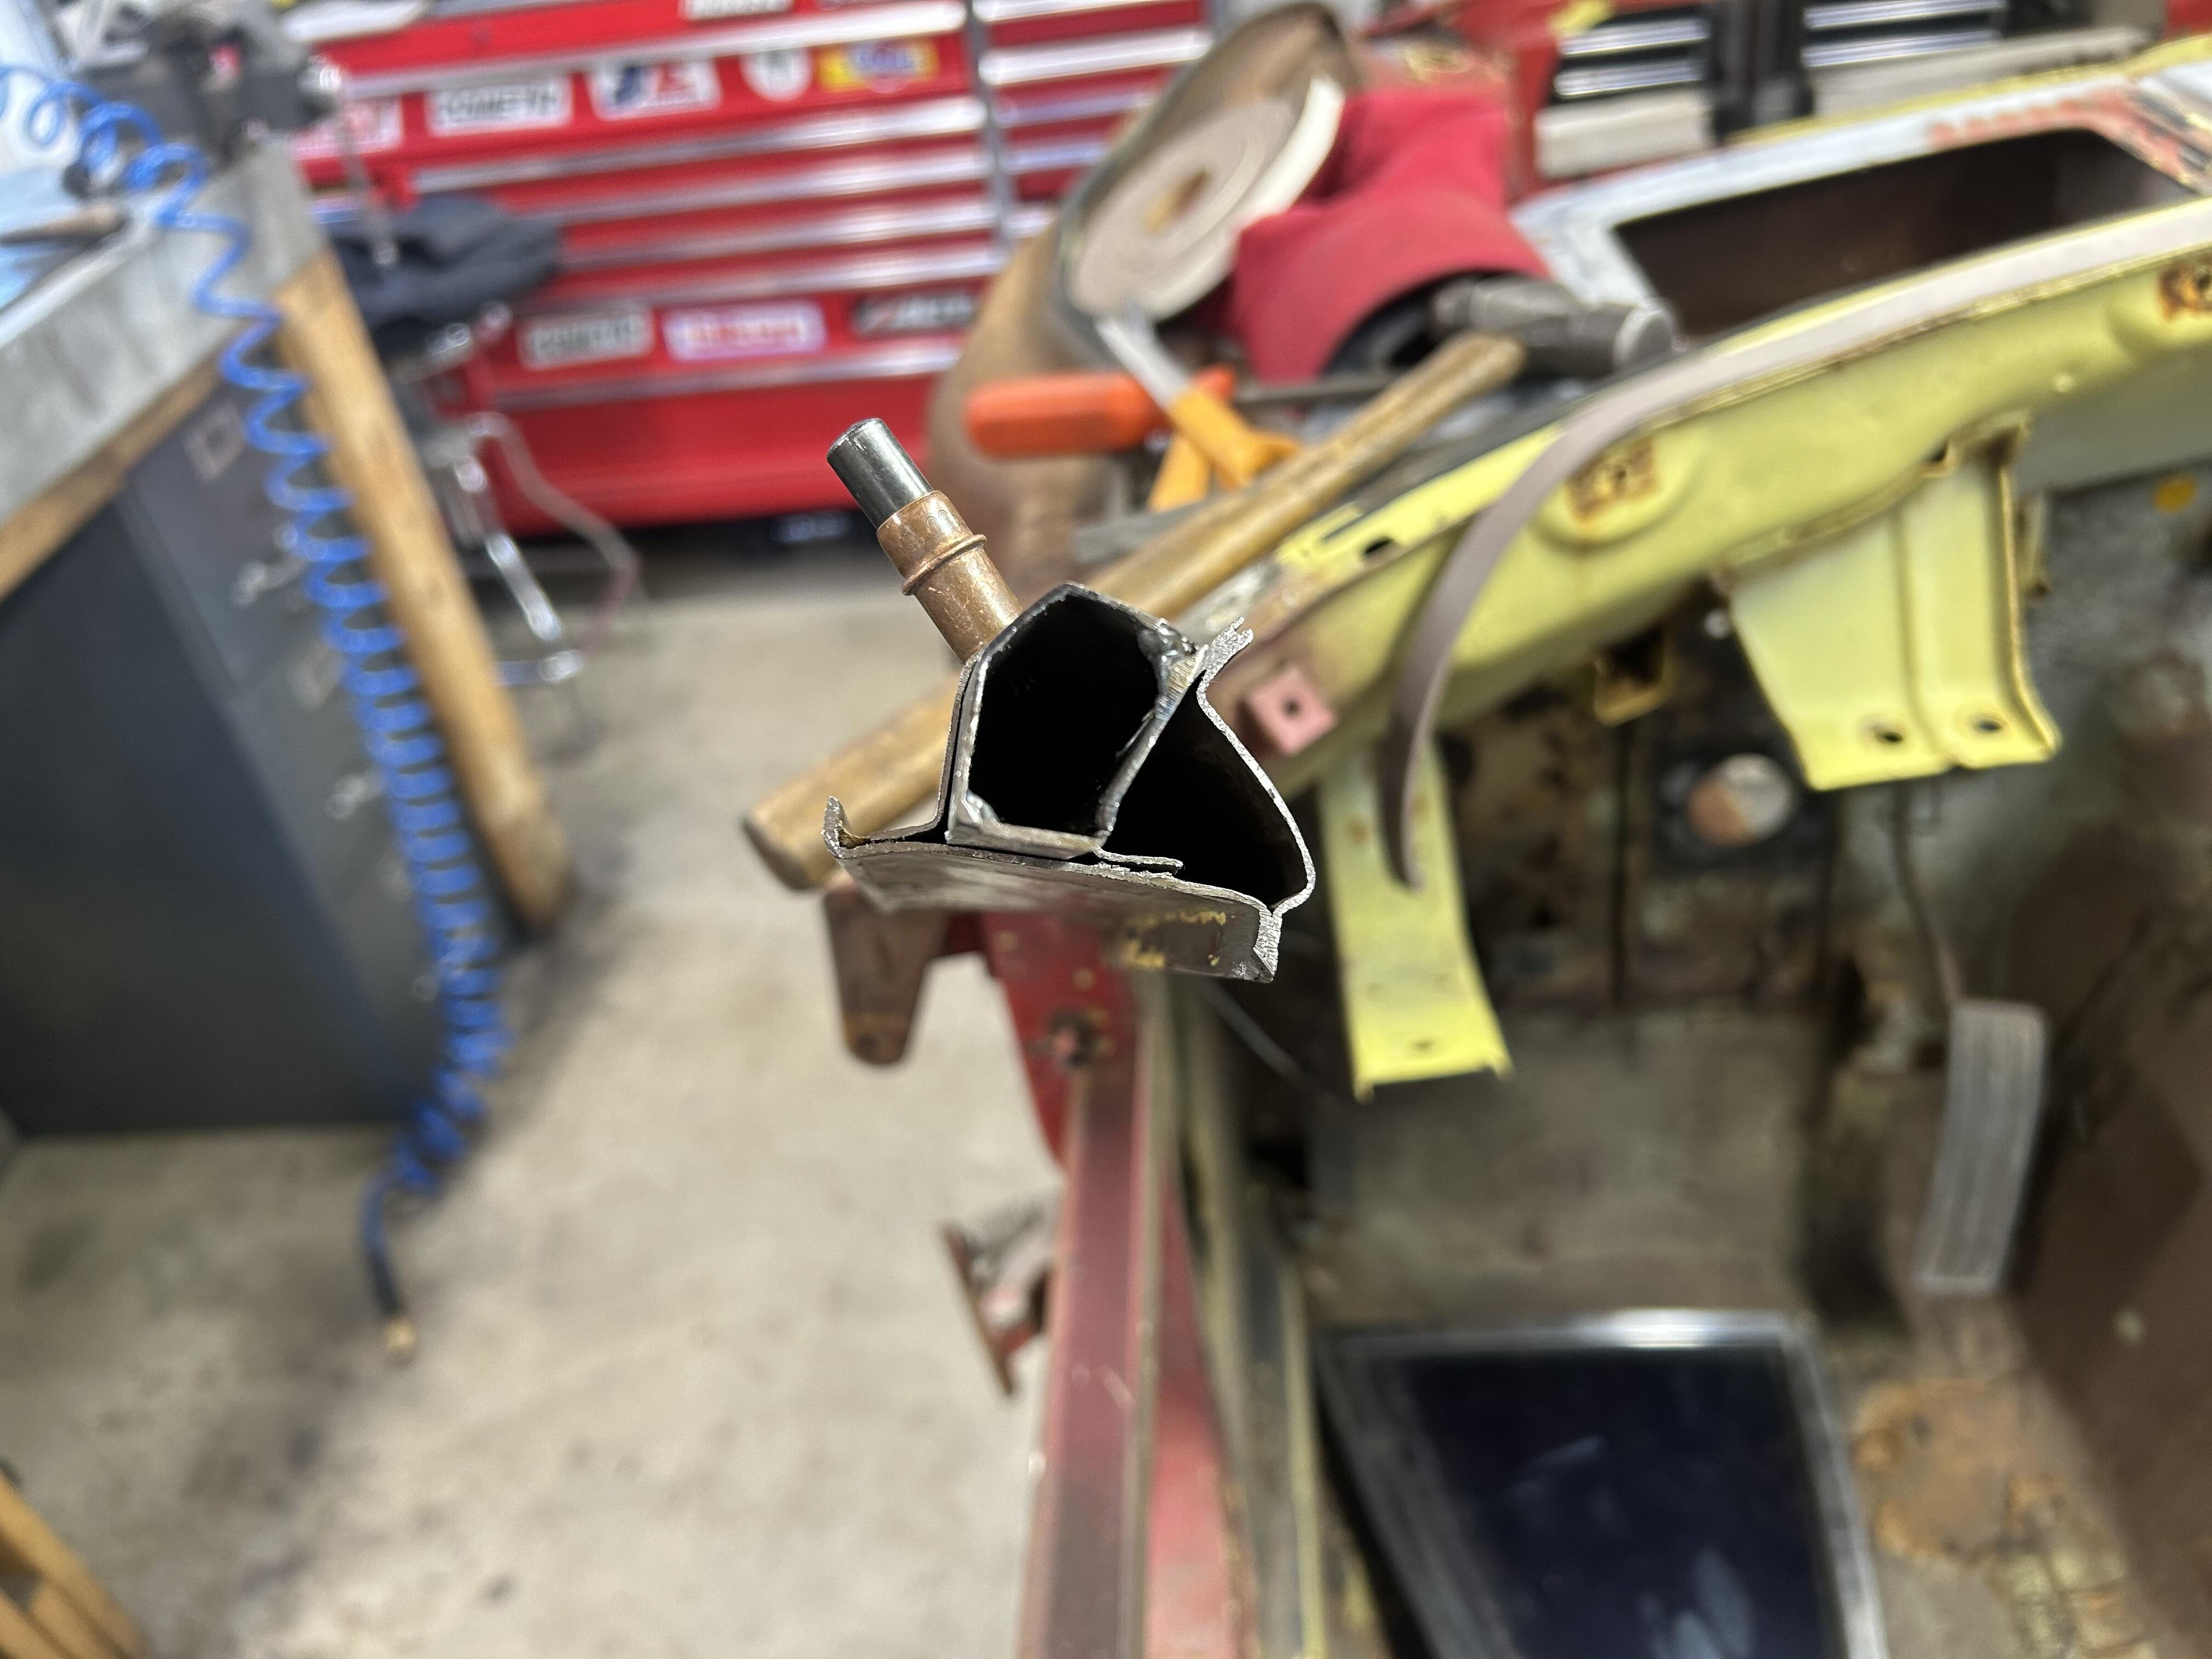
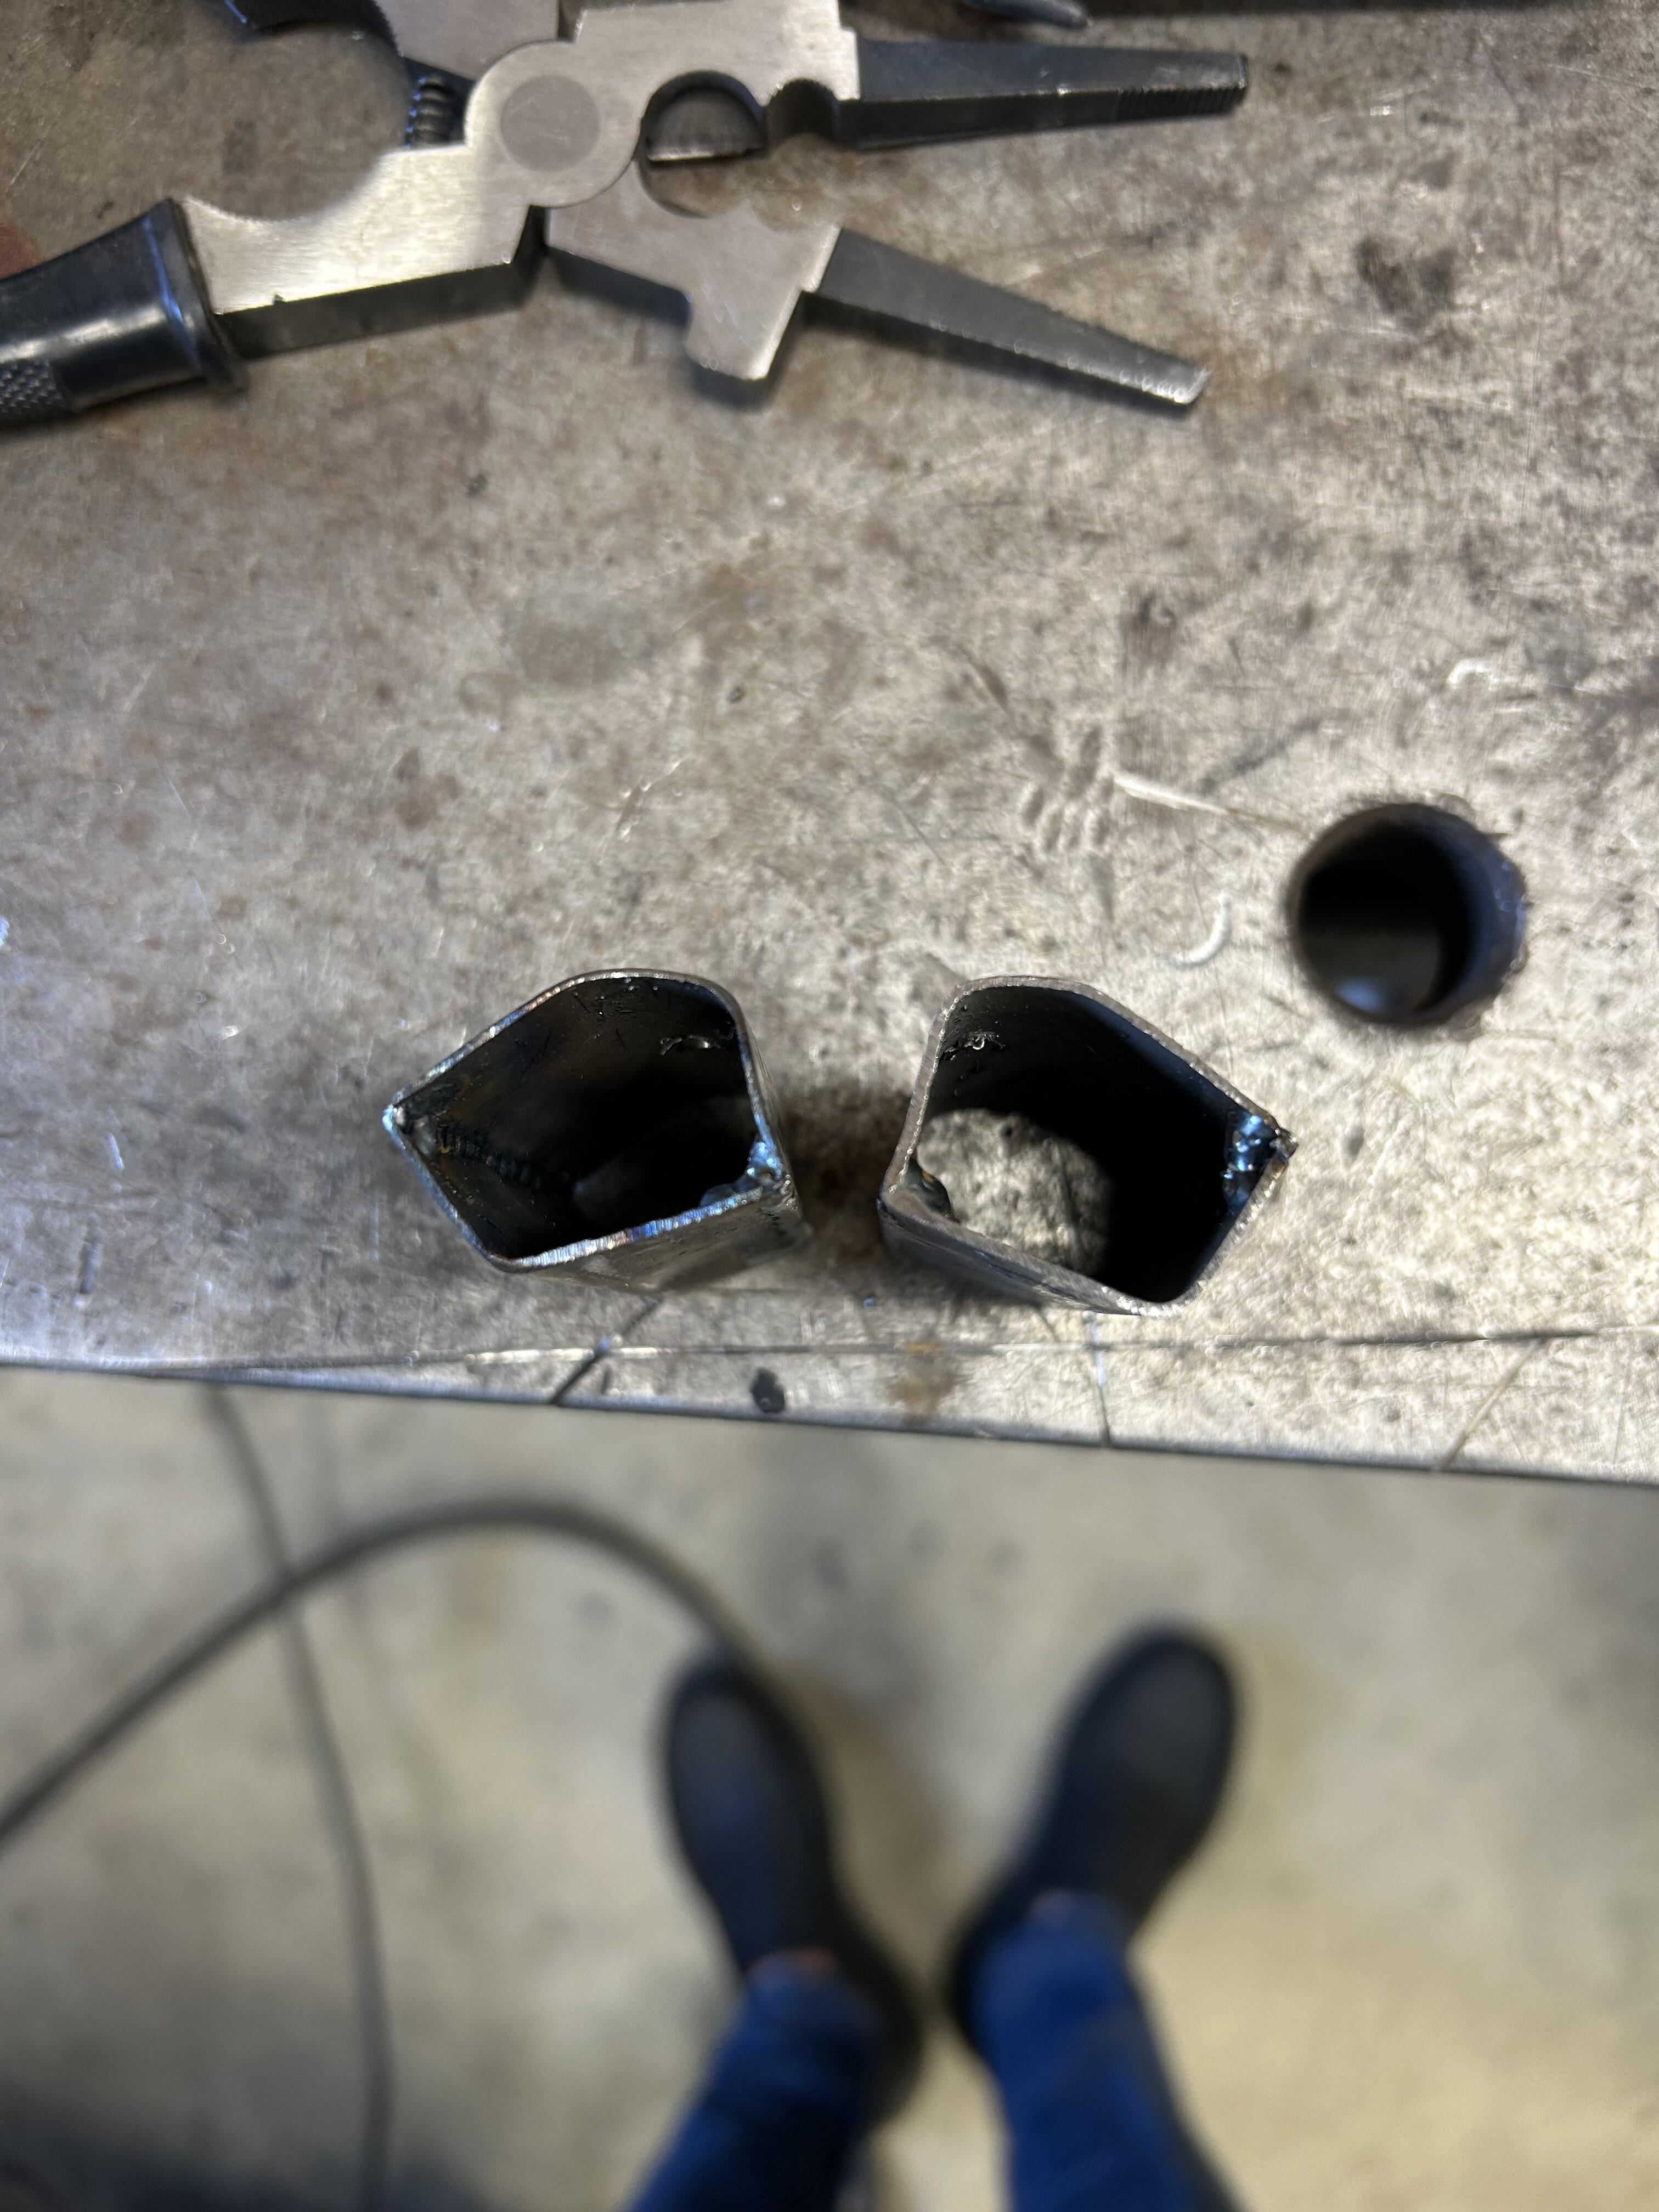
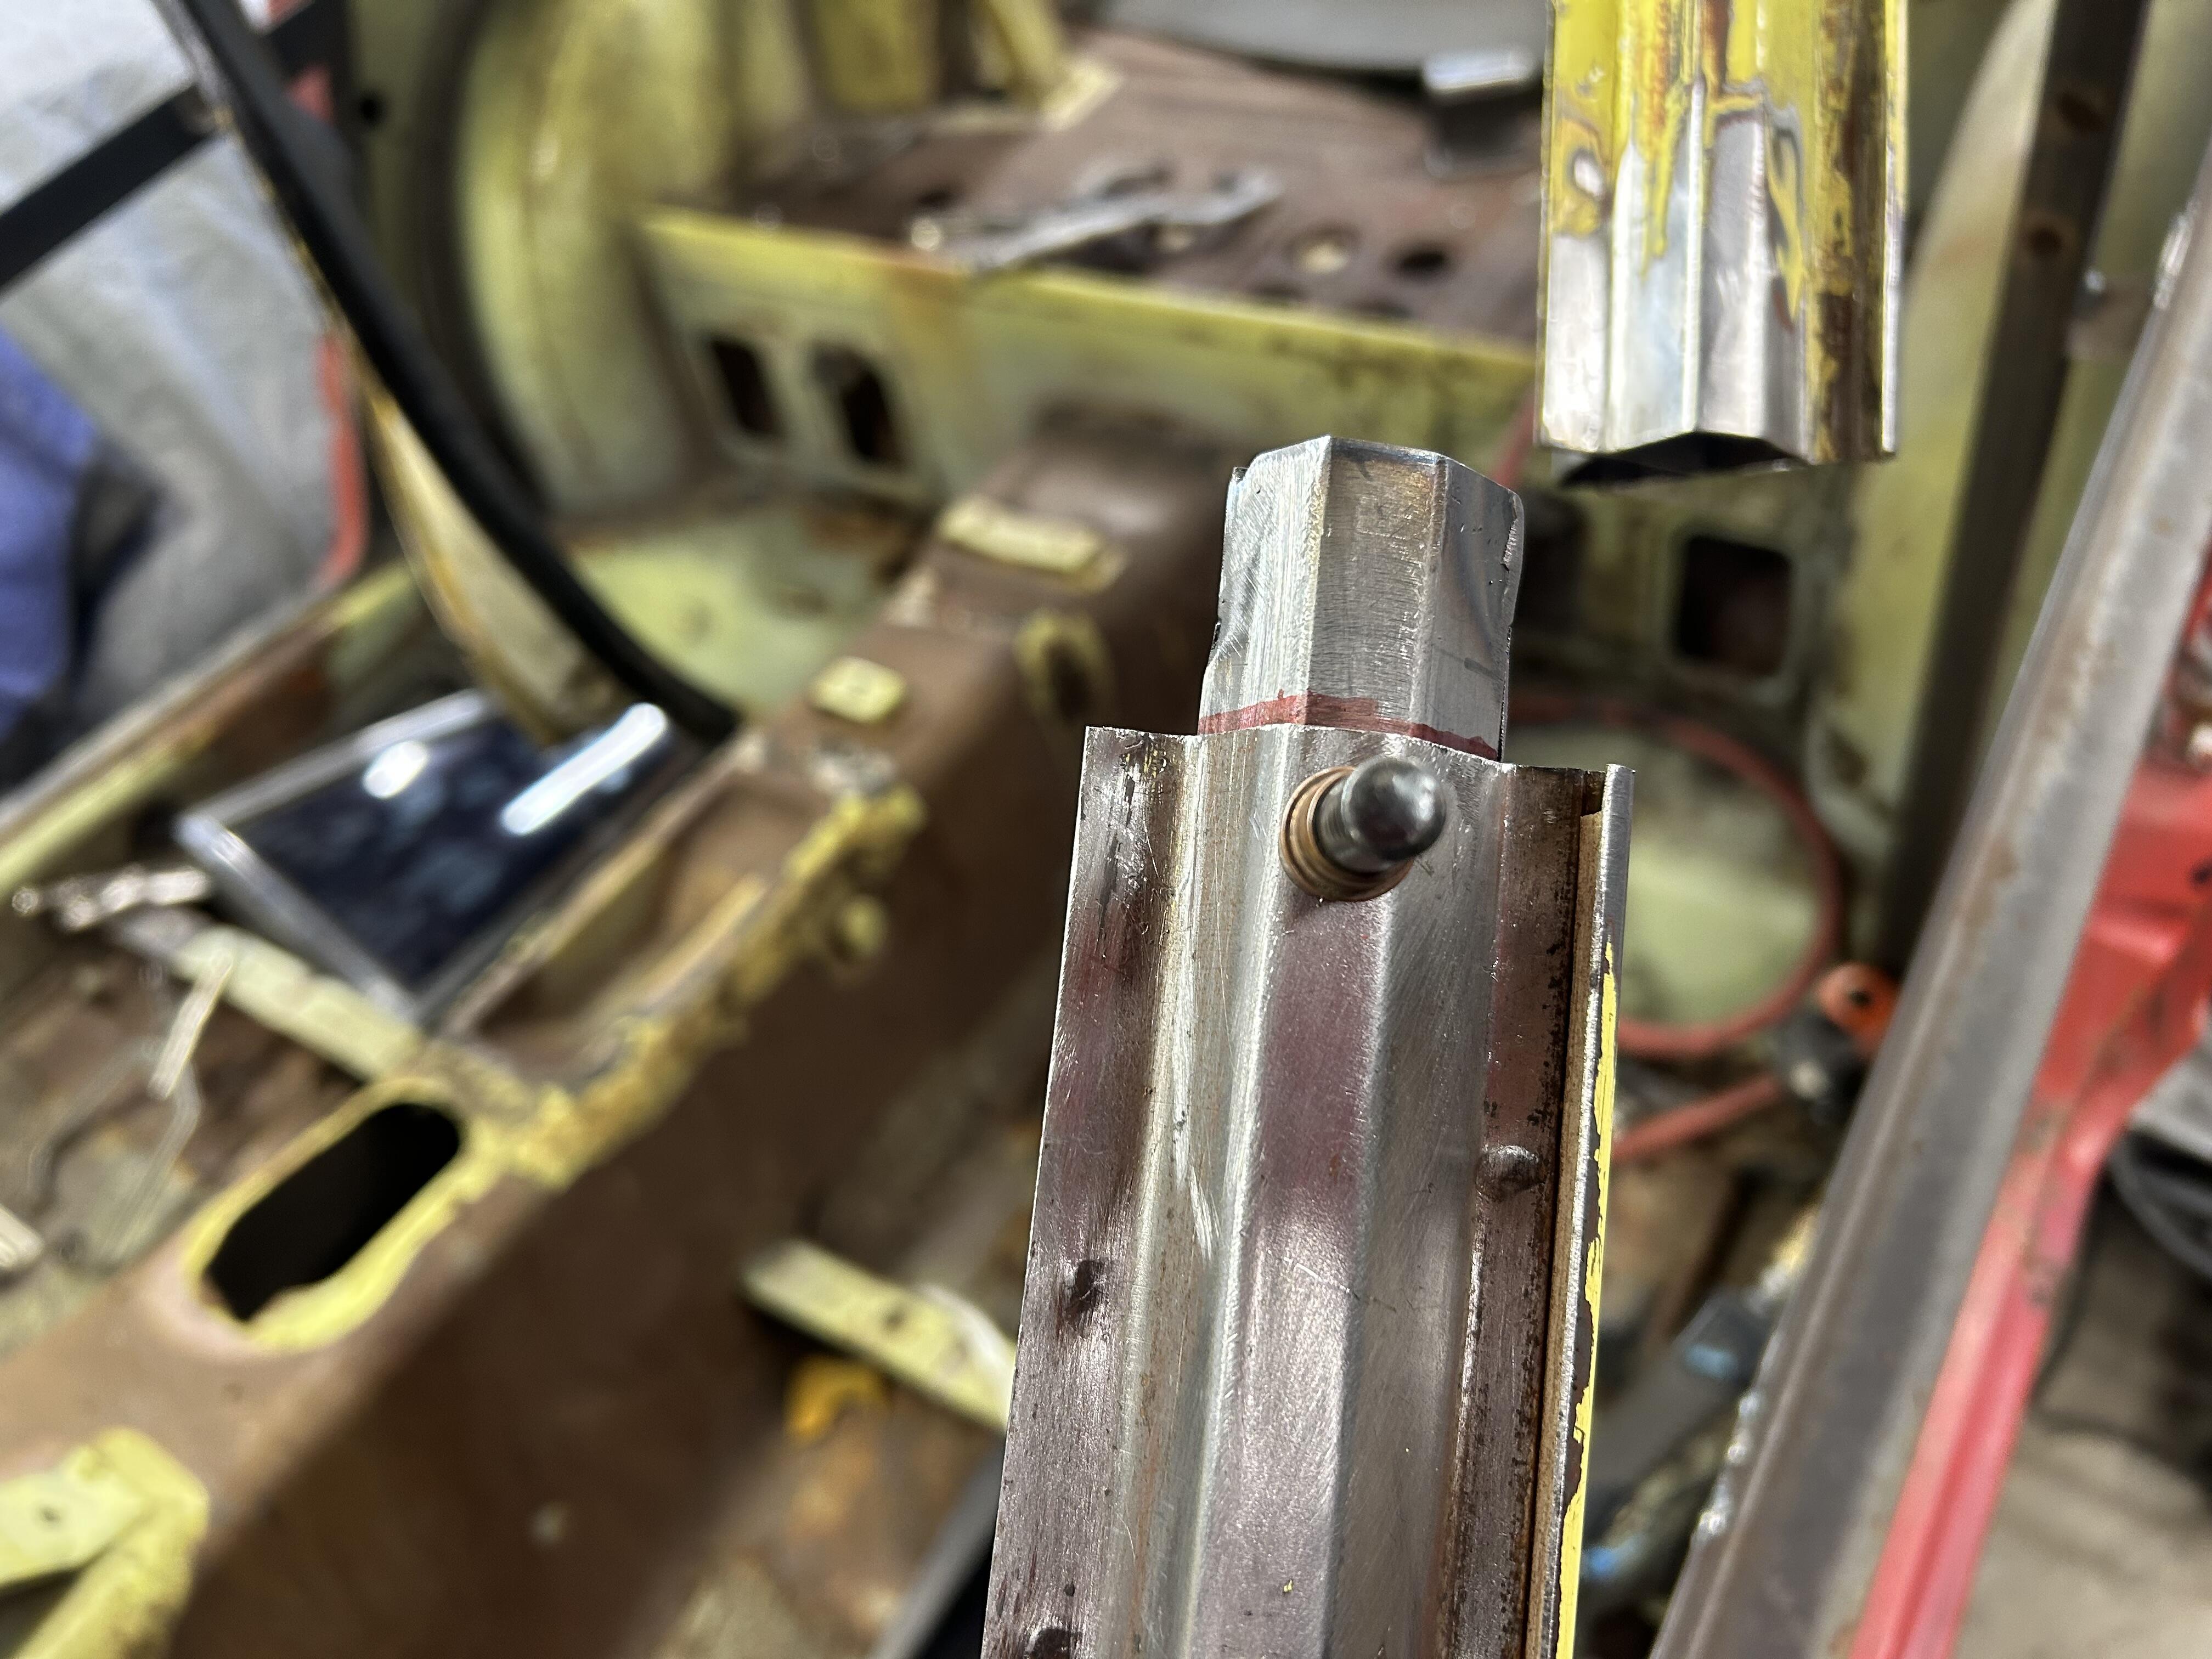
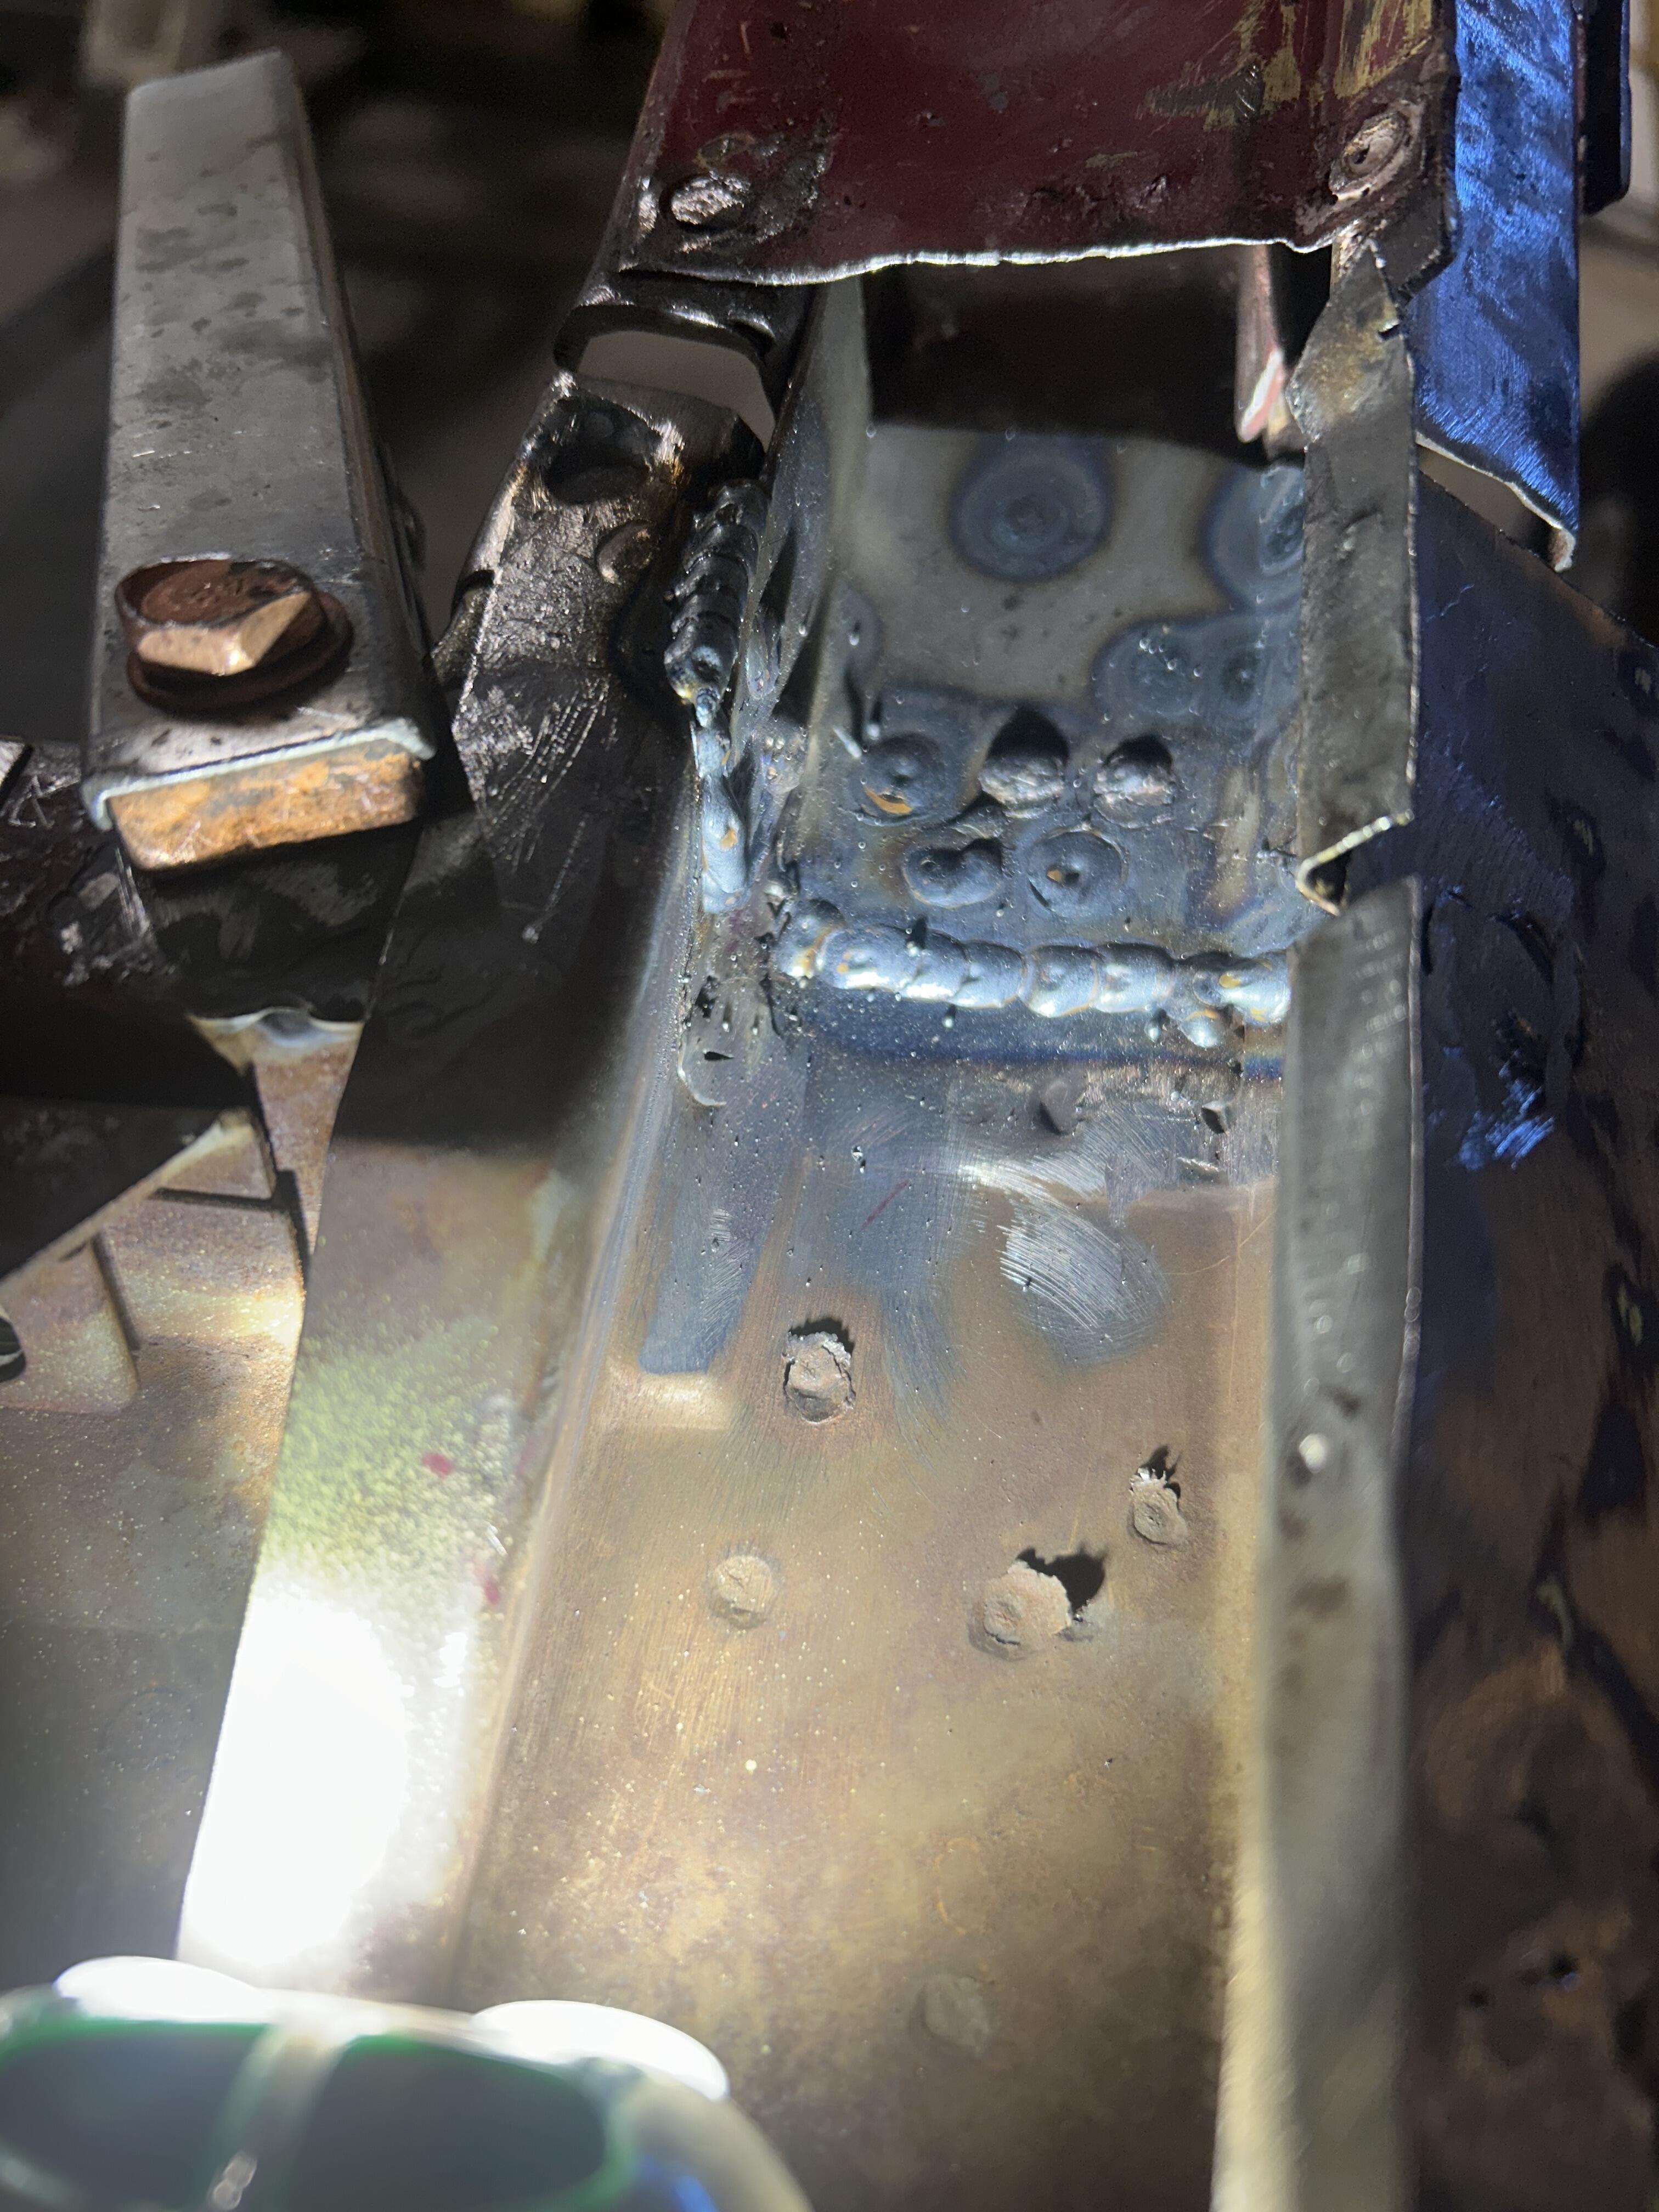
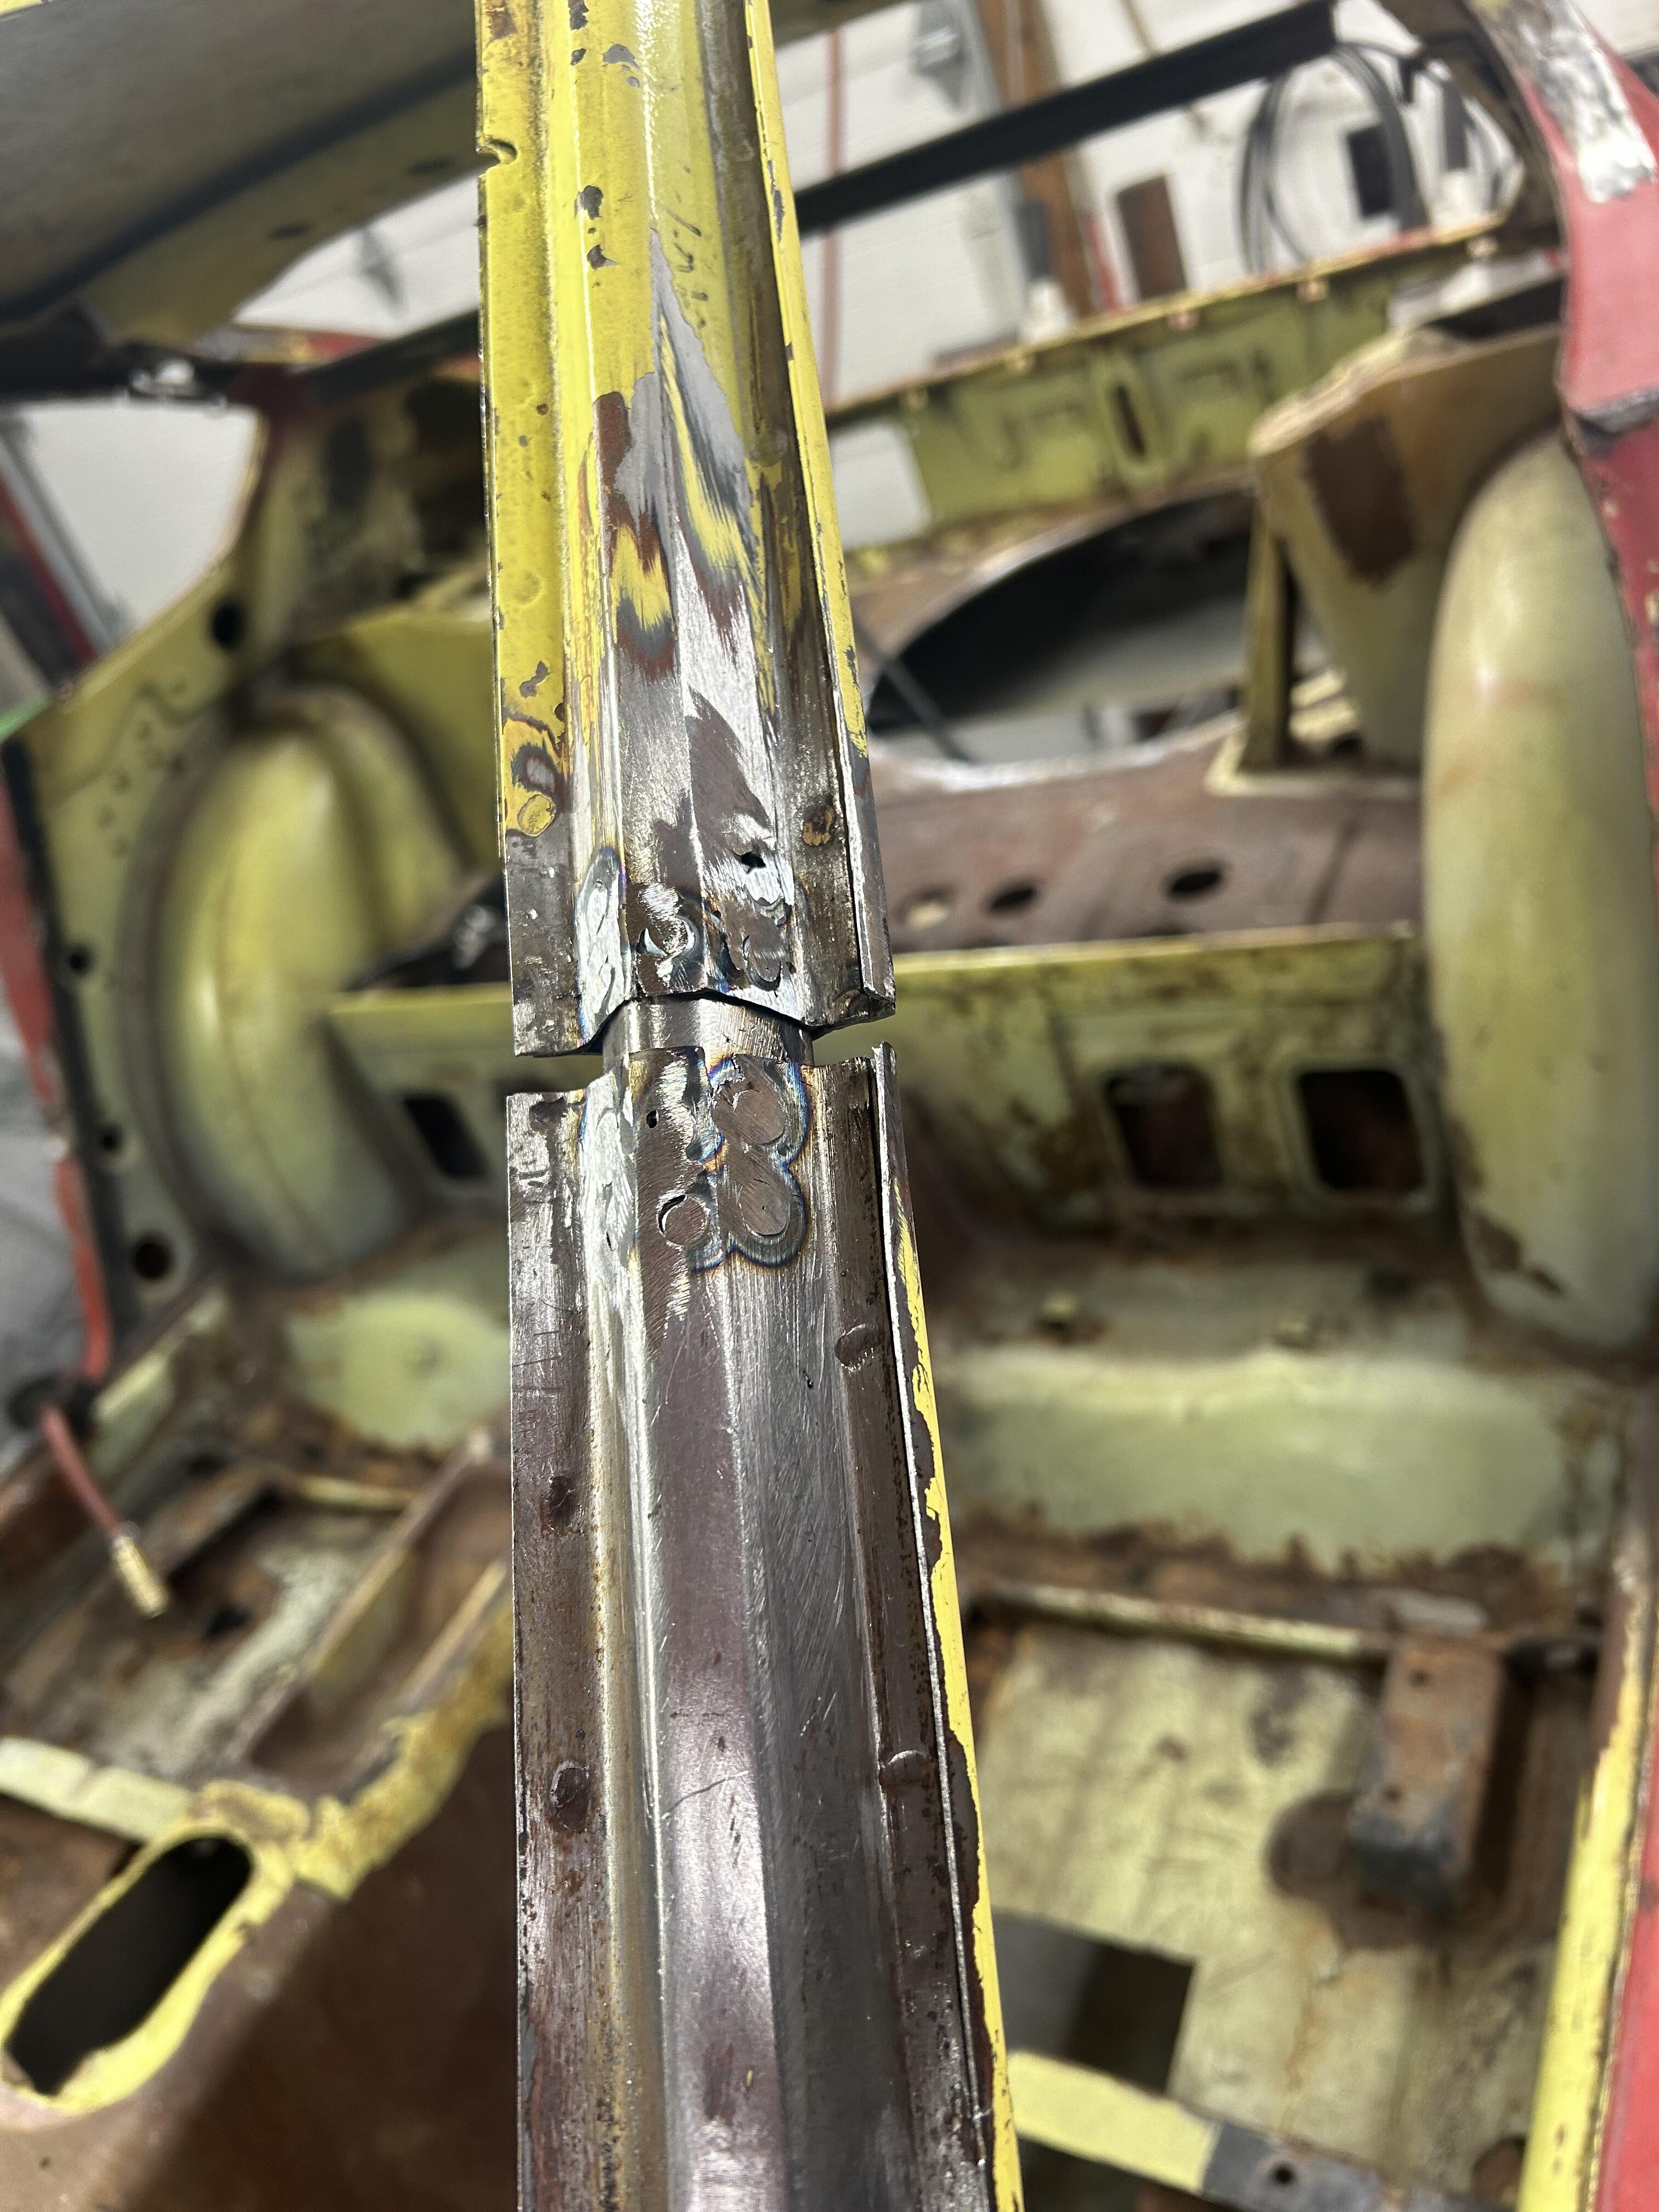
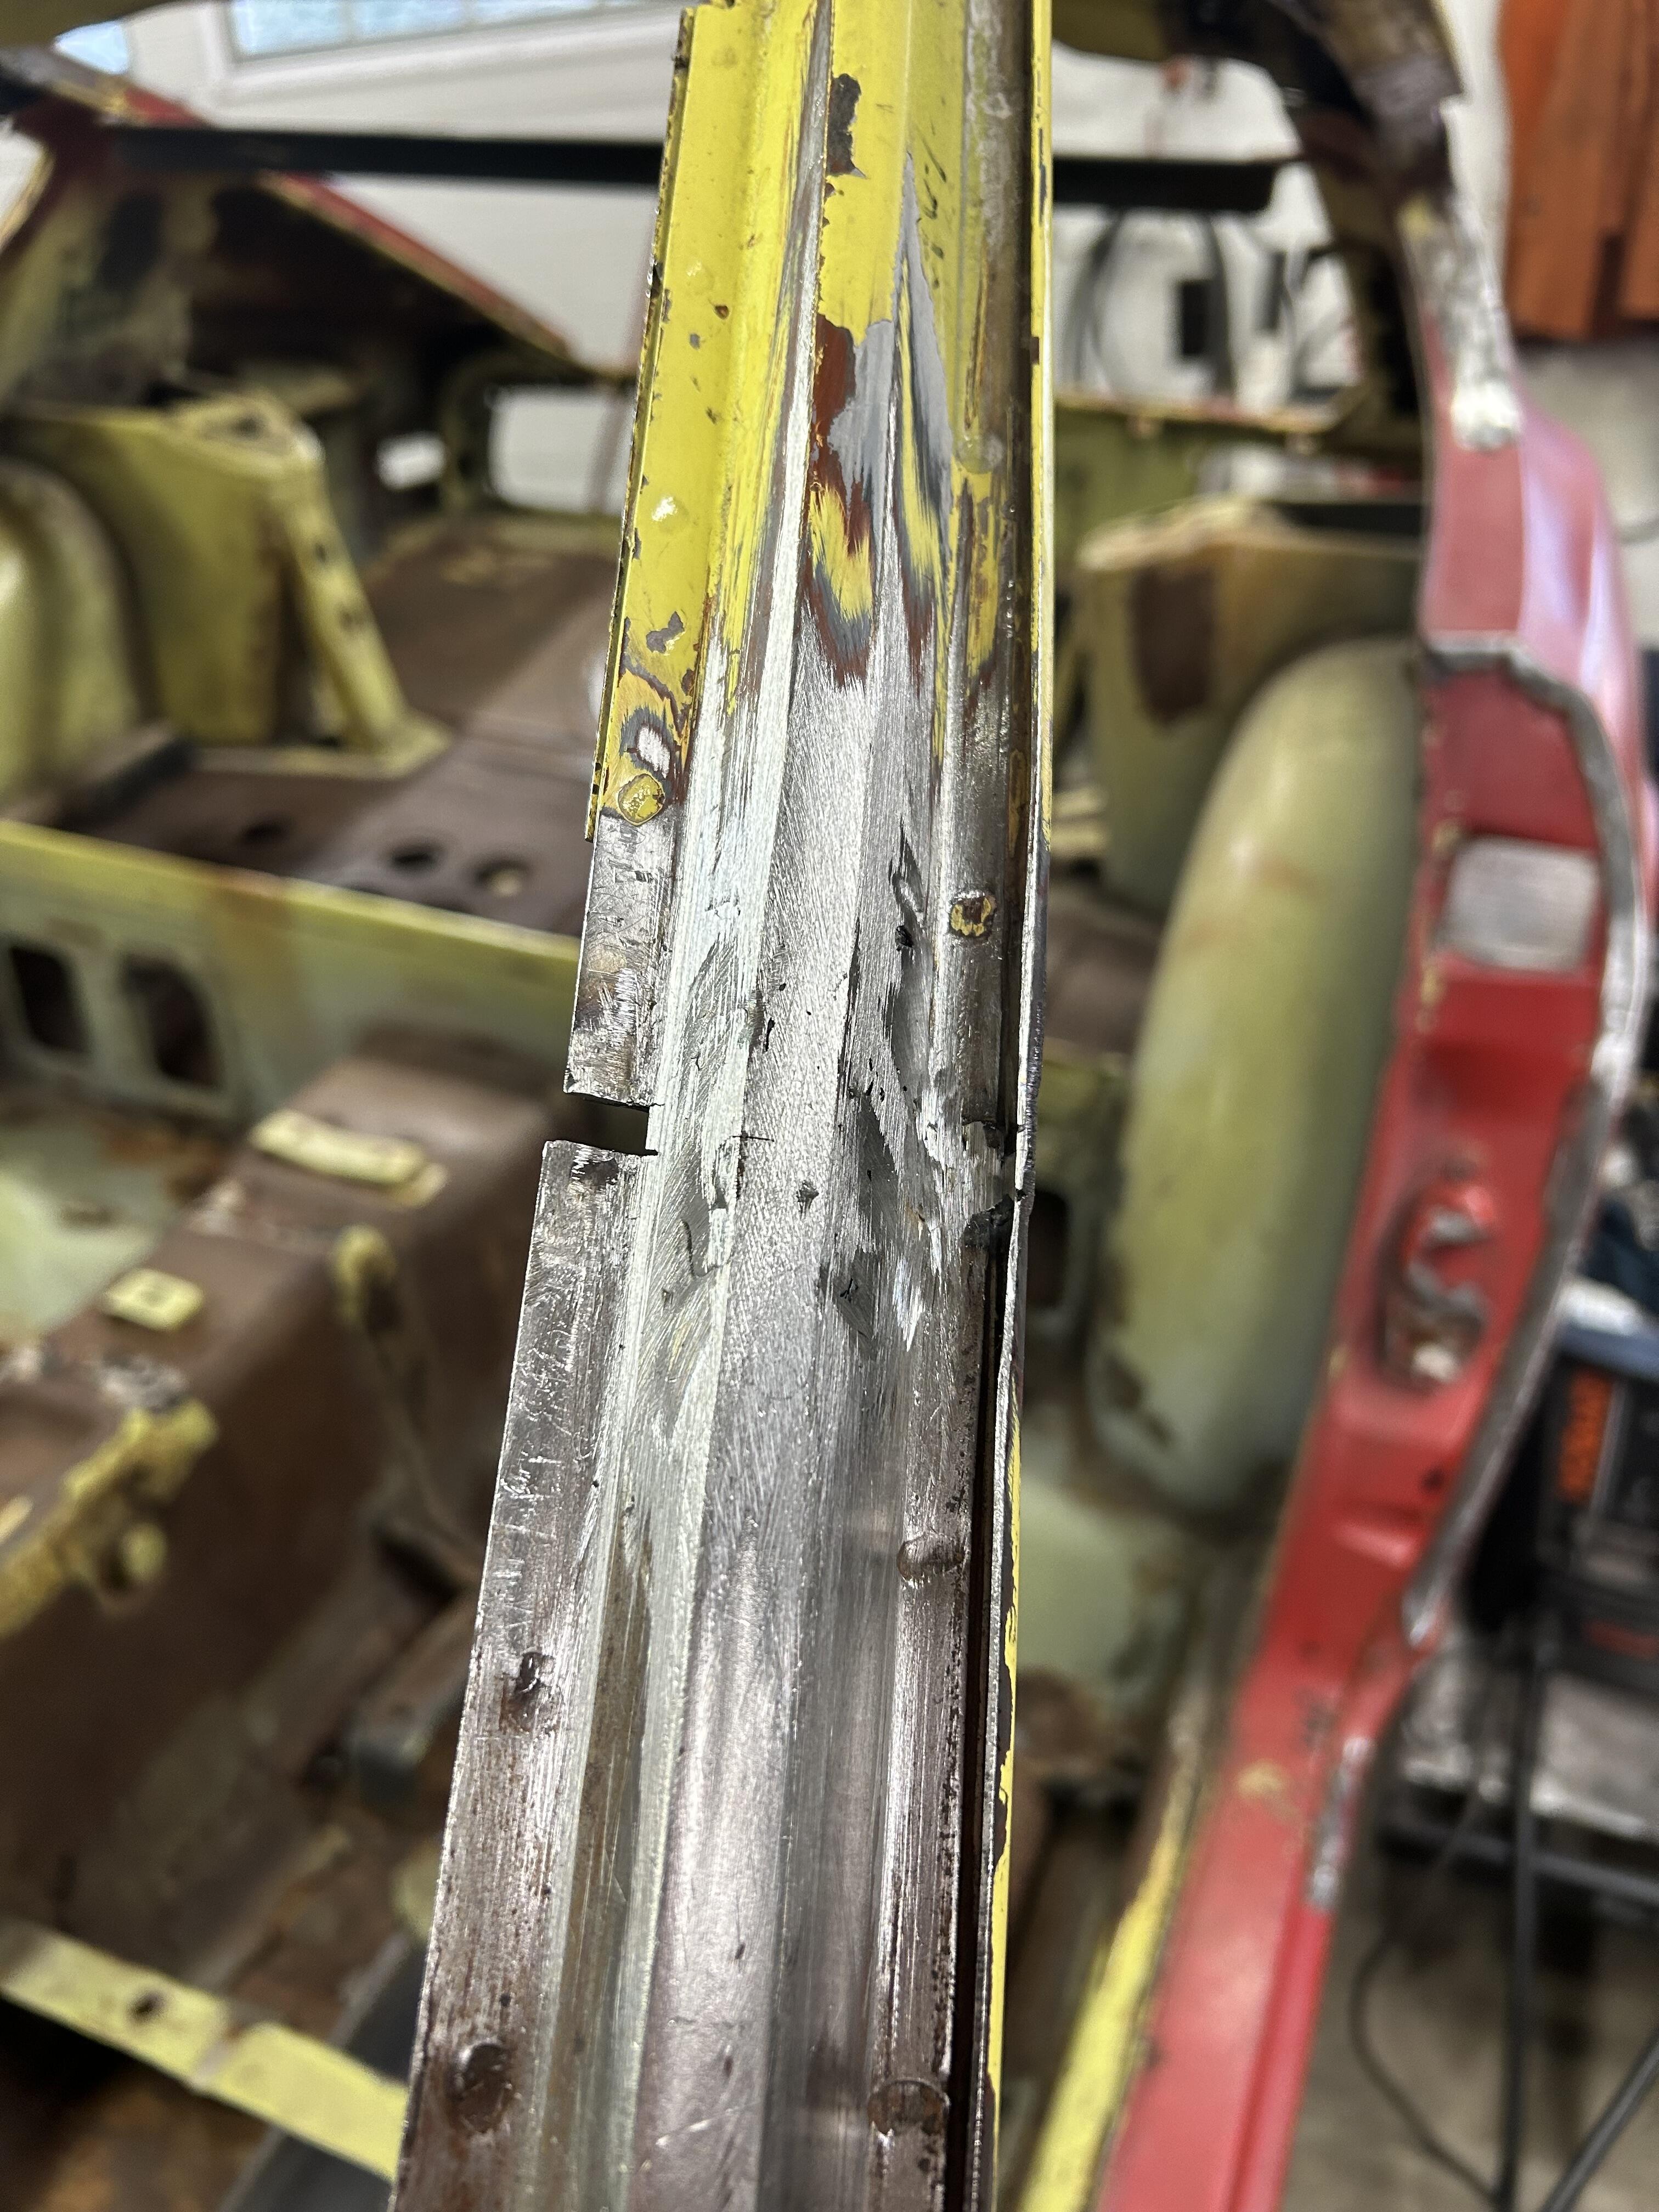
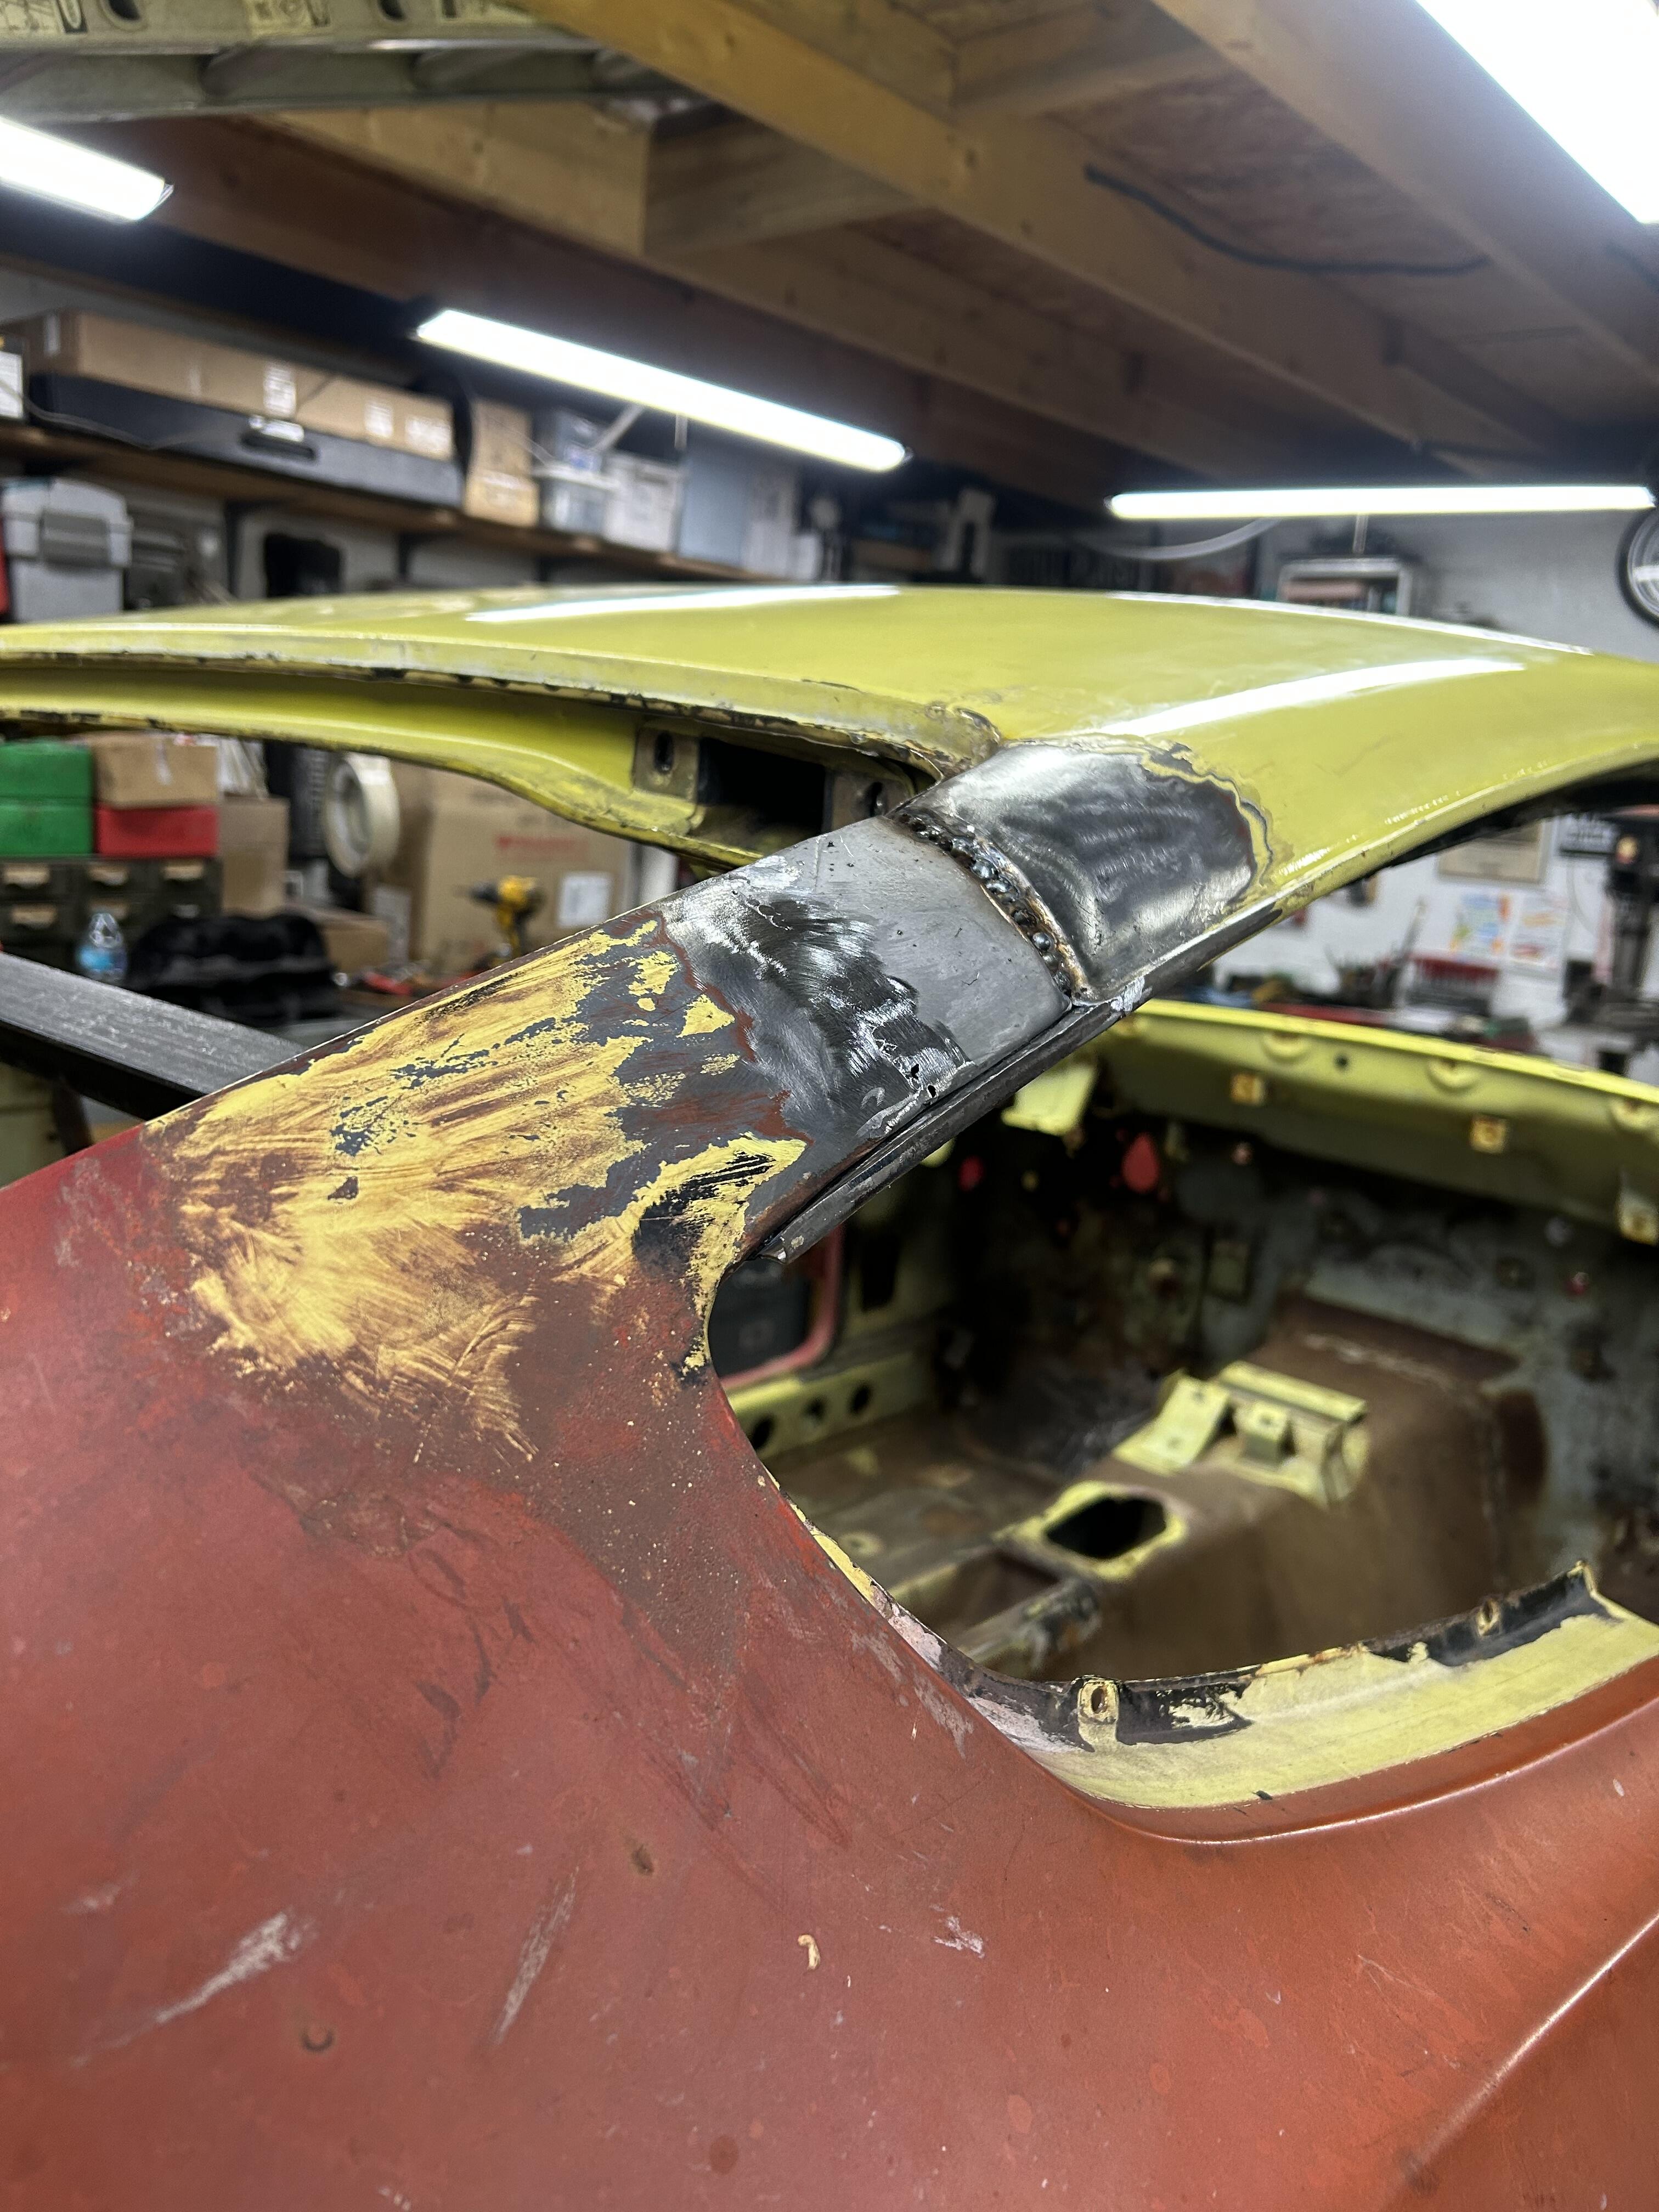
 Well here is a look of the innards of a A pillar on a Z. The way it was designed made plugging it a challenge to say the least . I had plenty of A pillar material laying around so I made some plugs to slide down inside the A pillar . I think they were less than 3” . I wanted to be able to plug weld and butt weld from all sides . I peeled back the skin on the inside of the pillar . That allowed access to weld all the way around the plug . On the back side of the roof I made a plate to help join/bridge the new roof to the rear quarter . Of course the ideal scenario was to have as small of a gap as possible . I thought I nailed it the first time - but I made the error of relying on measurements . I welded it partially and got the fit too tight and couldn’t fit a windshield . I had to undo welds and clean things up . I should have attempted to install the windshield and then welded . In the end I ended with a .250” gap which was acceptable to me . It sucked having to grind out mistakes - but I was determined . At the rear I had the quarter windows to help me line things up . Since they have 4 screws and they share with the roof and quarter - I just had to make them line up . The problem was the roof was a bit sprung and I couldn’t pull it in place without some heavy equipment. My friend of the bodyshop told me he had these big turnbuckles I could try . They were the ticket .