All Activity
- Past hour
-
 Is BSPT a possibility? The prevailing internet Z forums' "wisdom" is that the oil pressure sending unit holes are BSPT. JIS VS BSP: What's the different ?Before choosing a suitable thread standard, it is necessary to understand from various aspects. This article will introduce the difference between JIS and BSP, so that you can better choose the thread
 - Today
-
 Hello - I got them available- let me know if you are still interested
 -
Khanyile1 joined the community
-
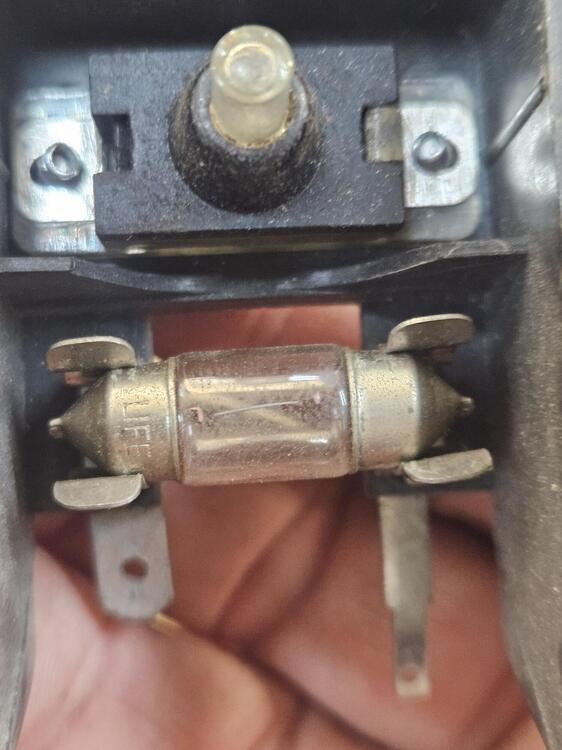
 I used aluminum aircraft rivets - and like your pop rivets, I should have used a semi-tight washer on the squishy end. The sheet metal on the contacts is really thin. I also "re-squished" the (original) rivets on the bulb holders.
 -
 You'll probably find they are JIS tapered pipe threads. Nissan used them on the 240Z in a number of locations in differing sizes, including for grease fittings.
 -
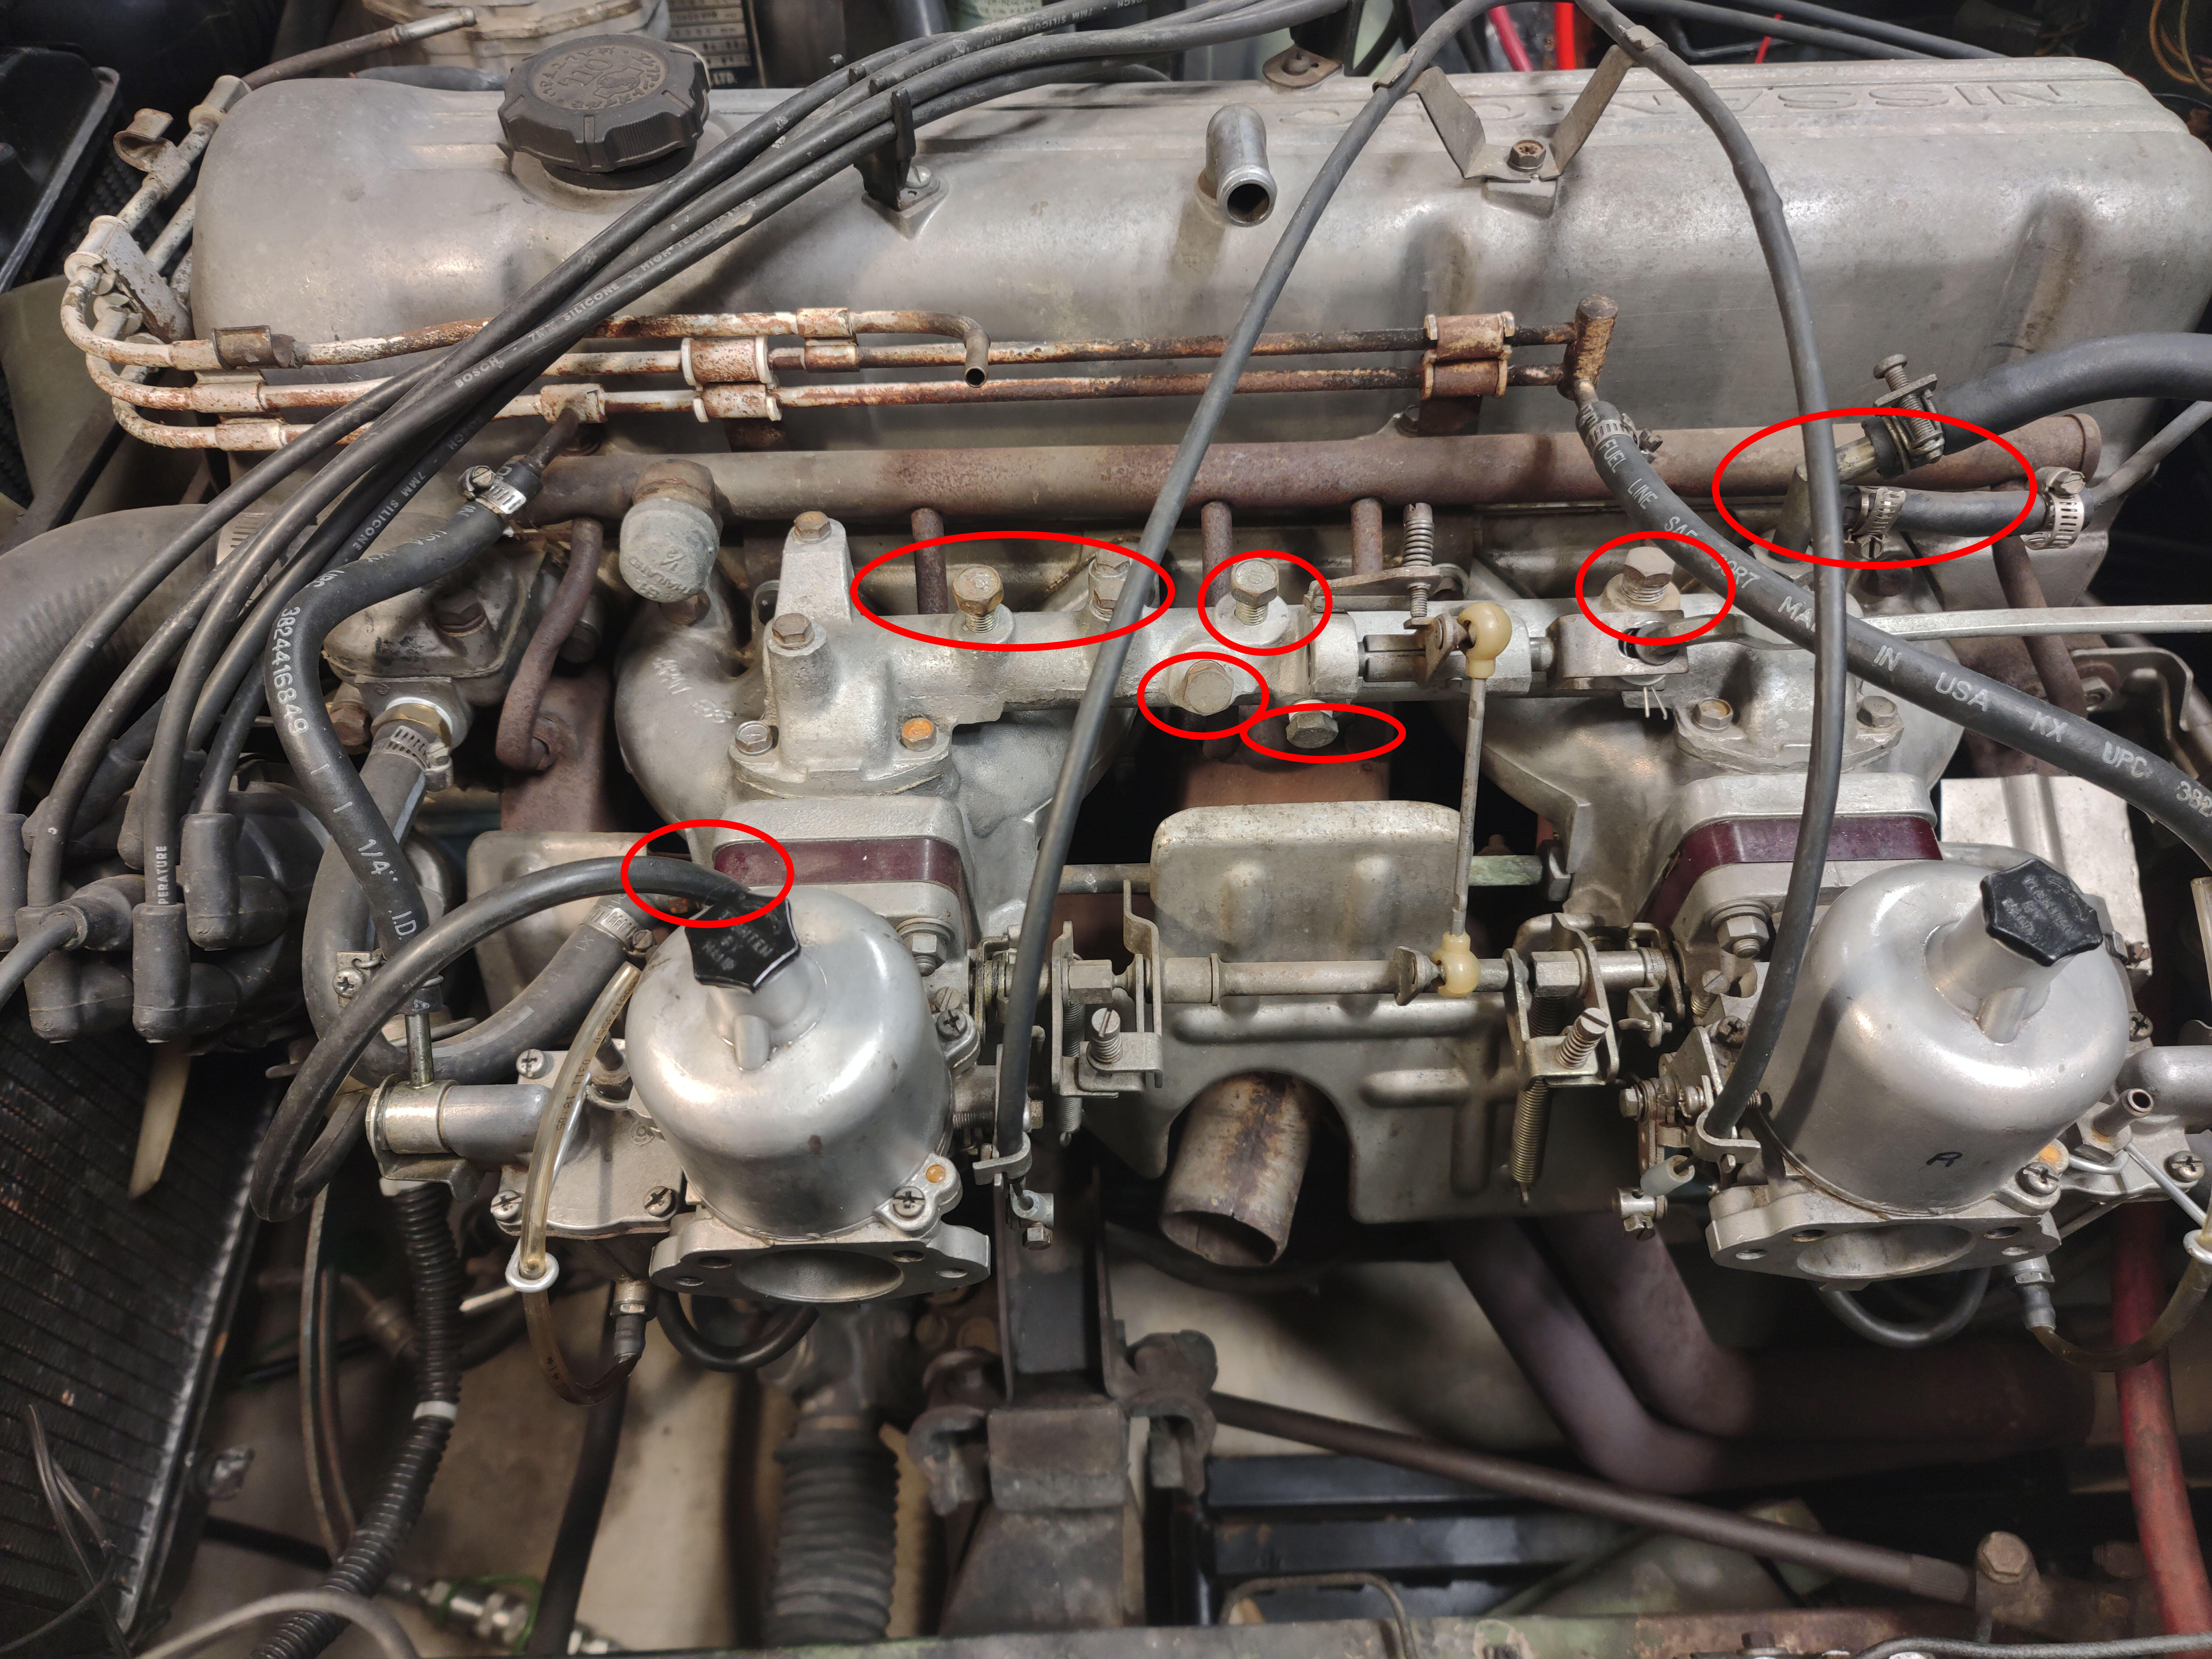
 Just to let you know, what appear to be bolts plugging the holes in the balance tube are actually tapered pipe plugs. They have a different pitch than most metric bolts and if you force a metric bolt into the hole, you will ruin the threads. I know, I'm working on a 240z that somebody plugged the holes with ordinary bolts, now I have to correct their damage.
 -
Some of the holes had real taper plugs, pipe threads. Two of the taper holes were about 10mm and somebody had forced straight thread bolts into the taper holes, ruined the threads. I might be able to chase them and put in 1/8" taper pipe plugs. I don't know that the bolts made a good seal. I'll look for my vacuum gage, haven't used it in years. Jim
-
Sounds like you're saying things have been just fine then something changed. As opposed to the brakes having always bothered you. If it was mine I'd find the source of the sudden problem before "upgrading" anything. Otherwise you could add the upgrades and end up with the same problem, never solved.
-
I included a photo. I circled all of the ports in the vacuum manifold, I think they call it something else. I bought the 240z assembly used on ebay, so somebody had messed with everything, I mean everything. They plugged many of the threaded ports where things, mostly emission items attached. They did not use Teflon tape, and I don't even know if the threads matched. I'm thinking about removing all the plugs, which in some cases are just bolts. If the threads are not right, correct them and use teflon tape to seal the threads. It would be easy to seal off the vacuum lines going to the master vac and transmission.

-
 I agree with Patcon. I'd cap off everything you don't really need right now, including the brake booster and the transmission. And yes, I think a vacuum gauge could be helpful. You should be in the 17-20 inches of vacuum at idle. If you're at 10, there's a leak somewhere. I also think pics could be helpful.
 -
Oh, and I'd be hard pressed to believe it's a malfunctioning check valve. If you're off the gas pedal when you're on the brakes (as you most likely are), the check valve won't really matter because the manifold vacuum is high (because you're off the gas pedal). Does the idle go up a little bit when you press the brakes sitting at idle? That's a typical sign of a torn diaphragm.
-
The reaction disk won't just fall out all by it's own. If this problem occurred all of a sudden, it's not the disk. A torn booster diaphragm will cause a hard pedal, and so will a malfunctioning poppet valve inside the booster. Either way, you're opening or replacing the booster.
-
Hahahaha!! It's true!!
-
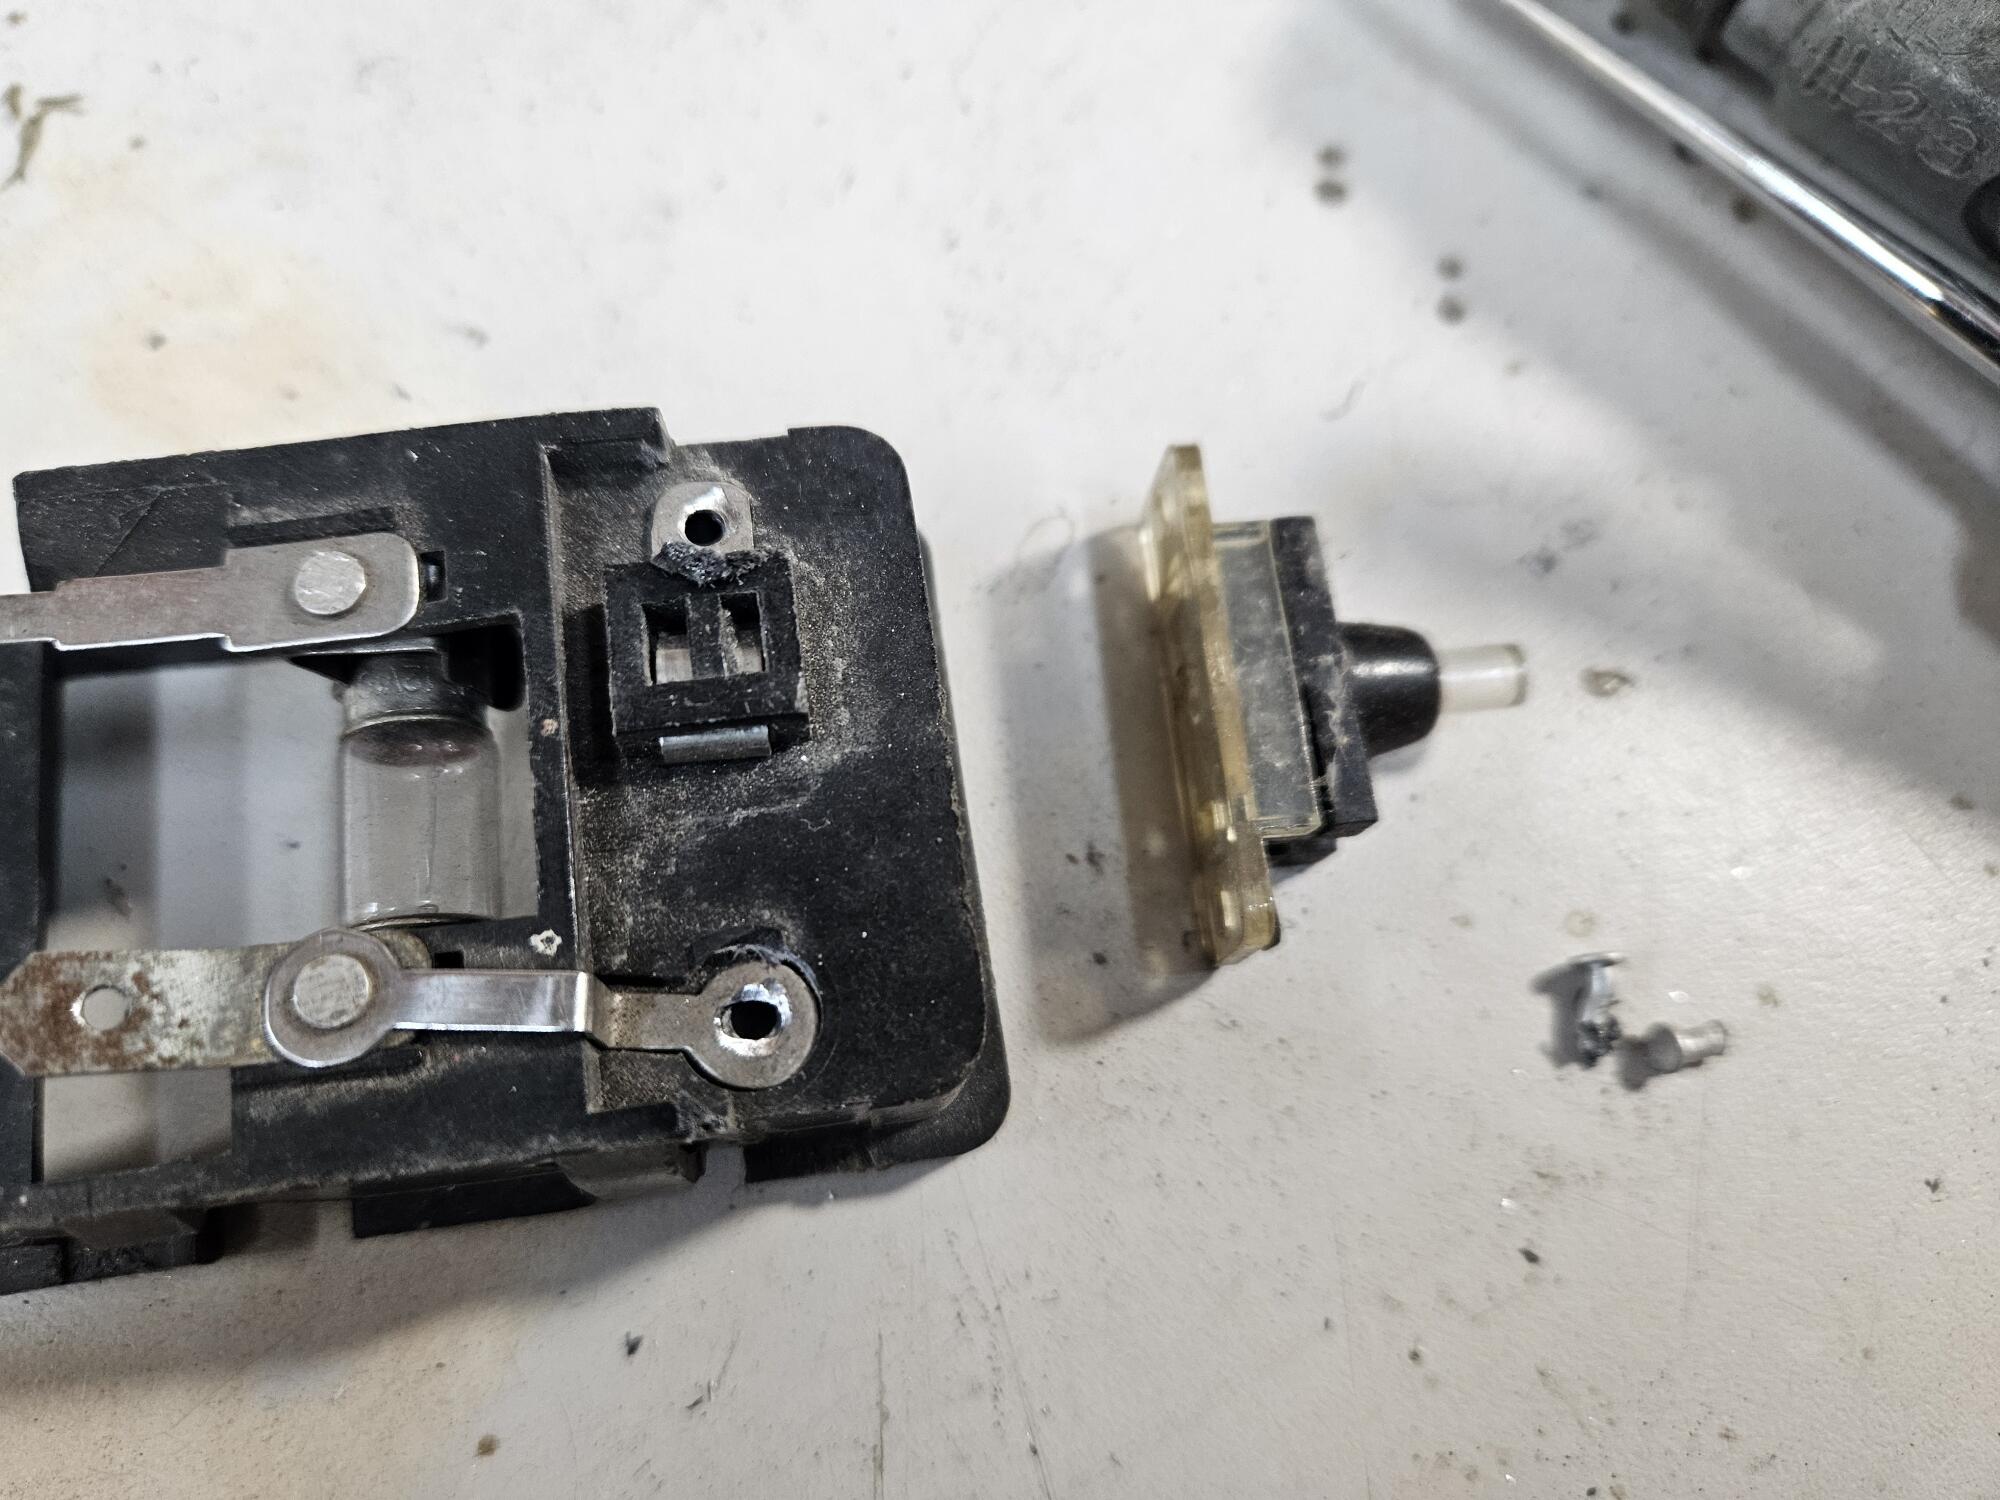
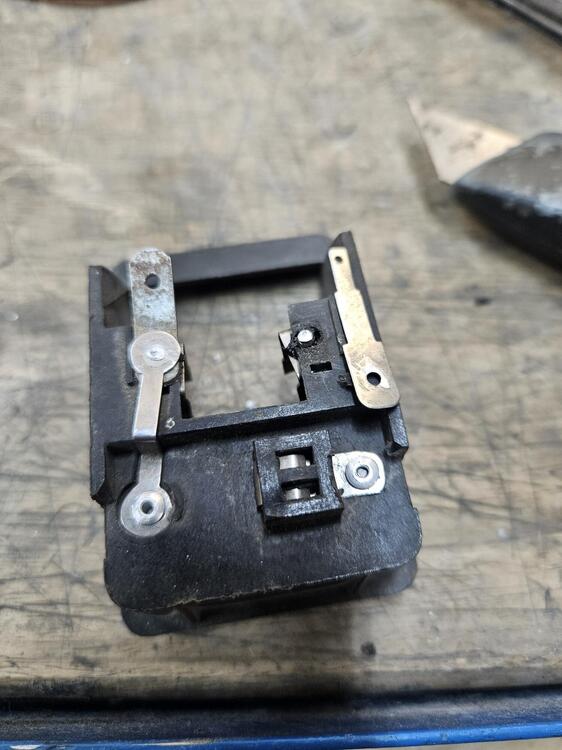
 I made some progress last weekend but not quite there yet. So I drilled out the two rivets at the switch. Replaced them with aluminum pop rivets for now. That made it better but it still didn't work. There was also a continuity issue at these other rivets The only problem is I used a grinder and as the rivet heats up it melts the housing. A die grinder might be a better choice. The LED lamp I was using worked for a moment then freaked out and wouldn't go full brightness. I ordered some more. So we'll see. I would like to replace the aluminum rivets with small copper rivets if I could find some good candidates and a proper way to staked them. They need to be about 0.095" or about 2-2.5mm OD
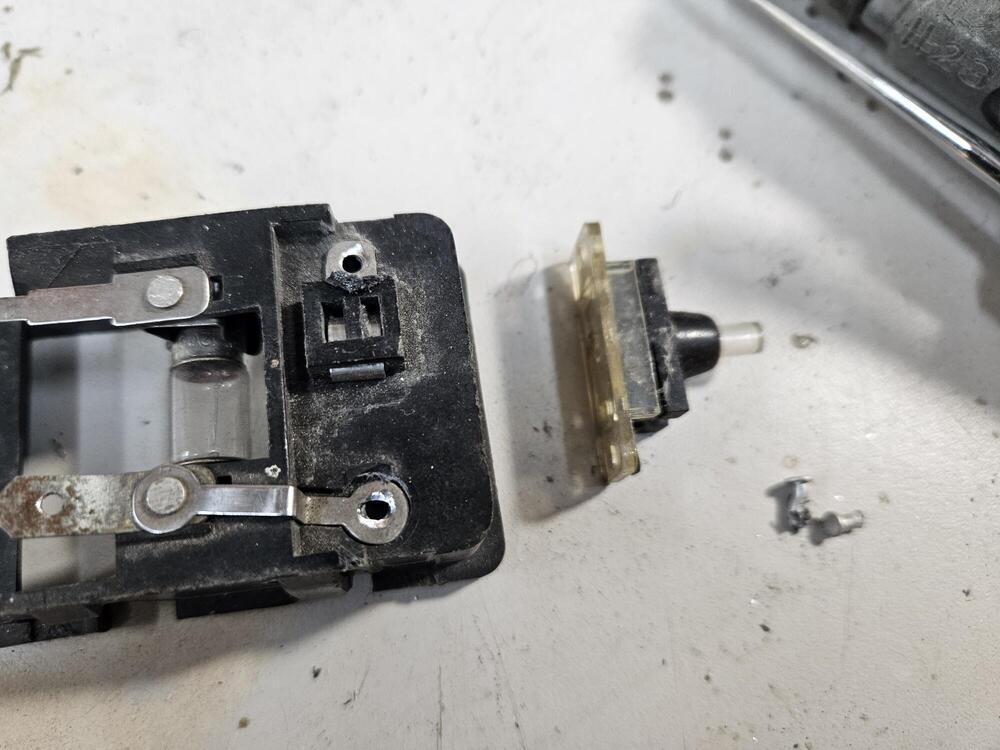

-
So Cody and I got the tachometer working tonight. Big thanks to @cgsheen1 Chuck. His explanation for current flow to the tach and back made it all make sense. I took the tip of my thumb off with a hammer tonight in the shop, so I didn't get the last piece of leather in. Opposable thumbs are really useful, as it turns out.

-
I have used the Zcardepot style pans in the past. It is a lot of work getting them to mate up well to the tunnel. If it were me, I would get the KF pans. I think they are better pans and will give a better finished product. You may not care today about an OEM look today but you might in ten years...
-
I think I would cap everything on the manifold that uses vacuum with an assortment of rubber caps. Then if you can get the engine started and sorted, add them back one at a time to check for vacuum leaks
- Yesterday
-
I pulled the hose going to the master vac, sucking on it or blowing into it no obvious leak there. I did not try compressed air. This is a 260z with an automatic transmission. I see vacuum lines going to the master vac and down to the automatic transmission. There is another vac line from the front carb to the vac advance on the distributor. There are two fuel rails, one from the fuel filter/fuel pump that feeds the two carbs, another one that feeds excess fuel back to the gas tank. The top hard line has nothing connected on either end, I think it was part of the smog system. I did find a hard line going somewhere, think it was a vent line to the gas tank, probably went on the charcoal filter cannister. The only thing that makes sense to me to have to turn the nuts so far down is a vac leak, but where? Would there be any point in connecting a vac gage to the intake manifold? I'm puzzled. I haven't tried using a propane blow torch to leak propane around suspected leaks but it's not like this car has vacuum lines going all over the place, it doesn't. I'd attach photos but don't know what would help at this moment.
-
CO: I feel pretty confident that the float levels are now correct. I have not checked for vacuum leaks, if the rubber diaphragm in the master vac was ruptured, that could be giving me a lean mixture and turning the nuts six turns down would compensate. Somehow I need to cut off the vacuum line to the mastervac. The engine used to have a carbon canister which I removed. I wonder if it had a vacuum line going to it, if so I wonder what I did about it. I agree, years ago when the car was driven, had to pull the choke back to get it to start, then would back it off a bit to raise the idle speed until it warmed up, not the case right now.
-
 I have front Willwoods on my silver Z with 15 inch Panasports. Probably right about reaction disc….won’t just fall off if you haven’t removed booster. I guess hard pedal could be a bad Brake Booster or check valve.
 -
 1971 Datsun 240Z joined the community
 -
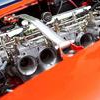
 http://www.zcarblog.com/wp-content/uploads/2025/11/IMG_3200.jpg For Sale 1970 Series 1 Datsun 240Z VIN # 6132 Monte Carlo Red. Original paint L28 engine with 4-speed manual transmission Full suspension upgrade with Z Car Garage Big-Brakes (Stoptech, 328mm) Price: $27k http://www.zcarblog.com/wp-content/uploads/2025/11/LouZ.png Interior: stock with Recaro Specialist seats: http://www.zcarblog.com/wp-content/uploads/2025/11/IMG_3212.jpghttp://www.zcarblog.com/wp-content/uploads/2025/11/IMG_3211.jpg http://www.zcarblog.com/wp-content/uploads/2025/11/IMG_3208.jpg Car currently has 16″ Kong Rewind wheels with Bridgestone RE760 tires and chassis upgrades: -Stoptech/ZCG big brake kit (Stoptech ST-42 calipers) -Arizona Z Car billet suspension -Ground Control coil-overs -MSA front/rear strut tower bars http://www.zcarblog.com/wp-content/uploads/2018/04/JC-4718-029-1024x768.jpg http://www.zcarblog.com/wp-content/uploads/2018/04/JC-4718-033-1024x768.jpg http://www.zcarblog.com/wp-content/uploads/2018/04/IMG_6613-e1526879060891-768x1024.jpg http://www.zcarblog.com/wp-content/uploads/2018/04/IMG_6616-1024x768.jpghttp://www.zcarblog.com/wp-content/uploads/2025/11/IMG_3205.jpghttp://www.zcarblog.com/wp-content/uploads/2025/11/vr-4718-191.jpg http://www.zcarblog.com/wp-content/uploads/2025/11/IMG_6615-e1526879090464.jpghttp://www.zcarblog.com/wp-content/uploads/2025/11/IMG_3207.jpg Engine is a stock L28: http://www.zcarblog.com/wp-content/uploads/2025/11/IMG_3209.jpg Solid car, only evidence of rust just below battery tray. Paint is original (Monte Carlo Red only available on early models) and could use a refresh. http://www.zcarblog.com/wp-content/uploads/2025/11/IMG_3200.jpghttp://www.zcarblog.com/wp-content/uploads/2025/11/IMG_3228.jpg http://www.zcarblog.com/wp-content/uploads/2025/11/IMG_3199.jpg Walk-around video: Previous zcarblog.com post highlighting suspension and refurbishment work can be seen here: https://www.zcarblog.com/2018/05/21/performance/lous-1970-datsun-240z.html Historic photos of the Z with stock suspension, wheels and current suspension with 17″ Panasports: http://www.zcarblog.com/wp-content/uploads/2018/05/IMG_3482-1-e1526533983660-1024x642.jpg Please contact Rob at shop for more info: rob@zcargarage.com or e-mail rob@zcargarage.com View the full article
 -
-
 Front willwoods look awesome. Will they fit under a 15" panasport though. I have no desire to change wheels. I love my old panasports. Reaction disk had occured to me, but I was under the impression those fall out during installation. IF it was right for years, how could it fall out now? I need to go back to the manuals and check. 8.5" Brake Booster Upgrade Kit for Datsun 240Z 1969-'72 New Version – JDM CAR PARTS they do still sell a 8.5" brake booster that uses factor that its a bolt on with 'no siginificant modifications' . Sounds like it may require the 70/71 Z's master mounting holes be be drilled out a bit like so many other kits. I will run the vacuum checks on my check valve this week to see if it in fact malfunctioning. I replaced it a while back with a new one when I installed a refurbished brake booster back in 2013 or so.
 -
Couple comments to hopefully help the process... So I don't know exactly how you are handling the choke lever, but the typical process is to give it a good pull, crank the motor, and then as soon as it starts, push the choke lever forward "some, but not all the way off". It's not unusual to need partial choke for several minutes to keep the engine running smooth when cold. If you're pushing the choke all the way off immediately as soon as the engine starts, you are probably moving too fast. Give it some time to warm up with partial choke before you try to get the engine to run with no choke at all. Engines don't like to run cold. and engines that have sit for decades are usually grumpy about being woke up from their sleep. It'll probably get better as you get more time running, but first bunch of minutes on an engine that hasn't run in a long time? Don't expect perfection. Next is there's no way you should need to be running five turns down on a stock motor. If you're thinking you need five turns down, there's something wrong somewhere. I'm hoping that it's as simple as you need to leave the choke on partially for five minutes, but if the engine is warm and you need five turns.... There's something wrong. And that "lifter" on the bottom of the carb does not make things richer on that carb, and in fact, it does the opposite. When you lift the piston like that, it completely disables the carb by making it super lean.
-
 I haven't posted in a while.....hope life is treating everybody with kindness The single best thing I have done to my braking system was to install a larger 8" brake booster. Best of my memory 69-72's had a small 7" booster. Nissan updated the 240 brake boosters to a 8.5" in '73. They knew the boosters were to too small and corrected the braking problem. You also may want to inspect/replace your brake booster check valve. I did go a larger caliper but never got that great breaking feel until I completed this upgrade several years ago.......This made a HUGE DIFFERENCE in my braking power. JDM-Car-Parts use to have an upgrade for 69-72 that had the correct bolt pattern to accept into the firewall. That made the transition from a 7 to 8" a breeze for me with no extra drilling. https://jdm-car-parts.com/products/datsun-240z-1969-1972-8-inch-brake-booster-upgrade-kit?variant=31778739748973
 -
 Thanks for the imput, I am going back and forth between the options. I know i'll have to do fabriation work to get the Z depot floors to fit, but I dont mind fab work. I just dont know if theres more of a pain getting seat rails mounted or other obstacles that will creat a conflict. I just got a 1977 280z as a project and the previous owner decided the best way to make his car look dfferent was to add about 200 pounds of bando so i feel you on that. gotta love a good project.