dutchzcarguy
Free Member
-
Joined
-
Last visited
Everything posted by dutchzcarguy
-
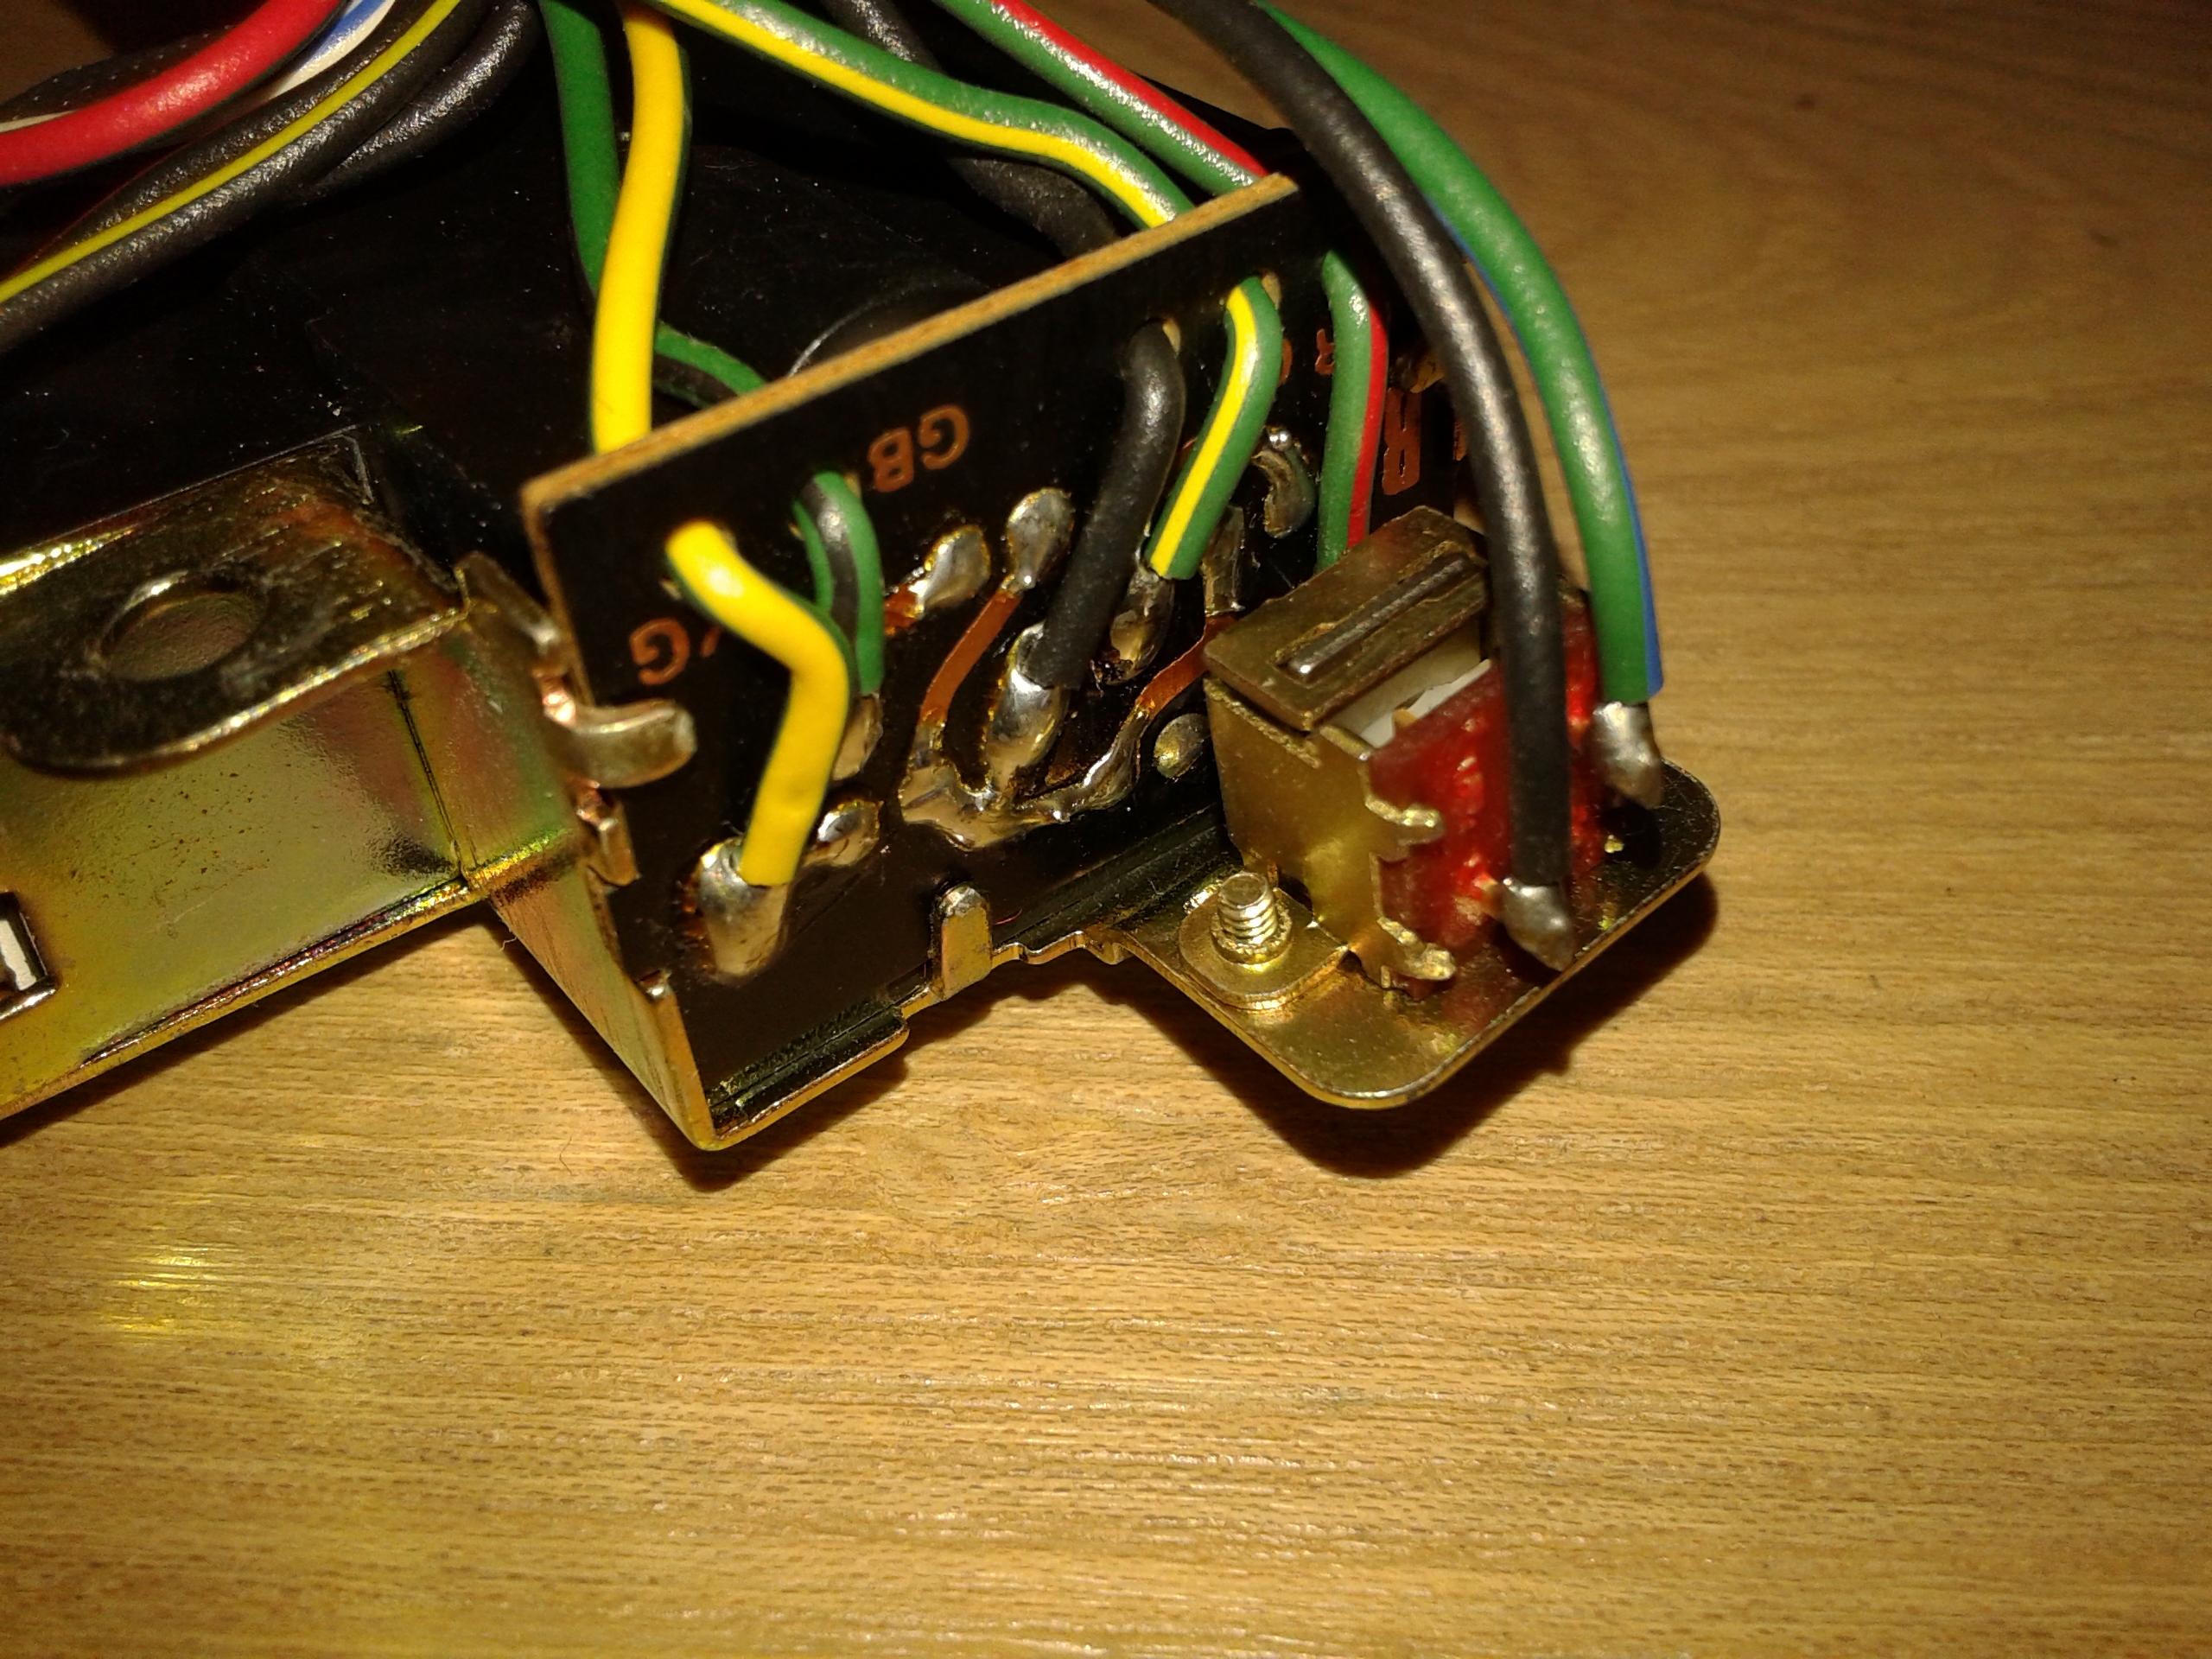
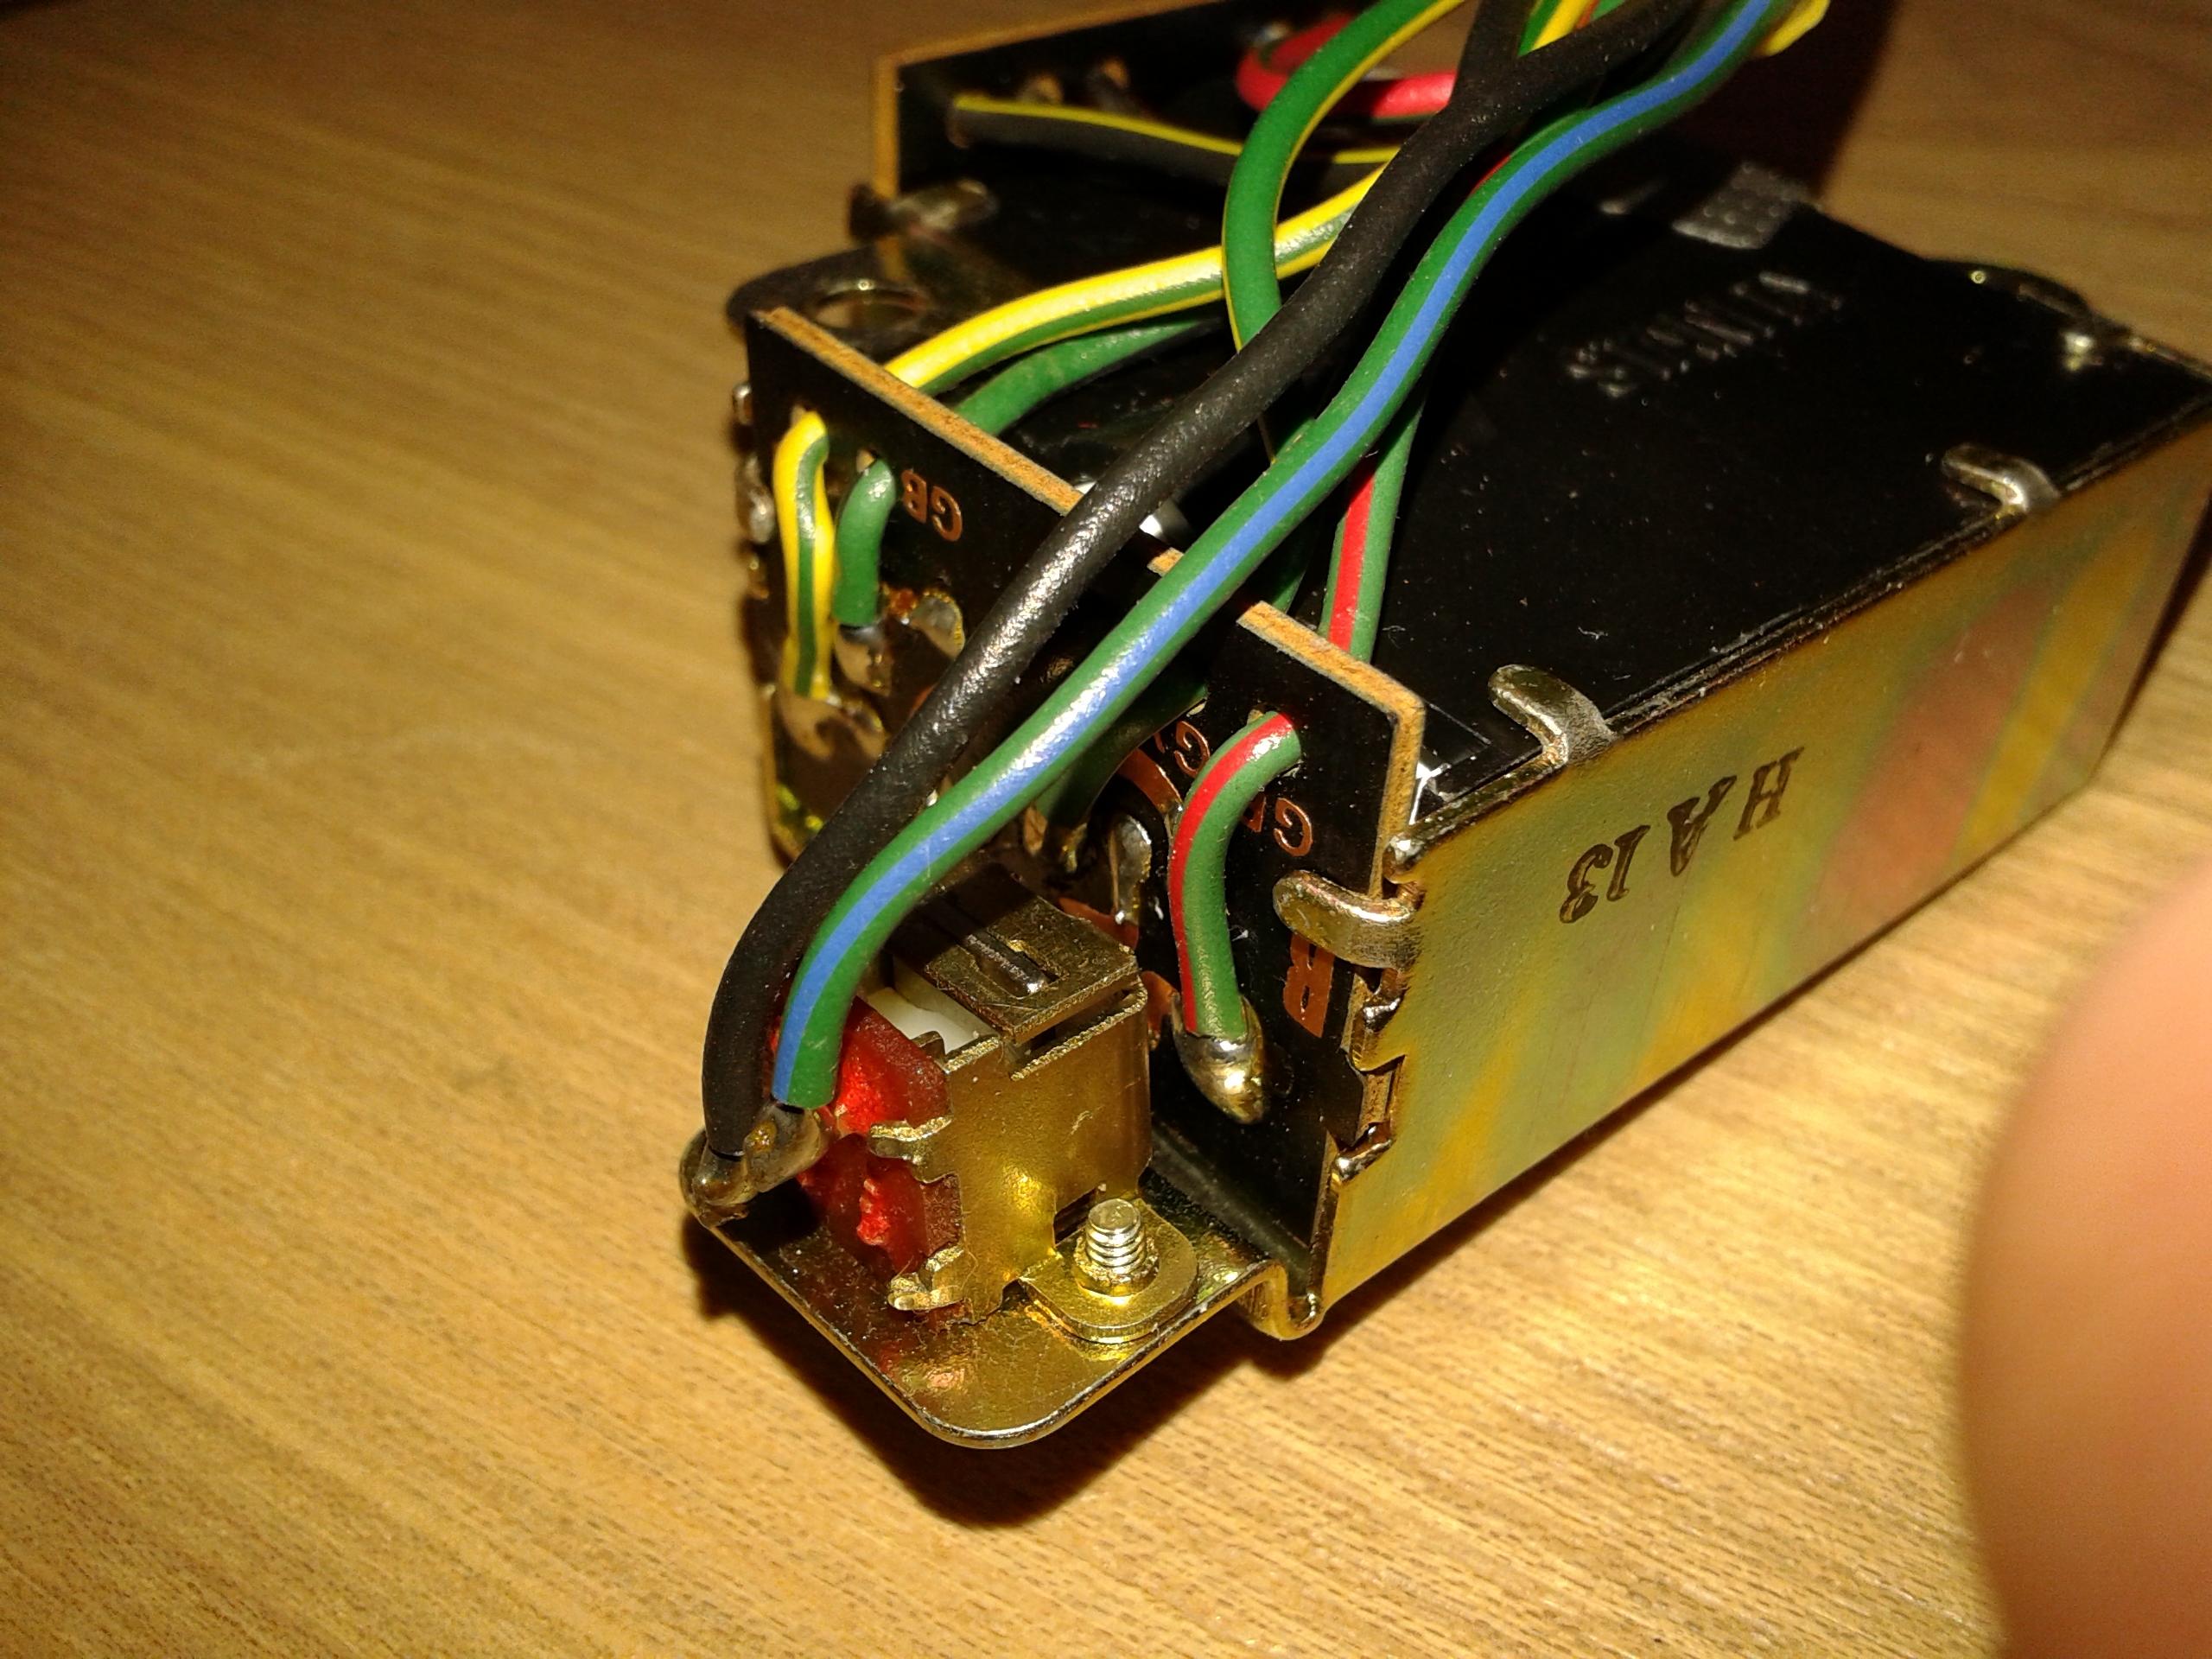
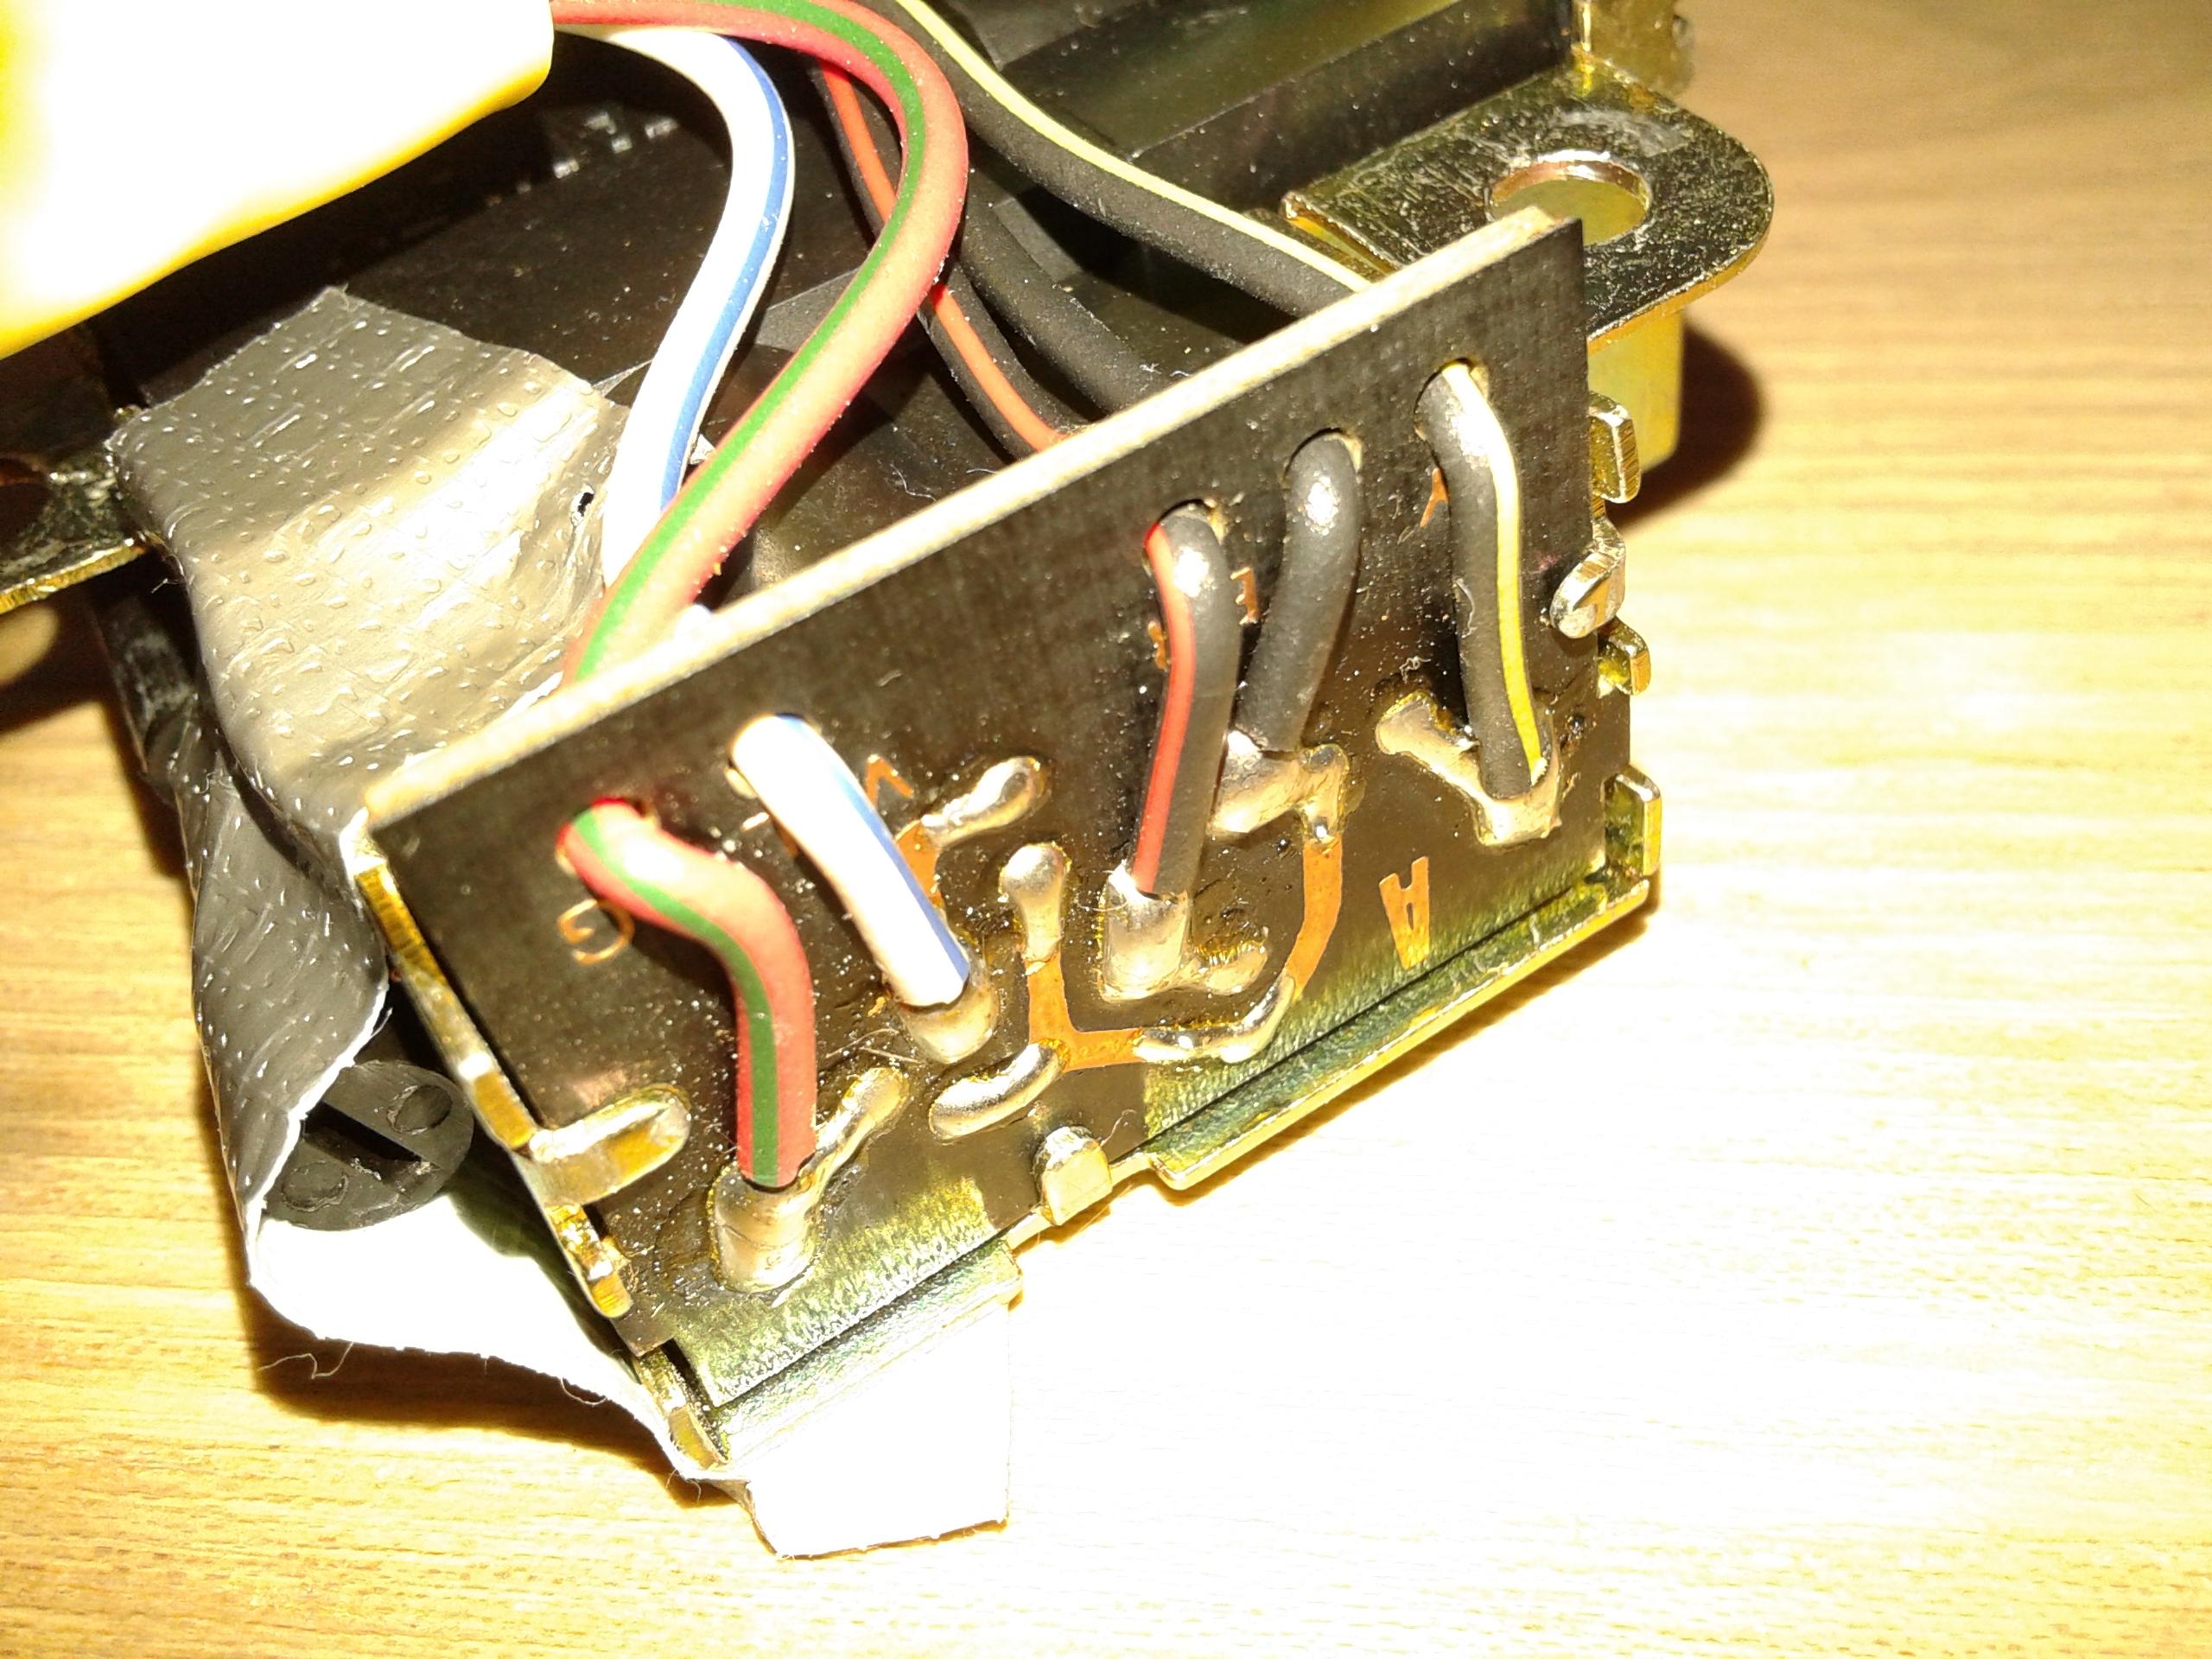
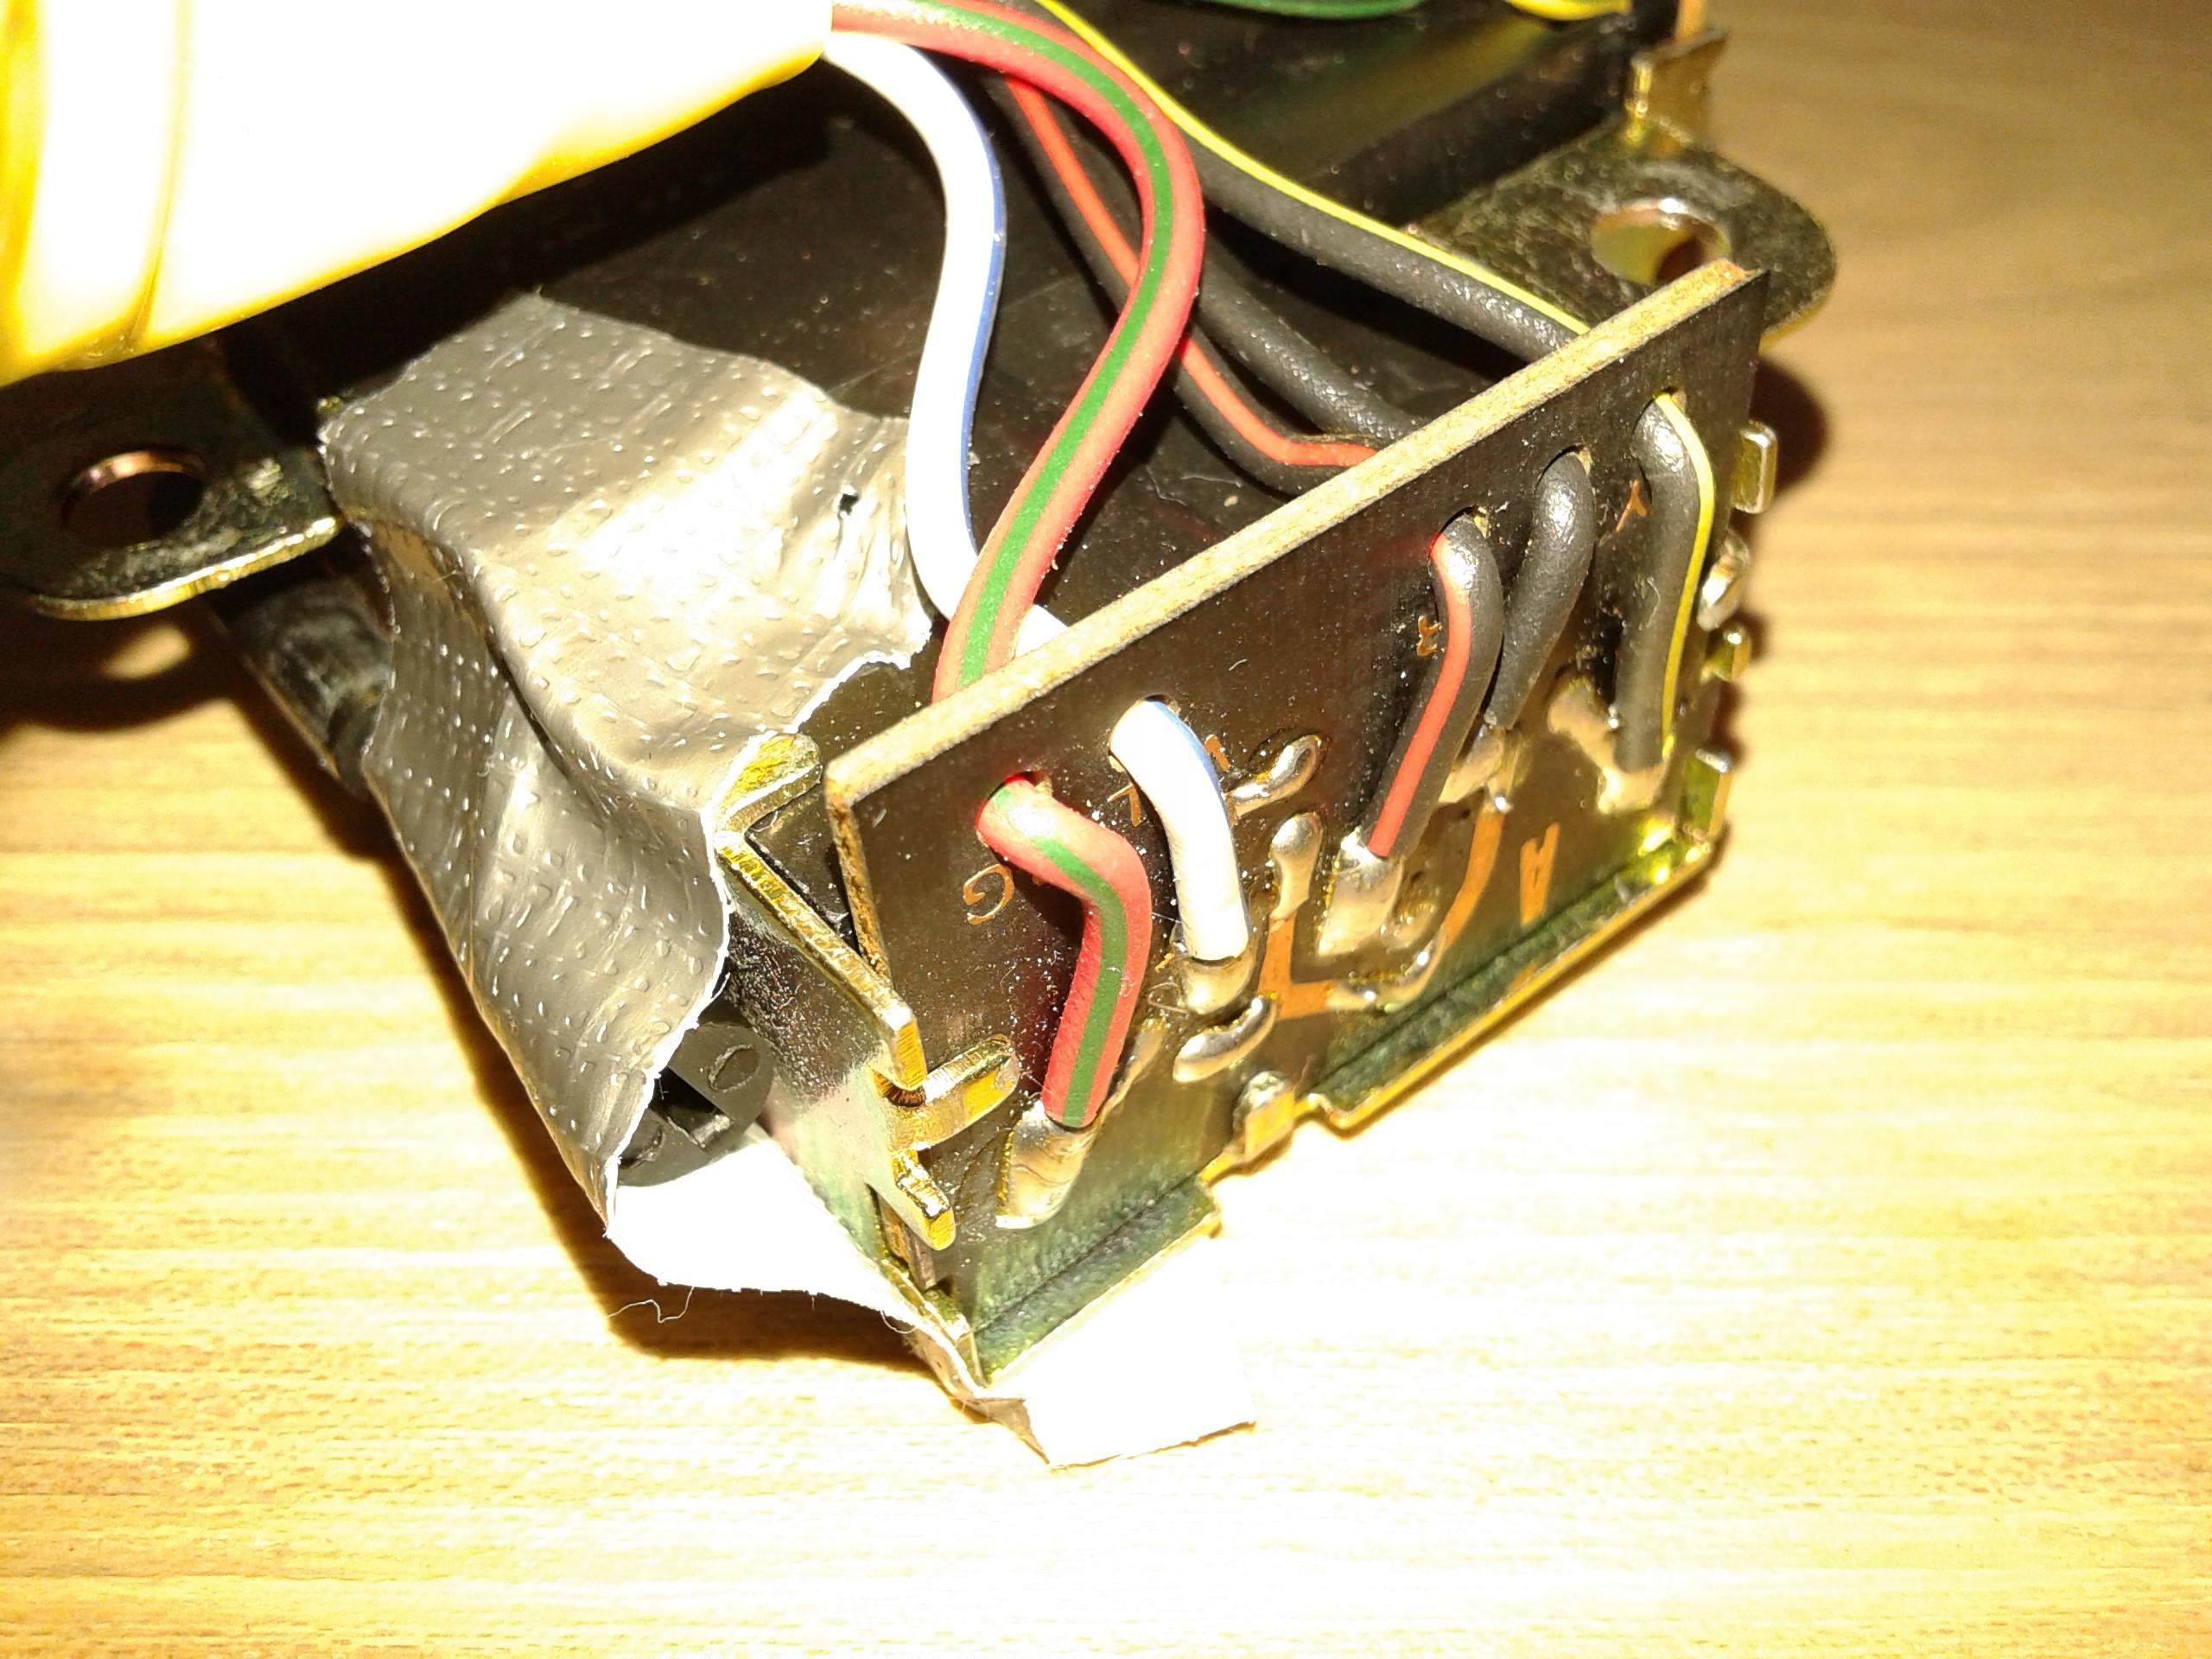
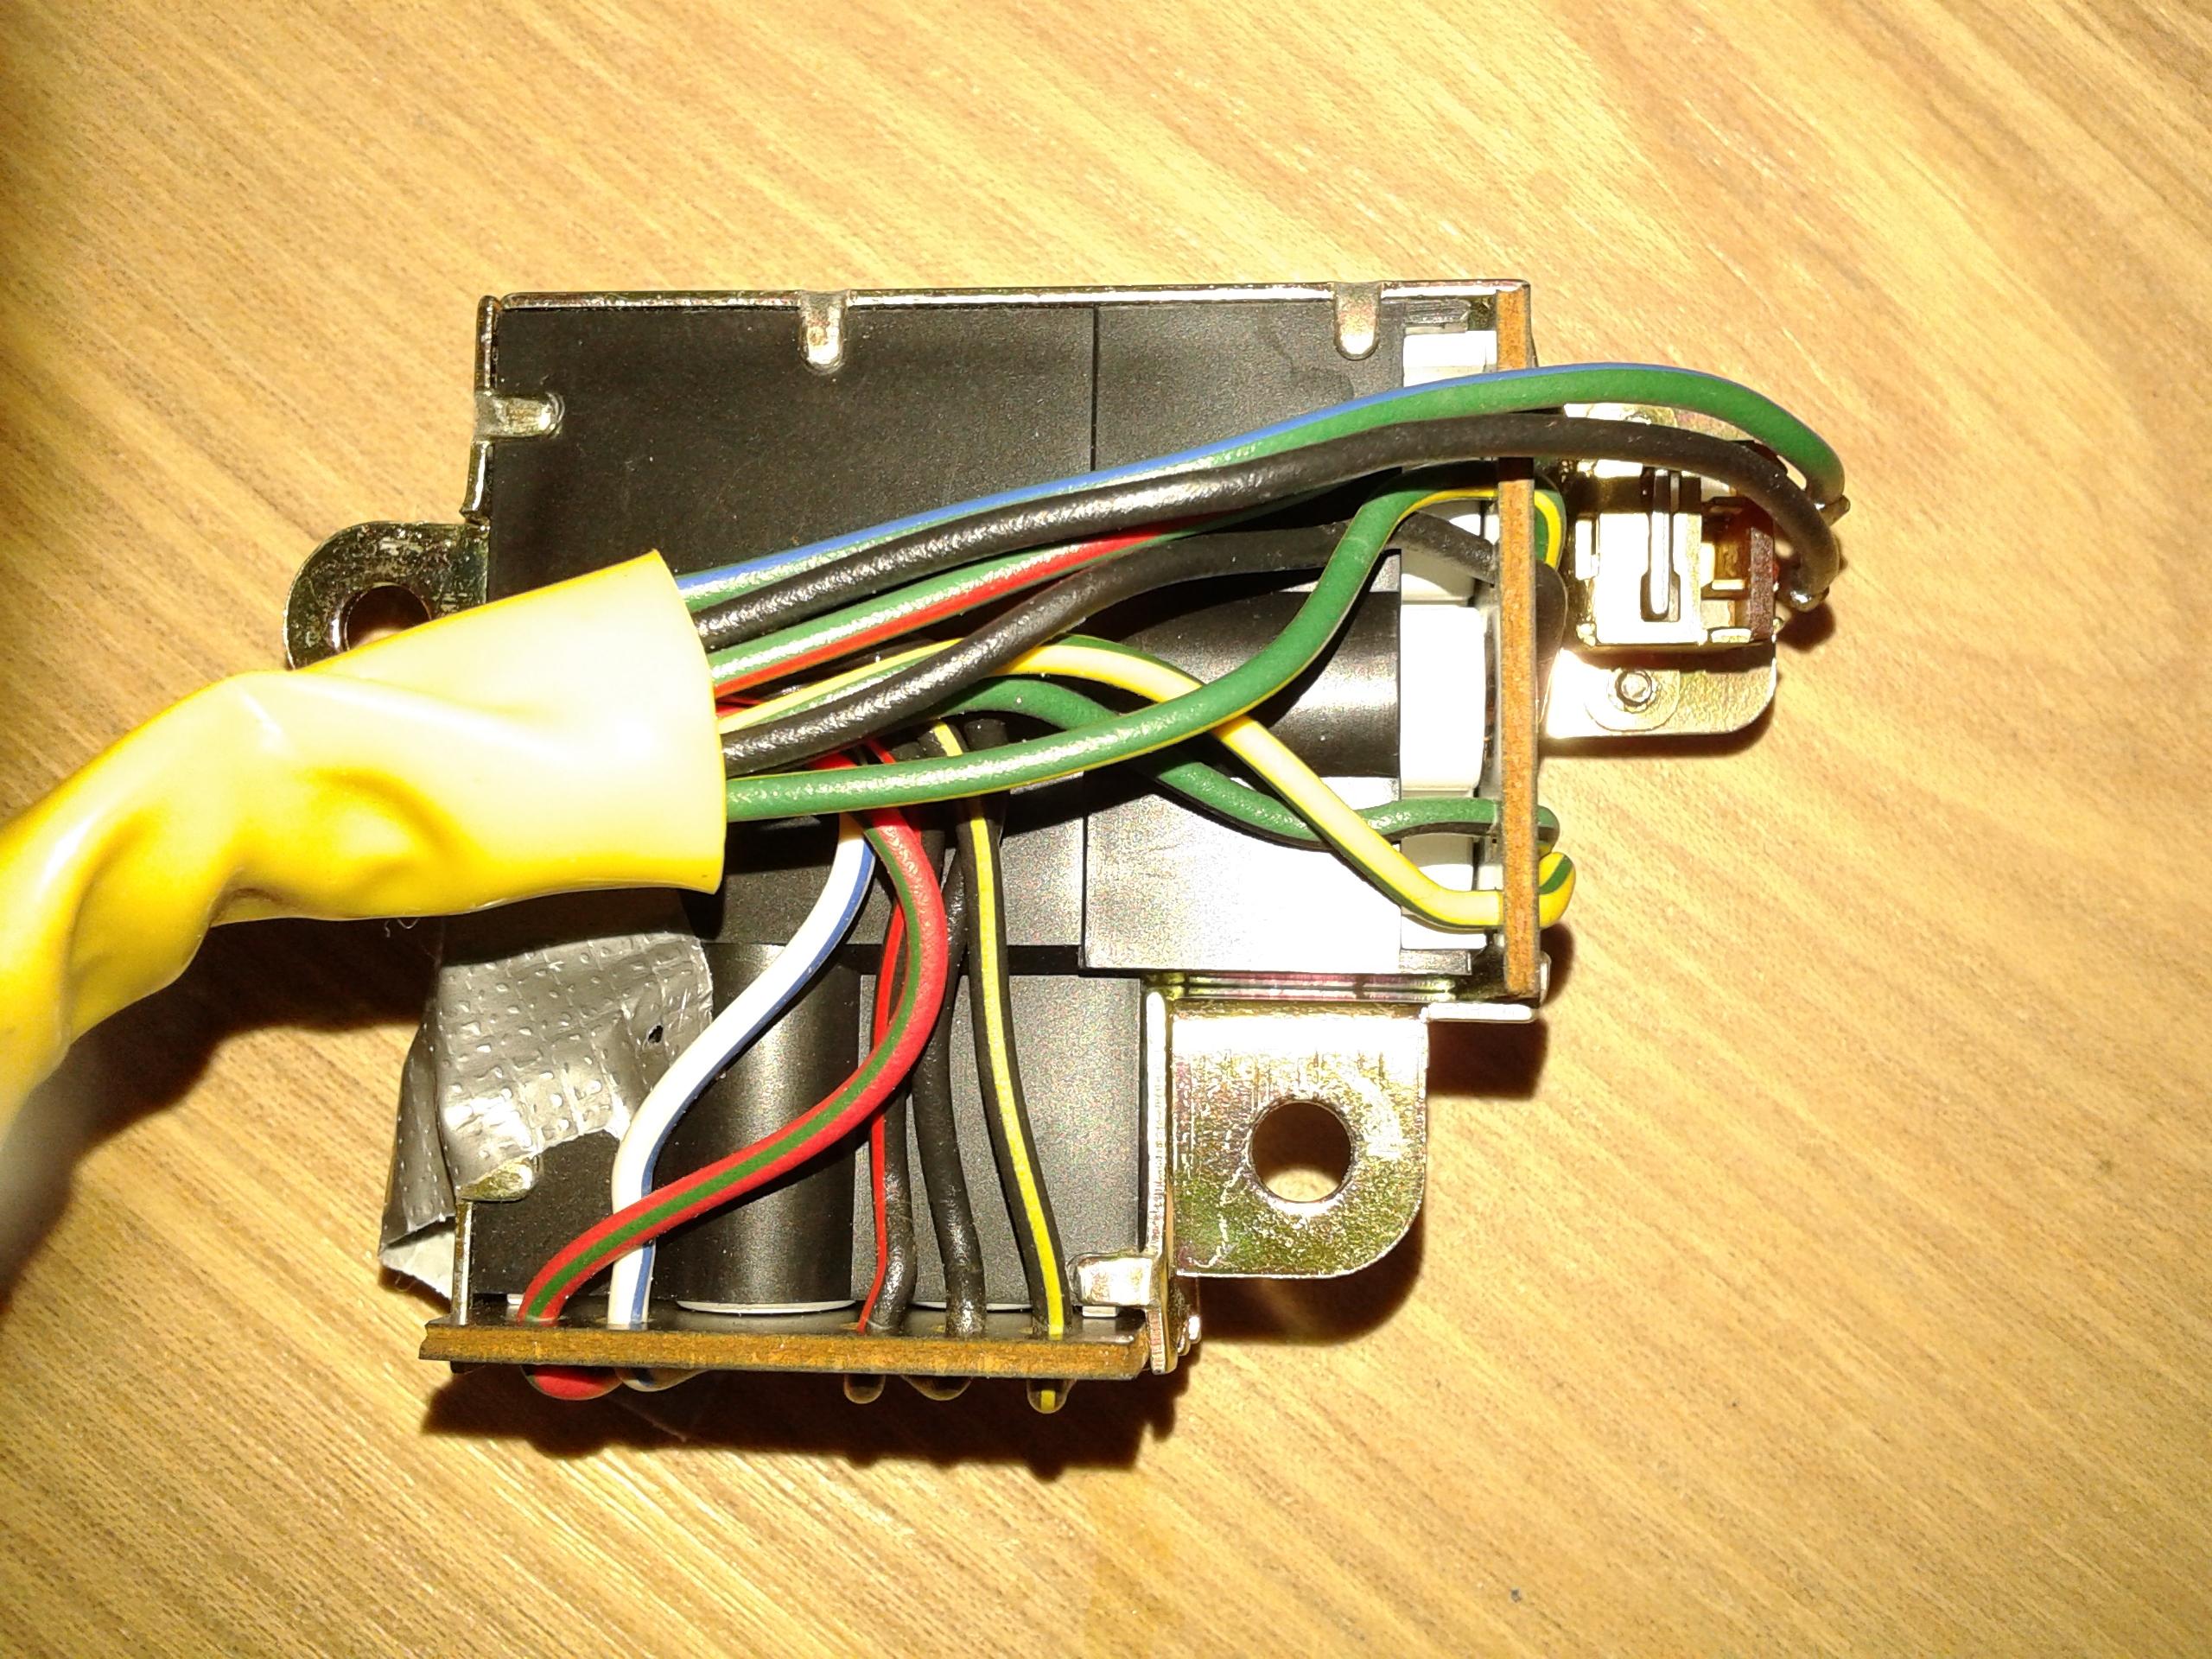
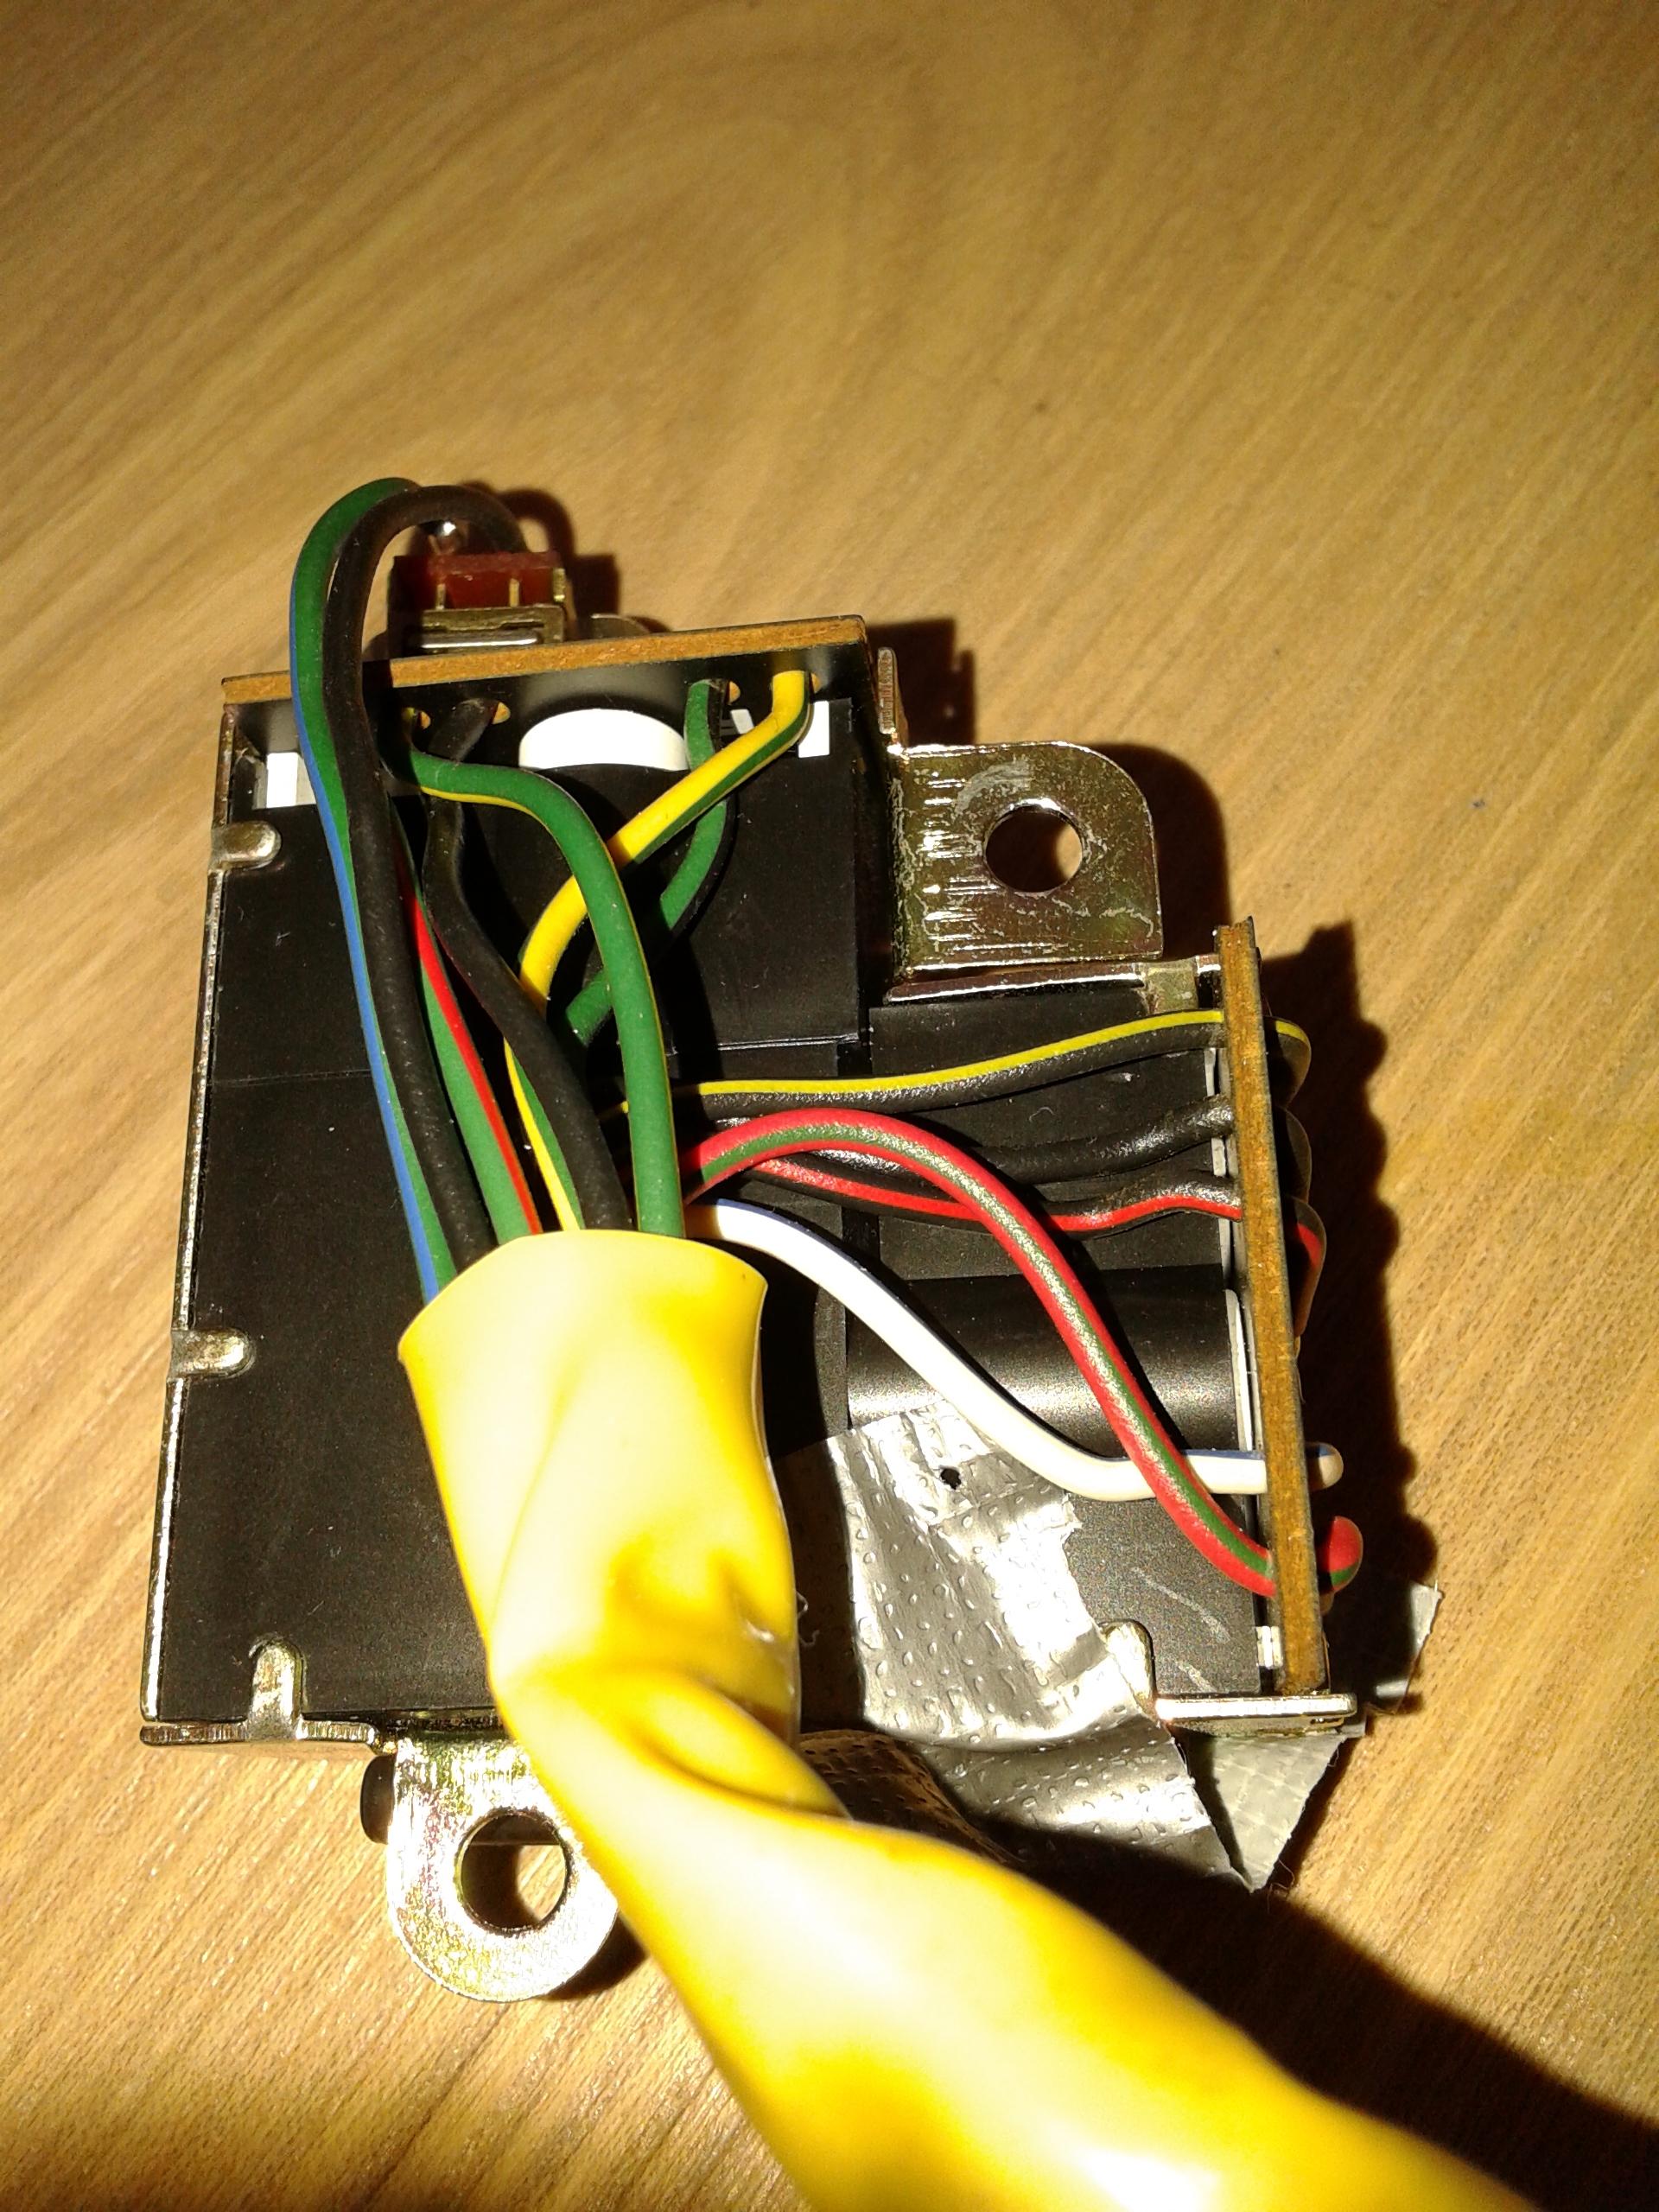
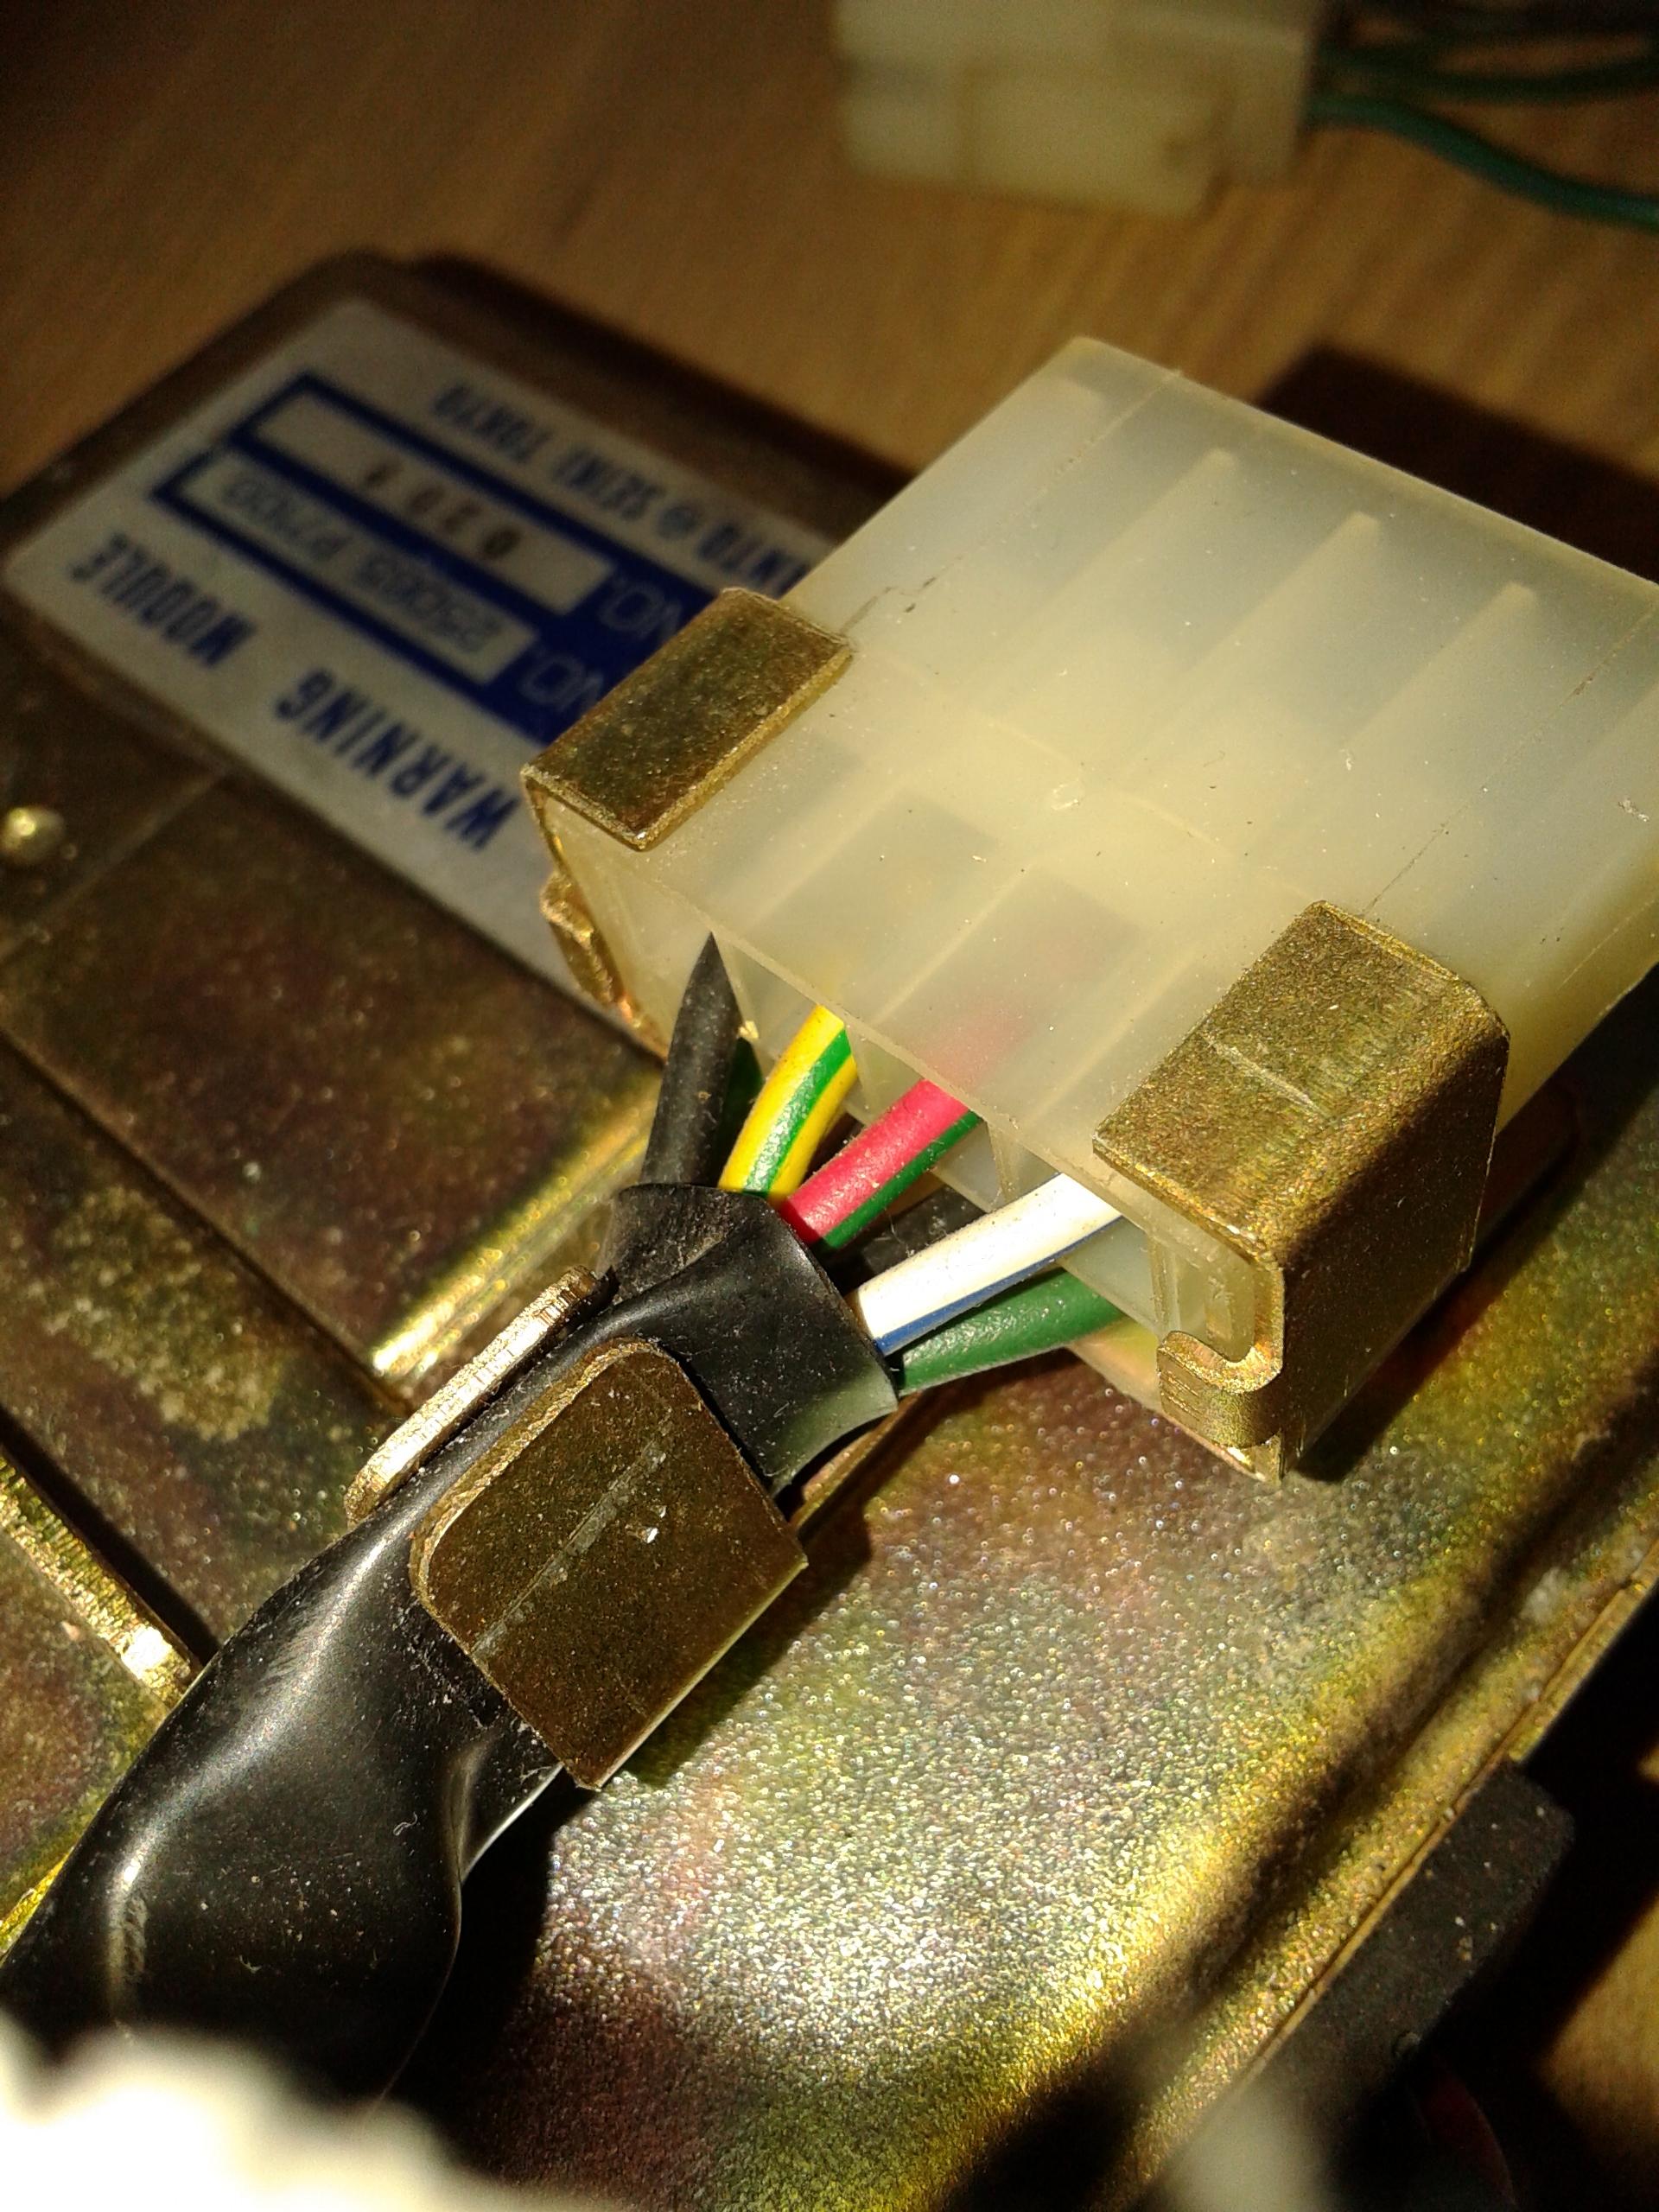
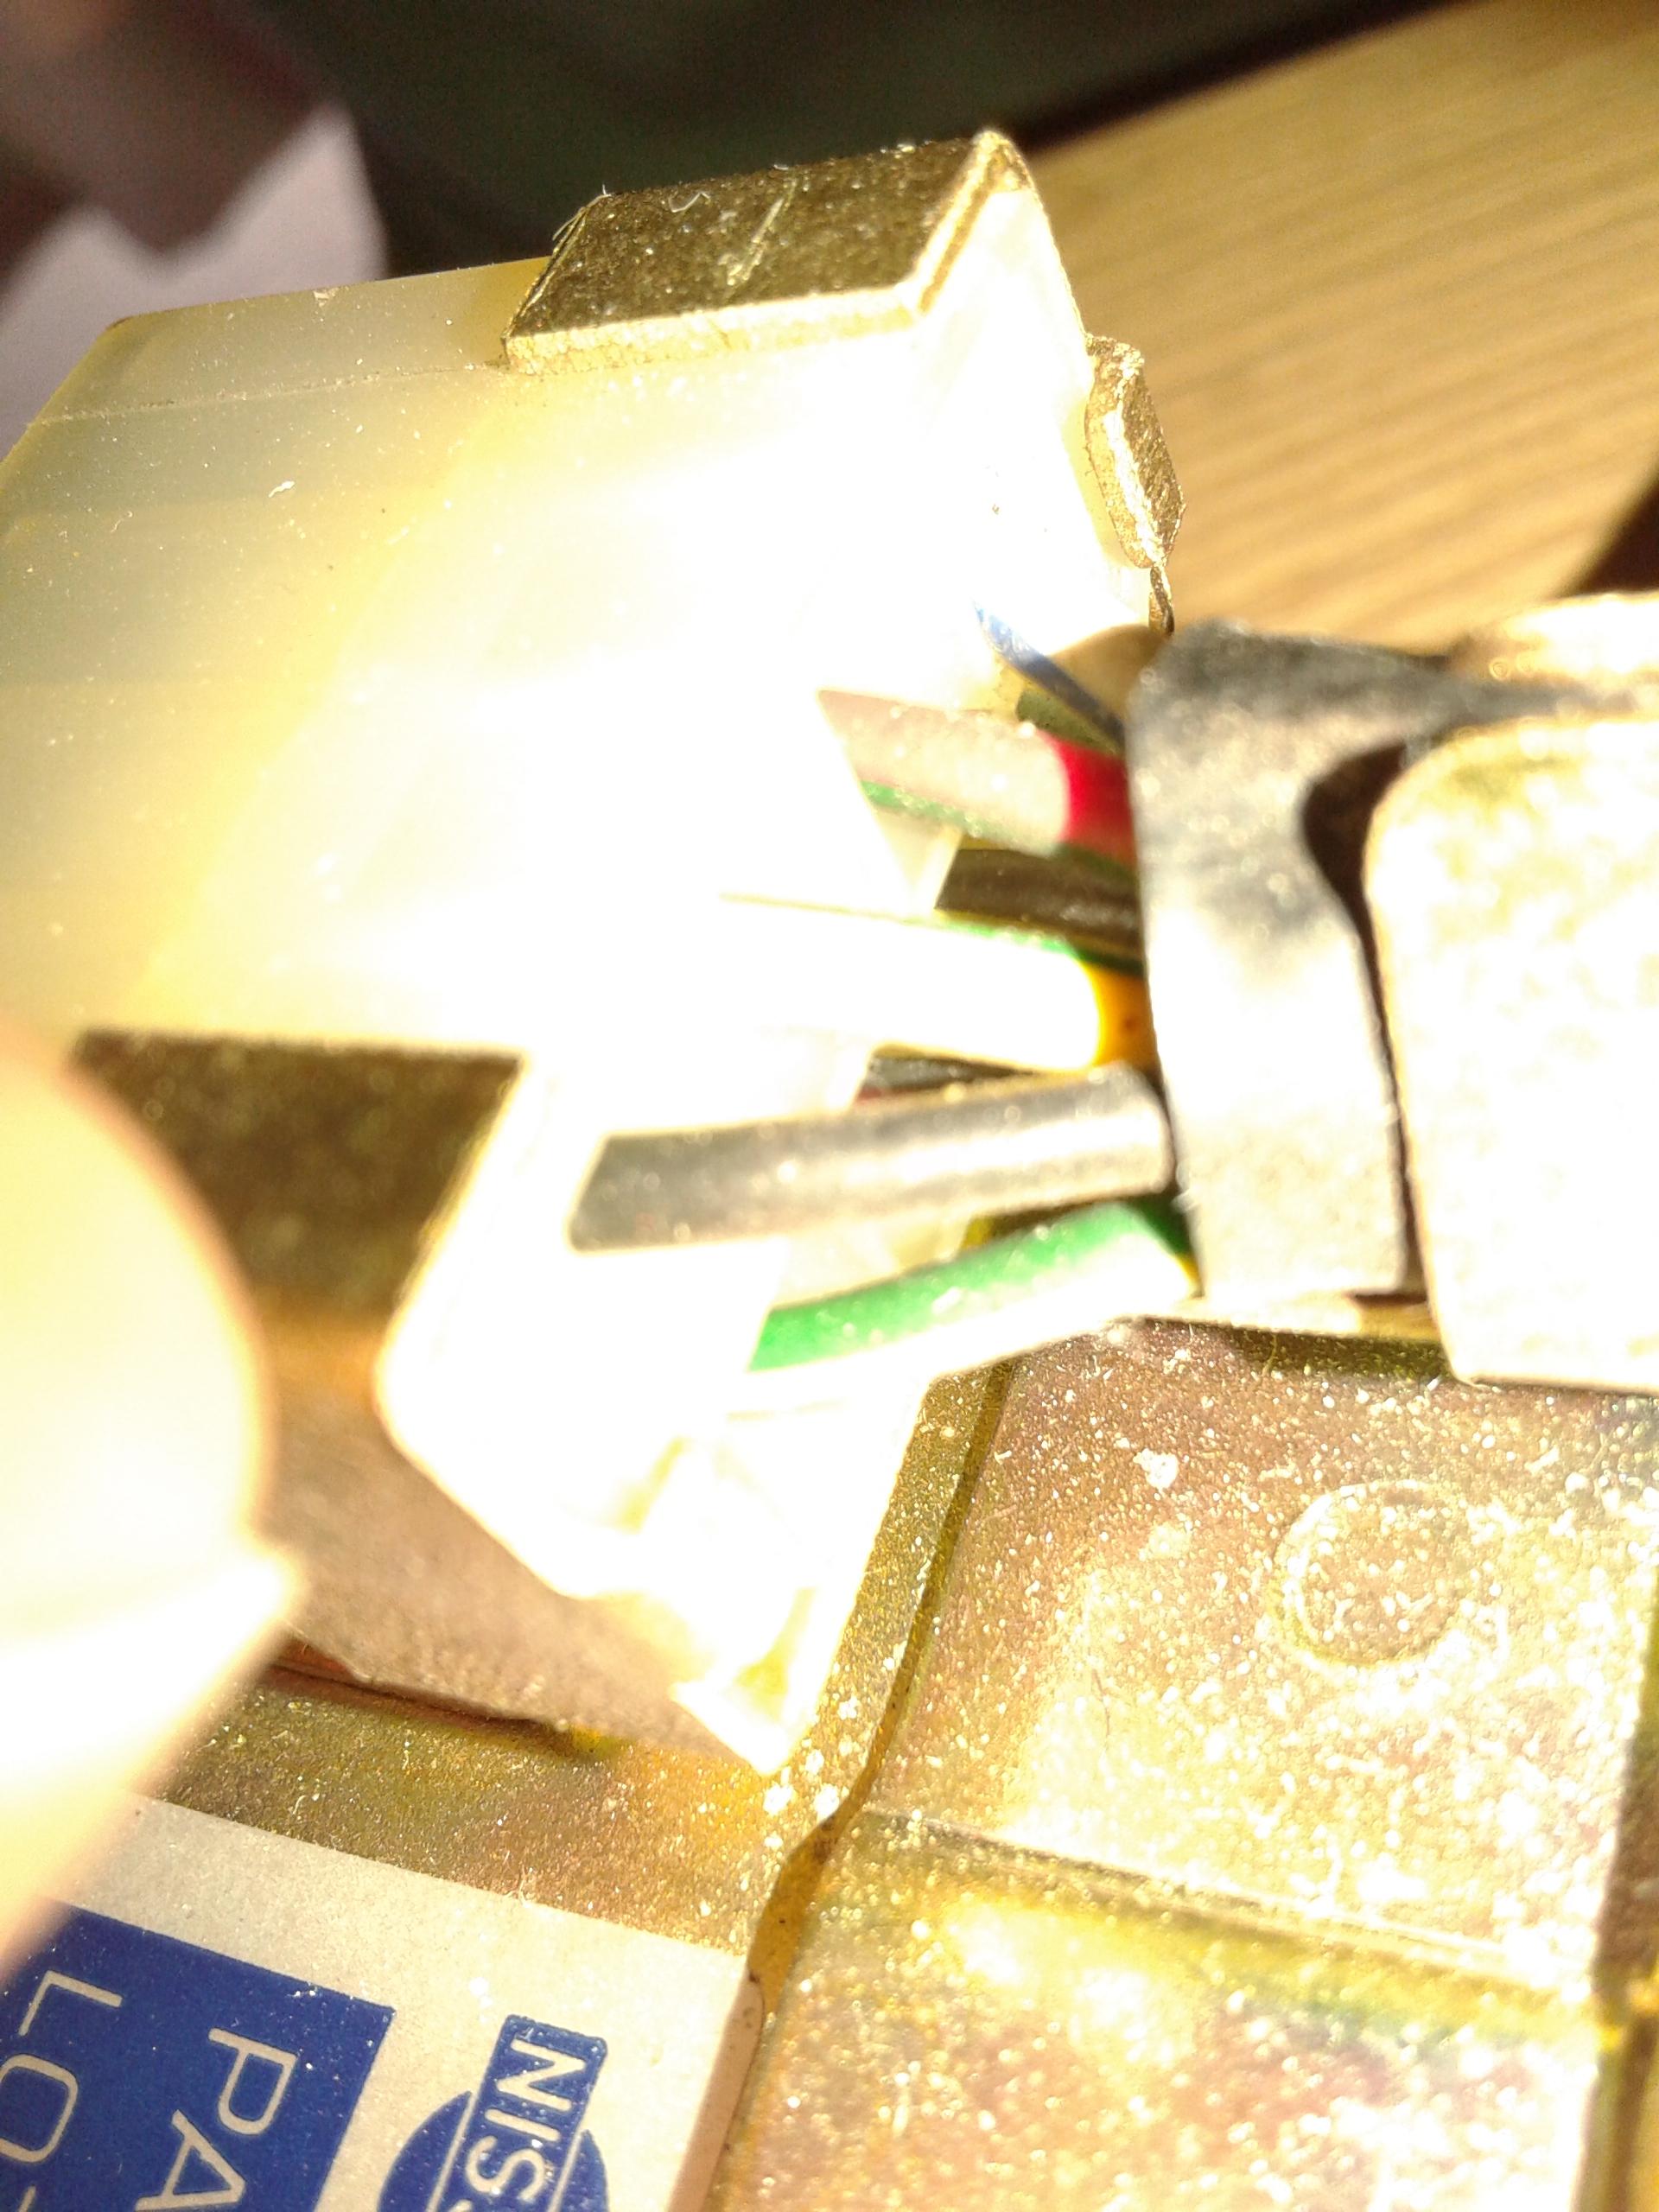
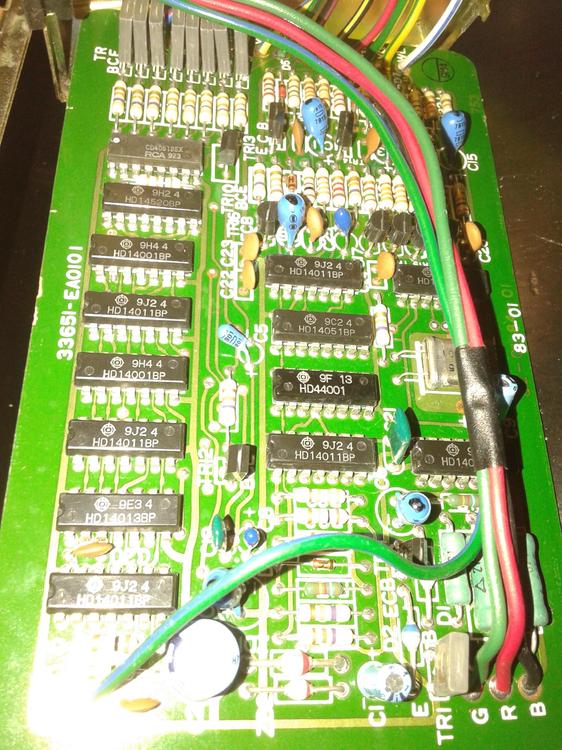
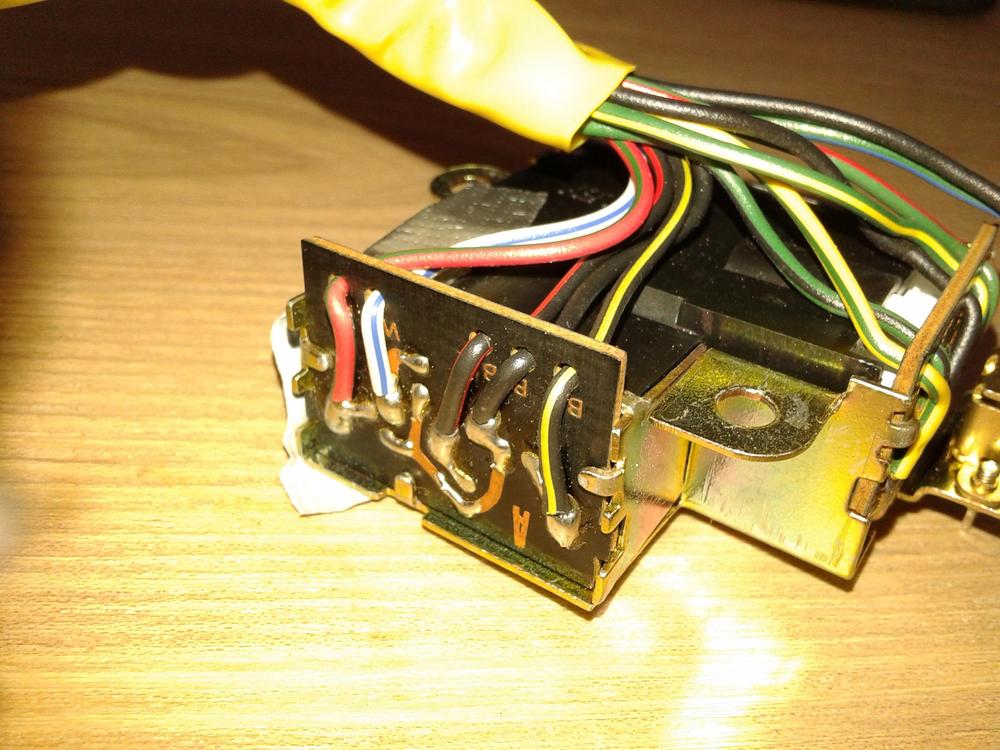
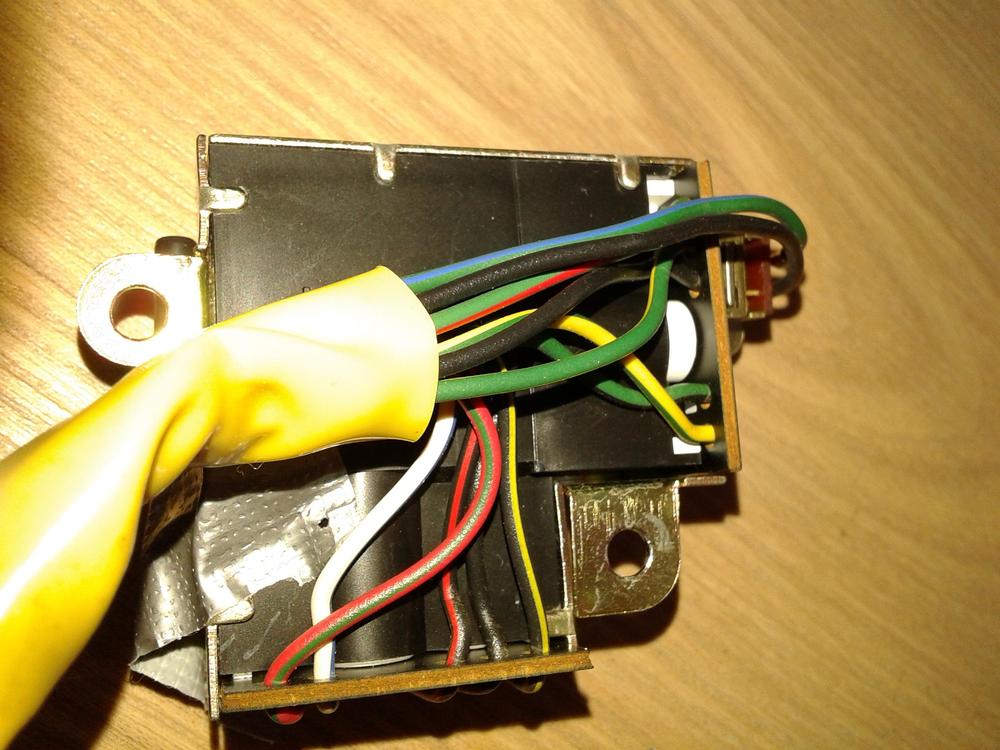
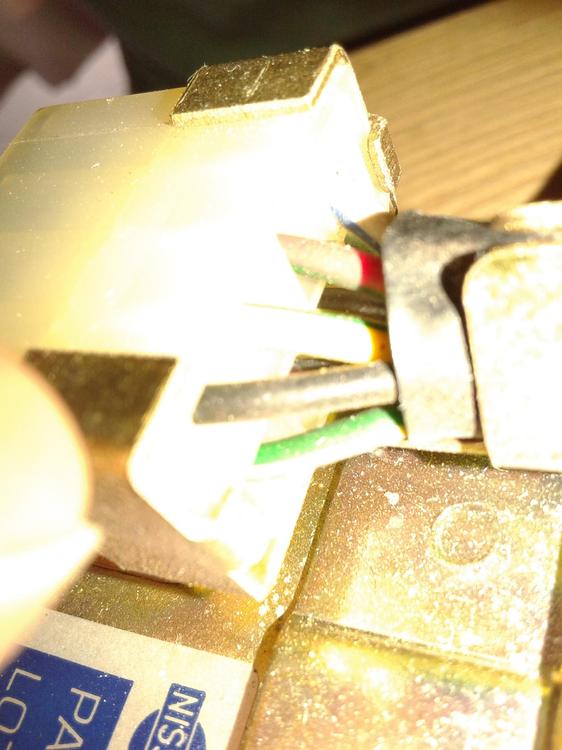
 One is aside the other on top of the cube. To Rich, Your welcome. i want to say, get yourself (if you don't already have one) the Original service manual, it's the best guide to solve problems. But.. Parts like the Warning Module, are in a block diagram, parts inside are not specified.. I remember that i made some pic's of the inside… of that amplifier.. or as they call it on the unit: warning module!! Lot's of... eh.... Cmos 4000 series? real late '70 electronics !!!! Look at it! You can't believe this electronic unit is almost 40 years old!!! todays electronics are hopeless when you look at/compare to this gem. Every part can easely be replaced.. try that with modern electronics.. pfoei! For as far i can see you only need to replace 3 capacitors on the circuitboard.. (In pic 1) on the right one cap (C3??) just right from the black tape round the 3 wires. and 2 caps in the bottom of the pic each on 1/3 of the board..(marked C1 and C2!) Maybe also the tantalum caps..(The blue droplets like parts) @Captain Obvious I don't know really but i think they are as strong as the rest of the part on the board? In the '70-80-90 when i repaired electronics you had lots of books, today with the internet.. you just type the number which is on the Integrated circuit (ic) and you get all the info on it you'll ever need !!! for example a 4011.. https://pdf1.alldatasheet.com/datasheet-pdf/view/63585/HITACHI/HD14011B.html
.thumb.jpg.b9a76feb003e4b9db9ac0a5b9852ac71.jpg)
.thumb.jpg.66a1e3b0215c7040c037b4bc901bb109.jpg)
.thumb.jpg.0d69e56674ca0a0ad49f930220905b79.jpg)
.thumb.jpg.32f7ab7926bde651d7ee34fbc7d74687.jpg)
-
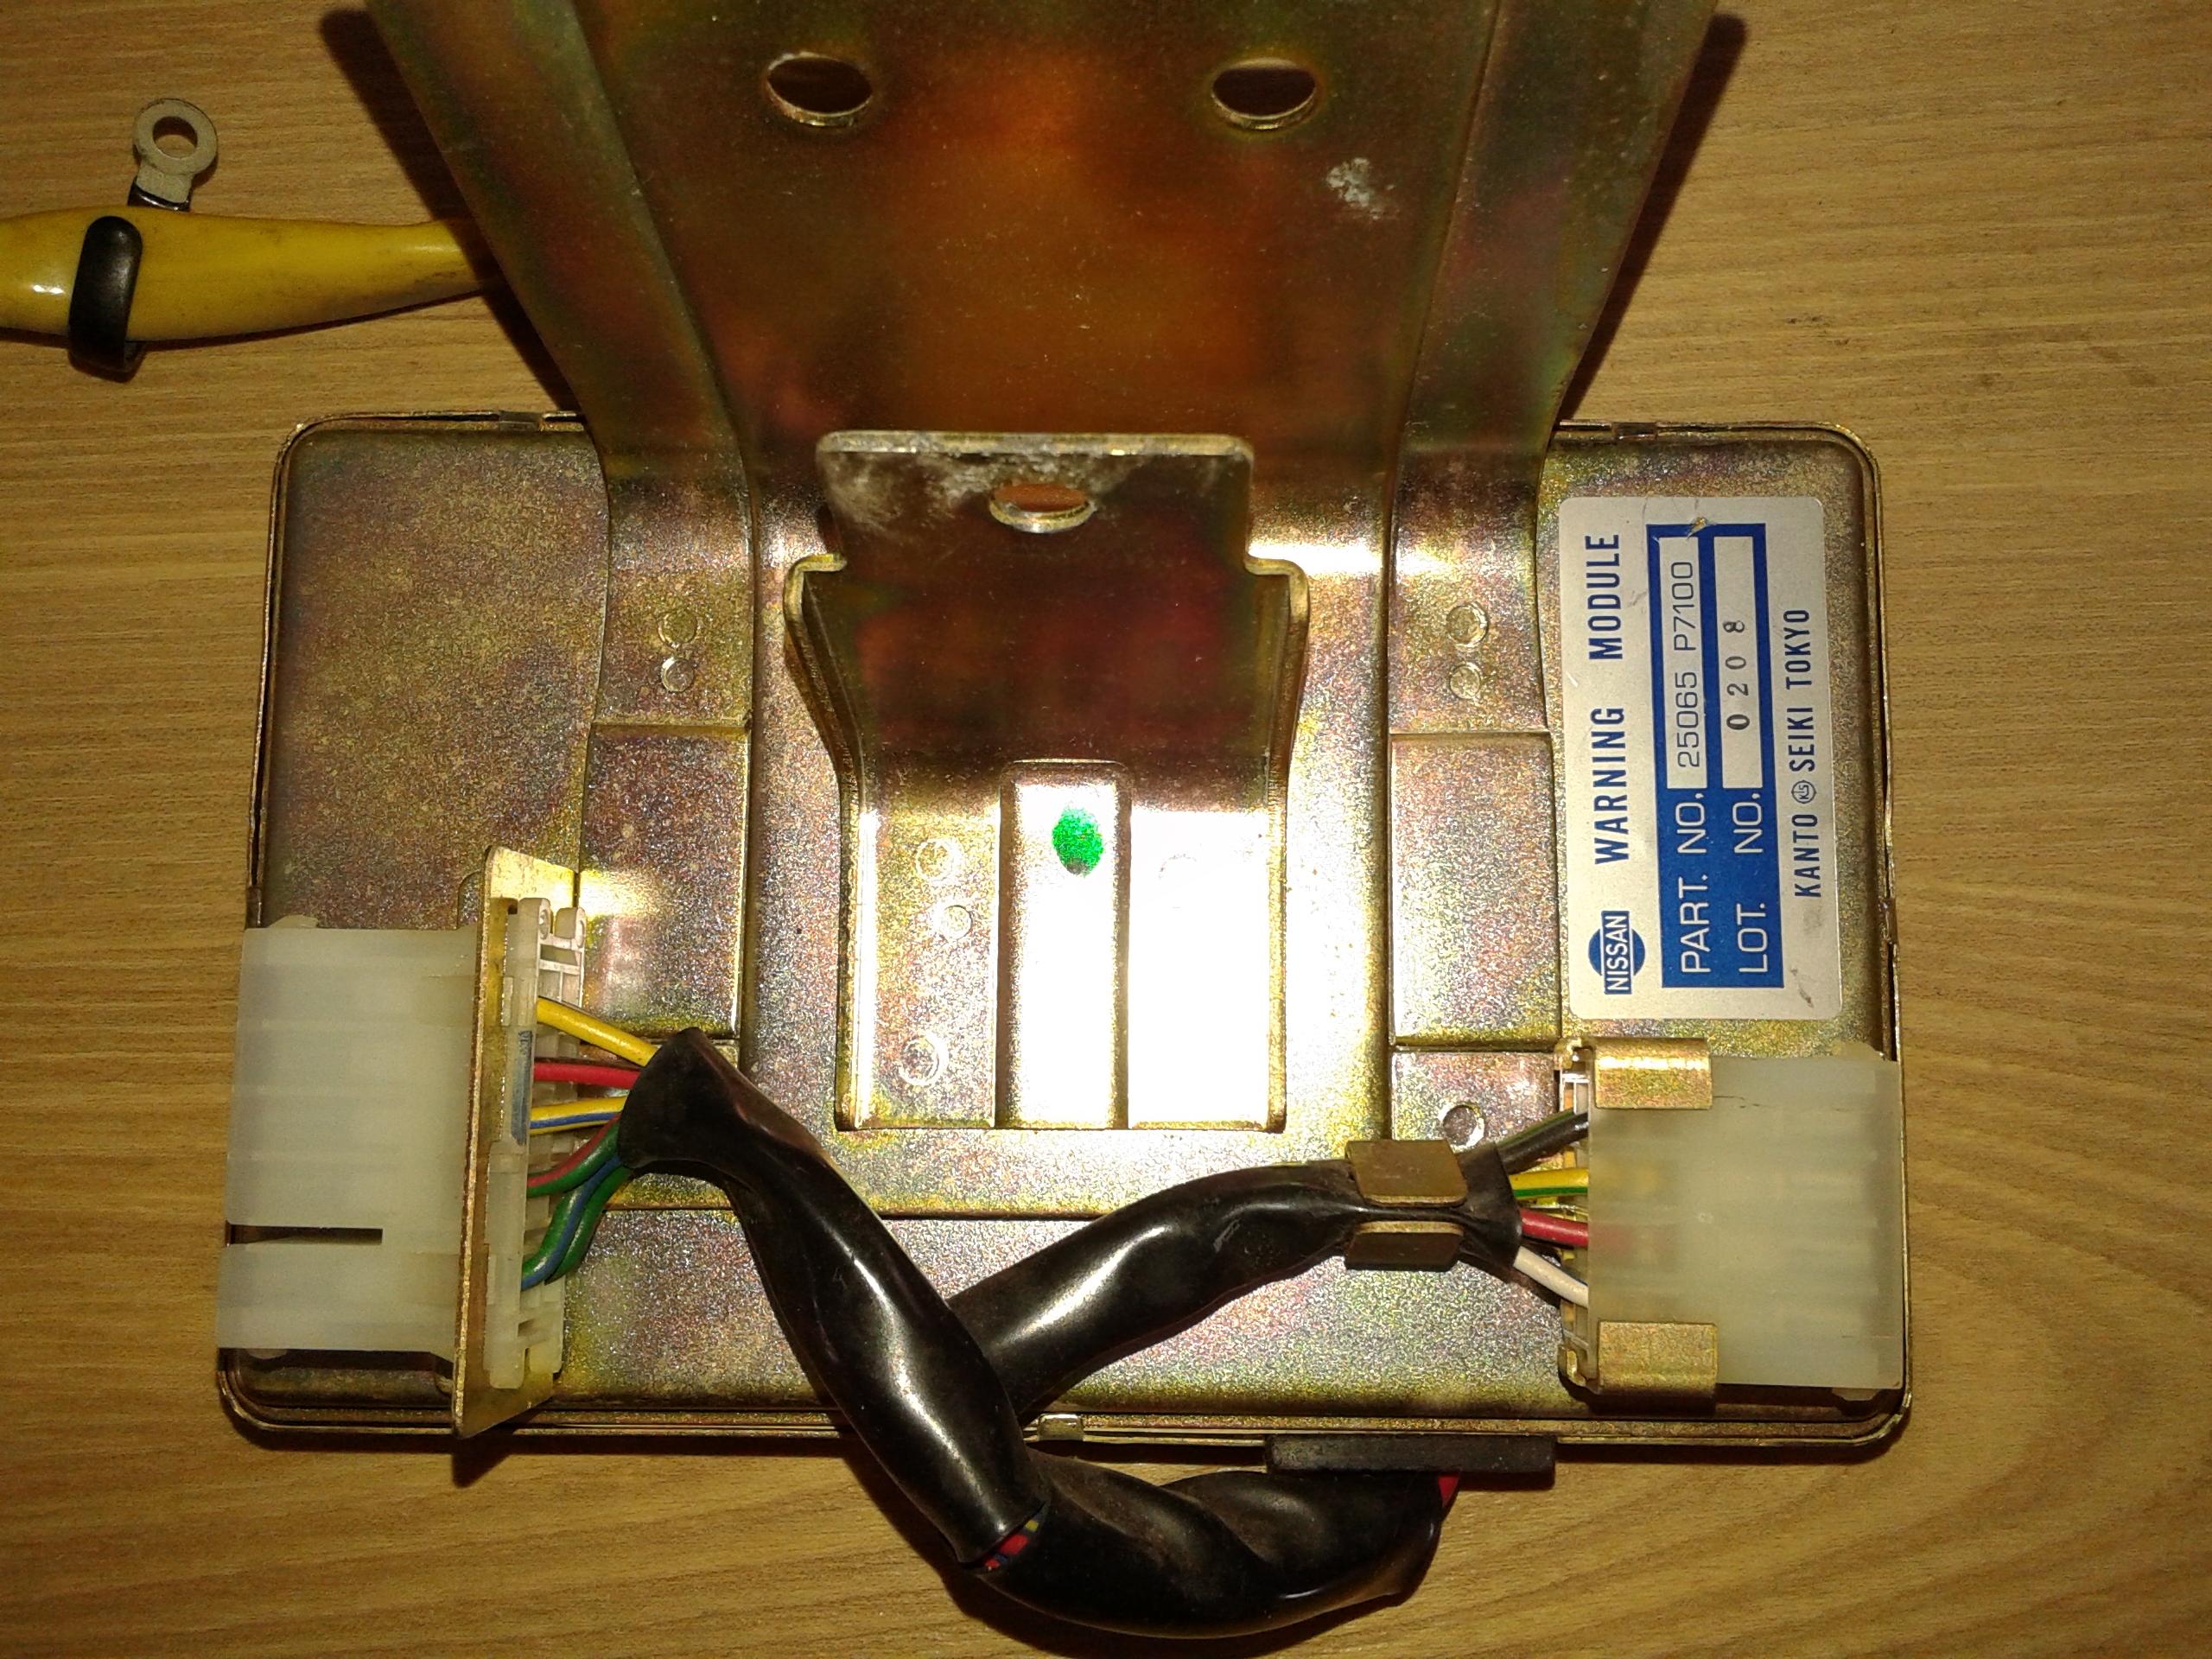
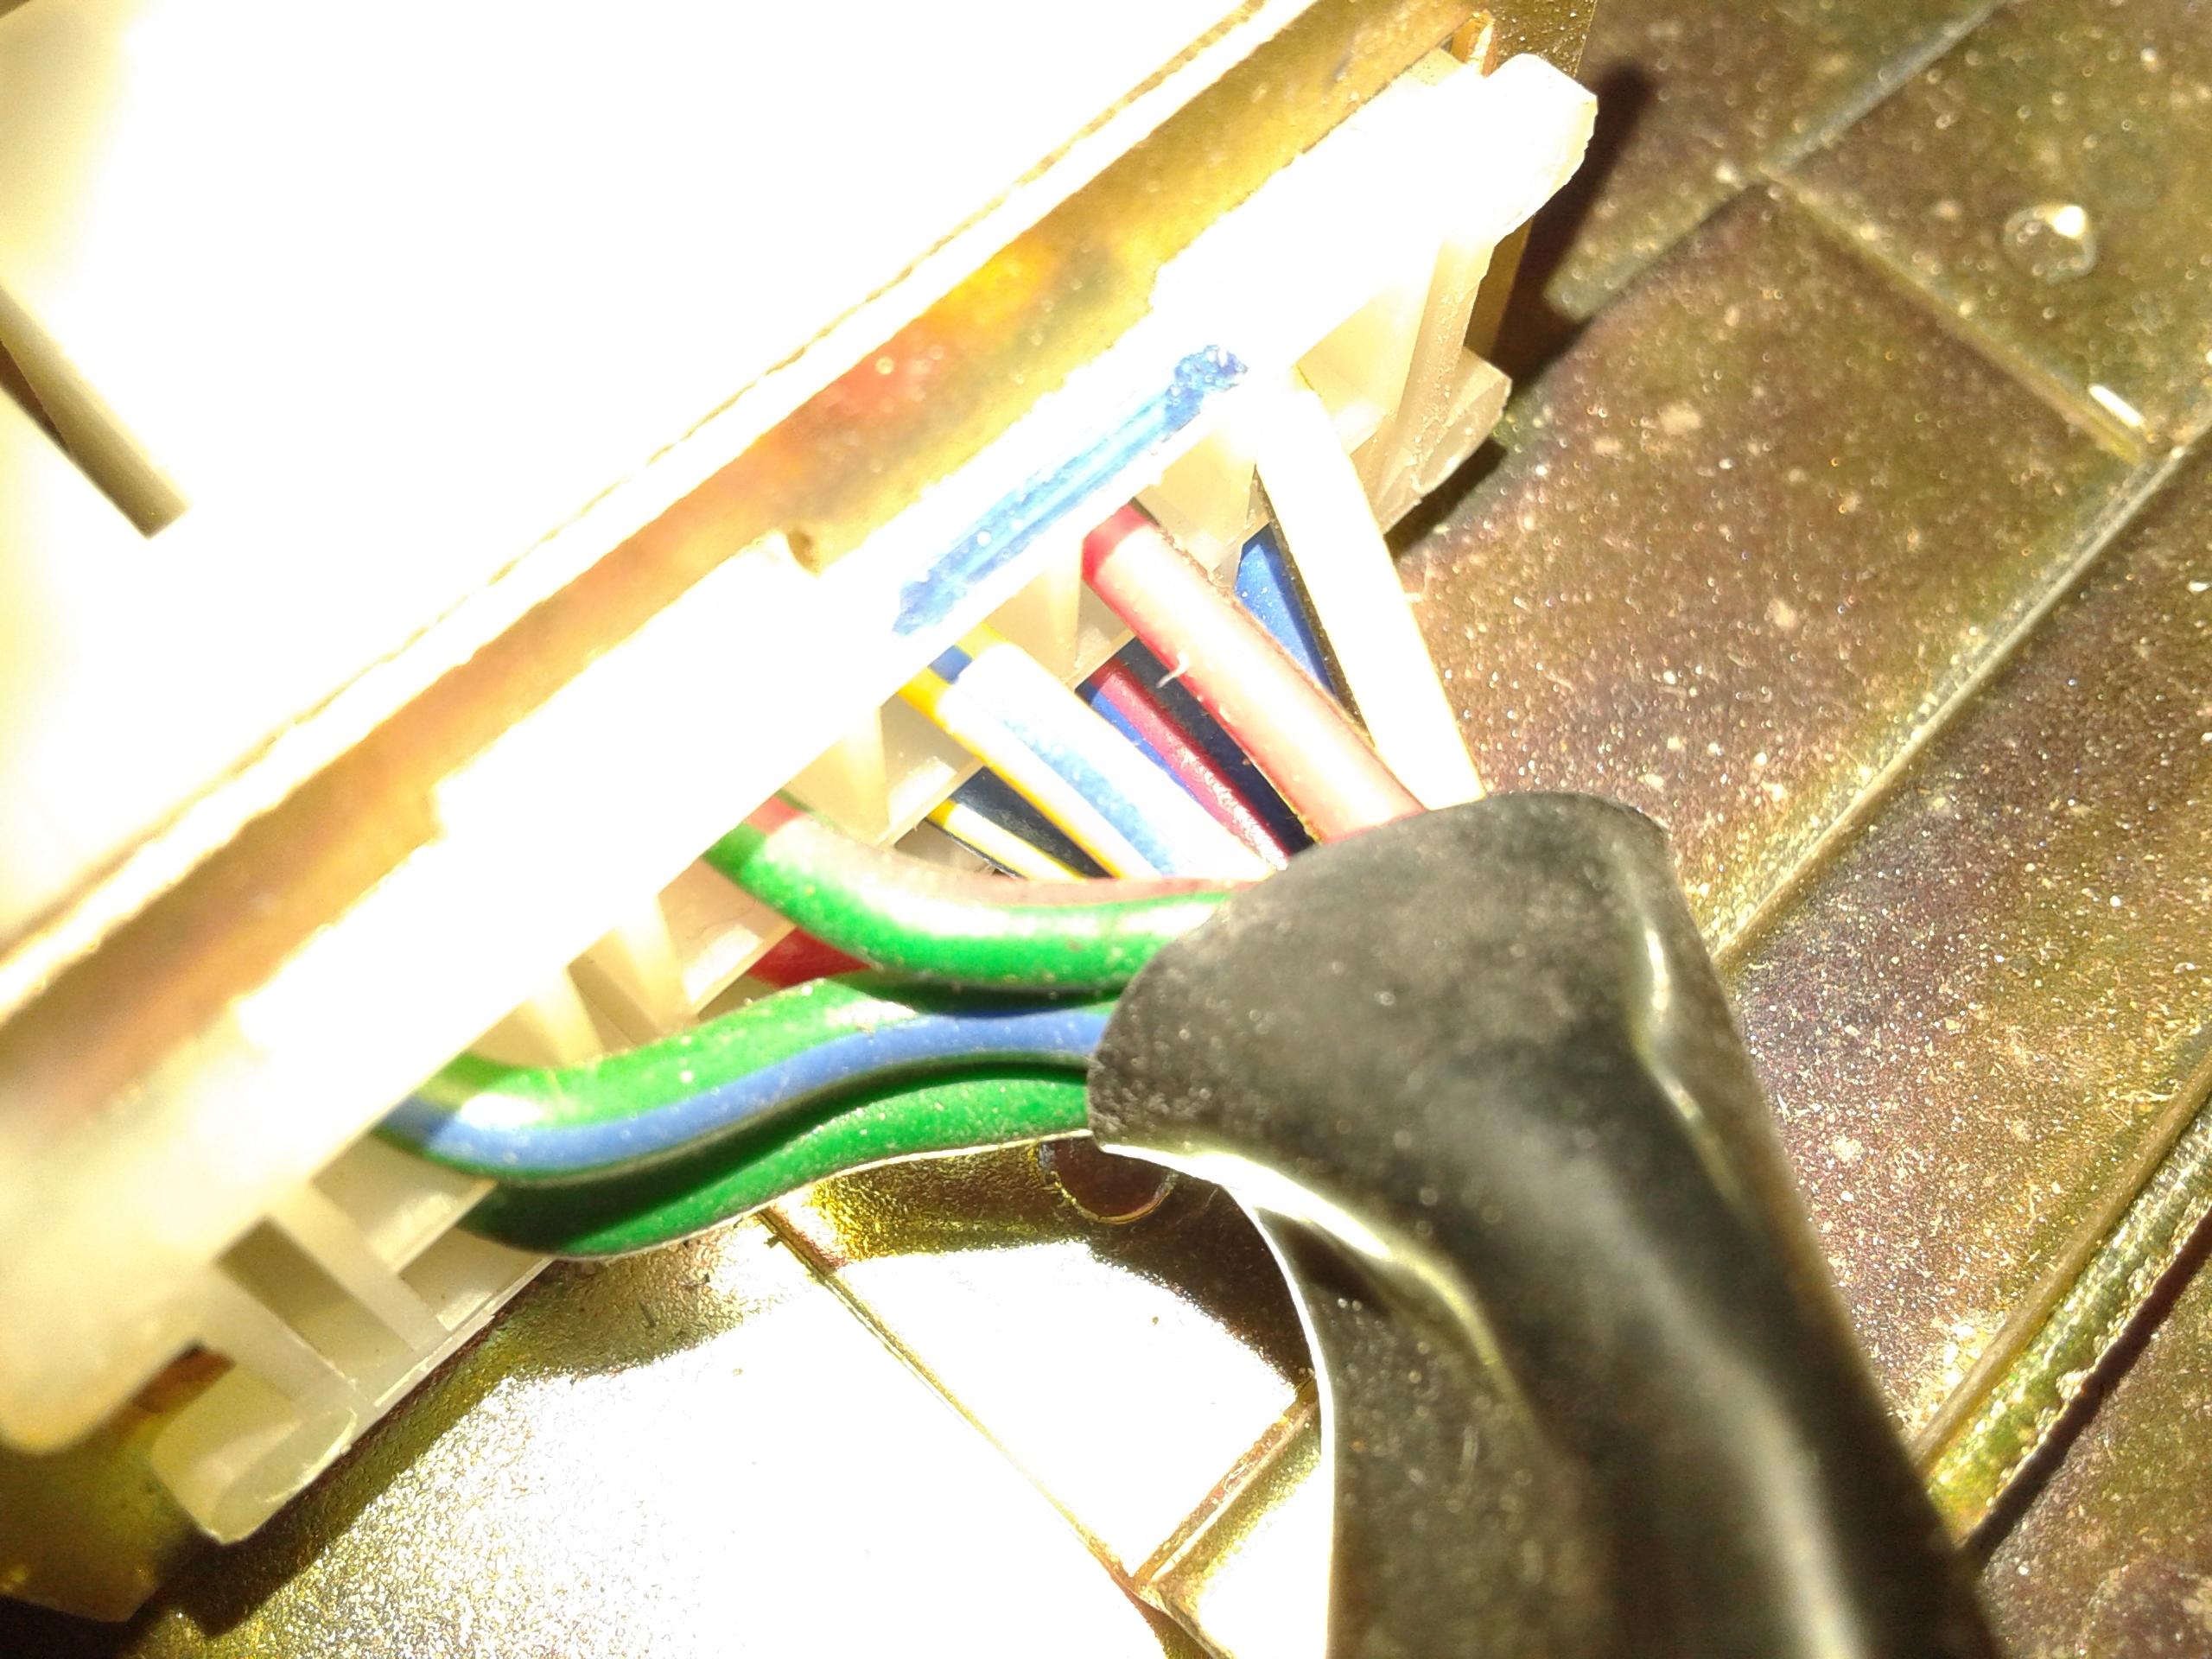
On page BE64 of the Original october 1978 servicemanual i see (bottom of the page) there are 8 lightbulbs inside the display! So they will have a thin film over them in a certain color.. As i'm sitting here doing absolutly NOTHING! ….. i can make you a few pics… yes... ? Hope i don't clog up the site... hahaha… are these enough? ? Took some of the … as they call it in the serv.man. (Huh??) amplifier.. the "warning module" .. as well. (forgot to make a pic of the wiring diagram in the serv.man. But that is only a schematic with 8 bulbs and a switch.) see the servicemanual, a few pages are dedicated to the warning system! What i would like to see are a few pics of all those sensors in the car, especially the battery sensor.. but i think those are gone.. (sensing the acid in the battery is a violent environment.)


-
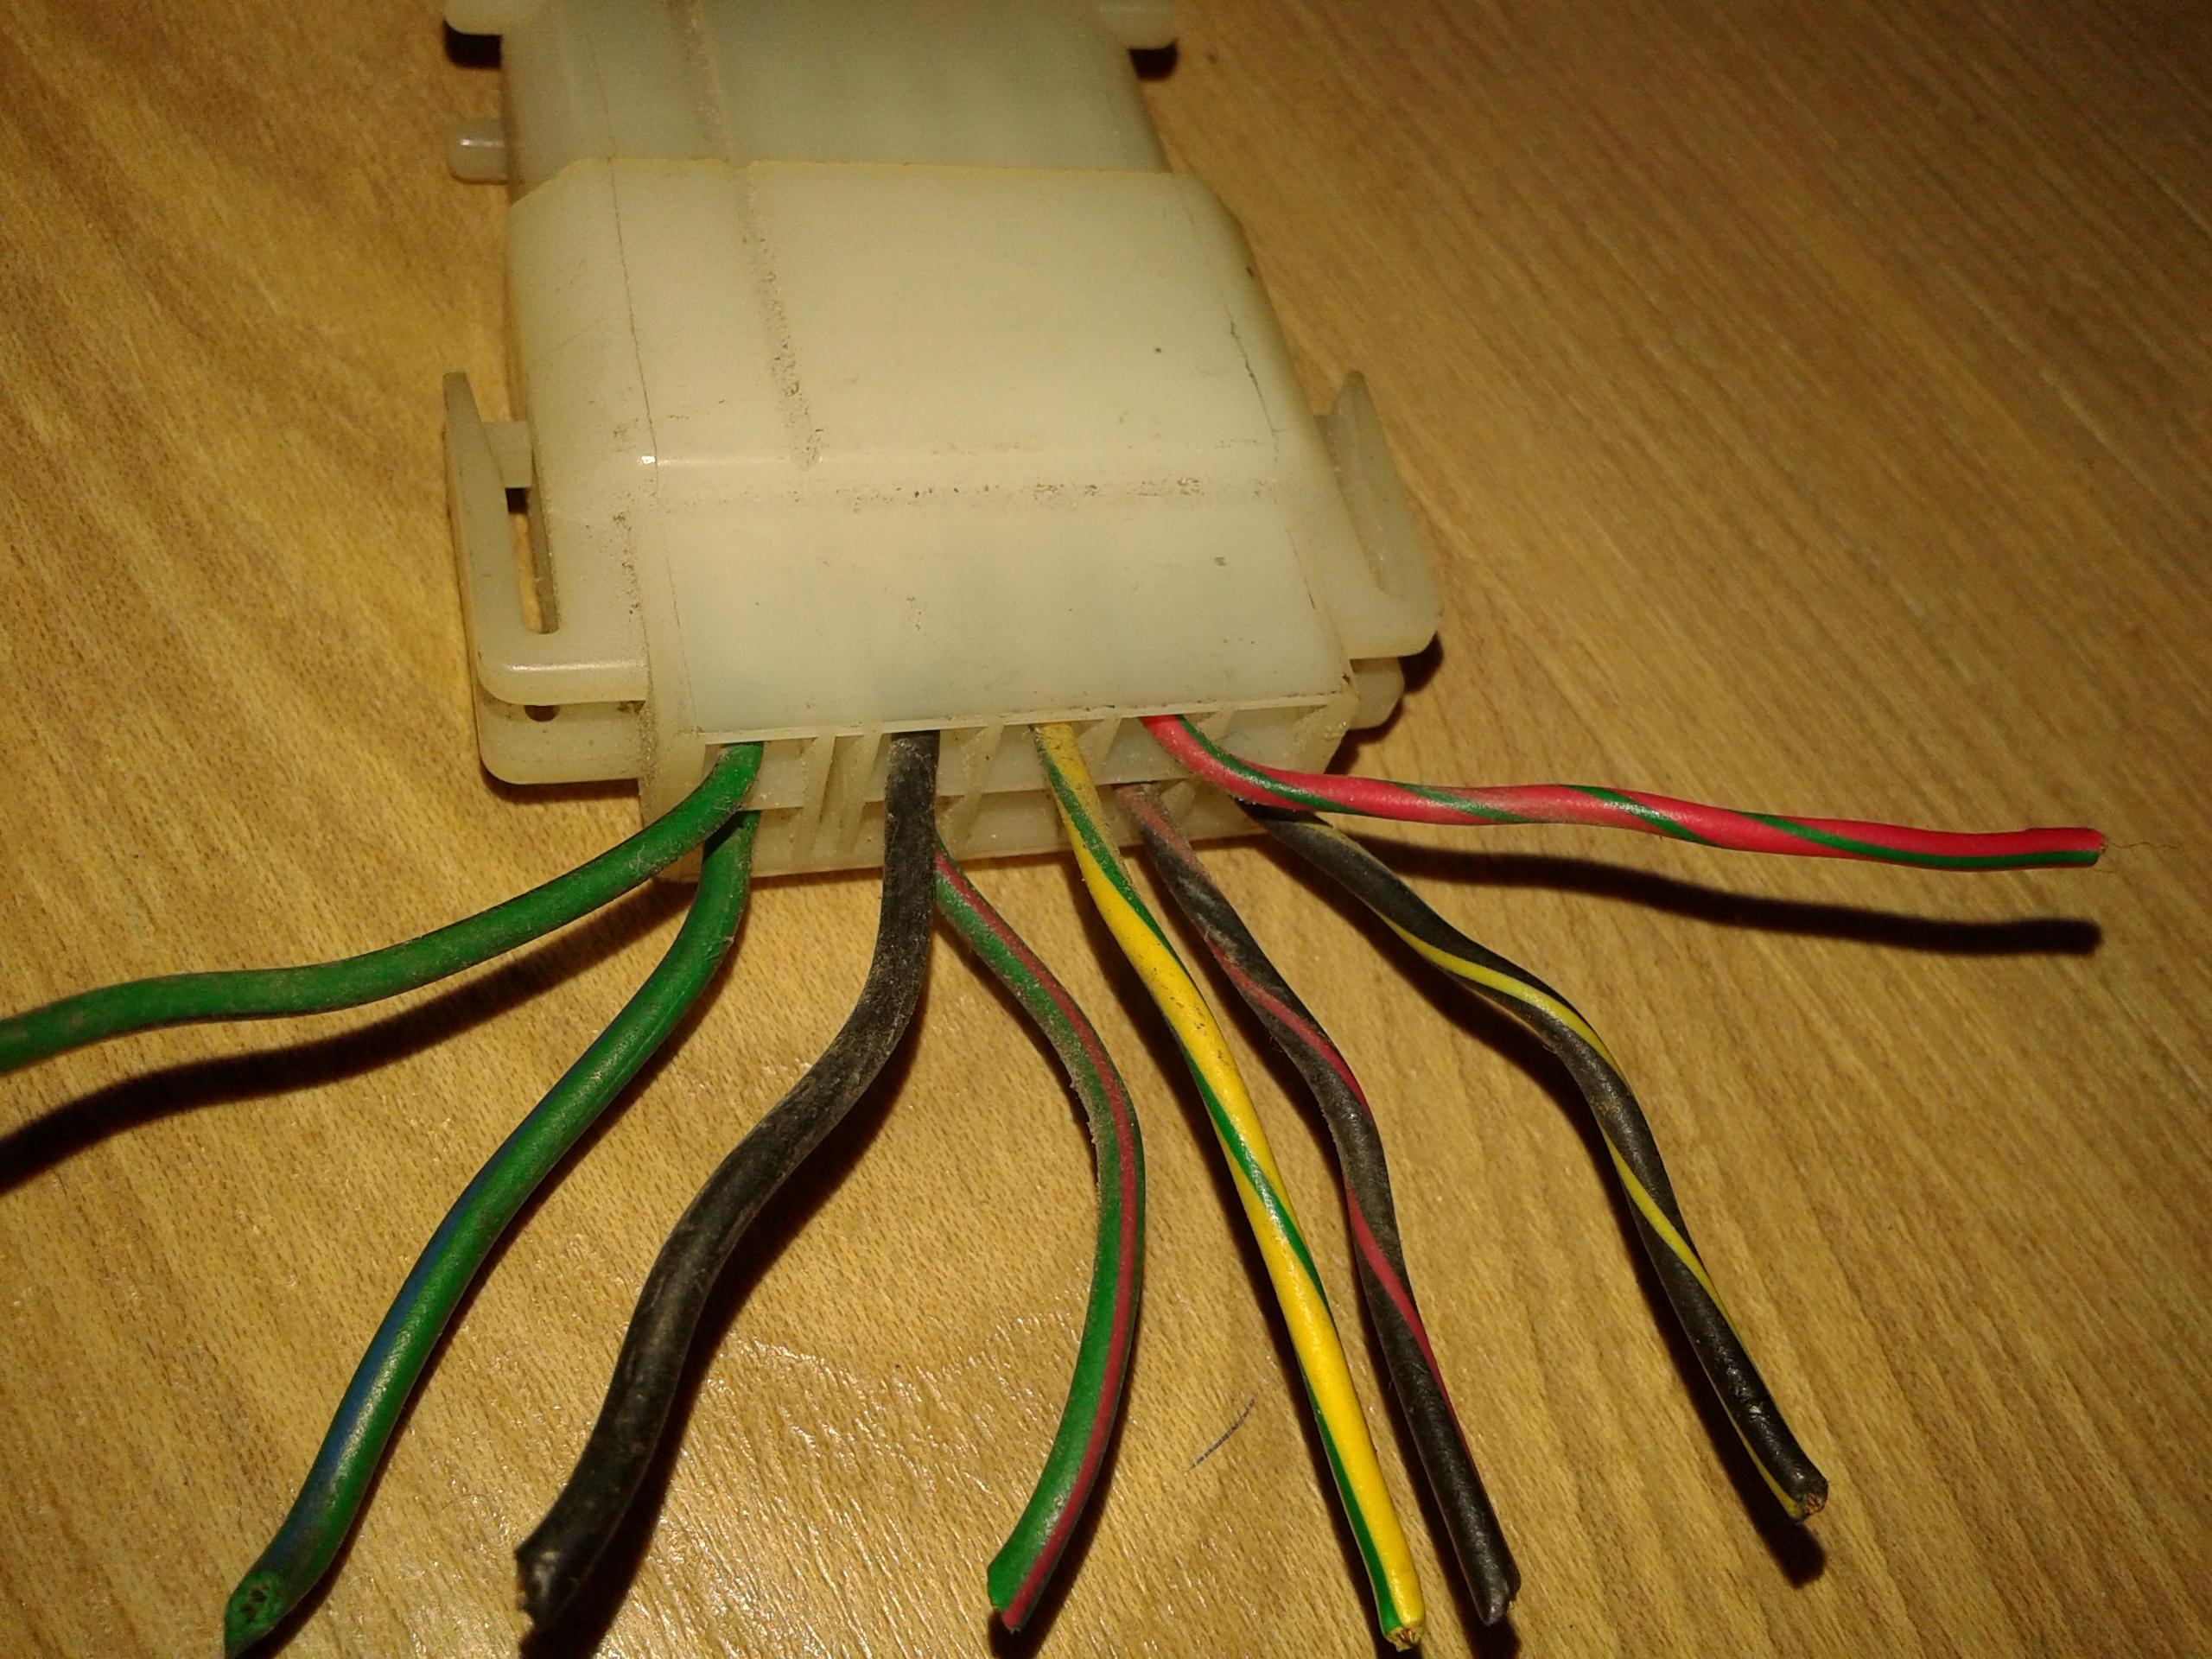
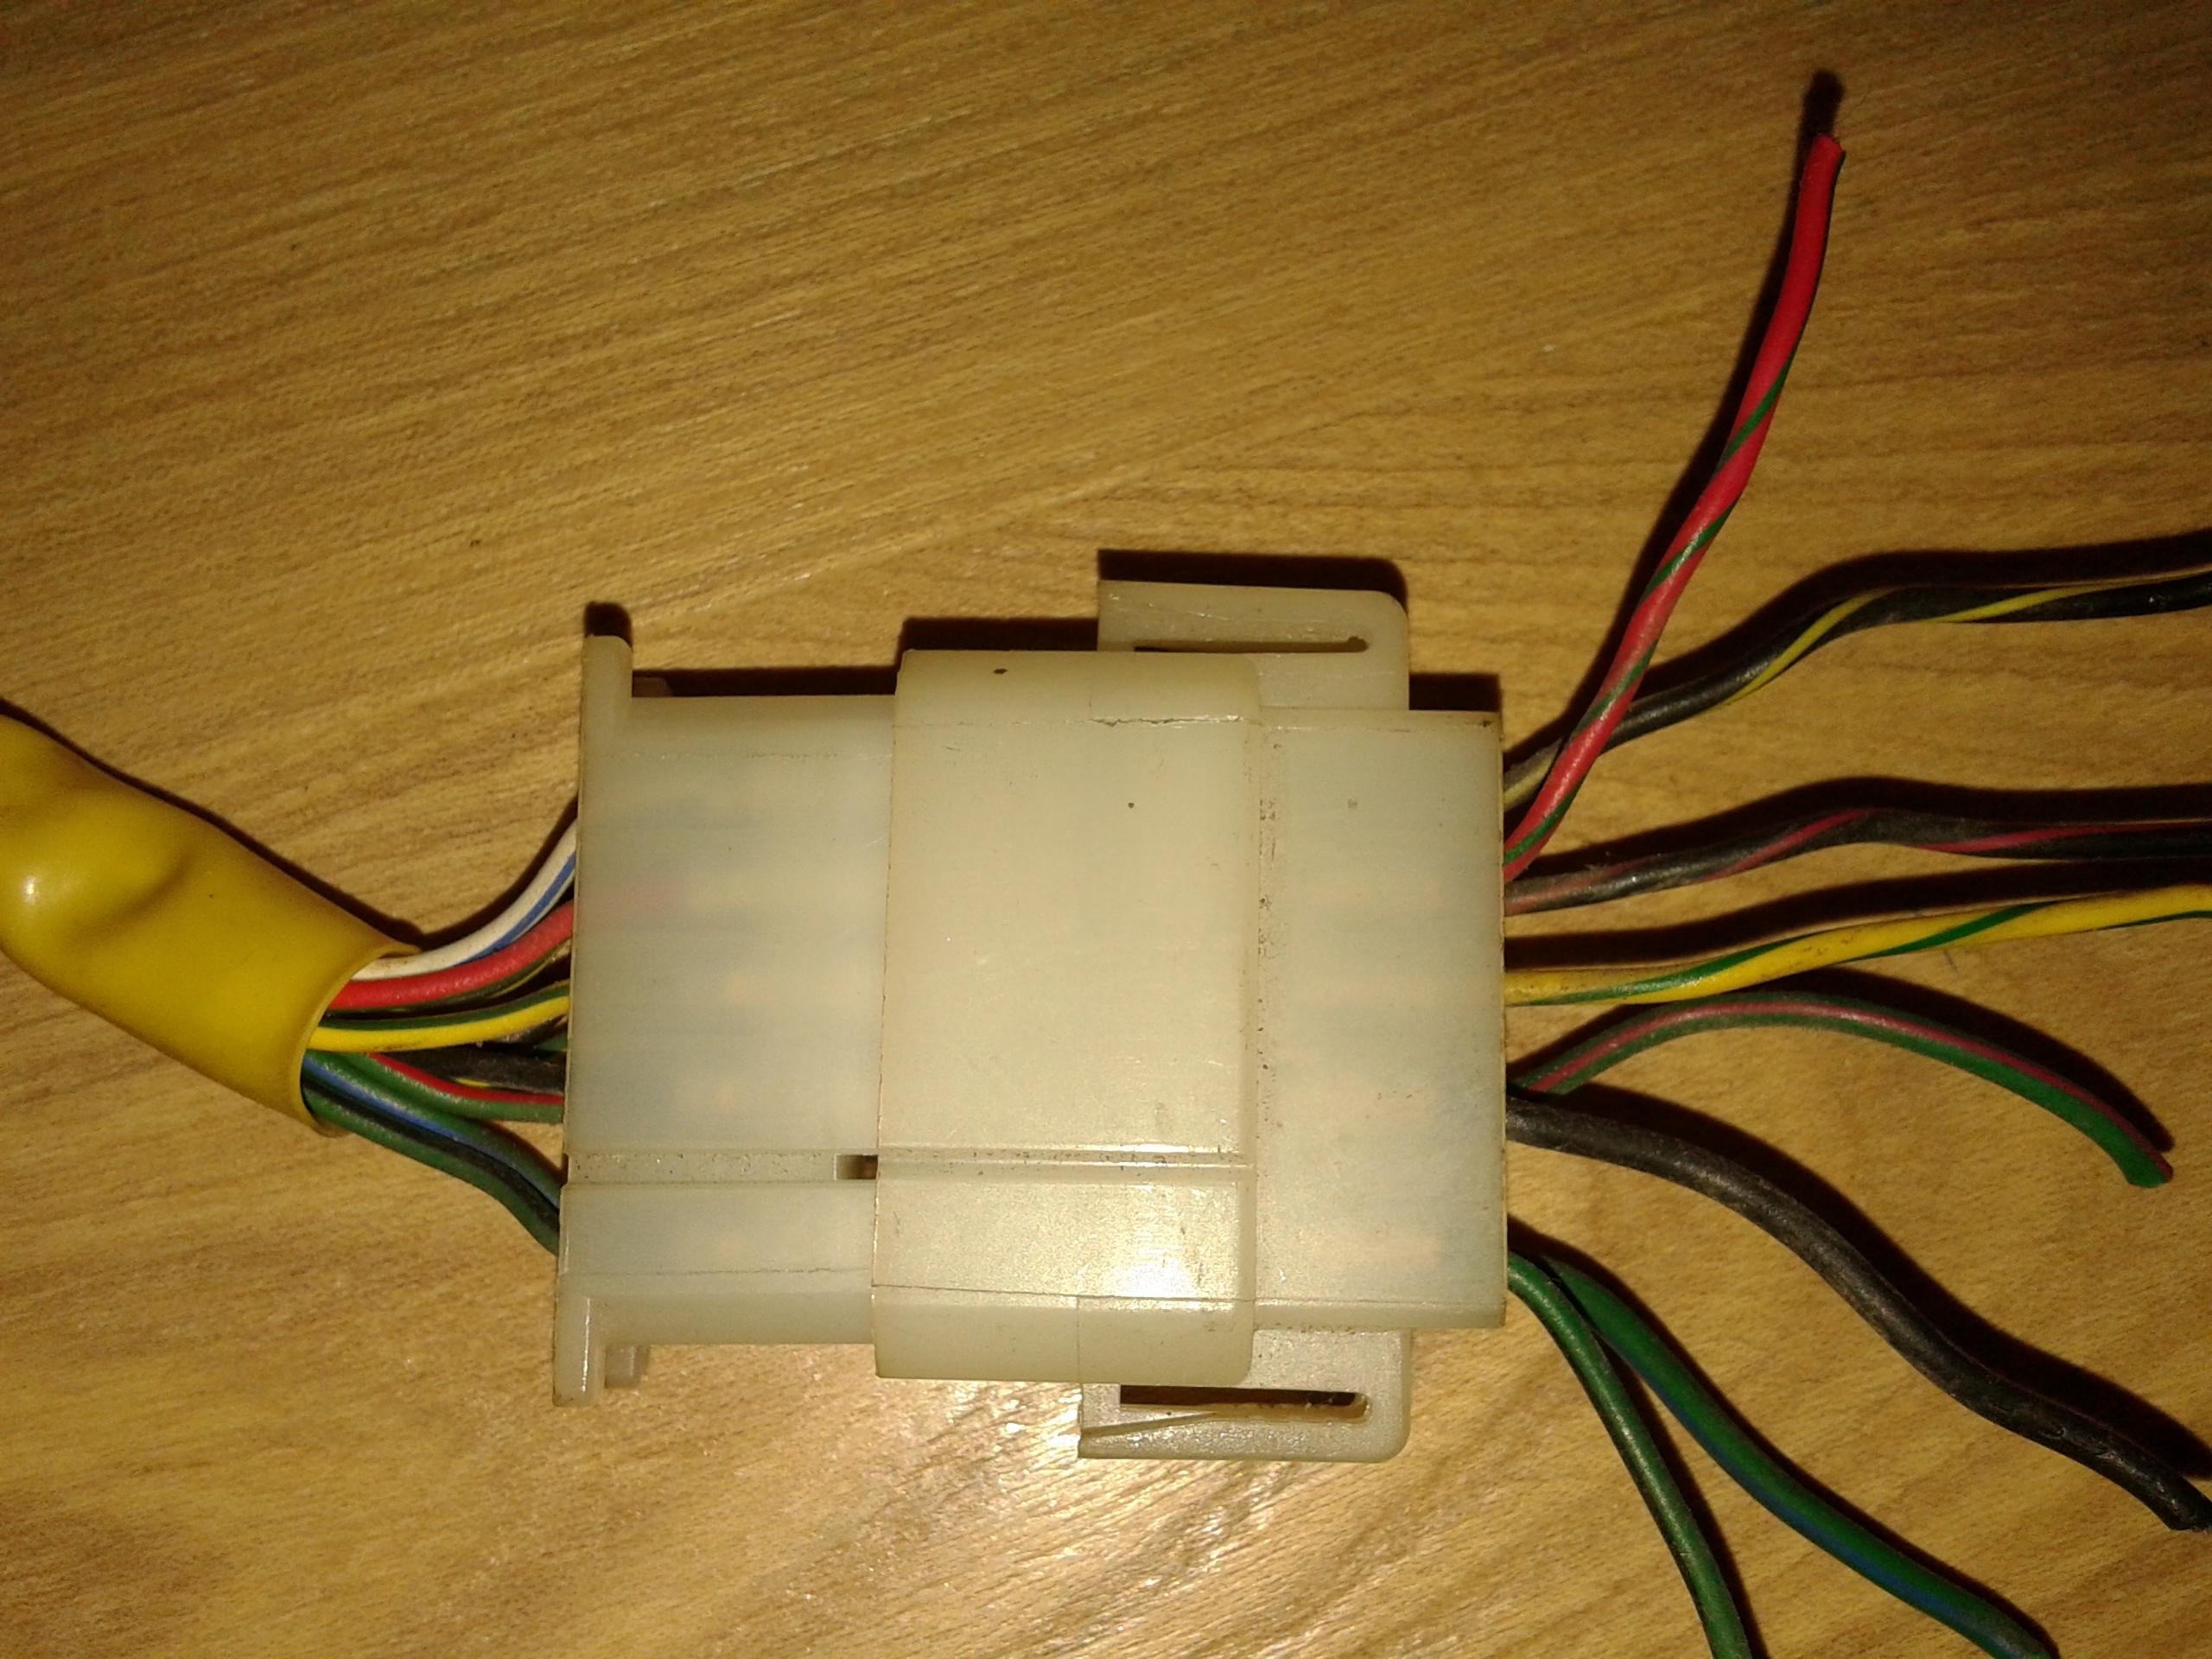
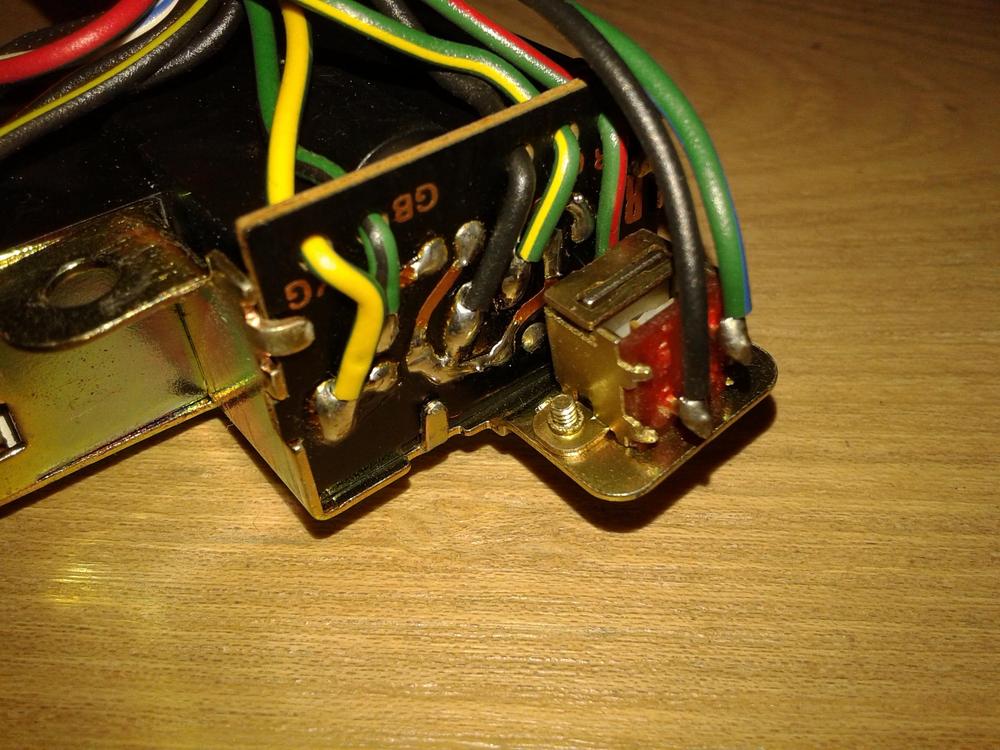
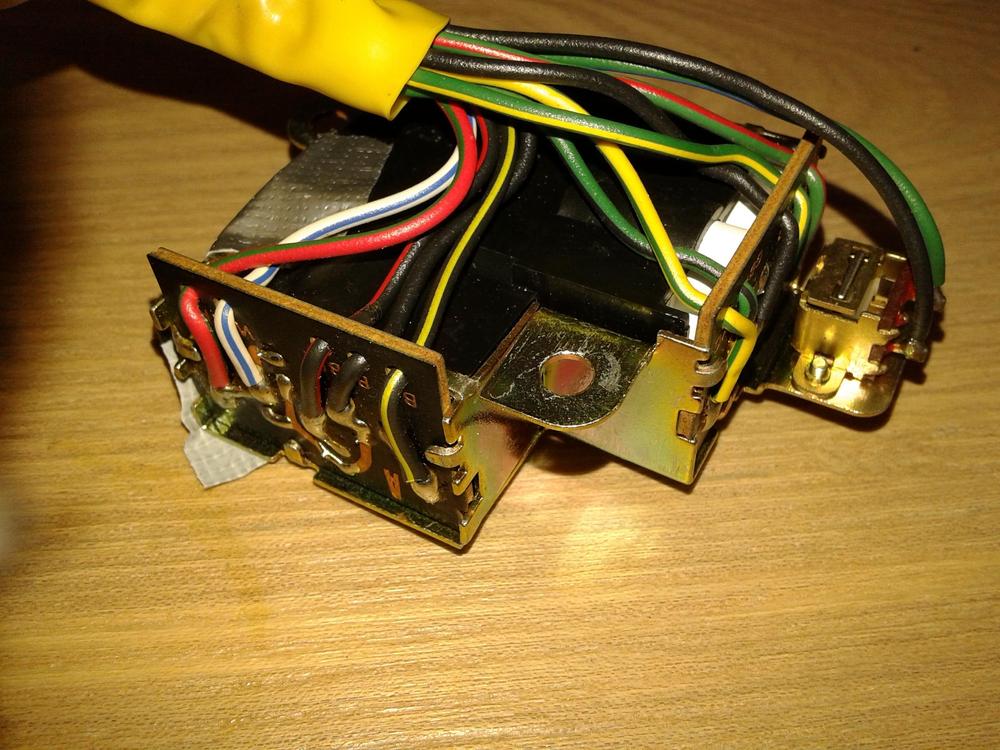
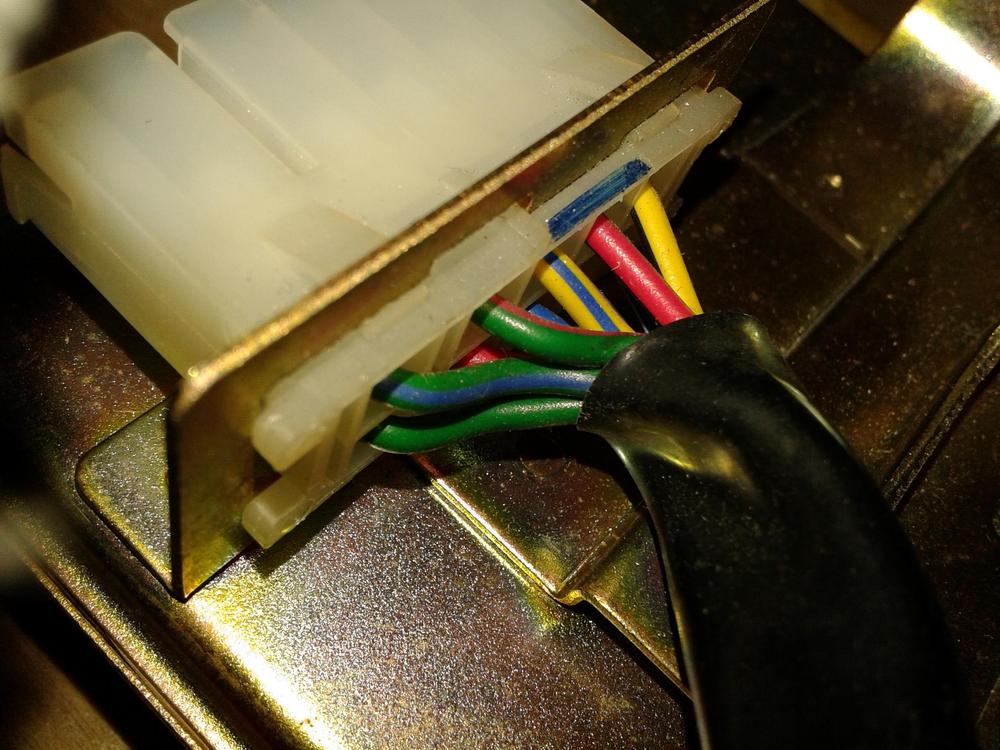
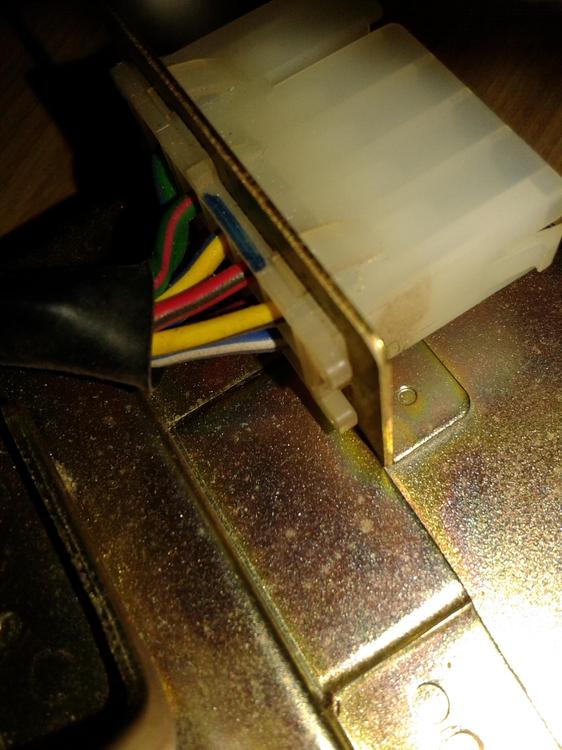
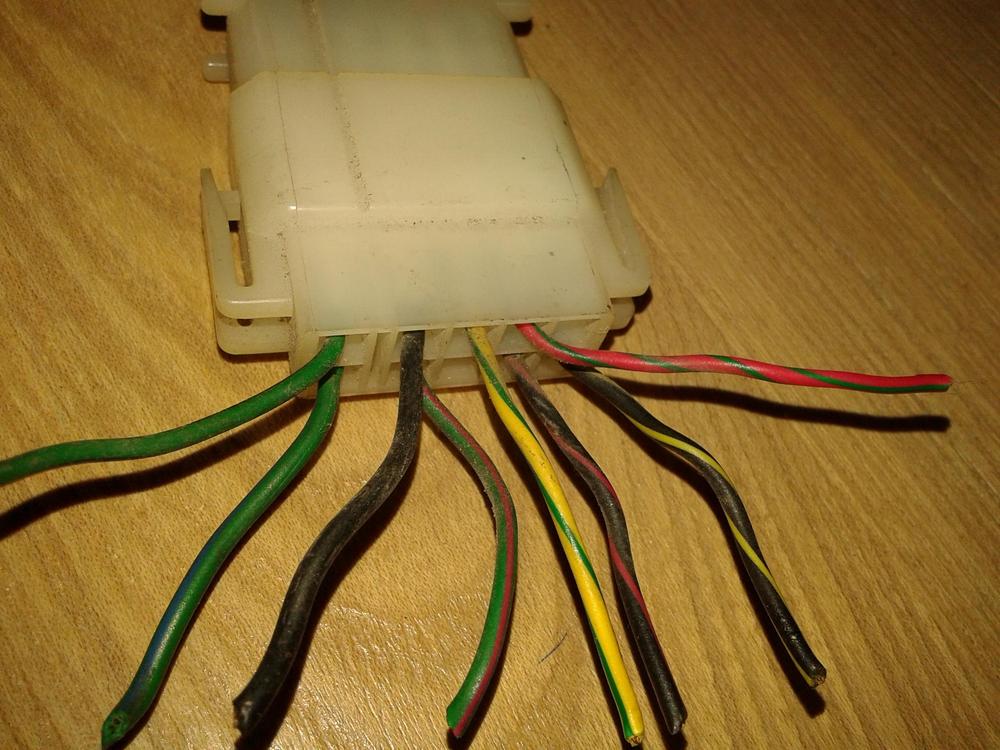
It looks like there are some lights in the top and right side of the unit, but i'm not opening this unit as it is in great condition. Since the unit has about 9 different wires, each display is simply activated by the ancillary sensor. If i had these sensors i could make a complete system for my own 280zx! The warning module is already in my possession
-
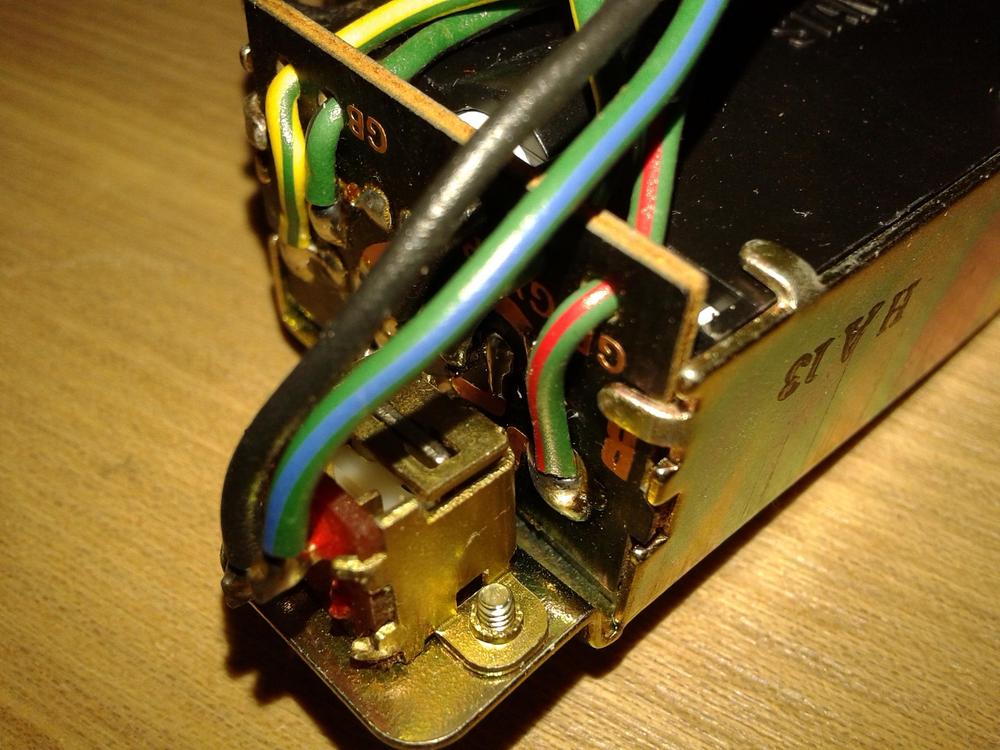
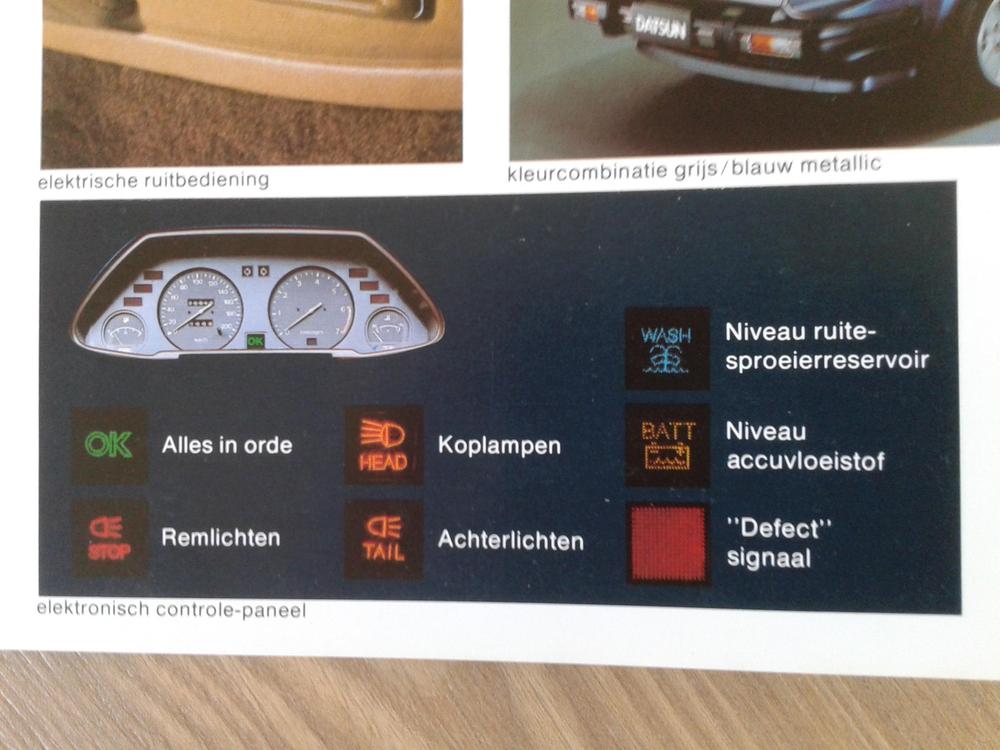
Hahahaha… yeah… one? it has got 3 of those! The switch has one, the print on the upper and on the right have both one.. haha but on the other end there is a 10 pole connector.. with only one black.. (yeah somewhere in the yellow sleeve is a 3 into one black..) Furthermore, i think i have seen such a display work long time ago and the STOP in this display is red.. (OK is green) and the rest is lit a sort of orange.. No... even more colors! Now i know where i saw one.. in a brochure! Learn a little dutch on the side CO! Hihihi… i think the display "car54280zx" (Don't know his first name.) see's is the last one.. haha "defect" signaal (signal) ! As you see there are 4-5 different colors in the display.. I got this pic out of a may 1st 1979 folder. btw.. the battery level.. going to be a little bit difficult with todays battery's ?
-
I think a shutter would be to complicated.. maybe just a small bulb or LED per layer? It has a 10 wire connector with 8 wires, 2 of them for the on-switch (they go separate to the connector) so there could be 5 signs to be lit.. There can be lights build in on top and from the right.. ( as you can see in pic 1of4) And… NO, i'm not going to open this unit! hahaha.. Maybe one day i need it for my own first edition slick roof 280zx..
-
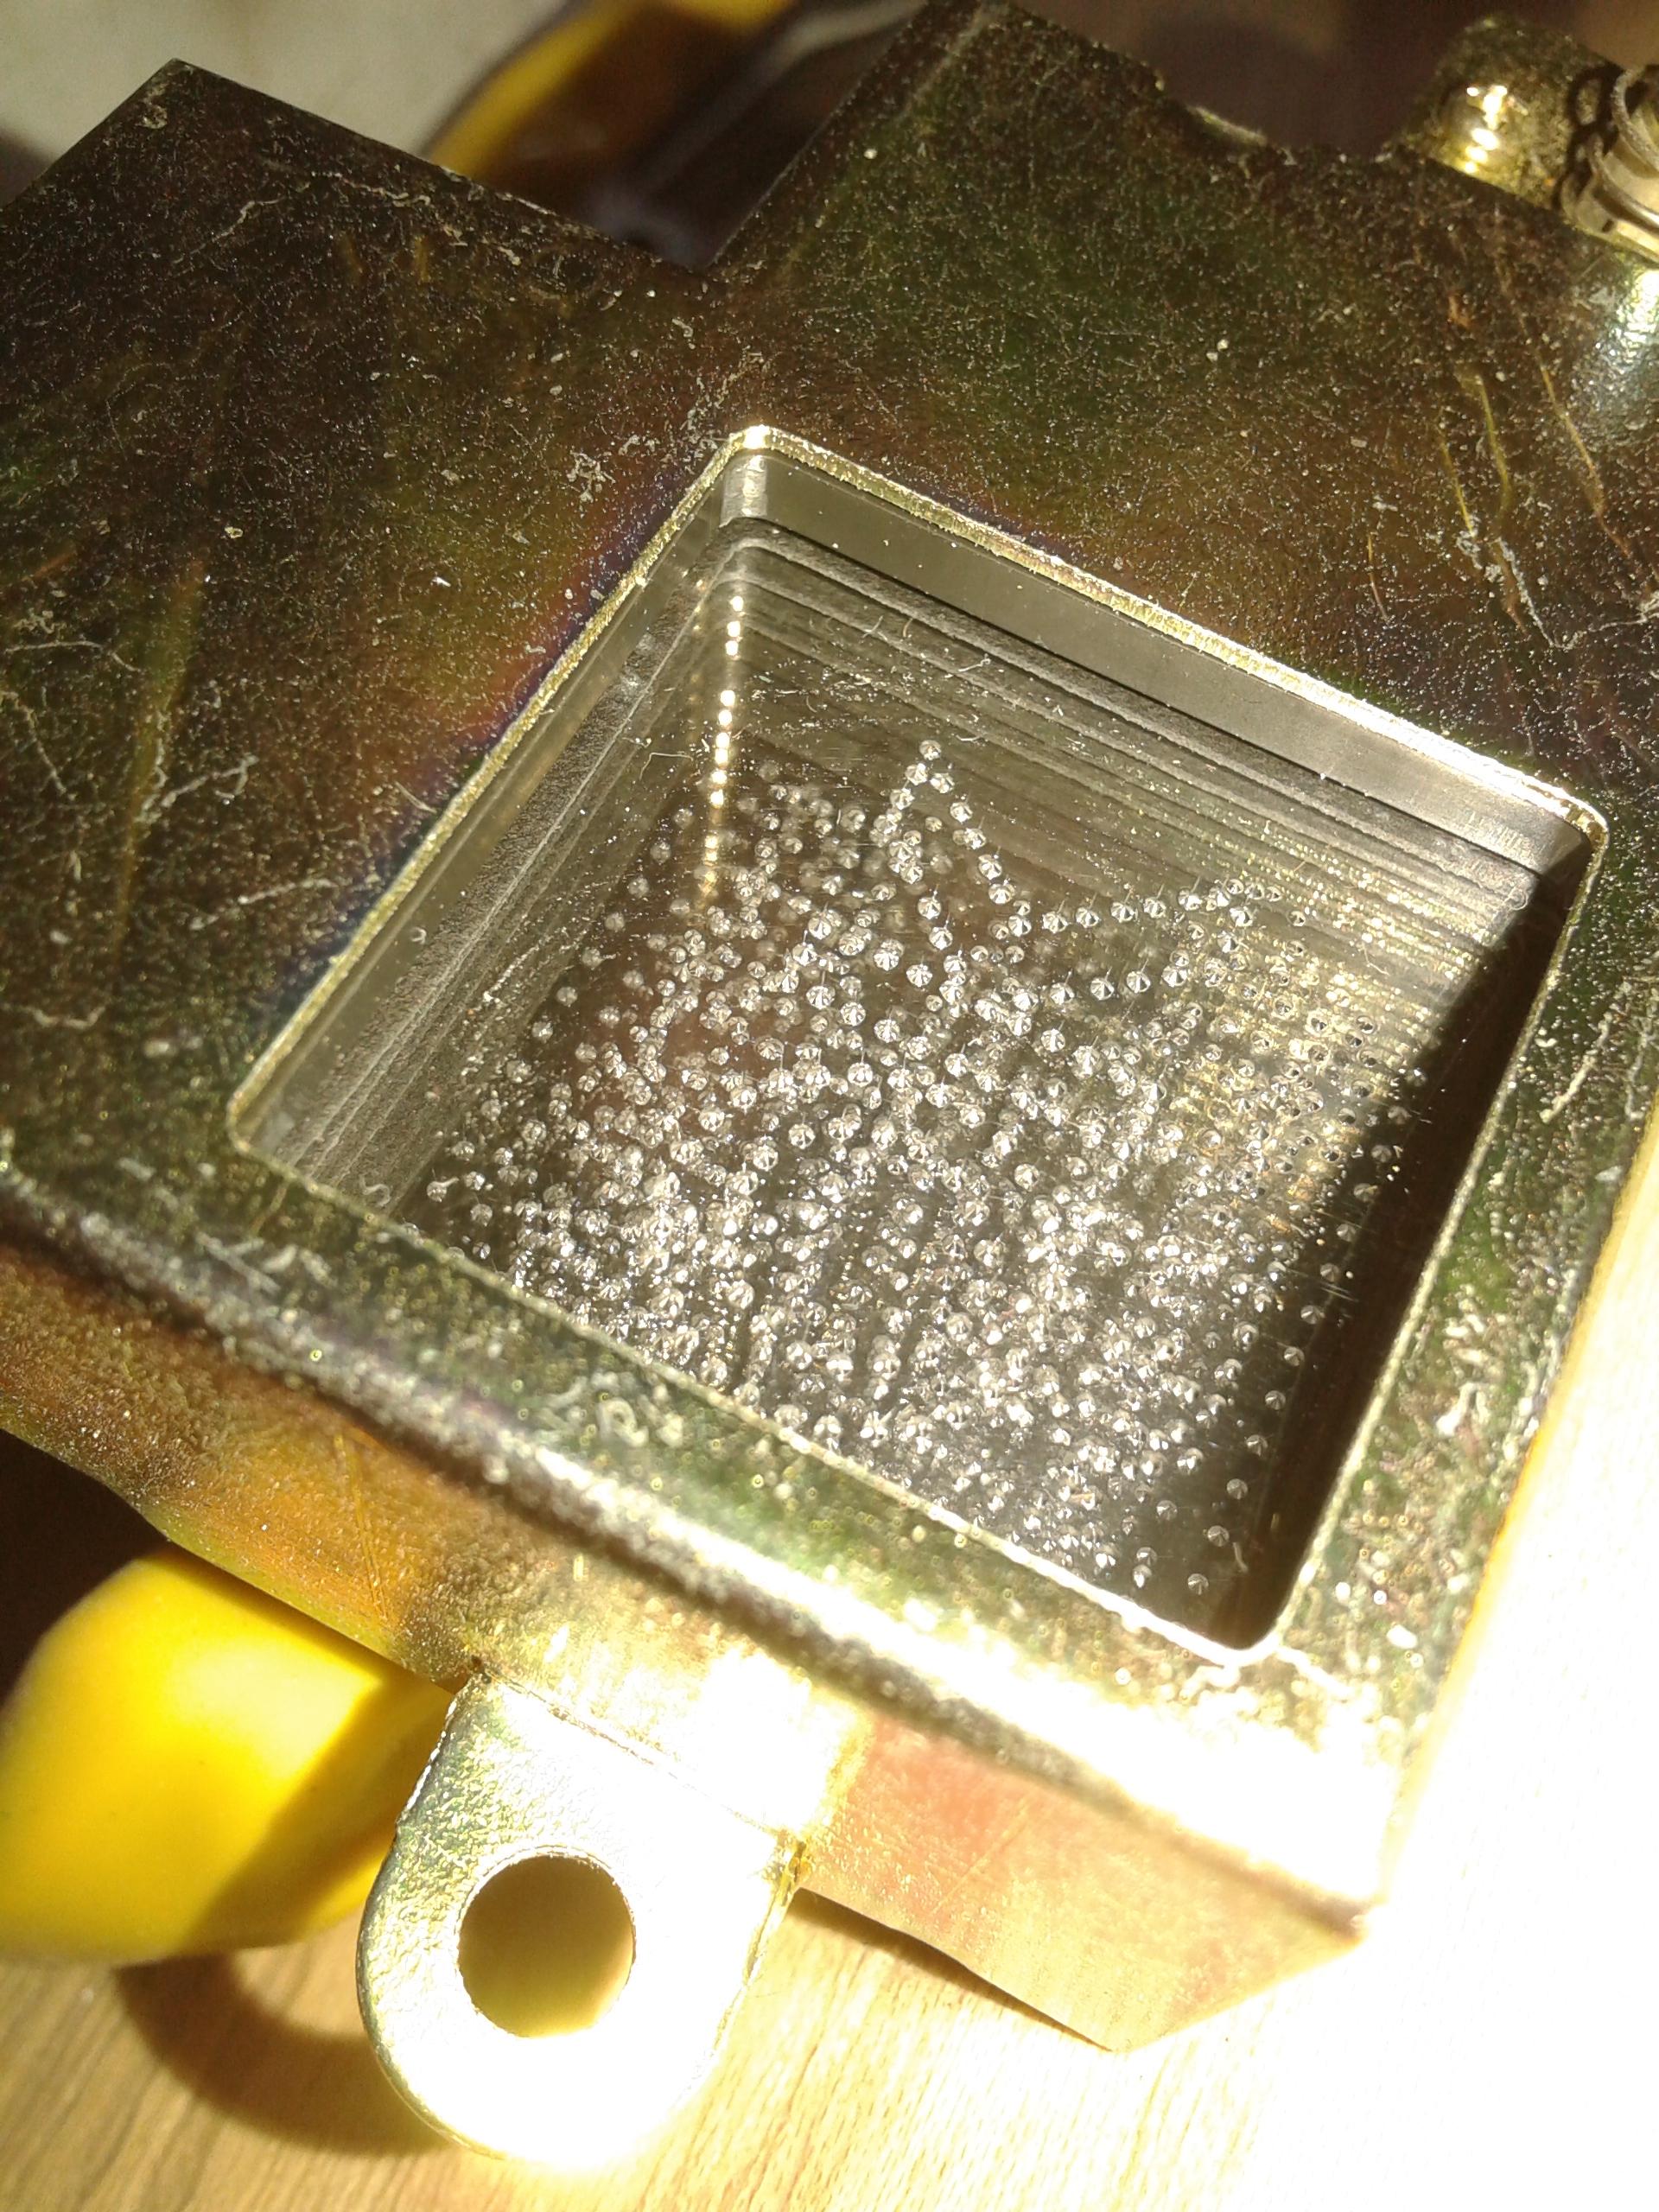
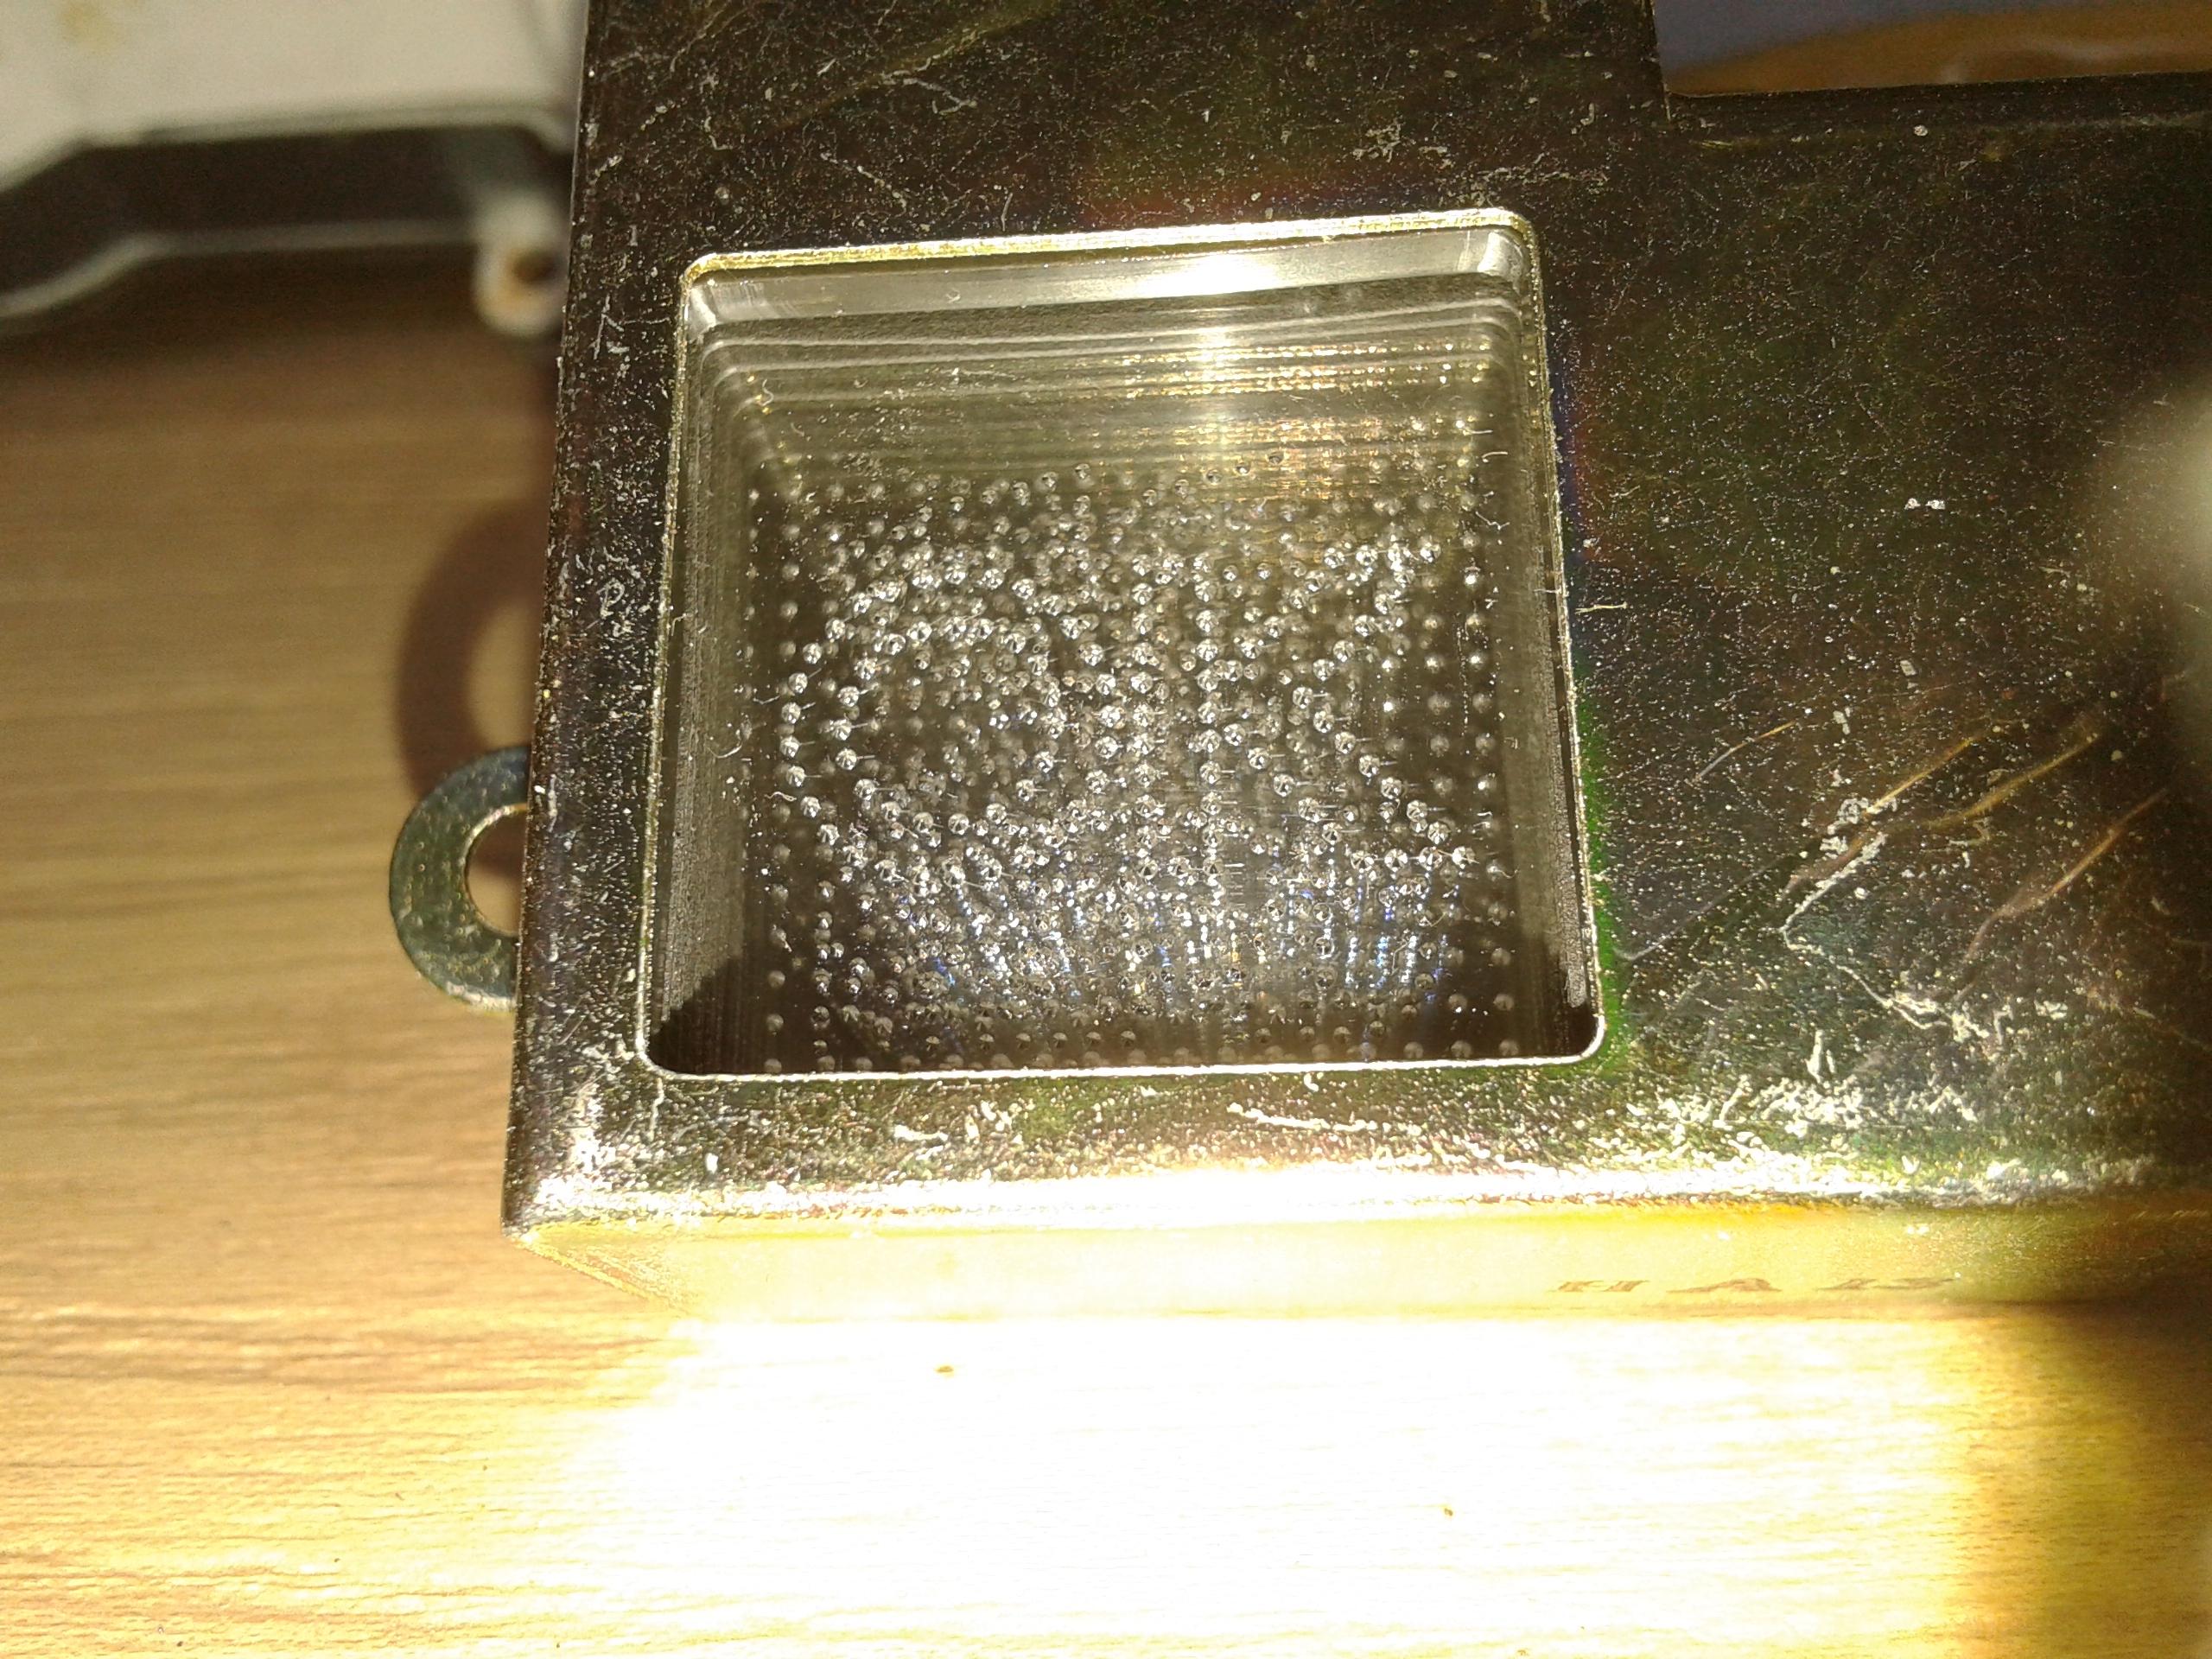
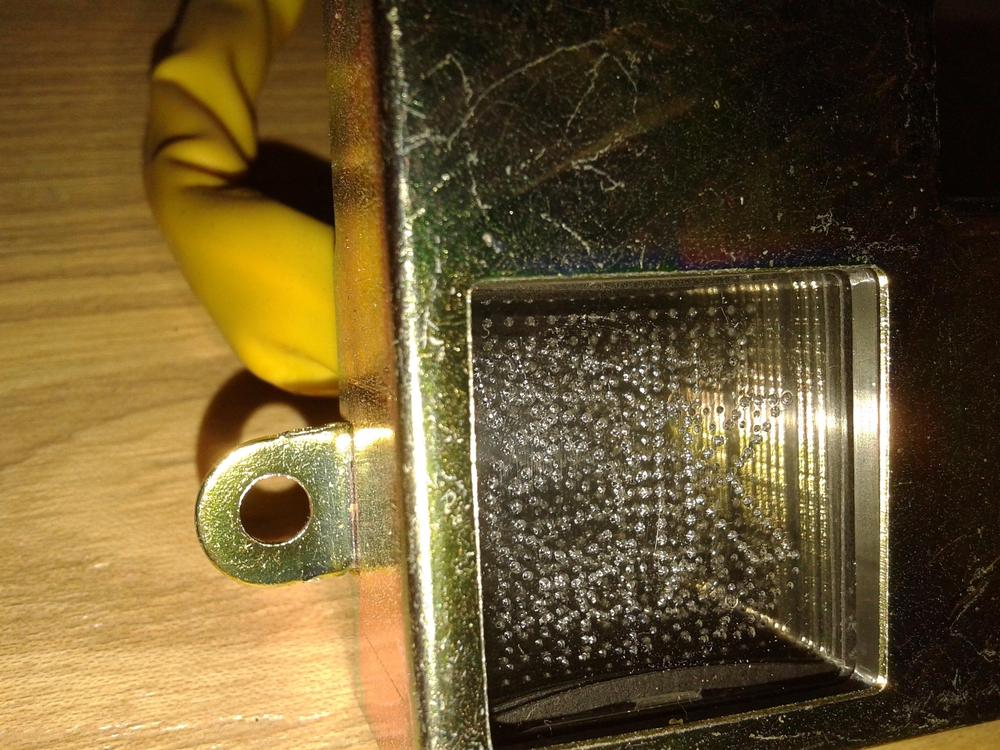
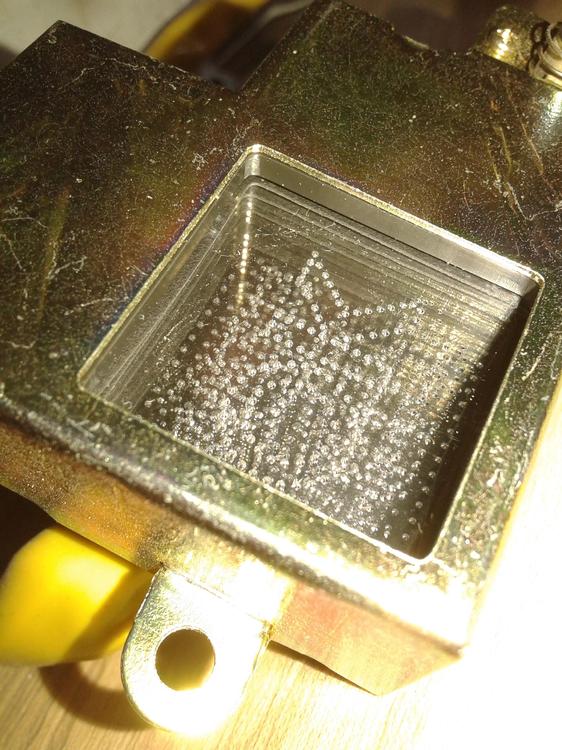
Now i wanted to find out what it is.. i looked if i got such a thing in my warehouse.. AND... YEP! got one! It say's: STANLEY on the back.. It looks like there is a little lightbulb in the right side of the display.. and the display is build out of layers of glass of some sort.. with small dots of glass on them.. Just by shining some light on the specific plate the sign gets visable.. What a cool technology! There are .. i took a good look in there .. around 20 plates of glass or ( i suspect) plexiglass in there, some have the pixels others are just dividers.. STOP is in front, then the headlight sign and OK comes next.. for as far i can see, behind those is the rest of the signs. By using a (colored) filter inbetween the lightbulb and the sign, these can light up in different colors!


-
In europe those parts would bring a lot of money..?
-
Yes CO, those are the right colors.. greenish for the OK and orange for the warnings, all of them.. so only the OK sign is green.. the trouble could be in the box with partnr: 25065 P7100 named : warning module..
-
So damn funny.. the swedish chef!
-
In 2001-2002.. something simular was a design for the, then new 350z...
-
My 240z feb.'71 has a E88 head Original.. HLS30-26074
-
Wow! I never used a Original nissan gasket twice! Can i get a full engine gasket set for my L24 (i got a reserve engine laying disassembled) from Kameari? (got an adress?) When my 280zx is ready i start on that engine.. it's a 48 year old engine that is in a very nice lightly used state!
-
Btw.. that thingy is it from a rear 240/260z (handbrake) assembly? not sure.. (It sits on the handbrakecable?? near the rear brake )
-
Are you telling that you had the engine apart and put it together with the OLD HEADGASKET ??? I never met anyone who did THAT!!! The gasket is for me.. a 1 time use only. Who of you did this also, i would like to know! (a used headgasket is useless to me! dented and no longer good sealing properties.)
-
It's gone…. the advert. ?
-
This last week… sitting at home... Corona.... After 6 years of working and waiting, this virus is now the thing to stop me from restoring this damn car… oh well... just have a little more patience... pffff… Almost ready for primer.. Only one person is working in the shop! (and a few in the office but most metalworkers and painters are at home.. For me as a (more or less) disabled person, nothing much has changed (due to corona) … meeting even less other people.. sitting in my chair behind my pc... wondering when i can start painting the damn thing.. oh welll….patience..
-
?? An Original euro bumper?? A euro bumper is exactly like the US. bumper.. it has no rozets on them just the rubbers and 2 rubber studs in the holes where in the US type sit the rozet's or bumperettes.. The bumpers without the holes (also for the rubbers to fit) where aftermarket ones, they never sat on a Original 240Z.. (EDIT: as explained to me, i learn still every day.. the JDM fairlady hád the non rubber holes bumperbar!!..) i do have a few sets Original bumpers, front and back...(240z as in europe and USA.) just a little rust in them not on them.. old chrome..old rubbers..
-
That's most times what's killing it.. The capacitors (electrolitic) now fail.. after a long time of "no power"on them they disintegrate/dry up.. You have to check the whole system.. don't know if there is but i think there should be a wiring diagram of the system in the service manual..
-
What's the problem with your display.. there are lots of automotive electrics repair people in the States i guess? Put some pic's of the electronics here, maybe we ( @Captain Obvious ) or me .. can help you ?
-
Isn't that citrus yellow?? i've seen no green car? ?
-
I can't take it any longer… i'll take a few days off.. away from this site..
-
If it was near me.. it was gone for sure.. then i build me another 240z.
-
Get the seals out and wash them in a normal wash detergent, they will get soft and flexible.. leave them in the detergent for a few days or even a week. Then you can use siliconespray or there is some special rubber spray for doorrubbers to keep them soft, also used for not sticking rubbers when it freezes.. good luck!
-
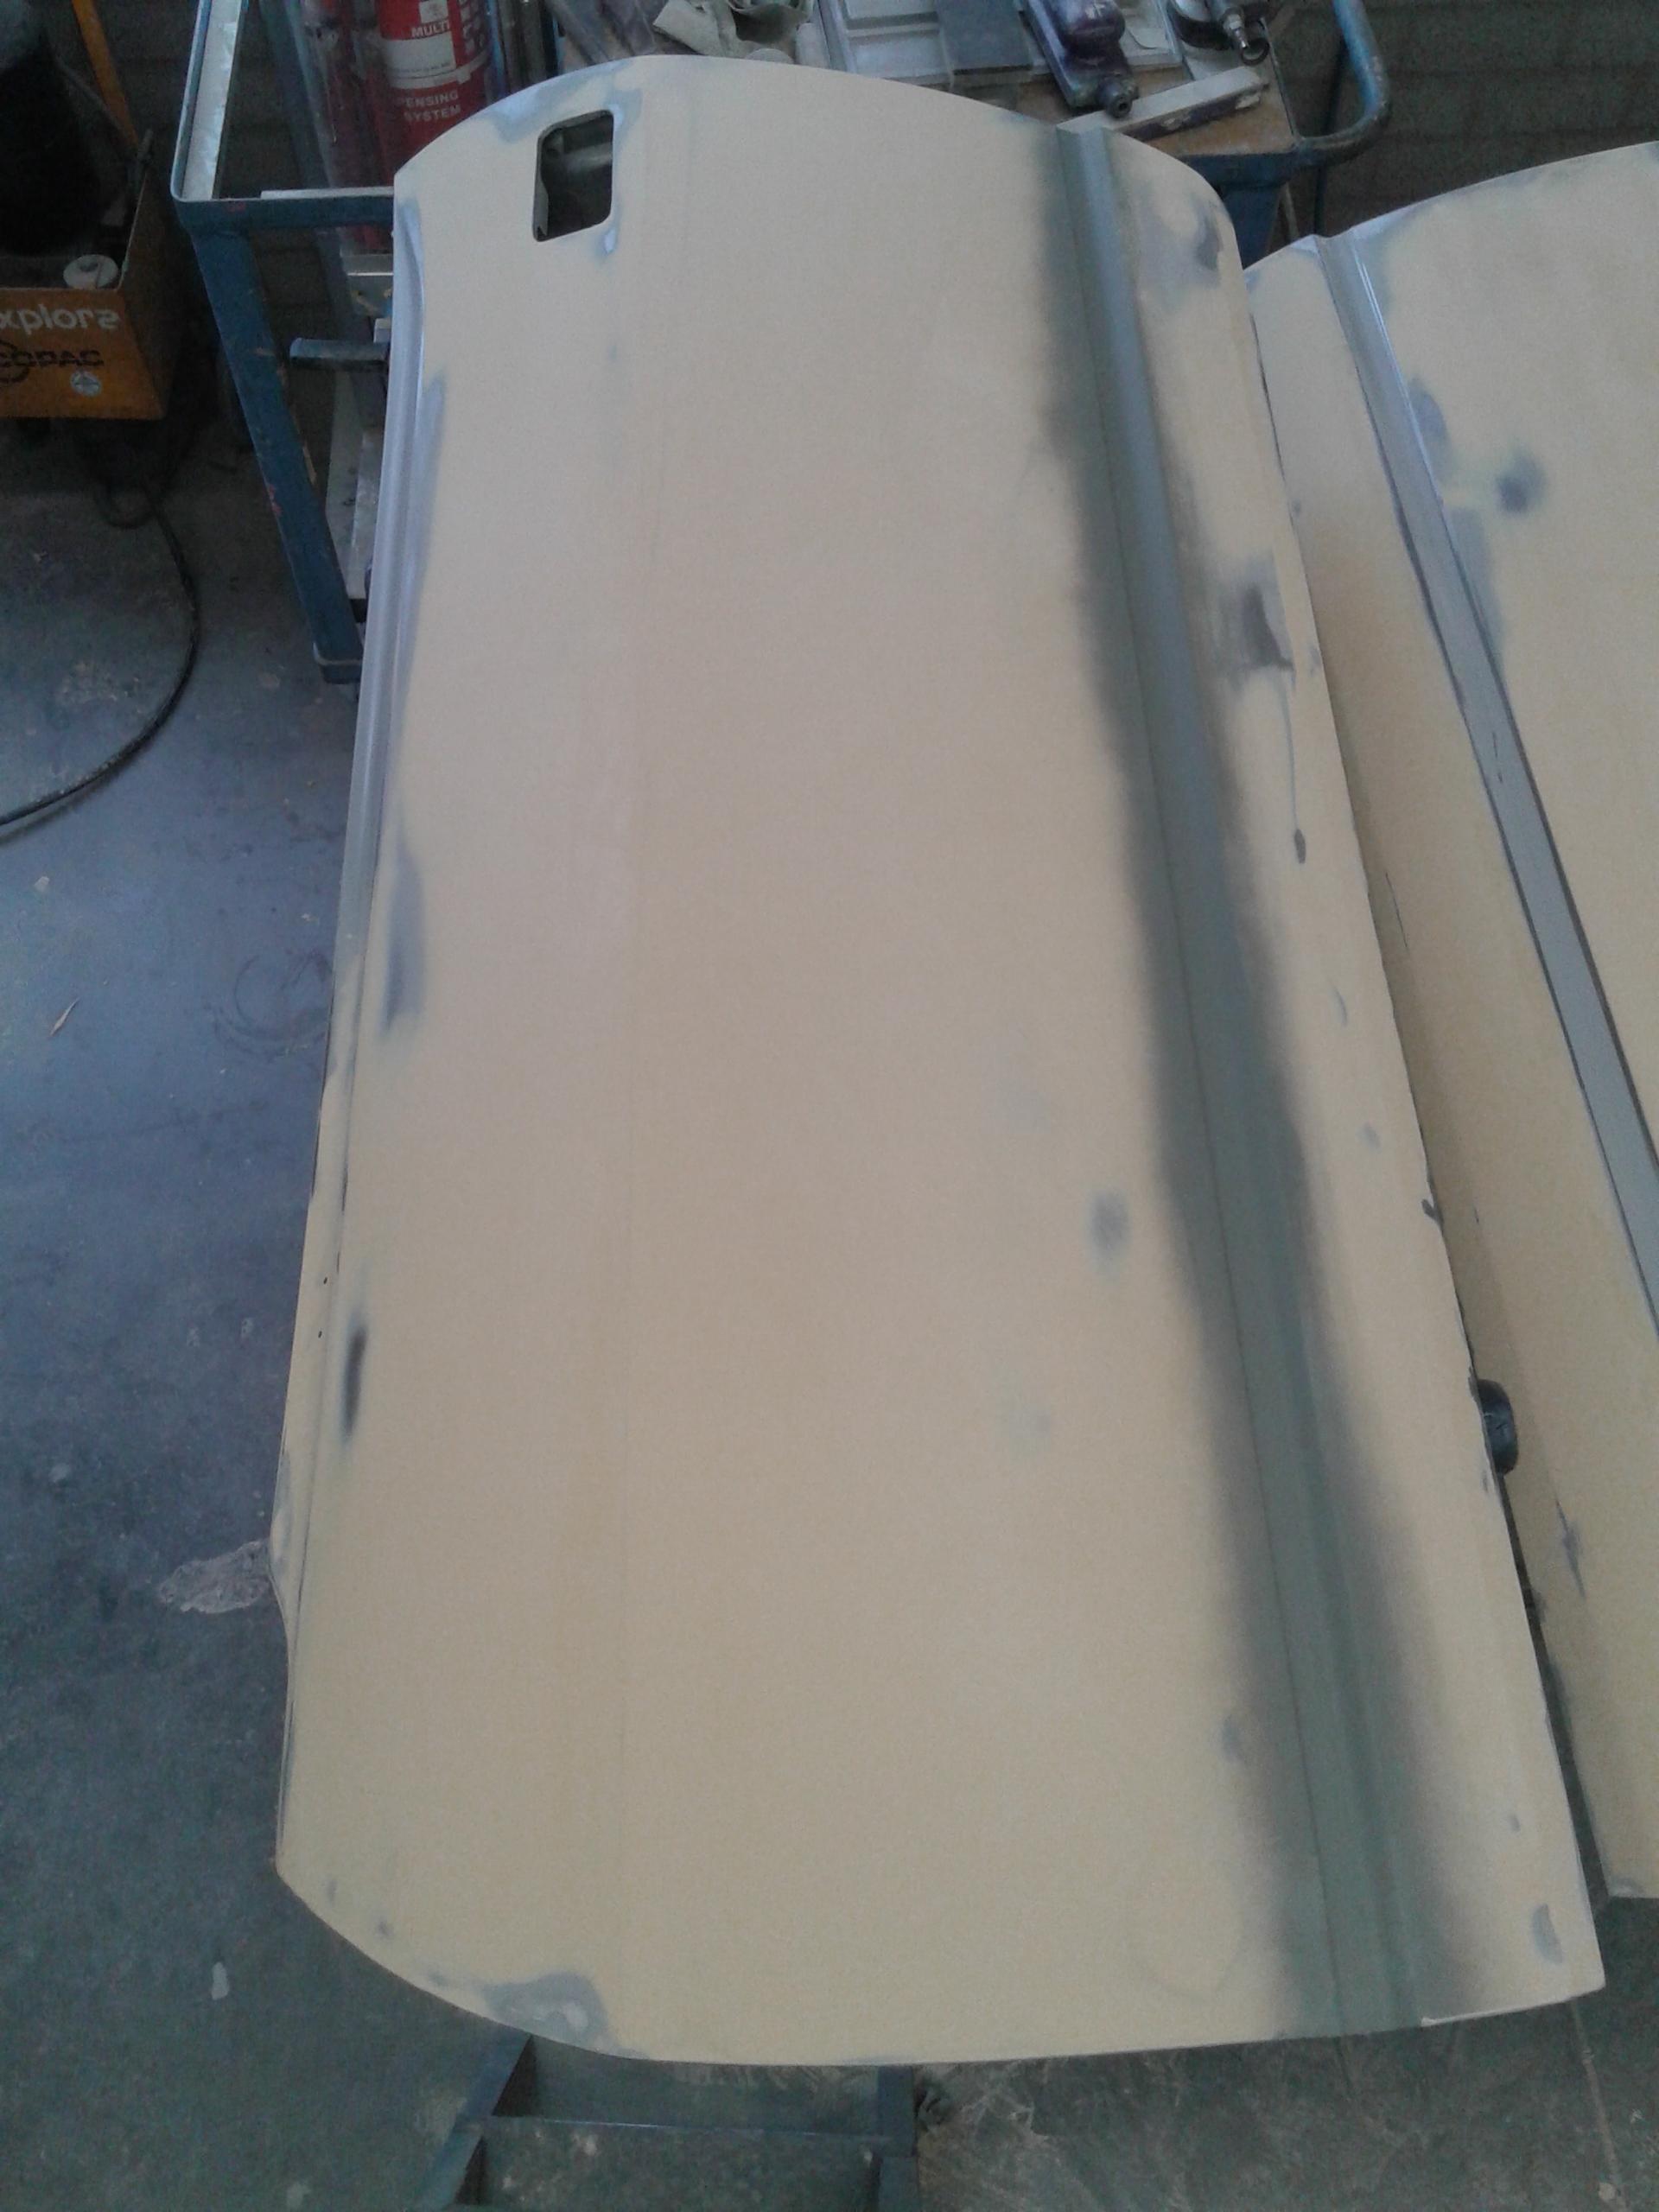
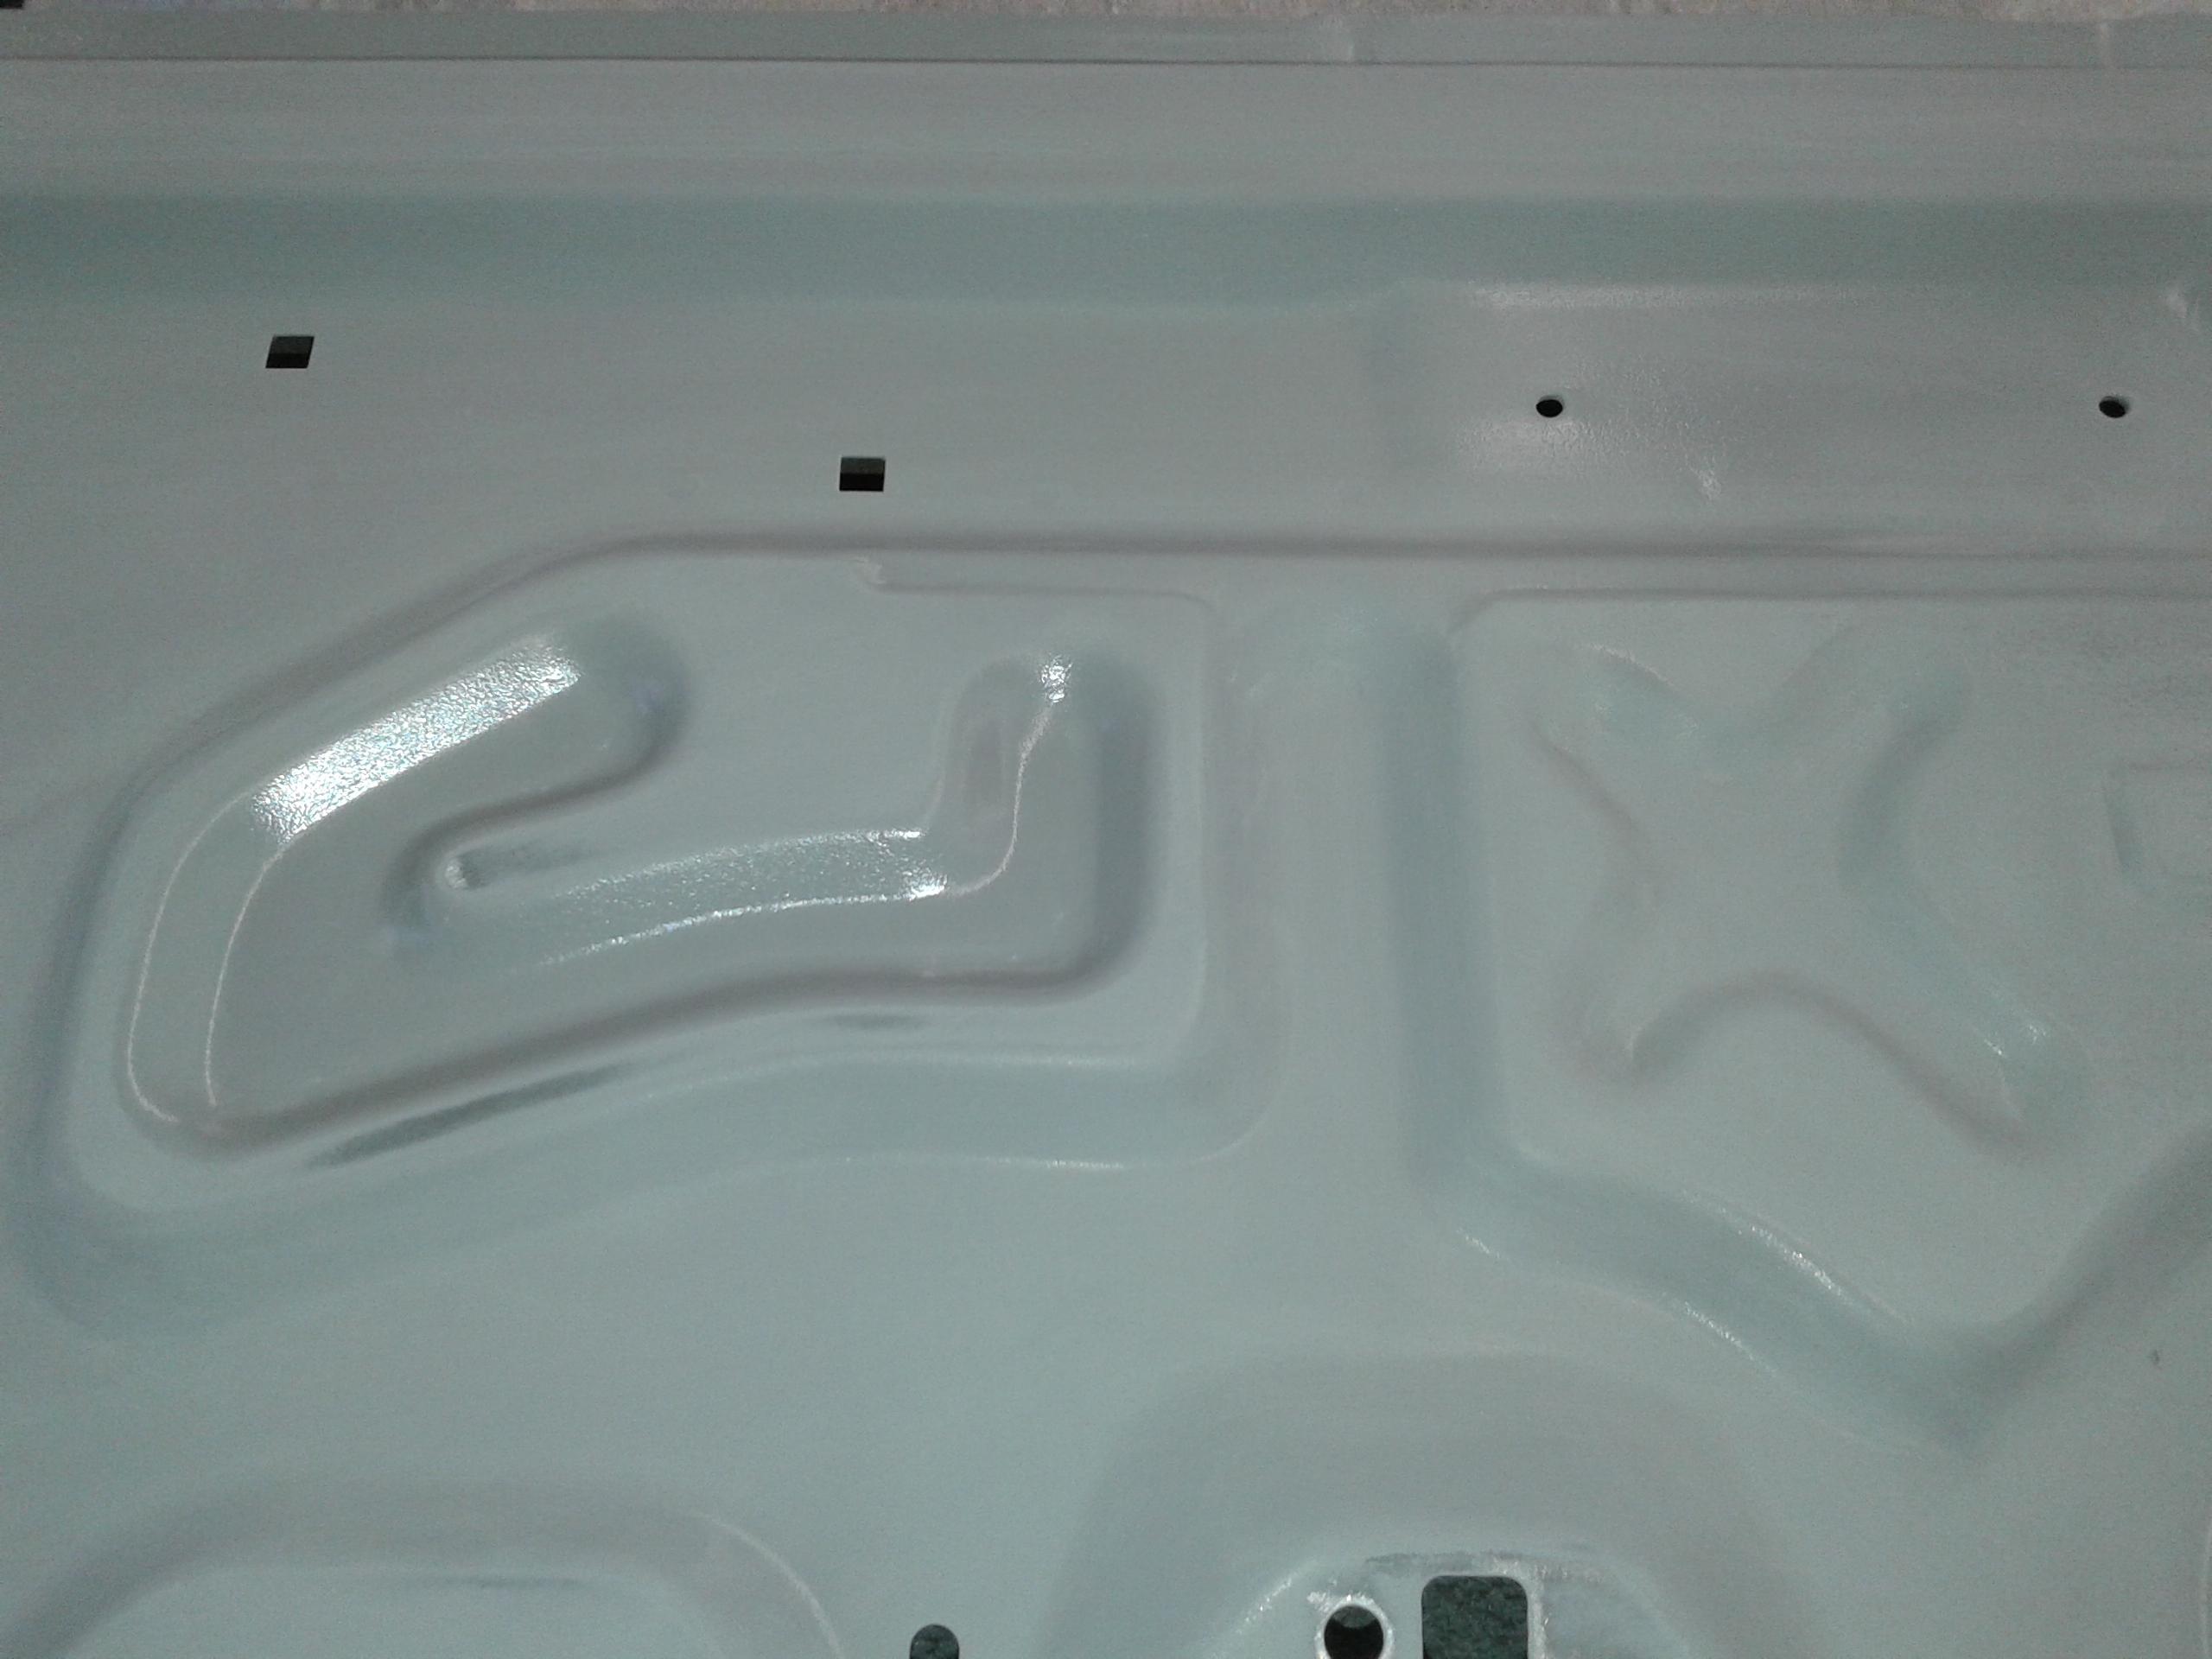
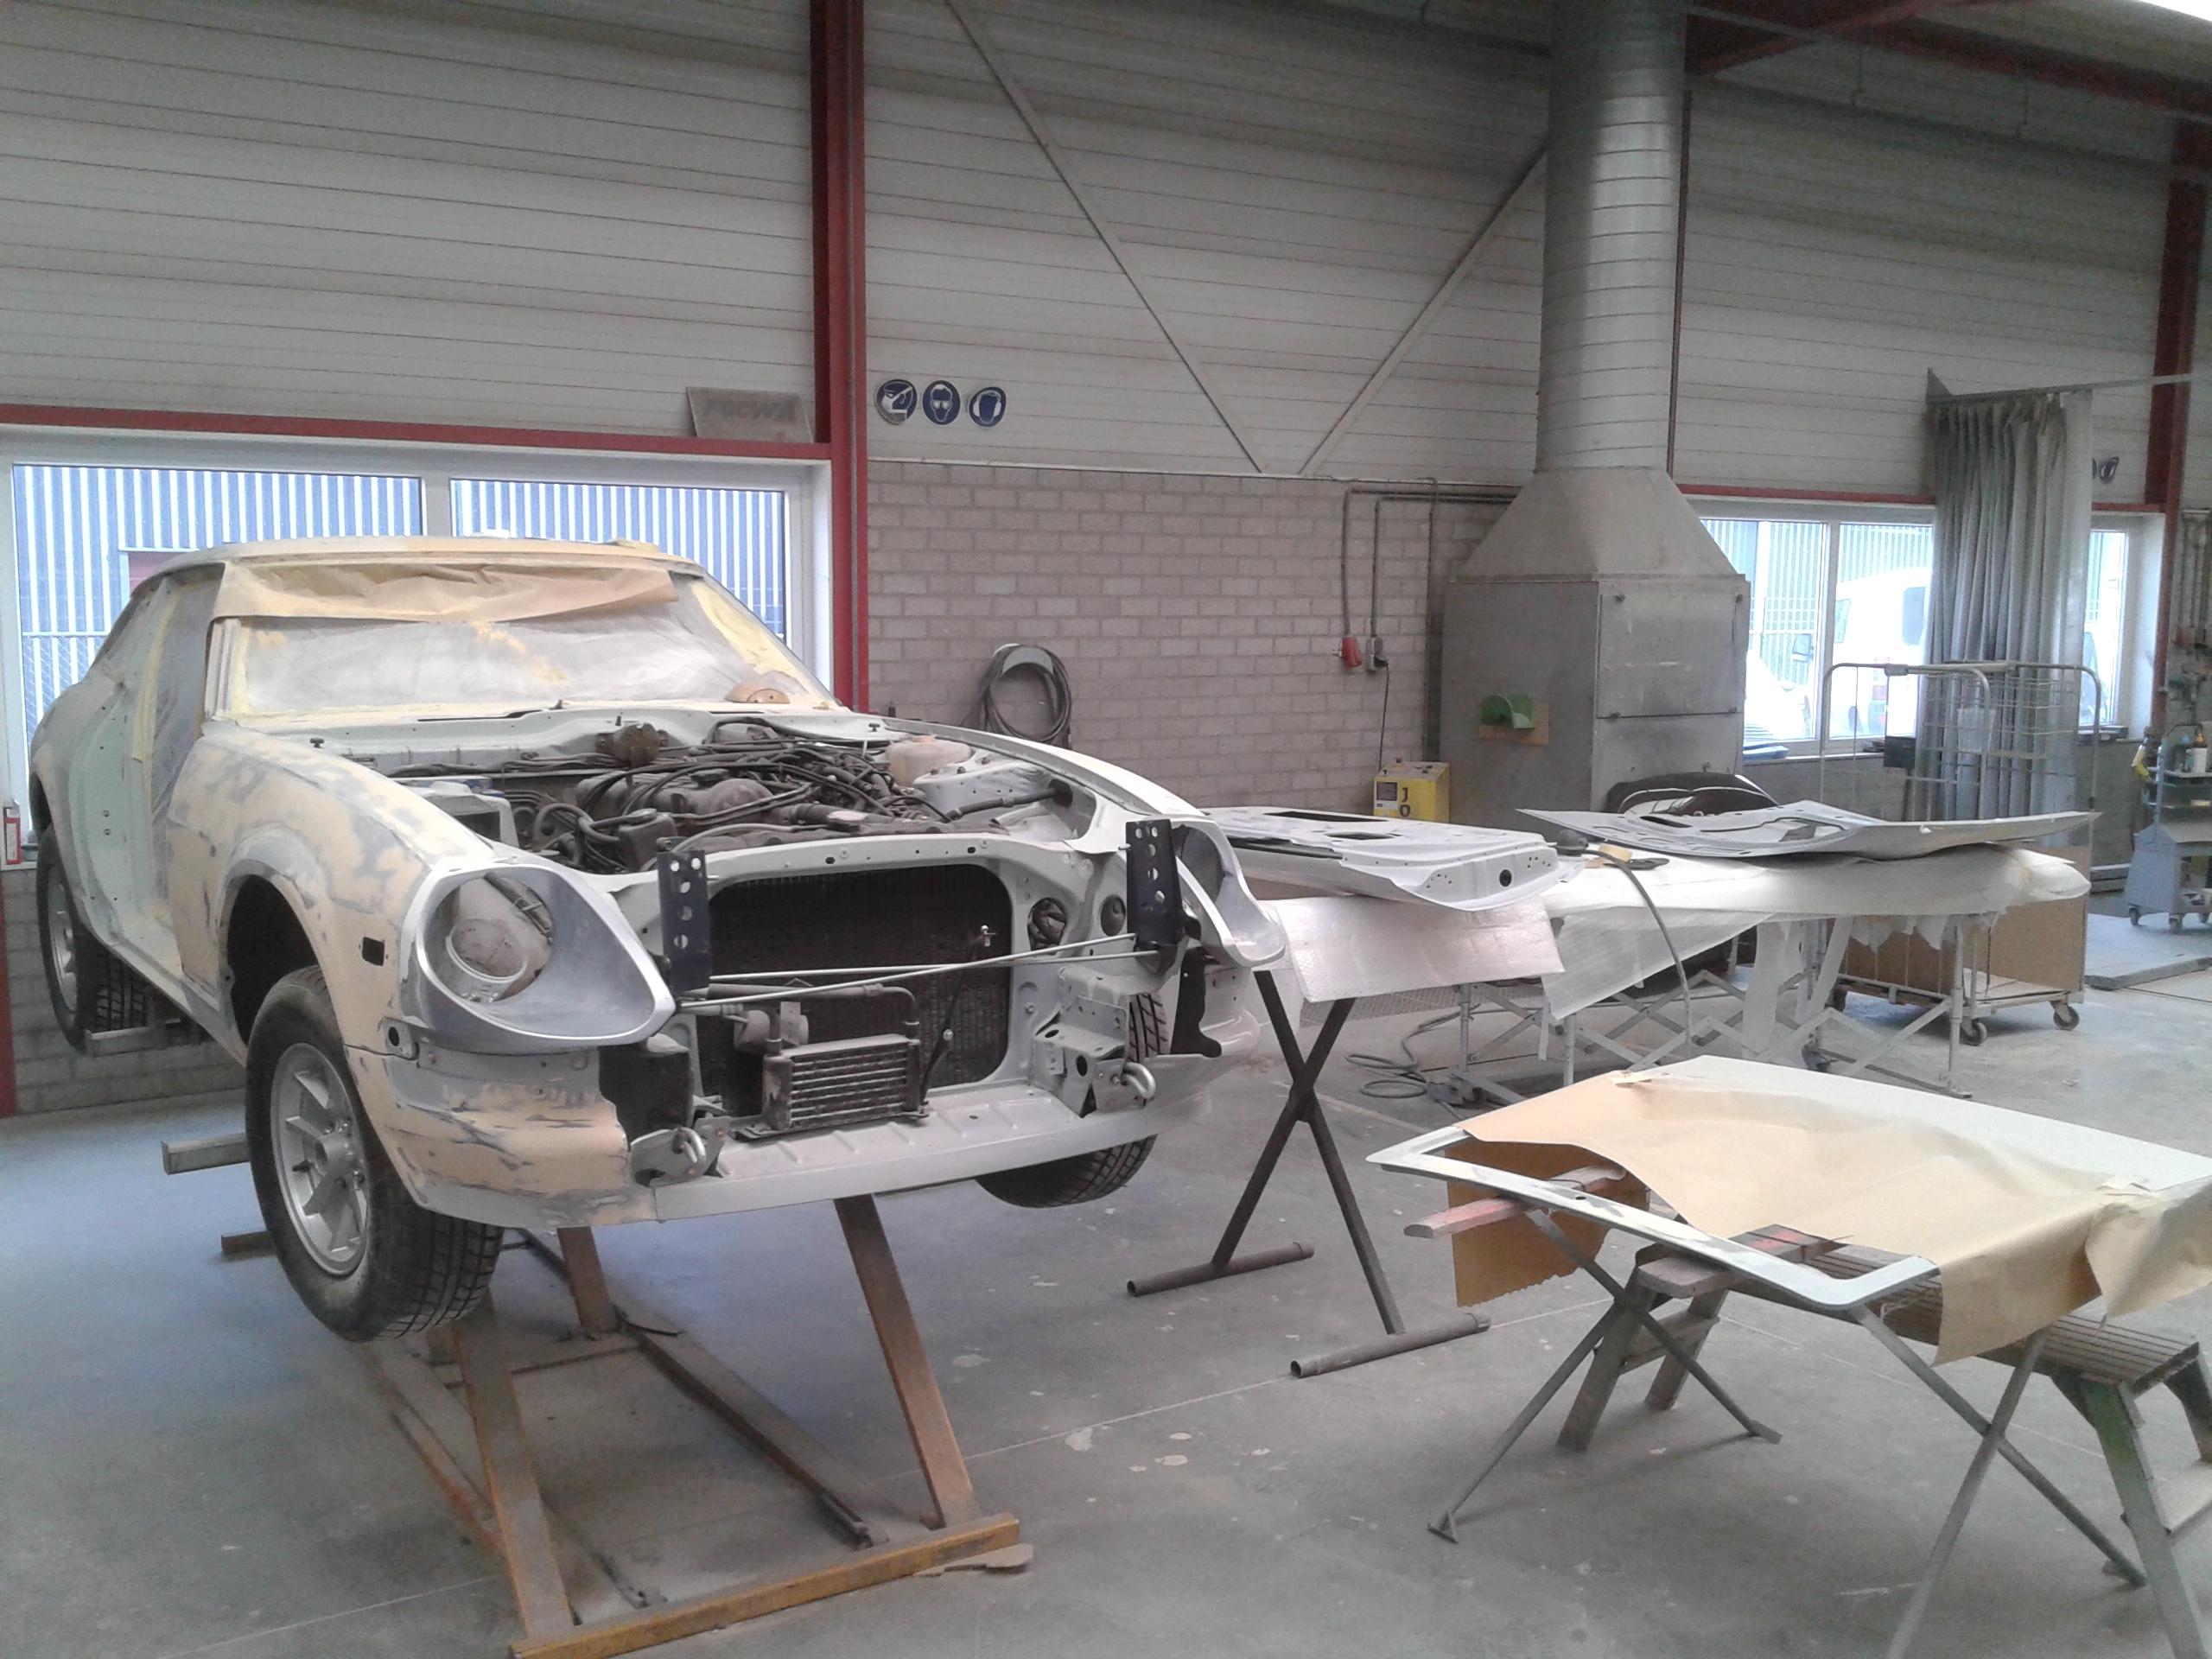
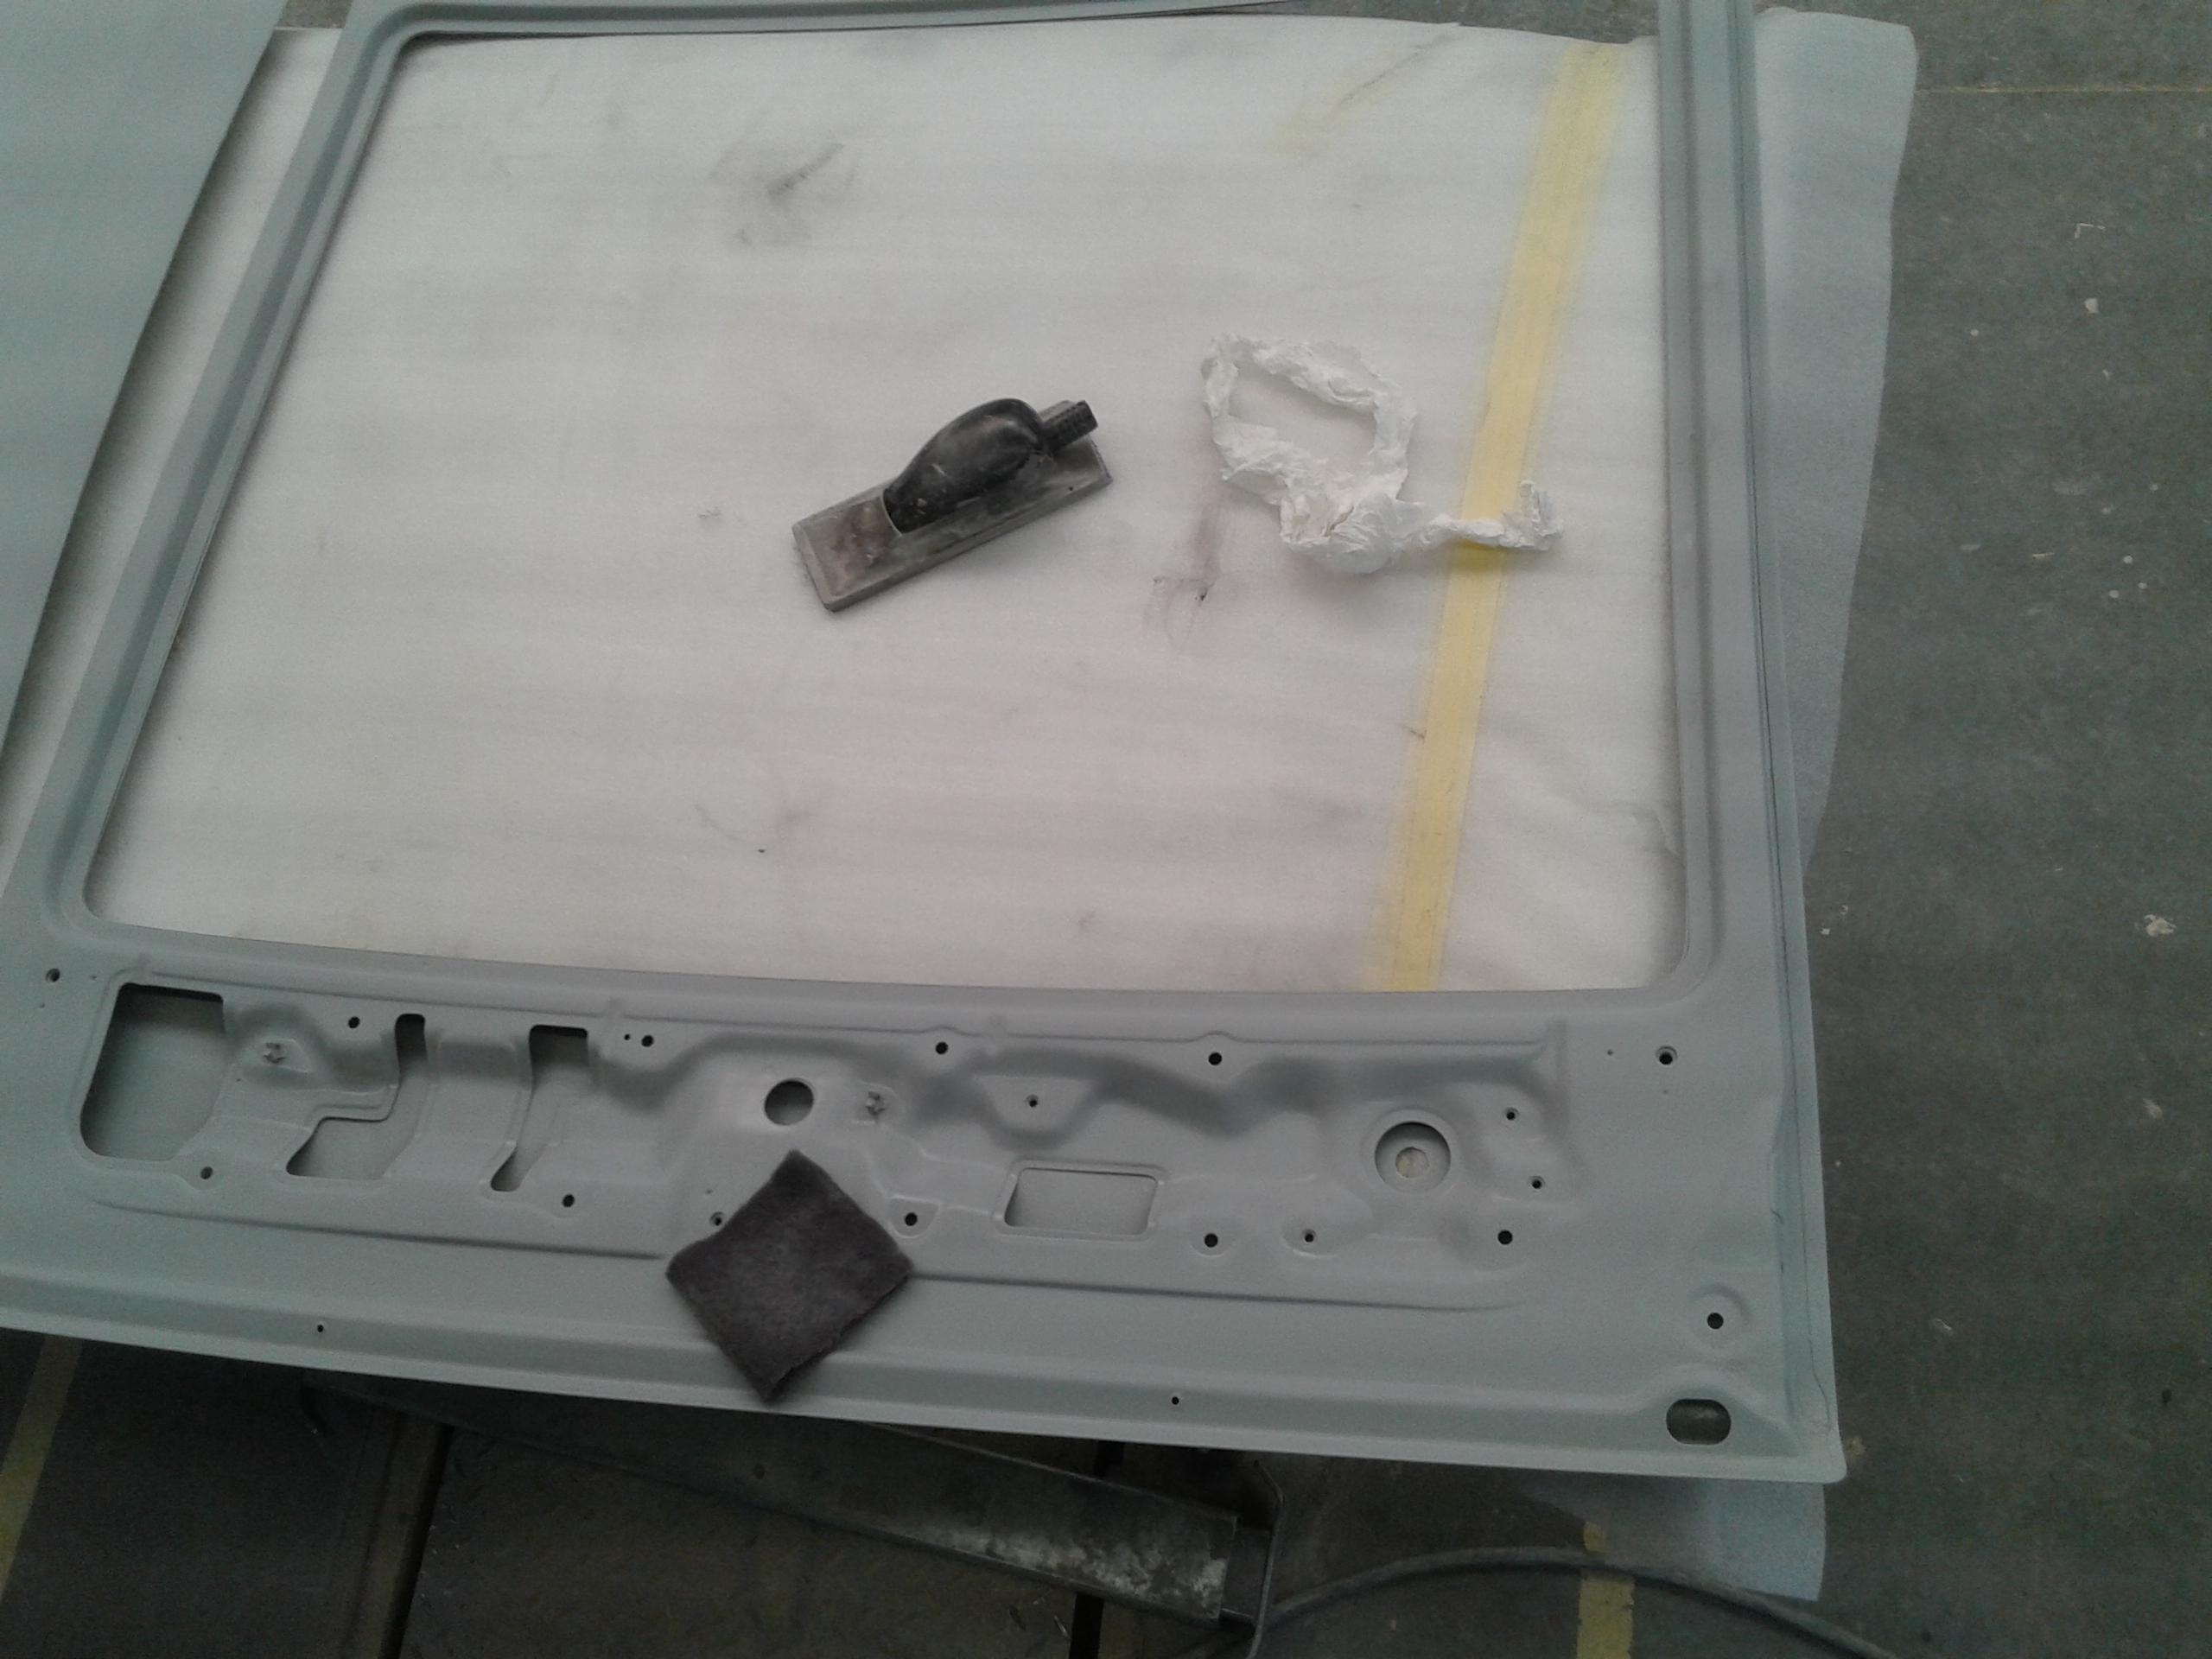
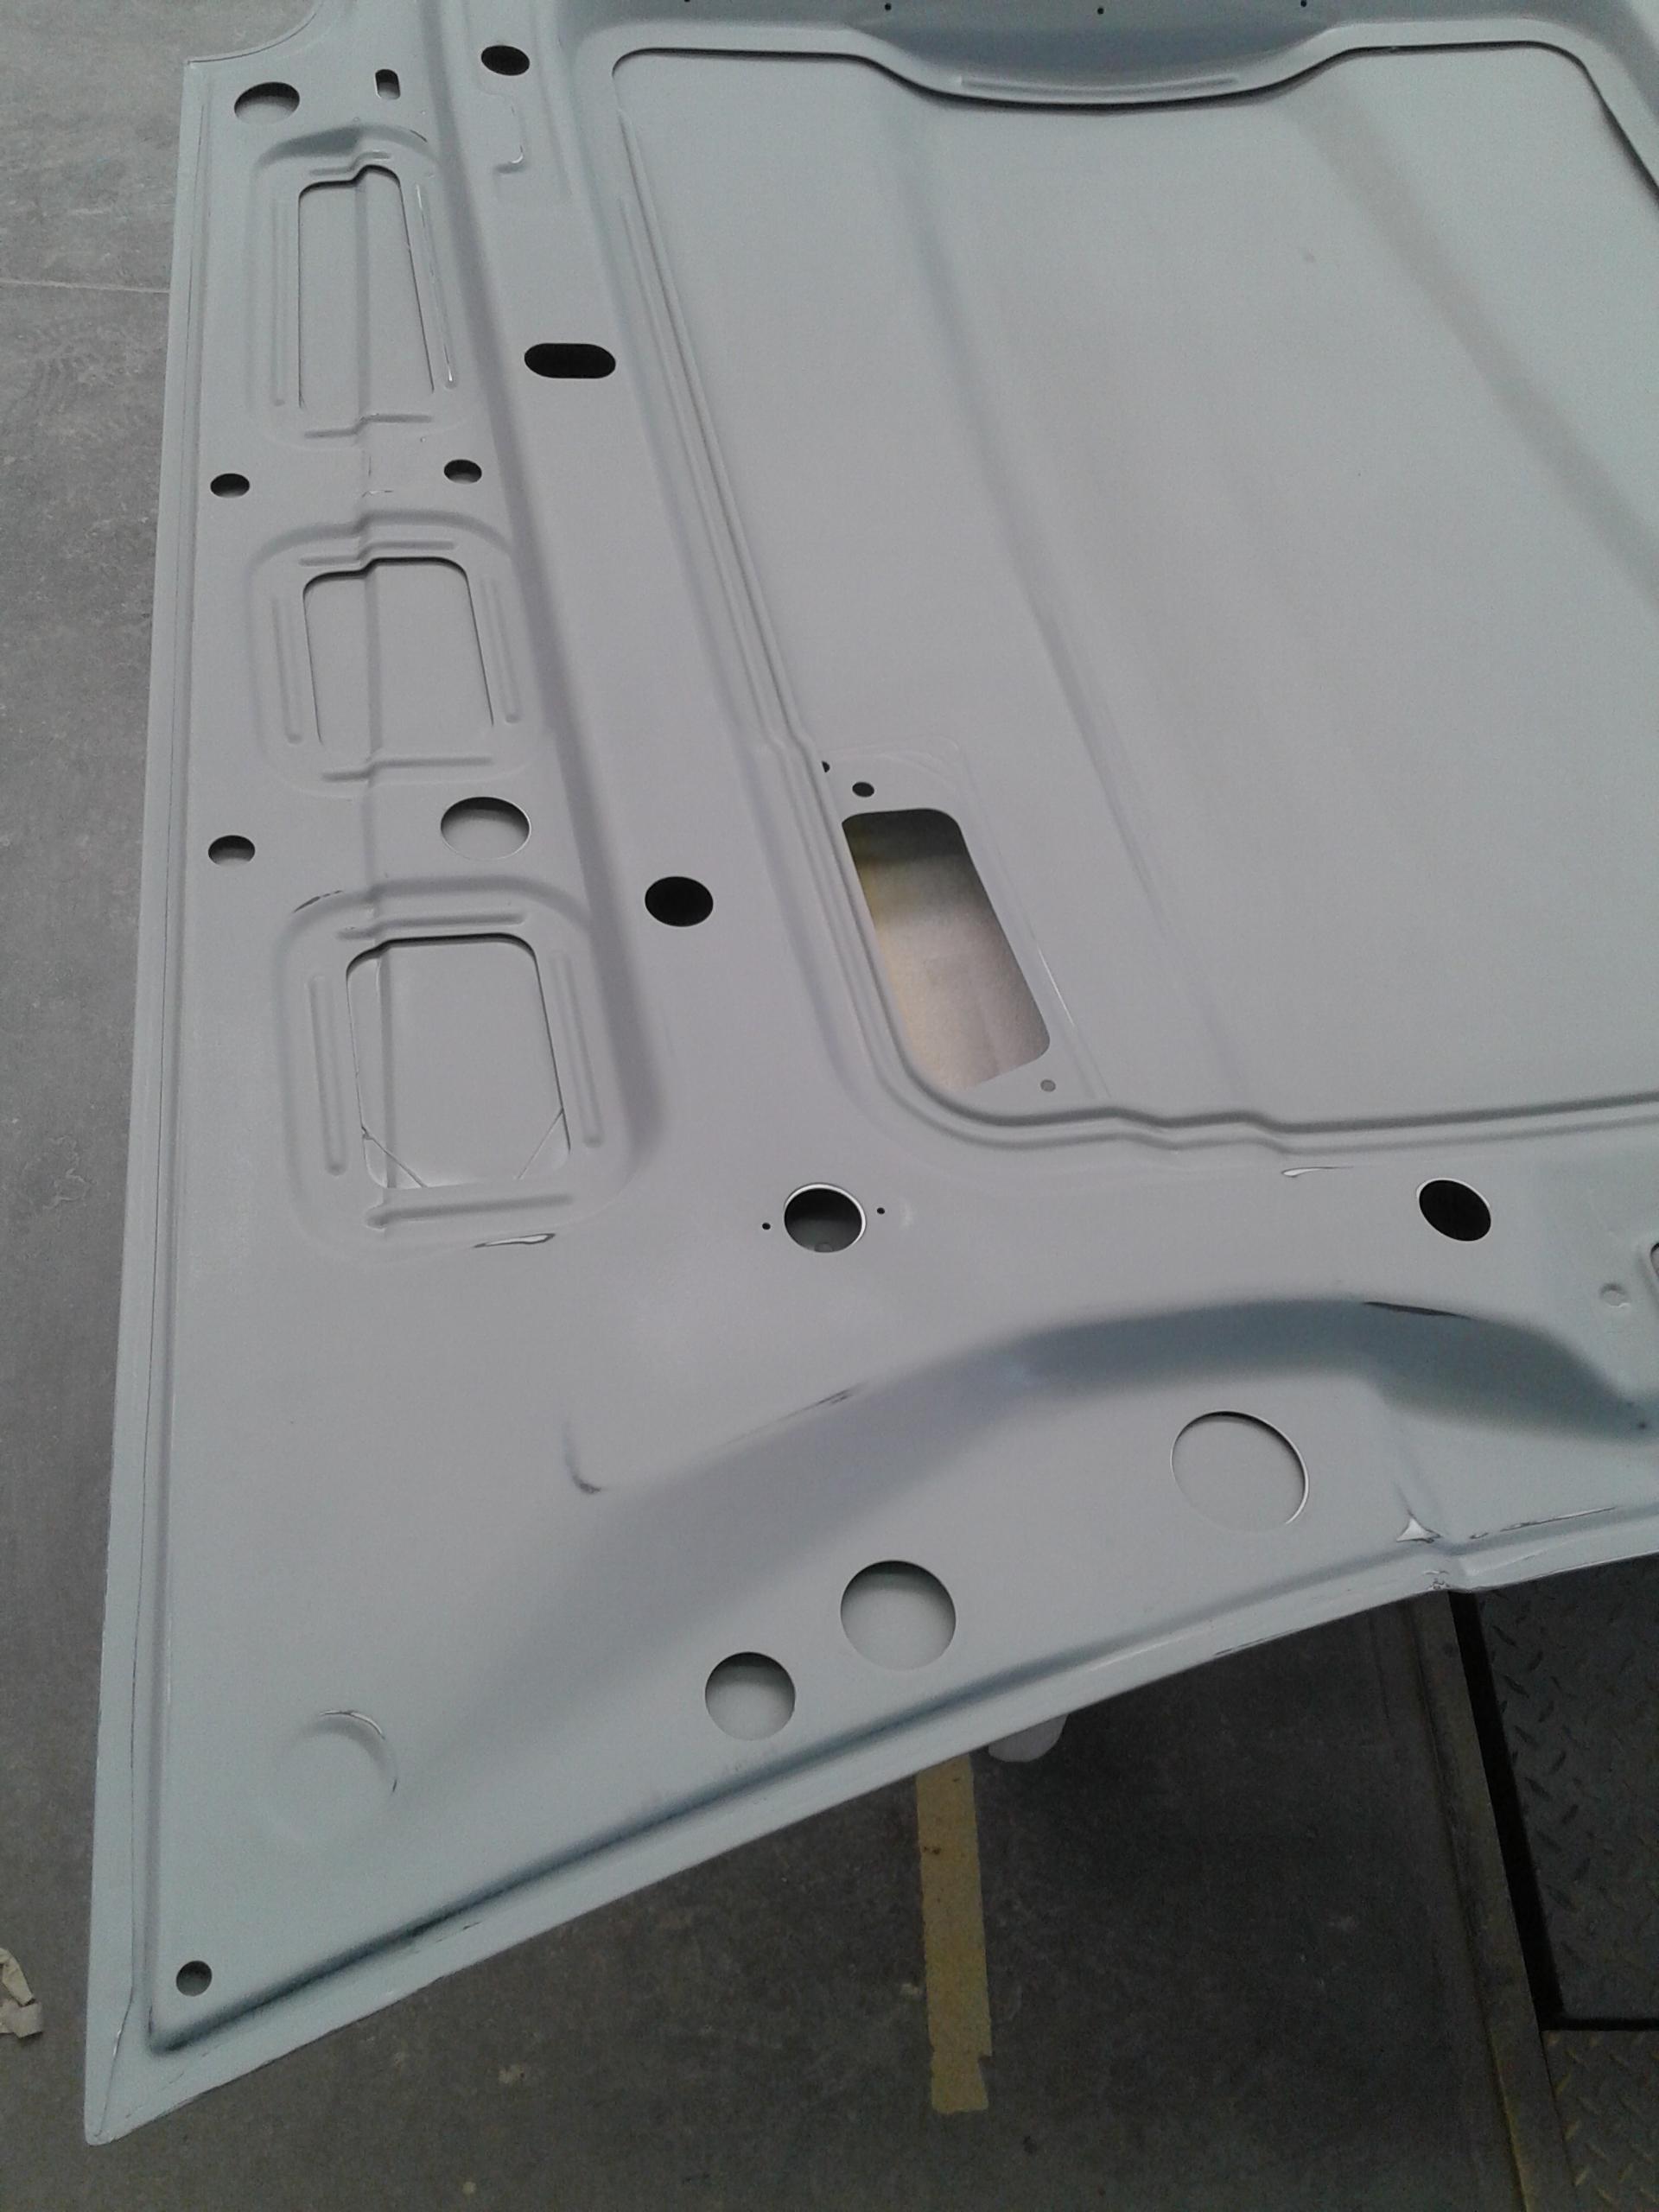
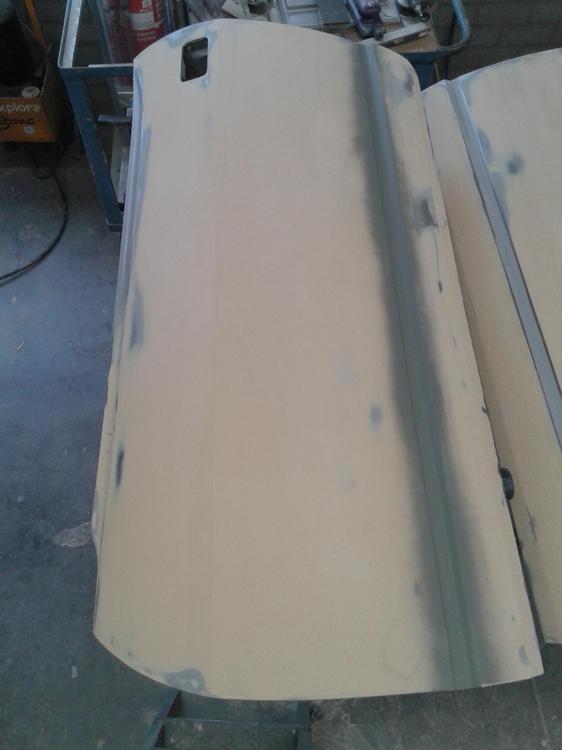
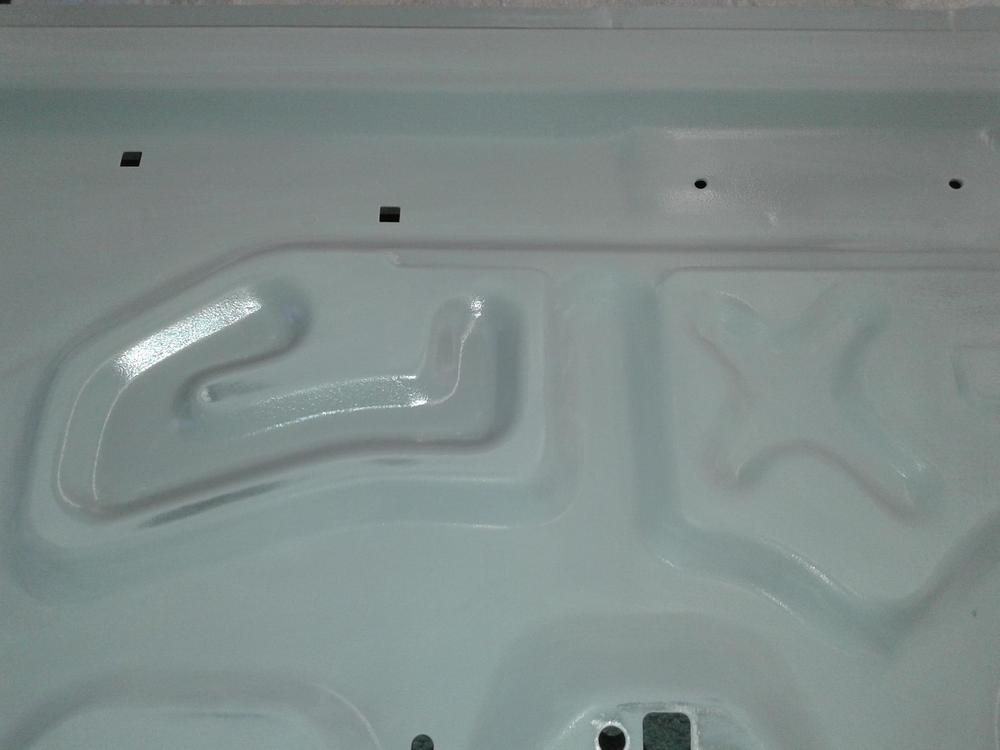
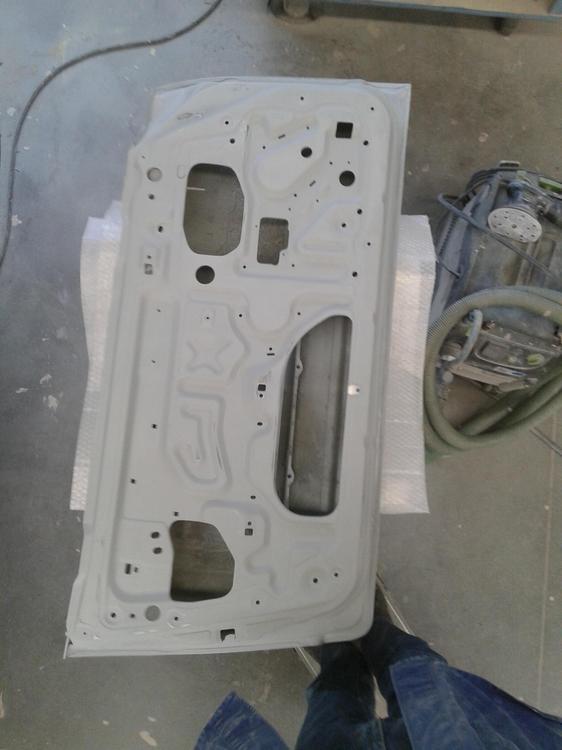
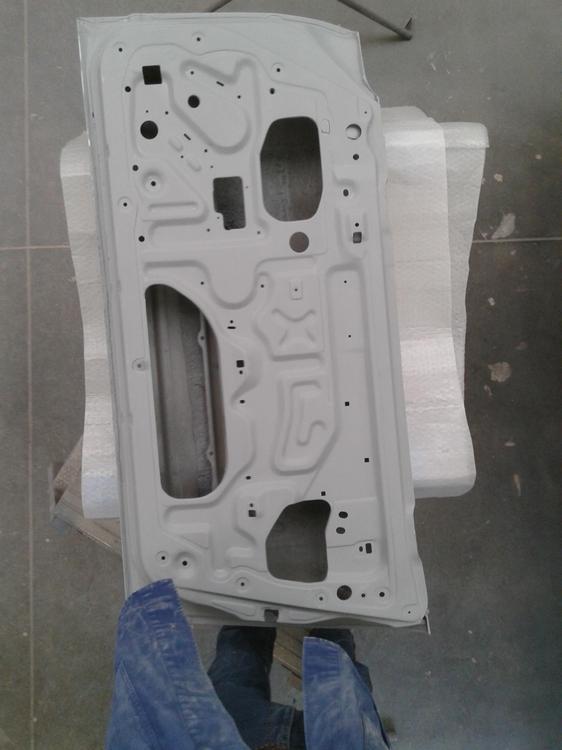
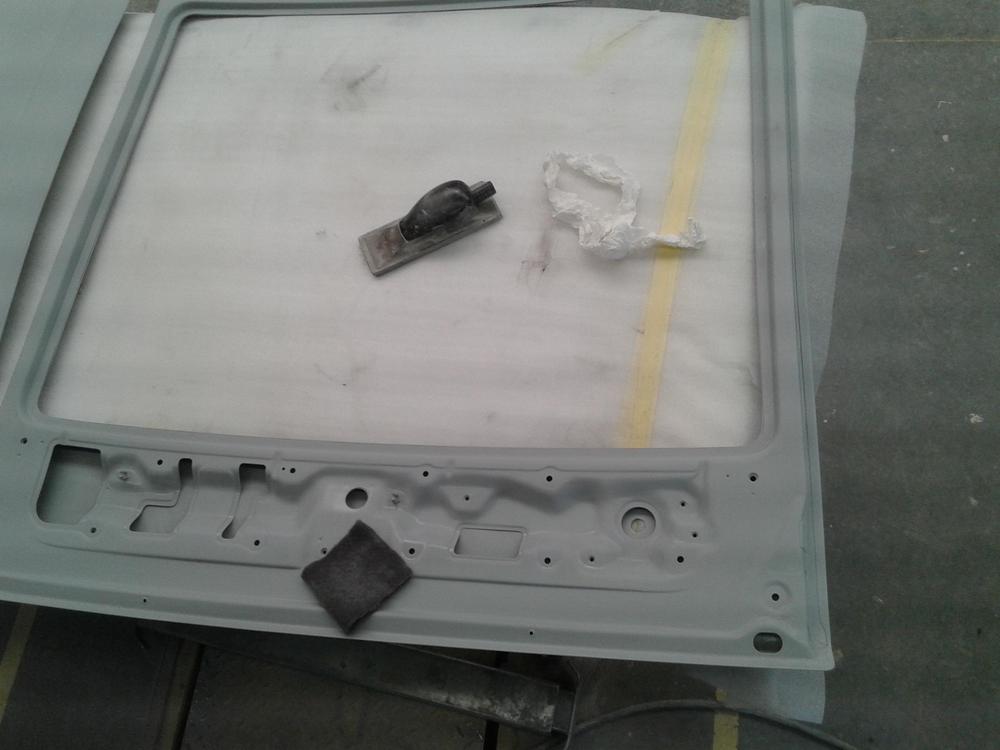
This past week, lots of sanding was been done… my favorite hobby... NOT!! Giving me trouble with my shoulder.. eating pain pills for breakfast.. But somebody has to do it. Paint was already ordered and now we are discussing who is painter haha.. me or "them"? I sprayed over a 100 cans and used a prof. paintergun a few times.. I think.. if i can do the inside doors and hood in a perfect way i'm the painter of my own car!! (It can't be THAT hard...? the only thing you have to look after is putting paint everywhere and at the same thickness.. HAHAHA...) some pic's of the progress.. Doors.. Rear hatch.. Hood.. Difference in sanded and not sanded.. clearly to see.. Here a pic of the workshop.. all kinds of zx stuff. Front of the car is done and the roof also.. I think paint this month.. at least the colorcoat in the edges (post of the doors and hood etc.) and inner side.


-
The only thing i can tell, if you don't overhaul the complete set of flattops... you WILL keep on adjusting the idle over and over until you really get sick of it! There is no good (cheap) way to let flattops do theire job right!!! The better advice is get yourself some roundtops! It's the easiest fix!
.jpg.72f474798725a8393f6c589756ef77e6.jpg)

.jpg.eda7f4b74aa4bdb135ddbb4c265ff18d.jpg)
.jpg.af13c80492af961573399d8c5ee1f9ef.jpg)
.jpg.95f878fa87acaeedd5805df11964be09.jpg)