Walter Moore
Free Member
-
Joined
-
Last visited
Everything posted by Walter Moore
-
 I remember that my 74 Volvo had some form of a "Jetronic" fuel injection system. It was a Bosch system, but it must have been different because it didn't have an air flow meter, just switches on the throttle body, and a manifold pressure sensor. It also had contacts in the distributor to fire the injectors... Strange system, but it worked very well.
 -
My thermostat bolts snapped off as well. I tried using an easy-out, but broke it off as well. I ended up having to VERY CAREFULLY drill out the bolt. A harrowing thing too, drilling a steel bolt out of an aluminum housing... I just keep drilling into it with ever larger drills until the bolt literally unpeeled from the housing. One mistake and you will need a new housing. At least I think they are still available if you mess it up.
-
Nice pictures.
-
Alan, for once we somewhat agree. I appreciate the information that it is available, but... Anyway, I have said my peace. Anyone in the market have at it! Laissez-faire I say!
-
It could be a coil or a loose wire. I had that problem twice after I first installed my electric fuel pump, but I changed some of the wiring so that the "cranking" voltage to the pump would always be 12V and the restart problem went away. Eventually it stopped and I don't know why. (I hate that..) Back to your problem. It could be a bad coil I suppose. If one of the windings is broken, and only makes contact when it is "cold", then opens at some temperature. After being off for several minutes it would cool back down and work again for a while. Coils are cheap, and easy to change. If you have a volt/ohm meter check the resistance of the coil (ignition off) both hot and cold. It should be about 1.2 - 1.5 ohms if I recall correctly. (assuming it is stock) 0.7 ohms if you have done the ZX distributor conversion and are using a ZX coil.
-
Nearly all temperature switches have a dead band, like the pressure switch on an air compressor. I know that it turns off well below 180, but I don't remember how far below 180. I didn't power the fan off of the key. The temperature switch is active all the time, and I constantly get helpful people telling me that my car mysteriously "started" while they were walking past it... Which of course was the plan, let the electric fans blow out the engine heat during the hot soak phase after I park the thing. They usually only cycle two or three times before the engine cools down enough to keep them from coming on. Of course if I lived in Arizona I probably could not leave it that way. Here in the mid-west it seems to work fine.
-
Are you talking about the mechanical pump I hope? I don't remember, do Zs have a screen on the pickup in the tank? Back "in the day" as my kids say, when we suspected a clogged fuel pickup we used to blow compressed air through the fuel line back to the tank. (If you try this, be sure to remove the gas cap, and be prepared for a big burst of gas to belch out onto the floor...) The problem with this method is that it will blow the fuel strainer off of the pickup in the tank if one is present. Do not try this if you have an electric pump back by the tank. Speaking of which, didn't the 73 have an auxiliary electric pump? Could the problem by that that pump is bad and the mechanical pump is having to pull fuel through a broken electric pump? Check back by the tank, under the car behind the right rear wheel. There may be an electric pump back there that is causing your problem.
-
Good luck Logan. It only takes time, patience, and money. Not necessarily in that order;)
-
Could you have hooked up the two wires to the ignition module backwards? The negative side of the coil goes to the terminal that forms the "top" of the T formation, and the positive side goes to the "post" of the T. If you had them backwards the coil would only fire when you turned the ignition off I think. I am going to assume that you have checked that the plug wires are all in the right place and all of that.
-
I think it looks good. I doubt it will accomplish much since I think if you actually hit anything very hard it would break the fiberglass spook rather than just cracking the paint. Actually, I have a spook rather like that, and mine seems to be far enough off of the ground that it doesn't hit parking curbs, but I suppose some curbs are taller than others.
-
I used a meat thermometer to set the thermostat for my electric fans so that the fan would come on when the water temperature in the radiator hit 180 degrees. (That may not be the optimal temperature to set the fan's turn-on point for, but it seems like I don't need the fan if the engine's thermostat isn't open.) Anyway, I noticed that my dash temperature gauge reads about 2/3 scale when the coolant temperature in the radiator is 180 degrees F. I have to run anti-freeze in my engine because my garage isn't heated and it gets very cold here in the winter. It's either run anti-freeze, or drain the coolant before I put it away for the winter. (And frankly I like to start the car from time to time in the winter just to keep everything working.)
-
My favorite is Dog&Suds, but I will drink A&W if I have to...
-
It sounds like you have a major short circuit somewhere and the fuseable link did it's job and prevented a fire. Check places where the wiring goes through grommets to see if the insulation has worn through allowing the wire inside to touch the metal frame. You may have to disconnect one part of the wiring at a time and check for continuity to the frame with an ohm meter. If it burned through that fast it must be a major short.
-
The club CD is much easier to use, but if you really need information here is another source: http://www.xenons30.com/reference.html
-
That looks a lot like where I started on my car. Been there, done that, still looking for the T-Shirt however... Keep hope. It can be done, because many of us have.
-
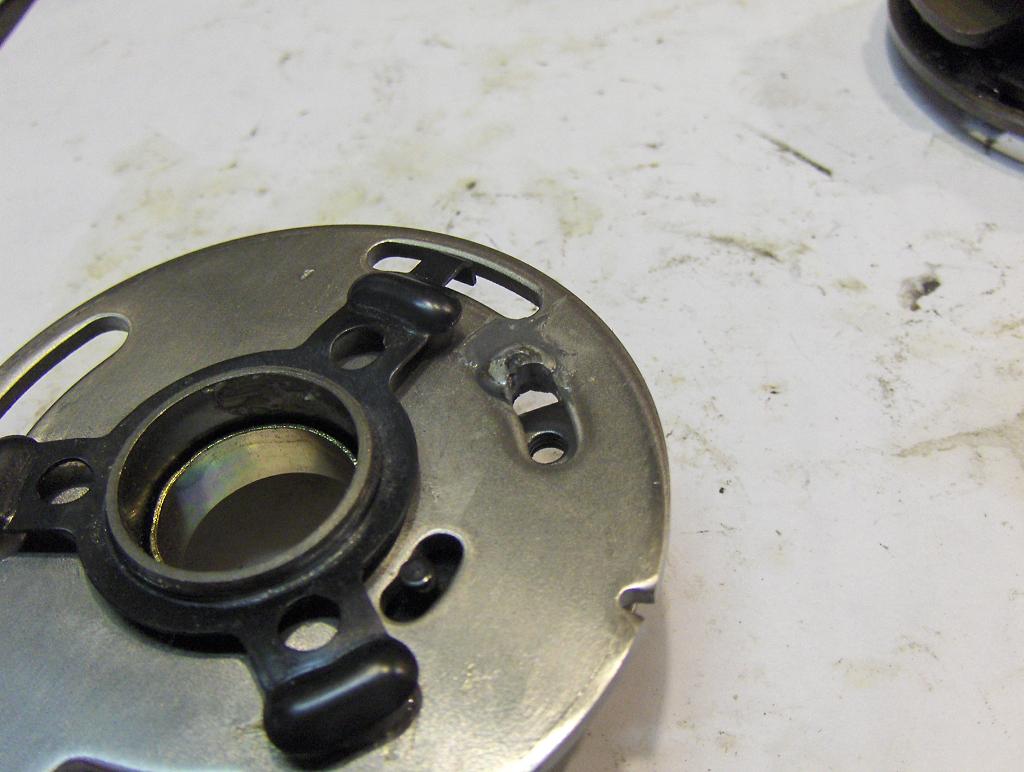
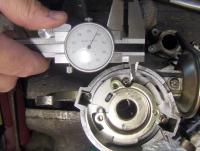
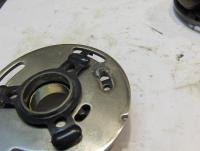
I have been tinkering with a 80ZX distributor for my 240Z recently. I bought a used one and took it apart. The advance plate (Breaker plate in the FSM) was broken, and I repaired it as I suggested in an earlier thread, but I was not happy with the operation afterward, so I ordered a new breaker plate and vacuum advance from a local Nissan dealer. I had trouble getting the "correct" parts, and ended up with these: Vacuum Advance: 22301-P7901 Breaker Plate: 22136-H9501 Having heard all of the horror stories about too much advance I decided to measure the vacuum advance of my new setup. To do this I first measured as best I could the radius upon which the vacuum advance mechanism operates, and discovered that it is apparently 27mm. Since the distributor advance angle is equal to the arc sin of the linear movement of the vacuum advance pivot divided by the radius, I was able to determine that the two parts listed above, mounted in a D6K8-02 distributor result in a vacuum advance movement of approximately 0.234 inches, which calculates to 12.5 degrees at the distributor, or 25 degrees at the crank. Clearly this is excessive. By comparison, the original breaker plate allows only 0.157 inches of movement by the vacuum advance, which works out to be 17 degrees of spark advance (at the crank). The FSM lists the vacuum advance of my ZX distributor at 18 degrees, which is likely true when the NLA original advance actuator is installed. But with the parts I have available it will only produce 17 degrees. Anyway, to make an already too long story shorter, I shortened the vacuum advance slot in the new breaker plate with a rivet and J-B weld. Then I used a Dremmel tool with a chain saw sharpening bit to lengthen the slot back out to the point where it allows the advance to move approximately 0.157 inches as measured by my optical-dial caliper measuring method. (See attached picture.) Unhappily the actual total length of the slot appears to be irrelevant because the vacuum advance actuator does not push the breaker plate all the way to the far end of the slot. This weekend I installed the rebuilt distributor and confirmed with a dial-back timing light and my handy air-vac, that vacuum advance does indeed produce 17 degrees of advance. So now I have this setup: Initial timing: 10 degrees BTDC Centrifugal advance: 17 degrees Vacuum advance: 17 degrees Apparently my points distributor, which I recently discovered had a broken vacuum advance, was in worse shape than I thought. The new distributor improves engine performance across the entire operating range. It finally idles smoothly, and it pulls much better in 5th gear. You just don't realize how much better a car runs with a solid distributor. The attached pictures show some of the things I have discussed above, and the spread sheet shows approximate timing advance angles produced by the vacuum advance movement listed. Be forewarned however that I have ONLY verified the advance angle produced by 0.157 inches of displacement. While the other displacements listed SHOULD produce the advance angle shown, I make NO GUARANTEE of the accuracy of the data. Vacuum advance distance.xls
-
The "distributor hold down bolt" is an ordinary M6 bolt that you can buy at nearly any hardware store. The reason that the timing is "off" at 1500 RPM is that the centrifugal advance mechanism starts advancing the timing at about 1000 - 1100 RPM. To set the initial timing you have to keep the car below 900 RPM, and disconnect the vacuum advance hose from the distributor. Sorry that you didn't get a response earlier, but there is so much traffic on this site that once a thread gets some age on it, and is pushed off of the RSS feed, most people don't notice new updates.
-
I originally used some "scrounged" wheel cylinders on my car when I first got it running, but with very little luck. The primary difference between the various years is that the early wheel cylinders slide back an forth in the backing plate during operation, and the angle of the threaded hole for the flair fitting is different. I believe that the correct wheel cylinder for a 71 has the hole at an angle, but I am not sure about the 73. Because the wheel cylinder slides during operation, the hard steel line that connects it to the brake hose is formed in a long arc that basically follows the outline of the backing plate around. It needs that long path to allow the tubing to flex during braking. It doesn't move much at any one time, but it shifts as the shoes wear I think. The wheel cylinder is single sided, and to move the opposite shoe the whole cylinder has to slide in the backing plate. I messed around with my scavenged parts for a year, never really got them to work, then gave up and replaced EVERYTHING on both sides, Drums, shoes, wheel cylinders, etc with Nissan parts from a dealer. After I did that the rear brakes work reasonably well. I have done brake work on a lot of cars with rear drums, and the Z has the strangest drum brake setup I have ever seen. It works well when everything is perfect, but it does not tolerate improvisation well... My advice: Get the right parts to start with and save your self a lot of trouble.
-
The speedometer in my Z came right in (compared to my stop watch and mile markers) once I got the odometer dialed in. But I had an older Impala years ago where the odometer was flat perfect but the speedometer was something like 20% LOW. Try to explain that to a police officer... luckily the only time I had to, the officer was younger than the car! (My speedometer actually read 60 and his radar gun read 72!!! Talk about being shocked!) He asked if the car had the correct tire size and I told him the truth, no one had made G78/15 tires in over 20 years.
-
Boy am I out of touch.... I don't even know what "LMN" is.
-
Aren't the seats from a 3 series BMW awfully tall for a Z? By the way, I helped my son rebuild the driver's seat in his 1987 325es, and I was not impressed with the overall design. It had broken in multiple places, and frankly was much weaker than I would have ever expected in a car with such a strong reputation. By the time we finished I think there was more metal mending the broken segments than had been in the seat to begin with.
-
So they had about $3000 in labor alone, another $10K in paint, plus uncounted parts costs... Must be a rich man's hobby.
-
Well, they appear to be driving on he left side of the road, so unless they are in Hong Kong...
-
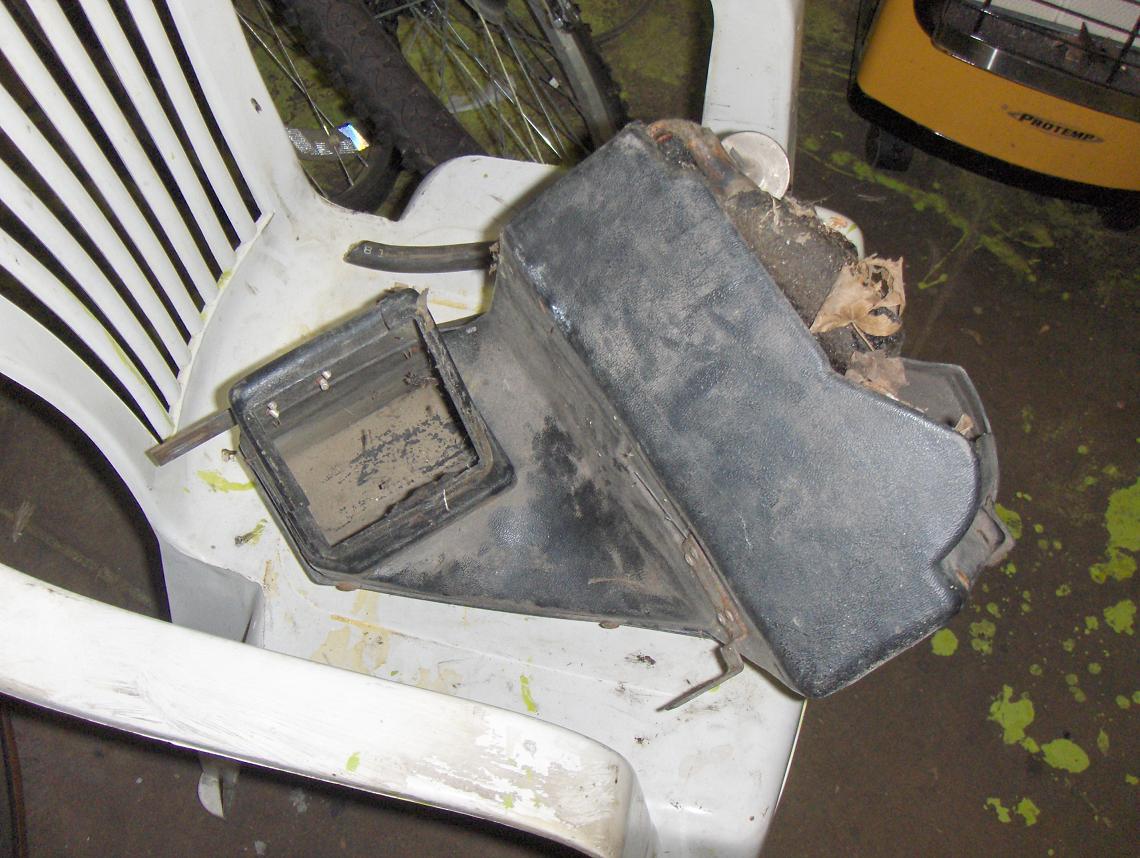
Okay, here is the scoop. In the attached picture the "outlet" of the evaporator is the small square opening on the left. The top lever of the heater control panel is marked with three positions: OFF/VENT/HEAT In the OFF position, the fan pulls air from INSIDE the car, near the passenger floorboard. (Passenger on a LHD car...) The evaporator housing's outlet mates up to the inlet of the inside air intake, thus you have to run the air conditioner with the top lever in the OFF position, or it does not work. Thus the aftermarket air conditioner didn't require cutting any holes in the fan housing during installation, and there are no holes to plug when you remove it! I knew it was something like that but my advancing "sometimers" got in the way.

-
If there was I never saw one... I just took the stupid thing out and tossed it, but I cannot remember now how it was connected. (It has been almost 7 years ago after all...) I will run out to the garage and check eventually.