Patcon
 Subscriber
-
Joined
-
Last visited
Everything posted by Patcon
-
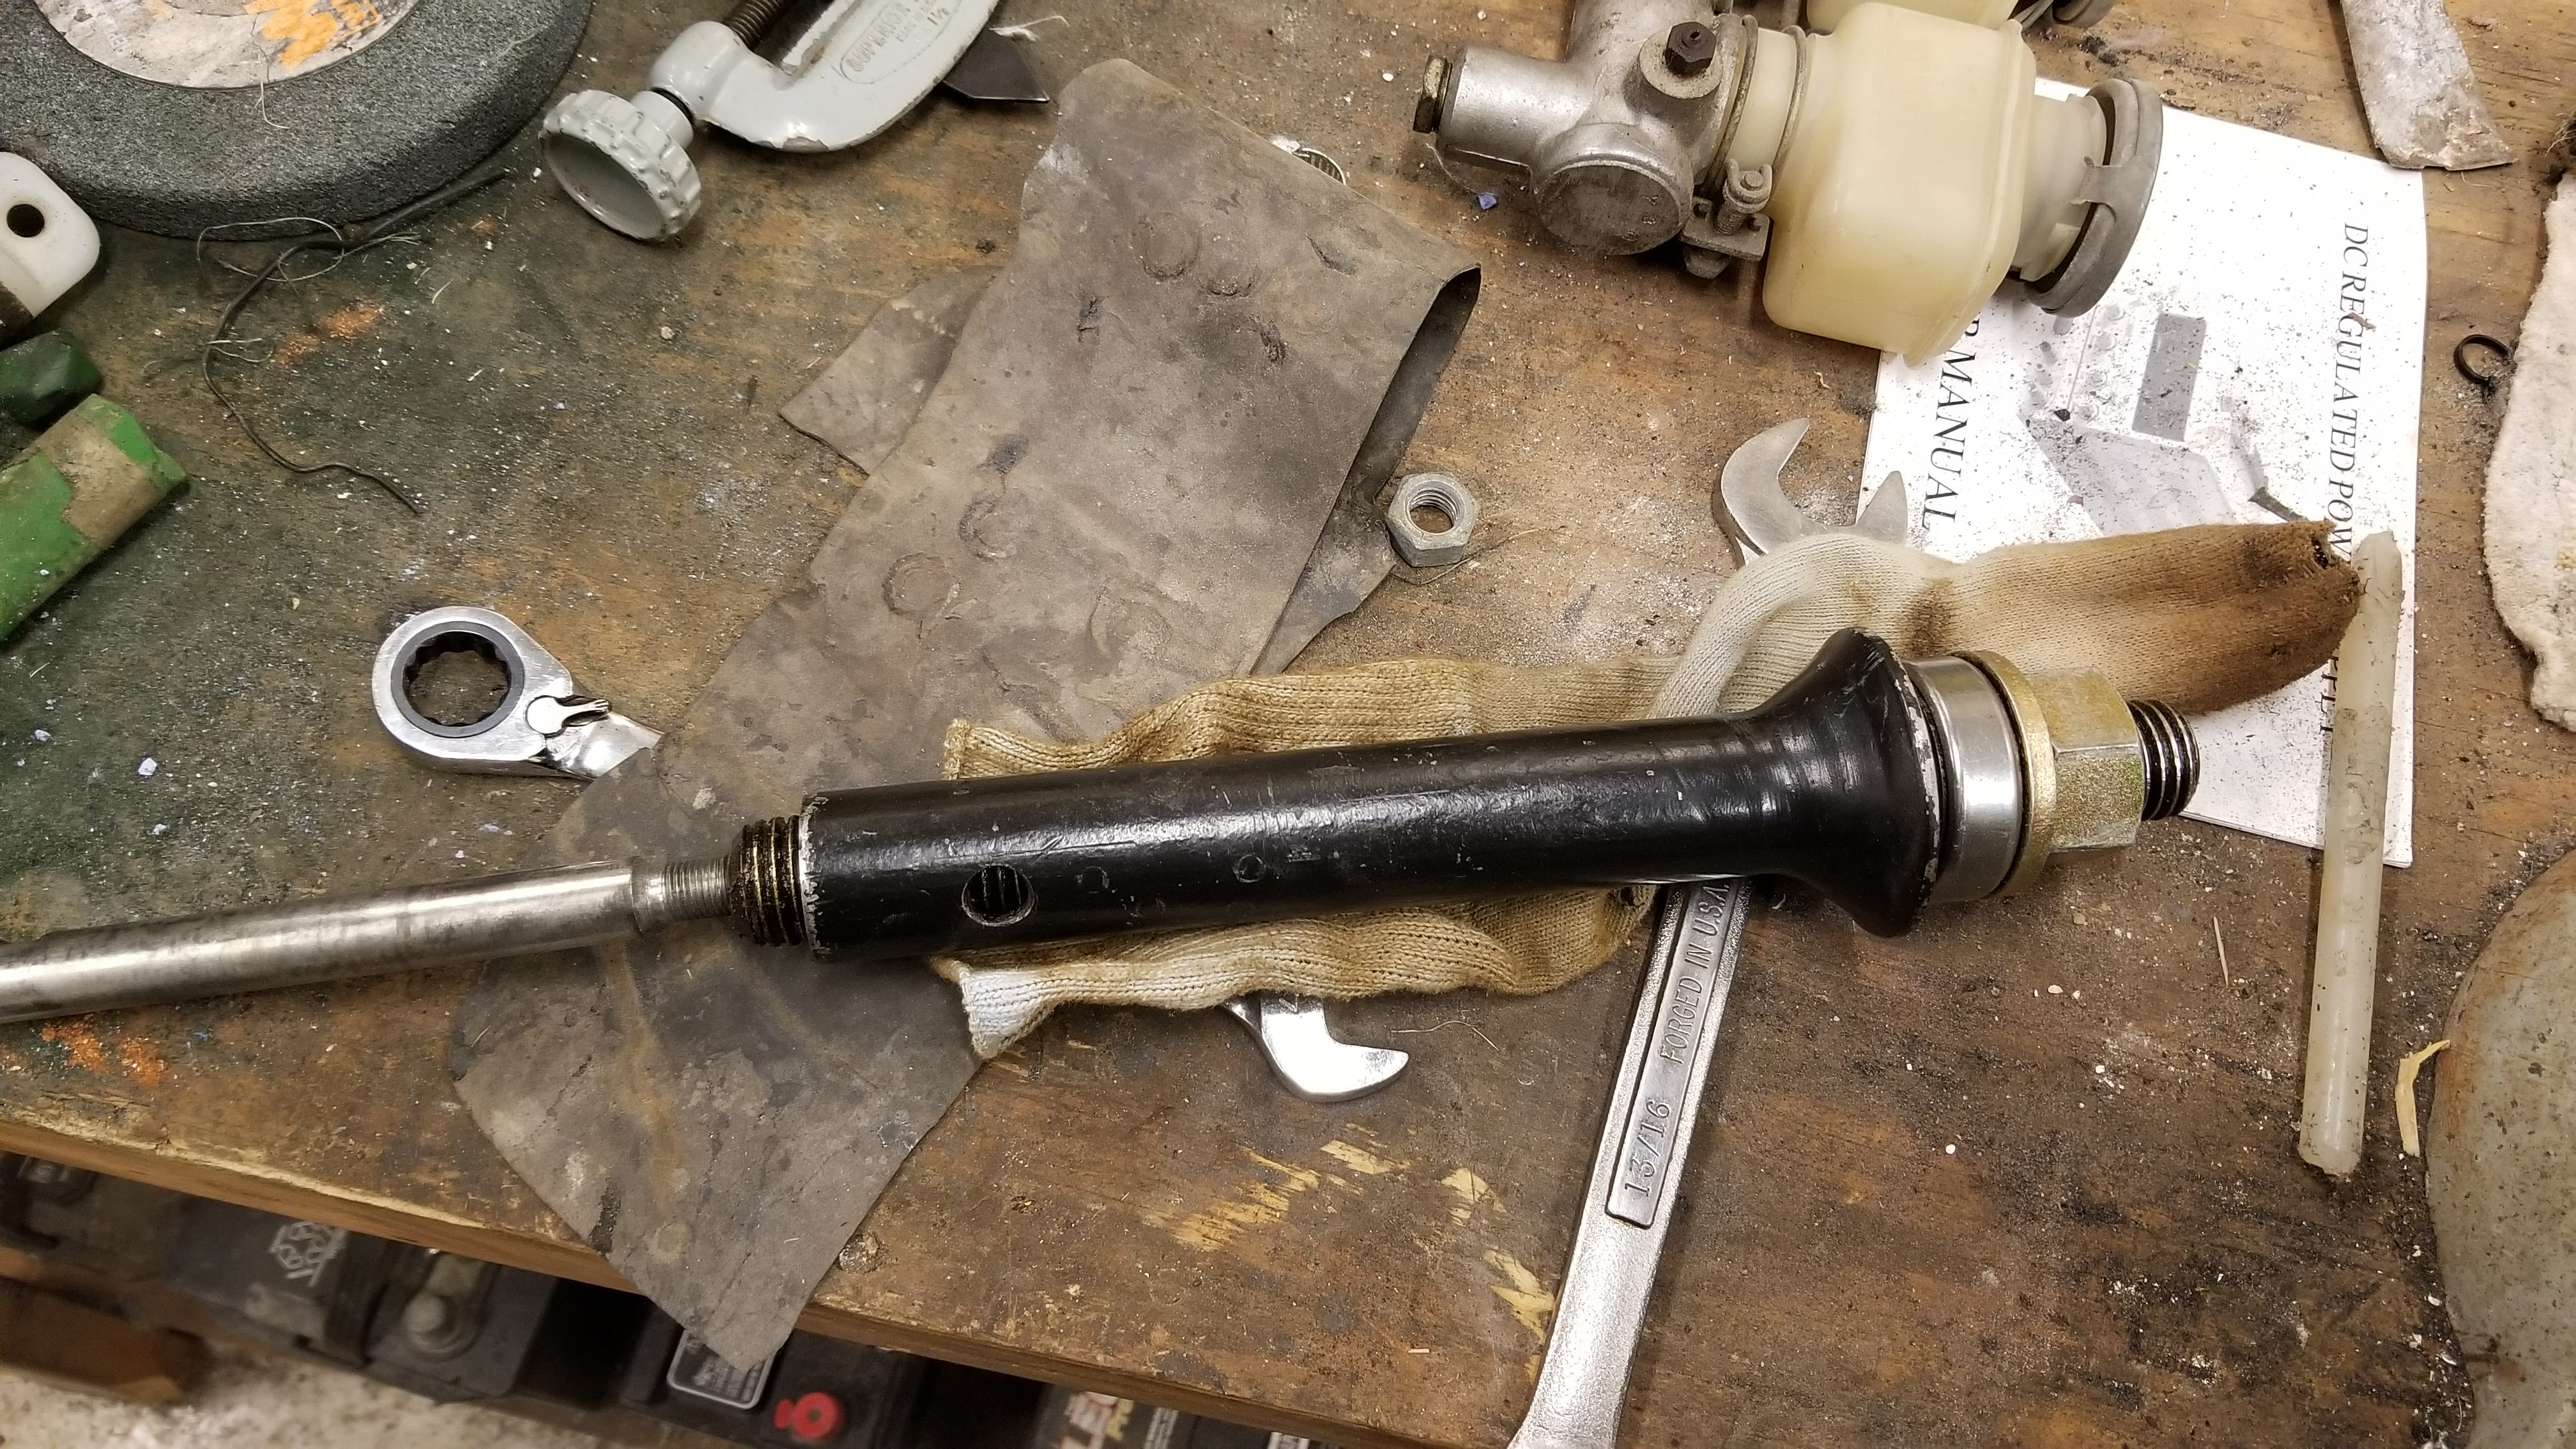
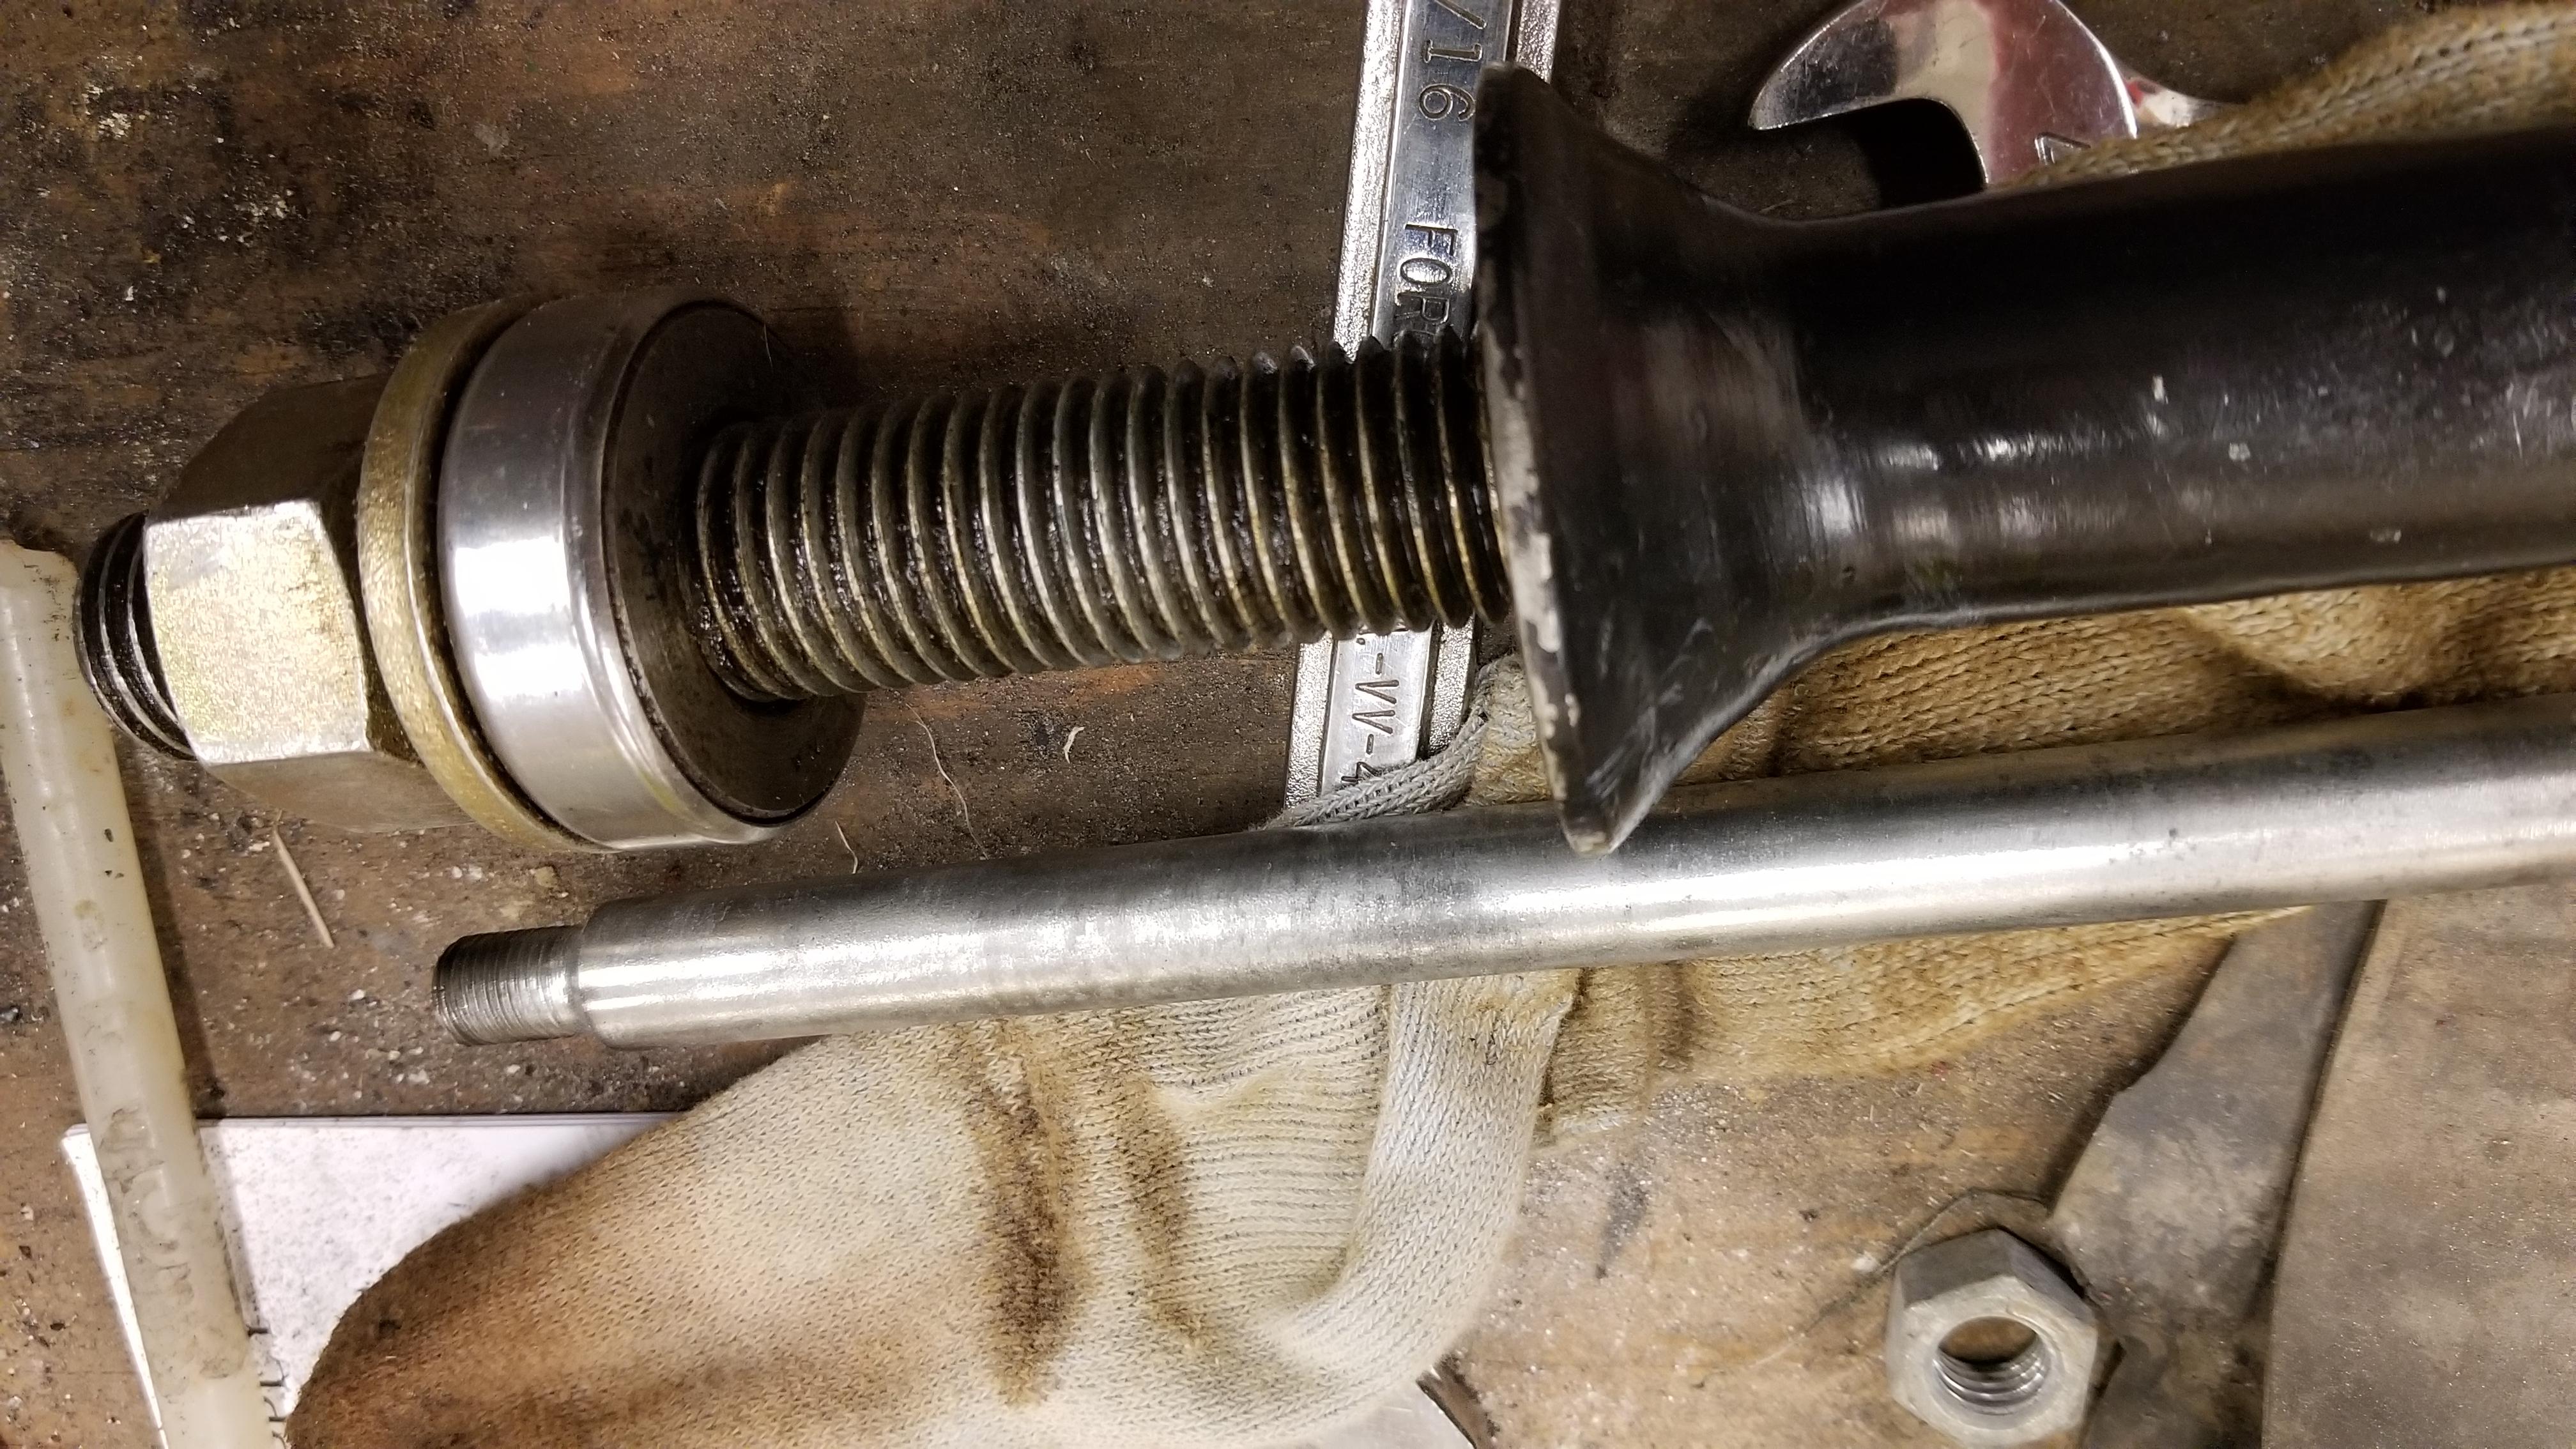
 Here is my puller. I bought it from some one many years ago. He was making them for forum members. Might have been on Hybrid Z The all thread is 1" hardened rod. With a bearing to help with friction I haven't found one I couldn't pull yet. Even the ones I just separated that have been sitting outside for the last six years. I use wrenches to turn it so if it gets too difficult I fall back to heat and penetrating oils. I could see pulling the end off one being possible with this tool Mitchell, Let me know if you need a loaner

-
This is a very good suggestion. Also be sure you have another alert person as a fire watch for the top side. Take the seat out and some wet towels if it comes to that... Don't use my son!!! Who didn't notice the smoke at all! I was like, "Where's that smoke coming from???? " "What smoke?" Torched the wiring harness because he was zoning out!
-
I believe this is the N3501

-
I believe this is the product 26th-z is referring to. the real problem is that by the time you buy all the ingredients you will have a significant amount of money tied up in it and probably enough material to make a sprayable gallon. It does not appear to be a catalyzed product, so pretty easy to spray DDL DURACRYL® is a fast dry, acrylic based lacquer system designed for repair of motor vehicles. This repair system is useful in spot or section repairs as well as overall finishing. DDL single stage colors can be polished to a full gloss. DURACRYL® basecoat colors have formula comments that tell when the clearcoat is required. Product Information Effective 11/03 P-148 Compatible Surfaces DDL may be applied over: · Cleaned, sanded and primed OEM or Refinish topcoat · DPLF Epoxy Primer · DPX801 Universal Plastic Adhesion Promoter · DSX1900 Bonding Clear · DX54 ROADGUARD® Chip Resistant Coating · DZ Kondar® Acrylic Primer Surfacer Required Products DTL Thinners Cold Temperature (below 50°F) DTL10 Cool Temperature (50 – 65°F) DTL16 Medium Temperature (65 - 85° F) DTL876 Warm/Hot Temperatures (85 – 110°F) DTL105 Retarder (over 85°F) up to 25% of thinner DTX114 Clear DURACRYL® Hi-Performance Clear DCA468
-
To my knowledge, no. Because all of the color is below the clear coat it makes it look deeper than a single stage can. It also tends to have that shiny wet look that is hard to accomplish with single stage. Also all of the UV inhibitors float to the top of the single stage paint as it cures. When you cut and buff it, you are removing the UV protection. The clear coat maintains the UV protection even after the C&B
-
I would be interested in antennae parts as well as a mast maybe two
-
Excellent!
-
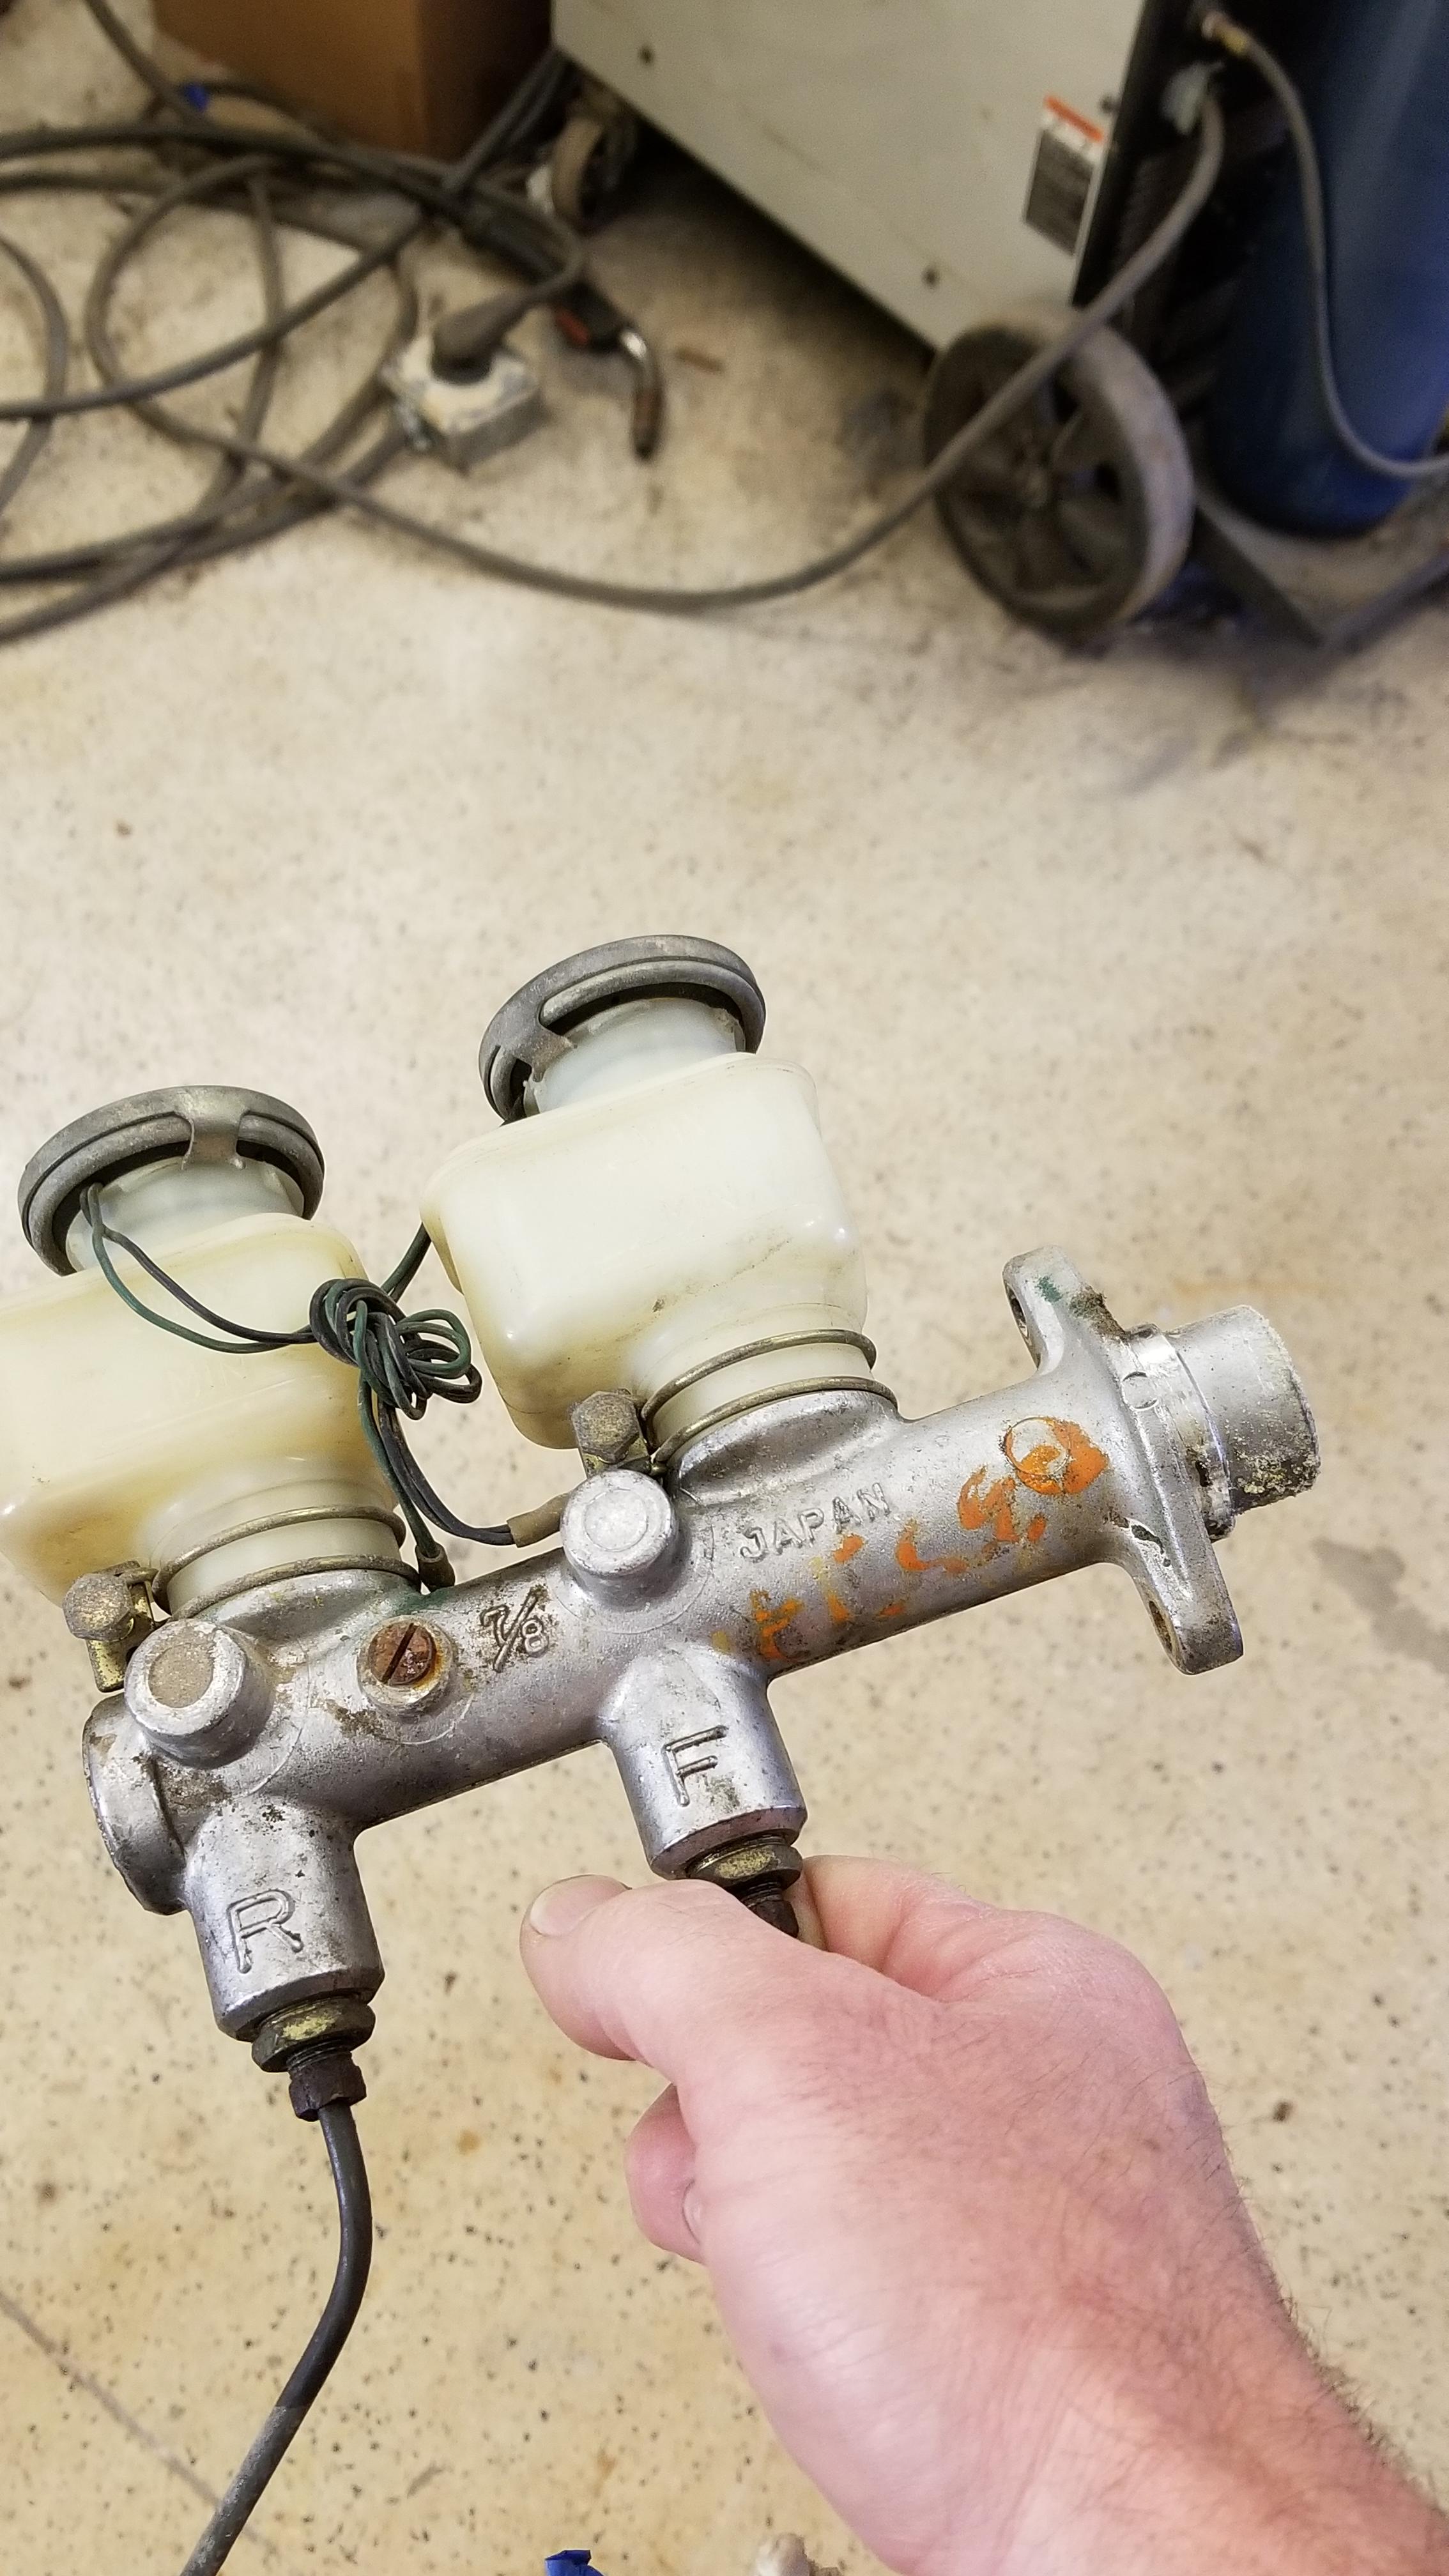
@jonathanrussell Did your rebuilt proportioning valve work properly?
-
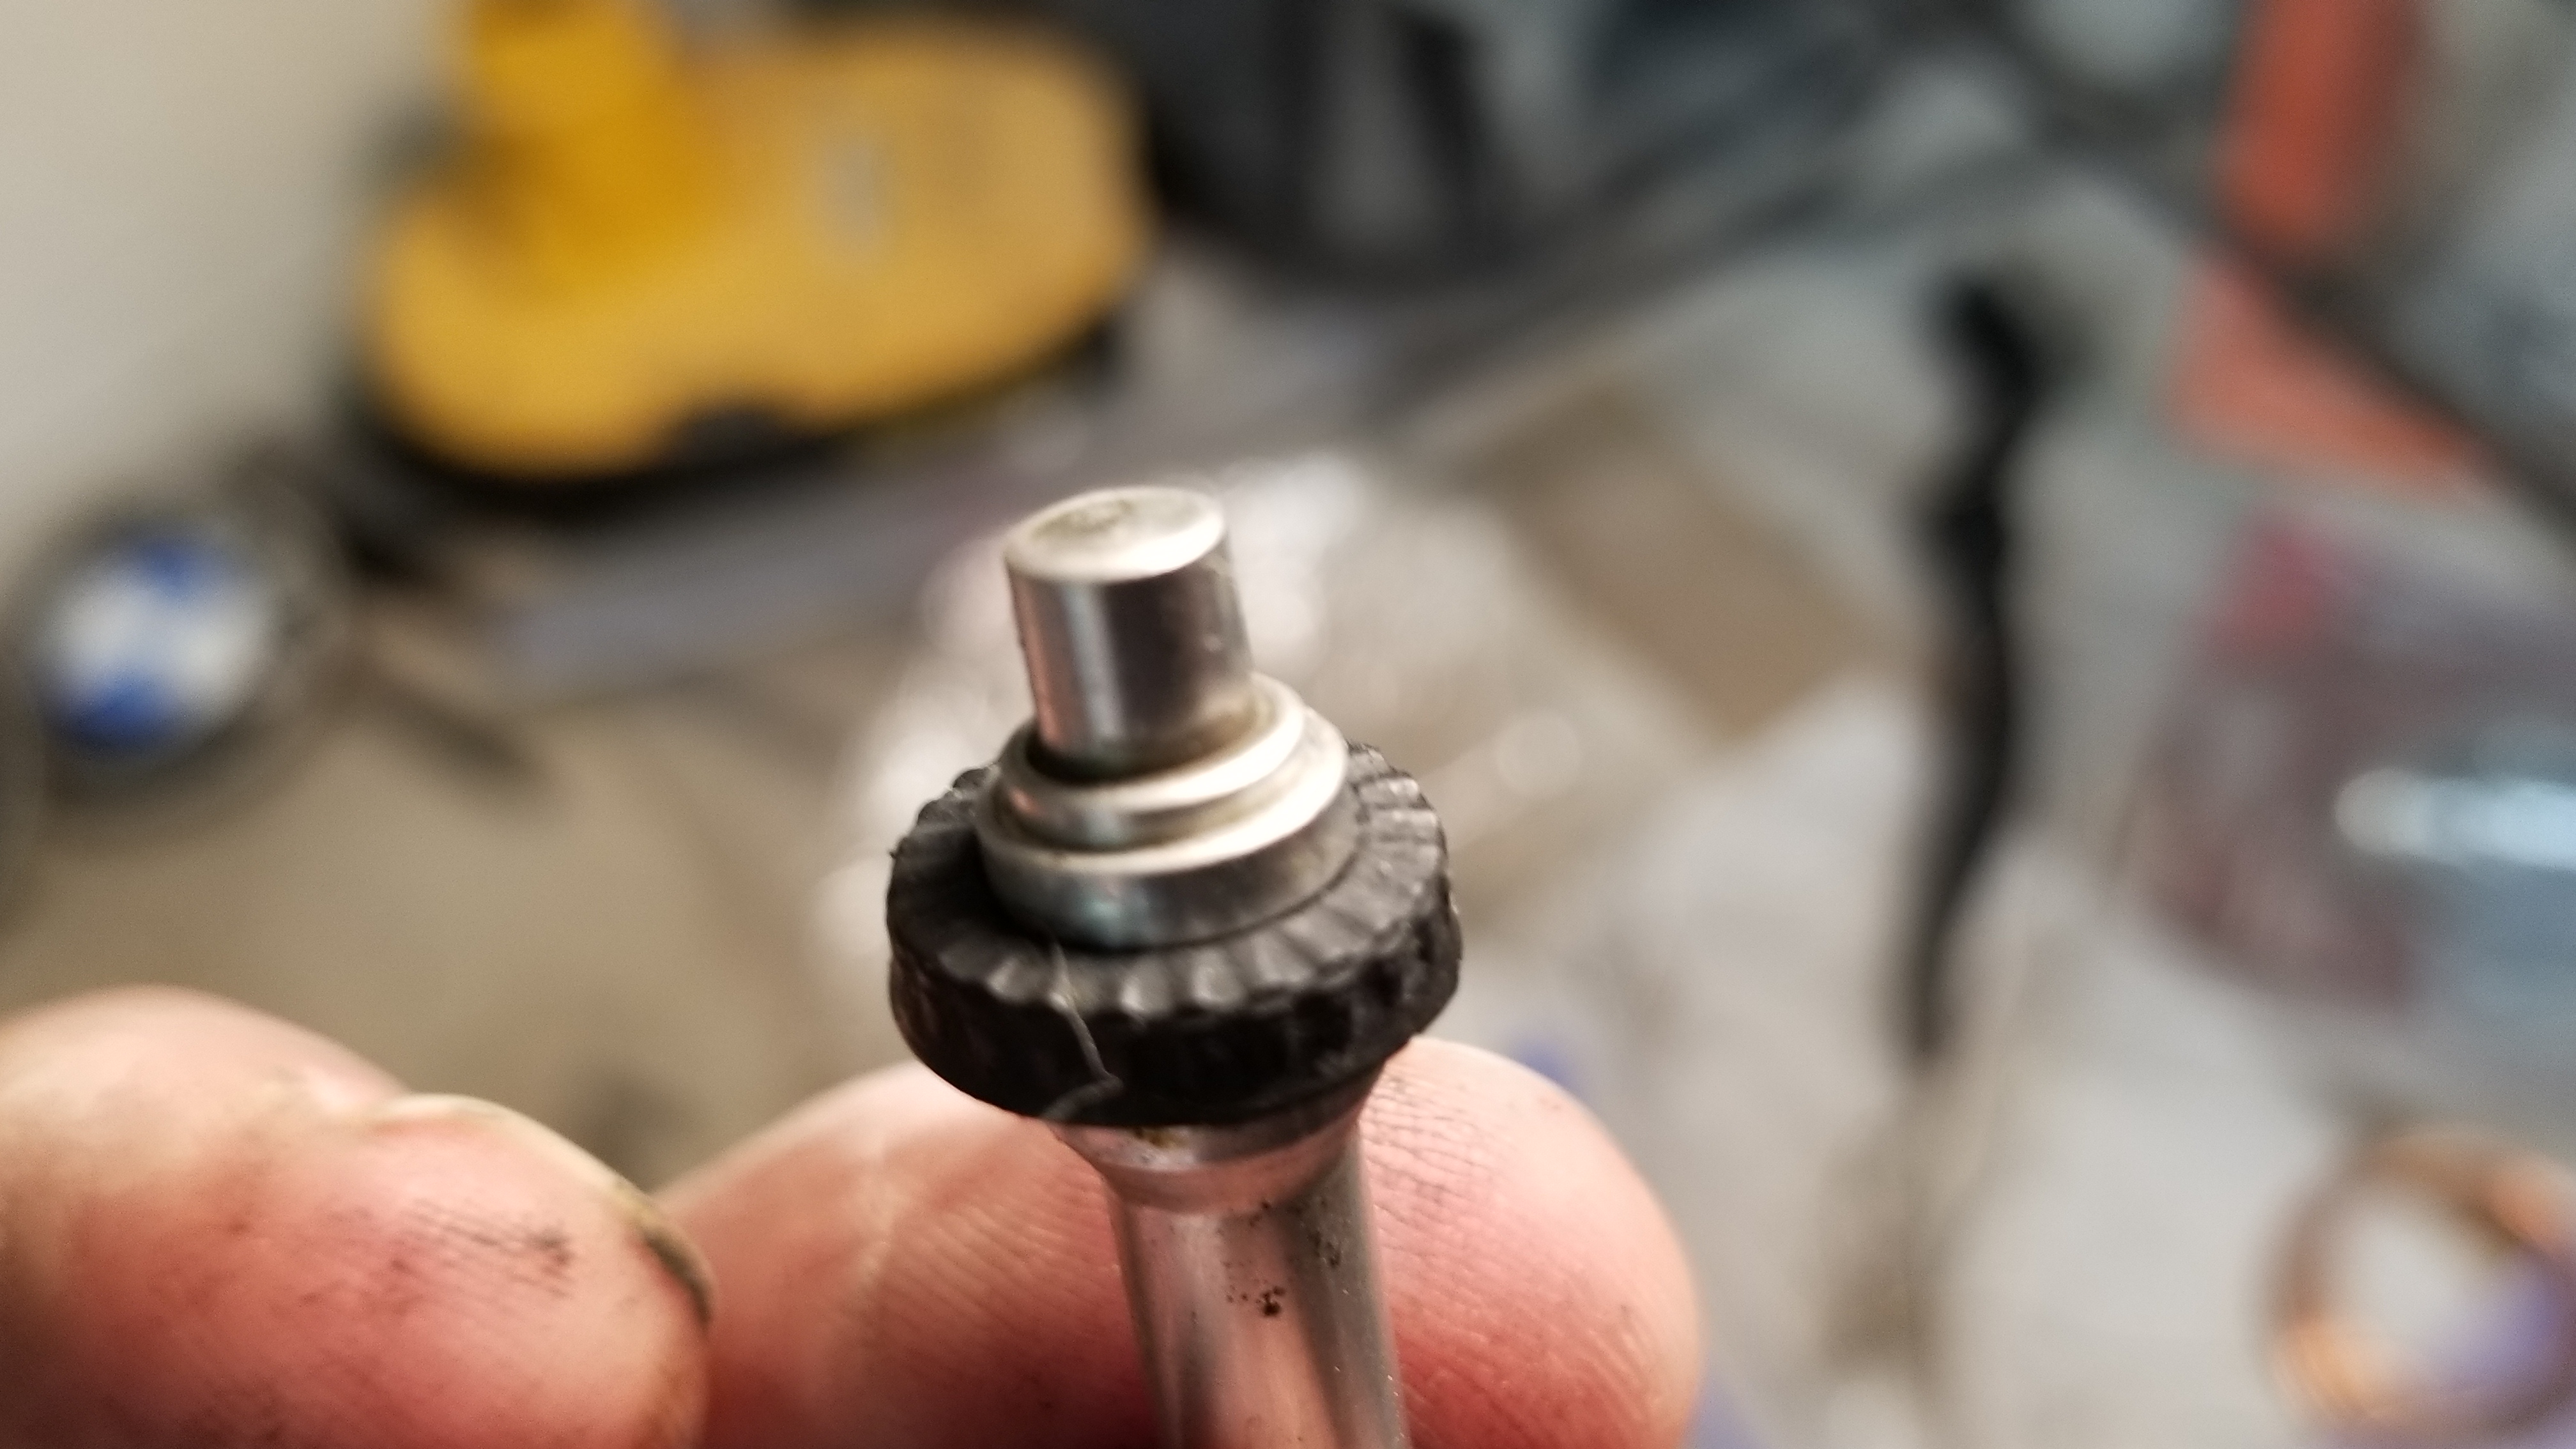
Thanks Jim! Any thoughts on brake fluid or grease in the brake switch?
-
But inside and out, full color change?
-
They didn't do that at the factory either. The only reason I could even imagine that would be needed would be if you were using a bunch of used parts you thought might settle in over that 100 miles. I suspect pretty much all of that will be new on your build so it seems it would be a useless step
-
Nobody has any answers for me? Feeling all alone over here in the corner...
-
I don't know if you ever said or not but I assume after see your dads and your other builds you are going to strip the car all the way down for the color change?
-
Who did you buy it from?
-
I would use the self lockers. If I remember correctly they require a lot of torque. I can't imagine them needed to be retorqued after 100 miles. They didn't do that from the factory...
-
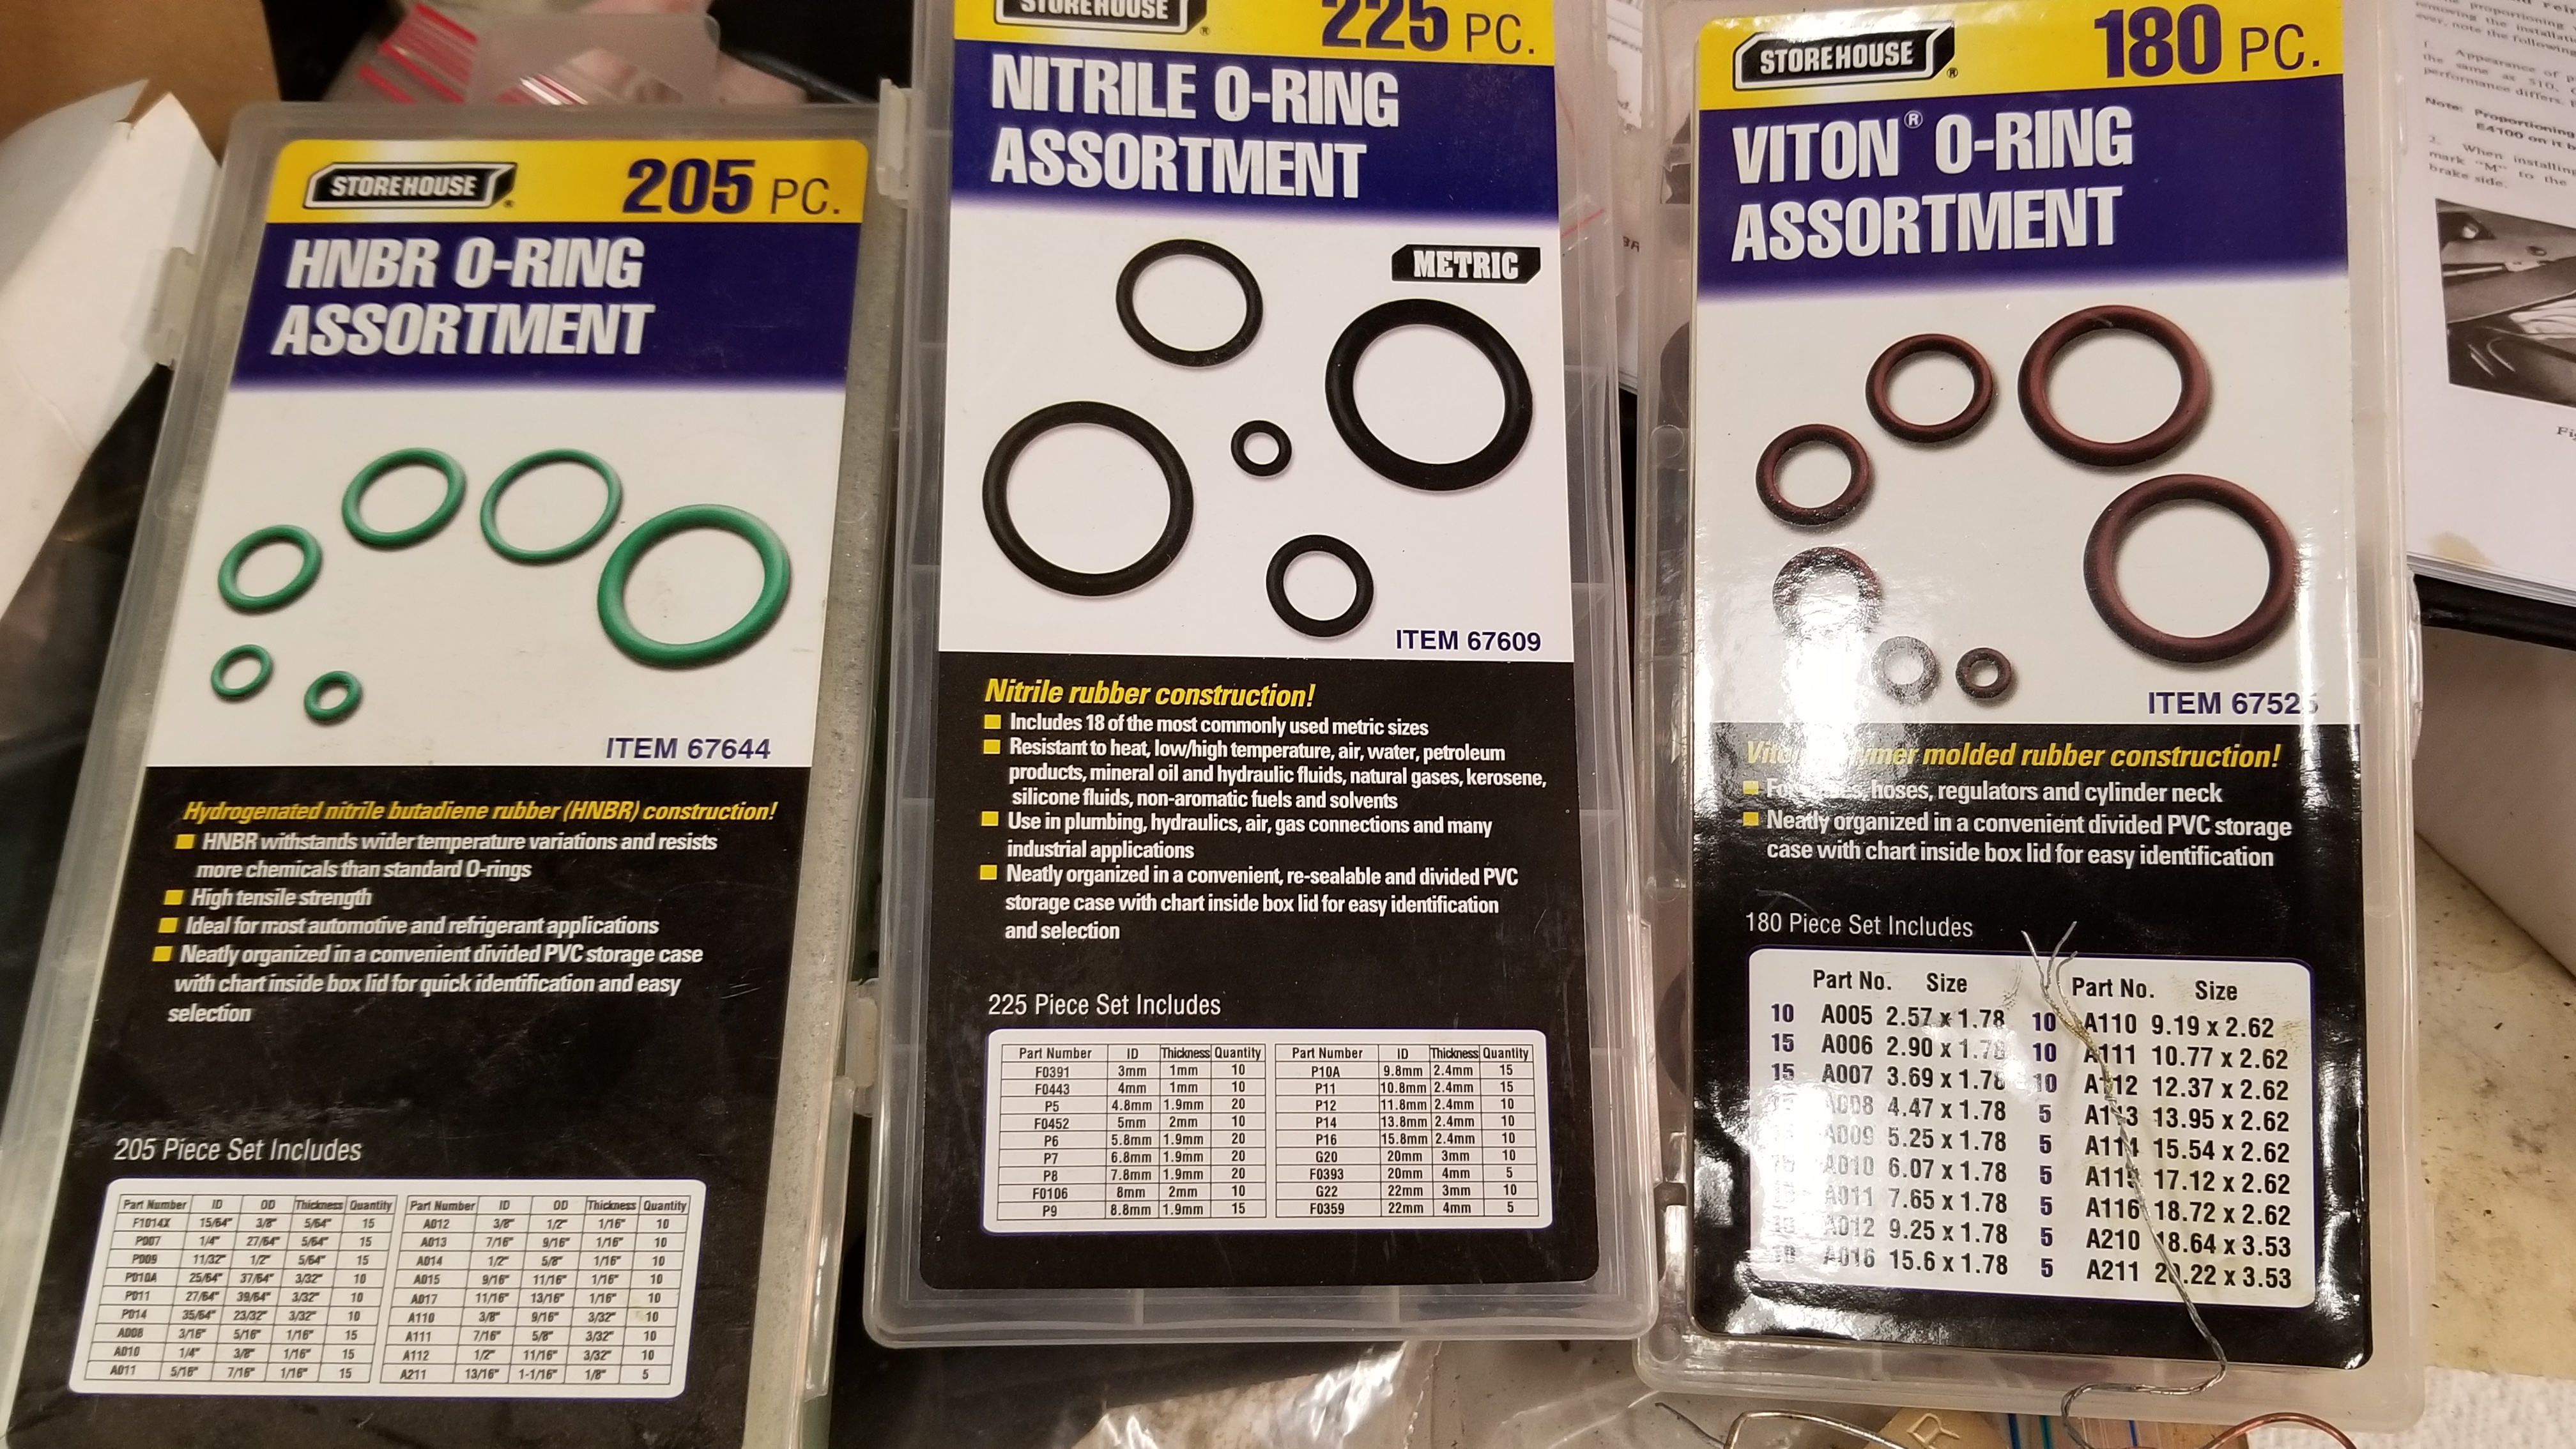
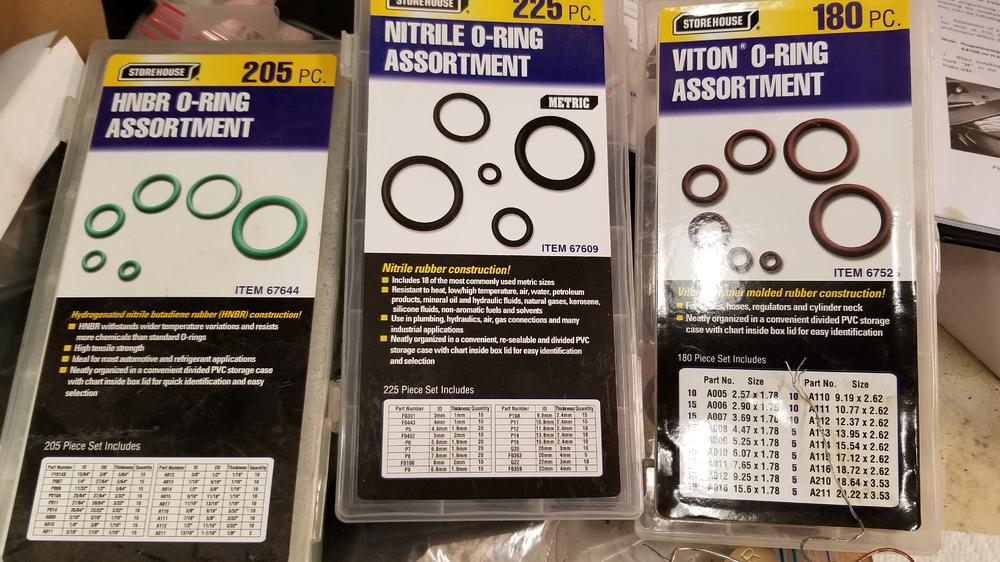
I found these two links from rubber companies. Evidently EPDM is the choice for brake fluid https://www.marcorubber.com/o-ring-material-quick-reference.htm http://www.efunda.com/designStandards/oring/oring_chemical.cfm?SM=none&SC=Brake Fluid Lot's of info in there for all kinds of chemicals!
-
If he has dual Webers they would not be my best choice for a Z. They work but they are fairly complicated. Nothing like a good set of simple SU's. For an SU swap you would need the SU's w/ the connecting linkage, air cleaners, intake manifold, balance tube, low pressure fuel pump and some fuel fittings, maybe the throttle linkage...
-
Thanks, I ended up using #0 steel wool. It worked really well but it does tend to turn your hands black. I wiped them down Eastwood Diamond clear. We'll see how they hold up...
-
What CO said! Also are your spindle pins new or used? If they're used you can buff them on a buffing wheel to make them nice and smooth. Many times they will shine right back up if the chrome isn't compromised.
-
Are you getting spark on a plug? If you shoot some ether in it will it bump over?
-
Not necessarily. Most shops have a brand they work with and most brands make good paints and price point paints
-
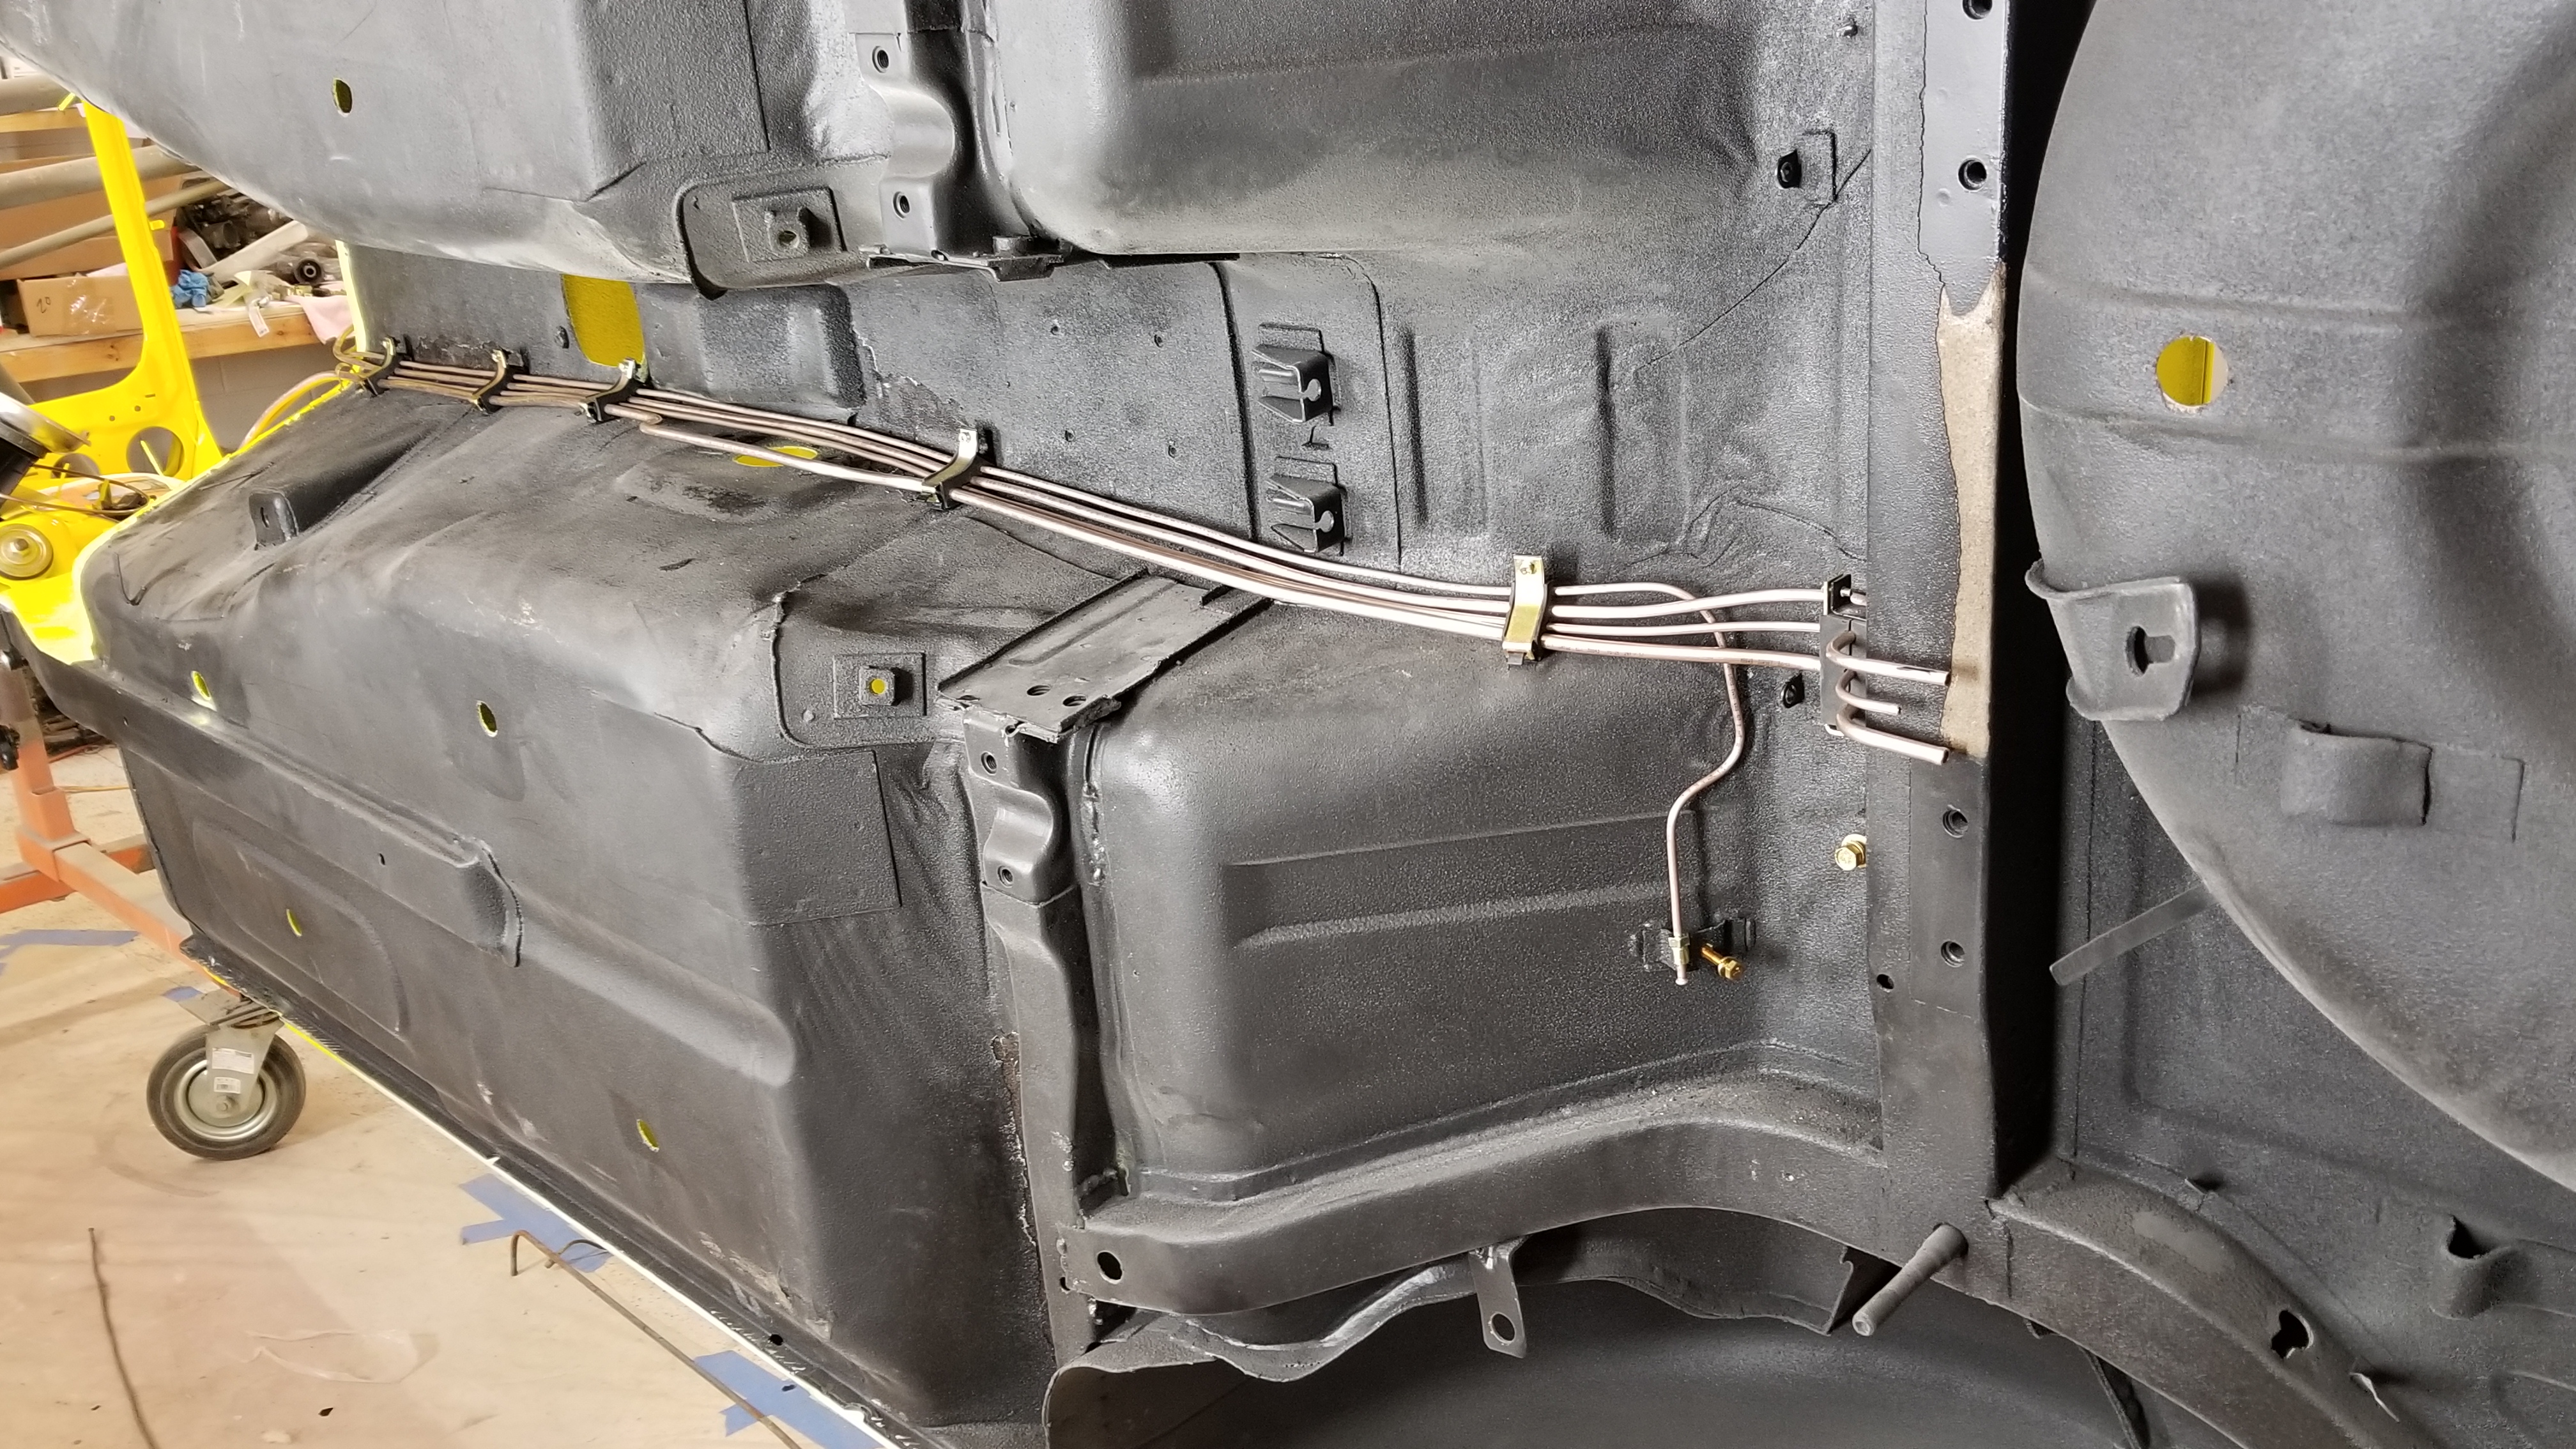
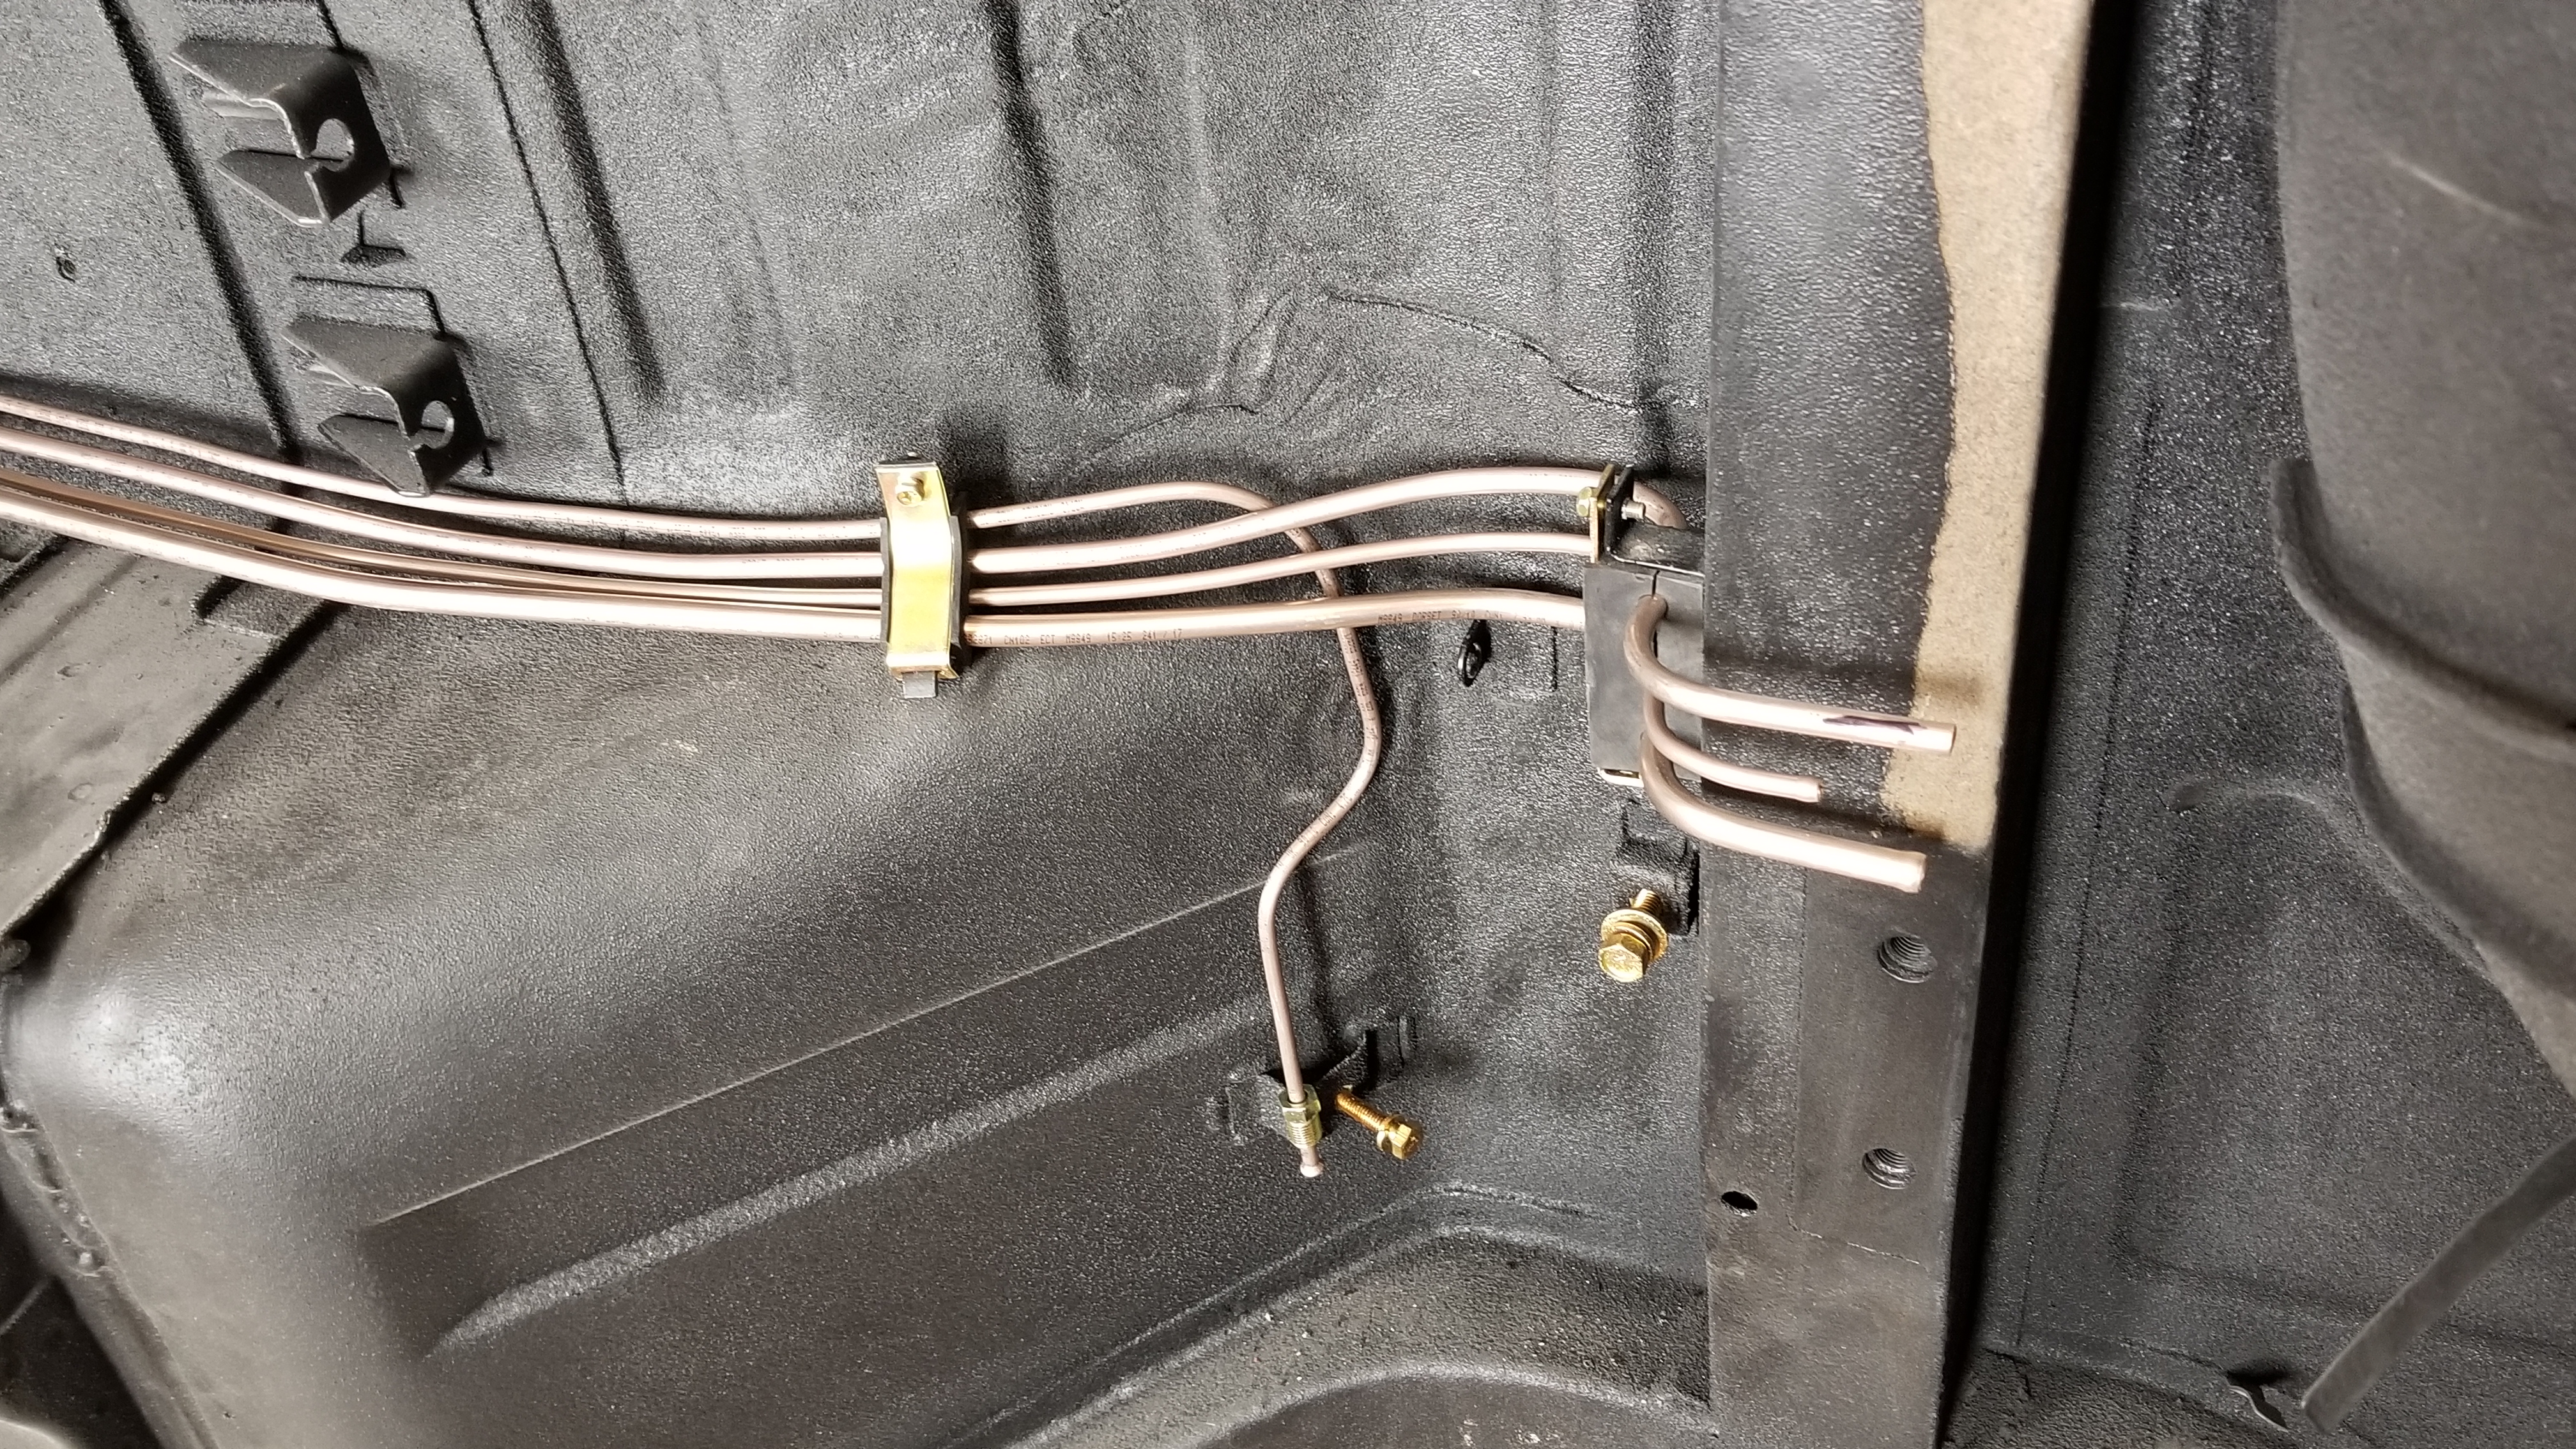
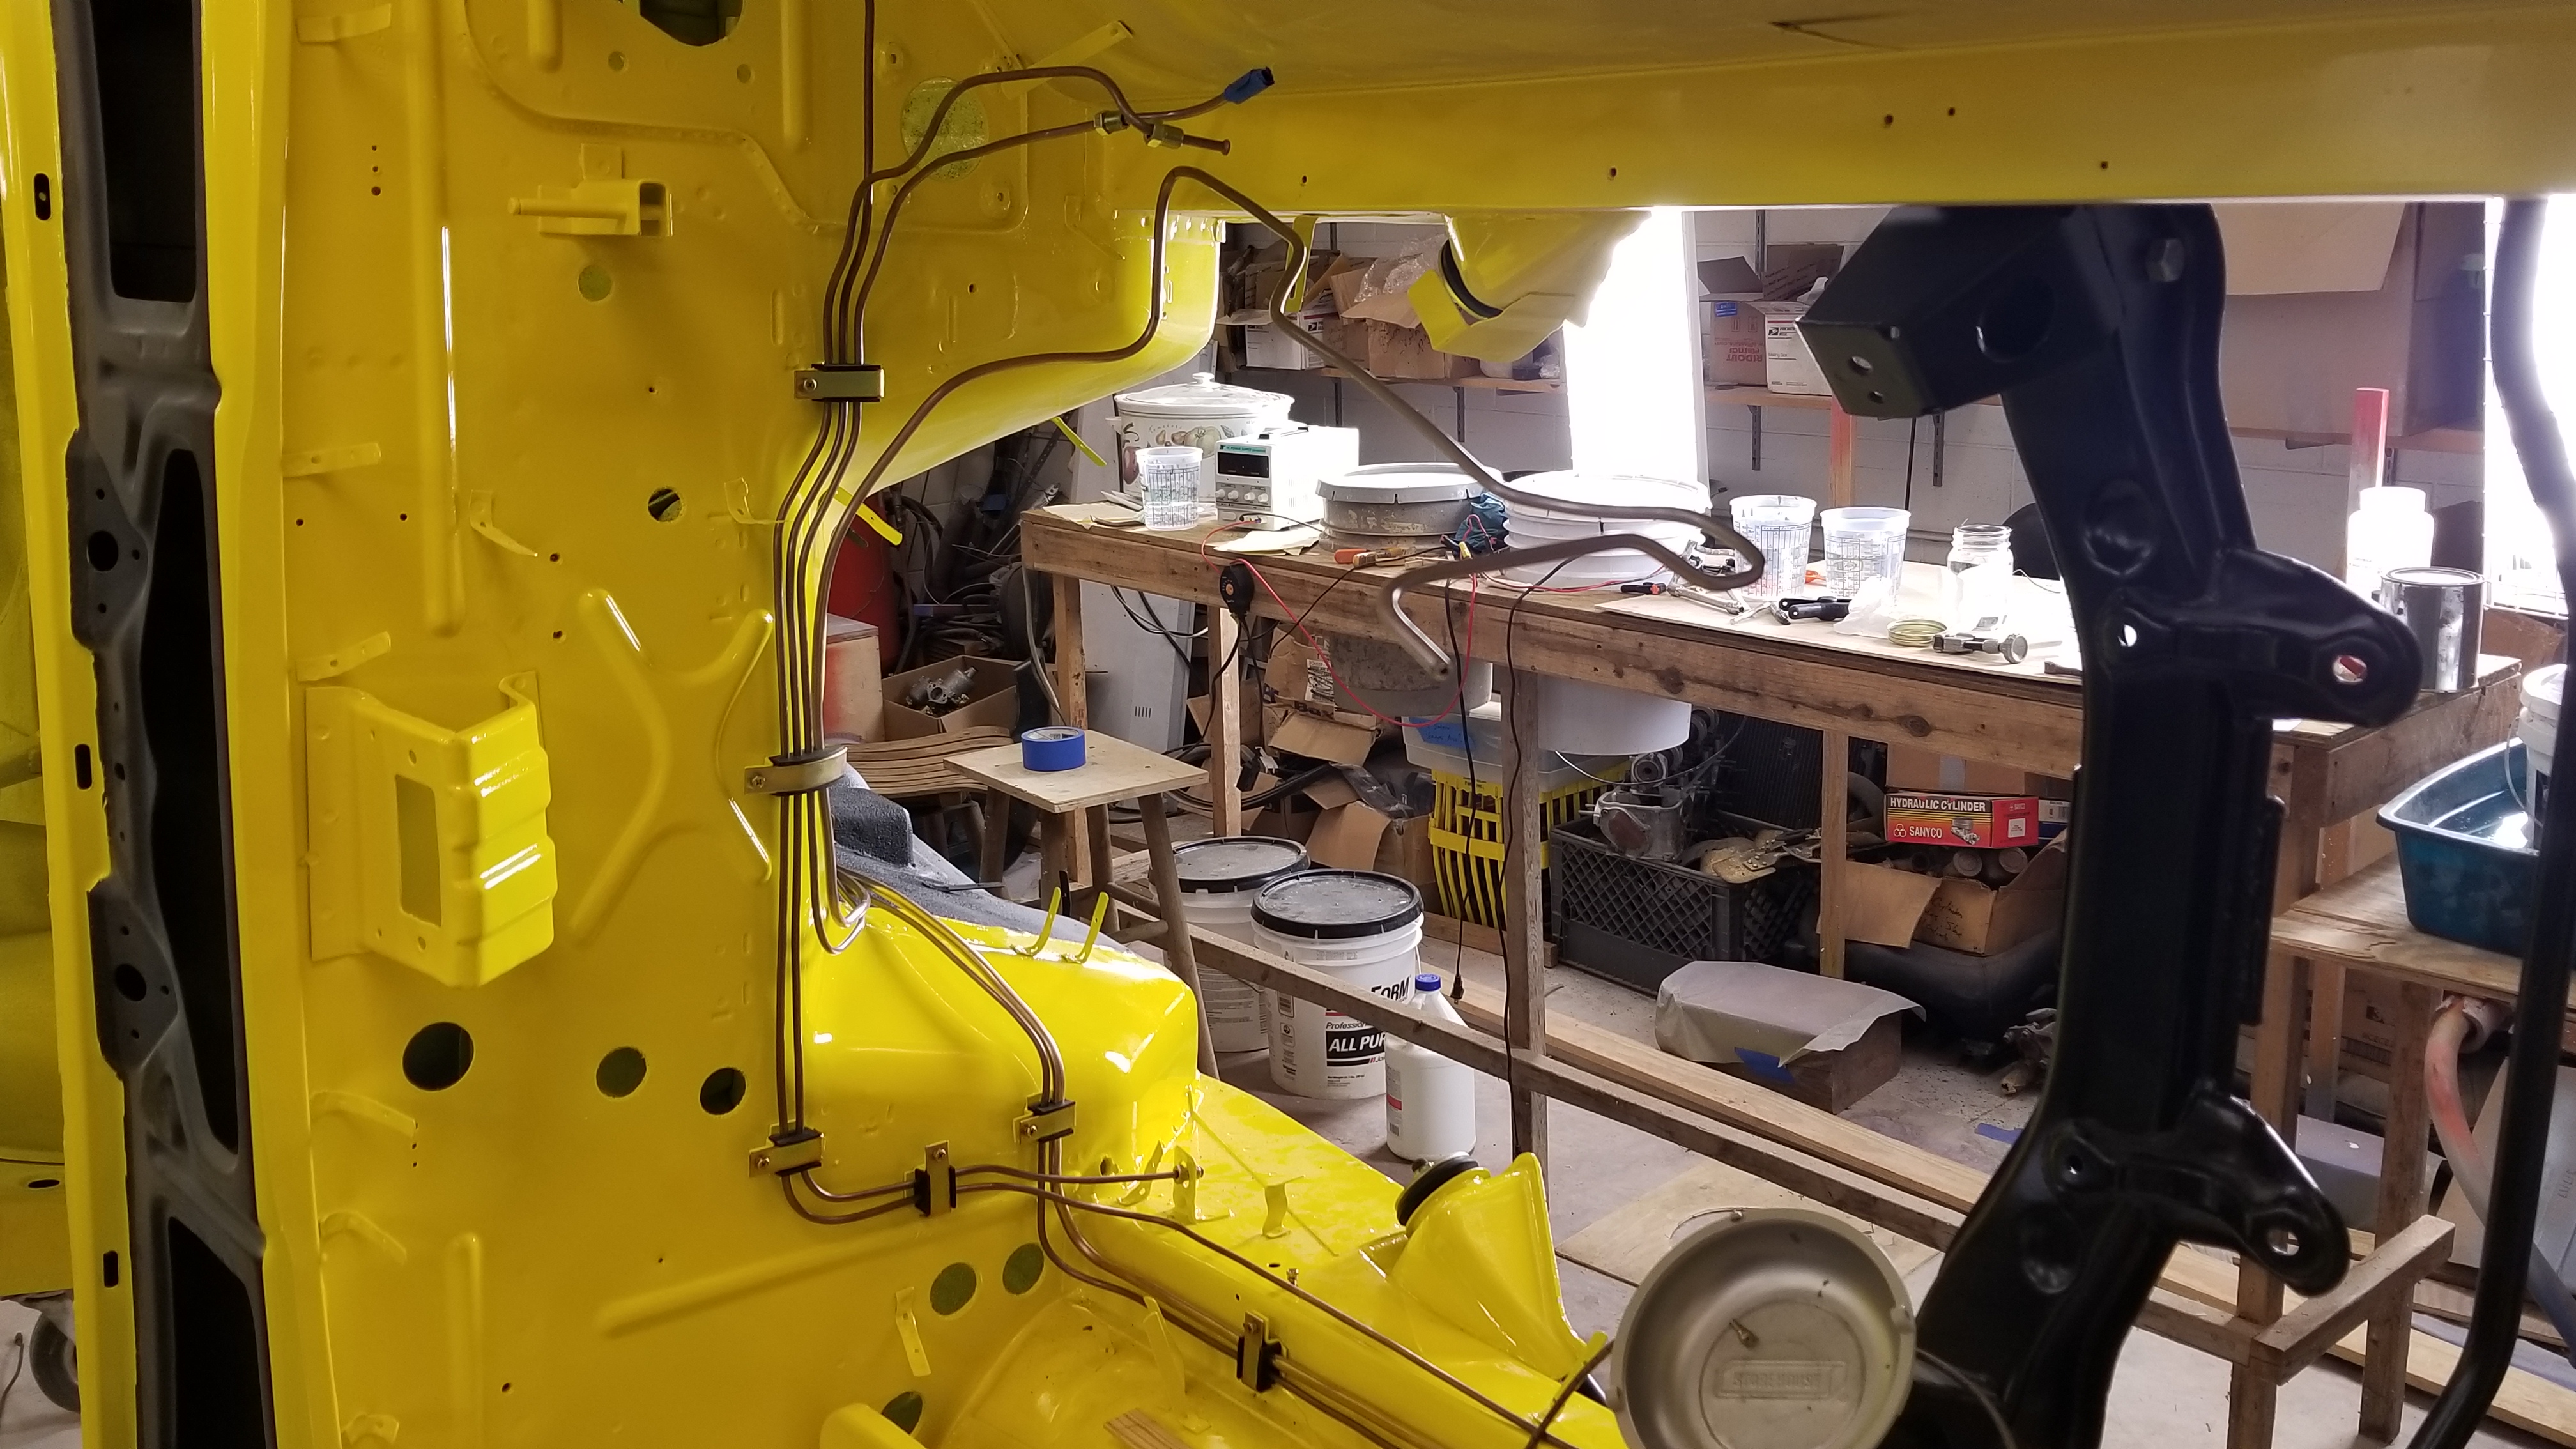
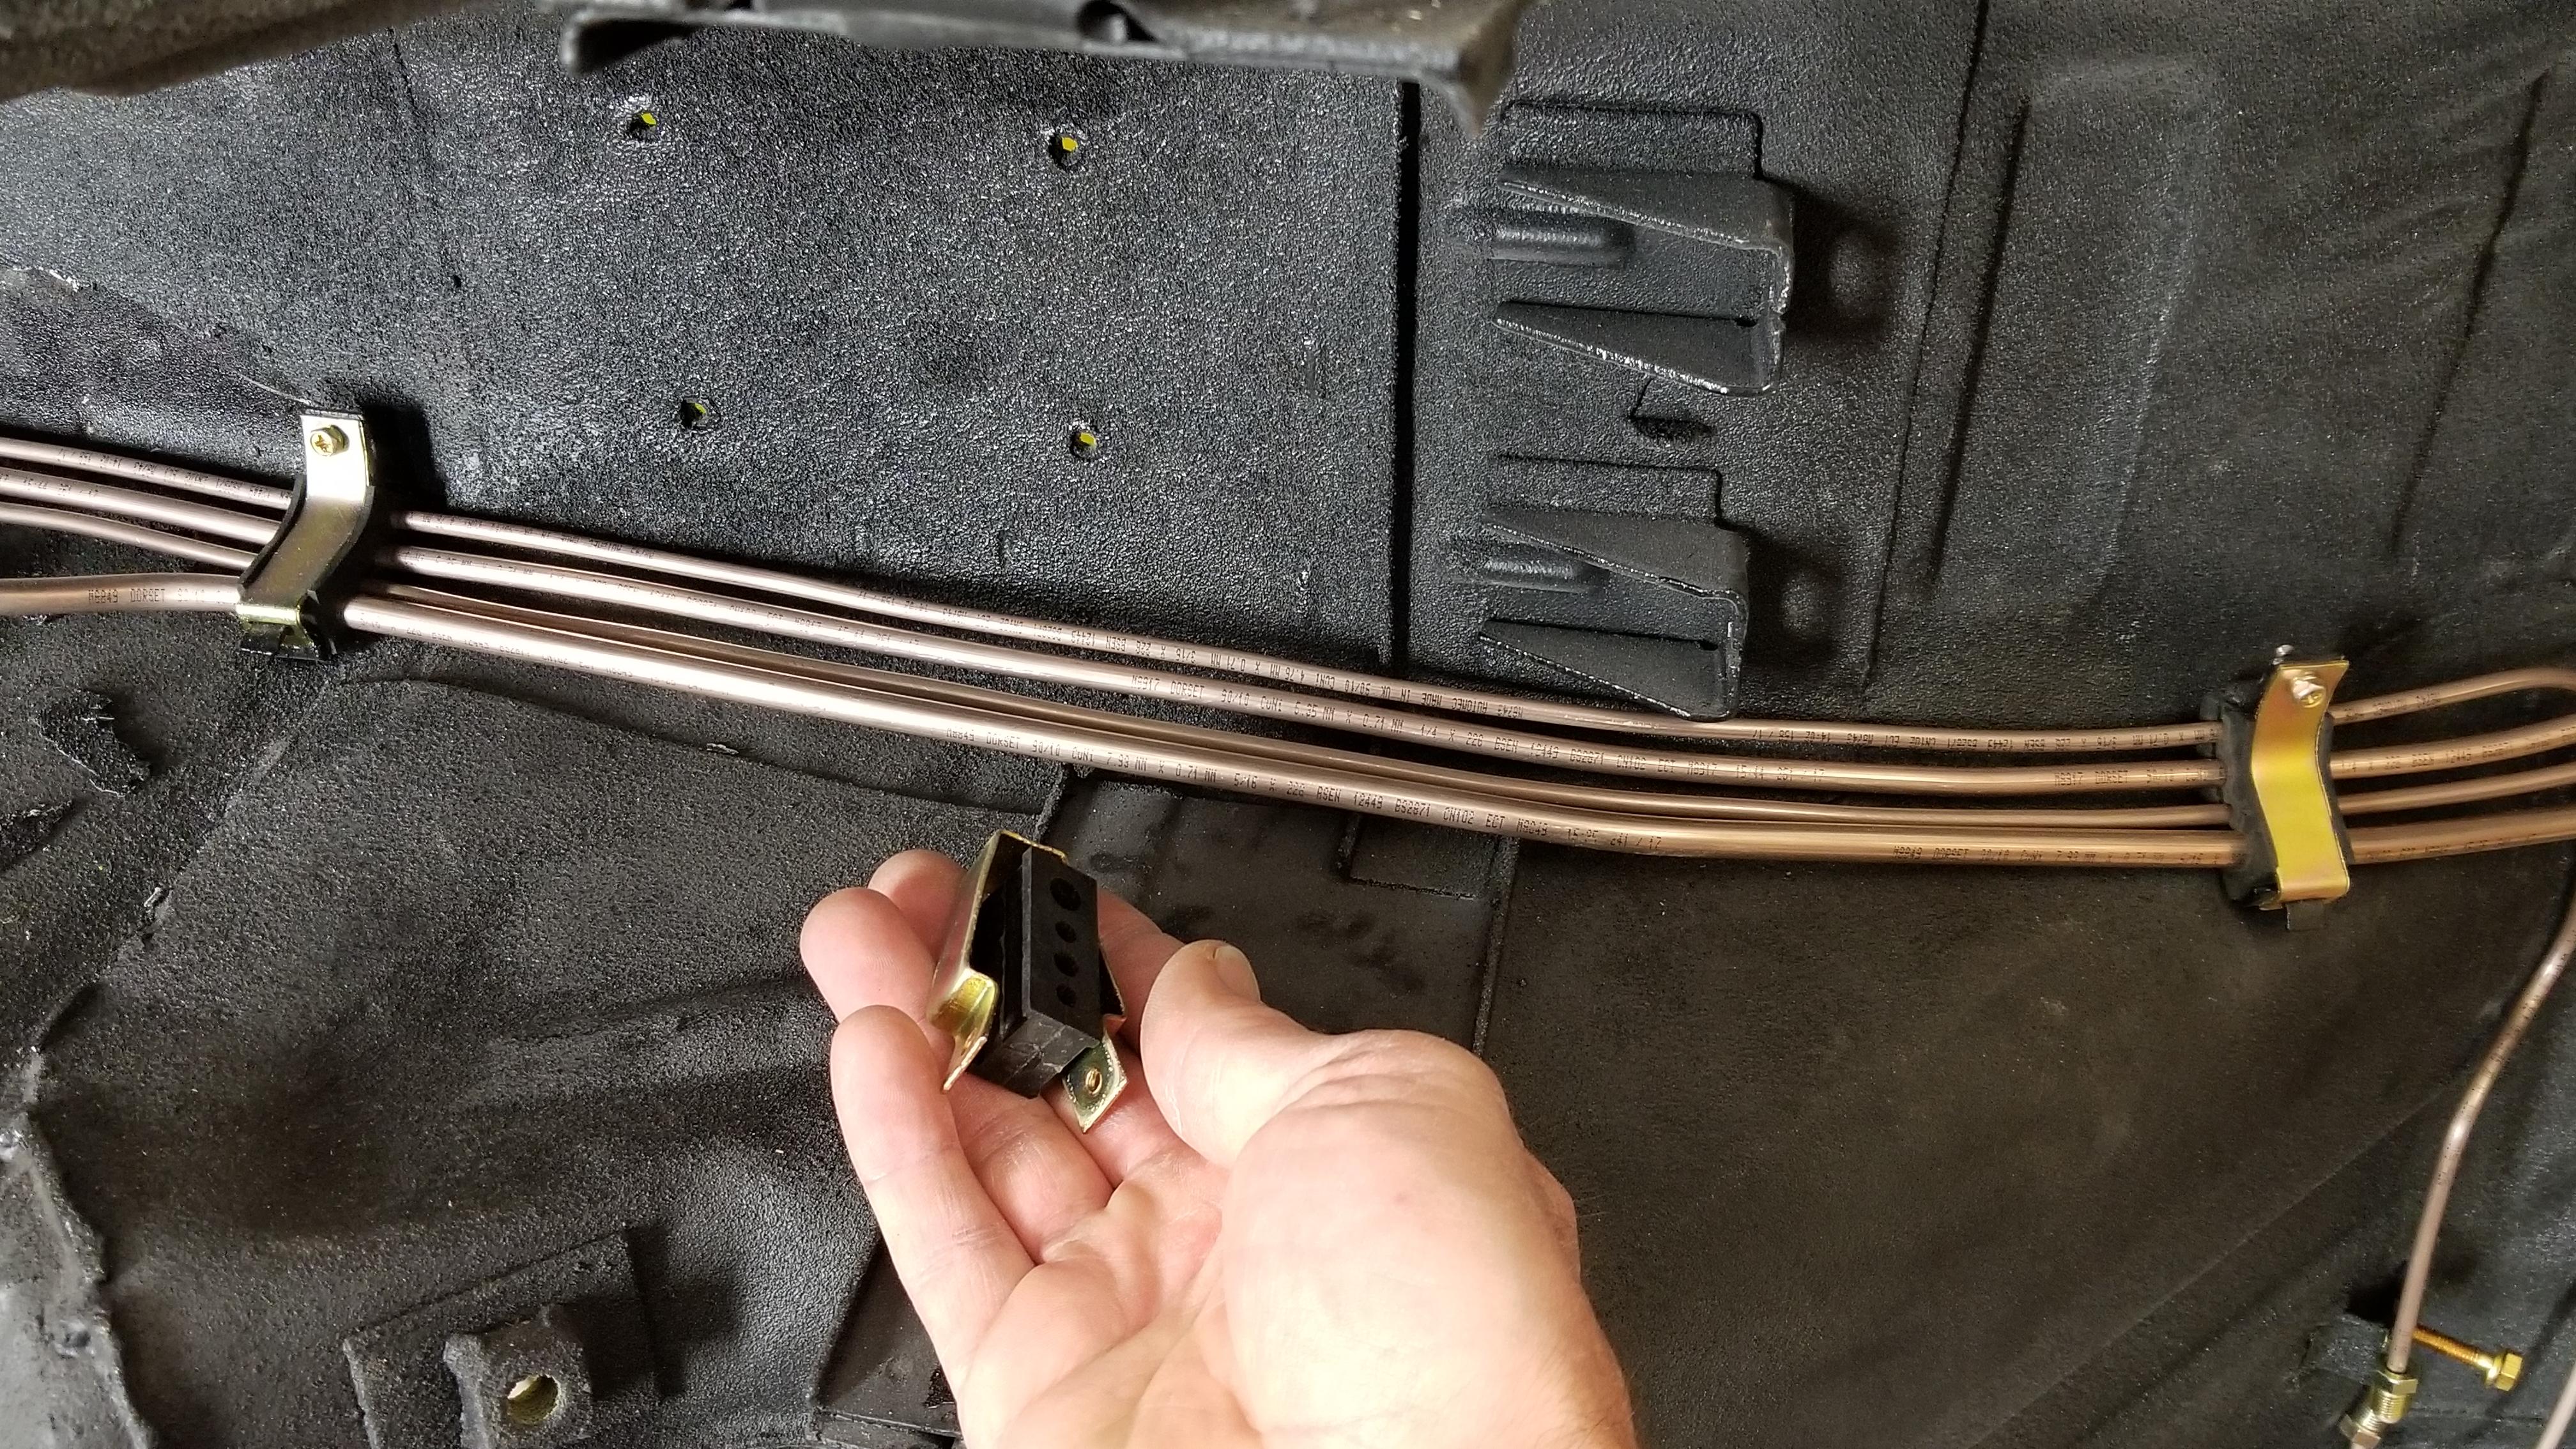
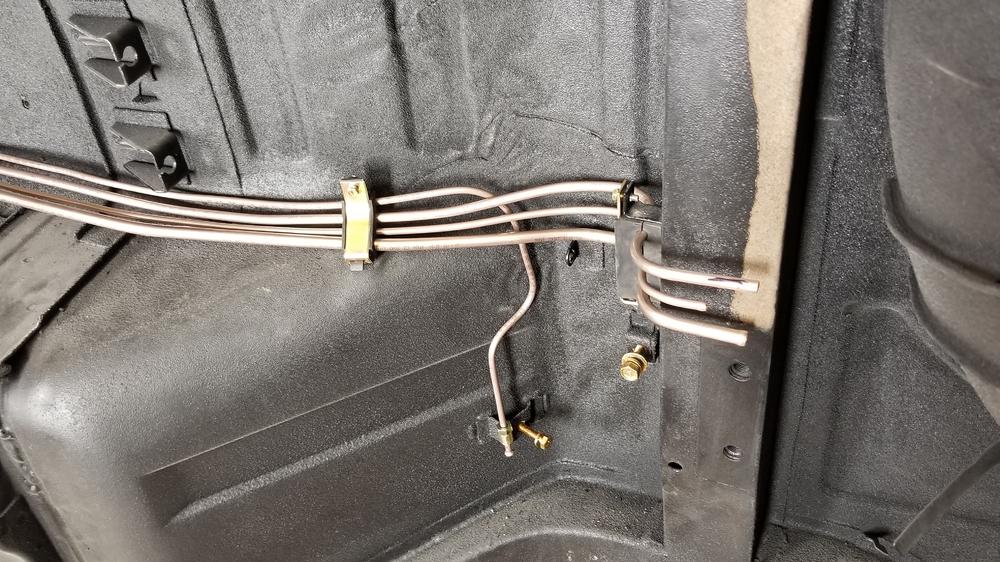
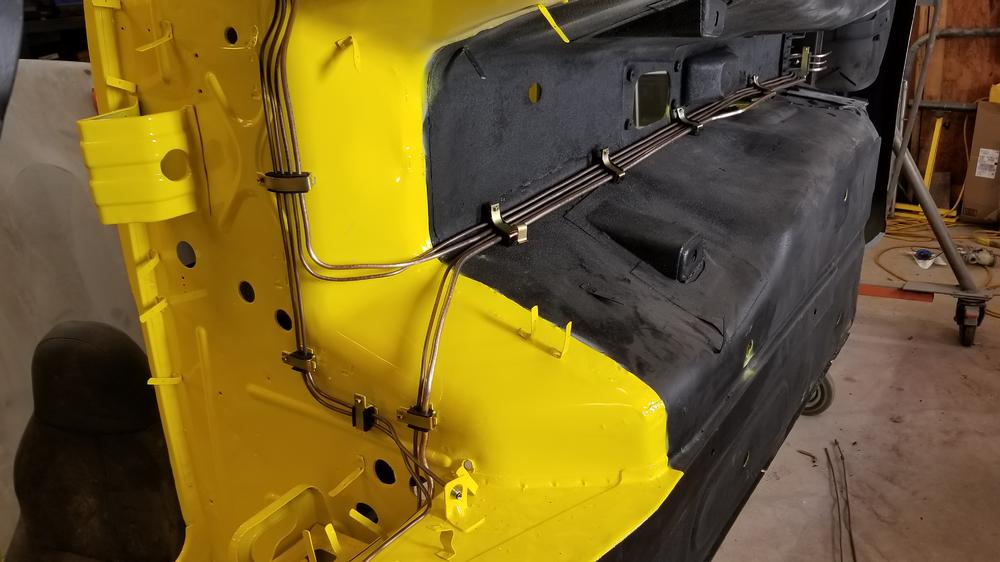
I also meant to say the brake and fuel lines are really a pain in the butt! If you are going to replace your existing lines, straighten the existing lines the best you can and remove them without damaging them. Then you can use them as patterns. If you don't have a pattern line, then it works best to keep the material rolled up. If you are doing one of the long lines that goes into the engine bay, then start from the front. You can make the line working towards the rear and cut them to length after it is pretty much bent.
-
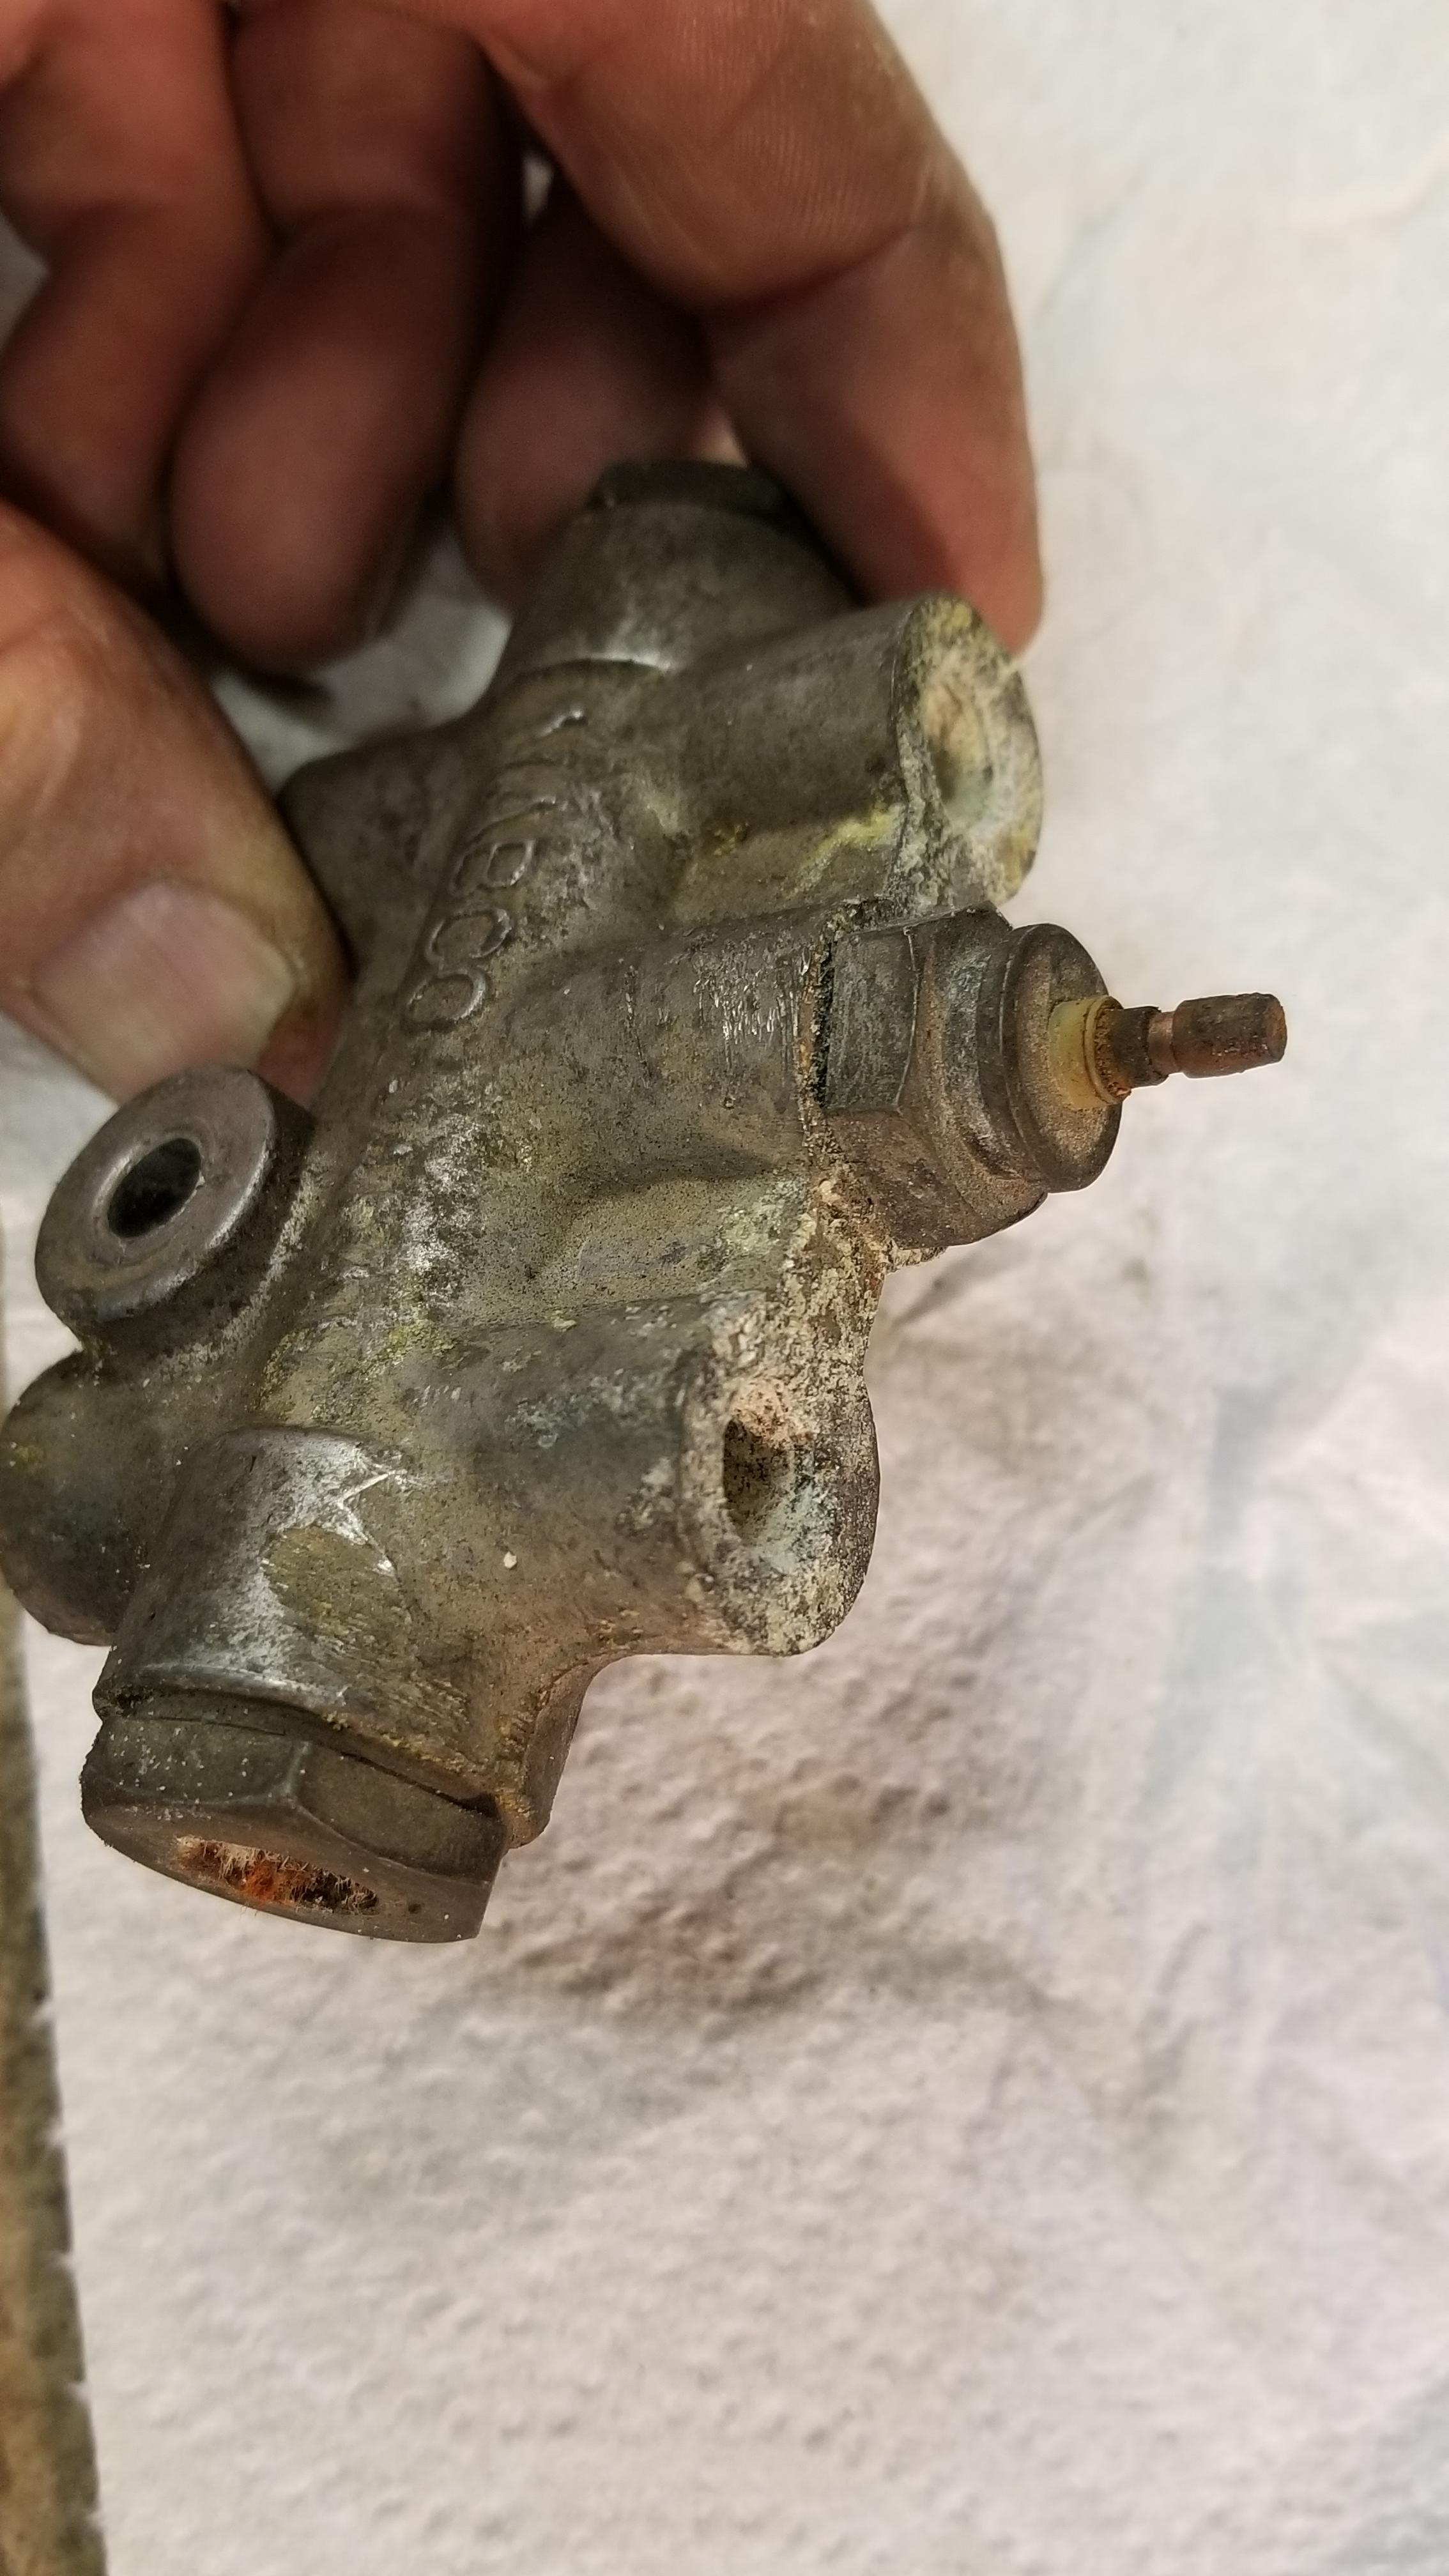
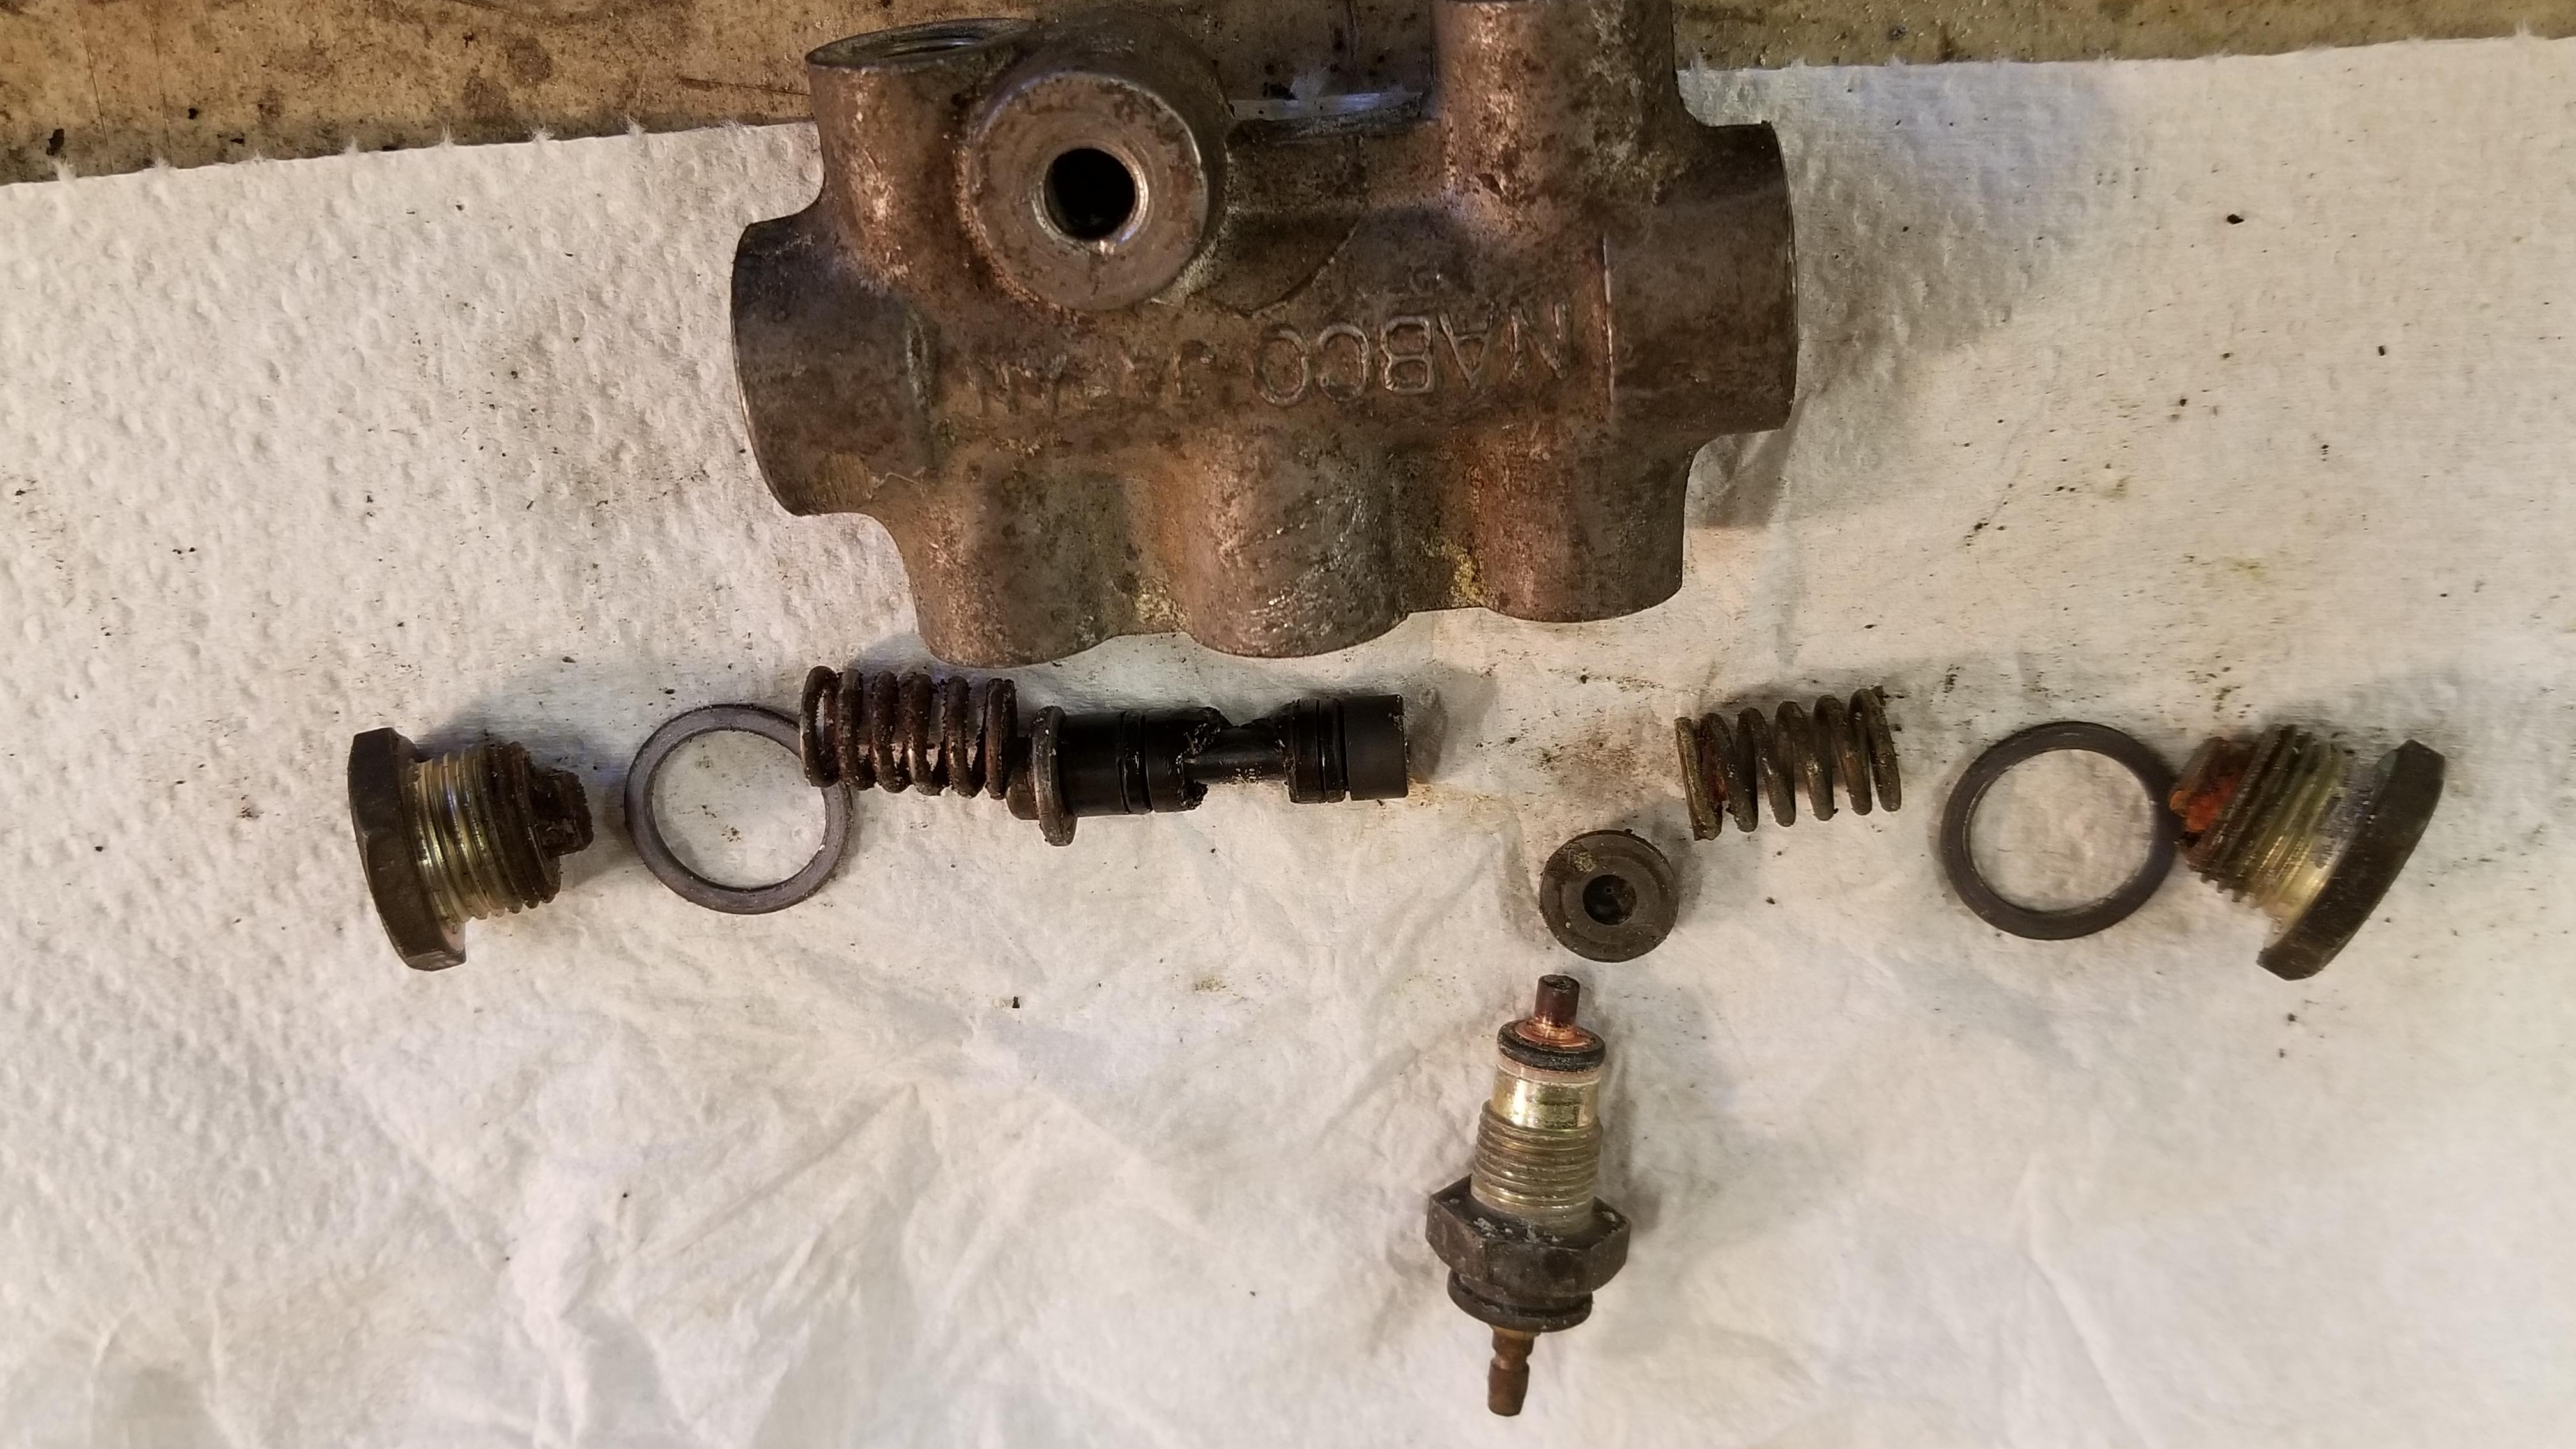
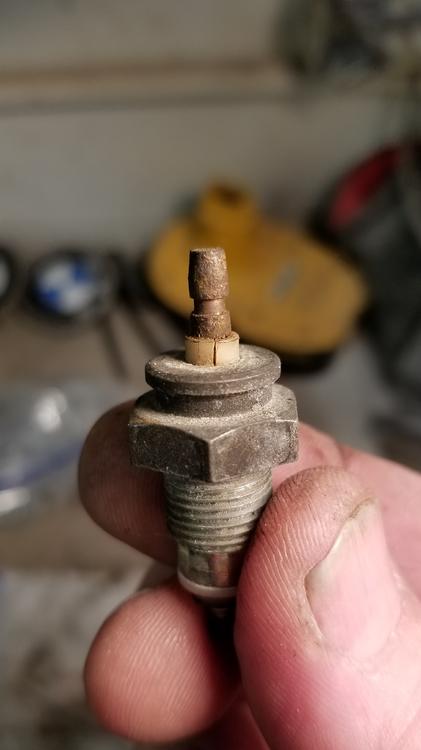
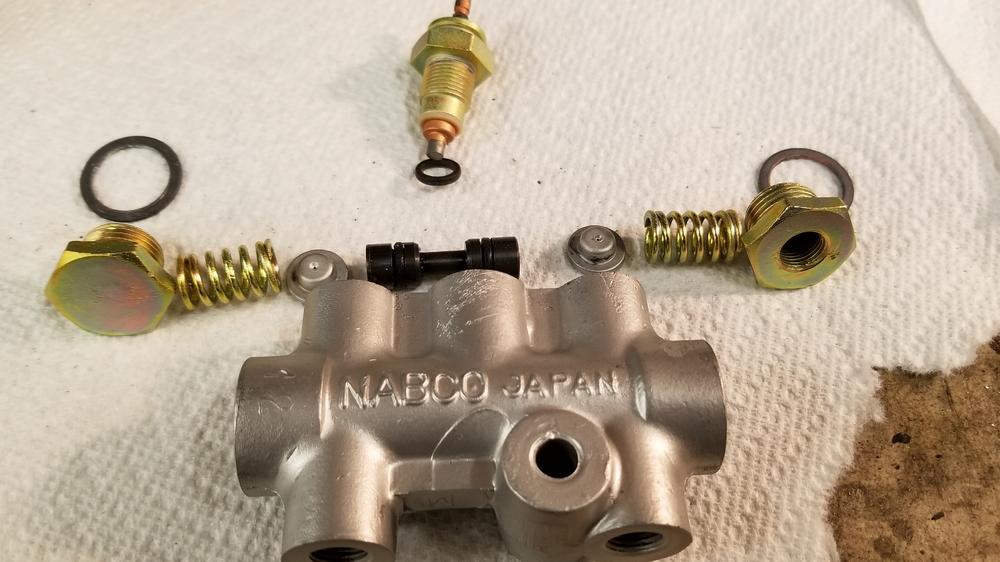
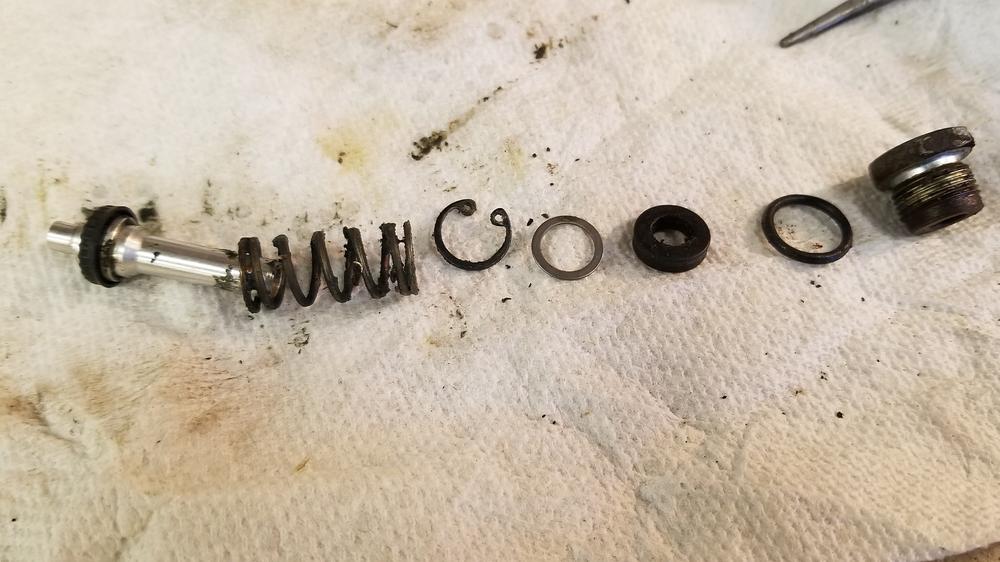
Here is the brake switch Sorry about the rotation. When they upload they are oriented wrong. Tried several things but no luck. @Mike Here is the brake switch. I was not sure if the little crack would be an issue, but everything appears to be ok. The parts plated out fine...since the copper didn't plate it is still isolated from the outside. The central plunger is steel and appears to have a black chromate finish on it. The little grey hats are not steel. I'm not sure if they are metal or not. They might be aluminum. There was something that l thought was grease in the center of the switch. Does that sound correct? Should I put grease in the center of the switch on reassembly? Will it interfere with the circuit? I would like to replace the o rings in the assembly. Any thoughts on which of these three would be the best for dealing with the brake fluid? Also speaking of brake fluid, what are your all thoughts on what brake fluid to run. Since the system will be starting fresh I could run what ever I want. I like the idea of silicone fluid to make storage and maintenance easier. I have heard though that silicone doesn't do as well with heat, like track days. So which what would be best to use? @gnosez What is Jeff's proper user name?

-
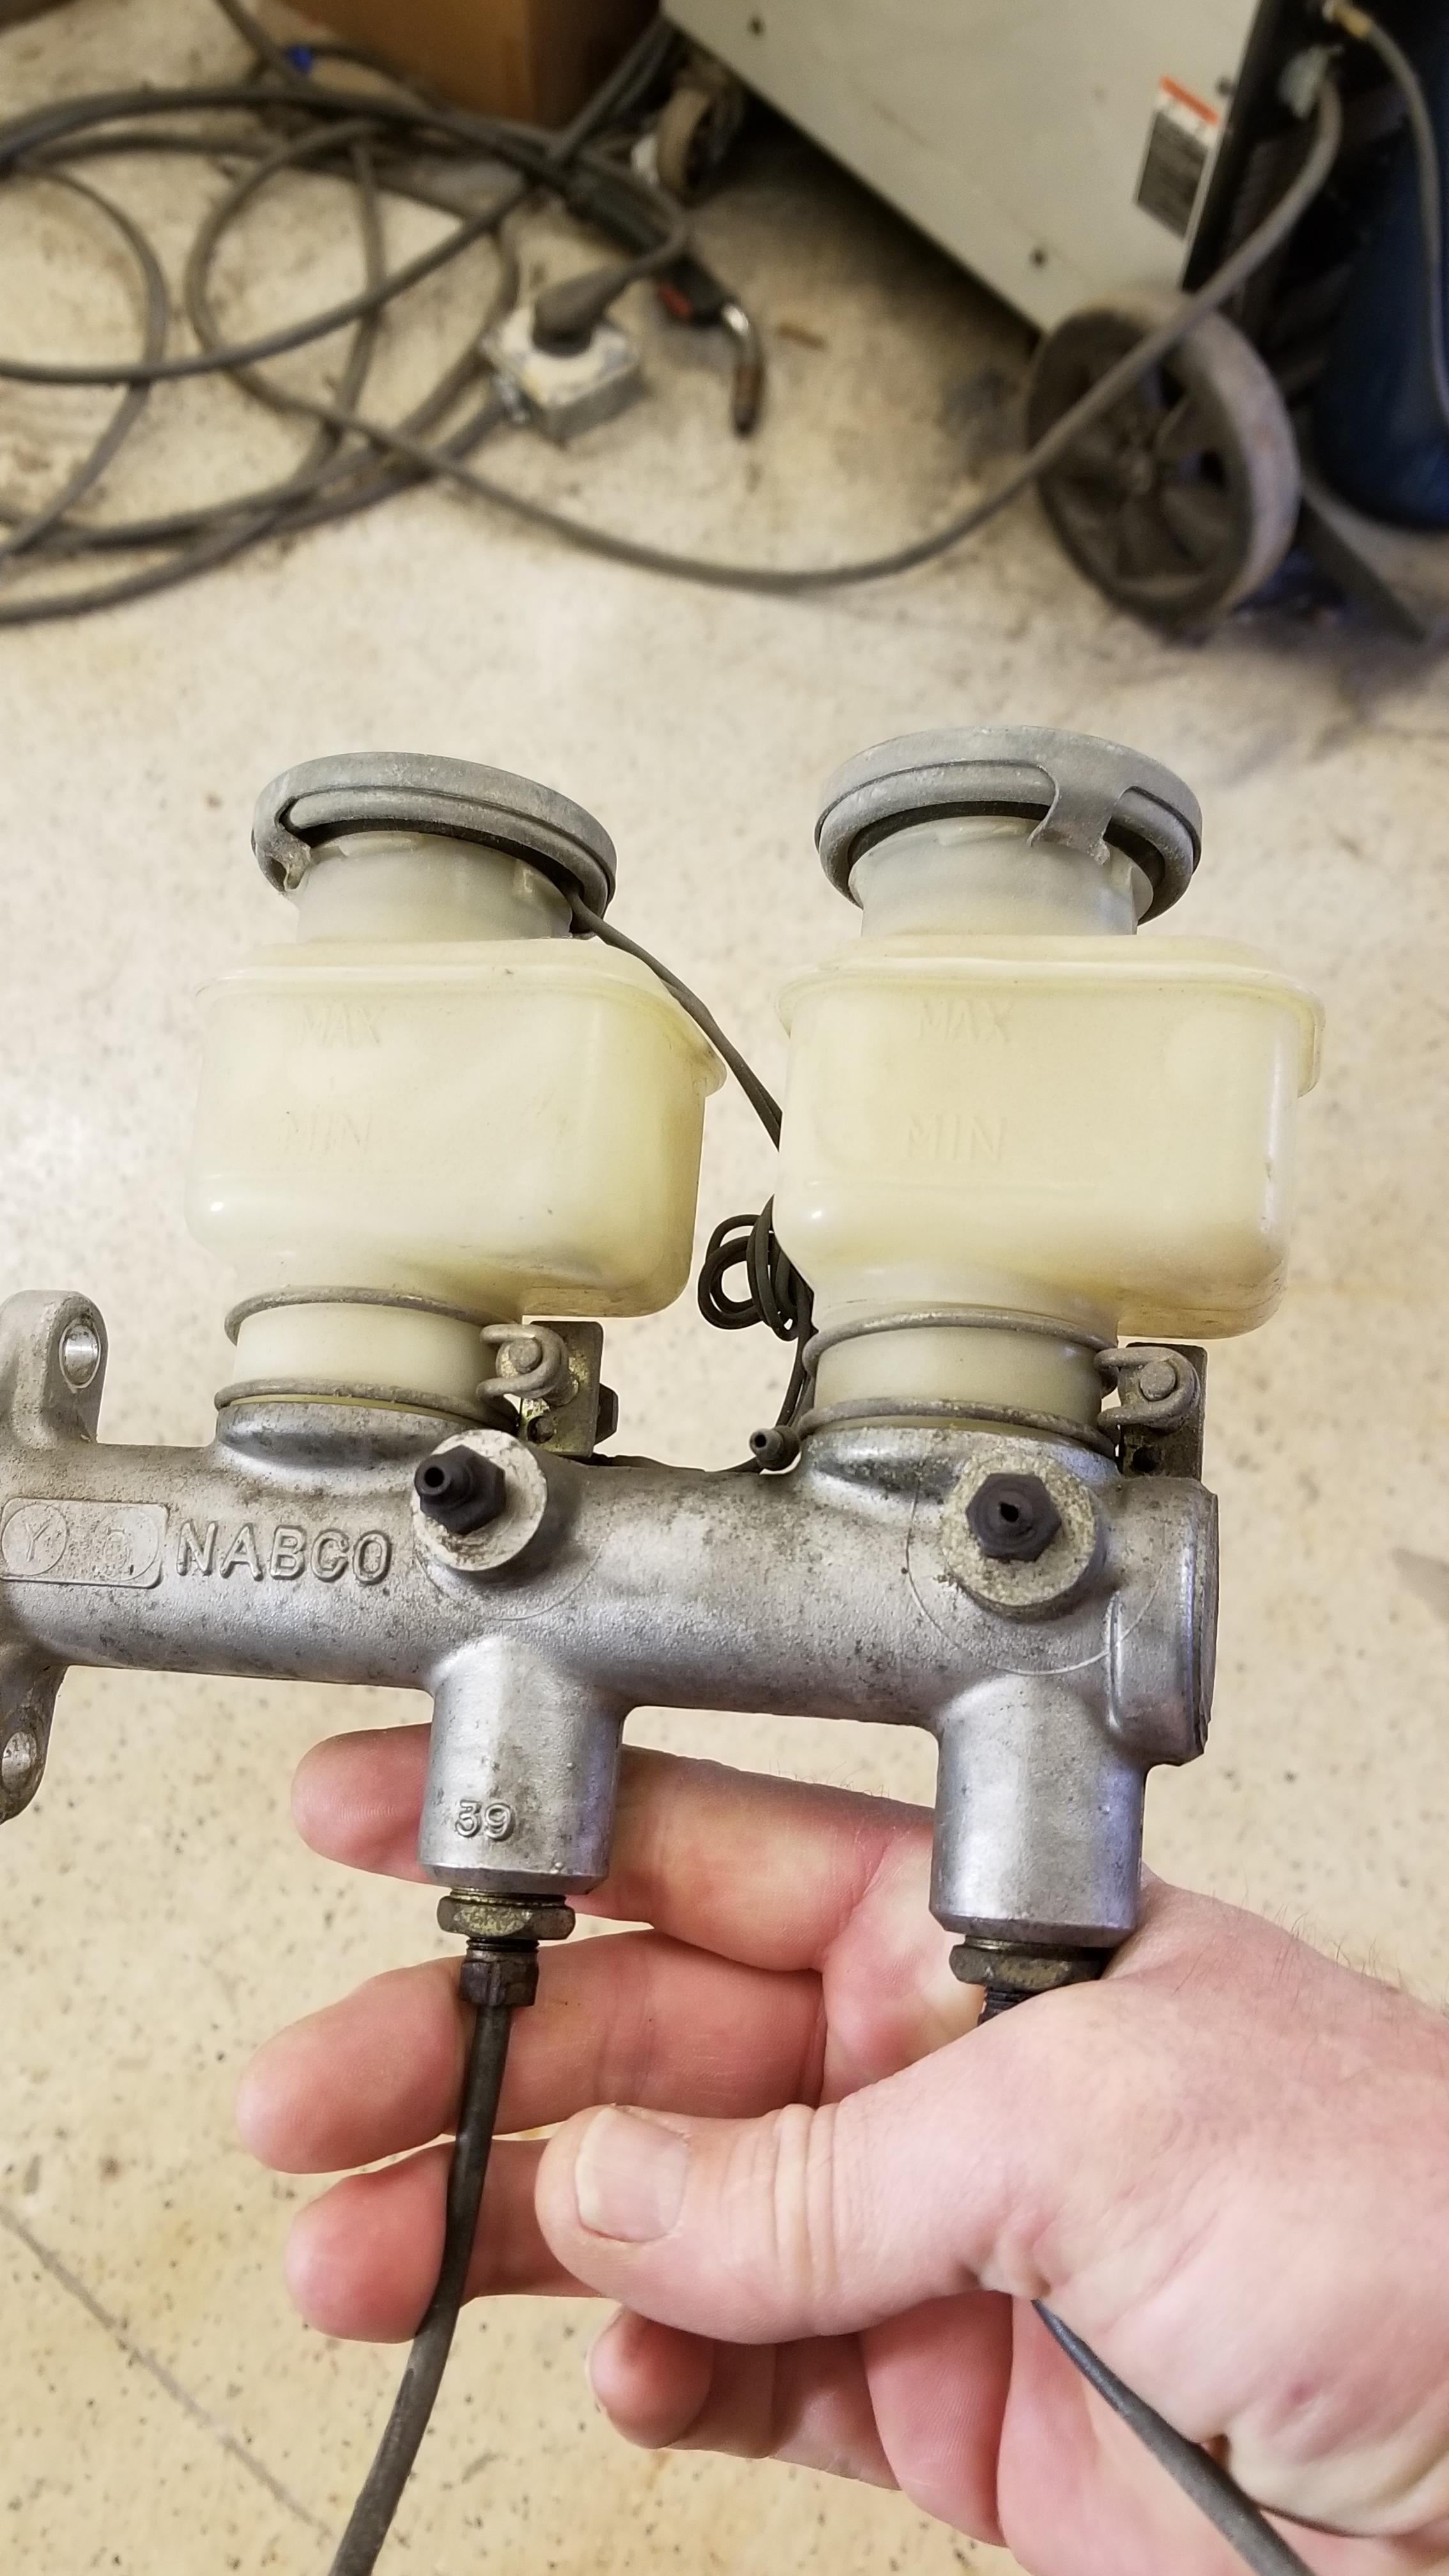
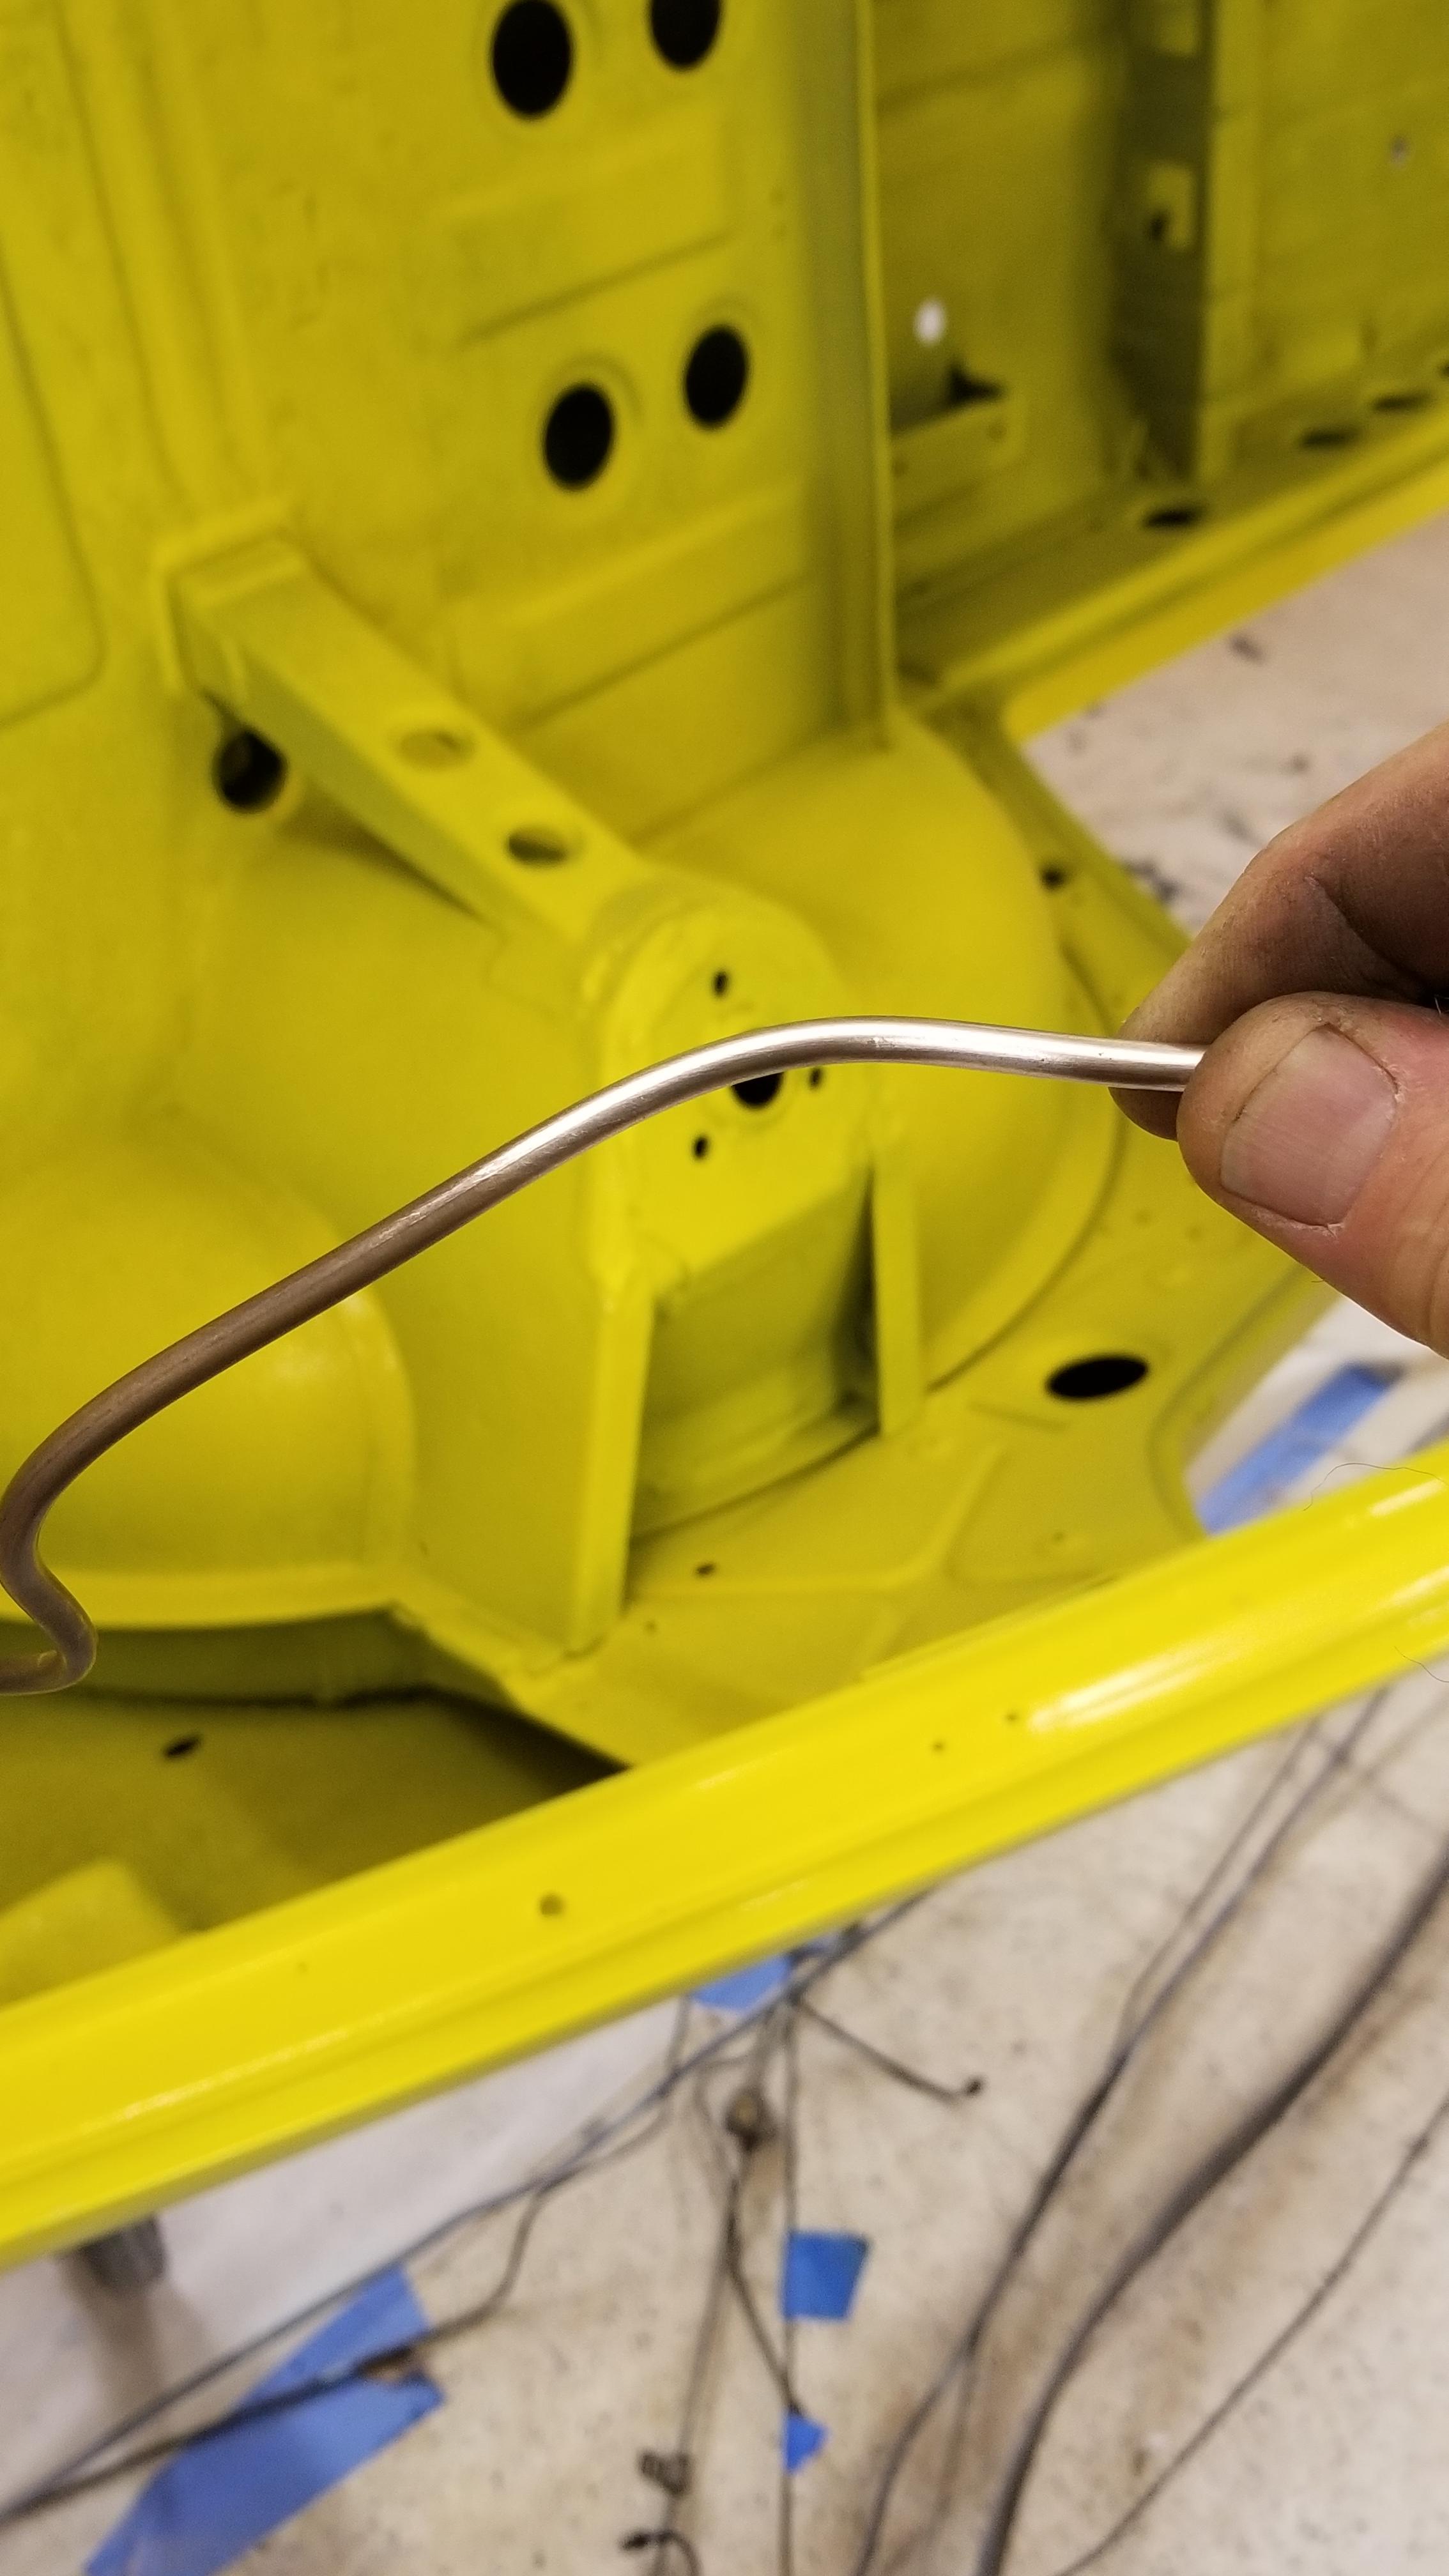
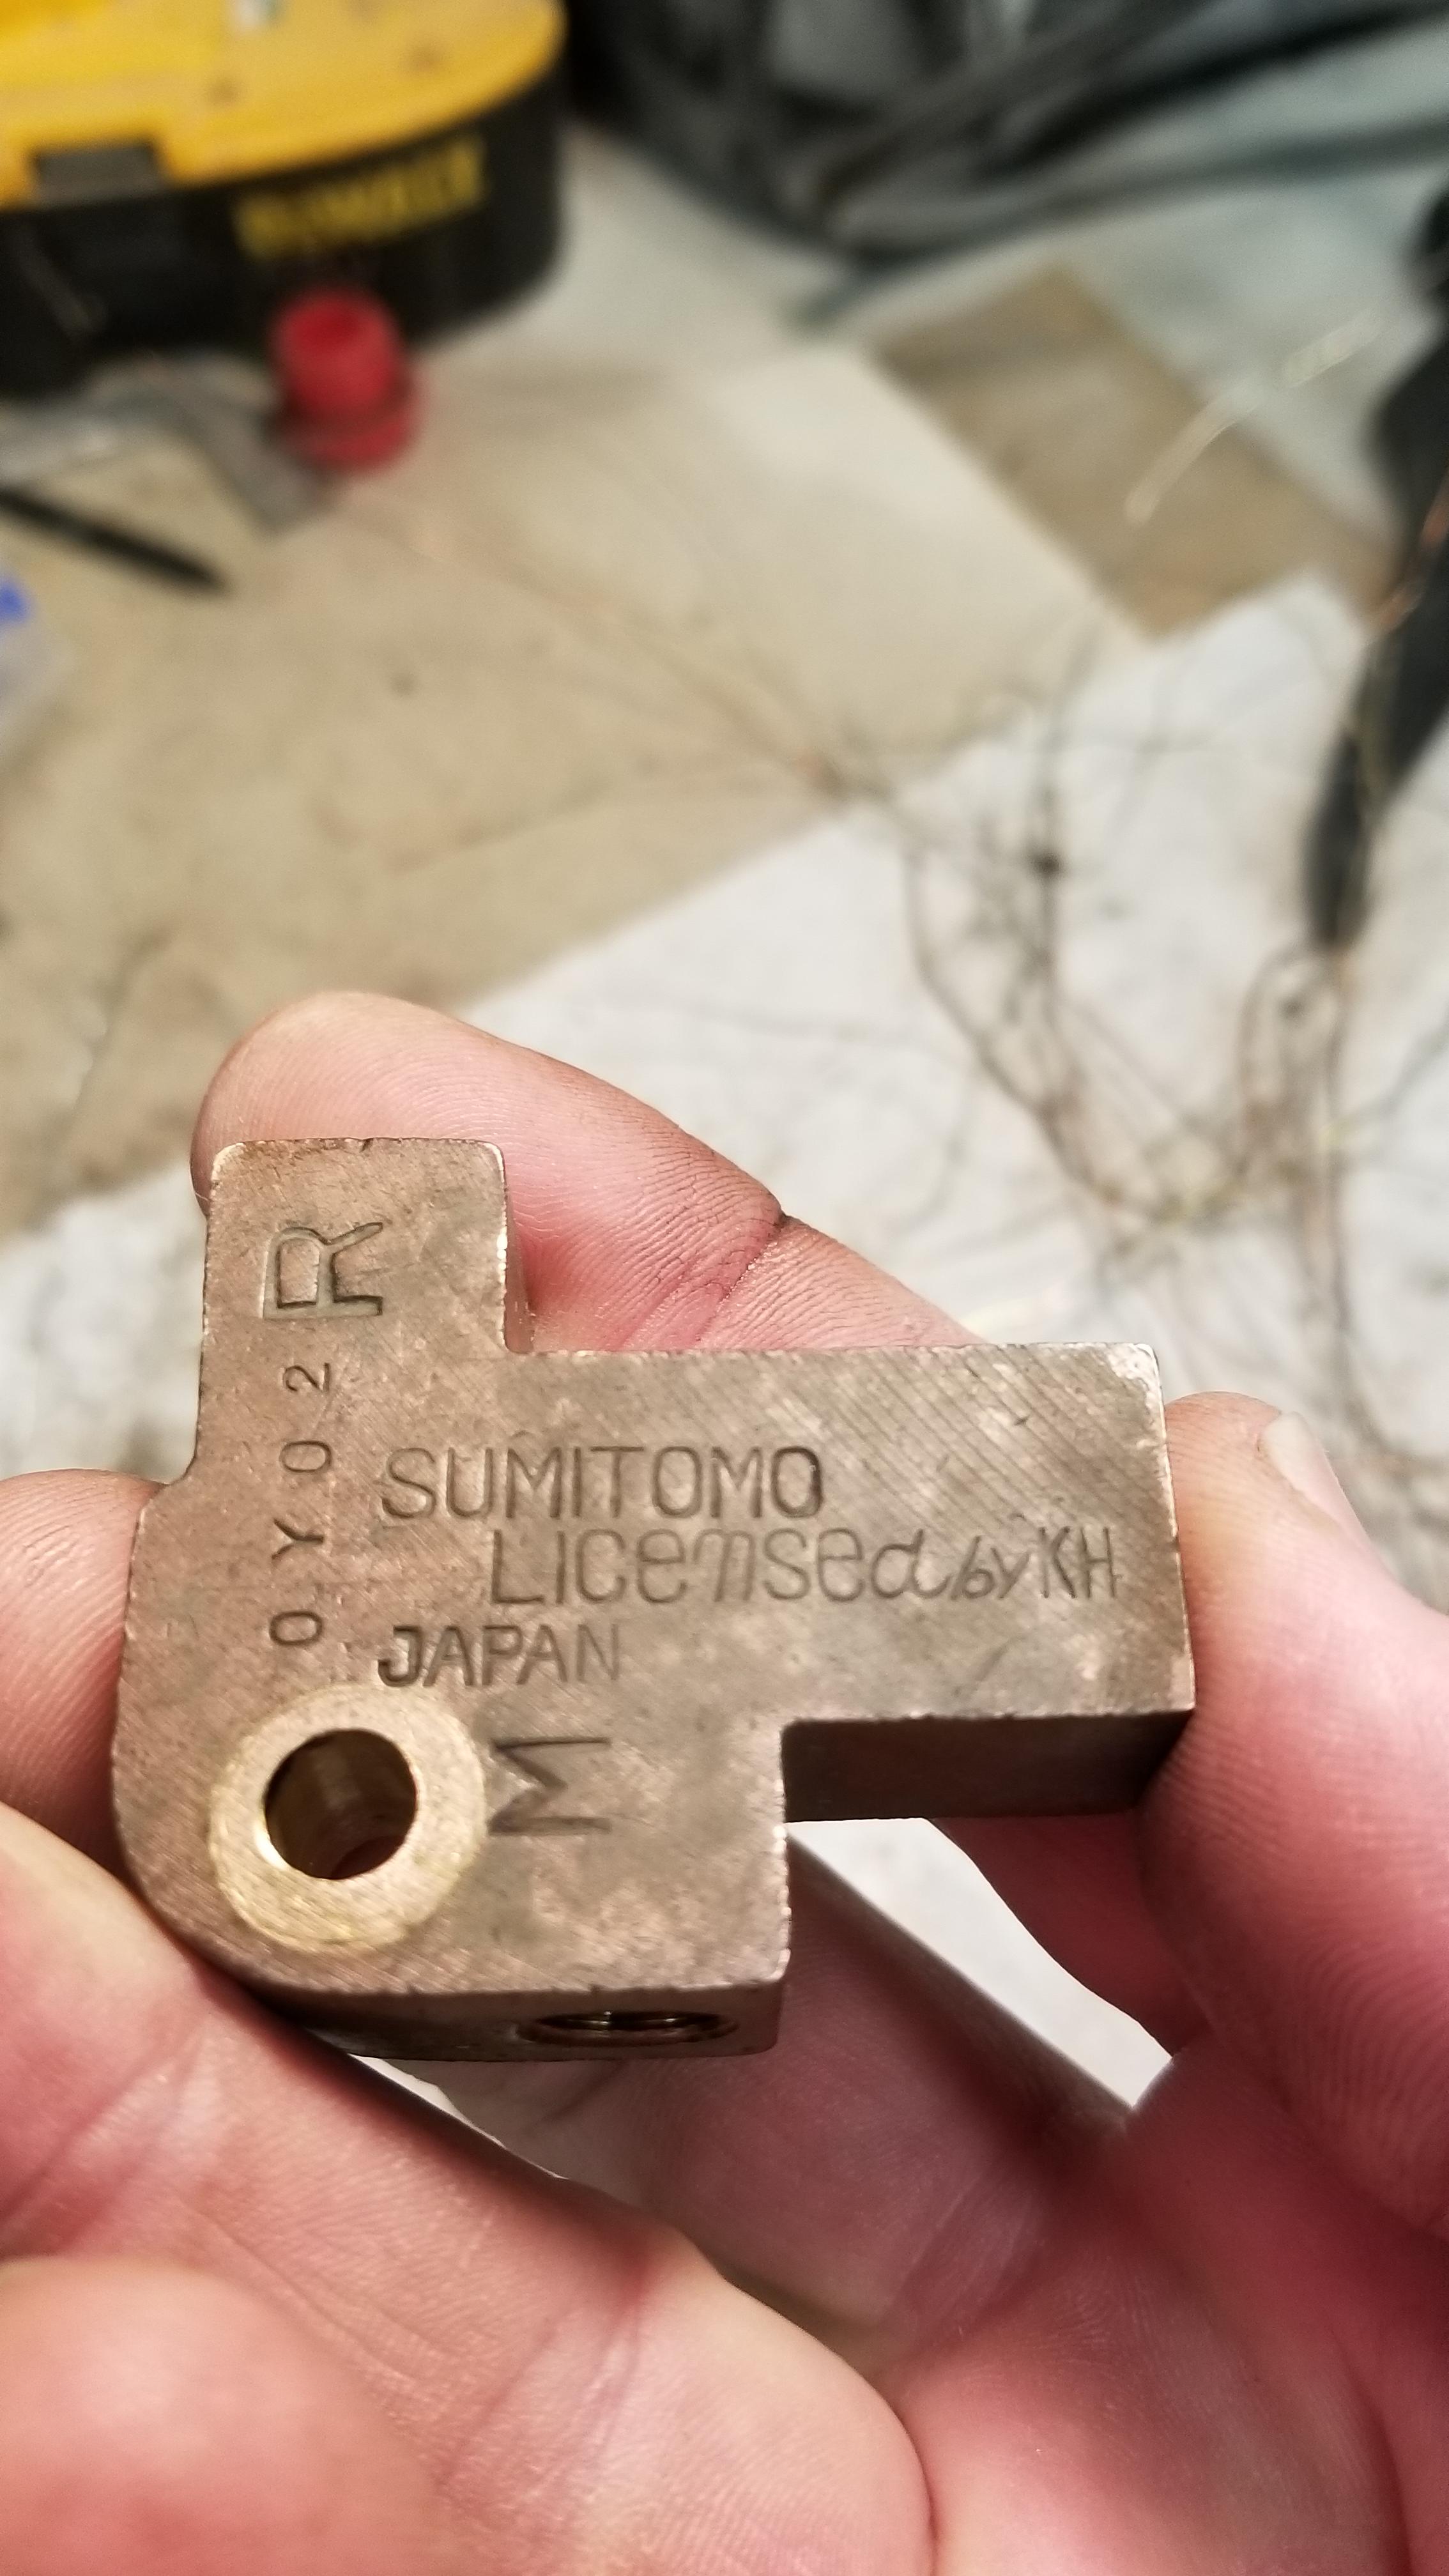
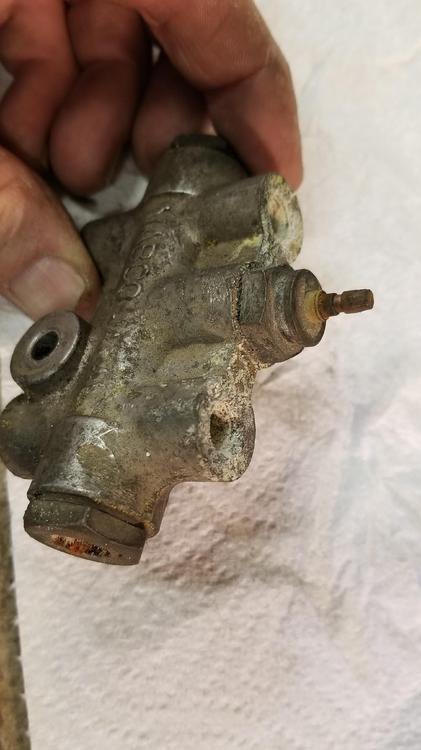
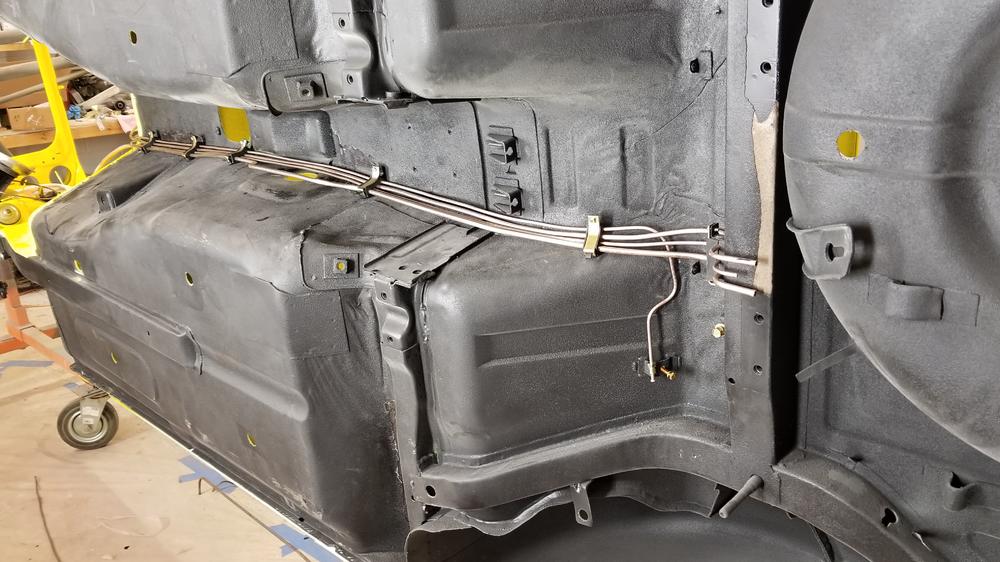
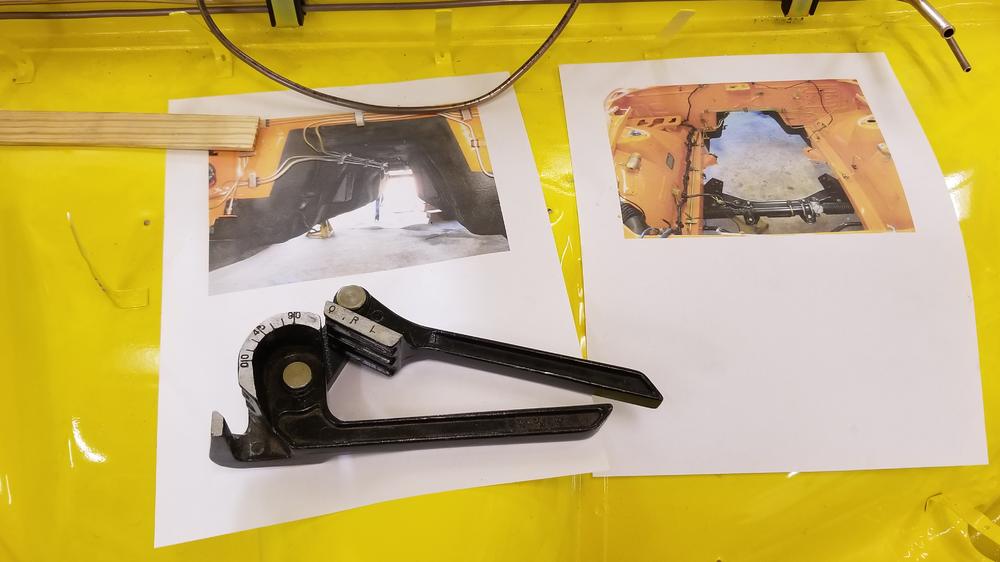
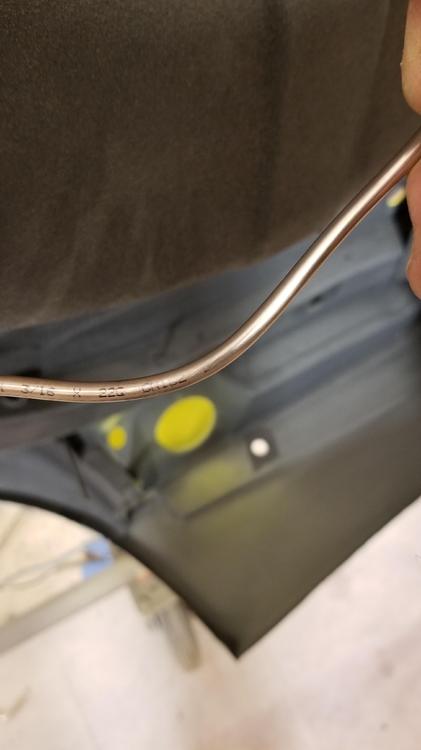
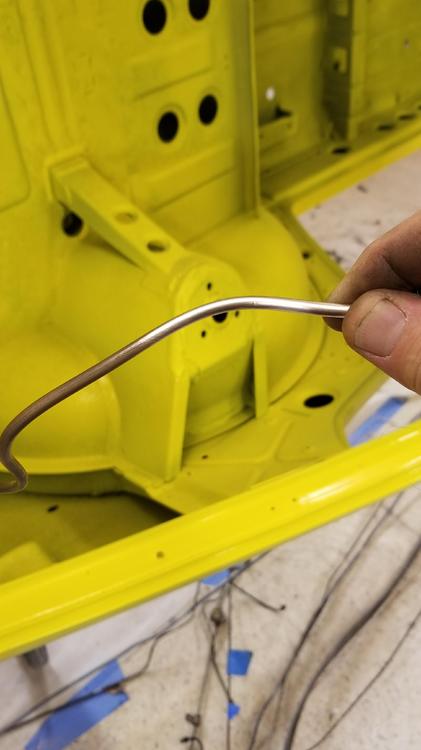
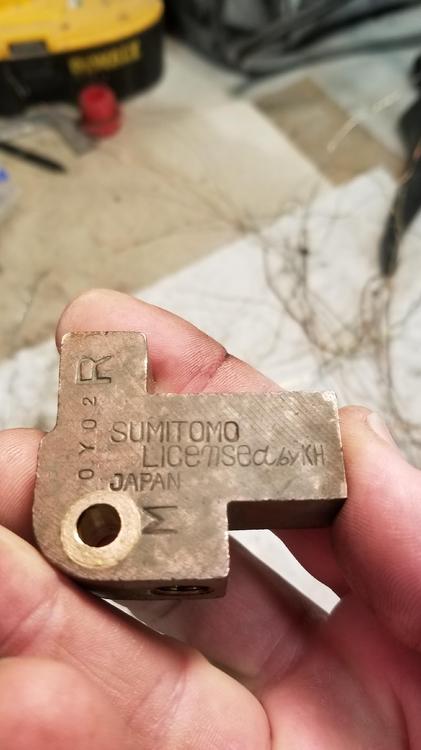
So I made some more progress today. Worked on finalizing fuel and brake lines. Plated parts during this time. Disassembled the proportioning valve and the brake circuit switch These are Fedhill lines. I flared all of these with an Eastwood flaring tool that was loaned to me by a generous car guy! I bent this in a multiple of ways. Hands and thumbs, the handle from the flaring tool, a piece of 1 1/2" pipe and this flaring tool shown below Thanks Rich for the excellent photo documentation! @motorman7 Can some one ID this maser for me? Also where does this bracket go? I am guessing it goes on this section of line near the differential mount. The Fedhill material shines up very easily with #0 steel wool. I then ragged it with some Eastwood satin Diamond Clear. We'll see how it ages... Here is the proportioning valve broken down. I believe this is the original one but can't confirm it. It has an E4100 tag on it. Car parts manual says it should be E4101 so I am not positive. It also has the dimple seal at the top of it. There is some corrosion on the bottom of the push rod. Don't know if this is gonna cause a problem or not????


-