jfa.series1
 Subscriber
-
Joined
-
Last visited
Everything posted by jfa.series1
-
 Julio - consider filing a small claims court action against the other driver. Getting a judgment against him is no guarantee of getting your deductible back, but having it on his record might just cause him enough grief to pay you back and clear it. Most small claims courts do not involve attorneys so major costs are avoided.
 -
I had heard somewhere that rebuild kits were NLA for the type A transmissions. Wouldn't Wereup be better off locating a type B tranny?
-
Leaves and other trash can get into the plenum from the grill in front of the windshield and then collect at these two drain points - resulting in rot in the plenum. When it has been good and dry for a while, consider dropping each of these hoses to check that nothing is collected in the plenum above. Another option is to remove the grill and force flush the plenum thru these drains.
-
Ethanol blends are the scourge of the marine industry, and especially owners of your typical bass boat or similar. The fuel systems are just not designed for the destructive aspects of this fuel. My string trimmer developed a problem and when I tore down the carb I found a small build up just like a sesame seed buried in a fuel passage. The feed holes were too small to admit it, so it formed inside the carb and then blocked the flow. [rant on] The corn crop is predicted to be dismal due to drought conditions and our food costs will be up because of that. But you can rely on big agri-business to keep lobbying for increased federal support and stronger mandates for increased ethanol content. [rant off]
-
Here's a pic for the guidance from Steve. The vapor return line is on the driver's side frame rail.
-
From time to time I see someone post about their intent to purchase (or have recently purchased) an S30 with the intention of restoring it. Once in a while we also get to see feedback about the unforeseen costs of a project and a decision to halt or abandon an effort. I thought it might be of interest to some to get a pretty good feel for the costs that might be incurred in a resto project so here is a tracking report on my project. Here's a bit of background on my starting point and the project: - a one owner car, always garaged, never wrecked or broken. - always a Dallas-area car, no rust. - 92K miles when it was put away in 1982 due to badly leaking valve seals. - body work and paint, the engine rebuild and install, glass installation, and the carbs rebuild were the only contracted items. - a head overhaul might have been adequate for the engine but I opted for a full rebuild. - seat covers, carpet, handbrake and shifter boots are new, all other interior pieces are original. - I did all the rest of the work at a $0 billed cost. The spreadsheet started with a needs list that grew as I identified new items. As I acquired each item, I transferred it to a purchased list and that is what you see in this report. Realistically, I think I have 99% of my items tracked. This was anything but a cost-is-no-object effort as I scoured the internet to find the best possible price on everything. I hope some current or future restorers can get some benefit from this. Z Restoration Report.pdf
-
If so, I bet it wasn't for garage sale $. Where in TX do you hide out?
-
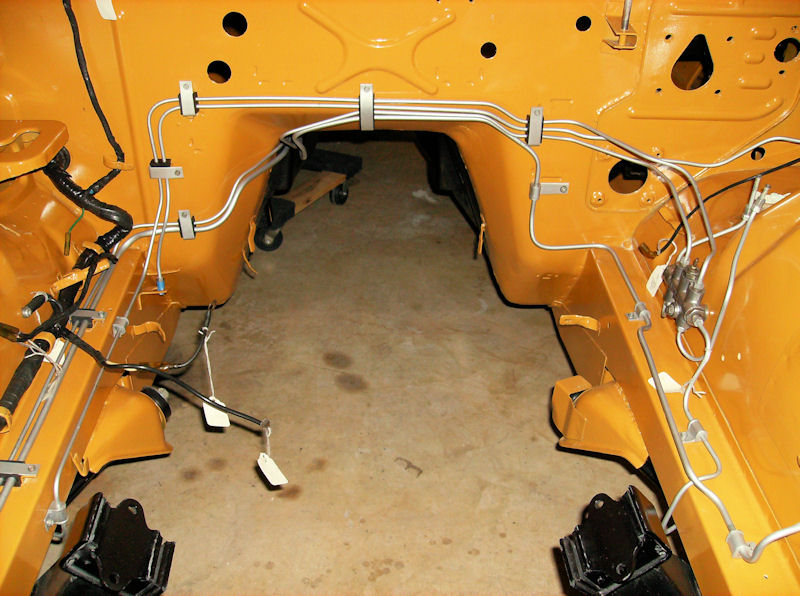
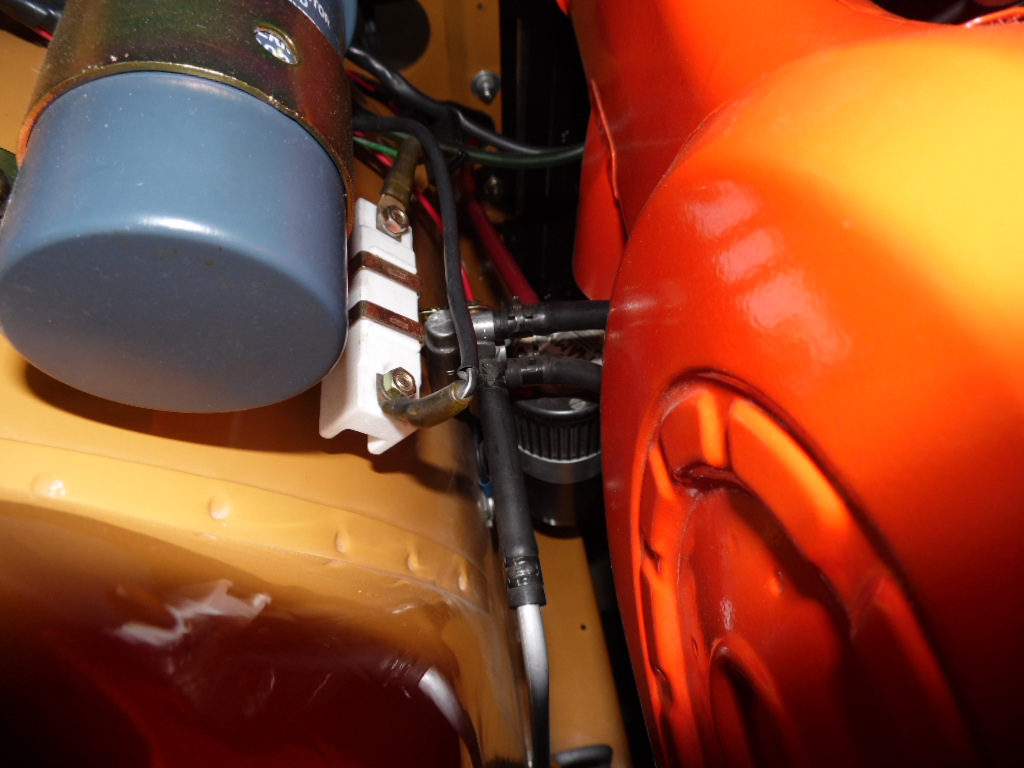
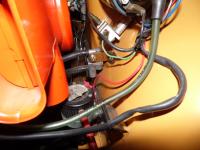
Here is the vapor check valve that should be on your fender under the coil and ballast resistor. The top hose comes from a small pipe in the center of your air filter box. The lower hose comes from a small pipe on the large crankcase breather pipe coming off the engine block. The second pic shows the return hose onto the steel line returning to the rear of the car. The steel line should be visible along the left rail. I hope all of this helps you solve all your plumbing questions. Good luck with your repairs.

-
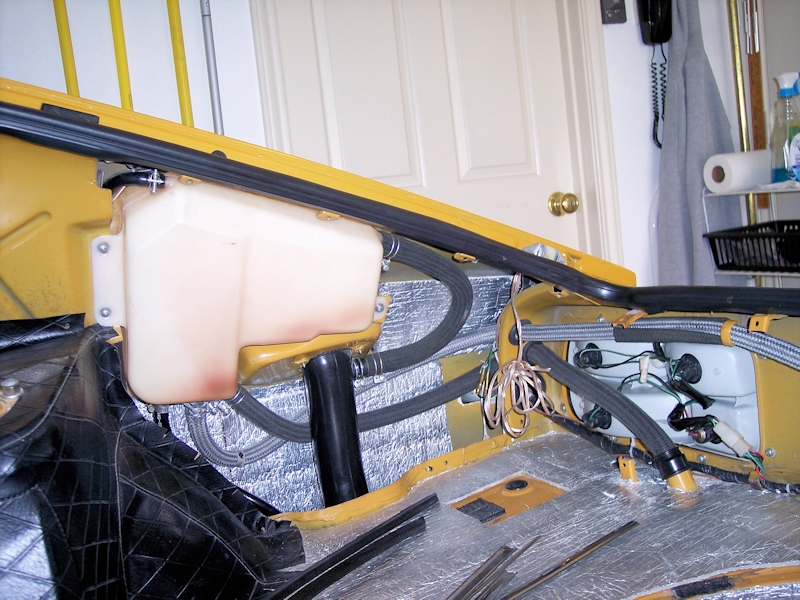
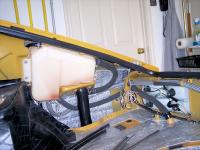
Here's a picture of the evap tank hookups to the fuel tank. Your evap tank may be metal but the connections should be the same. Look closely at the top left of the evap tank for a small hose - this one connects to the steel fuel vapor line running back from the engine bay. At the bottom left of the evap tank is another small hose that connects to a small pipe on the top of the fuel tank - this is the return line for any fuel that condenses in the evap tank. You will have to have this hose in place on the fuel tank before you raise it back into position. I'll look for or take some pics of the engine bay vent line connections for another post. On the major tank vent hoses I used genuine Nissan parts but others have substituted generic fuel line hoses with great success.
-
That looks like the Anti-Backfire valve p/n 14835-25601 per the online catalog, used on the L24 and L26 engines. It is NLA from Nissan, probably not a BD or MSA item. Your best bet will be to get one off a salvage car or someone who has pulled all emissions equipment but is holding on to the parts.
-
Good advice. Keep in mind that the higher the treadwear number, the harder the rubber compound. Look for reviews on any tires you are considering, include review searches on other sites such as Tire Rack.
-
Be cautious on installing too much in the way of poly bushings. Poly rack bushings are about all you are going to find now. OE's are NLA and the aftermarket Beck Arnley rubber bushings are also pretty much chicken teeth now (I scored some about a year ago). The changes you have underway will get you a very crisp steering feel and the T/C kit will add a bit of road feedback. Poly bushings for your front or rear control arms will certainly add to ride harshness and noise - been there/done that and retreated back to new stock rubber. Your new struts will almost certainly be gas-filled and will firm up the ride so consider sticking with your stock springs.
-
Nice looking car and not a bad list from the inspection shop. It sounds like they do a pretty good job. The "power steering belt" is probably the smog pump belt - no PS on these cars. When you do the struts, go ahead and replace the rear brake hoses so you know they are all in good shape. Strut rod bushings = T/C rod bushings.
-
Here's another vote for working with Discount Tire on a wheel and tire package deal. I've also got the 16X7 Rewinds, 0 offset, with BFG 205/55 ZR gForce tires - this size tire keeps the OE 25" overall diameter for an accurate speedometer. As to looking at 15" wheels, the available tire selections in 15" are generally pretty poor. If you do choose 15" you'll have to use a taller profile if you want to hold the 25" diameter.
-
Excellent! I especially like your "selfie" - well done.
-
There are no springs on either side of the seats for the early cars. One side has the rake adjustment knob with its gear and cam mechanism; the other side has only a pivot point. As pointed out above, if the large Phillips-head screws have come loose it is likely the holes in the seat frames are wallowed out and allowing for movement. Another possibility is that the pivot point on the non-adjusting side is damaged. Pulling the seats out and inspecting the hinges is the only way you'll answer the question.
-
When I first saw the this thread title I expected it to be another Viagra spam. Sure glad it wasn't that kind of problem! Glad you found the car's problem and it wasn't anything serious.
-
Looking good!
-
That is truly a fine looking car. Congratulations on your find and being wise enough to grab it. Welcome to the group.
-
Yaaayyy!!! Enjoy The Ride.
-
Check out the Classifieds tab in the red bar on the home page or forum page.
-
Which U-joints were replaced - driveshaft, half-shafts, all?
-
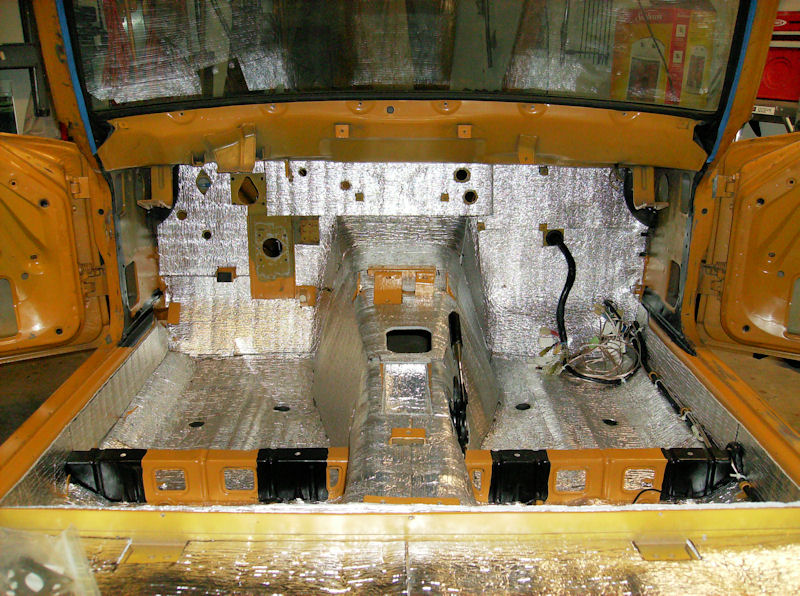
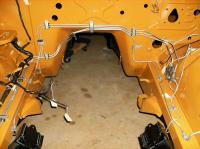
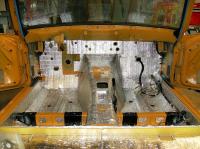
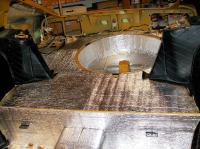
I did the same thing as Blue throughout the car. And had the same carpet slip problem, also solved with some adhesive-backed non-skid strips in the footwells. DO NOT use bubble insulation for this - it will crush and also breakdown. This is foil-backed 1/4" closed-cell polyethylene insulation, installed with 3M spray adhesive.
-
Perhaps the radiator was swapped out at some point with an AT version - possibly from a salvage yard?
-
This is the next bad-boy Z until we see what the what the Z35 brings us. 2015 Nissan 370Z NISMO makes surprise world debut at North Carolina "ZDAYZ" event - Nissan Online Newsroom