jfa.series1
 Subscriber
-
Joined
-
Last visited
Everything posted by jfa.series1
-
 Do you have new door weatherstrip installed? This is a pretty common problem with PRP door seals. Your comment about the driver's side suggests the lock is in a bind even though it closes. As you close the door slowly, is the window frame the first contact? If so, you might try to adjust it outboard a bit to see it that helps. No comment on the nylon locks as I've not had to replace any.
 -
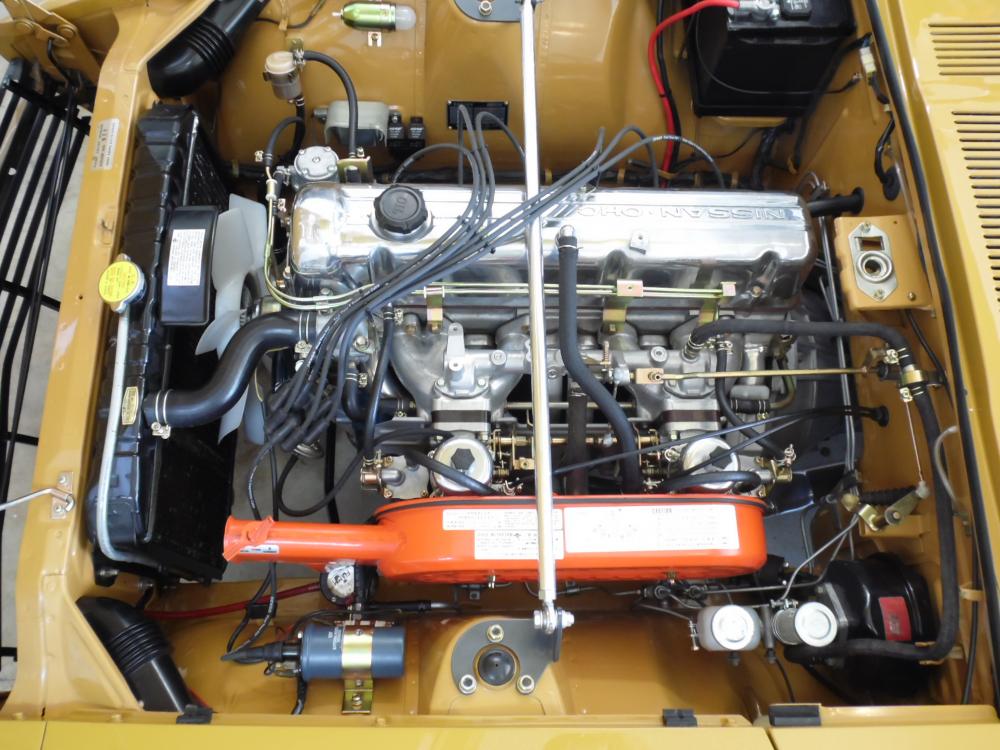
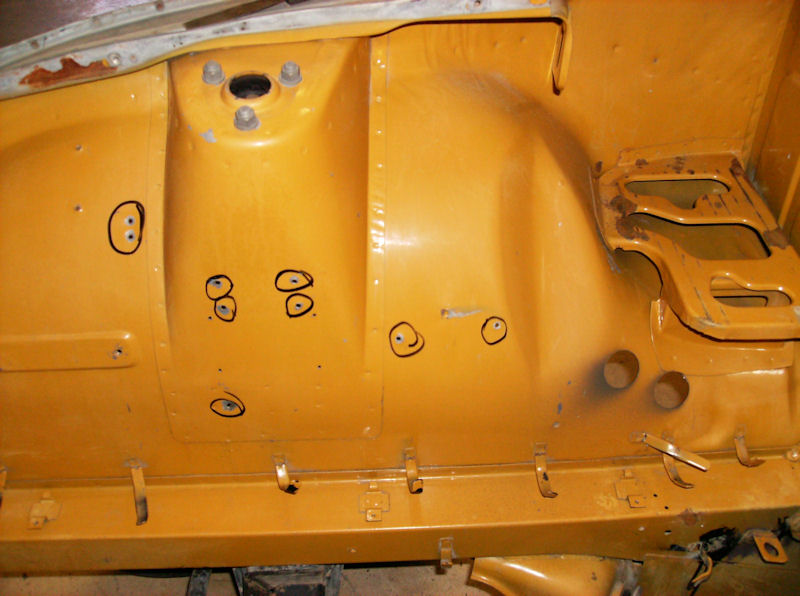
Hi Matt, You didn't say if the engine and tranny are out. If so, lots of opportunity to clean up the fuel and hydraulic lines as well as the wiring discussed above. Here is my resto'd engine bay - pretty well stock except for emissions plumbing gone from the balance tube. Like you, I had holes in the right side inner fender to repair from an a/c system no longer in the car. Jim

-
No scratches on the mounting bolts so I guess this really is the way you found it! Lucky to have working brakes - or, do they work?
-
Mike McGinness at Banzai is an honorable man, he has been supplying quality items to the Z community for many years as well as supplying excellent mechanical services. He is "old school" on his order and payment process. You should have NO concerns over sending him a check for your order. And... the engine paint he sells is ZCCA certified for color authenticity.
-
What the heck, here's another one.

-
Mount them in reverse of the instructions: retractor at the quarter window using the OE shoulder belt bolts, the other end at the outboard floor mount. The retractor should pivot freely if you've used the plastic bushings. You should be able to sit in the seat and pull the belt across your body towards the tunnel. By sash guide, do you mean a plastic cover over the latch belt? The latch belt mounts to the inboard location at the tunnel. For my install I had to add some angle to the bracket to get it to seat properly against the floorboard. Let me know if this all works out. Edit: OK, I jumped over to the WESCO site and may have spotted the issue. The belt you want is called the Roadster Retractable and you should get the 11" rigid sleeve end. This belt does not have a sash. I have the standard buckle but you have choices for extra $. Sorry for any confusion on model. Jim
-
Looking at the online parts catalog, the proportioning valve was in the rear thru 06/72 build dates and moved to the firewall 07/72 and later. The early versions are called a proportioning valve (46400-E4100), are NLA as stated. http://www.carpartsmanual.com/datsun/Z-1969-1978/brake/brake-piping/to-jun-72 The later ones are called a NP valve (46223-N3300 from 7207 - 73010. http://www.carpartsmanual.com/datsun/Z-1969-1978/brake/brake-piping/from-jul-72 The “T” connector is shown in both links, is between the proportioning valve and the brakes. To the best of my knowledge, the early valve cannot be rebuilt. They can get clogged/frozen and block the flow of fluid to the brakes (ask me how I know). If you find one, clean it carefully with brake cleaner to ensure fluid passes thru it but don't try to disassemble as you can damage the spring-loaded valve.
-
The mounting bracket on the buckle component will likely need a bit more angle to cleanly bolt to the tunnel. That's the only tweak I had to make. Your OE shoulder belt bolt should work perfectly for the retractor. Hope you like them.
-
Chris - as I recall, it is the key protruding through the lock component that engages with the ignition component. I think your ignition component is worn and ready for a replacement.
-
Understood. Sponges will hold onto grit. That's why they use a microfiber mitt and rinse it thoroughly before they go back into the soap bucket for each area of the car. Not faulting your method but a pressure washer can drive water into areas that might have a tough time drying out and subsequently inviting the dreaded "R" word.
-
You're going to love the subject of this video that came in the latest email from Hagerty. Lets just say that the folks at Meguiar's have impeccable taste in cars!!! https://www.youtube.com/watch?v=oxi7ly9BORc&utm_source=ExactTarget&utm_medium=email&utm_term=&utm_content=&utm_campaign=Hagerty%20Weekly%20News%203-30-2016
-
These rascals break off on most all models. Nice fix! Thanks for sharing.
-
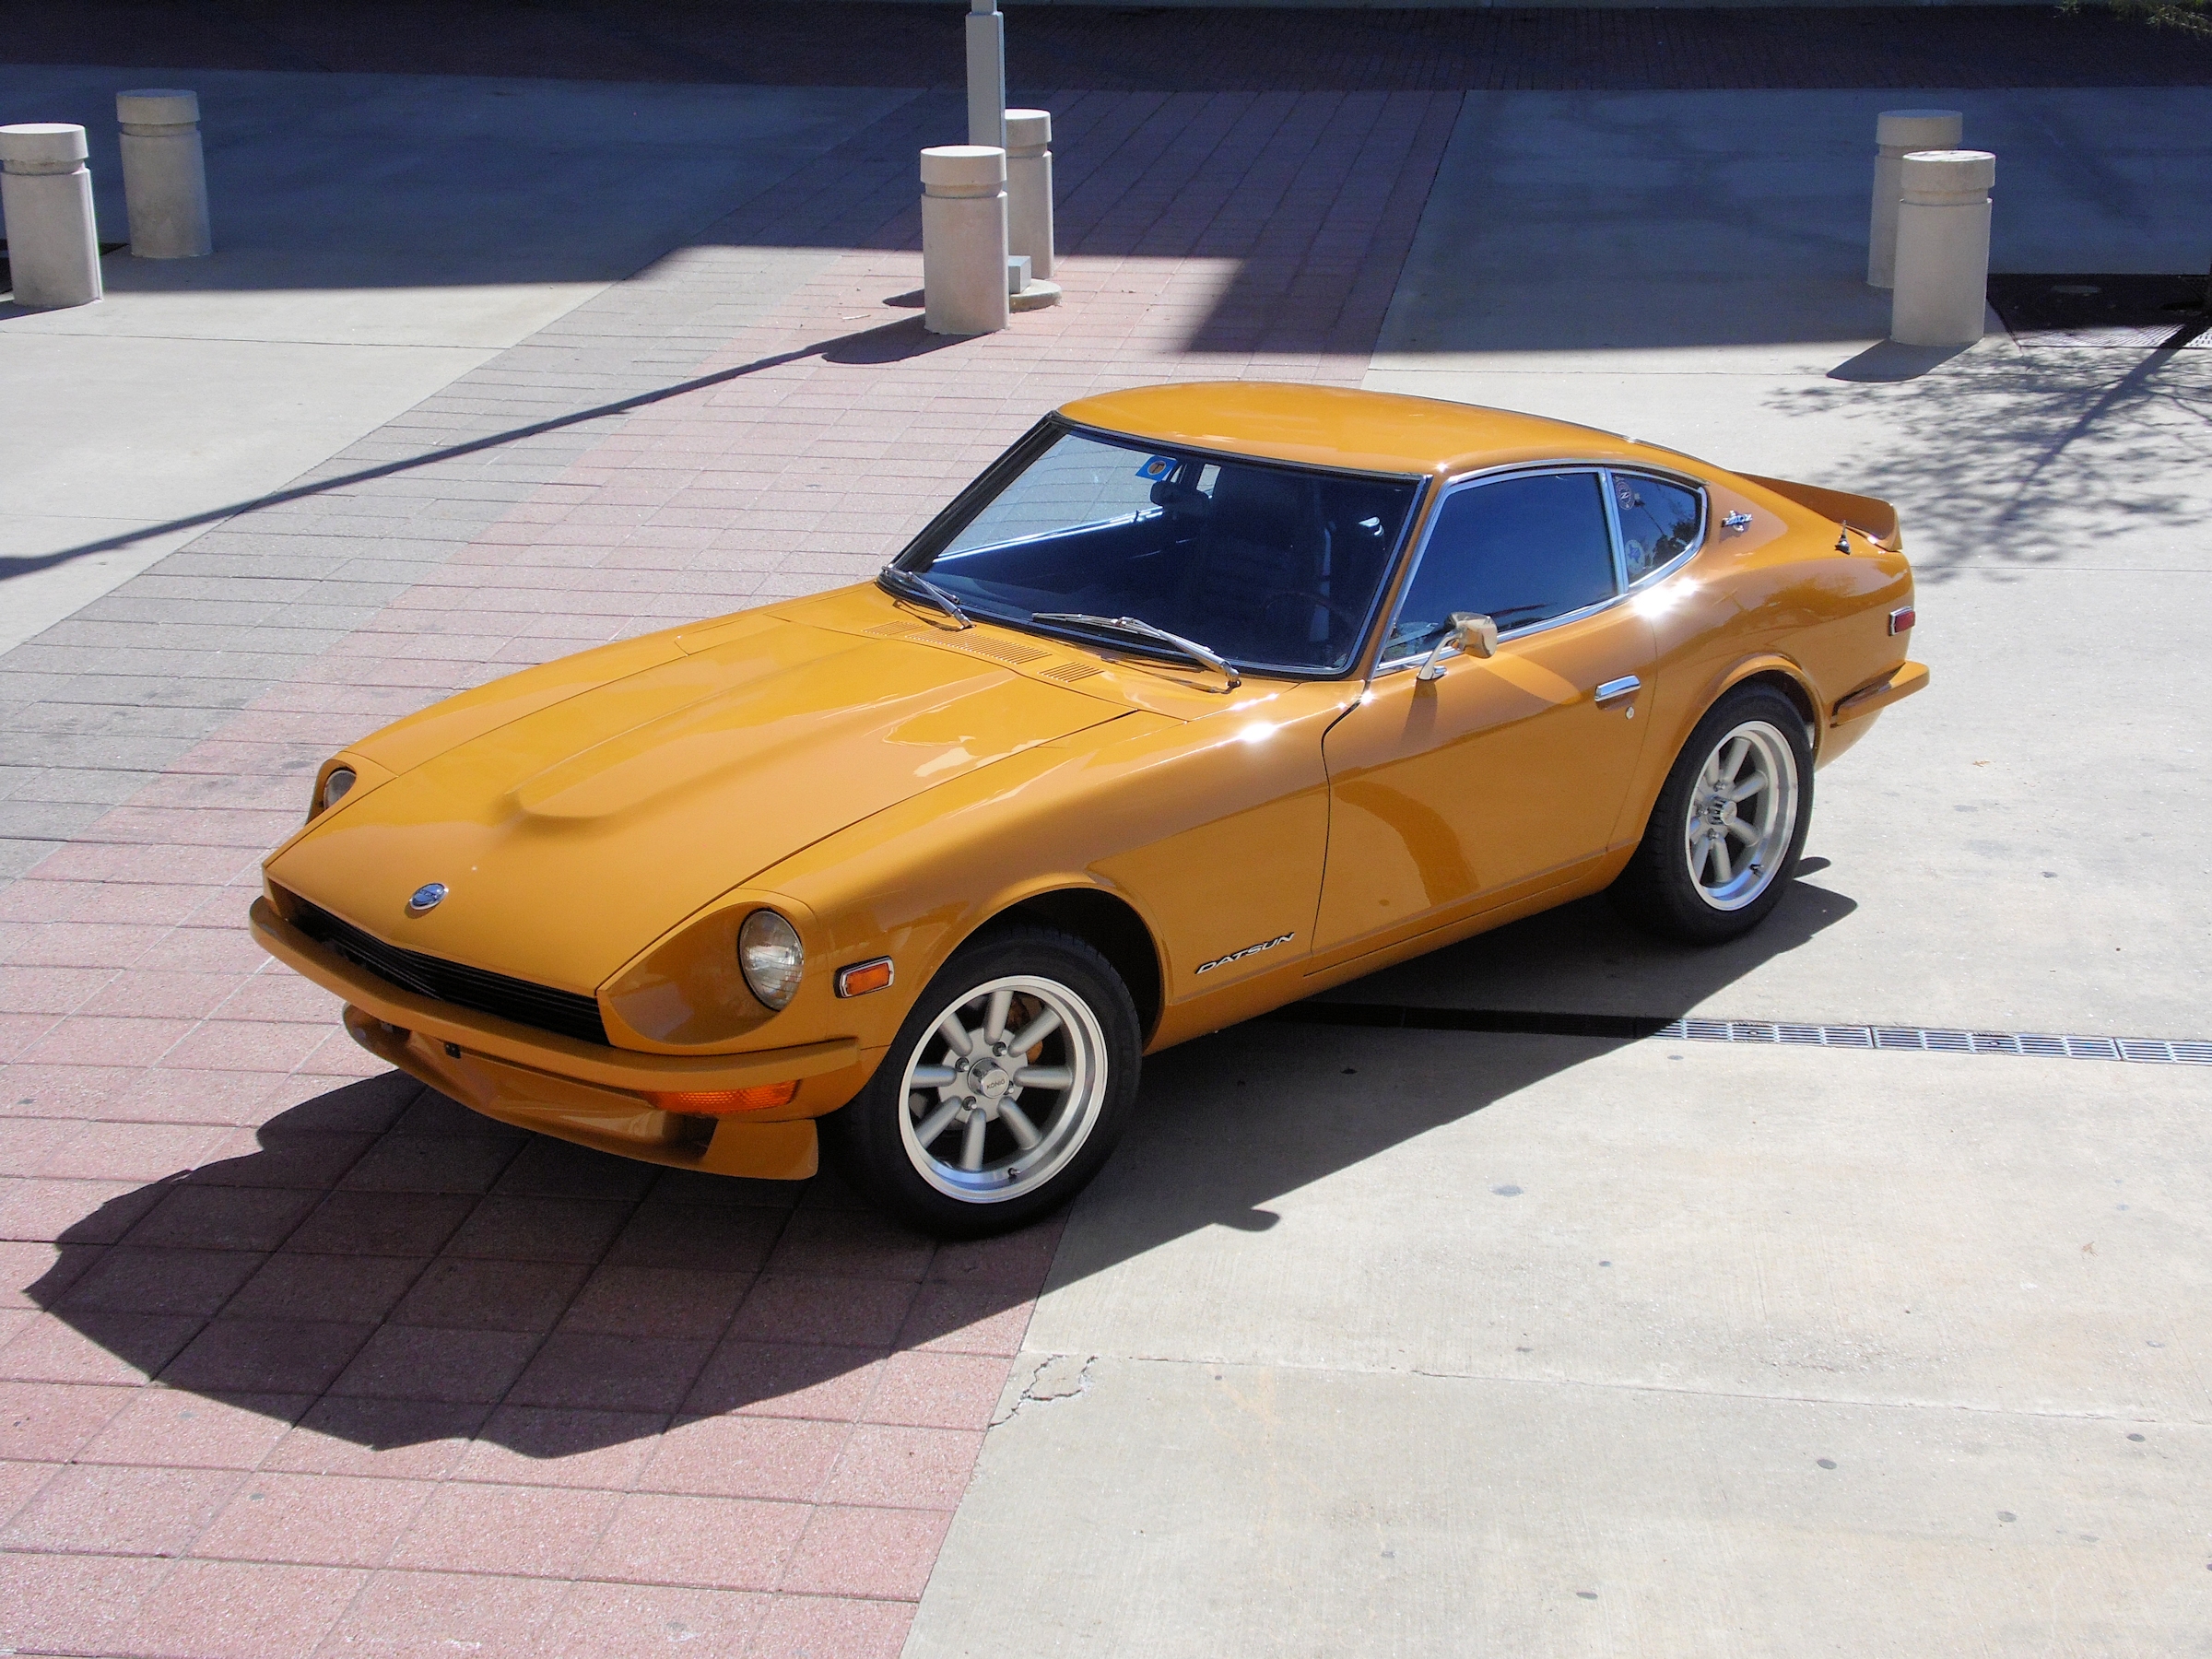
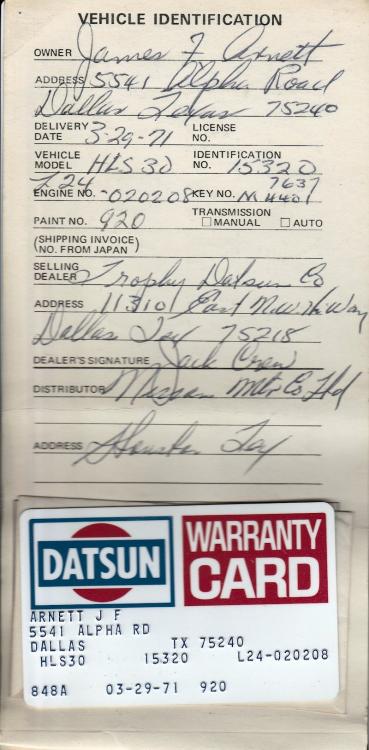
Hi Clay, Indeed - I remember you and happy to see the post and pics of your Zweet ride. Knowing that your car was originally 920 Safari Gold makes it all the more interesting to me - durn right I'm biased! Be sure to stay in touch. Jim
-
Another welcome to the group. That's a very nice car and we'll all be looking forward to your updates. +1 on Charles' comments - lots of fun to be had with that L-24. Check here with others running triple Mikuni's and Weber's for their engine mods to get a good set-up.
-
Branson is a YES. Looking forward to you natives showing me some neat roads. It will be a far cry from the flatlands of Dallas!
-
On the seatbelt topic, you might consider the WESCO roadster belts. The retractor mounts at the shoulder belt mount point above the quarter window and the other end at the outboard floor mount point. Of course, the buckle component mounts at the standard tunnel location. You end up with a modern, tidy 3-point belt with a smooth retractor action. I have them in my car, no mods needed.
-
Sadly, no pictures from the day I purchased the car - way too much adrenaline rush at the time. Right now, its looking a lot better than I am!

-
Been there, done that. Remove the staples holding the old strips, use pop rivets to attach the new strips. Push the fibers aside when inserting the rivets to get maximum penetration. Put a drop of black paint on the rivet to conceal it in the fibers.
-
You already know the answer. You gotta do what you gotta do!
-
With all this leather, where do you plan to install the chains?
-
Looks like one of those new-fangled 401.Z retirement plans!
-
It looks like poster 240ZX is trolling old threads and promoting HybridZ.
-
DJ - consider epoxy resin and fiberglass cloth to repair the door cards. I did that for a couple of clasp holes that were damaged with great results. This can also stiffen the card after you get the warp out.
-
Because the factory did not paint it that way. I chose to match the surfaces and pattern as it came from the factory, just a different finish.
-
Please stop with the "exactly" - its a bit irritating. I painted the same area as Nissan but its not "exact" because I used gloss paint for the reasons I explained. I don't know why other don't paint this area. It will take only an ounce or two to paint that bulkhead. Since Nissan never used POR-15, you should use it wherever you think its needed. As to more pictures, of course I do. Many of them are in this YouTube video I made up of my restoration project but don't expect me to clutter this forum with them: https://www.youtube.com/watch?v=7L1oxFQMfcU