jfa.series1
 Subscriber
-
Joined
-
Last visited
Everything posted by jfa.series1
-
 The "C" clips perform dual duty: they hold the plenum/gasket assembly against the underside of the hatch and the holes in the "C" clips are the receivers for the pins on the silver grills.
 -
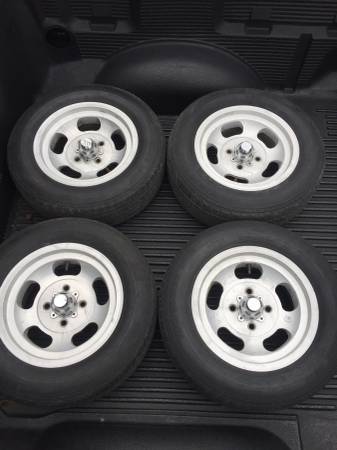
A set of slotted wheels is available in my area, thinking of picking them up for cleanup and resale. I've not yet checked them out and the seller does not have a price posted (yes, I've sent him an inquiry). I'd appreciate any feedback on prices folks have paid for a set of similar wheels. Thanks.
-
Hi Steve, Dave has contacted me regarding Autorama - I'm the club's car show coordinator this year. As it turns out, we did a 6-car S30 tribute display last year and will be presenting a Z32 tribute this year. I'm looking forward to connecting with Dave and have directed him to a qualified shop to give the car its arrival inspection. We're looking forward to a most excellent S30 and owner addition to our club membership. Jim
-
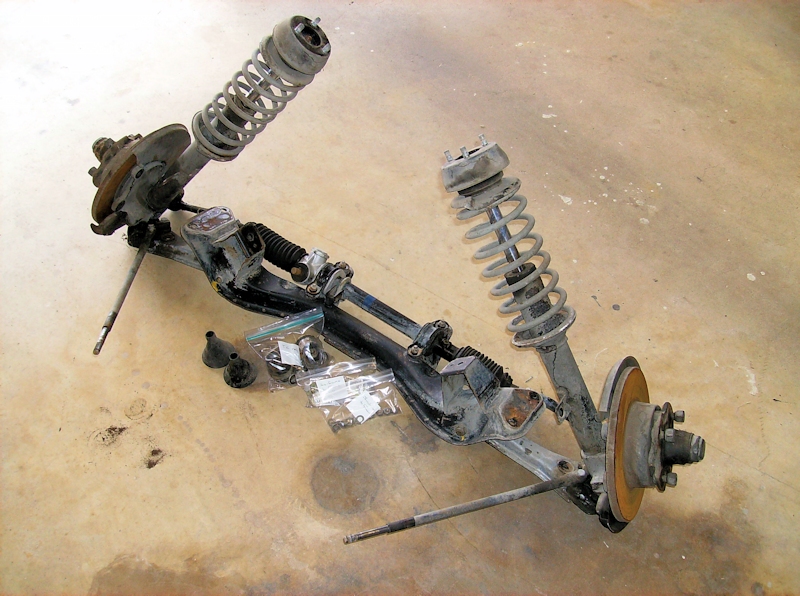
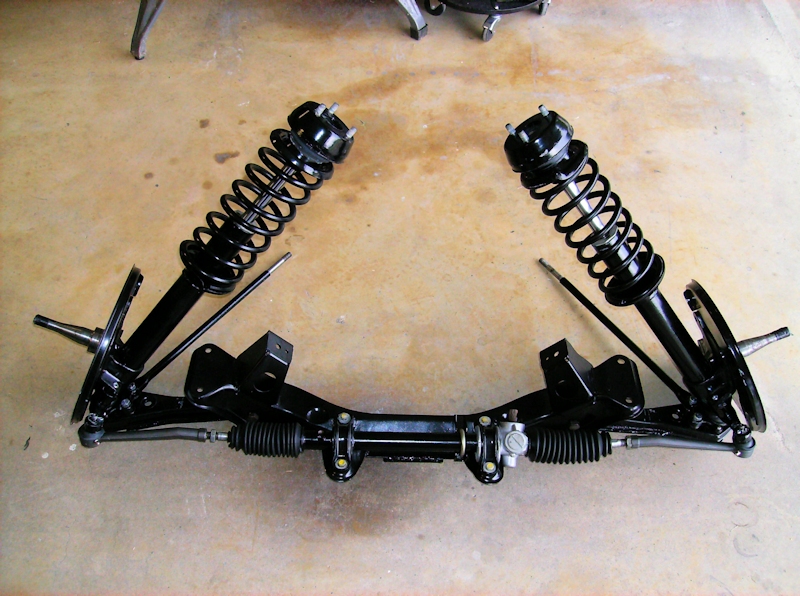
If you support the engine (not directly on the pan), the front suspension easily comes out as a unit and goes back in easy-peasy. These pics were taken with my engine and transmission already out but the principle is the same. Some long blocks under the edges of the pan would work, or an engine hoist to lift it just a bit would likely be the best approach.
-
I had the same thought after my resto project - stock 2.4 with a 3-row radiator, stock fan & clutch, new 160 thermostat. The car would not get up to a proper operating temp so I swapped out to a 180 and all is well. No A/C on the car, limited summer driving but it handled the heat and downtown driving at Memphis ZCON with no issues.
-
Here's one more welcome to the group - very nice looking car! If you have not already done so, look up the Cowtown Z Club on FB. Really a nice group of folks who enjoy fun things with their Z's.
-
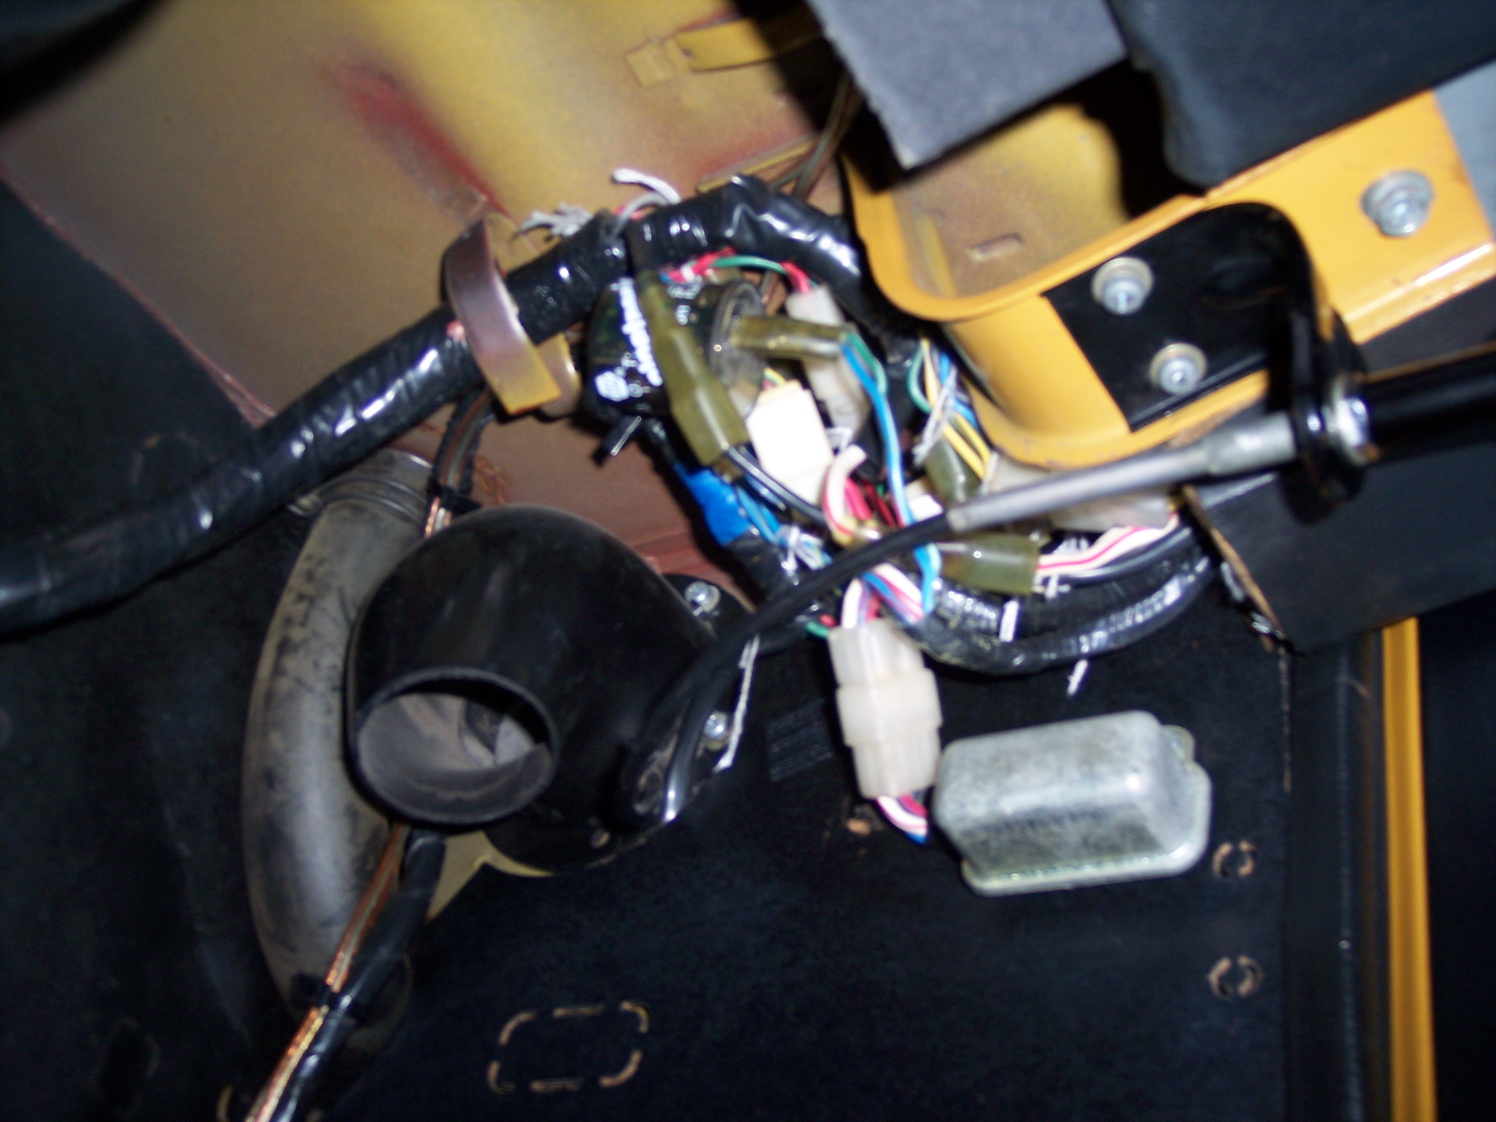
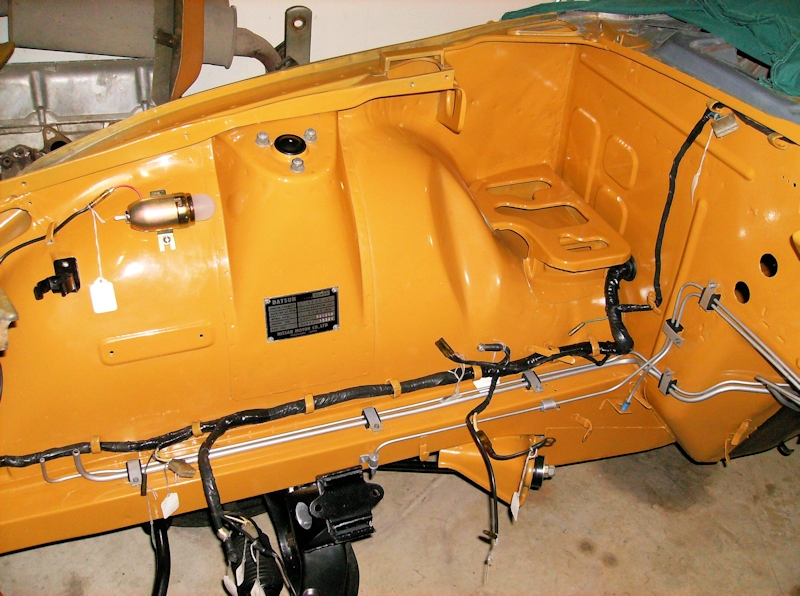
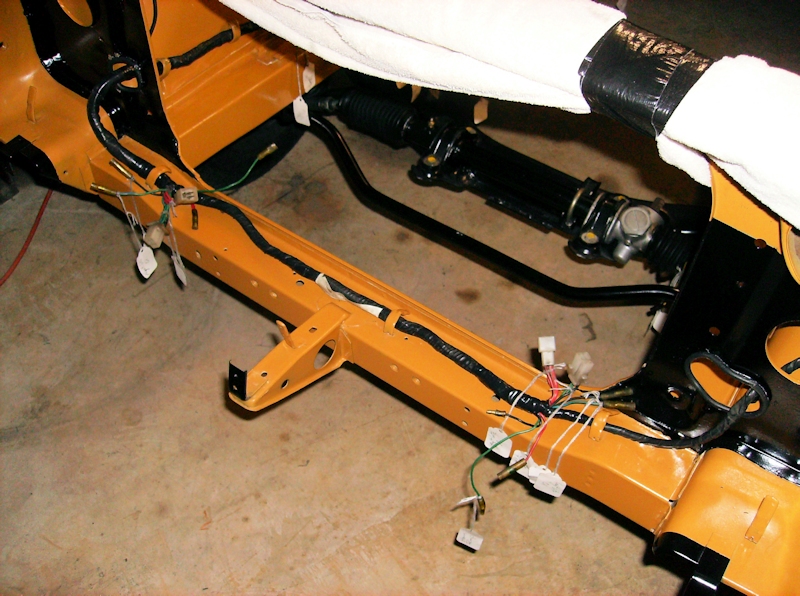
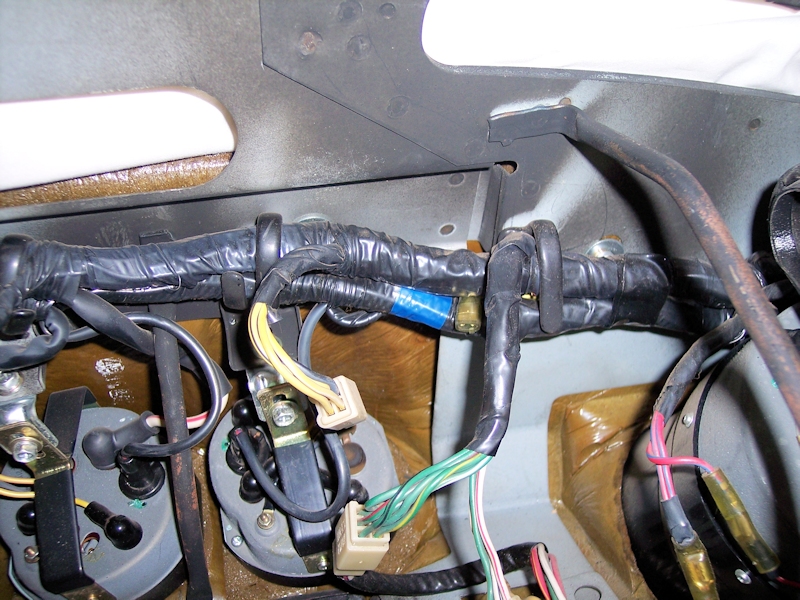
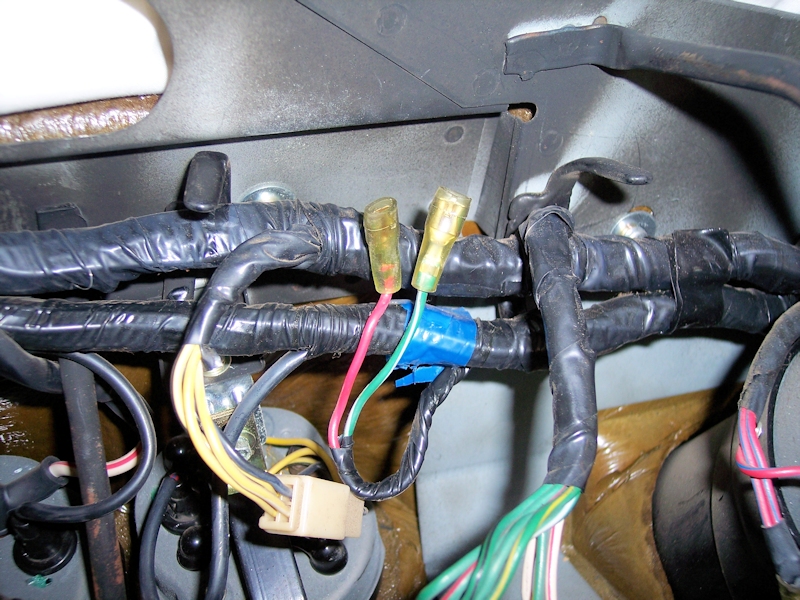
These might help - mind you my car is 12/70 so there are likely some changes by the time we get to your build date. The OE flasher on my car mounted to the steering column above the pedals. I have since replaced it with an electronic flasher, it does not have the tab for a mounting screw. I've also replaced the 4-way flasher with the same electronic unit - its tucked up into the wiring bundle on the second pic immediately below the tape wrapped harness.


-
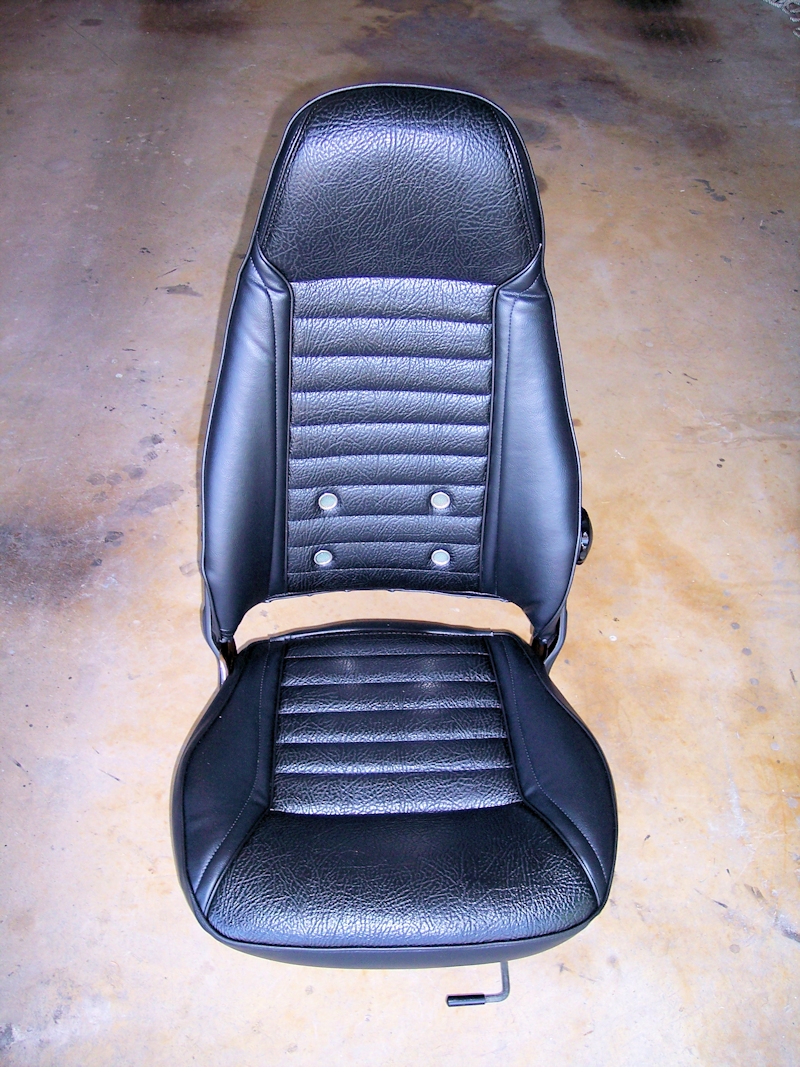
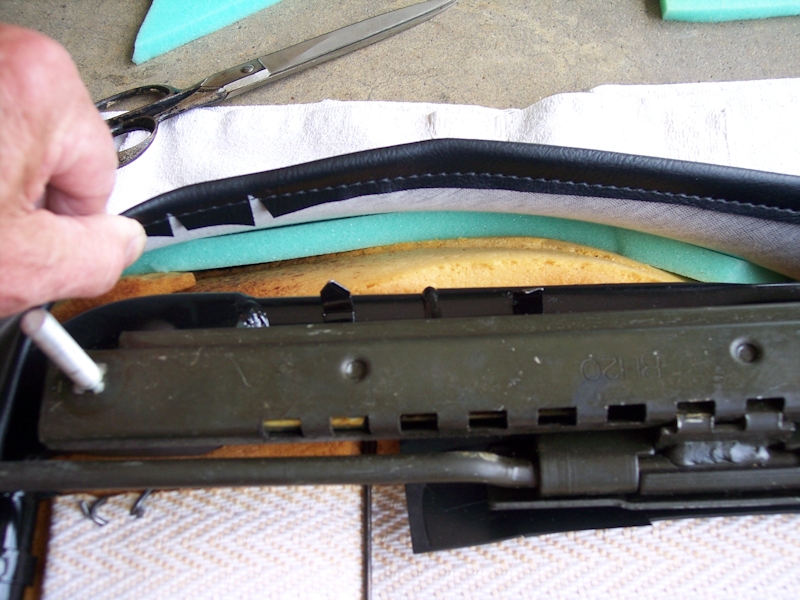
I reworked my seats as part of the resto project a few years ago. I found the OE foam to still be in good shape but decided to firm up all the contact surfaces with an extra layer of upholstery foam. I went to a fabric store and bought 3 yards of 1/2" foam and then cut pieces for the side bolsters and middle of the seat back, the same for the side bolsters,thigh support and middle of the seat bottom. I also added foam around the seat bottom skirts to help fill them out (pic). The extra foam for the contact areas has made a significant improvement in comfort and support.

-
Thanks Blue, just ordered two of them. One for me, one as a gift. Safari Gold rules!
-
Your questions make me think you have not yet downloaded the FSM's for your car. Go to this link for the free PDF's and particularly get the '71 Supplemental manual - it has great details on all the dash wiring, including plug shape descriptions. http://www.xenonzcar.com/s30/fsm.html
-
Ooops, I missed that.
-
Perhaps these will help. If your harness is not torn apart, everything pretty well falls into place with the factory retainers. I'm not sure by what you mean by "both ends of the firewall". I've got a couple of additional pics if needed. As to lights not working, you want to be sure all the grounds connections are clean and tight, have a bit of dielectric grease. The combo switch, turn signal switch, and the fuse box connections are also major culprits. Be very methodical in working through it - don't scattershoot.
-
Great set of pics, thanks for holding on to them and sharing with us.
-
Here's a pretty nice looking resto-mod project waiting on a new owner to pick up the task. A bit of rust showing in the dog-legs inside the door openings, no pics of the underside. Looks like lots of spares to either get back on to the car or possibly sell off. If only I had some additional garage space... http://austin.craigslist.org/cto/5955790866.html
-
The quick answer is yes... sort of. The wiring diagram shows the circuit and you've found the connections in the wiring harness in the grill area. The rest of the wiring is found buried in the dash harness and identified by the tell-tale blue tape Nissan used to mark an unused function. These would be the wires that would be connected to a switch in the dash. I've installed such a switch on my car but a strong word of caution is needed here: You don't want to run fog lights or any other kind of aux light directly thru this circuit lest you overheat and melt down the wiring. To finish this off, you want to use the circuit to activate a relay that will power the fog/aux lights directly from the battery. I have the switch installed but have not yet pulled the trigger on any form of aux light so I have not yet added the necessary relay and wiring.
-
You guys are waaaay cool. Signed: one more of the Memphis Jim's!
-
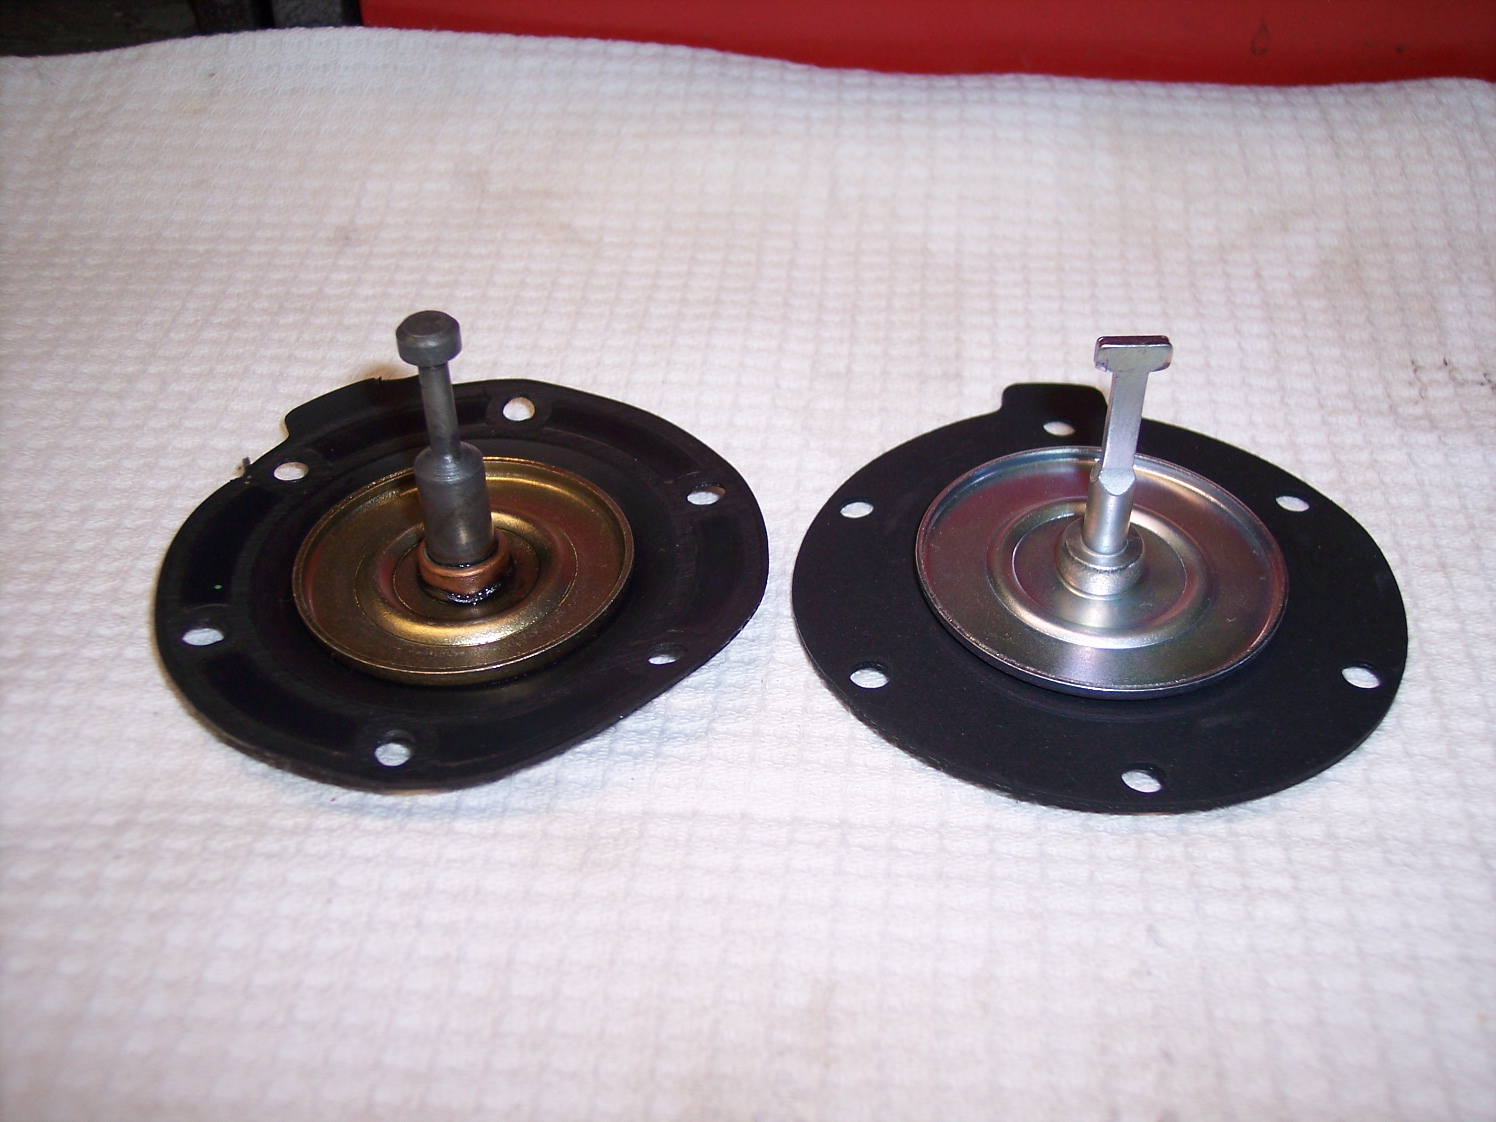
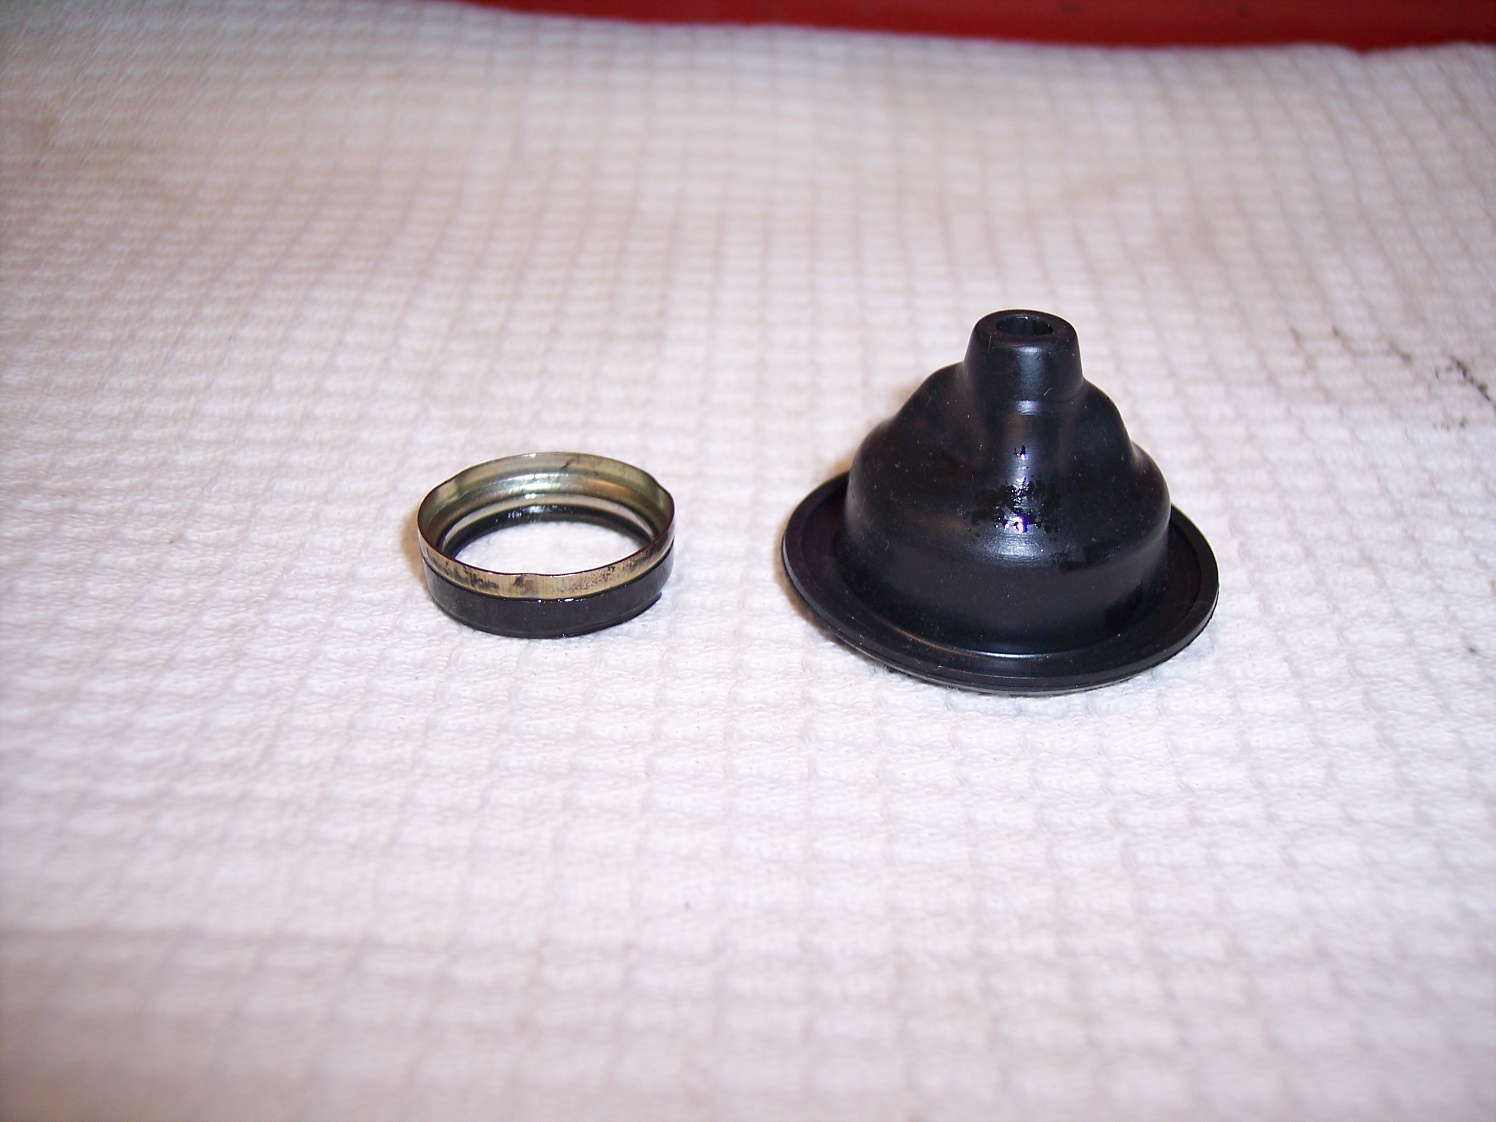
Rather than clutter up prior threads on rebuilding the Nikki fuel pump, let me raise this question: can a Kyosan Denki rebuild kit be used for a Nikki fuel pump? We have two great articles on the rebuild process, one from Arne in 2009: http://www.classiczcars.com/articles/fuel-system/rebuild-a-240z-mechanical-fuel-pump-r70/ and one from motivealloy in 2014 that is currently active: http://www.classiczcars.com/topic/50679-rebuilding-the-nikki-fuel-pump/ At least one of these articles stated the Denki diaphragm is "different" and will not work. The Nissan P/N for the diaphragm is discontinued and NLA and in motivealloy's thread I recently asked where to locate the Nikki rebuild kit but got no answers. In that thread, Darrel provided a link to rebuild kits from New Datsun Parts - that kit is for the Denki fuel pump and one that I purchased. Checking the pictures below I pose this question: I know the Denki diaphragm and oil seal look different but are they different in a manner that makes them functionally unusable? The primary difference on the diaphragm is in the fitting that locks in to the pump arm - doughnut vs. T. The tab on the edge of the diaphragm has a different orientation but that is external, all other dimensions are identical. The Denki oil seal is a boot that is a perfect fit for the Nikki body and is held in place by the diaphragm spring. I've searched extensively for a Nikki rebuild kit but no joy. So... here's the challenge to the experts: point me to Nikki rebuild kits or tell me exactly why the Denki kit will not work. Thanks!


-
Claimed.
-
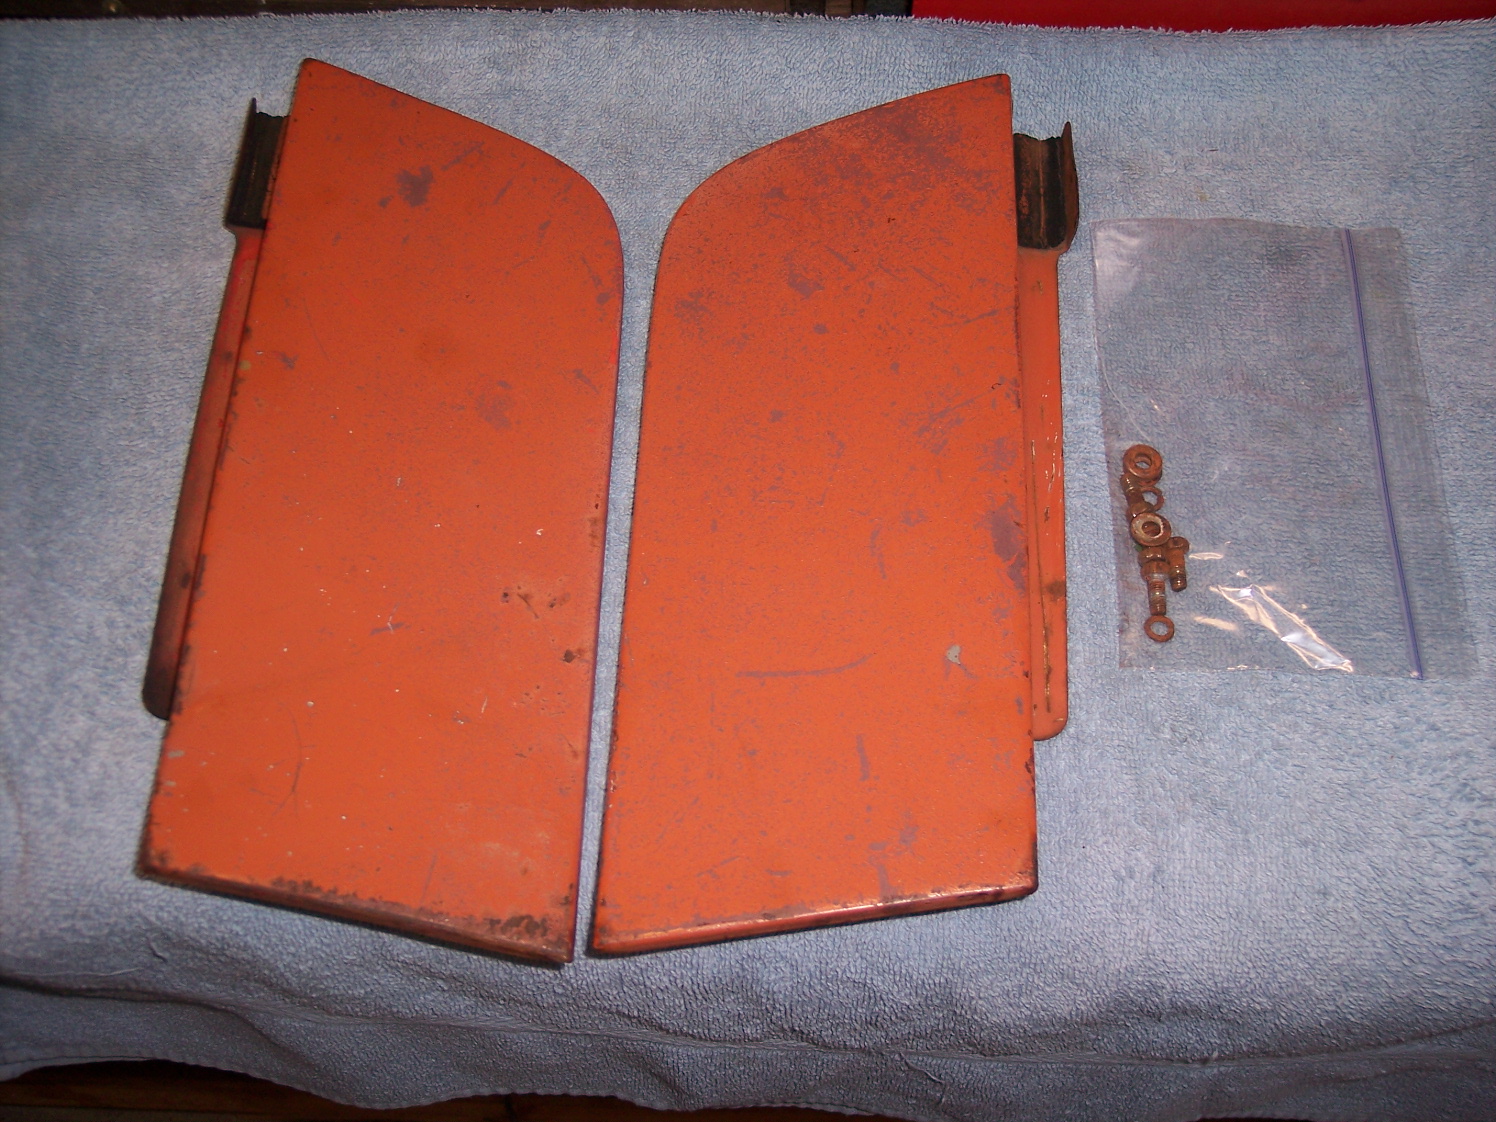
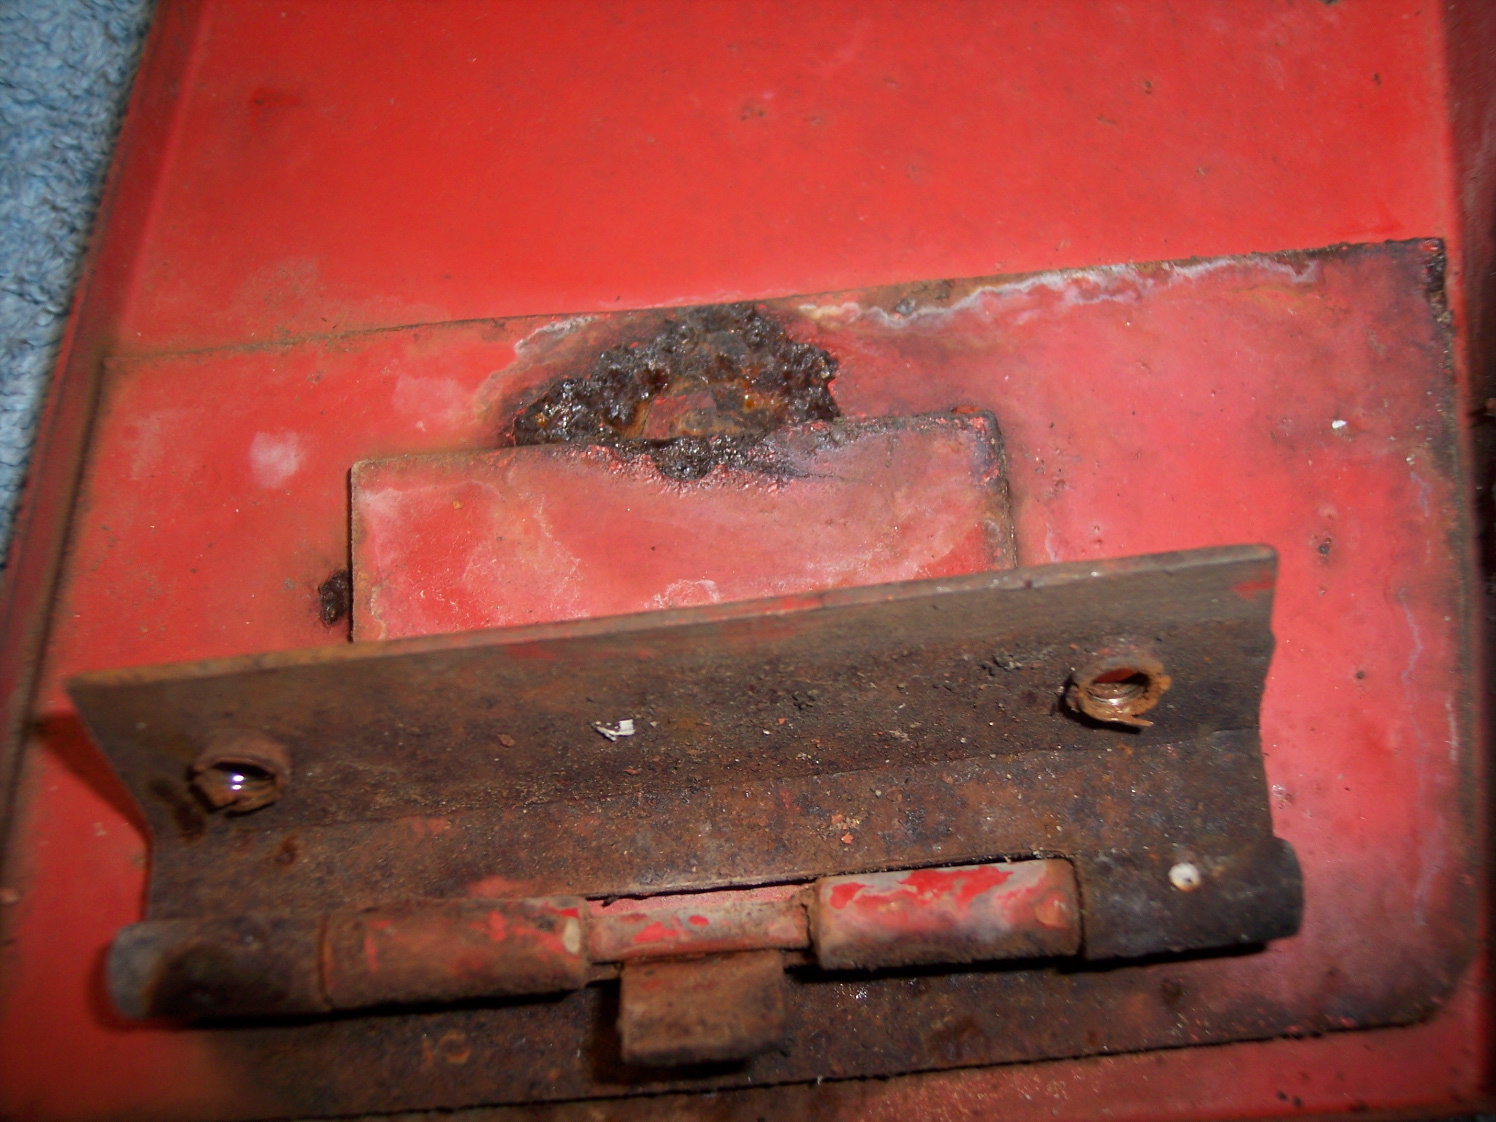
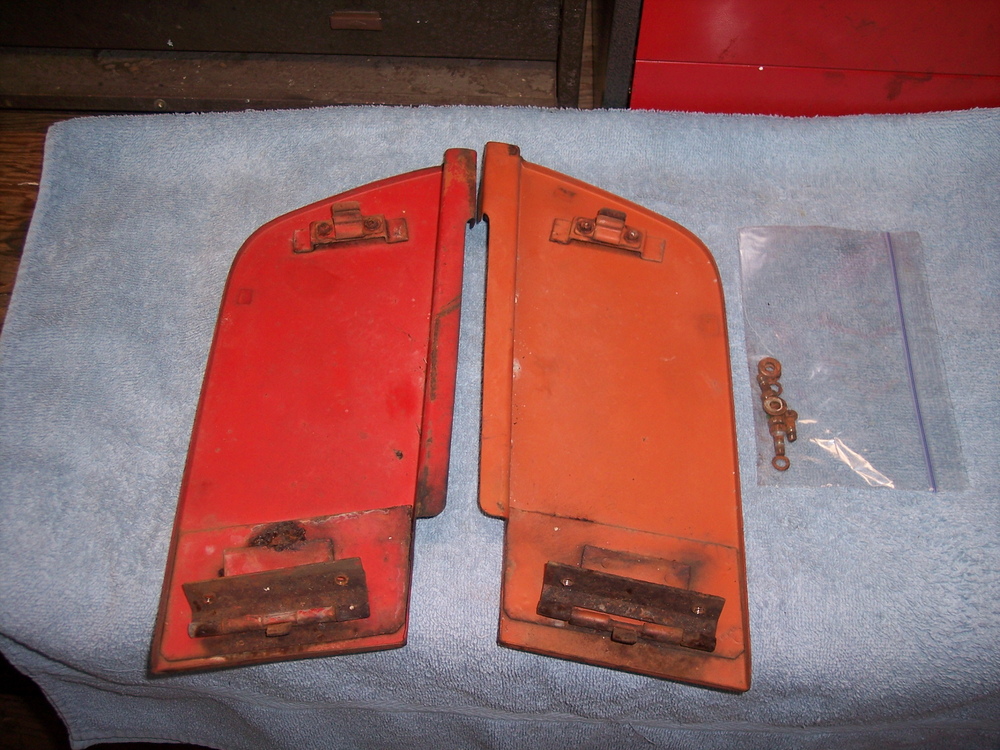
So that others may live... More treasures from the 12/71 parts car, here is a set of 240Z inspection lids with screws and washers. The right side lid has some rust on the underside, likely from exposure to battery gases. The parts are free to a good home working on resto project, I need only the $13.50 postage costs for a USPS Medium Flat Rate box (CONUS only). PM me if interested. Jim


-
I'll likely have a right seat available for the run from the hotel out to the Oasis, experienced co-pilots are always in demand.
-
One more welcome to the group. That's a Zweet looking car, looks like you'll have some fun with it.
-
Its on my dance card!
-
As long as the heater core is part of the cooling system plumbing, the pressure will be the same everywhere - radiator, hoses, thermostat, ...etc. Absolutely get that core pressure tested just as you would with the radiator. A good radiator shop should be able to clean and test it properly.
-
When you look at the engineering on the OE coupler, a couple of things stand out: the hole in the middle and cross-shaped grooves. I'm not an engineer and I'm strictly hypothesizing here but I suspect the hole is to allow for some torque relief. As to the grooves, when I twisted the OE unit I just sold I realized they provided some relief for the U-joints around the coupler and could reduce the side load on the bolts and bushings. Just guessing you understand.
-
HA! He's a "LT of USAF" - hardly. If he was real he would be a "LT in the USAF". Damn shame - he's in HI and the car is locked up in a military base on the mainland and can't be inspected.