
Zed Head
Community Member
-
Joined
-
Last visited
Everything posted by Zed Head
-
Your promotion would have more impact if you picked an item of misinformation and corrected it. Also not sure that the author can define his own work as definitive.
-
If it only happens in 1st and 2nd but not 3rd or 4th then it seems likely to be a transmission issue. The clutch operation is the same for all gears. Any chance it's actually a vibration coming through the shift lever? That's a common thing for 1st and 2nd. Both on the left side of the pattern. I wouldn't worry too much about it. Keep track of it, if starts getting worse you can take action.
-
What transmission did you end up putting in the car?
-
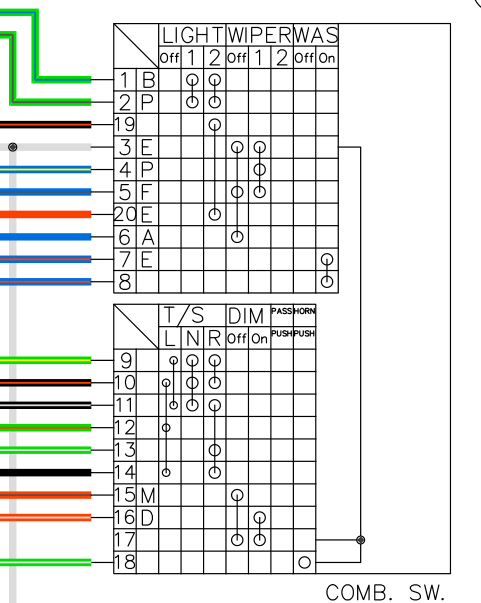
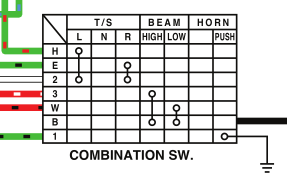
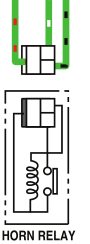
73 shows similar but they actually show a connection between the ground circuits. Seems like there would be a sliding contact like for the turn signals, to ensure a ground circuit. Just offering another possibility. There might something buried under the mechanism. I had mine apart long ago but can't remember what was underneath. Whatever it is would not pass much current. Just enough to trip the relay.
-
The 76 wiring diagram shows the ground through the combination switch.
-
Zero to plus or zero to minus. Might be that you have a short or an open circuit somewhere.
-
Check your points and the coil. Might be that the various problems are related. Check coil resistance of the primary and secondary circuits, verify supply voltage, reset the points gap, or, ideally, set the dwell. Verify a good ground for the points. Spark strength is all about current through the coil. Check the advance mechanisms in the distributor. Verify proper ignition timing. Retarded timing can kill engine performance. Once you know that spark and timing are good, you can focus on carburetion.
-
I edited right after I posted. Was hoping I'd beat you to it. Sent the person an email about the year and title. See what happens.
-
I never really look at those side bars, I missed it. I'd want to see it. Still. $4500. Has wheels, looks like it rolls. Seats. Engine. Etc. Probably an automatic. Edit - never mind, that's over there too. Even better. Manual, clean, rolls. good project.
-
Still looks like a good deal. Bet he doesn't have a title.
-
Here's a one owner 74. I think you guys are right. A new mystery... https://bringatrailer.com/listing/1974-datsun-260z-49/

-
Is it the front bumper? The big gap?
-
What do you see that makes you think that? Seriously, what are you guys looking at?
-
What do you see that makes you think that? The numerous red wires connected ground is kind of scary.
-
That looks like a great buy even with just three pictures. Maybe @Racer X needs one more for his collection. That's a classic Edelbrock filter. https://www.edelbrock.com/pro-flo-1000-series-chrome-air-cleaner-with-foam-element-with-5-1-8-air-horn-1002.html
-
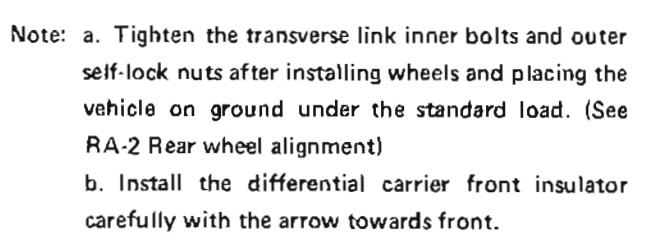
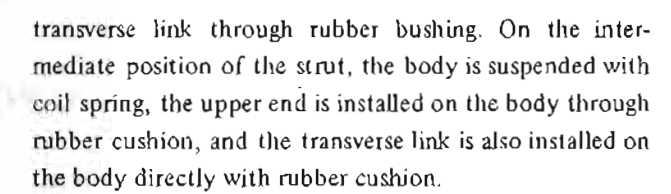
I think that they were aware. Have you ever seen a torn or split bushing? Here's 1973:
-
The Nissan bushing does not move/spin. It flexes. That's why you're supposed to tighten the bolt with the car on the ground.
-
Did you measure the stack height of the throwout bearing sleeve on the pressure plate? 92mm +/- a couple.
-
I saw your other post, wherever it is, about the pressure plate fit. Had a vague memory of a past thread about it, it's out there somewhere. Just now remembered the details. What I recall is that you can bolt a 240mm pressure plate to a 225 mm flywheel, using just 6 holes of the 9. If you use a 225mm clutch disc you should get 225mm performance but the outer edges of the pressure plate will not contact the disc. It will be like a 225mm clutch. Or you could use a 240mm disc but it would be riding on unsurfaced 225mm flywheel. Not clear what parts you ended up using or if you measured the parts. If I recall your other post, and from the pictures here, you have bolted a 240mm pressure plate to a 225mm flyhweel. Disc size unknown. Anyway...why did you grease the flywheel bolt holes in the crankshaft end? That's bad. You want them clean, and maybe even with some thread locker. Probably okay if you torqued them to spec but not really recommended. As far as balancing, you'll find guys that balance everything as an assembly, because they can and have made race engines. For insurance. But the parts are designed to be mix and match. Everything is balanced separately.
-
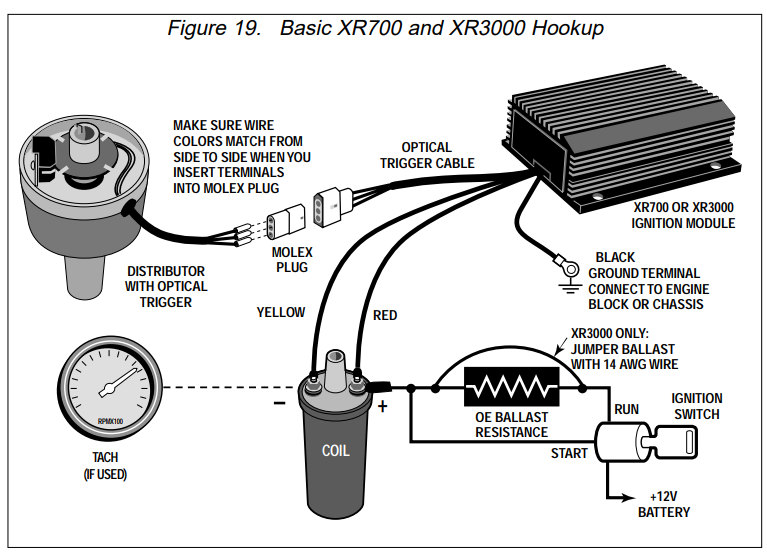
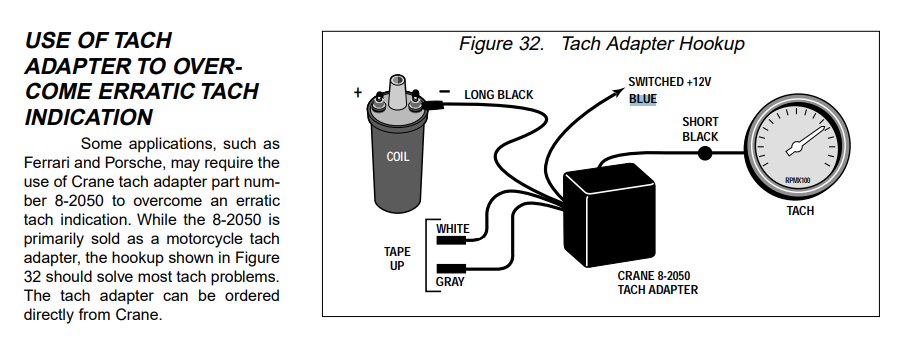
Page 16 here might help if you run in to problems. The Crane systems are electronic, like the ZX modules, and, apparently, people occasionally have problems when they convert from points to electronic. They describe how to adjust the tach. It's the system that the 240Z uses. Pretty sure that others have mentioned the same adjustment in past threads on the forum. It's not obvious. https://static.summitracing.com/global/images/instructions/xr700 instructions.pdf I also uploaded these to the Downloads area -
-
Just browsed thorugh the XR700 instructions. There's actually a lot of good basic knowledge in there. A whole section on adjusting the loop for the Smith type current sensing tachs. Pretty cool. But, the part you need is the basic setup diagram. Nowhere in the instructions do they mention a blue tach sense wire. There is a blue in the tach adapter section. but it's a power supply wire. If you're using the tach adapter you have blue connected to the wrong spot. Start over and read the instructions, I'd say. But maybe you don't need the adapter.
-
Got a Phillips head screwdriver?
-
Have you looked at the other end of the shaft? Maybe there's a clip missing. That would be a start.
-
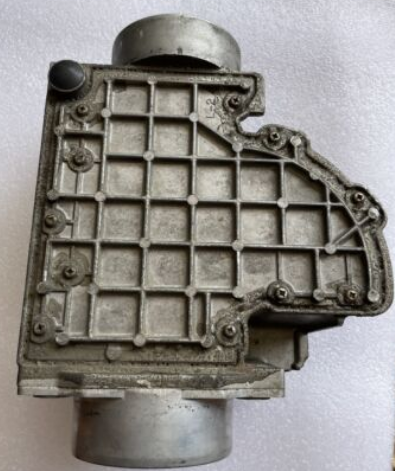
That's not really tuning. It's just messing with things. When you change the tension on the spring you alter the air-fuel ratio curve over the whole of the air flow range. You can't pick a spot and "tune" it in. p.s. the procedure from atlanticz is meant to get the AFM back in spec after people mess with the spring and ruin the AFM performance.
-
I think I answered the question earlier. If you really believe that there is play that is causing the wiper arm to lose contact with the conductive trace then you'll have to find a way to take it apart. The AFM rebuild guys do it. But they have skills and special tools. There's almost always a way to get things done.