Leaderboard
-
HusseinHolland
Free Member9Points1,031Posts -
conedodger
Free Member5Points12,513Posts -
Patcon
 Subscriber
 1Points11,142Posts
 -
Namerow
Free Member1Points1,551Posts


Popular Content
Showing content with the highest reputation on 07/16/2024 in all areas
-
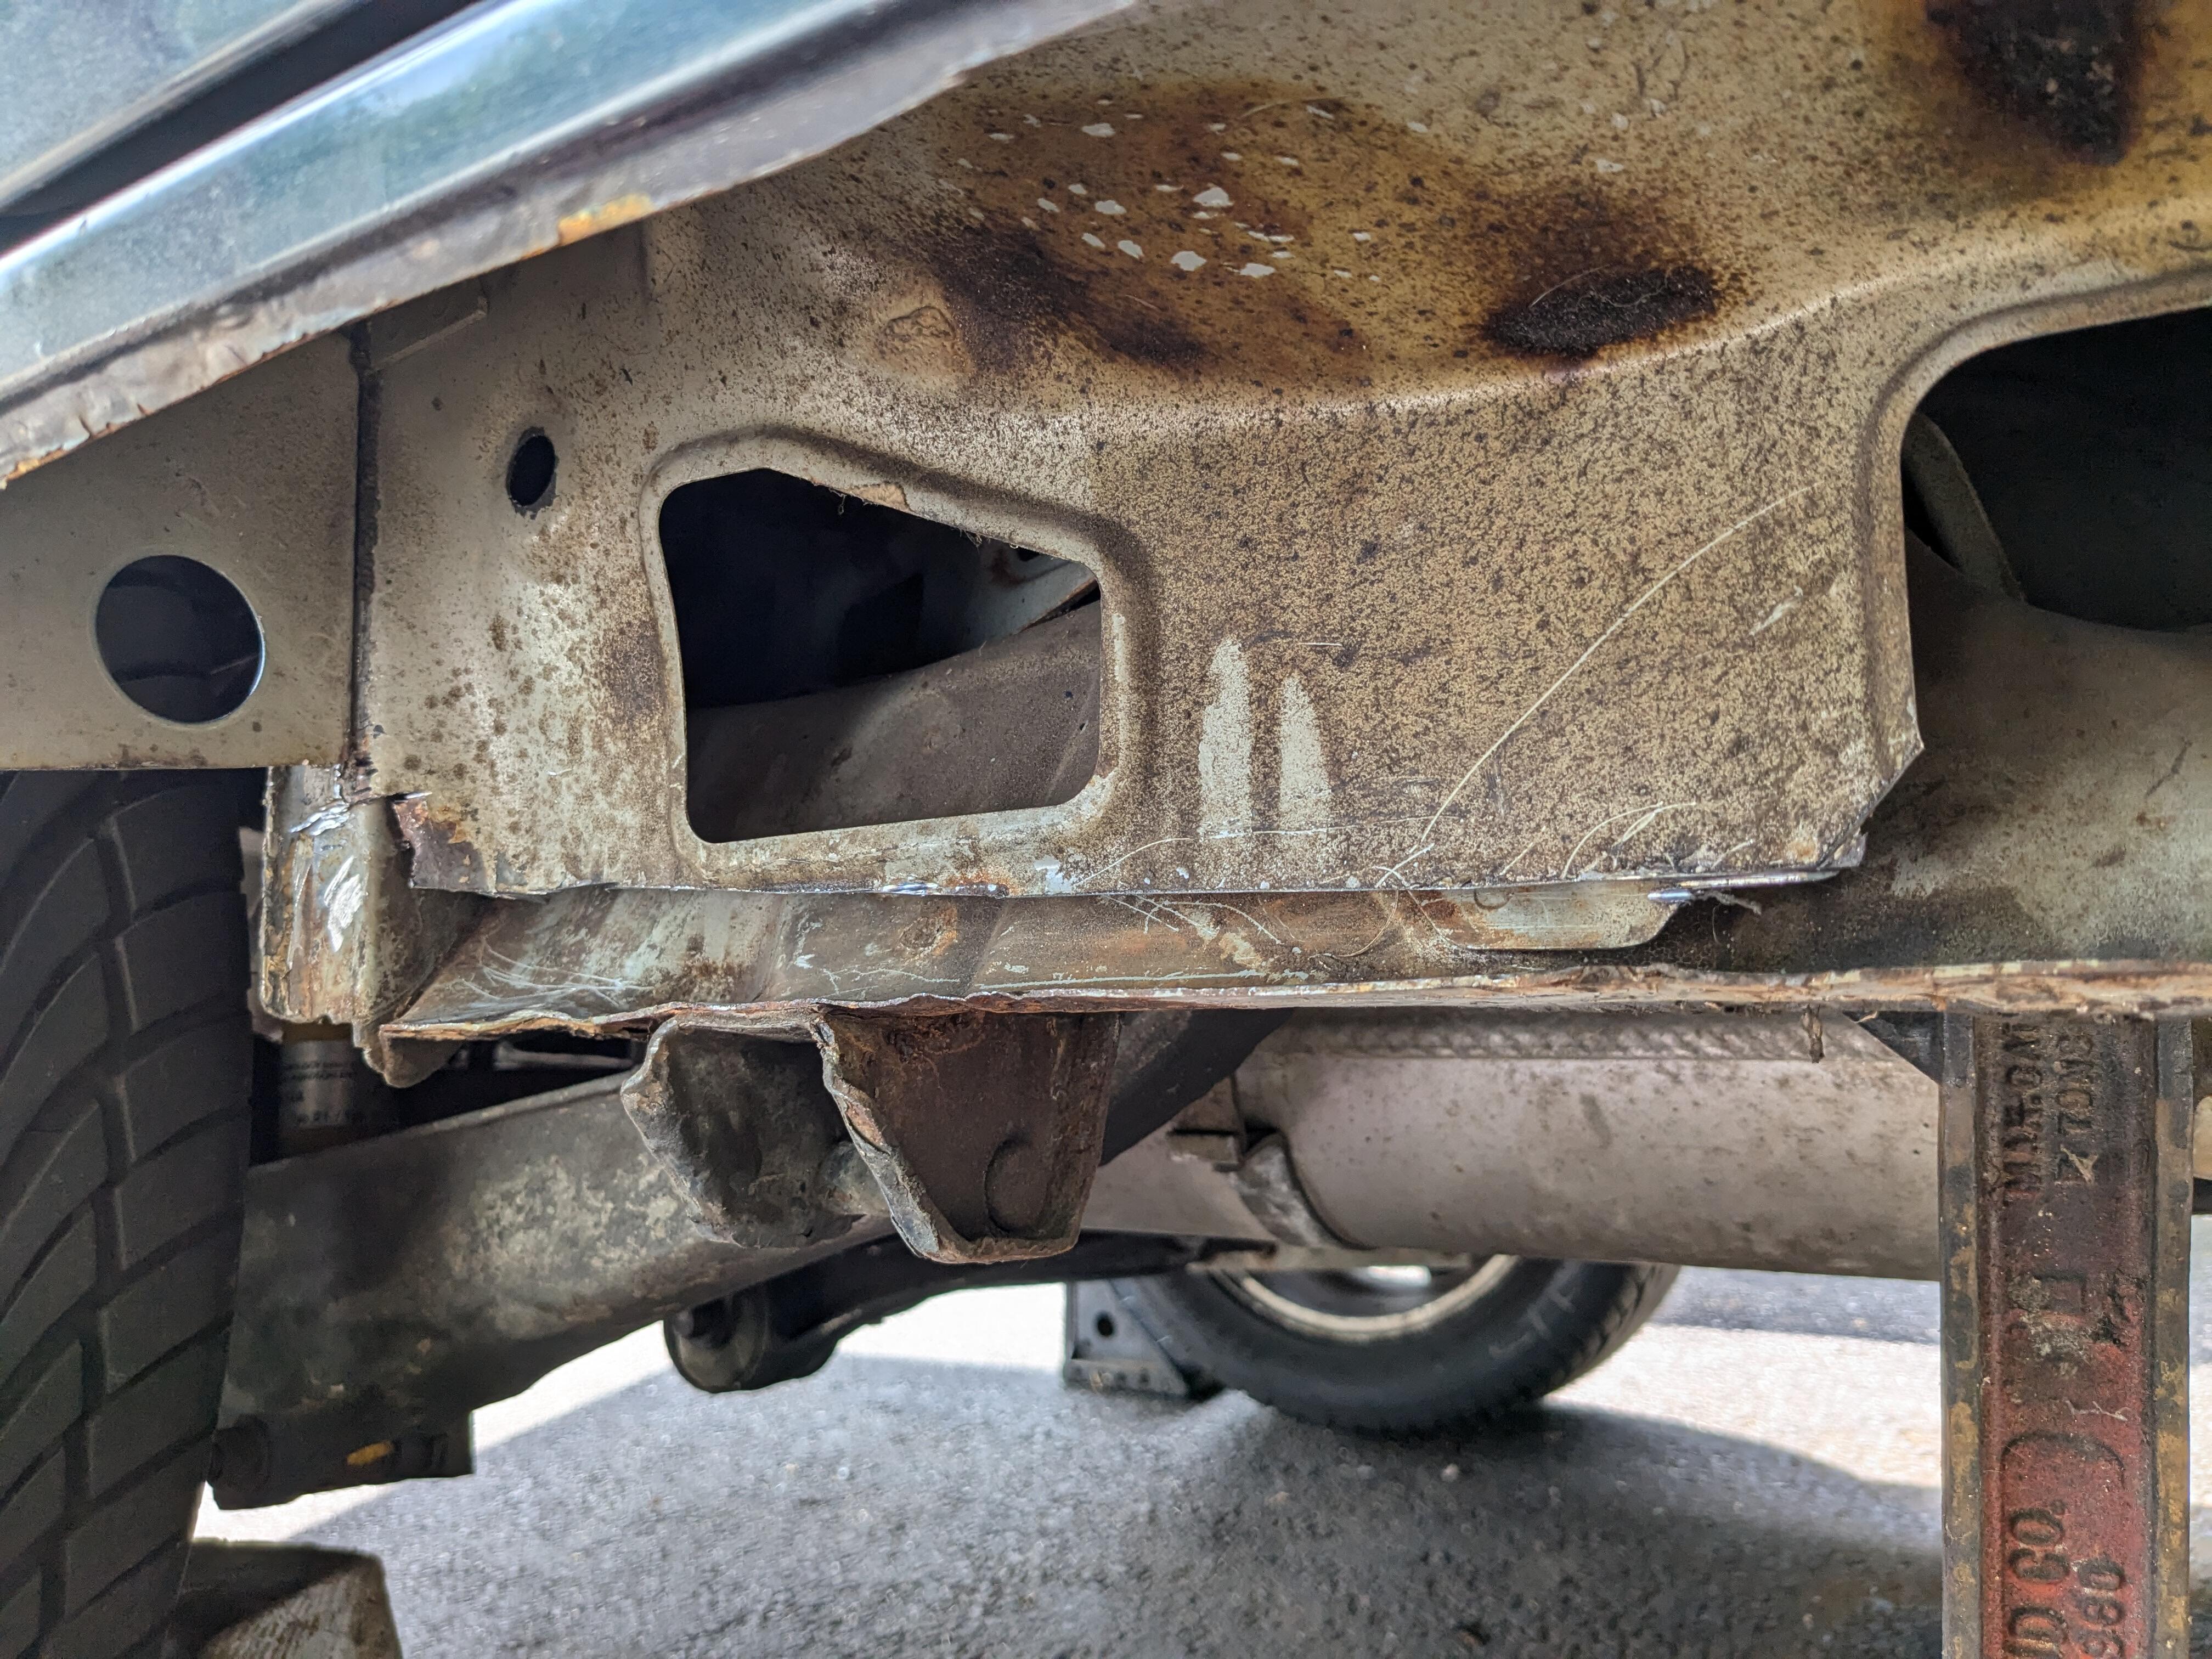
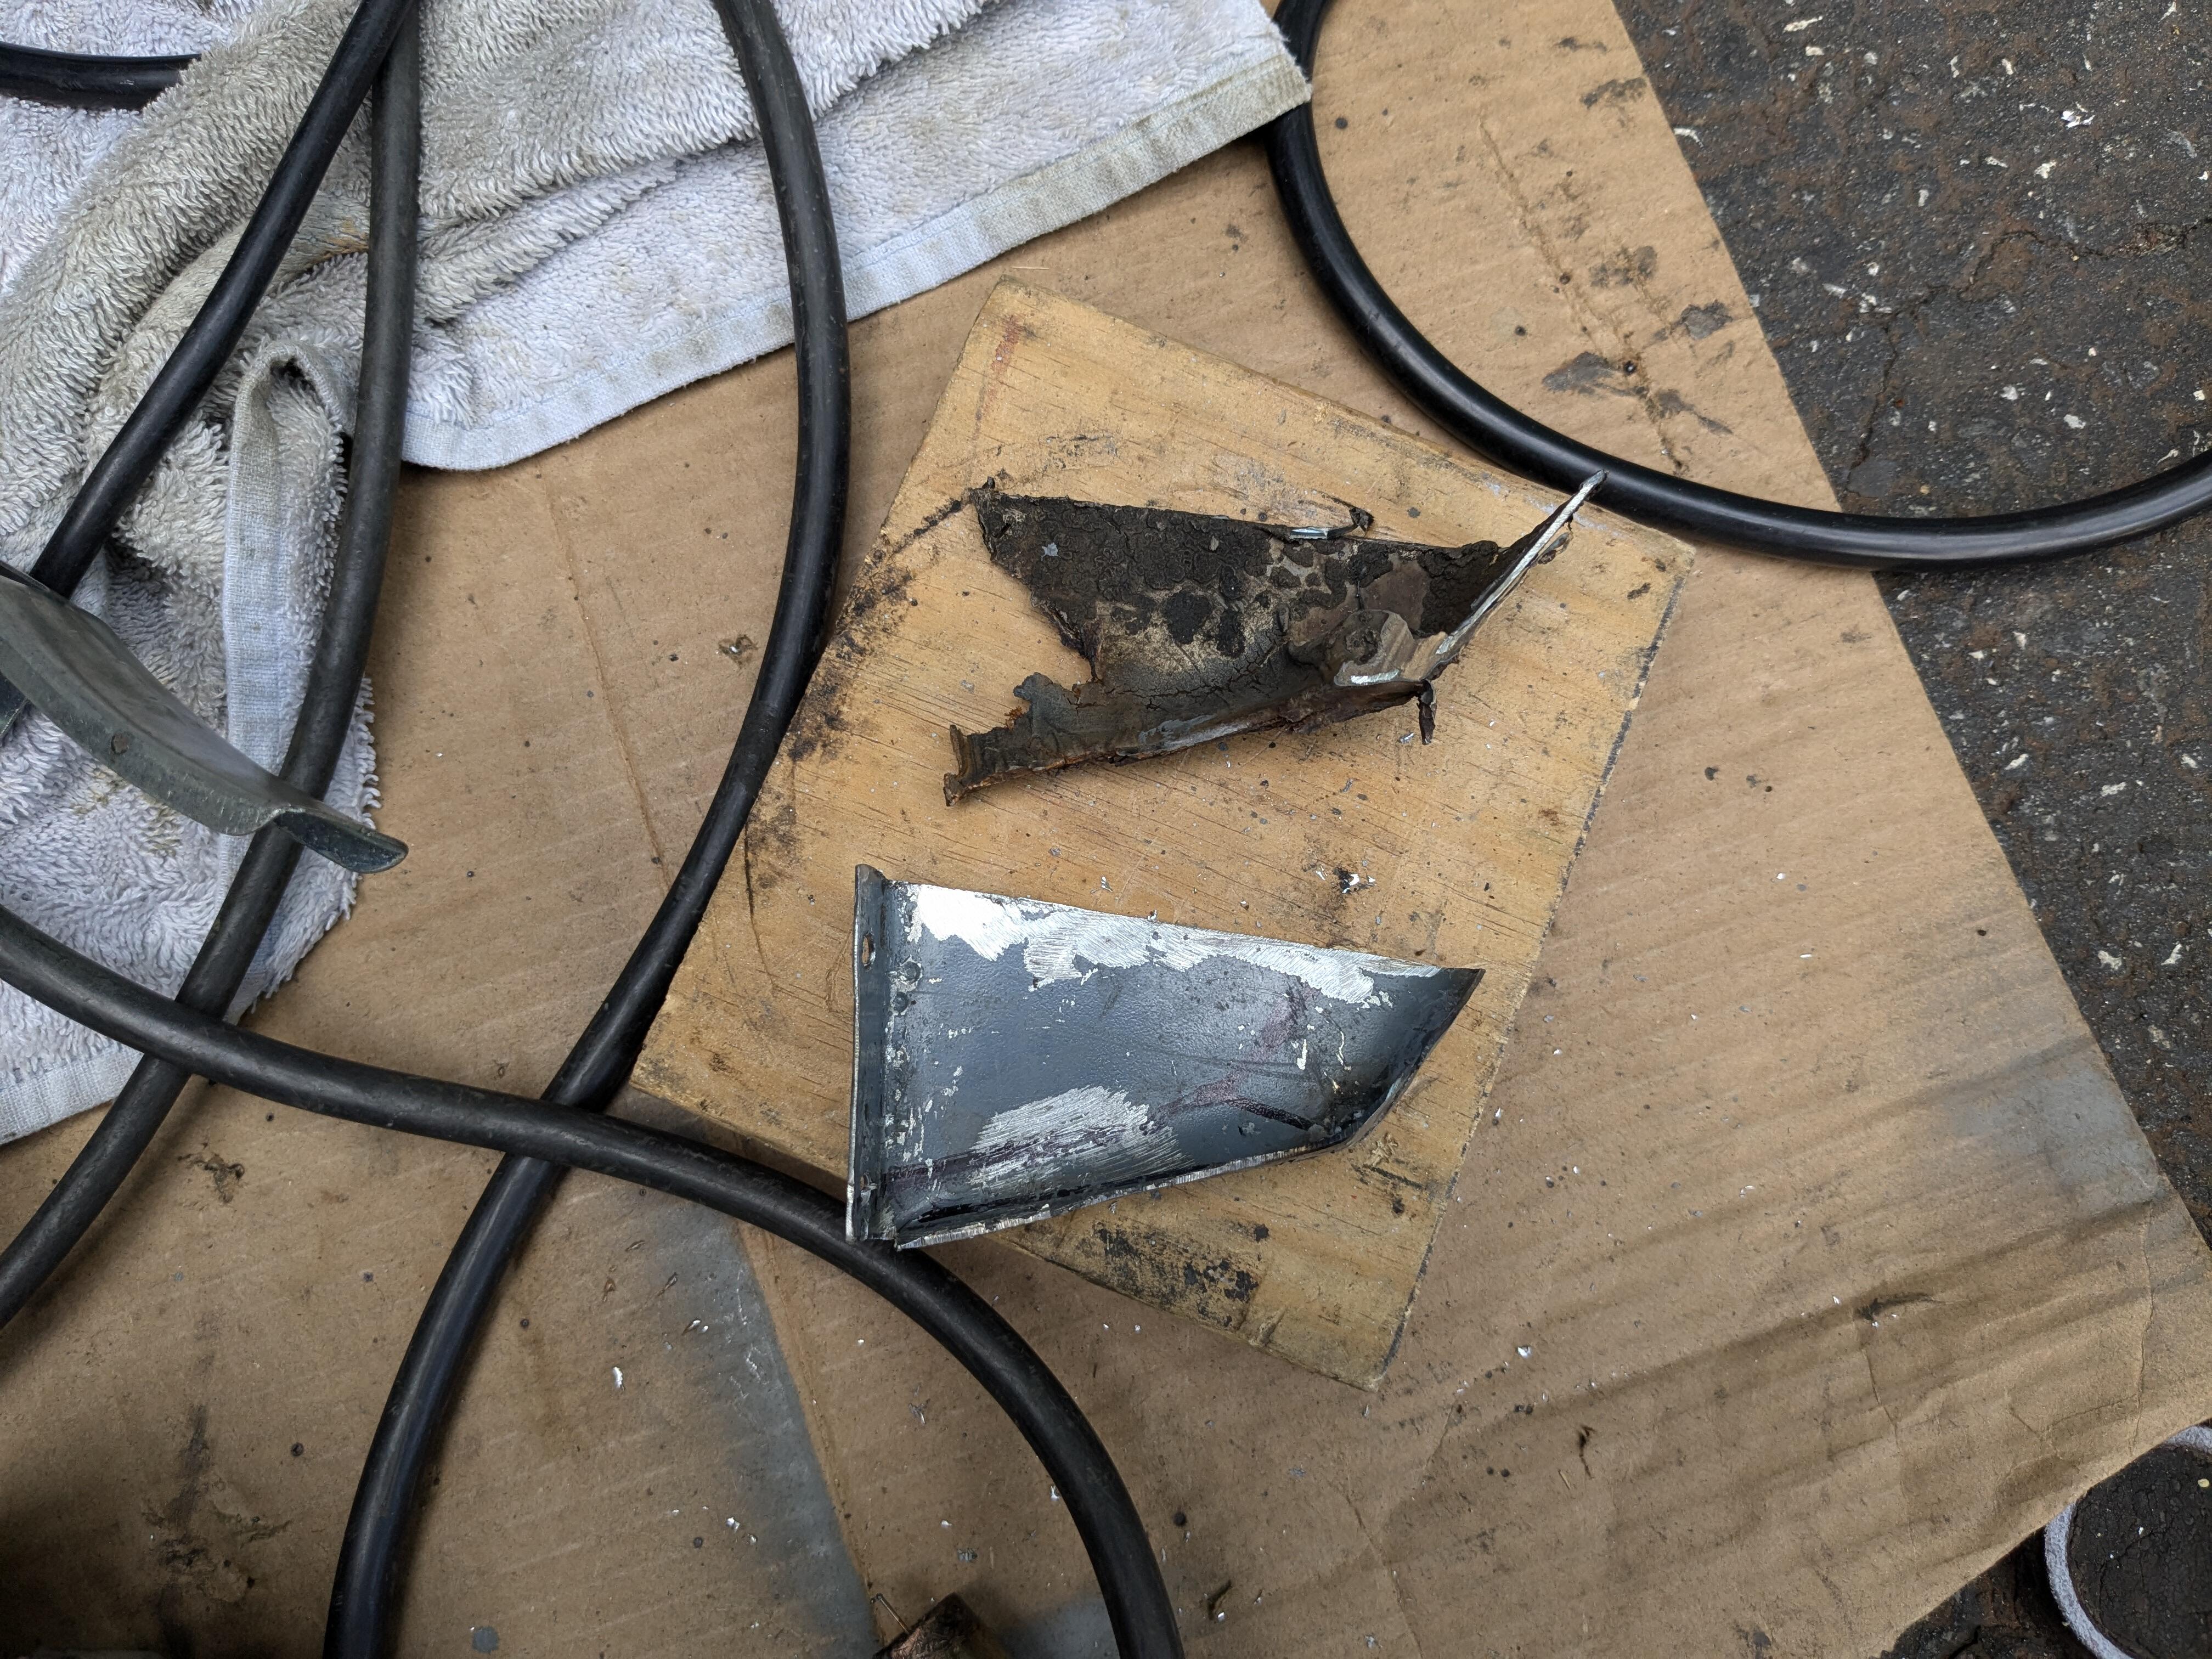
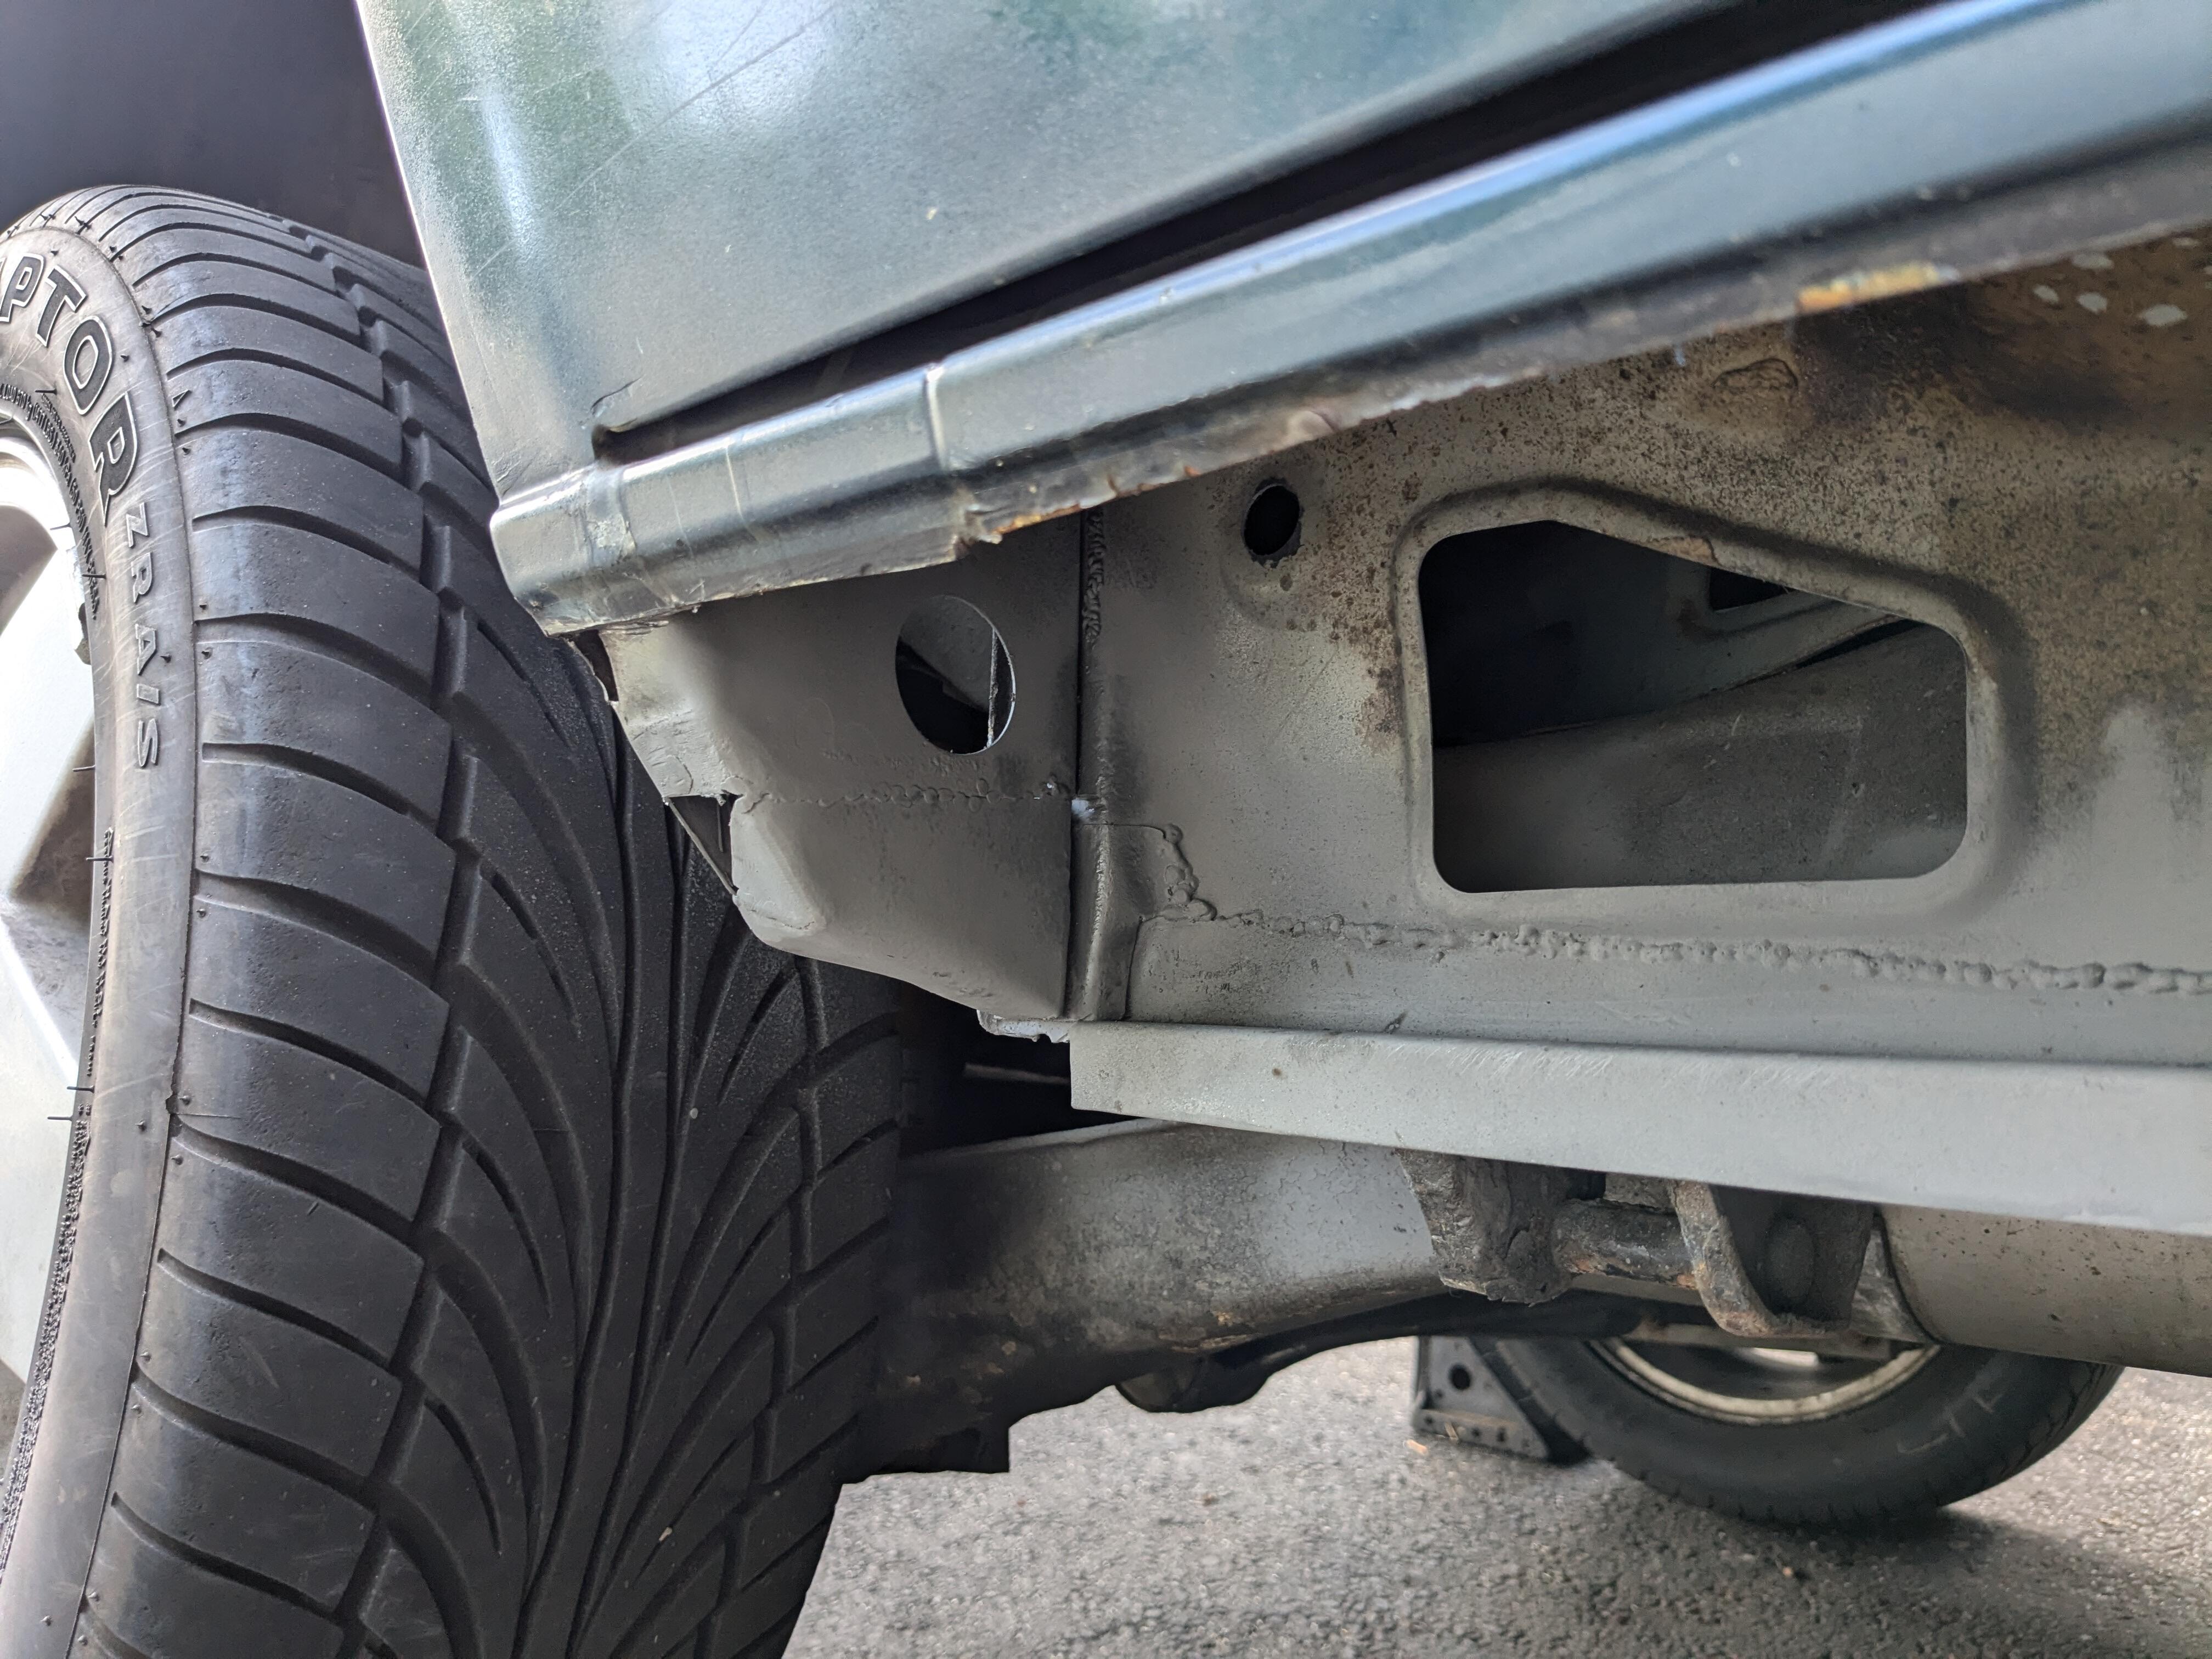
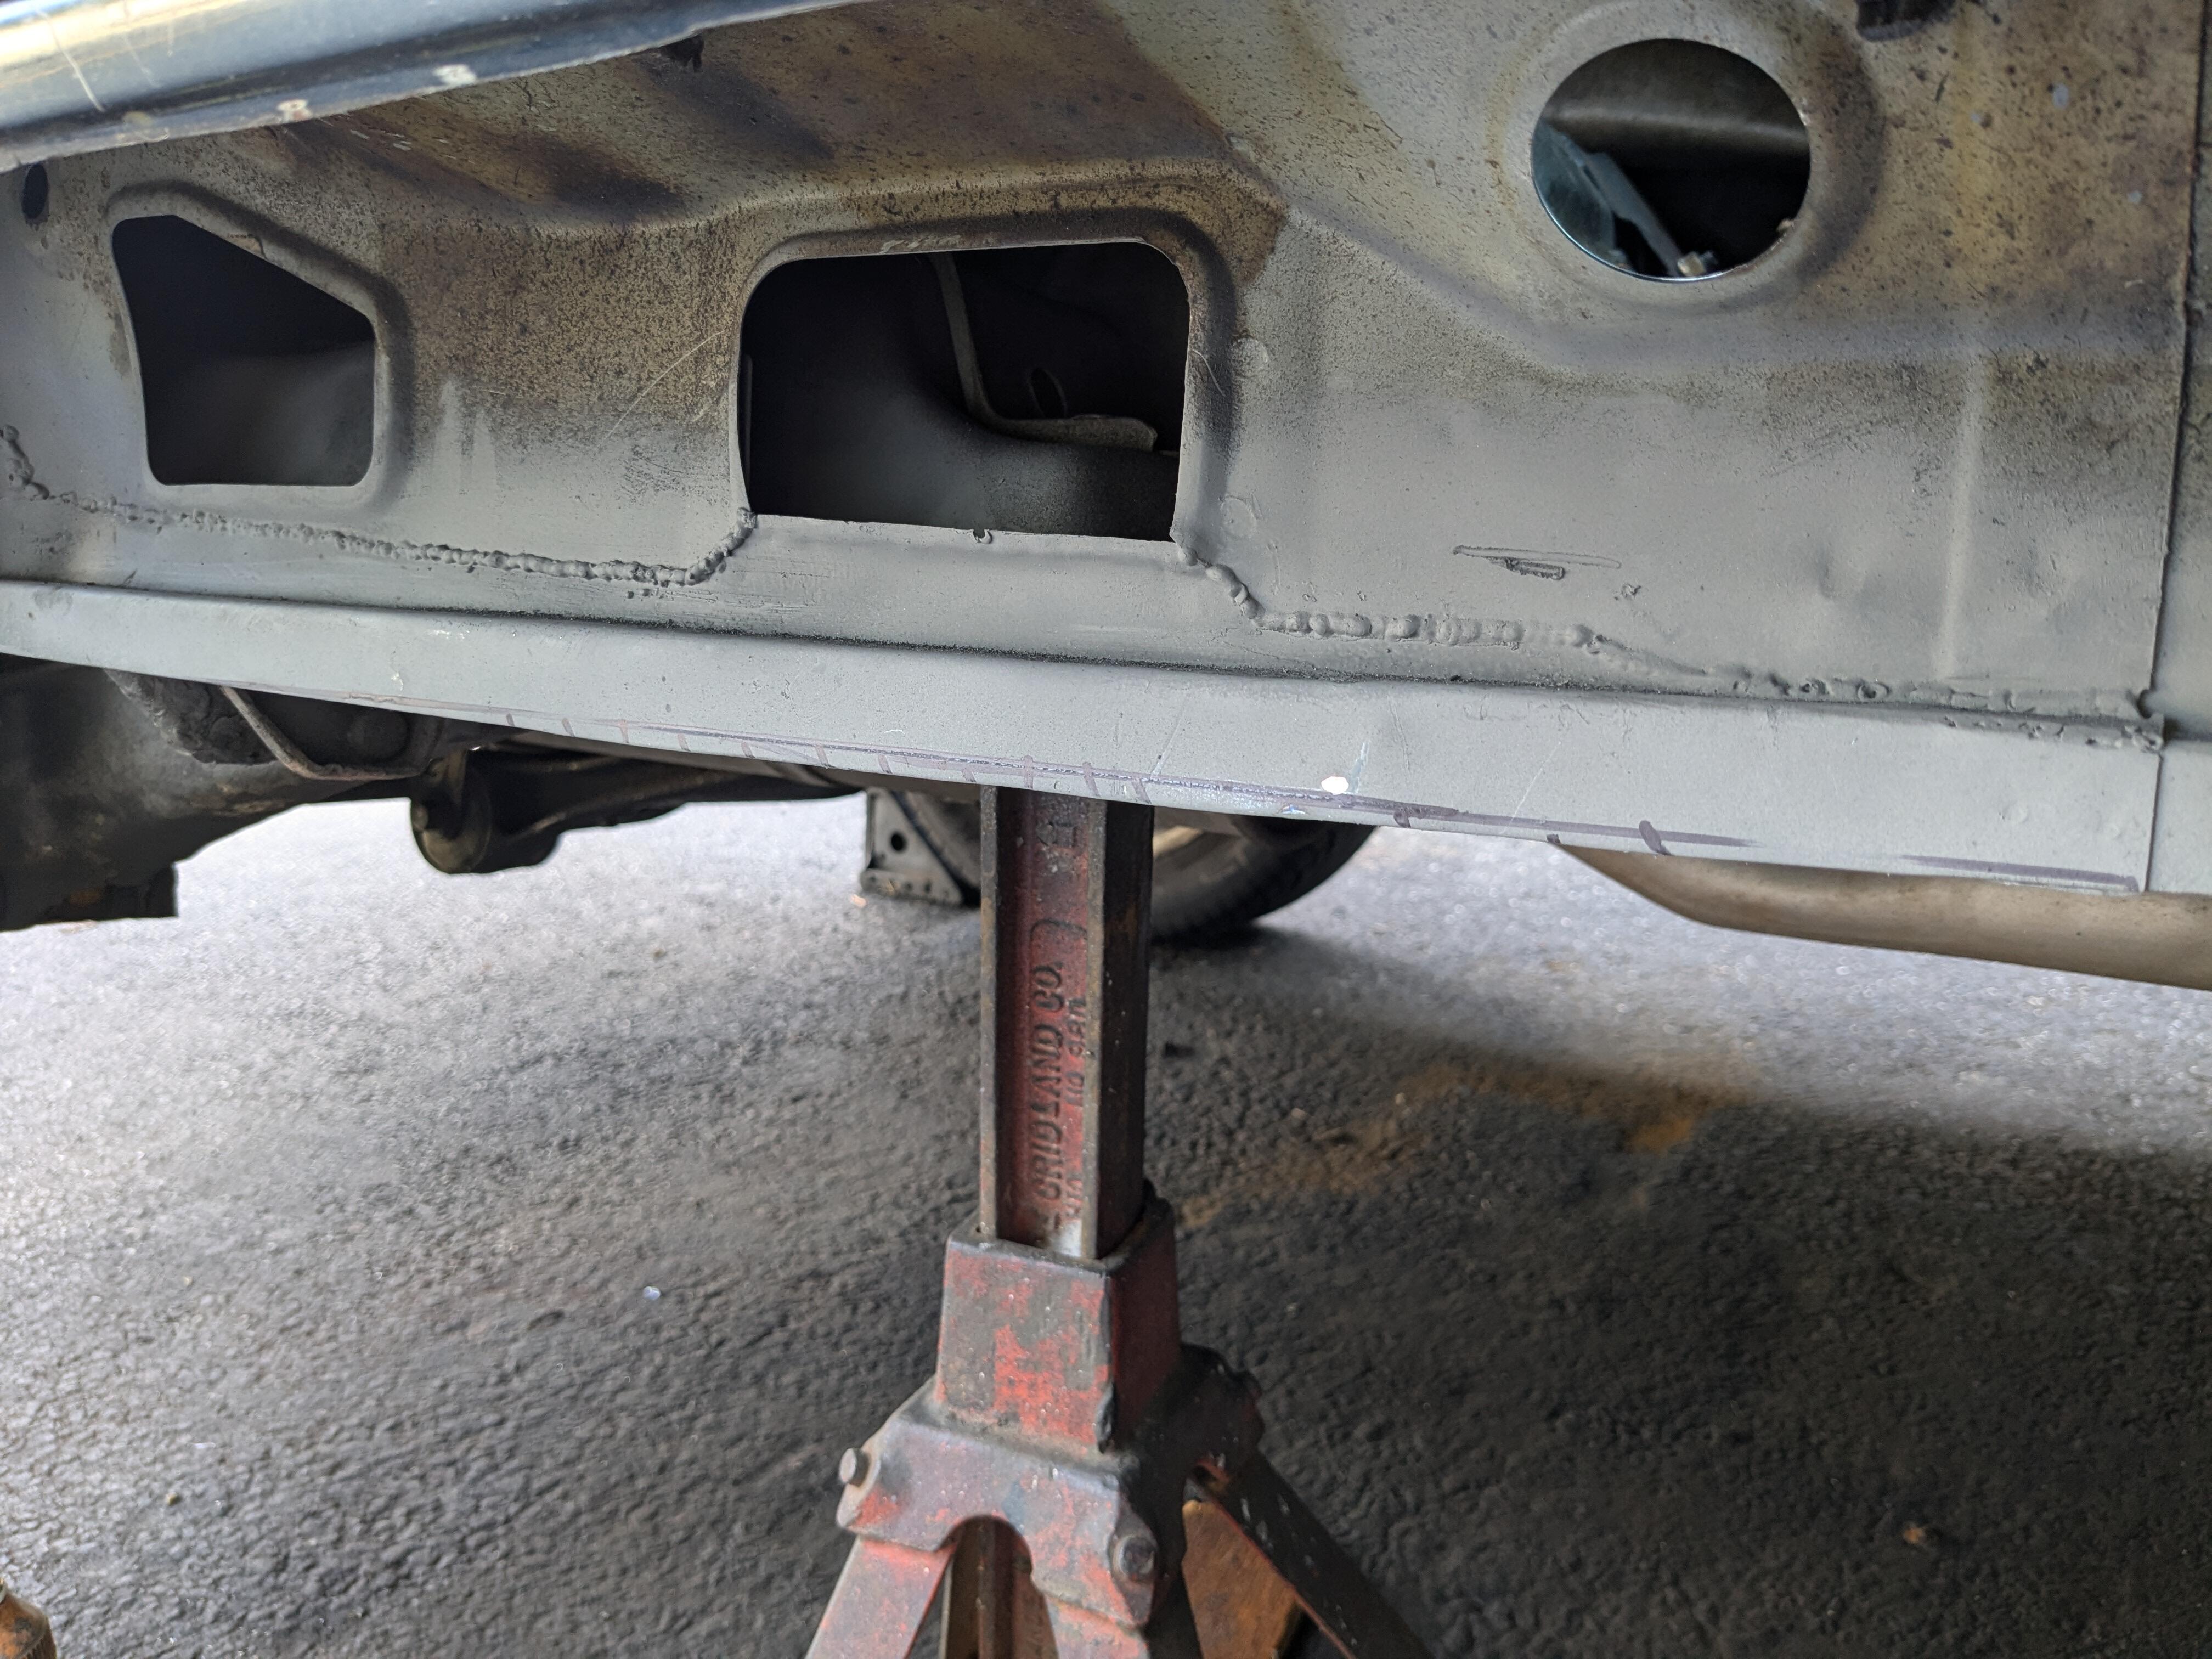
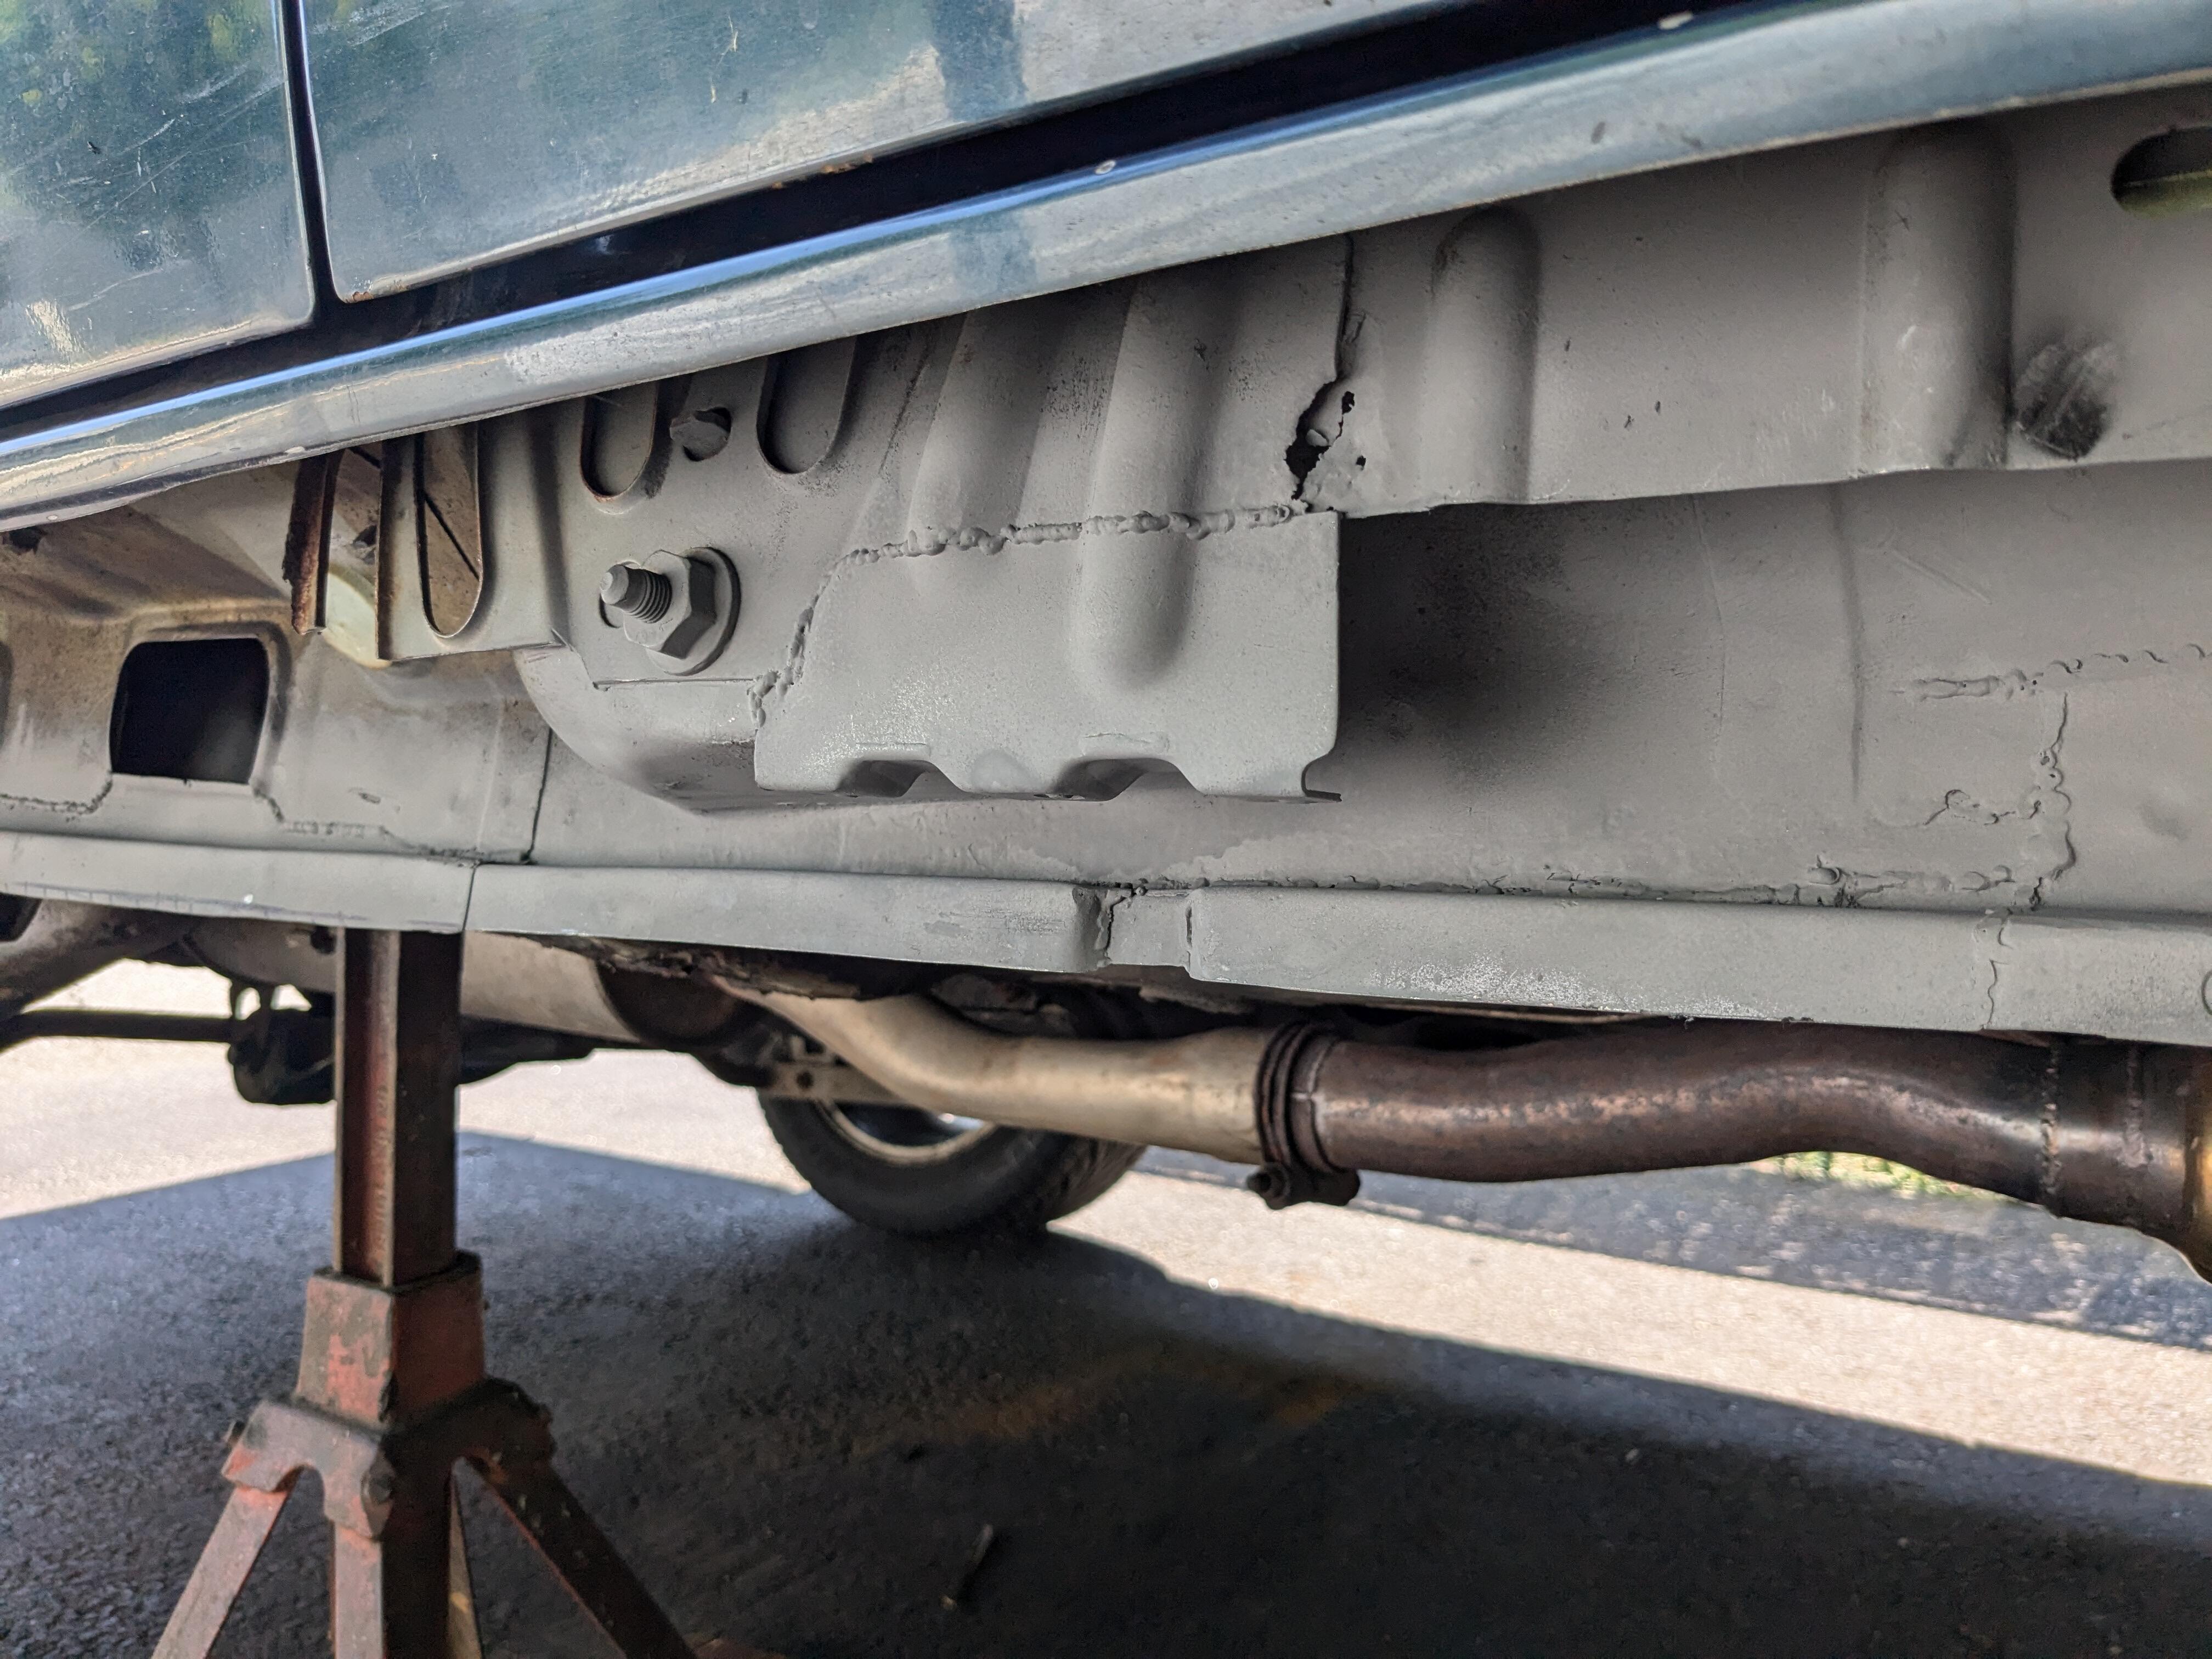
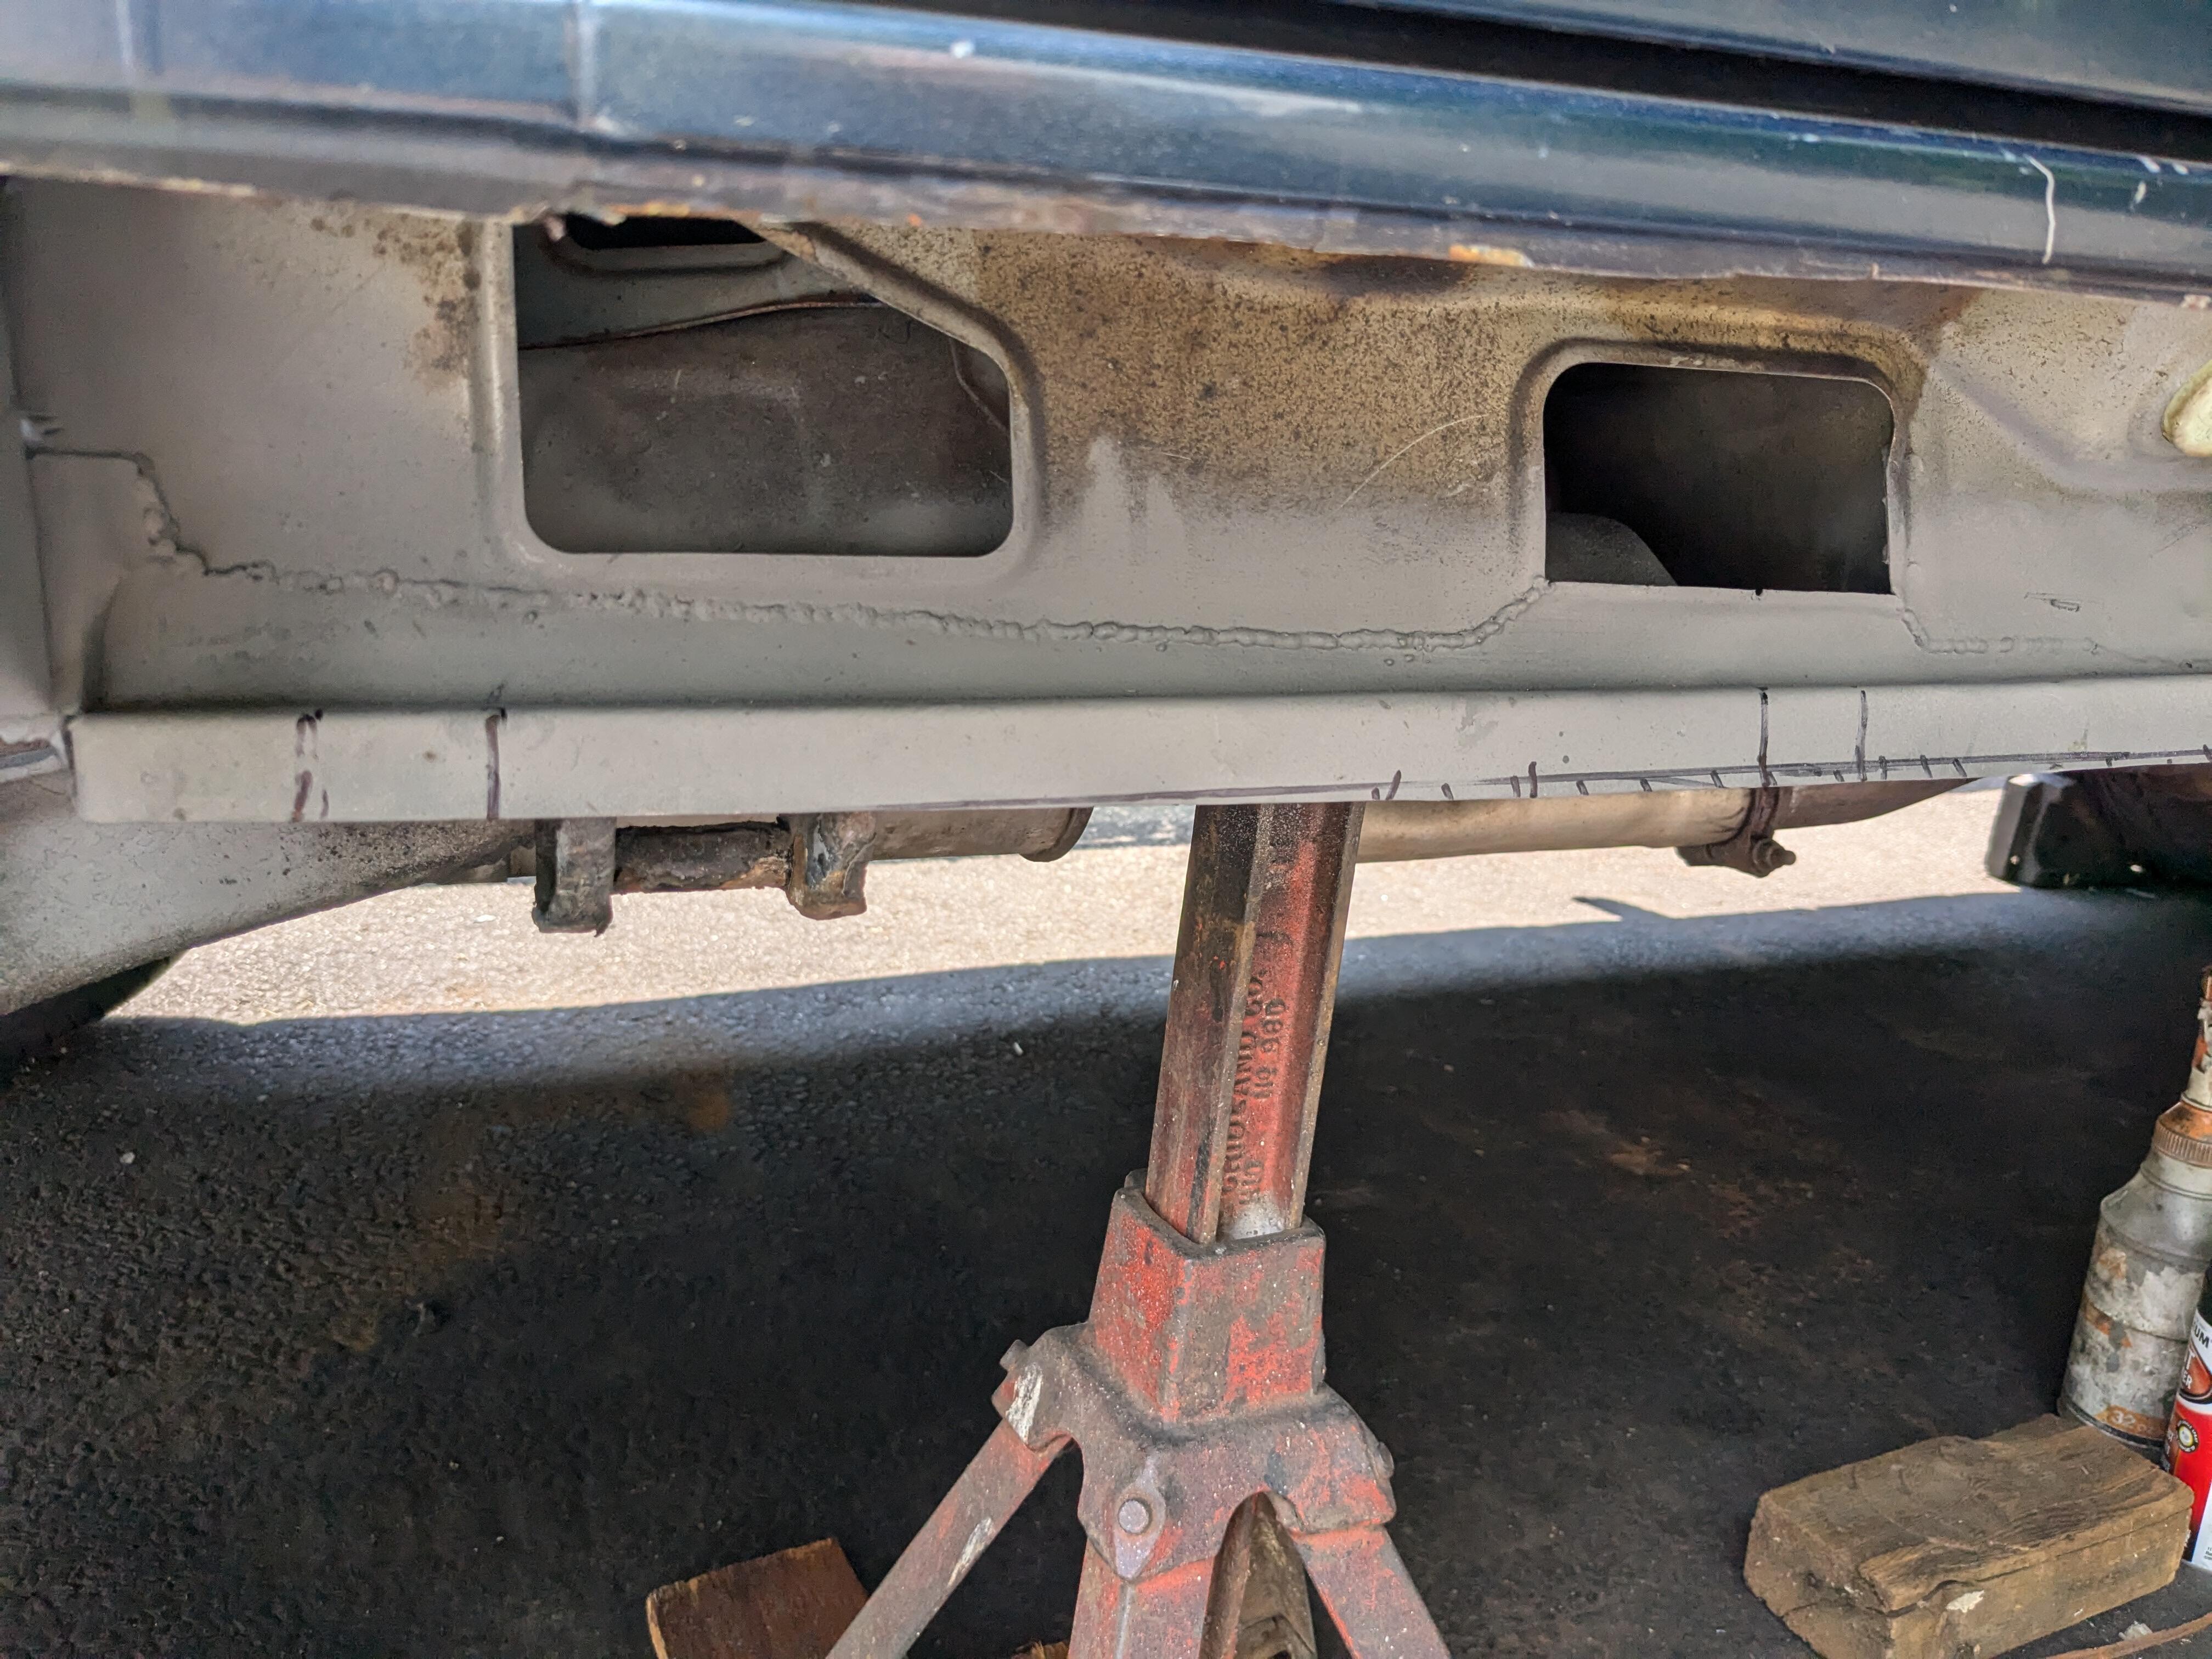
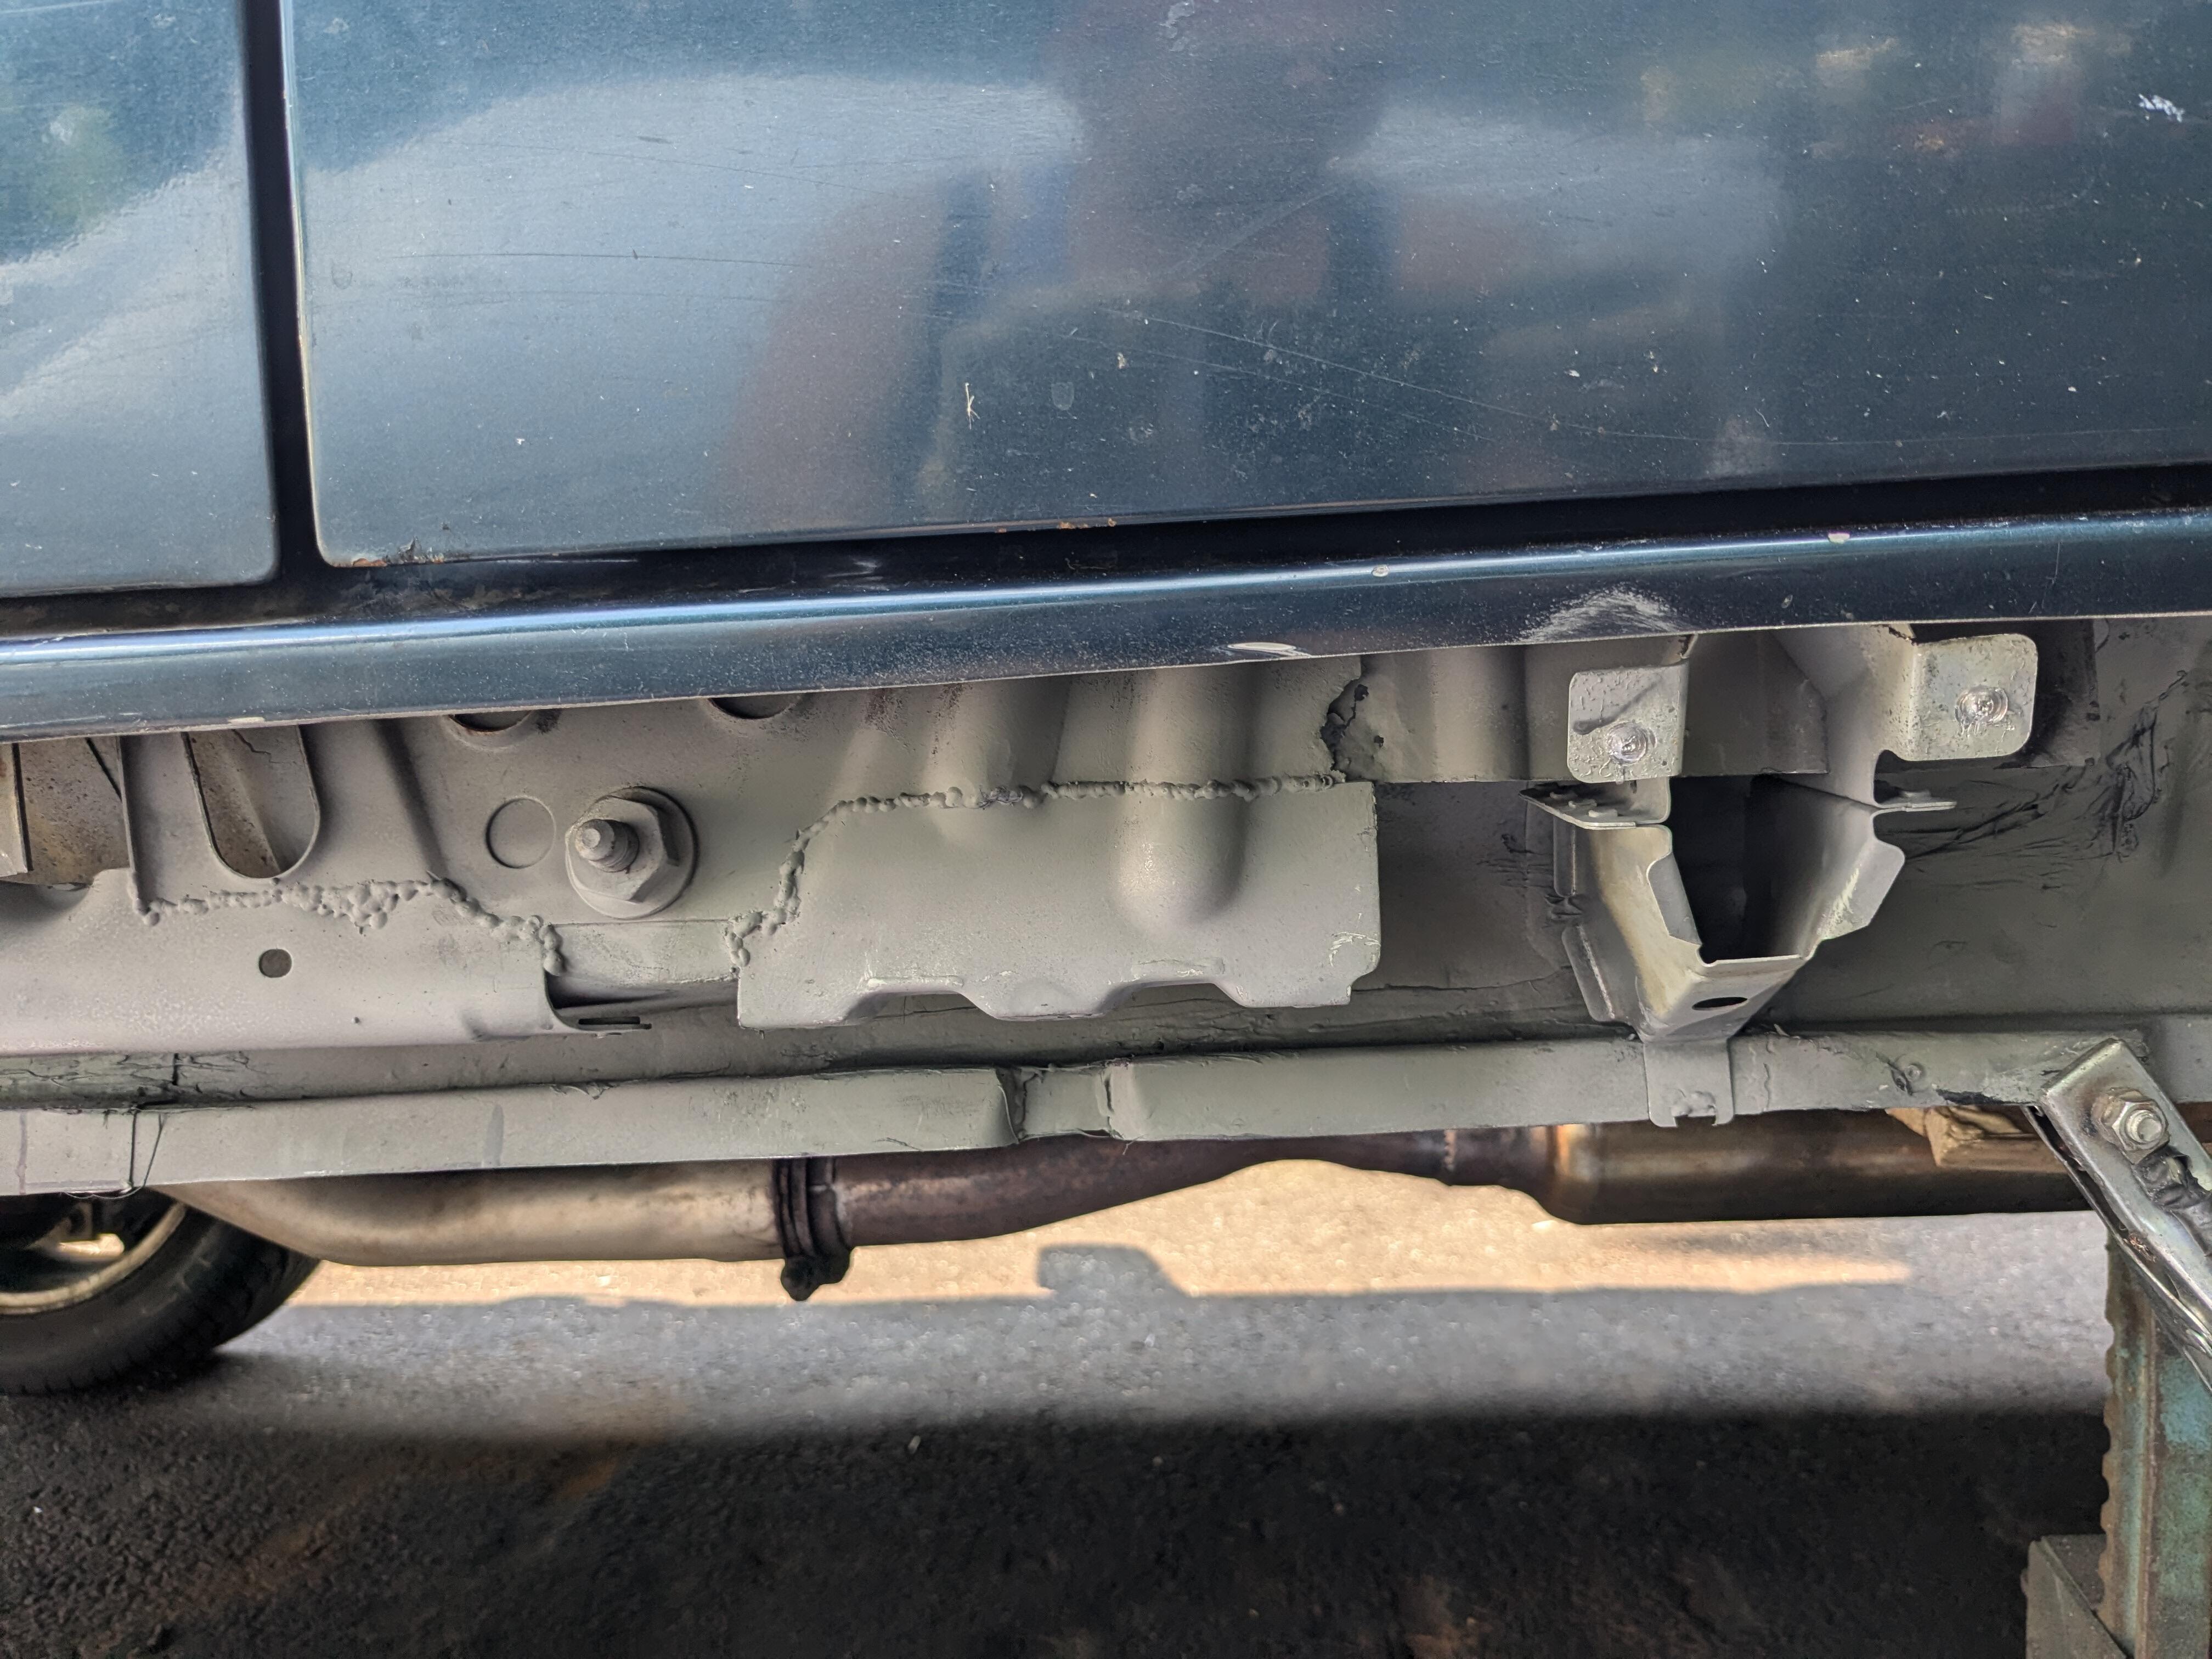
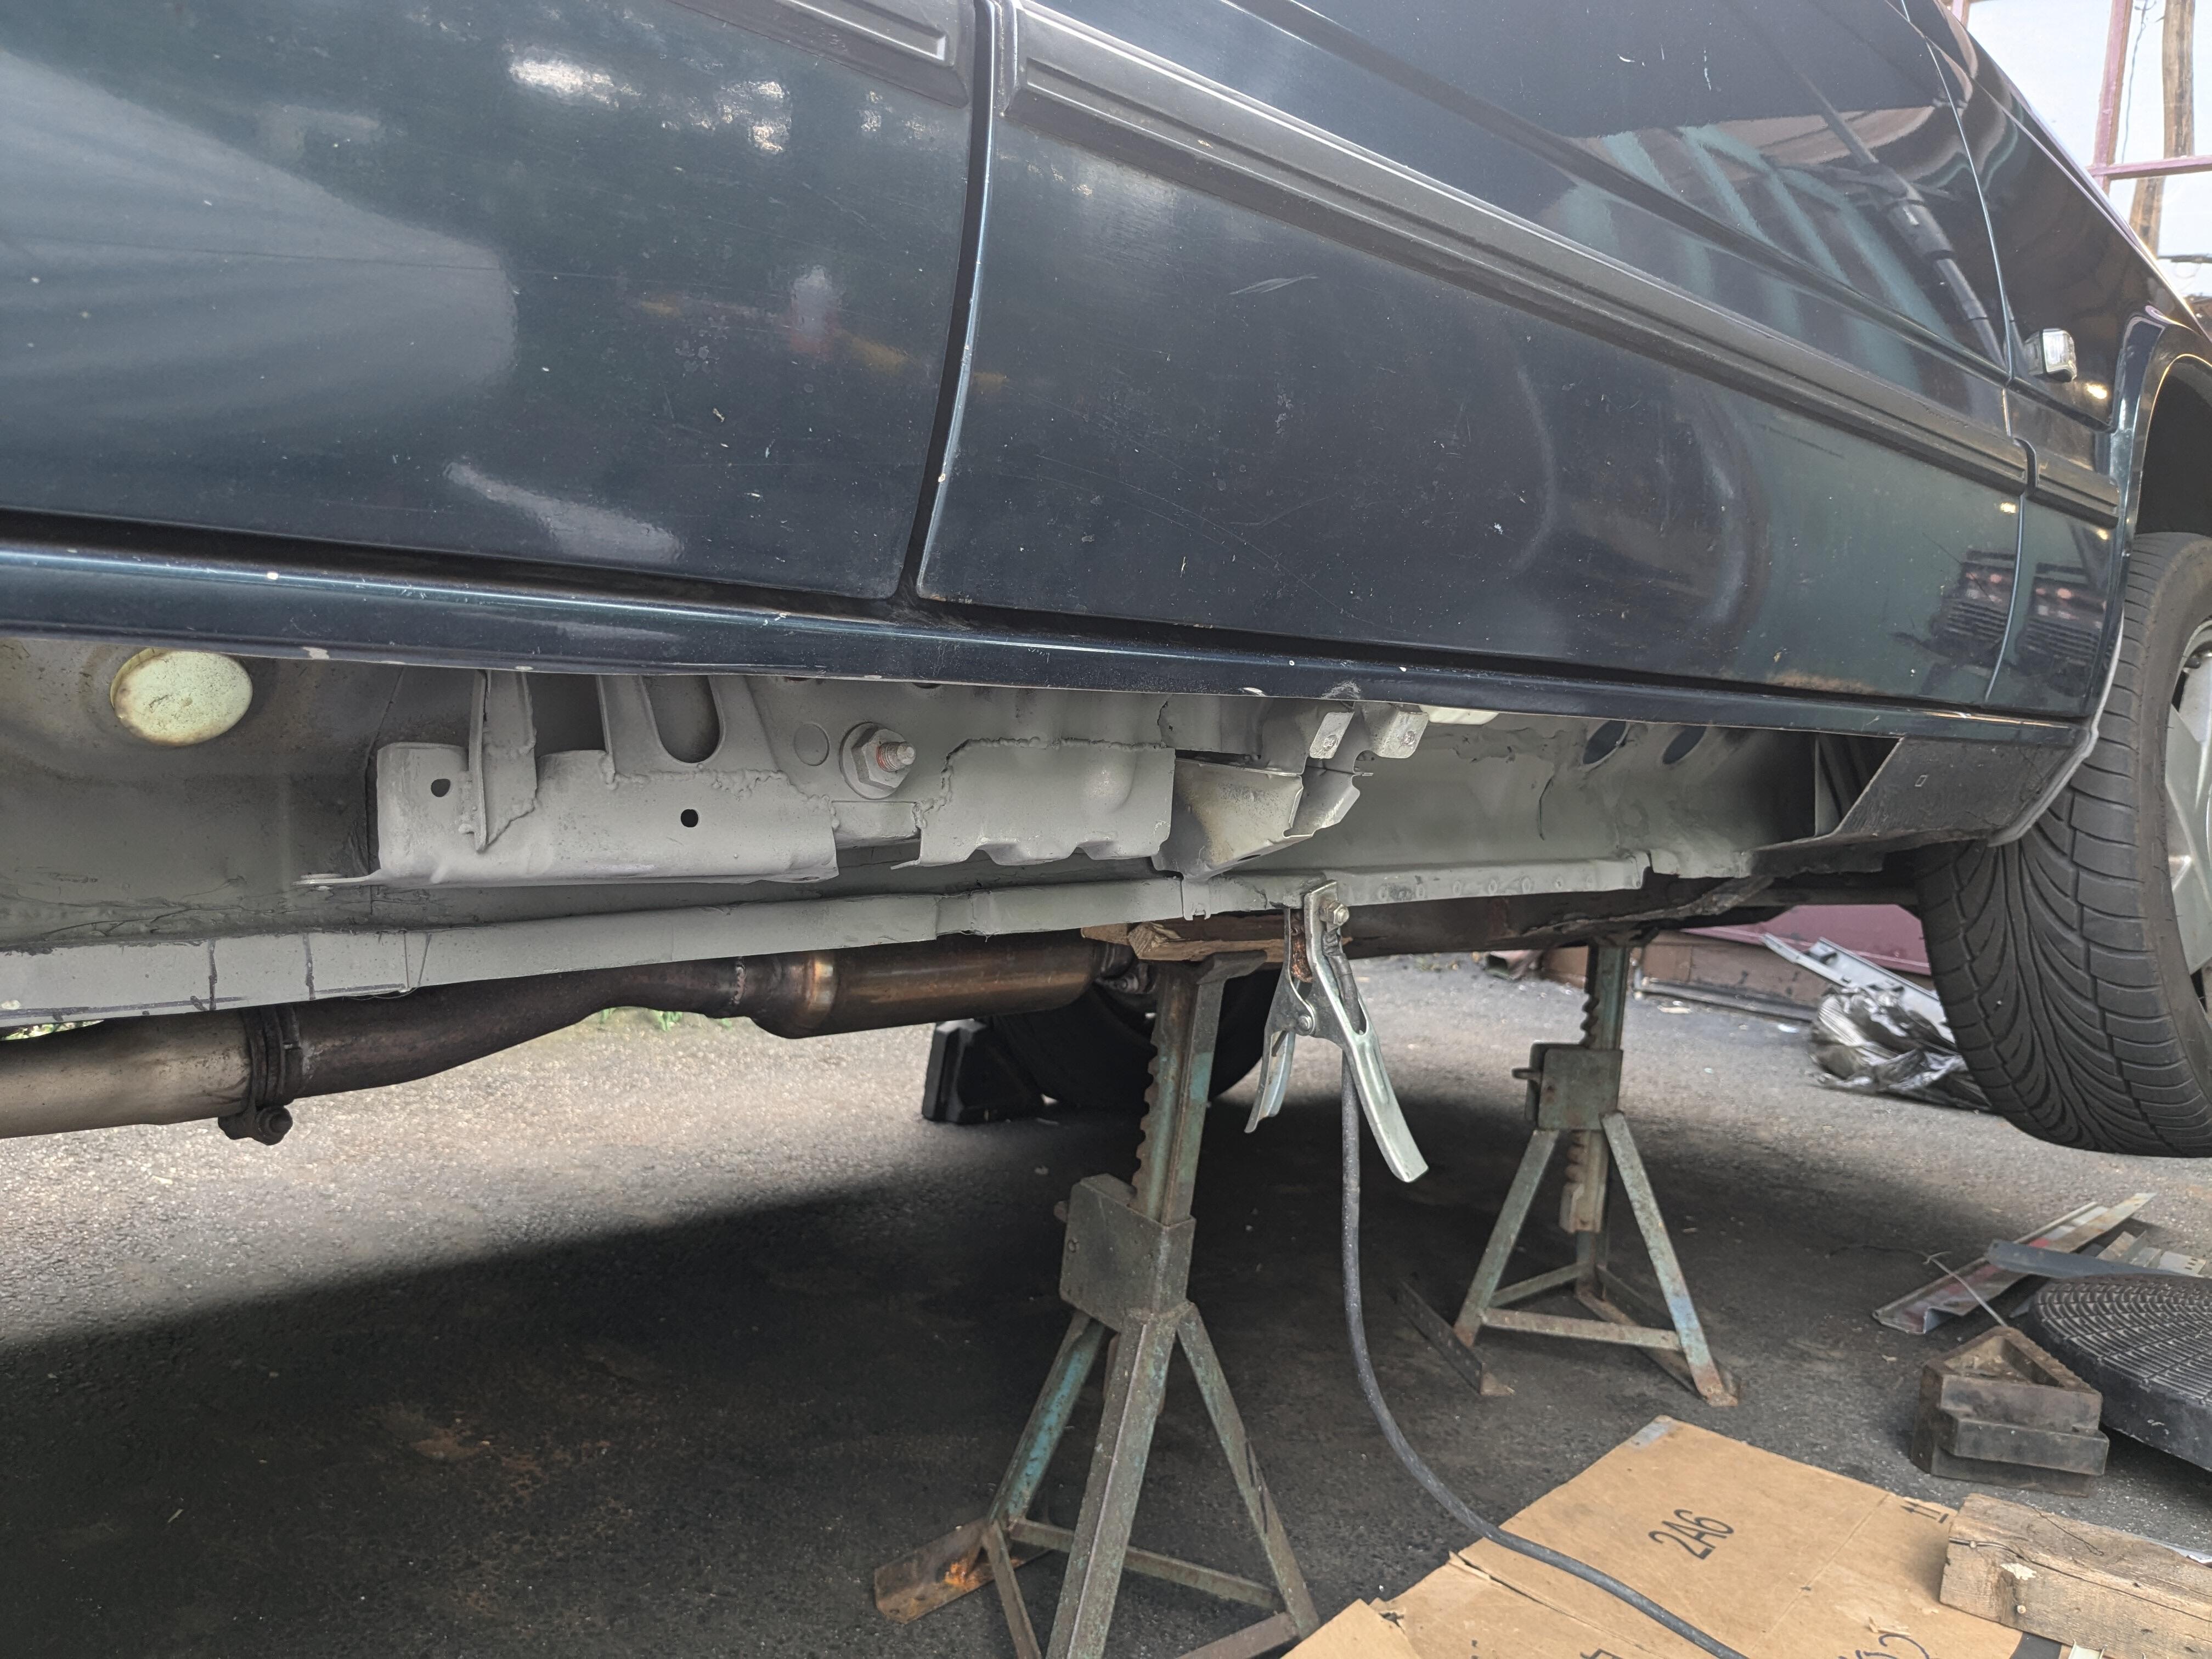
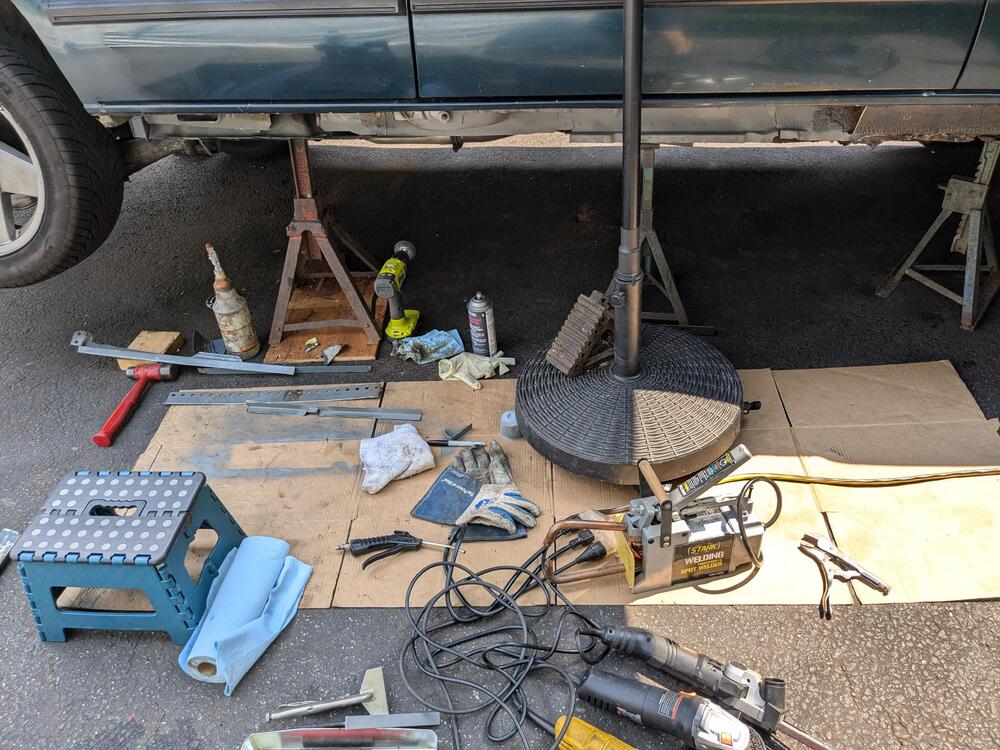
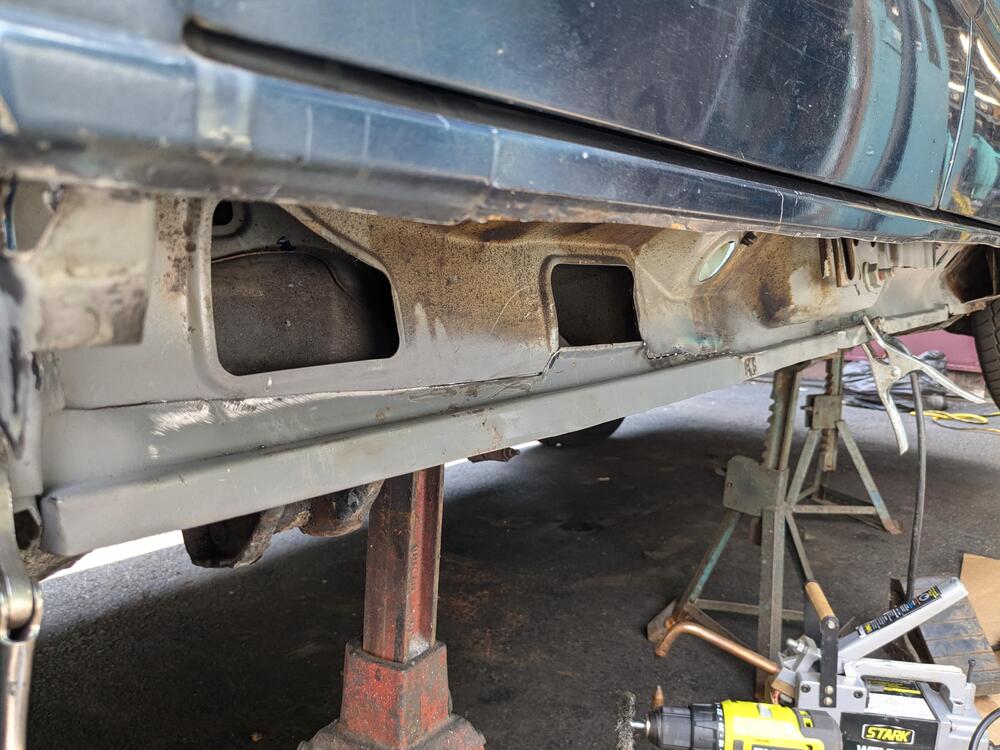
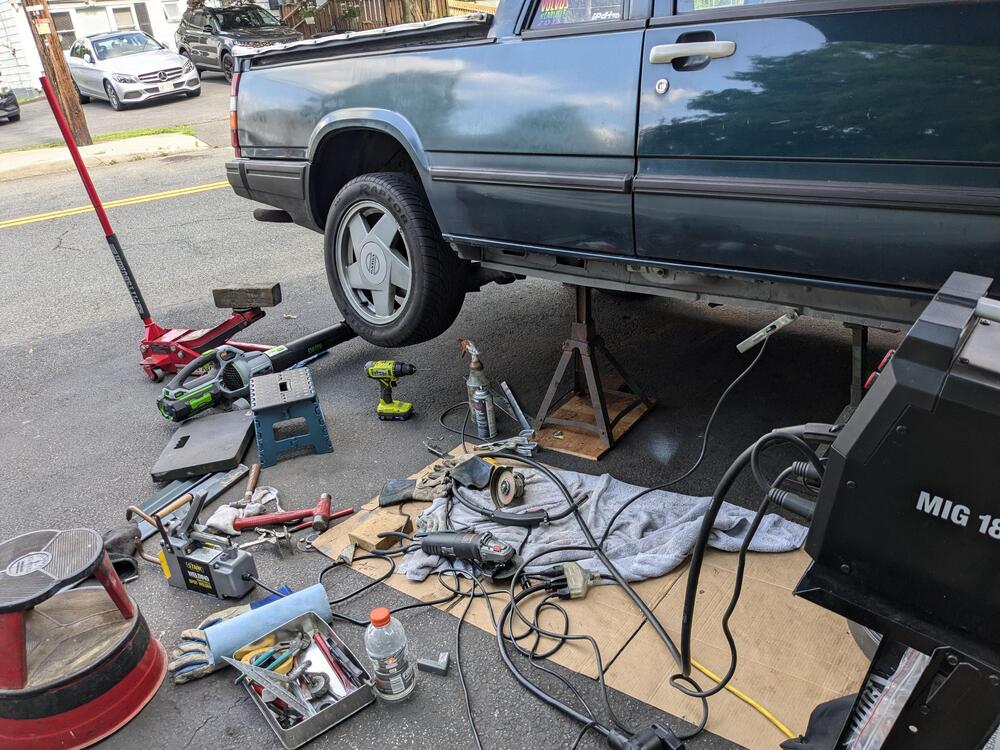
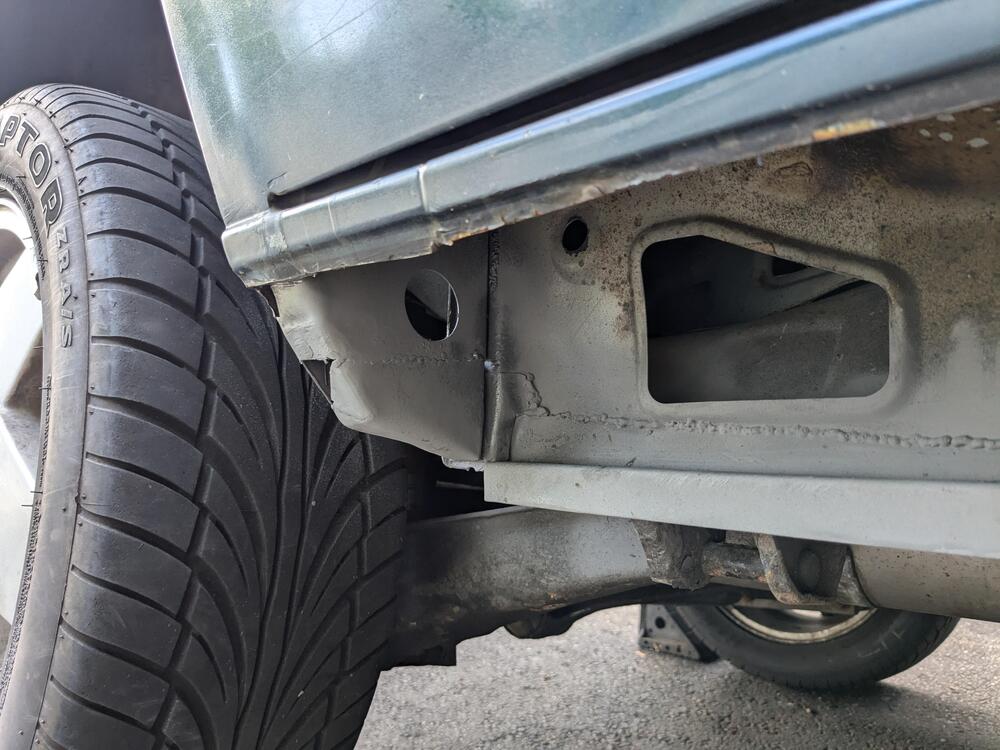
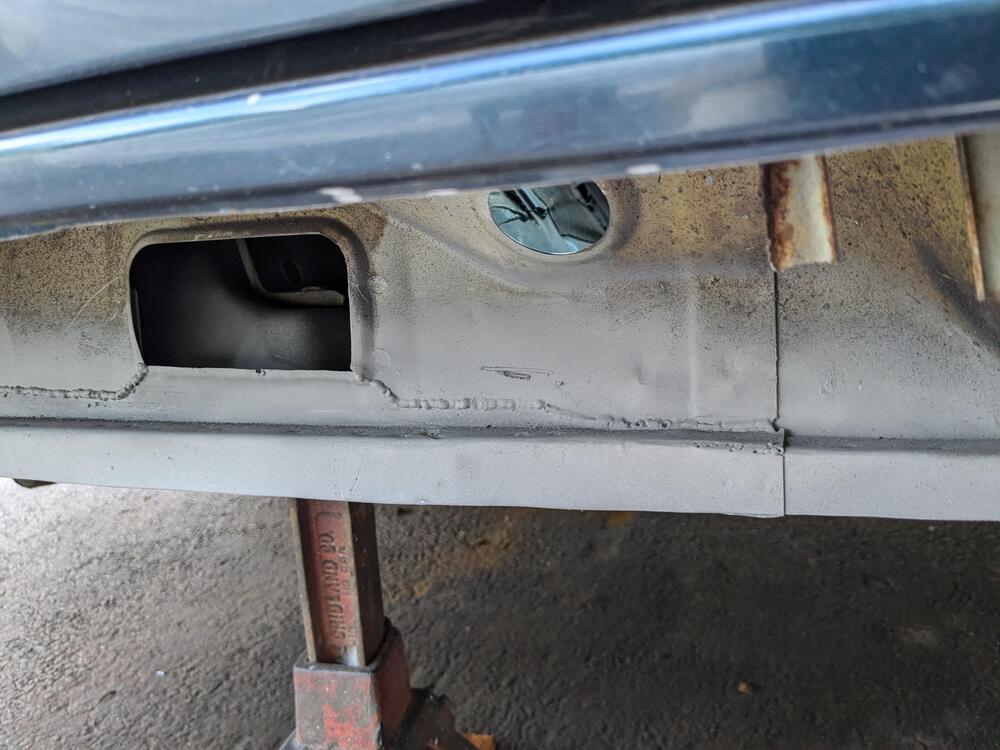
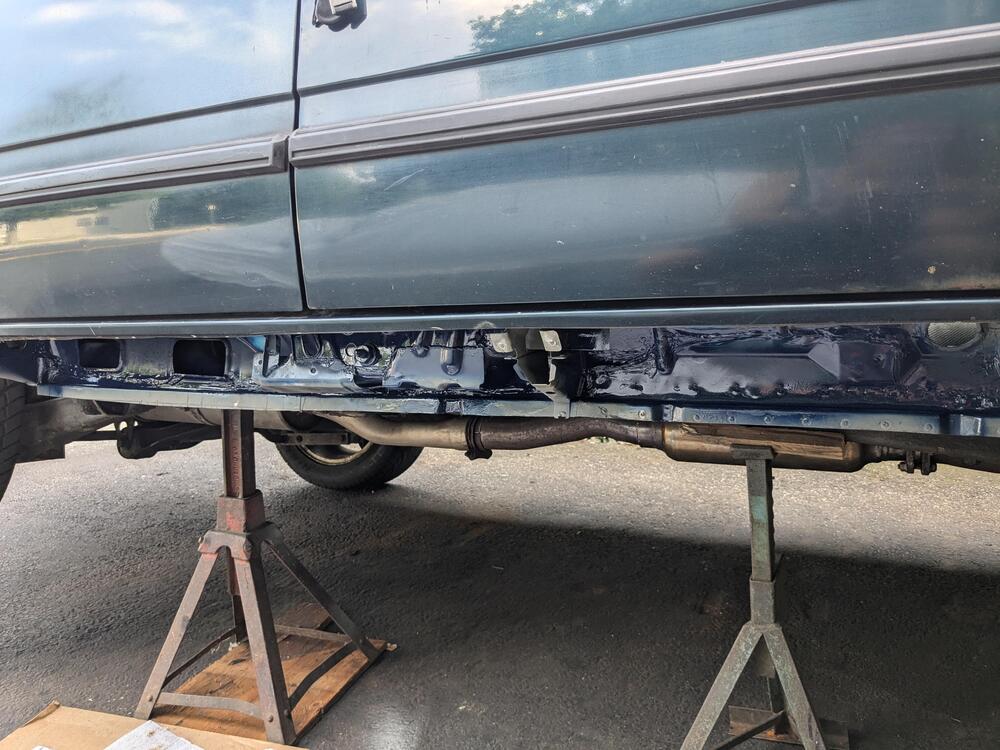
Back on the Volvo rust repair . Tomorrow I need to make the B pillar tie plates that rotted out, then I can do the rocker skin Cut out the rot on the rear half cut matching section to fit. Lower lip will be trimmed later stripped & applied weld-thru primer to butt join area added dogleg at left end to make up layers at wheel arch lip Started tacking the rear section in - I first added a bridging lip between this & the repair section from Friday (under clamp) rear section overlaps mid section, as with original construction Made the small end cap for the wheel arch base that the rocker skin ties to Not going to grind down the MIG welds - I'll just apply seam sealer to that spot welded the lower step to the floor and center crossmember junction and forward repair section to floor lip Still have to finish the mig welds where the floor joins the vertical repair to the right of spot welded section


 4 points
 -
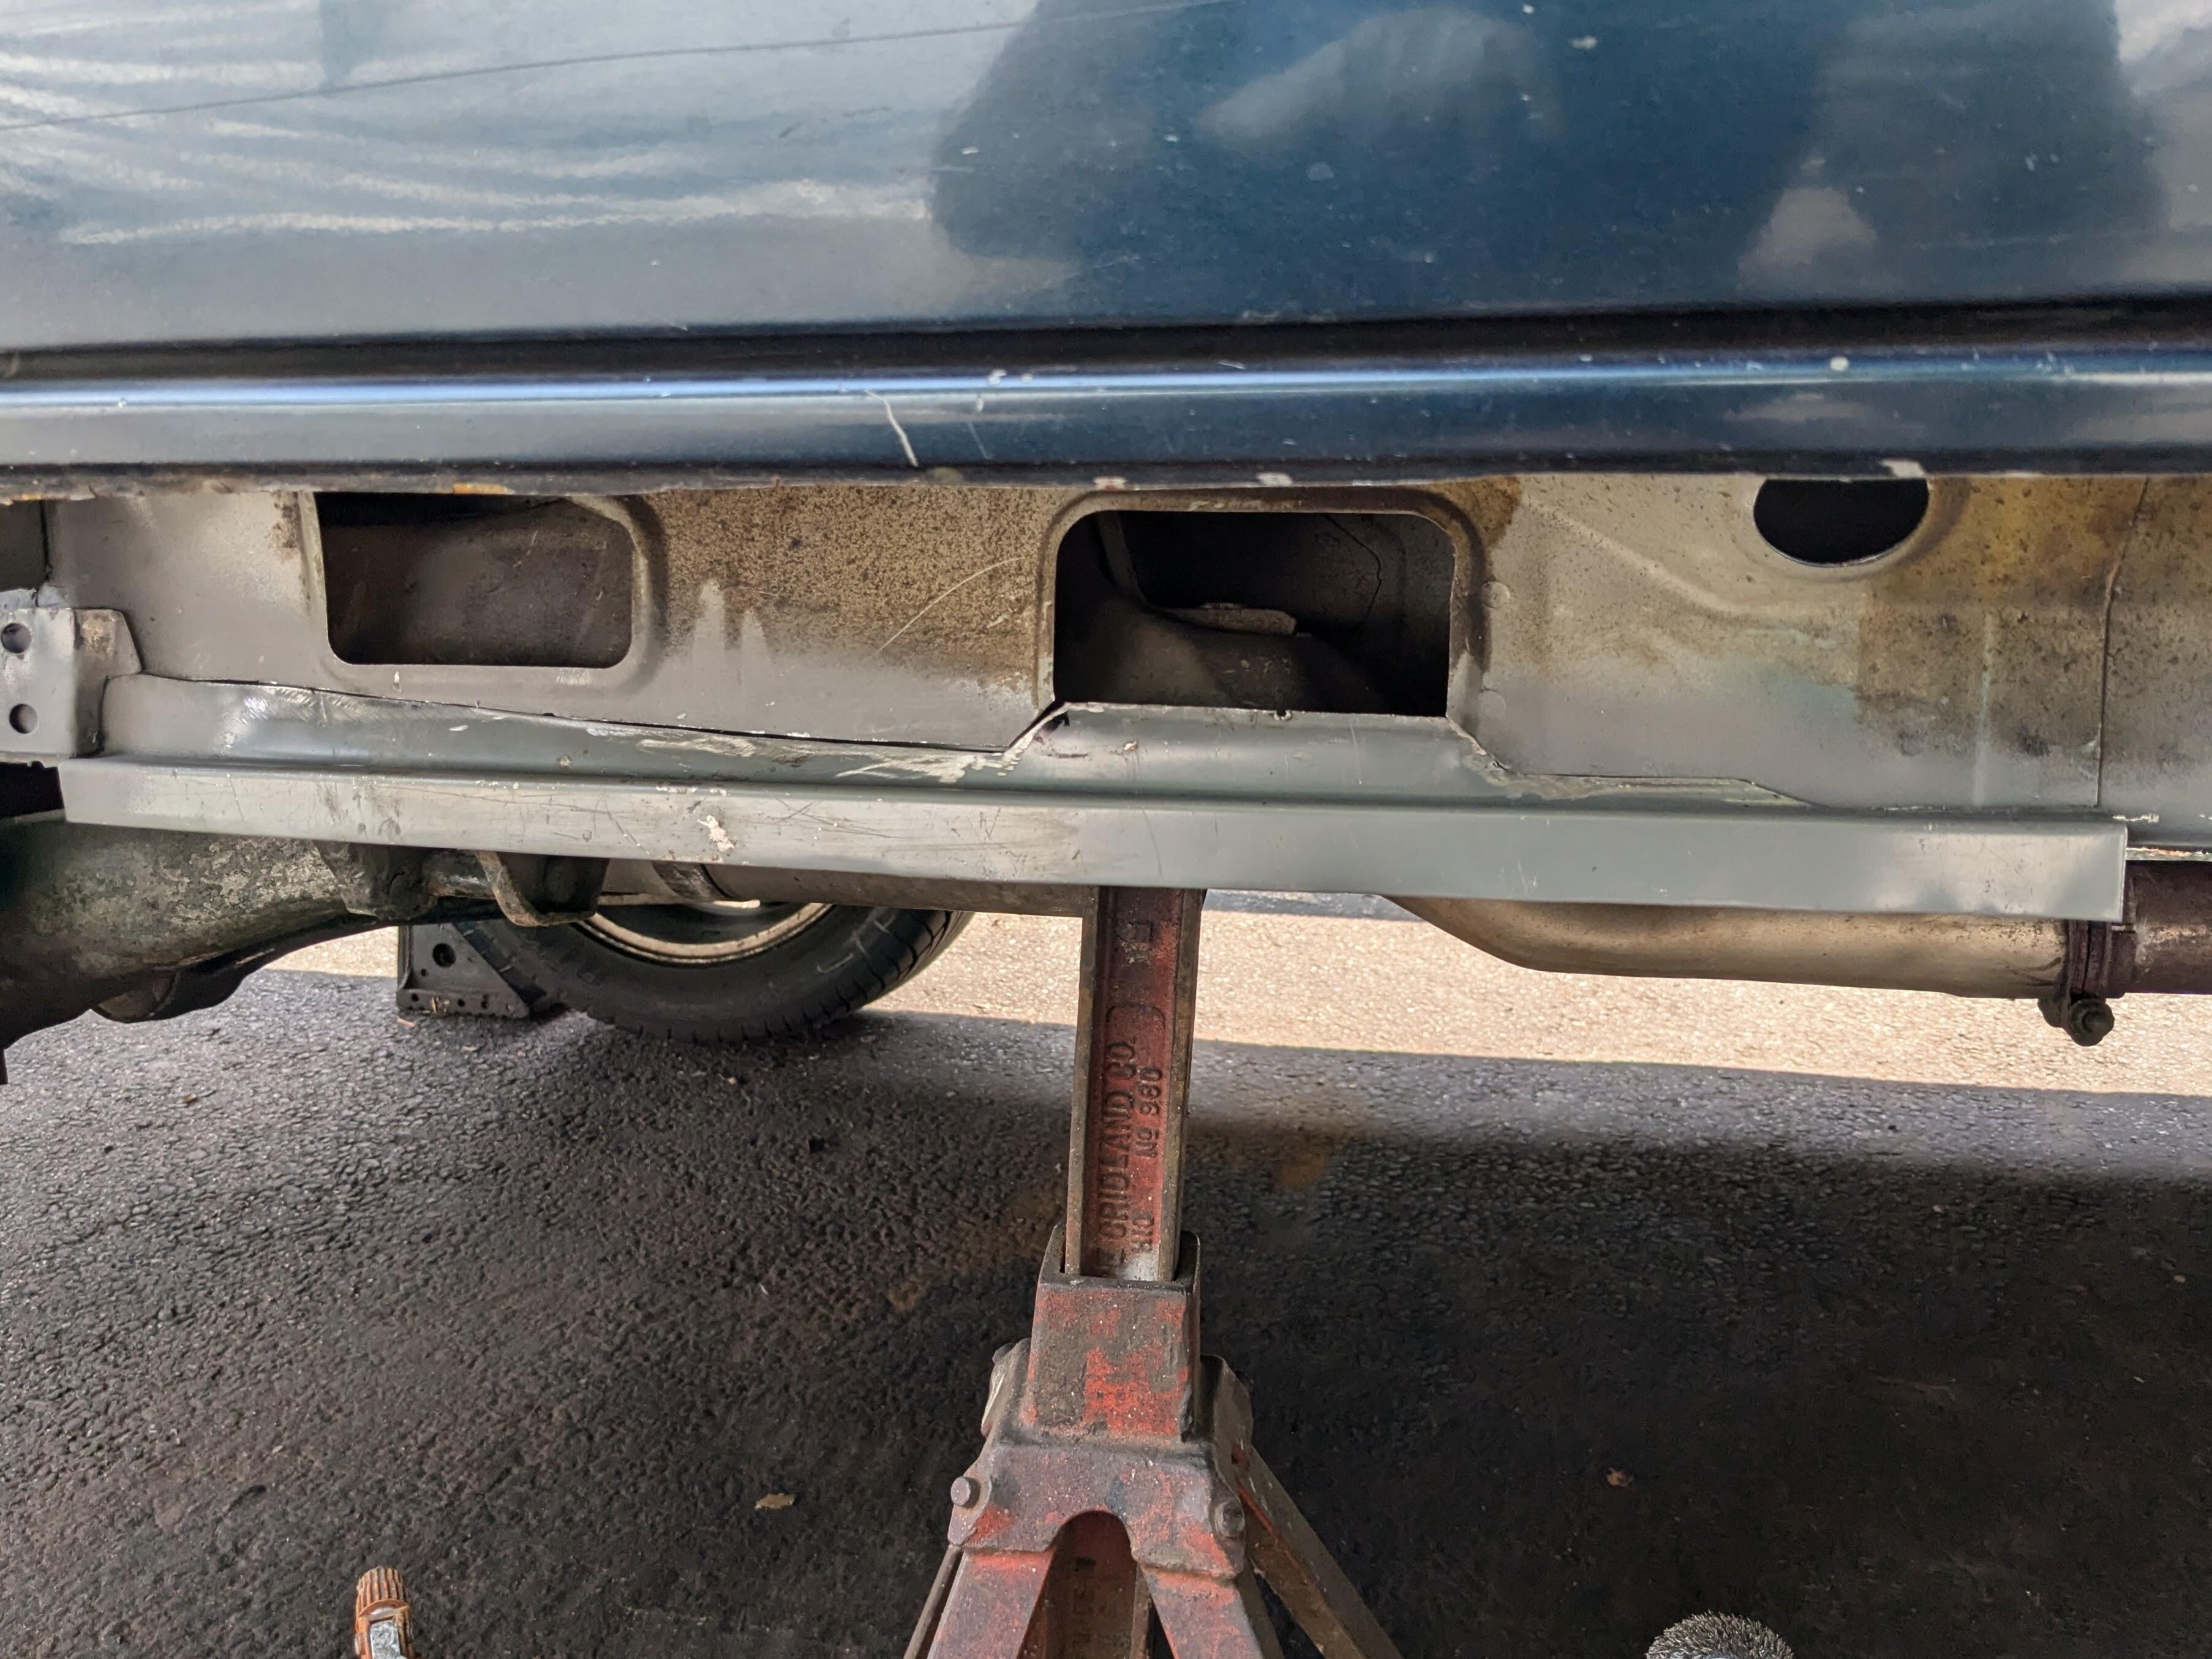
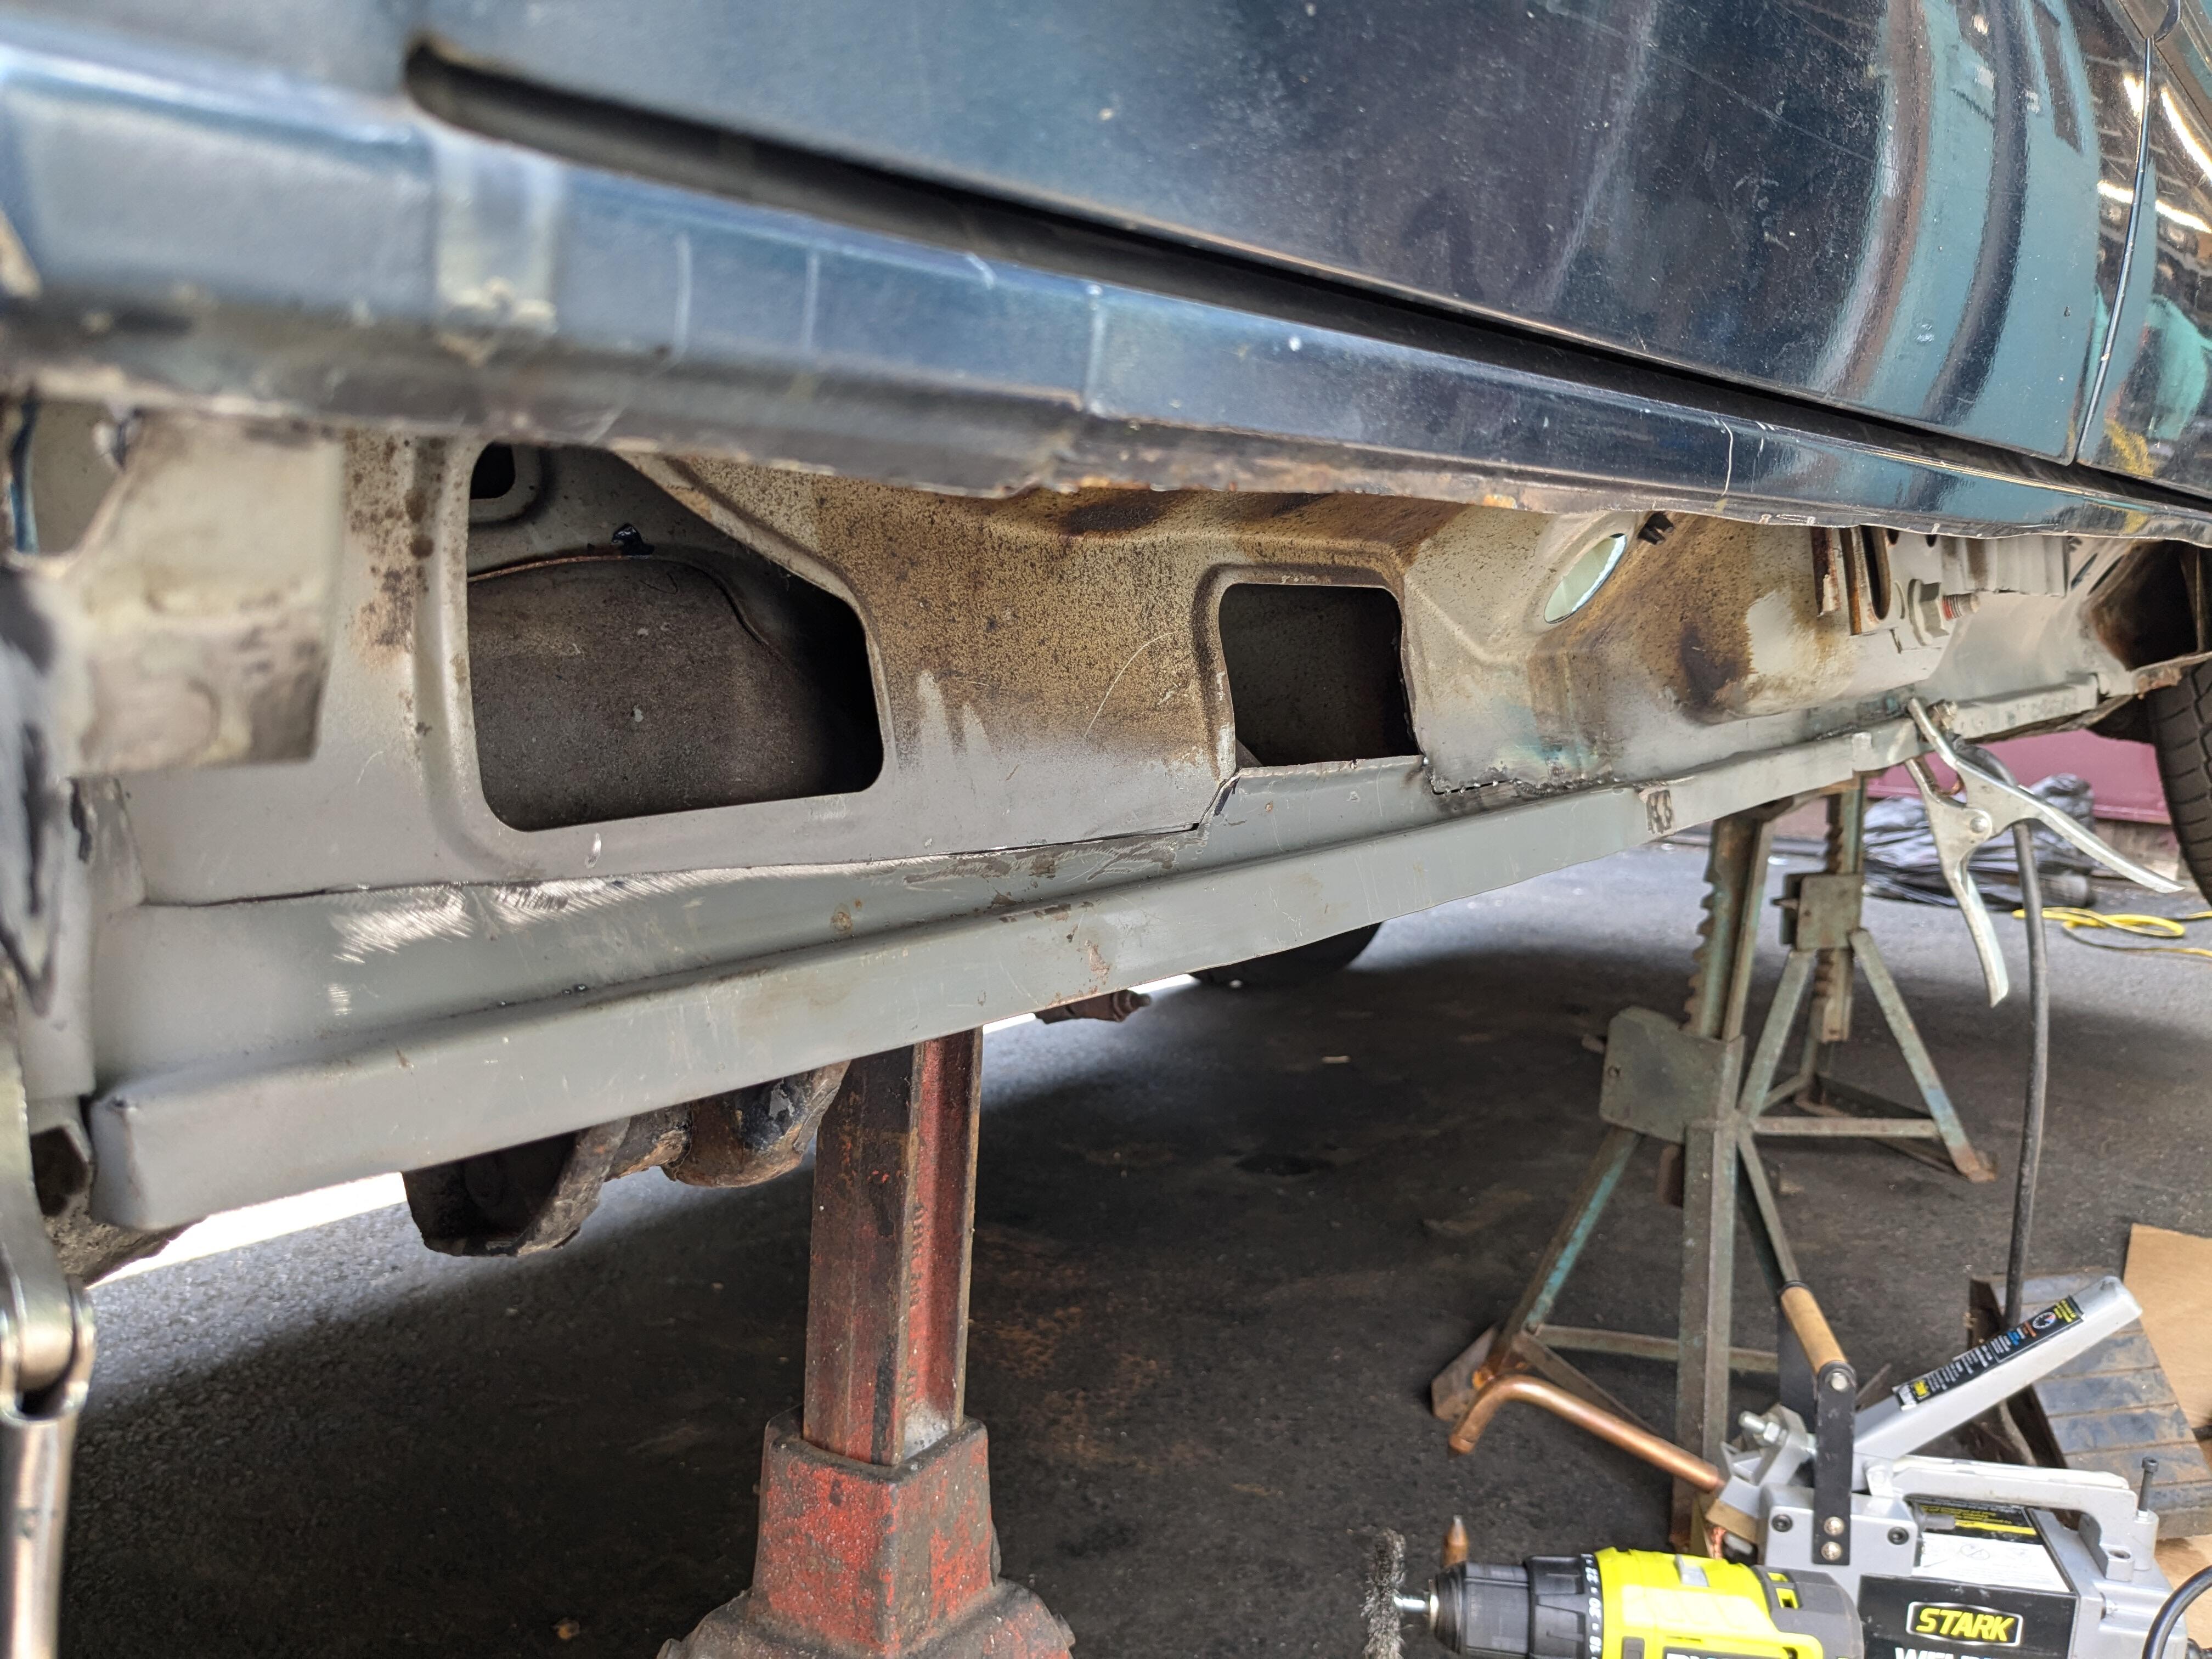
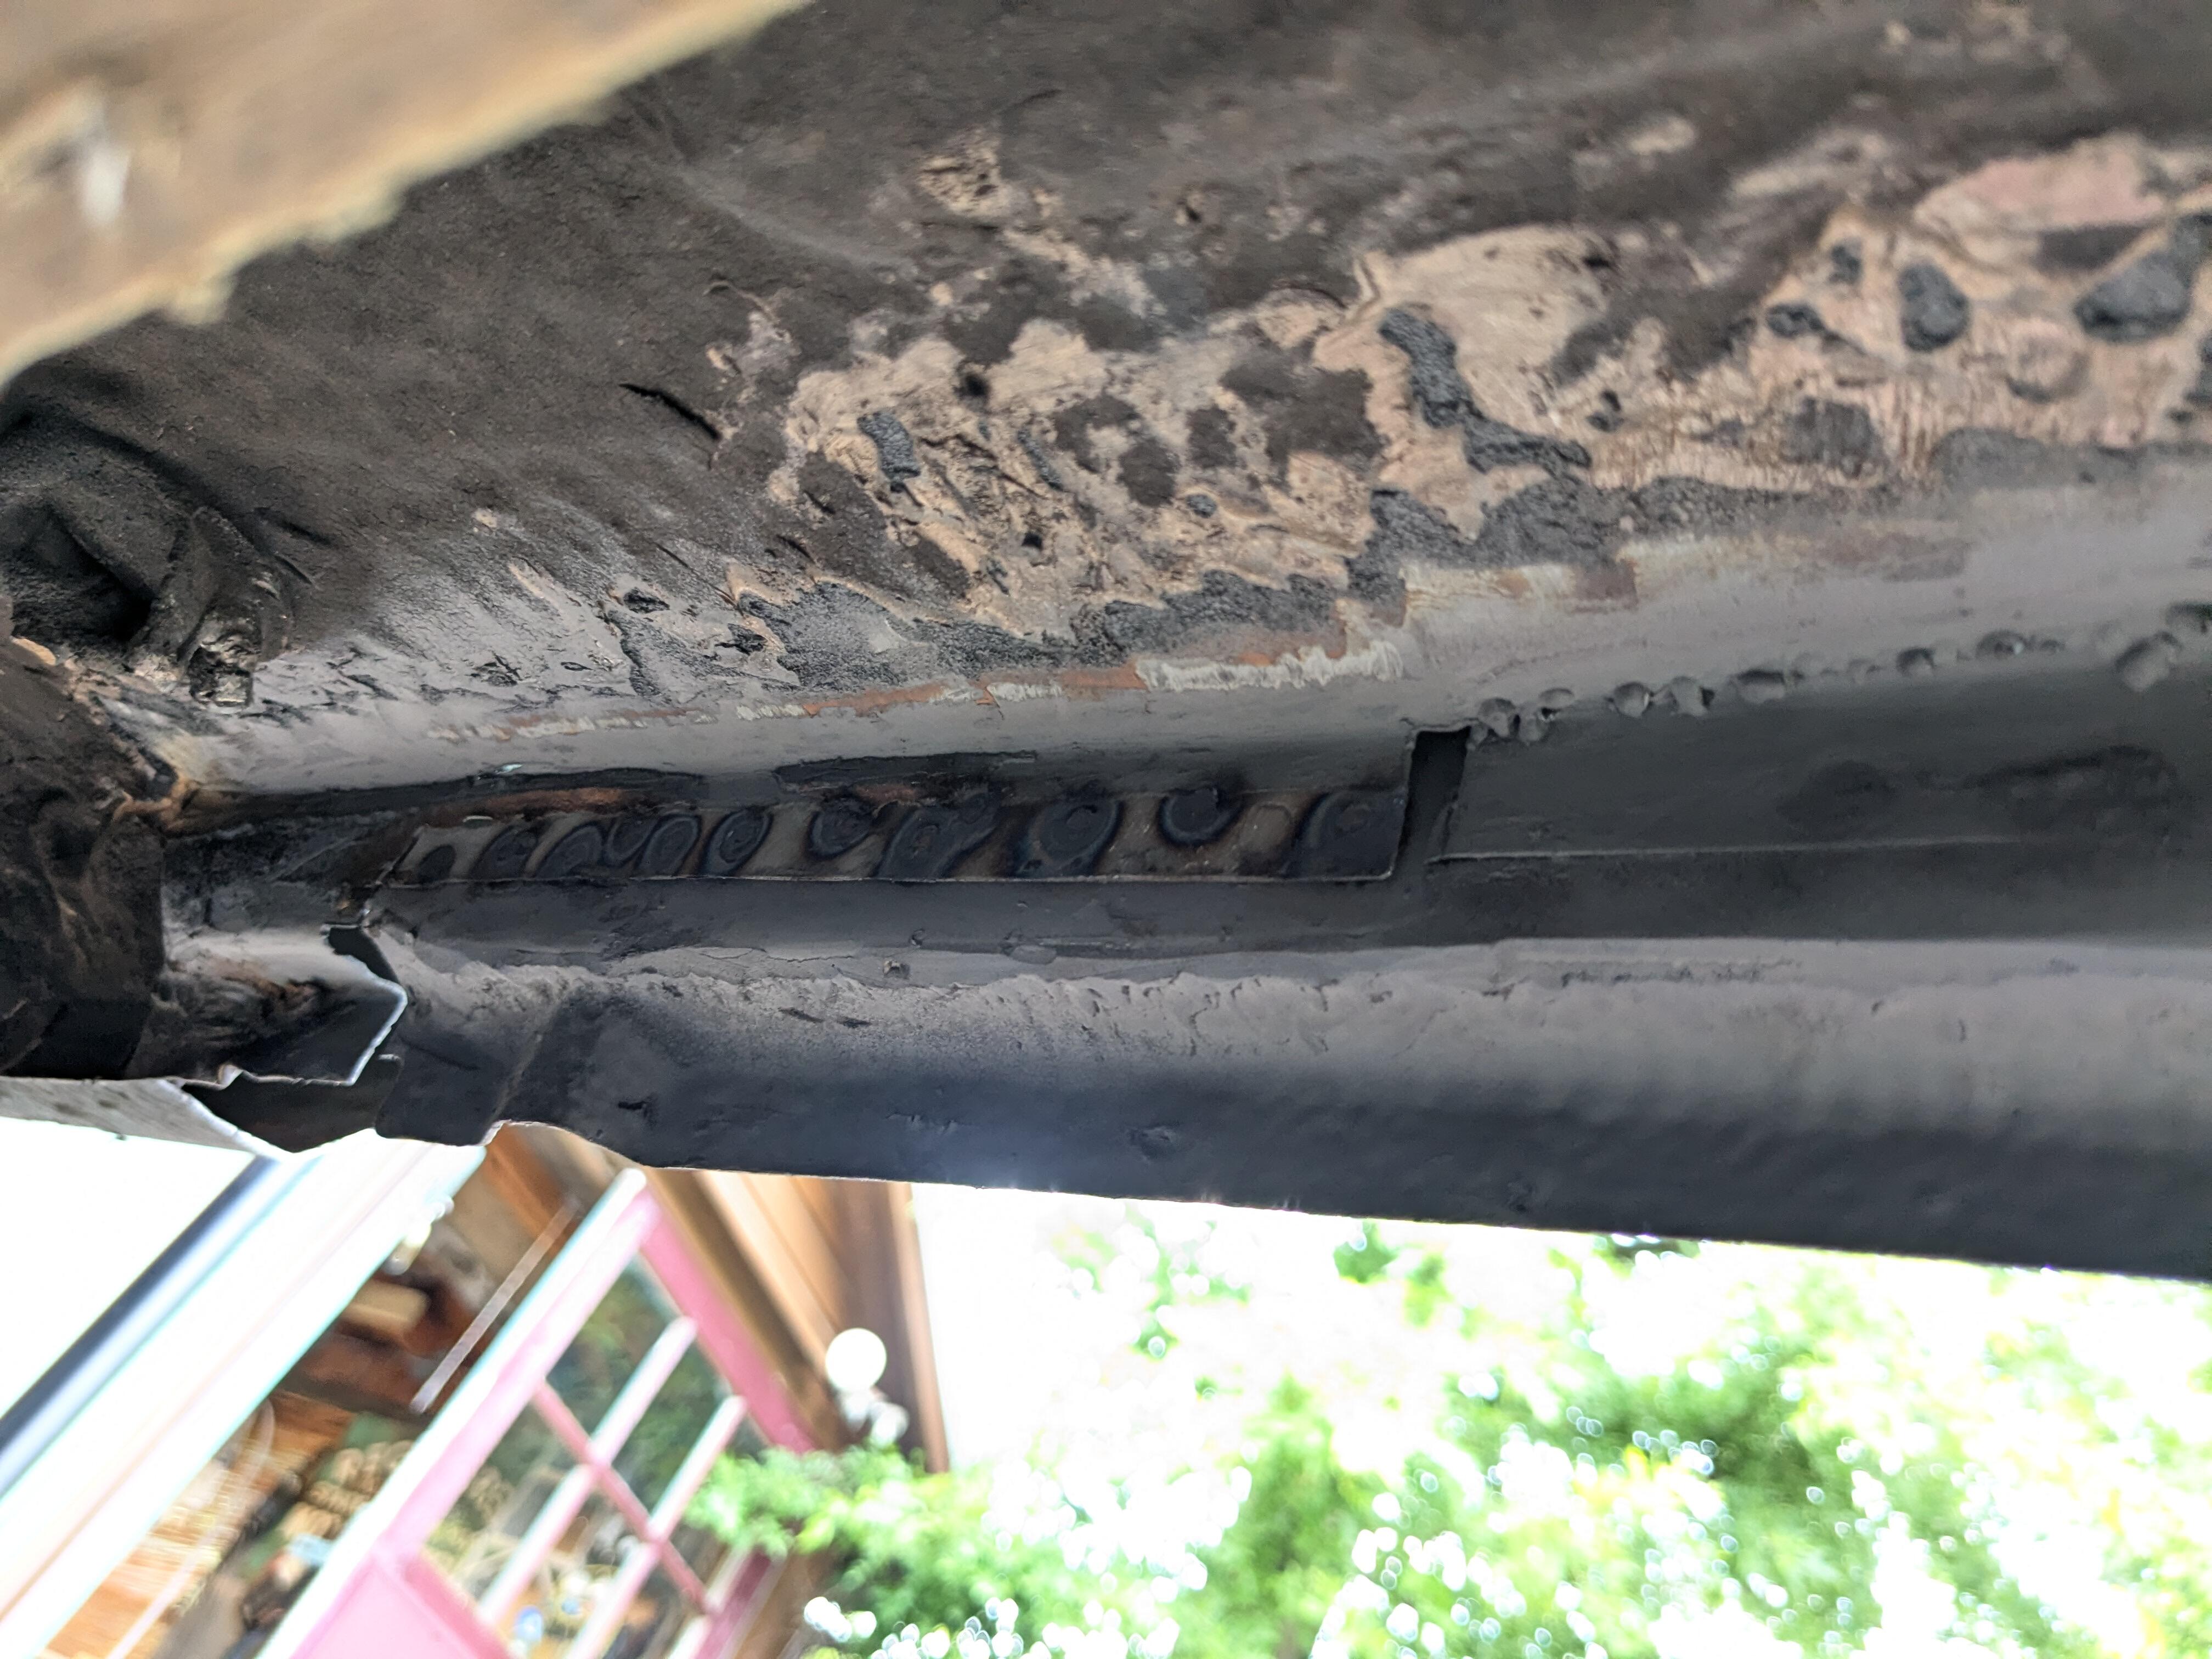
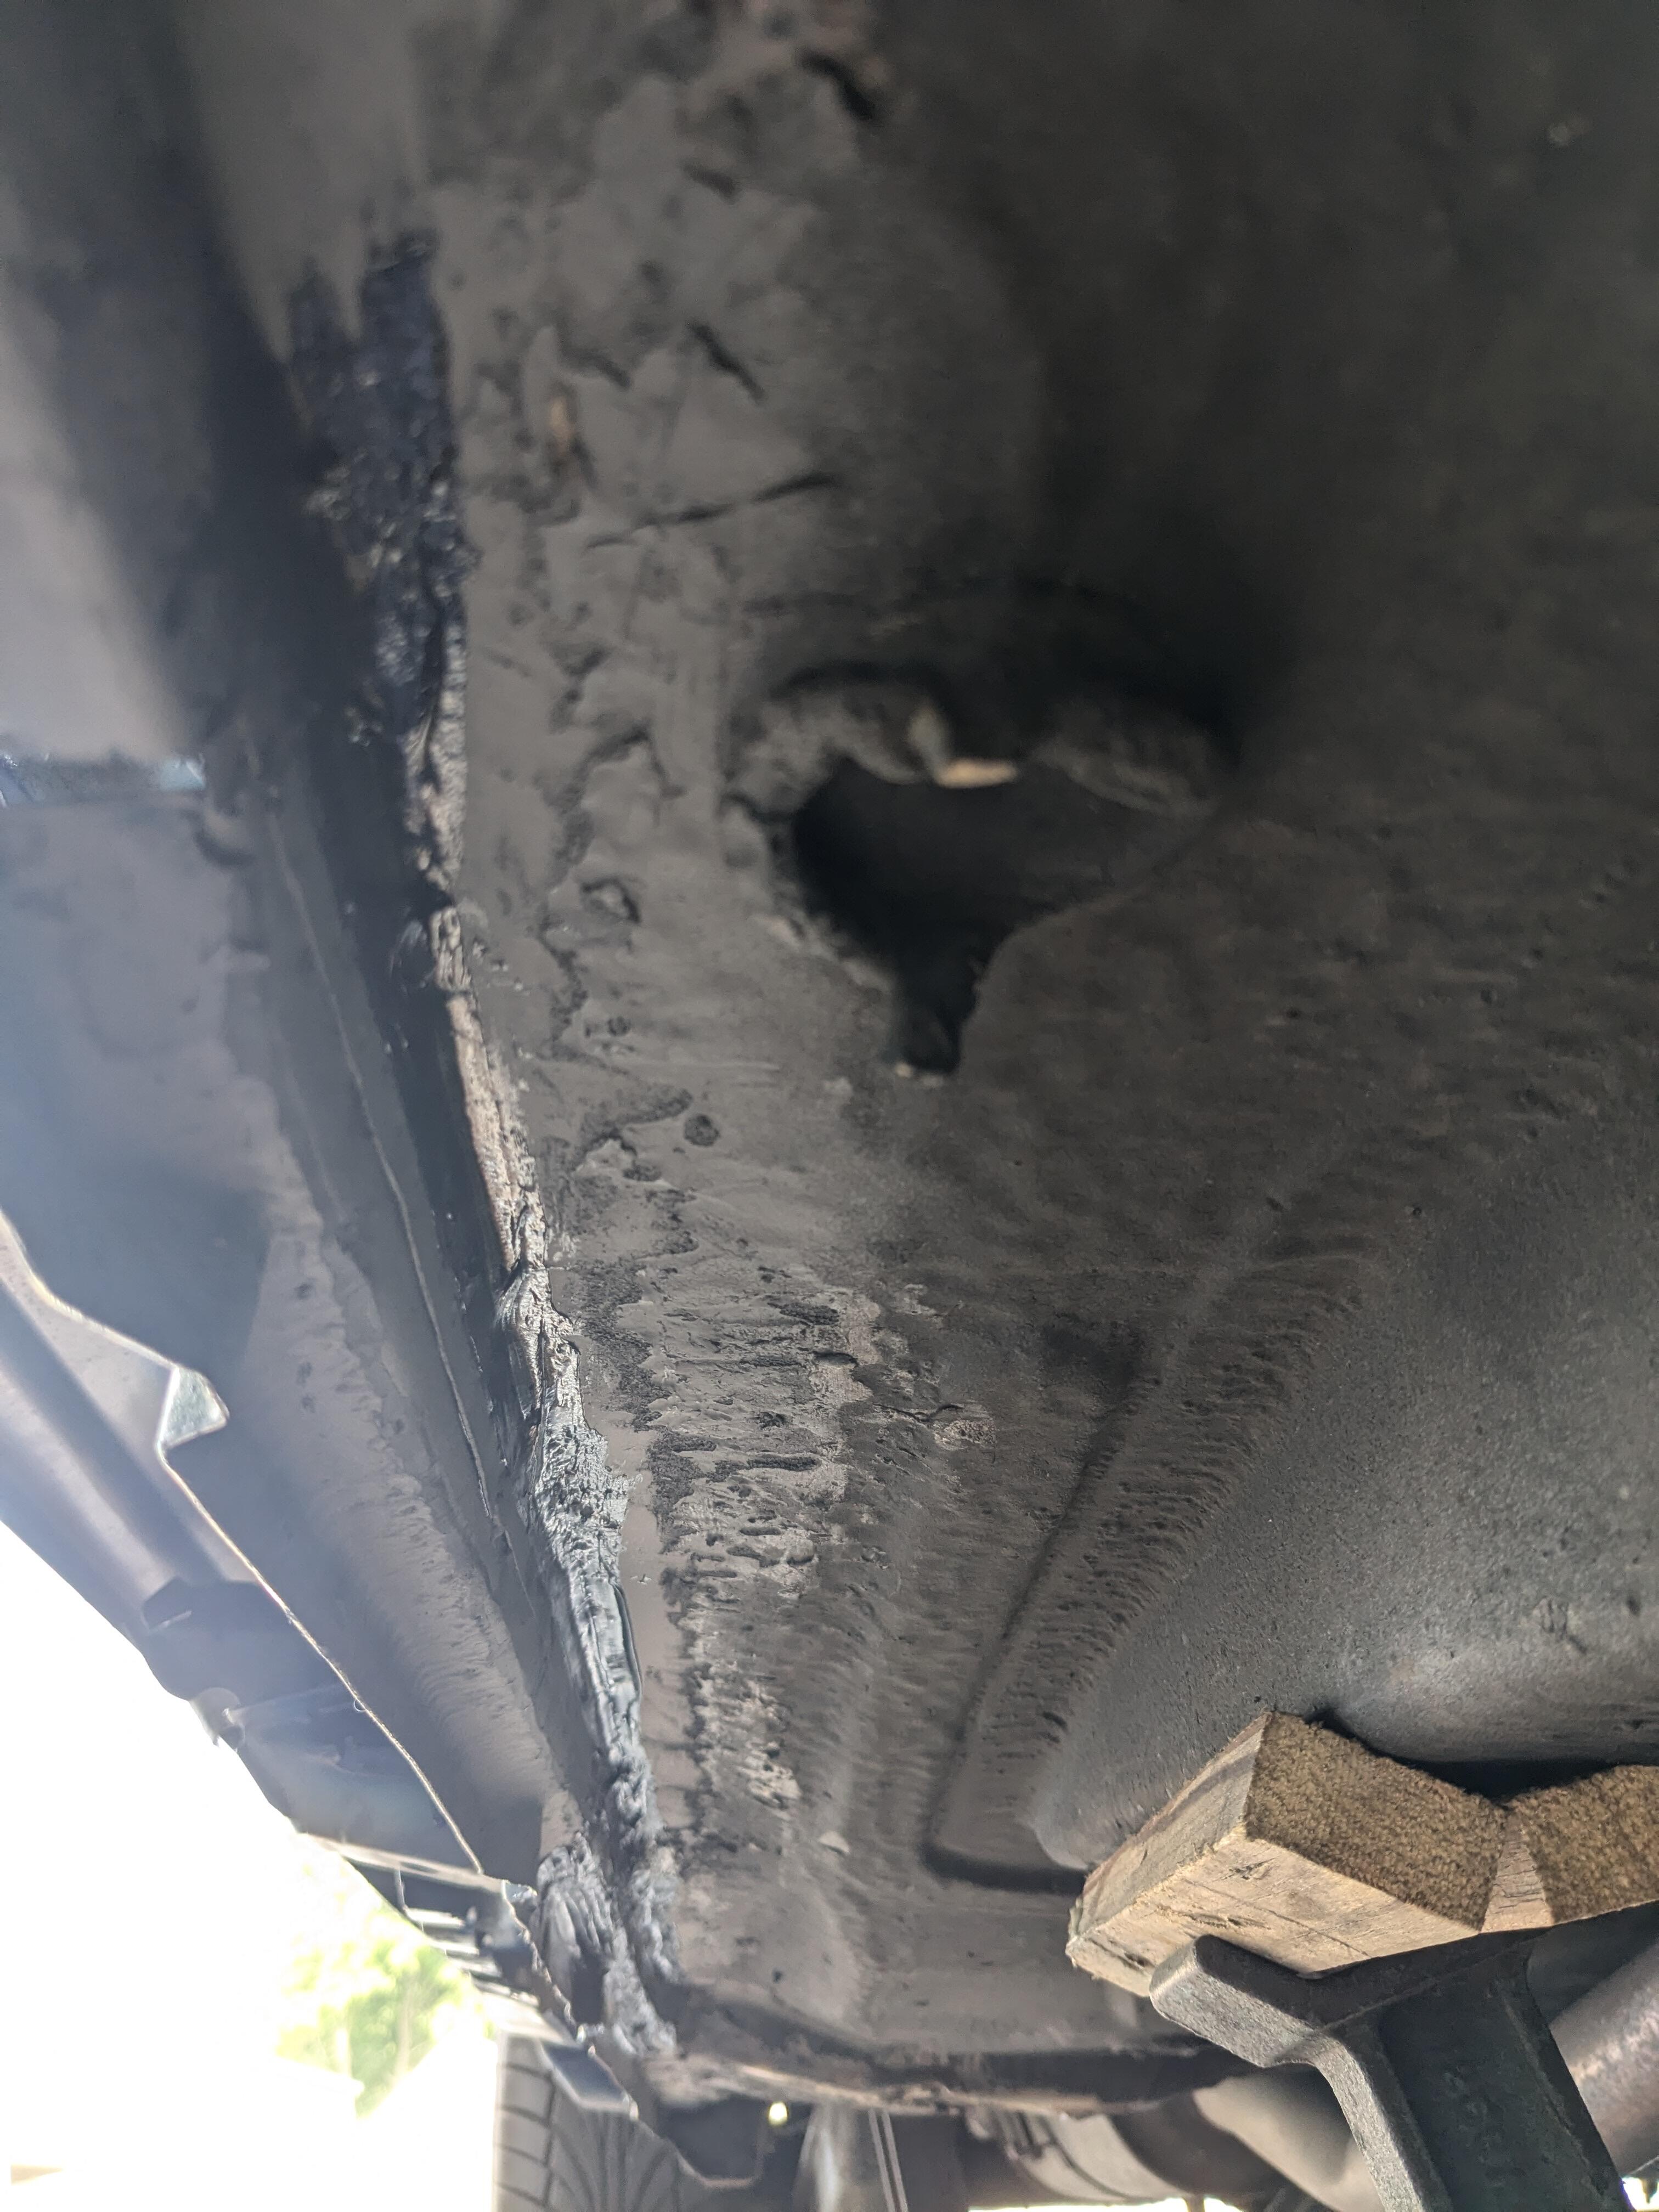
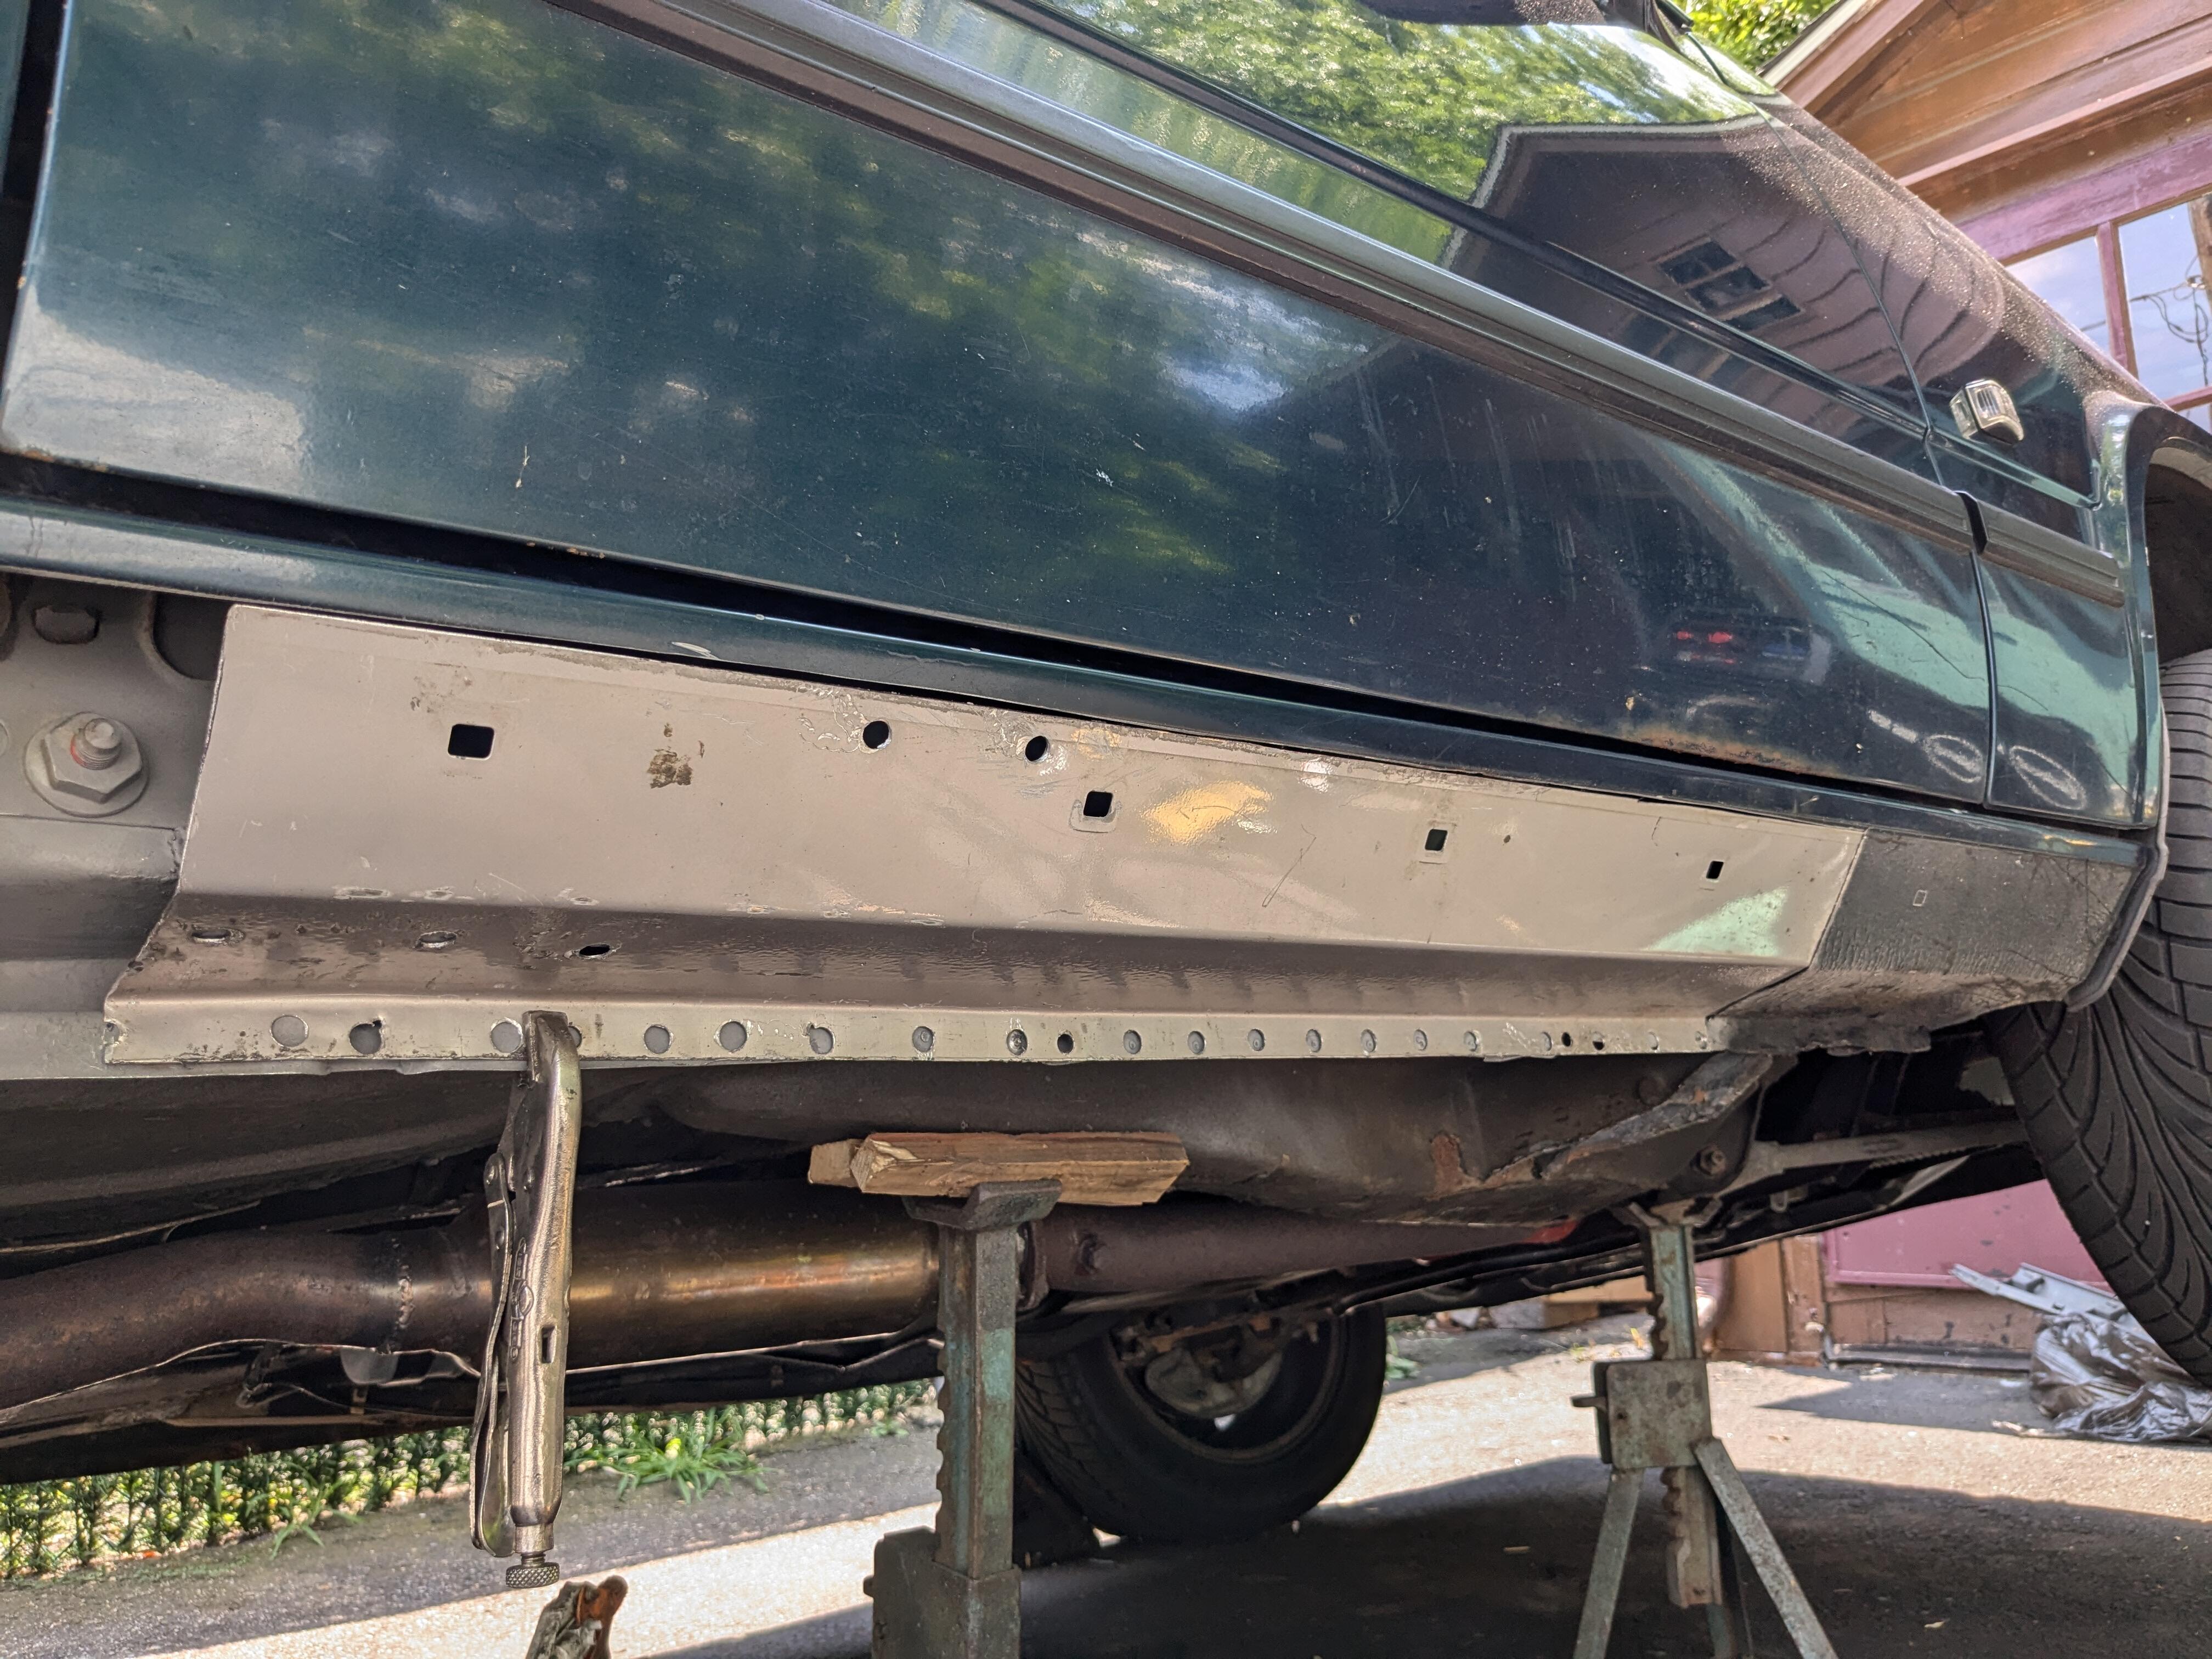
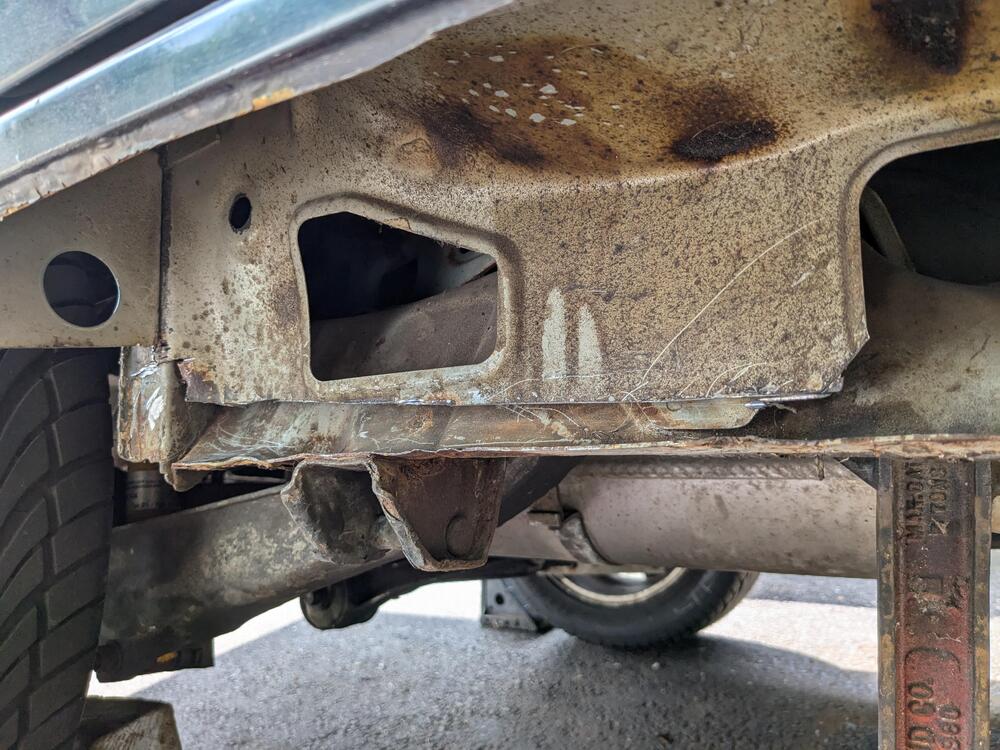
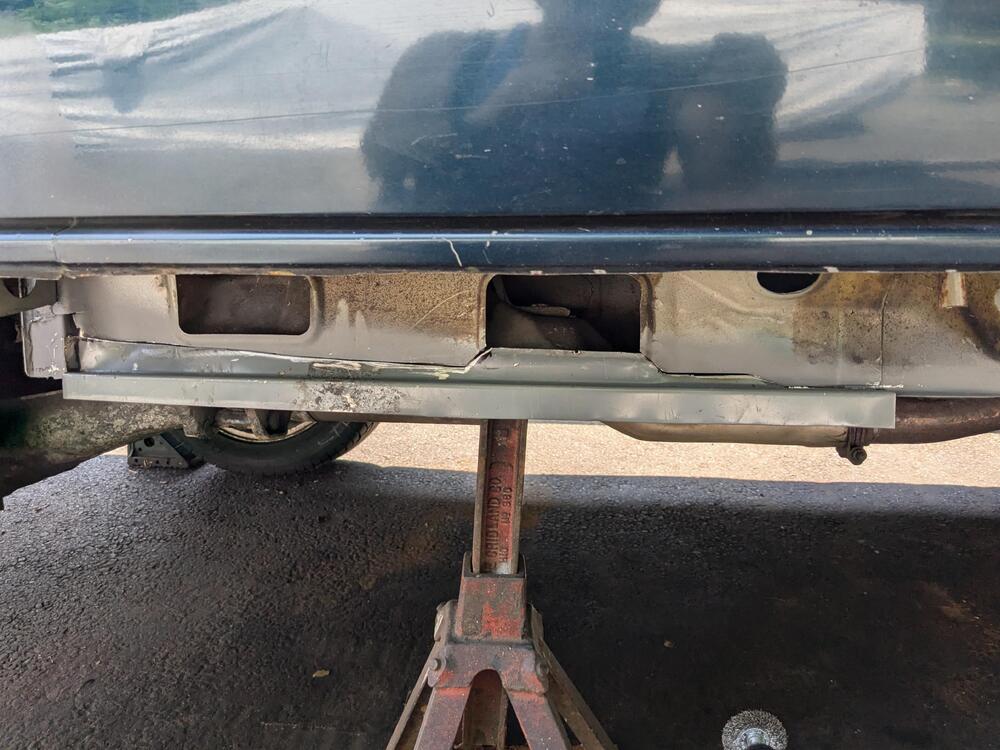
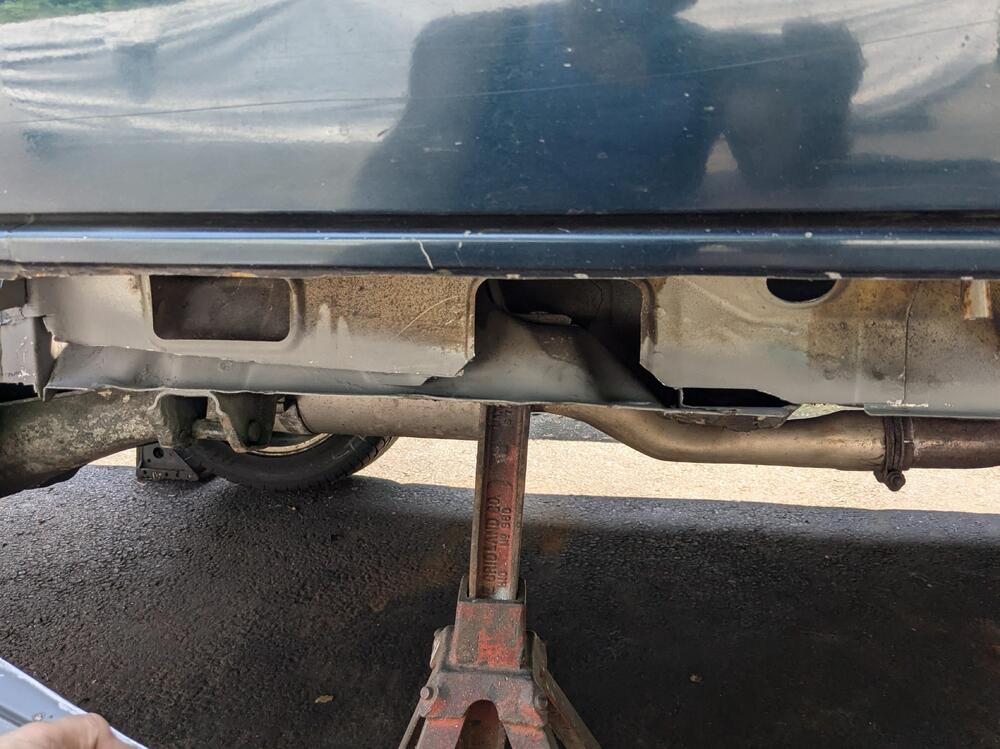
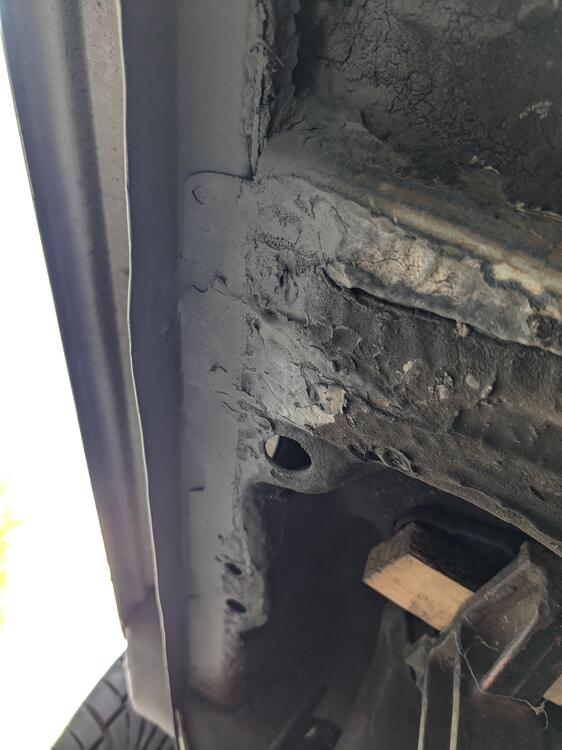
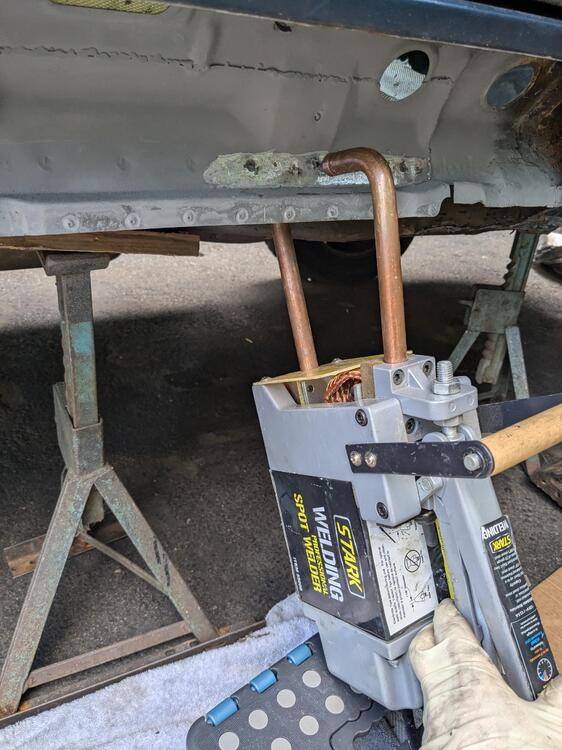
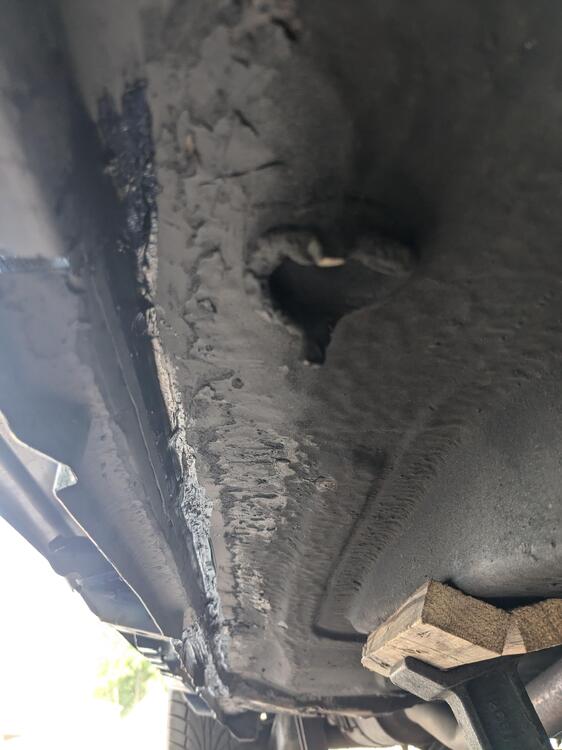
Got the underside seam welded, that was a bitch - working on my back. Welding spatter gets all over. Primed & initial seam sealer Got the B pillar base welded in - 1st part Side impact post & rear end of B pillar base The areas I've marked on the sill seam have to be modified for drainage Stepped the forward edge of this rocker section to fit inside the rocker, adjusted the fit to the B pillar anchors After I did the seam sealer here, I put some paint on the inner sill, since it's open anyway


 3 points
 -
The thing is, all that is referencing the OEM u joint on models that allowed for replacement, no? It is not relevant to an aftermarket u joint that uses the yoke flat measurement & cup size to determine appropriate fit. I would have to say it is more than get by for a while. The u-joint felt perfect. It's not difficult to tell if there is end float in any of the cups. Or if the joint is binding.2 points
-
1 pointRed-Kote seems like a good choice too. Made for sealing gasoline. http://damonq.com/red-kote.html RED-KOTE® Red-Kote is an internal fuel tank liner designed to seal leaks and prevent further rusting. As a sealant, Red-Kote excels at sealing the often hundreds of pin-hole leaks that occur along seams or where straps wrap around the tank. Once in place, Red-Kote forms a very tough, flexible membrane that will never crack or flake as many competitive products do. Red-Kote will not plug lines or cause engine damage when used properly. Future rust will be prevented because condensation will not contact the metal. A partial list of additives that Red-Kote is resistant to includes ethyl alcohol, methyl alcohol, toluene, methyl tertiary butyl ether, isopropyl alcohol and tetraethyl lead. Red-Kote takes approximately eight hours to dry1 point
-
1 pointI have used this before on an early 80s Ford fuel tank that had pin holes near the mid line. It worked great and lasted as long as I had the truck https://www.amazon.com/Seal-All-380112-Contact-Adhesive-Sealant/dp/B008VK0JS41 point
-
Today it's all about the details. I finally found some time to work on the 240Z project again. I wanted to install the door frames but while looking at that area, i noticed the drip rails were a bit messy. Therwe was some surface rust in the unprotected areas and the rail itself was a bit bumpy. So first i got out my trustworthy hammer and a piece of wood to straighten it Nect i decided to whire-weel the entire area to remove the remaining surface rust and old primer which probably covered some more. You can clearly see this area had some rust in the past, which is not uncommon: After that i gave it a good shot of rust-protection chassis primer: So now it's straight, clean and protected. Time to get back to what i had originally planned. quickly install the door frames. Well for some reason, things didn't really line-up. i quickly realized that one of the holes semed off, as there was no way to move the frame further in the direction of the hole. It even had an "extension" which seems to be done in the factory. I didn't really like it so i removed the exess metal and cleaned it (right foto doesn't show the finished solution) plus added primer. Also not sure about that other nasty weld. i might want to clean it to calm down my OCD. Not even sure if it's from factory or not. it's barely visible when the door is installed. During the installation i also noticed that the upper door skin part didnt really seem to be straight: Nothing a bit of directional force with a hammer can't solve. (note these are just dummy door frames for alignment, i will use NOS ones so i don't care if i sprayed primer on them *lol*) And here we go, both door frames are in: Another thing to check off from my task list. And a new one to add (that nasty weld) PS. Sorry for all Photos being 16:9. Not sure how this happened1 point
-
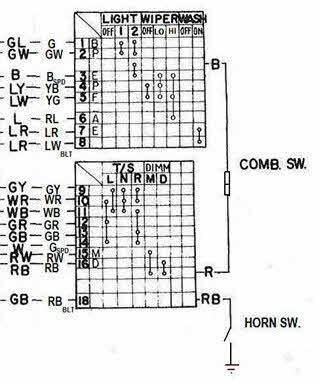
1 pointWhile I'm at it, here's my edit of the mini-schematic for the Combination Switch, corrected to reflect what I found in the actual layout of the wiring and contacts in the Combination Switch installed in my 4/70 car. I started with the mini-schematic that was part of large wiring diagram included with my car's Owners Manual ("20-Mar-1970 - 030300 - OM0E-0S30U2") and then made corrections... Note on the left side of the diagram that I have two columns of wiring colours: The left column indicates the colour of the wiring on the vehicle side of the Combo Switch connector. The right column indicates the colour of the wiring on the Switch side of the connector. 'SPD' = spade-type wiring connector 'BLT' = bullet-style wiring connector
 1 point
 -
1 pointI am Seriously Disappointed that you had only 15 Fan Blades in stock! Pick up your game a bit!! 😂😂😂1 point