


Leaderboard
-
bluez
Free Member3Points165Posts -

Mike
Administrator3Points23,065Posts -
Captain Obvious
Free Member3Points10,081Posts -
HusseinHolland
Free Member2Points1,031Posts


Popular Content
Showing content with the highest reputation on 05/25/2024 in Posts
-
Came out very nice, that’s quite an improvement..2 points
-
It looks like they "thinned" the web on the original throttle shafts. You can see the underlying brass where they cut the shaft down. You know.... For higher performance because it reduces air resistance at WOT.2 points
-
2 points2 pointsJust the remember the float bowl hoses are unique. They are not standard fuel line. They are softer and more flexible2 pointsThe double stripe in the photo is next to an E4100 part number, so I would imagine it is paired to that in some way. As mentioned up-thread, E4100 was listed for the S30-prefixed Standard Fairlady Z and Deluxe Fairlady Z-L models up to chassis number S30-00976 (at which point they switched to the E4101). PS30-prefixed Fairlady Z432 and Fairlady Z432-R got the E4200 from the beginning of production and switched to E4201 at PS30-00103, so I doubt they would have double stripes too. When we see paint stripe colour identifications on these cars (such as seen on springs, for example) it usually seems intended to identify parts that are in parallel use, and would help in avoidance of mistaken fitment. I think the large and prominent stencilling of the full part number on the moustache bars is significant in that respect, as Nissan were using the E4100 and E4200 in parallel on at least two different variants and their sub-variants. It seems as though the E4101 may have been in that mix too for the Export models, so I'm imagining a situation on the assembly lines where that large white part number and the stripe(s) also helped identify a complete assembled rear end 'module' on the jig (as pictured) before lifting and fitment into a painted body. Would be interested to hear other opinions on that.2 pointsIndeed! I didn't even take any pics of the inside prior to installing the rear cover - there was nothing to remark upon, everything went very smoothly.
 1 pointIf things turn out well, i have the great honour to meet a few very special Z-related People in a few weeks. For this once-in-a-lifetime opportunity, i thought it would be nice to have them sign a part of the Z. Either it will end up in the car or i'll hang it somewhere on the wall. For that i came to the conclusion that the best part would be the glove box door lid, so i decided to prepare on of them properly: First i removed the back cover, locking mechanism and hinge etc from the plastic front cover: With some gentle heat and some soft hammer-taps, the logo came out too: As you can see the surface had plenty of dirt and some mild scratches and fading: So first it was time for a proper wash: Then it was time for a proper plastic clean with my trustworthy "Novus" plastic repair kit: I used Stage 2 for light scratches and stage 3 (clean and polish). To further reduce fading, i decided to pull out the heat gun and use my old "heat treatment" trick (see here) The one big flaw in the middle is still viseble slighty, but ither it's a bigger damage or a manufacturing flaw and i't only visible under the right light. the overall rsult is quite good. So i'll have it (and the gold paint pen) ready to have a special signature on soon, hopefully.1 point1 pointI'd be careful pulling the chokes on also. The nozzles haven't been moved up and down in 10 years so maybe loosen the wires and pull them down by hand. Get those loosened up so you won't break the choke lever mount on the console. Also feel the "J" hoses from the nozzles to the the float chambers and make sure they aren't hardened. Good luck waking your baby/beast?1 pointAll part numbers 32354-A7400, 32354-E9800, 32354-E9802, 32354-E9804 are Right Hand Threads. Part number 32354-E9803 has a Left Hand Thread. The E9800 was used in the early 200SX 1979 - 1980. Right hand thread and replaced by the E9804.
 1 point1 pointYou won't know what it needs until you get in to it. The quality of the garage will be important. How you prepared it for storage will affect its rebirth. Did you dran the carb bowls? Add some stabilizer to the fuel? On the fuel tank, a lot will depend on the gas cap seal. I'd take site's advice and just crank it up on new fuel. It's carbs so not much to lose. See how it runs and decide if you have a huge project or just some minor work to do.1 pointExcellent. Well, not the "forget' part, but the part that it works well.1 pointYes - primer energizes the pump for 3sec w/key on, engine starts right up, every time. I think it could be reduced to 2sec, but I can't remember how to set it 🤪1 pointAfter seeing your pic I did some uncovering on mine. Did some cleaning to remove 54 yr old undercoating and found the p/n’. The rear differential assembly is the only thing I haven’t yet taken apart to clean.
 1 pointA friend of mine had a stencil made to reproduce that part no. on the rear moustache bar. I don't recall if HLS30 vs HS30's used a different part no. though. Here are some photos from a clean 73 model (HS30) we took apart a couple of years ago. https://photos.app.goo.gl/szJd62o9dARqLpWTA
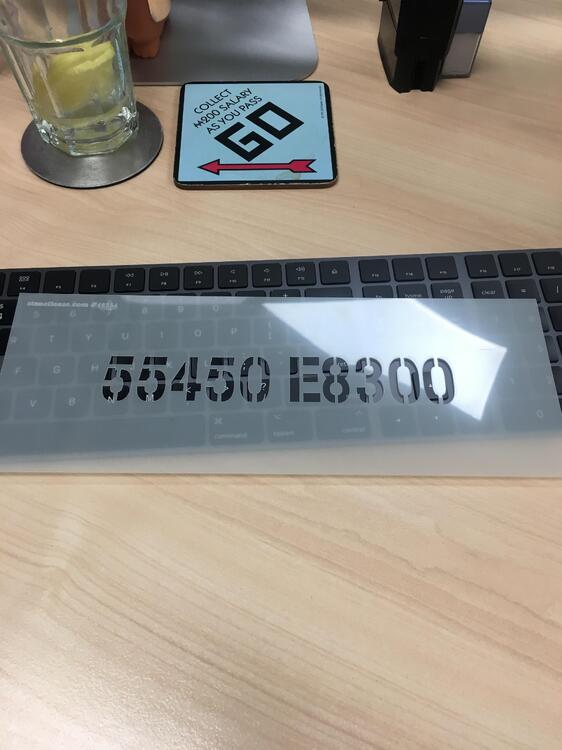 1 point


Important Information
By using this site, you agree to our Privacy Policy and Guidelines. We have placed cookies on your device to help make this website better. You can adjust your cookie settings, otherwise we'll assume you're okay to continue.