Leaderboard
-
Captain Obvious
Free Member9Points10,081Posts -
dspillman
 Subscriber
 4Points445Posts
 -
Namerow
Free Member3Points1,551Posts -
HS30-H
Free Member3Points5,509Posts


Popular Content
Showing content with the highest reputation on 04/27/2024 in all areas
-
Got it. I'm not a body guy, and I thought you were saying the joint mandated lead (specifically). It does not require lead... It requires a filler, and they chose lead. Thanks.3 points
-
I suspect lead is more forgiving of movement too. I think the move away from lead was because of the health hazards and the skill needed to get it on properly. Plastic filler gets more brittle with age but lead does not. Lead is also very maleable. Lead was a great additive for paint too, but was done away with for health reasons too. Sometimes the cons outweigh the pros...2 points
-
2 pointsGood deal. I hope karma shines your way for your contribution to the community.2 points
-
I wholeheartedly concur. It was another stinker. Unfortunately my stack of poor, bad or total garbage books on the subject of 'our' cars is so tall that it I had to apply for planning permission from my local council.2 points
-
2 pointsJust seeing this now. I already told somebody they can have 'em, not going to back out :). Looks like nice ones are worth some decent money, but these are far from perfect. I don't need to profit off them, and I'm happy to have them go to someone that will use them.2 points
-
2 pointsI assume you've been overwhelmed with the responses to this ad, right? My understanding is that those wheel covers are worth some $$. If you're really, really intent on just having them disappear, let me know and I'll be more than happy to cover the shipping!!!2 points
-
Woot!!! Hopefully we can get them together! Archie is looking forward to it!2 points
-
A dry-cleaner's bag works nicely. Just slip it over the entire seat back and trim to length. Makes it much easier to install the new seat cover. A bit of talc powder can also be used to assist.2 points
-
You do not need to replace the entire seat back and bottom, just obtain LH side brackets and sliders. (Note, the seat belt hook mounting screw hole would have to be drilled in the left (outer) side of the seat back.) Keith1 point
-
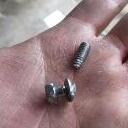
View Advert Turn Signal Switch 1977-78 280Z Completely refurbished! Dismantled and cleaned, electrical contacts polished, lever stripped and refinished in gloss black. All switch contact positions tested with a ohm meter to ensure proper function. $250 includes standard domestic shipping, foreign shipping available at actual cost. Payment via PayPal, PM if interested, thanks. Advertiser jfa.series1 Date 04/27/2024 Price $250 Category Parts for Sale1 point
-
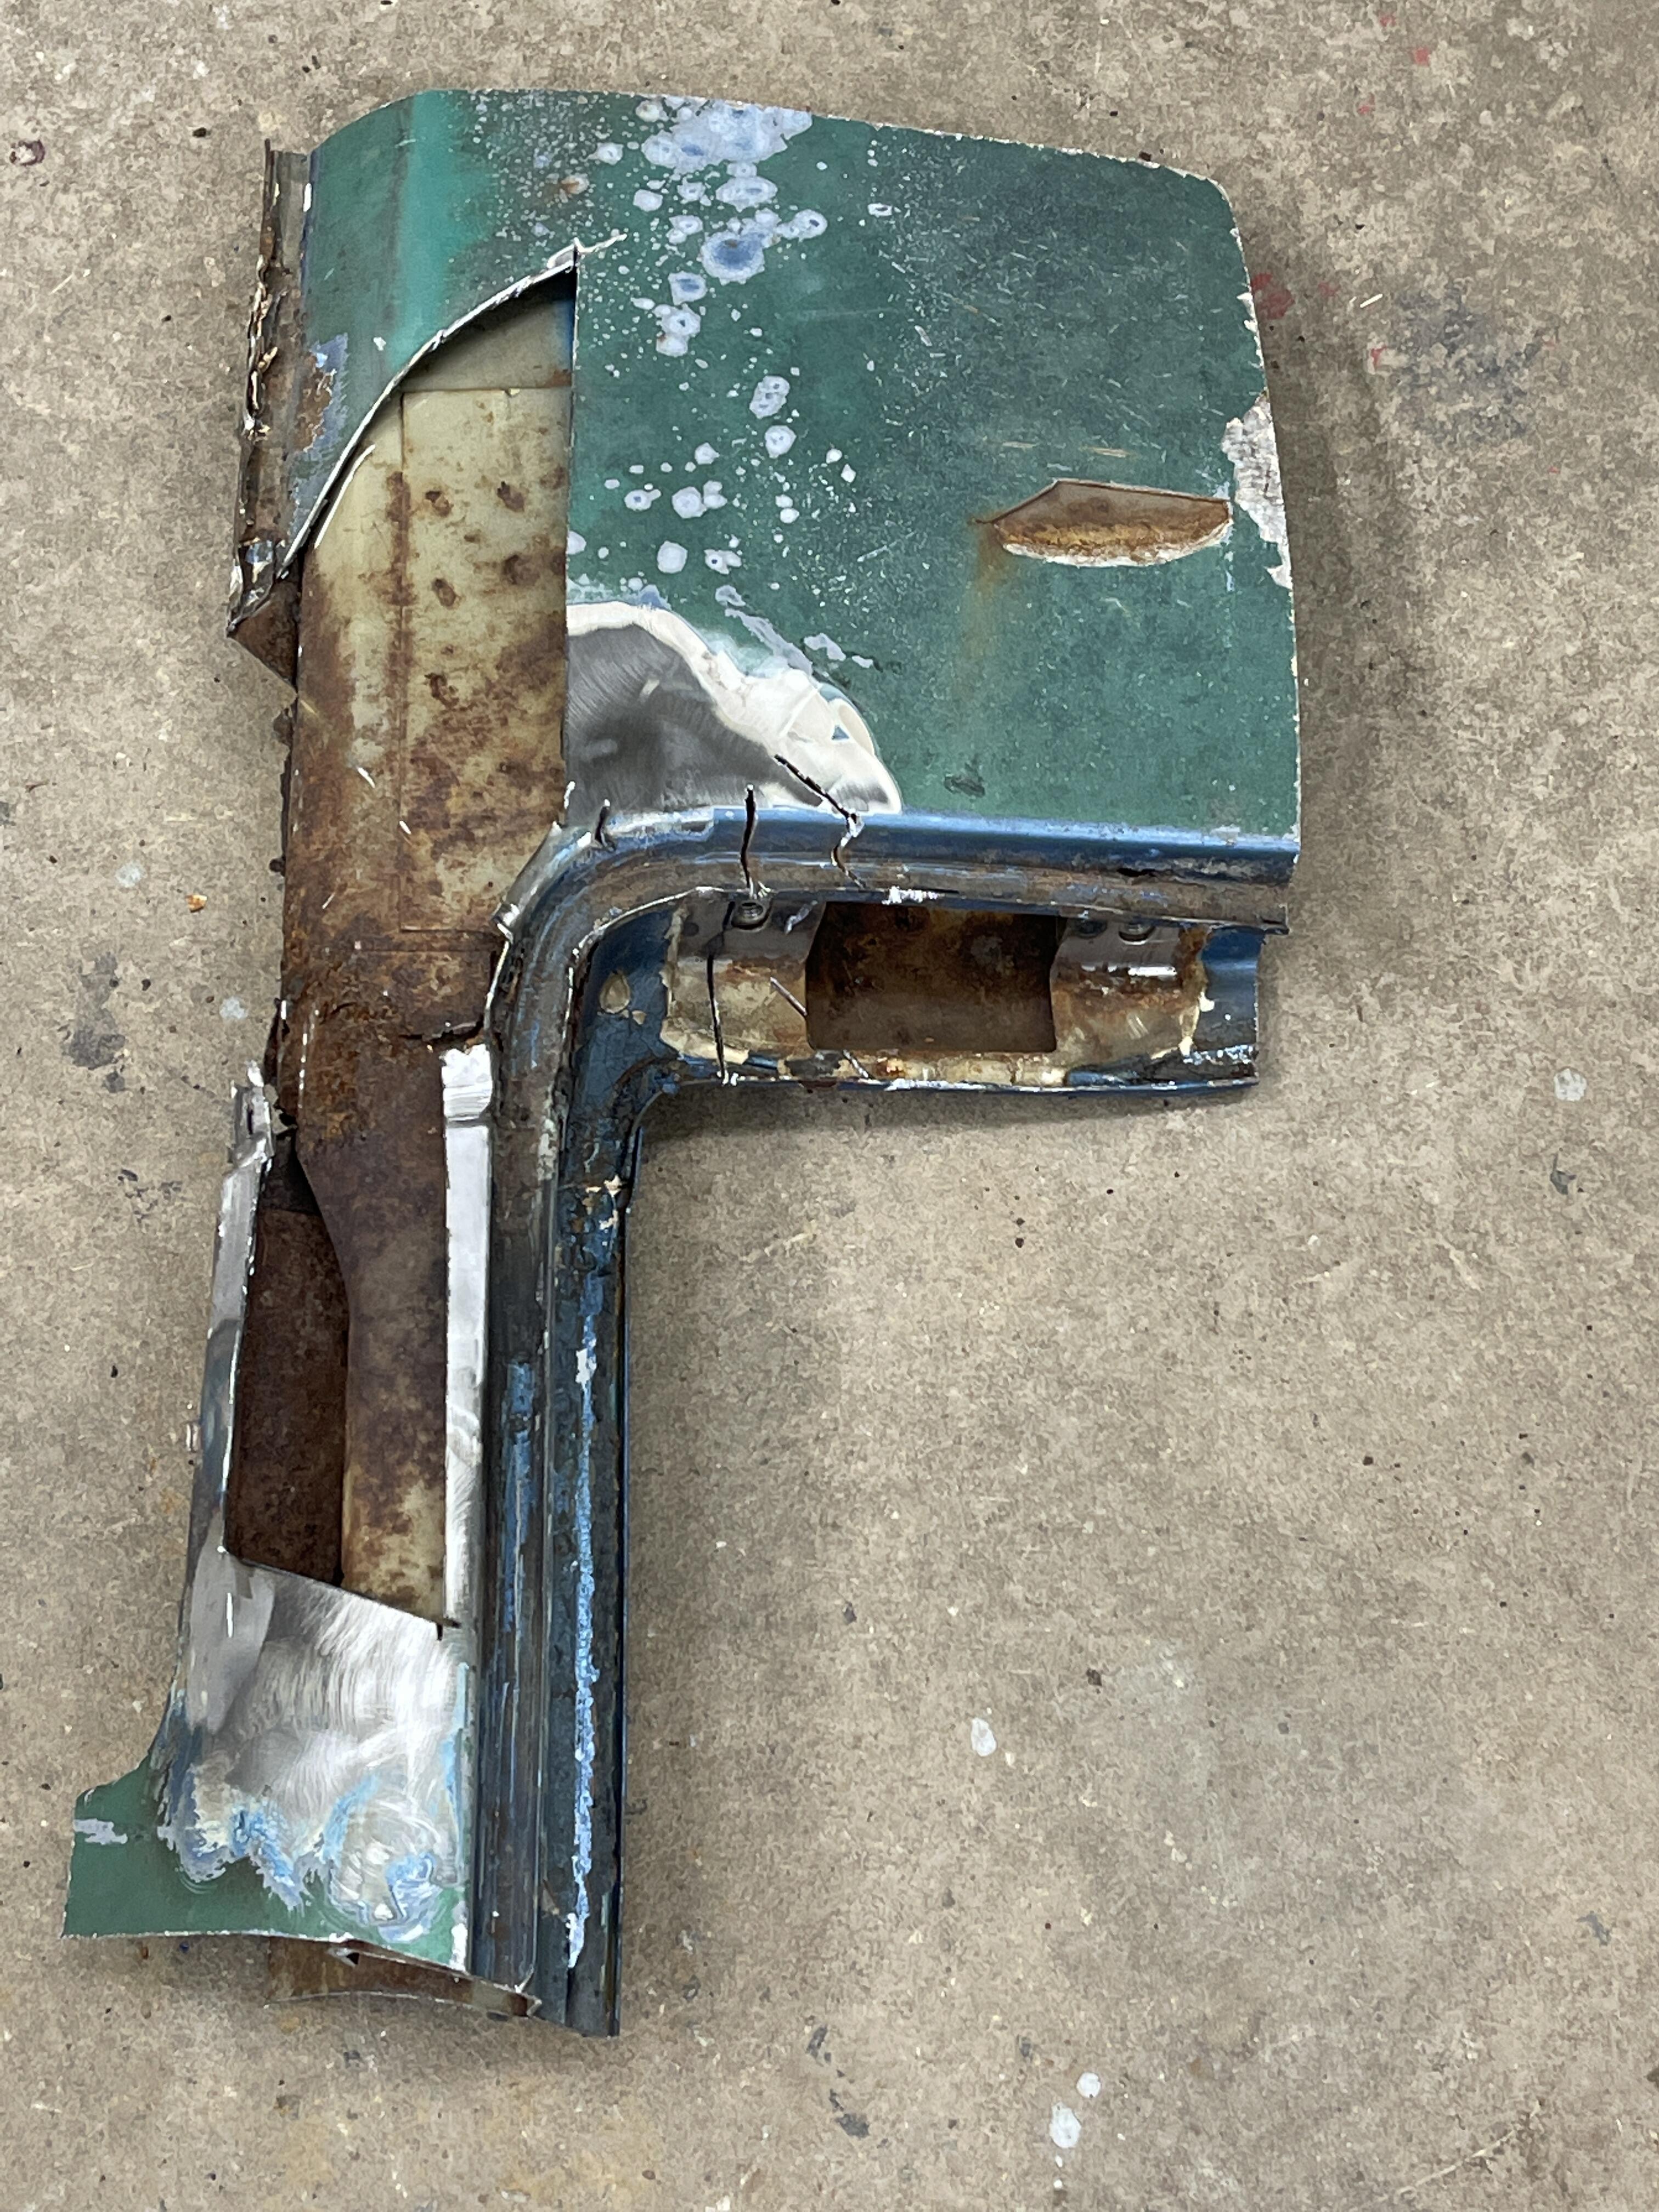
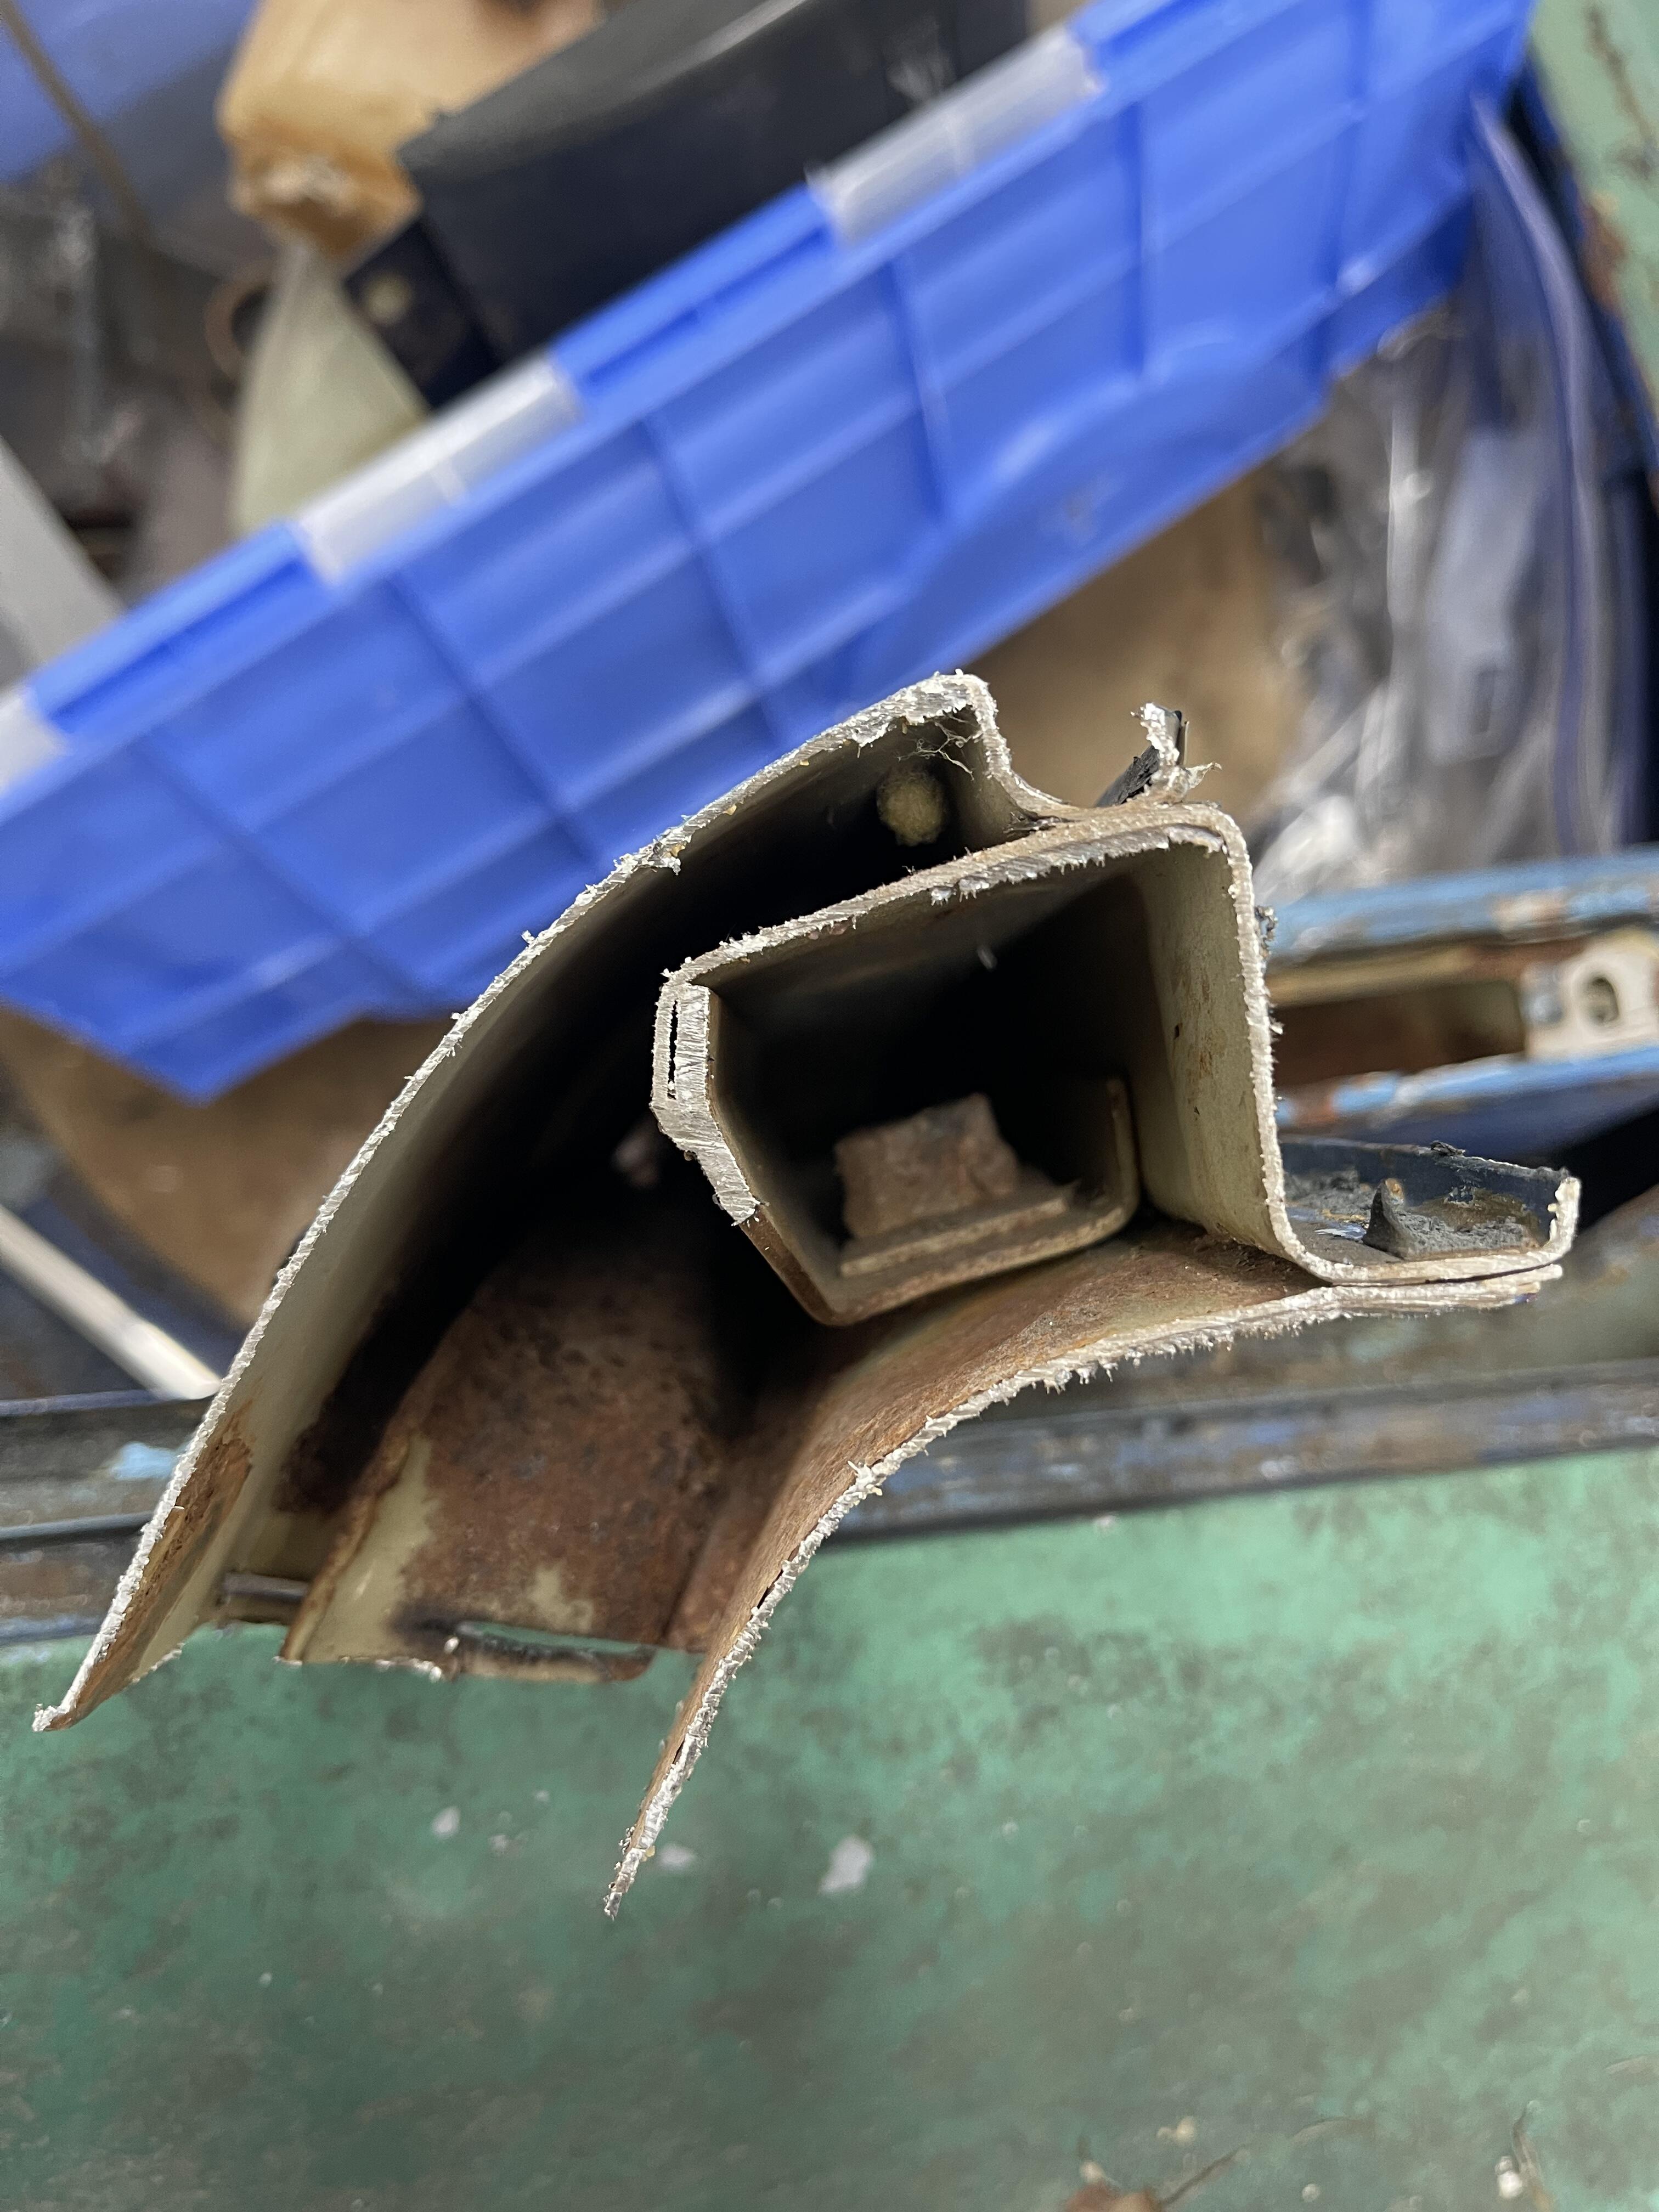
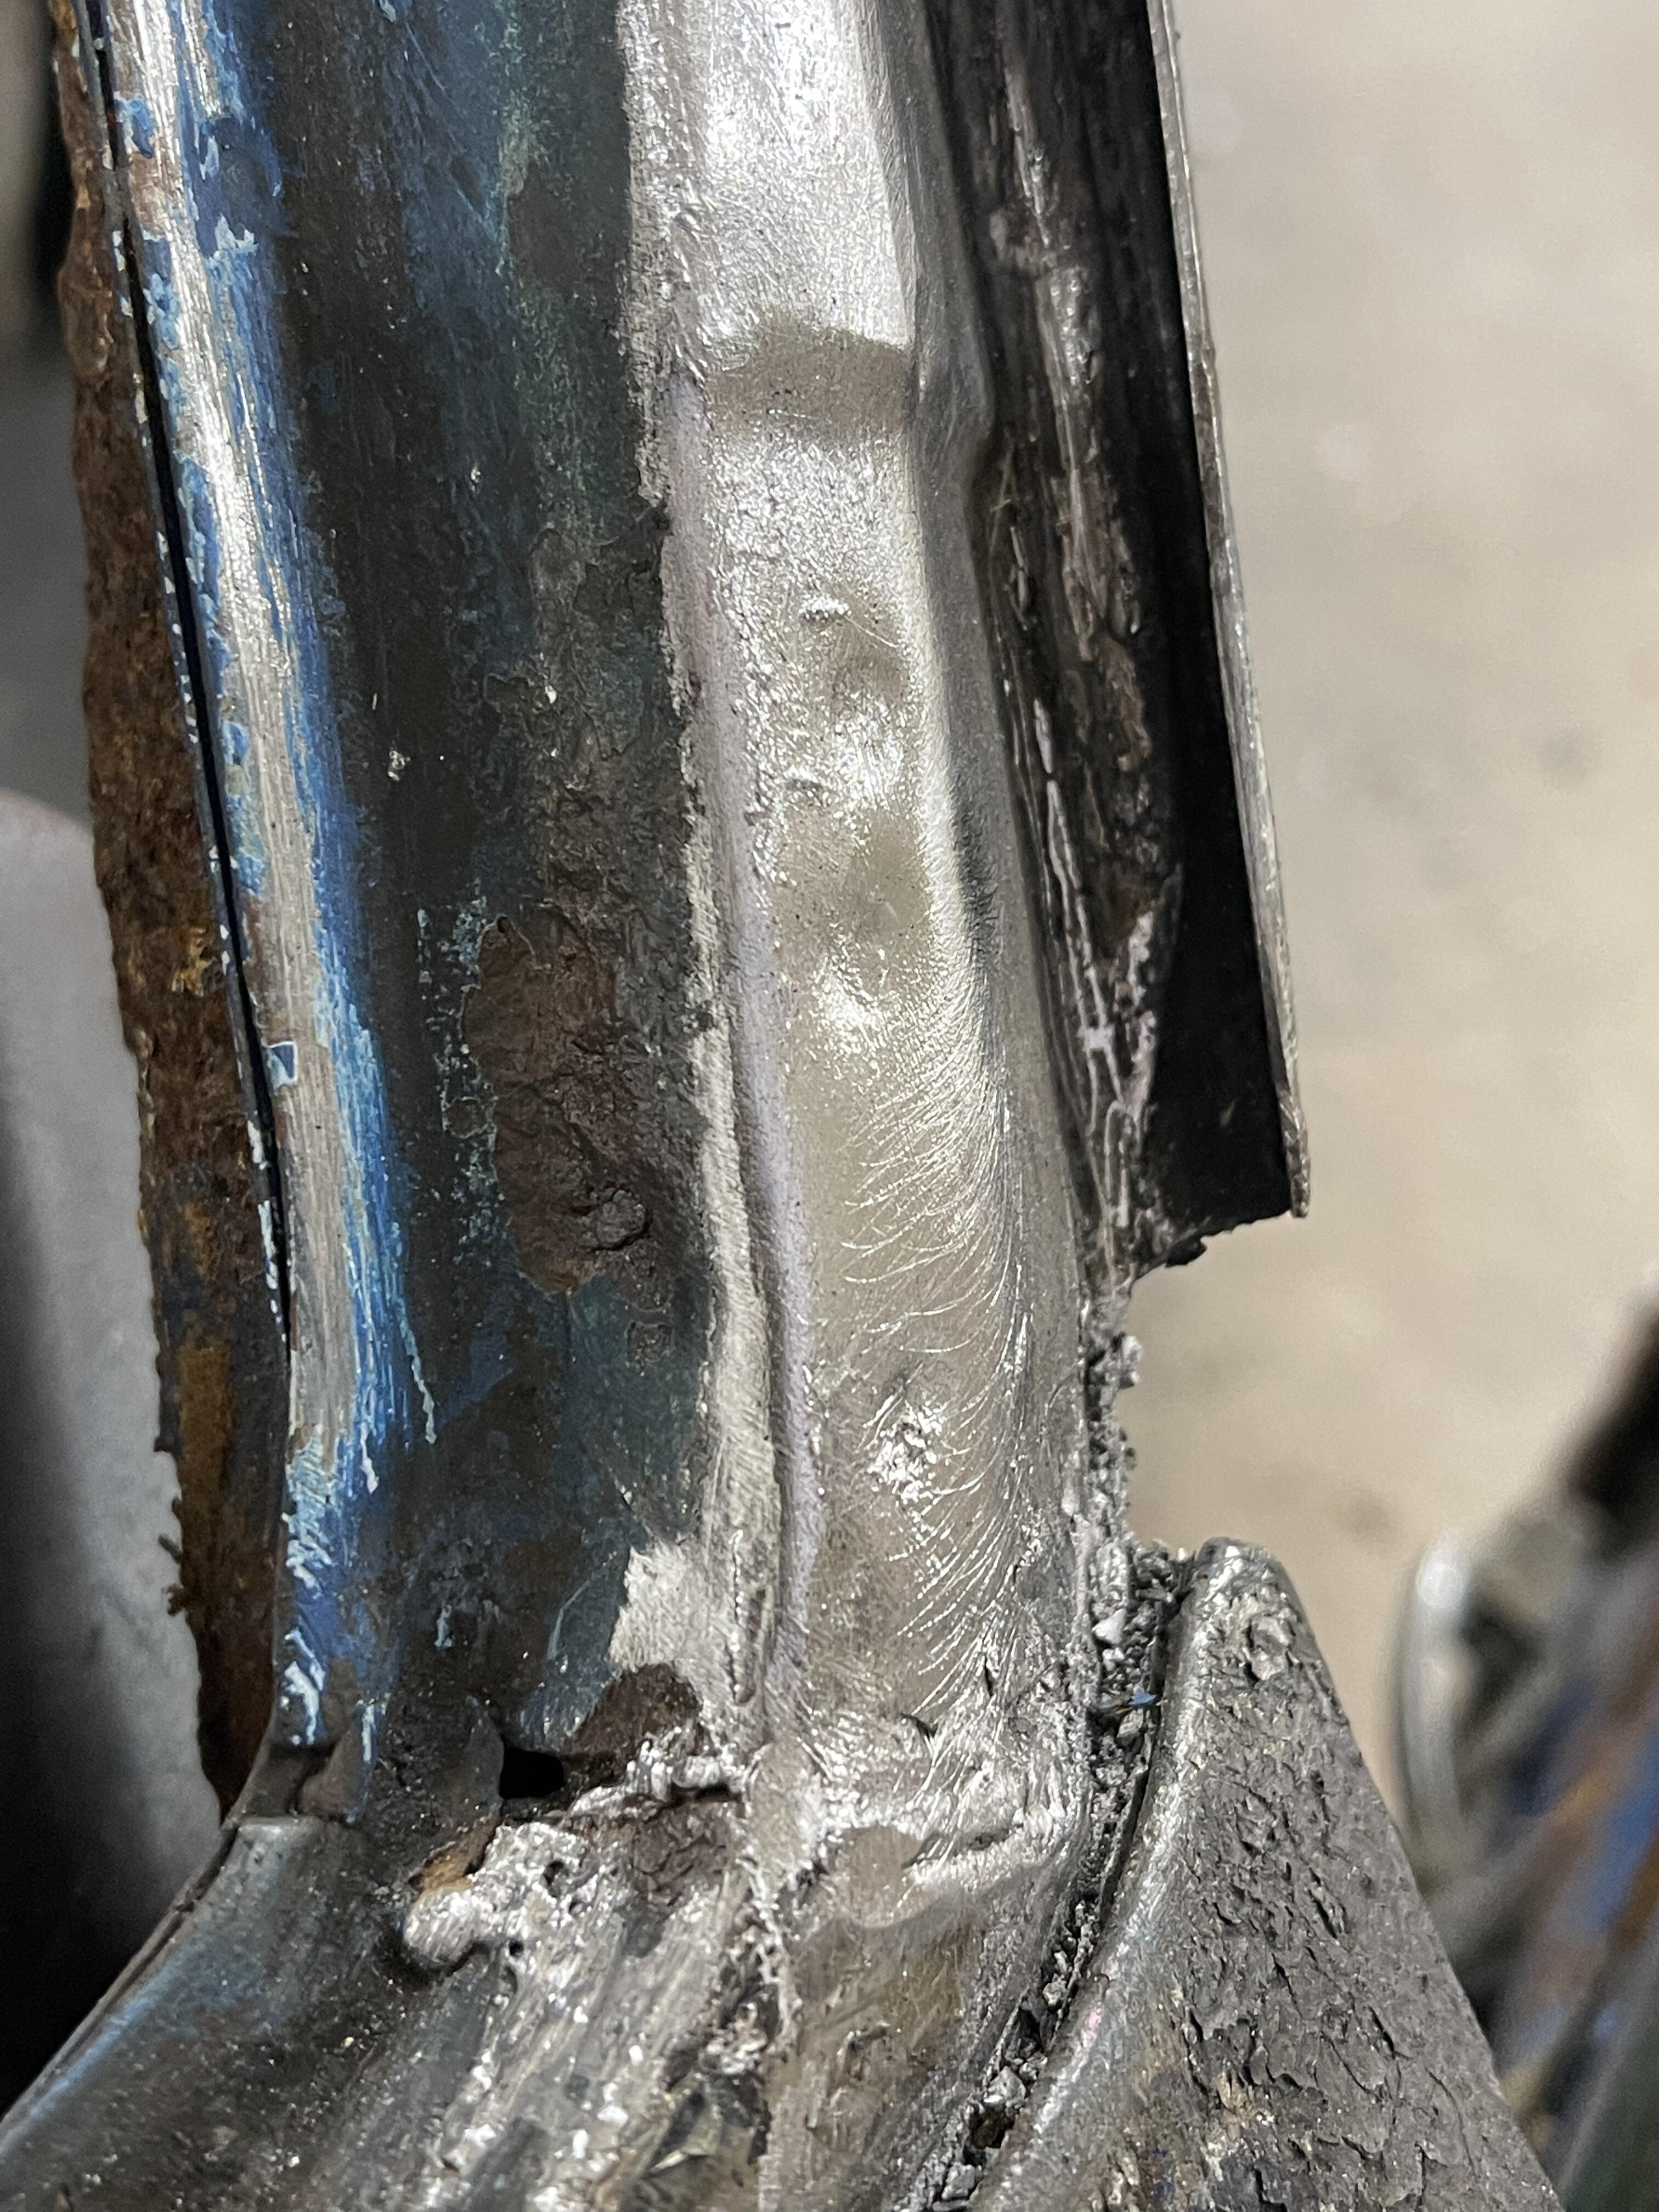
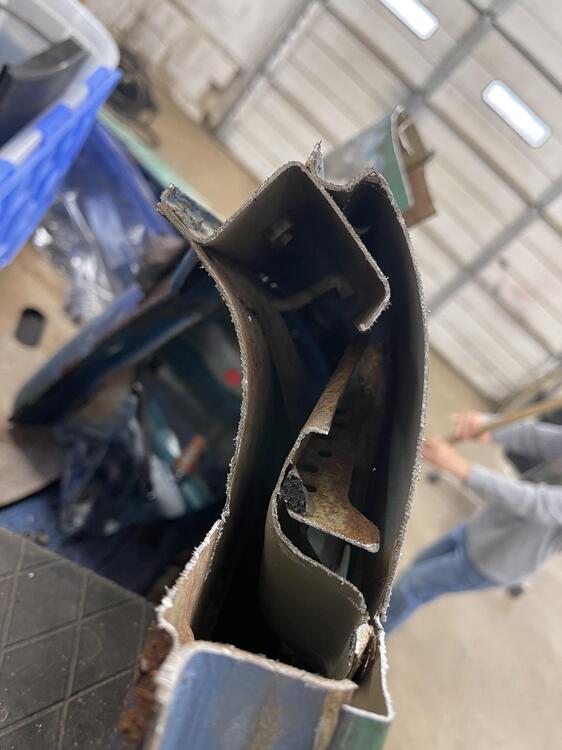
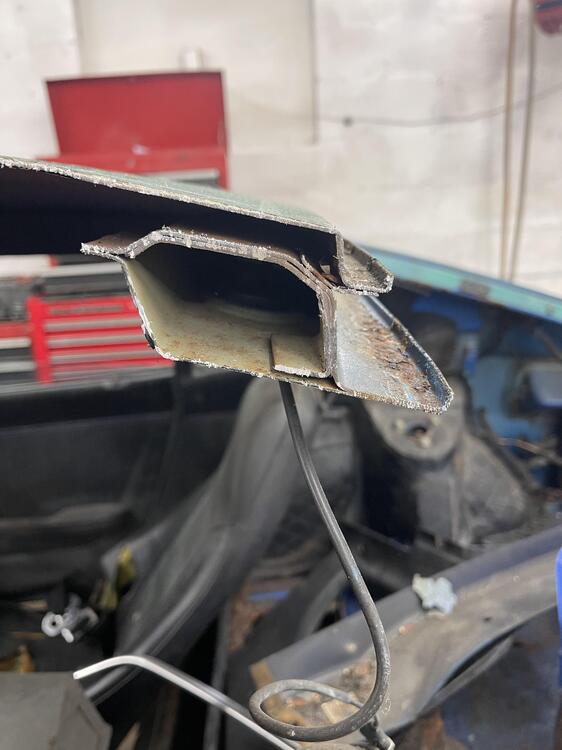
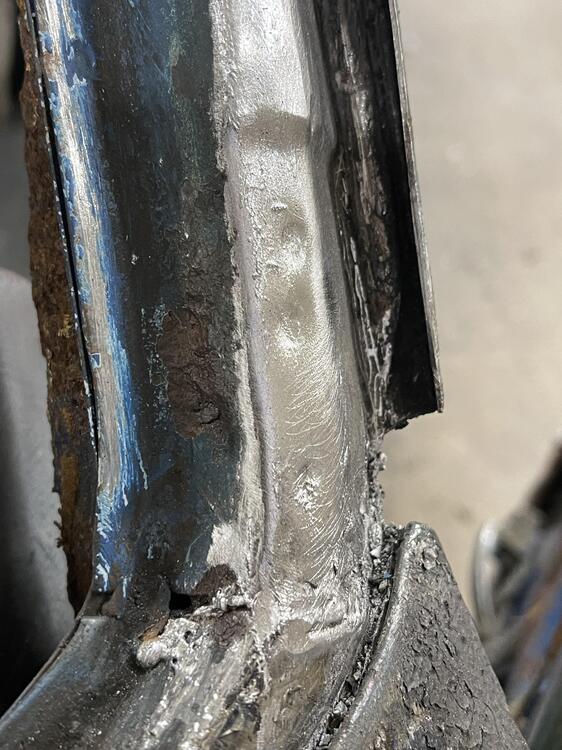
The base of windsheild frame/cowl area appears to hold much more lead then hatch area….
 1 point
 -
I'd say that the complexity of the joints (shape, and number, of the panels being joined) meant that they were likely to be - as we have seen in the 'nude' shots - 'cosmetically challenged'. Add a little assembly worker variation into the mix for good measure. They required filling/smoothing, and the top of the rear quarter joint was a large area. I can't think of any other areas of the early S30-series Zs where cosmetic filling was required before paint, as I pointed out up-thread. Can anyone think of any? This is specifically a Nissan Shatai thing. If it was their habit to use lead, and they had workers who were skilled at applying it well, and fast, then why not? It certainly 'dries' and is workable much faster than a plastic-based filler and there's no use-it-or-lose-it time constraint as there is with a hardener-added mix. Much better for a busy production line. And as we know, the lead is very resistant to cracking. Seems ideal.1 point
-
Gonna clean this peice up a little. Should be I interesting….dissection.
 1 point
 -
Captured nut in picture is shoulder belt attachment. 2nd picture back towards the taillights…3rd accross the top of hatch.

 1 point
 -
Multiple joints, and spot welds needed to be smoothed out of sight, lead would be a single application “brushed smoothed/grinded” smooth versus multiple filler applications and sanding. Lead continues out around the base of the window.
 1 point
 -
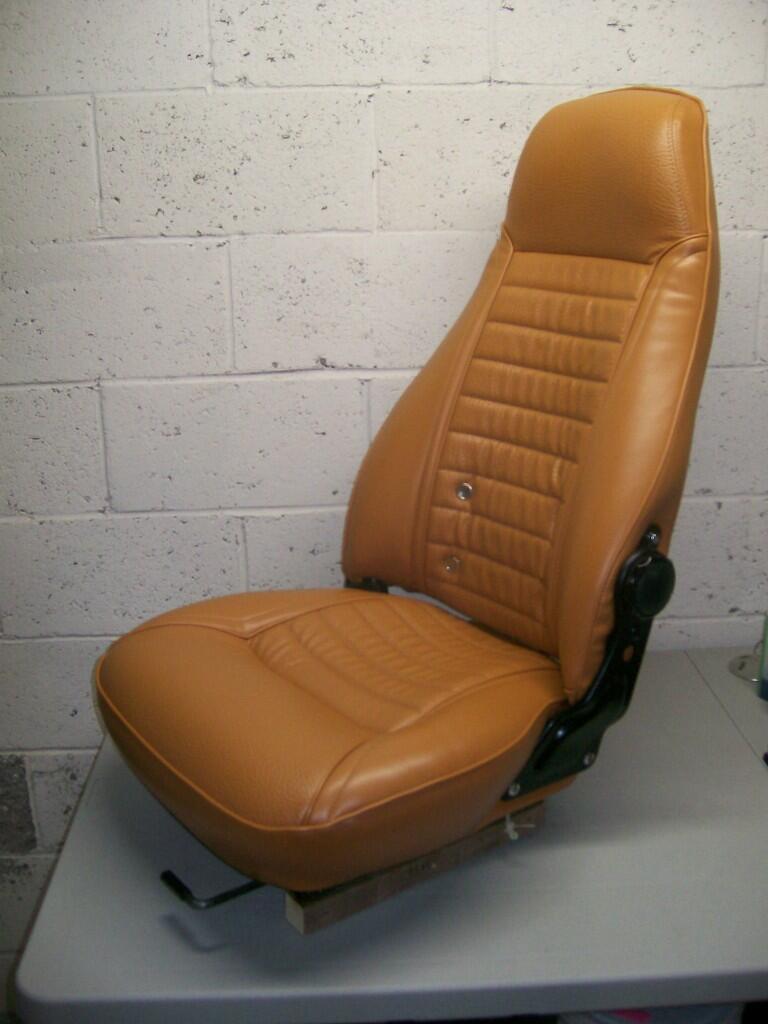
Nice job. I used Distinctive Industries' covers when re-doing the seats for my 70 Z. I did not purchase new foam b/c the OE foam still seemed in good shape. Long story short, I found the fit of the new covers to be a bit baggy. Things improved a lot with the addition of 1/2" and 1/4" foam sheet in strategic locations (esp. the front and side bolsters), along with pushed-into-place 'basting' material (bought at a dressmaker's shop) that helped to remove/reduce wrinkles in certain locations. I was pretty happy with the end result, esp. considering the fact that this was my first-ever venture into the world of automotive upholstery. FWIW, hot rod and boat shops can provide a lot of guidance for this type of work.
 1 point
 -
Had to get several things squared away on the truck - it's annual state inspection is due. Main thing was the tail lamp connections - since I drove it for a year with no covers over the back of the tail lights, the sockets had all got crud on them, and sometimes the indicators would come on through the brake light circuit and so forth. All indications of bad grounds. I have several new bulb sockets, so I dug those out and cleaned up the connections on the tail light circuit boards. Besides that it was just odds and ends that they would look at as part of the safety check. I got it inspected this evening, no problems there thankfully. Since I didn't have a lot of time, I focused on making a rack to store the wood that I had outside - the tarp I was using seen better days, and wasn't keeping the water off the wood. So I had to clean and dry them all . Figured it would be safe it to store them indoors. I used pieces of tubing from the canopy I had used to cover the X1/9 when I painted it back in 2018, and set those in the angle iron with six of the longer Fiat head bolts (welded in place)1 point