Leaderboard
-
grannyknot
Free Member5Points5,158Posts -

the_tool_man
Free Member3Points223Posts -
Paulytunes
 Subscriber
 3Points107Posts
 -
florian
Free Member2Points25Posts


Popular Content
Showing content with the highest reputation on 12/24/2023 in all areas
-
You need new pans and rails, from the extensive rust your photos are showing now I don't think it is even worth removing any more of the tar and paint. It's a big job for sure, but so is trying to weld patches to punky old metal like the last guy did.4 points
-
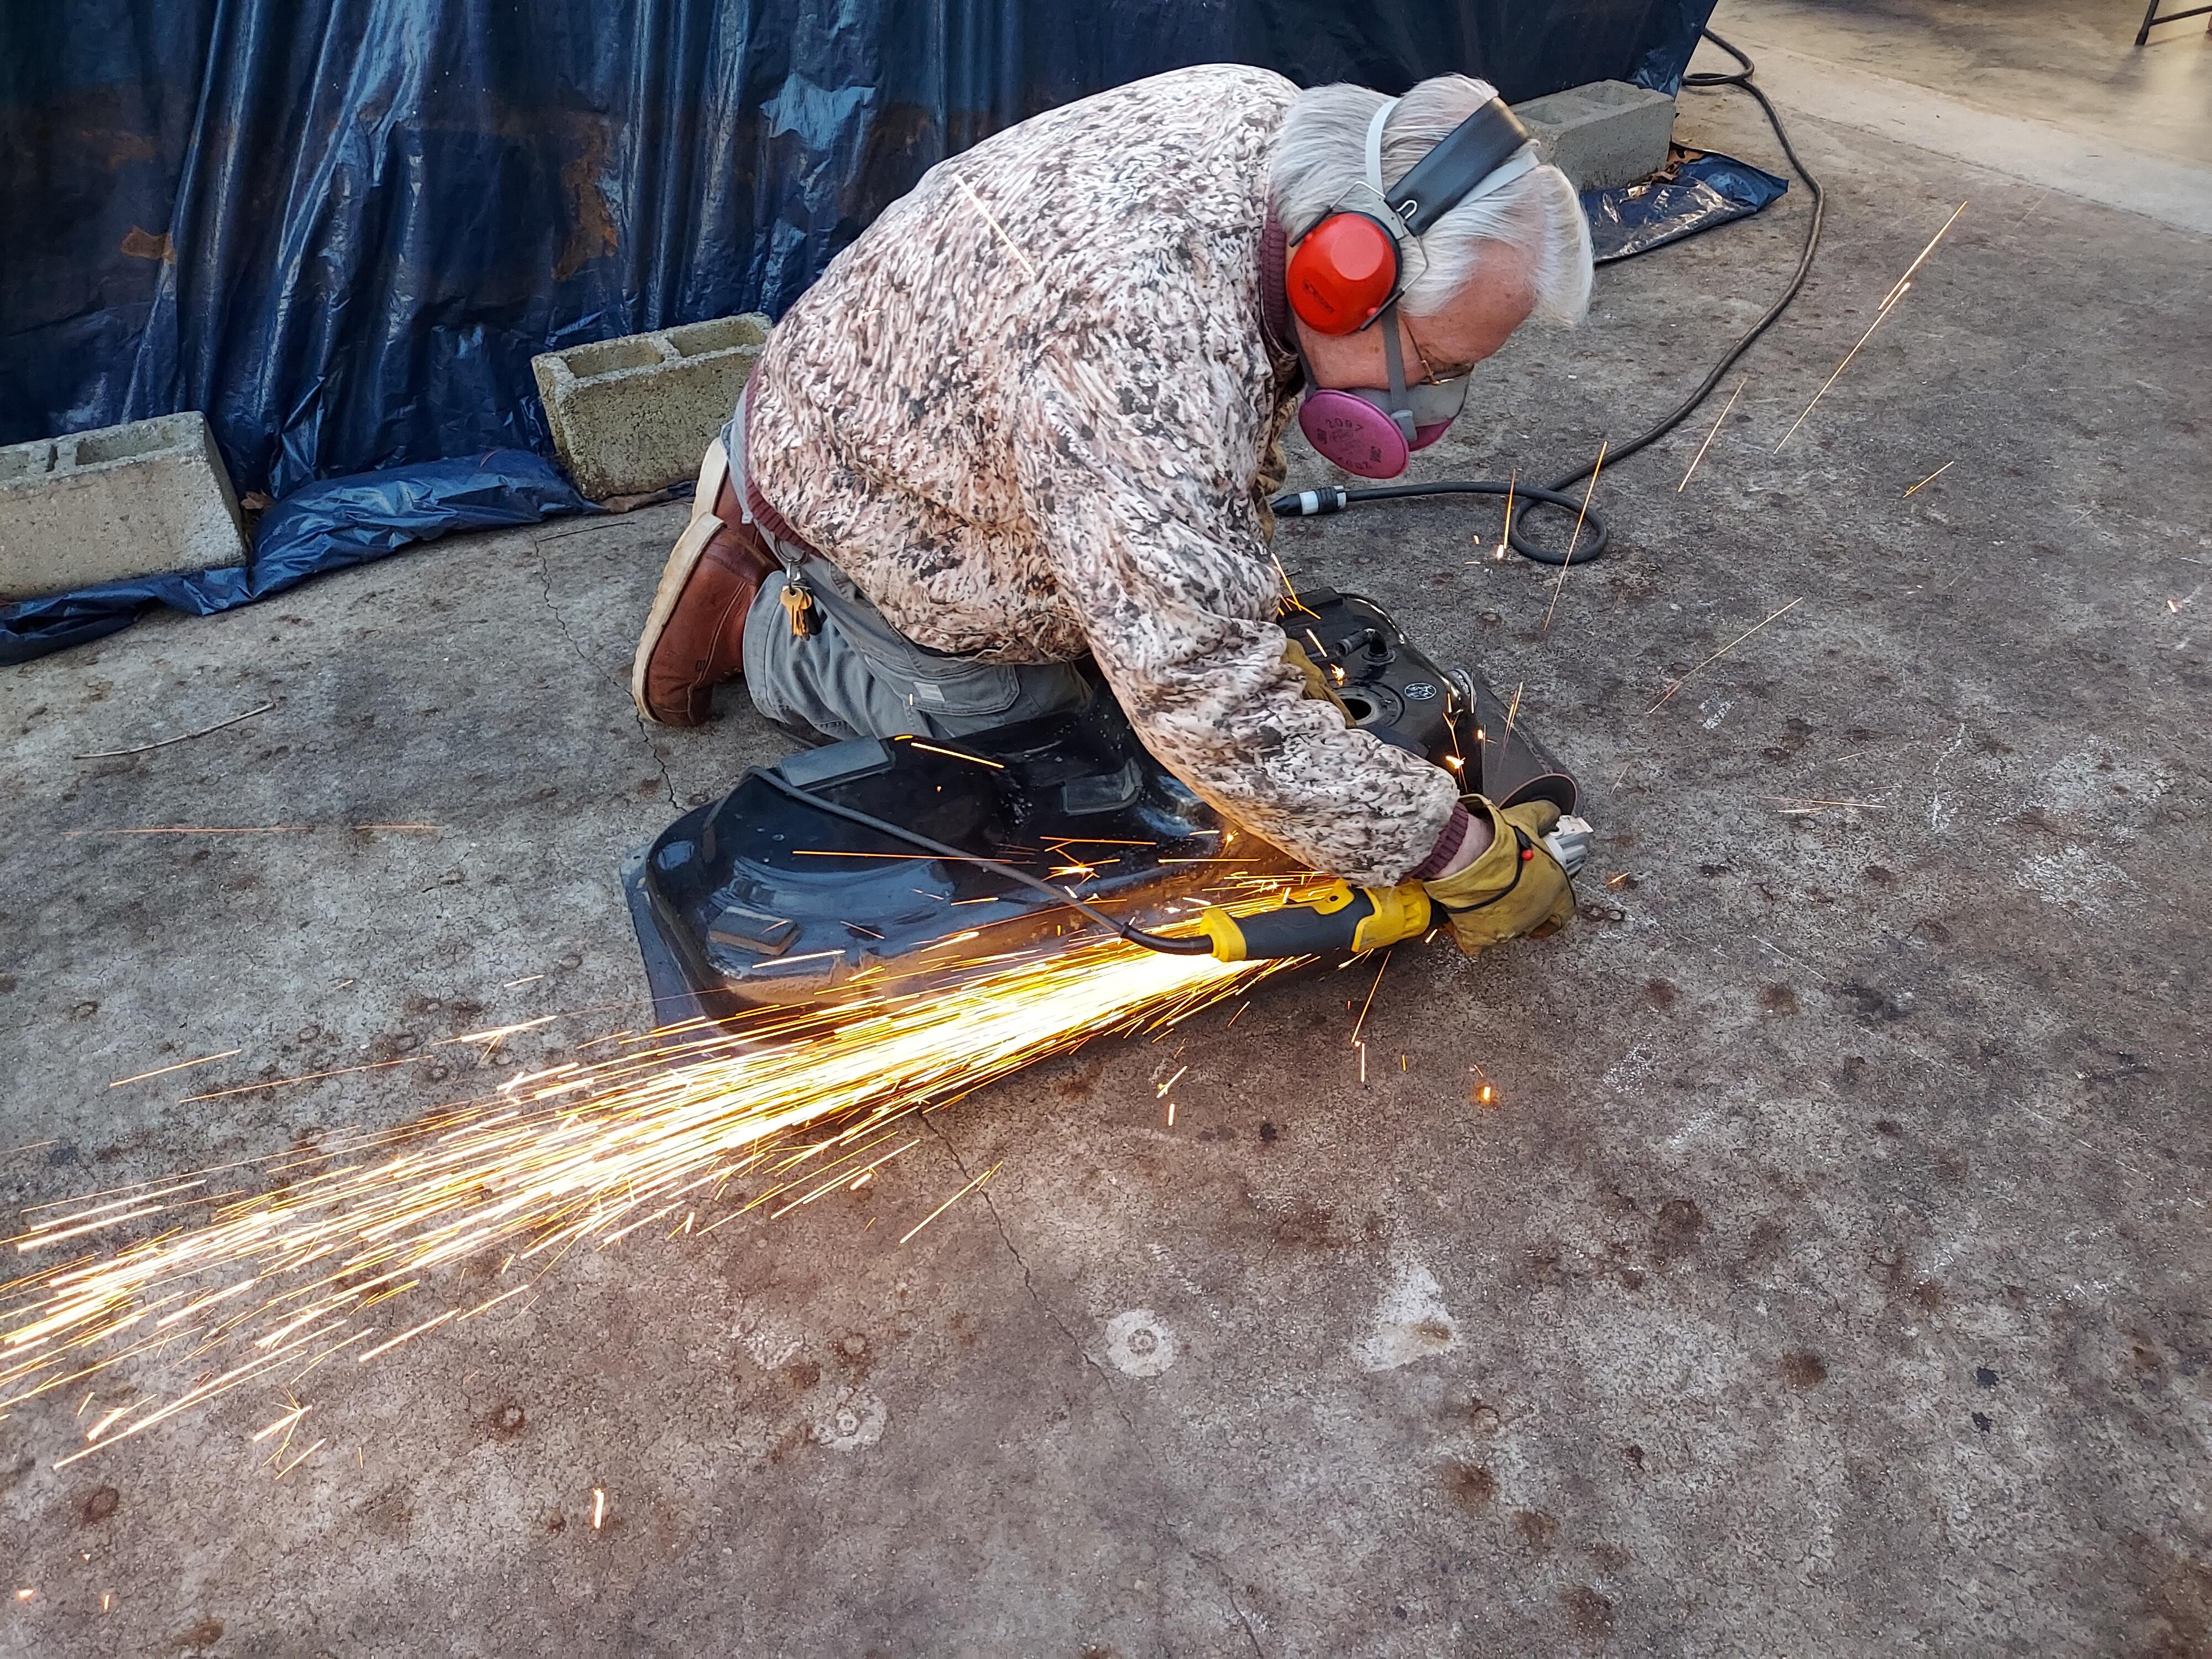
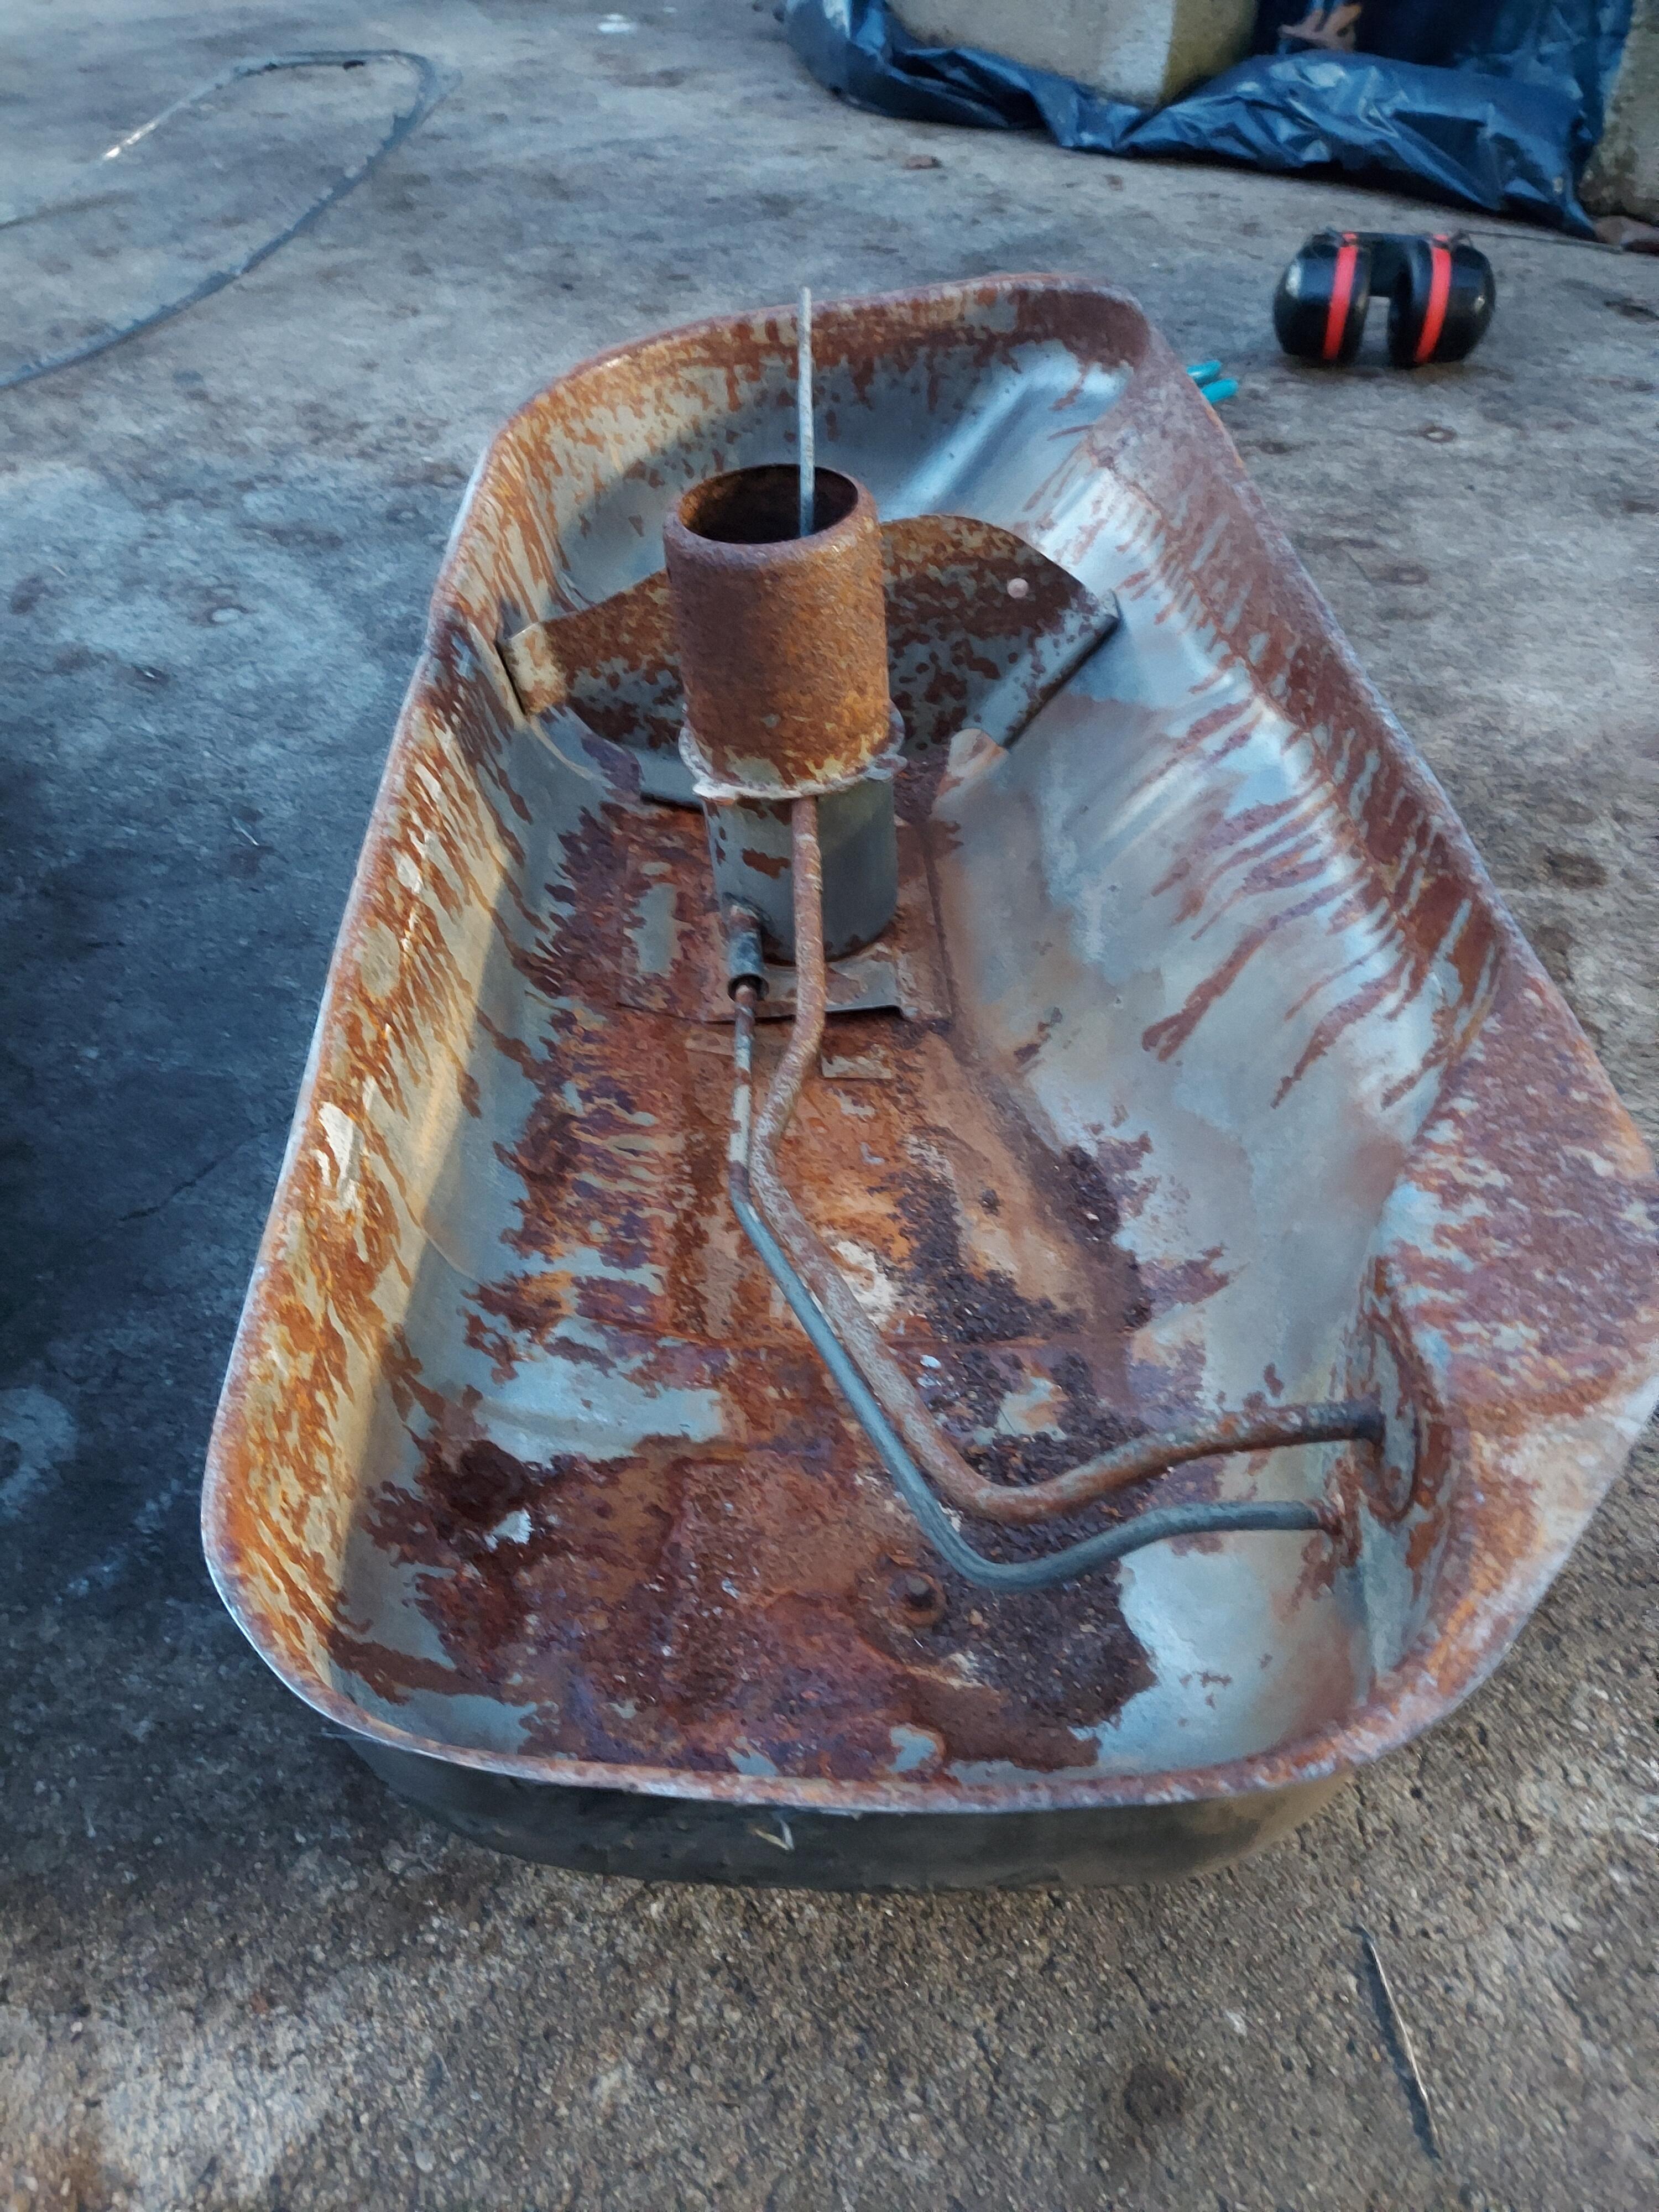
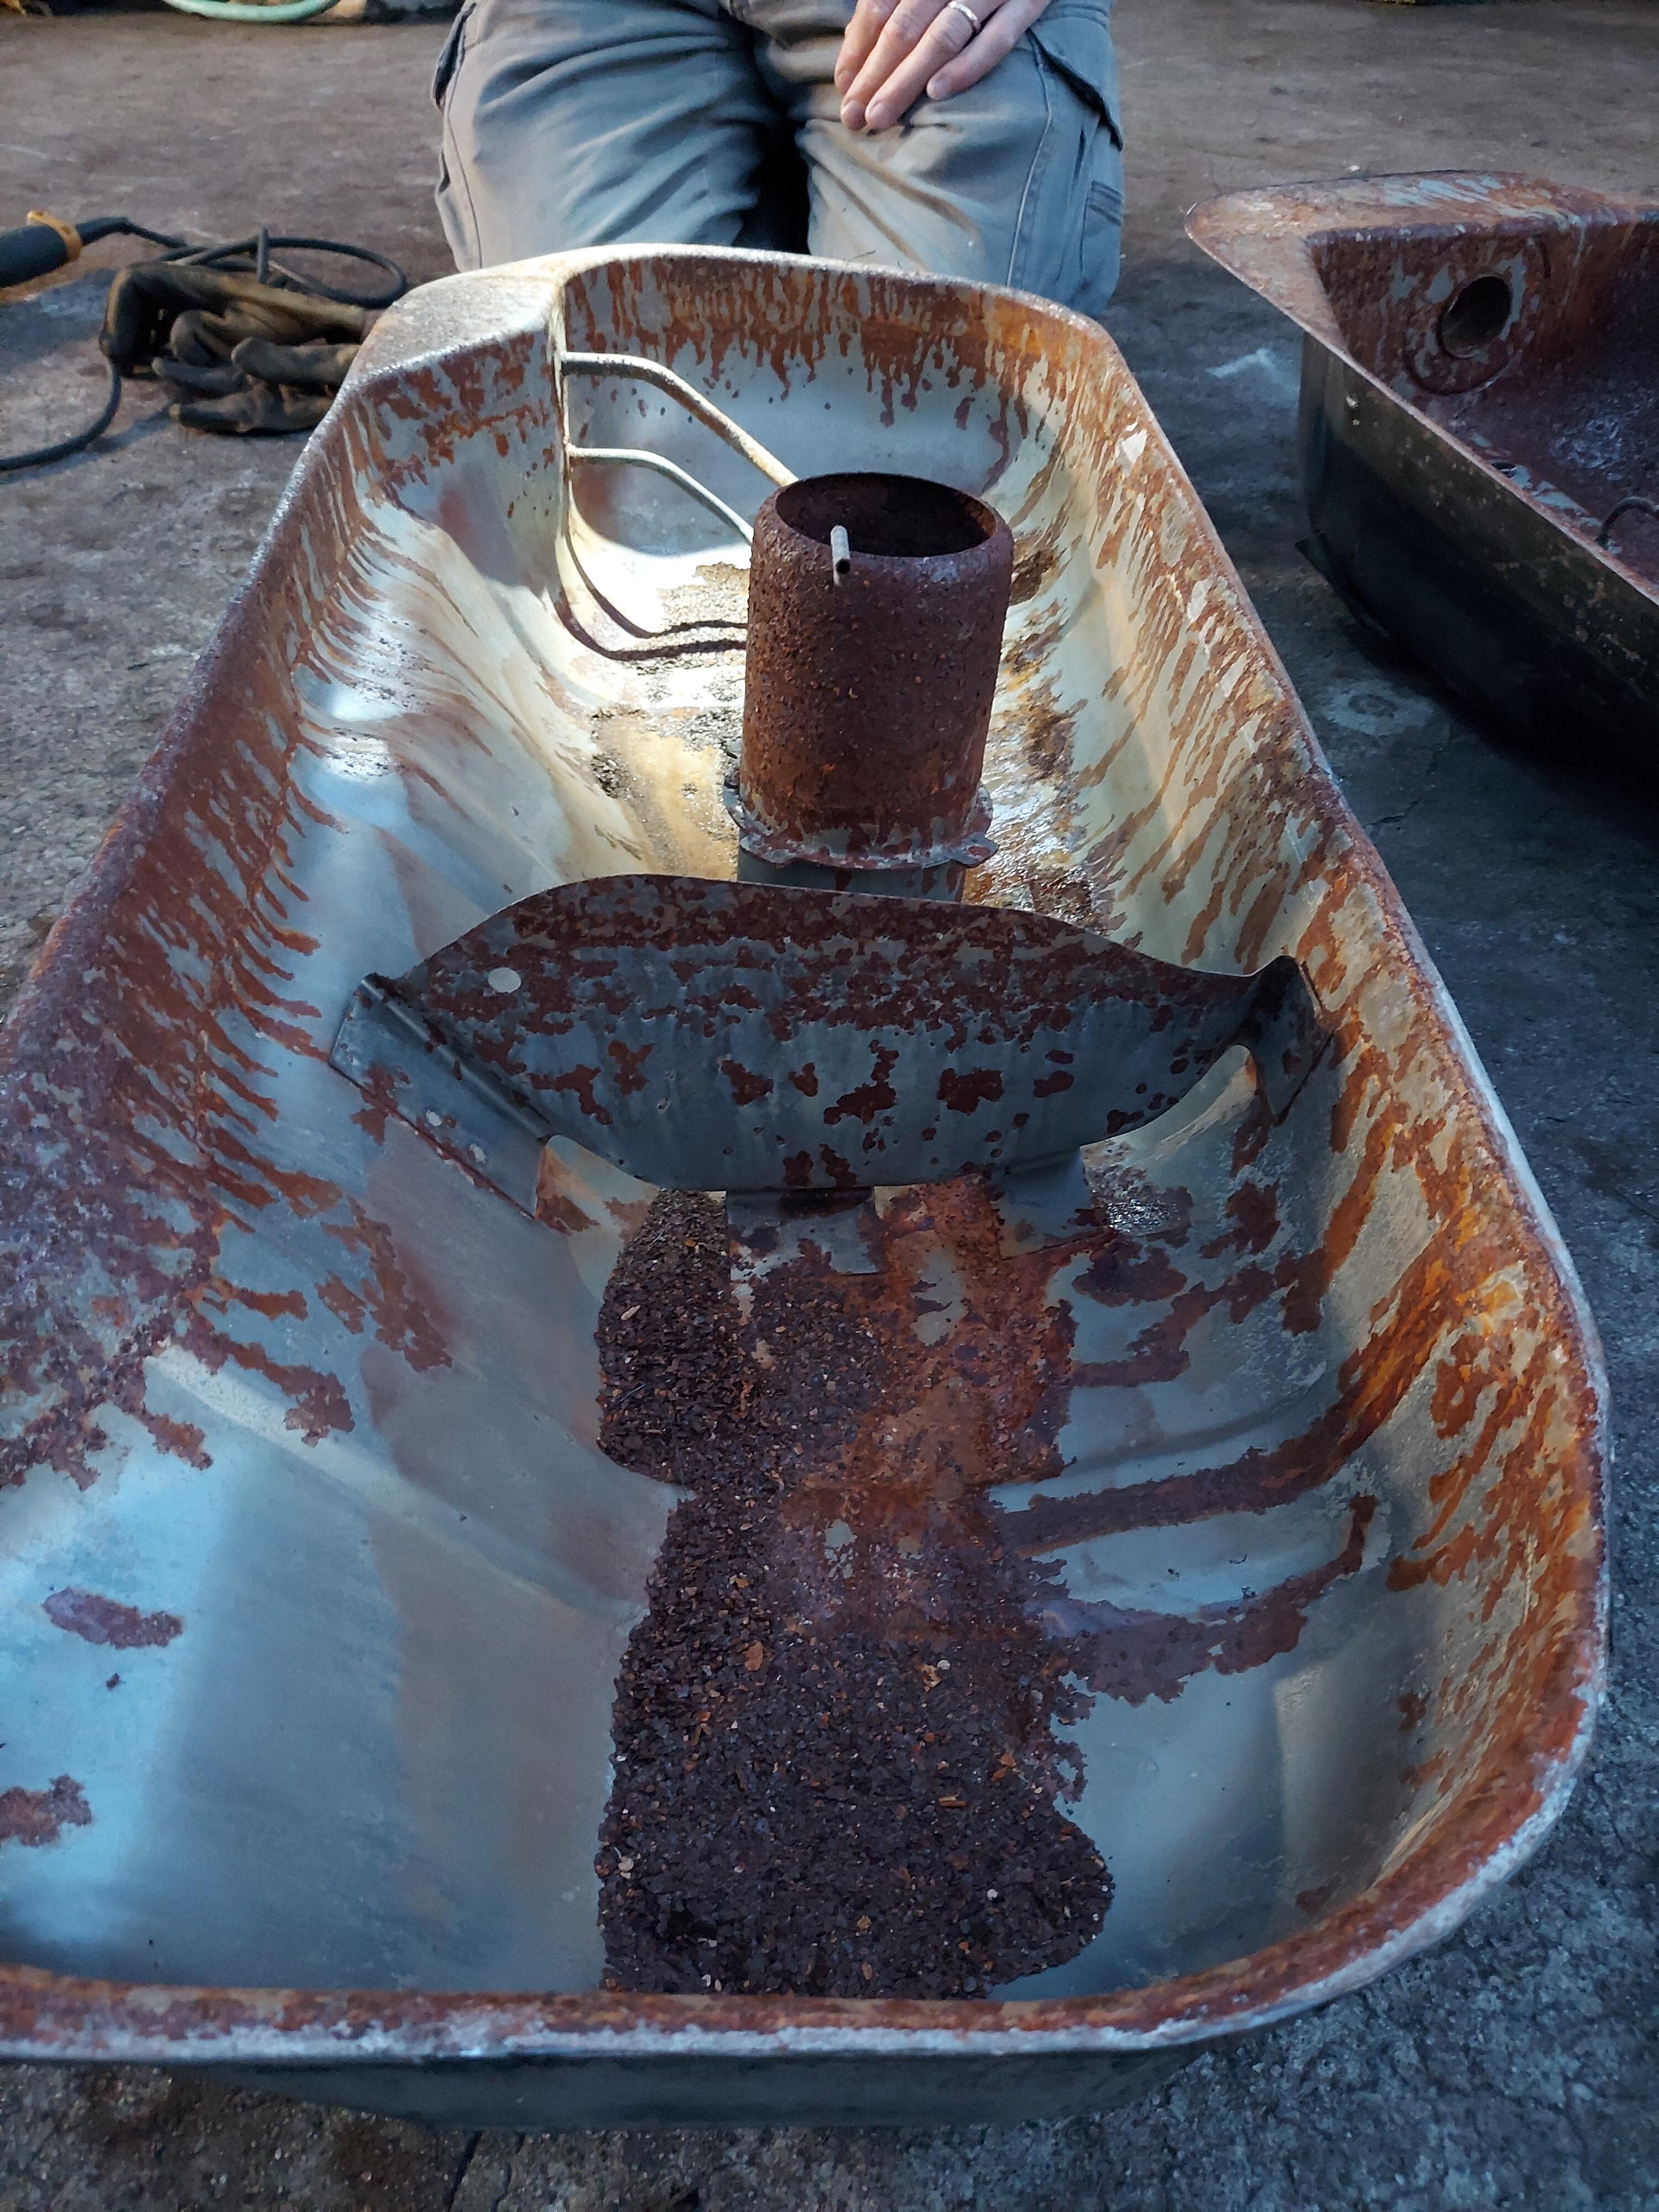
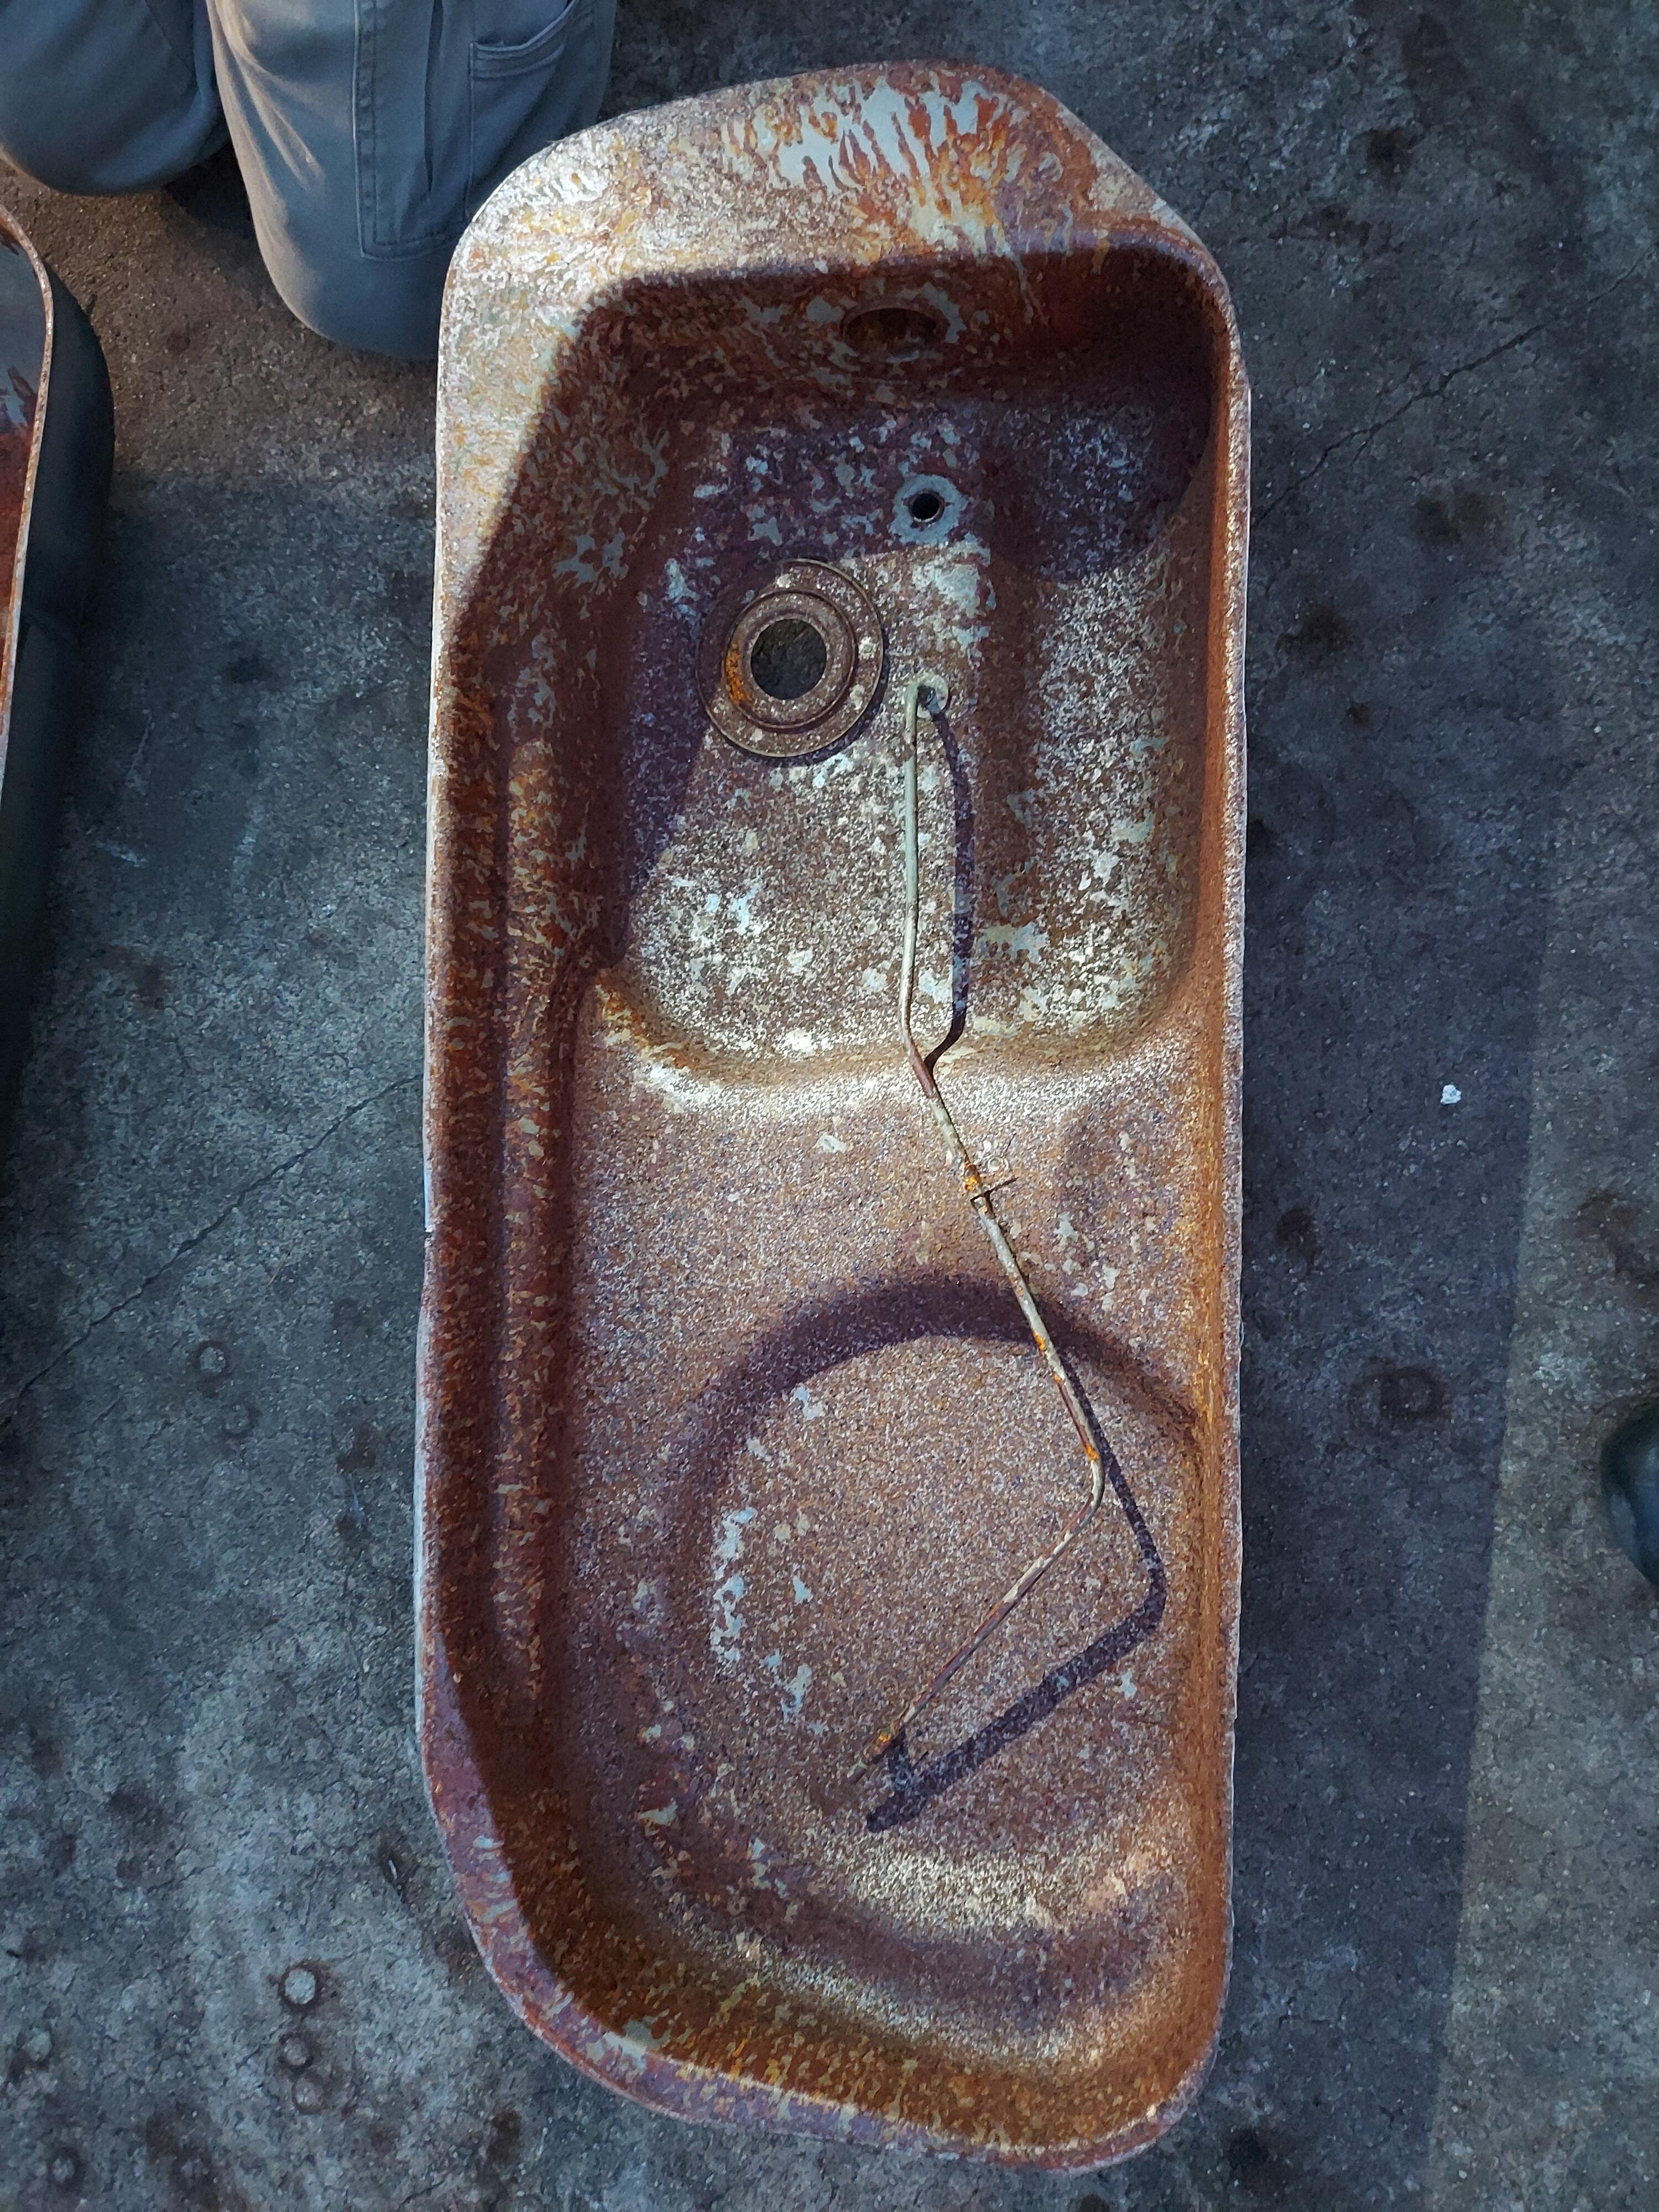
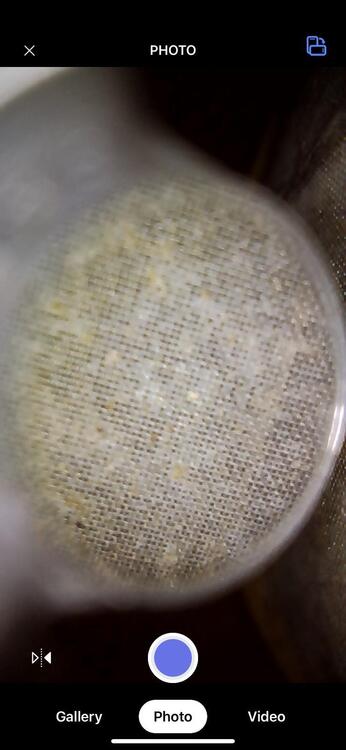
3 pointsDuring the latest round of EFI issues with my 77, with some help from @Patcon we isolated the fuel delivery problem to the fuel tank. I had cleaned and treated the tank for rust a few years ago. But that apparently didn't work. After dropping the tank I got a few cell phone photos of the inside for confirmation. Lots of rust. We suspected the primary issue is a rusted through pickup tube. Fast forward to yesterday. I took it to a buddy who is a master with a cutoff wheel so he could help me cut it open. We cut just inside the factory weld on the flange, leaving plenty of material to weld it back together later. After getting it open, it's clear that I did the right thing. Everything is rusty. Even the brass screen inside the fuel baffle is corroded. I'm posting pics for anyone who wonders what these look like inside. Bottom half from passenger side: Bottom half from driver side: Top half: Borescope photo of screen: The plan is to bead blast this clean and thoroughly coat it, leaving a strip for welding. Then I'll slosh more coating over the completed weld seam. More to come.


 3 points
 -
Thanks. I feel like it is peeling back an onion, the more I dig, the more I find. Even where the metal is good, it seems somewhat thin and bendable now all of the fill material has been ground away. I certainly did not expect the hole in the passenger side to be that large, or the rivet patch on the driver side to be that big. SMH. Oh well. I feel like Tyler Hoover, my car is giving me an extensive bill for the holidays.2 points
-
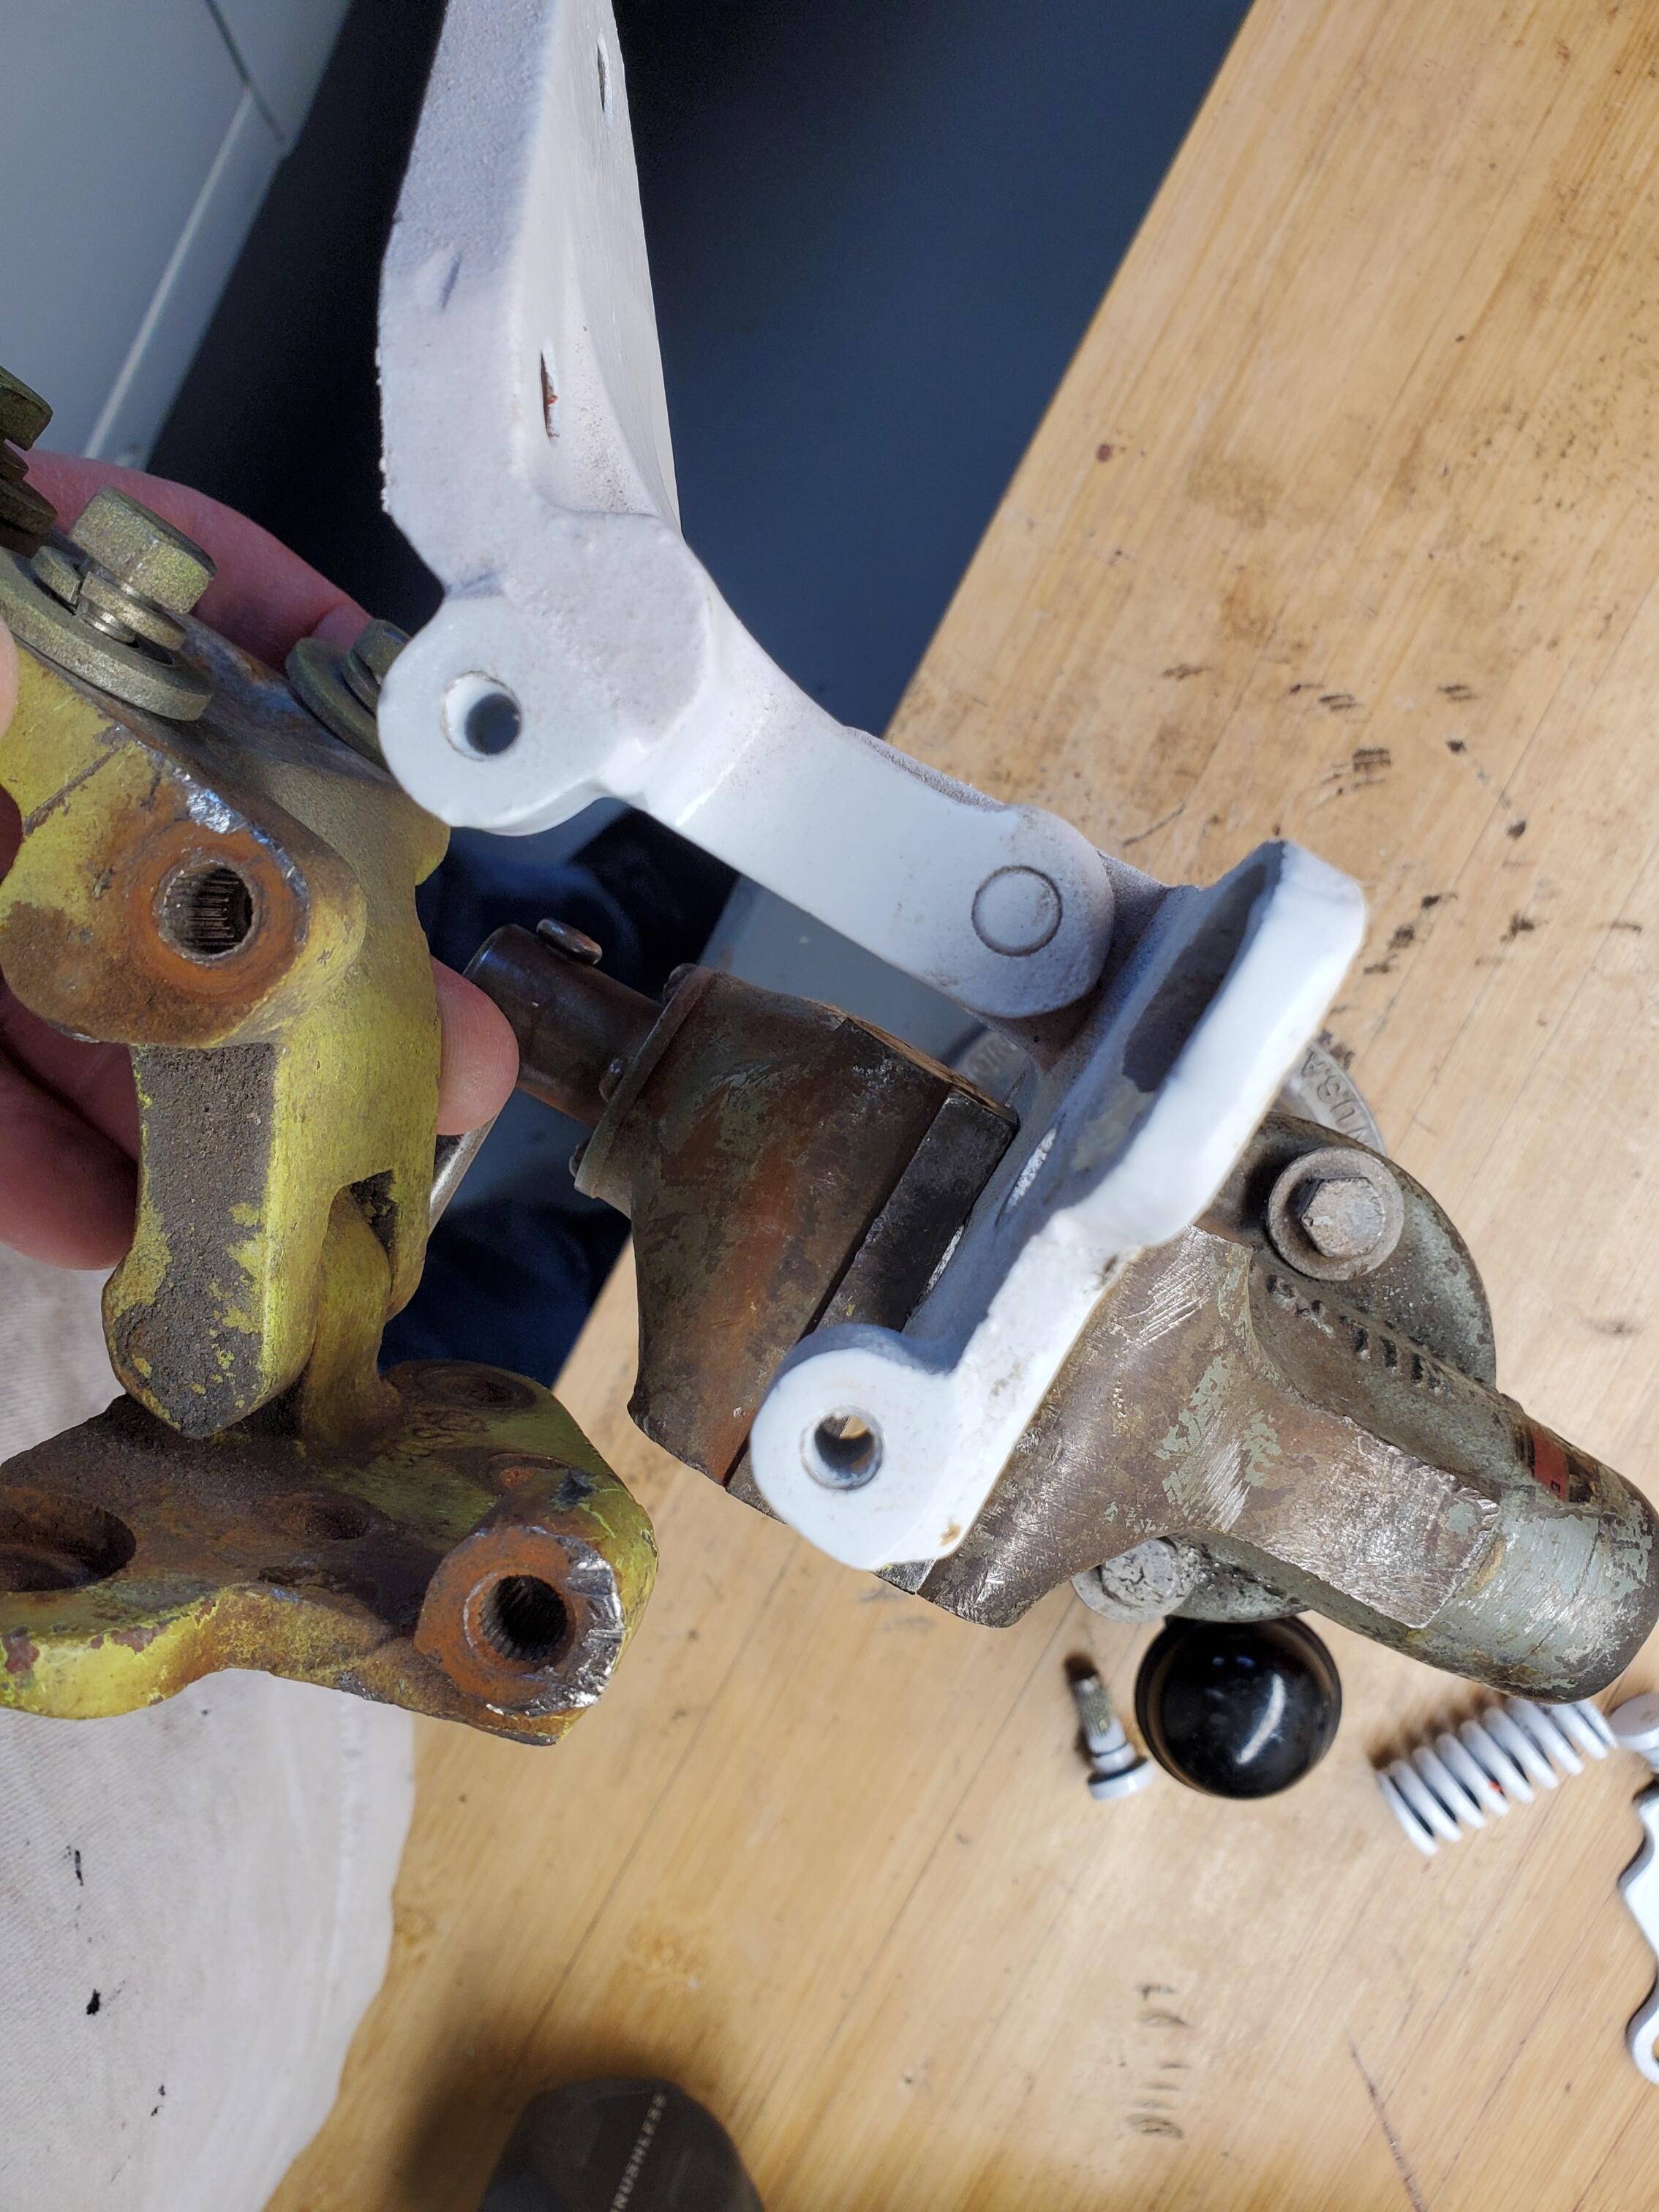
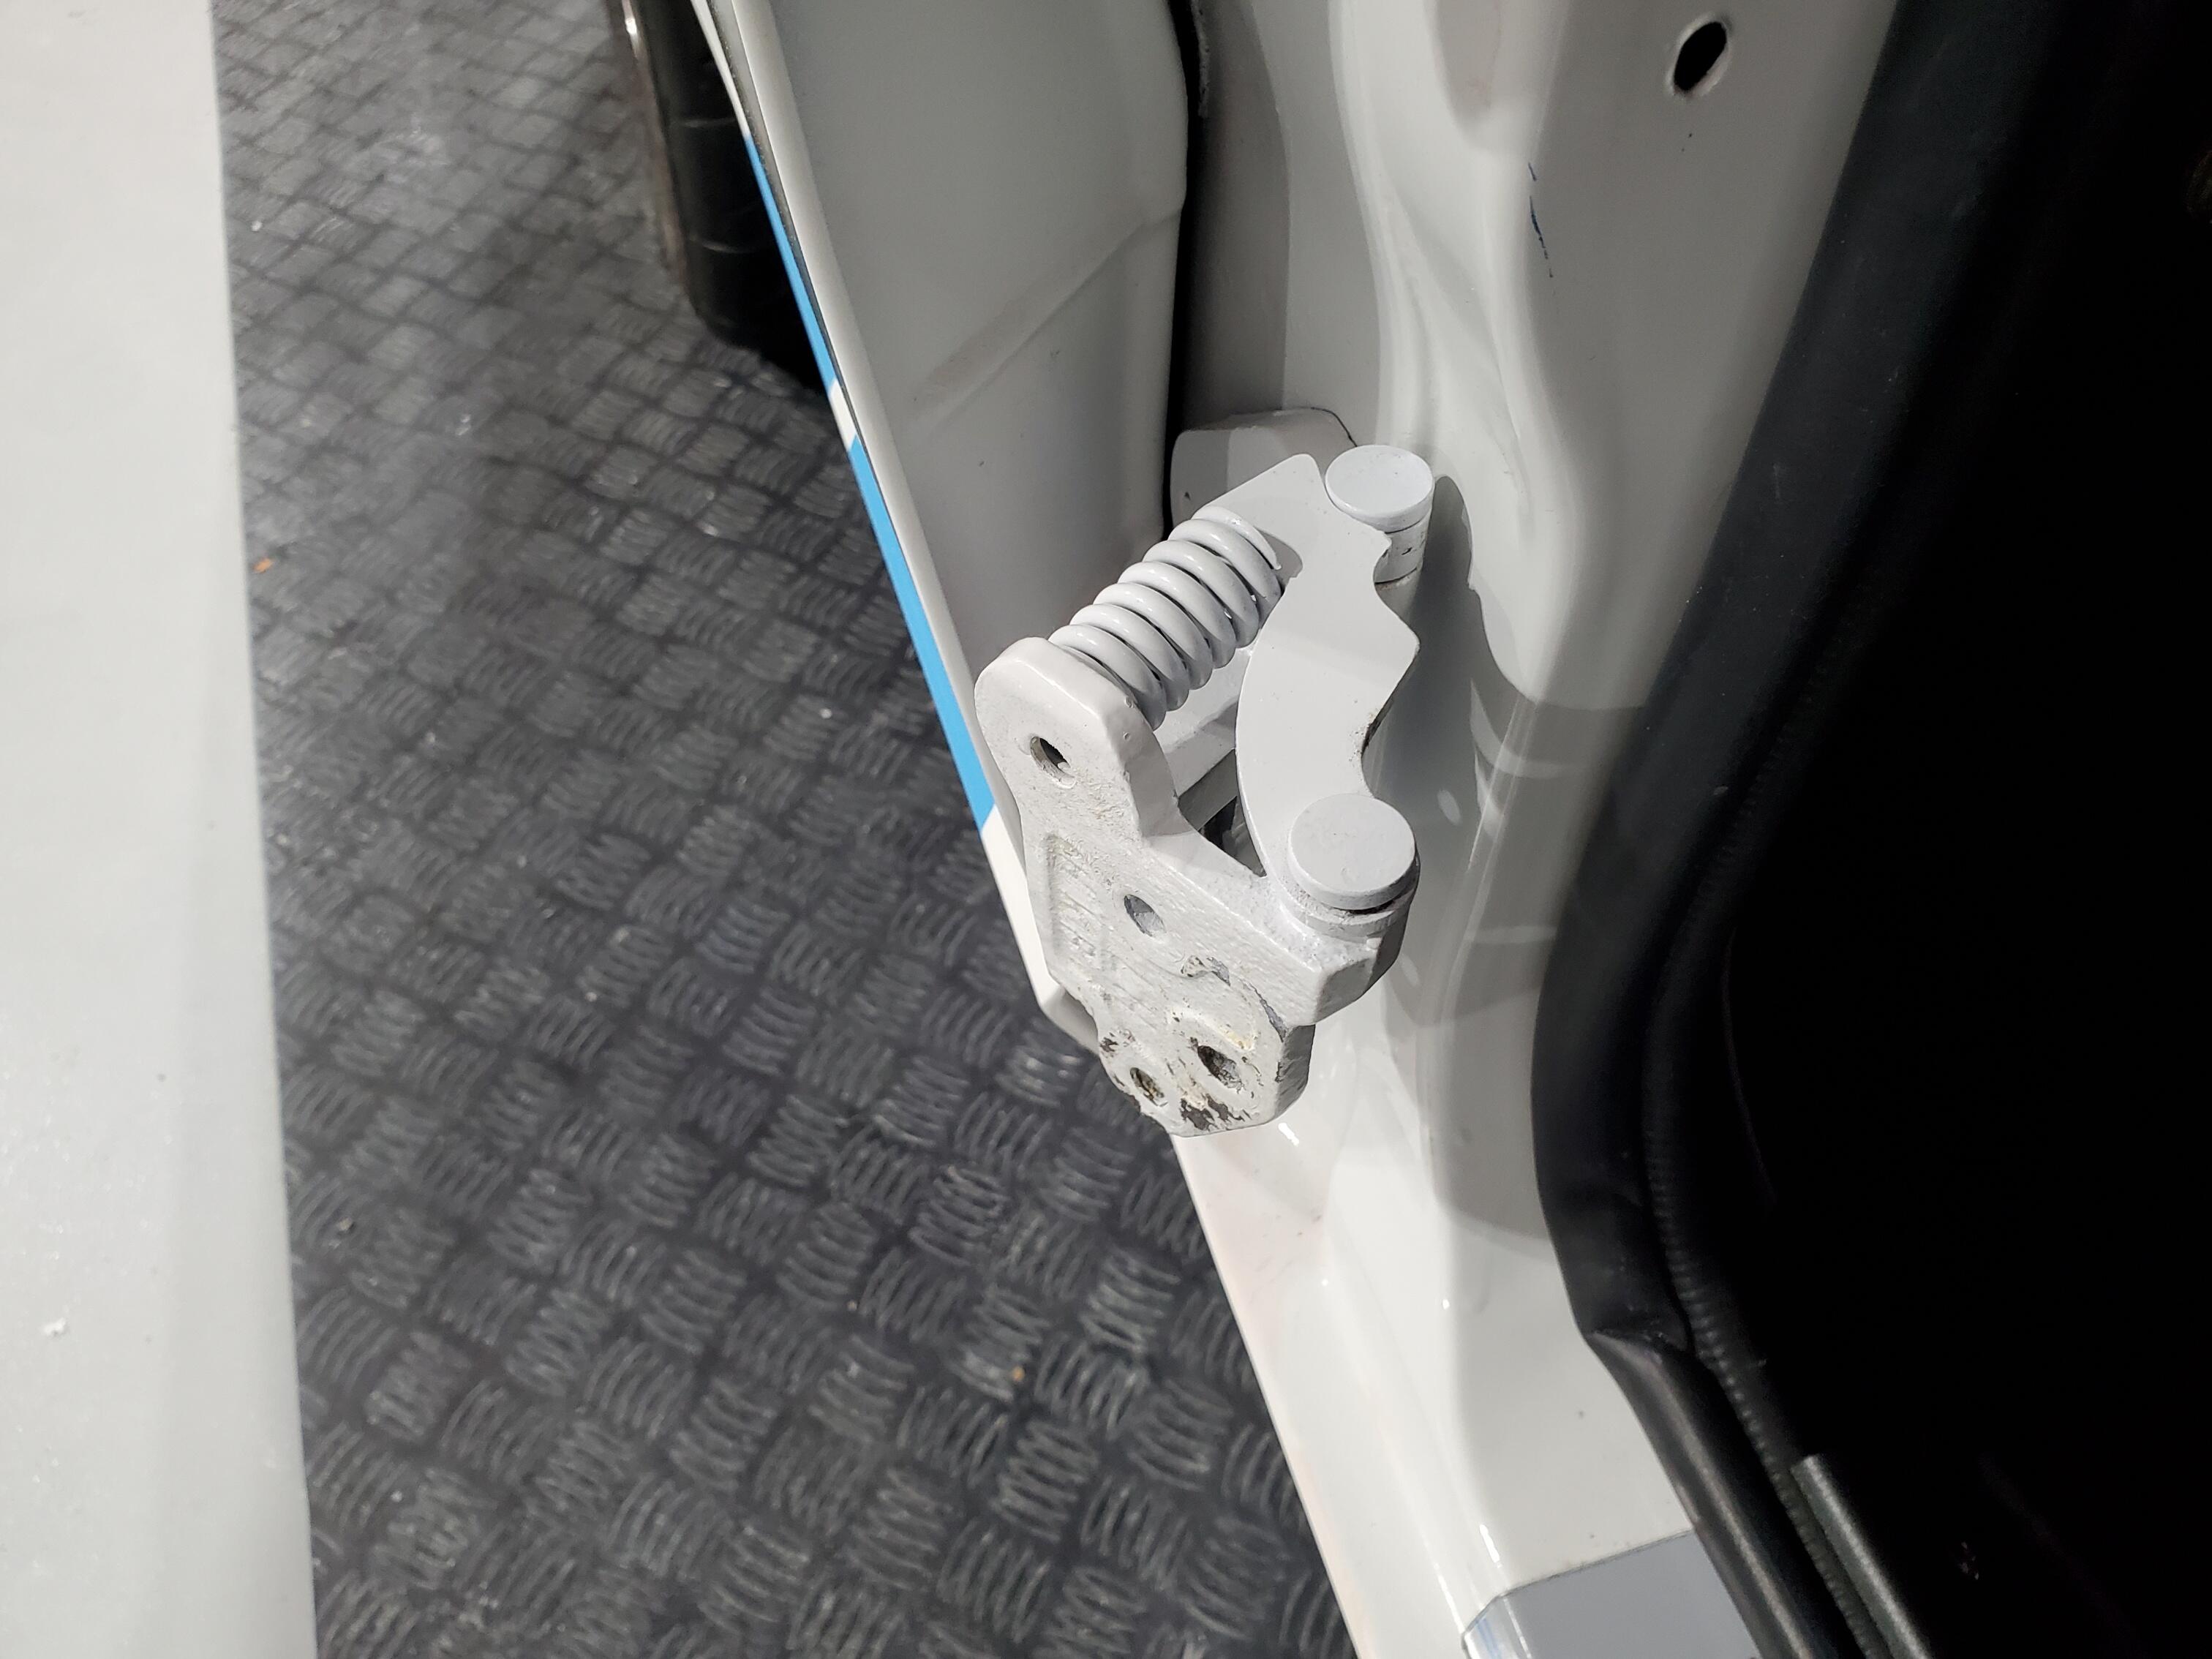
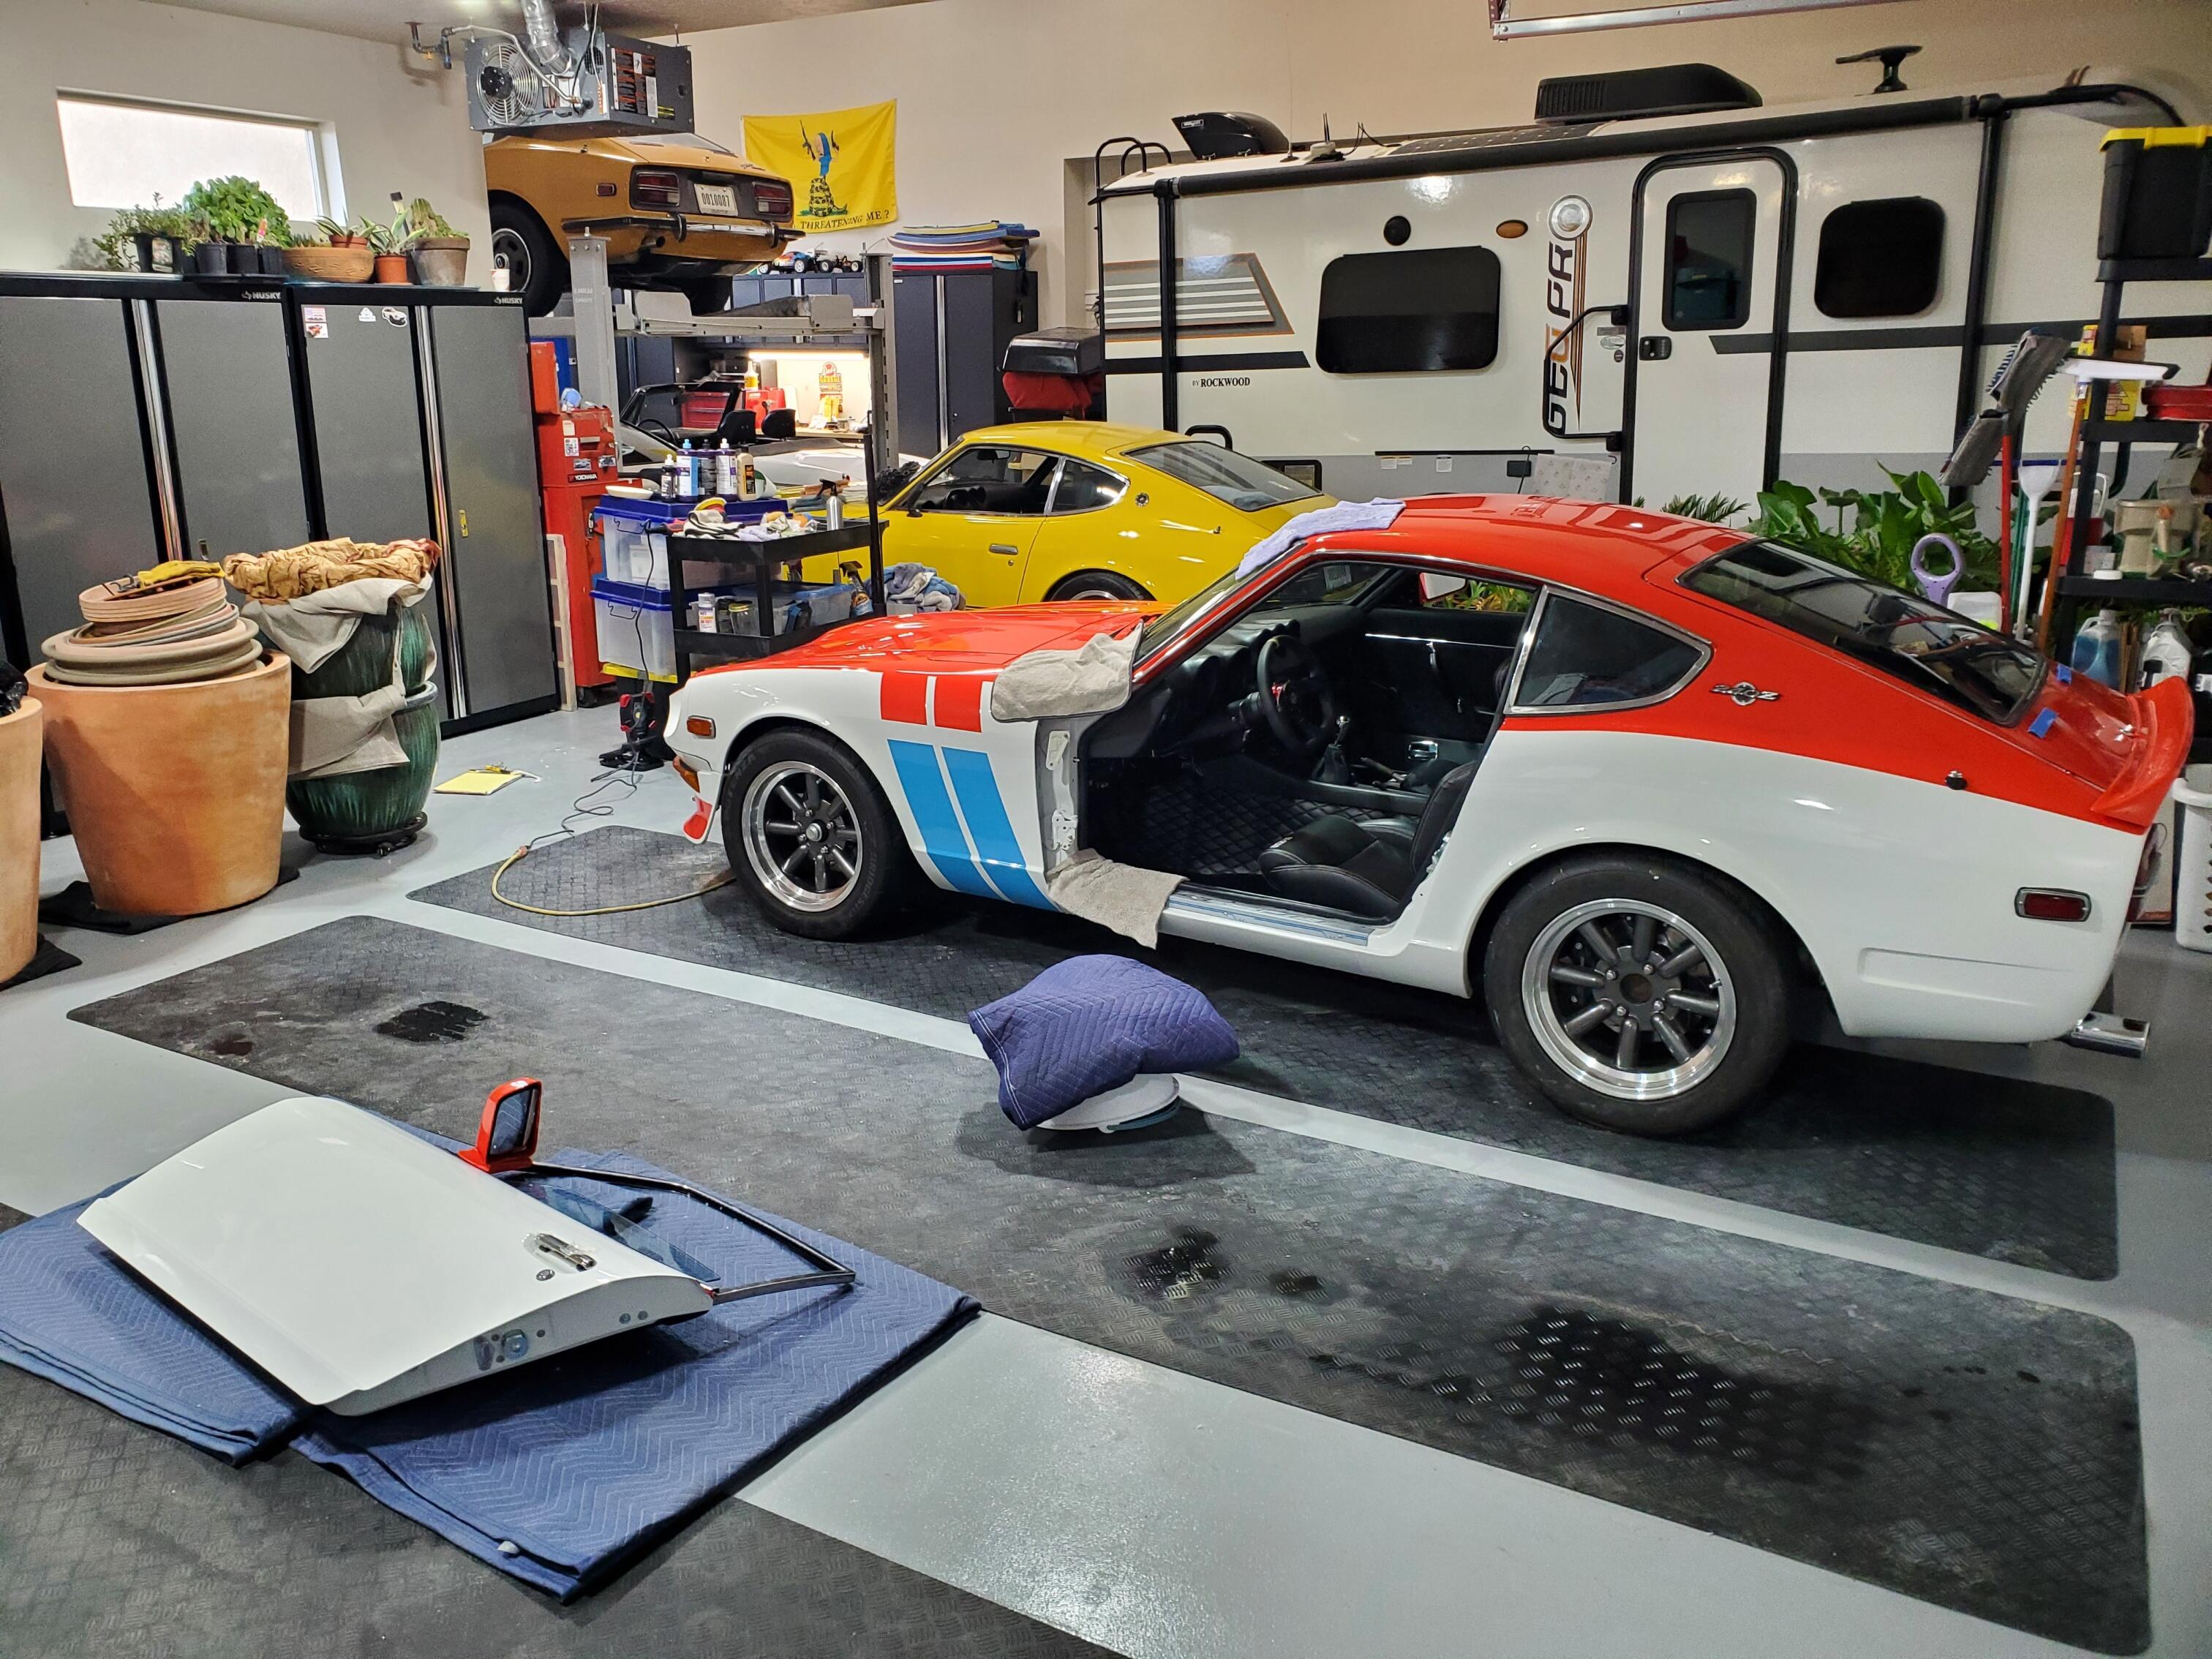
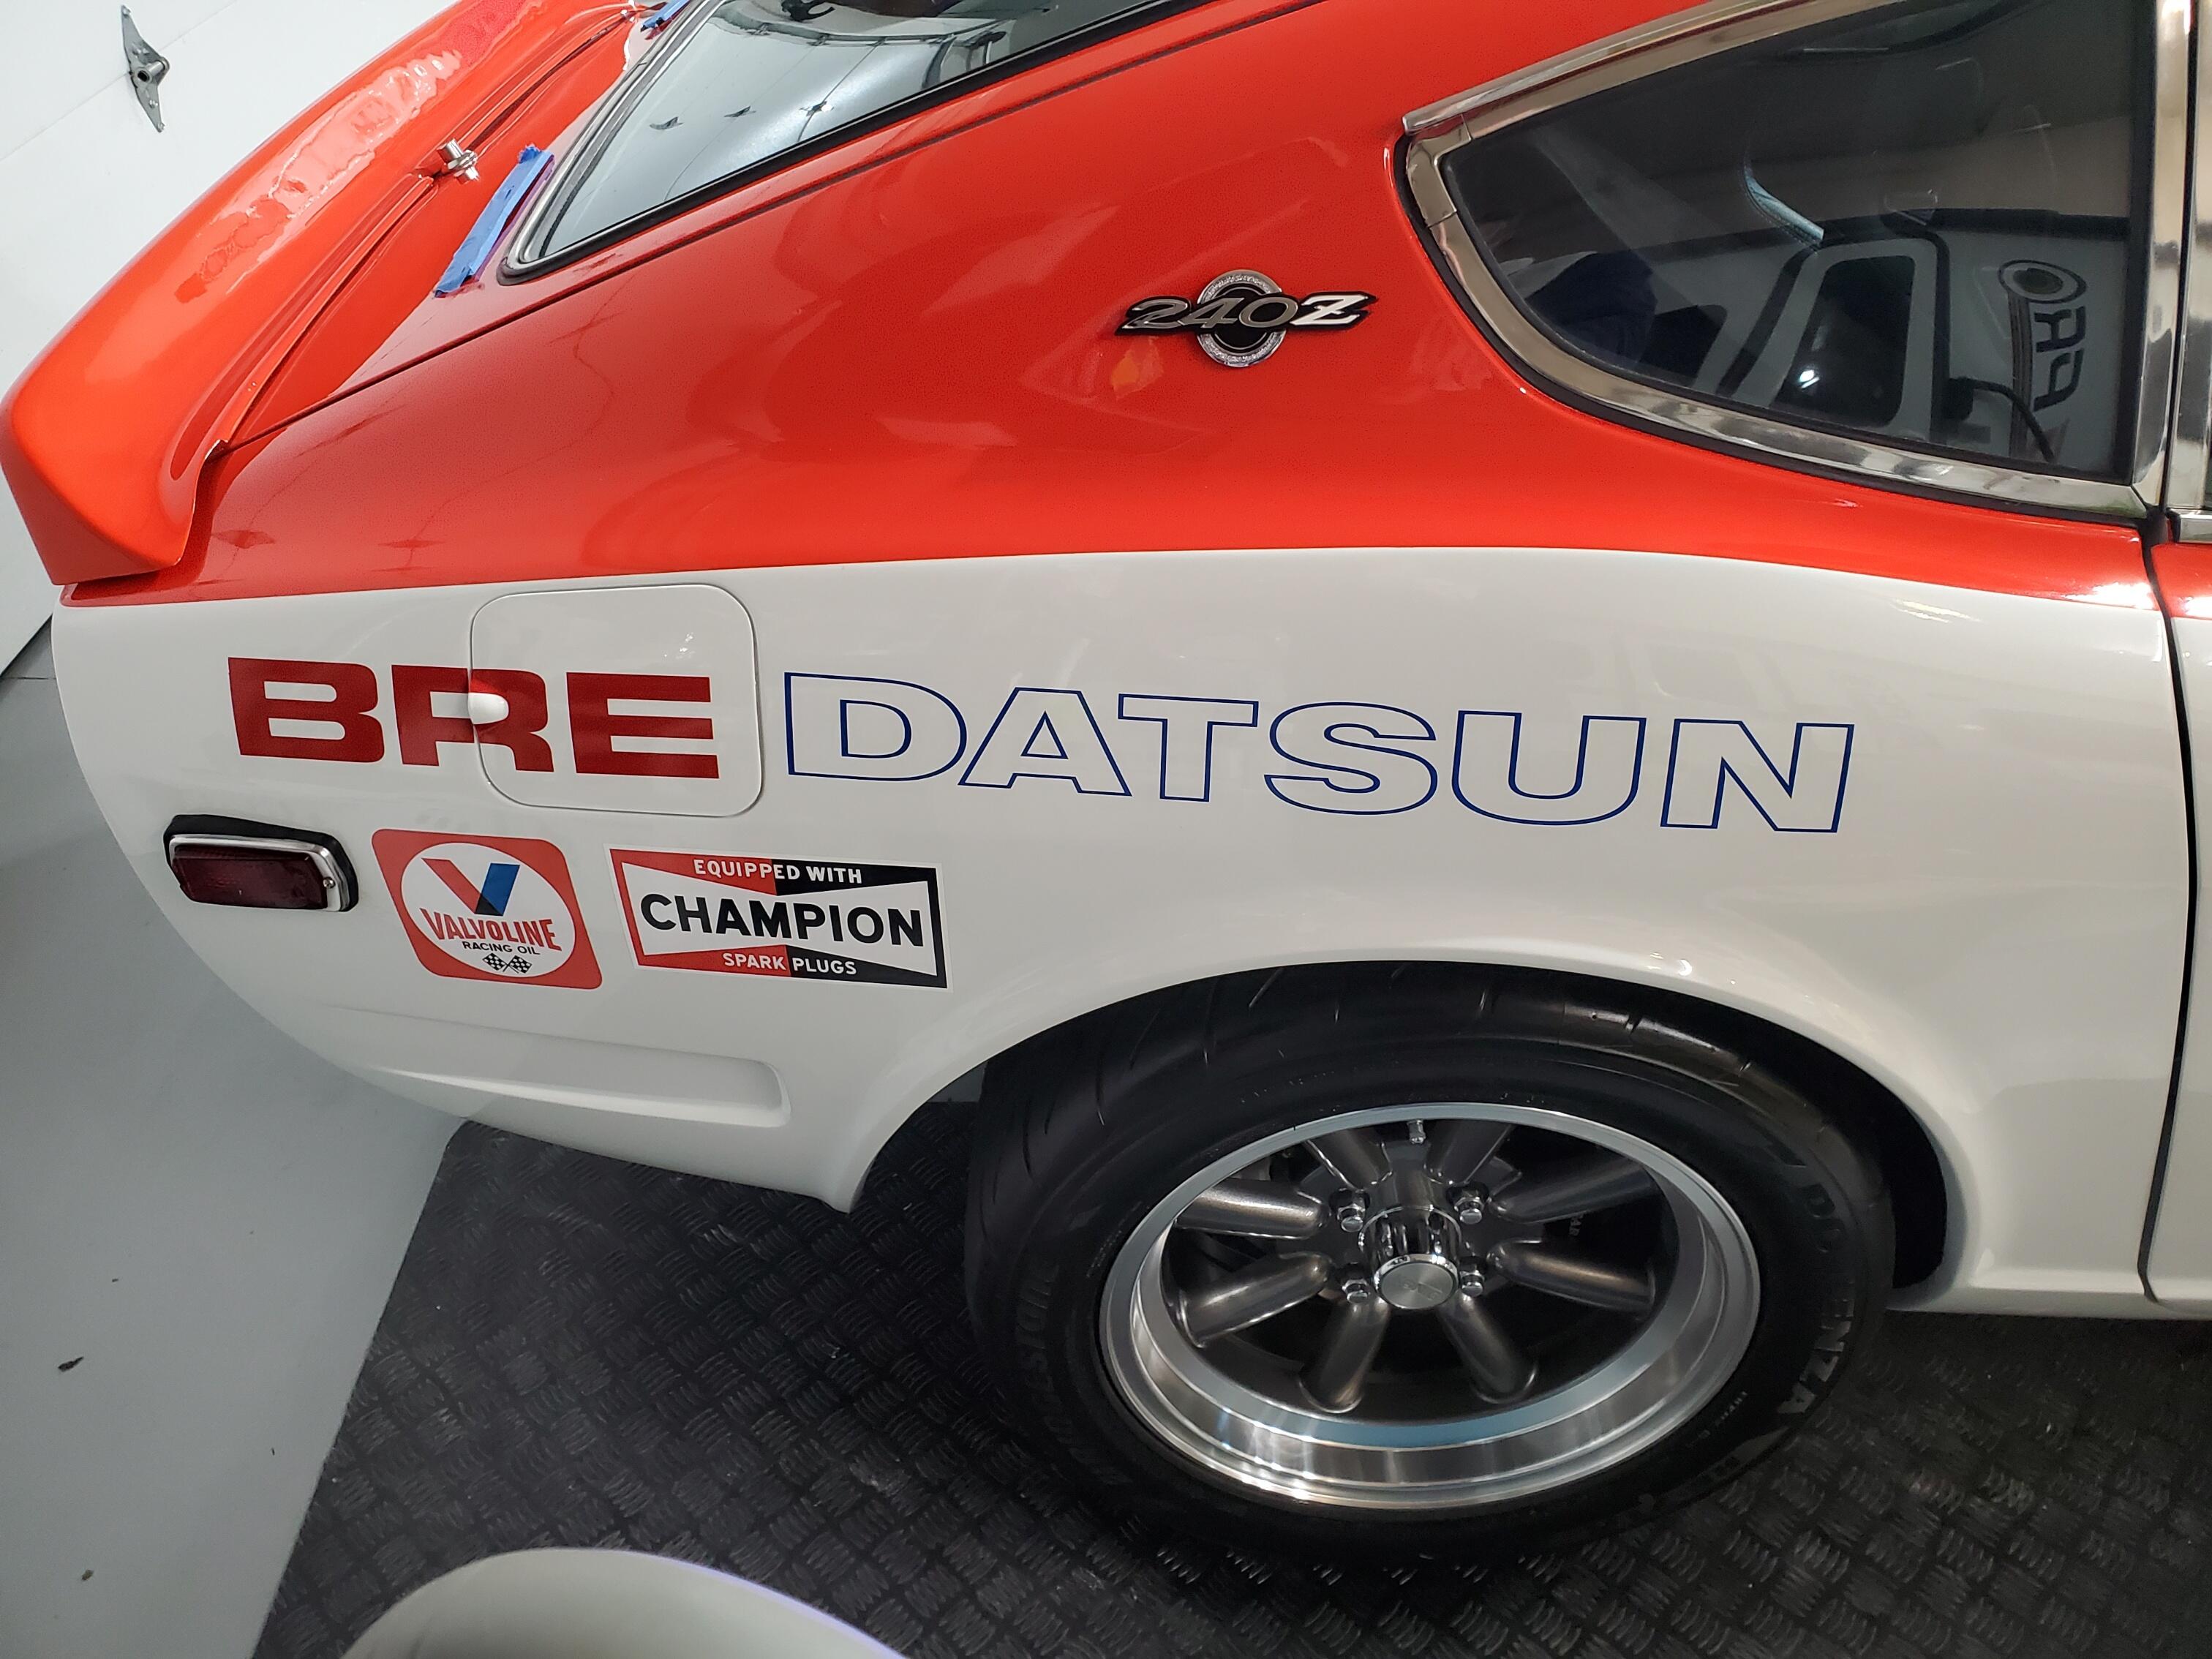
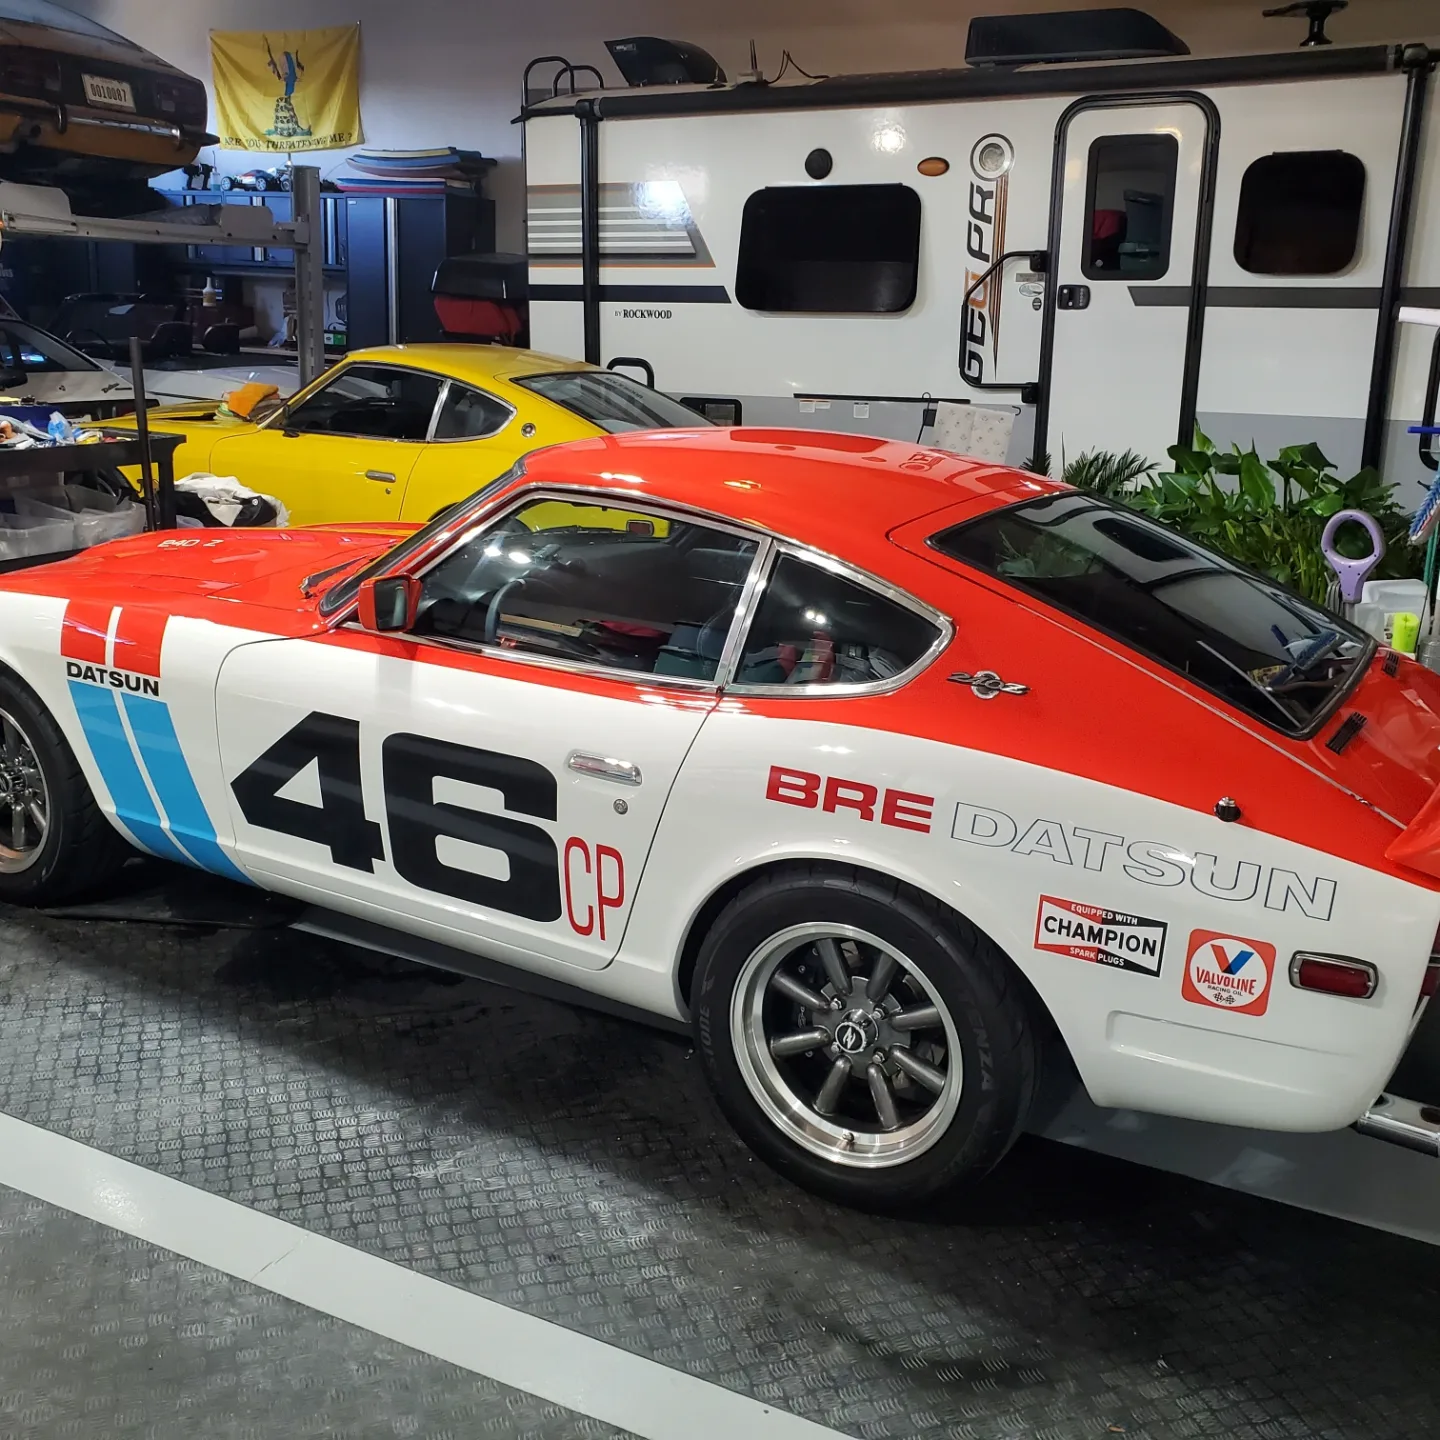
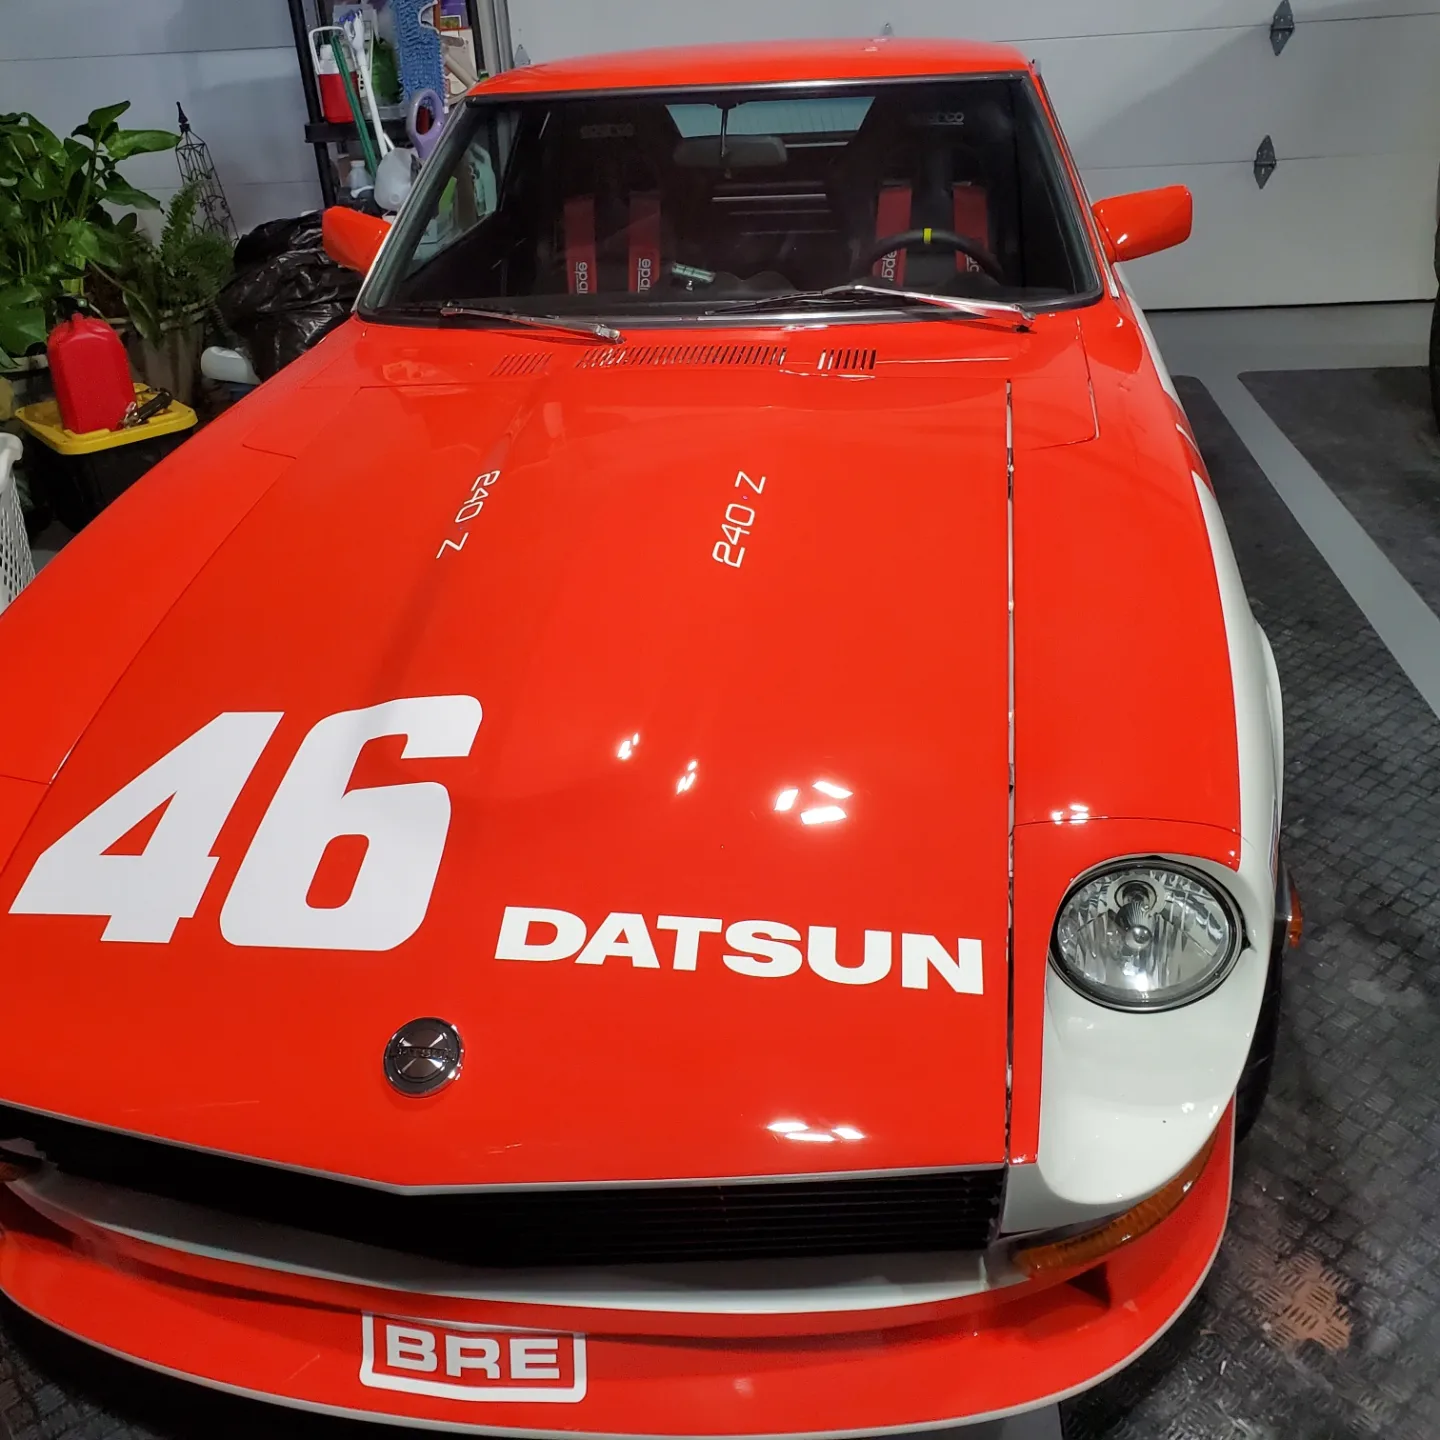
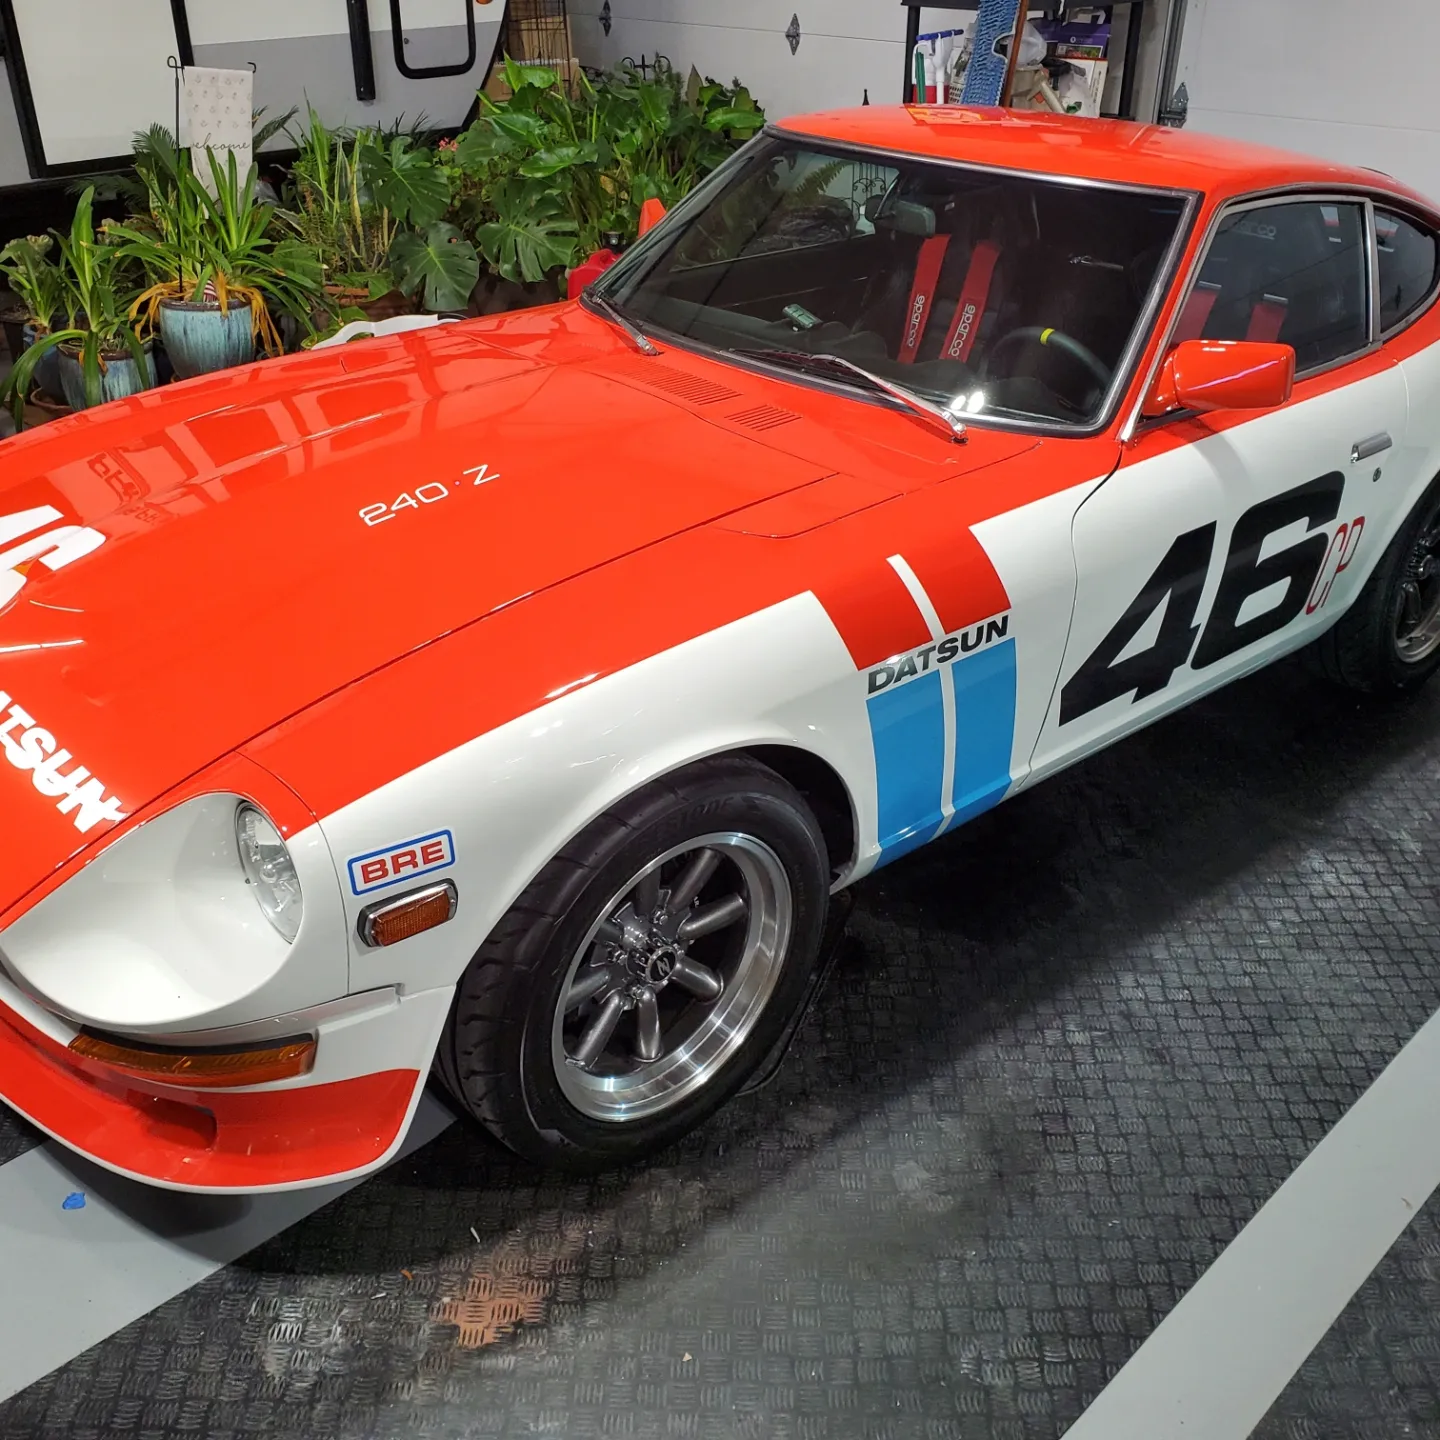
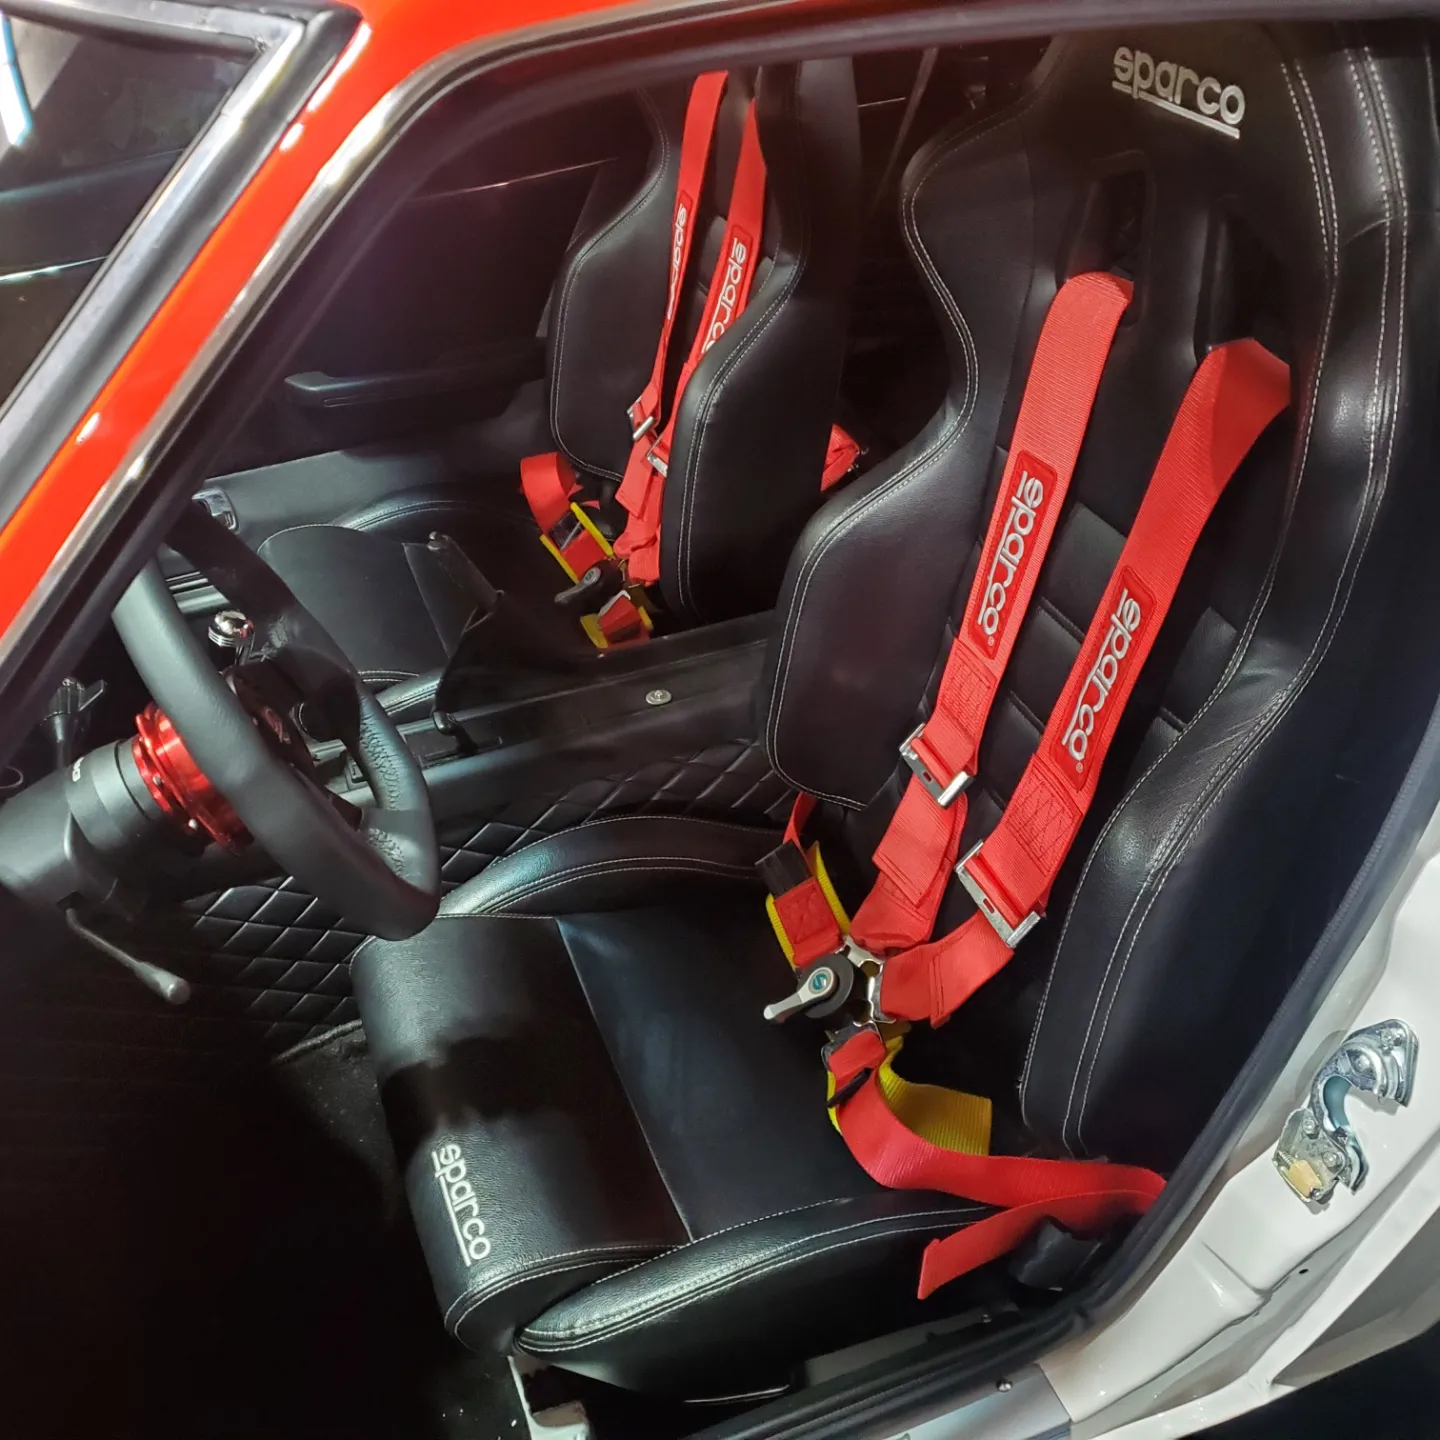
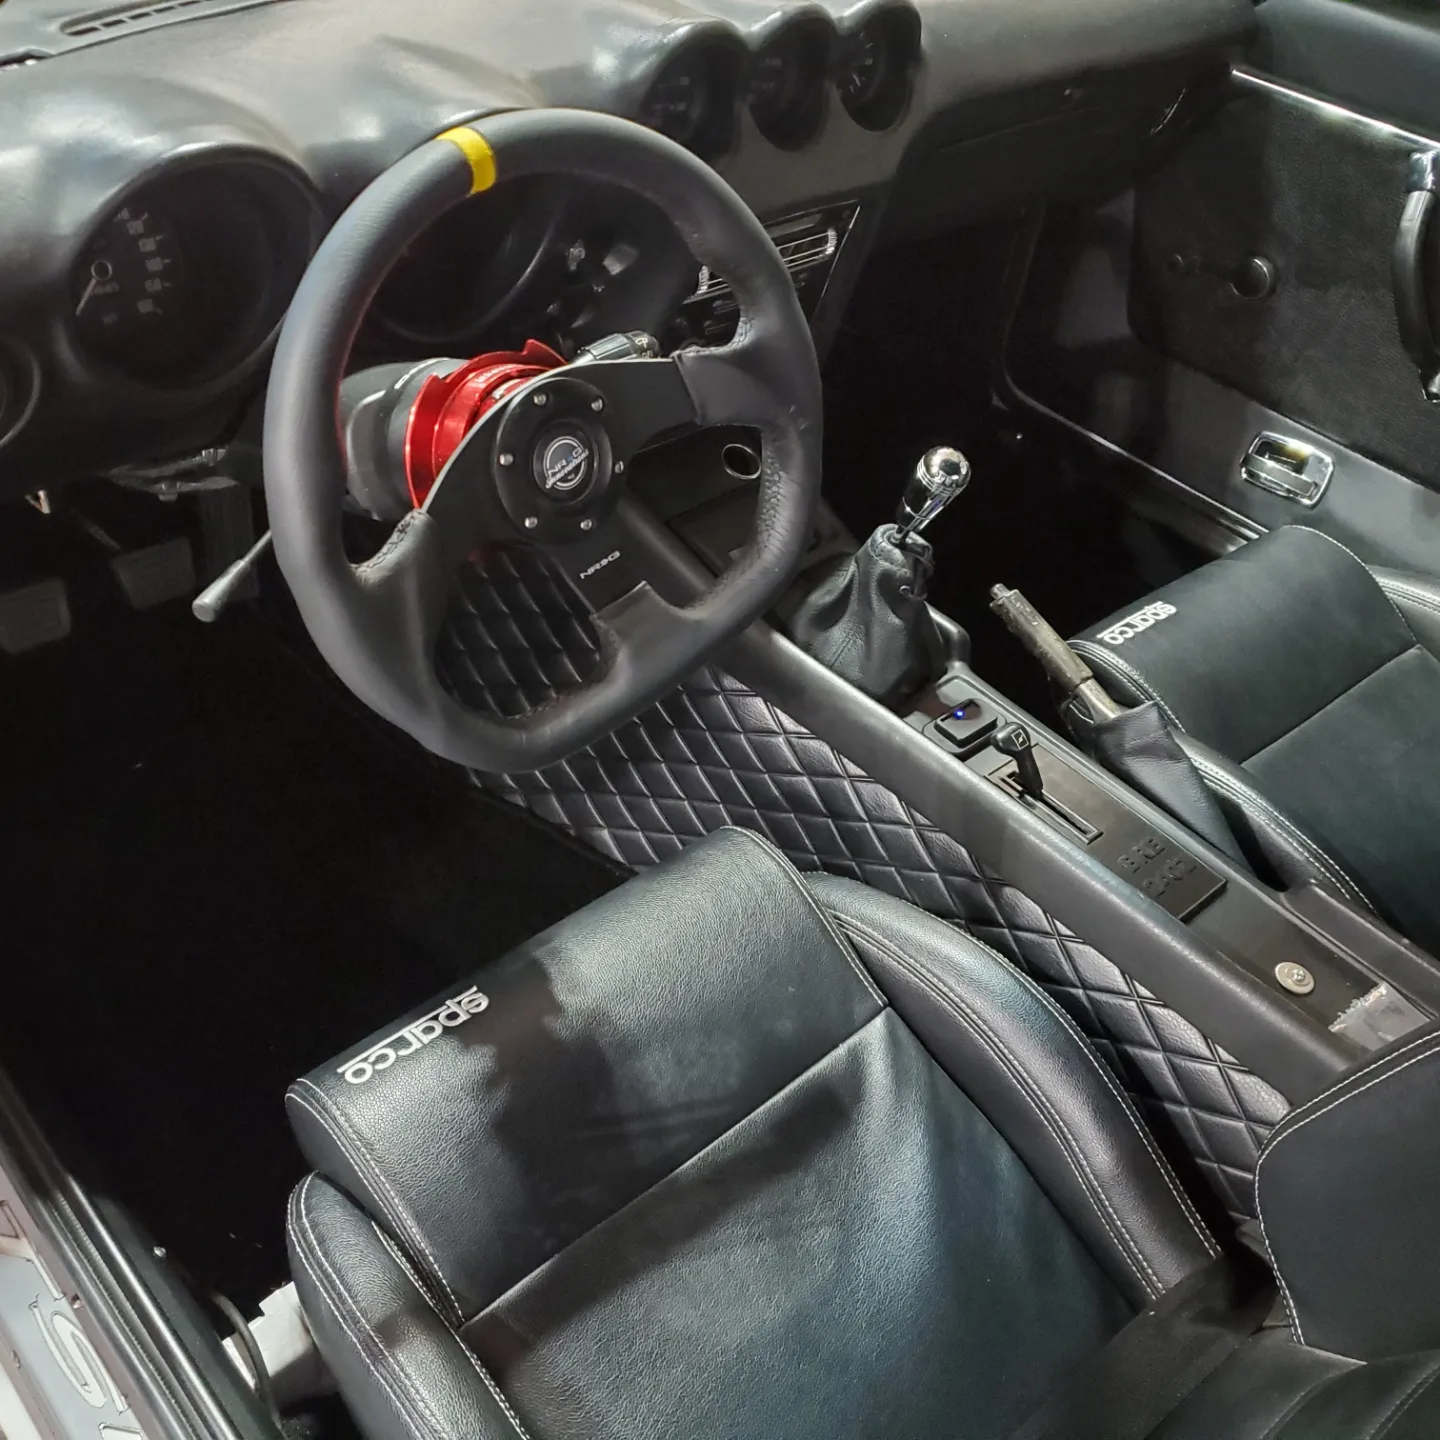
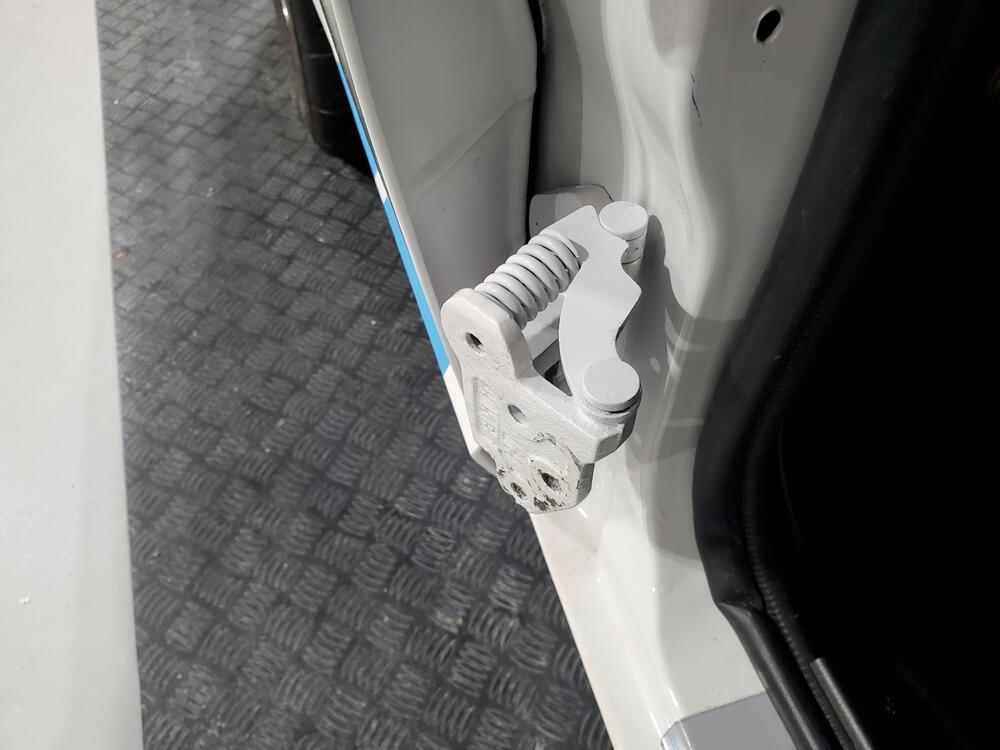
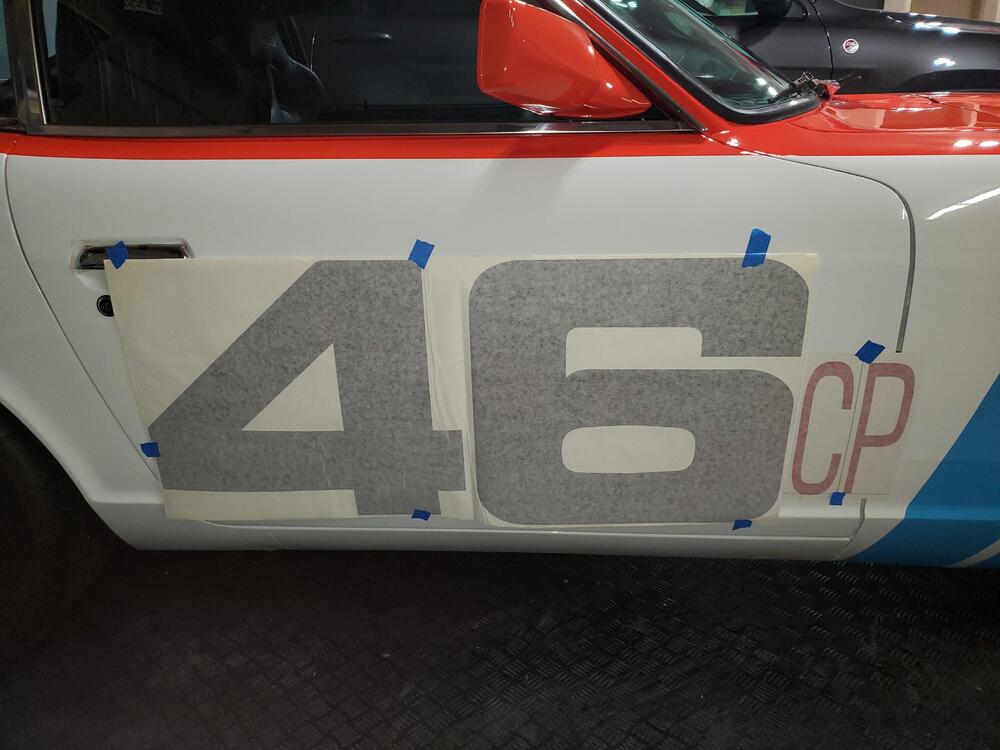
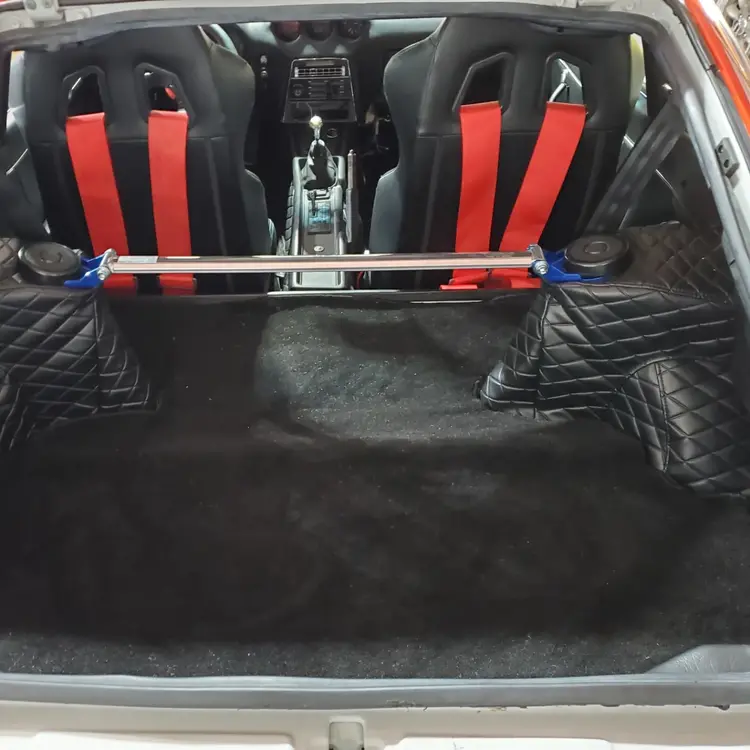
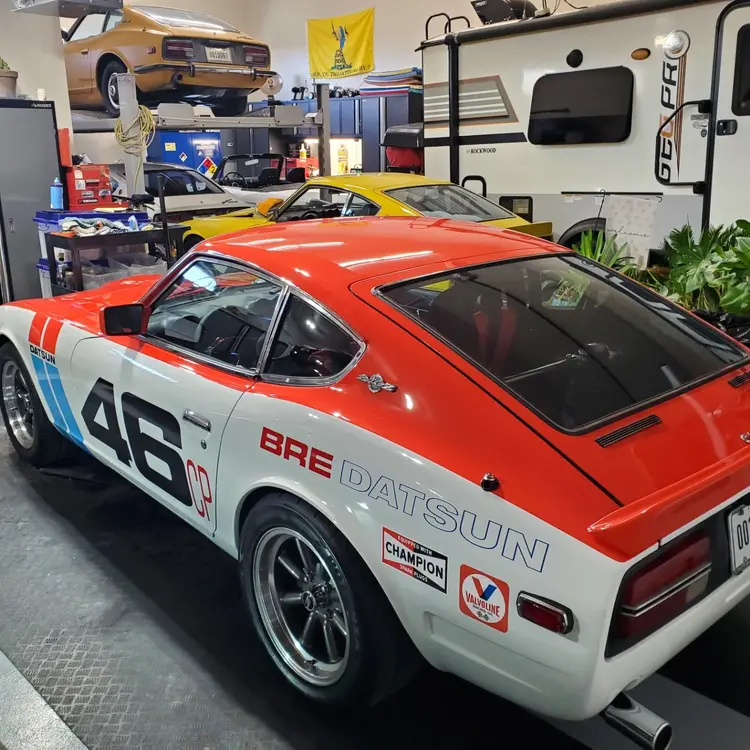
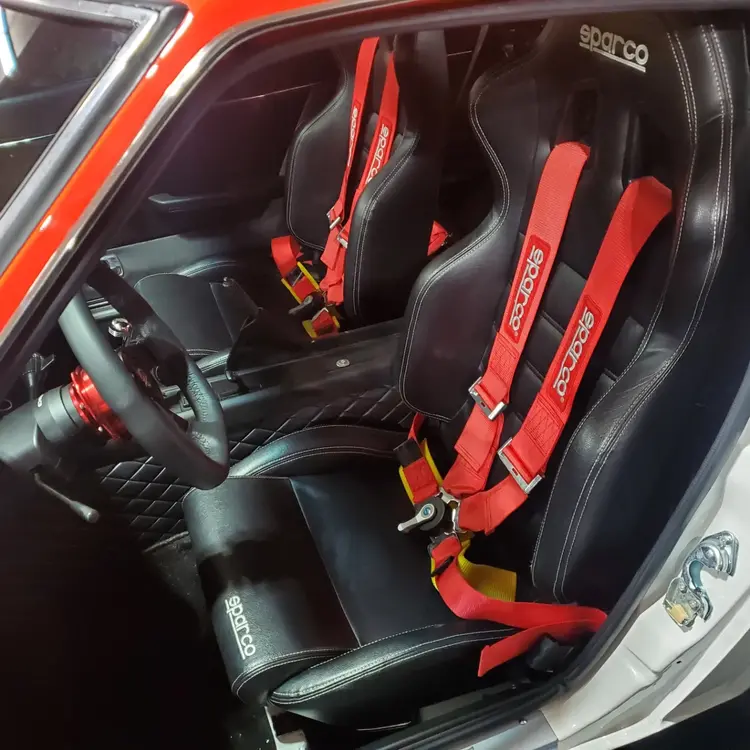
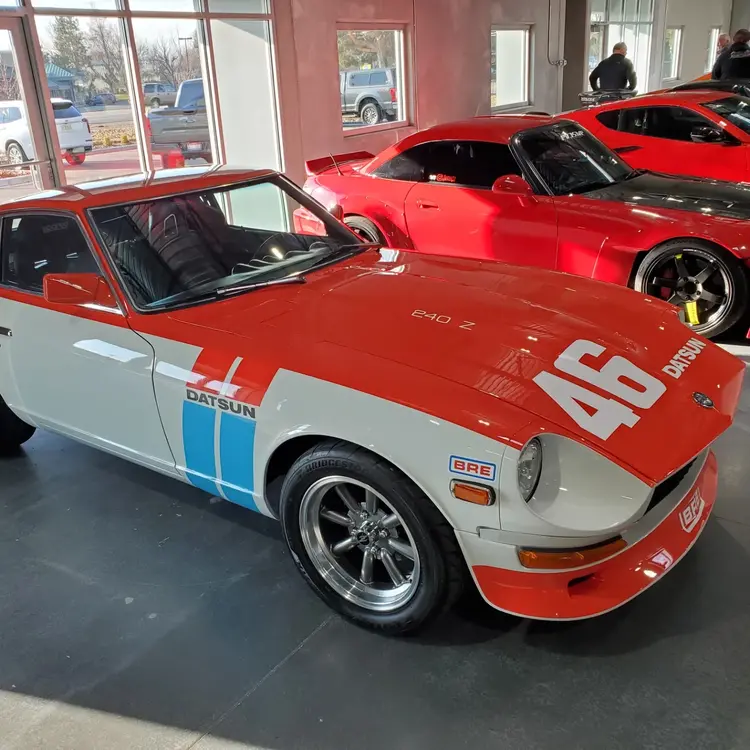
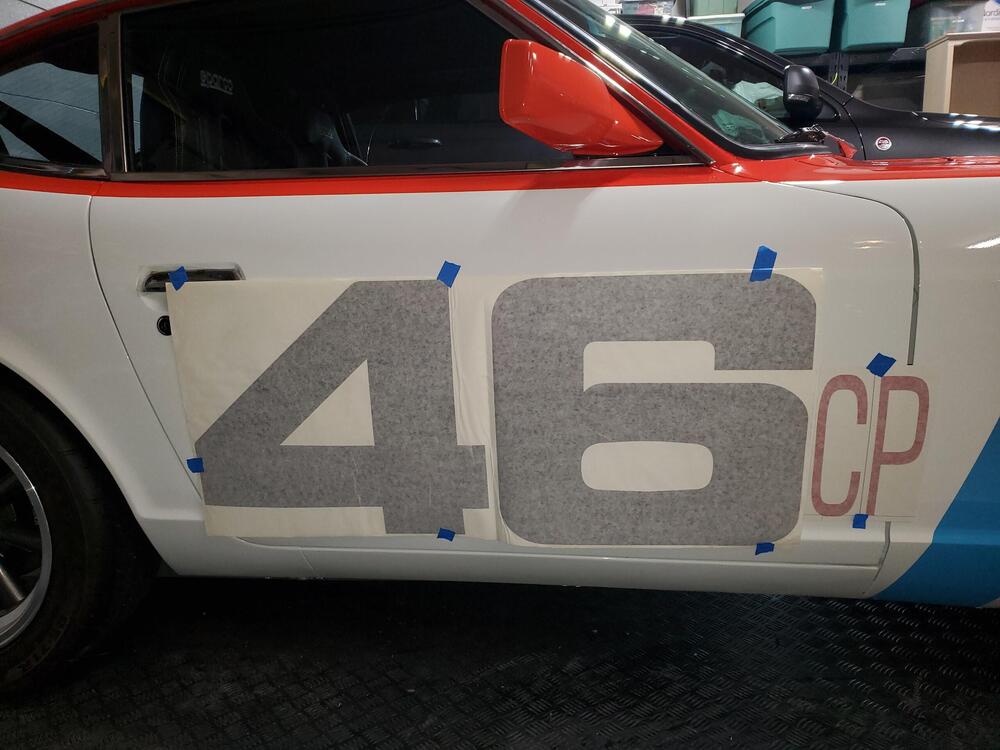
2 pointsI am getting close to the finish on this. One of the items I had to do was install the door hinge detent springs. Not sure why, but the hinges that were installed on the car did not have springs and detents once I received the car. So, I removed the springs and detent from a later model car (different pin size) and drilled out the early model hinge to accomodate the larger pins. Also painted parts white to match car color. The only way to install the assembly was to remove the door as the the spring and detent assembly can most easily be installed when the hinge is in the closed position. Door was removed very carefully with the help of my wife and bucket appropriatley sized for the door to rest on. I installed the spring and detent on the bench after I drilled the holes for the larger pin. Once the hinges were complete I re-assembled everything and re-aligned the doors. Once the car was color sanded and polished, I started applying the decals. The larger ones were attached using a light soapy spray on the car before aligning and squeegying (learned this from youtube videos). The smaller ones are easy enough to do without the spray. location of the decals was done mostly by eyeballing on line pictures of the original car. The number on the right front of the hood was the most difficult to install due to the curvature of the hood. The rest were pretty straight forward. The BRE on the fuel door worked out better than expected. We did run into one issue as BRE accidently sent us the numbers for the 510 race car and not the 240Z. The 510 numbers are about 20% larger than the 240Z numbers and obviously were oversized (see pics). I contacted BRE and was advised to "cut the numbers with scissors" to make them fit. Not the best customer service (my wife was a little more opinionated about their response so I will leave that out). Anyway, I had the owner contact BRE to work out the numbers issue, and the correct ones were sent a week later. I am very happy with how everything turned out. My first time installing vinyl decals. I took the car to a local car show just to show it off. Needless to say, the car went over very well with the spectators. Boise likes flashy race cars....not so much original stock cars. I installed two sets of seat belts. Racing Sparco belts that can be unclipped, and an aftermarket roller tensioned belt system that is a bit closer to stock. The heater works great which is a good sign as it is part of the VintageAir system. I still need to charge the AC system and also get the front end aligned. I will use outside services for those. All the electrical is in good shape. The car has a number of aftermarket electrical items including the Headlight relay upgrade, parking light upgrade, and front blinker/running light upgrade. All fairly easy to install, 2 independently fused for their respective relays. The only item that took a little work was the front blinker/running light upgrade. The housing of the running lights need to be electrically 'floating' and not grounded to the car body. To make the housings electrically floating, I just oversized the holes in the running light housing so the 2 attach screws did not contact the body and ground it to the fender. I will continue to finish up some of the little details here. Pics are below.


 2 points
 -
I've never seen this type of bolt-on floor rail before. In terms of its contribution to structural reinforcement, the word 'optimistic' comes to mind!2 points
-
Looks like I have got a real project on my hands! I will take a look.1 point
-
Ion addition to the above, your DS rocker appears to be rotted through at the front (pic4) - which means the various inner sections are likely in need of repair/sectioning. If you haven't already, look at Dave 71/240Z thread for clear pic of what the repair work will look like1 point
-
1 pointThe 240z setup is really nice but i have a bug about keeping original stock stuff. If I get rid of them i know i wont be able to sleep.1 point
-
Added the center 1x4 run & started figuring out the upper 2' corrugation overlap & flashing at the siding. Overlap roofing will have butyl seal, and foam seal at the flashing. Waiting for the short screws for the overlap risers Added a drip seal along the siding recess after this - since the flashing cannot fit behind the siding, I need to figure out an alternative sealing method for that. Secured the two outer panels temporarily to check alignment & fit1 point
-
1 pointRegarding the Google Chrome browser, I use a Mac and seldom use Chrome. So for grins, I opened Chrome, logged into this site, opened a reply window, and started typing every word incorrectly. Every incorrectly spelled word was underlined in red. So, maybe it is a Windows update issue as mentioned earlier. As a further check, I contacted my son who is a computer engineer in Google's Los Angeles office and attached a link to this message thread. His response is below. BTW, Merry Christmas to all! "Hard to say for sure but if I had to hazard a guess: either the Windows update screwed things up or they unchecked the Chrome "check spelling" option (it's kinda easy to toggle by accident if you right click on a text box)."1 point
-
😆 Yeah, I know what you mean, my work looks like a hack did it compared to this guy. That small blaster he is using inside the car I think is a dry ice blaster, there is no blast media build up when he's using it.1 point
-
I am very pleased that the video has been so well received here. He hasn't been known in the Z scene before and doesn't want people to know who he is. I'm therefore taking on a bit of the task of sharing his videos everywhere. I also have to say that all of his documentaries (and there are many more!) help the Z scene a lot. If you want to see more, as a Patreon you get to see a video of the work done every day. When you watch it like this, you can only marvel at how much work goes into the small details.1 point
-
1 point
-
1 pointI have the 240 two wire type on my '77 as well as the '72 240. I like the stainless look best, no faded black wipers on my cars.1 point