Leaderboard
-

CanTechZ
Free Member6Points1,311Posts -
inline6
 Subscriber
 5Points1,282Posts
 -
grannyknot
Free Member5Points5,158Posts -
.JPG.cfcada9cf1c1b502df3f5f2f2ca3ff36.JPG)
SteveJ
Free Member3Points9,646Posts


Popular Content
Showing content with the highest reputation on 12/17/2023 in Posts
-
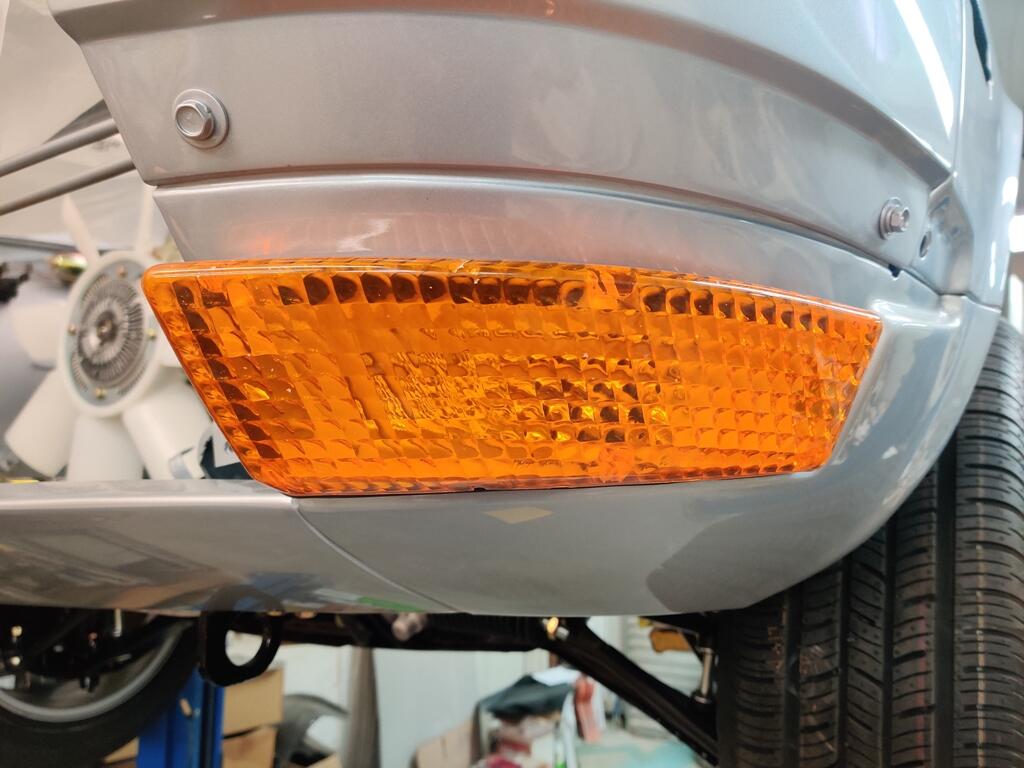
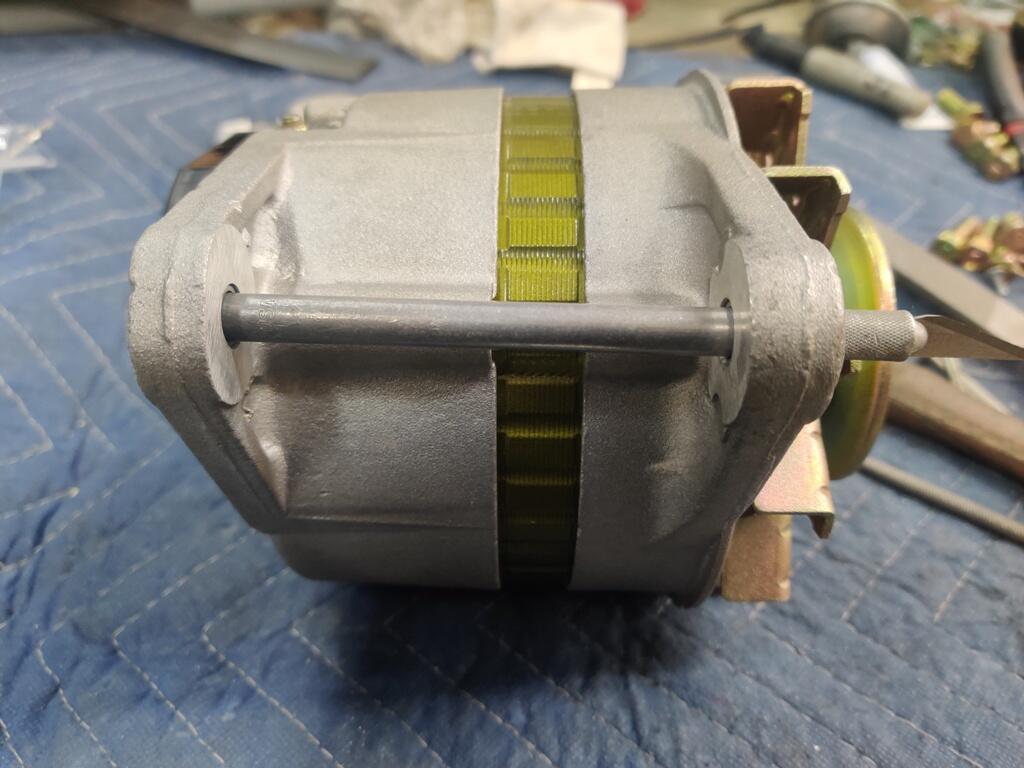
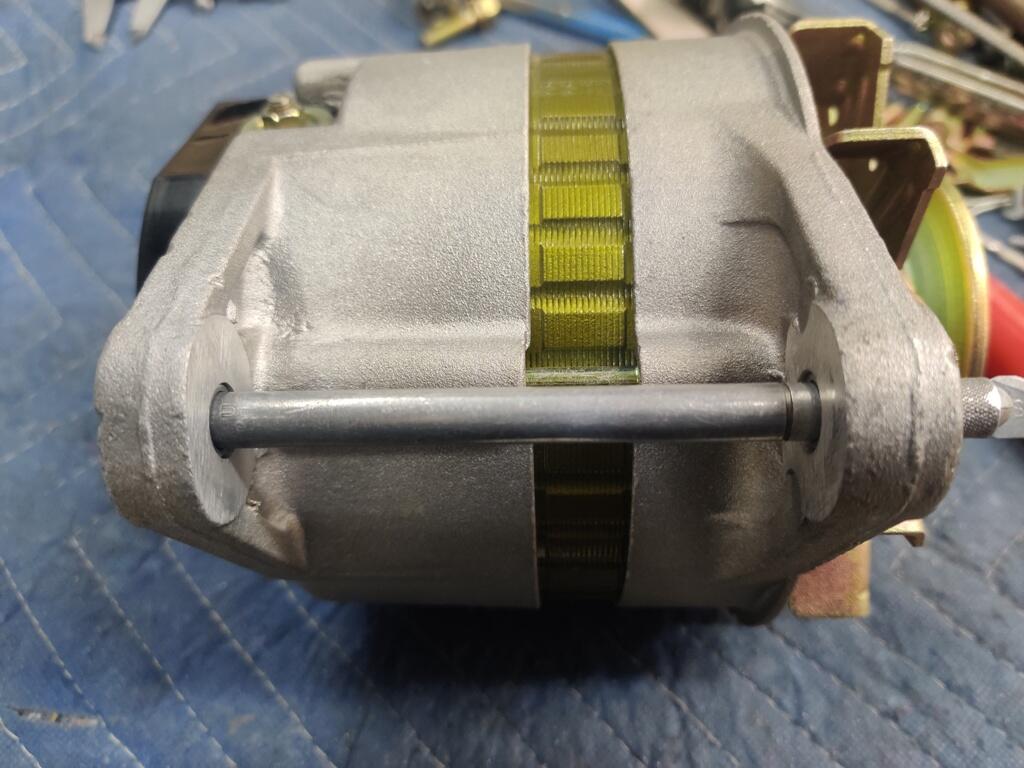
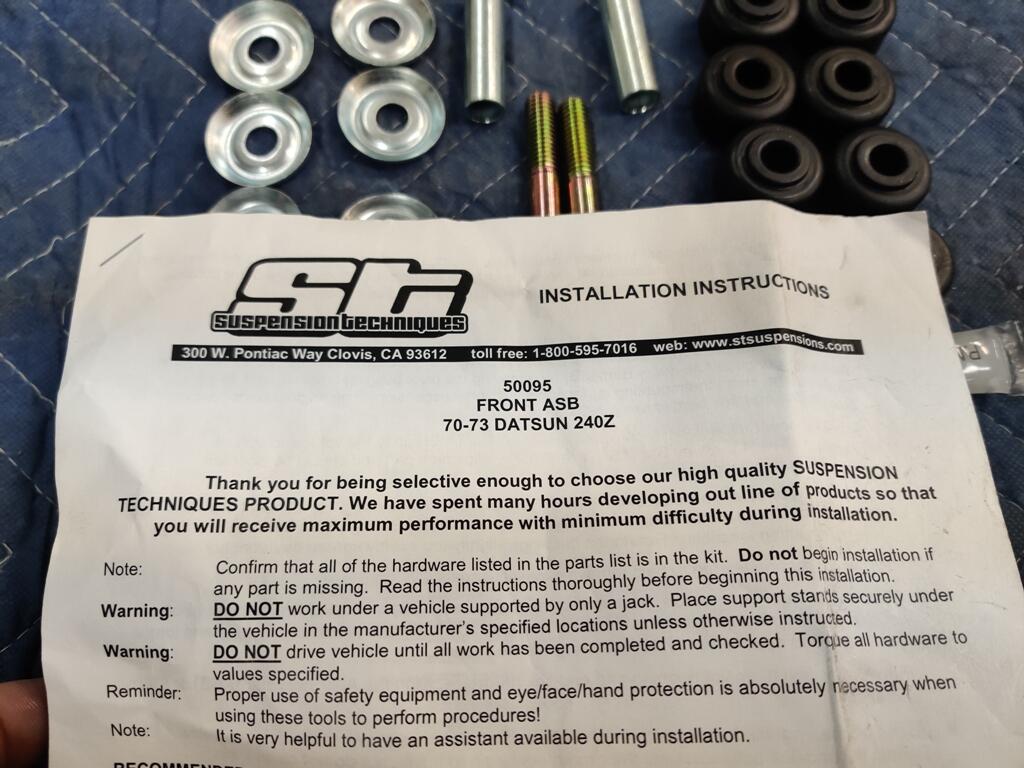
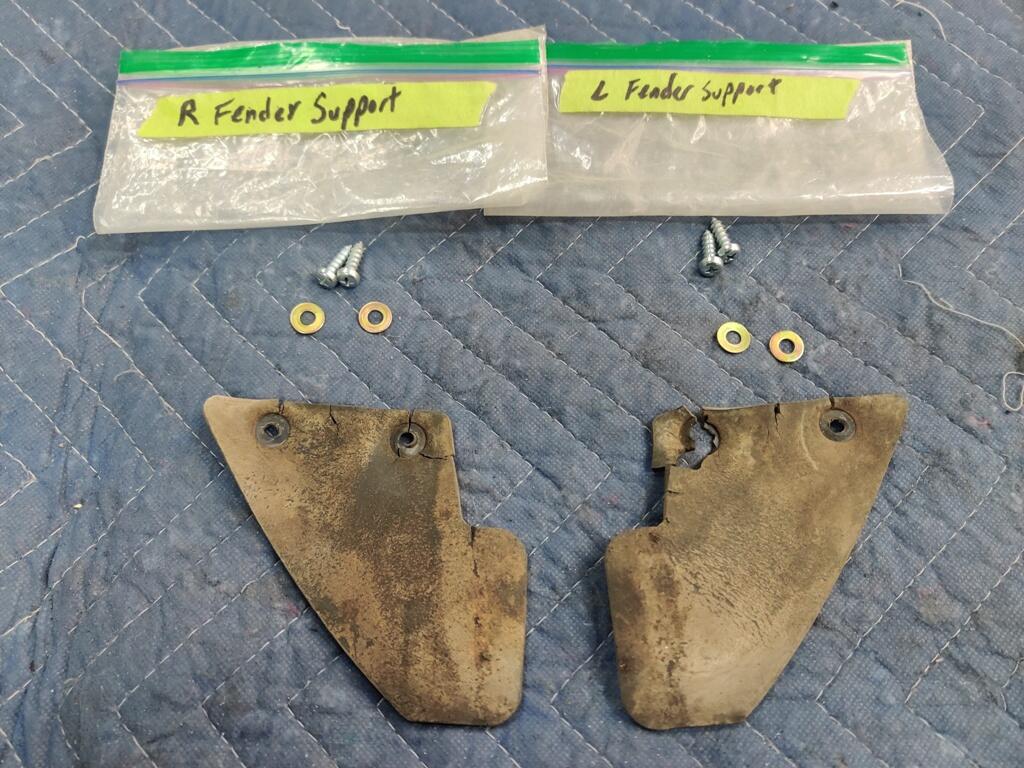
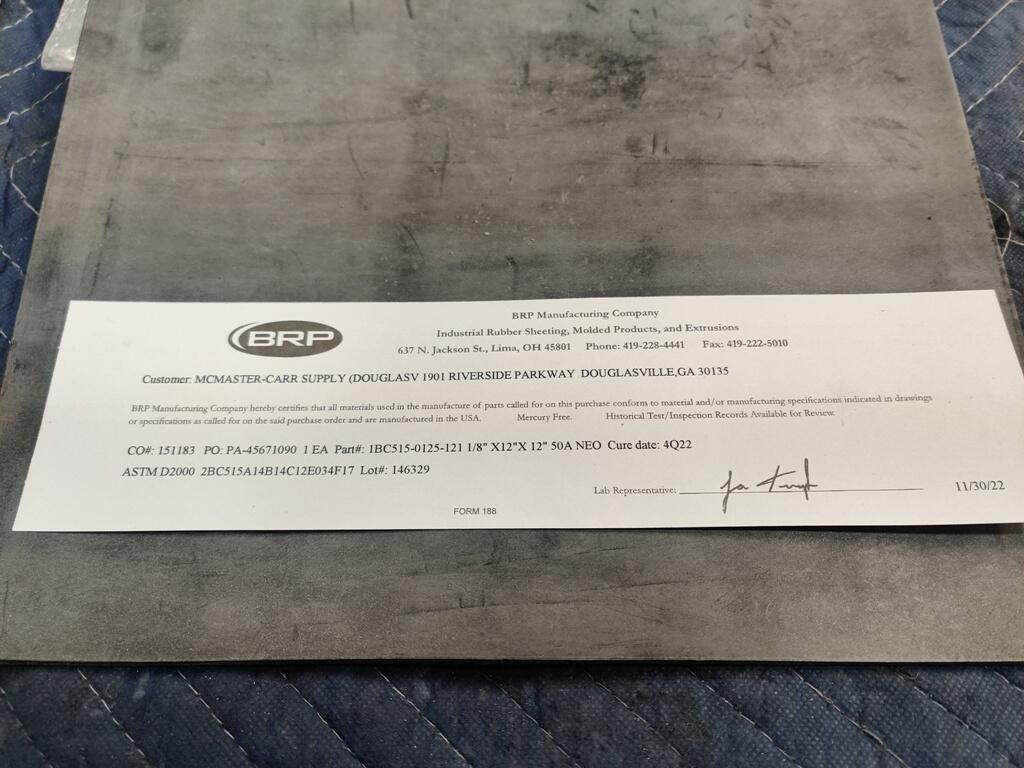
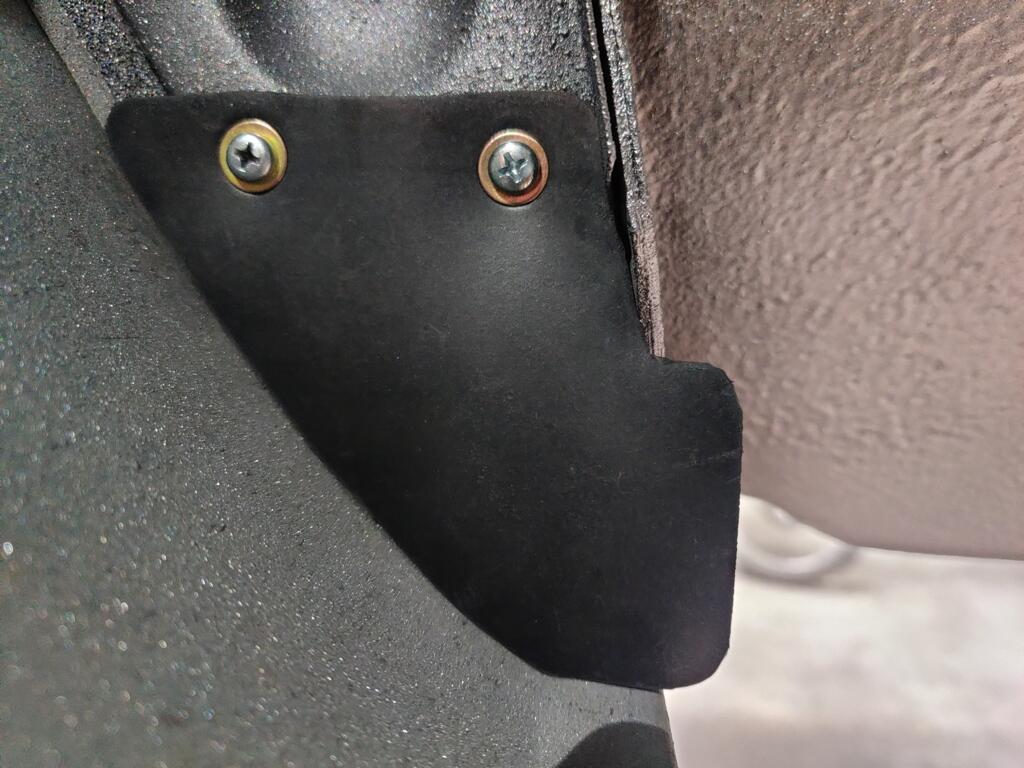
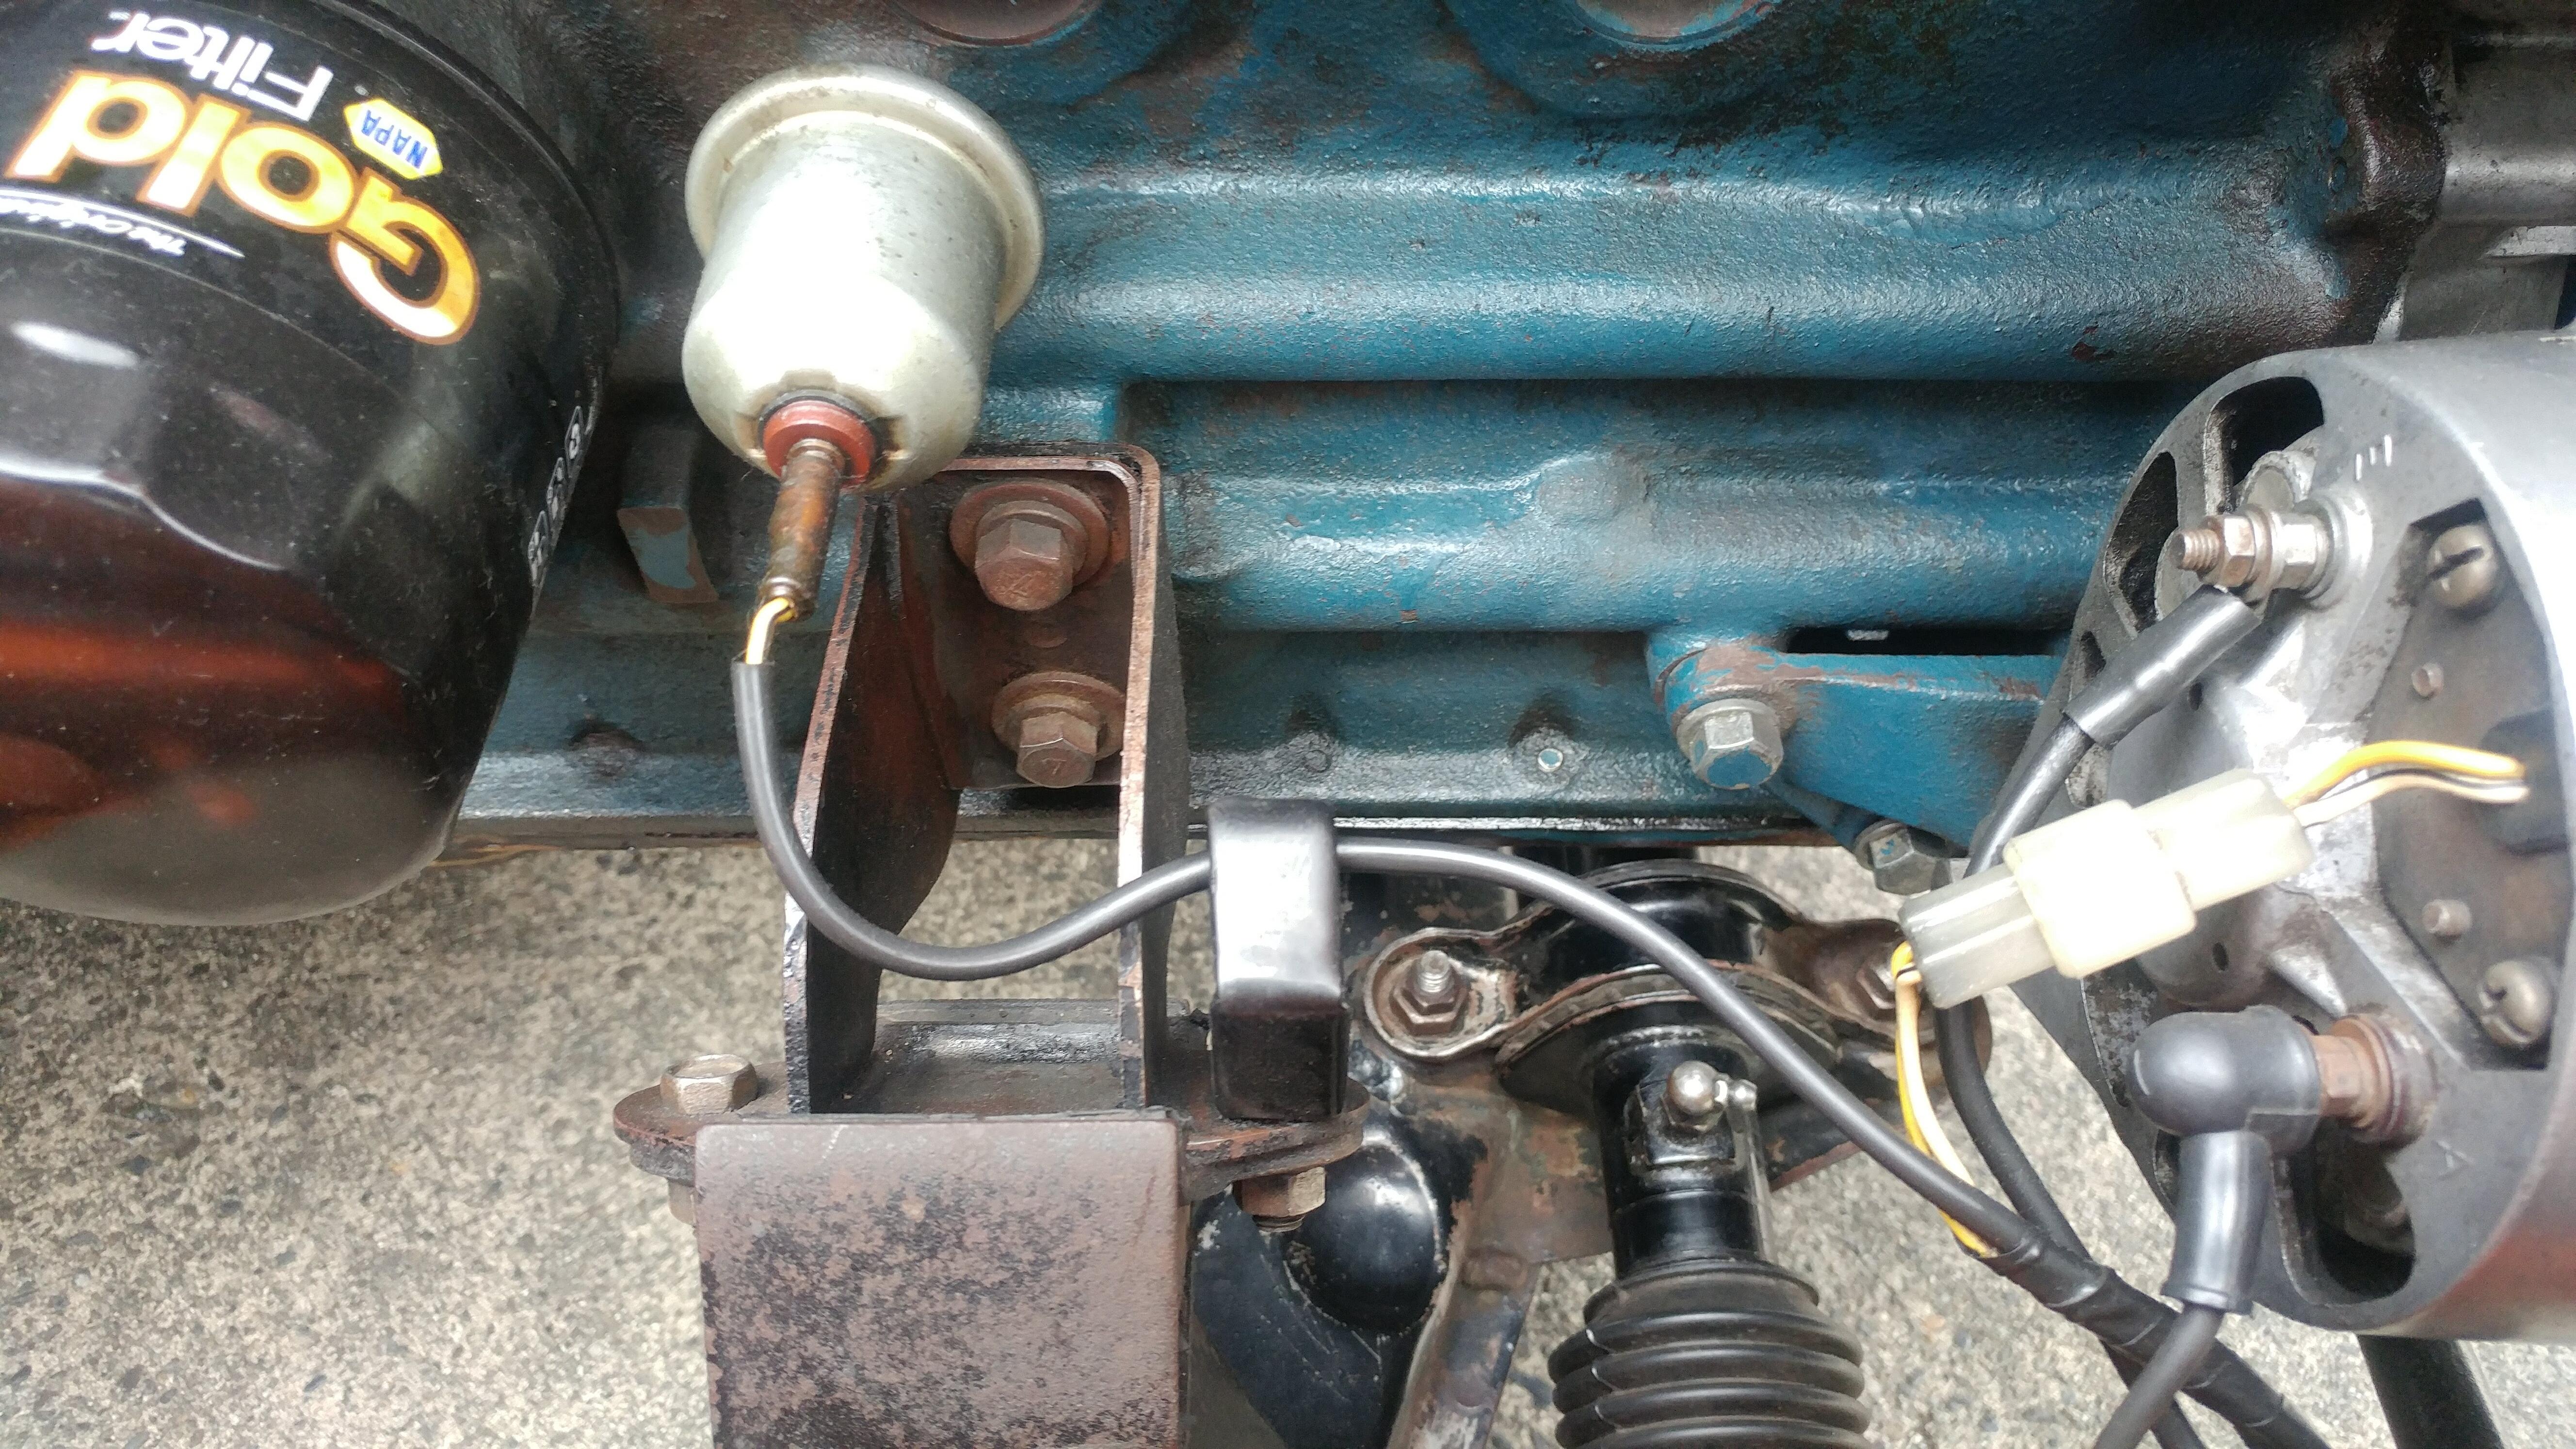
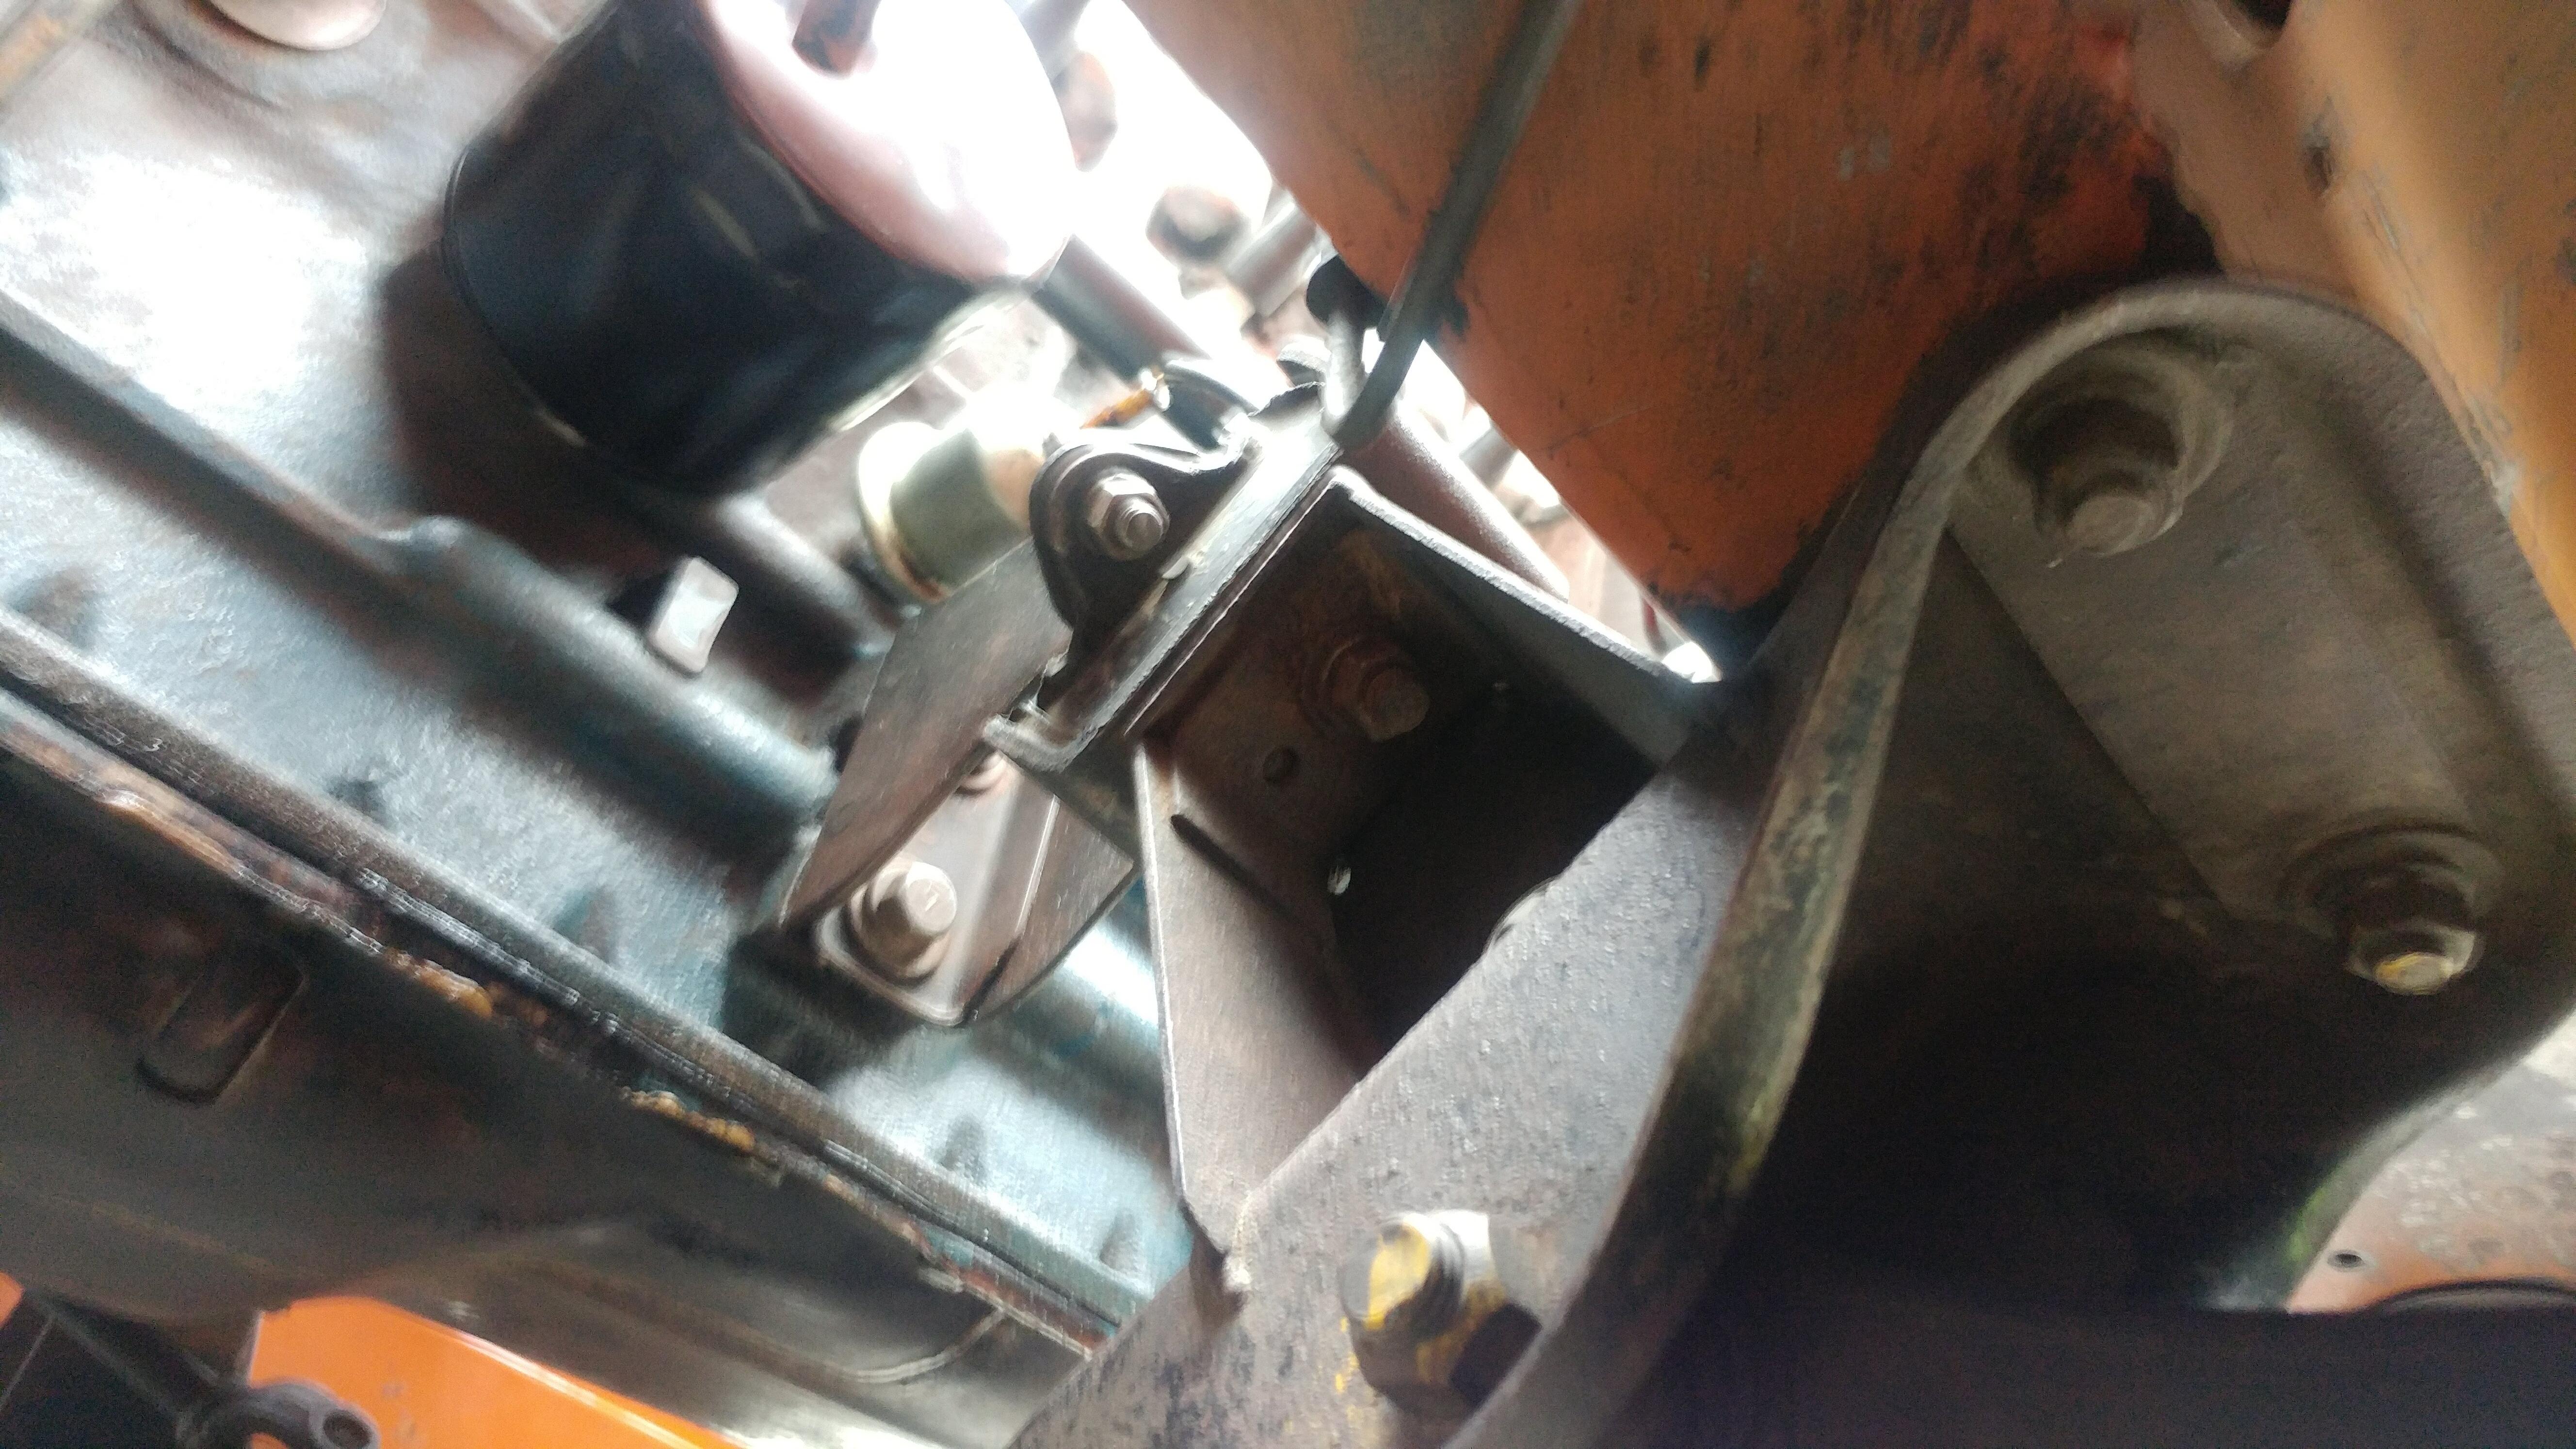
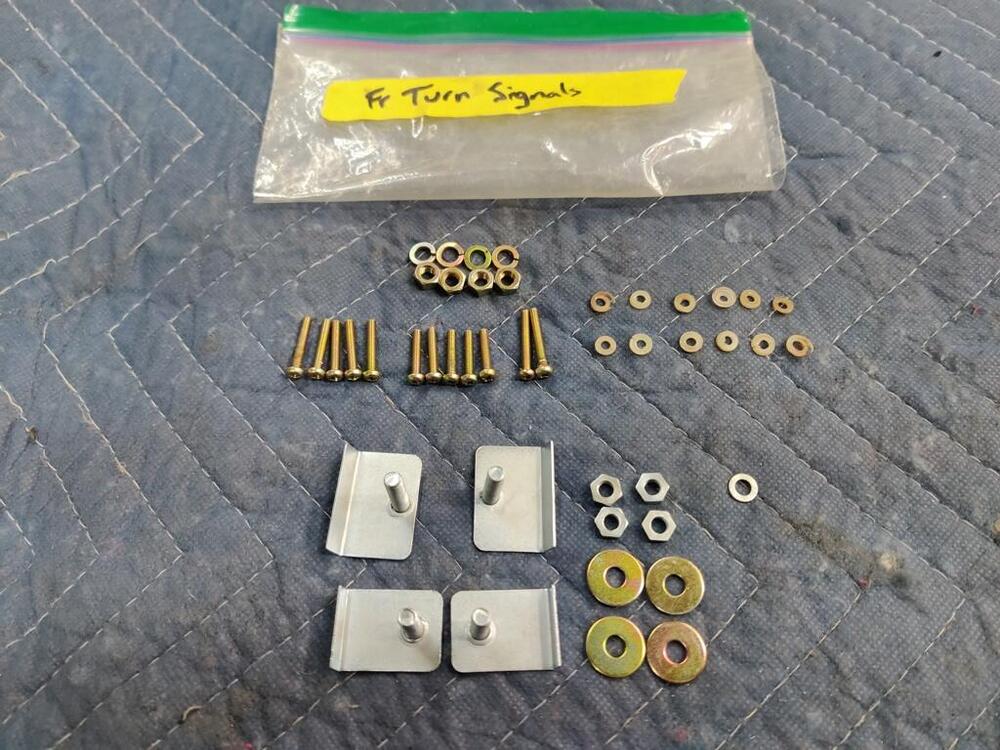
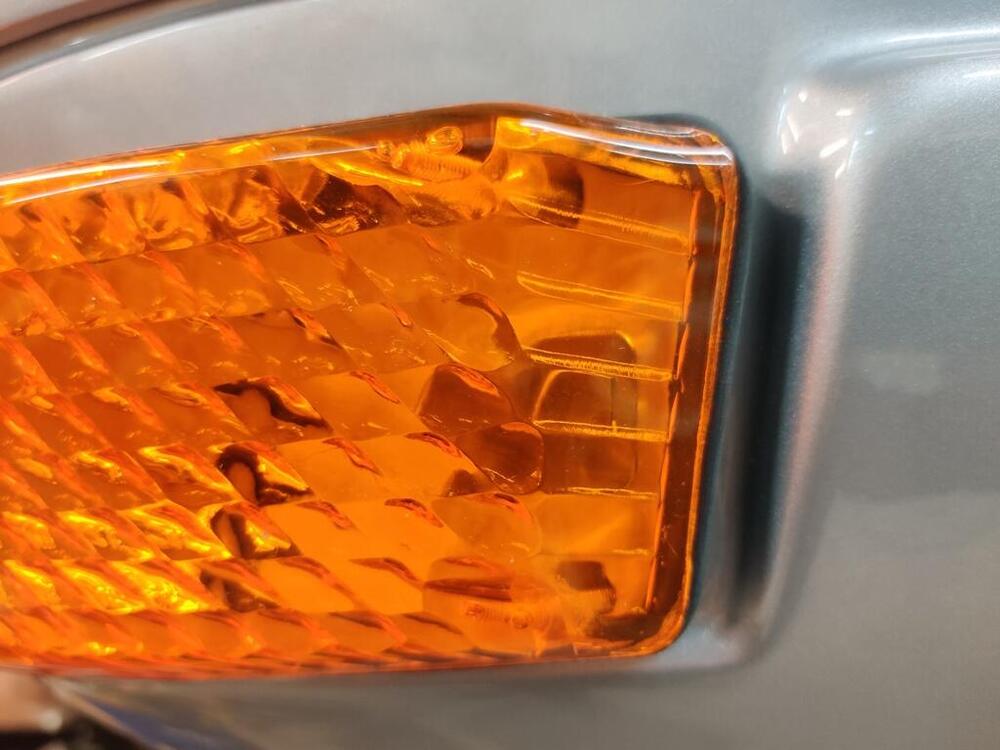
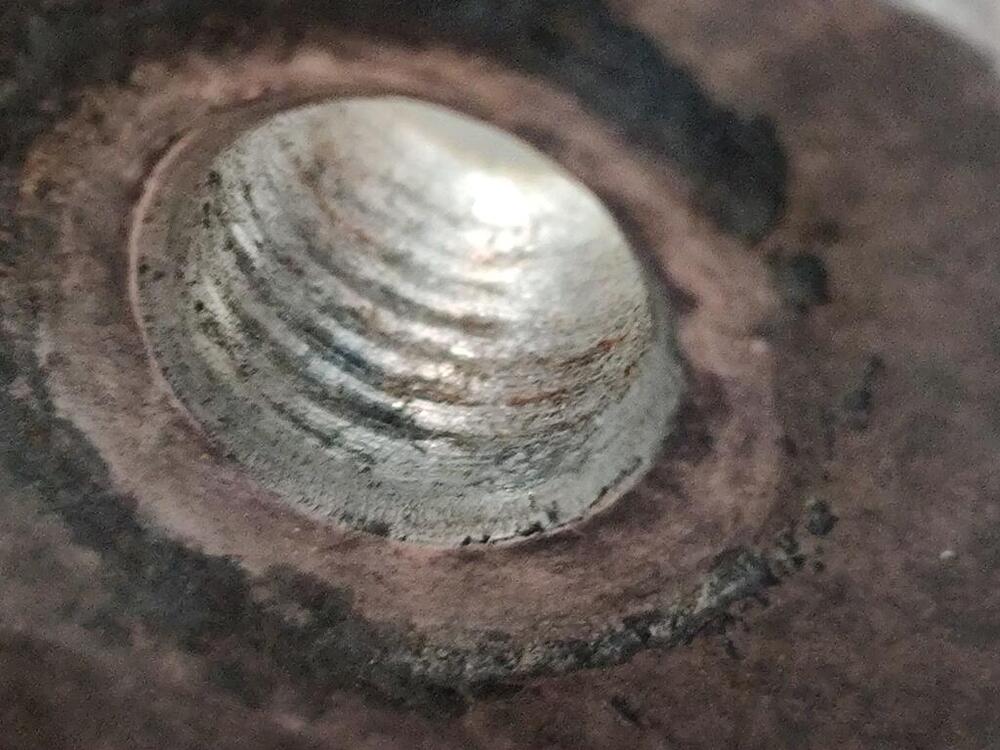
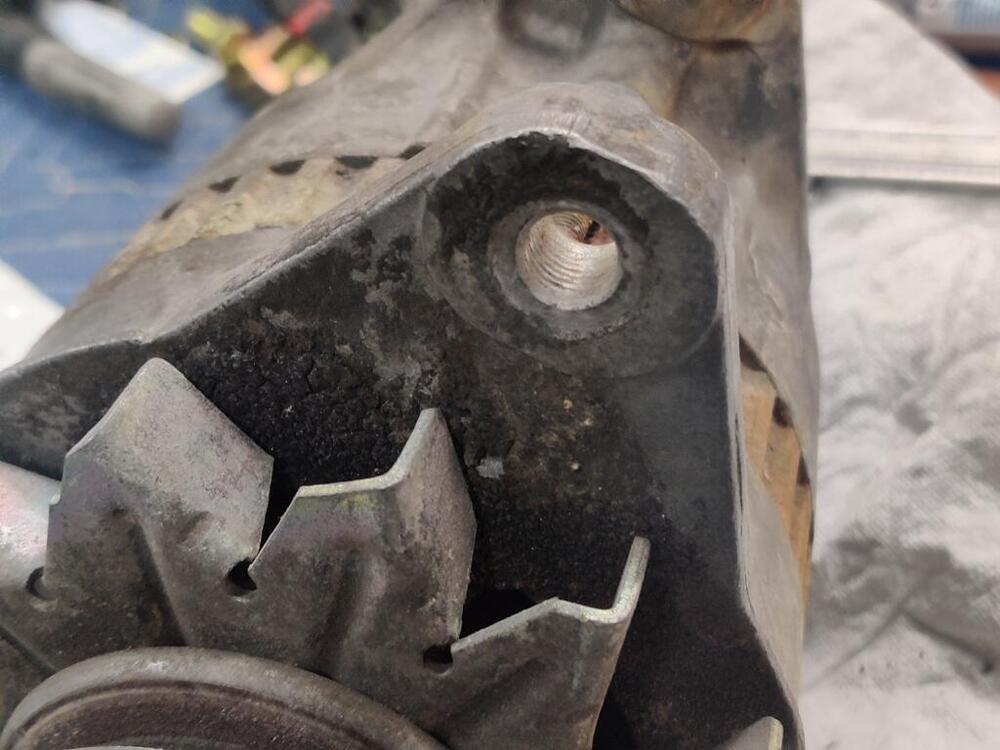
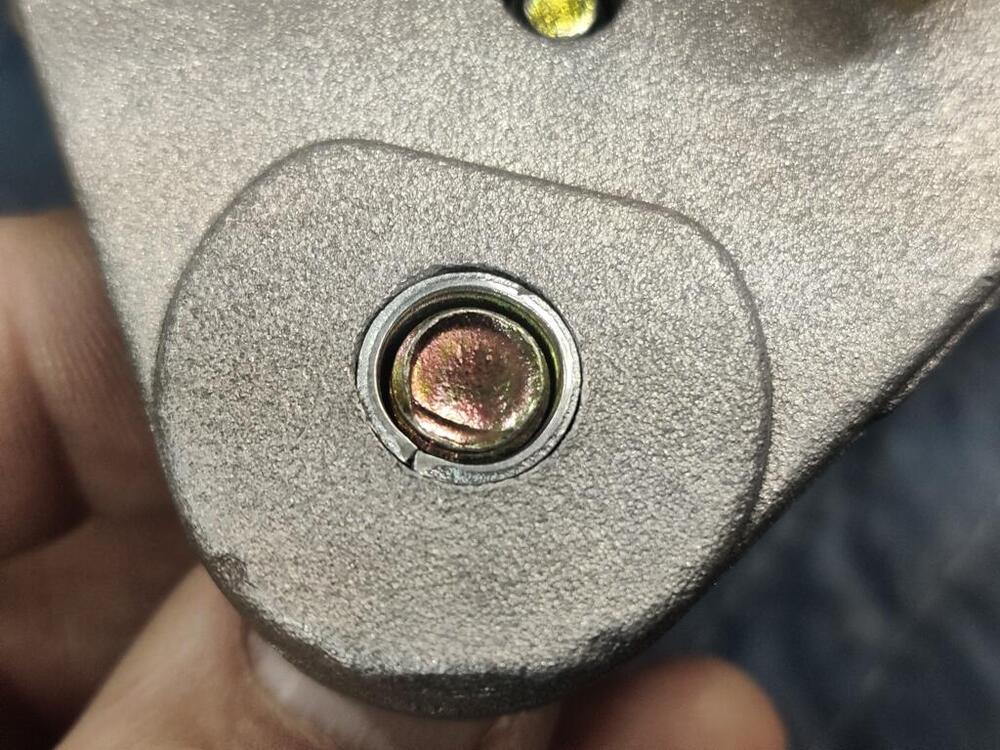
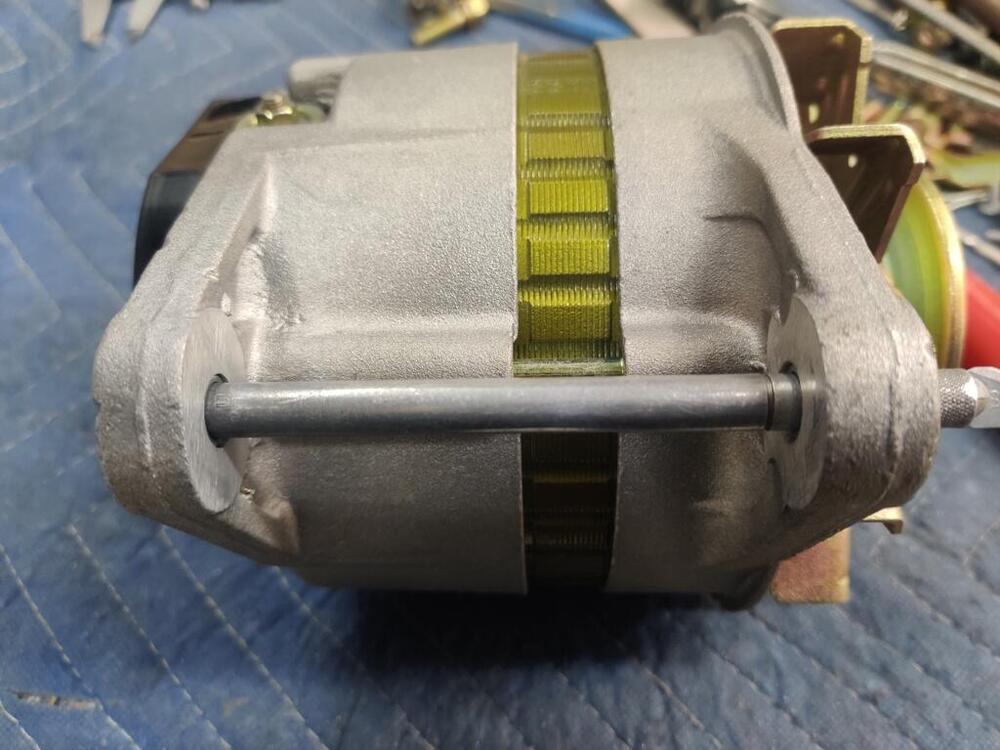
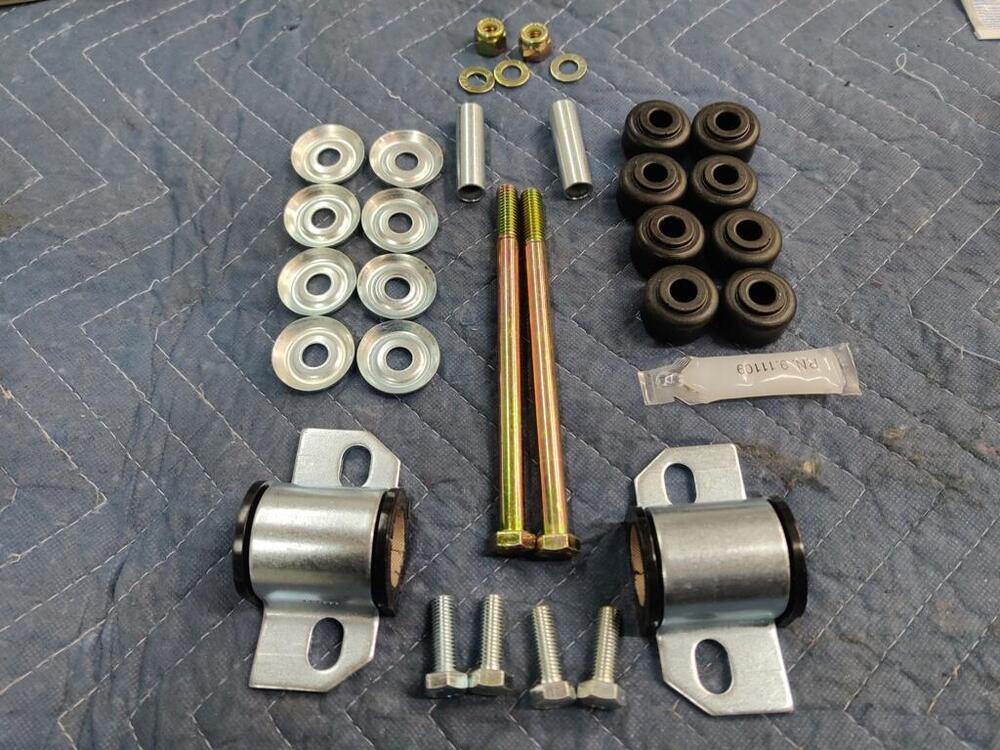
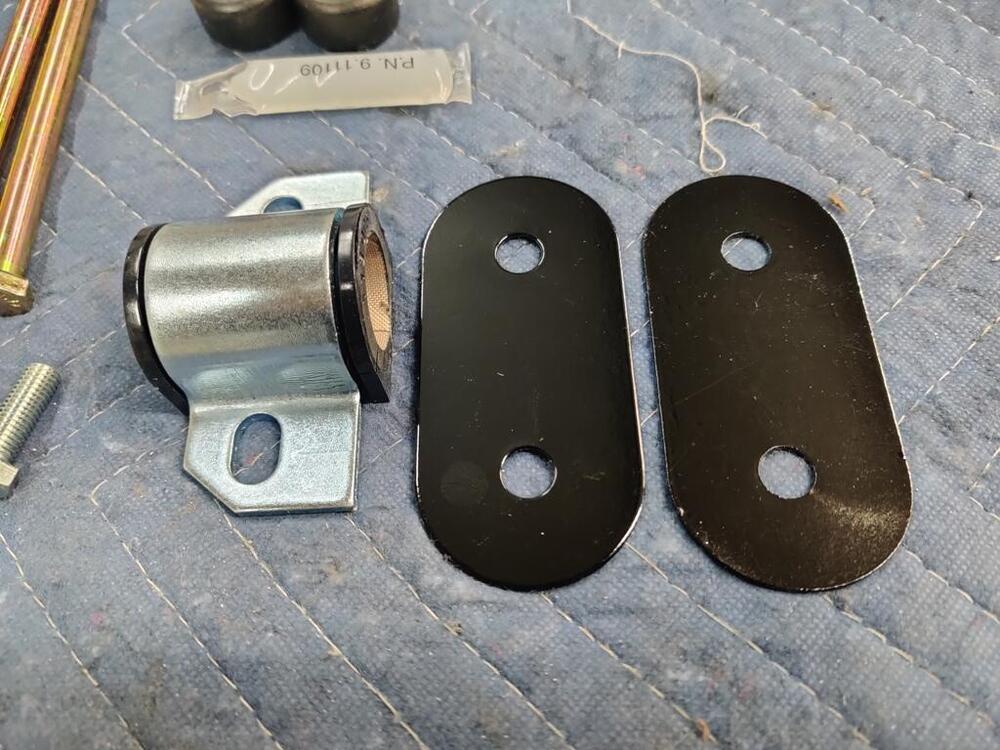
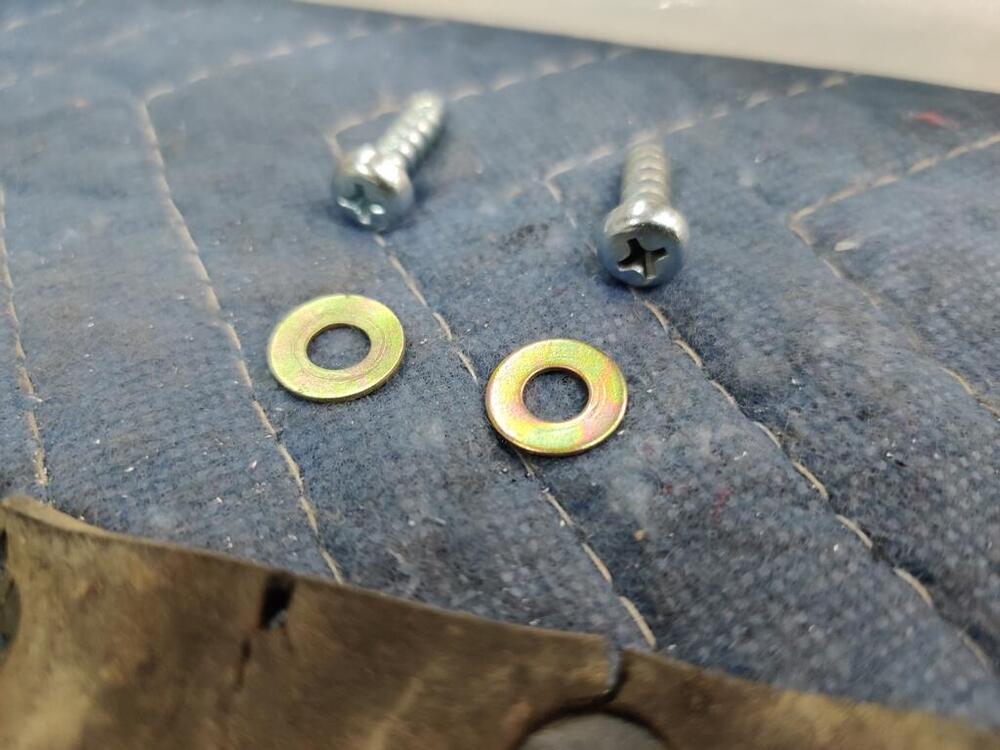
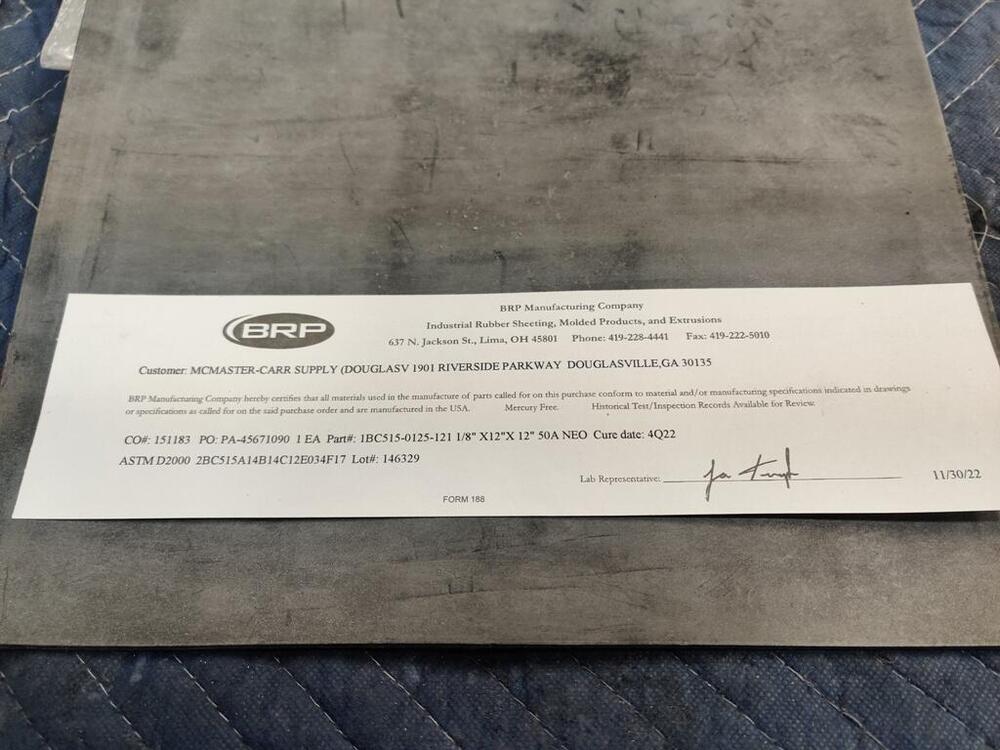
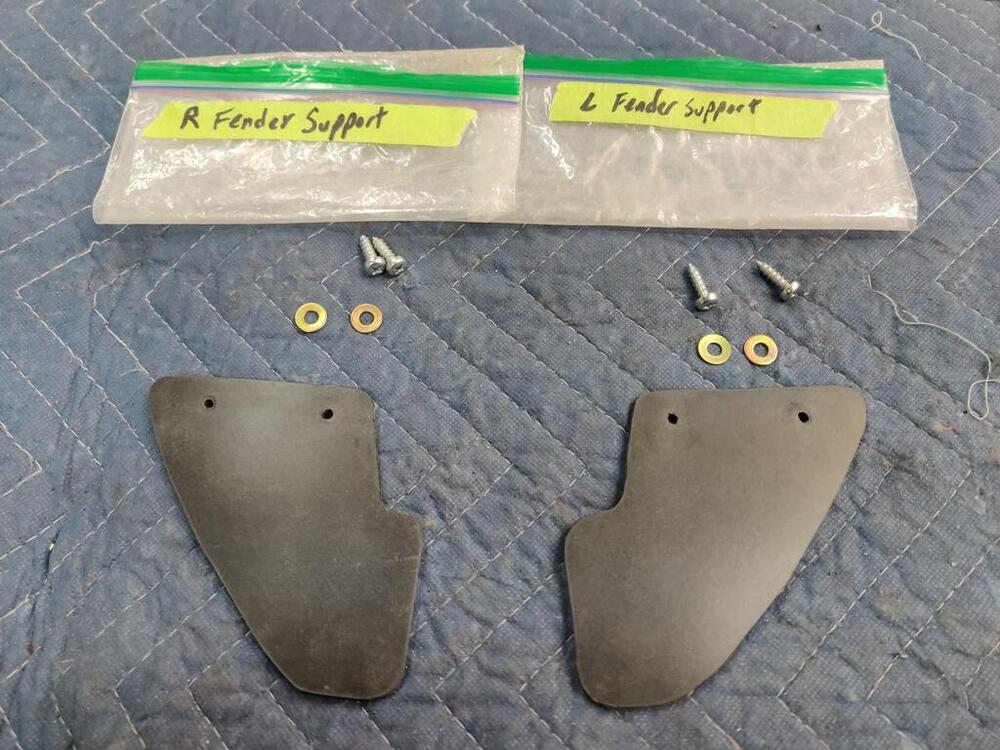
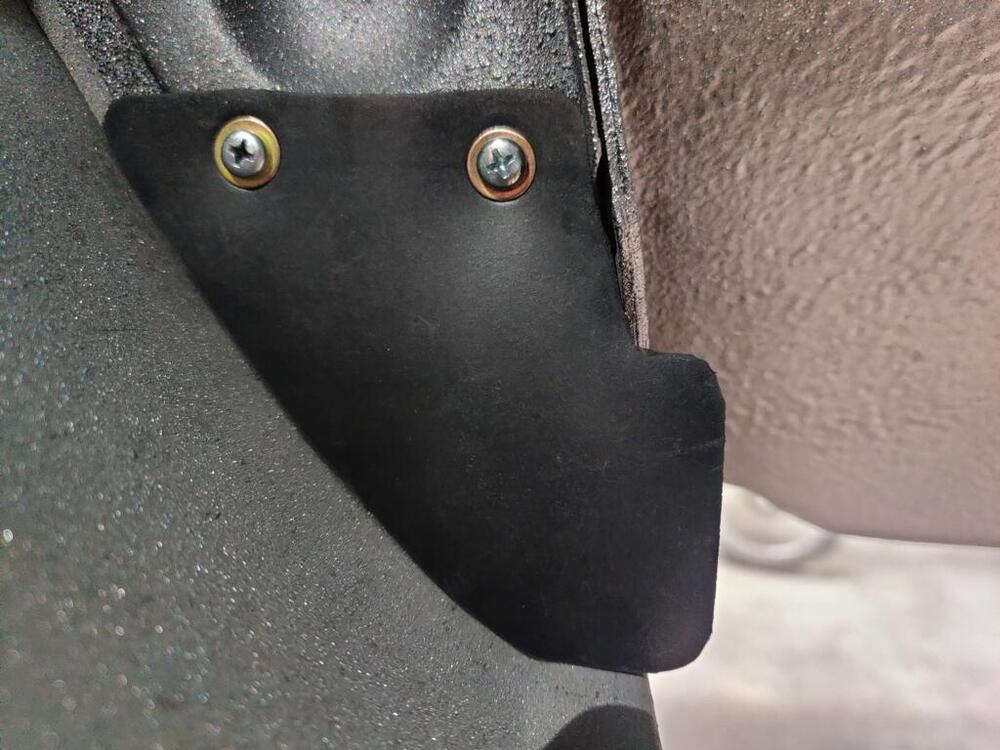
Upon closer examination of the both the alternator that came with the car, and the new replacement, I found the lower mounting holes to be more similar in ID than I thought. They measured out at about .400" ID for the old one and about .410" ID for the new (rebuilt one). I used a 27/64ths drill bit (.420") to enlarge the holes on the rebuilt alternator so I could install some split sleeves I bought from McMaster-Carr. I had to shorten the spacers a bit to fit the tabs on the alternator. Doing what I have done here with spacers is not actually necessary, but I am glad I went this route. You can see the impression of the threads in the old alternator bolt holes from the way it was installed before. With the sleeve, things were tightened up nicely. What I did not count on was that the distance between the alternator mounting tabs was about .015" narrower than the alternator bracket. How frustrating is that, when you go to bolt an alternator on one of these cars, and it isn't a "bolt on" part?! I very carefully hand filed the inside surfaces of the mounting ears of the alternator. Lots of measuring with calipers... with very careful filing. Even after the spacing was correct, and I could get the alternator to slide tightly onto the mounting bracket, the rear tab would not align so I could thread the bolt in. I thought for a moment that I must have filed the inner surfaces out of plane. But, then I slid my Exact-o knife (aluminum bar in the pic) through both mounting ear holes and saw the issue (middle pic below). You can see that it is at an angle. When rebuilt, the front and rear case halves were assembled "cocked". I loosened the three bolts that held the front and back together, aligned the holes in the mounting ears and retightened the the bolts. In the third picture here, you can see how the Exact-o knife (bar) is square after re-alignment. Installation went perfectly after that. Next, I cut replacement rubber shields for the inner fender supports. I sourced this rubber sheet from McMaster-Carr as well. After that, I unpacked the Suspension Techniques front anti-roll bar and hardware. Installation went very smoothly. While part of me wants to have the car look 100% stock, I really don't want to drive a 100% stock 240z. The four speed, the 4.5" wide wheels, and the stock suspension are... not great. I have never run this combination of suspension parts: (ST springs and front and rear bars, with "the new" yellow Koni shocks). It will be interesting to see how this car drives when it is fully assembled. Next, I pulled the restored front turn signal assemblies out of storage and grabbed the re-plated hardware for them. It is very satisfying to assemble and install parts like this which need little or no additional work.


 5 points
 -
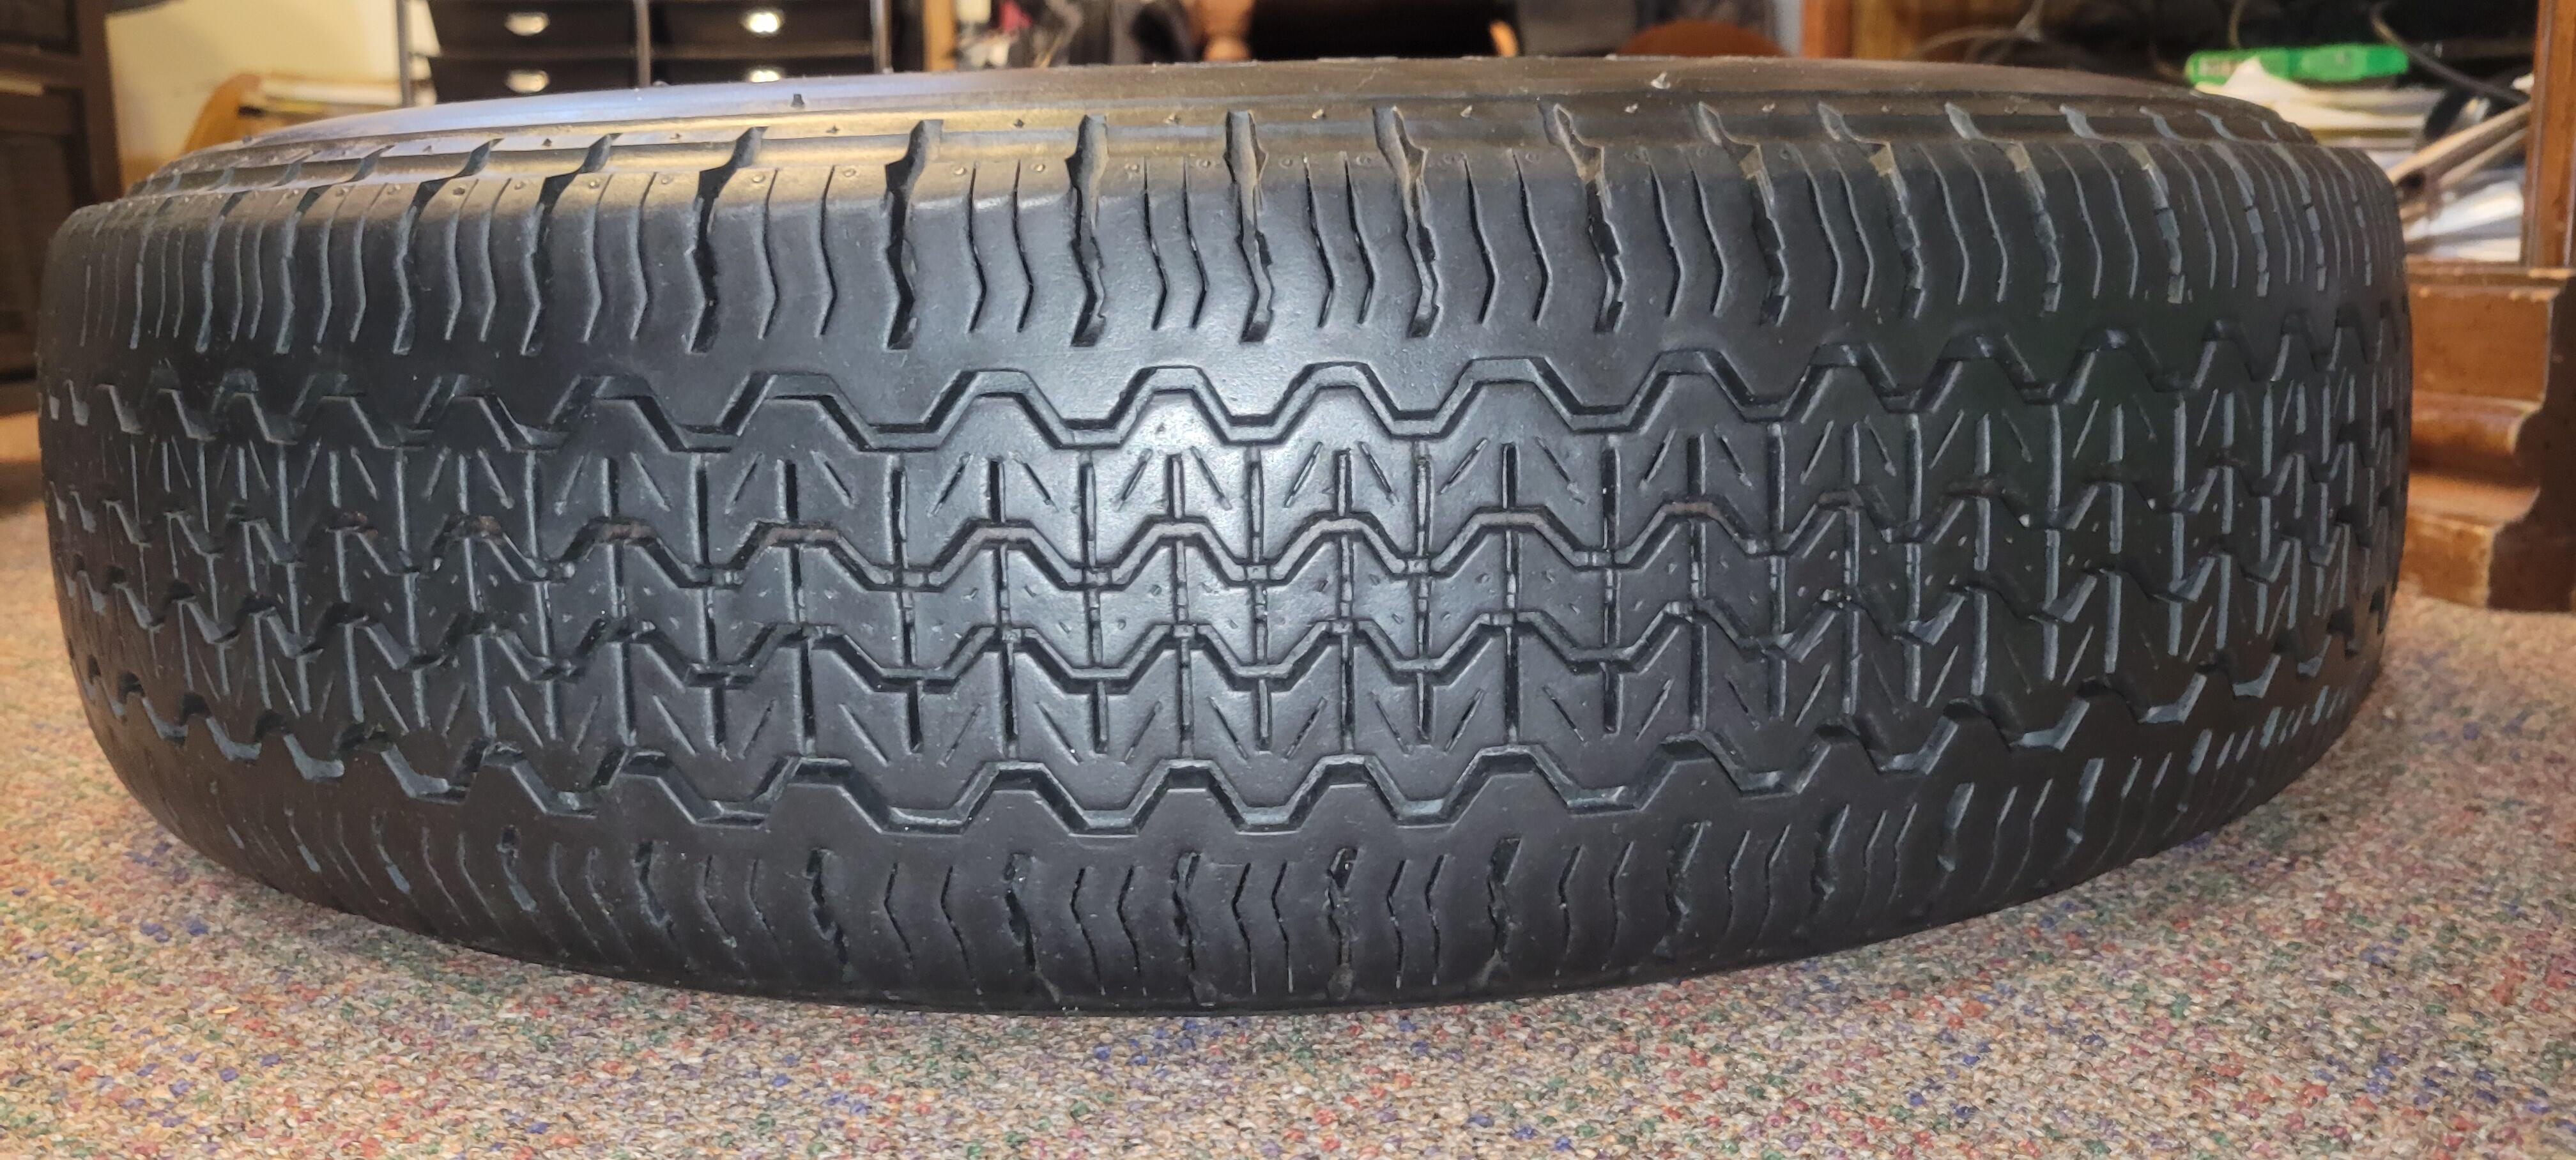
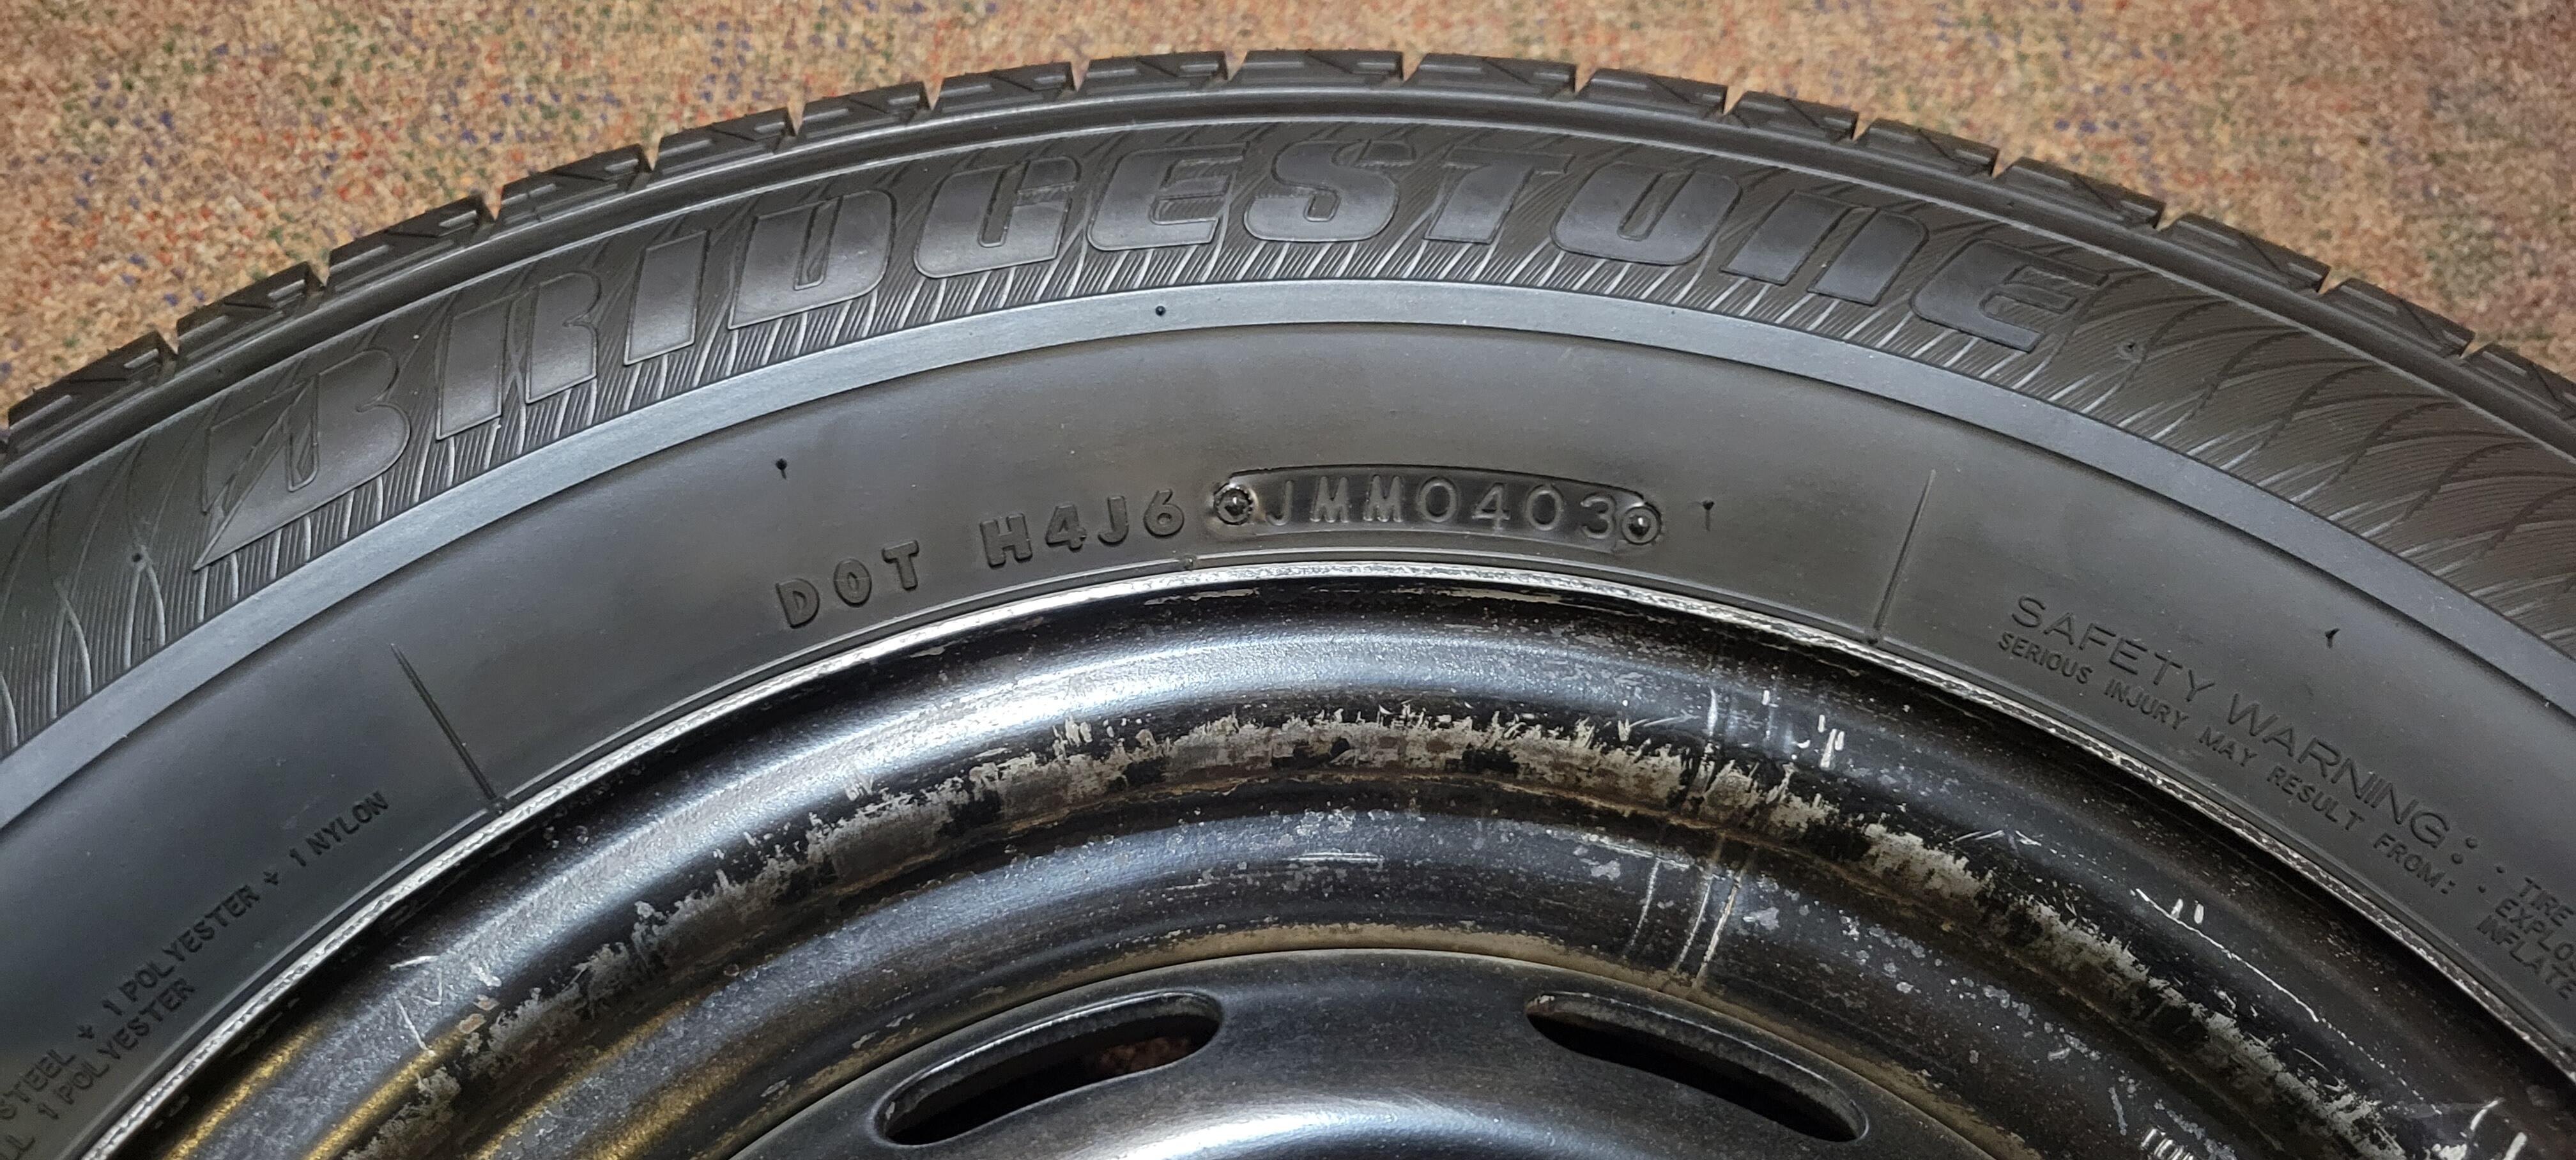
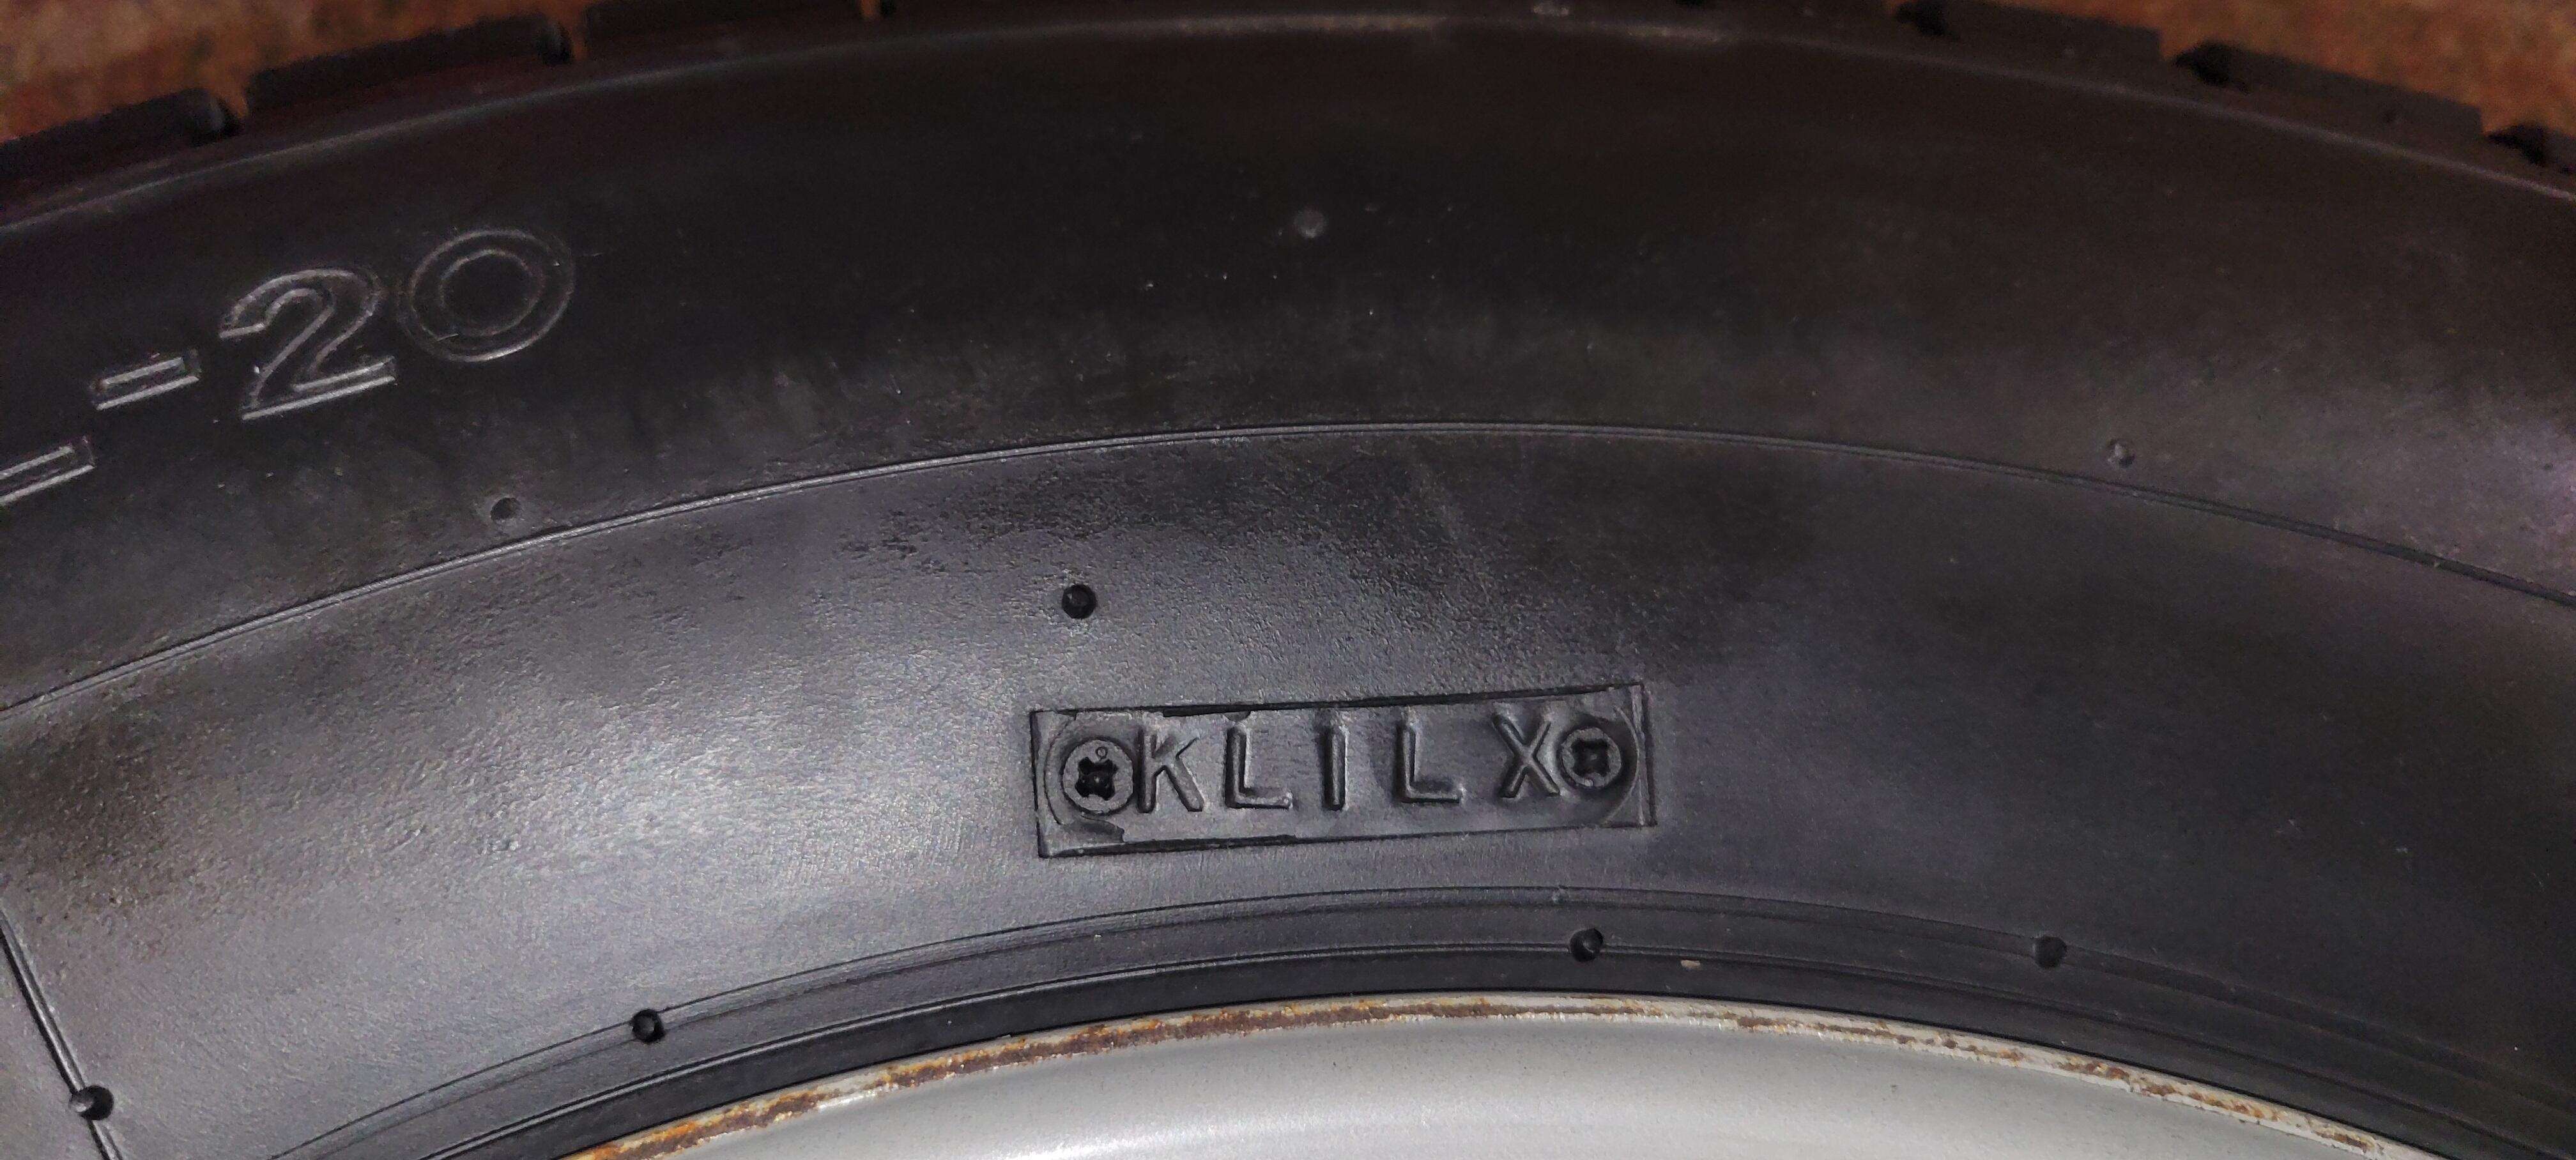
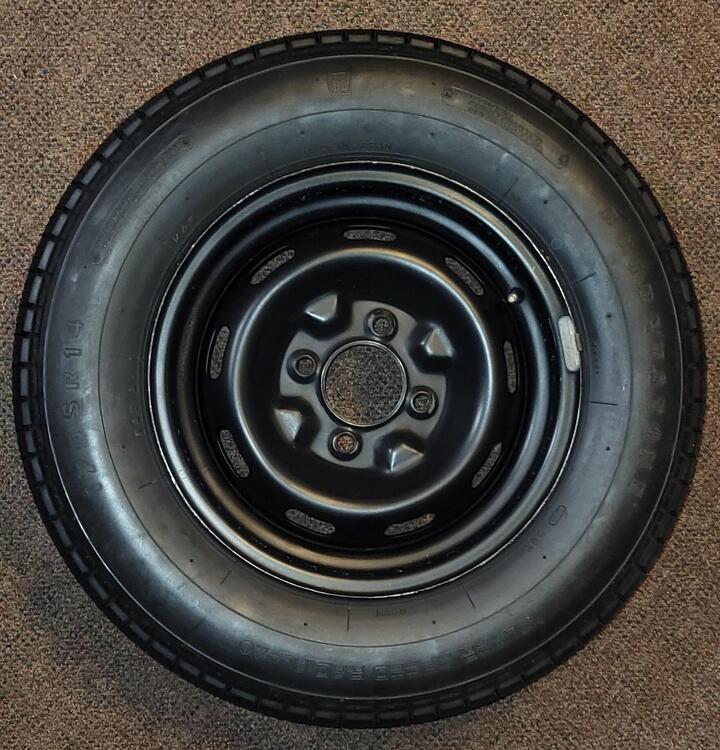
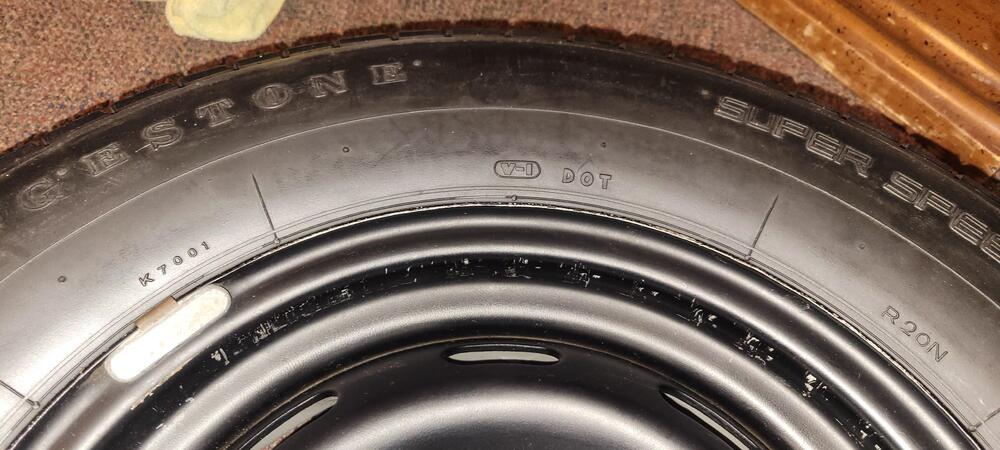
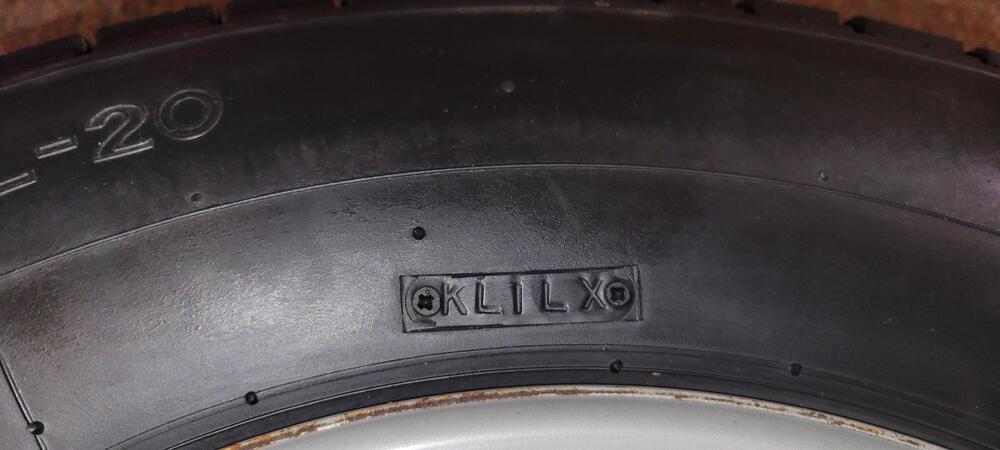
2 pointsThe DOT standardized "Tire Identification Number" system did not come into affect until January 26th 1971. Prior to that tire manufacturers used there own systems for date codes. After reading this topic I pulled the original spare from my 7/70 to see what I could learn. Mine is a 175SR14 Bridgestone Superspeed Radial-20. It still has 7/32" of tread left. There are markings that read "K7001" to the left of "DOT" and R20N to the right. I also discovered on more thing I had not noticed before. On the reverse side of the tire there is one more marking in addition to the ones on the outer side. It reads "KLILX" and was created by a mold that could be changed for each run of tires. You can see impressions of the screw heads that would hold the tag in addition to the date code numbers. All of the other markings are part of the permanent tire mold. I now believe that this is the date code. I have no idea how to decipher it. I was thinking roman numerals but that read 51st week 1960. @kats any thoughts? The last picture is of a modern Bridgestone tire that was last on my car before I started my resto. It uses the modern DOT system which since 2000 uses a 4 digit date code (0403 = 4th week 2003), but you can see that this portion of the DOT number is changeable. Here are a few pictures showing condition and markings. edit: added the pic showing the "KLILX" marking.


 2 points
 -
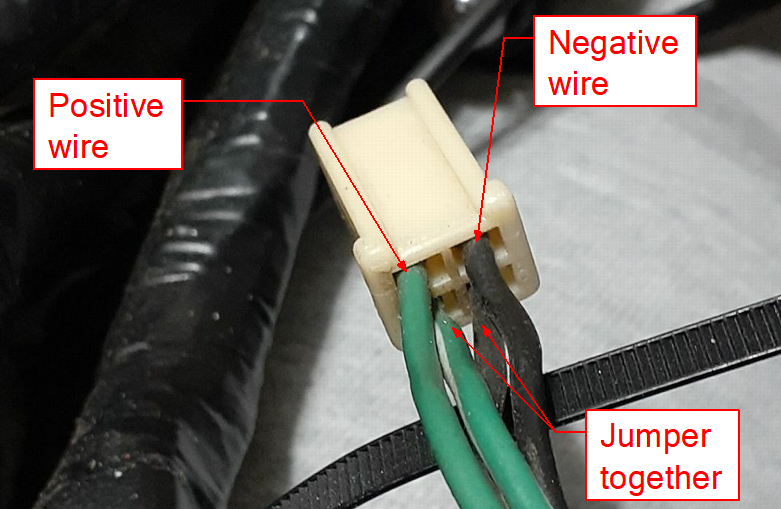
2 pointsI'm not sure why you think the tach needs recalibration. Have you changed something in the ignition system? Assuming the tachometer is ready to be replaced, I'll use Speed Hut as an example. Why? I have wired them before, and there are mounting adapters available. See gauge link, gauge adapters, and instructions. Would the Autometer tachometer work with the gauge adapter? I don't know, and frankly I don't care. Here's an approximate list of steps: Get a 4 pin non-latching 2.8mm connector from Vintage Connections. This will allow you to wire the tach to stock wiring. You will need the male side of the connector. See the photos below for the dash side of the harness. You should also probably get two 2 pin latching 2.8mm connectors for the other wiring modifications. If you don't have a proper crimping tool for open barrel connectors, they have that, too. Use a short piece of 16 or 18 gauge wire crimp the 2.8mm pins to either end. Insert that jumper into the bottom terminals of the 4 pin connector. That will ensure your ignition wiring out to the positive side of the coil stays intact. Crimp the 2.8mm terminals onto the tachometer wires. Install those terminals on the correct sides of the connector. See photos below Remove the two wing nuts holding the tachometer in place, cursing about how small the hands must have been on the person who installed it. If you don't have a dash cap, pull the tachometer out enough to disconnect it. If you have a dash cap, curse the day you or the previous owner installed it and figure out how to get the tachometer past it. (Sorry, no help from me on the dash cap.) As you pull out the gauge, disconnect the bulbs and 4 pin connector from the back of the tachometer. Cut the socket off the red/blue wire on the lower gauge bulb. Contort yourself in a strange way to strip about 1/4 inch of insulation off that wire and crimp a female 2.8mm terminal onto it. Strip about 1/4 insulation off the white wires on the gauge and crimp both to the same 2.8mm male terminal. Install those terminals into their respective connectors for when you put the gauge in. Run a length of 16 AWG wire from the negative of the coil to up under the dash. Protect this wire with 1/4 split loom or other durable cover. Connect one end of the wire to coil negative. Crimp the other end of the wire to a 2.8mm female terminal. Note: I can't see anything about a resistor between this wire and the tachometer. You will want to verify with Speed Hut. Crimp a 2.8 mm male terminal onto the yellow wire. Put those terminals into the respective connectors. Attach the connectors. Slide the tachometer into place. Note: I'm not sure about how to secure the tachometer. Program the tachometer according to the Speed Hut directions. Keep in mind that none of the aftermarket tachometers have turn indicators in the gauge. Speed Hut has them in the speedometer. By the time you are done with the install, you are probably at least up to the low side of the cost of fixing your old tachometer. Why don't you say what your tach is or is not doing? Shoot some video of it. Post the video on YouTube and link it here. We may be able to guide you through a cheaper fix.
 2 points
 -
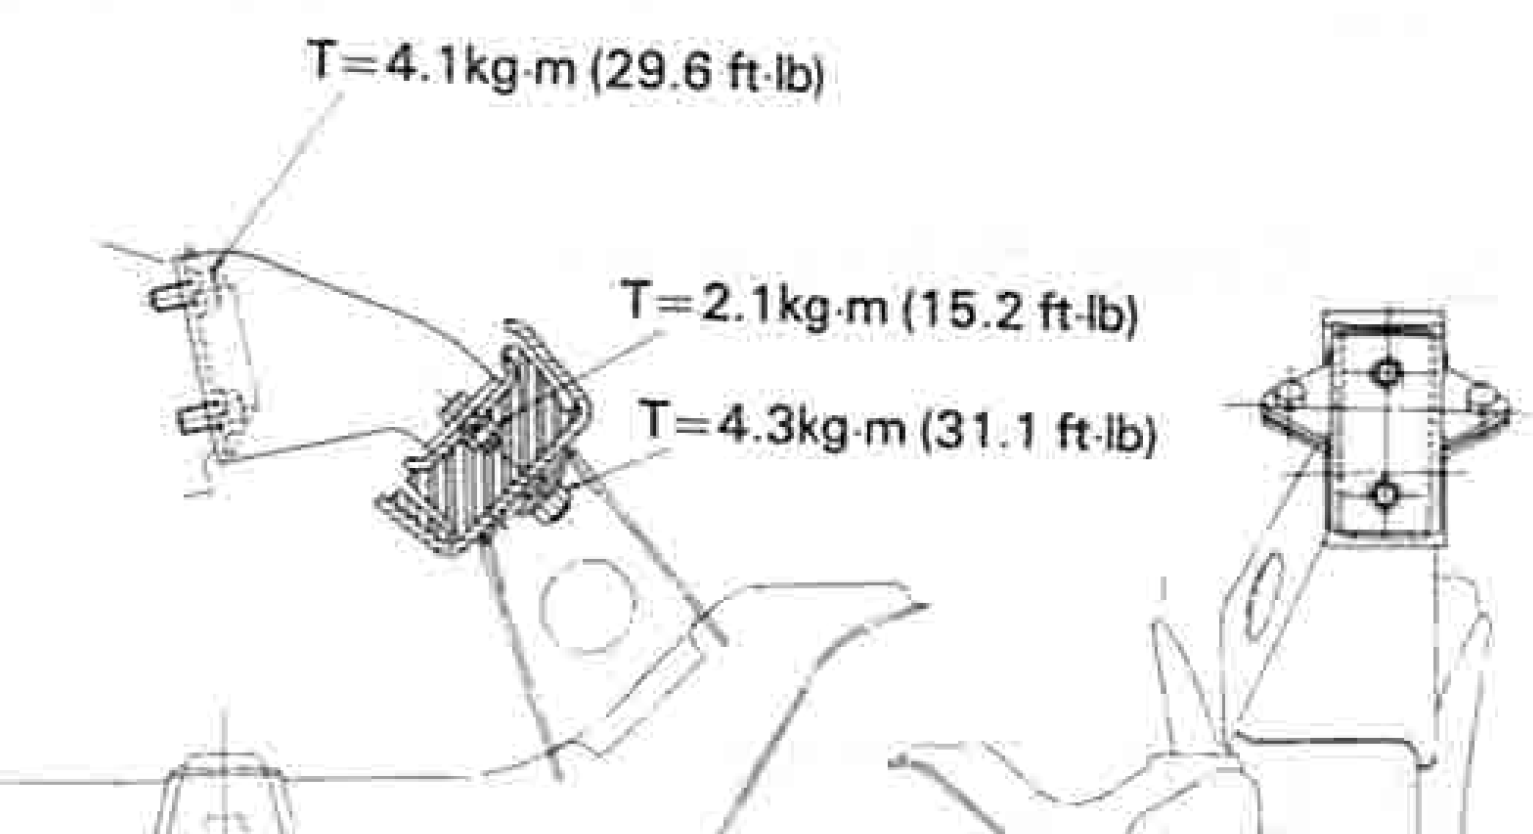
2 pointsHere are a couple of pics from my 7/70, nuts down. Hope they help. And here is an image from the 1970 FSM,


 2 points
 -
It's a no reserve have fun big bumper last year 280Z driver. Not a 71 collector model restoration worthy investement. Don't get too carried away in the critiques. It's for the guy who wants a drivable hobby car. Or a quick flip. Buy it, get it running, keep another Z on the streets, make a few bucks.2 points
-
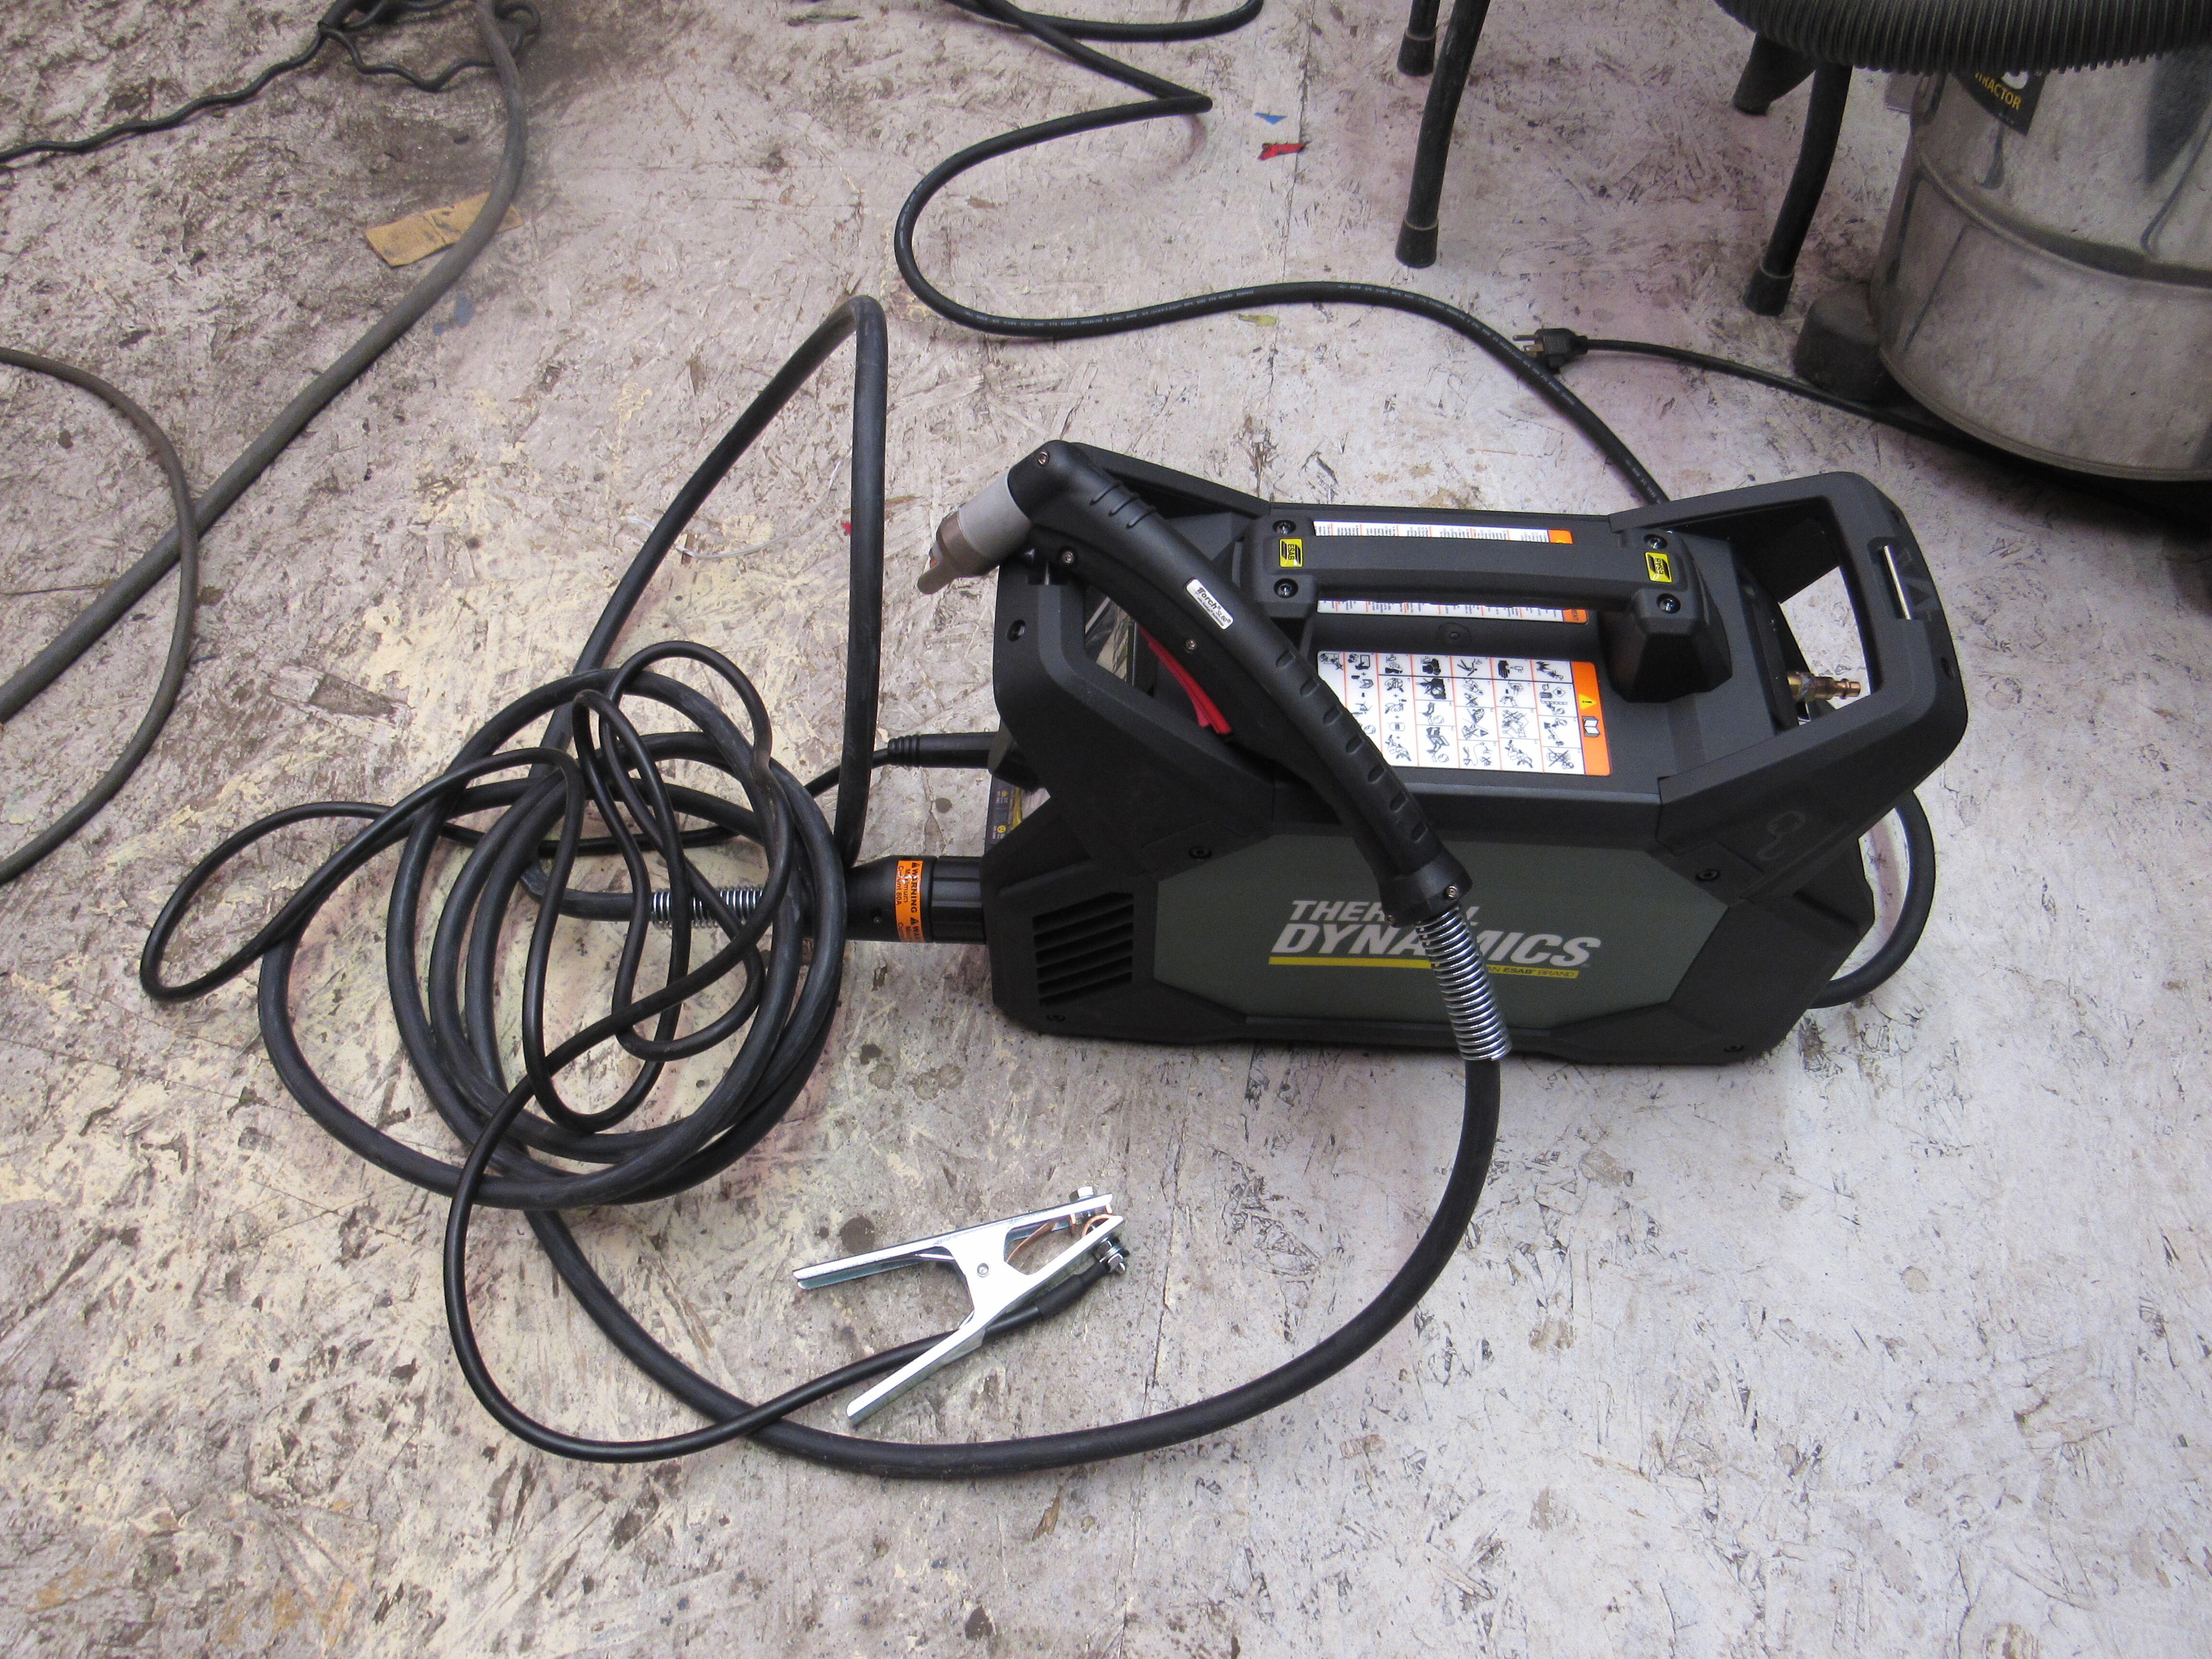
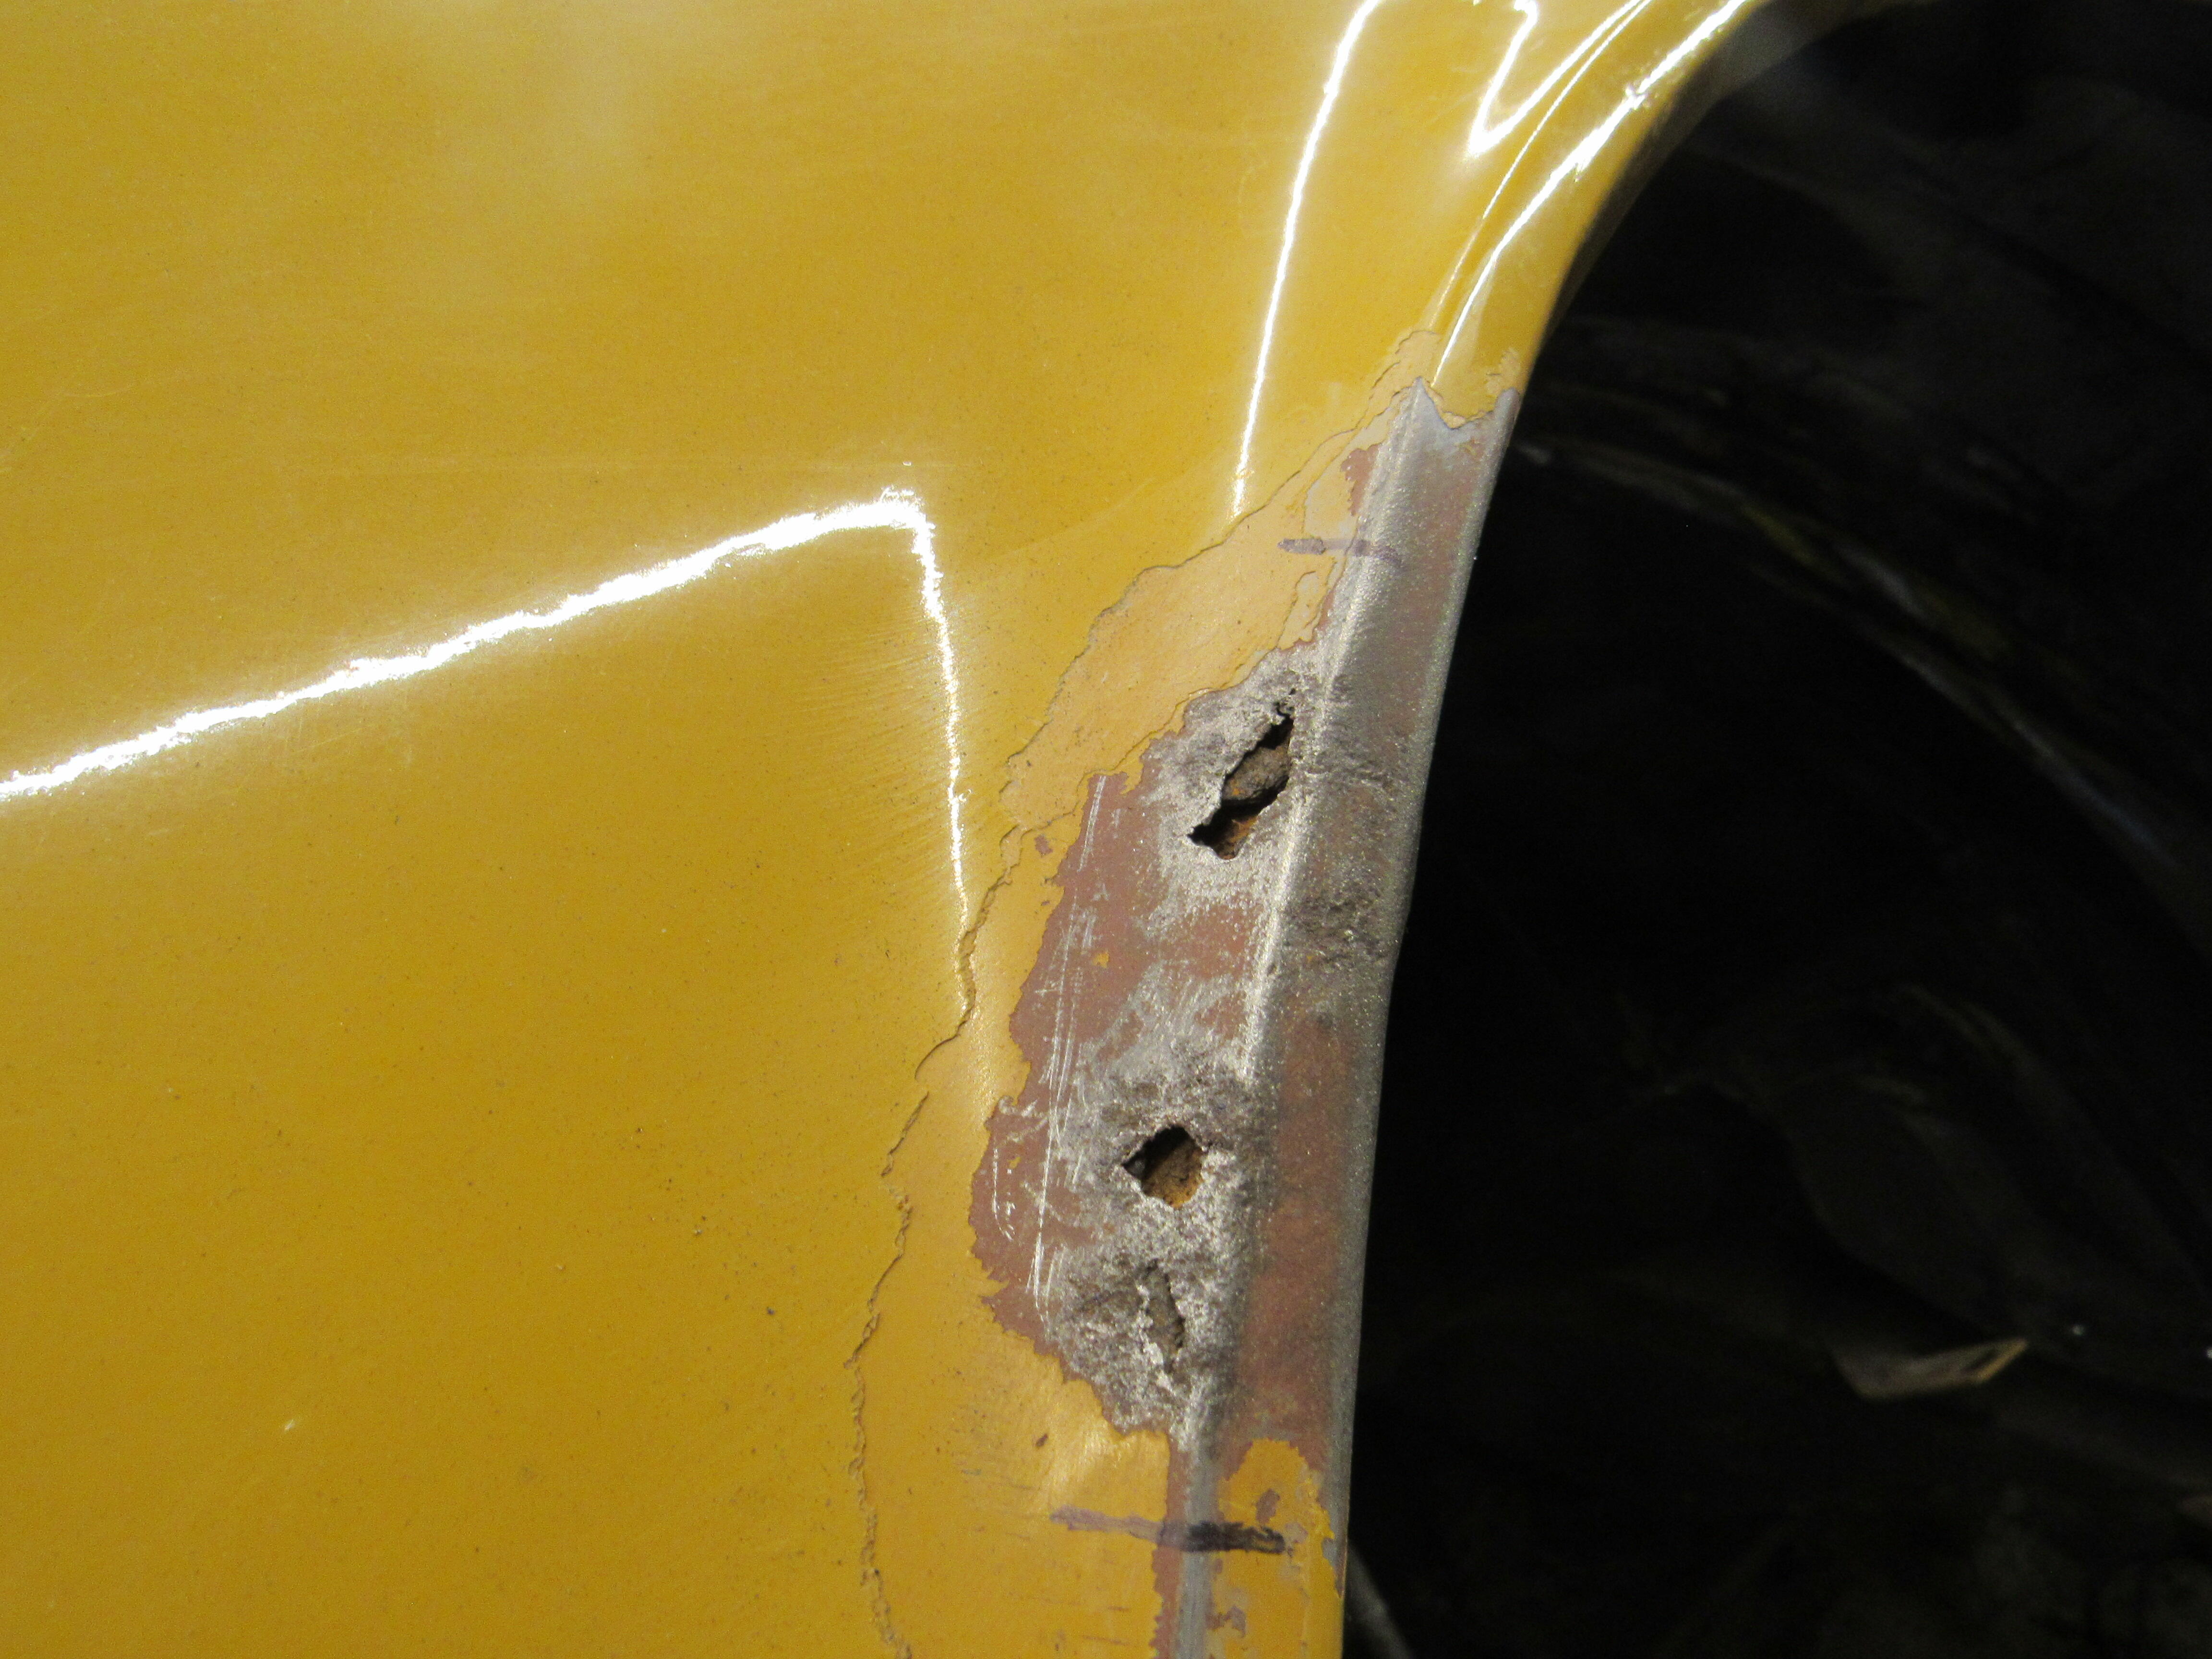
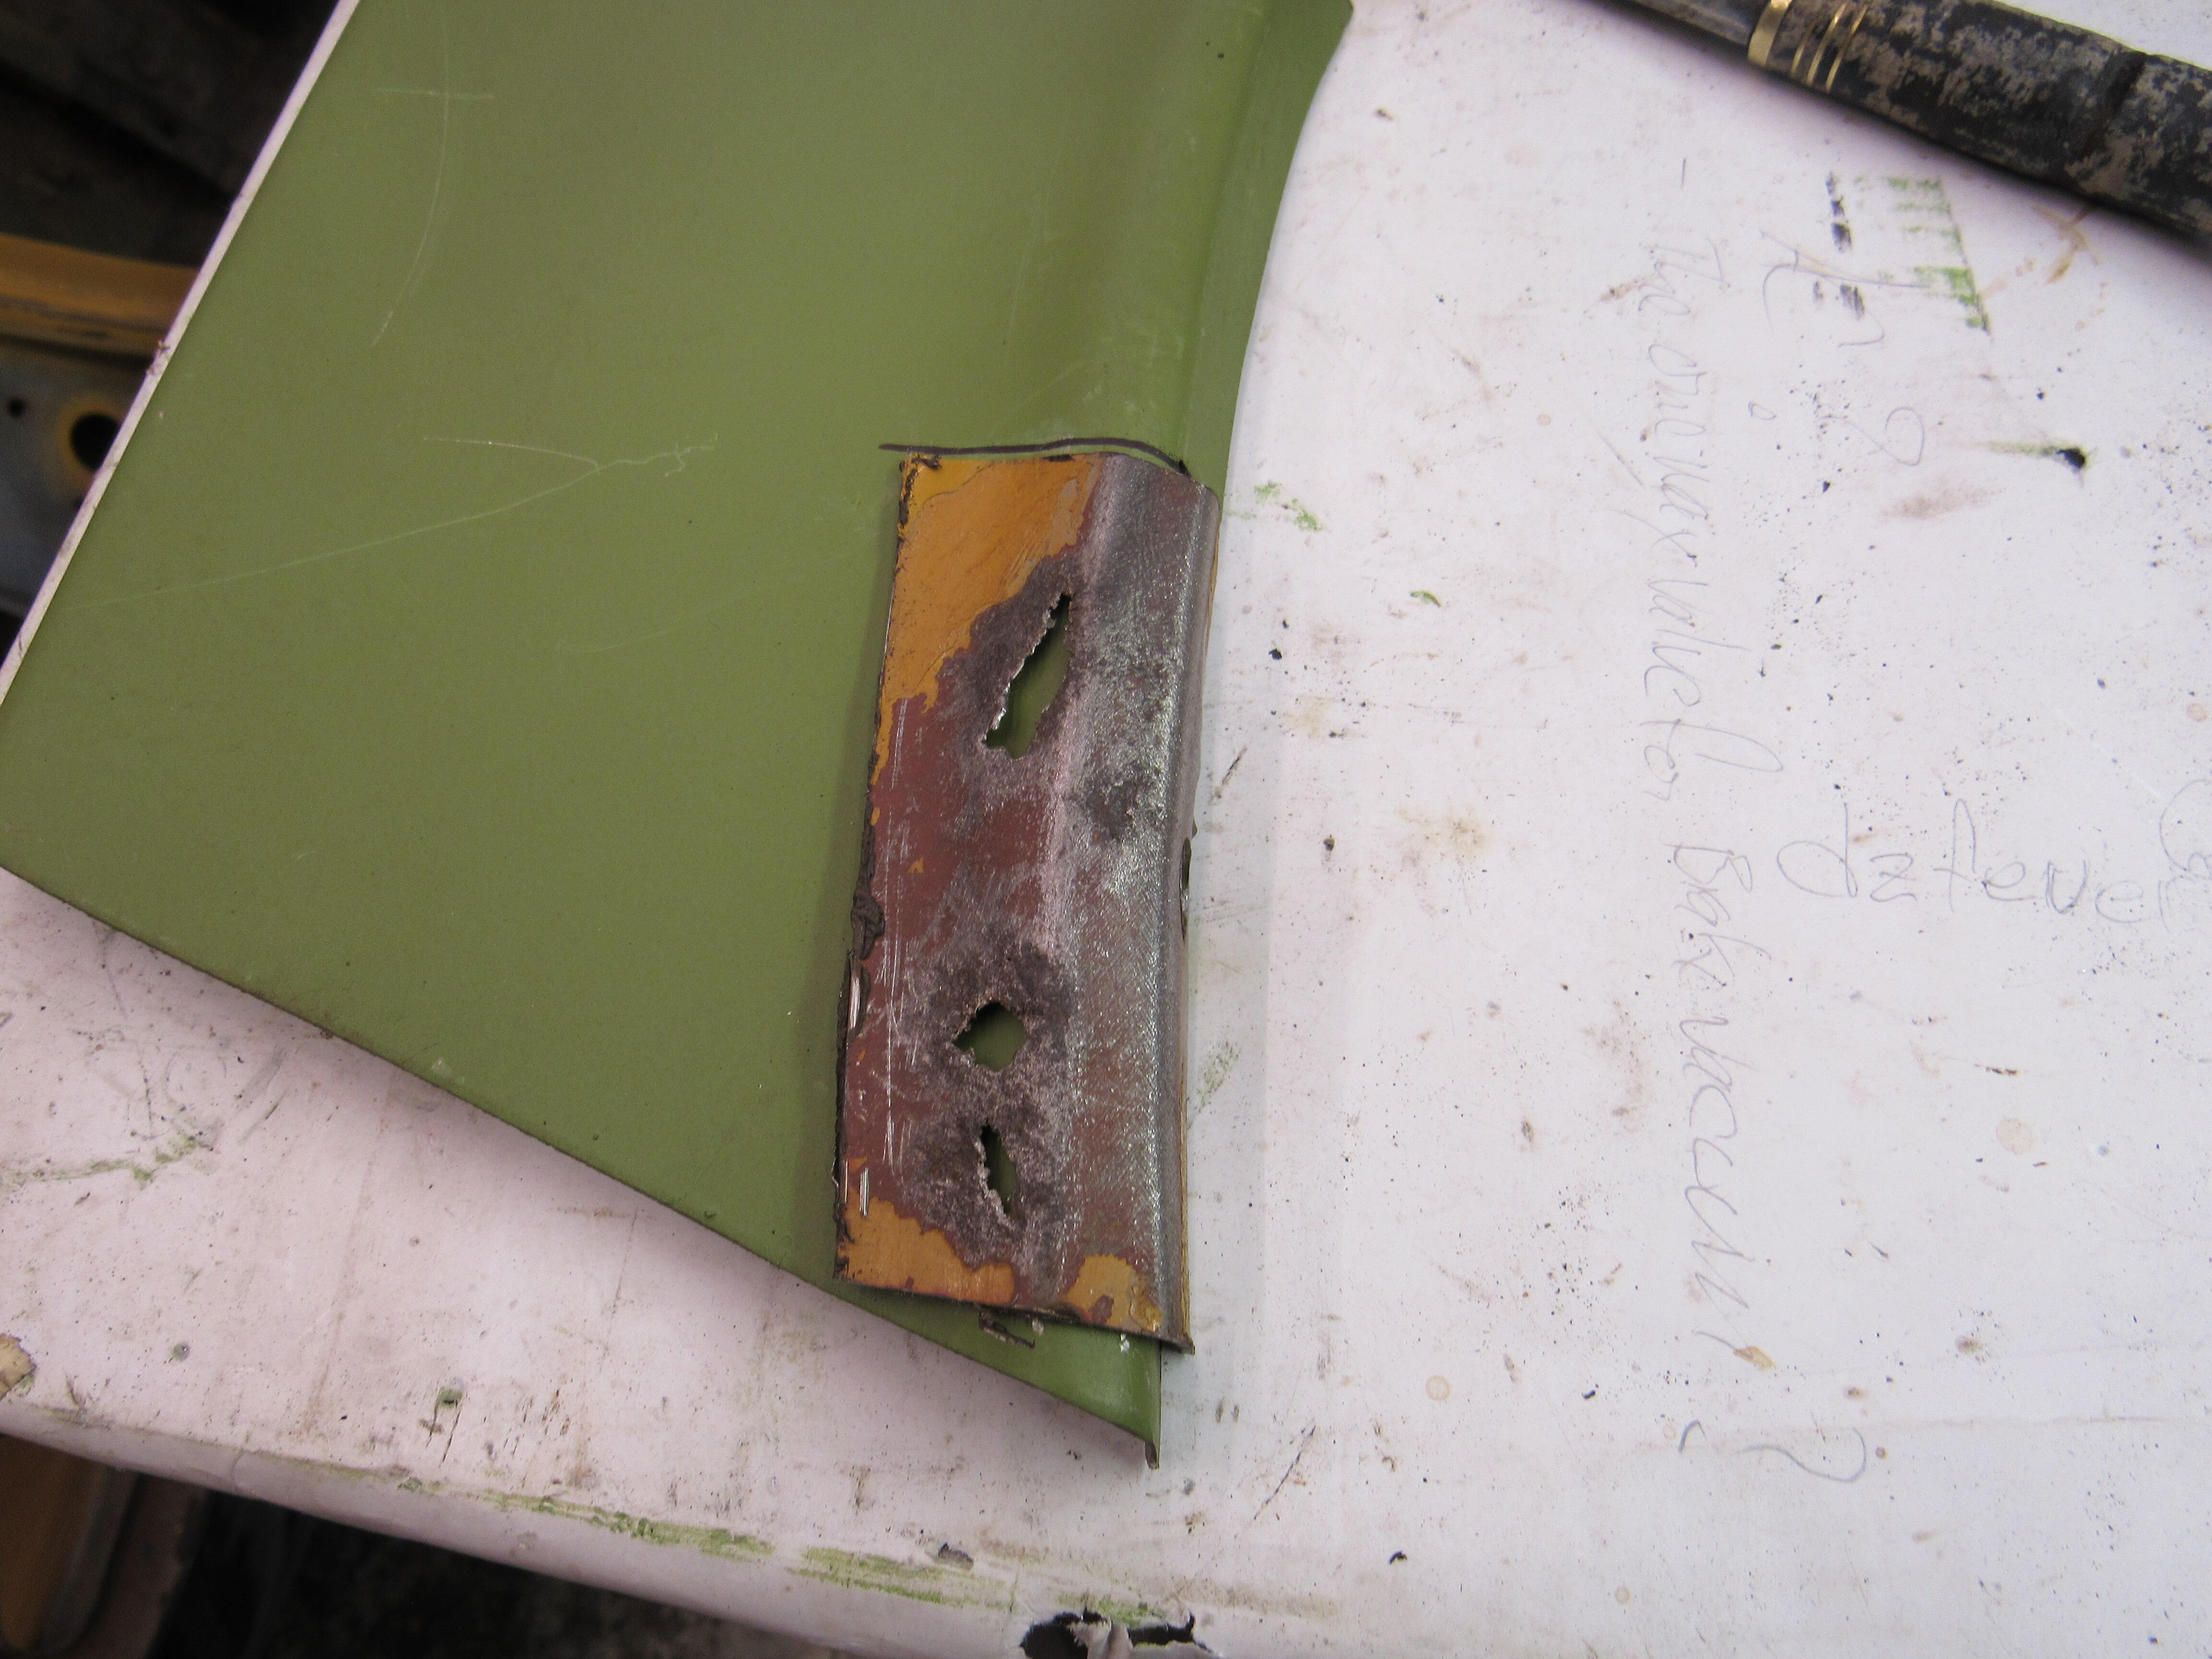
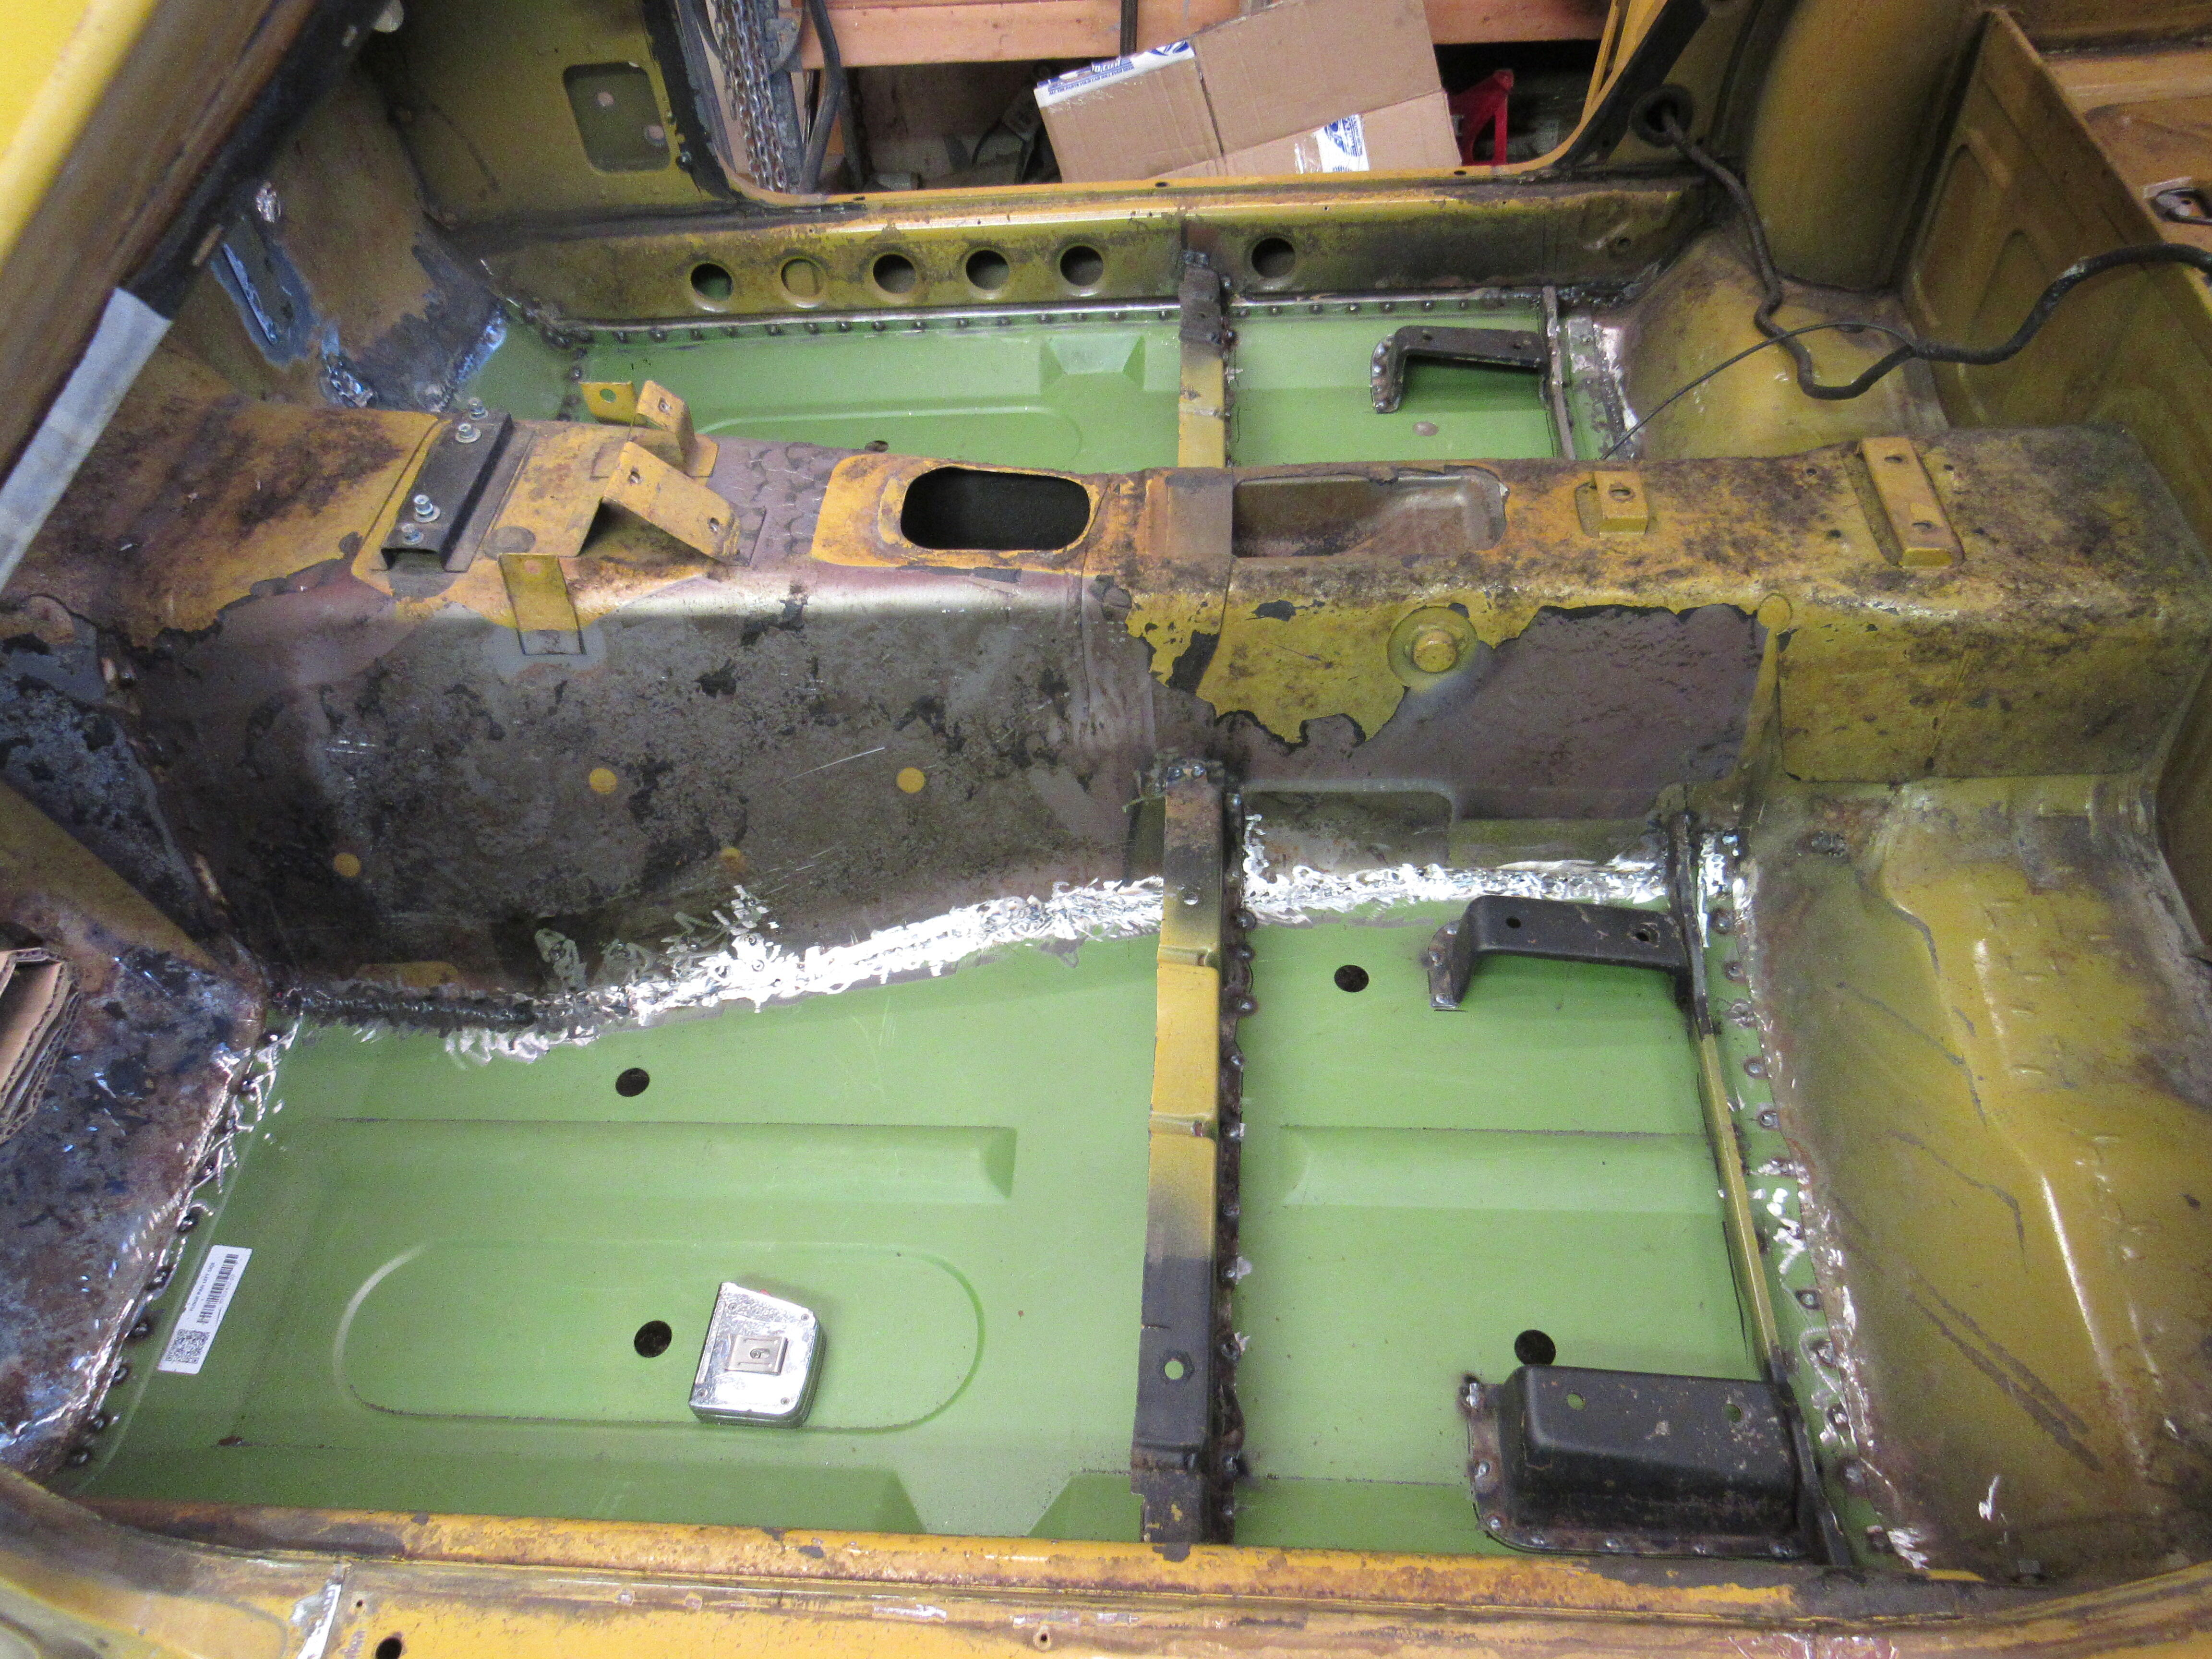
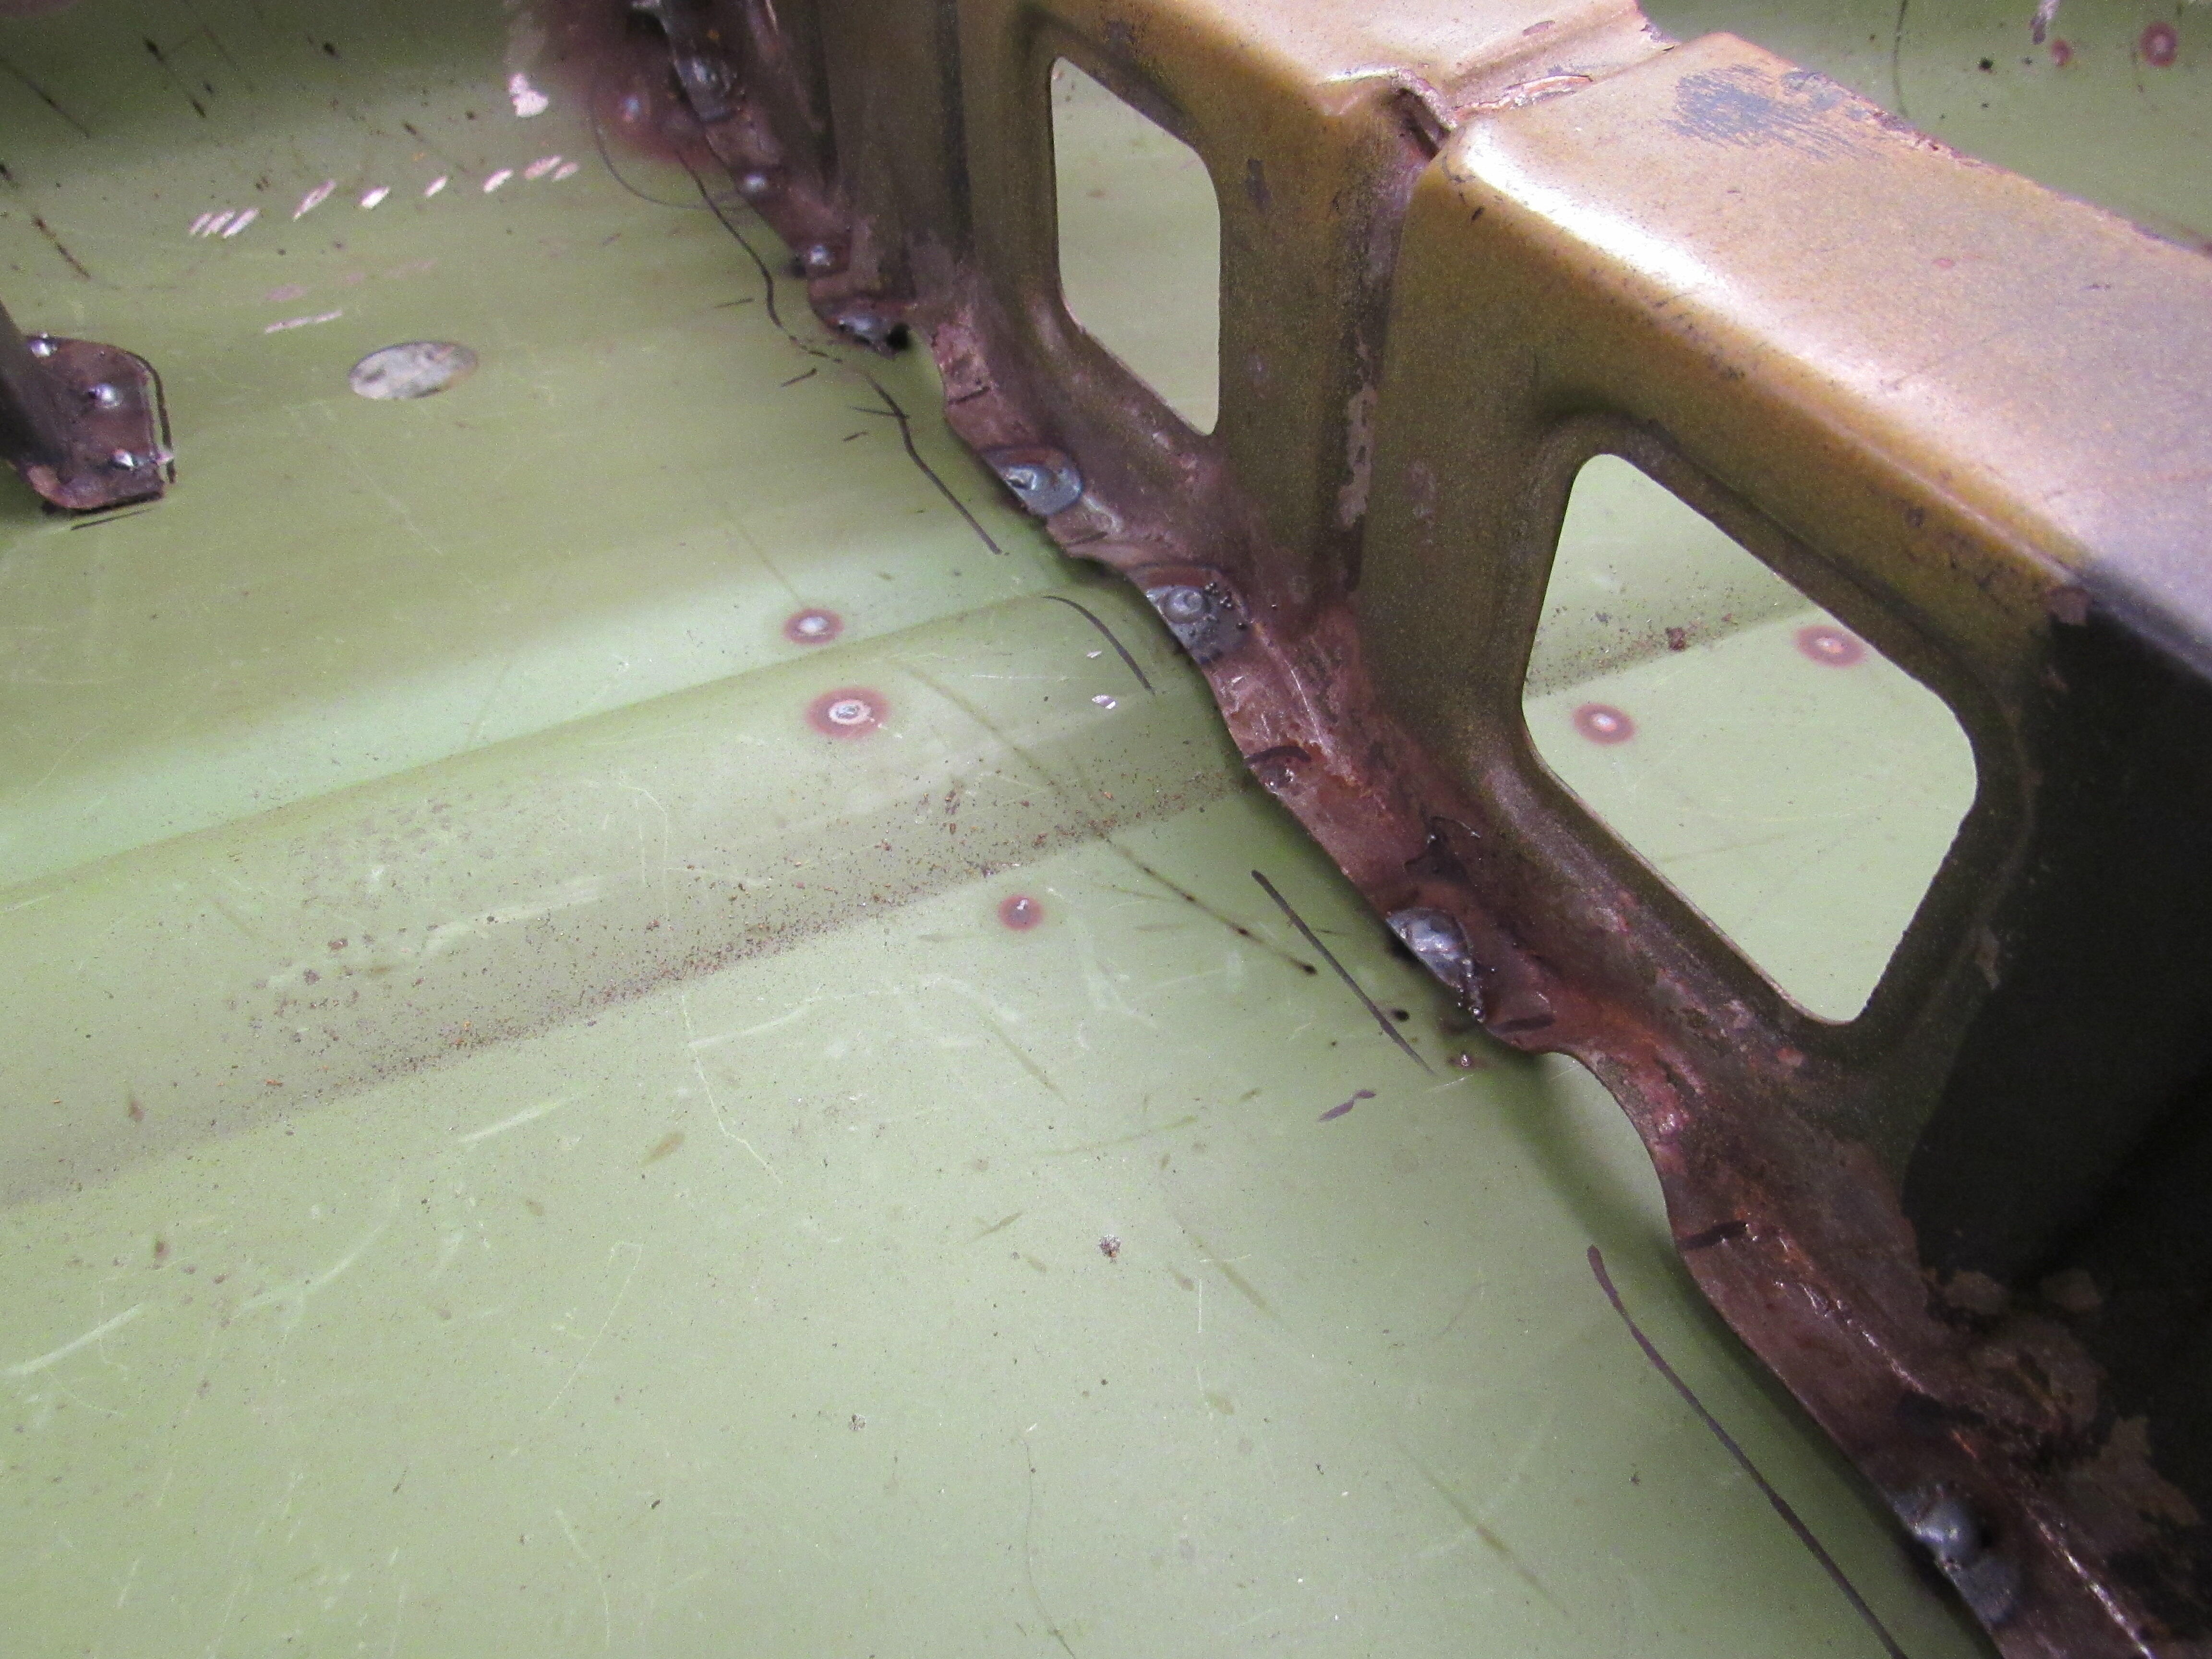
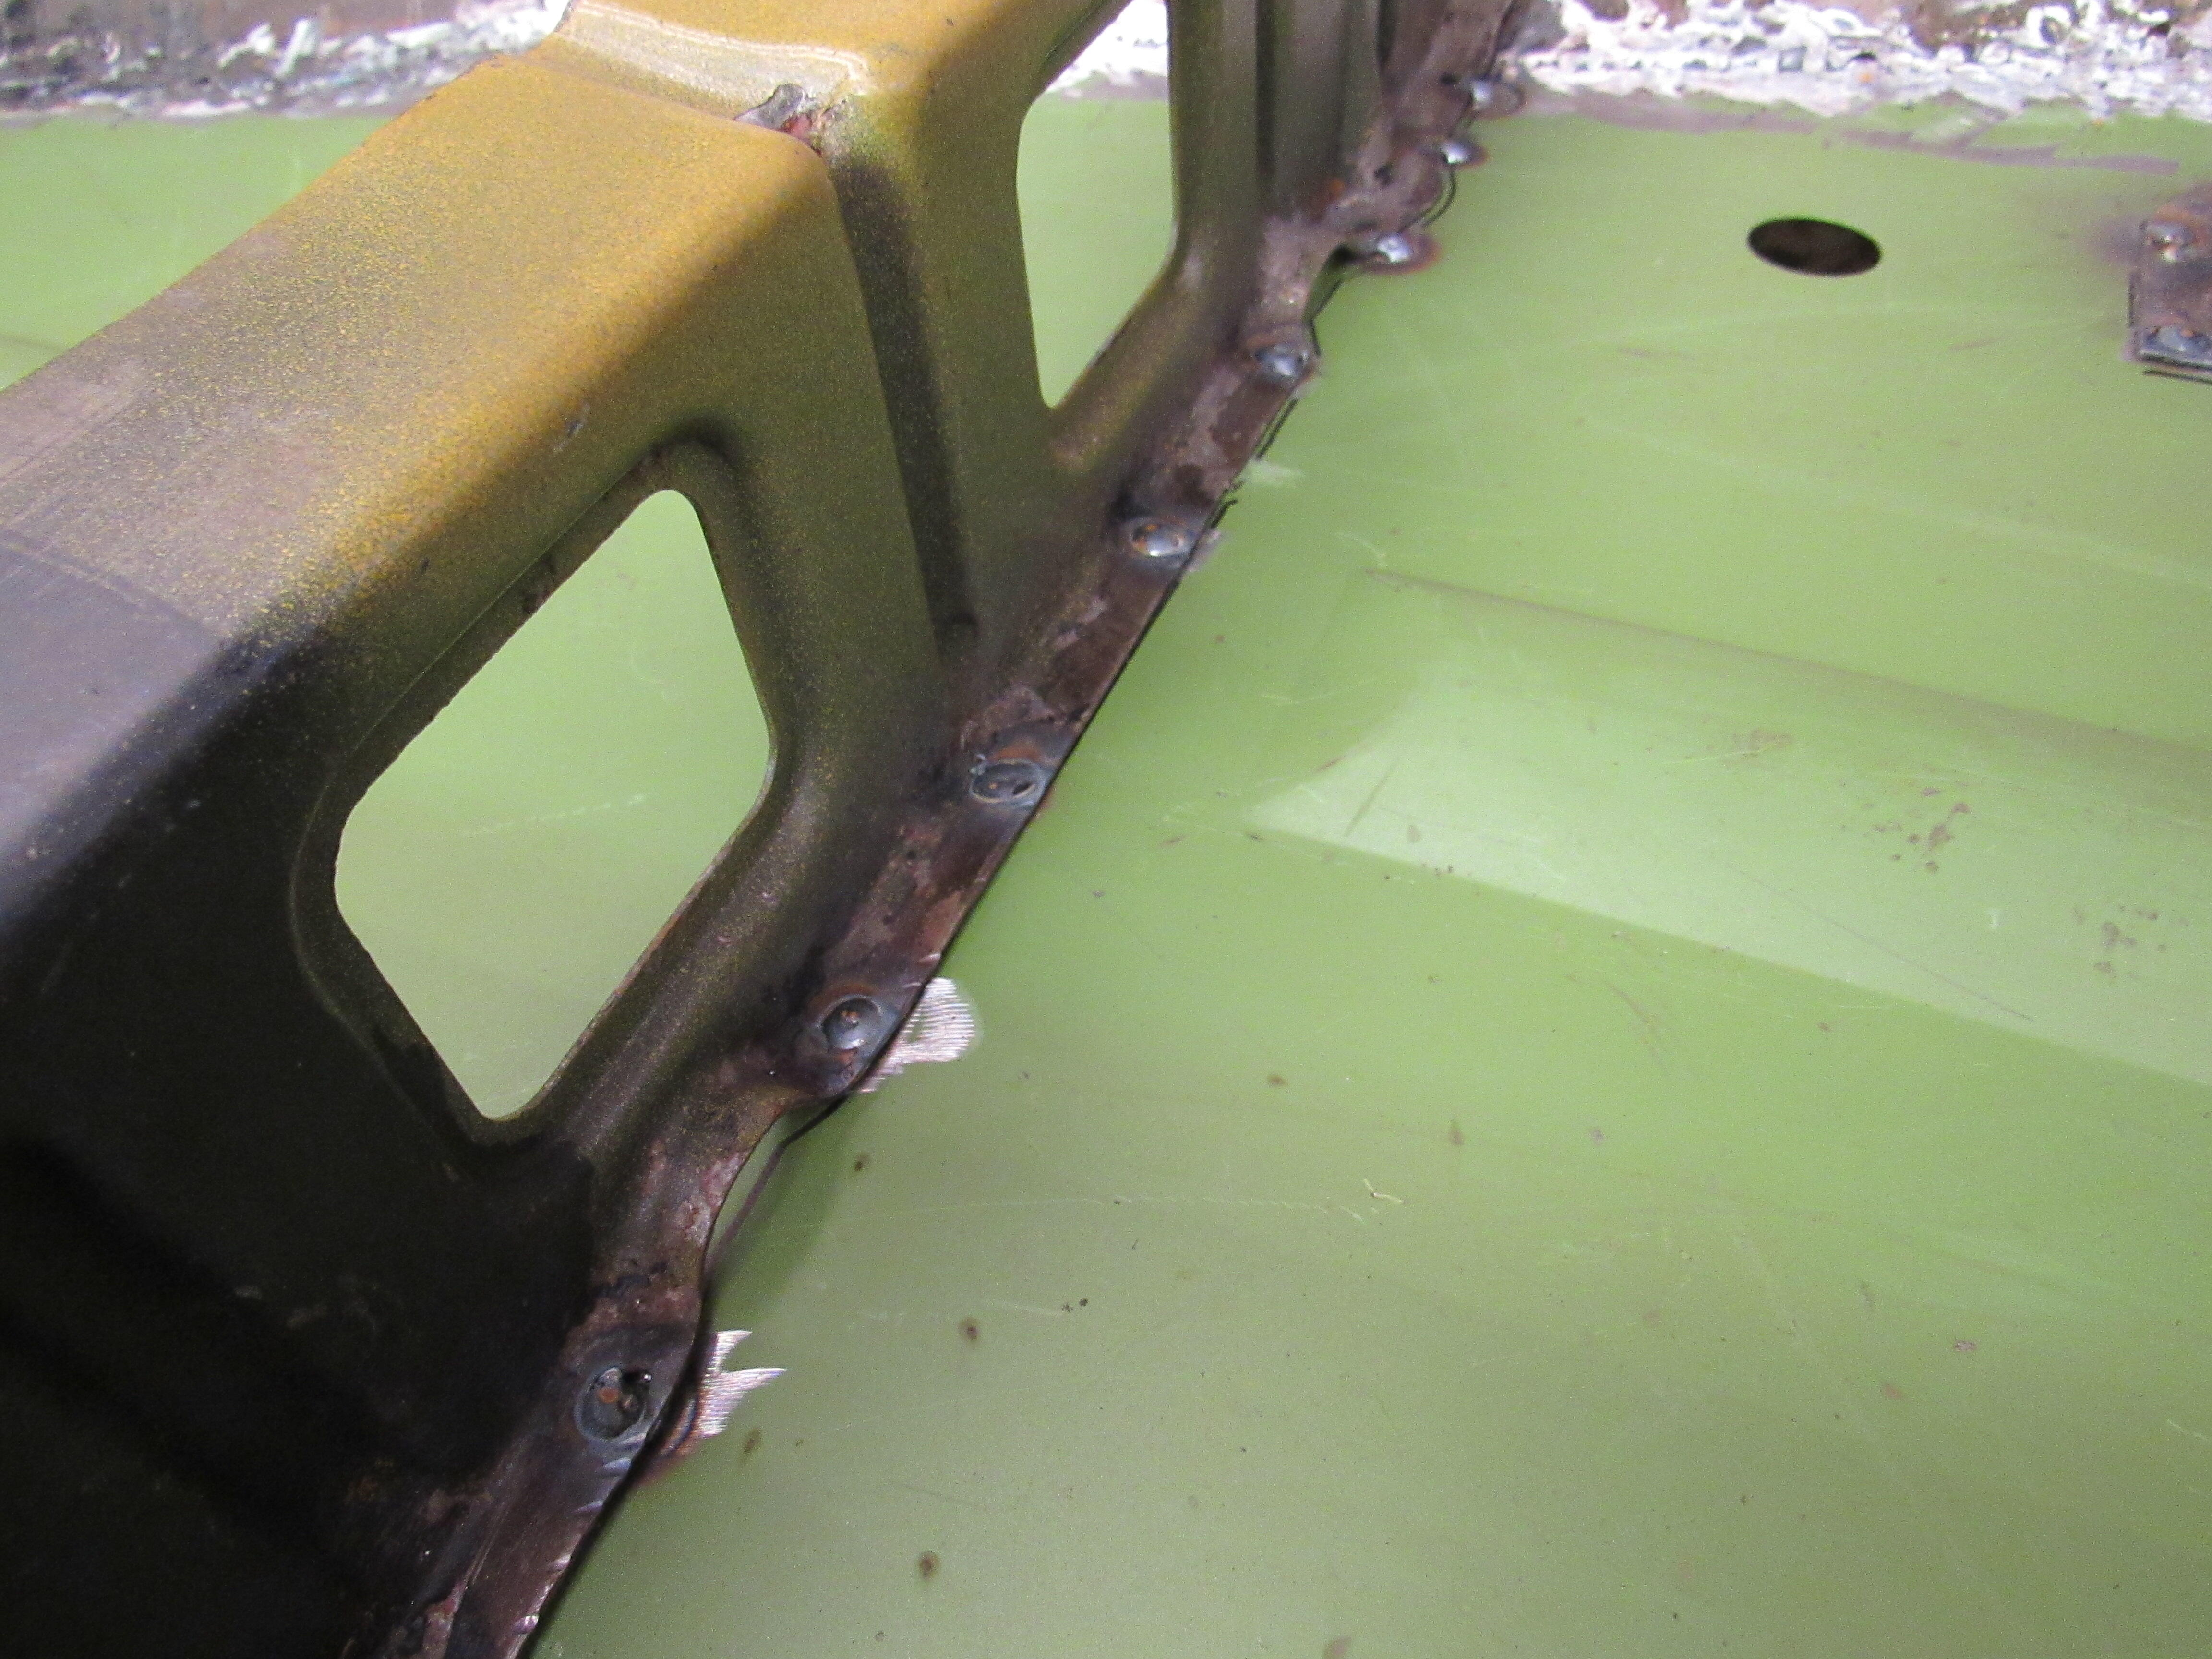
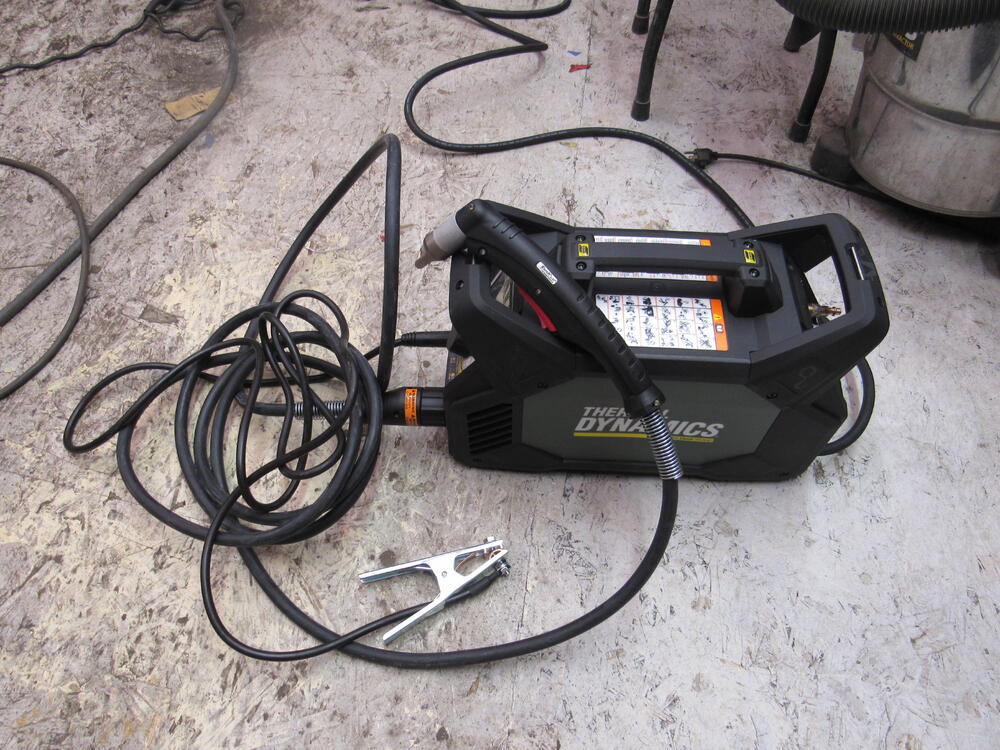
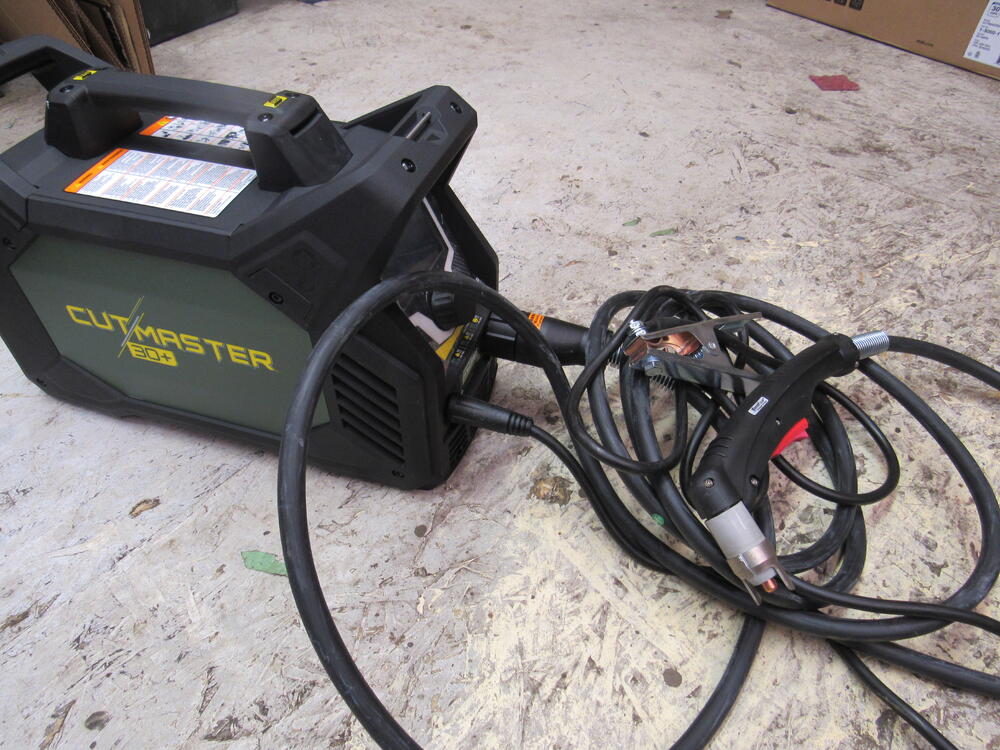
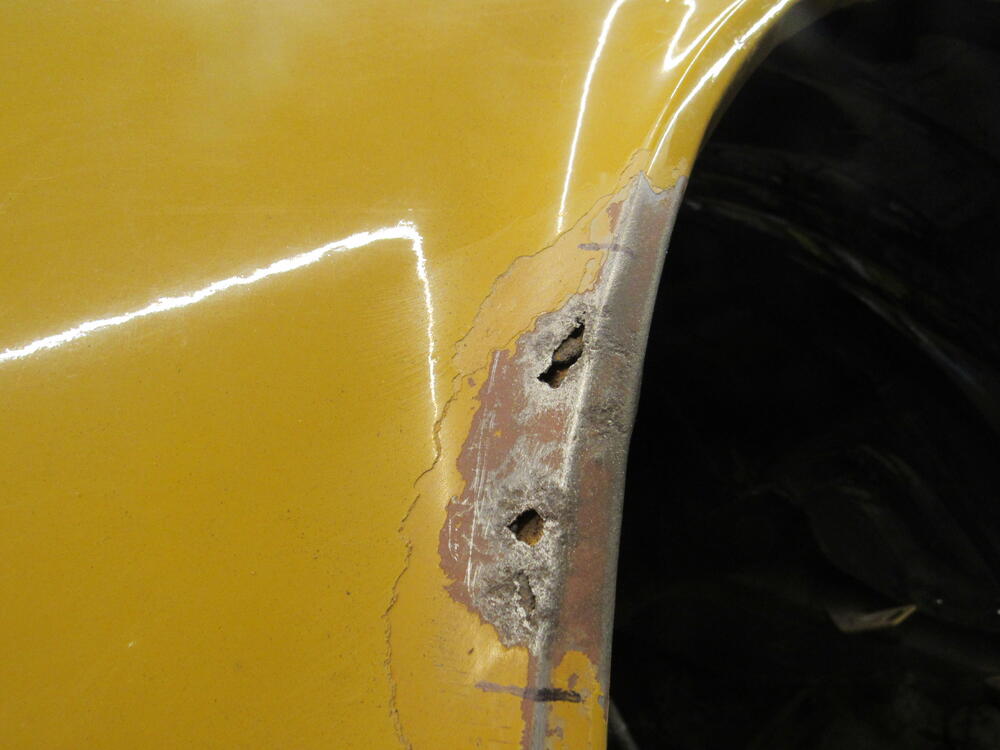
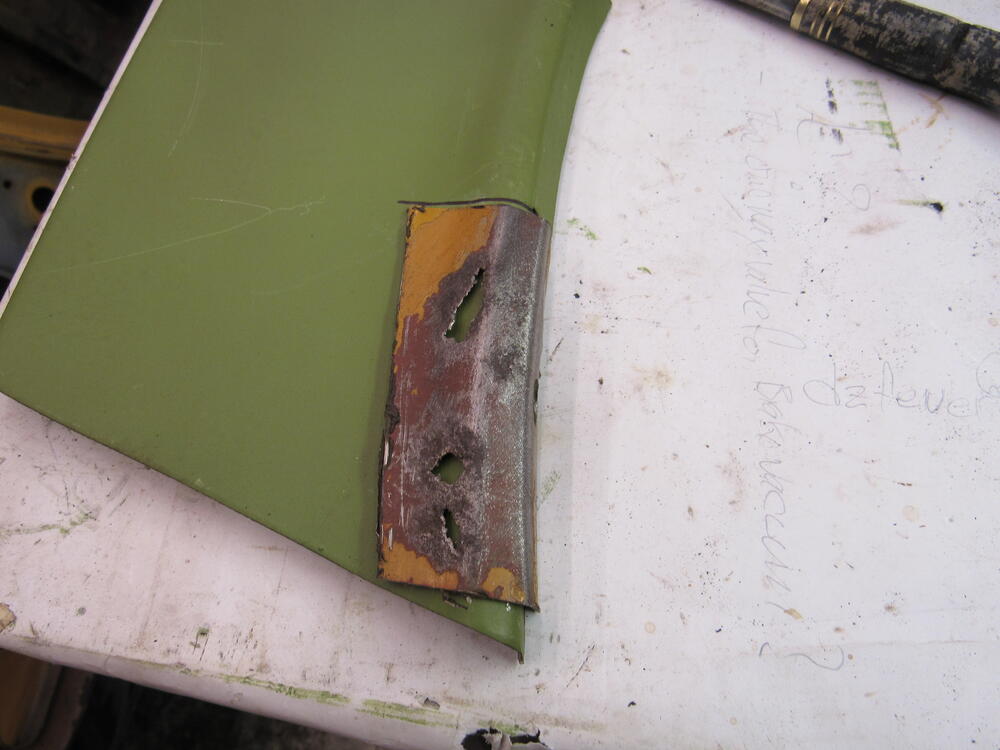
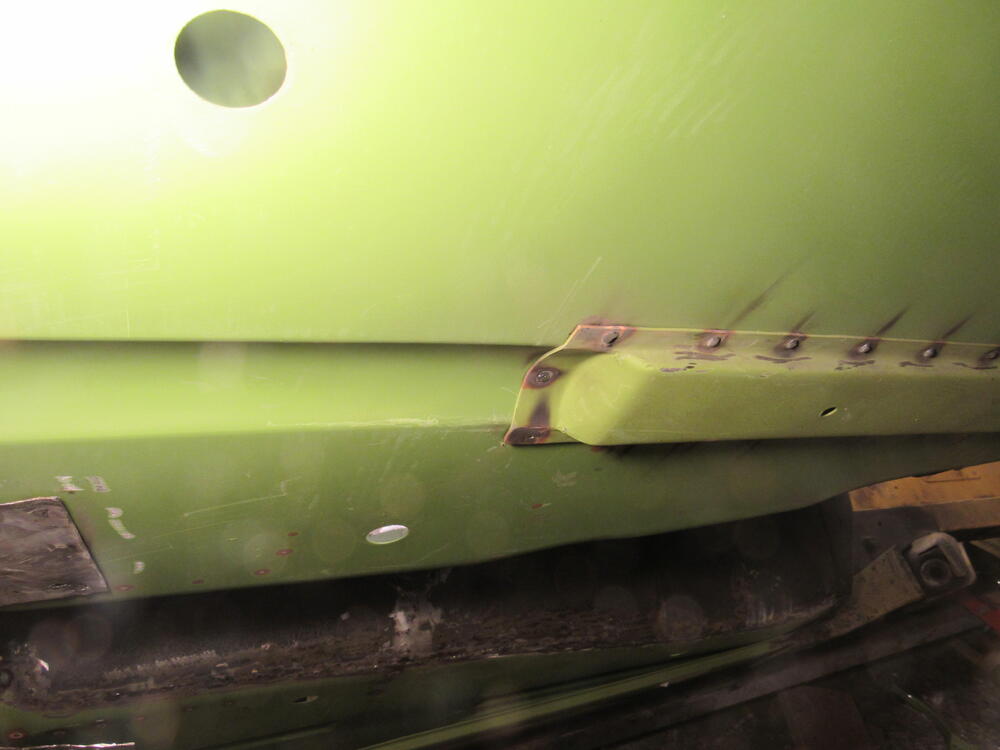
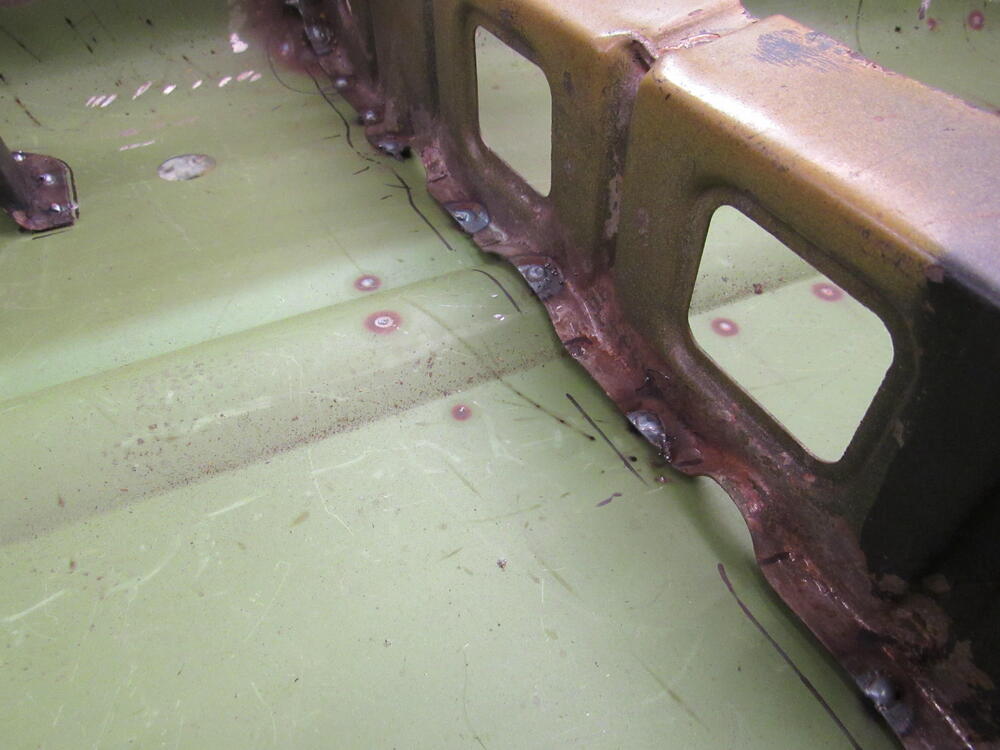
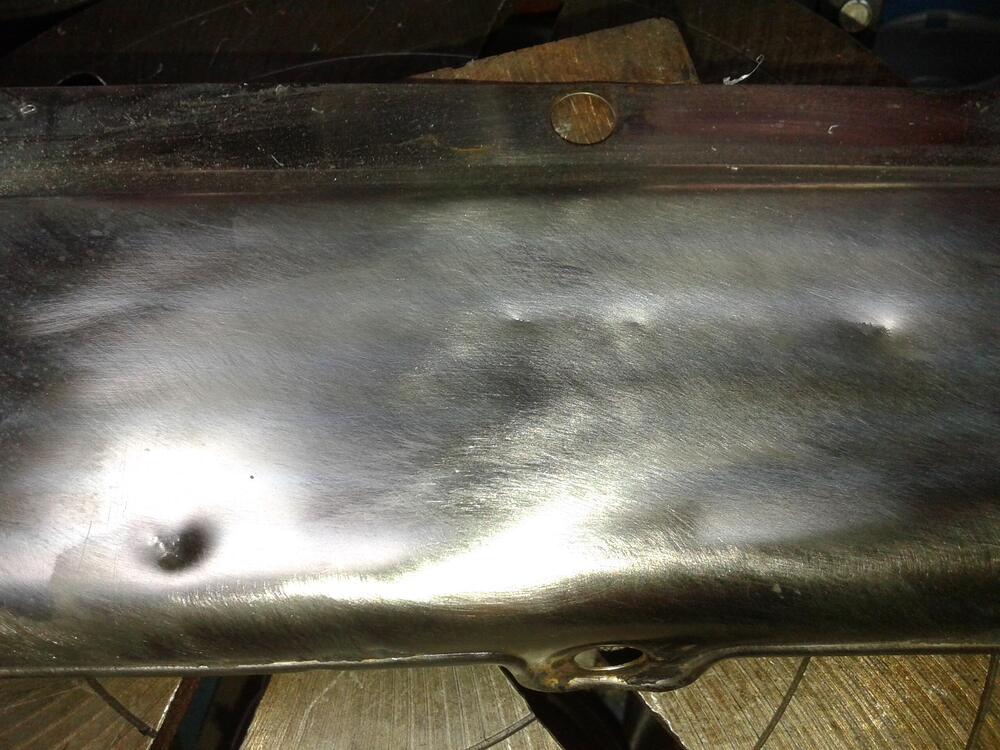
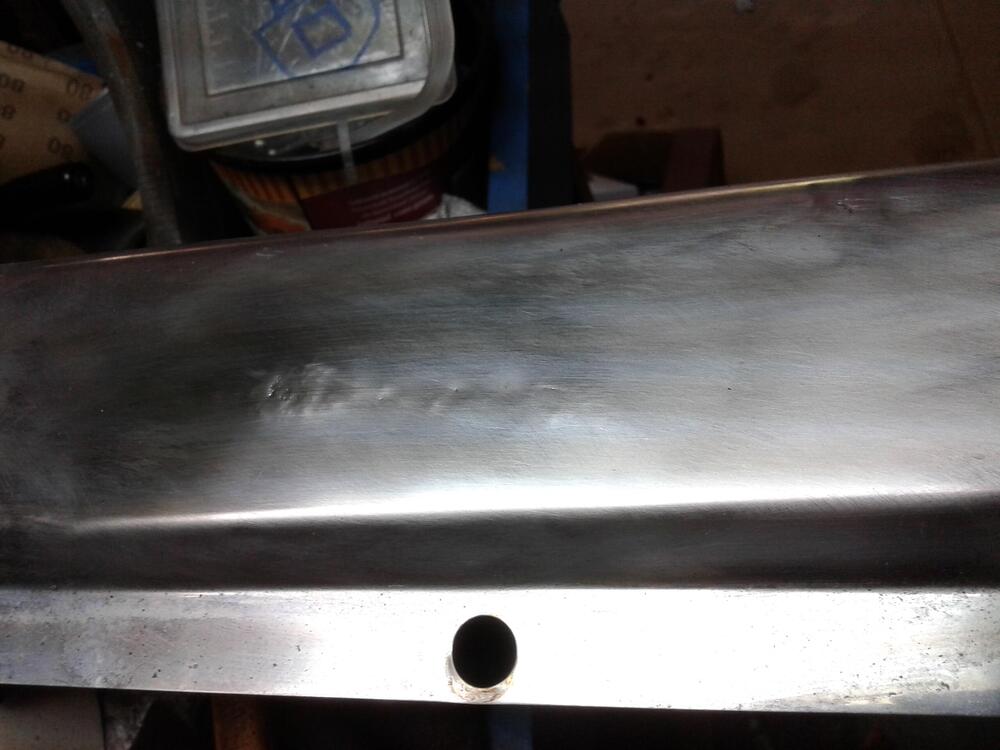
2 pointsI'm working for the best customer you can imagine, Dave just dropped off the best Xmas present I have ever received. An ESAB Thermal Dynamics Cutmaster 30+ plasma cutter! This thing is such a sweet toy, I used it today to cut out the last reinforcement plate for the D/S rail. I have wanted one of these for years so it is going to get a lot of use. Repairs on the wheel well lip can be a real bugger, the quarter panel and inner wheel well liner are so close there is very little room to work with. Fortunately, the off cuts of the KFV dog leg panels came in handy as they are a good match for the lip. Both floor pans are in now, if you install the rail first you can end up with a gap under the front seat mount even though it is at the correct height. So on the D/S I installed the seat mount first but found the rail to have a big gap, had to slice the end of the rail so I could get everything to line up and then weld it back together.


 2 points
 -
I love the cardboard to hold the dry ice against the trans tunnel.2 points
-
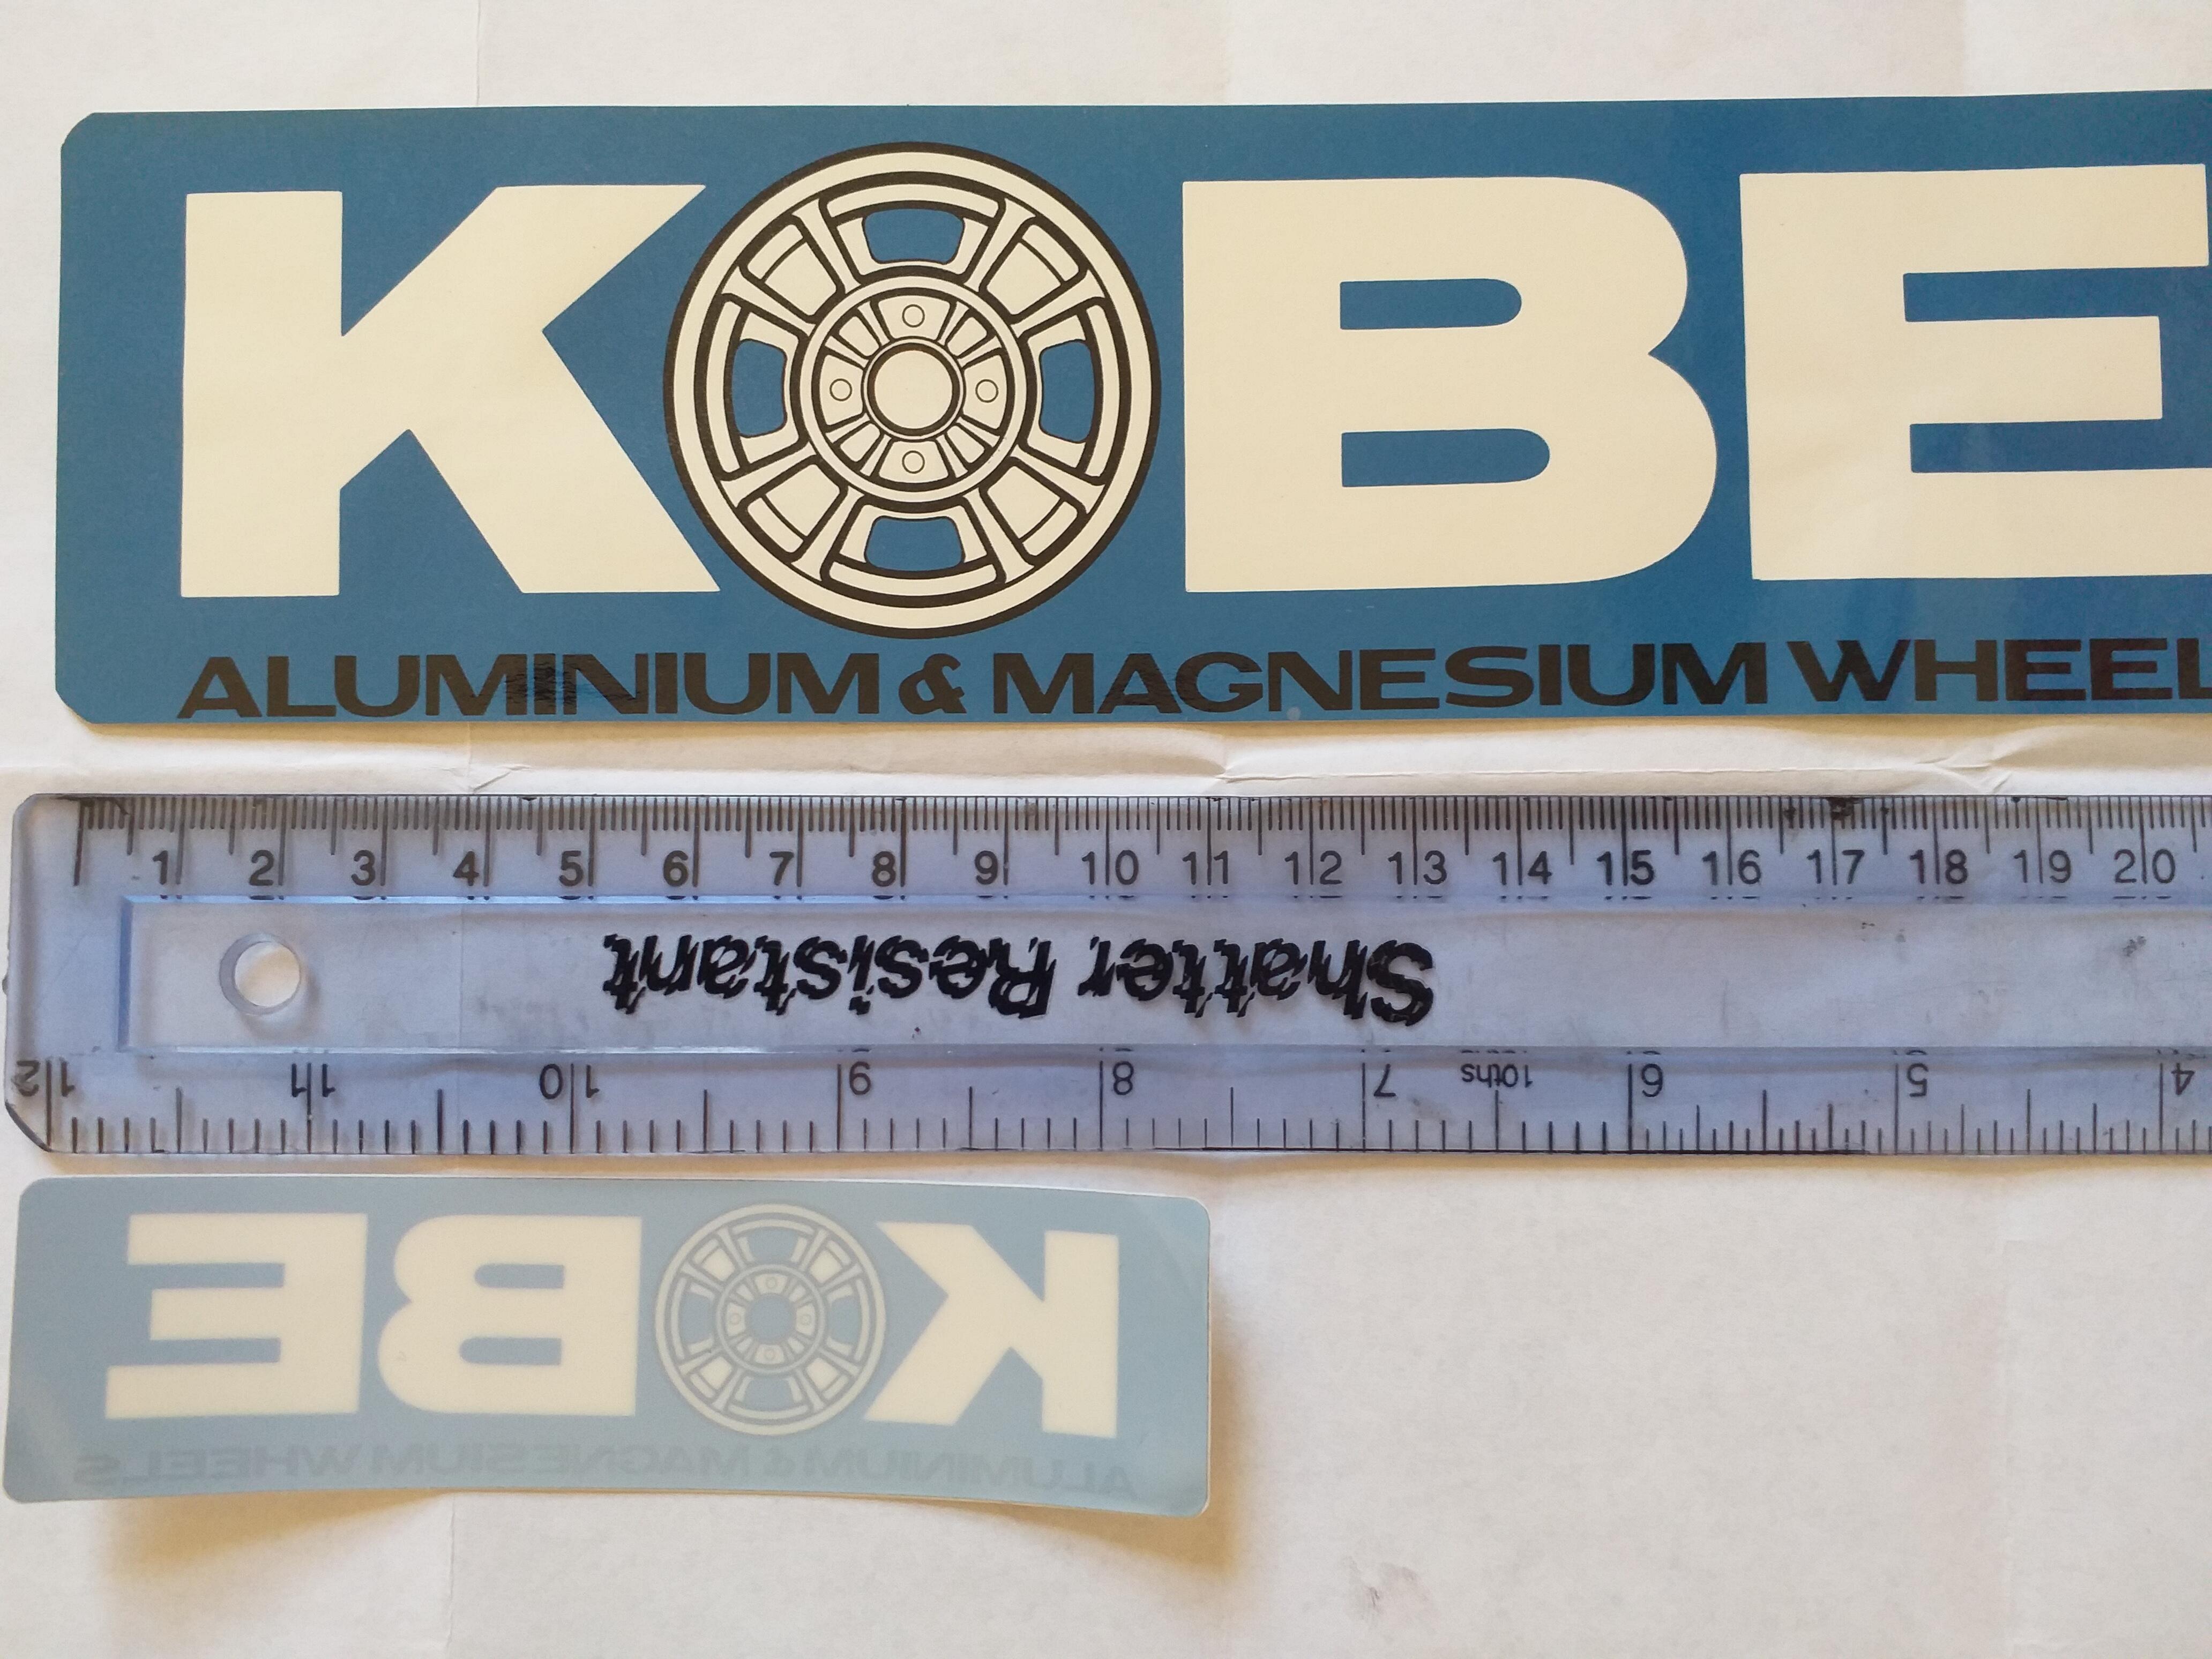
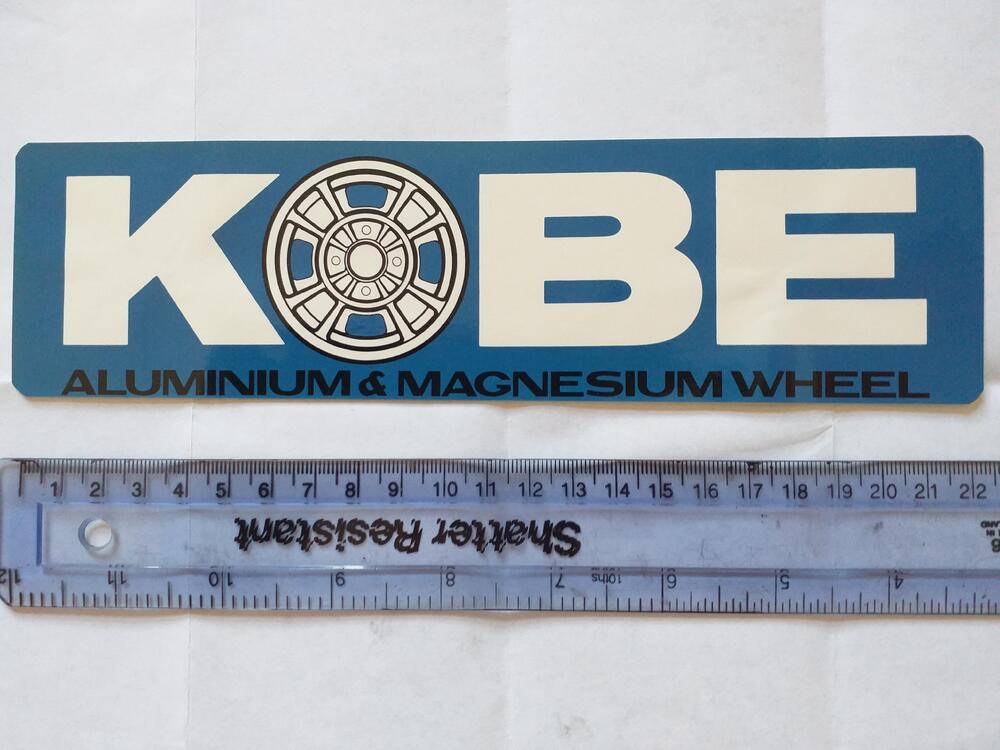
Whilst on my far too frequent trawl through various searches on Yahoo Japan auctions, I found this Kobe Seiko wheel sticker. I loved it, but the price was high, and I left it a few weeks, and finally convinced myself (well the wallet) to buy it. Its fairly well documented on here who Kobe Seiko were and the wheels that they produced for the S30, as well as wheels for various other cars. I liked it as the wheel featuring on the sticker is a Maglloy version, Kobe released in, I think, 1978, and I am lucky enough to own. The original sticker is quite large (22cm) and due to its expense, I didn't want to use, or where to put it. So, I had the original scanned, scaled down (33%), added the blue colour to the hub centre, and added a "s" to wheels instead of "magnesium and aluminium wheel". This meant the text needed recentered. It reads better being plural, as I presume plurals in the Japanese language isn't something done? Whilst I was there, I had a half size and original size made (as a flie ready to make) as well. Also, the original looks like its been cut out of a sheet of stickers, as the gap at the bottom, below the text, tapers a little, this I also had adjusted. Then had one of the sticker making companies make a small batch of the 33% scaled down, into window stickers, so they stick on the inside of the window. Now the sticker is about 114mm long, a much better size to put on the car. Not done that yet, but peeling a bit of the backing away, the company making these has done a great job. If anyone wants one (for little $), drop me a line, but the reason I did this was to have a Kobe sticker I could use, and printing by the company is a minimum order quantity wise. Also, share this great original sticker for what it is.
 1 point
 -
1 point
-
1 pointhttps://speedhut.com/gauge-applications/revolution-racing-performance/performance-led-tachometer/performance-led-standard-tachometer/4-tachometer-8k-rpm-shift-light-jdm-datsun-z-series/?dd-link=0kx6p31reeb The Speedhut 4" tach is a good fit for the stock gauge bezel. I can't find my photos atm of when I did it but a few members here have done it. You do have to take Speedhut housing off and modify the stock housing but it is a good fit and looks largely original. Have a look at post #83,1 point
-
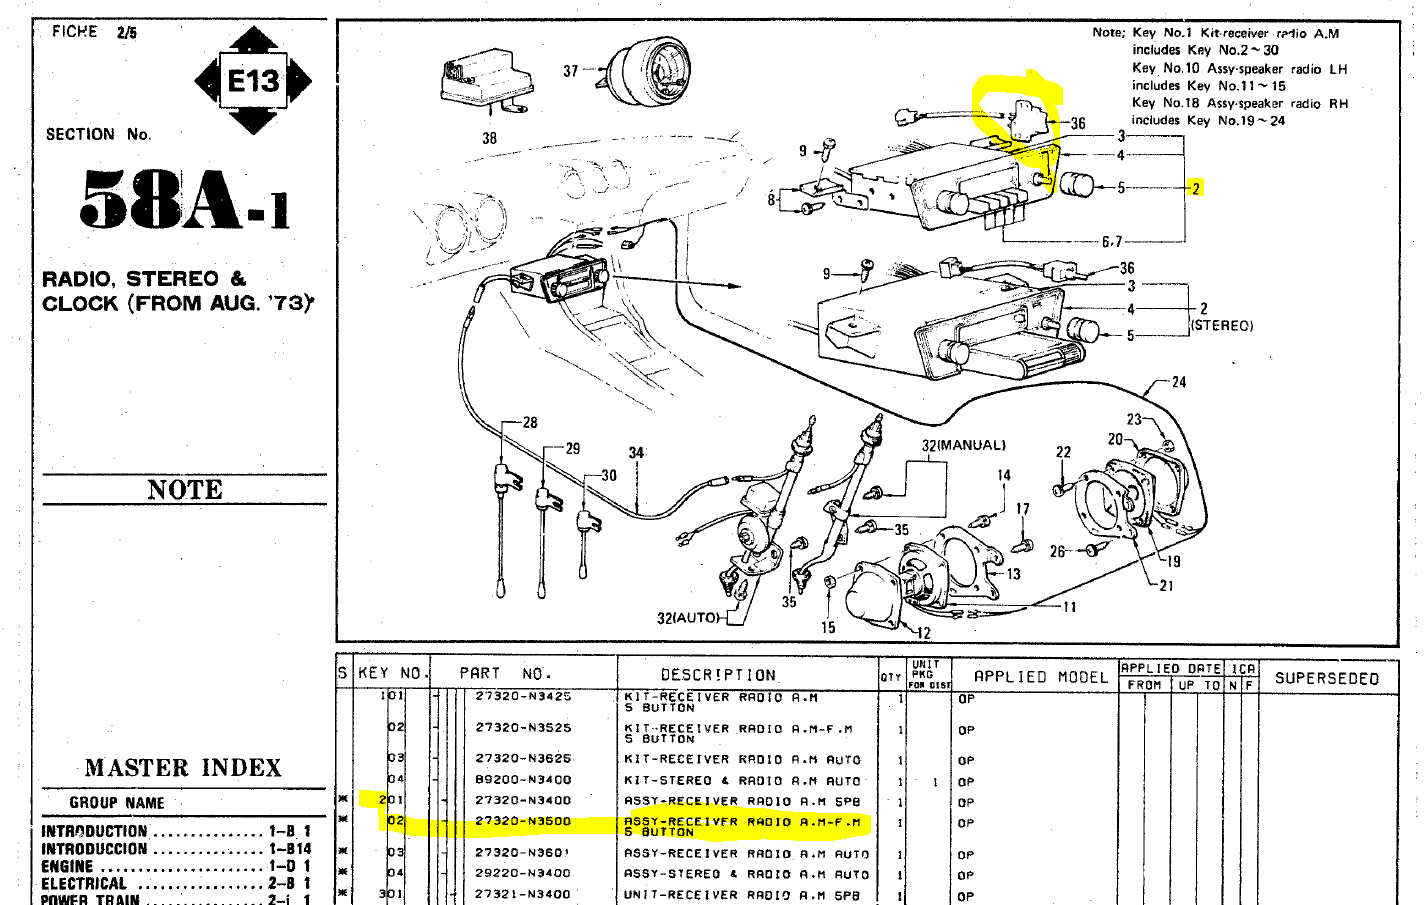
Looks like this AM-FM one shown in the 1976 Euro parts book, found in the downloads section. It has the early switch for the auto antenna that only came on the early AM only radios (Hitachi) here in North America.
 1 point
 -
I don't believe that is a 280z radio. I believe its for a 240z. Btw if it works, its quite valuable! It even has value if it doesn't work. Look on Ebay to see what I mean1 point
-
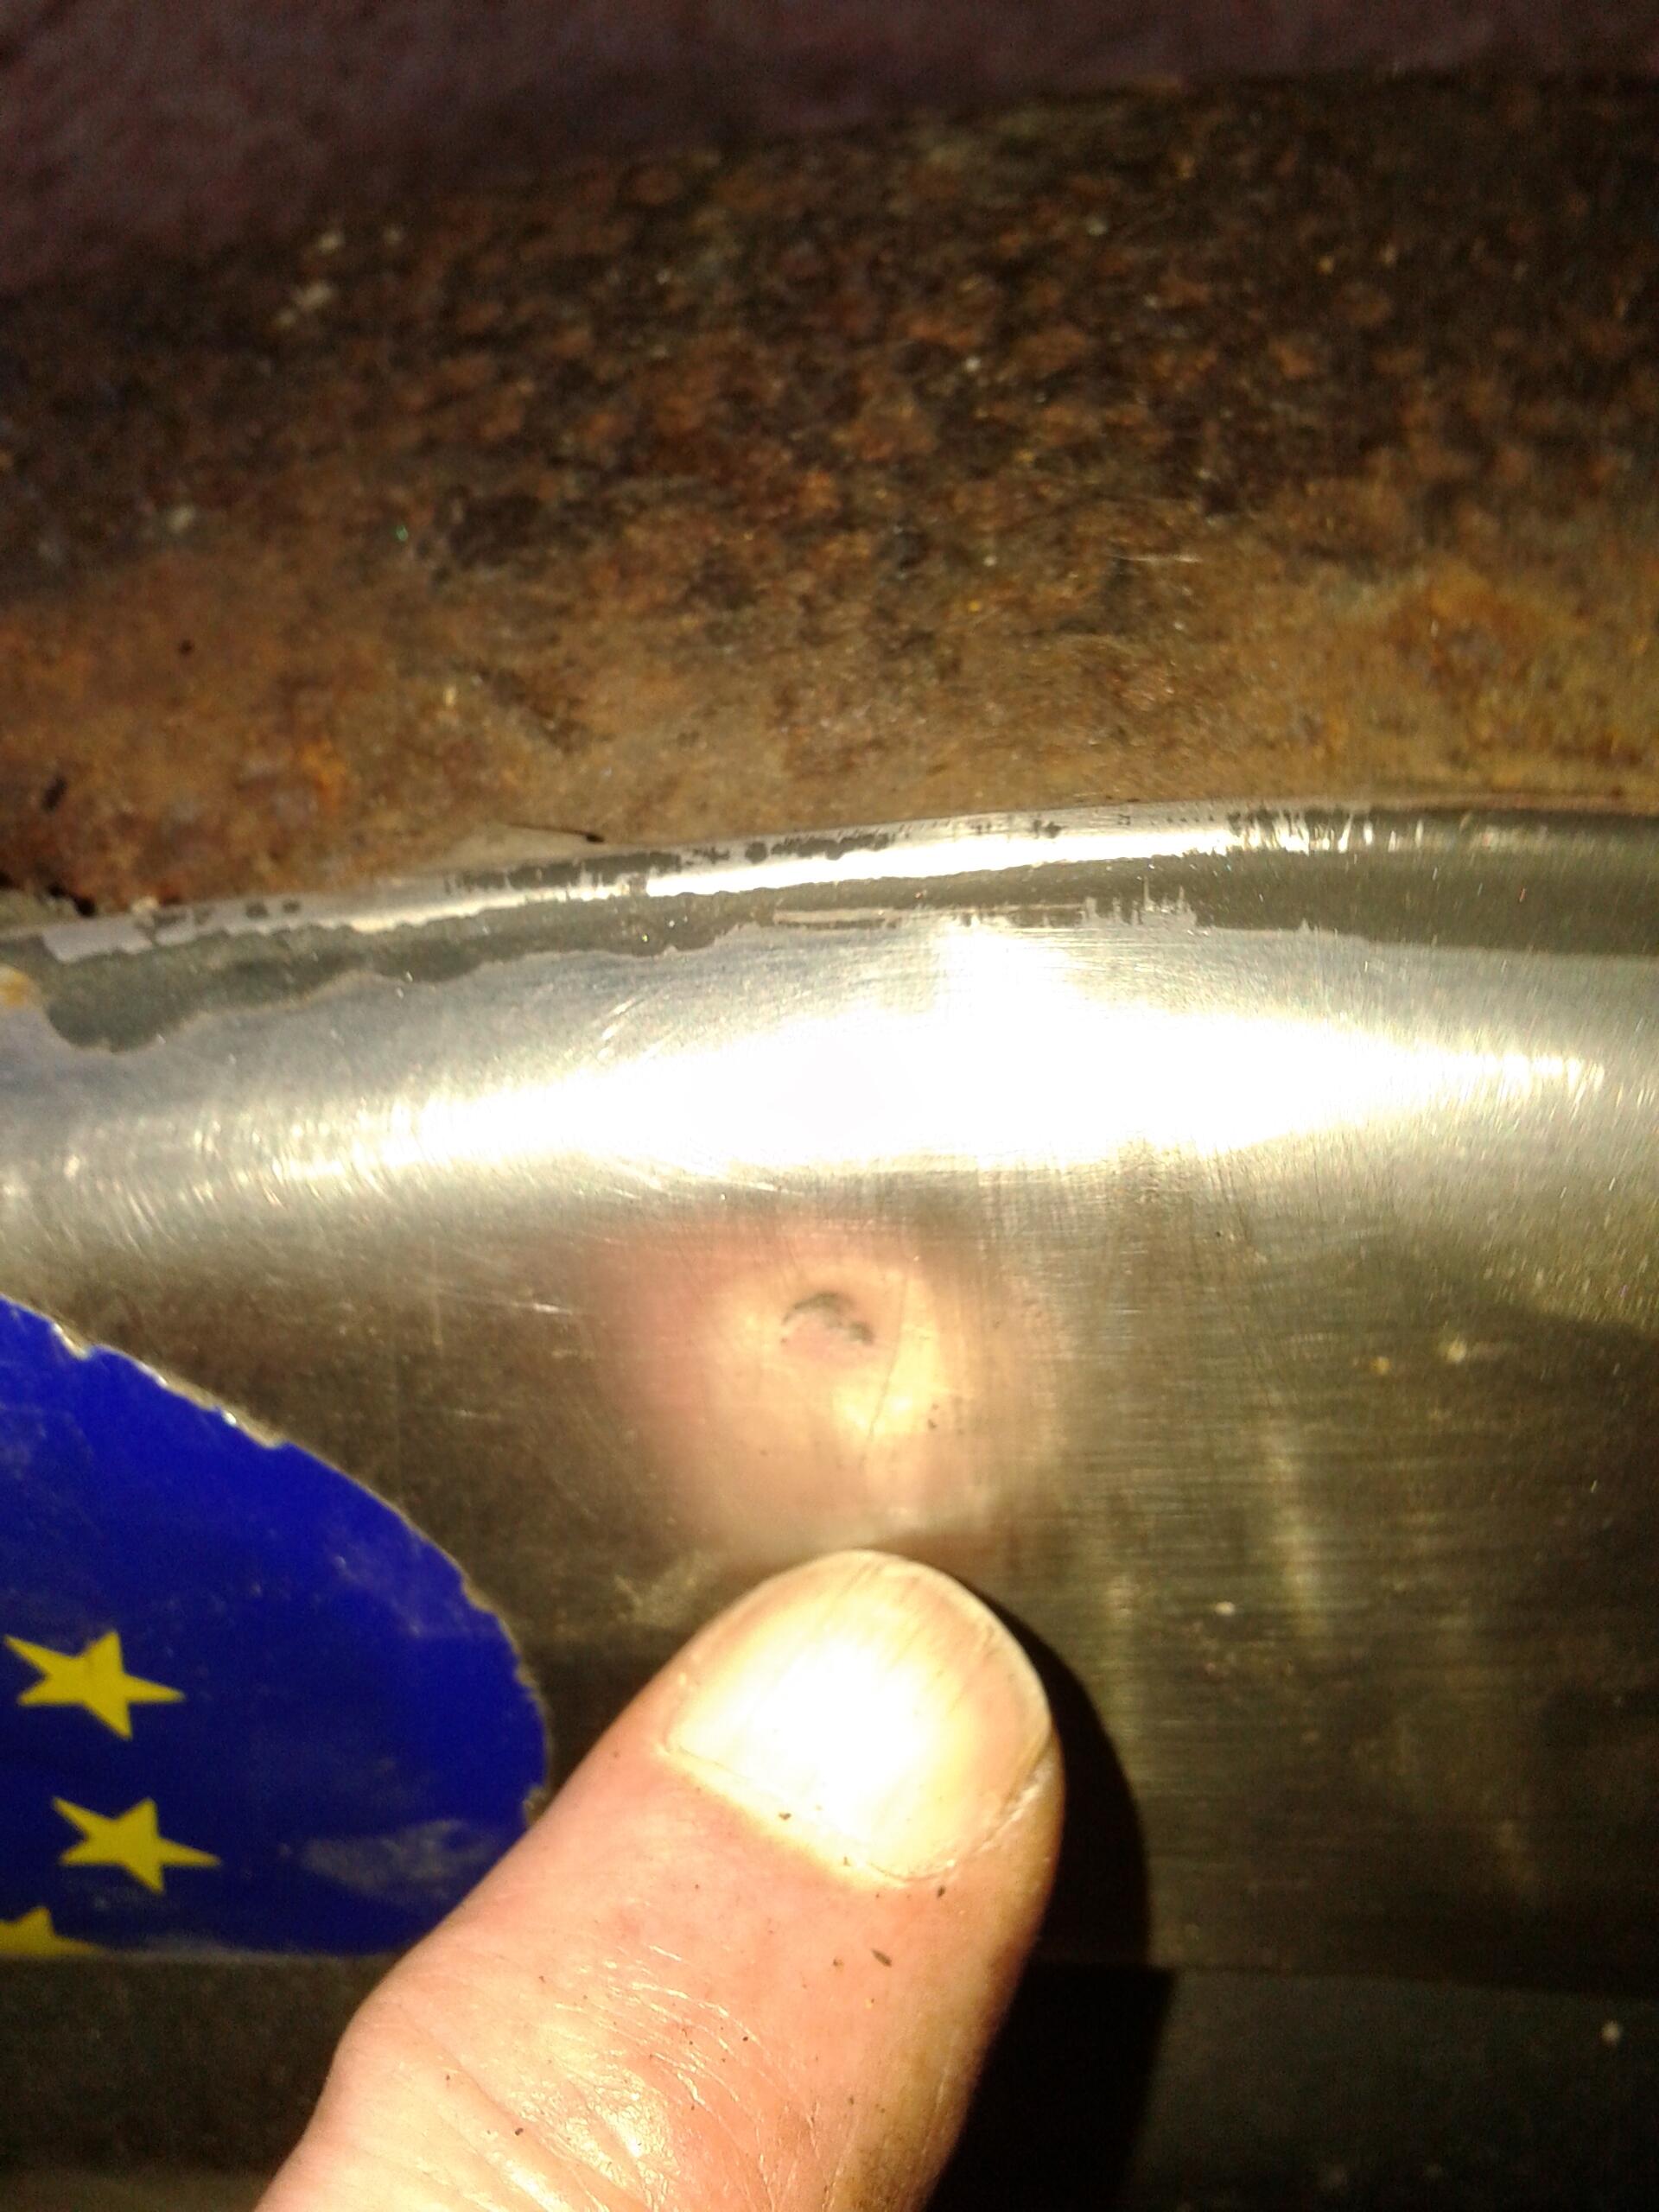
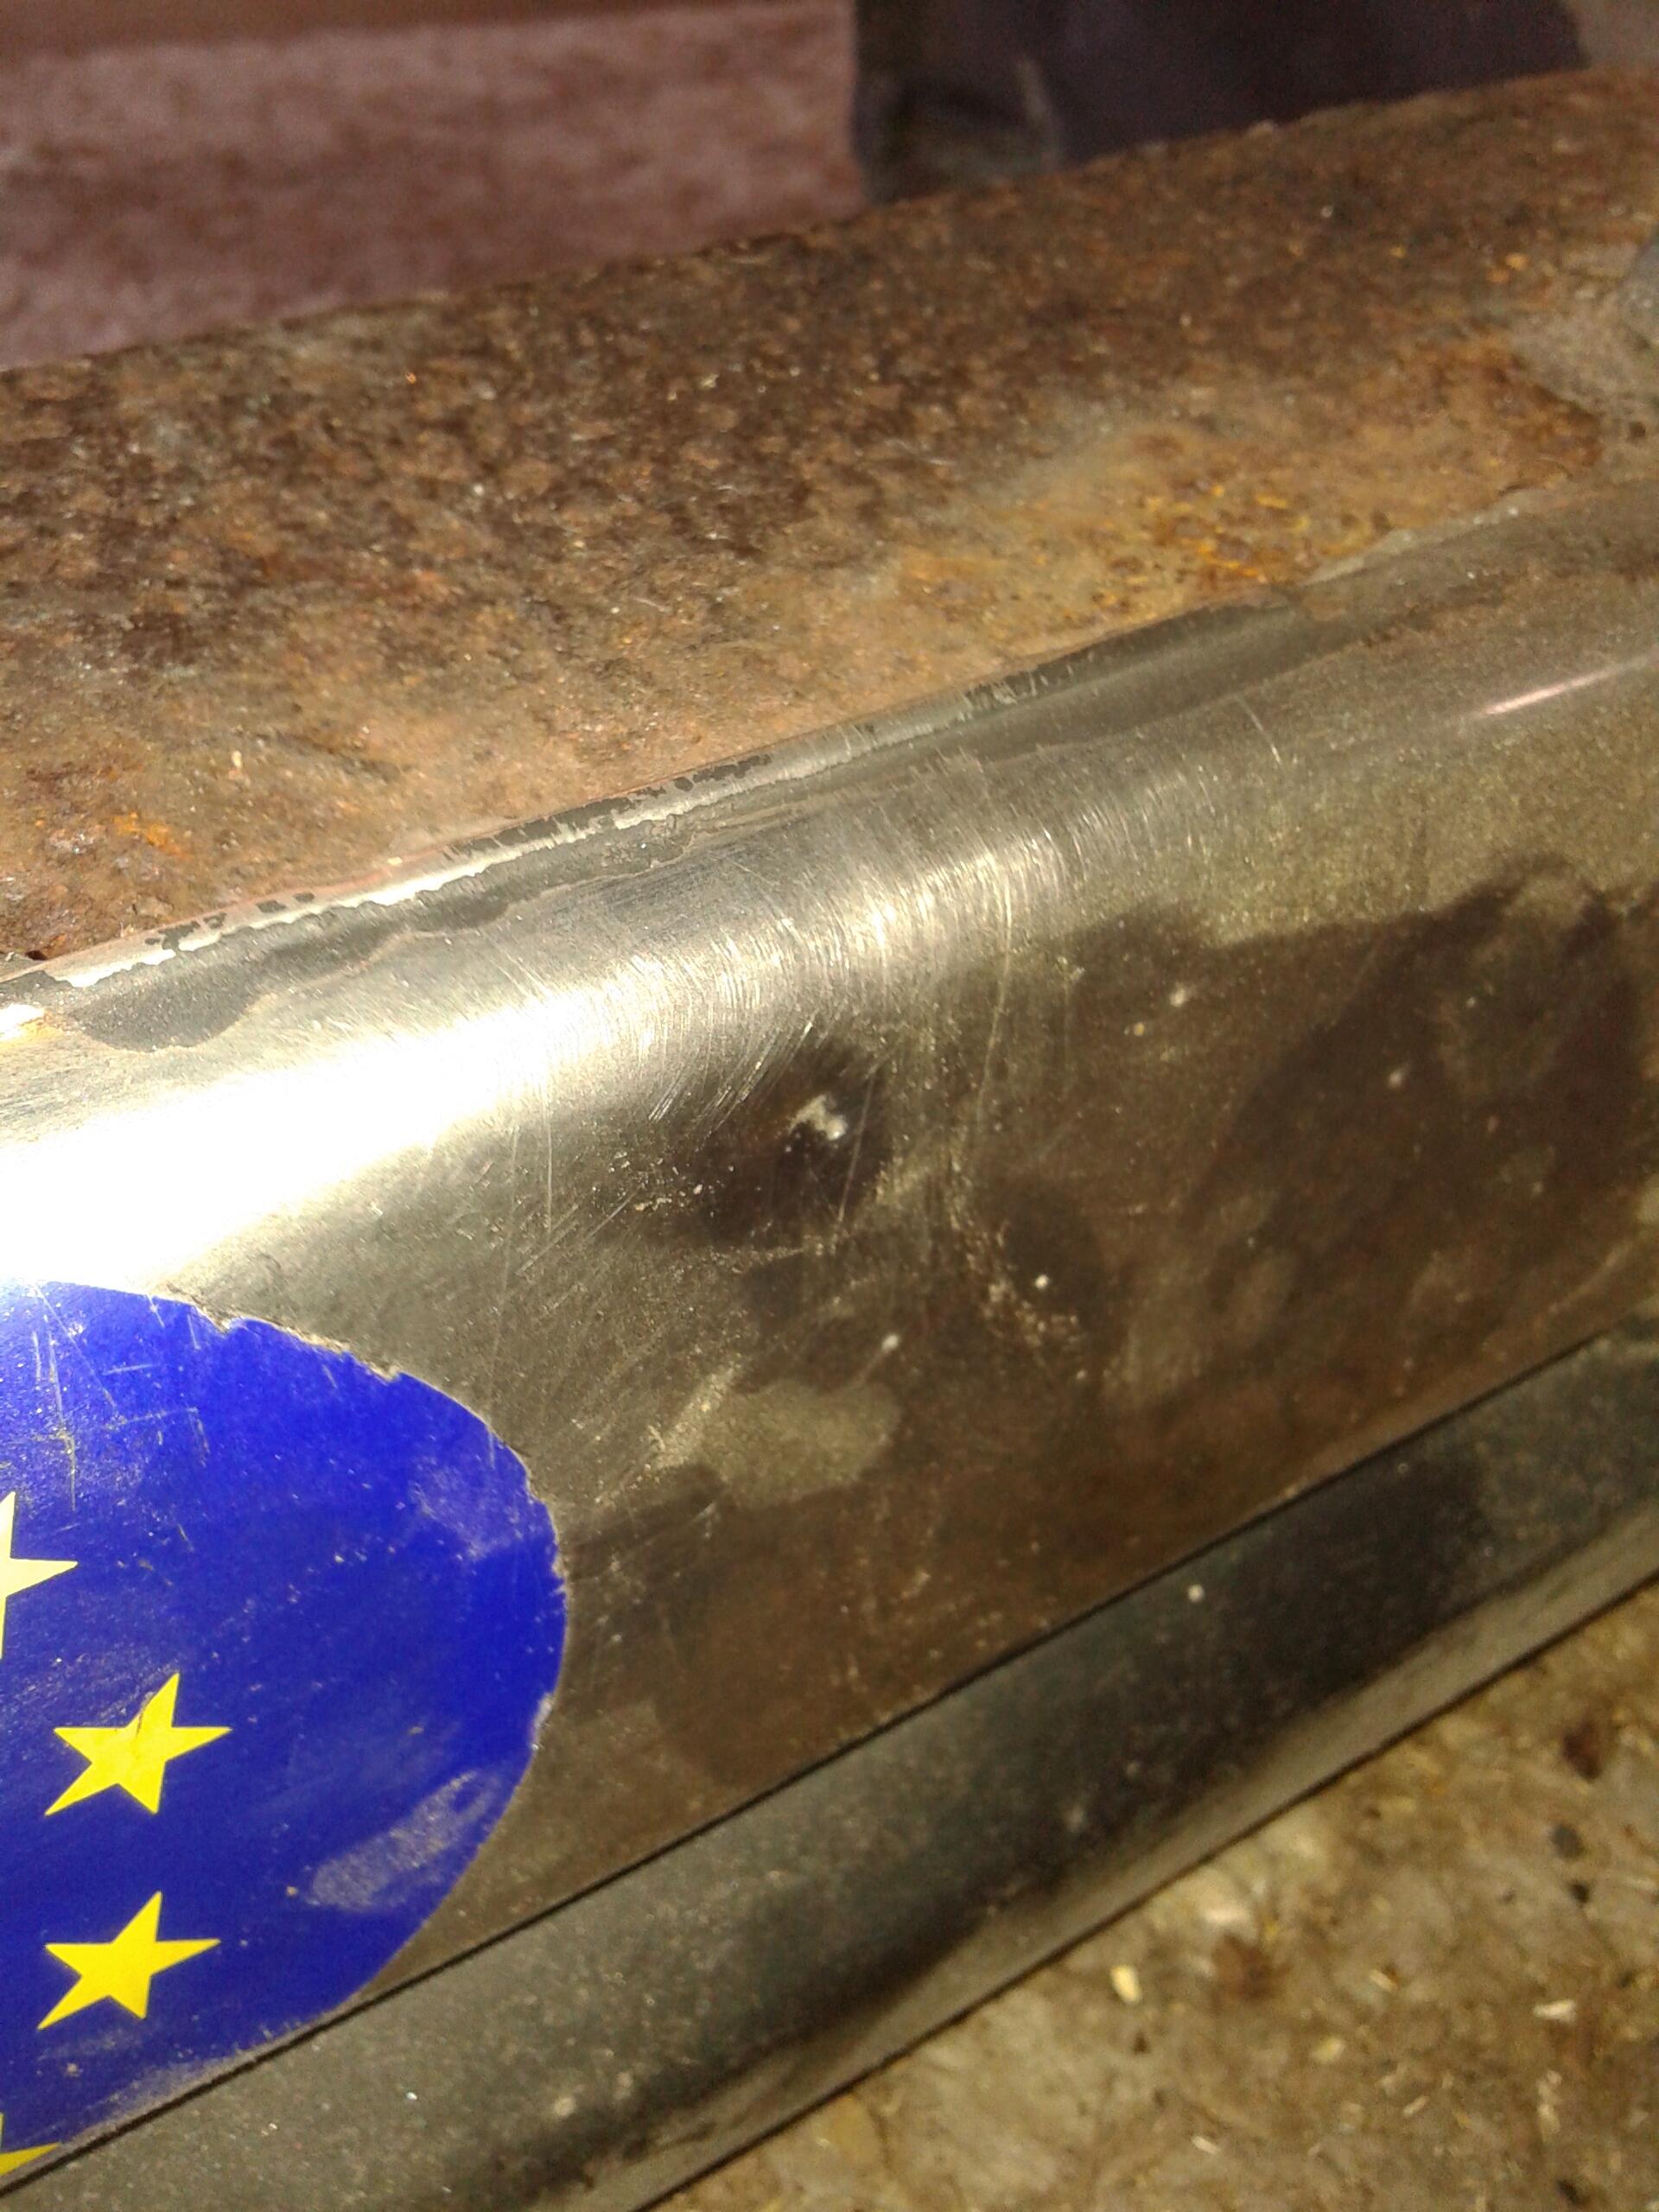
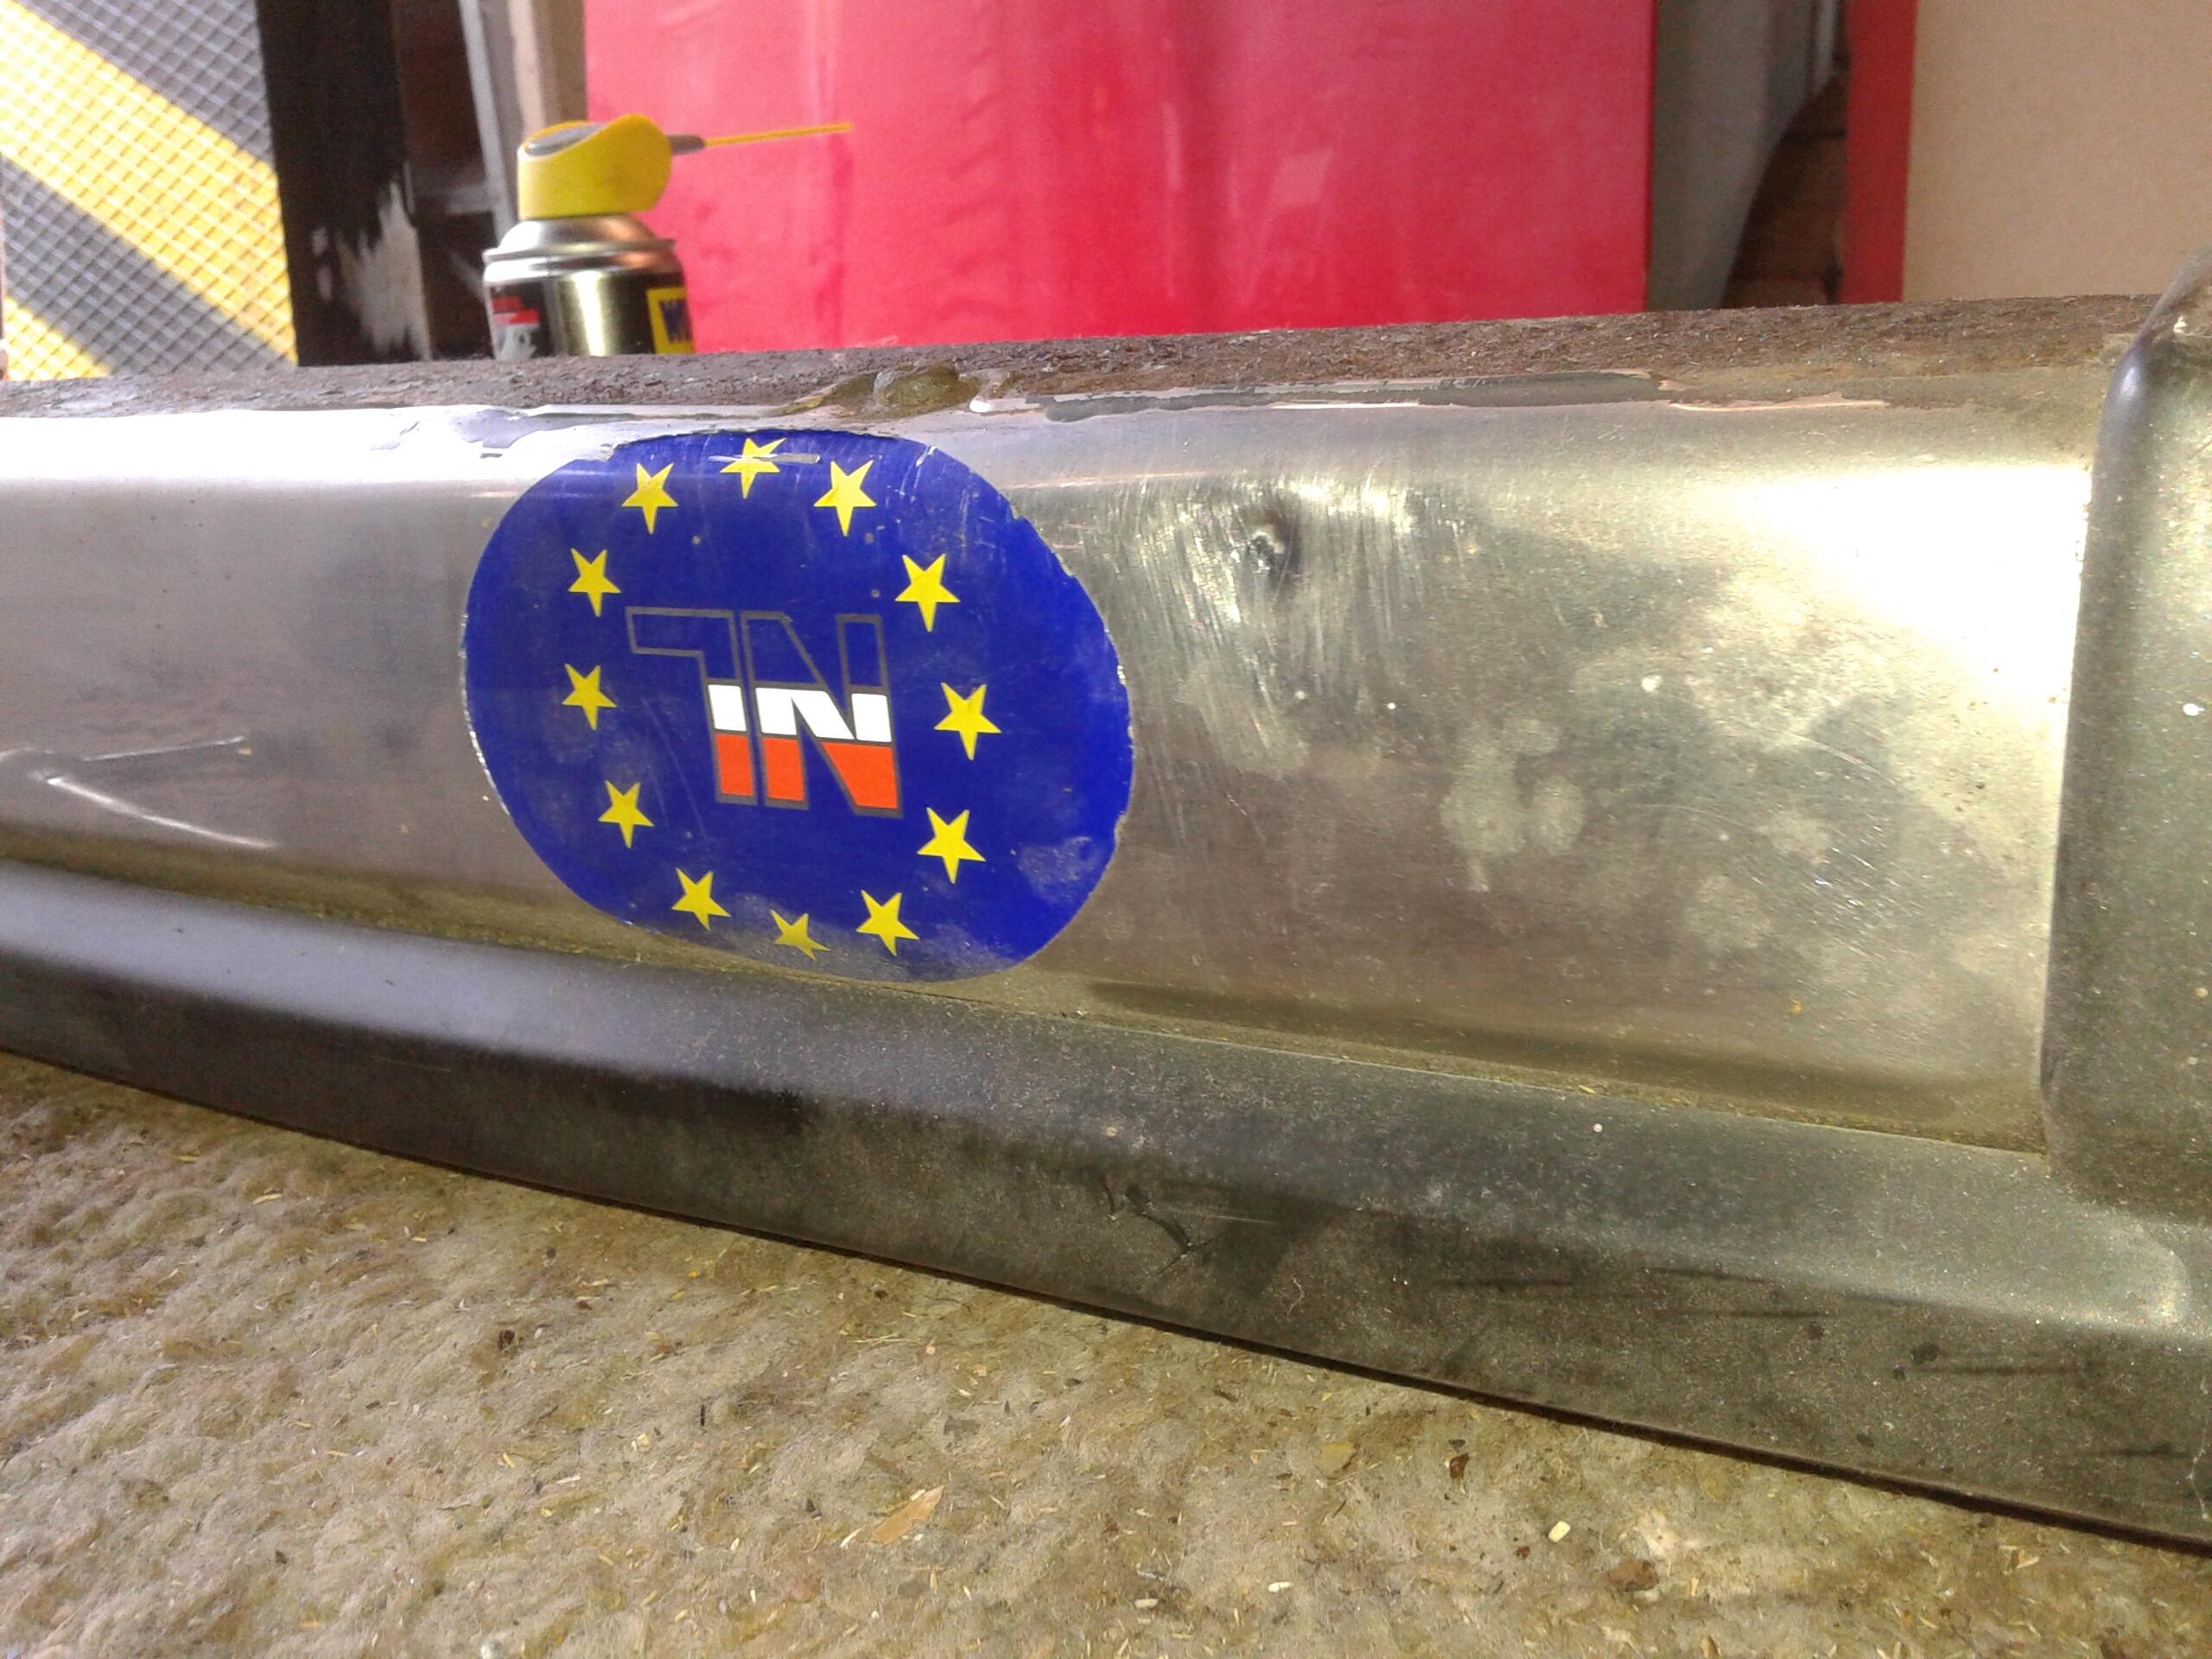
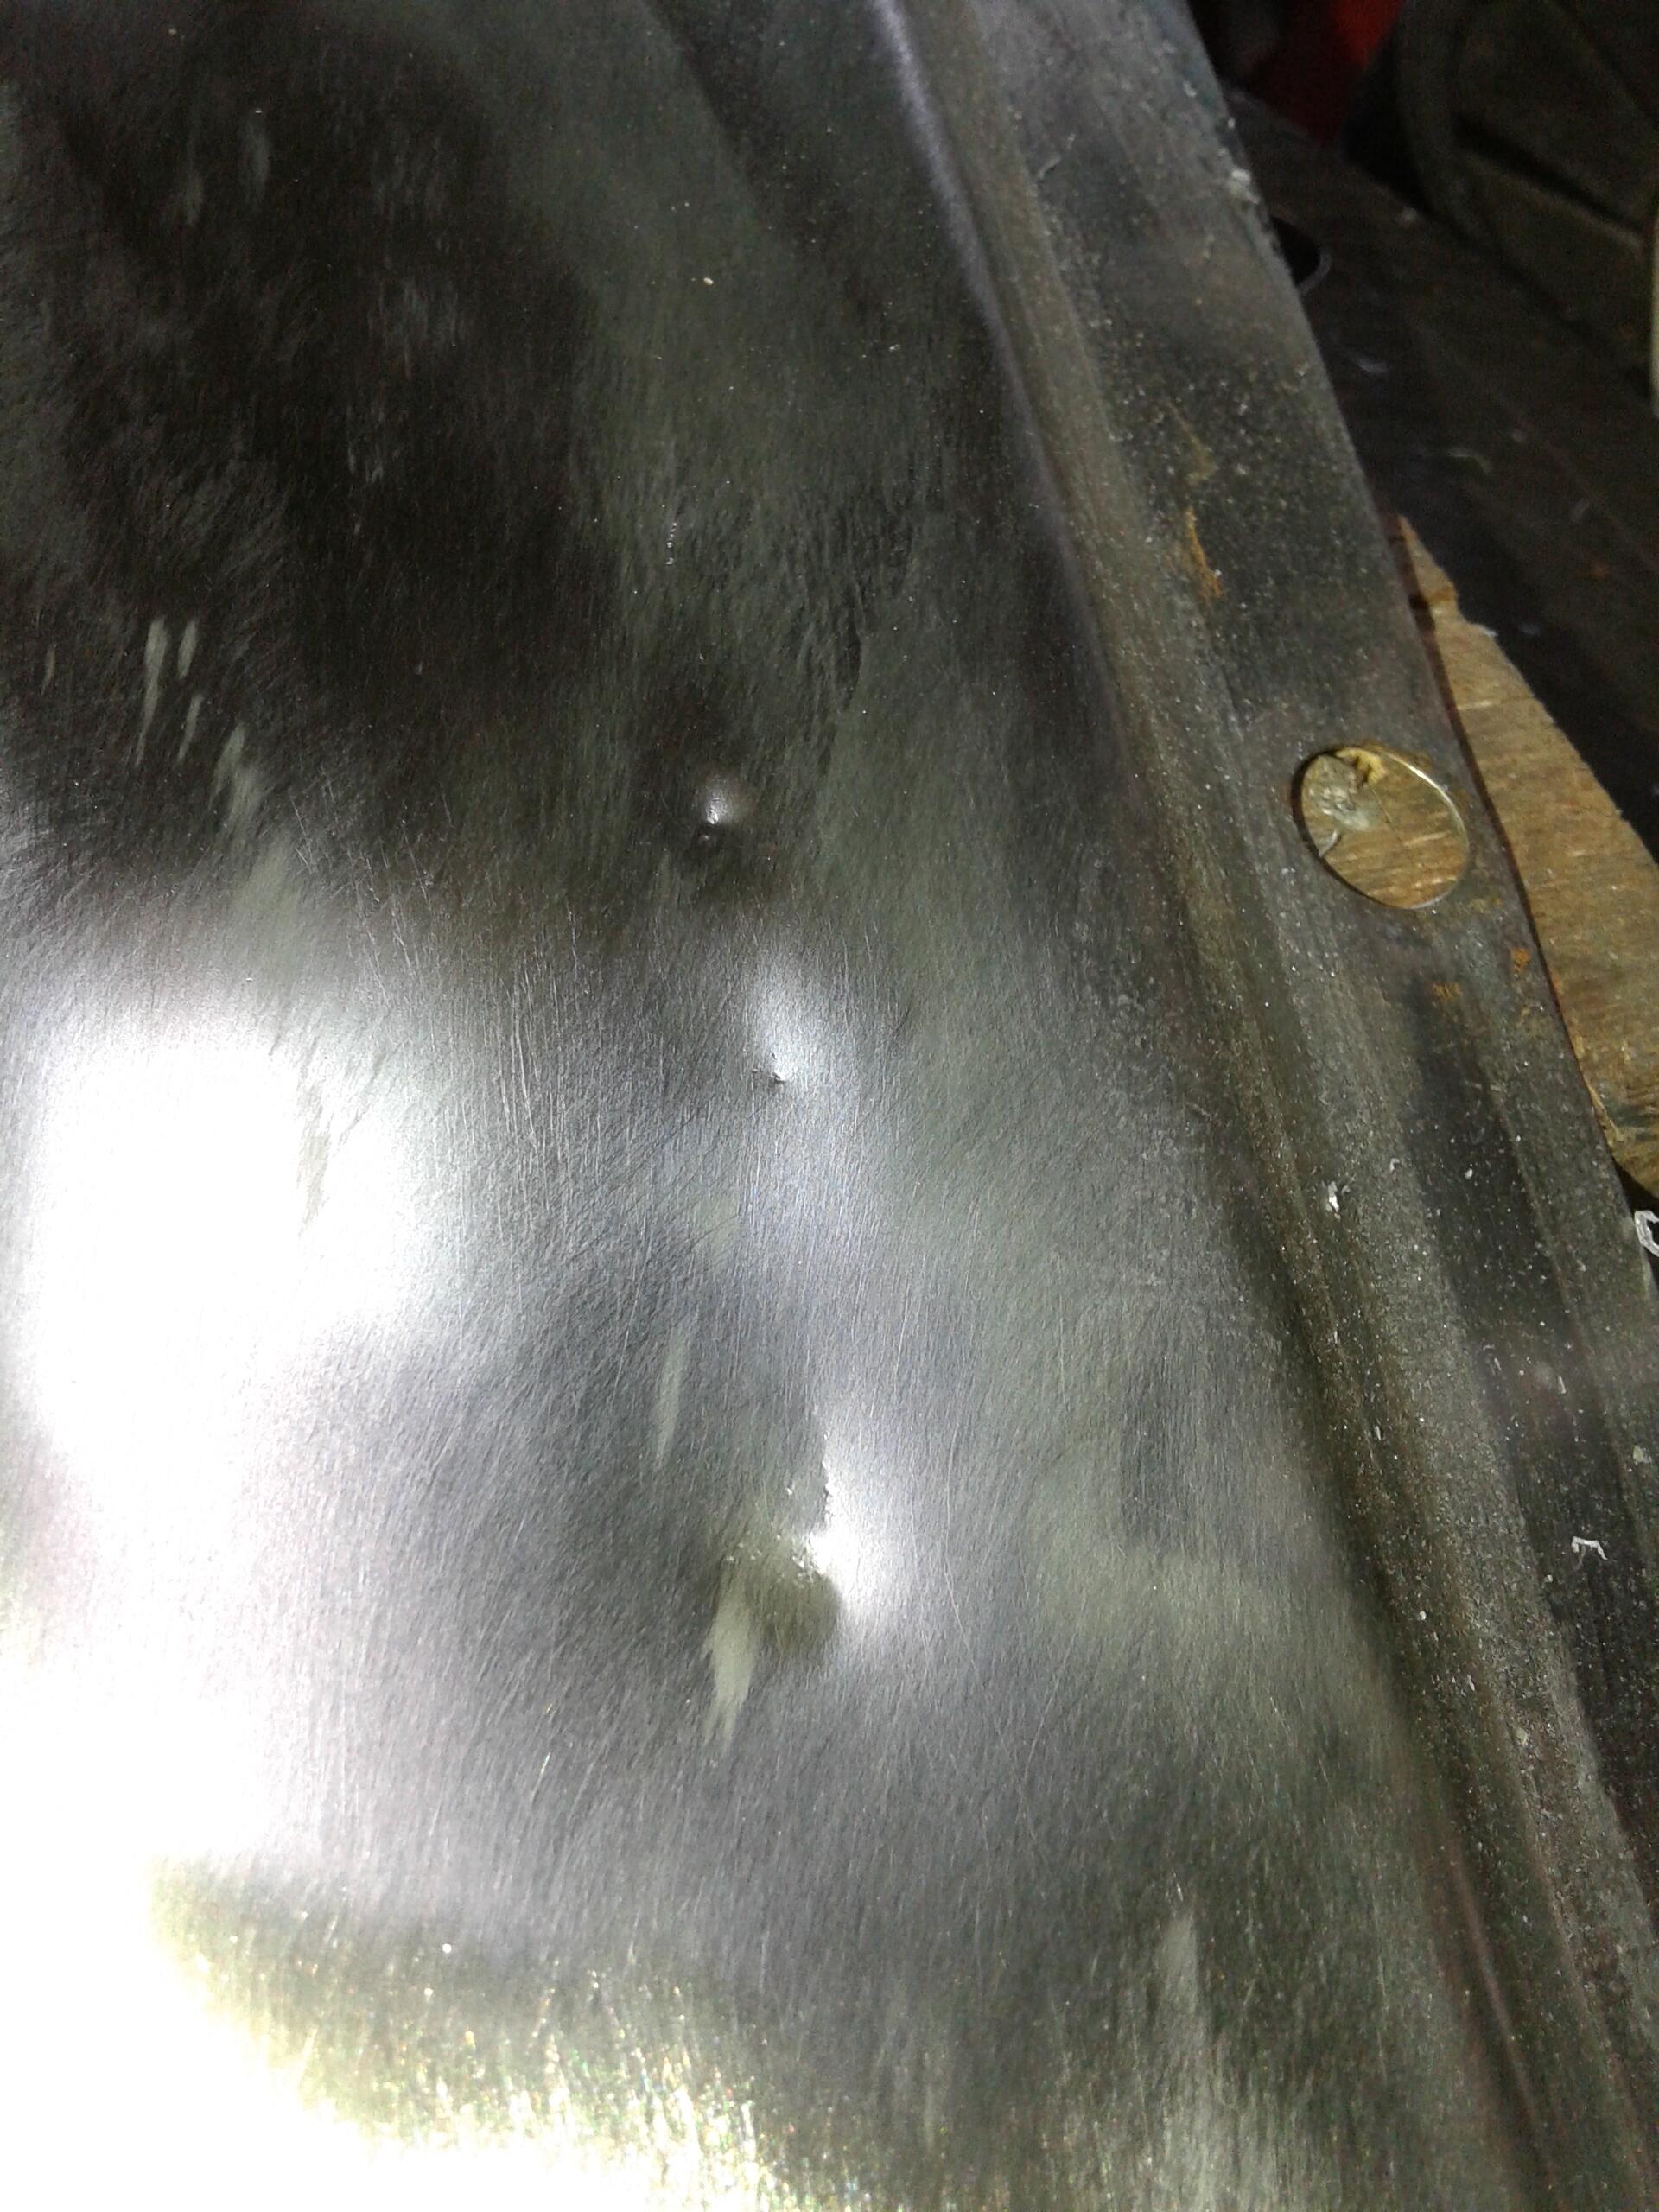
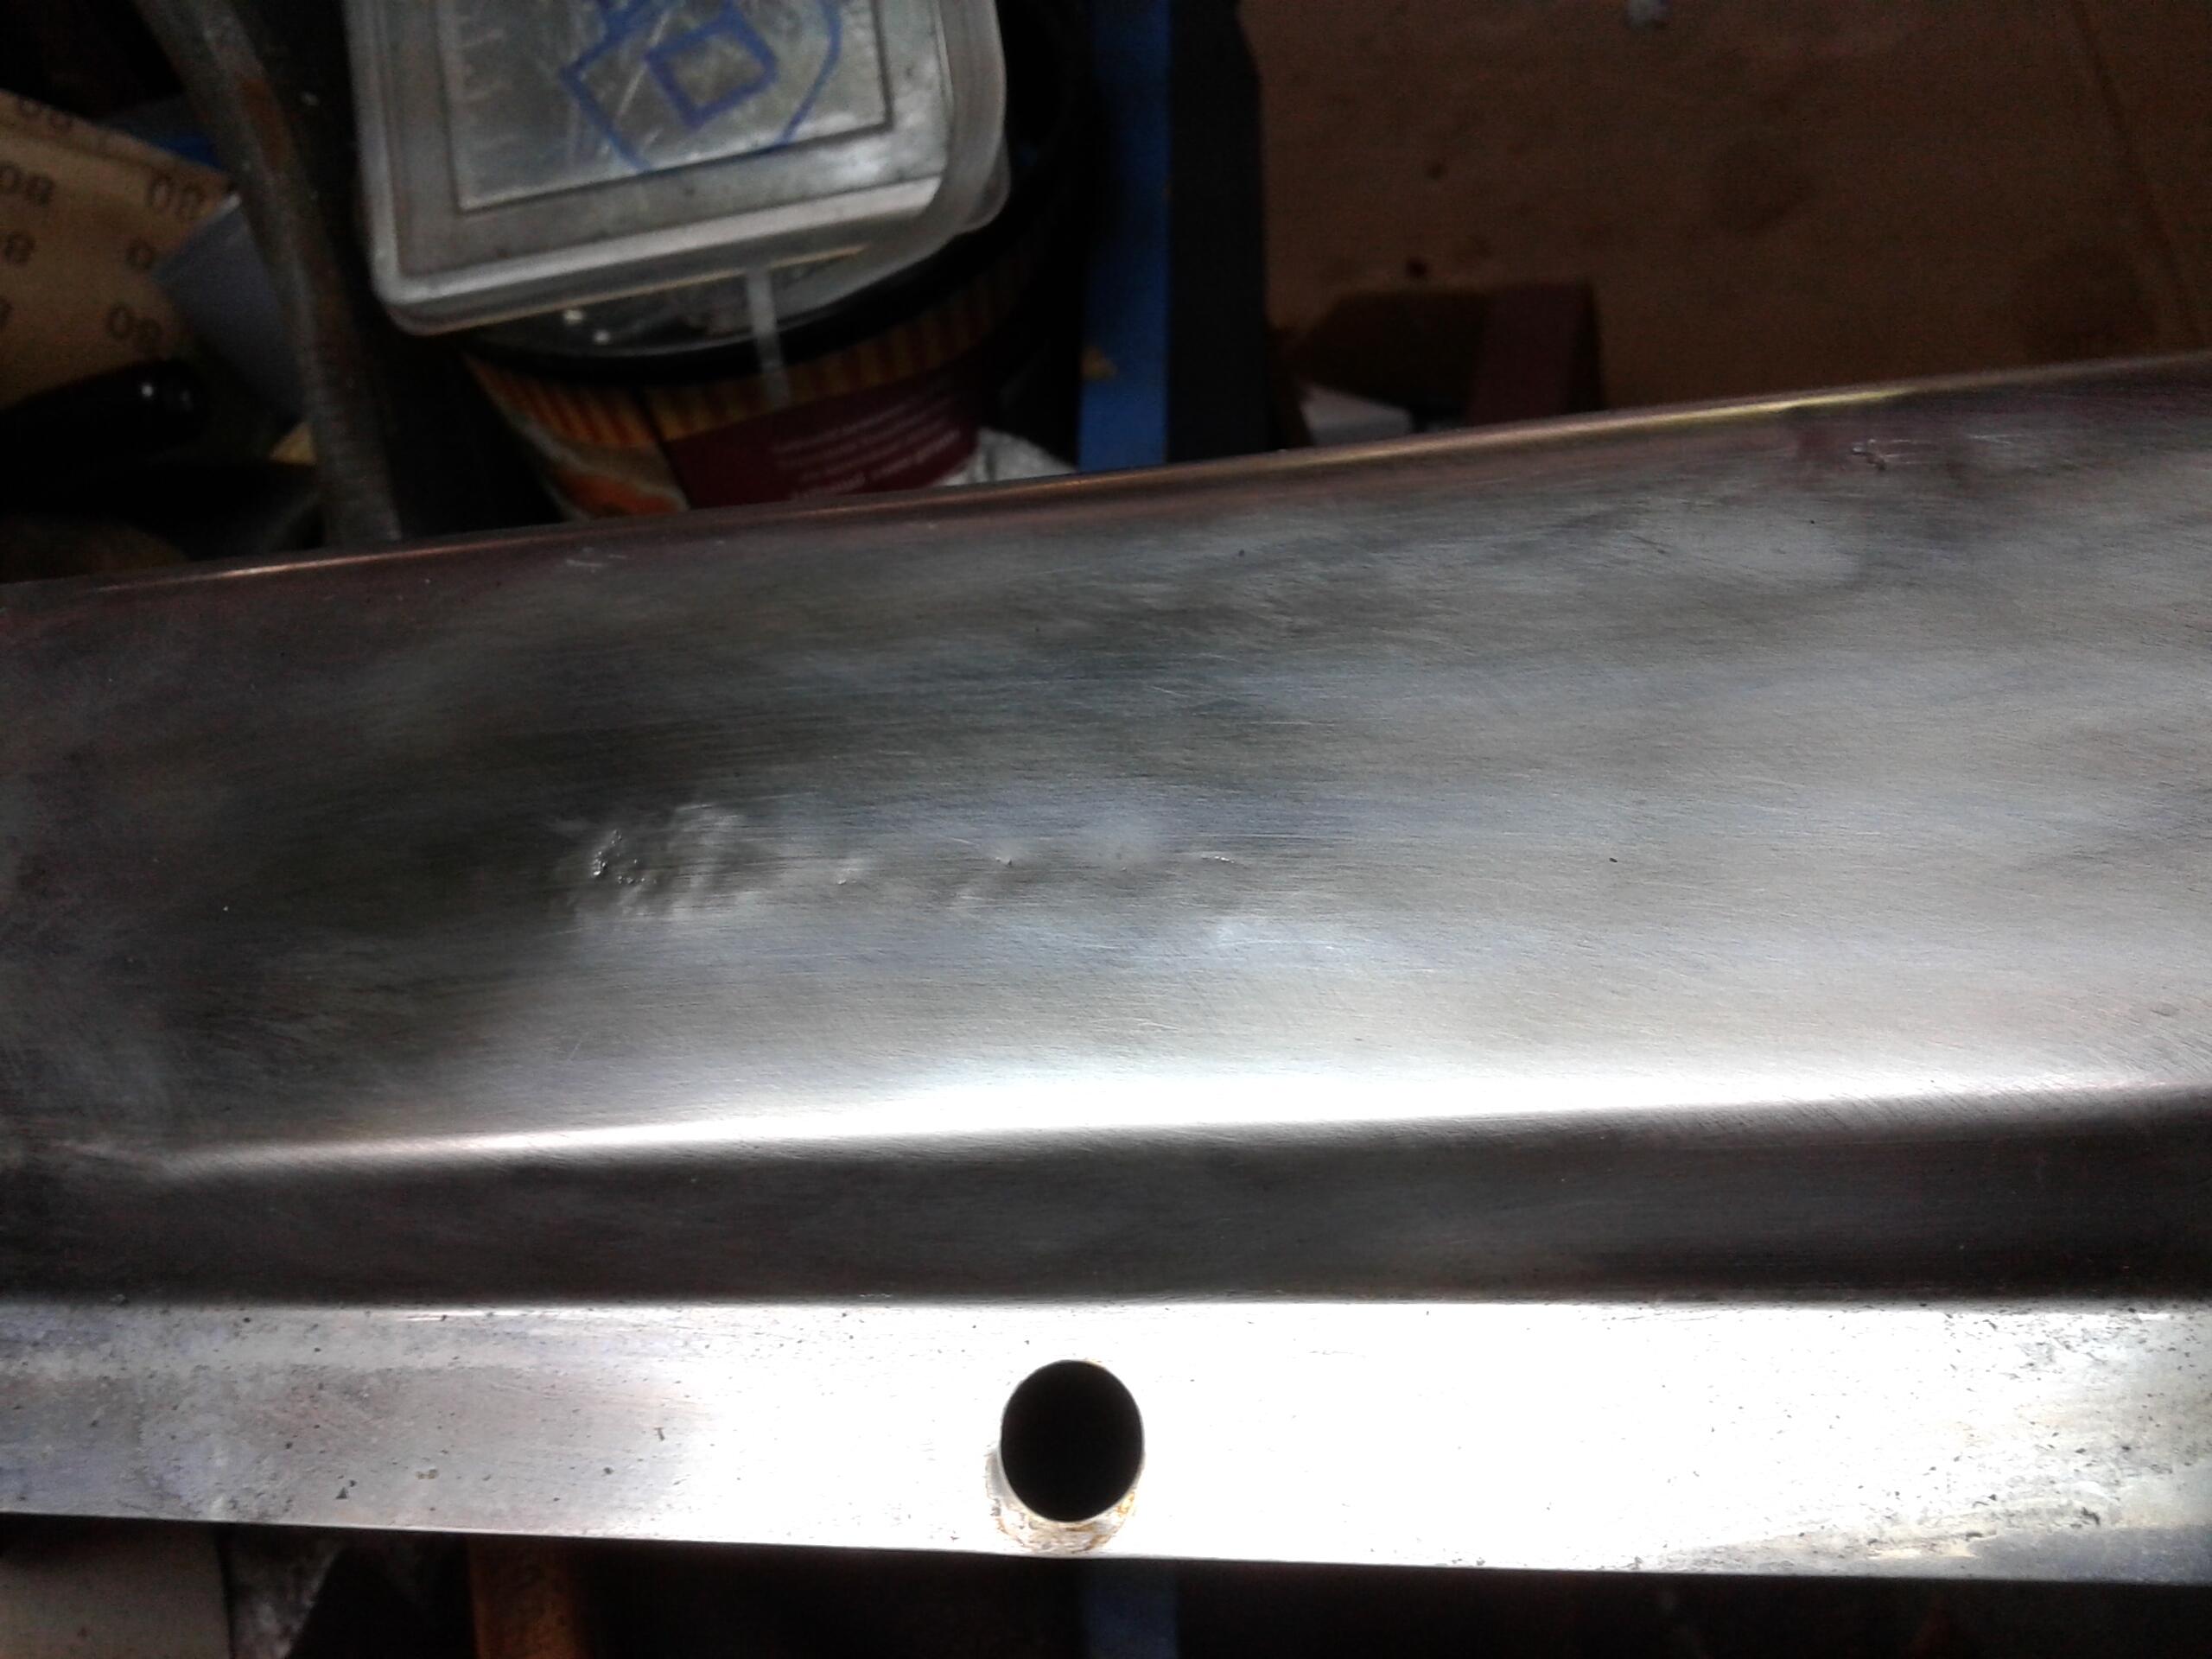
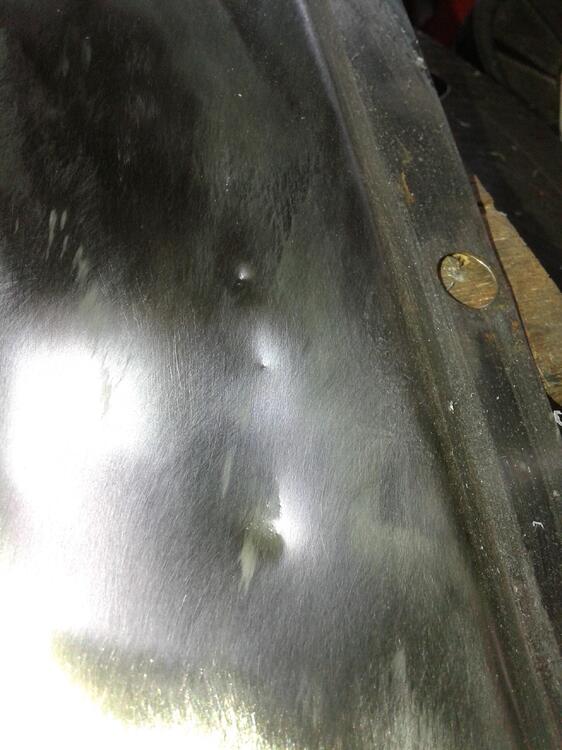
Aha.. i didn't notice that.. (I look at the repair not on the hands who are doing the work haha) I once had some very difficult dents in the rear bumper from my 280zx and worked on it for about 3 days every afternoon some hours.. I think the result is about perfect? This metal part is stainless and very hard and only 0.68 mm thick. It had some nasty dents.. the PO had bought some stickers for them haha... When i look at how bad it was.. i'm surprised myself haha.. It turned out very well.


 1 point
 -
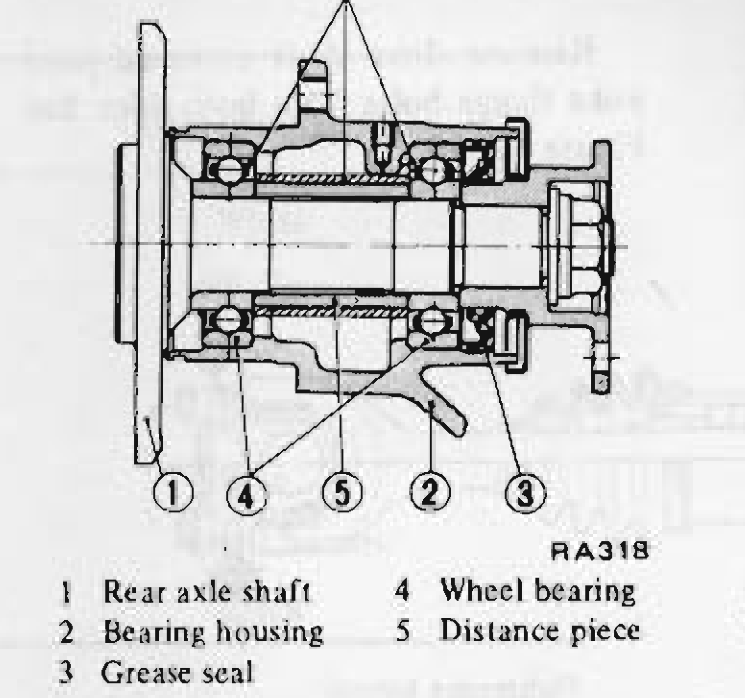
1 pointMore heat? Make sure the heat is focused on the parts that need to expand. The casting that holds the outer race or the bearing inner race. Not the axle shaft. Looking at the drawing, a torch flame on the casting/housing is your best bet. Inner and outer so the bearing races get hot too. If the grease isn't smoking there's room for more heat.
 1 point
 -
1 pointMy friend replaced the wheel bearings in my 260Z a few years back. The right side didn't budge until I was hitting it with a slide hammer while he was on the other side with an air hammer. Sometimes they are just that stubborn.1 point
-
1 pointYou are pretty much on your own in determining the correct size. Aftermarket louvers were offered by a many companies and the installation hardware varied. Some like Shadow did not require any drilling and could be lifted for cleaning with a set of small keys. Best bet is to dig around your fastener stash for a few sheet metal screws an apply the trial and error method.1 point
-
1 pointIt did feel larger, but not very much. Looking at the nose to nose they are not that different on length, but the new one is higher and definitely heavier. Sitting in it kind of felt like home but it's definitely not as roomy as my 240z. The 3 gauges on the dash were left - low speed turbo, center - high speed turbo and I think the right was a clock (I didn't get that far right on the gauges). The dash is a screen that you can set up how you want it. Driving the car was night and day different from my 240Z (I do need to go through my suspension). Man, it's a goer! I would need some time to get used to it. The car was definingly silent! I killed it right off the bat. The controls are way tight. Feels like electric power steering, really touchy brakes. 1st gear seemed like it was lower than I expected it to be, but when you stomp on it in 2nd (pointed in the direction you want to go) it just GOES! It feels like it's very agile.1 point