Leaderboard
-
emccallum
 Subscriber
 4Points428Posts
 -
conedodger
Free Member3Points12,513Posts -
ckurtz2
Free Member2Points340Posts -

SpeedRoo
Free Member2Points359Posts


Popular Content
Showing content with the highest reputation on 08/31/2023 in Posts
-
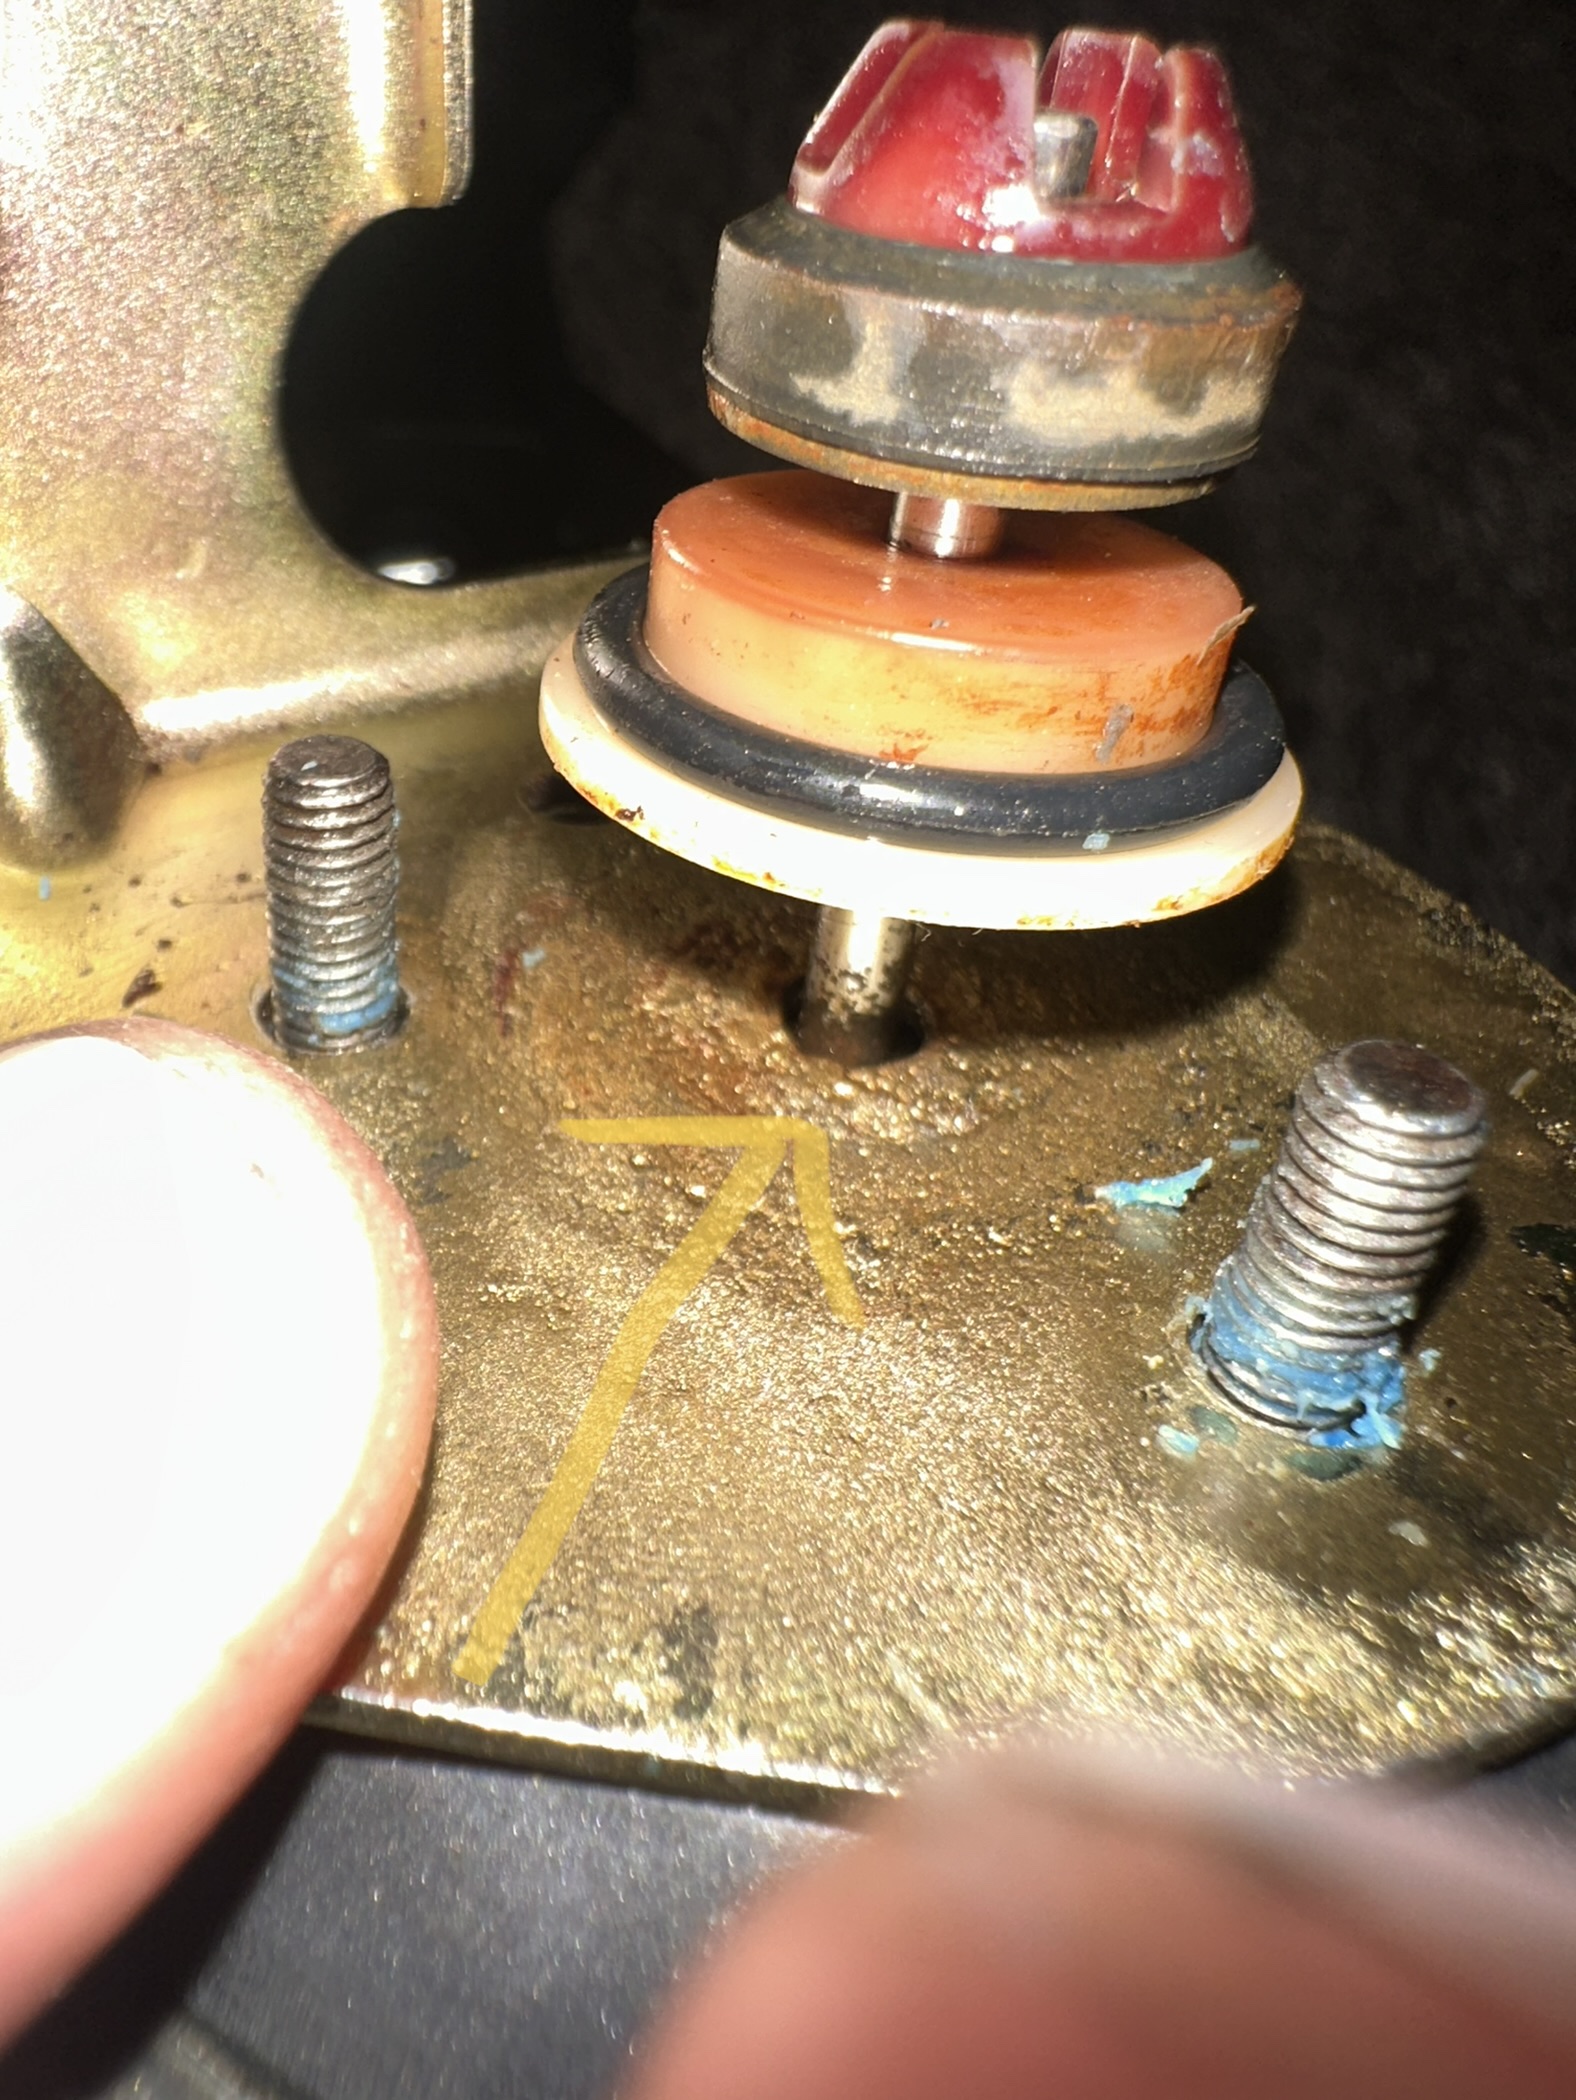
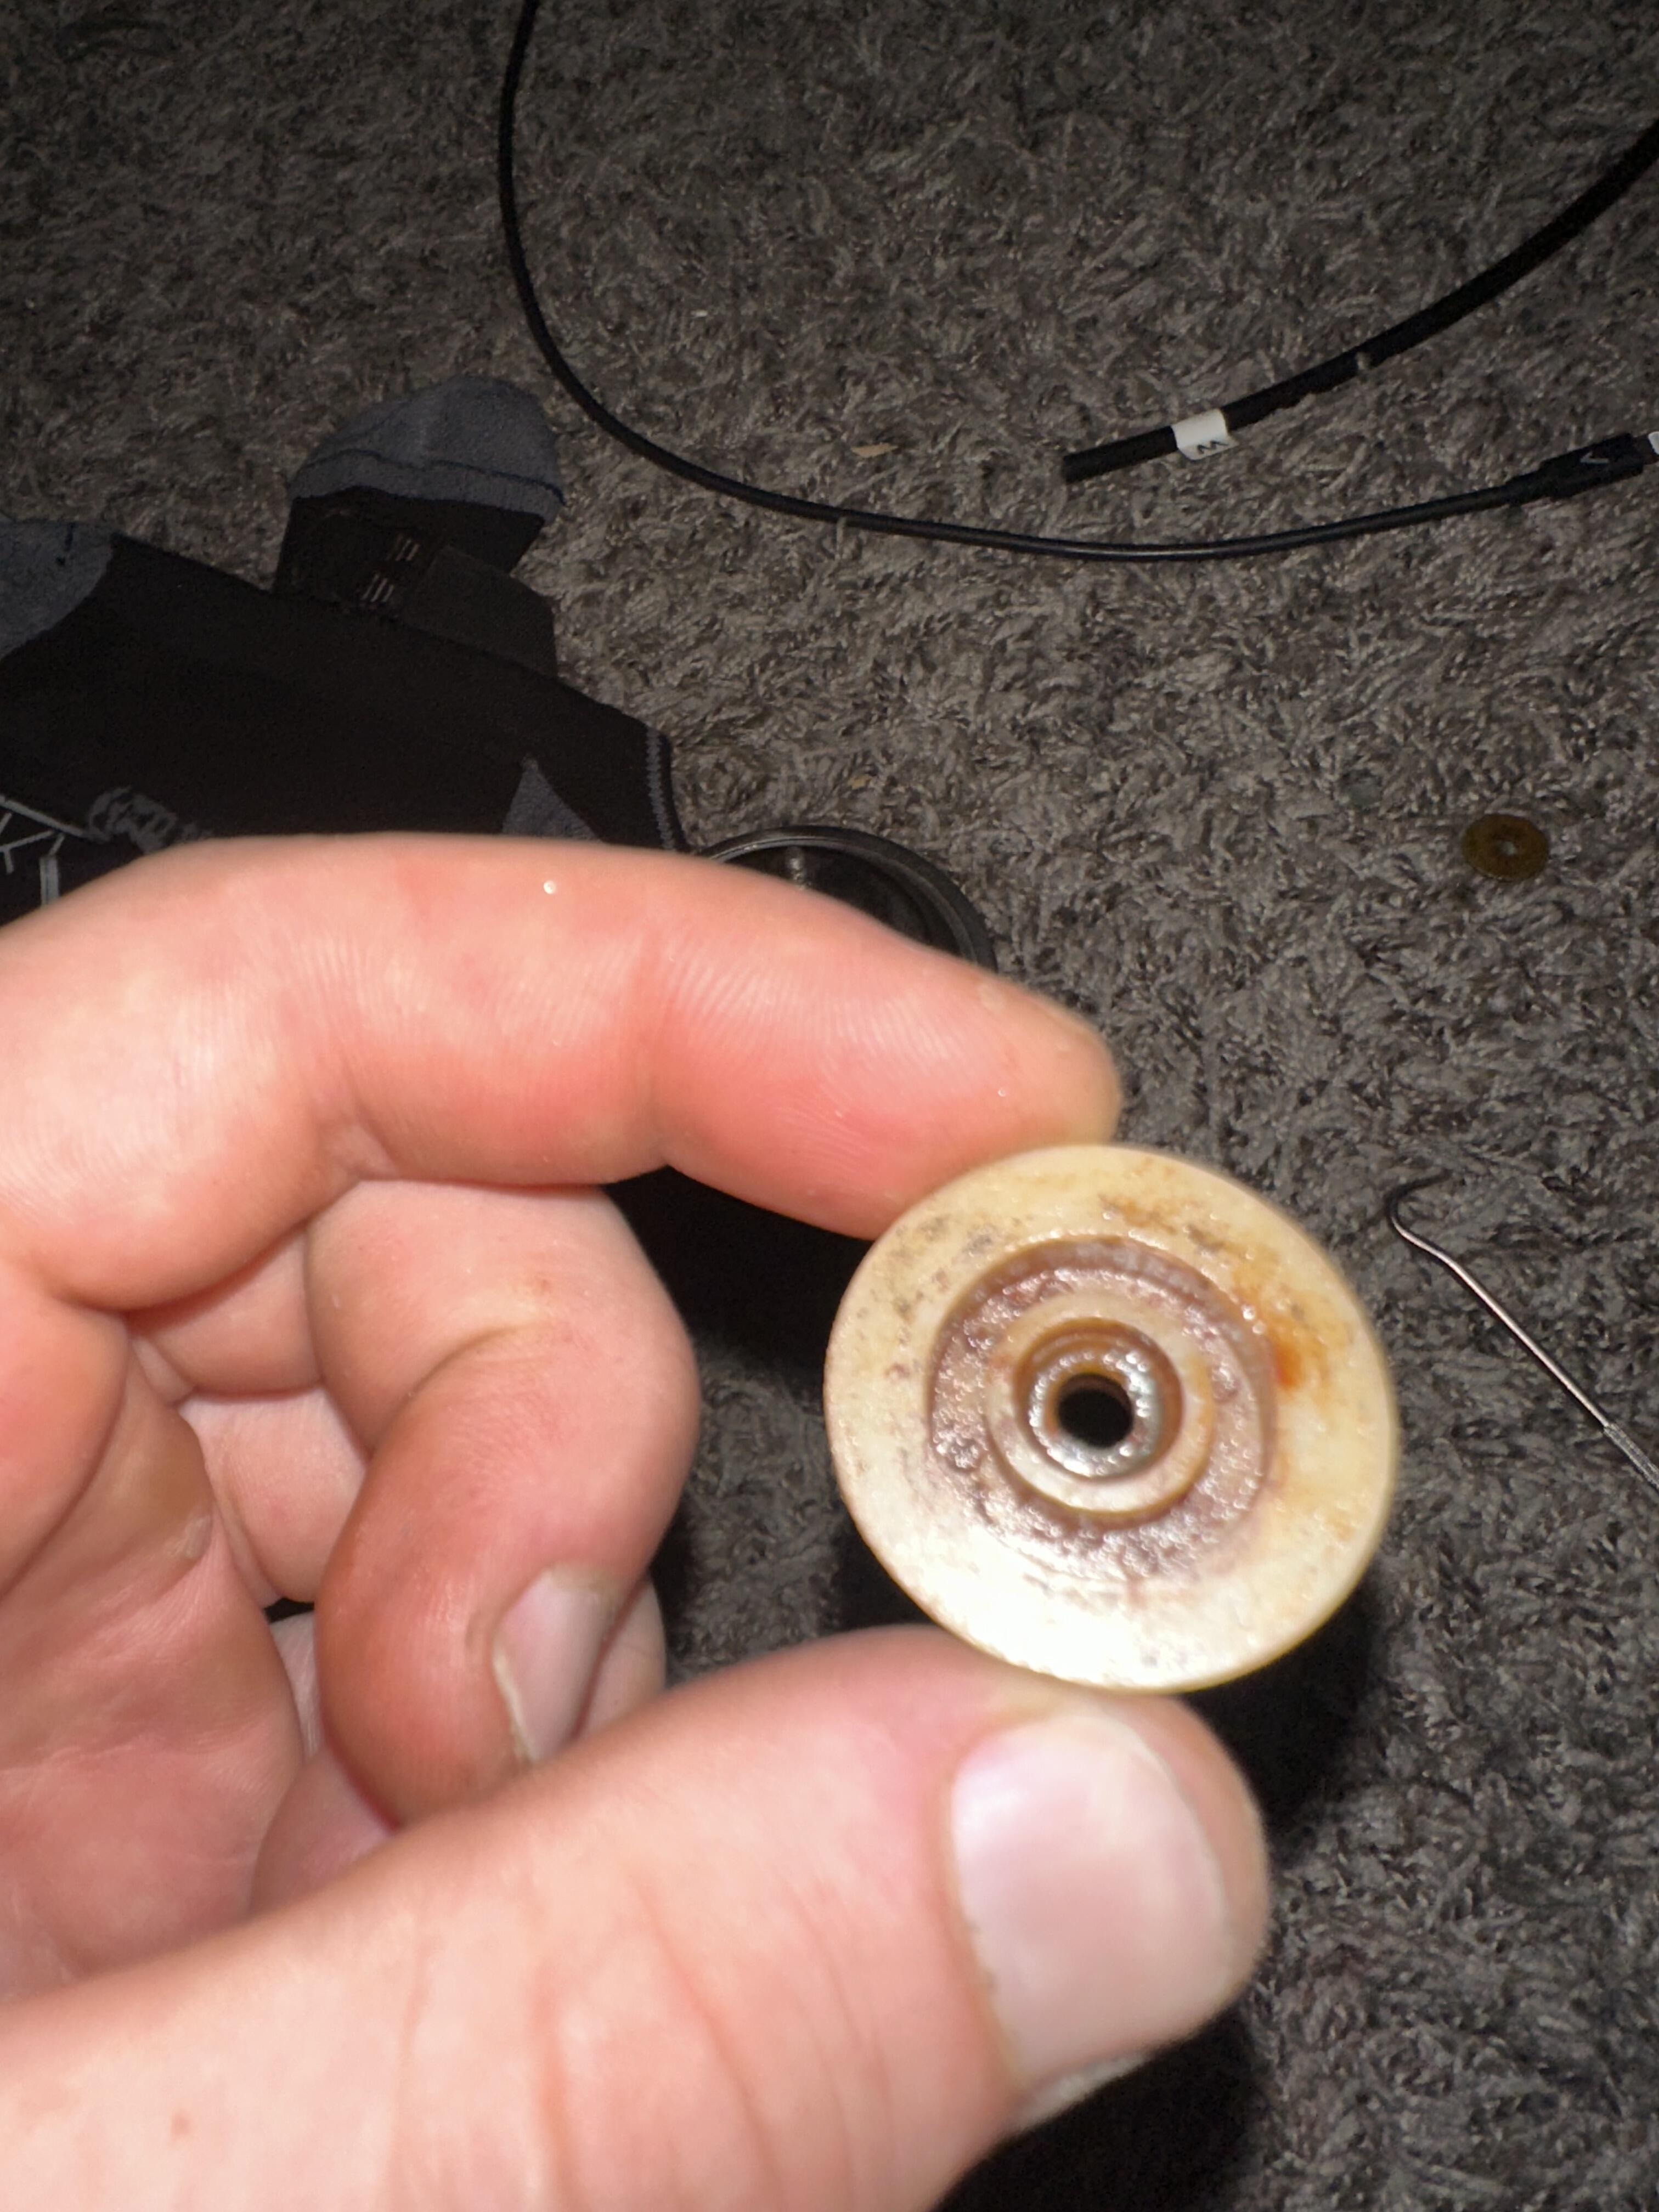
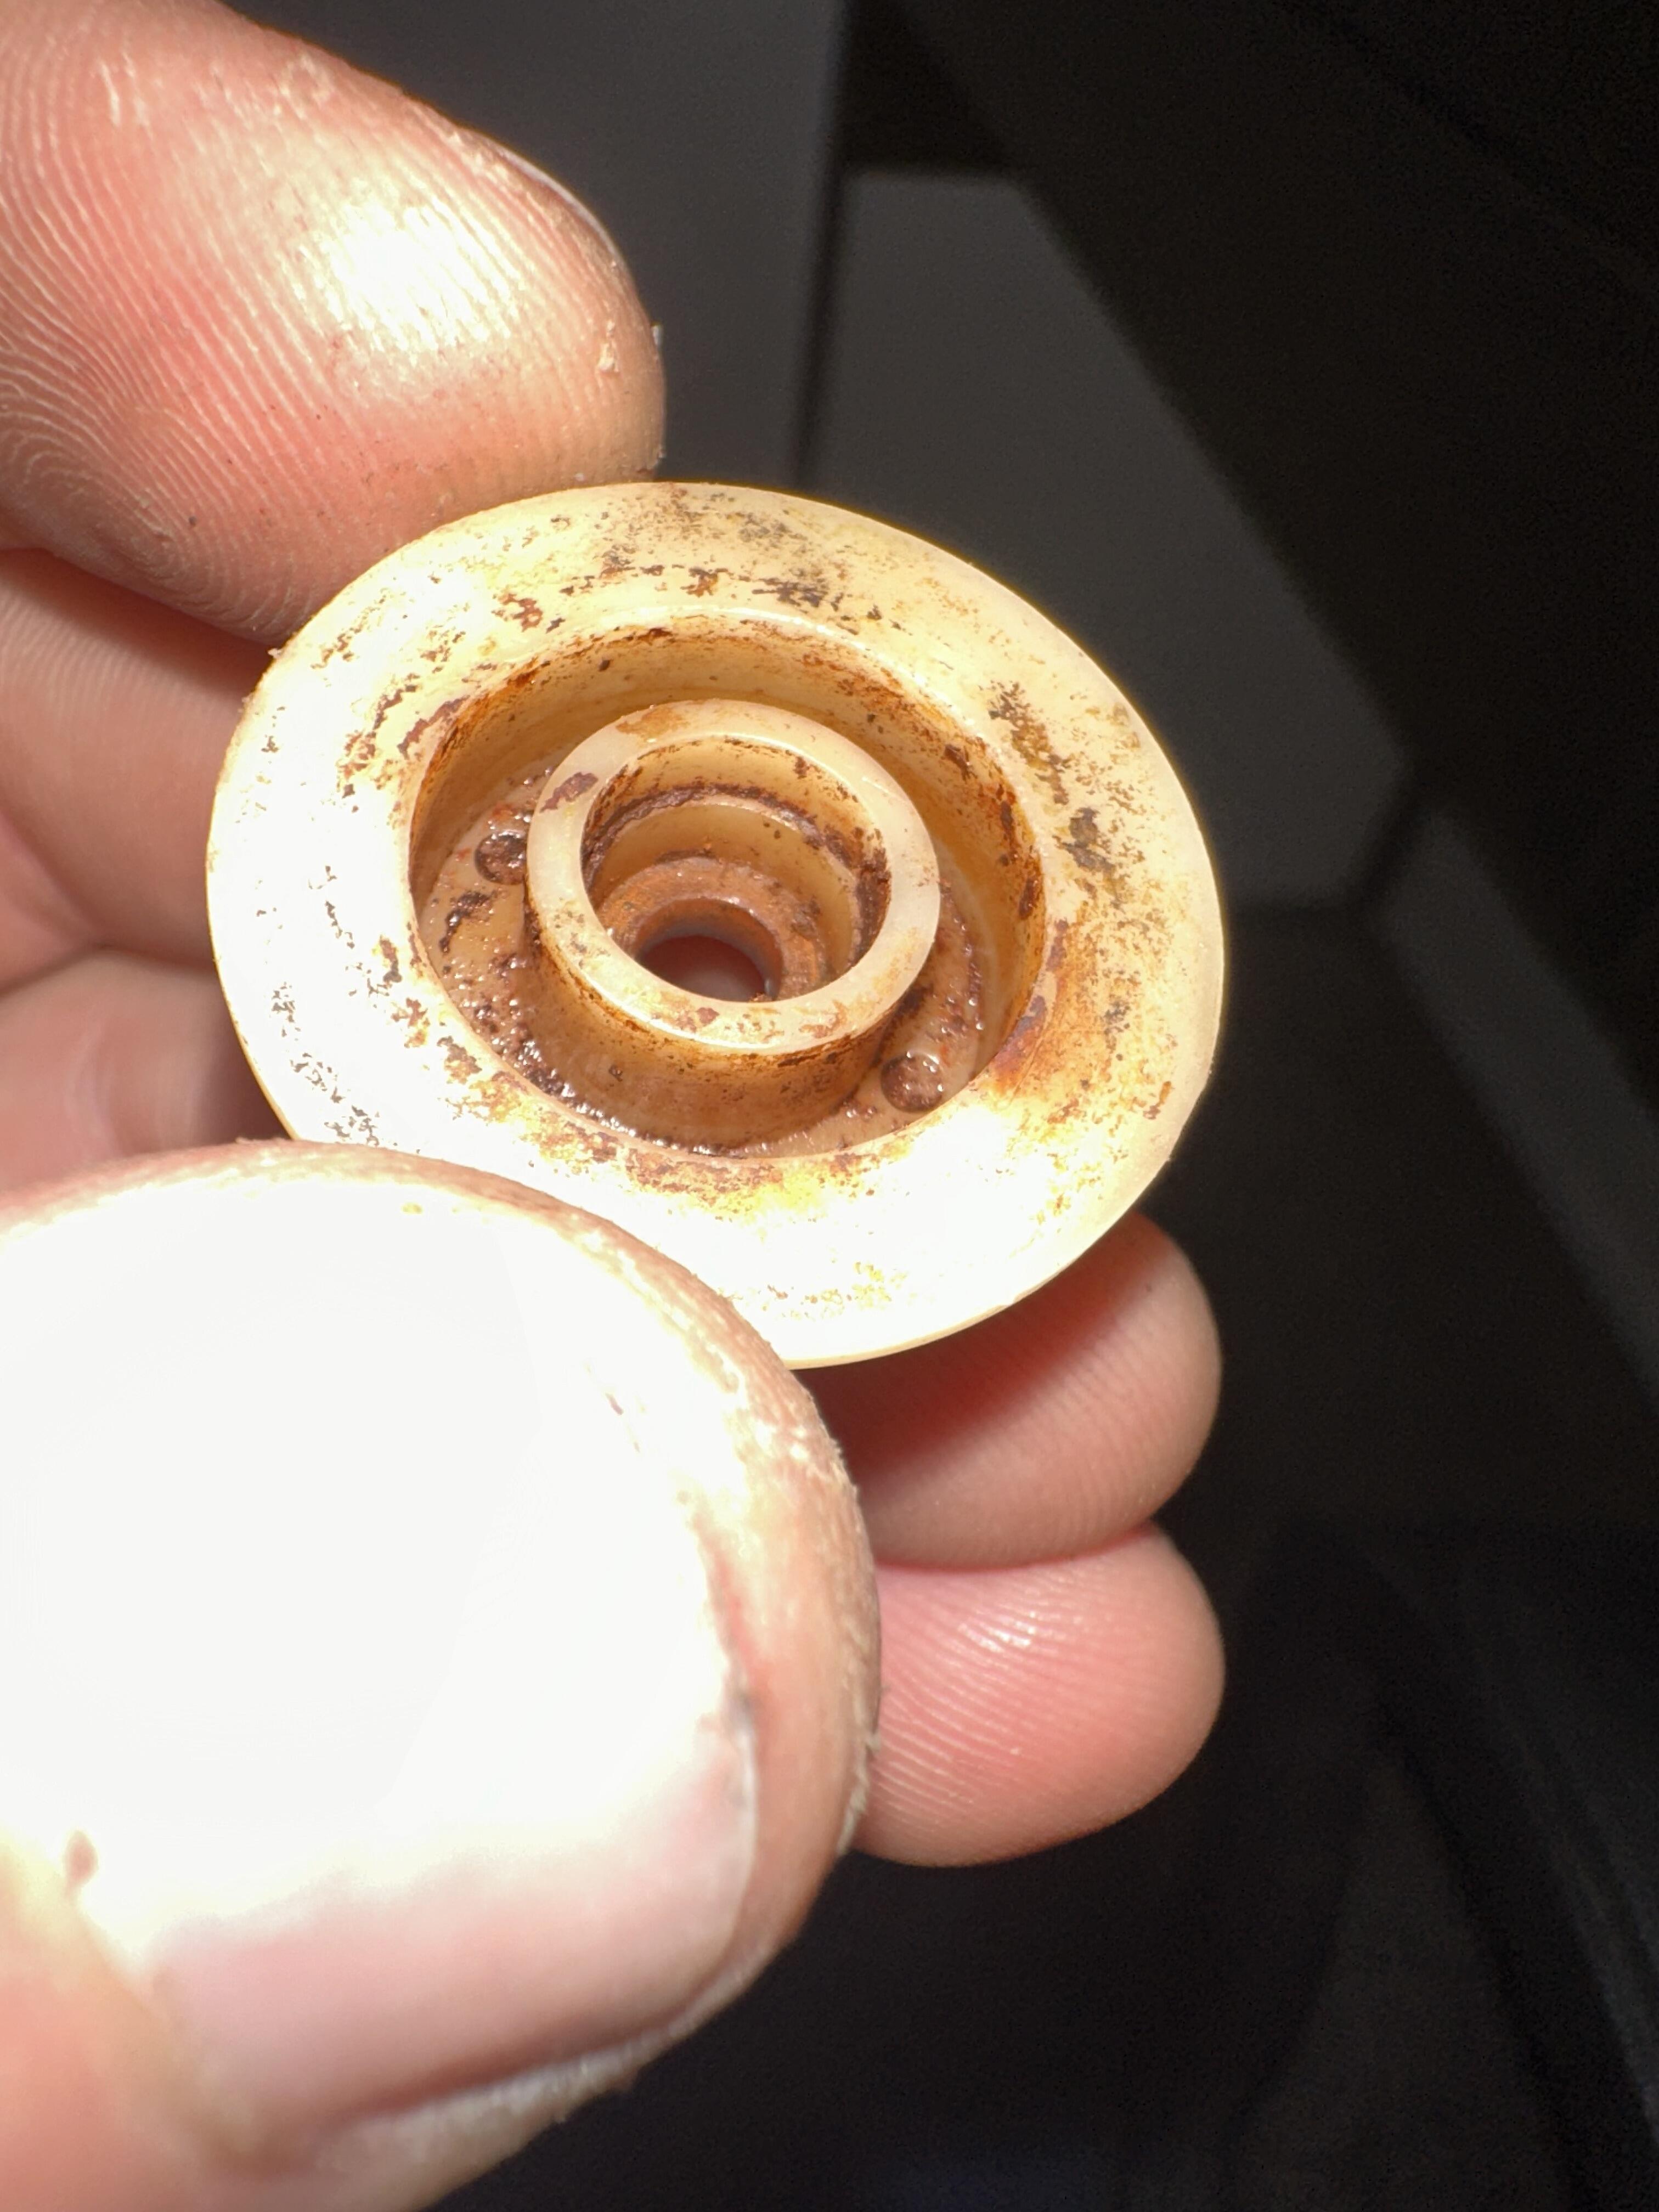
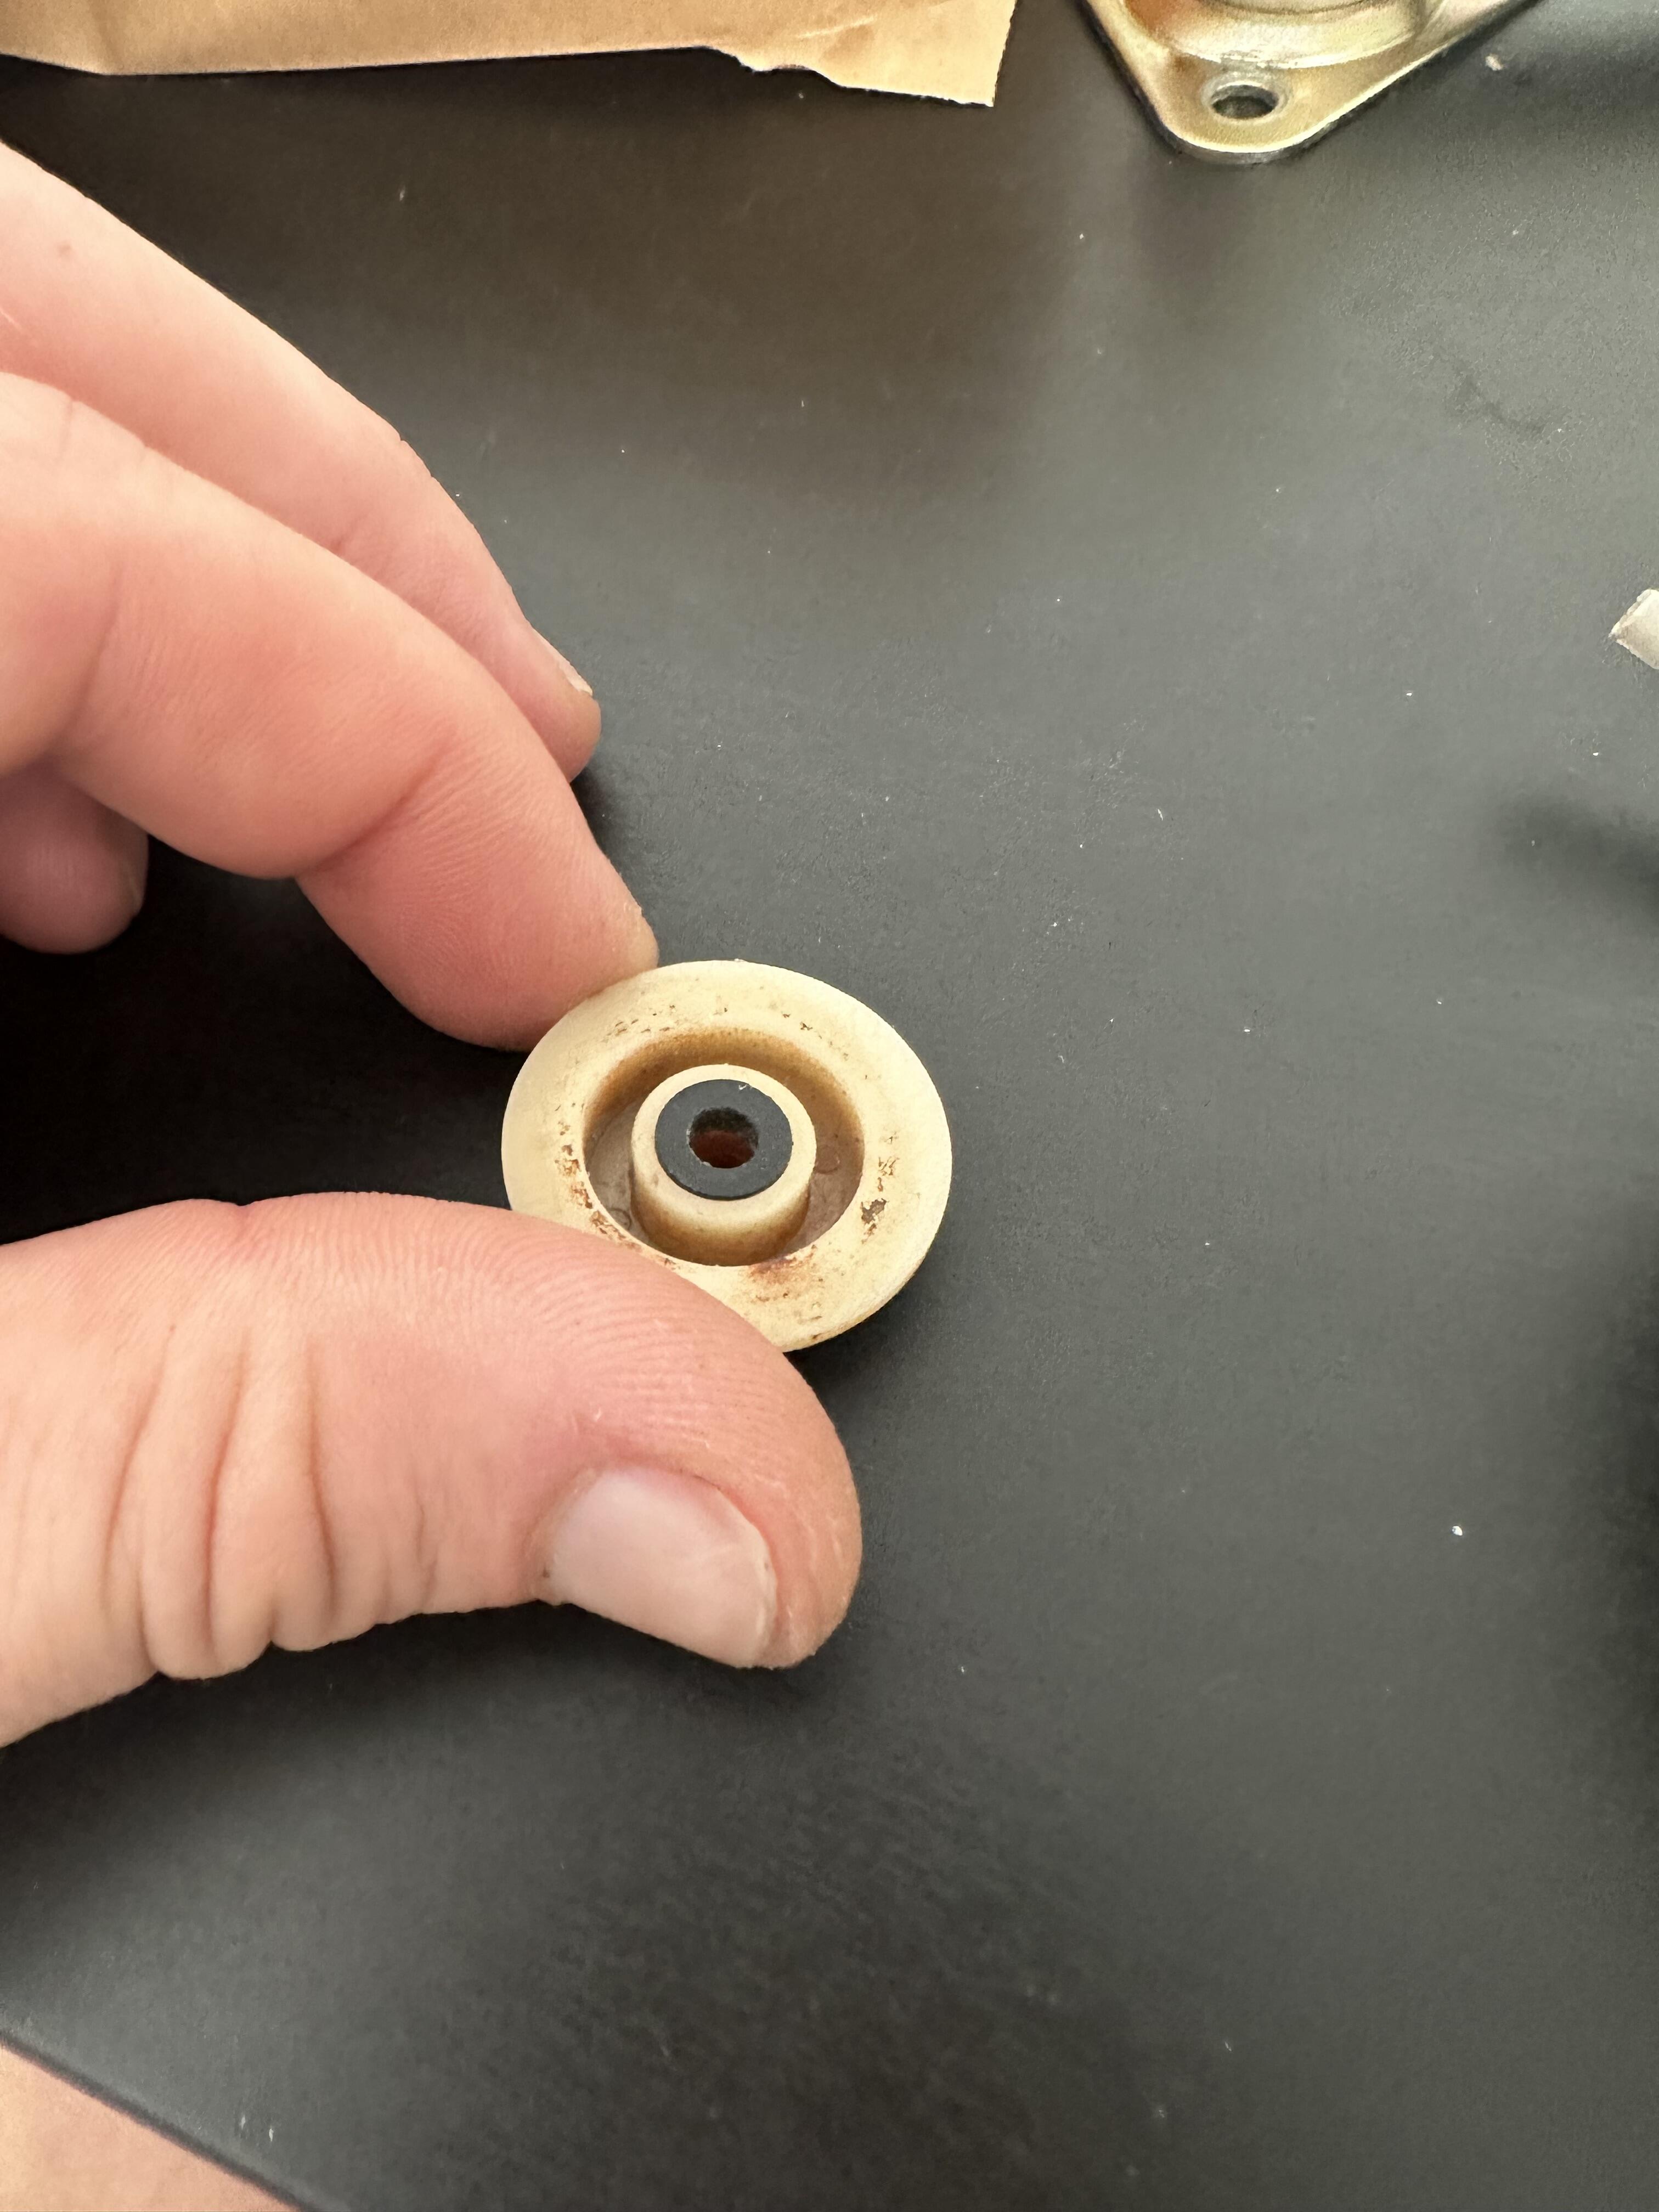
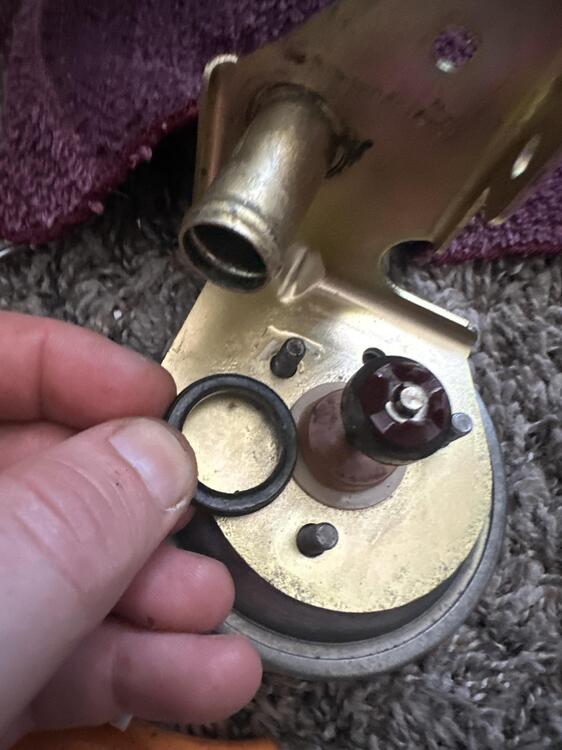
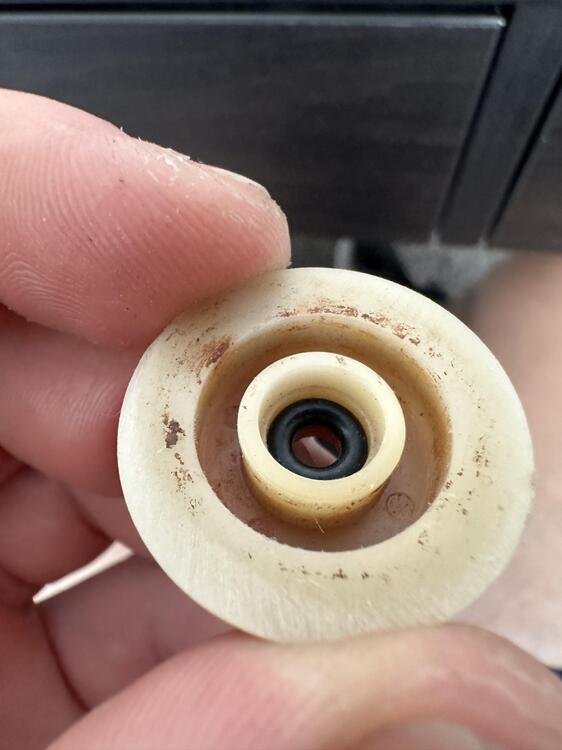
2 pointsHey guys, Just figured out how to rebuild the vacuum water valve on a 280z without having to send it off somewhere to be restored or buy a stupid expensive one online (If you can find it. I couldn't). This one is off a 1977 280z. The valve in question is the valve that is actuated when the climate control is put into the heat position and vacuum is sent to open the valve to allow coolant to flow to the mechanically operated coolant valve (That one is operated by the temperature setting). Anyways, mine was leaking super bad like a faucet. I did some research and came across this youtube video. Not sure why its age restricted. Here is the valve out of the car and off of the heater box. (I had it recently replated). Here is the outside seal the video explaned to remove/replace at the base of the valve. I replaced the seal with this O-ring. I found it at ACE hardware. Don't remember the size. Ignore the yellow arrow. I put back together the valve, put it back into the spagetti mess of hoses and vacuum lines on the HVAC unit, then put the whole HVAC unit back in the car. It honestly seemed to leak even more coolant. Wasn't stoked. Removed from the car again, tried a bigger o-ring, and then put everything back. I also torqued the three nuts down much more. Now it leaked even more. Took everthing out of the car again, and decided it must be leaking somewhere else. And then lightbulb, I realized it must be leaking through the center shaft, and not from that outside seal. There are two c-clips that hold the plunger together. Remove the bottom one first, slide the plunger down the shaft, then you can remove the top one. Everything slides off from then on. Sure enough, at the bottom of the plastic base peice at the shaft is another very small seal. Mine was rock hard. You can see that the seal just rides on the lower part of the plastic shaft. The o-ring has nothing to retain it, so I found that really odd. The o-ring in theory could just ride down with the metal rod and seal absolutely nothing when the vacuum is applied to the valve. To correct this flaw I went to ACE again and found an o-ring that fit the shaft tightly and fit inside the plastic peice snug as well. I also went into the hardware section and found a nylon bushing that I could file down to fit inside the plastic base. Thus, it would sandwich the o-ring in and not allow it to move down the shaft. Here is the nylon bushing placed over the oring. I put everything back together and it has sealed perfect so far. One thing I forgot to mention was that my shaft was slightly pitted where it had been leaking at the o-ring. As long as its not too bad it can be fixed. I lapped it with 600 grit, 1000grit, 2000grit, and then never dull. It smoothed the shaft out just fine. IF YOUR VACUUM POT DOESN'T WORK IT IS NOT FIXABLE. You will have to source a different one.


 2 points
 -
2 pointsIt was a raptor liner kit, then sprayed silver over it. I used it under the fenders and inside the doors. I had one or two small places that we missed with the Raptor liner. I touched them up with some regular undercoat. In those areas the silver did not react well and left a yellow tint. I guess it is was the oil in the undercoating. The raptor liner is made to be able to overcoat with color. Your car is looking great! Mine should be finished this week from paint. I am trying hard to keep up to your standards, but you are setting a really high bar!!2 points
-
Is it really necessary to trash other people's car's on here. It's one thing to question if things are done correctly or not but outright criticism is really bad manners.2 points
-
Recently, at the bodyshop i got asked what piece of metal this is between the original floorpan and the repair patch they put over it. I had to admit that i don't know if it was original or not, but the welds definitely looked like OEM Spotwelds. After asking on the Classic Z Forums, i got the information that this was a factory reinforcement plate for the floorpans. Unfortunately it was not listed in any of my parts books, so i guess, it was either added to the cars during the assembly process withohut proper documentation, or it was part of the original floor pan part and never sold separately. A friend of mine has his car over at Romas from DCW Classic at the moment for some bodywork and told me, they currently have such plates removed from the car and he could give me the exact measures so i can replicate them: See following photos for your own reference: So i thought it's easy for my bodyshop to replicate them with all the photos and measures. Now while searching the interwebs for something else today, i accidentally stumbled on those ready-made replacement panels from ZCardepot for 19$ per side: https://zcardepot.com/products/floor-pan-reinforcement-sheet-metal-240z The only thing that makes me a bit unsecure, is the fact that they're stainless steel. I have no clue how good it is to weld stainless steel to regular steel. I know you need a bit of a special welding technique or electrode, which any bodyshop should be able to handle. But my main concern is corrosion, as i know metals tend to have so called "contact corrosion" aka "galvanic corrosion" when two different metals are put together? Not sure in this case however. the pieces should be easy to replicate from scratch, but hey, you need to have something to think about, right? 🙂1 point
-
1 pointI forgot to include the hole spacing in my post, so although they are perfect visually, they are 2.5” spacing and I need 3-5/8”. And then I had a thought while typing the above. I wonder if they are measuring the “spacing” between each adjacent pair of holes, rather than the “bolt circle” diameter approach that I was using. So I rushed out and measured my cap, and sure enough, adjacent holes are 2.5” !!! So these likely work! Thank you!1 point
-
1 pointSounds like a plan. Root problem might not be one of the caps, but it's certainly a good place to start without really digging into it. If that doesn't take care of it, we can go from there.1 point
-
1 pointFwiw, I converted from distributor&carbs to EFI and wasted spark for about £2200 all in. Chinese ITBs, Speeduino ECU and lots of second hand ebay bits. It was quite a lot of work though.1 point
-
1 point
-
1 pointEiji and I try to hit Dinwiddie quarter mile track once a year. He almost always has more motor than me, but I did beat his 280ZX with triples in my stroker 240Z. Eiji generally runs in the low 14’s and I in the low 15’s.
 1 point
 -
1 pointmost likely the 10uf or .22uf cap, Easy fix as long as you dont smoke the TINY wires of the coil when messing about with it. That was what it took to get mine going.1 point
-
1 pointA little progress this weekend, but nothing significant. I am still waiting on my carbs to come back from Ztherapy. Hopefully in a week or so.
 1 point
 -
1 pointYou know you have a real mental disorder when you decide to take the time to tear into the 240 clock to try and get it running. What an intricate mechanism. I got it running. For how long, who knows. I will check it in the morning. Merry Christmas! Video evidence: 20221220_195857.mp41 point
-
1 pointI use RockAuto for most of my parts. I like the Centric brand. Use brake grease so the shoes and wheel cylinder can move freely. Chuck1 point
-
1 pointPost your VIN here and we'll be able to tell you about your car. Keep in mind that these older and smaller numbers don't contain any encoded information (color, options, etc.) that newer VINs do. However, the first few letters, HS30, HLS30, etc. will help us identify the specific model and the actual serial number part will help narrow down the manufacture date and/or model year.1 point