Leaderboard
-
HusseinHolland
Free Member5Points1,031Posts -

Zed Head
Free Member4Points19,236Posts -
.JPG.cfcada9cf1c1b502df3f5f2f2ca3ff36.JPG)
SteveJ
Free Member3Points9,646Posts -

Dave WM
Free Member2Points3,591Posts


Popular Content
Showing content with the highest reputation on 03/22/2023 in Posts
-
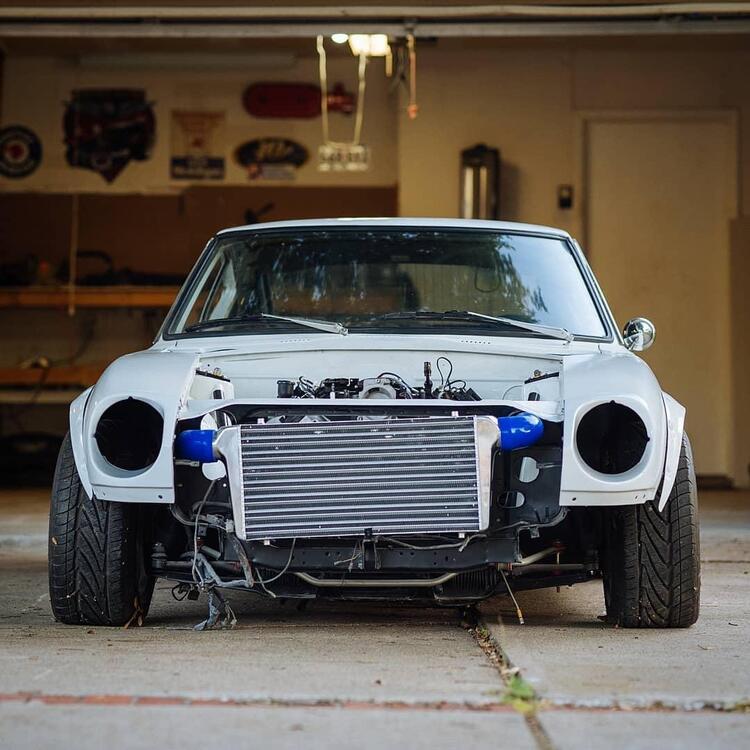
Had a few hours after work, so I focused on fitting the Skillet grille & the front bumper & brackets, after I replaced the 3 pedal pads Brackets in first, then test fit bumper With the bracket alignment figured out, I worked on the Skillet grille. 4 brackets are loosely fitted to the grille prior to mounting. I bought the full grille, not the bumper version, as that version has large cutouts on either side. I cut narrow slots to allow the bumper brackets to pass through Then I put the bumper on before I ran out of light. The fit is really nice. 4 M10 studs secured through the brackets with 17mm head stainless nuts. I'll put the spoiler back on tomorrow. The only catch with doing it this way, is that the valance has to go in after the grille, so the 3 mount screws , and then the horns have to be fitted from above. There are small bumper blocks that I also bought from ZcarDepot (800-924). A M6 bolt passes through the fender & into a captive nut in the bumper4 points
-
2 points'46' indicates Showa 46, which is 1971. Japanese calendar dates tend to follow USA format, which is Year-Month-Day, so '46-11-9' is November 9th 1971. This of course indicates manufacturing date and/or quality control check of the console, not of the car. It may even be for the FRP moulding of the console body and not the completed article. Consoles were made in another facility and then shipped in batches to Nissan Shatai's Hiratsuka plant for the build-up of the cars. The batches may well have been made up of consoles made over several days or even weeks, and it is doubtful that they were attached to cars in sequence according to the quality control date - although it is logical that they would normally have been attached to a car within a few weeks of production. I think it is fair to say that most quality control/production date stamps on the components of these cars tend to average out at within a month of the car being given its 'OK' completion check, although it is possible to observe the odd exception which tends to prove the rule...2 points
-
That is a cool tool. No more fiddling around with two different gauges. This thread has the spectrum from cold adjustment, take-your-time and get it right, up to hot, I-know-what-I'm doing get it done.2 points
-
In all the video installs I looked at, they seem to have issues with the spoiler dropping/warping - the 280Z has a valance that the spoiler sits against, if you don't remove it.. Clamped the middle to secure it, marked & drilled the 4 outer end attachments. Instead of futzing with nuts & bolts, I just used M6 stainless rivnuts & M6 sems screws For the leading edges, I used plastic body clips instead of bolts Added two rivnuts to the center section to anchor it All together (for now). I have a tall Skillard grille coming, and chrome skinny bumpers to complete the look. Ultimately, the spoiler will be body color. Added tape to where the bumper trim bolts went, covers up the extra unneeded holes. I'll make some brake ducts, so those cutouts don't look out of place1 point
-
taking a bit longer for the wide band O2 to get here, will update when done. I did use the color tune and got some video, but its too hard to see on the video to really be good for viewing. The color looked very good when in closed loop, should be interesting to see what the wide band says. I have been toying with how to deal with the AFM, one idea is to mount and the air filter infront of the core support then I can just route the air tube back from there, no worries about the perch. OR remove the perch (dont really like that idea) or just get the MS3 diy kit and make up my own. That seems to be the best solution and I may end up there. Anyway more to come...1 point
-
I see a company in Florida. Not CA Datsun.

 1 point
 -
1 pointThis does not matter.. the speaker's housing is totally isolated from the speaker's coil. Most radio's (amp's) are NOT happy when you use the minus or chassis on one side of the speaker.. You need to use 2 isolated wires from the amplifier to the speaker, NO ground! (Do not ground one of these wires onto your cars chassis!) Eh... No.. But it can blow-up your amplifier! When you put a testlight (basicly a resistor of low impedance..) between a 12V+ and a speakerwire.. you are putting a voltage (DC) on a amplifier output and that can be catastrophic! (Personally i NEVER use a testlight always a multimeter or scope.) If you put some DC on a speaker, do this with a 10-20 watt old speaker and a 1,5 volt battery.. when you put the 1,5v to the speaker you will see the cone go in or out depending on where you put the plus and minus! So you can imagine the music signal must be AC as the cone moves on the music IN and OUT.. Imagine.. that speaker cone gets a signal made out of many,many!! frequencies and it has to "speak out" ALL of these frequencies at once!! Now you probably have much more respect for a speaker.. About home audio... As an audiofile (My other expensive hobby 😉 ) I got some experience with amps and speakers.. The speakers are the most important part in a audio system.. you can have a perfect set of Amps/recorders/players/tuners but when your speakers stink.. you'll have no good sound. I don't expect a good sound out of a speaker that cost 30$.. Personally i listen to speakers more in the range of 1000-3000$ (Studer's ReVox Symbol MK2's and Zachry EM24's (These are from the 70's and 80's!)) Here some dream speakers....1 point
-
I have never used the special bent crow's foot wrench. I've always just used two open end wrenches and snugged the lock nut. After hundreds of adjustments over a dozen cars and 40 years, I've never had one loosen. Of course, I always check the clearance after it's tight to make sure it is still correct. After a while, you get a feel for how loose to leave the clearance so they tighten just right when the lock nut is snugged up.1 point
-
1 point
-
1 pointYeah, I'm not yet convinced some light on the test light is a problem. As for what you're hunting..... Blown speakers? First question would be "What's your typical listening volume?"1 point
-
1 pointHihi.. As i have worked some time in studio-audio... long time ago.. i find this a funny remark.. CO thanks for the explanation.. it's not a bad explanation.. i wanted to ad: IF you DO measure some DC on your loudspeaker cable.. your amplifier is leaking DC and this kills your speaker if it's a lot.. It also distorts your sound as your speakercone will come to far out of the speakerchassis or if it's a negative DC it wil got to far inside and get stuck.. DC on a speaker is always a very bad thing. If you want to get rid of a speaker, put some 200 volts DC on it and look how fast the cone will get out of the unit! BTW.. 200 volts AC does the job aswell 😉1 point
-
1 pointWhat exactly are you trying to do? It sounds like you're looking for a non-existent problem.1 point
-
The low clearance could be because the valve seats have worn. Maybe due to unleaded fuel on old seat material. People use brute force on the locking nut with a wrench and suffer busted/cut knuckles. The parts up there are sharp. I found that a small sledge hammer, like a 3 lber, used to tap on an open end wrench on the lock nut worked well for loosening. There's room for an open wrench on all of the locknuts, you don't need the crow's foot adapter unless you want to get precise on tightening torque. It's about as simple as it looks. There's a threaded stud with a locknut. Loosen the locknut, turn the stud, tighten the locknut, confirm lash. After a few you'll realize that tightening the locknut pulls the stud up and reduces clearance a little bit. There's a tutorial out there somewhere with pictures. Can't remember the name, it might actually be linked in this thread somewhere.1 point
-
Not specific to @HusseinHolland's question, but the valve used by @Captain Obviousdoes appear to be from a 2000 Acura TL. https://www.rockauto.com/en/moreinfo.php?pk=6636476&cc=1361090&pt=6860 As for the dead photos, blame Photobucket. Now @Mike generously hosts more photos on the server so we can include images that aren't dependent upon outside services.1 point
-
1 pointThanks everyone. After taking in all suggestions, I just followed Robert Pirsig's advice: "Assembly of Japanese bicycle require great peace of mind." I eyeballed the stainless line and figured there's enough spare line length in the big curve to "stretch" it an enable the tight 90 degree turn, and I just futzed with it until it worked. Putting it on, taking it off, over and over until I mentally pictured how it should go. I used a sharpie to mark which axis to bend and when my tube bender wouldn't work, used imagination and problem solving to jerry-rig a tube bending jig until I got all the bends right. Like, I used the end of a crescent wrench, which was held fast on a 2x4, as something to carefully bend the line around. Sure, it would have been a snap to pay the exorbitant price for the 1972 cylinder, but I made $200 an hour adapting the line to the cheaper brake cylinder. Success!1 point
-
oh man i wish this was out a couple months ago when i was rebuilding my gearbox.... must fight the hoarding urges.1 point
-
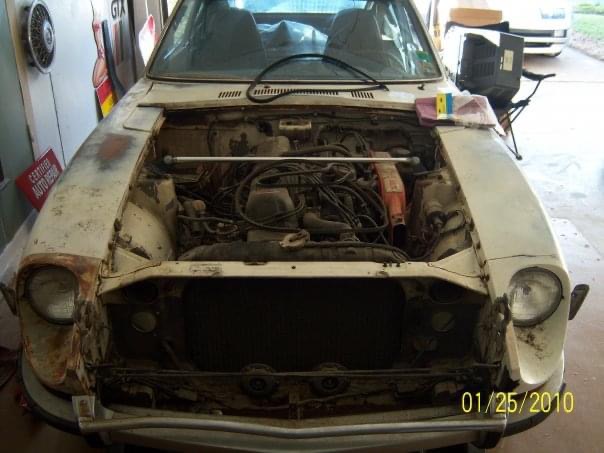
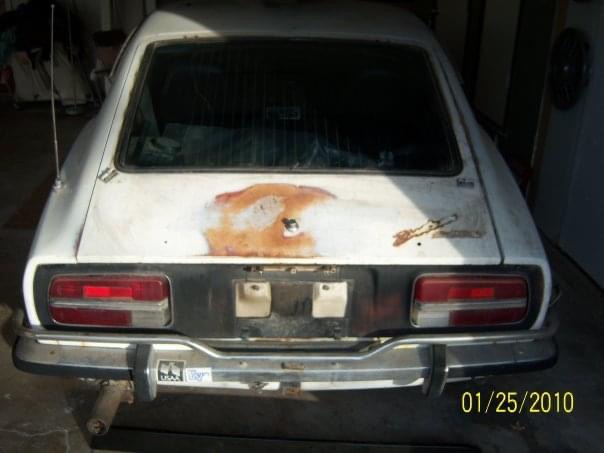
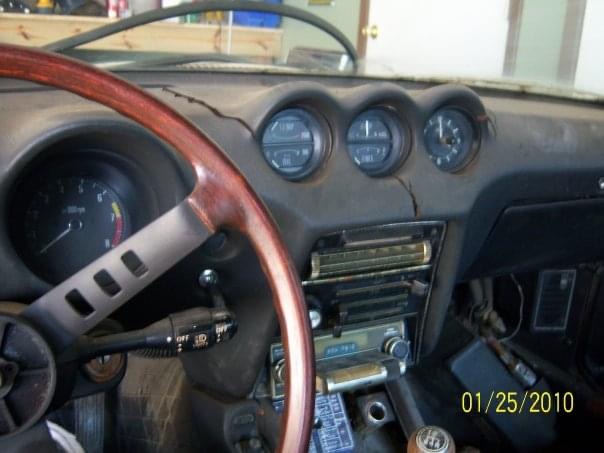
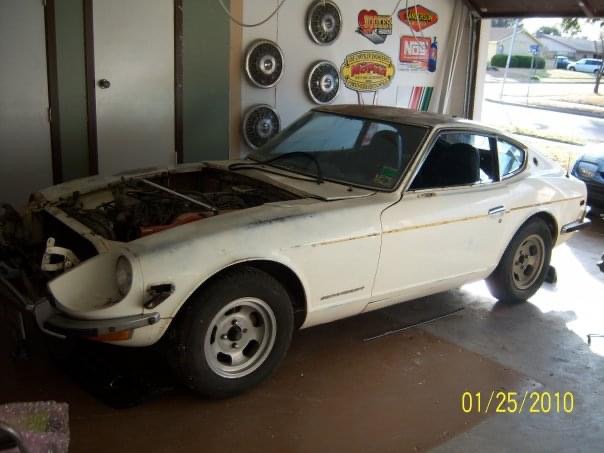
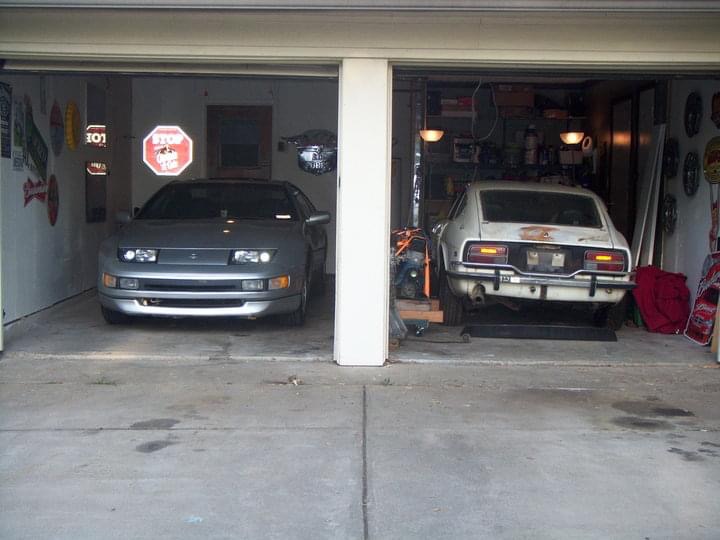
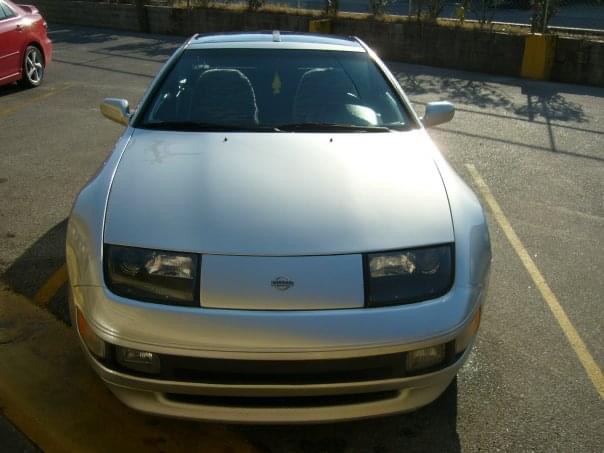
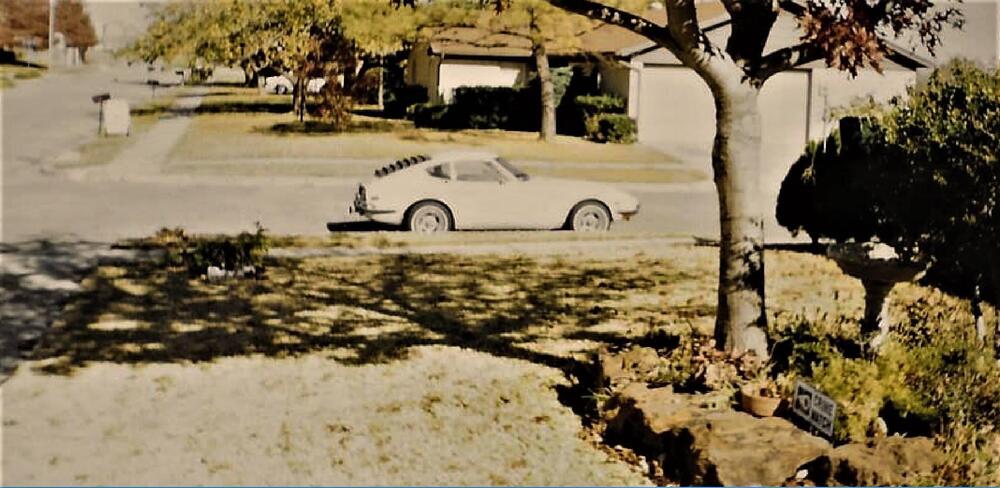
1 pointSo to recap. Dad bought a “71 240Z about the time this 280Z had issues starting up. I figure an ignition relay went bad within the EFI. He daily drove the 240Z until 2004 when the engine was smoking very bad. Dad gave it to me and my intention was to drop the Rebello stroker into it and restore. The car had issues as you can see. Ended up selling it to a friend (all parts I collected for it, was going to go BRE styling, but I kept the Rebello Stroker) who still has it, albeit its now a V8 conversion. When I returned to the states in 2008, I got a 1992 300ZX NA. When everything works as it should, it’s a GREAT ride. But once something goes wrong, it’s not so great. the ZX to me was a mantainence nightmare, but I still loved it. The only reason I sold the car was to finance the 280Z dad finally gave me.


 1 point
 -
1 pointGot this one and bead blasted it for you. Let me know if you want it. Just pay for shipping.
 1 point
 -
Well good news! new plugs (old ones looked pretty fouled prob from idling for 45 minutes, New CHTS (nissan), New O2 sensor (NTK japan). made sure the fuel tank was elevated so pump did not have to pull up (was about 1 foot below pump before). started, ran great, green led started regular flashing in a pretty consistant manner (before it was flashing but very inconsistent in on off duration). Not sure which was the magic bullet, i considered doing one change at a time but WTH, I just wanted to see if it was going to work. Next up will be to get a tach on it (ordered it may as well add to the test stand).1 point