


Leaderboard


Popular Content
Showing content with the highest reputation on 03/30/2016 in all areas
-
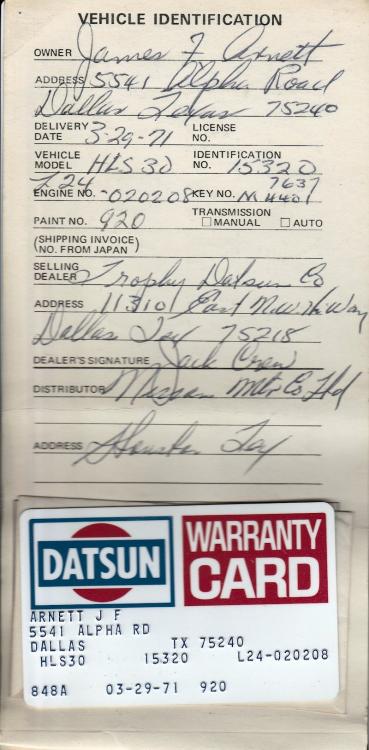
2 pointsQlooks Iike we have a mini-society of original owners gathered here. My original ownership anniversary was 4 days ago. Congrats, Jim, on your faithful stewardship of such a beautiful car for The past 4 & 1/2 decades.2 points
-
1 pointZed Head - I think you may be right. I think someone did a DIY job on the passenger floorpan. There are no drain holes and the metal is very thin and flimsy compared to the driver side floor pans. I have recently ordered new floorpans and frame rails from MSA, they have not arrived yet. hr369 - I agree it is pretty messed up, thats why i have not really driven it in 3 years. I think I'm lucky that I found the car I wanted (1/70) that was not in to bad of shape. I have seen allot of early Z's that were in worse shape.1 point
-
1 pointhttps://www.youtube.com/watch?v=LhHuAv4t-go Got those little door bumpers, after breaking them off for the umpteen time, I came up with this fix. Hope it helps someone.1 point
-
1 pointSadly, no pictures from the day I purchased the car - way too much adrenaline rush at the time. Right now, its looking a lot better than I am!
 1 point
 -
1 pointZach, Welcome, I am new here as well. I am also in the Navy and am stationed in San Diego. I also have a 1970 240Z and have really enjoyed owning it so far. I am about to start a full restoration and can't wait to get her back on the road. Clay1 point
-
1 pointHi Zach, Welcome to the club! I have a '70 240Z myself. Here is the website to the local San Diego Z club if you are interested, ZCSD http://www.zcsd.org/ . We meet the first Tuesday of every month. Also, I live just down the 78 from you in Escondido. I am the guy you saw at Les's shop last Saturday. Best regards, Rich1 point
-
1 pointGreat looking car Zach! If you go the Rb route, I'll take the Mikuni's ...1 point
-
1 pointI just did my tank. It's pretty easy to remove and replace: (1) Pull the right rear interior trim panel. I think to get to it you have to pull the rear panel over the tail lights, the ceiling panel where the dome lights are, and the right quarter window panel. You'll also have to temporarily unfasten the right gas strut. (2) remove the shielding over the fuel/air separator. (3) Unfasten the filler hose and vent hoses. Shove the vent hoses through their holes. (4) Drain the tank via the plug on the bottom right of the tank. (5) Remove the fuel lines from the bottom right of the tank. (6) Remove the round inspection plate (2 screws) over the righthand side of the fuel tank in the hatch area. Unplug the sender unit. (7) With the rear of the car on jack stands, loosen the nuts at the forward ends of the tank straps. Pull tank downwards slightly to dislodge it. Loosen nuts more, and remove the straps. Drop the tank onto your tummy, and have a friend pull it off of you and remove it from under the car. Your friend will also need to guide the filler tube safely through the hole and ensure that your vent hoses aren't hung up on anything. (8) Remove the sender by tapping the retainer ring tabs with a hammer and screwdriver to turn it in the obvious direction. Carefully extract the sender unit and put in a safe place. (9) Lean the tank somewhere outside, preferably in the sun, with the filler tube downwards. You want any remaining gas to evaporate. The fumes are heavier than air and will sink through the filler neck. When you can no longer smell gas in the tank, it's safe to work on it. Peer inside with a flashlight to see what's going on. In my Z (a '78), there's a fuel sump in the middle of the tank about the size of a tall coffee can (but a bit skinnier). That's where your filter screen is. The bad news is that you can't service it. You'd have to take it to a radiator repair place, where they can cut the tank apart, remove the screen, clean it, remove rust from the tank, coat it, etc. I think I was quoted about $500, but my tank was pretty clean and didn't need it. I simply powerwashed it, rinsed it several times with acetone and B-12, dried it, cleaned the old paint and rust from the outside, and repainted. If your screen is clogged, you might be able to blow it out using compressed air through the fuel outlet tube. That might also destroy the screen. Many people will tell you that you can use an acid wash to clean out the tank. That's true, but it's also going to eat up the fine screen. Then if you use POR-15 to coat the tank, be aware that it will clog the screen. That's not a problem if you've already eaten it up with acid, but you may need to install an inline pre-filter before the fuel pump. You should replace all of your rubber lines when you reinstall. Be sure to use only fuel line, including on the big vent hoses. You can get large dia fuel line from a tractor supply or via mail order from Hampton Rubber in Hampton, VA. (You'll have to call Hampton Rubber for this. They don't usually send out mail-order supplies. They can also supply the rubber strips for your tank straps, cut to the size you specify, as well as all the hose clamps you need.) As far as I could tell, my filler hose was made of some rubber like neoprene and was in fine shape, even after 33 years. That was the only rubber I re-used. Good luck with this job!1 point


