


Leaderboard
.JPG.cfcada9cf1c1b502df3f5f2f2ca3ff36.JPG)


Popular Content
Showing content with the highest reputation on 07/01/2015 in all areas
-
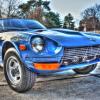
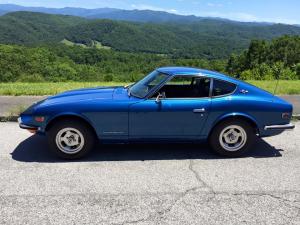
3 points3 pointsThis is from this past Sunday, June 28. Took her for her first turn on the "Tail of the Dragon" and then the Foothills Parkway here in East Tennessee. This picture is from the Parkway looking out over where I live, West Millers Cove. If you've heard of Blackberry Farm Resort, that's the place. She was wonderful, screaming through the Dragon! I may have sped just a bit. Handling was unbelievable, and very strong. Pretty sure I and the bride are going to take her to Memphis for ZCON.
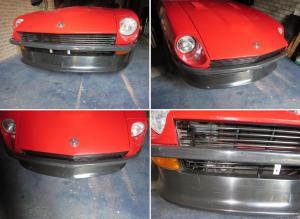
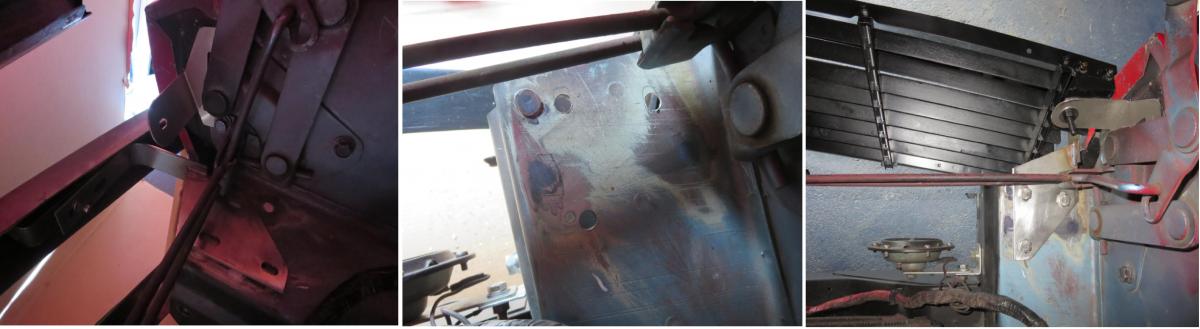
 2 pointsIts been a while, but it been just too bloody hot to work on the car lately. I've had the bumper brackets a couple of days now and decided to brave the heat and fit them today. All the brackets so far are hand made and a little shabby here and there because I have been making corrections, redrilling, rebending etc. The final brackets will be cut with a laser and look a lot better than these. Just need to make the same adjustments in the dxf files. The bumper brackets are made from 3mm, but the final brackets will be 4mm. The 3mm would be ok for fibreglass, but I think they would be too flexable for the chrome or stainless steel bumper. Fitting the bumper bracket. Still need some washers and painting here and there. That will happen when it comes apart for the final brackets. Everything back together. If anyone is interested in a set, I plan to cut a couple of sets (while Im at it). A kit could include: 2x Bumpers brackets with ss bolts and nyloc nuts. 2x Grill top mounts. 2x Grill bottom (side) mounts. 2x Long vertical bars for the grill plus M3 bolts and nyloc nuts. (These are to convert the grill from 7 to 9 bars and lower the 240z grill centre anchor to connect behind air-dam) 2x Side vertical bars for 9 bars plus M3 bolts and two extra nuts for side mounts. 2x Brackets to mount the horn. (On the 77-78 the horns were mounted on the bumpers shock) Everything except the 4 verticle bars is made from Stainless steel 304, bolts and nuts are A2-70. The 4 verticle bars are aluminium. Instruction how to get there (without all the experiments I went through).
 1 pointI have read through this thread multiple times to make sure I understand it. Just to re-cap below. 240z = RedWing Cost estimate to get back on the road = Approx. $2000 Timeline = Long term, 1 - 2 years depending on ability to raise funds Labor needed = many hours Current condition = Has not run in 8 years. Value = one owner series 1 car. Work space = back yard, could be pushed under car port after 280z is sold. 280z = RedBird Cost estimate to get back on the road = Unknown Timeline = Near term, 30 days. Labor needed = Unknown Current condition = Not running but complete and maintained. Car ran correctly up until 6/1 and has had other work already done to it. Value = fuel injected car with regular maintenance. Work space = car port As others above have suggested, get the 280z running again first. It ran well not that long ago and ideally could be brought back to life with some trouble shooting and repair. Could be something simple but I would not ditch the FI unless absolutely necessary. Overall it sounds like a nice car and I think would make a better driver than the 240z in a much shorter amount of time. Get the AC fixed if possible and just drive the 280z. The 240z has a lot more question marks, costs, and time needed. It could easily spin out of financial control. If you sold the 280z and sunk all the proceeds in to the 240z there is no guarantee it would be road worthy after $2K was spent on it. It will need everything plus many weekends of time to tackle all of the known projects. This does not take in to account what will be discovered as things are taken a part to be rebuilt. I fully understand and appreciate the sentimental value the 240z holds. However, it will not be back on the road any time soon and really needs to be gone through bumper to bumper. The money factor is huge at this moment since even at $100/mo she is looking at 20 months just to pay for parts. Working under just a car port is not ideal and will make each project take longer. From the way it sounds the 240z needs to be someone elses project car in a garage so it can be secured when it is apart being repaired. I would say get 280z running, clean up the 240z, take some good pictures, provide an honest description, and sell it. Series-1 cars, as long as they are complete bring good money. That way she would have a running classic Z car that is dependable and money in her pocket for future repairs.1 point1 pointI painted my block before any assembly and am quite happy with the results. You are going to get some form of fluid on your freshly painted block, just need to clean it up right away! http://jarvas240z.blogspot.com/2014/11/block-cleanup-and-preparation-for.html1 point1 point1 pointi agree with the carb swap to get the 280 running more affordably - while the efi can be made to be quite dependable, there are just so many variables that can go wrong and the diagnostics (though simple by today's standards) are an order of magnitude greater than a set of su's. if you add up the relays, injectors, sensors, afm, harness connections, fuel pump, vacuum system, etc. it's a daunting prospect. a low-pressure fuel pump, a carb re-build kit, some fuel line and a few misc. fittings will get the swap done for less than $100 (minus labor, of course). i have a big hunch that the all-too-common rusty/cruddy gas tank is involved in her situation as well. the low-budget, get-her-running solution is to get a half-dozen in-line filters between tank and fuel pump and keep an eye on them and change 'em out every couple months when they fill up w/crud until she has the $$ to drop the tank and clean it out. this is, of course assuming that the bottom end and valve train are in decent shape (not clattering away and/or burning all sorts of oil).1 point1 pointHow could it be a convention without him? I was reading on the ZCOT FACEBOOK group that a group from ZCOT, including Mad Mike will be driving up 7/13.1 pointBecause if it involves a laptop, I'm an idiot. If I had been exposed to it as a kid I would be fine, but now, forget it. I did mange to get the 123Ignition distributor programed, I was pretty proud of myself. But engine management, that sounds a lot harder.1 pointI made every effort to follow Eastwood's instructions as closely as I could, but between my space/equipment (i.e. outdoors next to the garage) and almost complete lack of experience spraying paint, I'm well aware of my limitations. I've read about other people having the same problem, so I suppose it's possible that that paint just has a smaller margin of error than my (meager, I'm sure) abilities allow for. Hopefully the rest of the job holds up alright -- it looks good, at least! -- and for future jobs I can go back to the rattle can...not sexy, but I've had good results with it.1 pointIn the 70 & 71, the headlight switch completed the path to ground from the High/Low switch on the other side.1 point


Important Information
By using this site, you agree to our Privacy Policy and Guidelines. We have placed cookies on your device to help make this website better. You can adjust your cookie settings, otherwise we'll assume you're okay to continue.