Leaderboard
-
pogden
Free Member1Points60Posts -
EuroDat
Free Member1Points3,309Posts -
Dr. 240Z
Free Member1Points308Posts -

newtonhubcap
Free Member1Points184Posts


Popular Content
Showing content with the highest reputation on 06/03/2015 in all areas
-
My rebuilt carbs from ZTherapy were delivered by UPS at about 7:00 last night. This morning I took a couple pictures (because they will never look this shiny again) and then took them to my mechanic for installation and tuning. I've posted the pictures for those who haven't seen what one gets in the box from ZTherapy. http://tinyurl.com/pgajmmc Dennis1 point
-
Got the auto electrician around today to fit the JDM Euro Spec tail lights we need over here, change the front running lights to indicators and the headlights to include side lights we also need, and fit relays and resisters where necessary, on Friday it's going for its MOT, Ministry Of Transport Test, every vehicle here must have an annual test if older than 3yrs old, also I received from our friends from Z car Depot, new front and rear bumper rubbers, an OEM passenger door mirror, door gromits, cone shaped rubber that fit in the B post, courtesy light switches ( the push switches in the doors that make the interior lights come on when you open the doors, sorry for the explanation you may call them the same thing ;-) ) Happy Days
 1 point
 -
1 pointI'm no engine builder, but I'd have a hard time closing that thing up knowing I had pistons that looked like that...1 point
-
Hi everyone - this is my first post on this forum, but I've been a heavy reader for the past couple of months. Amazing knowledge shared here! I made good progress over the weekend disassembling my 76 280z in anticipation of a late-June trip to the body shop for some new paint. Wiring harnesses are out, dash and HVAC are out. Most of the hydraulics in the engine bay are out (PO had apparently didn't know the difference between a flare nut wrench and channel locks, so I guess I will learn how to flare and maybe even bend brake lines. Lots of dull, corroded fasteners and fittings. Thinking of trying my hand at replating them myself while the Z is in the shop, but that leads me to consider buying a vibratory tumbler in order to get everything cleaned up first.1 point
-
1 point
-
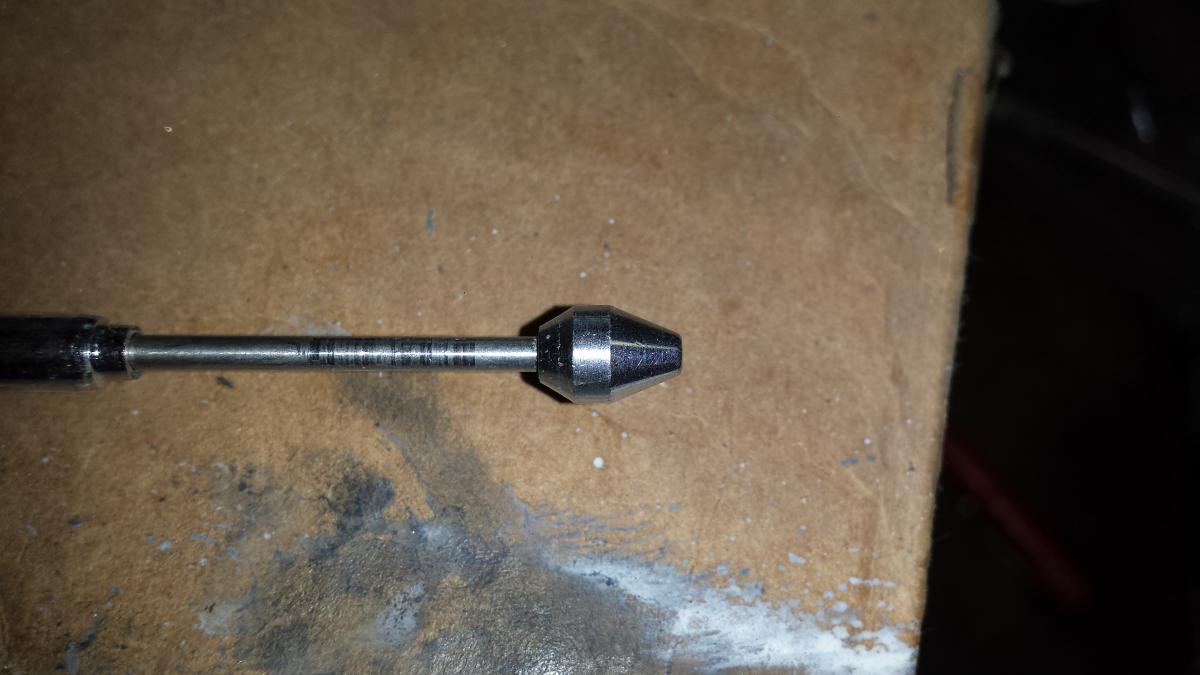
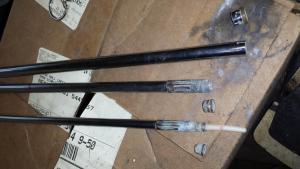
1 pointBuilt up enough courage to take my "acorn" oem antenna apart. As with most antennas the motor works but antenna doesn't move. So, I pulled the antenna apart. Of course the sections come out the bottom of each tube and at the bottom of each tube is brass collar that the antenna tubes are crimped too. Using my dremel cut-off wheel I cut each brass collar off and pulled each tube section out. I am down to the final section but just learned the "Acorn" tip will not fit through the final section. My question is doe any one know how the Acorn tip is installed? Is it solider, does it screw on what? Do I need to cut it off and then weld it back? My objective is to install a new nylon insert into it and reassemble! Greatly appreciate any info or point me in the right direction. Here are photos of what and where I currently stand. Thanks in advance.
 1 point
 -
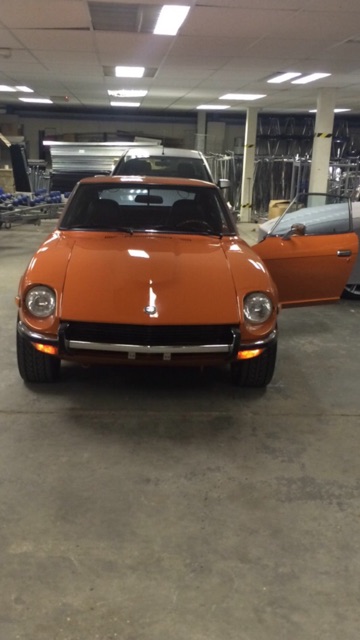
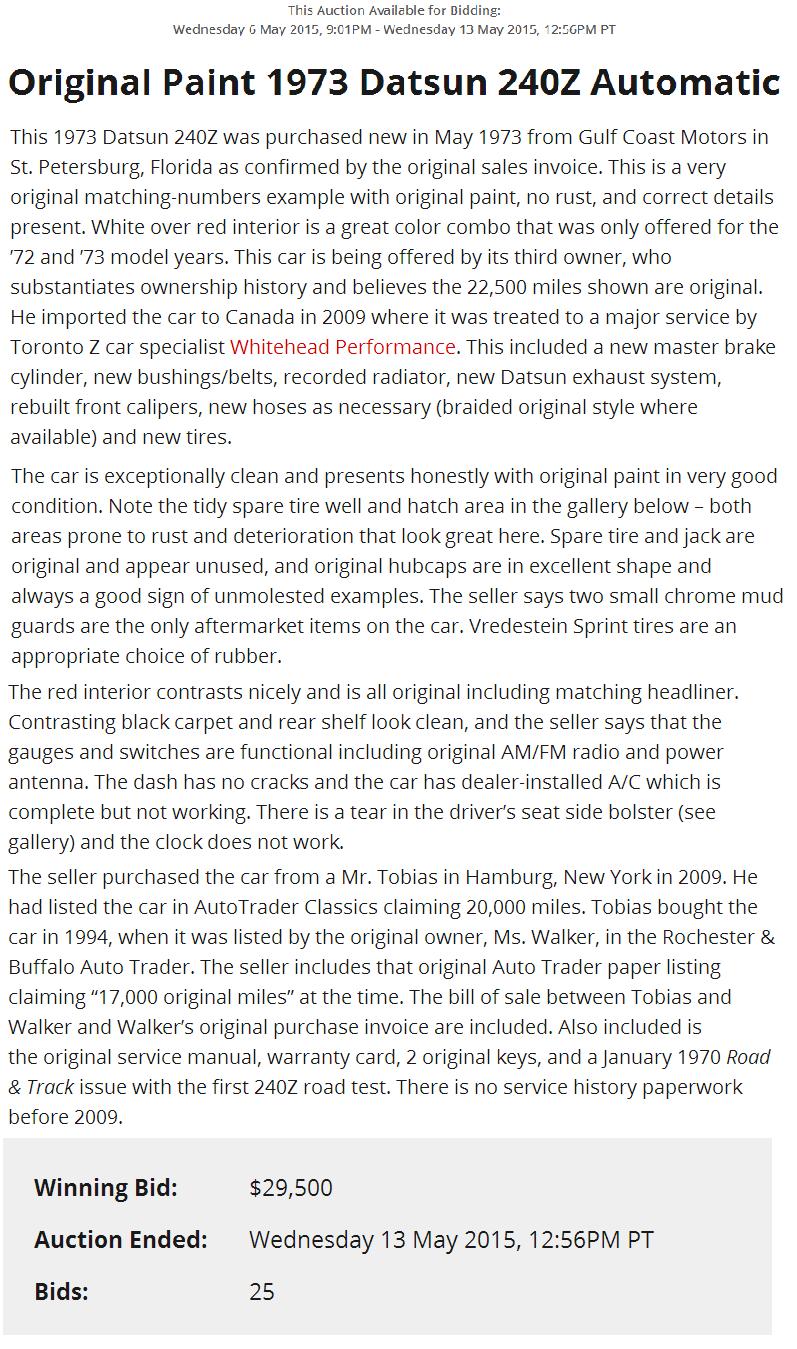
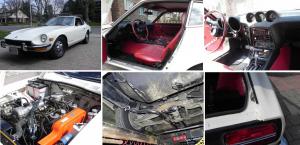
I thought it might be goed to post some of the photos. The links work for a couple of weeks and them fail which makes the thread pointless. Pitty. It is interesting to see an automatic go for so much, but I must admit it is in very good condition. It hasn't been messed with in anyway. Chas
 1 point
 -
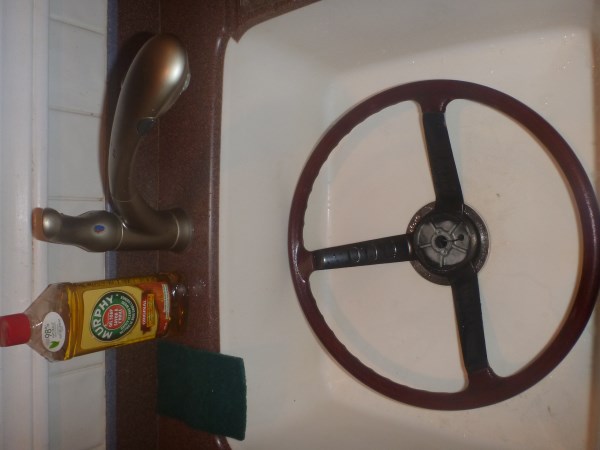
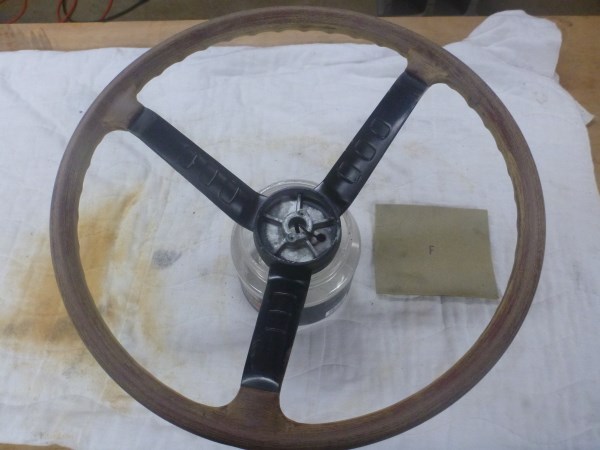
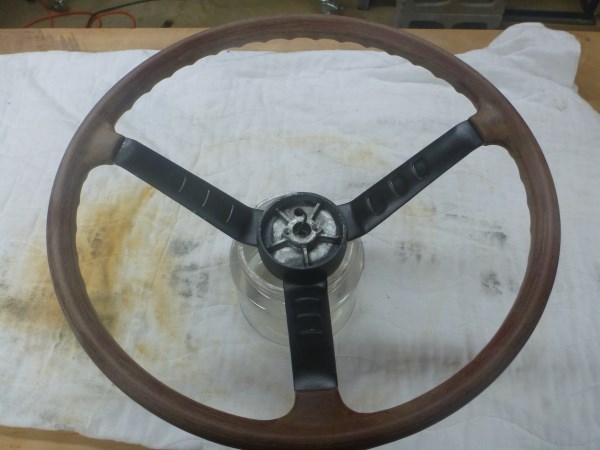
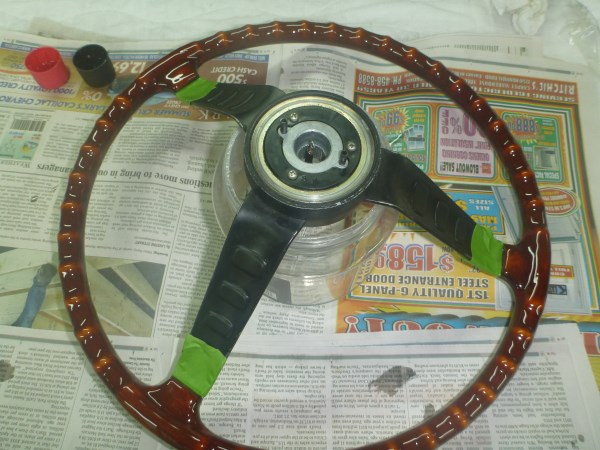
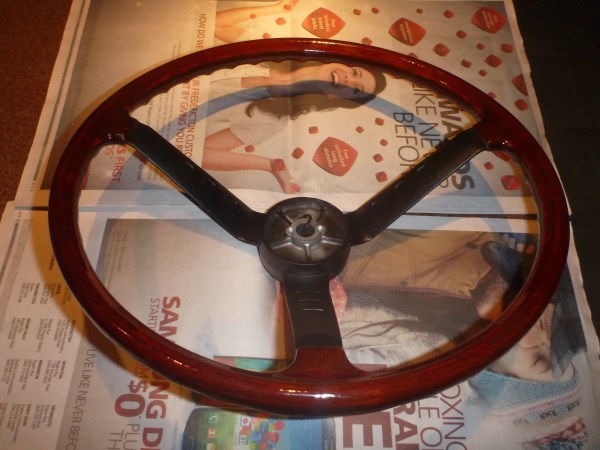
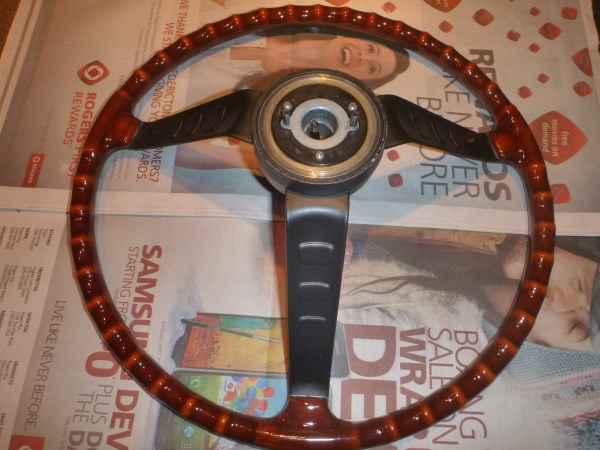
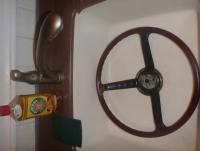
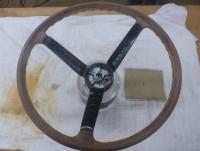
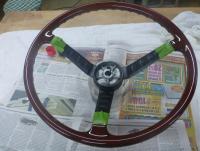
1 pointHi, After reading several posts on this project I refurbished my Z's steering wheel as follows: 1) I cleaned the grime off the rim with a green pad and Murphy Oil. 2) Next I sanded the wood/epoxy rim with a fine sanding pad. 3) After taping off the spokes I covered the rim with 'Famowood' Gloss Glaze Coat. 4) Taped off the finished rim then sanded (to 400), primed (self etch) and painted (semi gloss enamel) the spokes. George


 1 point