All Activity
- Past hour
-
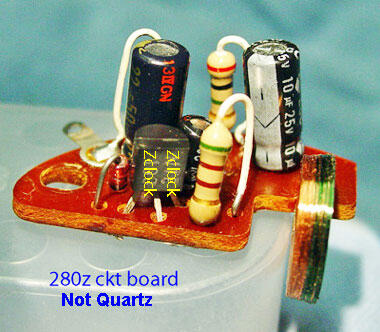
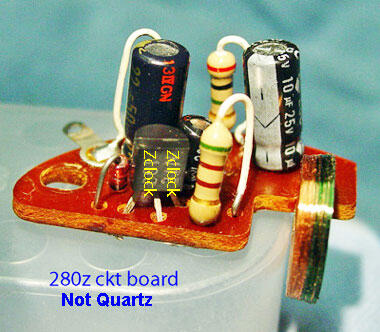
280z/RC-1 knob Rebuilt circuit boards
I have rebuilt circuit boards for the 75-78 280 OEM clocks and single knob RC (calendar clock) . Your core circuit board is required and the cost is $78 plus shipping and taxes . If you are interested or have questions please contact me, ron@zclocks.com Thanks for looking
-
Float level advice, please.
I've read that the mixture screws raise or lower the nozzles 1mm per revolution. One can raise the nozzles to the top and lower them 10 turns. At ten turns, the fuel level should be near the top of the nozzles.
- Today
-
LBS joined the community
-
psdenno started following [2025] What Did You Do To/with Your Z Today?
-
[2025] What Did You Do To/with Your Z Today?
Cliff, you can buy a lot of Powerball tickets for $12,000 😎.
-
The OG 240Z - Reanimation Project
I really needed one more week to work on the OG before I left for Zcon. Just one more week would have made the whole drive so much less stressful. I would have known that I had a radiator problem and I would have mitigated it before I left. But I lost that week waiting for struts because Amazon screwed up. So here's where I am today. I took the leaky radiator I got at the show to a local radiator shop. They sealed up the leaks and pressure tested it. I swapped it into the car, and.... Driving around with no thermostat, it wouldn't even reach proper temperature!! Way better than what was in there! So just to see where the gauge would land, I put a 160 degree thermostat and went for a drive. It stabilized about here: So next chance I get, I will swap out the 160 for a 180 thermostat and check again to see where the gauge lands. But the bottom line is I'm a whole lot better off than I was with the previous radiator! I blame Amazon. And photobucket.
-
[2025] What Did You Do To/with Your Z Today?
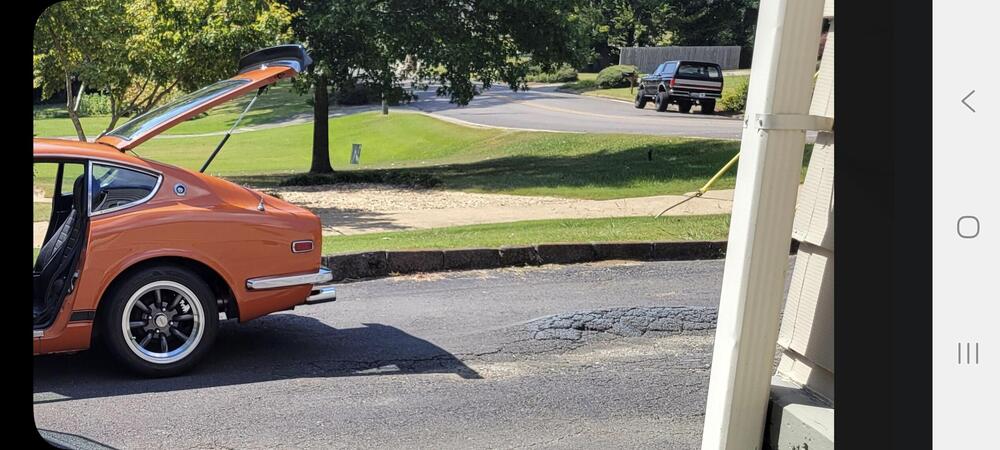
Your saying $12k for a new driveway with those measurements? Not digging up the old asphalt and hauling it off? Thank you Charles, I've just guessed at the price of concrete. One of my neighbors with a smaller drive paid $15k for concrete but that included breaking up and hauling off the old concrete. I'm just going to wait on my Powerball winnings. For the time being it's gonna be patched and possibly sealed. If I do a good job the next owner's will buy the concrete.😁
-
[2025] What Did You Do To/with Your Z Today?
My calculation is about $12,000 for concrete Not including any demo
-
[2025] What Did You Do To/with Your Z Today?
Joles Asphalt 2.6 Google review Not enough crush and run then not enough asphalt. They used enough to make it level and look good for maybe a year. What I dug up yesterday was mainly dirt with very little stone under the 2" of asphalt. I got screwed dude. But when it started to show they were long gone. So now I get to fix it. They charged me $3,000 in '03 or '04 now another guy quoted me "around $10,000 but it'll be right when I'm done". I think it will do the same thing if I use asphalt but concrete...WOW that stuff has gone through the roof. My driveway is 20 to 25 feet wide and 125 deep. You could land an airplane on my driveway, the kids in the neighborhood think it's a skateboard park, I could put a Christmas tree up and have my own dragstrip. It's long and wide, concrete would be $20K
-
Float level advice, please.
I decided to go through all 14 pages of this thread. I spent many hours trying to get my fuel level in the bowl correct, whatever "correct" is. I even fabricated a plexiglass model of the fuel bowl so I could actually test the float in combination with the needle valves, which I know are NOT grose valves. I also found I was totally wasting my time by measuring the distance from the top lid of the fuel bowl to the top of the float, which we now believe was meant for grose valves. The critical measurement I've learned is the actual fuel level in the nozzle, not the bowl. Either .426" or 10mm would be the level of fuel below the carburetor bridge. That level happens to be based on the fuel level in the bowl, which is determined by how one bends the tabs on the float itself. Some of us have discovered that to get the proper fuel level, the float is actually too high in the bowl and is dangerously approaching the lid of the float bowl. As you can see, CO has fabricated some brass screws that when inserted into the float will help the float attain the proper angle when the fuel level is correct. I have fabricated similar screws and will drill and tap holes in the float as CO did, and hopefully after re-adjusting the tabs will finally have the proper level. I will report back with my findings, but from I've read from CO, I am expecting good results. Jim
-
Saving- 04858
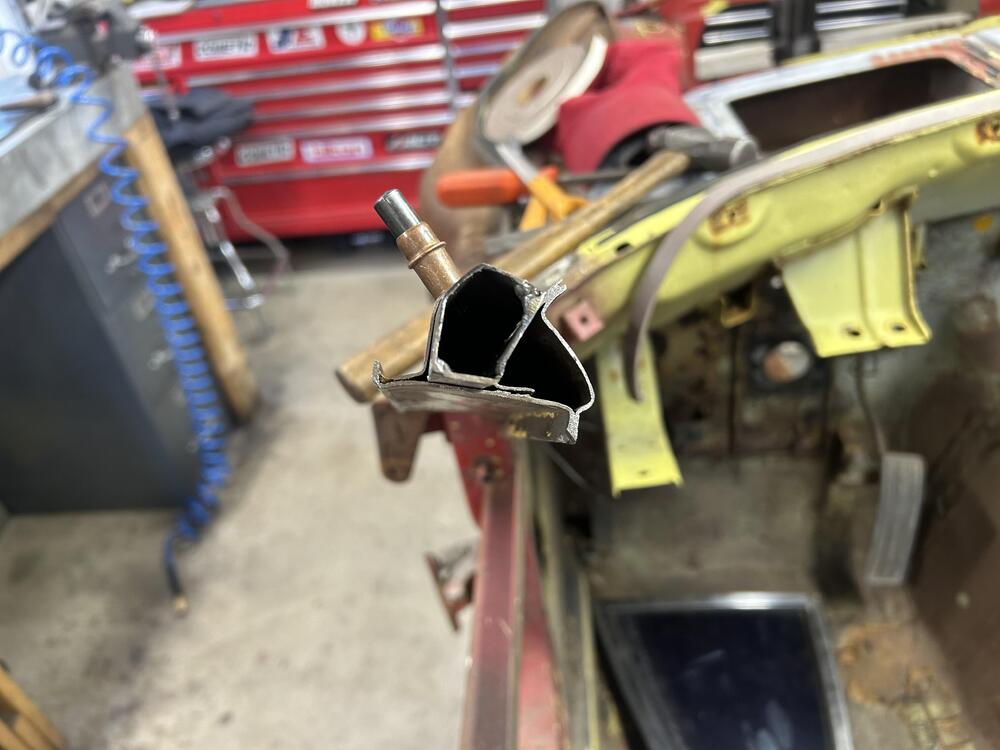
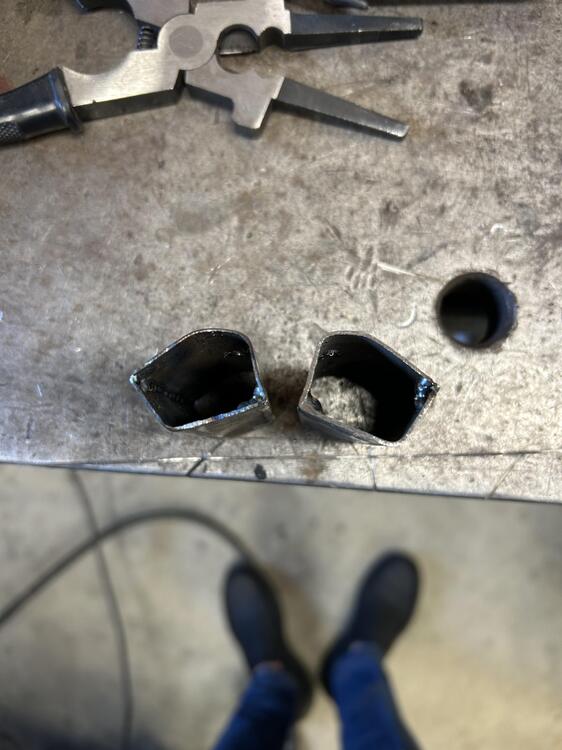
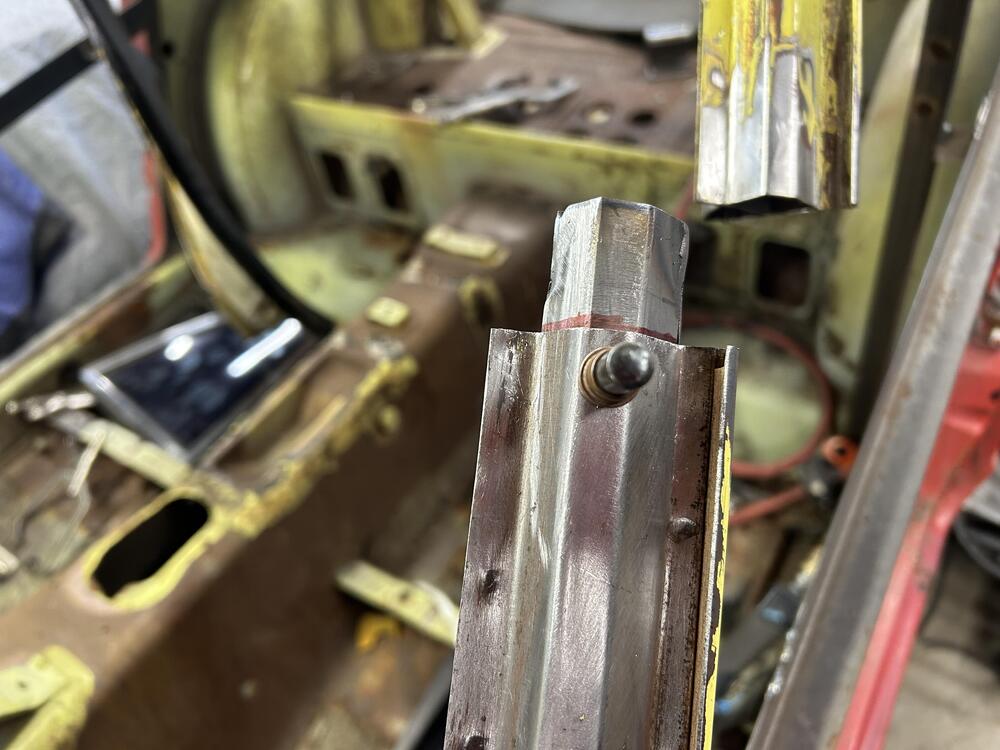
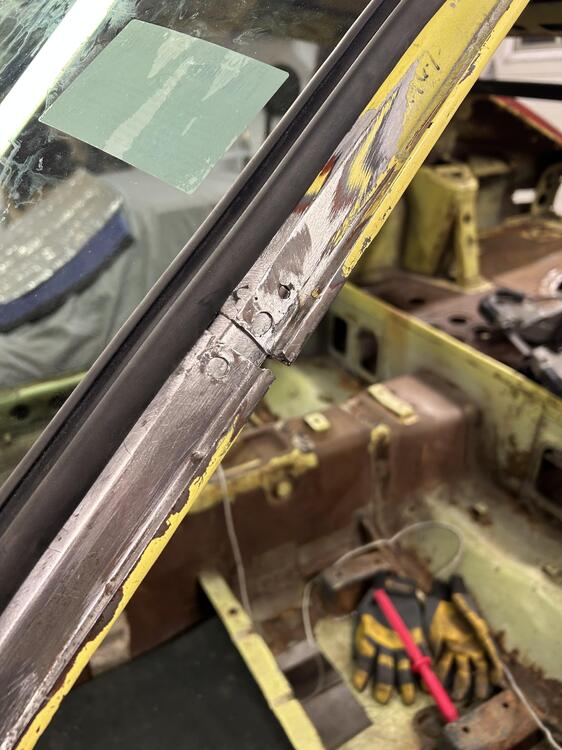
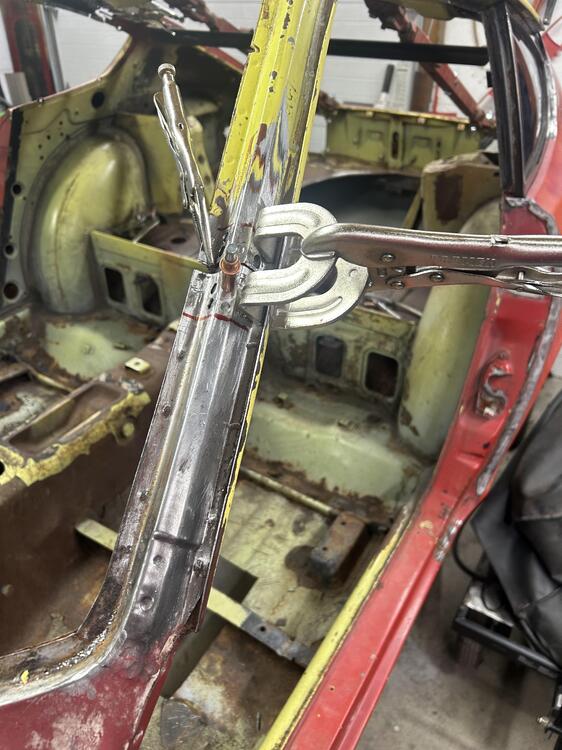
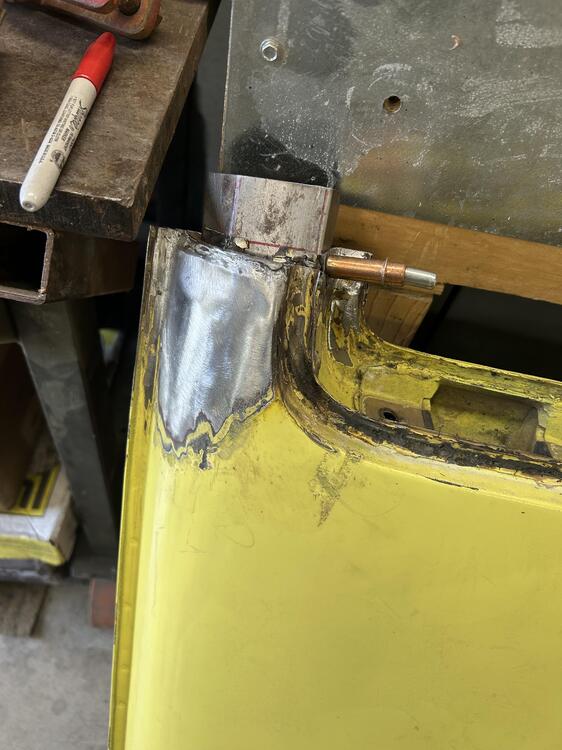
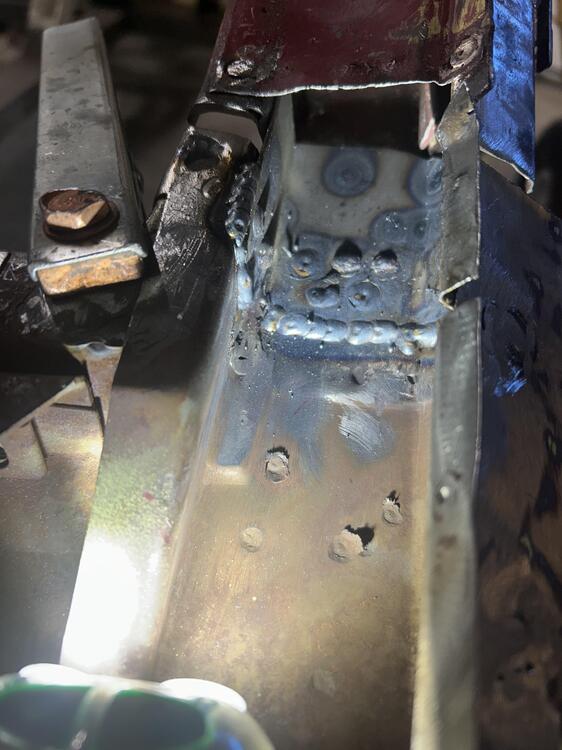
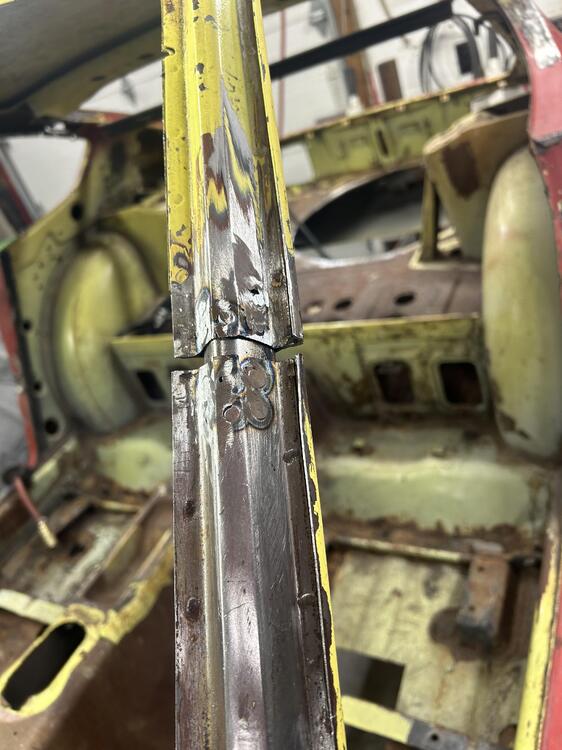
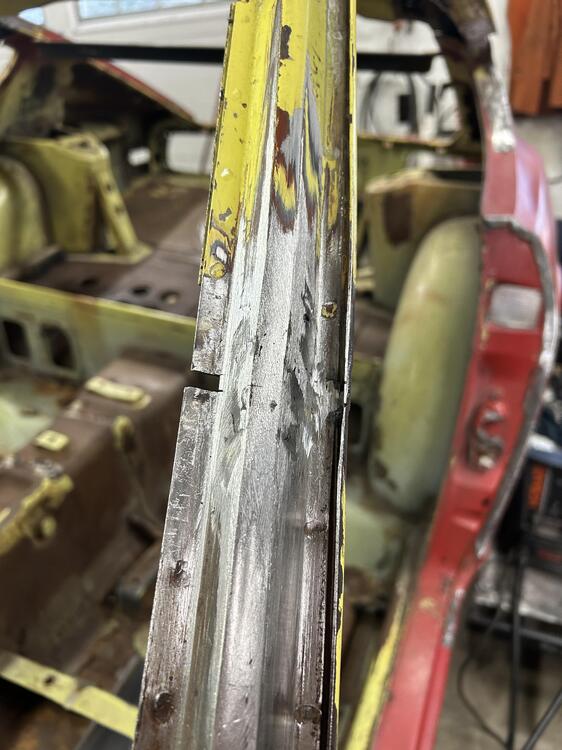
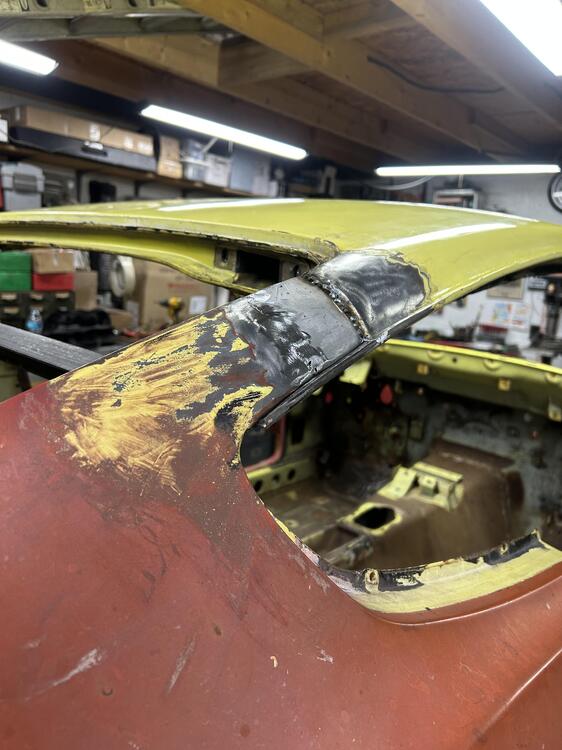
Well here is a look of the innards of a A pillar on a Z. The way it was designed made plugging it a challenge to say the least . I had plenty of A pillar material laying around so I made some plugs to slide down inside the A pillar . I think they were less than 3” . I wanted to be able to plug weld and butt weld from all sides . I peeled back the skin on the inside of the pillar . That allowed access to weld all the way around the plug . On the back side of the roof I made a plate to help join/bridge the new roof to the rear quarter . Of course the ideal scenario was to have as small of a gap as possible . I thought I nailed it the first time - but I made the error of relying on measurements . I welded it partially and got the fit too tight and couldn’t fit a windshield . I had to undo welds and clean things up . I should have attempted to install the windshield and then welded . In the end I ended with a .250” gap which was acceptable to me . It sucked having to grind out mistakes - but I was determined . At the rear I had the quarter windows to help me line things up . Since they have 4 screws and they share with the roof and quarter - I just had to make them line up . The problem was the roof was a bit sprung and I couldn’t pull it in place without some heavy equipment. My friend of the bodyshop told me he had these big turnbuckles I could try . They were the ticket .
-
Wiring bellows tubing
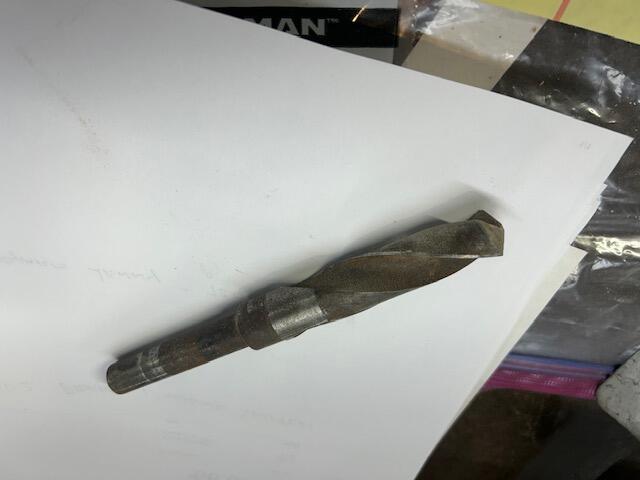
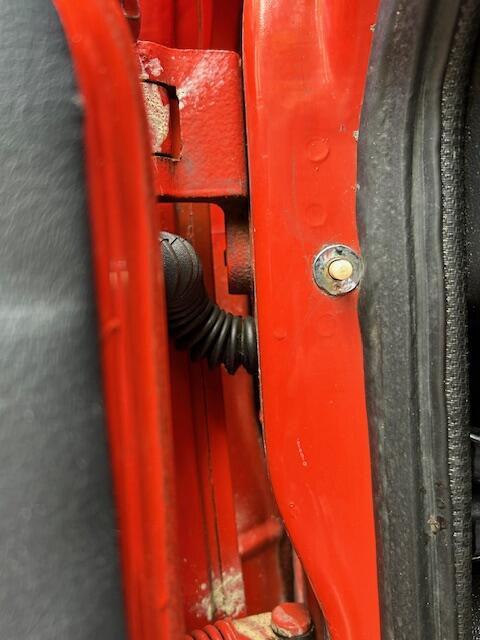
Yeah, I used a step drill as 3/4" is apparently the one size in my "monster drill" collection that I don't have. It's smart to paint that bare metal (I'll use some of my POR-15) as it will undoubtedly see moisture -- but no salt... not under my ownership at least. Doors to be done tomorrow. Thanks again. This will all go into the power window tech article on which I'm working.
-
Hatch drip gutter extension
Worked for Grannyknot using zero-forgiveness sheet metal. I don't see the problem.
- Yesterday
-
Wiring bellows tubing
Those spots look good. I used this beast and it was tough (was wondering why I didn't use a step drill 😄) I did paint the bare metal in the holes. . Here is a picture of the motor installed This is a Spal heavy duty unit (not sure if these are still available) Been working great. Important that the window works smoothly first !
-
Wiring bellows tubing
Damn, but that body metal is THICK at that location. I estimate it at 3 mm. Pretty near took all the life out of my Harbor Freight step drill bit.😊
-
Wiring bellows tubing
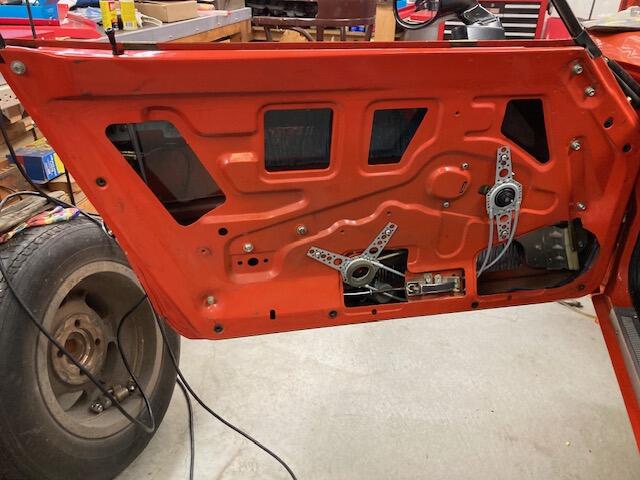
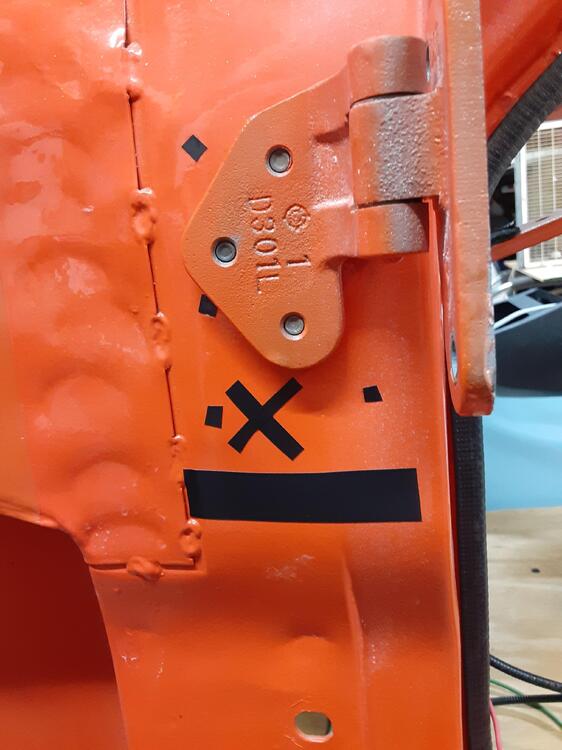
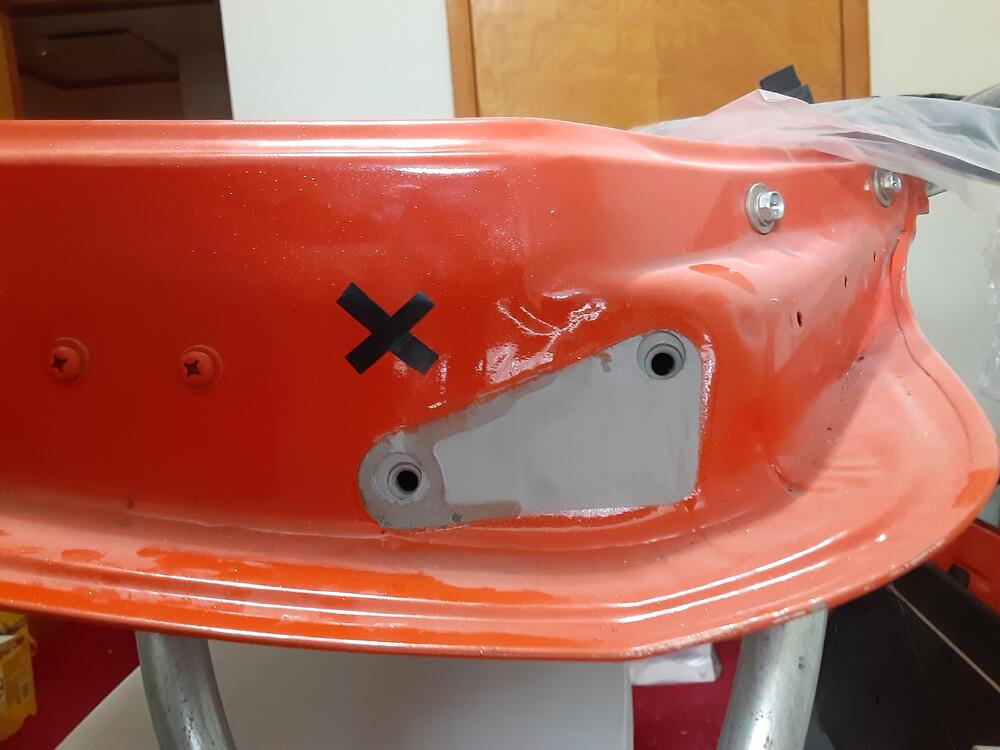
Thanks for those pix, SteveE, as they are very helpful. Judging from its relationship with the door jamb light switch position, it looks to me like you drilled into the lower part of the upper door hinge recess on the body side. I measured the bottom of that recess to be roughly 55 mm below the center of the lowest bolt securing the hinge to the body. In my photo below I've marked spot welds with small "dots" of black electrical tape and the bottom of the recess with the horizontal piece of tape. And the "X", you ask? That's where I'm going to center the 3/4" hole for the bootie, which pair should be arriving tomorrow. As for the hole in the door, it looks like yours is at the same height at the lower door hinge bolt. From feeling around inside my door, that's where there's just a single thickness of metal (immediately below it feels like there's a double thickness). So my drill point there is also marked with an "X".
-
[2025] What Did You Do To/with Your Z Today?
We'll call this " The Battle of the Bulge". What caused it?
-
Wiring bellows tubing
More options: https://www.amazon.com/Harness-Wiring-Rubber-Sleeve-Dust-Proof/dp/B0DPSSGQM3/ref=sr_1_3?crid=2IFD08NNIUUXC&dib=eyJ2IjoiMSJ9.j6sCbuIjzN-WBnm2XXwWVu4090p00UNg2r3CNwgAFBVu9Lpb66DXNbNe_7yLAqI4vMWRl0gsNxdRcdAK9V-5dS-n5-_exNneA0CtlQFm27hcWNwAakn7syA0o6BJfeUK2eQPmD7LDR4KUk4i1u1e9-fLz4GBRraJloEbMOQi9a9O9VQGqdfo0GKMkXonZdBkHD4duo1hl7_Sb6vS8y5-yGtRl5shRUZRCjQAmJjD7V0.Qts0l3KNs3i-pKnDHJ-7Dj_thqYPP4NnJJ0nn_ue6Po&dib_tag=se&keywords=rubber%2Bbellows%2Bsleeve%2Bfor%2Bwires&qid=1758484994&sprefix=rubber%2Bbellows%2Bsleeve%2Bfor%2Bwires%2Caps%2C104&sr=8-3&th=1 https://www.amazon.com/Keep-Clean-10620-Door-Rubber/dp/B00H8JW4FK/ref=pd_sbs_d_sccl_3_5/134-8277767-9799355?pd_rd_w=O36Uk&content-id=amzn1.sym.2cd14f8d-eb5c-4042-b934-4a05eafd2874&pf_rd_p=2cd14f8d-eb5c-4042-b934-4a05eafd2874&pf_rd_r=8C2WBECPMWQVPQYRVYPN&pd_rd_wg=PgAlV&pd_rd_r=c69dac03-422a-494e-8aae-6aec3dcada49&pd_rd_i=B00H8JW4FK&psc=1 https://www.amazon.com/Megatronix-DAB-Replacement-Actuator-Flexible/dp/B0817DGHVP/ref=pd_sbs_d_sccl_4_6/134-8277767-9799355?pd_rd_w=zPpDR&content-id=amzn1.sym.2cd14f8d-eb5c-4042-b934-4a05eafd2874&pf_rd_p=2cd14f8d-eb5c-4042-b934-4a05eafd2874&pf_rd_r=BQ52F24TMDDBWQFXYEDN&pd_rd_wg=2aWdn&pd_rd_r=07eabe98-68fe-425c-b050-99f1004eeb04&pd_rd_i=B0817DGHVP&psc=1
-
[2025] What Did You Do To/with Your Z Today?
Today I broke my back it feels like. All the things I've done to the car aren't worth a flip when I can't back out of my driveway. So today I dug up some asphalt to save my oil pan and my exhaust from The Z Store.
-
Hatch drip gutter extension
How much for both sides? 🤭 Kidding around. It does seem simple but I would be concerned about the length to clear the slam panel when the hatch is closed. It would be very close without breaking the extensions when you shut the hatch. ????
-
Wiring bellows tubing
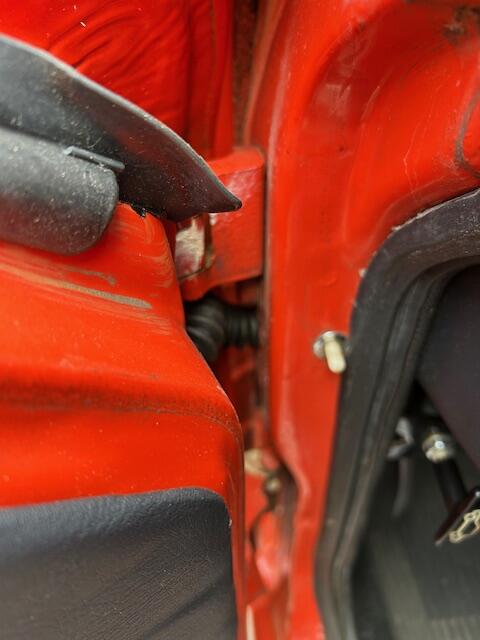
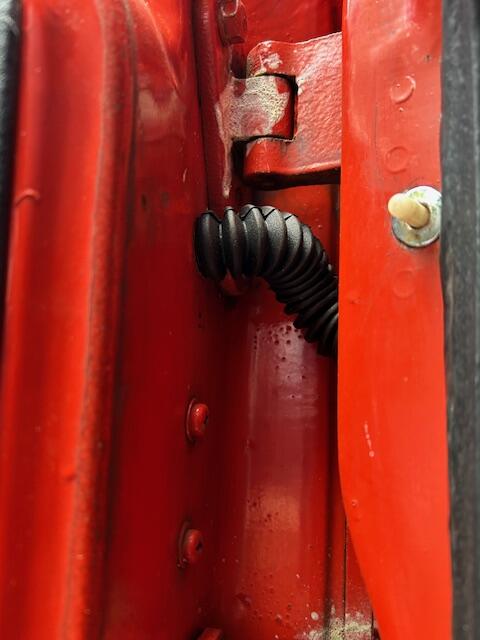
First picture looking done from top Second picture door side Thrid picture body side The boot was a straight section about 6" long. They came from Dave many years ago. The boots have been installed for 5 or 6 years, but only used heavily for this past summer. All seems good! I have power windows and power lock wires running through them.
-
1972 240z tachometer not reading nor working with MSD blast 2 coil. Any solutions?
Outstanding.
-
1972 240z tachometer not reading nor working with MSD blast 2 coil. Any solutions?
Car is running fine with the msd blaster 2 coil. Tach is working.
-
Namerow started following Hatch drip gutter extension
-
Hatch drip gutter extension
Even though Grannyknot made his gutter extensions out of sheet metal and welded them into place before applying his the final paint coat, you could just as easily fab up something similar and just glue them in place. Make them out of 'L'-section plastic (hobby store) to address rust concerns and paint them body colour before gluing to the hatch body sill.
-
saturday night music thread
They wrote great songs but I can't think of any covers that were done. What a shame.
-
Datsunman joined the community
-
saturday night music thread
You forgot the link!
-
saturday night music thread
Bonus Nazareth track -


