XYZ
Community Member
-
Joined
-
Last visited
Everything posted by XYZ
-
If you can find/get an address,the more specific the better, you can go to the county assessors office and do a search for ownership on the property. That's all public record. It's not to hard to find the real owner, but if the place is leased to someone else that could be harder, especially if the owner is out of state or a corporation or trust or something. You can sometimes do this search over the internet too depending on how good the county site is. Good luck! It looks like a little treasure trove you've come across.
-
check out the thread on Need front end advice. There's a some discussion about this topic and a website for general info and specifics to this question.
-
Yep. looks like it exists already.
-
Mike- Just a thought, but since this is a computer based club what about a mouse pad with the club logo on it?
-
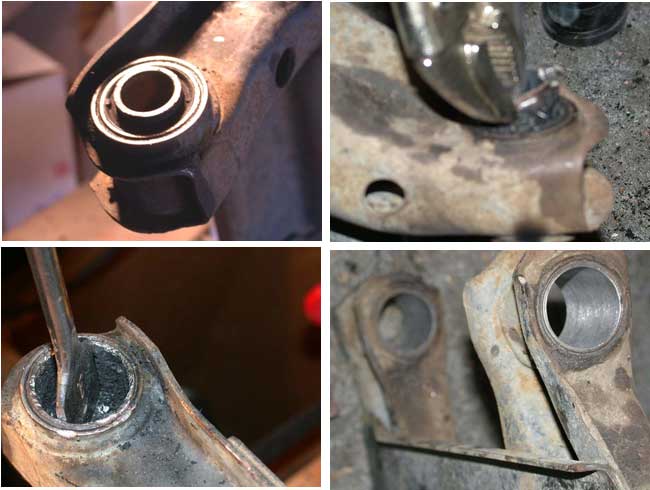
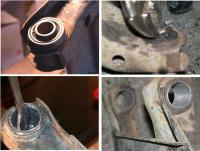
I thought I might share a few things I learned recently when replacing my bushings on my rear control arms. First, grease the hell out of all the bushings, inside and out and all the sleeves too. I learned the hardway. I had to remove my control arms twice as I forgot to grease the first time. I learned a trick to removing the spindle bushings on the outer control arm while making my swap from stock to urethane. The bushings are actually pretty easy to remove once you figure it out. I've attached some pictures to help describe what I did. I started by drilling the rubber to loosen it a little (I'm not sure if this really helped or not but it's what I did) next to the inner sleeve. Next, I attached some vicegrips to the sleeve sticking up. I then heated the sleeve from the underside and interior with a propane torch for a few minutes. Once the rubber started to soften, I used the vicegrip as a fulcrum to pull the sleeve up and out of the rubber. The vicegrip popped off a few times but as I kept heat on it the sleeve slid right out. Then I used a drill with a 1" paddle bit and drilled out the rubber. After that, I placed a hacksaw blade through the remaining bushing and cut two grooves about a quarter rotation apart through the sleeve making sure not to cut into the control arm. Then I took a flat blade screwdriver and started working on one of the grooves until the sleeve let go. The heating and drill took about 5 -10 mins and the hacksaw part took about 10-15 mins. each. Unfortunately, I didn't refine this process until my last bushing. I think it would have gone pretty quick for me had I known a good way to get these bushings out. There is a similar technique in How to restore your datsun z-car but you must hack through the rubber and two layers of metal. I think removing the inner sleeve and drilling was easier. After cleaning up the opening I greased everything, I mean everything and attempted to reinstall the CA. That's when I found out another trick. The urethane bushings I used, by suspension techniques, have collars on them that reduce the opening of the CA by an 1/8" or more. I couldn't get that thing back on. After an hour plus of fighting, I got pissed off and cut off the collars on the inside part of the CA with a knife and the CA slipped right back into place. You'll notice in the photo's the original bushings don't have a collar just a sleeve. Unfortunately, I don't have a picture of the bushings so if you haven't seen them the collar part might not make sense. I'm not sure if what I did was right, but the way it sat without my cutting the collars off meant I wasn't driving. Everything seems to be working fine and the new bushings are basically the same now as the original bushings. Hopefully, someone might be able to use this stuff and speed up there bushing replacement. Also, I'm no mechanic so if anyone wants to chime in with other observations, great.
-
I like the original Z logo design on the front and back, just above the cups. I also agree about the collegiate hat style. For what it's worth...
-
When I got my Z this past summer my insurance agent would only cover it for the basics required by Colorado ie.. no replacement value. I was told I had to get an appraisal to set the replacement value for the car if I wanted that type of coverage. I am currently in the process of switching companies and now have the car listed and covered (pending underwriter approval) as a show car with full coverage and just about the minimum deductables. This knocked off nearly $300.00/yr for coverage too.
-
Try www.shox.com They have the lowest prices I could find for the suspension stuff. I also tried stricklyz, motorsports industries, victoria british and www.nismoparts.com but shox.com was the lowest. Do make some calls because prices where all over the place. AS an example, I saw Eibach springs anywhere from $280.00 down to $209.00 for a complete set.
-
I've been looking for about three weeks now for a good looking set of wheels. Pretty far and few between. The only things I could find that I like are centerlines and I'm not totally set on those. I was quoted $215.00/wheel and 5-6wks lead time for dealer. I thought I had found some really nice rims by superlite but they were more than centerlines. I've searched the net as best I can but the biggest problem is when you try to search for a Z they don't seem to exist. Good luck. If you find something maybe you can post it to help the rest of us wondering aimlessly through the world of wheels.
-
I'm not sure where this pin is that your talking about? I saw a pin that I had to drive up and out that held the transverse link pivot bolt in place, is that it? Or is there a little pin holding the bushing and sleeve inside the control arm hidden in rubber? Just curious as you can tell this is my first bushing replacement.
-
Thanks for the info- in response to some of your questions on the rear control arm, my reference to the upper bushings means the larger units next to the differential (I'm not the best with the terminology). The lower bushings for me are the ones next to the wheel. I removed the control arm in about 10 mins. but it was the small bushings themselves that I wasn't interested in tackling immediately. Do I drill them out between the sleeve and the outer shell? How do I clean up the inside of the control arm once that stuff is out? I don't have any air tools but I do have a small propane torch:D I assume these buggers need to be completely lubed up as well? The steering wheel shimmies quicky back and forth at these upper speeds. I have replaced the steering coupler, the tie rod bushings, the endlinks on the sway bar and the rack and pinion bushings. The only thing in the front not replaced is the control arms and the bushings relative to the struts (coming soon). With all that's replaced I figured it was the alignment?!? I plan an upgrade on the brakes (maybe sooner rather than later) but I haven't done the bearings or the brakes at this point. The steering wheel used to shudder between about 35 - 45 mph (not quite as feaverishly) and then go away. Now it shimmies/shudders at a higher rate of speed, closer to the speeds I like to drive.
-
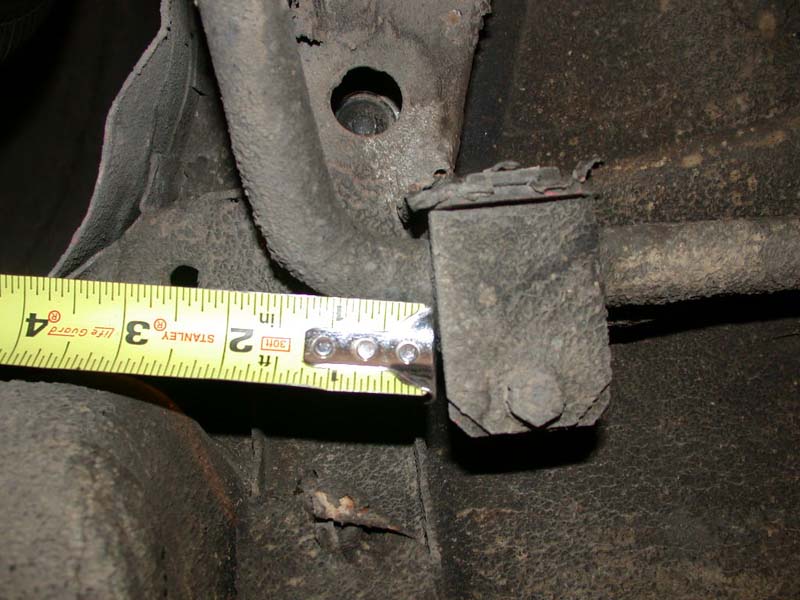
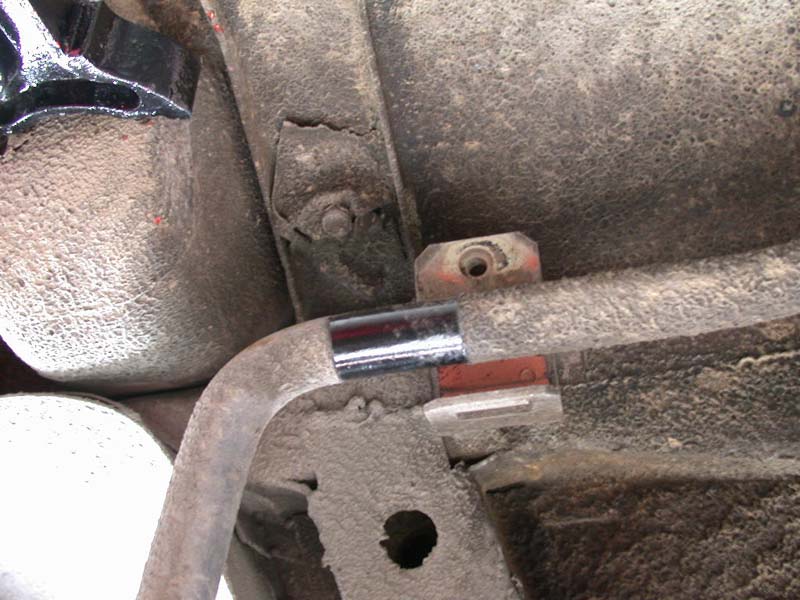
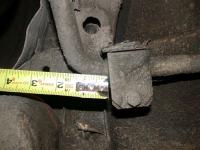
Here's another pict with a tape measure on it for reference. I think the first picture is pretty clear as to the location of the bracket. You can see the clean spot where the bushing was before I replaced it.
-
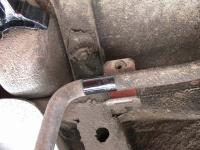
Daniel- Here are a couple of picts of my swaybar location on my Z. I have a 260 if that matters (I don't think it does?). I hope this helps you. This isn't the easiest place to get a good photo.
-
Okay- My saga continues in the bushings replacement process. A few questions to throw out there. First, I just did the upper bushings of the rear control arms took it out for a drive and now my rear end squeaks like a new shoe. I saw in a past posting that the bushings should be greased which I did on the inner sleeve but not the outside of the bushing. Did I miss the boat here? I didn't grease the outside as I figured I would collect dirt and debris like a magnet. Second, I did not replace the lower bushings in the rear control arm as they were in pretty good shape. Other factors considered were that they are pretty small bushings and I didn't have the tools to do a respectable job removing them (or the patients). Should I expect any problems by leaving the old bushings? Third, can the front control arms be dropped/removed similarly to the rear control arms without messing with the strut tower and if so exactly what all should be greased on the urethane bushings? Finally, I replaced the bushings for the rack and pinion steering but have not yet got the thing re-aligned. On my test drive besides my new squeak, the steering wheel shudders as it approaches 50+ mph. I'm assuming this is due to miss alignment as it did not shudder at the speed previous to my tinkering. Any thoughts?
-
Someone last week posted a similar question about lug conversions and a website was given as a resource. www.modern-motorsports.com. This site has a little information regarding adaptors for a Z to a Honda bolt pattern which is listed as 4 x 100 or 4 x 4" for the Honda wheel. Maybe this will help you. If you email the site they should respond pretty quick. I was looking into Honda wheels as well and I got a respond about this adaptor in a day or two.
-
Daniel- I have not worked on the rear yet, however, looking at the end links in the kit, there was 4 provided and they were all the same. I don't know about the stock end links and if they are all the same or not. Hope this helps.
-
FYI - I contacted Energy suspensions regarding modifying the sleeve for their endlink bushings. Removing a 1/4" of sleeve will have no negative effects on the performance of the bushing. I was glad to learn this. After talking with a few people who have messed with these bushings they recommend a large C clamp or ratchet strap to compress the bushings to start the nut on the bolt. Or do what I did and cut it!
-
Here's another angle for you to consider. I know the only reason I joined was because I had the ability to view this site anonymously for awhile so I could see what the quality and content was of its users. I found the content and format pretty friendly and once I really had some questions I started to use the site as a member. I also looked at zdriver (I think that's the other forum site) but I didn't like it as well. It's completely possible if any and everyone must sign in you may slow or stop new members from joining. People act like water in that they usually take a path of least resistance and if you put up barriers for them they will go elsewhere. I'm not sure what the motive would be to make people sign in if you are getting all the stats you need currently to shop sponsors but I think the site is pretty cool as is. I've done alot of research on this site regarding my Z from technical info to looking at other Z's etc. Anyway, this is one members thoughts. Thanks for setting it up by the way.
-
This may or maynot help but I had a similar problem with my car. Every time I went into my garage I smelled gas. Everyone who went in there complained. I was messing around with my carbs and noticed my oil levels in my dampers were low. I topped them off and my gas smell went away. I also adjusted the idle screws and the next day there was no gas odor. Maybe you have a simple problem like this. It's at least worth looking at since it only take a few minutes.
-
I was pretty surprised when the link didn't drop right in. The other thing I forgot to ask about is the torgue of 15 #/ft on the nut for the end link. The original shaft had two nuts top/bot. and I could see how you could get the torque because of the way the shaft on the link is designed. On this new link it seems like I could just keep going with the tightening of the nut and deflect the end of the sway bar until I crushed the new bushings. Not sure what to do with this. This may need to be part of my phone call to energy suspensions.
-
I started to replace all of my rubber bushings with urethane today. I learned a few things to make the process easier and I ended up wondering some stuff too. I'm hoping someone can learn a little bit from my experience and I can maybe learn something from my questions that follow. I replaced the steering coupler and swaybar endlinks. The coupler seemed pretty easy and would have been easier if I had figured out that jacking the car up first would allow me simple access to the nuts and the ability to turn the steering shaft with little effort. I figured this out after a half hour battle trying to reconnect the shafts in vein. Every time I tried to align the pieces I knocked a bolt into the u-joint and would have to start over after freeing the bolt. The other thing I learned was, to make it real simple during reconnection, loosen a nut on the lower shaft that allowed me to slide a collar up and down the shaft ( via tapping on it with a hammer), shortening it so I could get the two pieces together easier. Beyond those two things it was pretty simple. Neither of these things were explained in my Haines manual unfortunately. The next item, the endlink bushings were more difficult than I thought. This leads me to my questions. I got a complete kit from Energy suspension that I thought were direct bolt swap-out but I had to modify the sleeve that goes over the 5 1/2" bolt of the endlink. When I assembled the entire link with washers and bushings I had no thread to start the nut on the end. I removed about 1/4"of the sleeve to give me the necessary room. How do you compress the urethane bushings enough while trying to start the nut and avoid modifying the sleeve? Perhaps the bolt was too short, it's a 5 1/2" bolt. I haven't replaced the rear links yet as I want to contact the manufacturer to find out if I created any problems. The other thing I did, which I now regret, is knocking the little round seat that was on the top of the control arm off. Apparently this is a permanent piece but it looked very much like one of the washers for the bushing that had been compressed into the hole for this link. Again this was not part of the Haines explinations. I removed only one but still... Anyone know what problems I might expect by removing this seat? Can I use one of the old washers in its place? This seems to be a reasonable solution since it would be fixed on the shaft of the link bolt like the other washers. Sorry this is so long but I thought the history was necessary. Any feedback would be great and hopefully others who are rookies like myself can benefit from the things I learned the hard way.
-
Thanks for the feadback JC.
-
JC - When you switched calipers you went from stock Z calipers to the toyota calipers, straight swap? Is there any retro-fitting? Did you upgrade the lines from rubber to braided hose? Did you change the rotor (I believe that's the correct term) as well? This may seem like a stupid question, but what is advantage of the toyota caliper over the Z caliper? I want to upgrade my brakes as well when I rebuild my suspension and need to figure out the best upgrade. I've seen people actually change the rotor size to a larger diameter and I wondered if doing that means you can also change the stud pattern from 4 to 5 to get into a larger selction of wheels. Any feed back would be great.
-
Hi Everyone. 2 many, no offense taken. I honestly don't know where that sticker should go. I've been under the hood of exactly one Z, mine, so I have nothing to compare. I actually am surprised there is a specific spot for that sticker. I would think if it makes it into the engine compartment where it's visible then it's purpose has been served. I do know that the history I was given on my car leads me to the conclusion that it has never been repainted. I'm owner #3 and the second owner new quite a bit about owner #1's history with the car. Anyway, I'm content with my paint job (for now) so it no biggy for me. I thought I could help Ed by posting the picture as a reference and I may have muddled the situation further. I'm certainly no expert. I still believe it's worth contacting Nissan to see if you can get touchup kits for the color in question and seeing if it's what you want.
-
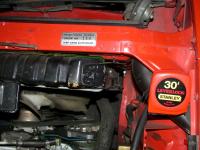
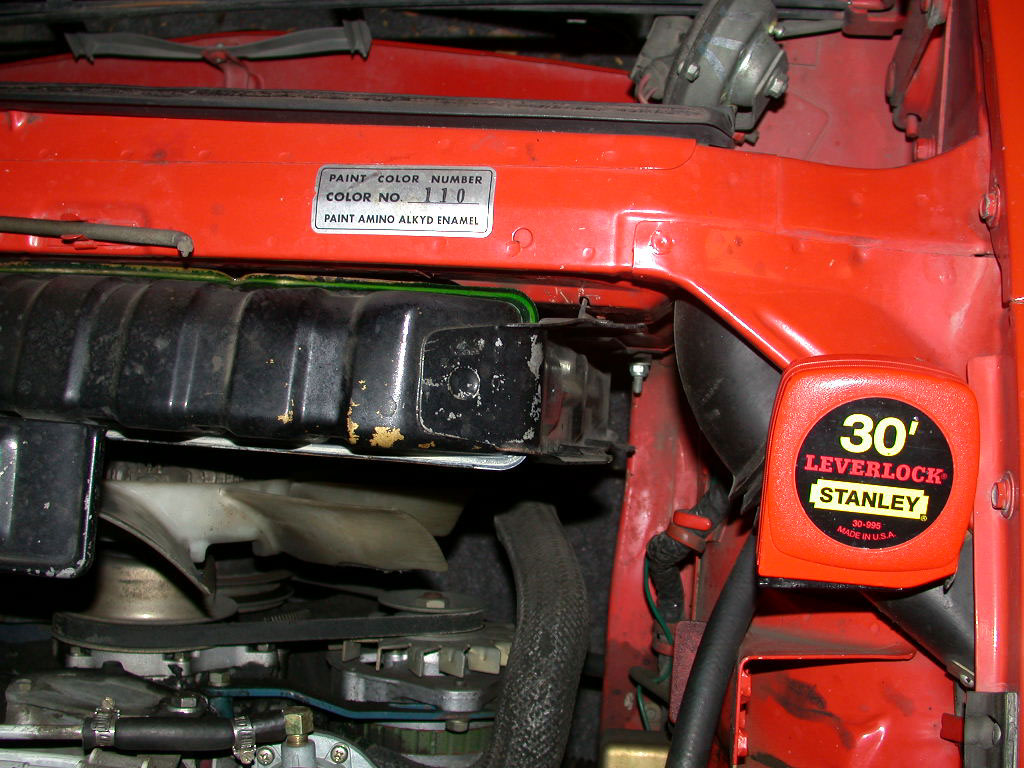
I looked at Daisenei's car and I thought it was a little difficult to know exactly what the color was due to the shadows. It is different than my car color for sure. I had a body shop recommend contacting Nissan to get a sample or touchup kit for my car giving them the color number. I have not followed up on that but you might try if your looking for a specific color. Obviously no guarantee's as to getting anything from Nissan but its worth a shot. I know my car is definately orange and the color in the members section is a reasonable rendition of my car color. I have included a photo of my color with the color tag and an orange stanley measuring tape for comparison. This picture looks more red than the members section and that has to do with the type and amount of light. I don't know if this helps but I do know color is a hard thing to describe and interpret. Good luck.