chaseincats
Community Member
-
Joined
-
Last visited
-
Currently
Viewing Topic: Brake fluid leak at master
Everything posted by chaseincats
-
I have that here coincidentally. Can foam actually create an air-tight seal?
-
My hatch plugs are fine, its the antenna drain plug (under the car) and possibly the antenna itself Is the drain plug grommet still available? I can't seem to find it.
-
Ok guys so I found them and here's the list: definitive: vapor tank vacuum line grommet had a huge hole vapor tank hose floor grommet was cracked a bunch of cracks on the fuel filler hose body mount mating area cracked body seam sealer near rear wheel well possible: antenna to body rubber - exhaust get in here? antenna drain plug missing - are these available anywhere? I've taped this shut a few times but it didn't really help
-
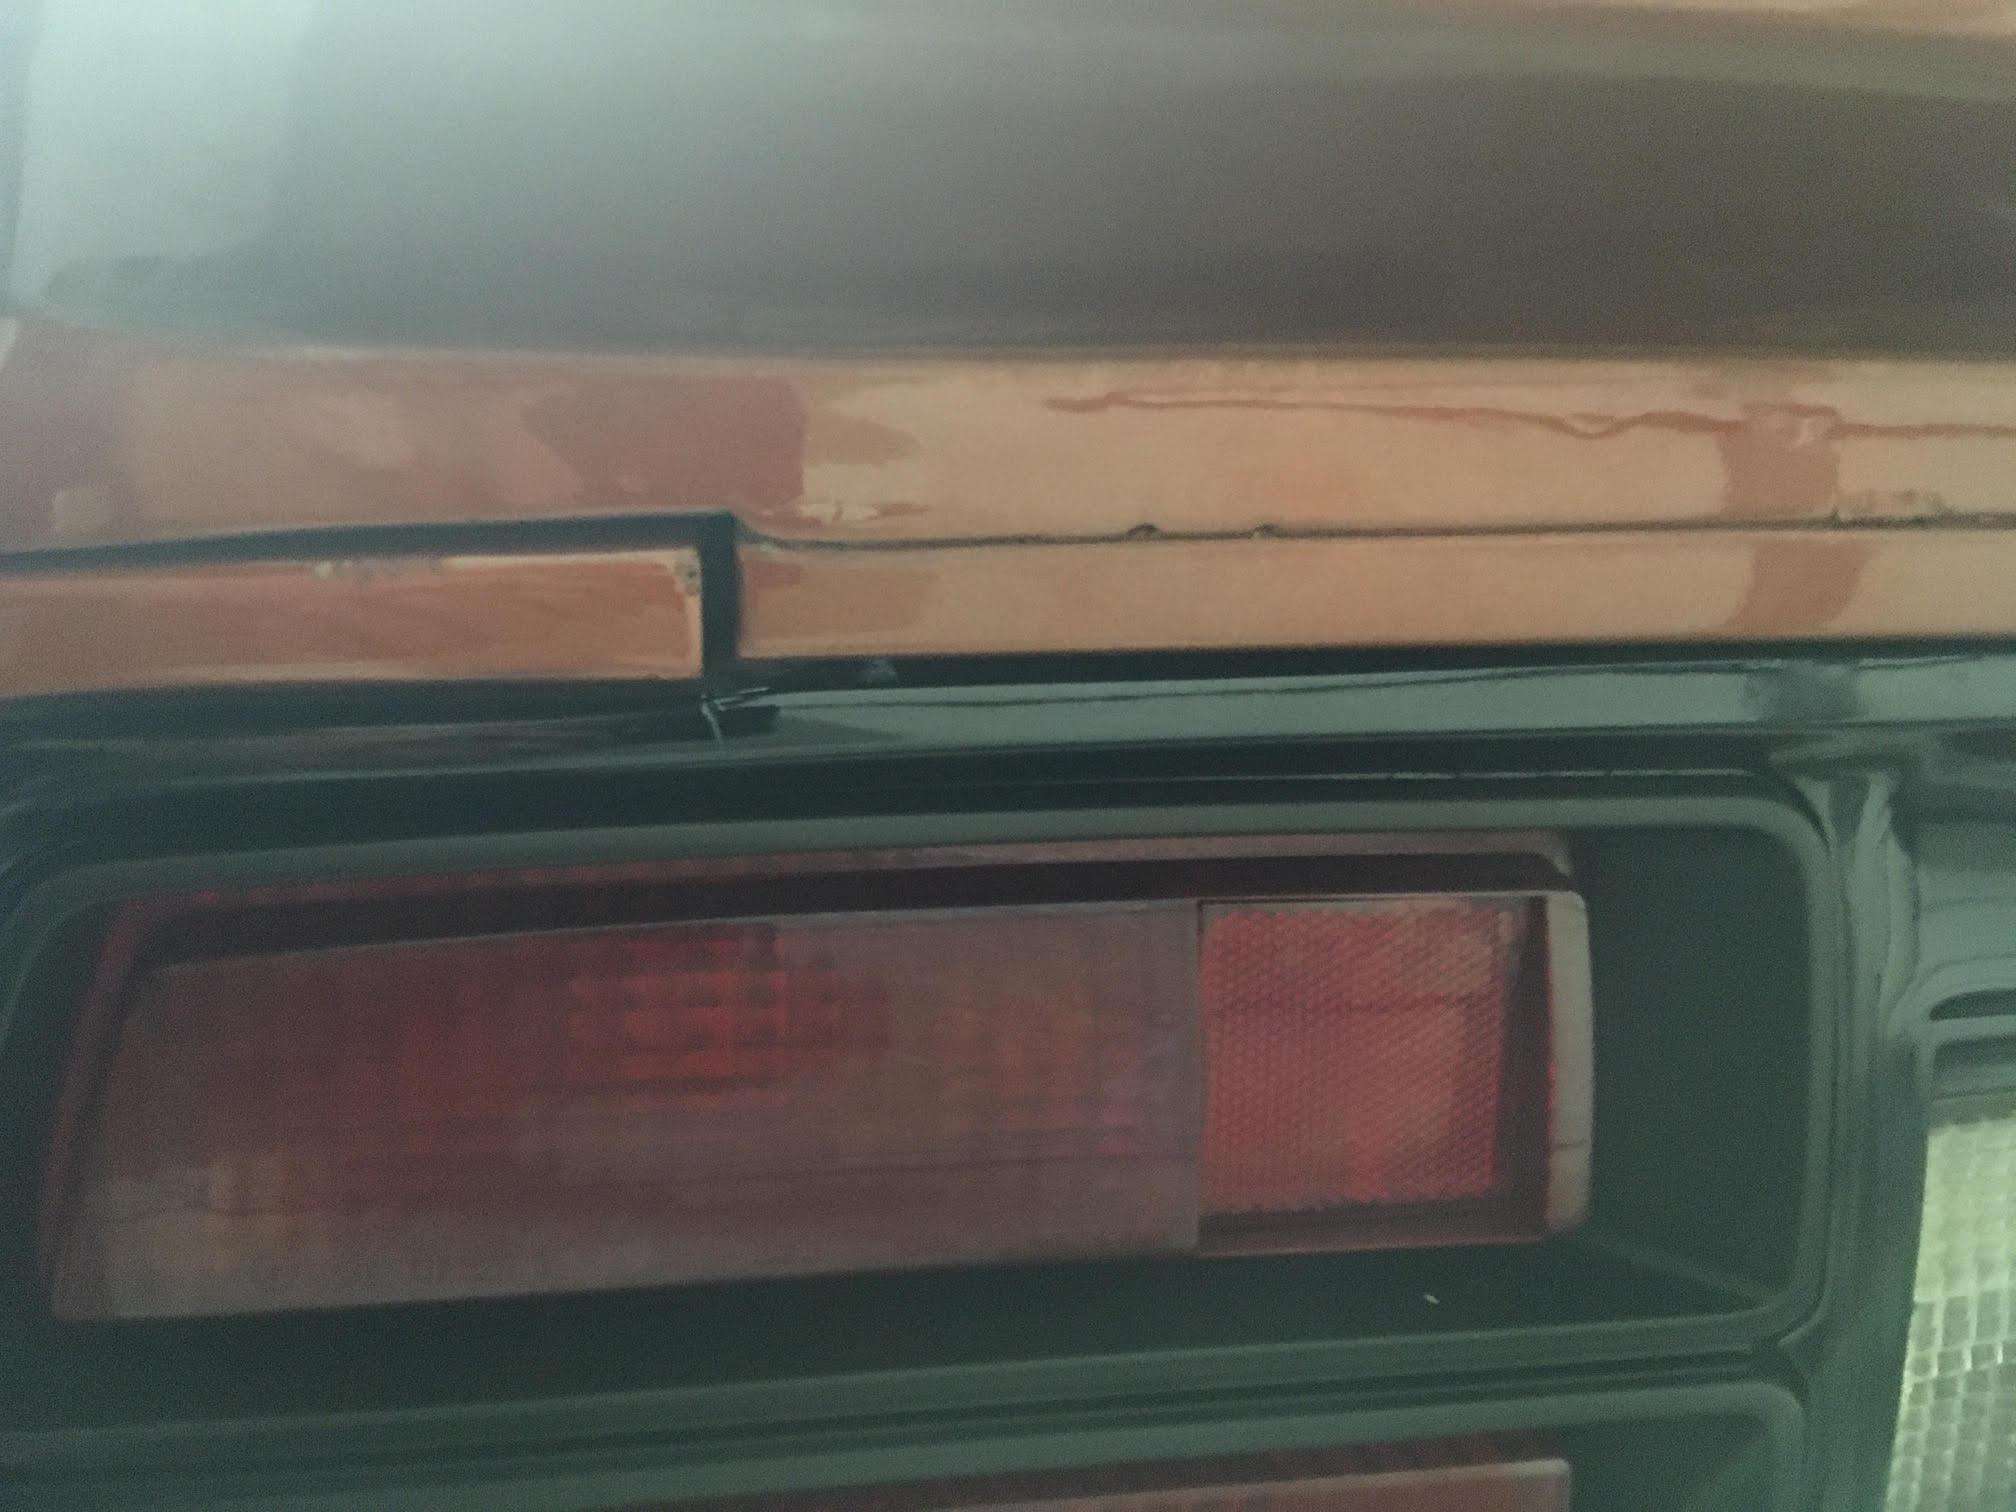
Hi guys, Is it possible for worn/torn vapor tank floor grommets to be the culprit for exhaust fumes in the cabin? If the holes were on the exhaust pipe side, I'd say I've finally found my leak but these hoses/grommets are on the passenger side of the car. (Note: I have changed the inner/outer hatch gasket, glass seal, taillight gaskets, sealed the hatch's vinyl panel, and sealed the hatch grommets) I can also see light through the accordion-style grommet that seals the fuel filler hose to the car but obviously can't glue that shut like the other I found - is that accordion bit replaceable?
-
Awesome info, thanks! The car has an L26 instead of an L24 - would that change any of these ratings or are those pretty universal for all L-series engines?
-
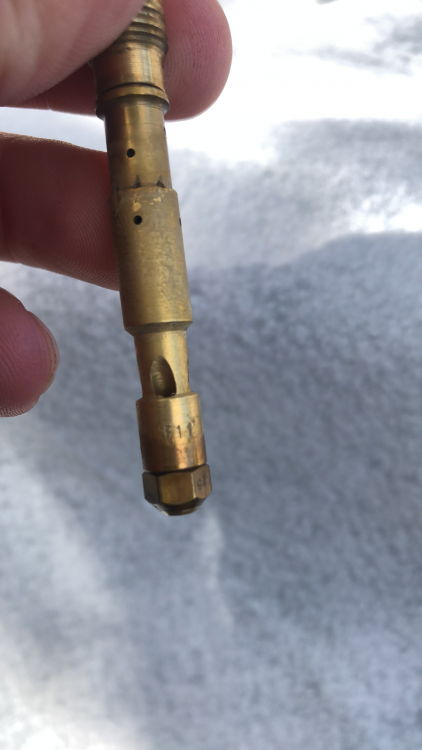
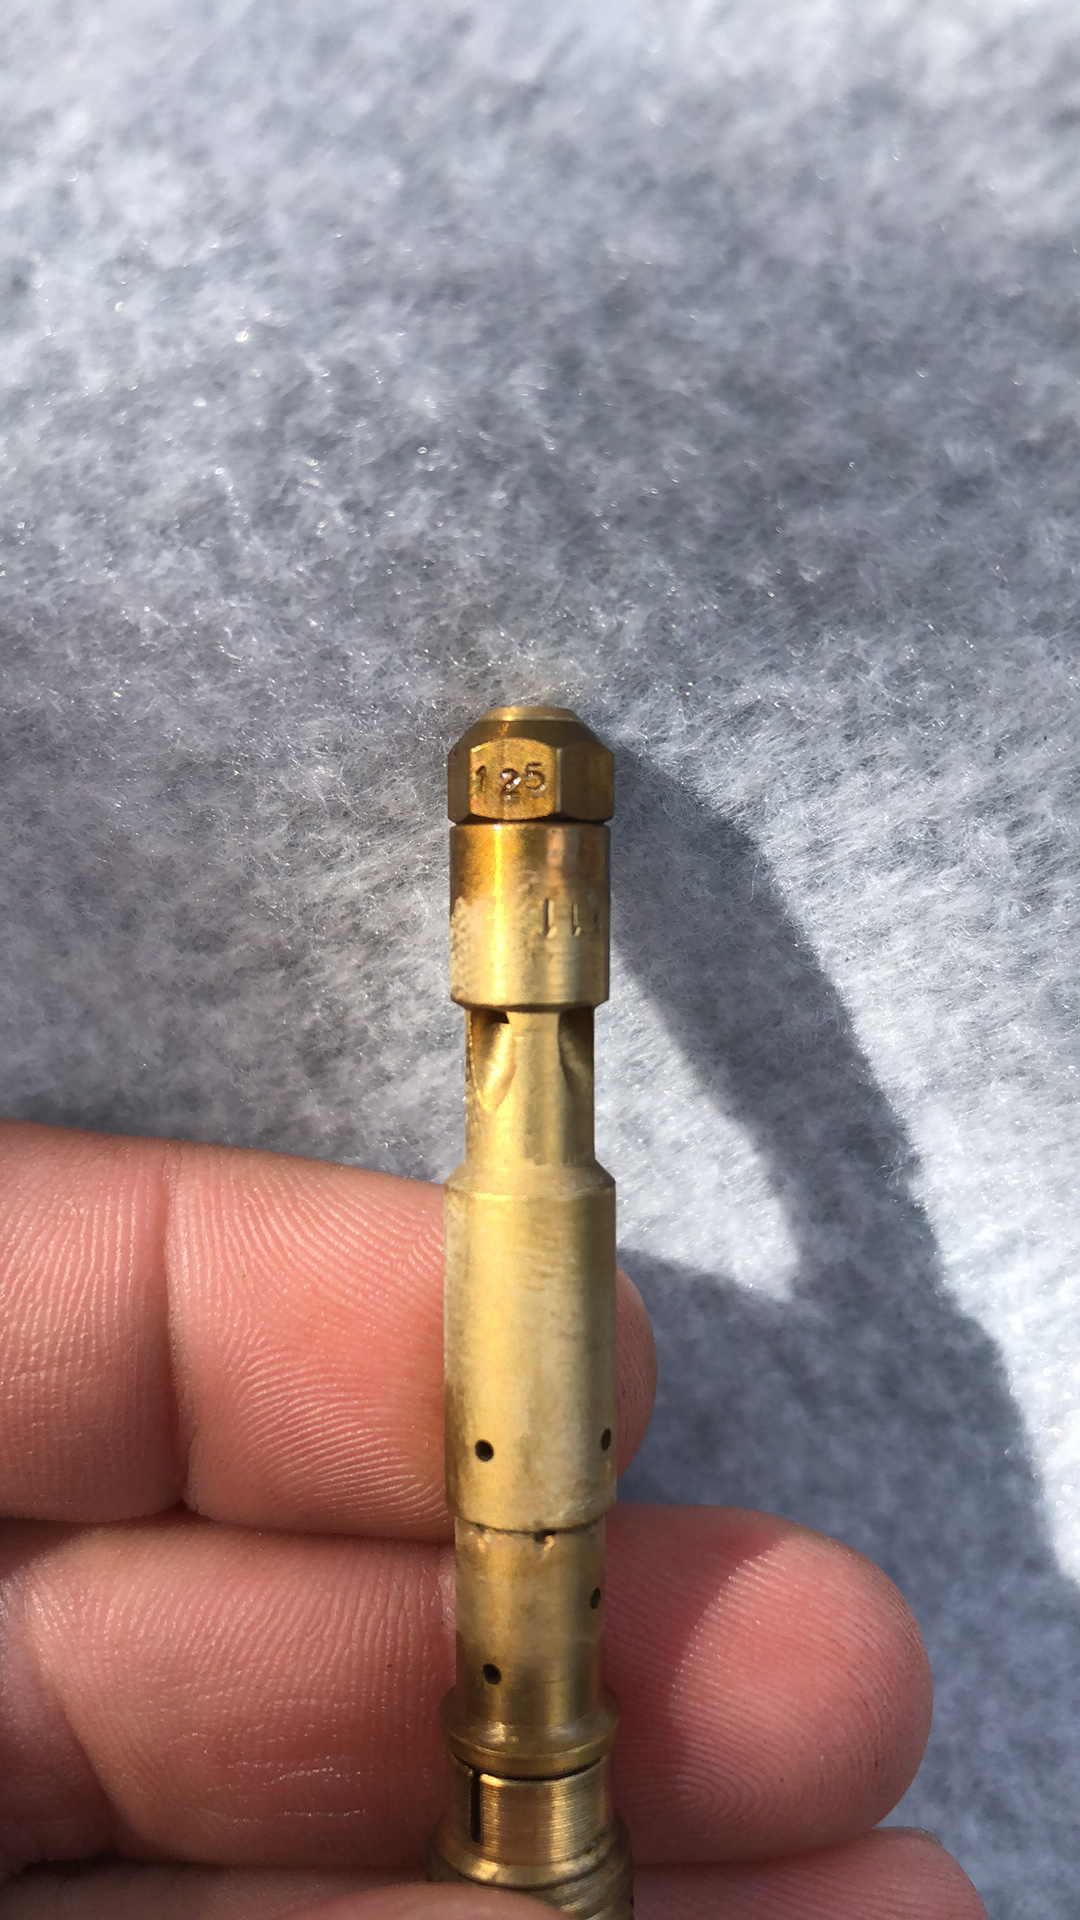
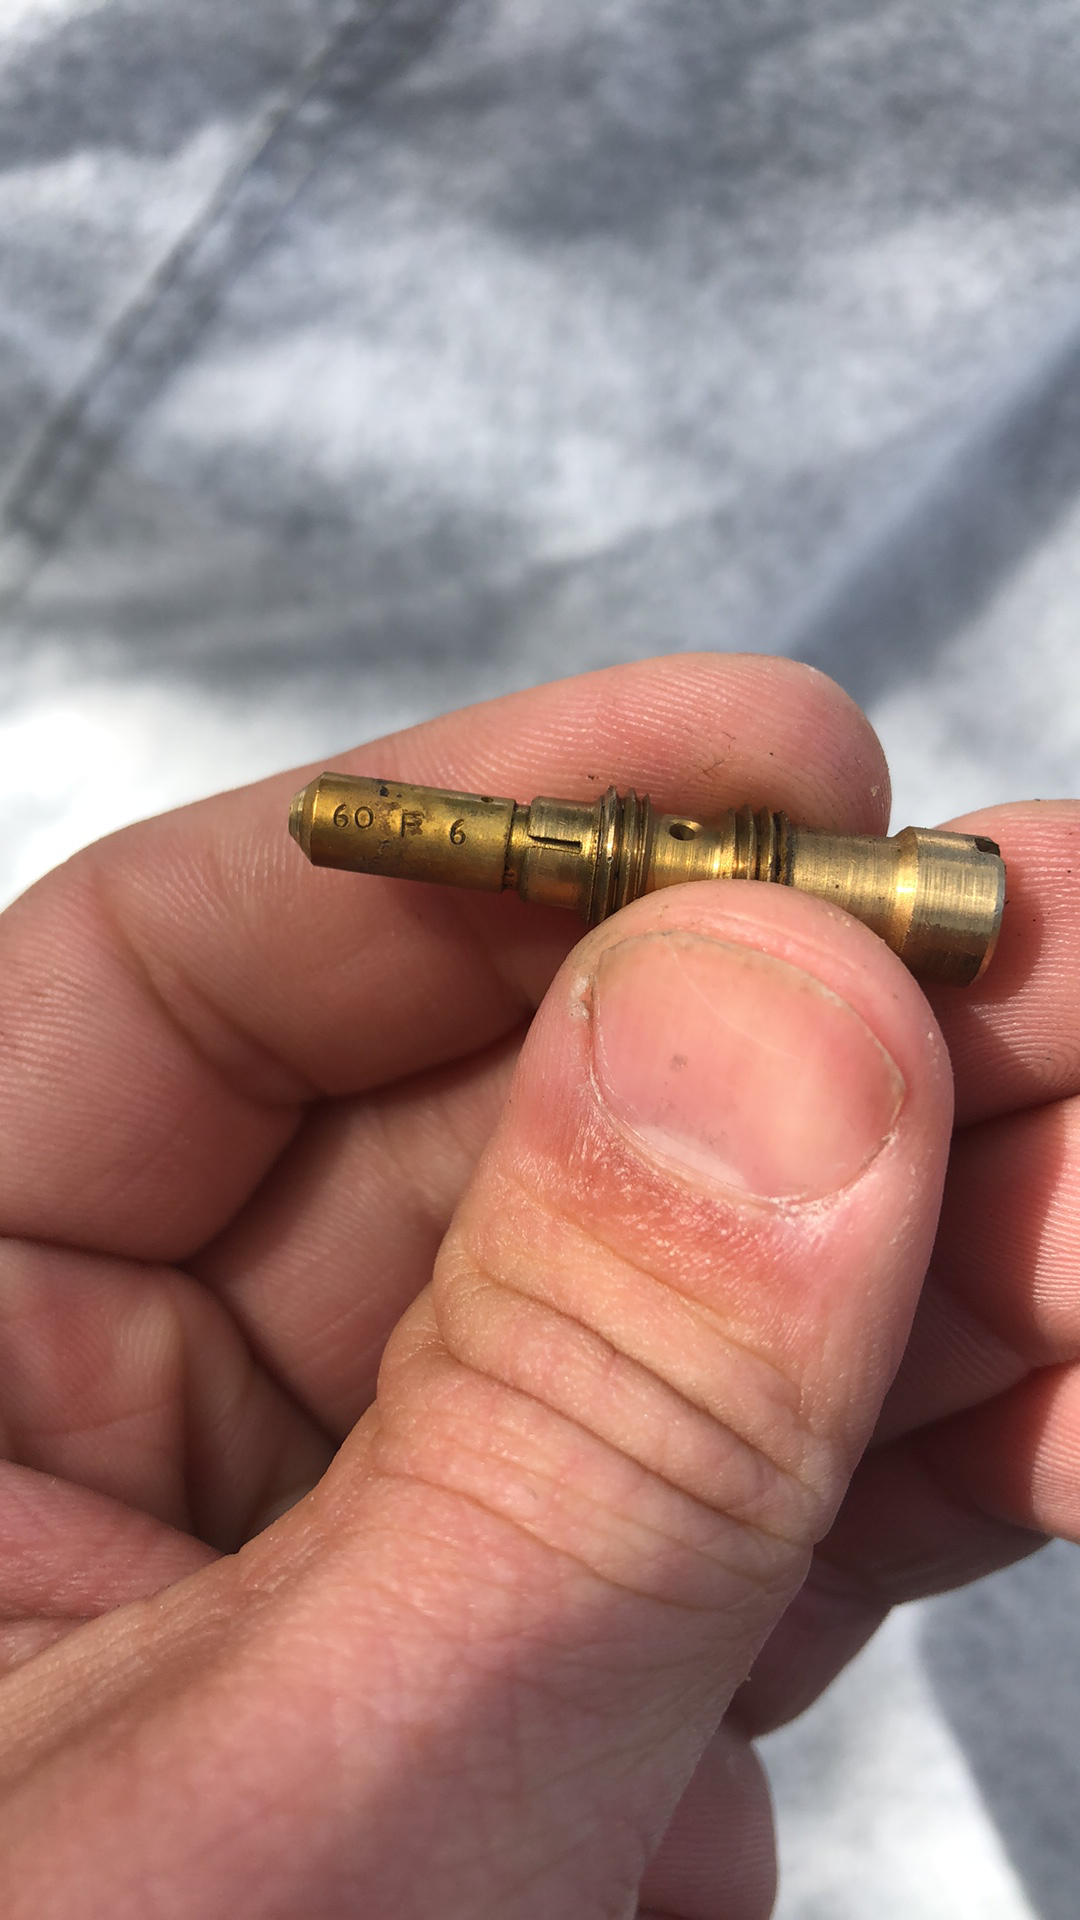
Have some main/idle jets & emulsion tube pictures. It looks like they say: main jet/emulsion tube: 60F6, F11 idle jet: 125 Any ideas?


-
He's out of town until Monday - I'll get back to you then. Thanks for all your help so-far. @240260280 Gotcha on the main and idle jets, any recommended stats for emulsion tube?
-
Will he have to measure the opening hole, or will the size be stamped on the jet?
-
Thanks, I'll pass the message along.
-
Yeah, that's what's so strange about it and leads me to believe maybe the jets that kit comes with are too large?
-
Since it's a 260 it has both - a mechanical pump in the front and an electric in the back. It has an in-line pressure regulator on there set to 2. I believe this is the regulator he has: https://www.oreillyauto.com/detail/b/mr--gasket-4367/performance-16477/engine-16841/fuel-system-16571/fuel-pressure-regulators-17798/37354b4805ef/mr-gasket-fuel-pressure-regulator/9710/4514726/1978/nissan/280z?pos=1 EDIT: He only has an electric fuel pump in the back set to 2.5 psi
-
Ok - let me msg my pal
-
Question for you guys - I have a friend who bought this: https://www.ebay.com/itm/Weber-DCOE-Kit-fits-Datsun-240Z-260Z-280Z-Triple-Performance-40-DCOE-K659/272778769560?ssPageName=STRK%3AMEBIDX%3AIT&_trksid=p2057872.m2749.l2649&fbclid=IwAR1-Pa61k0L6wA2H0mXxTlwqbQ5MLFtBQT5KGbX4TlrUgjEMWnvBwIyfpWE Even with the air mixture screw set to max-lean, the exhaust out of this car is so rich it burns your eyes within a few seconds. Are the jets this kit comes with too aggressive? -chase
-
Wow, I had no idea that was there. I just took a look and the latch was bolted in all the way in the down position. My guess is they had it that way with the old deteriorated seal on it. I moved it up quite a bit and the hatch closed really well. Is there a calibration spec for this? For example, is it a "drop it from 1/4 height and it shouldn't latch but if dropped from 1/2 height it should" type of spec?
-
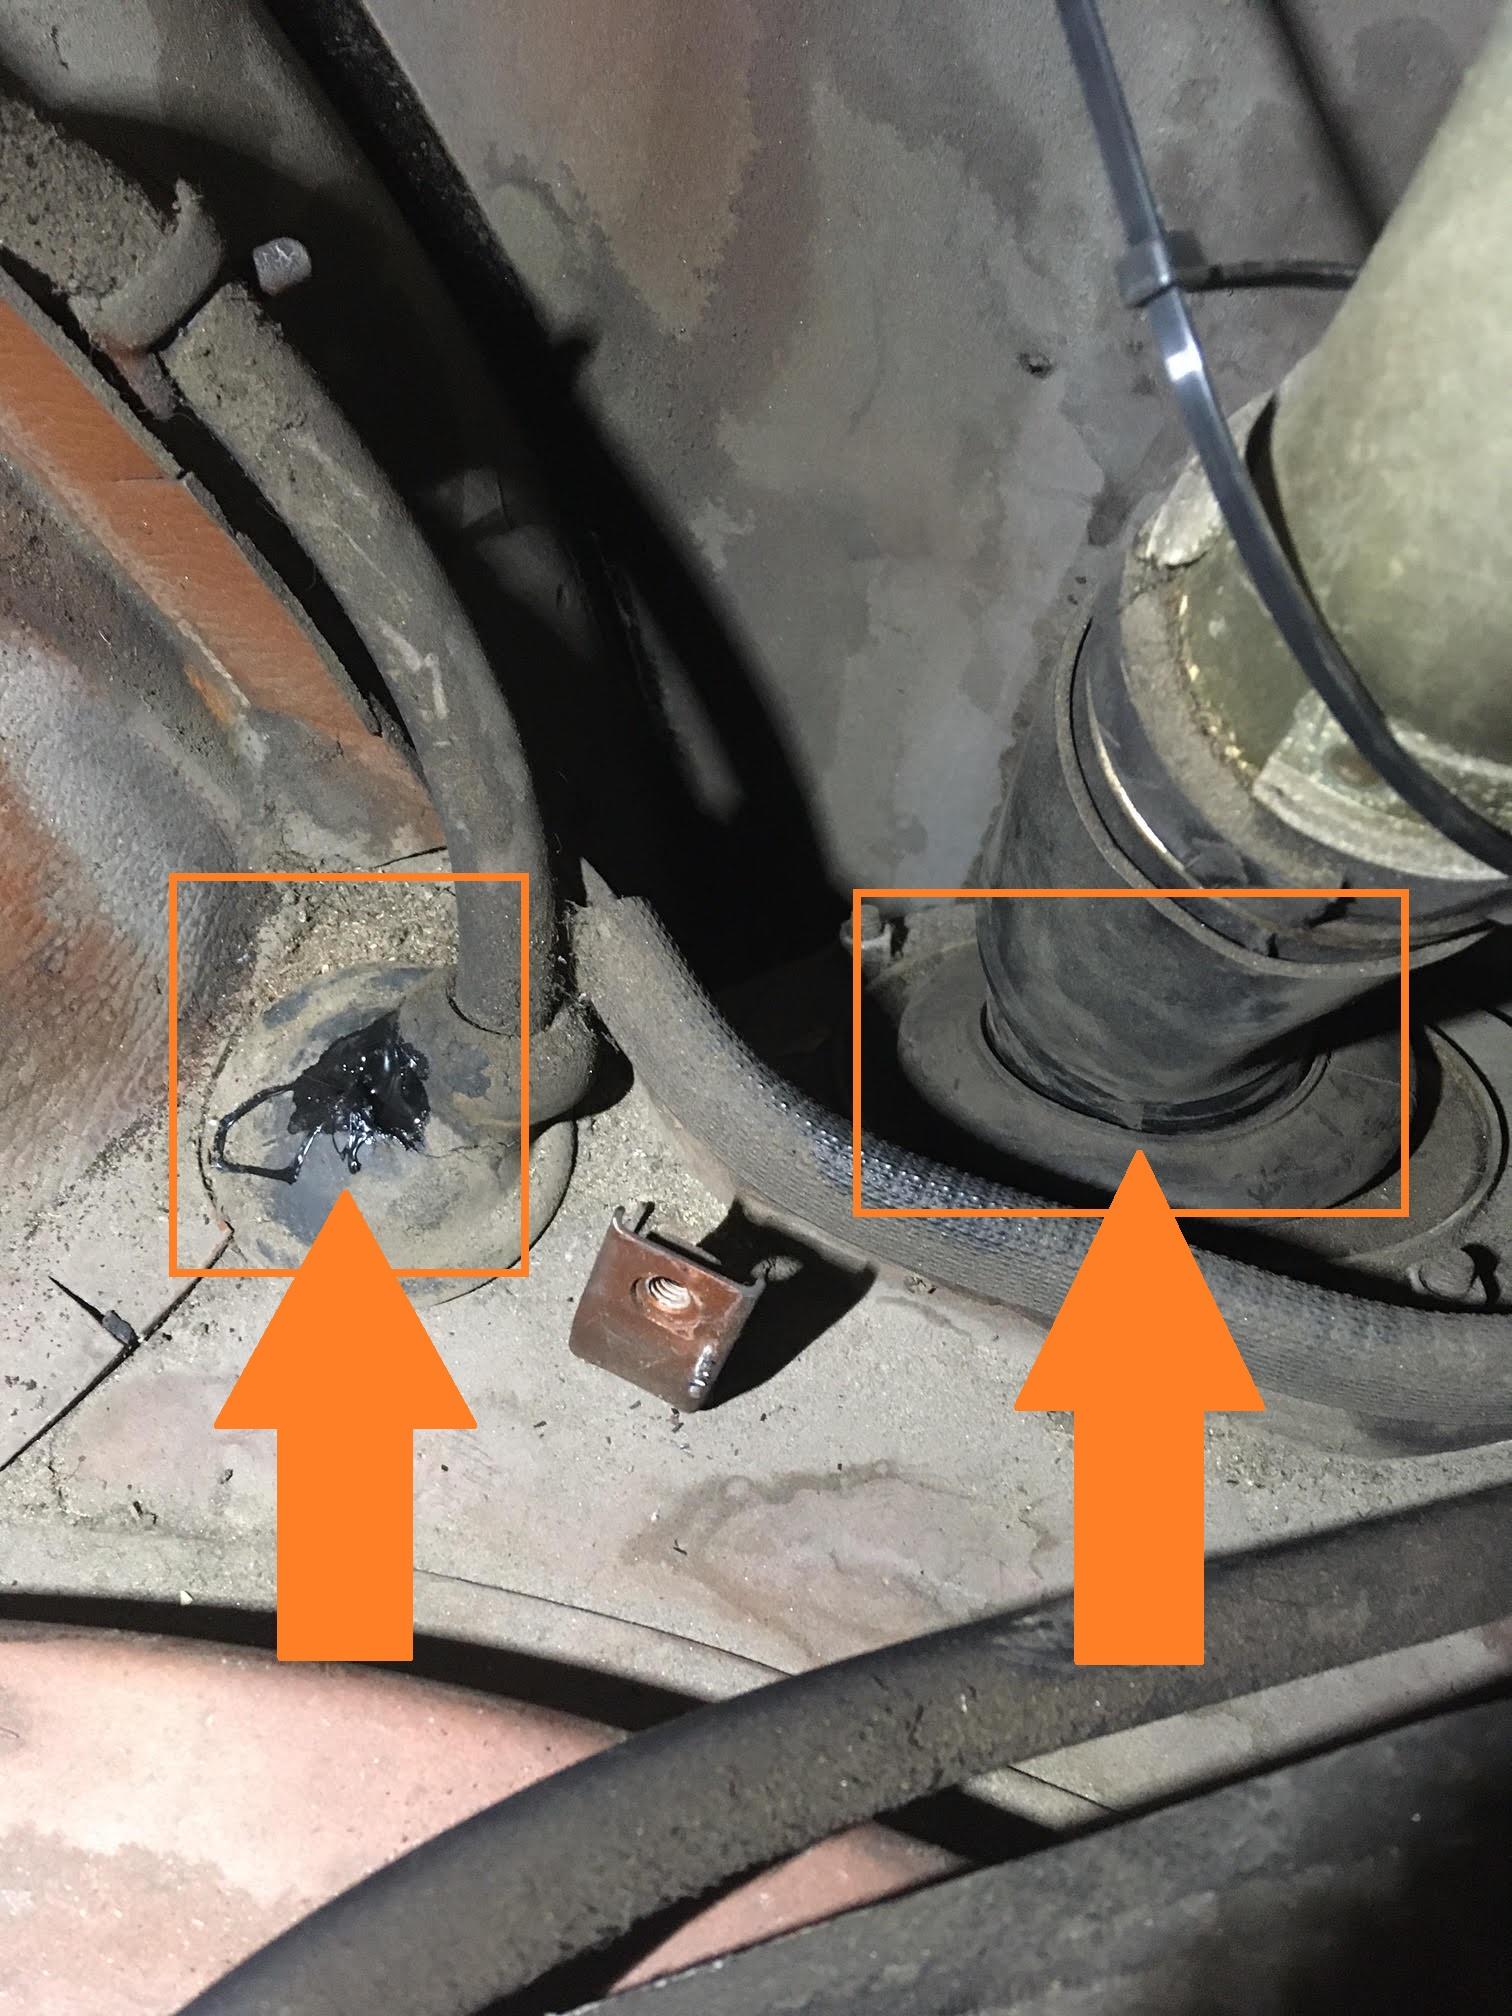
The latch is connected to a patch panel so that might be the root cause - the panel installed improperly. That said, with the hatch closed, the middle of the hatch seems to slightly bow out when compared to the body lines. I also just tried to close it with the windows down and to no avail - it will just sit open on the seals.
.thumb.jpg.a20fd0fff6d451c5e6343e39906d2c38.jpg)


-
Is there a way to raise the hat shut lines so that I don't have to keep slamming the hatch to close it? I have an OEM seal on it and have had it for a while and still seem to have to slam the hatch. Is my hatch adjusted incorrectly?
-
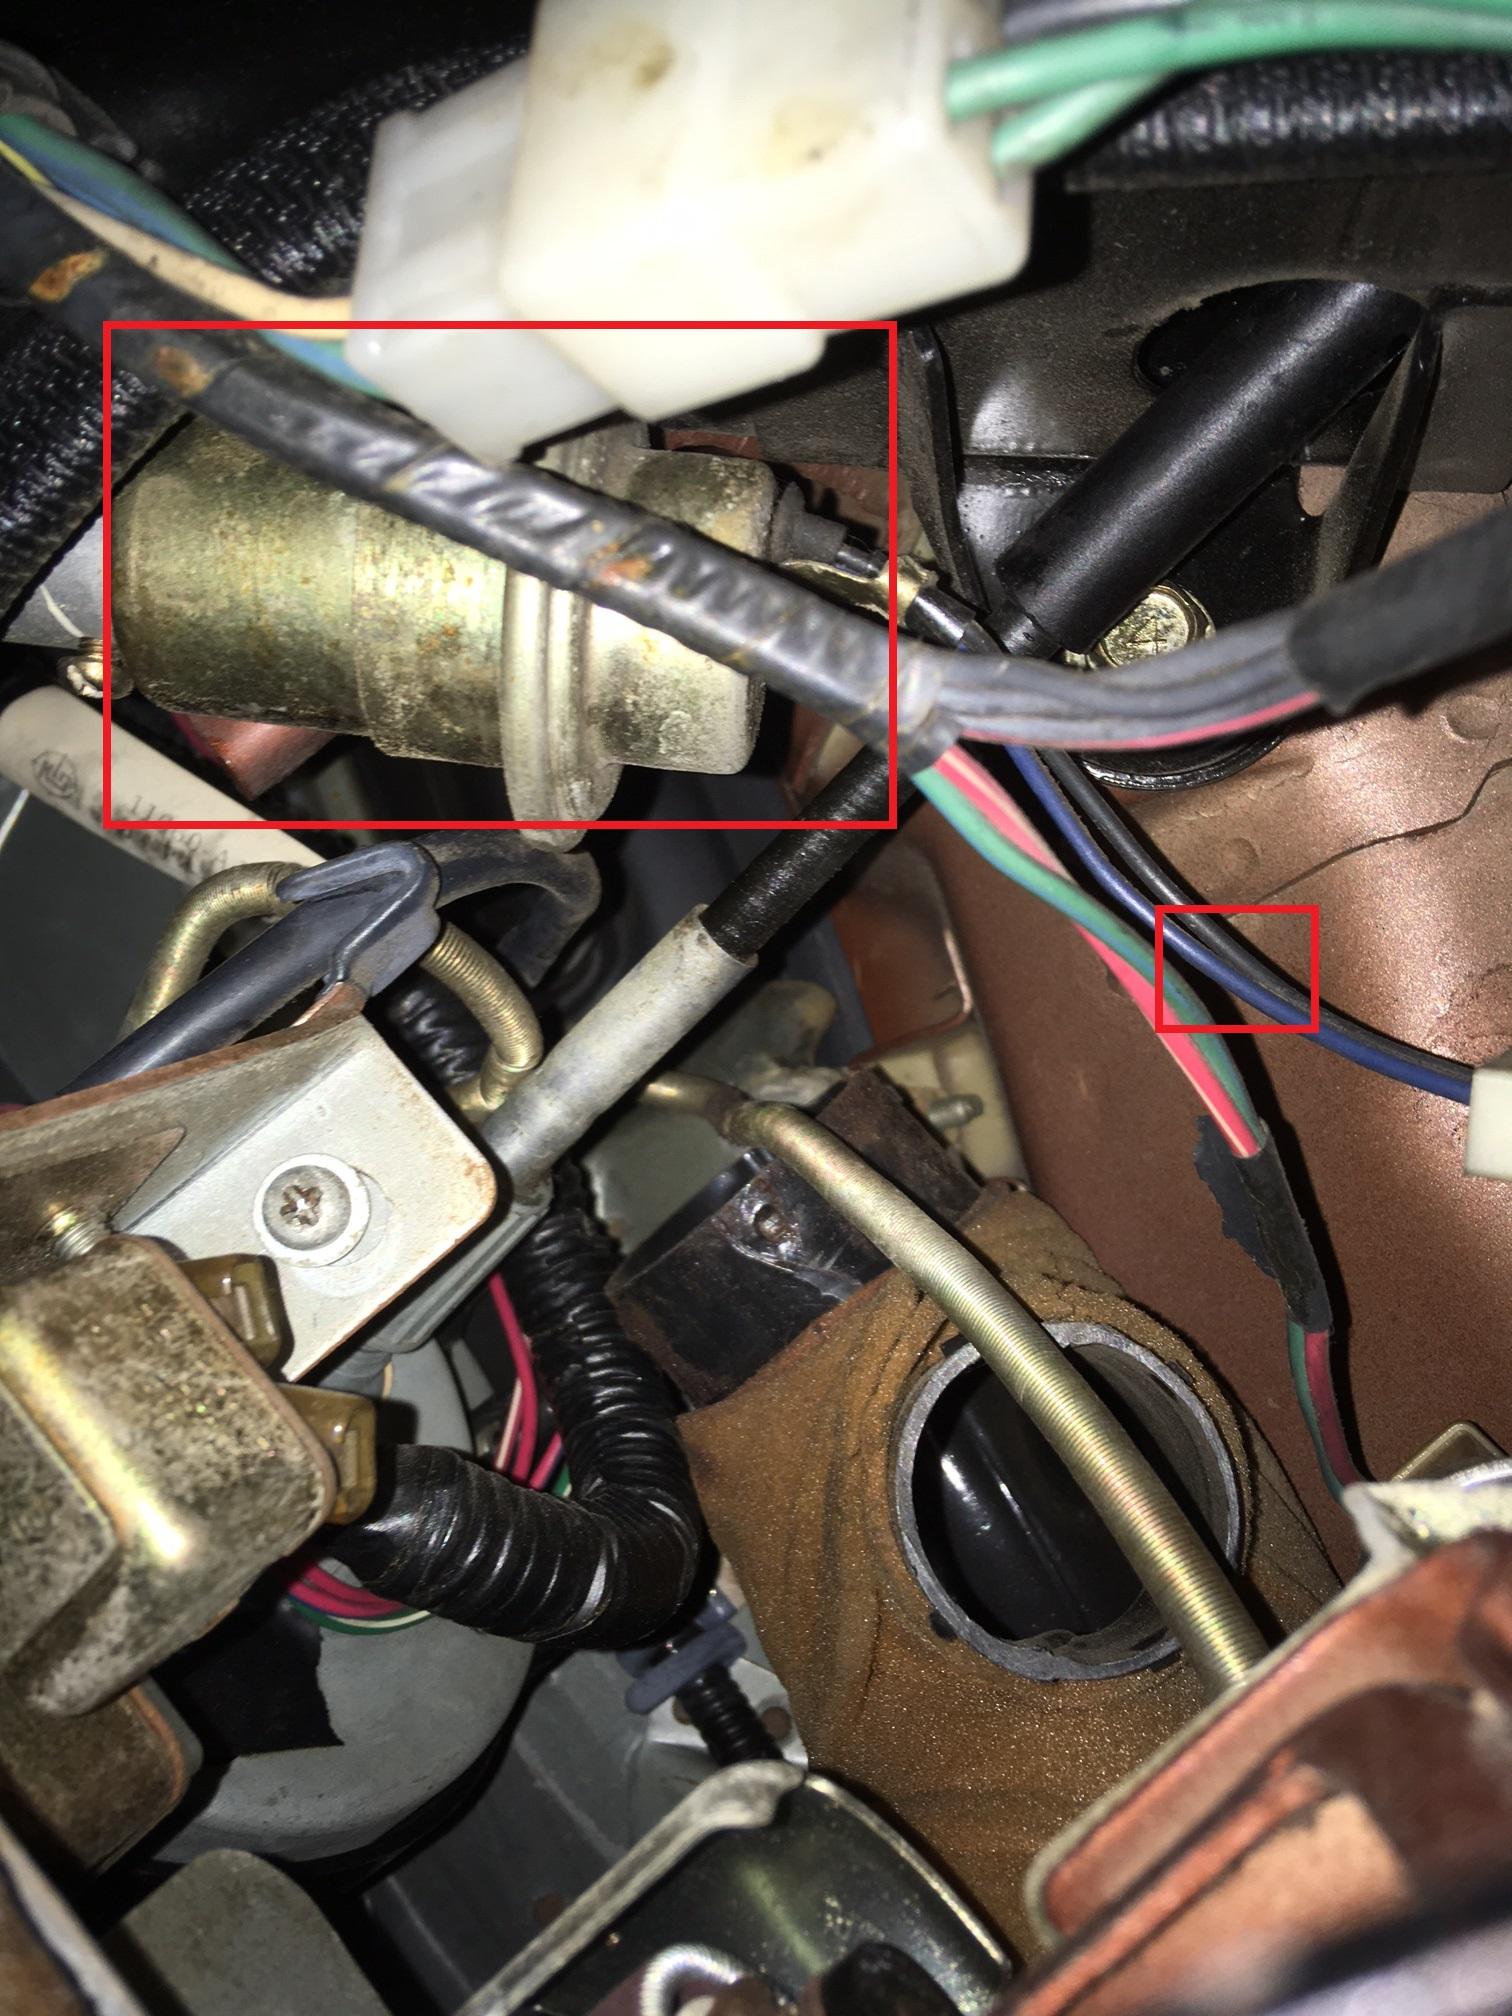
I have a california car so I'm guessing its there somewhere haha - I'll check the fsm EDIT: I found it - check and see if you have it, it is this gold pod and the wires going to it are solid blue and solid black. I'm guessing to engage that we just bridge those 2 wires?

-
Is there a way to trick the ECU into going into high-altitude mode?
-
Zcon will be in Colorado Springs in 2021 - i plan on driving up to try it, maybe you can give it a 2nd shot then haha
-
Were you ever able to figure out what went wrong/what you could modify to go higher?
-
Thank you so much for these great ideas, I'll tackle them one by one: Fuel: I tried the pump priming method but that didn't change things. Timing: I recently changed distributors to a rebuilt one (the old one's center bushing was dying) and with both OEM distributors I get the same result. The car is also timed at 10 degrees at idle and runs smooth as glass. Compression: Not sure about the compression (kind of afraid to look haha) but the car runs really well and has great highway pull as-is. Spark: I changed the plugs last year to the iridium plugs with new ngk leads and all the recommended tune-up brands/gear to no change. The car also has some sort of ignition box made by "Jacobs electric." The one spark related issue I can think of is the center terminal on my distributor cap is semi melted - I put some ox-guard on the side of the terminal walls and plug and I believe that helped though.
-
I've tried that and get the same result (I should have mentioned I tried that)
-
Is it possible to improve cold start cranking time? The car has new plugs, wires, cap, rotor etc and runs great once its started. It's also worth noting that after the car has started once, it will start considerably quicker the next key turn (demonstrated on the video). Video: https://www.youtube.com/watch?v=yiT8P_TLuLM My old mechanic said it simply does this because the engine "just takes longer to build pressure than other cars." There are no vacuum leaks (checked with a cigar) but there is oil blowby via either worn piston rings or valve seals (I know that due to there being a small amount of oil on the plugs) but I'm not sure if that could be the reason. Note: this video was created when it was about 80 degrees out so the cold start injector was not firing. Any ideas? -chase
-
Thanks
-
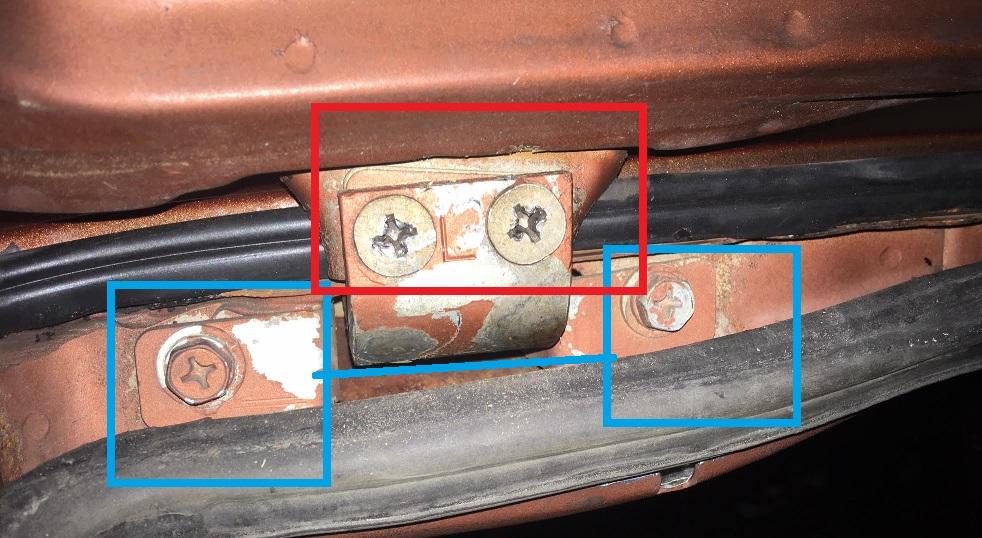
Quick question for you guys, I need to remove the hatch to glue some outer weatherstripping. I remember reading that if you take the wrong screws/bolts off the hatch, it's a pain to get the hatch to close again properly. Which should I take off in the below picture to not disturb the closing alignment of the hatch, the screws boxed in red or the bolts boxed in blue? Any ideas? -chase


.jpg.3bd3501446a452b404292a3977eb6d73.jpg)