chaseincats
Community Member
-
Joined
-
Last visited
-
Currently
Viewing Topic: Brake fluid leak at master
Everything posted by chaseincats
-
Does anybody know what went on the center console that this panel covers up? My car came with the original panel cover and was always curious. This is the panel: https://zcardepot.com/products/console-switch-delete-plate-cover-plug-240z-260z-280z
-
And here is the end of the post-credits scene for this feature-length thread: after 3 separate mismatched injector shipments from rockauto, I finally got 6 matching ones and sent the rest back. Took the car out today for the first time and interestingly enough, with the new reman injectors, I needed to richen the car a bit to get it to our numbers. I expected the old injectors to have had a diminished fuel output due to age but who knows.
-
Update: The issue was old/tired/maybe dirty injectors. Bought new injectors/fuel filter and it starts on the first crank when stone cold.
-
Hi, I tested my EGR by connecting the BPT valve and later the EGR valve directly to intake vacuum (my thermal vacuum valve isn't working) and the engine almost immediately died and the EGR valve made this strange whistling noise. Any idea why this happens? The engine was at operating temp in the video: https://www.youtube.com/watch?v=hTZni7rL87k
-
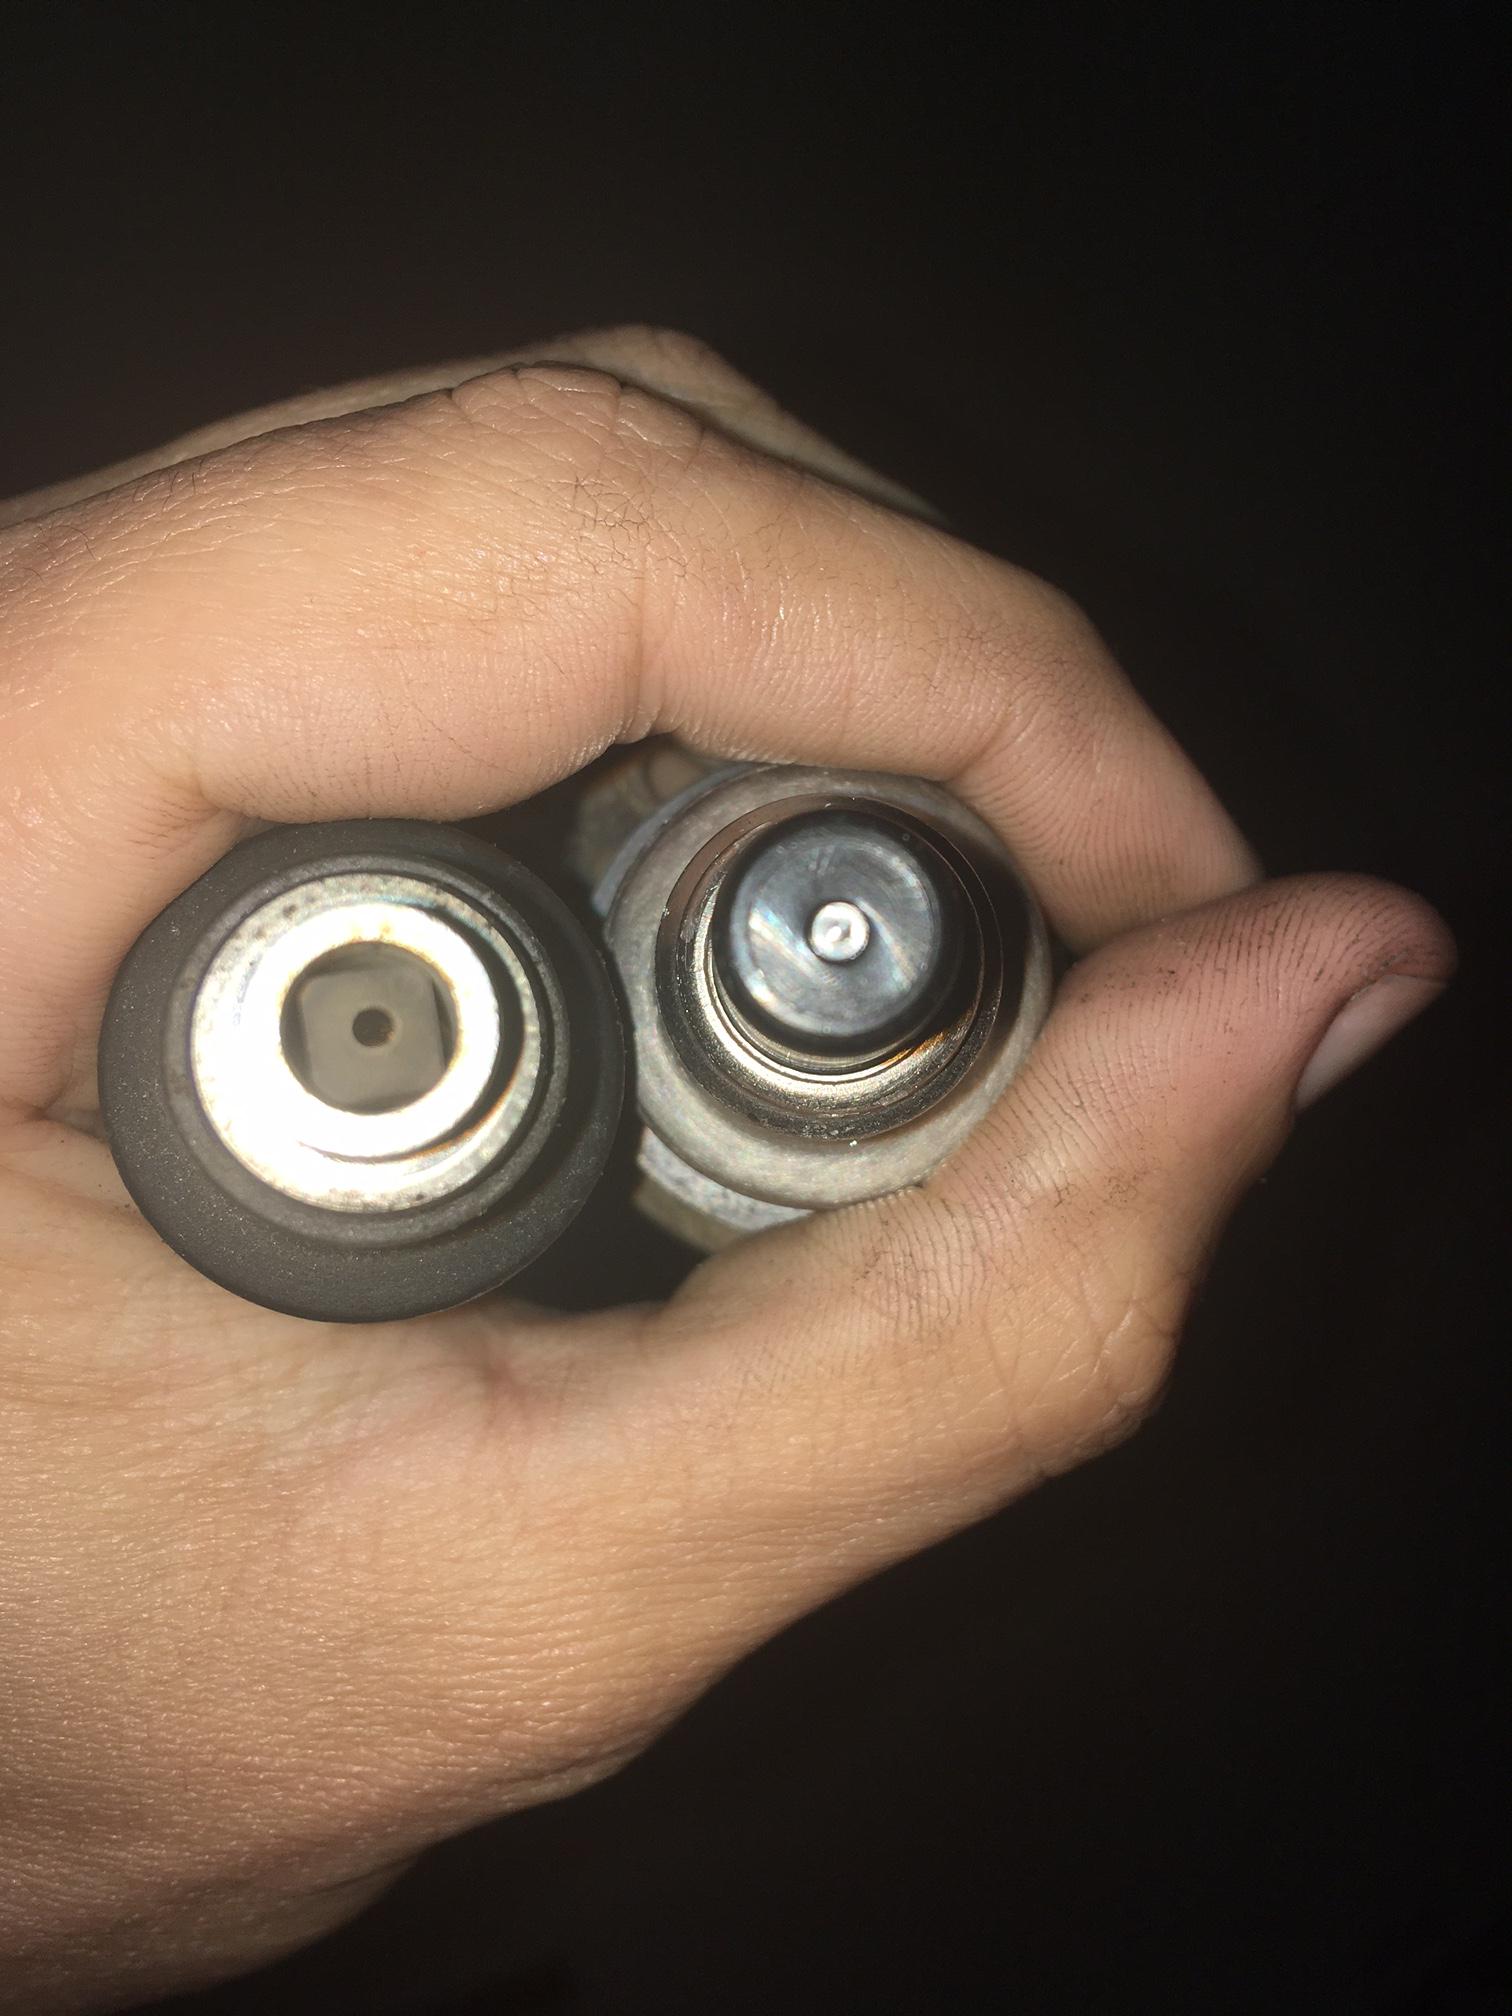
Good point about them matching regardless of flow rate. I just took a look at the bottoms to compare what was on there (left) and the Bosch ones I bought (right) and they look way different. Are the ones that were on there for the turbo or just some weird reproduction maybe?

-
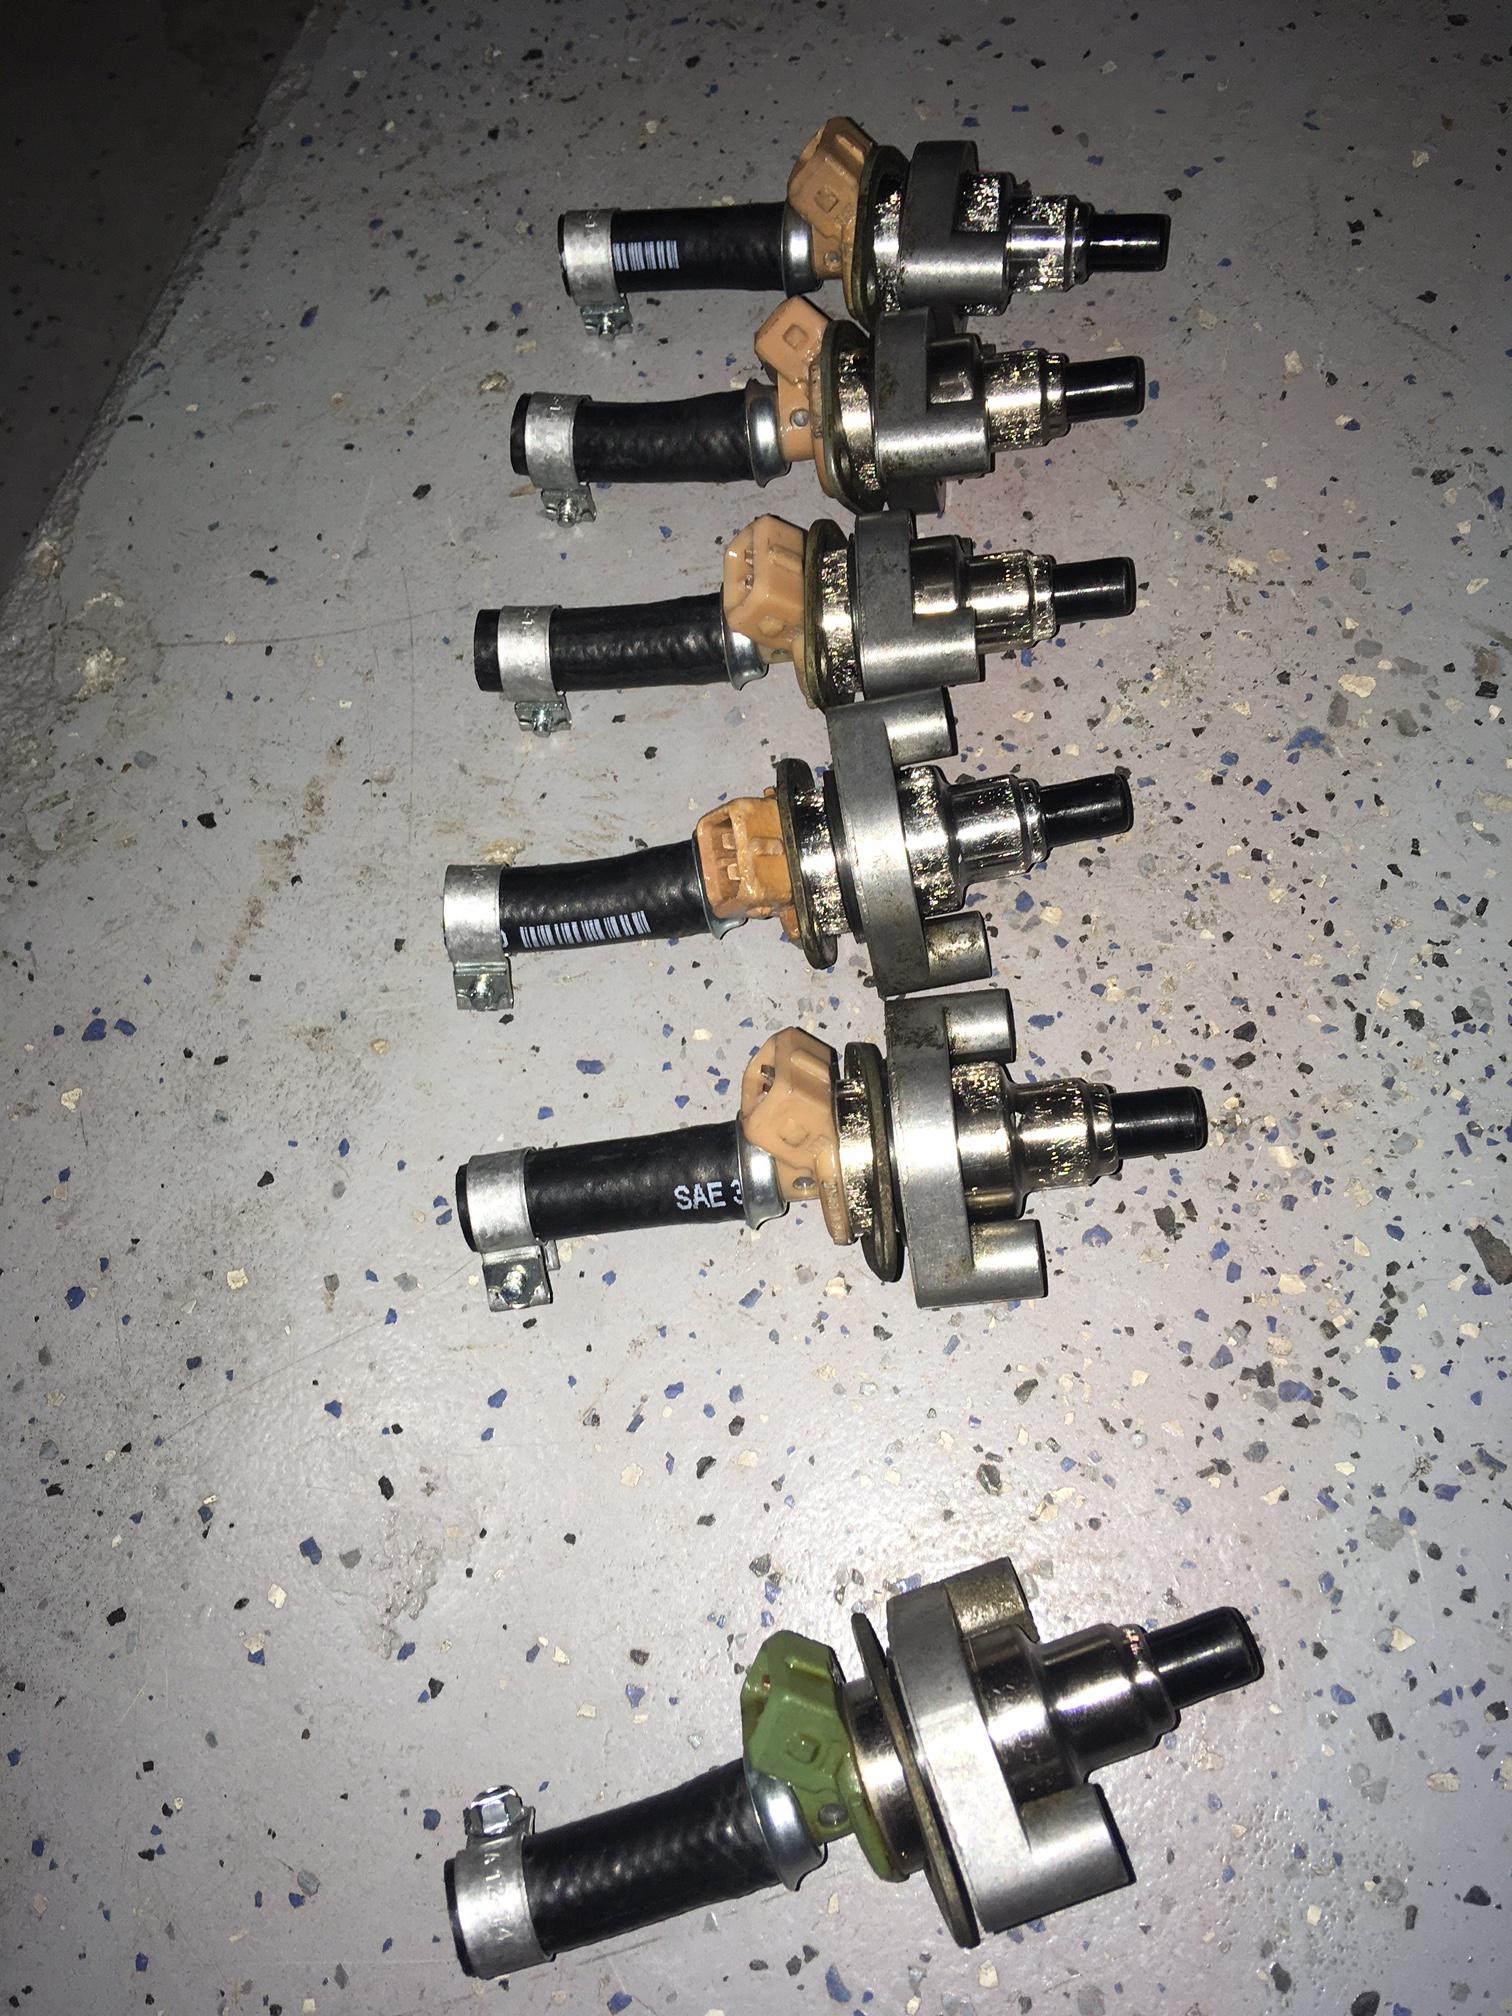
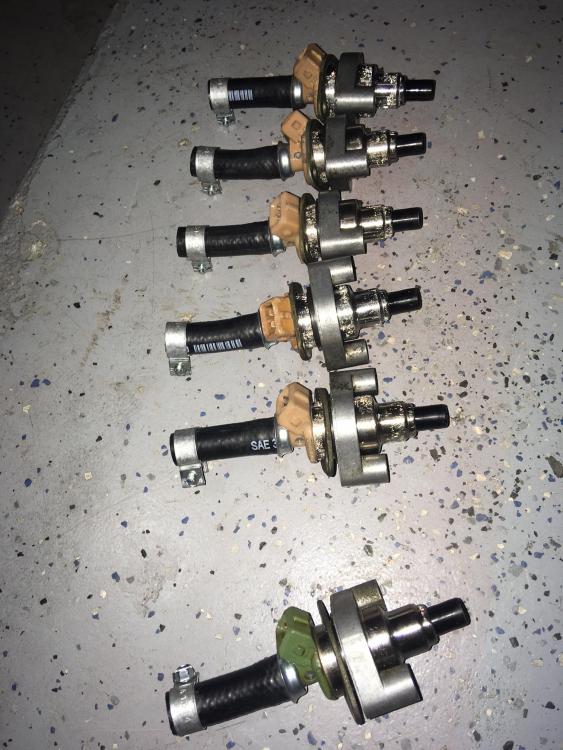
I was sent 5 tan and 1 green injector from Rock Auto. Besides being annoying, since it seems that the tan is the earlier year's 280 color and the green being later they should all be the same spec right and would be ok to mix/match (http://www.atlanticz.ca/zclub/techtips/injectors/index.html)? The injector hole on the bottom of both are the same size so that should indicate the same flow rate, right?
-
Well this is interesting, I bought replacement injectors since I'm sure they've never been changed and Rock Auto sent me brown-top 280zx turbo injectors. Since those flow more I'm guessing I'll need to retune the car right?
-
So I noticed today, one of my injectors is leaking now. Could the increased head due to running leaner have been the final straw on the seal/hose (not sure which yet) causing it to give?
-
In the post-credits scene of this thread here are my 'a couple days later' thoughts/observations: - I pulled a couple of my spark plugs just to see how they looked and they were QUITE grey indicating the car was running very lean. Now, I don't know if they got like that when we were running off the charts lean earlier and if they will return to how they looked before this or not, but the car seems to be running well and the gauge numbers check out so I guess I'll ignore them? Could my valve seats suffer if my plugs got toasted like that? - My car has a delayed start which as previously noted got worse when we unplugged the TPS but will start immediately when I jury rigged the CSV to fire on every start (https://www.classiczcars.com/forums/topic/64824-very-strange-cold-start-valve-issue/) which I'd have though was indicative of running lean. That said, I have a "Jacobs Electrical" coil/box setup (part number 380672) and the guy in the below video says if you have the wrong coil resistance (this one is correct) or if it is hooked up backwards you'll have weaker spark but the car will still run. Since the PO rewired this part of the car for the ignition box, could I flip the wires attached to the coil posts or would I risk frying the box? All the stock wire colors are of course wrong since all wiring comes from the box: Video will start at the appropriate time stamp: https://youtu.be/TlxiZXK06lI?t=647
-
The problem is that the main carb canister chamber connected to the large vacuum hose (the one that goes directly to the manifold) does not hold vacuum so there's a permanent vacuum leak there and then a slight one via the ported chamber so I just took it out of the picture. Both chambers are supposed to be vacuum tight it seems - I tested this by spraying carb cleaner on the canister at idle and the rpms rose. I can confirm later today if the mixture changes with it plugged in though.
-
No, I completely took the carb canister out of the picture. It is still in the car/connected to the tank vent line but its vacuum hoses are disconnected. Yeah, there is indeed a change when the wot pin connects it feels kind of like when turbo boost comes in on a turbo car.
-
Absolutely agree and here are the final numbers: Idle - 14.2 Cruise: 14.7-15.2 (depending on load) WOT: 12.3 In the end, I moved to the lean side by 2 teeth from where the PO had it set. I originally moved it 15 teeth back but that was undone once we discovered the TPS's WOT pin was to blame.
-
And so my friends, we shut the book on this project. I drove the car about 60 miles today and settled on around 14.9-15.1's tooth for cruising and man, I'm floored at this engine. My other car is electric and I've never driven a gas powered car that runs as smoothly at speed as this does now. Adjusting the TPS was the key but I was also running it too lean earlier today, as I felt I needed to rely on the WOT pin to get any sort of power out of it. Richening the cruise out from 15.5 to 14.9ish really was the key to smell, responsiveness, smoothness and power (even before the WOT pin connects). For reference, that was richening by 1 gear tooth this also changed WOT numbers from 13.3 to 12.2. I can't thank you all enough - I hope this thread helps others in the future if they decide to tune with one of these gauges. Some other observations due to leanness I believe: - the car comes to operating temperature faster than before (but does not overheat) - the car is harder to start now if the TPS is disconnected
-
It seems to be holding the position I bent it at originally but in terms of bending it back up so WOT comes on earlier it doesn't seem to want to stay in that position...
-
Right, stock felt like MAYBE 1/4 or so, right? Do you think I bent it too far? I tried to bend it back in a bit but it wasn't holding that position and I didn't want to keep messing with it for fear of it breaking...
-
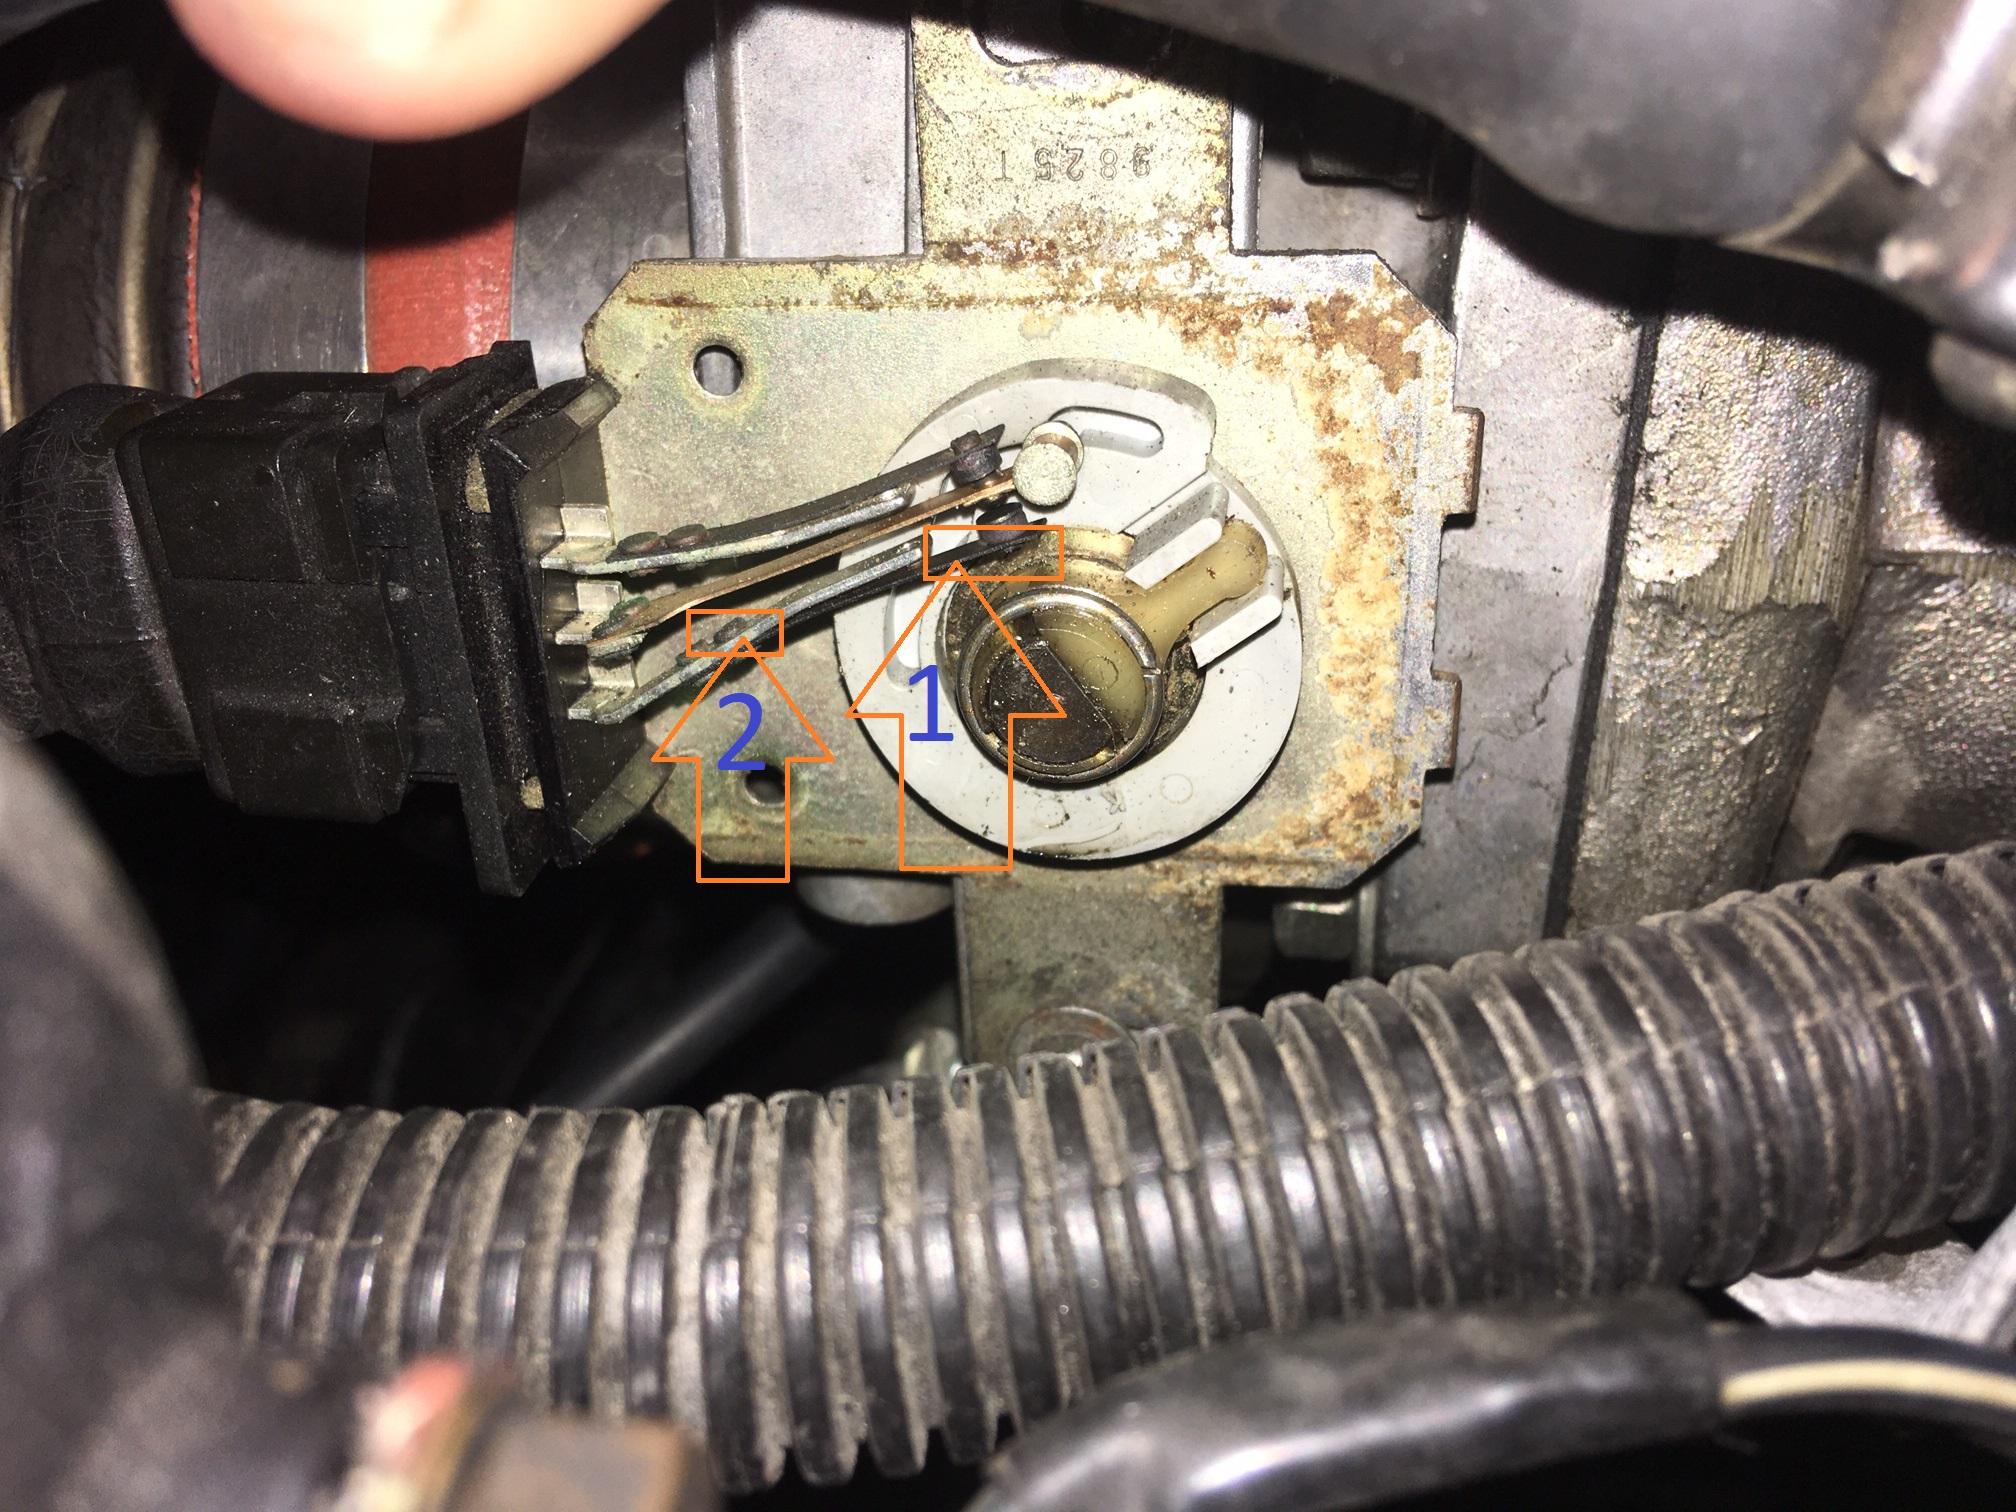
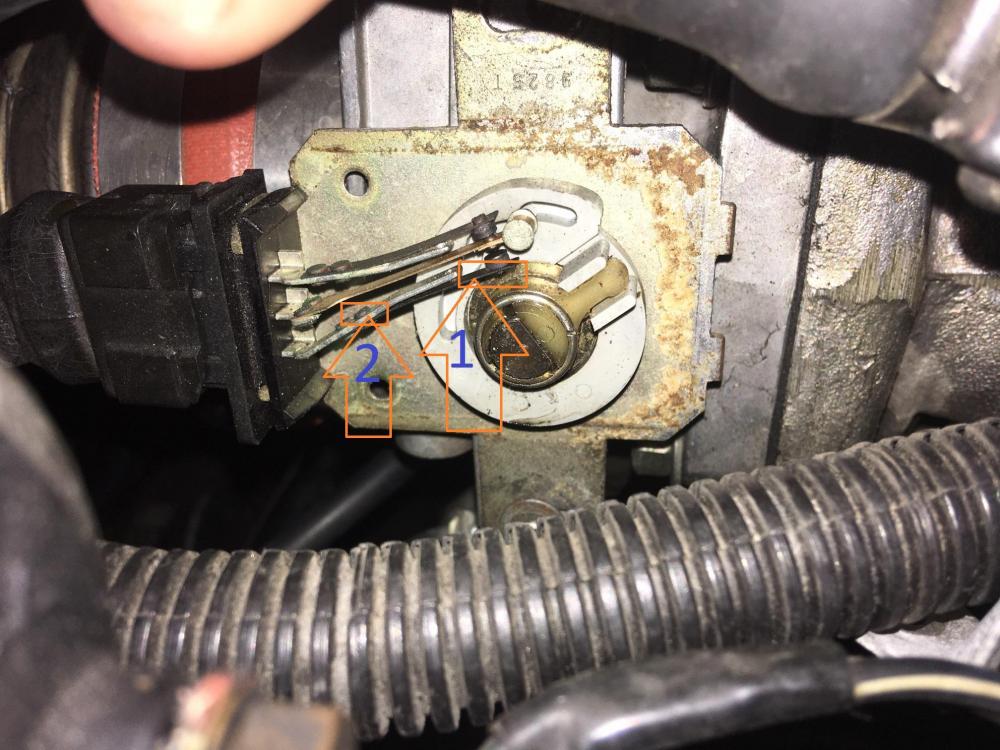
Interesting idea - we may go that route depending on how the bending goes. One final question, am I bending the thin copper arm (noted as "1" in the below picture) or the thicker grey metal arm (noted as "2" in the below picture)? UPDATE: I bent #2 and using a multimeter to test the wot pin I'm now getting WOT continuity at 3/4 pedal pressure instead of 1/4 lol. I tried to bend it back to get WOT at 2/3 but it doesn't really want to go back in place. Either way, I'm happy with this and will report back on the driving dynamics/numbers tomorrow night.
-
Ok gang we are at the finish line here - I followed @240260280 's method. We're sitting at a 15.5 highway cruise with the TPS unplugged, so I cranked the bolt down, put some paint on the current gear tooth for future reference, and shut the cover. I then plugged the TPS in and set the idle to 14.2 while running at 800rpm. Now to bend the WOT arm which I will do when it's light out haha.
-
@240260280 Good plan, very methodical - I'll do that probably tomorrow evening. Regarding the tape, I'm guessing you mean just electrical tape wrapped around the WOT contact, right? @Captain Obvious Interesting idea, I might take that up down the road after everything is setup properly @madkaw Good to know on the max leanness number for WOT thx
-
Thanks @Captain Obvious & @siteunseen I definitely think I'll need to keep the TPS switch plugged in in some form as the car drives like a wet shoe without it lol
-
Ok gang, I have some pretty big findings. Our issue is very much the TPS. I was driving and getting in the high 13s after leaning it way out. Frustrated, I pulled over and unplugged the TPS and immediately cruise changed from the 13s to the 17s. The next plan (probably tomorrow) will be to configure the car to get low 15s (good target?) on cruise with the TPS unplugged, then fiddle with the TPS pins until I am able to get the proper cruise with it plugged in. The problem very much is a lack of space between the cruise and WOT pin as I was barely able to hold it in the 14s with some really finite pedal work when it was plugged in.
-
Why not just bend it back delaying when the center pin touches it?
-
That's odd but I don't see how it would change anything. I thought he bent the main support pin of WOT back.
-
Sounds great, thanks!
-
Wow ya that is a huge difference compared to the pic I put up last night. I'll get some numbers/rpms for you near the end of the week and then I'll do some bending. Any idea what RPM you have to hit before it connects to the WOT tab? I set mine using a multimeter on the bottom two pins and twisted the sensor so that when it got above 1400 the contacts would lose continuity.
-
Can you pop the cover off and take a picture of the arm spacing? That would be awesome