Jeff Berk
Community Member
-
Joined
-
Last visited
Everything posted by Jeff Berk
-
I went with leather and I'm happy with that. Otherwise, I'd suggest finding an upholsterer to create a new cover.
-
I think zKars is right. It's hard to say where the differential came from because the R180 was switched out with an R200 in the early 1980's but some time after that, it must of got switched back to an R180.
-
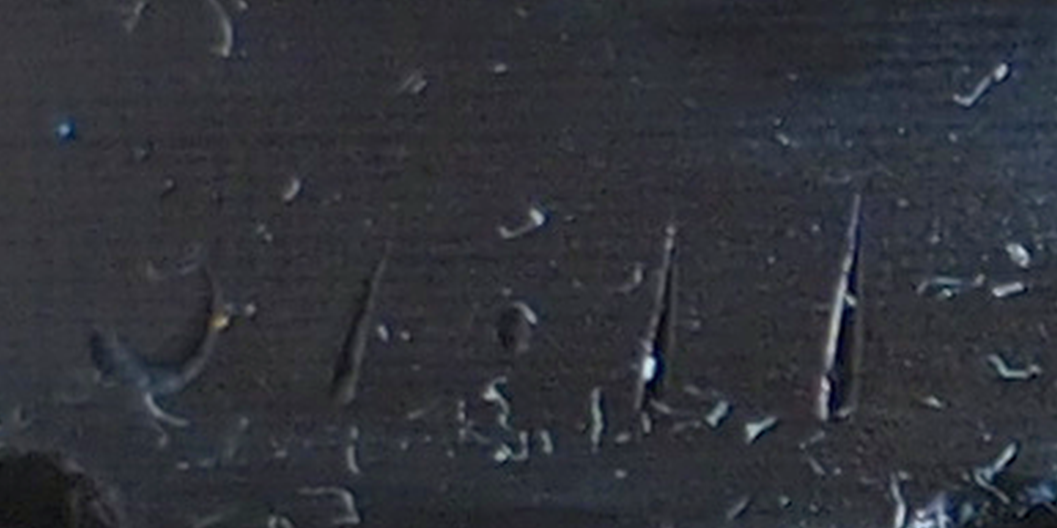
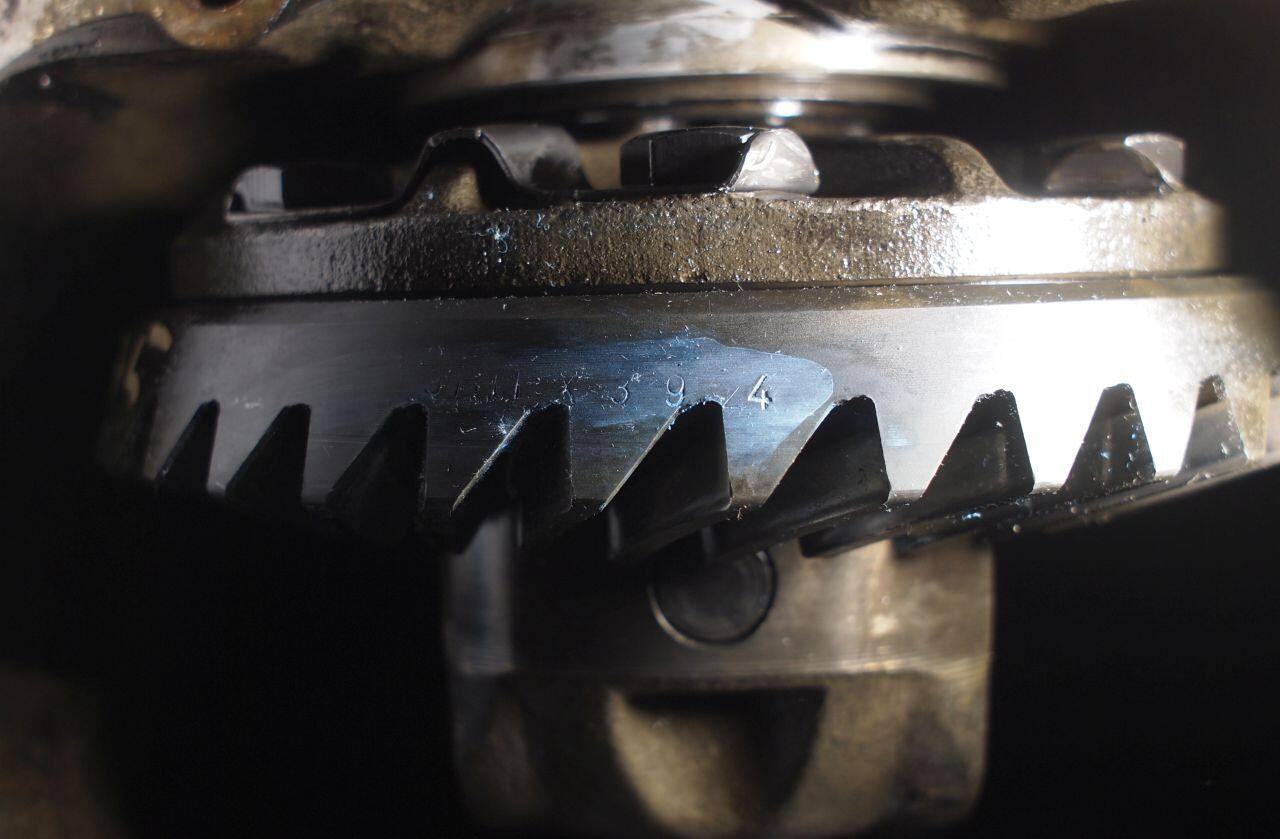
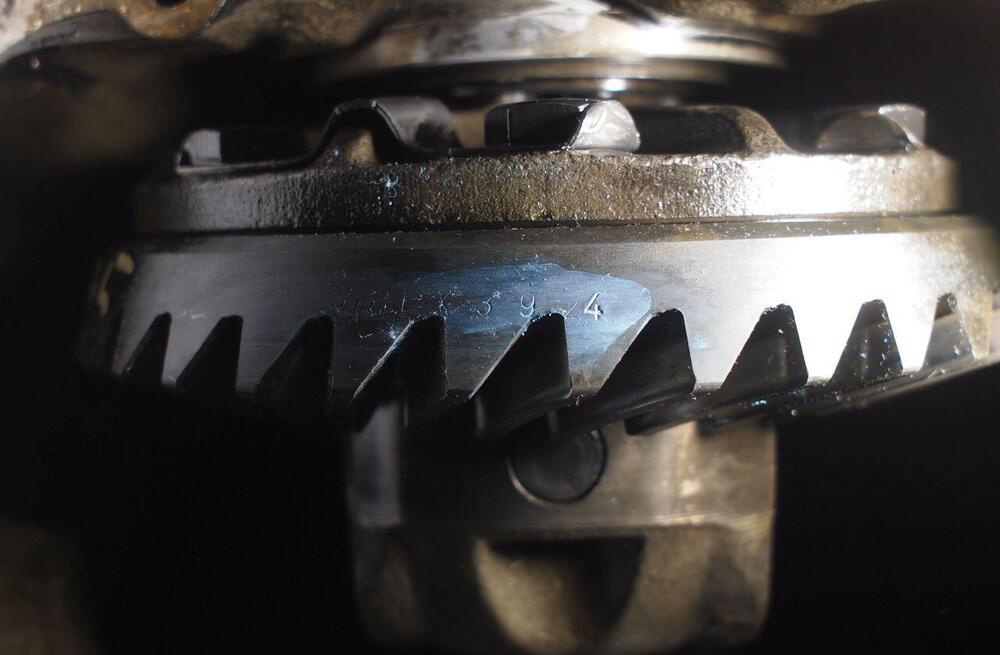
I'm trying to determine the gear ratio on my R180. There is a number on the ring gear of ?? x 394 Does this mean 3.94:1 ? Should I just see how many turns of the differential input is required to make a full revolution of the ring gear? Can anyone assist in decoding this? Jeff
-
Thank you
-
Thanks all. I'll check to make sure the 1/2 shafts are operating smoothly and if not, I'll dive into rebuilding them.
-
I'm removing my differential to install a LSD*. While at it, I was looking to see if I need to address anything else in this 49-year old car. I've seen detailed videos on rebuilding half shafts and was wondering what could possibly require rebuilding on them since there is so little movement this component needs to experience. The universal joints appear to be fine so far. *BTW: I decided to go with a KAAZ unit because I like their technical support, ability to adjust (although not easily) and I found a great price including shipping if I order them from a Japan-based vendor. Jeff
-
Has there been any updates on this project since May?
-
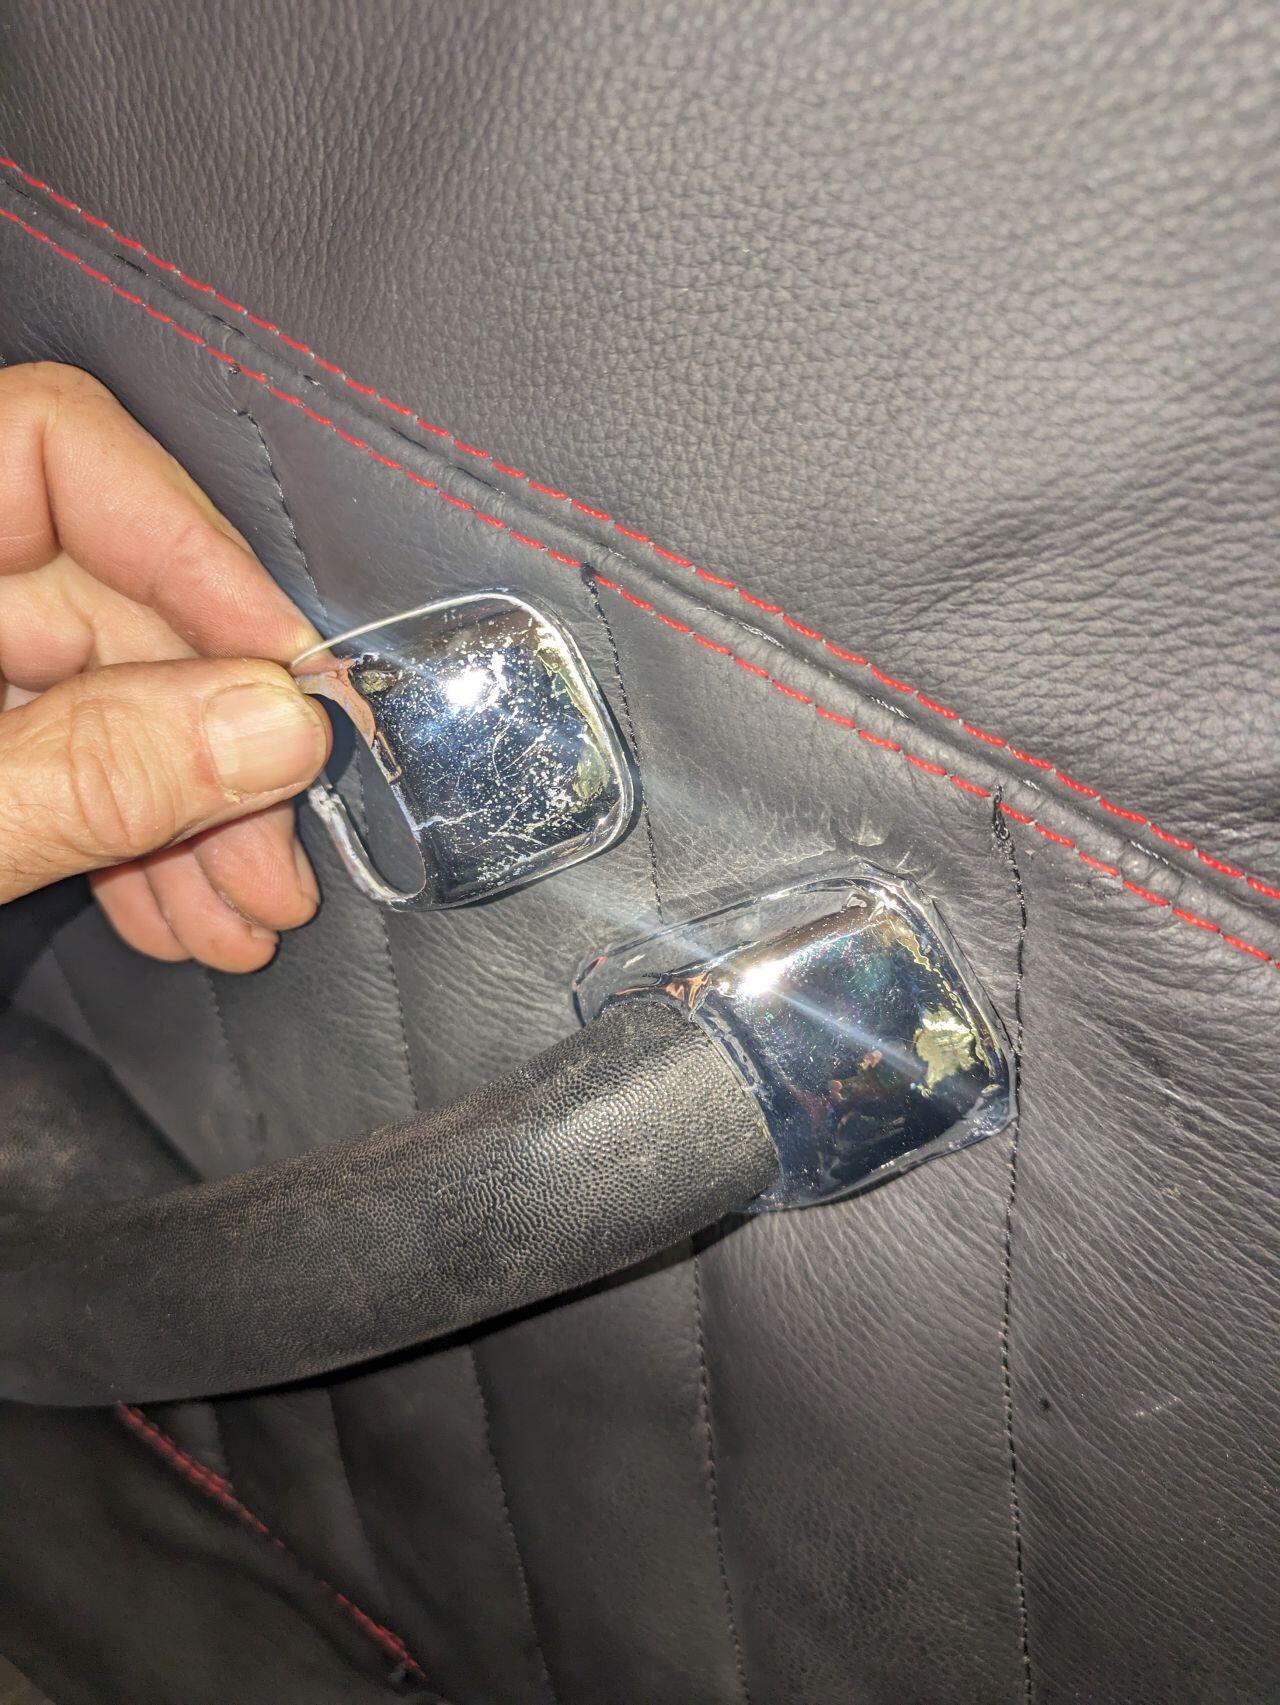
OK, not prefect but close. I'll post the obj file tomorrow if anyone wants to make one or two. I printed it in PLA, sanded it, sprayed it with a few layers of gloss, then stretched chrome vinyl film over it. I will print the next one in ABS because this one warped a little when I heated up the vinyl wrap to stretch it. The photo shows the original one in my hand and the printed one installed. It looks like a chip is missing in the printed one but that's just some strange reflection.

-
Well, if you think you might need a hitch, go for it. I don't think I can afford a drive all the way to AZ for this. I suspect it should be almost exactly what is on a 240z.
-
I think its an April '74 (VIN RLS30019158). My Z spent much of its early life in AZ with an previous owner.
-
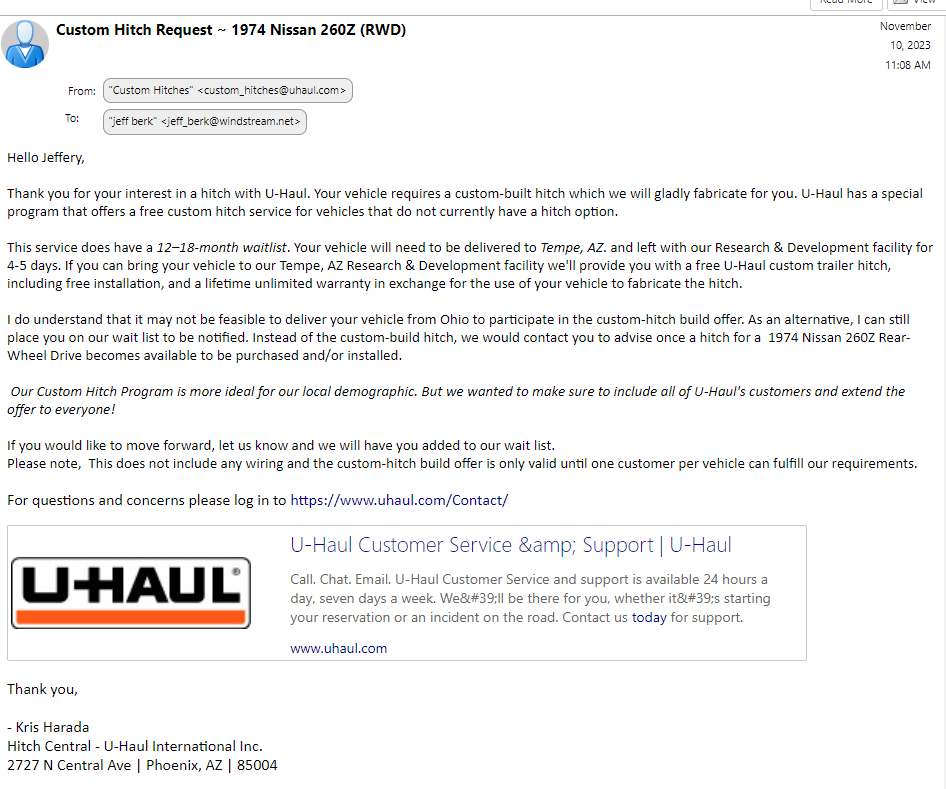
I was looking into installing a hitch to tow a support trailer for Auto-X and checked with U-haul and got a strange response that I cannot act upon since I live in Ohio.

-
The OBX LSD ebay listing indicates that it fits the 84 to 89 300ZX. As far as I can tell, I have a R200 out of a 280zx so it should NOT fit my differential. But, from what I read in a posting here on ClassicZ is that the difference between 84 to 89 R200's and the 75-83 R200's is that the 75-83 R200s used a ring gear bolted to the carrier with 10mm bolts while the ’84-89 used 12mm bolts. In the video by Stewart Motoring, he had used bushings to fit the 10mm bolts into the 12mm holes. Does that mean that all I need to do is purchase the same bushings he did from McMaster Carr and that will adapt the LSD to my ring gear? I'm assuming that I can retain my existing side shafts or half shafts (whatever they are called) between the rear wheels and differential. NEW TWIST: The vendor shows the OBX unit is out of stock but he has MHP LSDs at the same price.
-
Going back to the LSD option, I found this OBX on e-bay from what looks like an authorized dealer. https://www.ebay.com/itm/185599652068?fits=Make%3ANissan&hash=item2b3699f0e4:g:vqgAAOSwhrFjNjda&amdata=enc%3AAQAIAAAA4MIe6Uoer6SZ0hsN5krJSbV4iFzg4hk%2BAWSrQNuI663pte0VClGAiTftyVKD9QBBi5zpeWVgyuK7X8d5qM%2FvG4Fo2gXX2RUObNdHtG7D73Mo9nfI0dJ%2Byd593rpBfvqSsa06fVSNP9akt2sG6CZD7DFkwHTKIkLlpH1aKehC0cNbptijaXZ0q2oTs7O8rOM1knezPhA2heLZqUcojkWuFCv528k9hwvcmaAXmIzBdy8Glh3gTCT%2FOHue2Fql5GMDzkHZlZnI6Rfj5h2XZdh9jjET%2B9q3StxSl37CyBSmwgLf|tkp%3ABFBMhuTRzfZi I think my differential is an R200 out of a 280zx so I'm assuming this unit will work. I understand that I'll need some ancillary parts like shims, but I can use my existing axles. I've been reviewing the following youtube video which seems informative (how did we survive pre-youtube?).
-
I've never touched the castor and camber, just the toe in using a tape measure and two aluminum plates. I'll need to read up on the other two adjustments.
-
Perhaps breaking loose is the wrong words. I get tire screeching and oversteer both right and left. I understand that oversteer is inevitable when the car is pushed beyond its limits. I want is to expand the car's limits. I thought sticky tires was my most cost effective way to do this but now it sounds that an LSD might be the way to go. My suspension configuration is as follows (italics indicates early 1983 owner upgrade based on documents that came with the car.): 1) Technics front/rear anti-sway bars (links and bushings replaced 2018) 2) Quick steering knuckles (I have no idea what this is) 3) FIA Nissan Racing Calipers (4-pistons) 4) KYB front/rear struts (2018) 5) 1-1/2 inch lowering Eibach Performance Spring Kit (2017) 6) Front strut tower bar
-
It looks like my best option to control my car around the sharp Auto-X turns would be to install an LSD. I'm tabling my tire upgrade for now but if I go back to it, I can always buy a full set of 4 and car-top two of them. Documentation from the owner back in the early 1980's listed the front brakes as FIA Nissan Racing Calipers (4-pistons). I don't know how to differentiate this unit from a Toyota 4-piston so I'm assuming it is still the current unit. I'd like to keep my costs to around $500 +/- so if I go with an LSD it looks like it might have to be the OBX unit. I started looking at videos on its installation. I have access to some uber-gear-heads in my area for support if I get stuck (R&R Restoration & Repair in Kent, OH and Case Western Reserve University's [ThinkBox] machine shop, Cleveland, OH). I've been avoiding the Toledo auto-X because of its distance and my concern over the reliability of my car (see my initial post about break downs). I think I have issues sufficiently under control now and my daughter's family live 5 miles from the Toledo airport and could come to my aid if I get into trouble so I might risk it next season and see you there grazyZlair.
-
No LSD. Just an R200 installed in the early '80s by a previous owner.
-
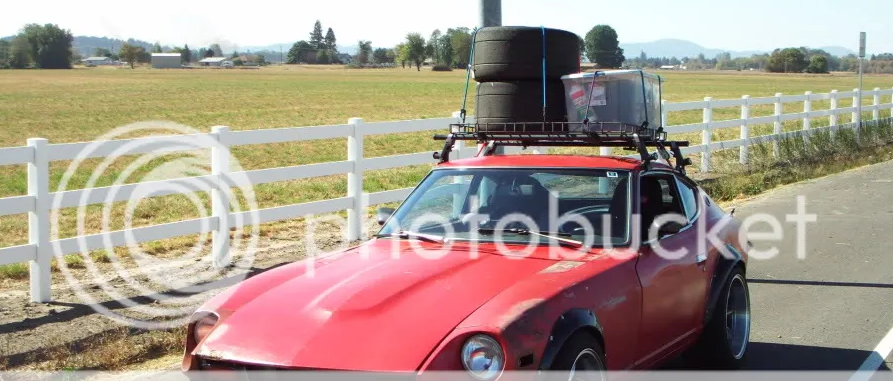
I've tried Auto-X three times but my car broke down due to vapor lock once and a damaged battery cable another time. I made it home eventually under my own power. This past weekend I got a successful 8 runs in at Dragway 42 near Cleveland, OH. The event took place in their parking lot which is a lawn area crisscrossed by pavement. This was their last event of the year so I'm making plans for my 260z's hibernation upgrades. One issue I'd like to address is rear tire grip. I've tried lowering my air pressure to 28.5 psi in the tires all around but my rear tires could still use a little more grip. I'm currently using Kumho Ecsta AST KU25 All-Season 225/50R15 91H which are performing well on roadways. I started looking at a track tire alternatives that I can switch to for auto-X and came across some 225/50R15 Hoosier R7 with 3/4 thread remaining on usedracingtires.com at $100 each (plus shipping). I am likely only able to haul two extra wheels in my '74 Z so unless I want to risk driving with these slicks on the public streets, I would be limited to switching out only one axel at the auto-X event. Now the questions: 1) Are there any issues with using my Kumho tires in the front and these Hoosier slicks in the rear? 2) Has anyone had experience with usedracingtires.com? 3) Since I'll be purchasing a pair of steel wheels to go with the track tires, should I stick with 15 inch wheels? I'm not sure what width and setback are needed for stock fenders and lowering springs, factory drum brakes in the rear. Thanks for reading Jeff

-
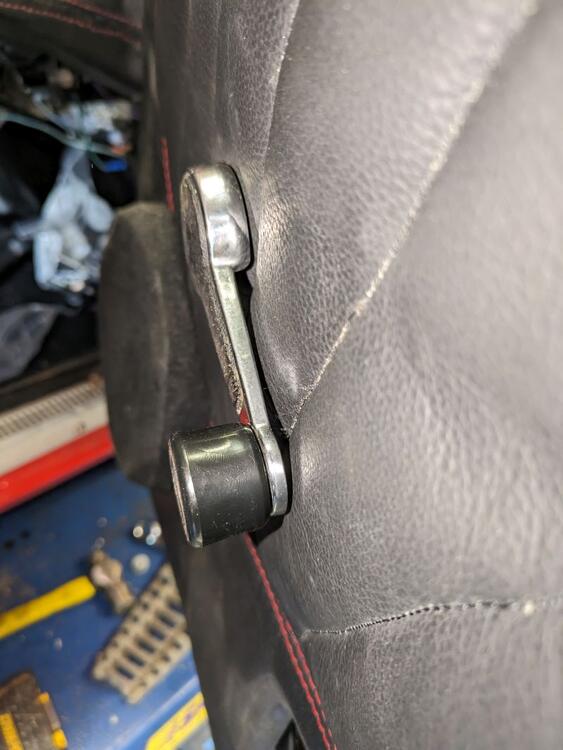
In my latest attempt at logging tens of hours into refusing to spend $30 and up for parts that should cost <$10, I'm focusing on recreating the chromed plastic cover over the top bolt holding the arm rest onto the door of my 260Z. The part was reportedly never offered on its own and is NLA except as a reproduction. One of mine broke in half and the other is almost at that point. https://www.thezstore.com/product/1517/door-armrest-chrome-finisher-74-78-260z-280z I'm playing around with creating a high quality 3D scan, printing the part with a 3D printer, and coating it with chrome. So far I've attempted with a scan using my Android phone, then a $1K+ stand alone scanner. The print is close to being where I want it. I'm going to try and chrome it using chrome vinyl film like what's used in vehicle wraps. I'm posting this to force myself to following through. I plan on posting the final obj file for anyone wanting to print one for their own use. The attached early attempted scan obj file can be opened in MS Paint 3D for viewing. 3DModel_LowPoly.obj
-
If someone needs a crank shaft lengthened, I don't mind doing it for them. However, it would require them to dissasemble the window regulator, pay for round trip shipping, and most importantly, not raise a fuss if I screw up the job. I didn't show my second modified spline shaft but the small rod extending out of one end of the part snapped off while in the lathe, but I was able to use the threaded rod to replace it.
-
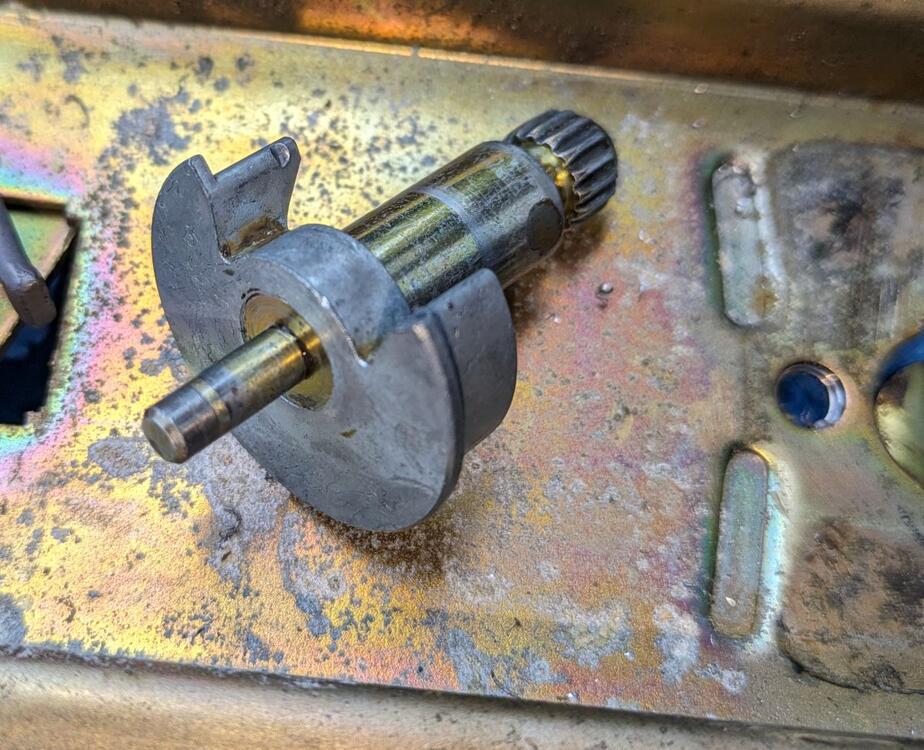
Finished product. Now to move onto the next detail. So many little issues to chose from.
-
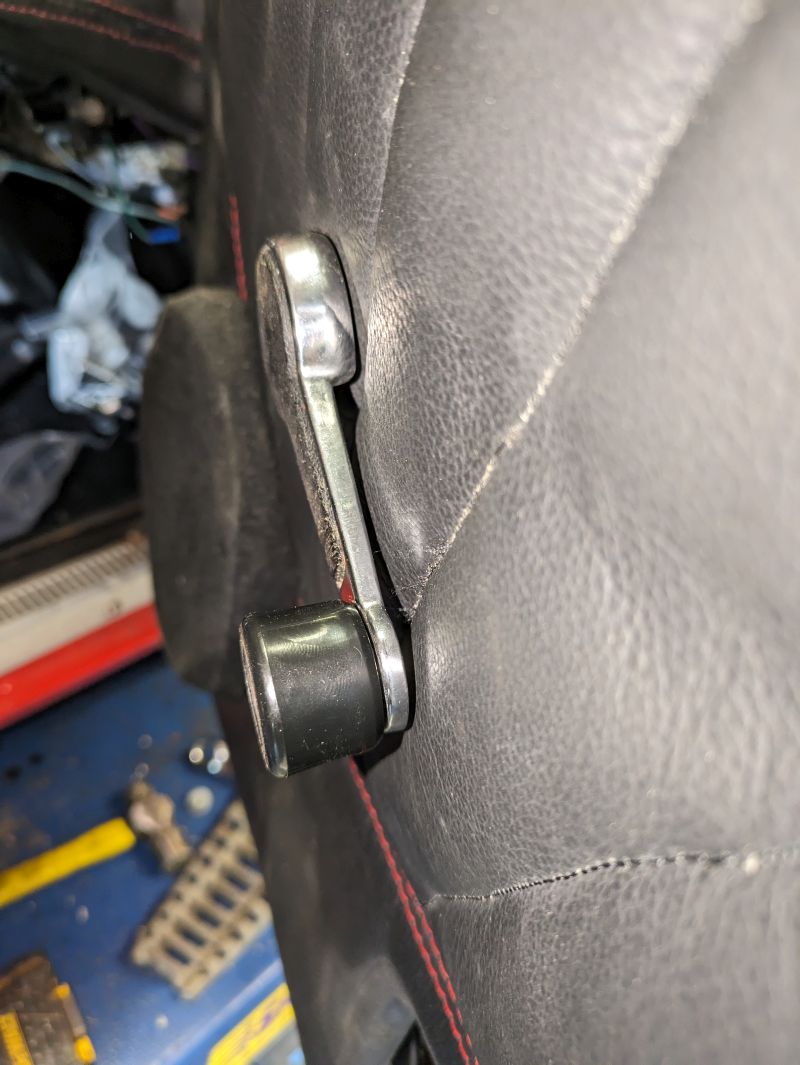
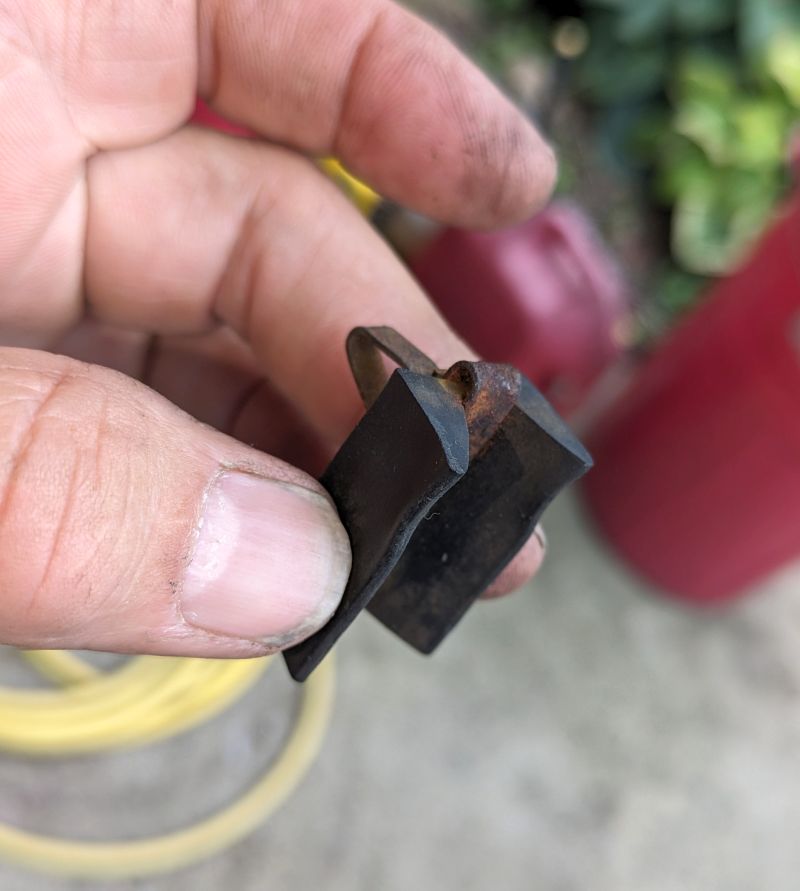
I welded it up and made a mess out of it but it cleaned up ok on the lathe. I'm just trying to get the window back in the track now and then I'll post a picture of the finished project. I found a rubber bumper in the bottom of the door. Any idea where it goes? I couldn't ID it in the FSM

-
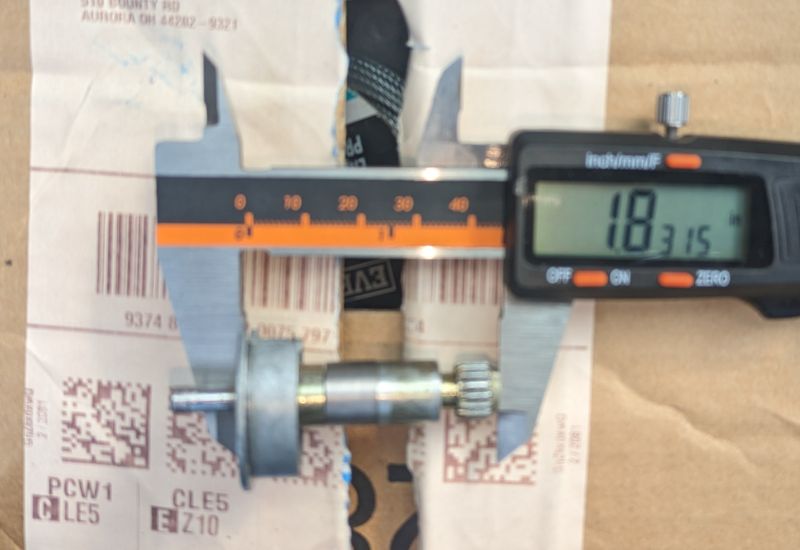
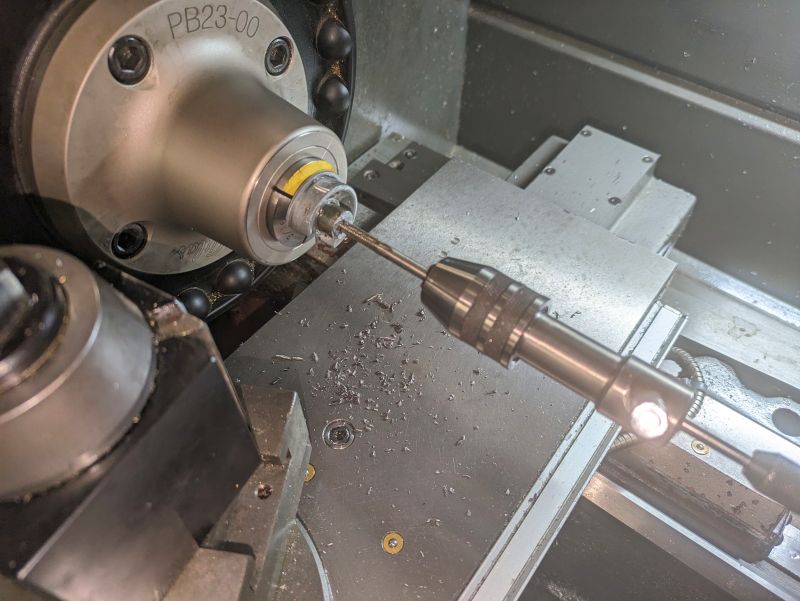
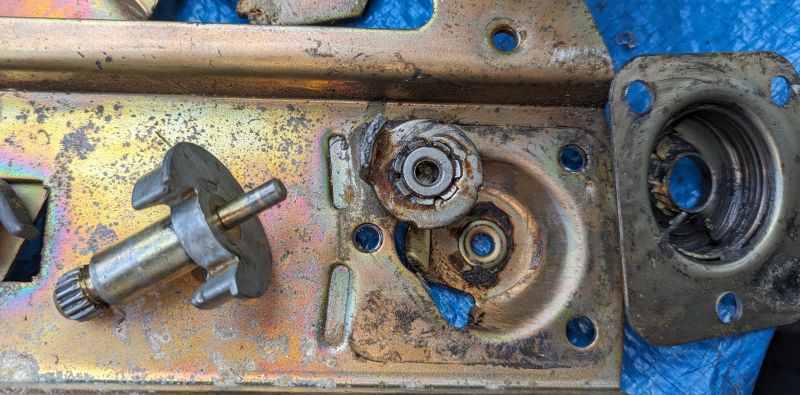
Well here's where I'm at. I cut the shaft; drilled, tapped, faced off the ends; made a spacer from some scrap; and used a short section of all thread to piece it all together. This increased the length by 0.29 inches. I'll need to weld the stack in a couple spots to withstand the torque. I'll then weld the regulator back together. If all works well, I have a second one to do. Thank you all for the input.
-
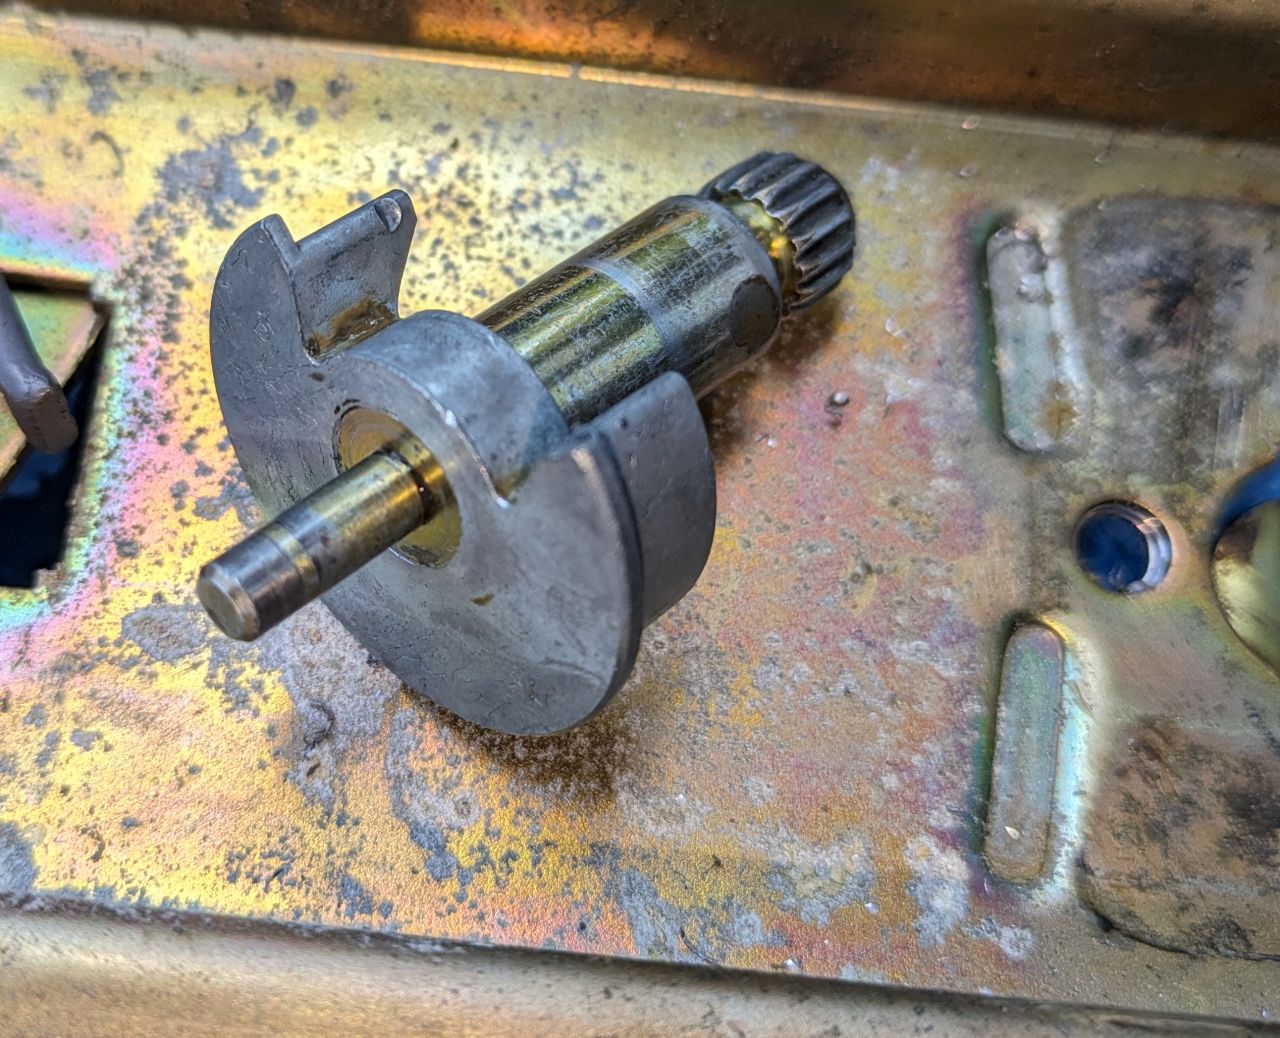
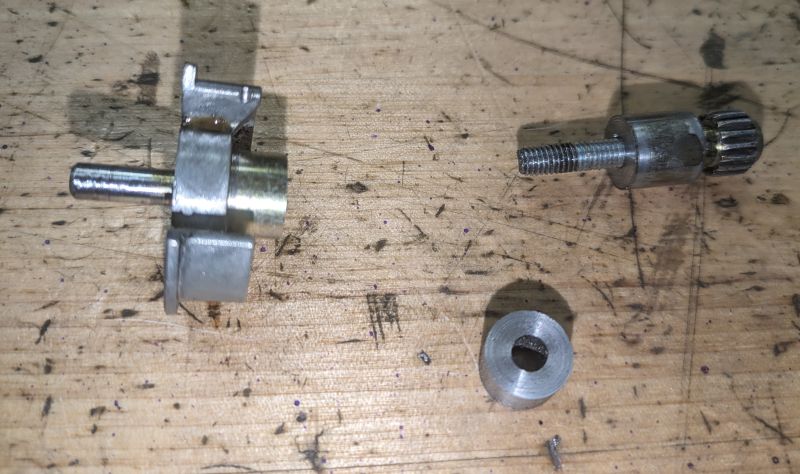
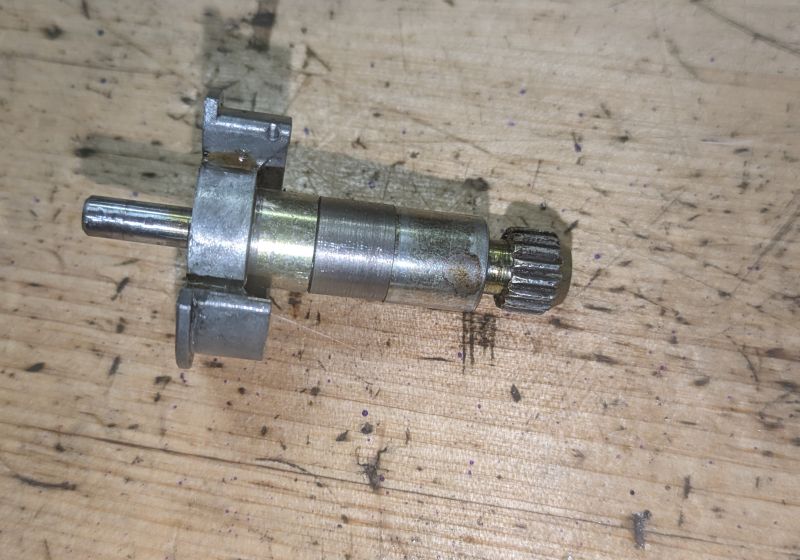
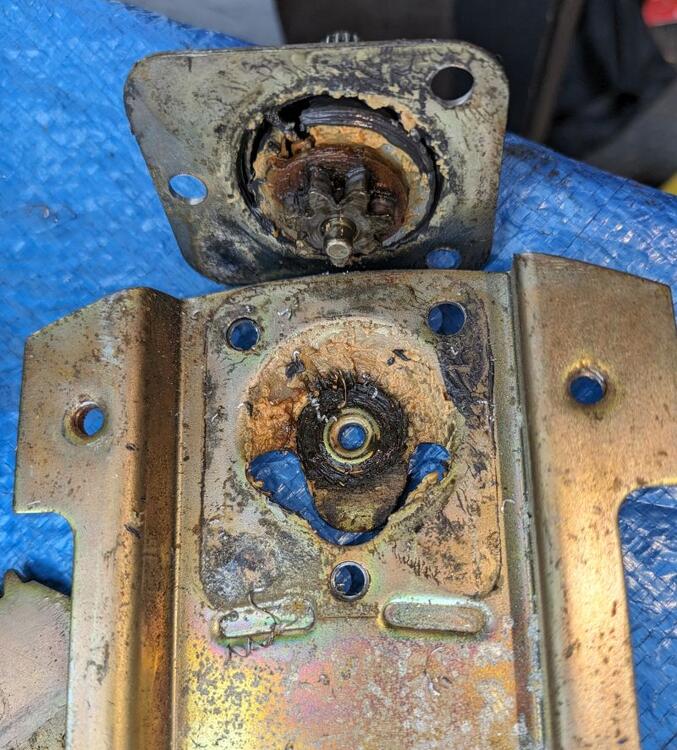
Well, I had nothing better to do so I took it apart to see what's inside. I used to do that a lot when I was a kid. I figure I can reassemble it with some nuts and bolts or a spot welder I hope I still have access to. It looks like the spline shaft is press-fit to an aluminum collar that mates to a spring. My options now look like the following (assuming I can put this back together): 1) Cut the shaft and extend it by adding a little steel by welding the two parts 2) Attach a short hollow tube between the two parts that can be welded or fixed with set screws. The added diameter would not be a problem. 3) Extract the shaft from the aluminum collar and turn a new shaft. The easiest might be #2 and the most elegant would be #3. Separating the shaft from the collar would be my primary concern. Feel free to offer input. I'll try and get this to the makerspace in the next couple of days to see what's suggested.
-
I might just bite the bullet and pull a door panel off to take a look before winter.