
Jeff Berk
Community Member
-
Joined
-
Last visited
Everything posted by Jeff Berk
-
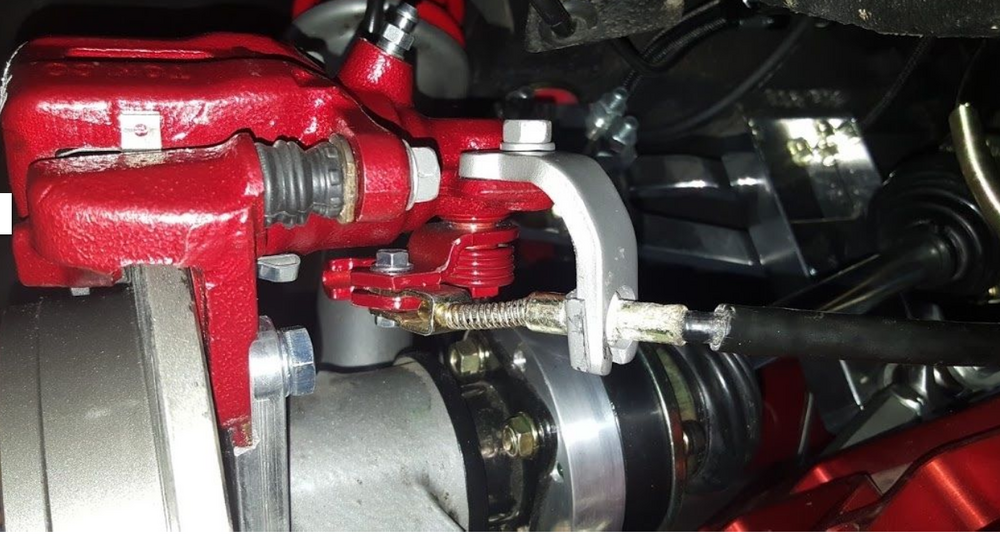
The spring is likely stiff but can you move the arm on the caliper that the cable attaches to?
-
He is also very friendly. I just contacted him about getting a few of these dust shield retainers. At about $20 each, they are not cheap but for the effort to make them, its just worth buying. I found his wooden bicycle wheel writeup interesting. I have some bicycles older than my Z (Peugeot PX10E).
-
Yup, that's what I have. I'm e-mailing e-za@vintagecraft-e-za.com to arrange purchasing 4 more rings since I only have enough to do one of the two calipers.
-
Well an update... I can only find 4 of the clips. So much for autocross this year.
-
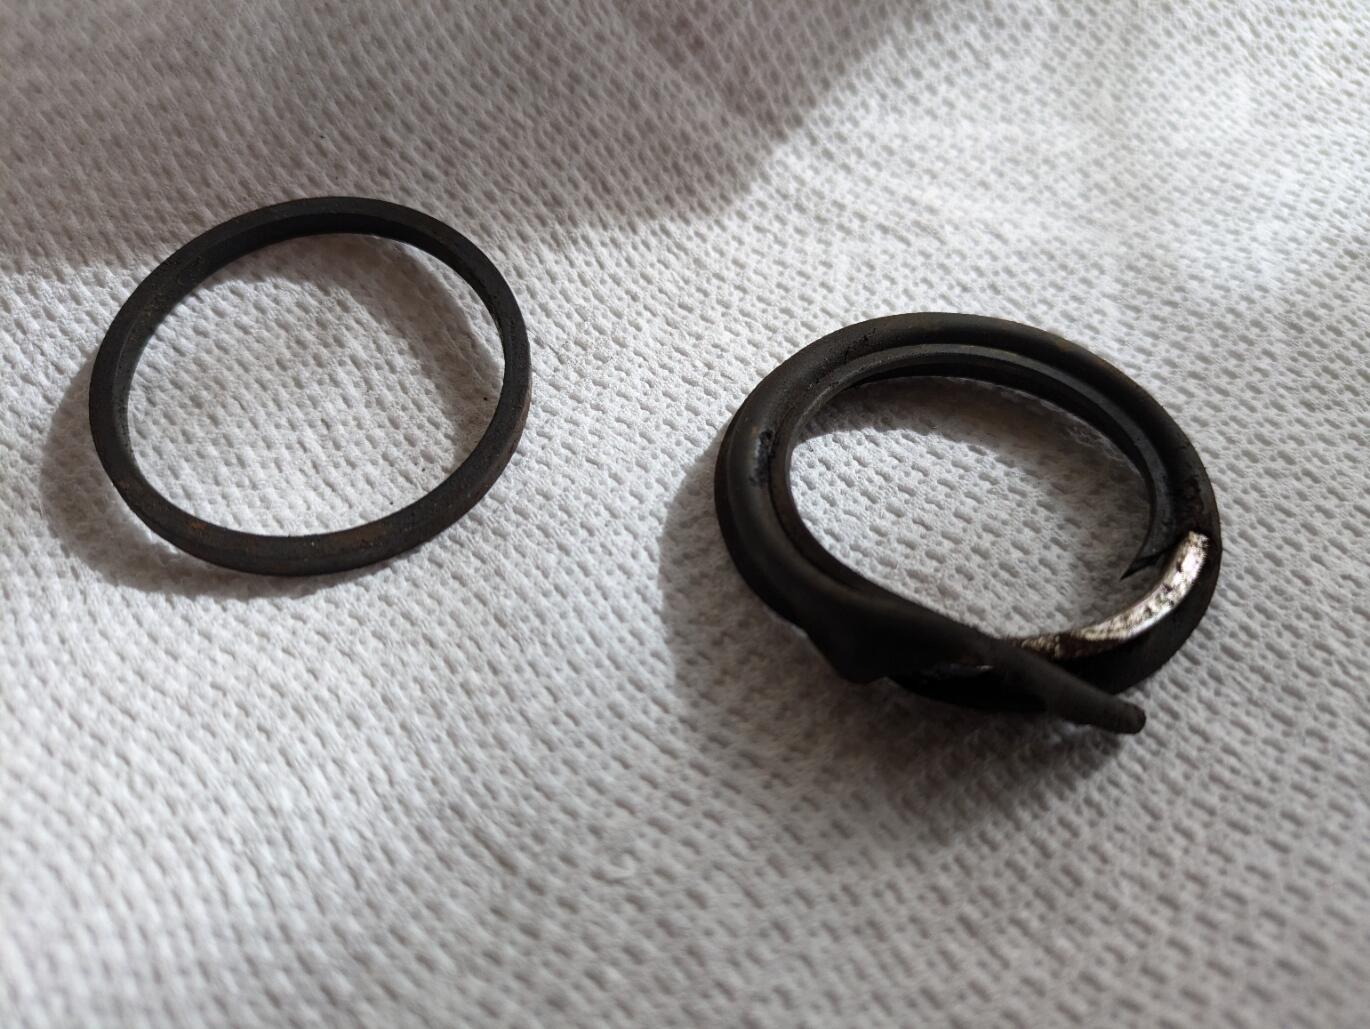
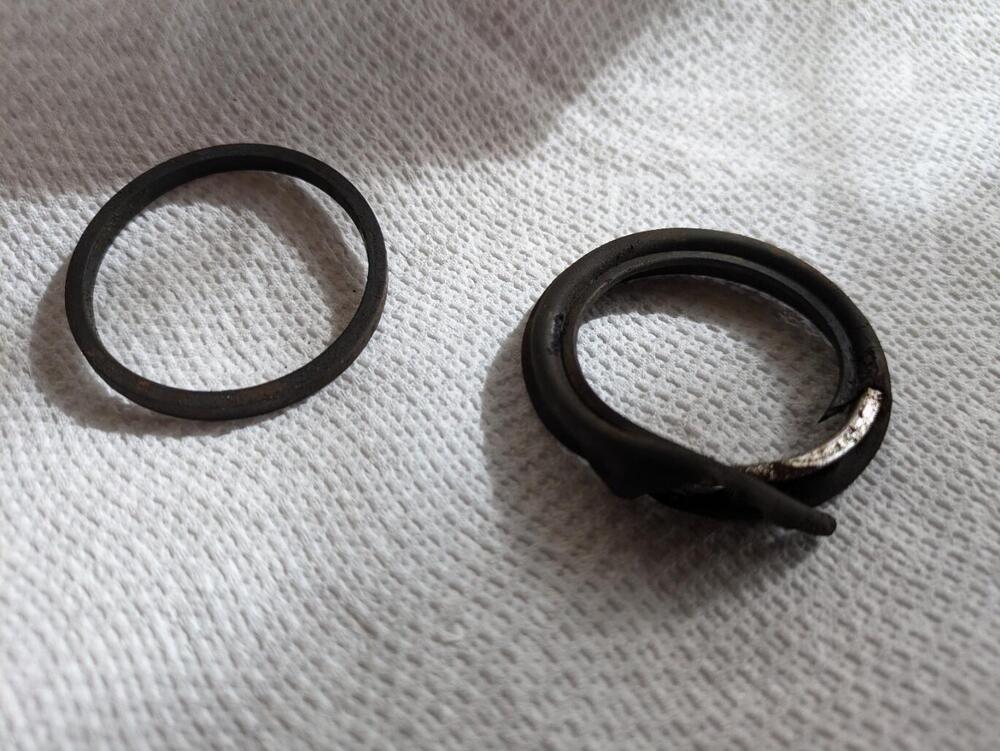
I'm impressed by all the responses. First, part 4 is labeled as a "piston seal". I included a photograph showing the old one on the left. On the right is the old dust seal with the metal ring inside. I mistakenly assumed it was a retaining clip. I need to clean them up but at least the couple I looked at this morning look serviceable. I am also assuming that the dust seals likely came with these retaining rings back when Nissan supplied them. I had to purchase an aftermarket set because that's all I could find. I really want this put together by tomorrow so I can register for my first autocross of the year this weekend.
-
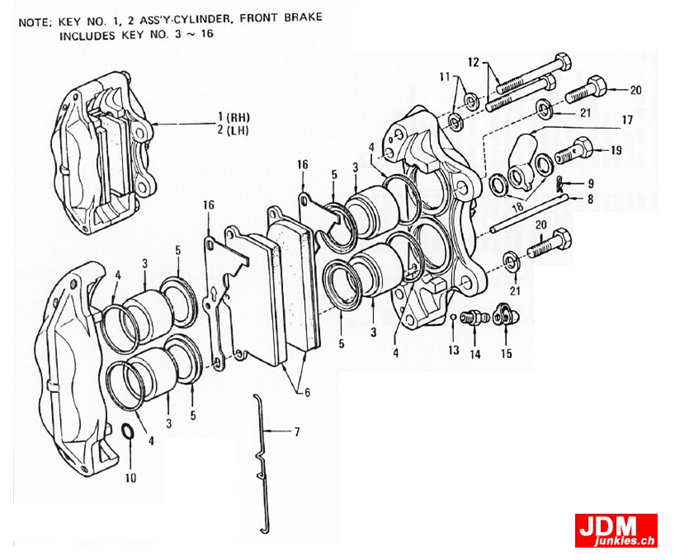
Looking at this diagram, it shows a dust boots that go over the pistons and rests on the inside surface of the caliper (Part 5). The original boots were held on using a wire spring clip. I'm assuming the clip is not needed since its not shown and the dust boot will seal well enough just resting on the caliper even as the pistons move in and out. Please correct me if I'm wrong.
-
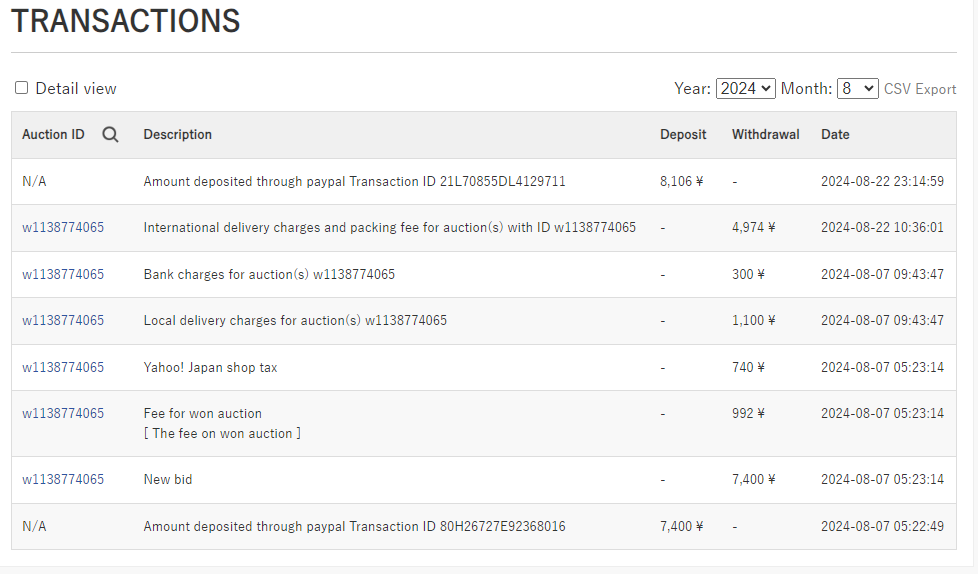
The parts are finally being shipped so that I can rebuild the brakes. In the process I learned a bit about purchasing through the Japanese sites Jauce (brake pads) and Amayama (4 pistons and seals). Mostly that fees can be far greater than the cost of the parts for the Jauce action site. Note $0.0068 dollar to 1 yen. Amayama was reasonable with fewer line items.
-
I just looked at my car and compared the grill radiator assembly with those sown on Carpartsmanual.com and my car definitely has the early version. I wonder if the holes in the later splash-board were added to address loosing screws and washers while working under the hood? I might cancel that order as it hasn't shipped yet and wait out a splash-board that will fit without modification.
-
The big question is can I, through minor modifications, make the splash pan fit?
-
The only difference that was apparent to me from the photographs was that the later version had a large hole, presumably to reach the radiator drain ****. It would be really helpful to see the difference and to know if they are similar enough so I can get away with the 280z version.
-
The same thing can be said for most Zs I've seen for sale.
-
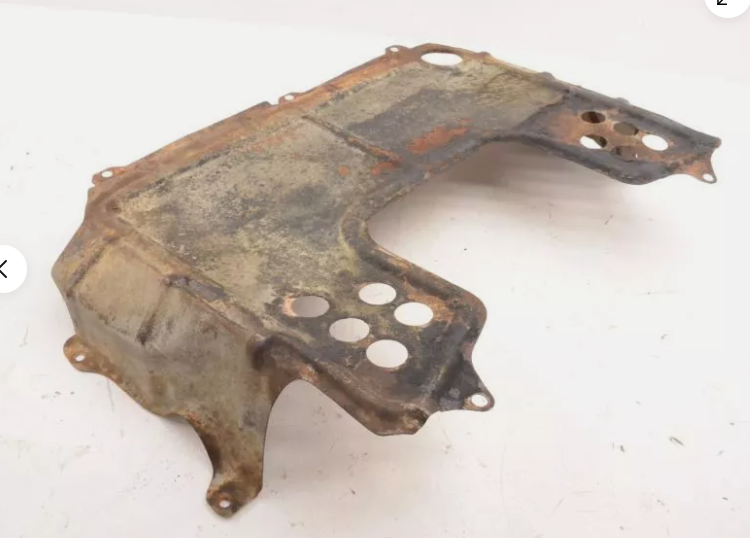
I ran across this on e-bay for $136 w/ shipping and was wondering if its worth picking up to aid in keeping the engine compartment cool. I have an early 260z but I suspect this design for the 280z matches. If I sand it down and if it fits in the powder coat oven, I think I can make it look nice for the cones I drive over in Autocross.
-
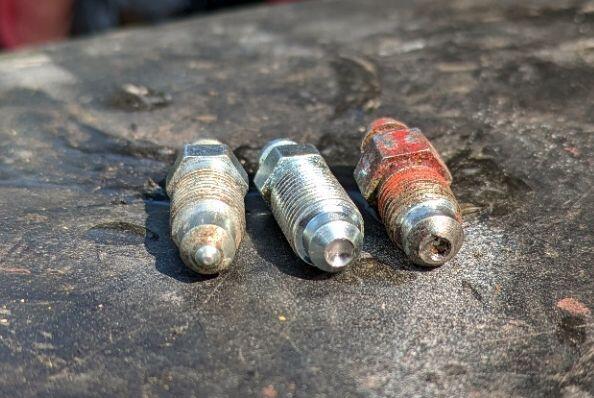
HS30-H I learned of the similar Jag bleeder last night while researching the Sumitomo. It appears to have also been used in some Studebakers like the Avanti. A post on a Studebaker forum suggested just cutting off the tip of a modern bleed screw to create one. The Jag screws, at least the one I found a reference to were 3/8" 24 thread although they also used a 3/16-inch ball. Captain Obvious The treading was a little messed up on the original bleed screw, possibly from being over tightened but the caliper's threads seemed to be fine. The old screws were tightened to the point where the flat tip was deformed by the ball bearing. I just came back from the makerspace where I modified a pair of bleeder valves I had on hand. The photograph shows from left to right, an unmodified bleeder, a modified, and the original. The original likely had a flat bottom when new but was damaged as mentioned above. I decided to mill a shallow 3/16-inch diameter concaved surface to secure the ball instead of just making a flat surface. This was likely unnecessary. I then spun the 3/16 end mill by hand in the caliper where the ball seats to clean it up a little. I might try and assemble this and see if I can draw a vacuum with the valve closed to test for leaks.
-
Does anyone have an opinion on machining a modern bleeder screw to match the one used in the mk63? There was a person on Jauce.com that RIP260z pointed out that was selling some reproductions that I suspect were just modified modern screws. It seems like all you need to do is cut or grind a flat spot on the end of the cone, then grind a 3/16-inch dimple in the flat spot to fit against the ball.
-
I think I got the threading issue taken care of with a tap and cleaning up the threads. The bleeder screw appear to just need to press against the ball bearing to seal the port in the caliper unlike the more common design that requires a precise fit of the conical end of a bleeder into a matching profile in the port. I'm not too fond of the placement of the bleeder between two protrusions in the caliper, however. This design makes it difficult to close the valve while keeping a bleed drain tube attached.
-
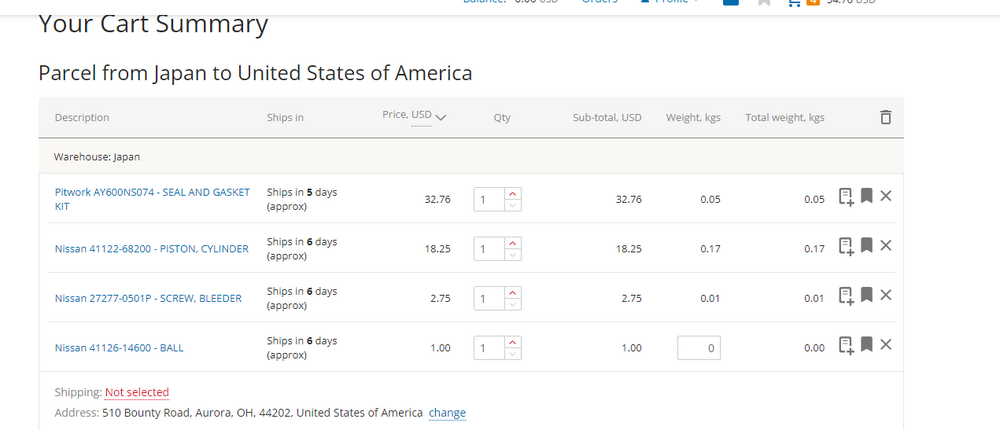
I ordered the parts, the above items from Amayama excluding the bleed screws and ball that were NLA. The brake pads are coming from Jauce. I'm getting the balls for the bleeders from McMaster for about $8.50 for 100 and some washers for mating the two caliper halves. The measurements of the balls and the washers appear to be closer to inch than metric dimensions. I have a few weeks of down time to prep the calipers. I'm planning to clean up the caliper halves and powder coat them; hone the cylinders, clean up the best pistons with crocus cloth and replace the four pitted ones. I might replace the four pins that hold the brakes due to corrosion using stainless steel rod. I have a Wilwood 1-inch master cylinder I bought off someone that I'm trying to figure out what to do with since I'm no longer going with the Toyota 4X4 brakes. Is there any advantage to installing this unit over staying with the OEM?
-
I don't know how safe a site they are, but I found everything I needed (except the pads) at Amayama.com. I'm still tearing down the brakes and so far I only need one piston and possibly one bleeder valve replaced. Unfortunately, my 260 will be down for a few weeks waiting on the parts.
-
RIPZ Thanks for the heads up on the auction. I've purchased parts from Japan before but never at auction. Now I'm torn between completing the Toyota upgrade or staying with the mk63 upgrade by a previous owner. If I go the Toyota route, I can keep or sell the mk63. If I go with the mk63 route, then I can return one of the calipers and the two rotors to Rock Auto. The pads and one caliper are not returnable because they have been installed. I'm thinking maybe the mk63s are the better choice if the pistons are not pitted. Jeff
-
Zed Head, That's not a bad idea. I think I'll give it a try. Once I know the thickness, I can machine something at the makerspace. Jeff
-
I'm going to check with T3 on which of their spacer will work to be on the safe side.
-
HS30-H Thank you for the diagram. The thickness (15mm) was something I was missing if I wanted to go ahead with using the mk63's. I still hope to figure out what I'm missing on the Toyota conversion. I also need to verify the mk63's are in usable condition.
-
BTW, I just got a quote from Brake Materials & Parts in Fort Wayne, IN to re-line my mk63s (assuming the bleeder valve is working). It would cost $50/pad plus $30 shop fees (i.e. $230 plus tax and shipping).
-
The brake caliper flange is not threaded so the caliper needs to move inward then the bolt will go through the caliper flange and into the threaded attachment point. If I install the spacer, I think that will move the rotor outward and move the caliper in the wrong direction.

-
The bleeder seems to thread in better since I cleaned up the threads. Here's a few more pictures of my Toyota installation problem. I tried reseating the hub but that didn't help. It looks like the hub is fulling seated.


-
It looks like my caliper needs to move inward about 5mm. I wonder if I did something wrong when I repacked the bearings.