
Jeff Berk
Community Member
-
Joined
-
Last visited
Everything posted by Jeff Berk
-
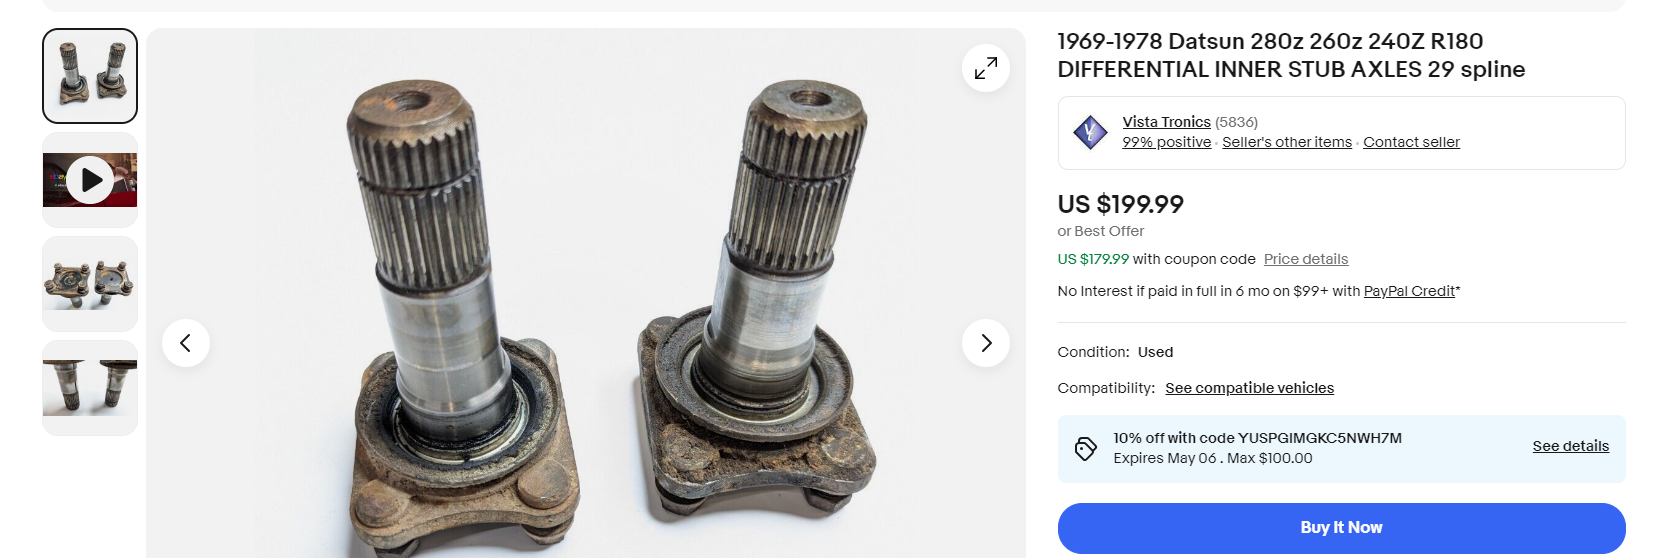
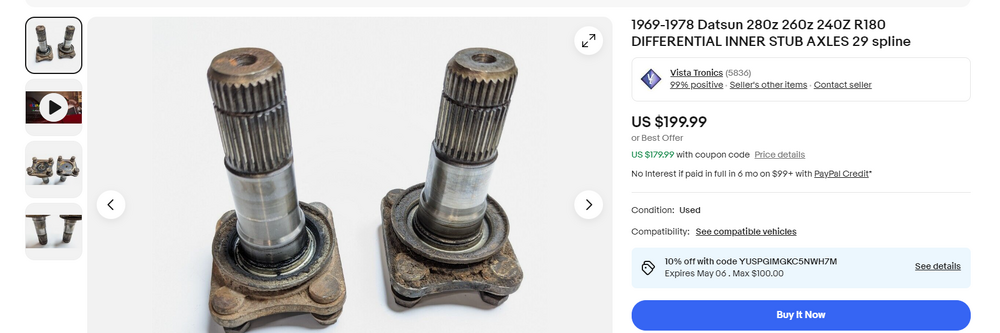
I just found this on e-bay but my car doesn't have this flange. The splined axle is part of the universal yoke.
-
I finally was able to regain access to my garage to install the differential and ran into a (major) glitch. My axle ends will not attach to the new differential. Everything went fine, other than a smashed finger, until I tried to screw in the yoke fixing bolt. It would just spin. It was then that I realized that there was nothing to screw it into. I contacted KAAZ in the US and was told that the unit I purchased DAN2020 is designed for a C-clip stub. They do have a unit designed for a bolt-type stub like used in the early Skylines DAN2030. Dose anyone know where I can get a stub designed for C-clip installation or a drawing showing the exact location and dimensions of the C-clip slot so I can machine one on my existing stubs? Note that although KAAZ tech support identified the DAN2020 as being the correct model for my car, I purchased it from a vendor in Japan in early December so that potentially complicates any exchange.
-
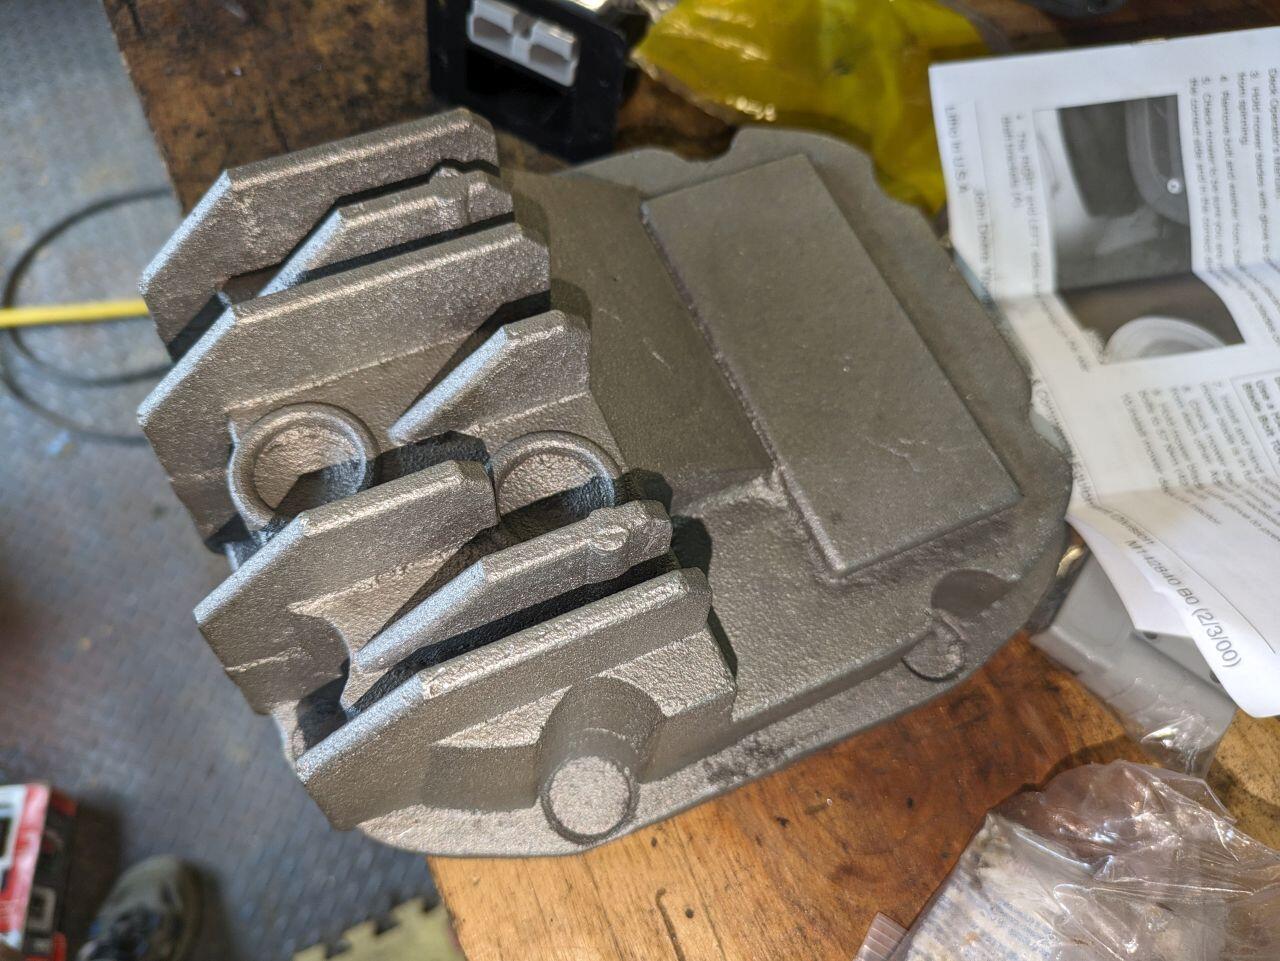
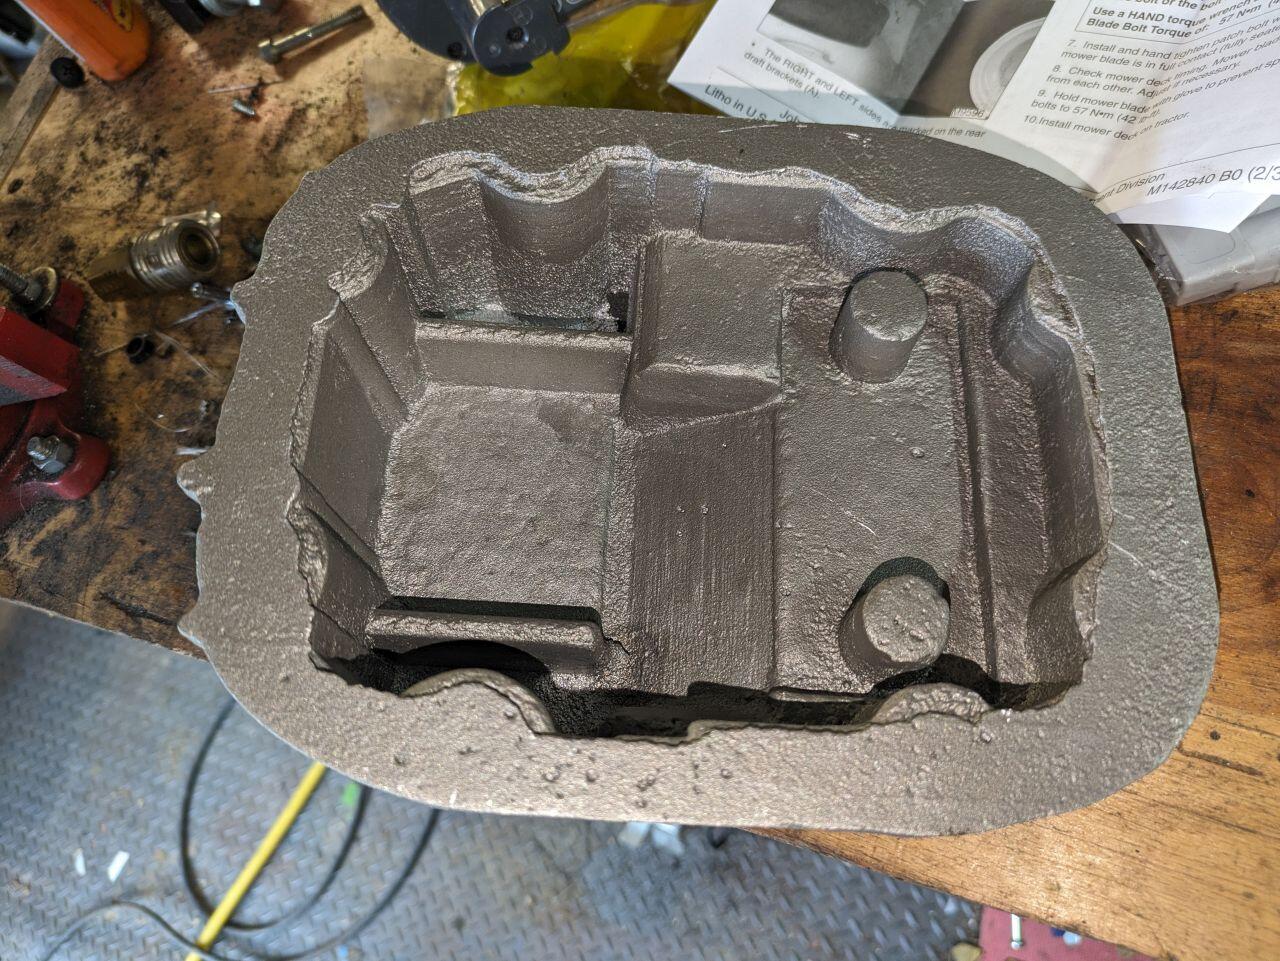
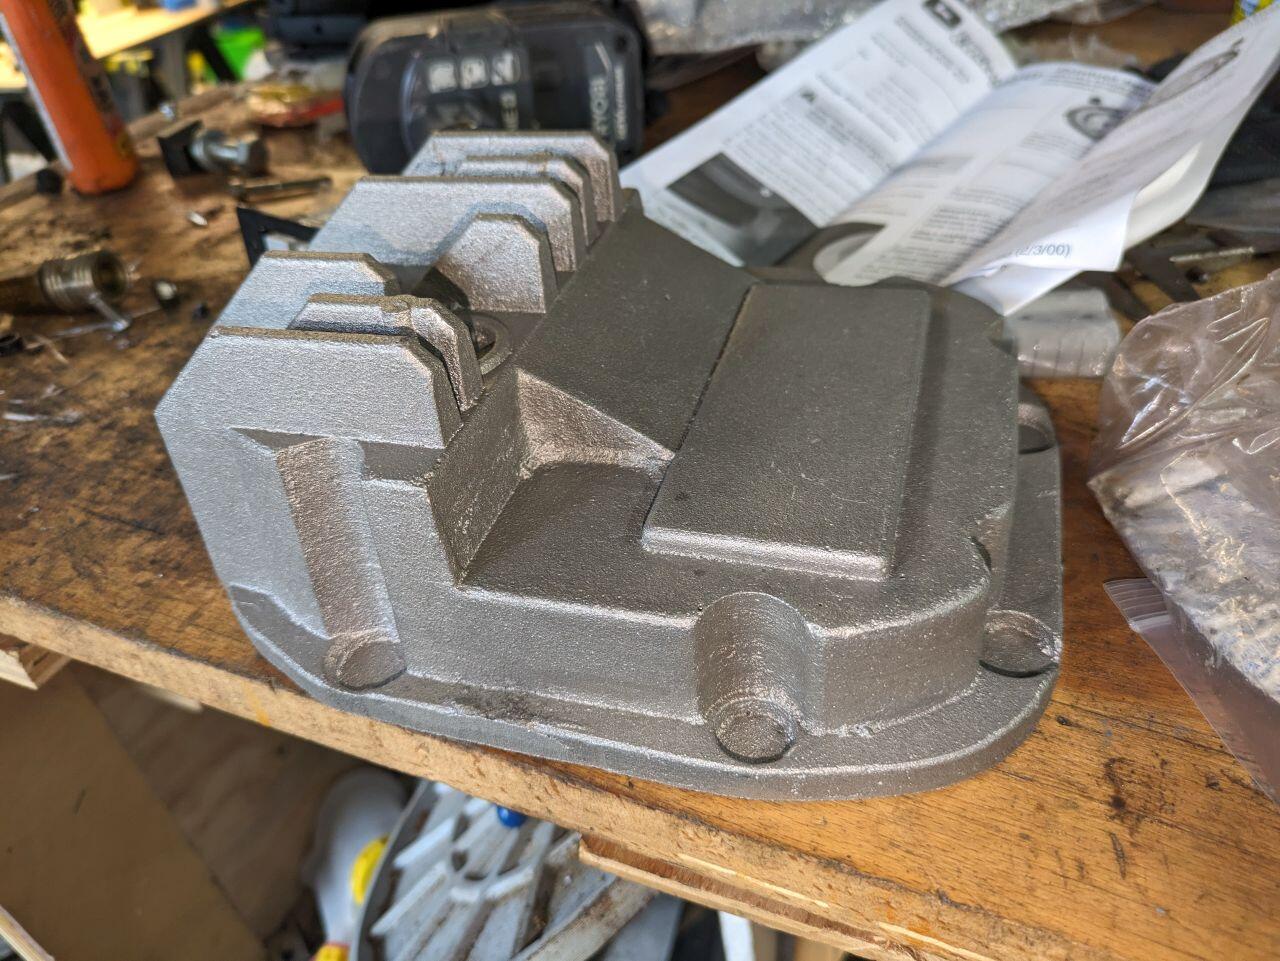
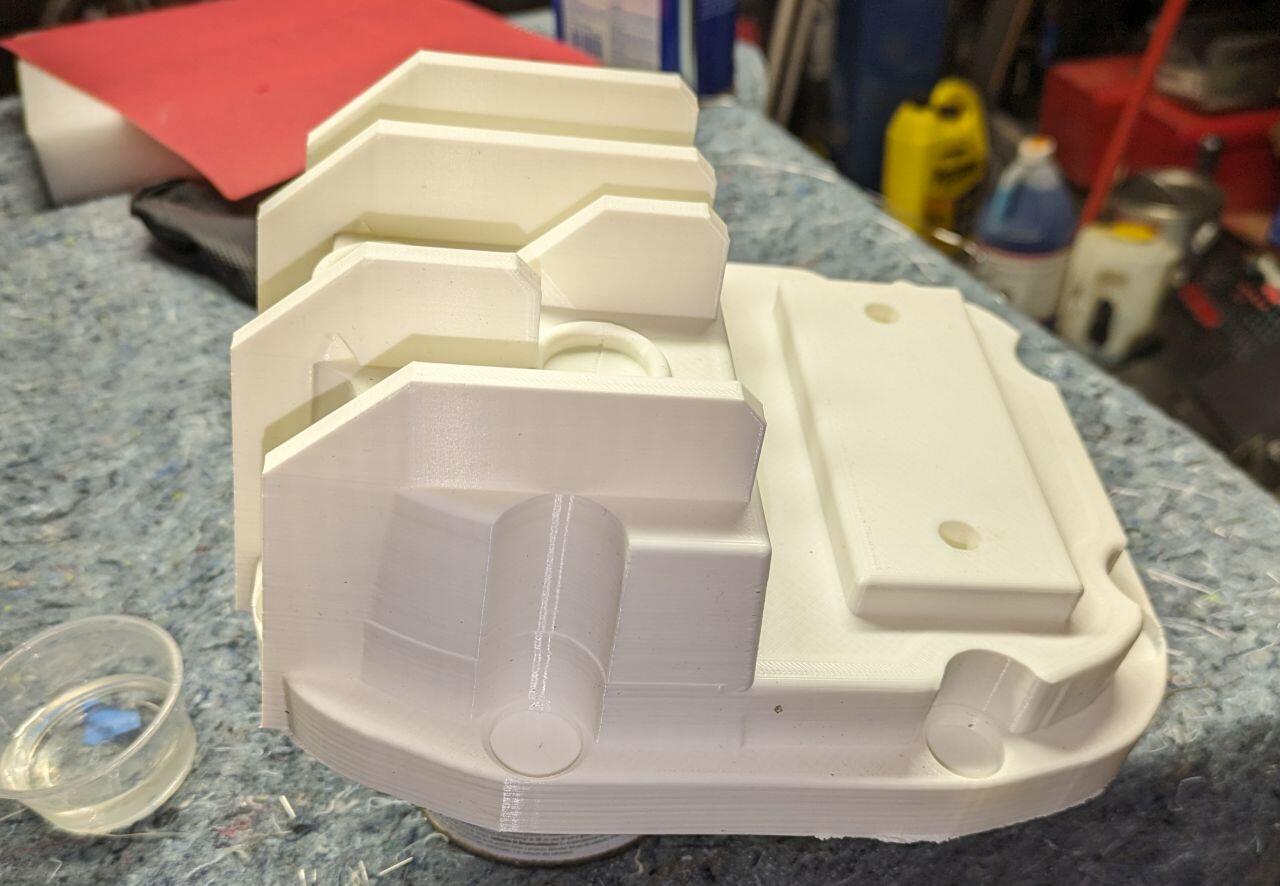
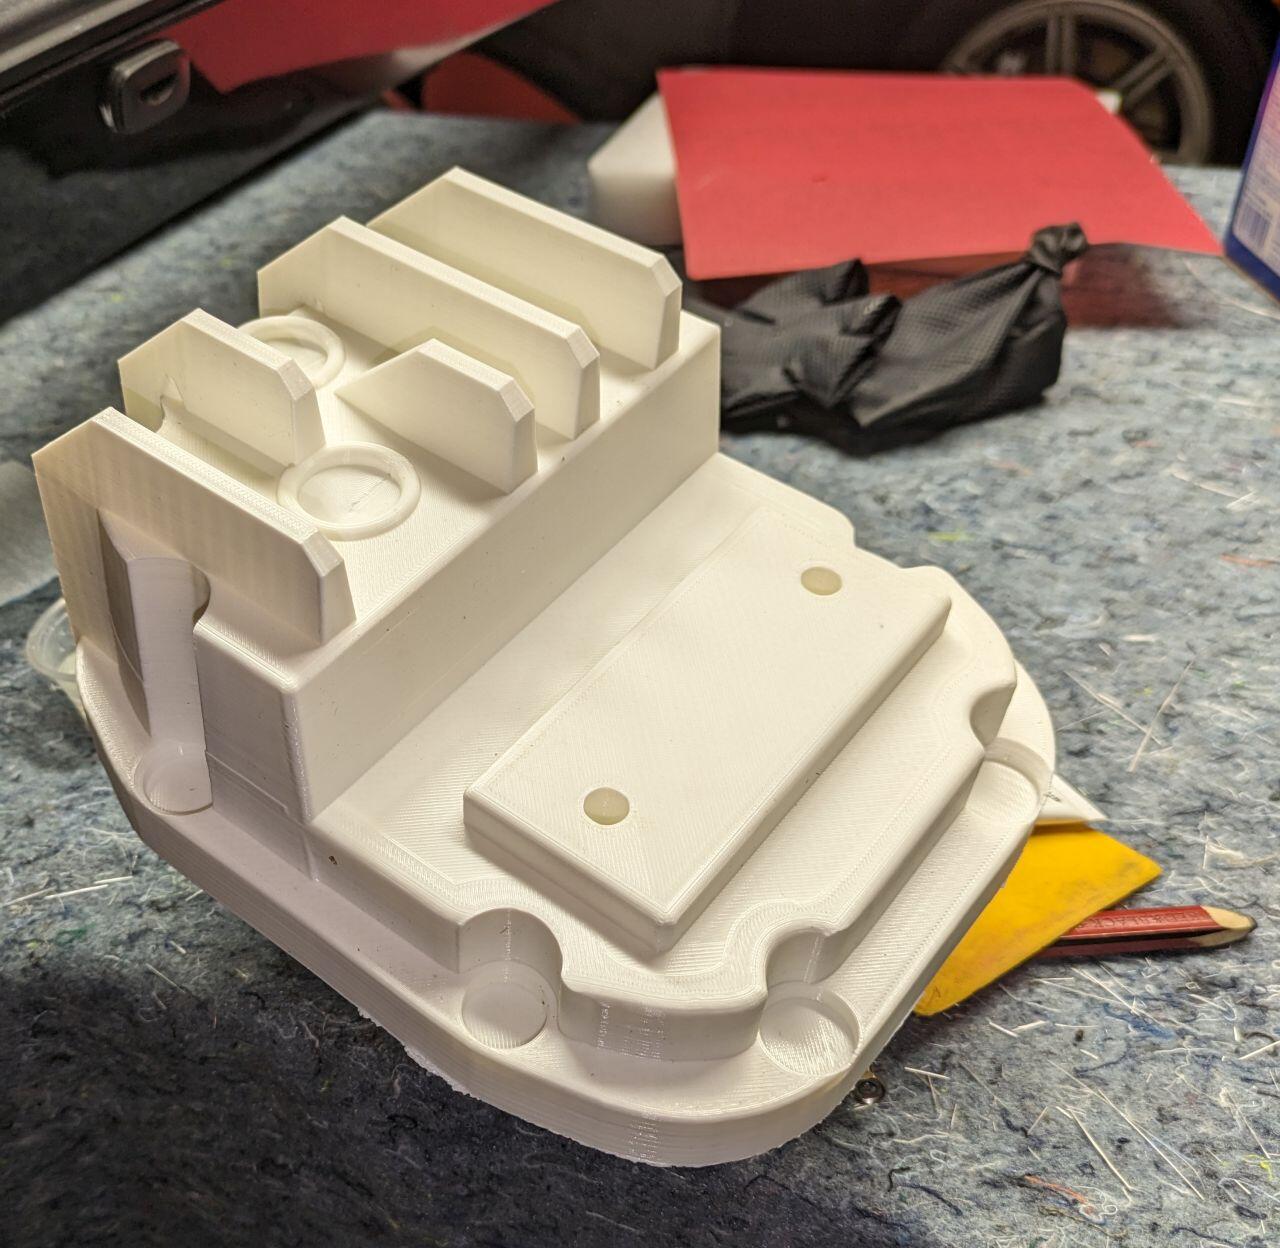
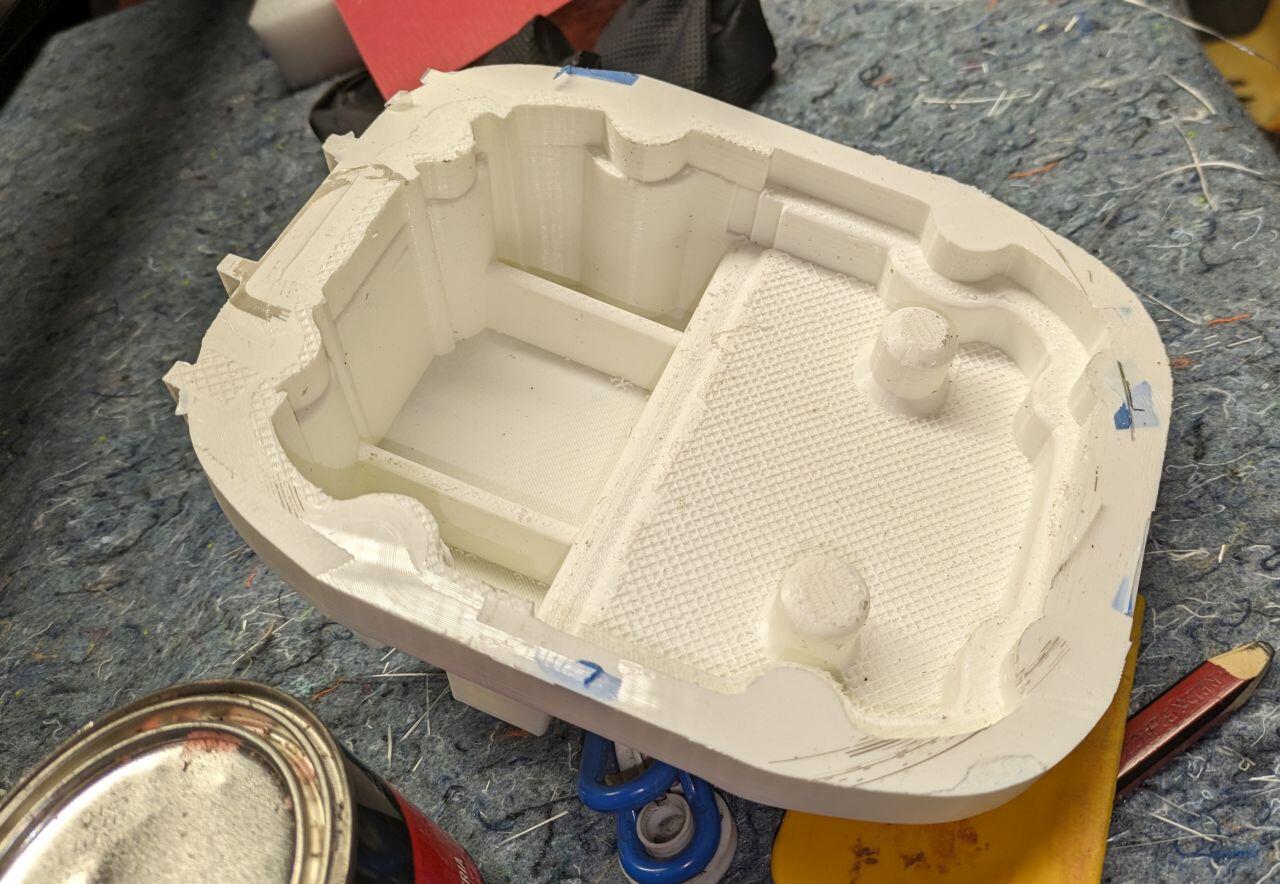
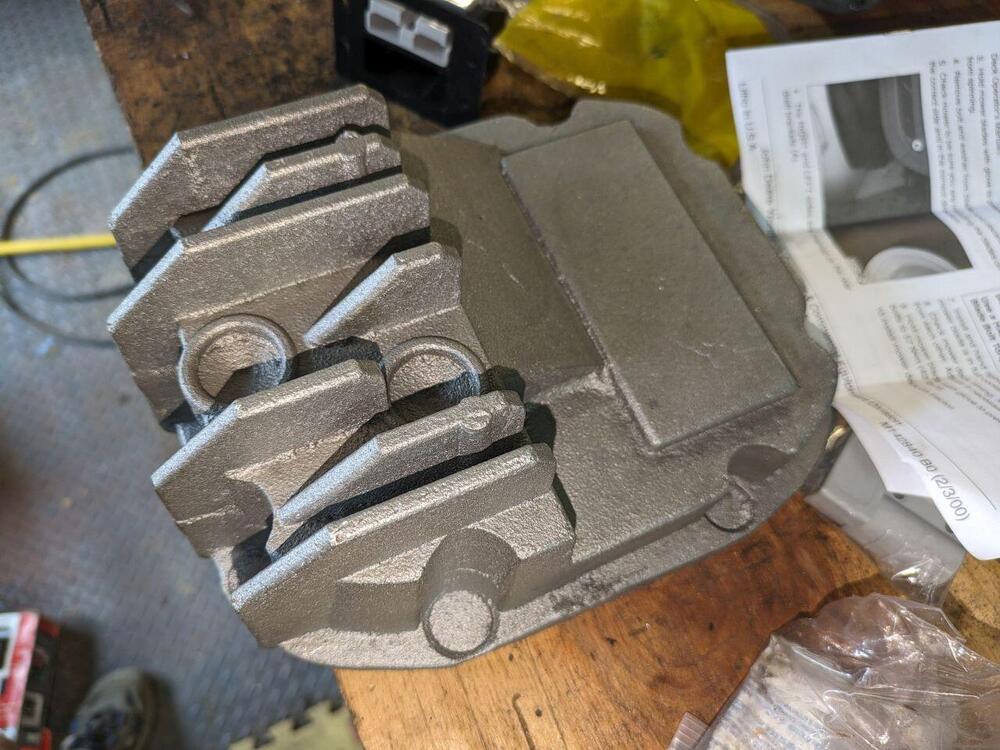
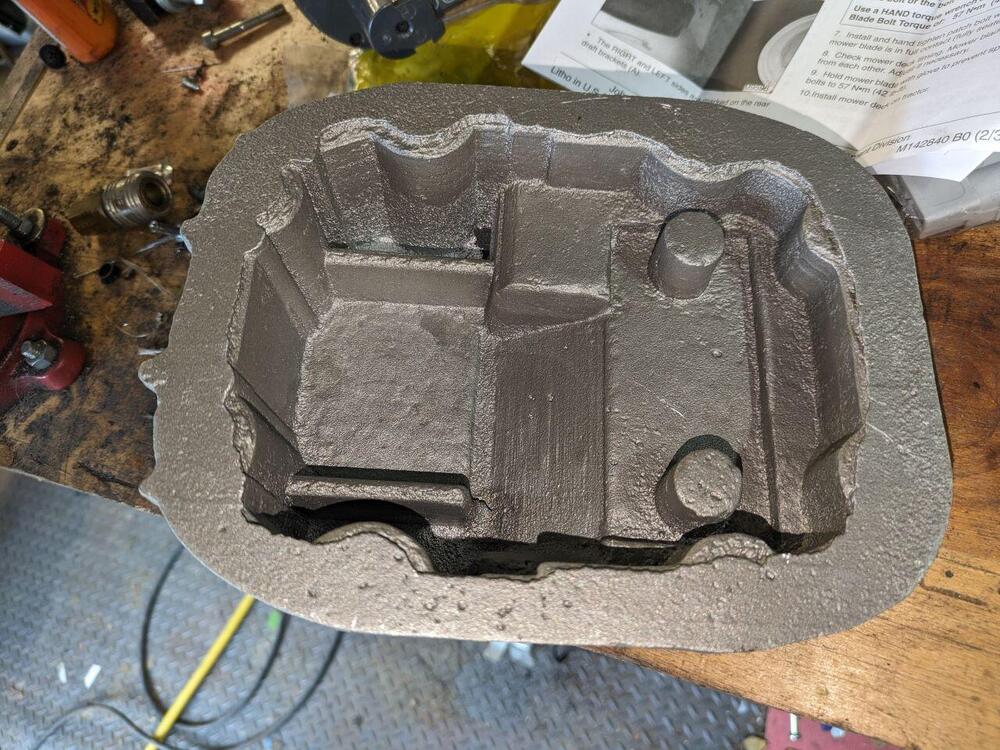
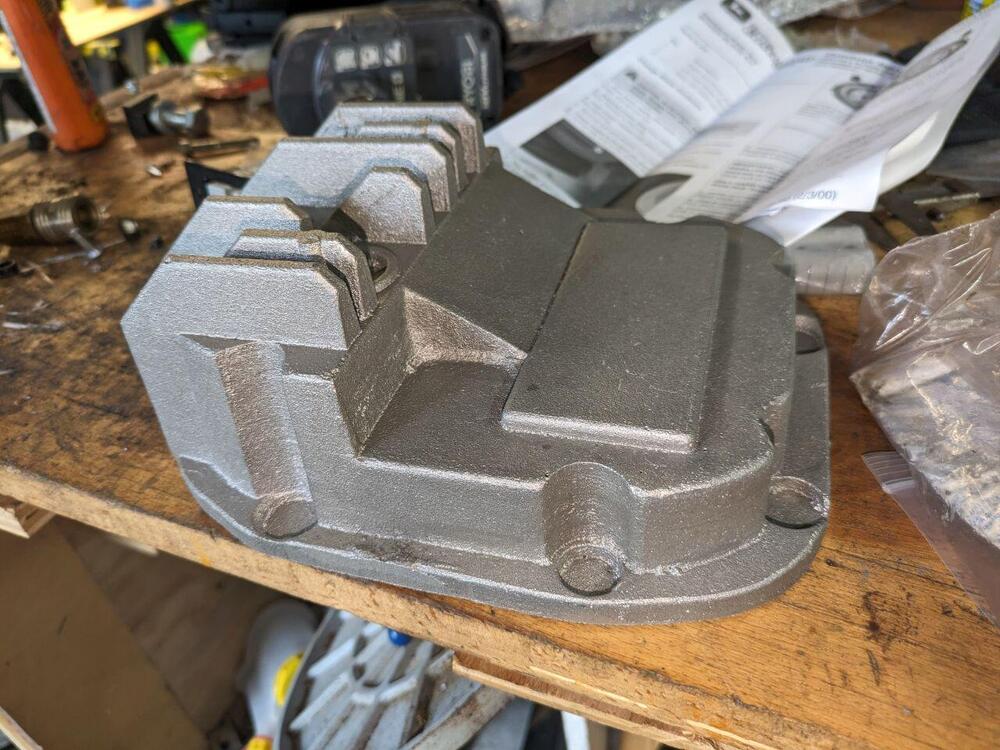
I was just installing the differential with the original cover when the post man pulled up with a package. It came to a little more than expected at around $60 plus $23 S&H, and will need a lot of post-casting cleanup but for a first custom made part, I'm more than satisfied.
-
This is related to a project on another thread. I'm having a custom diff cover cast and need to tap it to accept the OEM plugs.
-
I wonder if it's actually 1/2-inch BSPT? They are almost interchangeable. If it is 1/2-inch NPT I should have one locally available.
-
Does anyone know the threading size for the differential drain and fill plugs. I tried to measure them and came up with 27x2.0 but apparently this was incorrect. My "Thread Detective" doesn't go this high.
-
-
Great mod! Any chance you still have that CAD file? Its a shame to cut up the cross member just to get the two saddles. Great paint job! I've been tempted to get one of the inflatable paint booths for the back yard or create a booth in the garage like you did. For now, I'll stick with vinyl wrap.
-
Patcon, I've been going through the pages of the Lily build and have not spotted that part yet. Can you give me some direction on where that section of the build thread is? Jeff
-
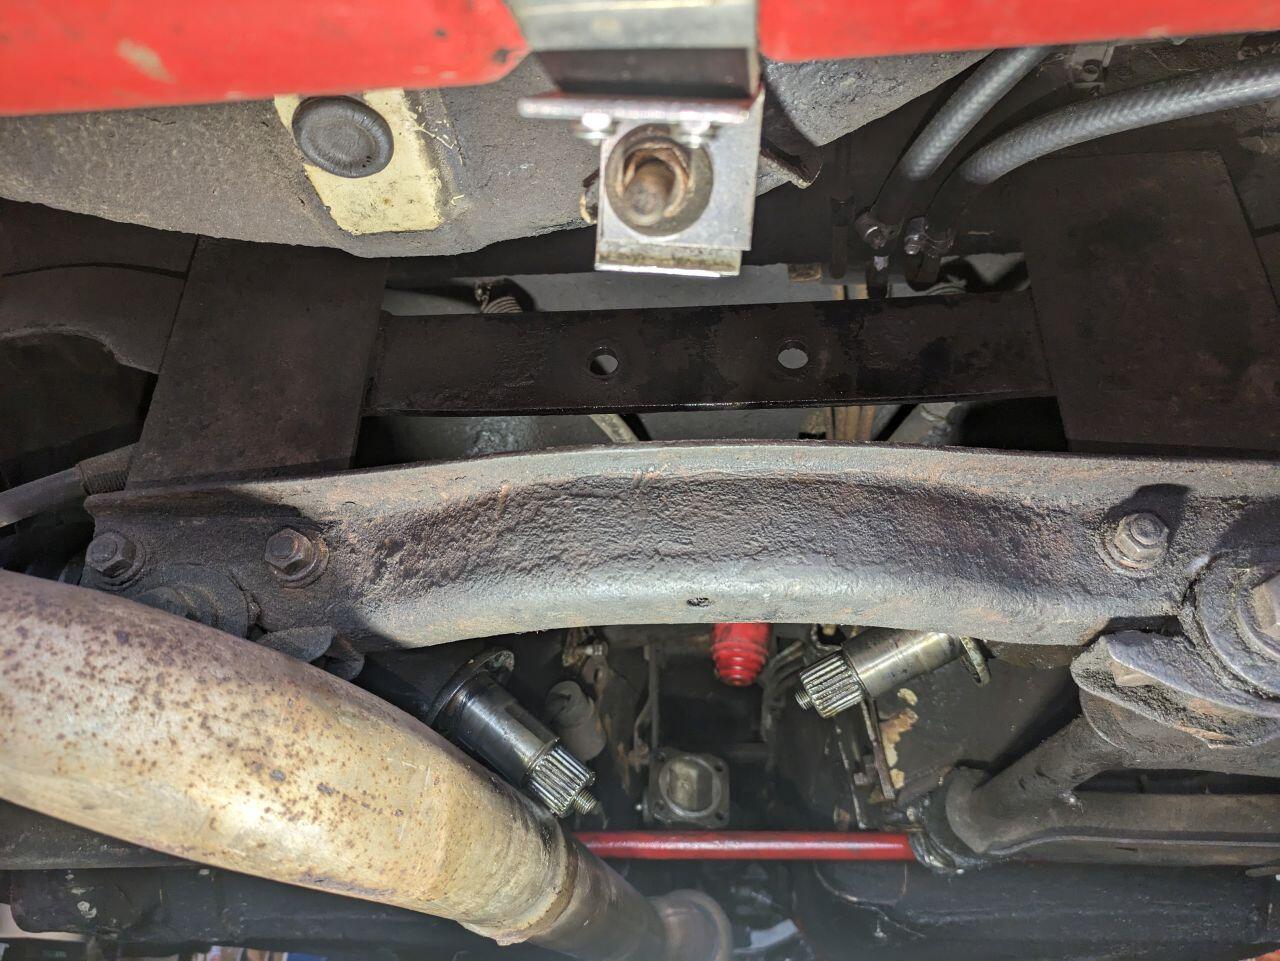
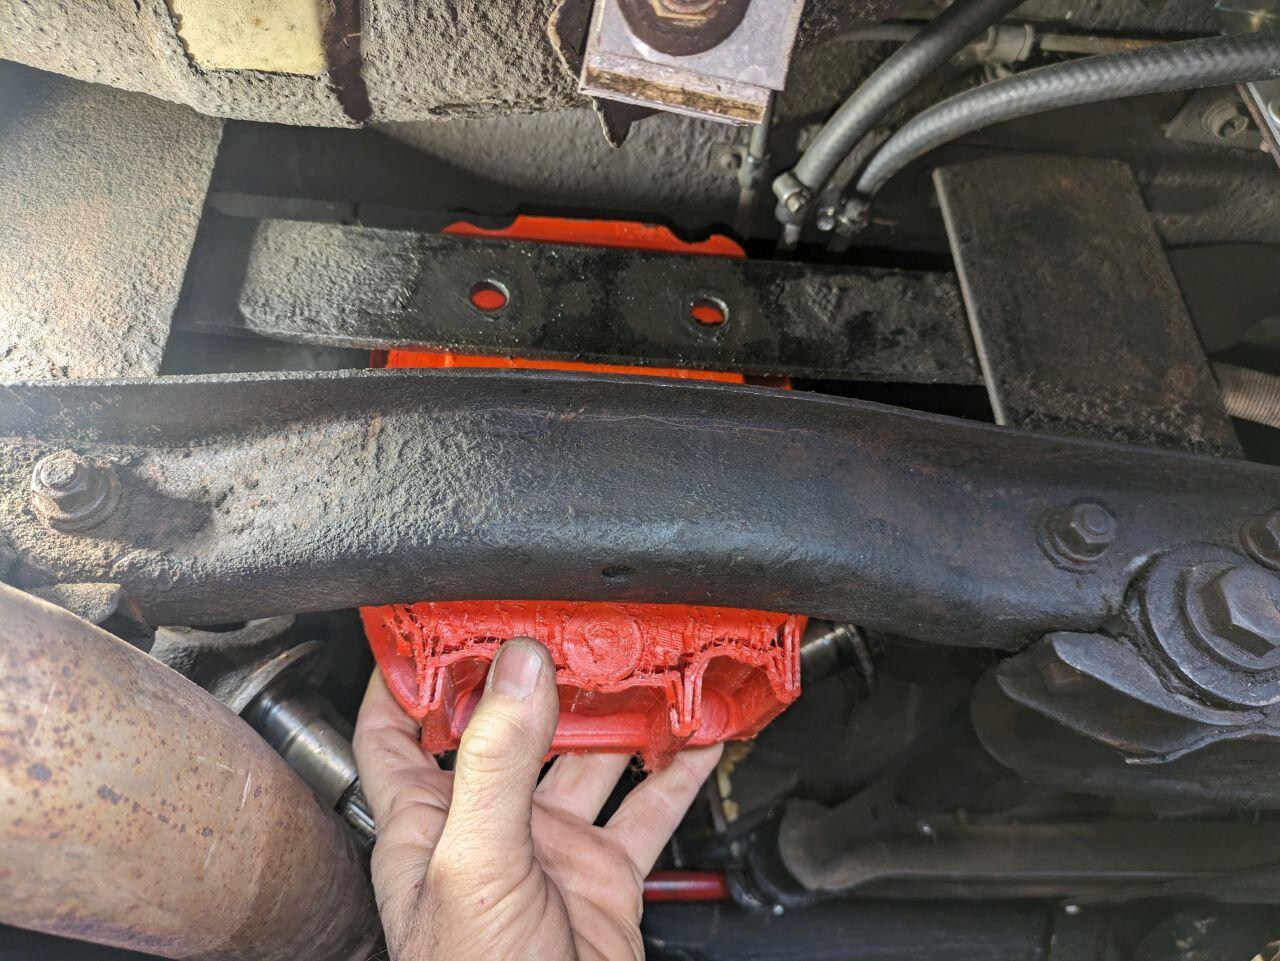
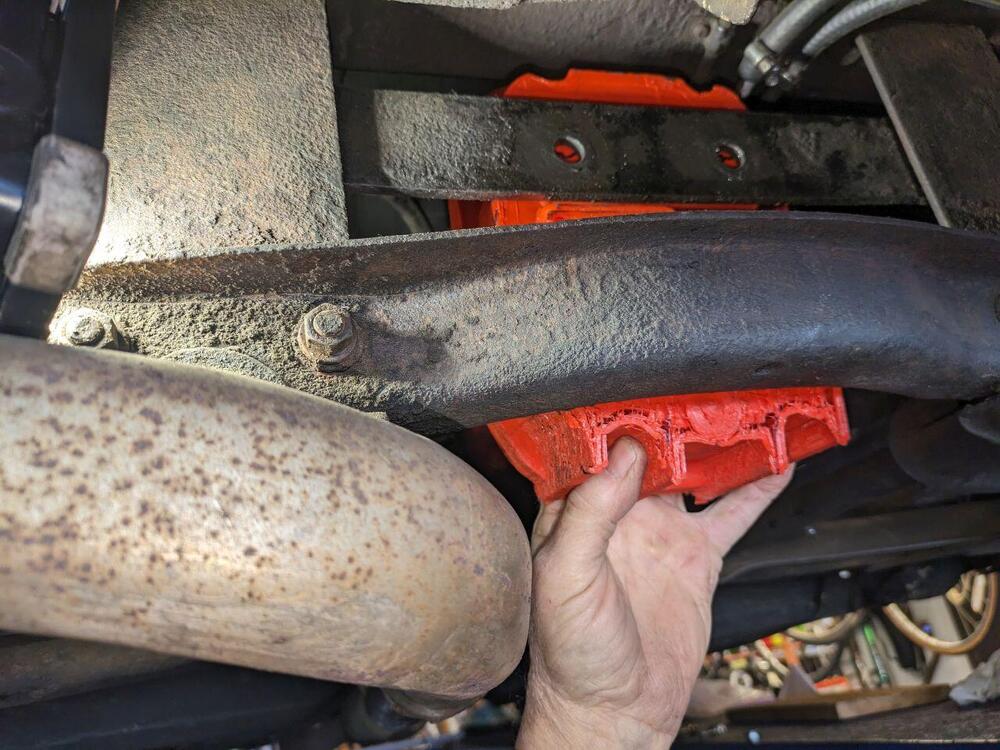
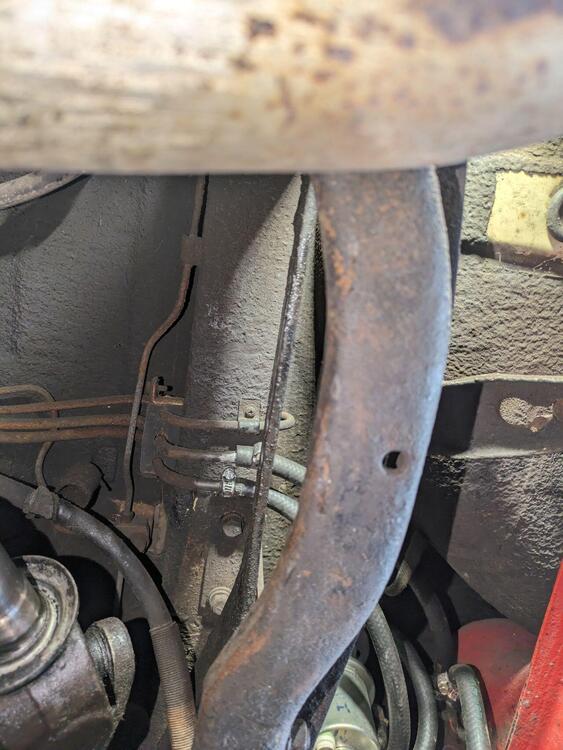
That cross member supports the transverse links which gives me pause. It might be possible to create a standoff to shift the cross member 2-3 inches to the rear. The question is: Does the improvement in heat dissipation from the LSD worth the change in design of the vehicle's suspension supports? It looks like this R200 finned cover had the same issue and required modification as well: https://protunerz.com/products/protunerz-billet-r200-finned-differential-cover My son's partially dissembled Lotus is back under the Z again making this more difficult.
-
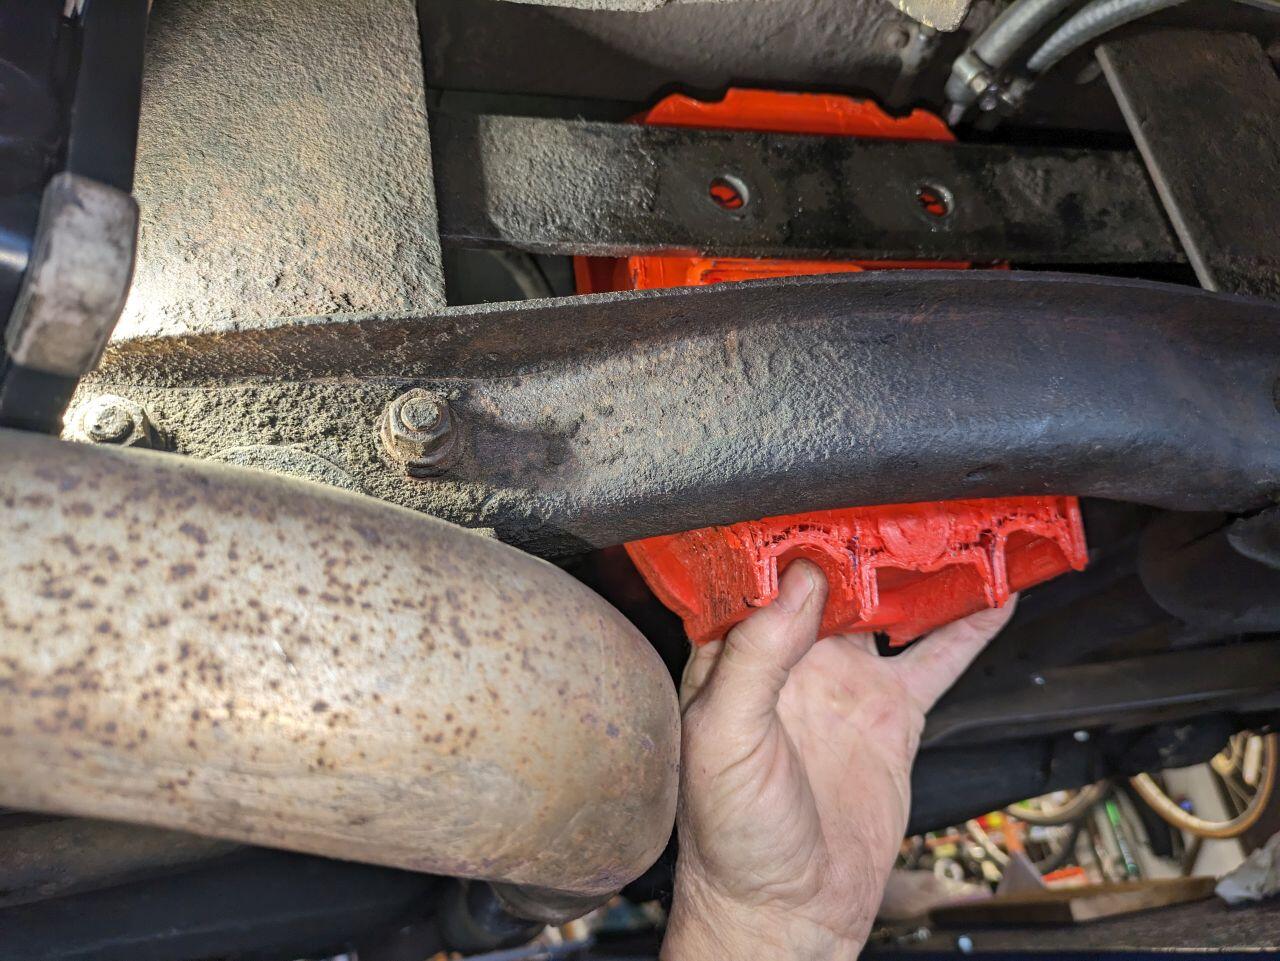
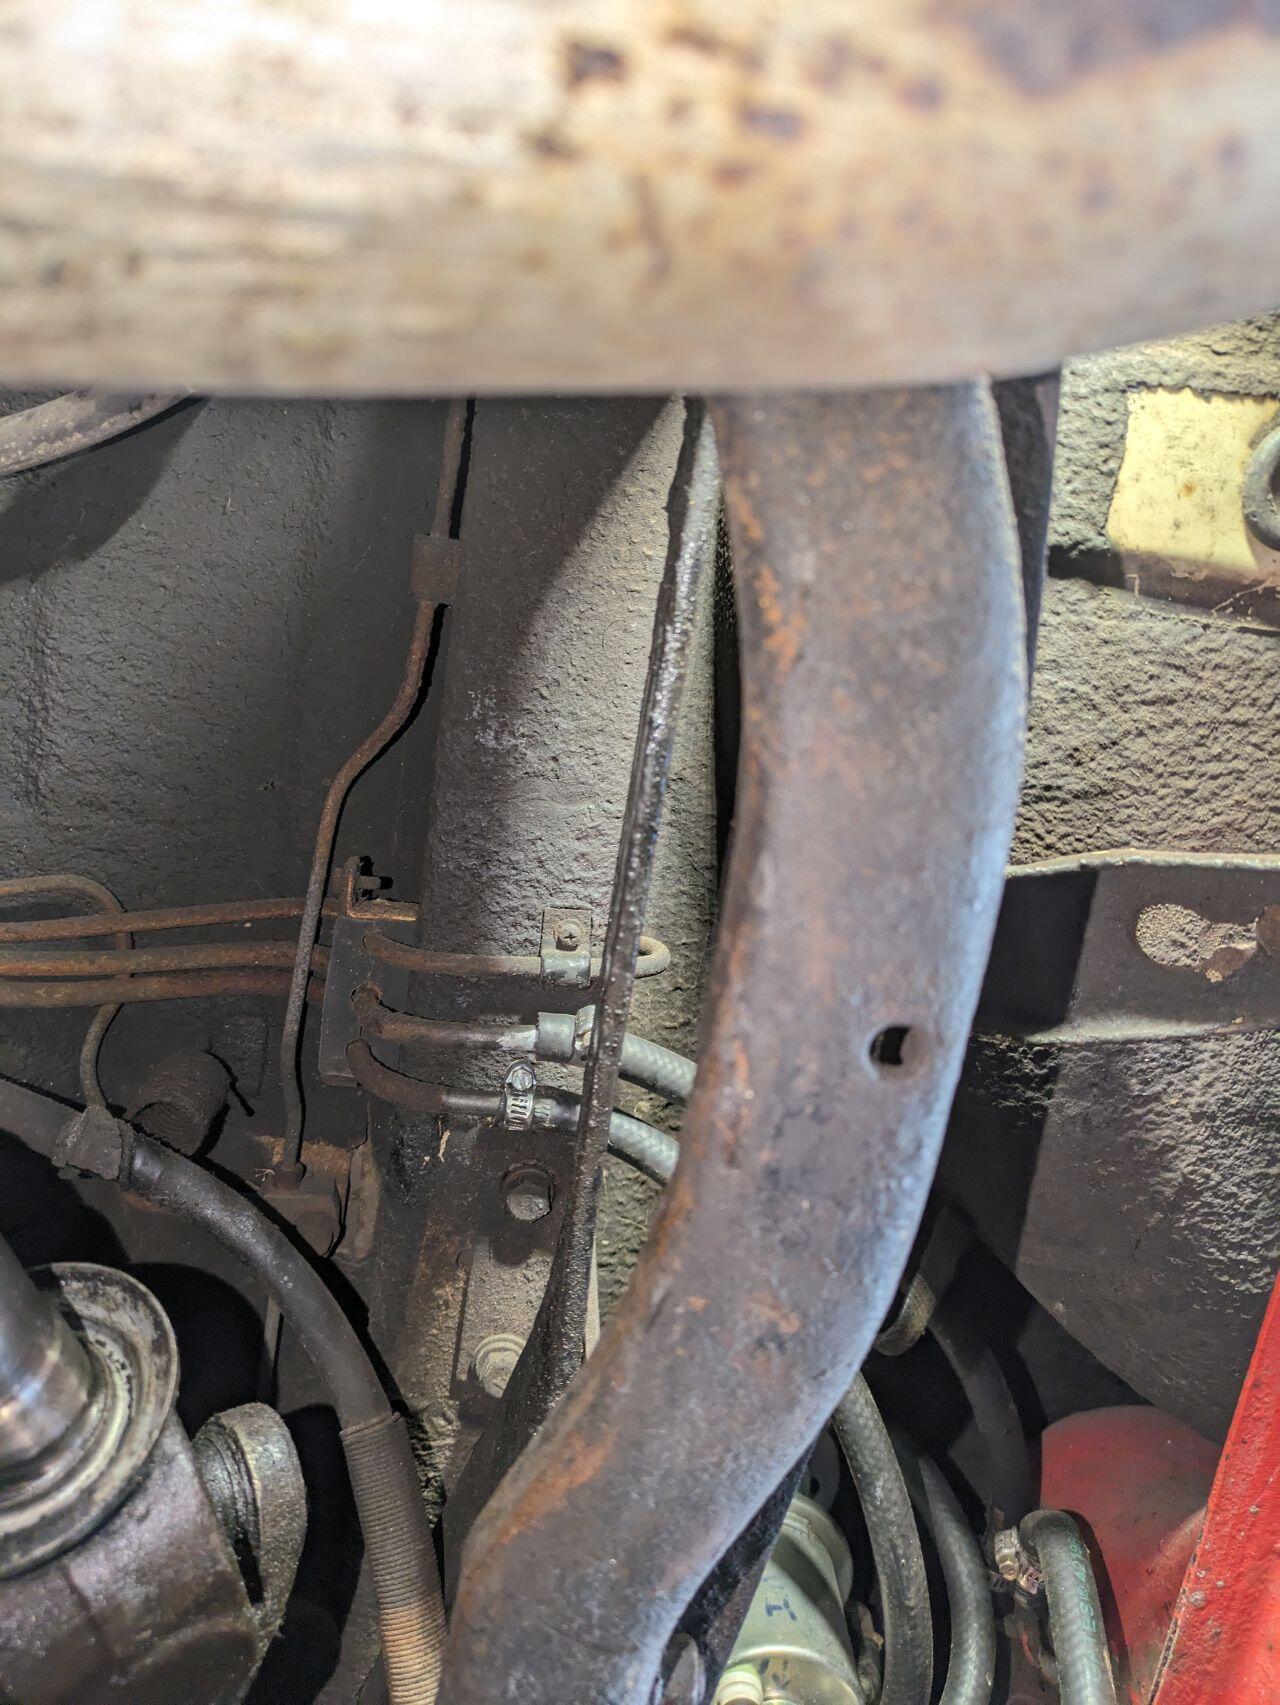
Back to the drawing board. I got my son to push his '05 Lotus out from under my Z which is up on a lift so I could check for fitment. When I tried to fit a prototype onto the mounting points I realized that there is a cross member below it that is in the way. I'm not sure what I can do other than greatly reduce the reservoir volume and size of the heat exchange fins.



-
I saw that video and I included mounting points on the fins to attach a removable 1/8-inch thick scoop. I drilled out the fill plug and treaded it for a temperature sensor so that I could experiment with it during autocross to evaluate the effect. Anyone know the threading on the fill and drain plugs? I'm going to need to order a tap. I also need to locate the fill plug I tapped and promptly misplaced. My shop is a tiny corner of my garage and I still manage to misplace things.
-
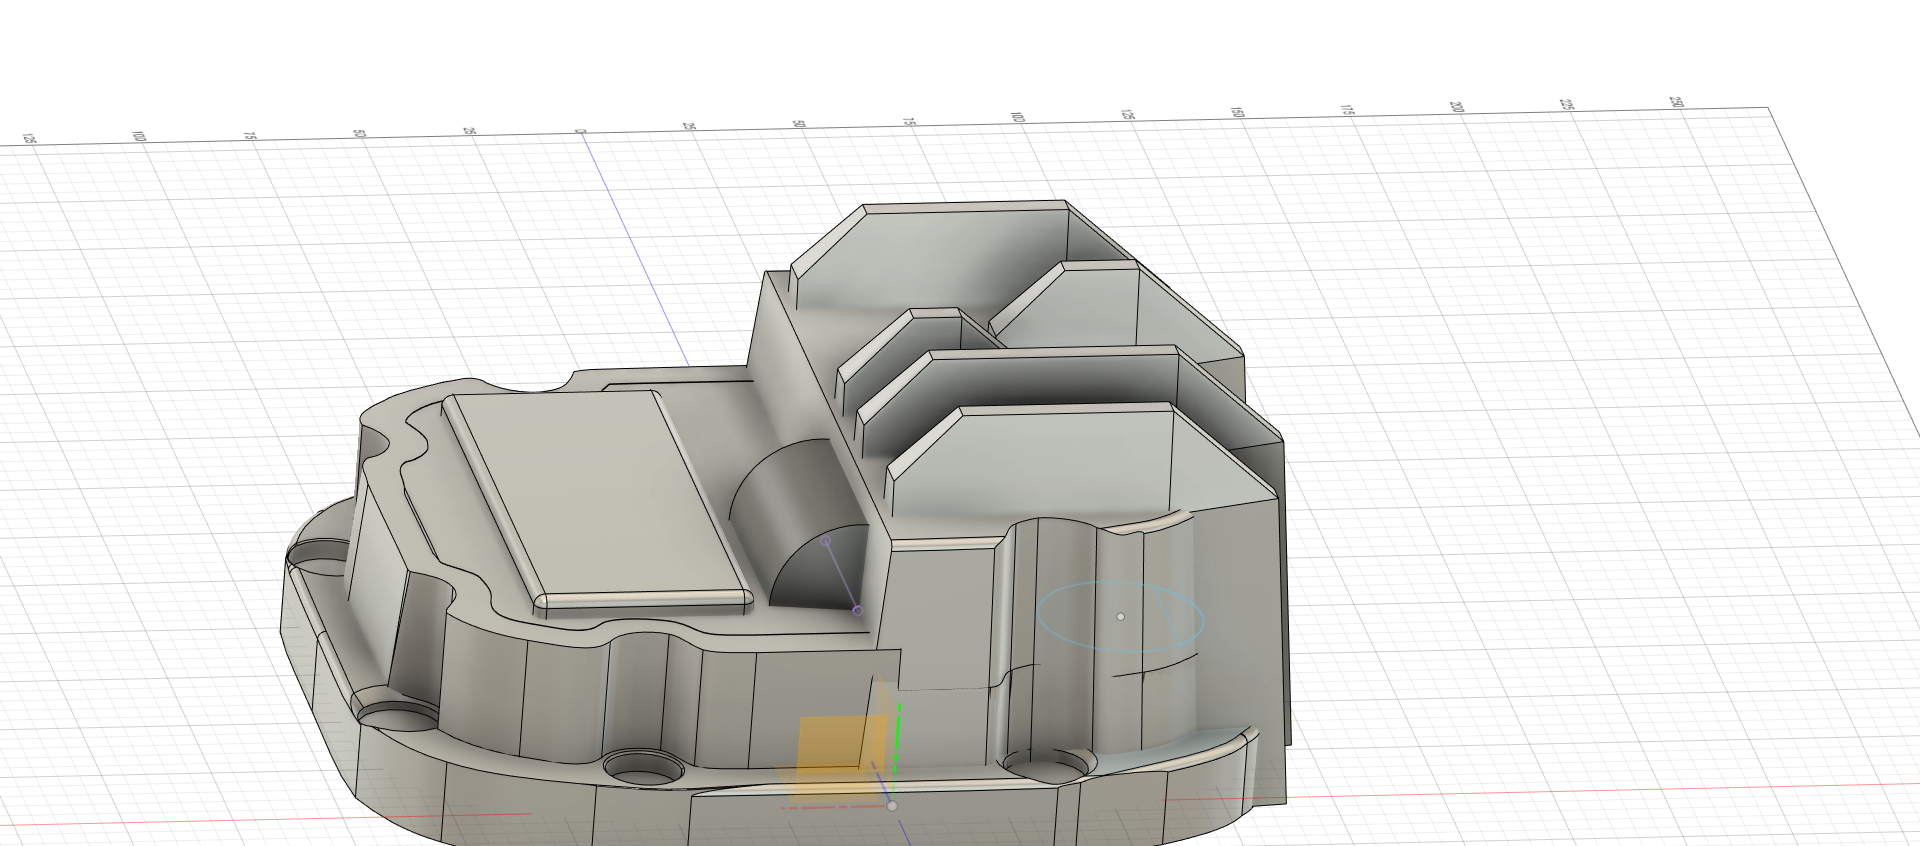
Right now it's looking at about eight pounds. I'm using the software to apply fillets where I can and I'll round the remaining edges post printing. The attached obj file is a viewable 3D file. It can be viewed using Paint 3D although it takes a couple of minutes to load. The stl file might work better depending on your software. differential with draft Rev 3 v5.obj differential with draft Rev 3 v5.stl
-
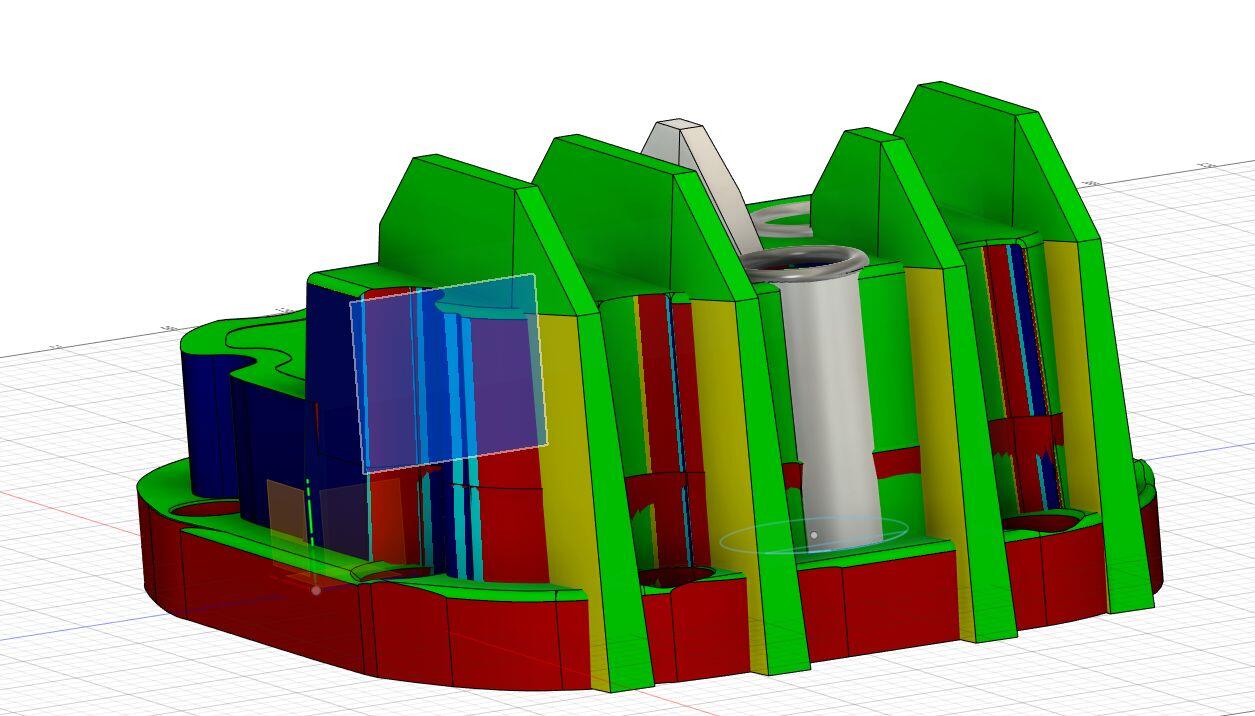
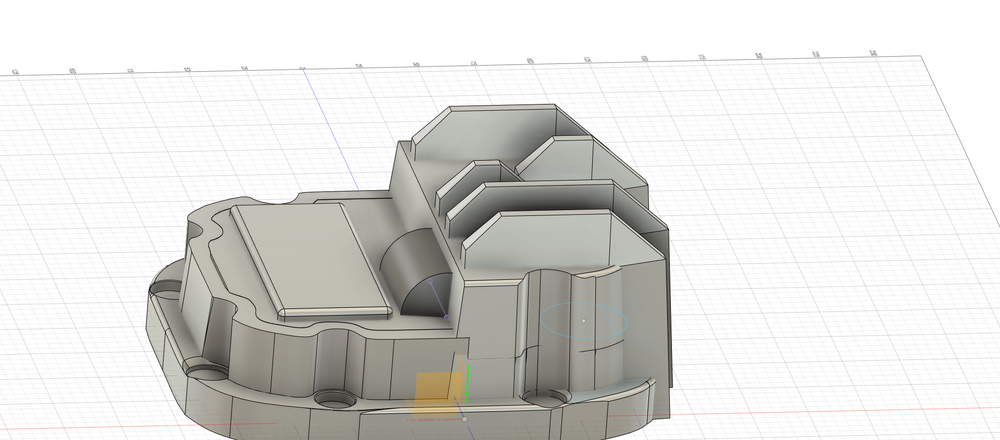
CO, Emmanuel didn't seem too concerned about the areas you marked so I'm assuming draft is not too important if the depth of that portion of the mold is not too great. I'm also not too competent in using Fusion 360 so adding draft in some areas could take me hours, if not days to figure out. In some cases, I've had to scrap the model and start from scratch. I'm currently struggling with modeling a channel to promote fluid circulation from the spinning ring gear. What is shown in this version is actually a model of the cavity. The solid portion of the channel will be covering it and then I'll change the channel part to a "cut". I'm sure the shell command would work better but I'm not too proficient in its application. Time is running out because Emmanuel only does aluminum castings every 3 to 4 months. If anyone has a suggestion, please speak up. Jeff
-
CO, Thanks for showing that. I think I have it fixed now. I used the drift feature in 360 Fusion to the angles until they changed from red. I'm considering adding a channel to aid in the flow of fluid that's splashed up by the ring gear. Grannyknot, You mean a group buy so we can get this part even cheaper? Lets wait until at least we see if this part works. Also, keep in mind that (1) a lot of post-cast work is necessary, and (2) I don't know what I'm doing. Jeff

-
I just got a call from Emmanuel at Cattail Forge and his only suggestions based on the 3D print I sent him were to add draft to the cooling fins along the bottom and to create the holes for the mounting studs using a template post casting. He also said that I should assume 1.3% shrinkage (there's that image again). I confirmed with him that labor would be about $35 and the aluminum was $3 per pound. His next aluminum forging will be in about 4 weeks.
-
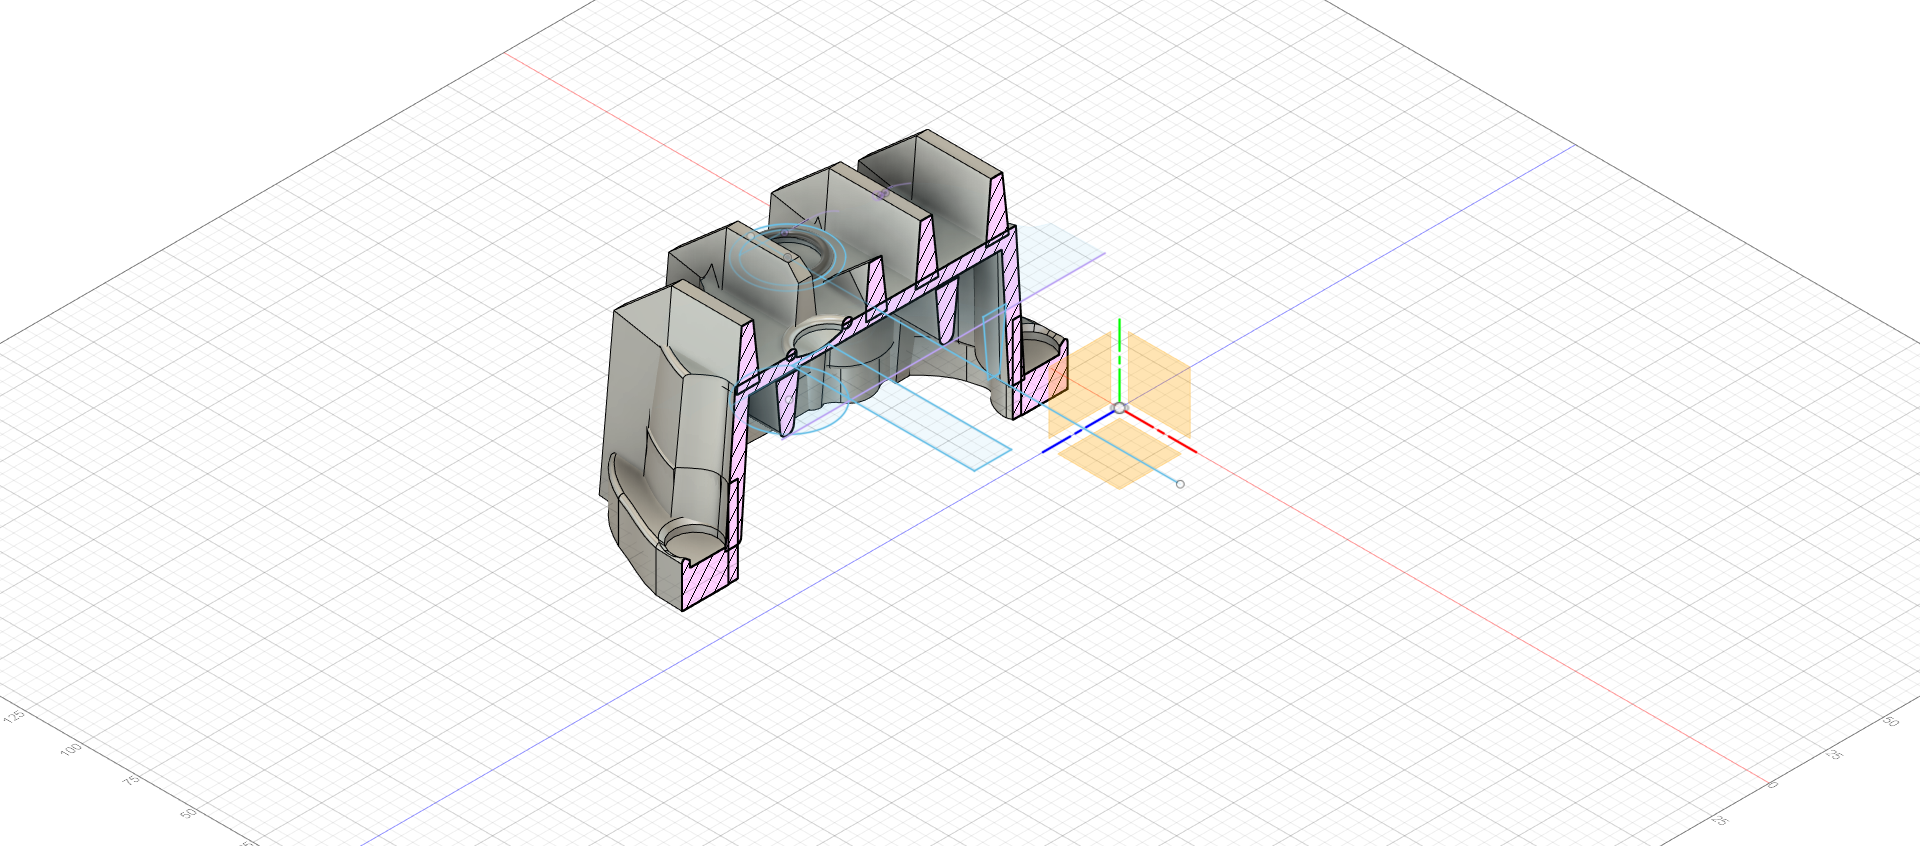
I originally tried to use a 3D scan but that got to difficult using the available software so I started from scratch. This is likely my 3rd iteration of the part. The problem with the version in Post #16 was the expanded reservoir did not have enough draft and the only way to add it was to redo much of the reservoir. The internal bracing was mostly eliminated because I felt the one I was modeling seemed to be thick enough. The internal fins were intended to provide better heat transfer and also some internal support. I was considering adding some internal channeling in the next iteration along with suggestions offered by the forger.
-
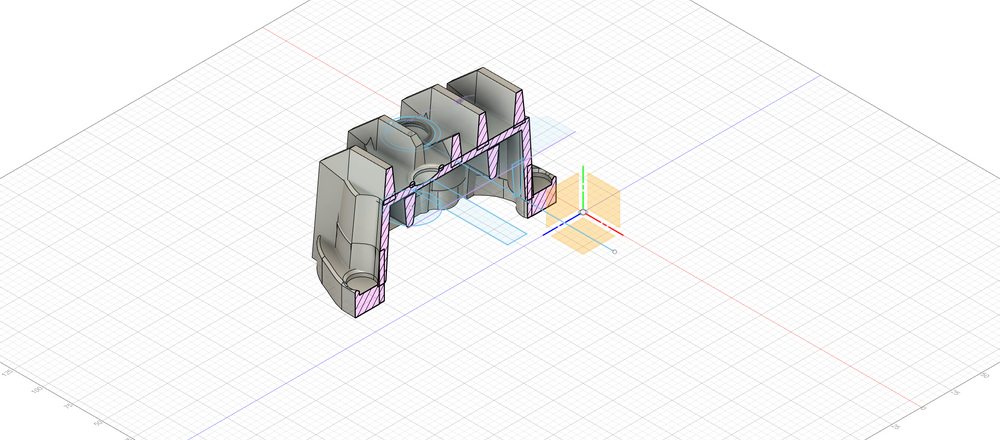
CO, Thanks for the review. I agree about the mustache mounting holes. The fill hole is offset from the internal fin. The Inspect>Section Analysis feature in Fusion 360 was handy for positioning these features. Unfortunately, I didn't spot the Inspect>Draft Analysis option in Fusion until after I printed the part. I noted a few faces that looked troubling in the analysis in my letter that accompanied the part to the forger. There's a steep learning curve with Fusion especially if you are not a CAD person. Unfortunately, it looks like you and the forge are about 6 1/2 hours away. Jeff
-
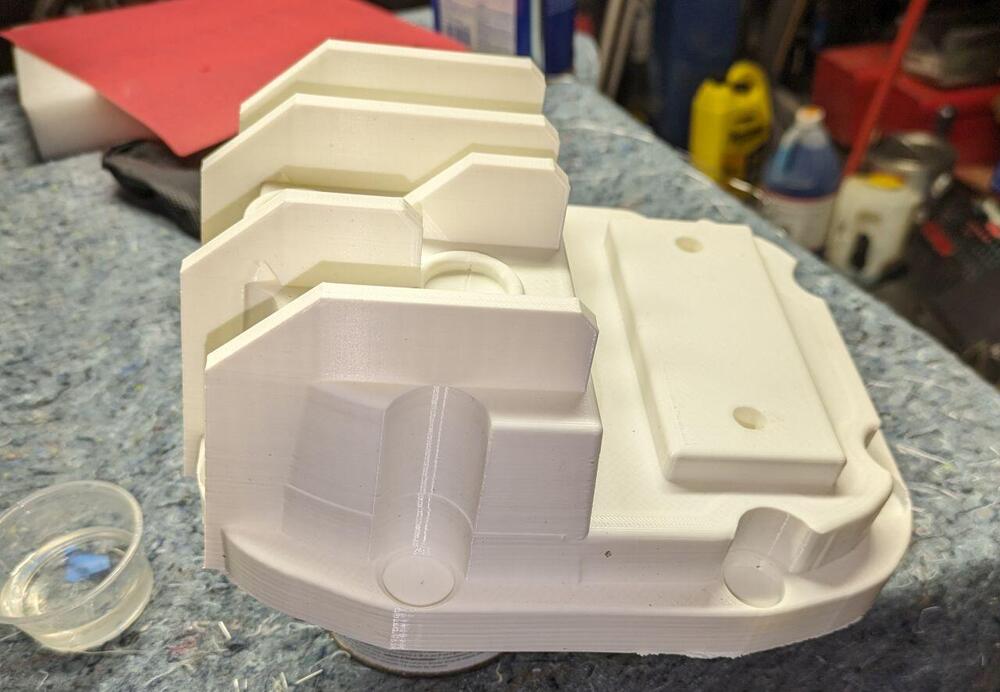
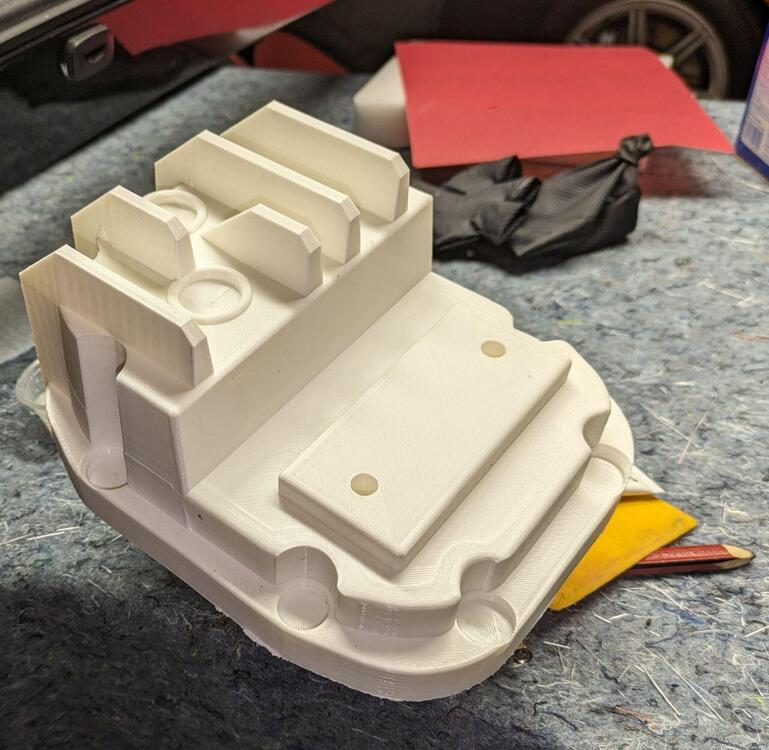
I just got the prototype printed. It took ~45 hours and 450 grams of PLA plastic. I test fitted the cover on my diff and there was a clearance issue that I'll need to address in the next iteration. I'm sending it off today to the guy in PA with a forge for him to offer suggestions. That brings up the question, is an operator of a forge called a forger?

-
I don't fully understand the process but I'm sending the caster a 3D printed part for them to create the mold. Its tempting to visit the caster's forge but its a 5-hour drive.
-
That adhesive is about $100. I actually have some conductive adhesive for attaching aluminum heat sinks to electronic components. I might give that a try and see if it helps during an Auto-X (and see if they stay attached).
-
I did look at the Banks video and borrowed some ideas from it like adding an under differential air deflector. His temperature studies also was the reason why I added a temperature sensor to the fill plug. I'm planning on using the original diff cover and observe the temperature during one or two Auto-X events. After that I need to change the oil and I was then going to try the new cover and see how it impacted the temperature measurements.
-
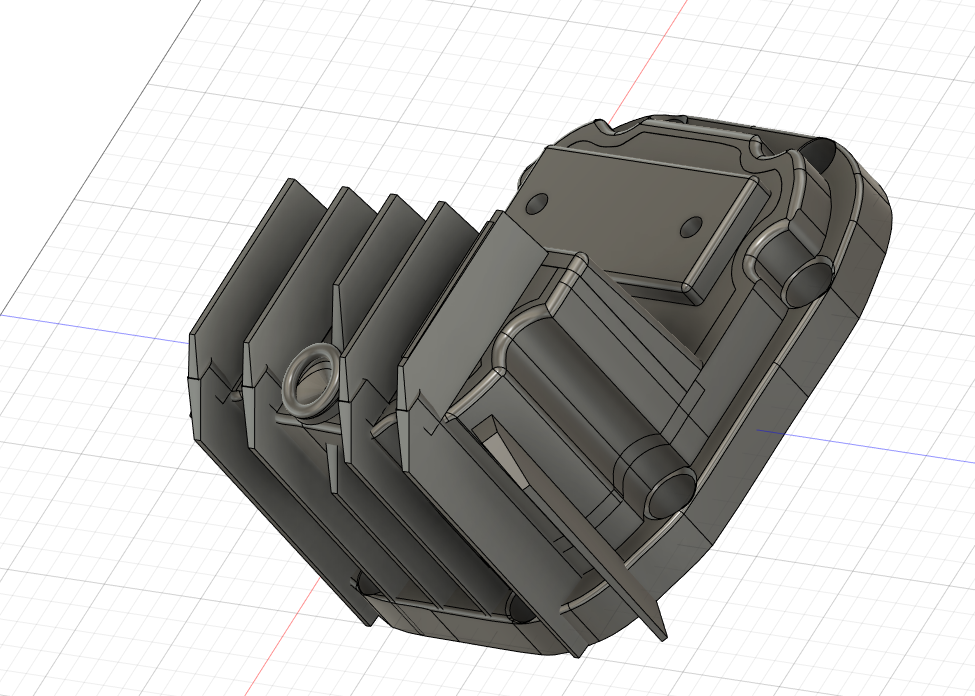
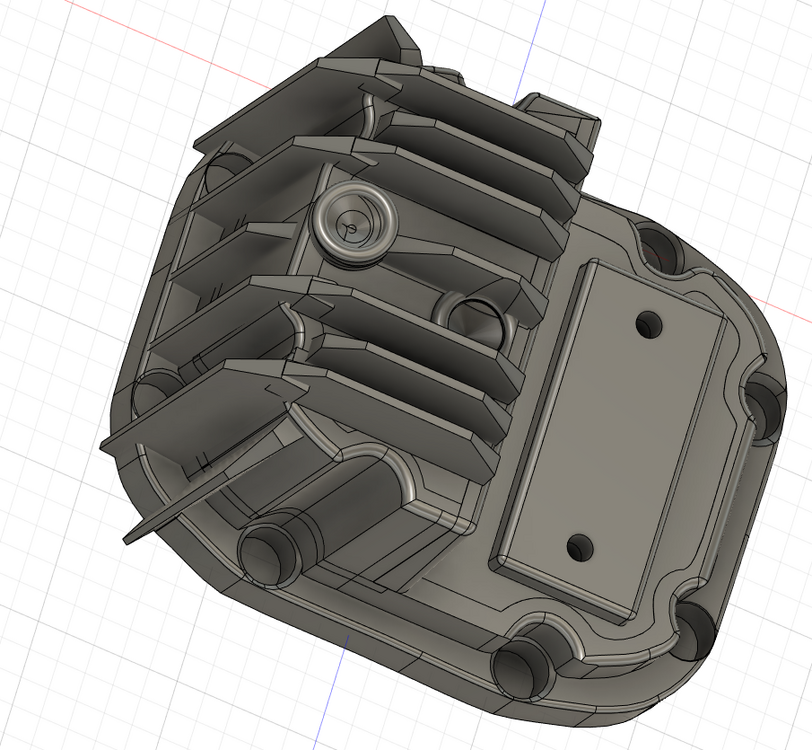
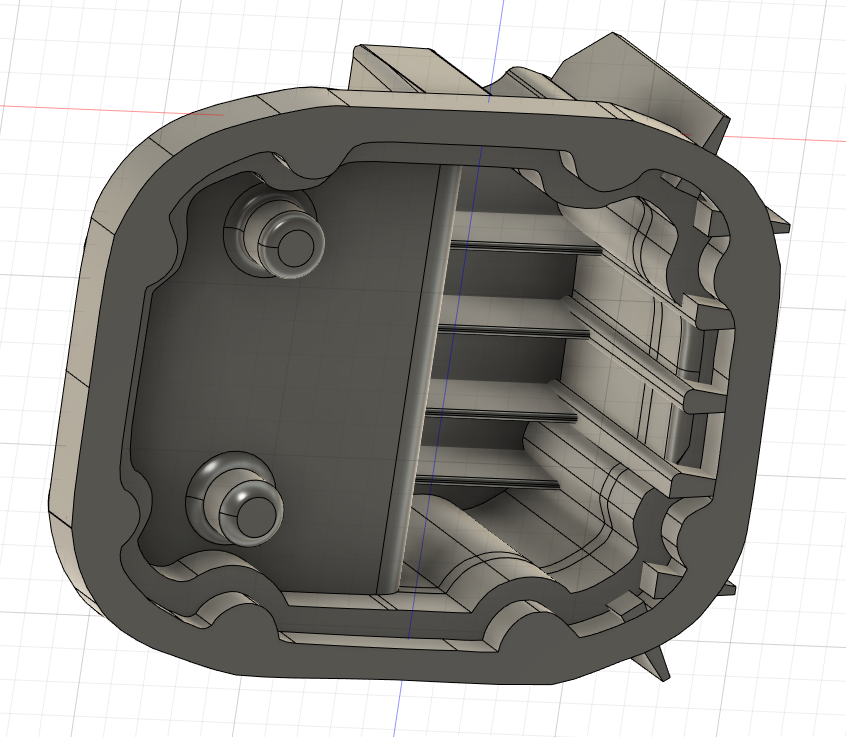
Thank you for all the input. My knowledge base for casting is at the low end as I’ve never had casting done for anything, but this is a chance for a new adventure of sorts. I’ve modified the design based on comments, and I was planning on printing a 3D test piece to send to the caster to review. I recall that he said to keep parts to ¼ inch or thicker and to have a draft as CO called it to make it easier to separate parts from the mold. I think that the concern might be that the separation of the 3D printed part from the sand to form the mold and not the separation of the cast part from the sand, but what do I know? Besides external fins, I’ve also added fins to the interior to promote heat transfer between the fluid and the aluminum although aluminum to air is likely the more important thermal transfer concern. The interior fins should also add strength to the bulbous oil reservoir. I was planning on doing all the drilling of the holes post casting. With all the points CO brought up, I think this part is not going to happen for a few months while I research the process a bit more and communicate with the caster.
-
When I called in December they said they will be doing aluminum in 3-4 months so they are likely a very small, busy operation. I'm going to enlarge the entire structure using a percentage of around 6.5% to allow for shrinkage*. I guess if dimensions are critical, you don't use cast aluminum which is likely why you need shims when assembling a cast aluminum differential. *Every time I see the word shrinkage I think of that Seinfeld episode.

-
My worries about the fins was that I don't know how thin I can make them. They are 4mm across the top. I was warned that they need to be tapered to allow them to release from the mold. I have a spot on two of the fins where I can attach screws to mount an air deflector to direct air flow from below the differential across the back. I don't know much about casting but my understanding is that the Cattail Foundary uses sand casting. They only do aluminum every few months so it might be a while for them to get to doing it. All they need is a 3d print that is scaled to account for shrinkage. https://www.lancasterfarming.com/country-life/antiques-and-history/cattail-s-customers-come-from-near-and-far/article_bfdbf807-69b1-5194-9fee-762e003d46dc.html Back to my original question, does the presence of an LSD heat up the differential more than an open differential? Should I increase gear lash slightly to account for the increase in temperature? I notice that my gear lash (pinion to ring gear) decreased when I installed the LSD so I had to do some shim adjustment.