Datsun Dealers
Community Member
-
Joined
-
Last visited
Everything posted by Datsun Dealers
-
-
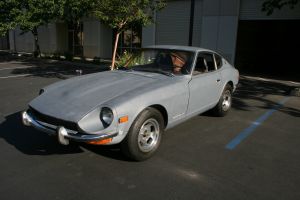
Bought my silver Z January 2012 from Greenville, SC. Orange Z was sold fall 2014.
-
Please excuse my bluntness. This guy's dreaming. How does a tire shop know if an odometer's rolled? You might restore this car and claim 80,000 original miles with tire receipt, but nothing will be original. Some real World ends of the spectrum. I bought my running 1973 240z for $3600, delivered, with a $500 "military discount." Previous owner had it 34 years, he didn't remember much except he had the carbs switched. 15 year old paint. Minor fixable rust. A box of paperwork and $2500 in recent work. These were taken the day I registered it. On the other end, I found an orange '73 with a 4 barrel Holley I picked up for less than $500. I got it running, new fuel pump, clutch master and slave. The interior was about as rough as the one you showed. A few dents on a few panels. It had a lot of new maintenance parts (starter, water pump, brakes, oil change receipts)...but floors and rockers were pretty bad. I sold it for $1750. The guy told me after switching to a smaller 4 barrel he's driving it to work. And this one has been on eBay a few times, but ended at $3,000 this time. It's an Arizona car. http://www.ebay.com/itm/Datsun-Z-Series-GT-Coupe-/231541682842?vxp=mtr
-
From the album: 1973 Datsun 240z
-
From the album: 1973 Datsun 240z
-
From the album: 1973 Datsun 240z
-
I'm not sure if you've totaled it up, but here are MSA's prices for bumper rubber. 70-72 Vertical (guards) $32 each rear 70-72 Horizontal $59 each rear 70-72 Vertical (guards) $22 each front 70-72 Horizontal $38 each front That's a total of $302 before tax and shipping. My theory is that if you've spent a year and a half trying to restore your Z to as near original as possible, you should go for the original bumpers. If you had modified it, then I would say go for the JDM bumpers. Like others have said, if you ever sell it, all the effort towards originality will be wasted to the purist who sees the JDM bumpers.
-
-
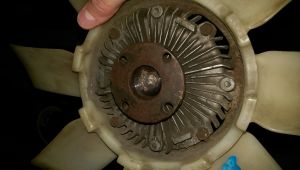
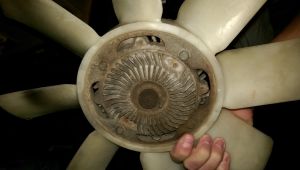
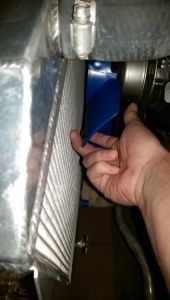
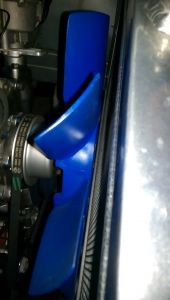
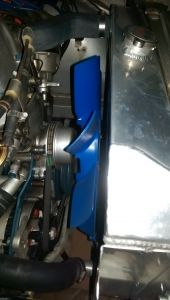
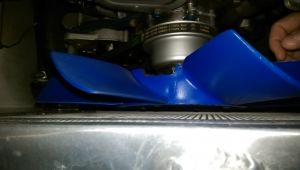
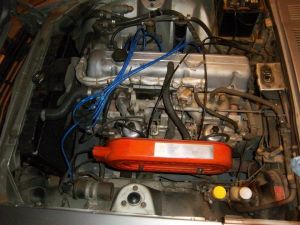
After looking at my own car, and another spare fan, the fan is definitely backwards. And there is definitely an offset when you mount it. When mounted correctly to the clutch, the mounting surface is at the front of the fan. Flipping it will give you about a half an inch of extra room. Did you have cooling problems beforehand? That fan is definitely not pushing as much air as possible to your engine. Here is the spare fan for the offset reference, and photos of my clearance between a Champion 4 Row radiator, with an original fan, and new Nissan motor mounts on a '73 240z. It has more room at the top of the radiator. It is very close for my liking, with about 1/4" at the bottom. With 1300 miles I have not had a problem. EDIT: I just remembered my transmission is removed from the car. I have a scissor jack and a 2x4 bracing the engine from underneath so as not to snap the motor mounts. It may have shifted slightly when the transmission was dropped.
-
-
-
-
-
-
-
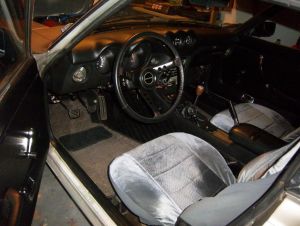
Congrats on the purchase! What are your plans? Let's see an engine bay and interior photo.
-
Those needles look crazy to me! I imagine if I attempted to grind some needles this is what they would look like. I agree with Stanley, I just always assumed custom-ground needles would be round. But if it comes from Rebello, it must work. I'm running SM needles with an L29. With SUs and the cam, the idle is happiest at 1000 rpms. There could definitely be some fine tuning done, but these are 40+ year old round tops and I'm happy with the performance. When I called Z Therapy, Steve recommended trying the SM needles (before seeing if a custom set was necessary), but I also have stock SUs, not bored to 48mm. Congrats on 285hp!
-
Thanks for the info. I hope to stock up. Amazon's price is $5.58/quart. I noticed the NAPAs in Colorado are much larger than the ones in Georgia.
-
I'm replacing everything in the rear except brake hardware and the rear bearings. I probably would if I had more time or money. And the sooner I'm driving the Z, the better. I've gotten decently lucky pulling spindle pins, strut cartridges, and bushings. I never had an issue with brake shoes or rear bearings so I'll leave them as they are.
-
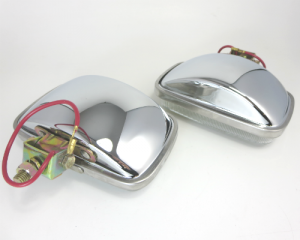
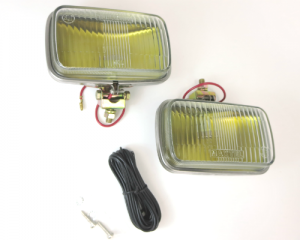
How about these from Japan for $159? A little steep for my budget but they look very nice. Not OEM--but also not $995. http://jdm-car-parts.com/collections/datsun-240z-260z-280z-280zx-nissan-fairlady-z/products/jdm-fairlday-z-datsun-240z-original-style-fog-lamp-set
-
-
-
Chickenman, thanks for sharing. Zed Head, I wanted to share my limited experience. Rebuilt 2.9L F54/E88, Schneider 270-80F cam kit, includes new (ccw) camshaft, springs, rockers, etc., 10.0:1 compression ratio. My engine builder recommended Valvoline VR-1 10w-30, so that's what I went with. It is not the "Not Street Legal" racing oil. Schneider offers a warranty, but you must use their break-in additive. I called the company and the guy said to change the oil after the first 500 miles. At 500 miles, I did the first oil change. At that time I used the VR-1 10w-30 again, with no additives. I'm now at 1308 miles, overdue for an oil change. The Z is on jack stands for a rear suspension rebuild. I'll stick with the VR-1 until something goes wrong. At around 1000 miles, I checked valve lash and everything was spot on with no adjustment needed. The lobes looked perfect. I look forward to adding a lot of miles this summer. At least one trip to the local drag strip and hopefully some road course fun..
-
Part of me felt bad, but the pin just would not come out. Then it was a little enjoyable!
-
Some positive progress. After having to cut the last one in half, I was worried about taking apart the rebuilt 4.11 K R180. Between parts and labor, I have right around $600 into this differential. I couldn't break a single bolt above the ring gear free by ratchet and hammer so I had to use the 1/2" air impact gun. This one came apart in about 10 minutes total, including the roll pin. All parts were cleaned, with the threaded buttons from my original R180 pressed into the side gears. It would be great if the thrust washers PN 38426-U3000 were an available item. I'm calling Courtesy tomorrow. I test fit the differential and all parts assembled easily. I will take it apart once more to replace the thrust washers and lube it with gear oil. I may also have all rear suspension parts painted by this weekend. I have access to an entire paint booth for $10/ hour.