siteunseen
Community Member
-
Joined
-
Last visited
Everything posted by siteunseen
-
Red Line 75/90 got the whine out of my '72. Whatever came out was orange like Sunkist.
-
Question on the Duplicolor #102 Graphite. I've sprayed my rear finisher 2 or 3 times. In between coats I've knocked the sheen off with 0000 steel wool. It looks so good dull I want to spray the matte clear over the lightly sanded Duplicolor. Would that be a mistake? It get's the metallic looking sparkles out but everything I've read says spray the matte straight on the Duplicolor. I'm guessing "it's up to you" will be the consensus but was hoping to hear someone else had done the same. Thanks for any experiences. Cliff
-
More motivation! I've read that thread 2 or 3 times and am still intimidated with the dash cap install. It's still in the bag, hanging under a wire shelf in my spare bedroom.
-
I put my valve cover on upside down once, thermostat side is straighter IIRC. Could it be the EGR tunnel sucking in air somehow?
-
-
Standard FJ707Ts are good and not too expensive, $30. They come with the O rings and a clamp. https://www.google.com/search?q=standard+fj707t&rlz=1C1BOFA_enUS494US494&source=lnms&tbm=isch&sa=X&ei=h_TpU77GIcme8gHfoYG4DA&ved=0CAcQ_AUoAg&biw=1280&bih=620
-
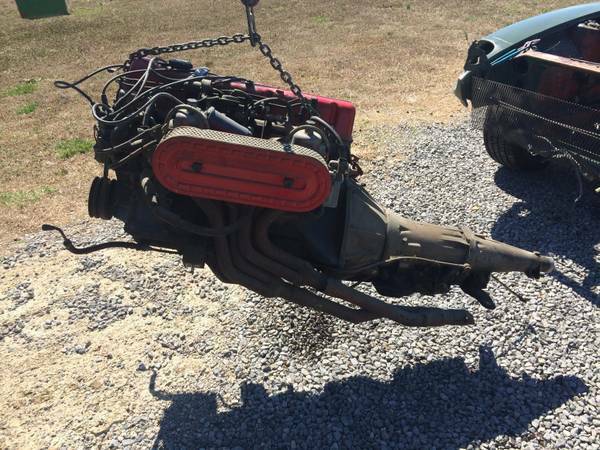
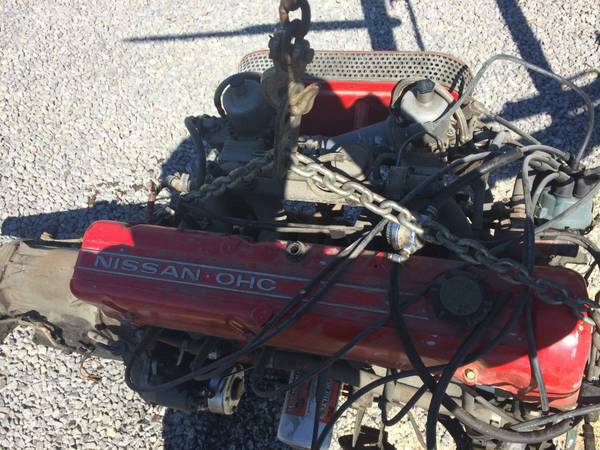
...that came with a 2.4 motor. Going to get it Friday.

-
Thanks! I bought 10 from my Nissan dealer Friday. I am just getting around to installing them, I cleared them with Valspar Flat and it looks dusty dirty. I've bought the Duplicolor Matte clear for the rear finisher and will hit the emblems with that. I'm hoping the matte finish will look better than the flat. Thanks again.
-
Here's good read,http://www.classiczcars.com/forums/interior-s30/48276-full-dash-cover-installation-help.html. 1973 starts at #37, he had the same problems as you.
-
According to Dashtop's web site it's right, 240Z
-
Mine have a pharmaceutical magnet under the drivers seat. What I did today was put the steering rack poly bushings on #918. With the car up on ramps and no weight on the steering or suspension it was simple. I had already prepared myself for unbolting the motor mounts and jacking the front up a few inches, but NOOOO thank goodness.
-
After a good drive my ashtray is hot enough to light a cigarette it seems. I've got the 2.5" exhaust so maybe that's my heat source. My reverse light switch used to leak a little too but it's the same level as the fill plug so I always thought I had too much in there, it has quit doing it. Maybe it's bone dry?
-
So where does the plug from MSA go?
-
I've found 2 12oz cans of R-12 and a can of the oil. Might just put the oil in and save the freon for next year. I don't know much about the A/Cs and will be pulling the motor out this fall. I'd hate to waste the 2 cans unintentionally.
-
I tried sneaking up behind a horse, of course.
-
I talked to a machinist. He says the cylinders were cleaned up and that widened them by .030". That's why it has the .030 over sized rings for the stock pistons. He's an old friend of my Dad's and laughed at me! He said to clean the hell out of everything and bring it to him for measuring to make sure it's all going to work. I can get bent out of shape when I don't understand things, that's why I'm still single and half nuts.
-
Straddle a ditch......
-
I wasn't in my right mind when I posted that last night. I was wondering if .030 is a common cylinder over size after a machine shop honing. I believe that is the reason for the part number to be 6124 030. I definitely will do a dry fitting before installing these rings that came with the block assembly.
-
My F54 cylinder holes measure 3.4" after a good cross hatch honing. I've got some Hasting rings, 1.5 1st 2.0 2nd then the oil ring 4.0, for the ZX pistons. Does that -030 at the end of the part number mean thirty thousandths larger? Would 3.416" be too tight? They're cast iron I believe. Thanks for any help/ideas/opinions, Cliff
-
That'd be easy to get that look. MSA black fiberglass bumpers, Motorsport! Fiberglass Bumpers - The Z Store, Nissan-Datsun 240Z-260Z-280Z-280ZX-300ZX(Z31/Z32)-350Z-370Z Parts $350, Xenon #3124 front spoiler Xenon 3124 Xenon Front Air Dams - Free Shipping on All Orders @ JEGS $168 from Jegs.
-
As long as the tail light section is original you should be able to get it back. But if you don't have the original bumpers you could leave the bumper covers on and just get rid of the side molding. I like the looks of some of the front bumper covers. I'm looking at MSA's kits, Motorsport! Full Body Kits - The Z Store, Nissan-Datsun 240Z-260Z-280Z-280ZX-300ZX(Z31/Z32)-350Z-370Z Parts
-
I've got a friend that has the 414 in those big tanks I'm just not sure which to use but you're right, E-bay would be a sure thing. Those are the yard sales I like, when they don't have time to check everything. Maybe I could find some between here and Addison, MI. The 127 Sale-The World's Longest Yard Sale
-
No help here just my buzz. My '77 buzzes 6 times when I turn the ignition to ON, I wait until it stops then crank it. My '72 buzzes when I put it in gear without the lap belt fastened, that's annoying when I'm just moving it around my garage.
-
That's the one my late '76 build date but titled a '77 with an oiler cam plus spray bar N47 has. It has paper thin gaskets too.
-
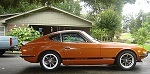
I think you could find a better one too. I've got a set of triple Webers and have been advised to leave them off, they are a pain to get right and the original SUs are much more user friendly especially to somebody that's not familiar with carburetors, like me. Having a high pressure ZX fuel pump with Webers which only need around 3 lbs does not make sense to me. I think it would be a lot more tinkering than driving, not fun for your 1st Z. Here's #110 original paint, that one on E-bay looks more pinkish to me.