Patcon
Supporting Member
-
Joined
-
Last visited
Everything posted by Patcon
-
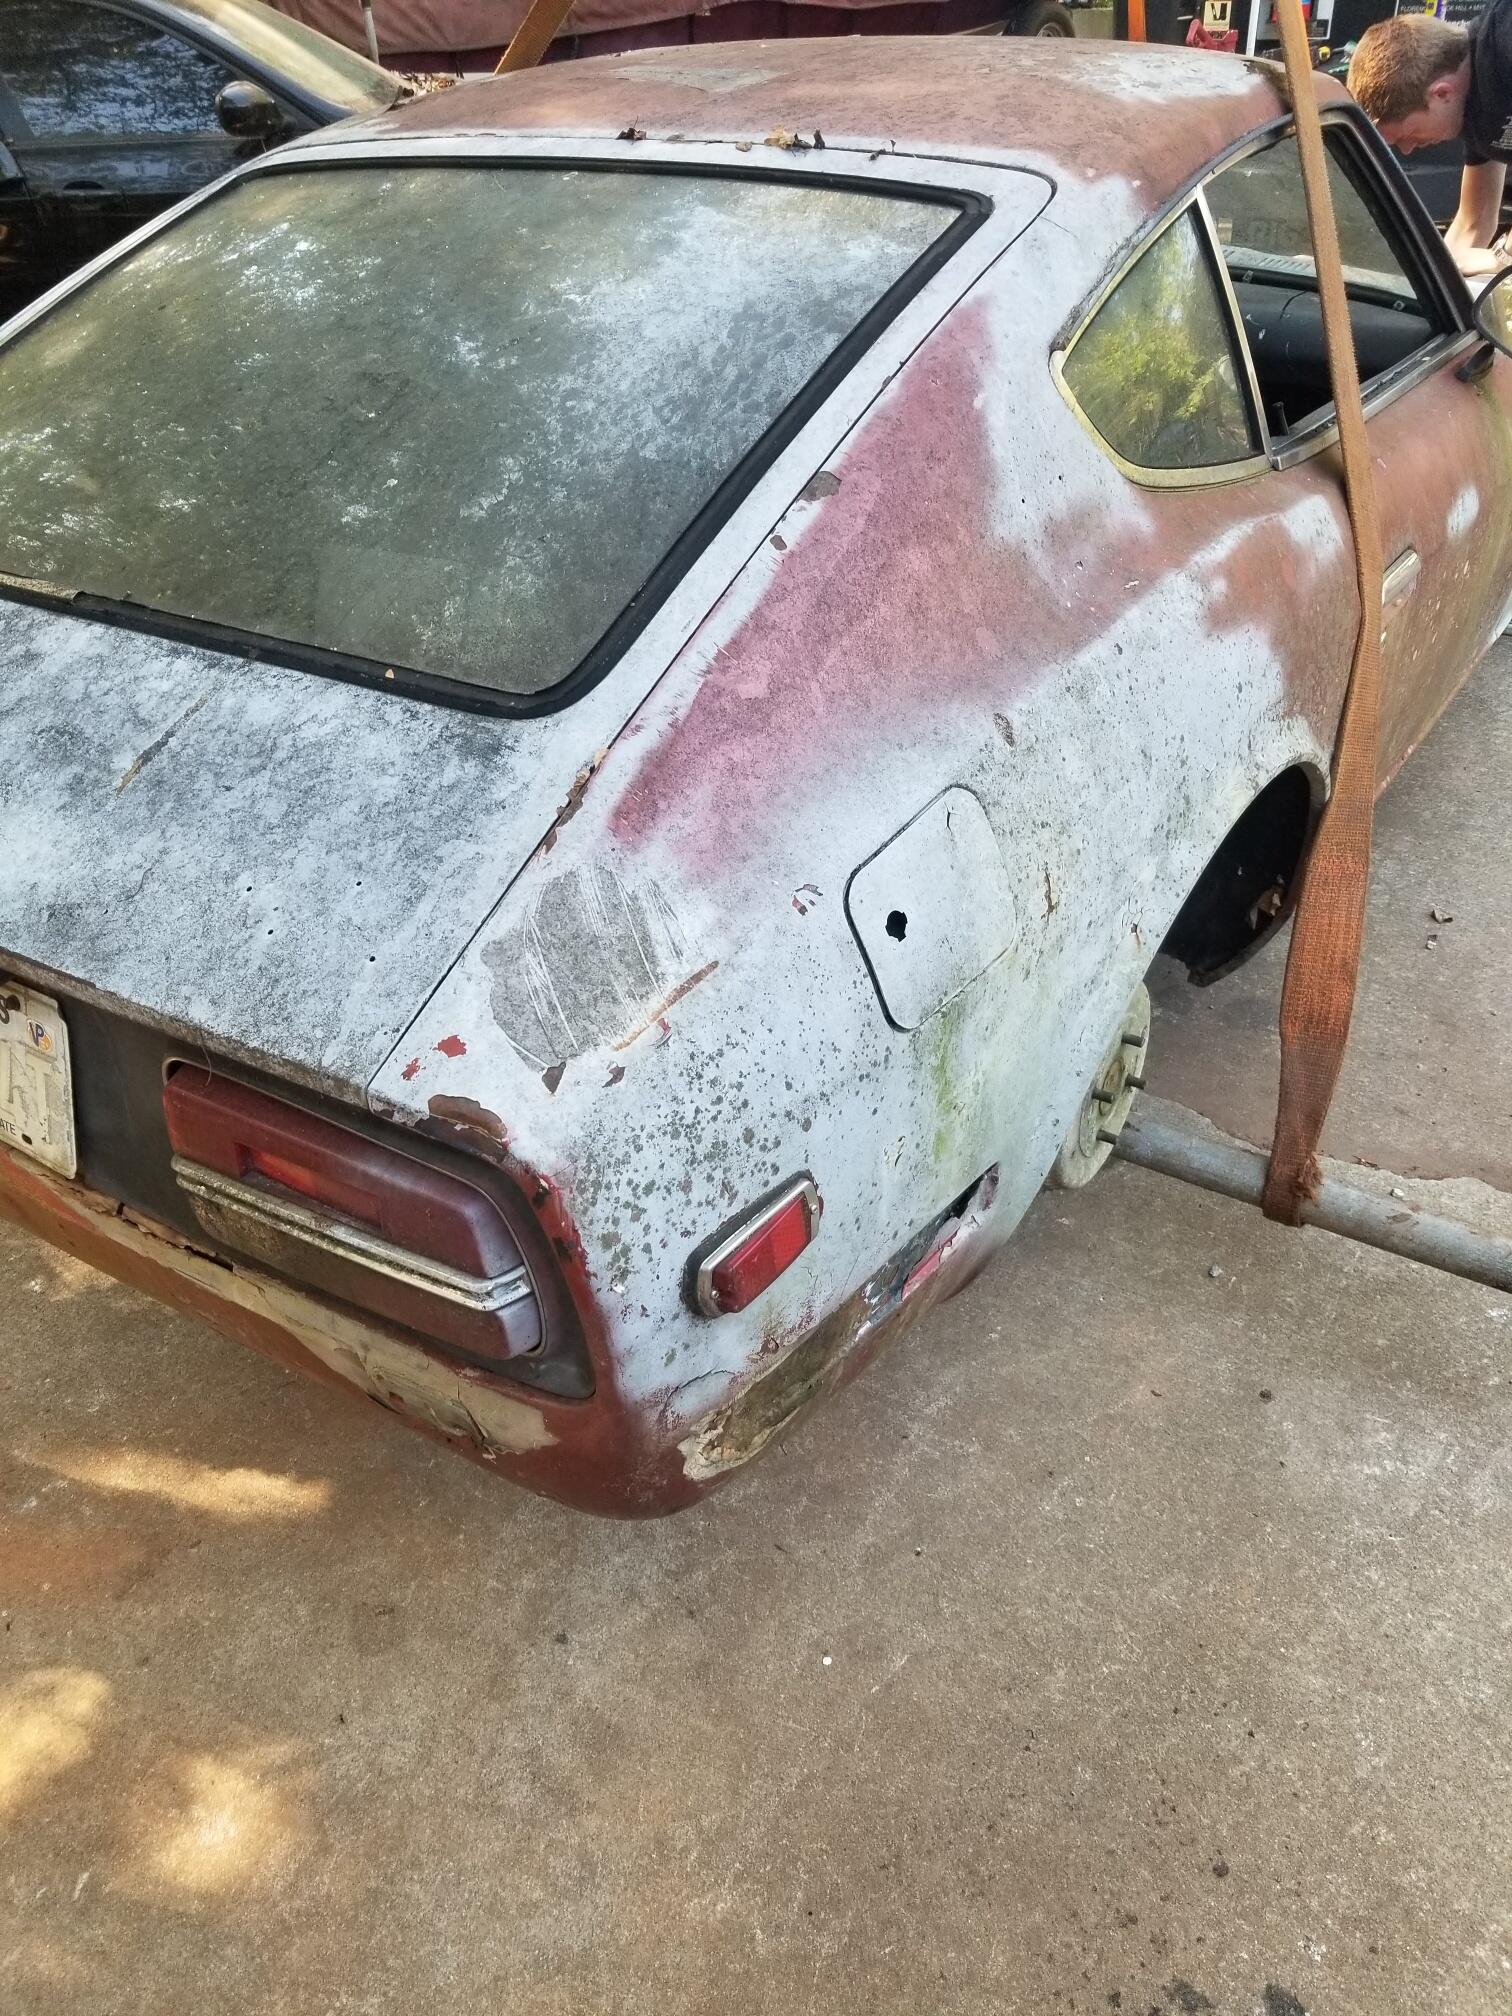
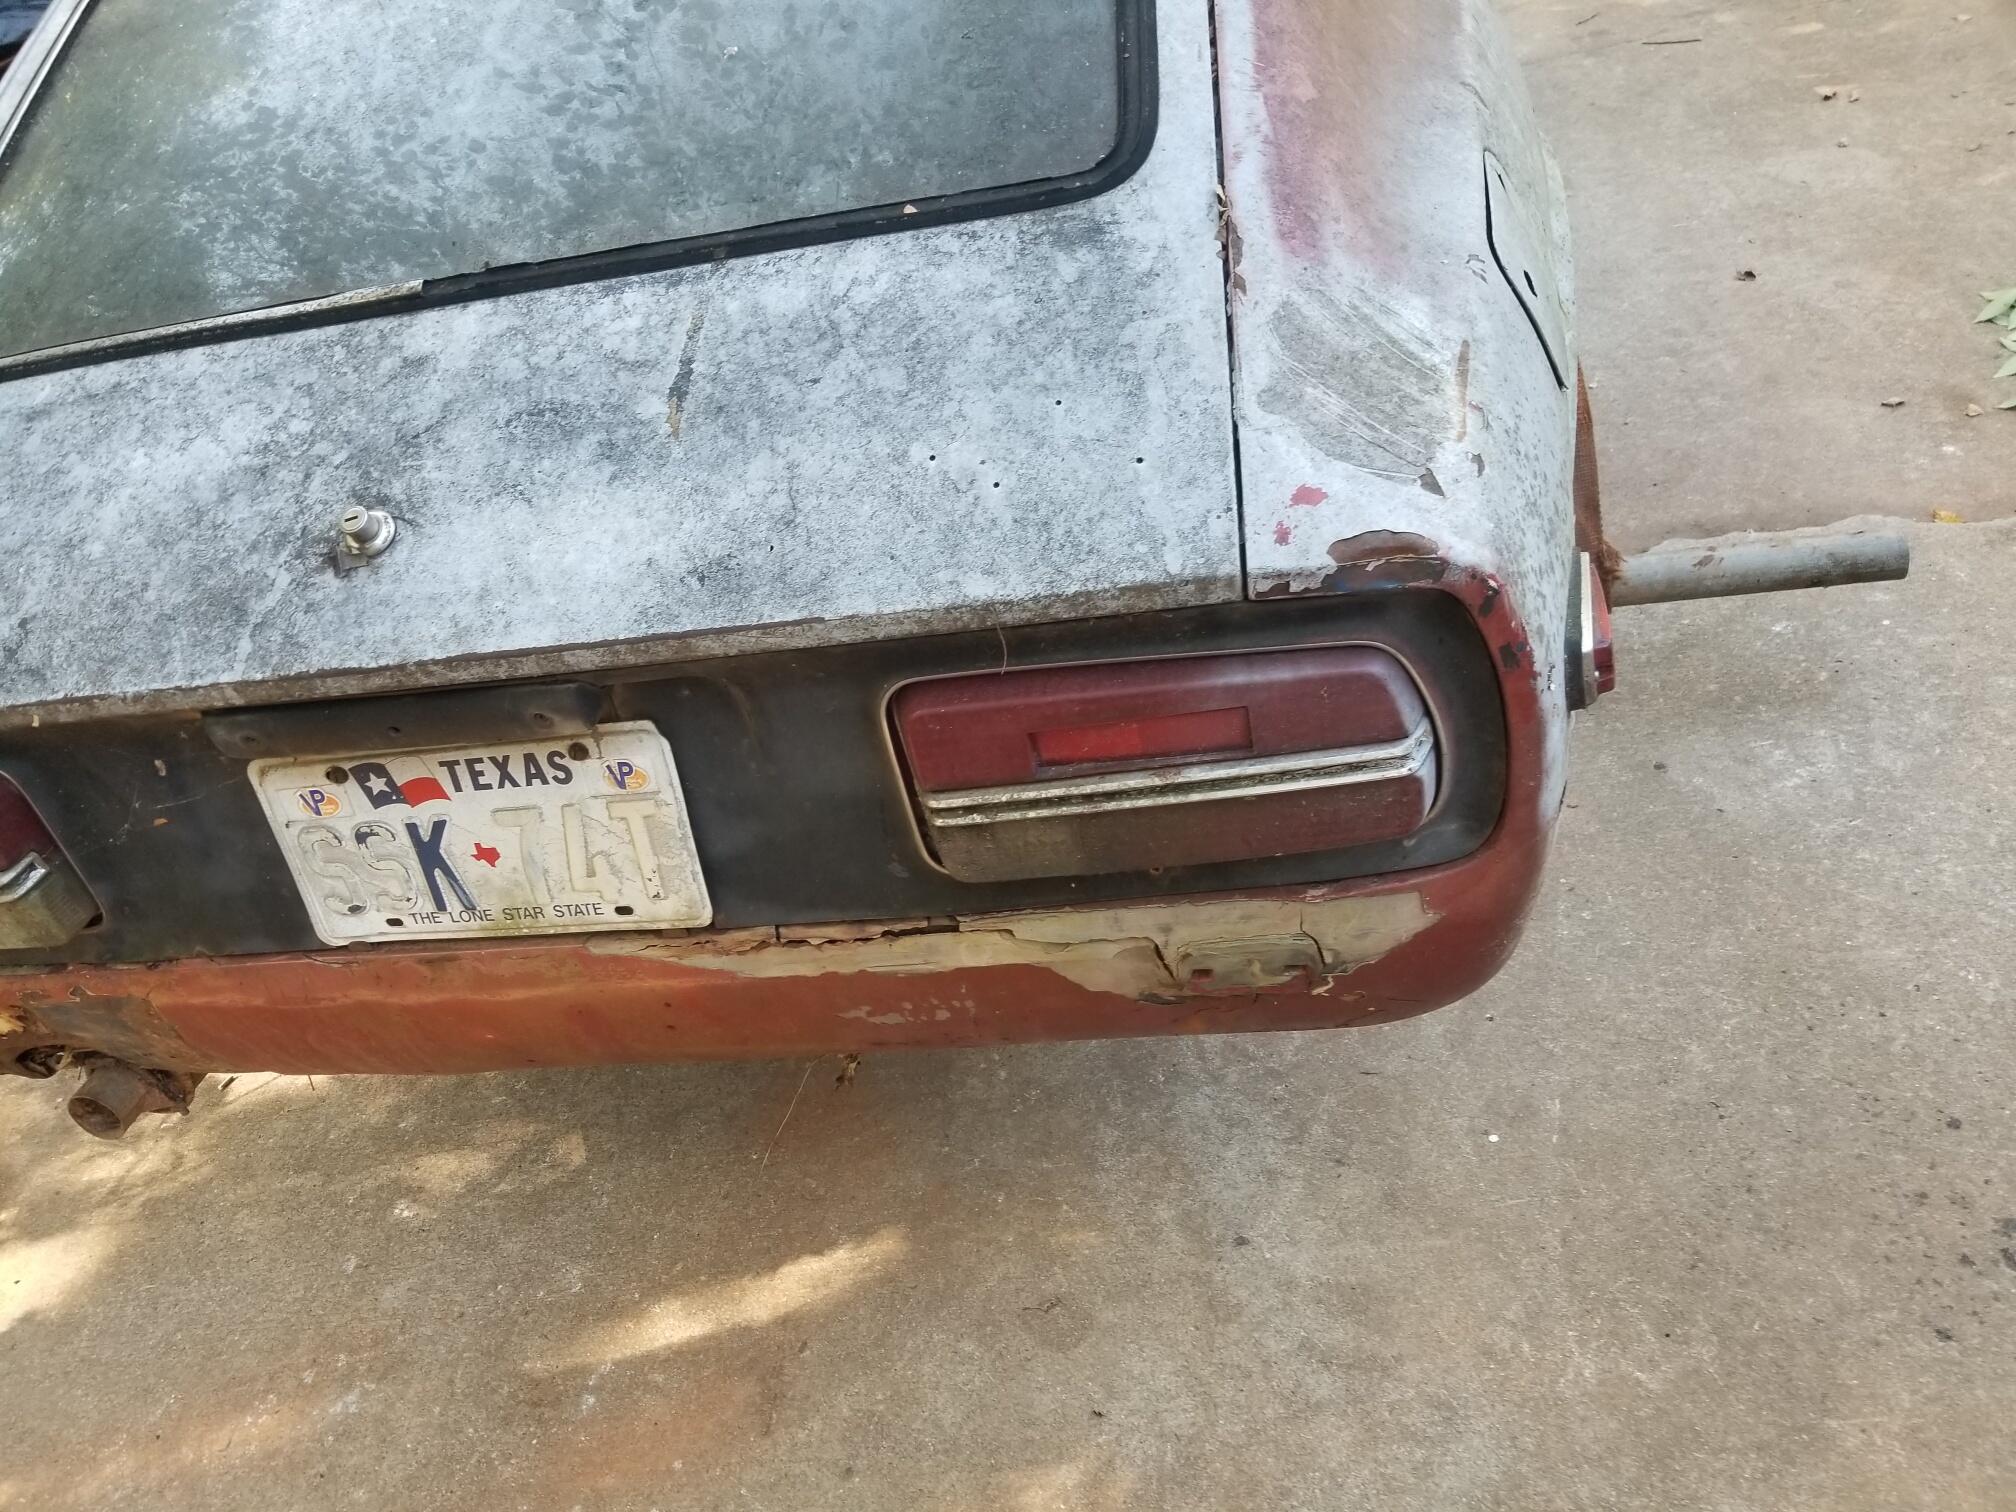
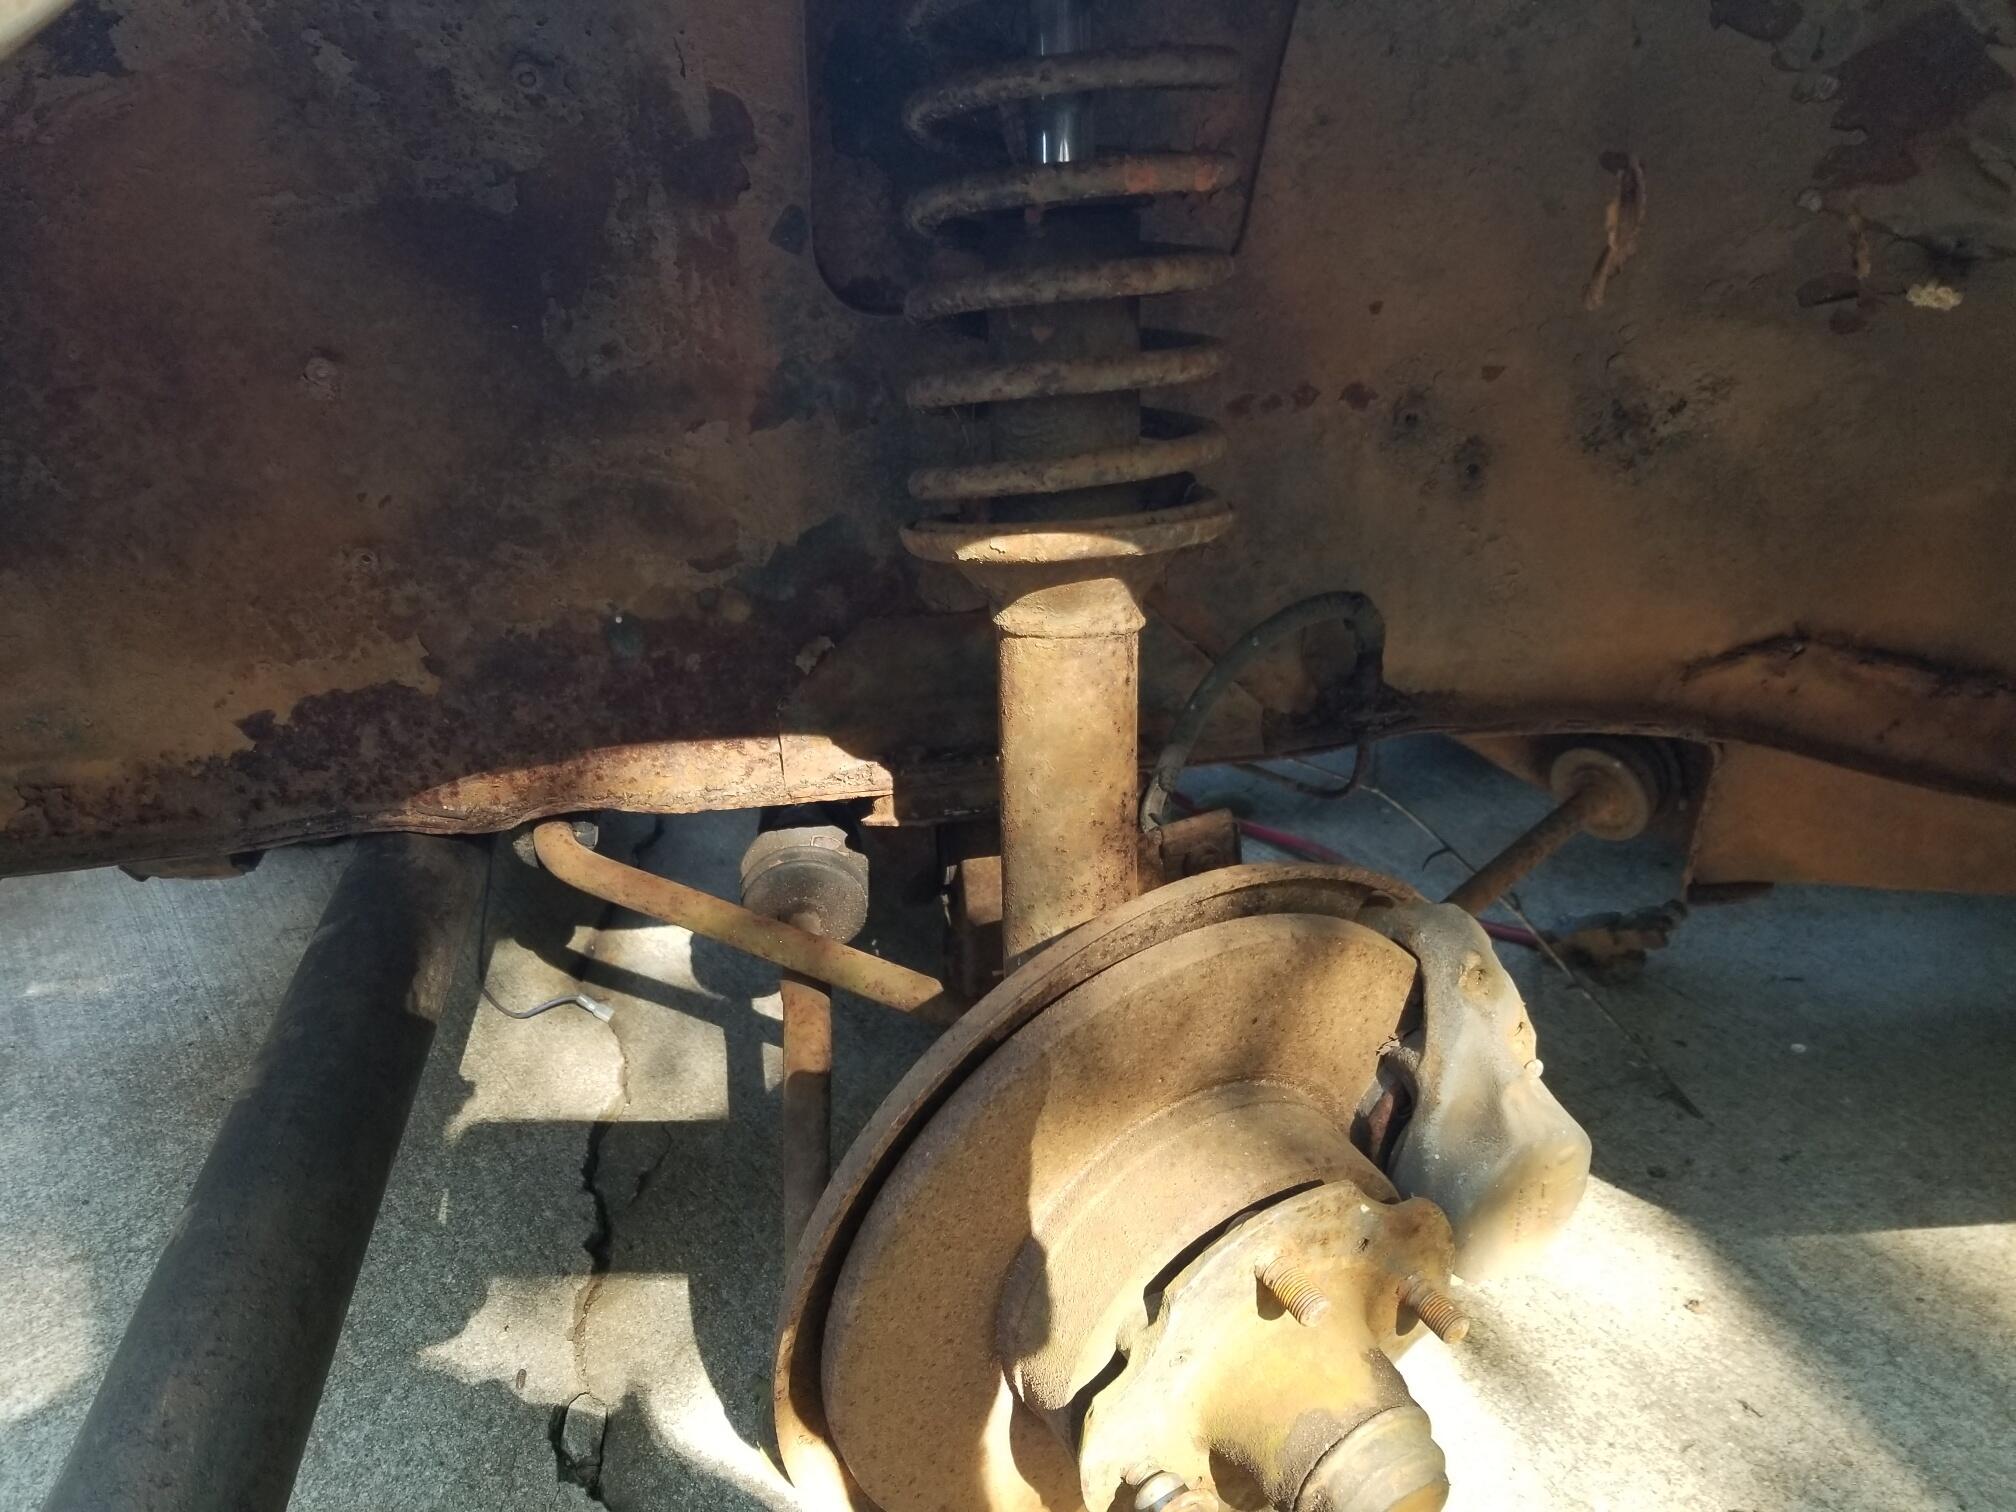
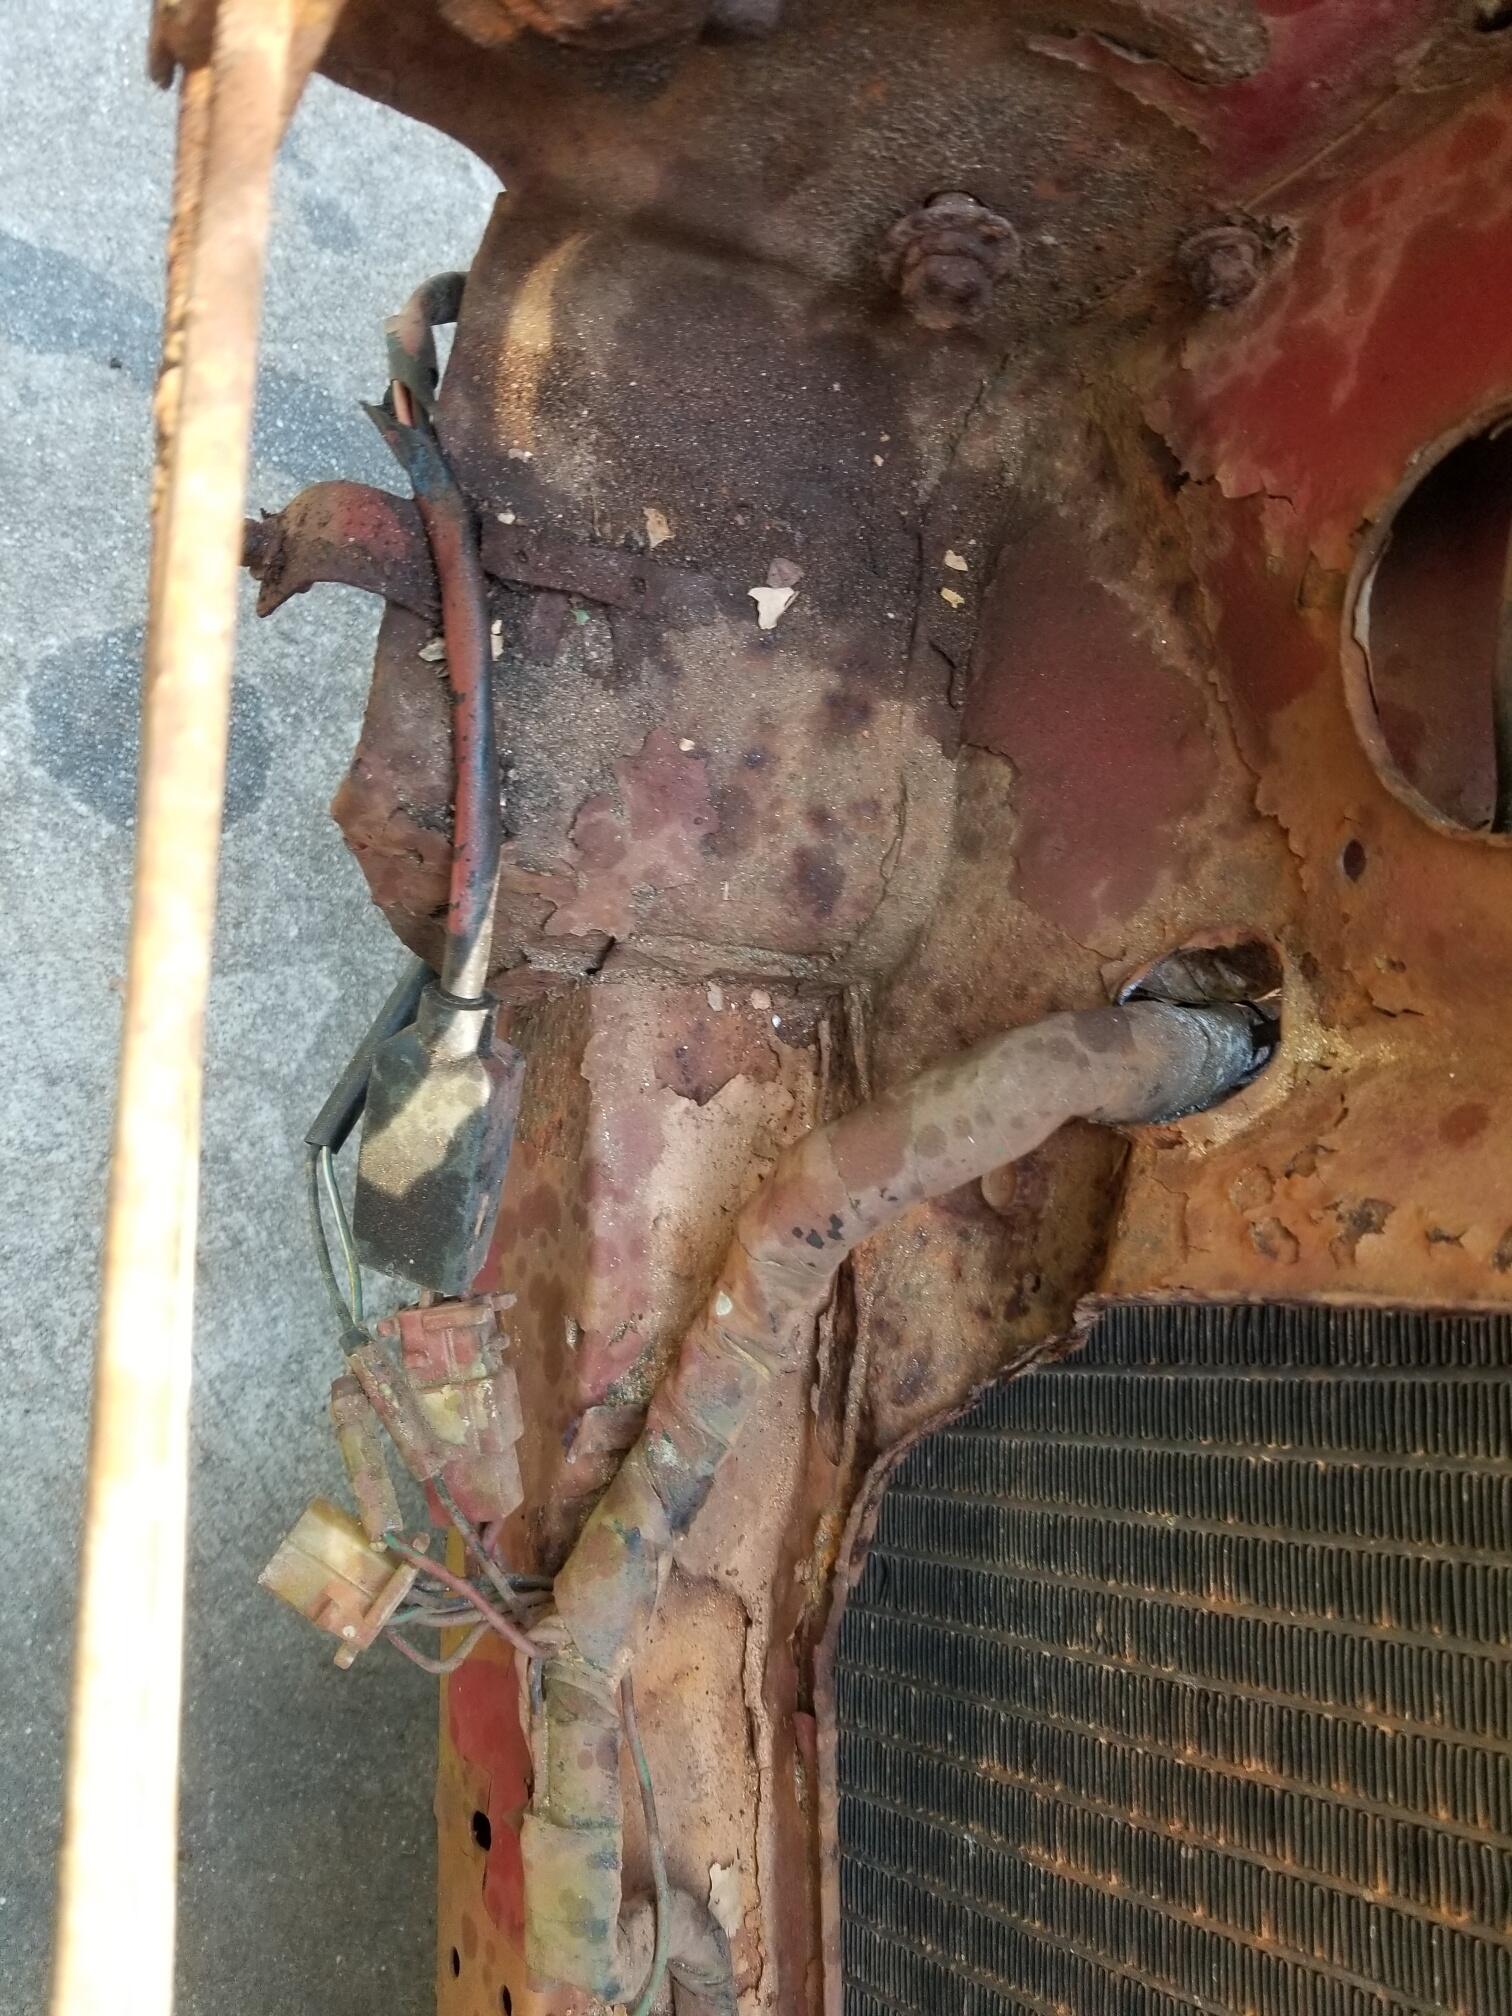
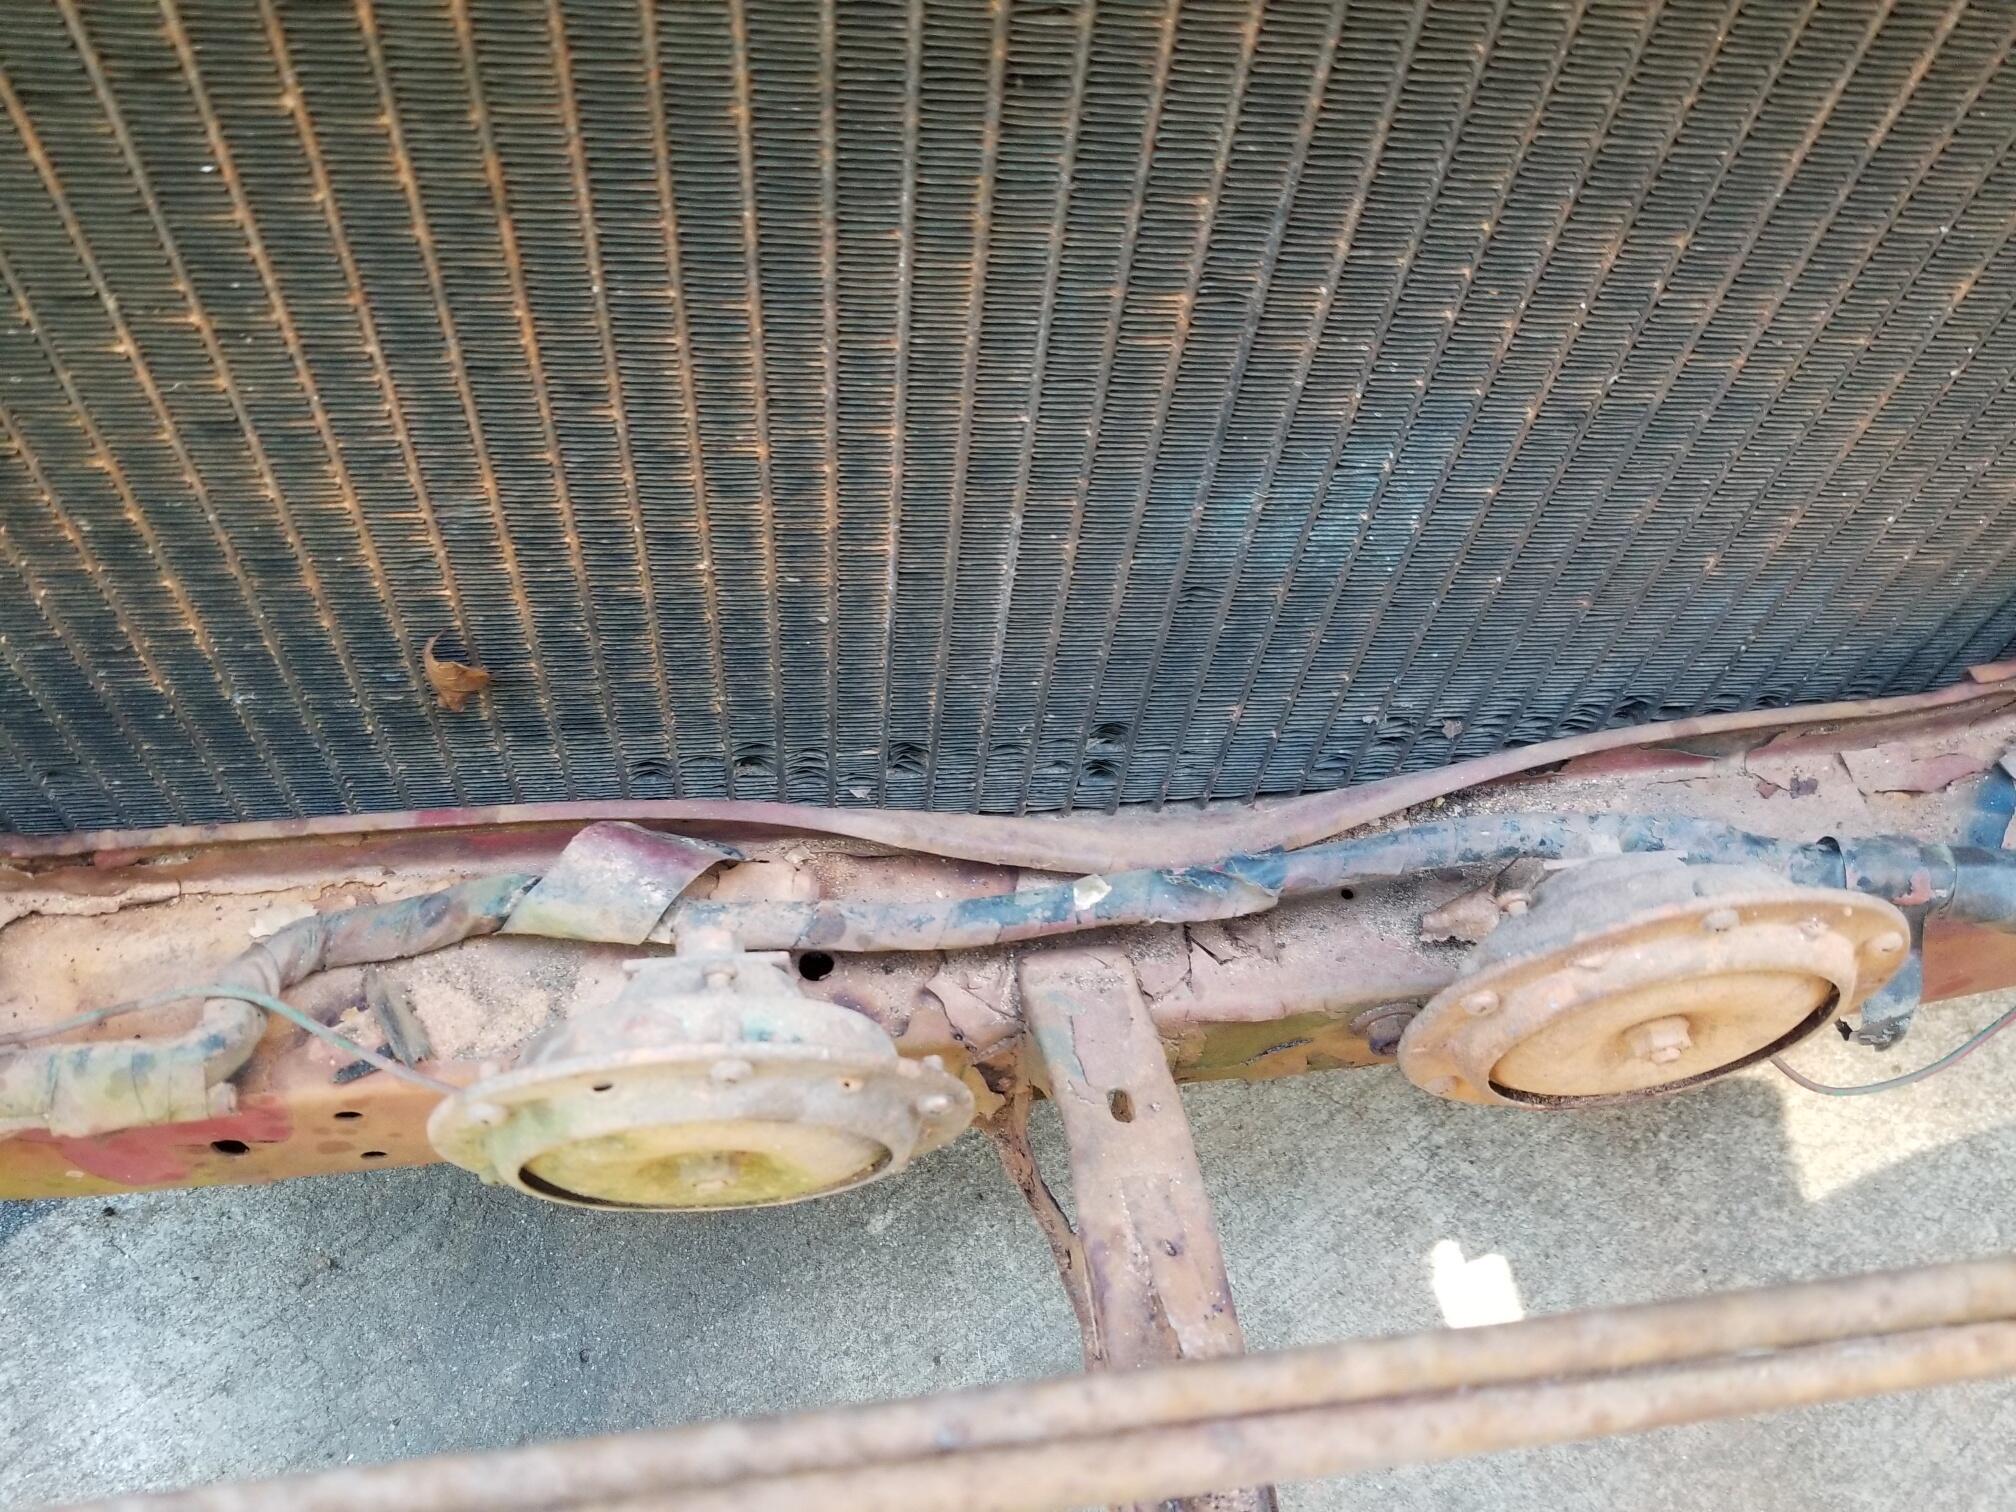
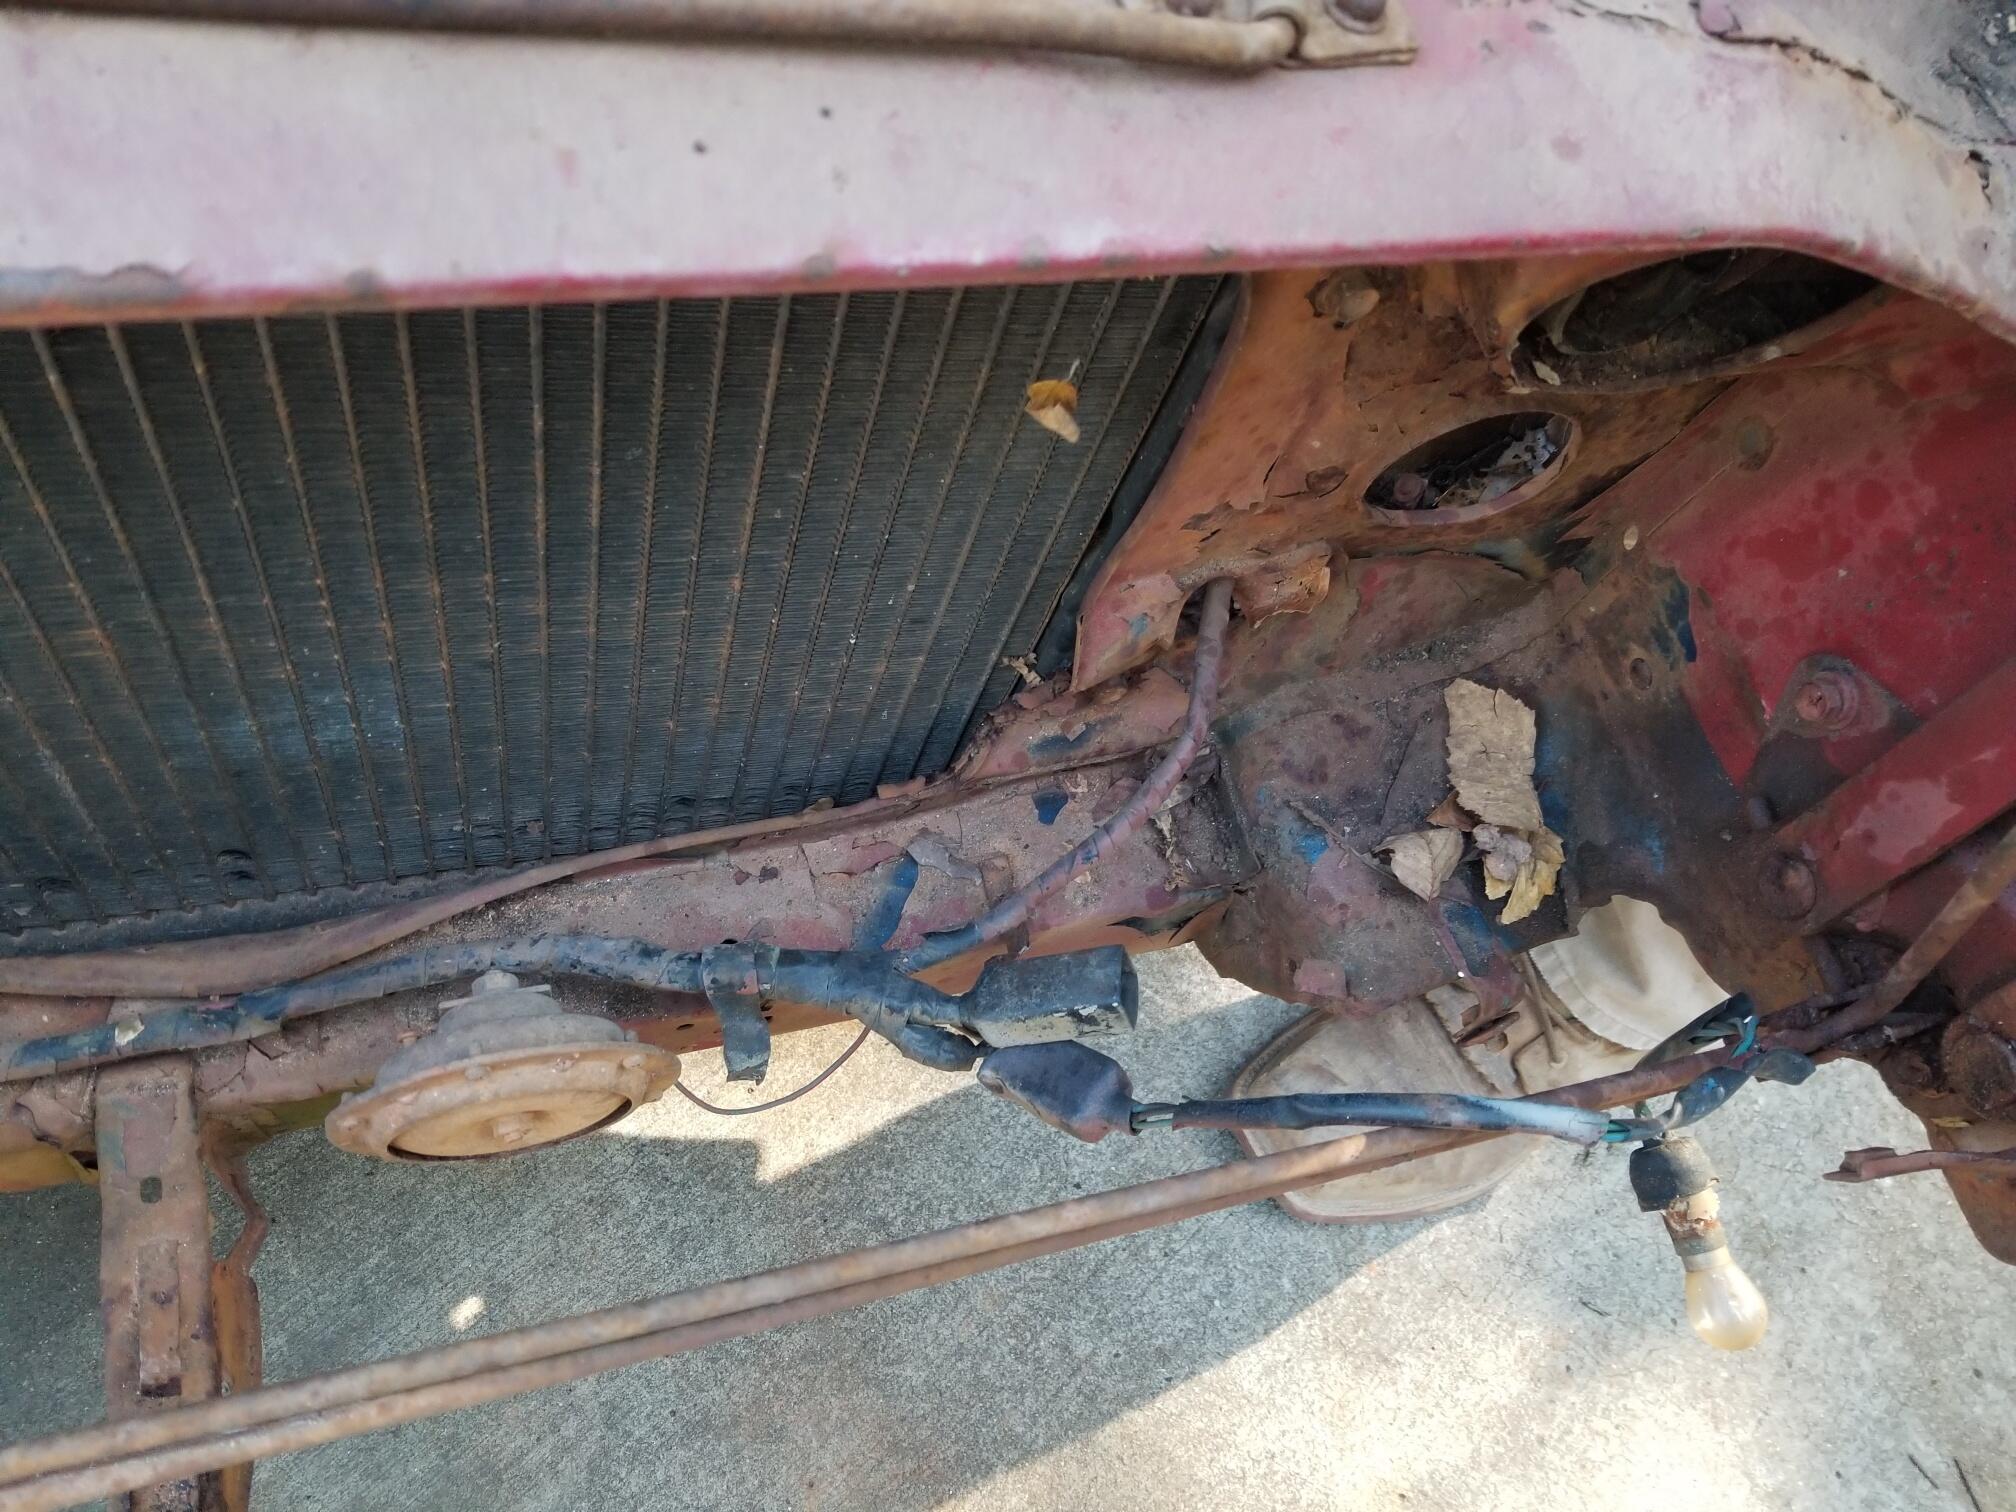
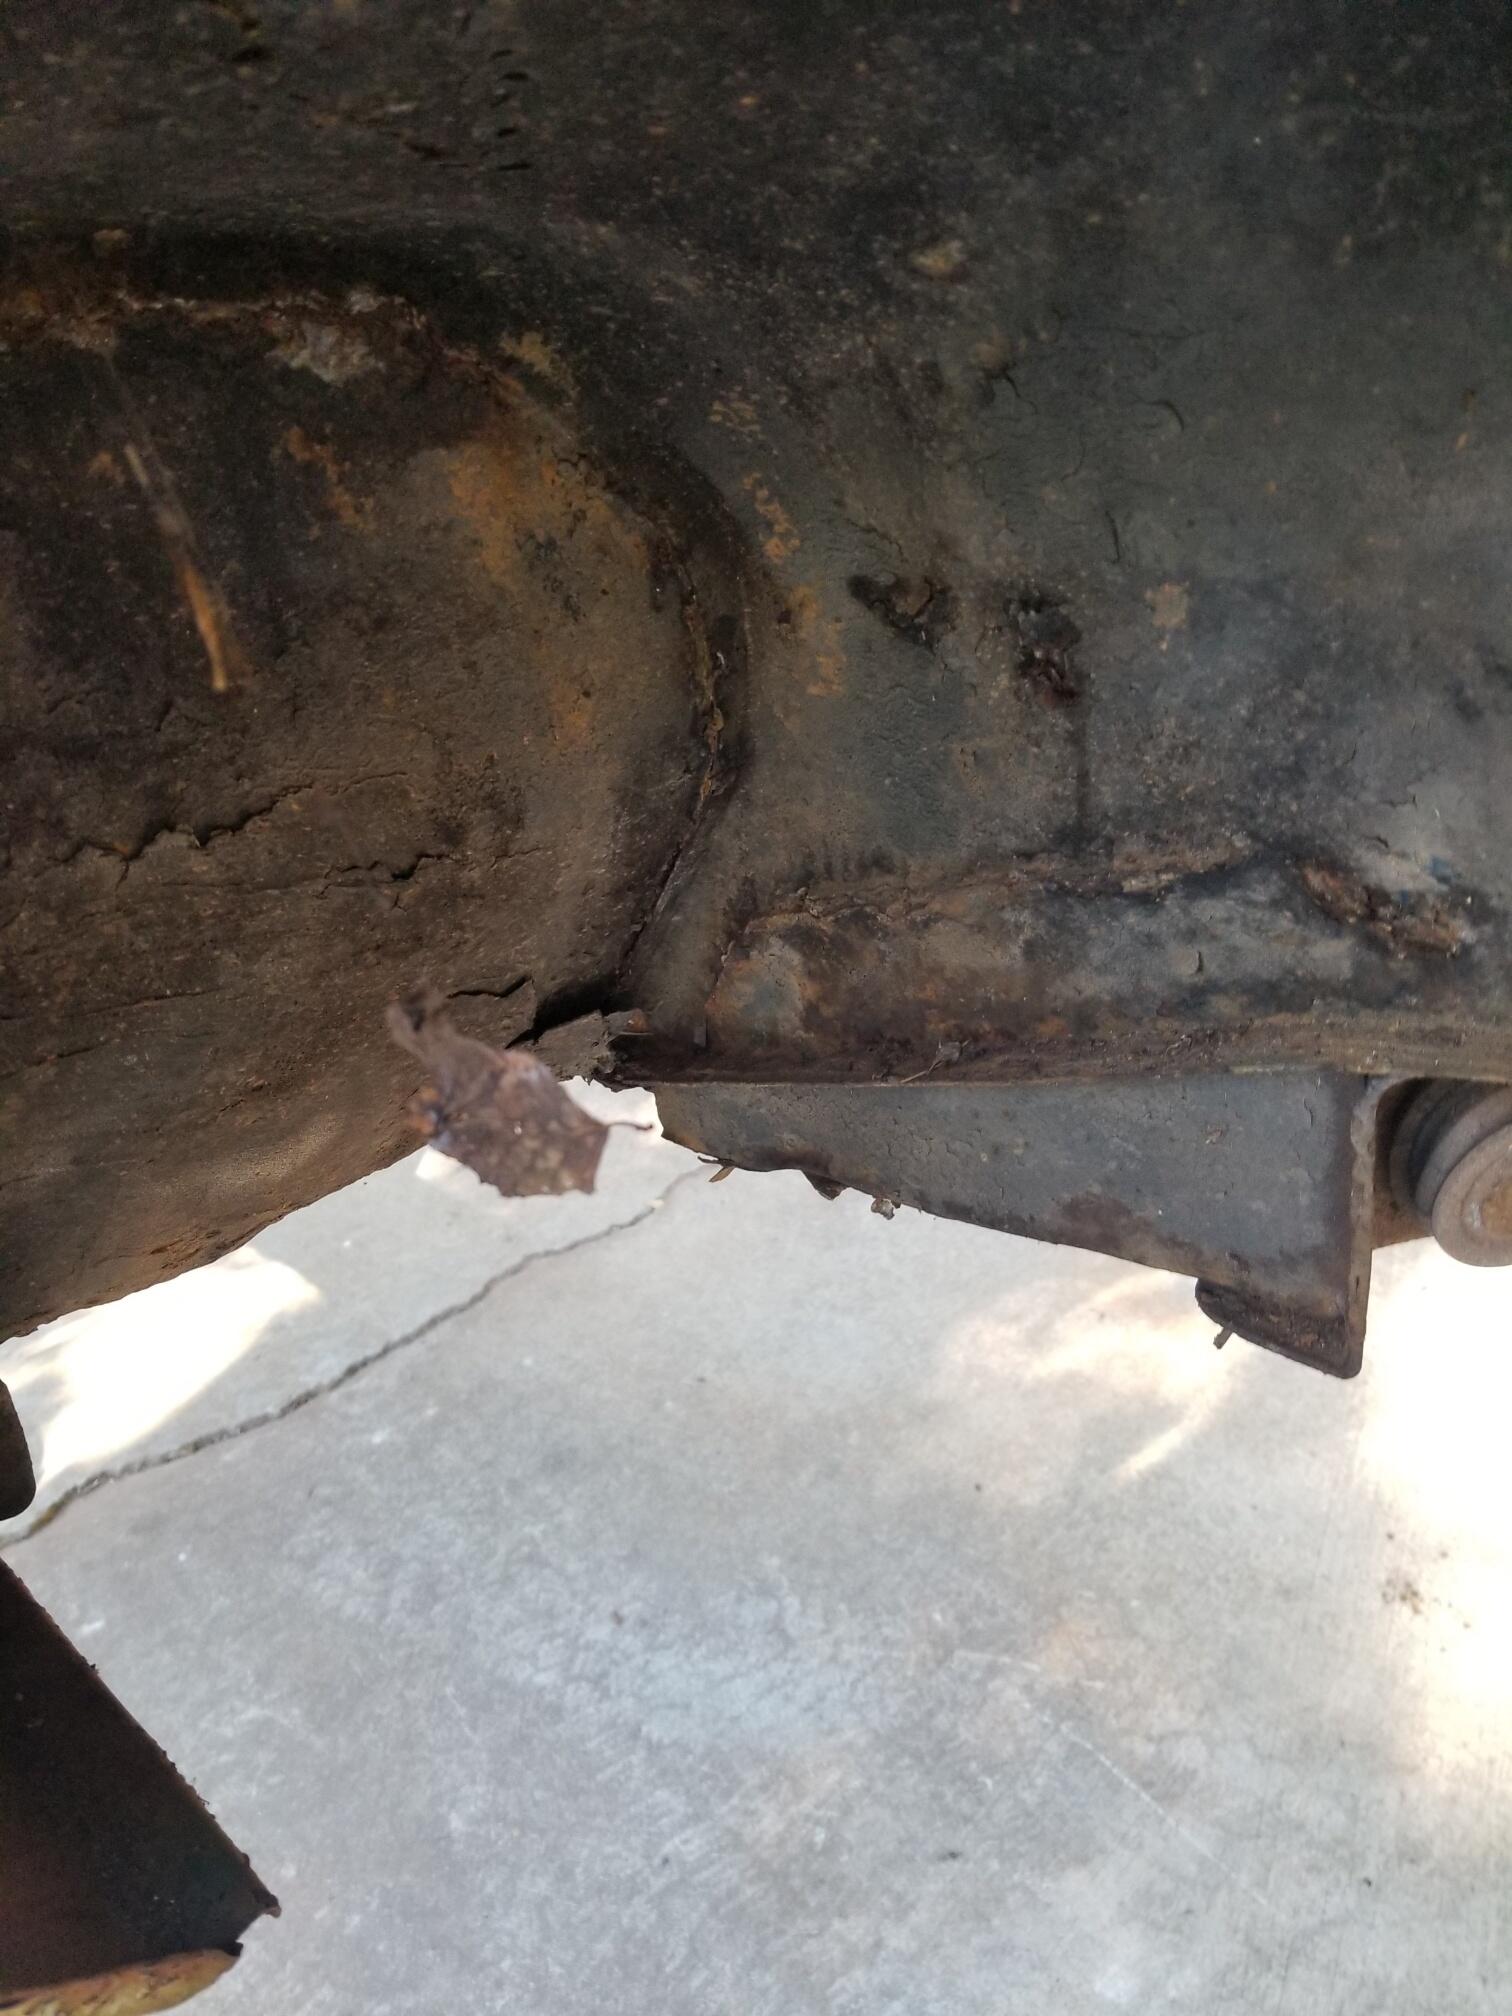
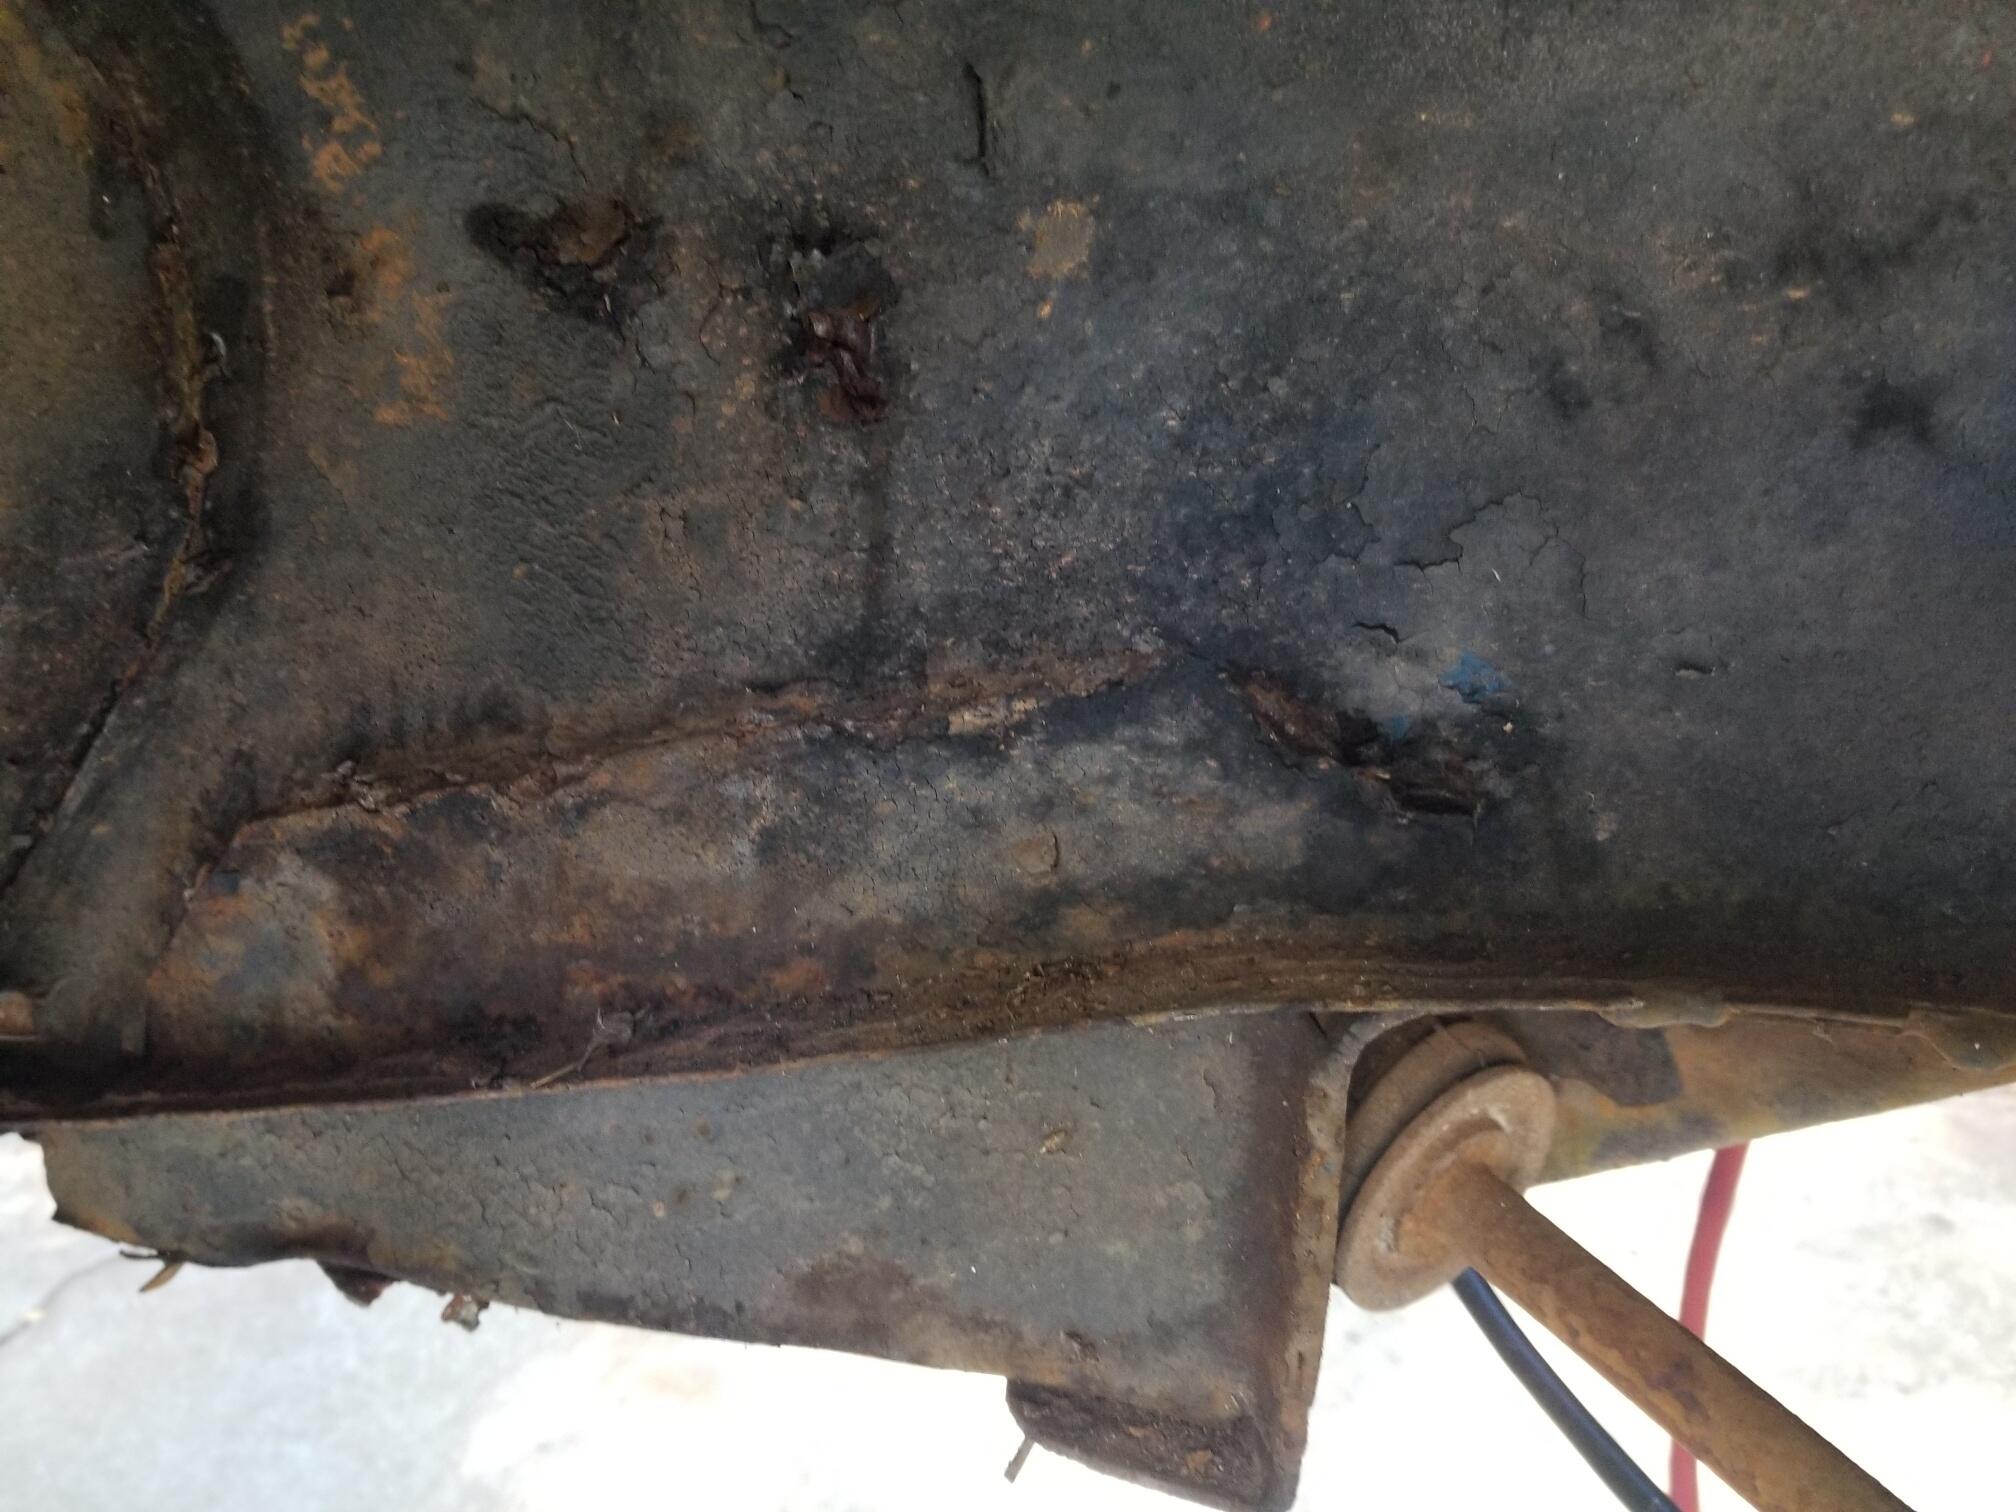
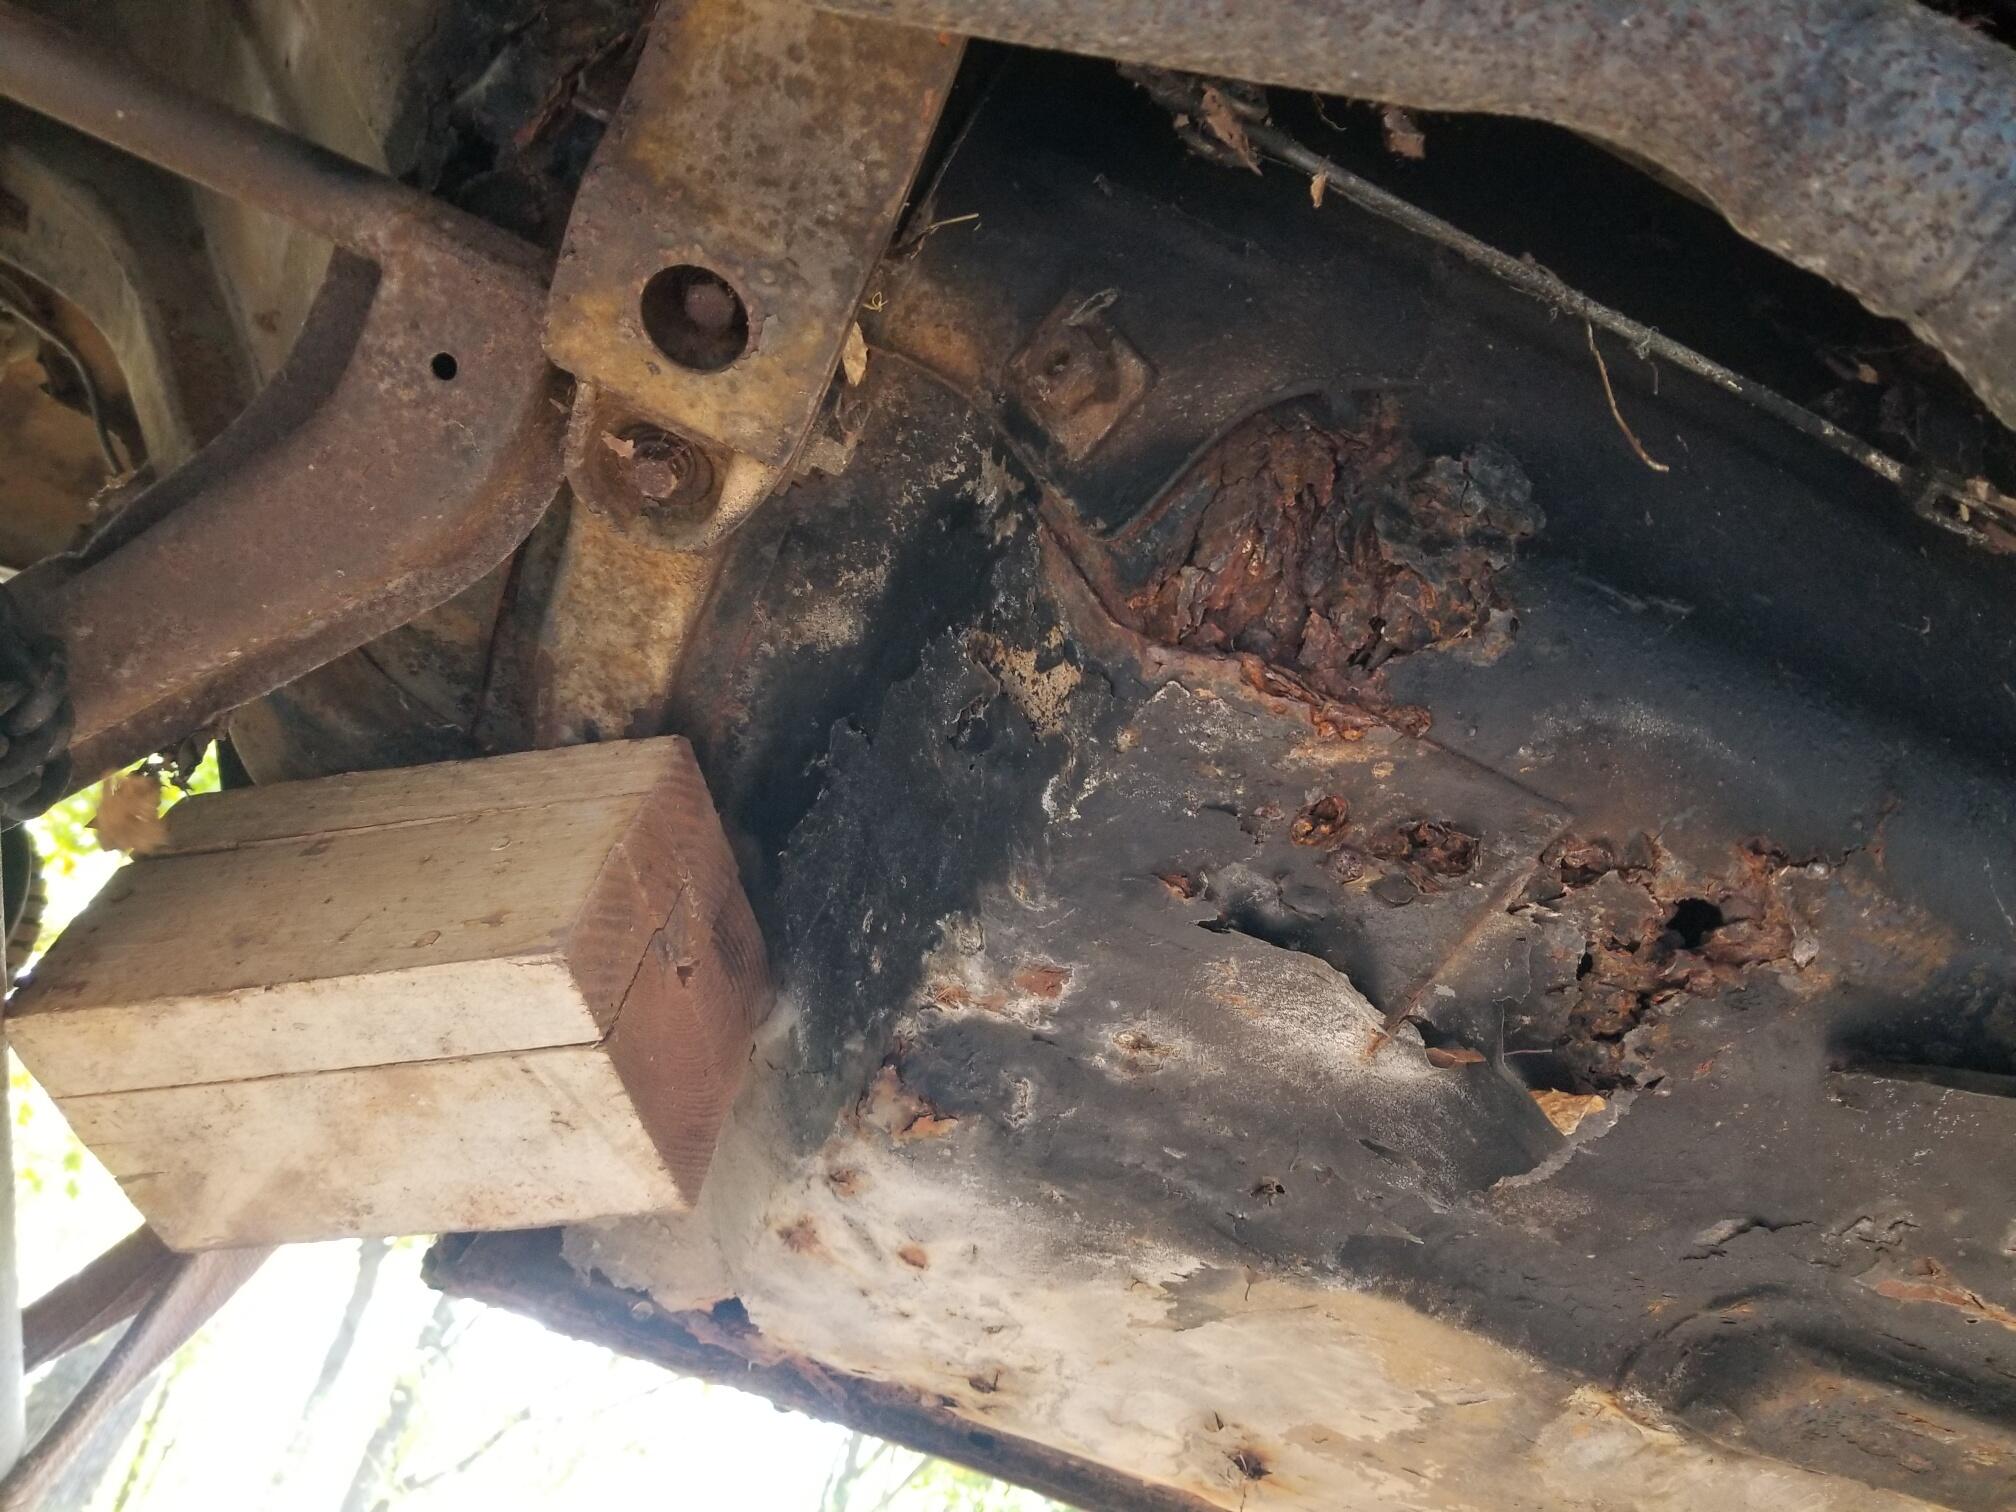
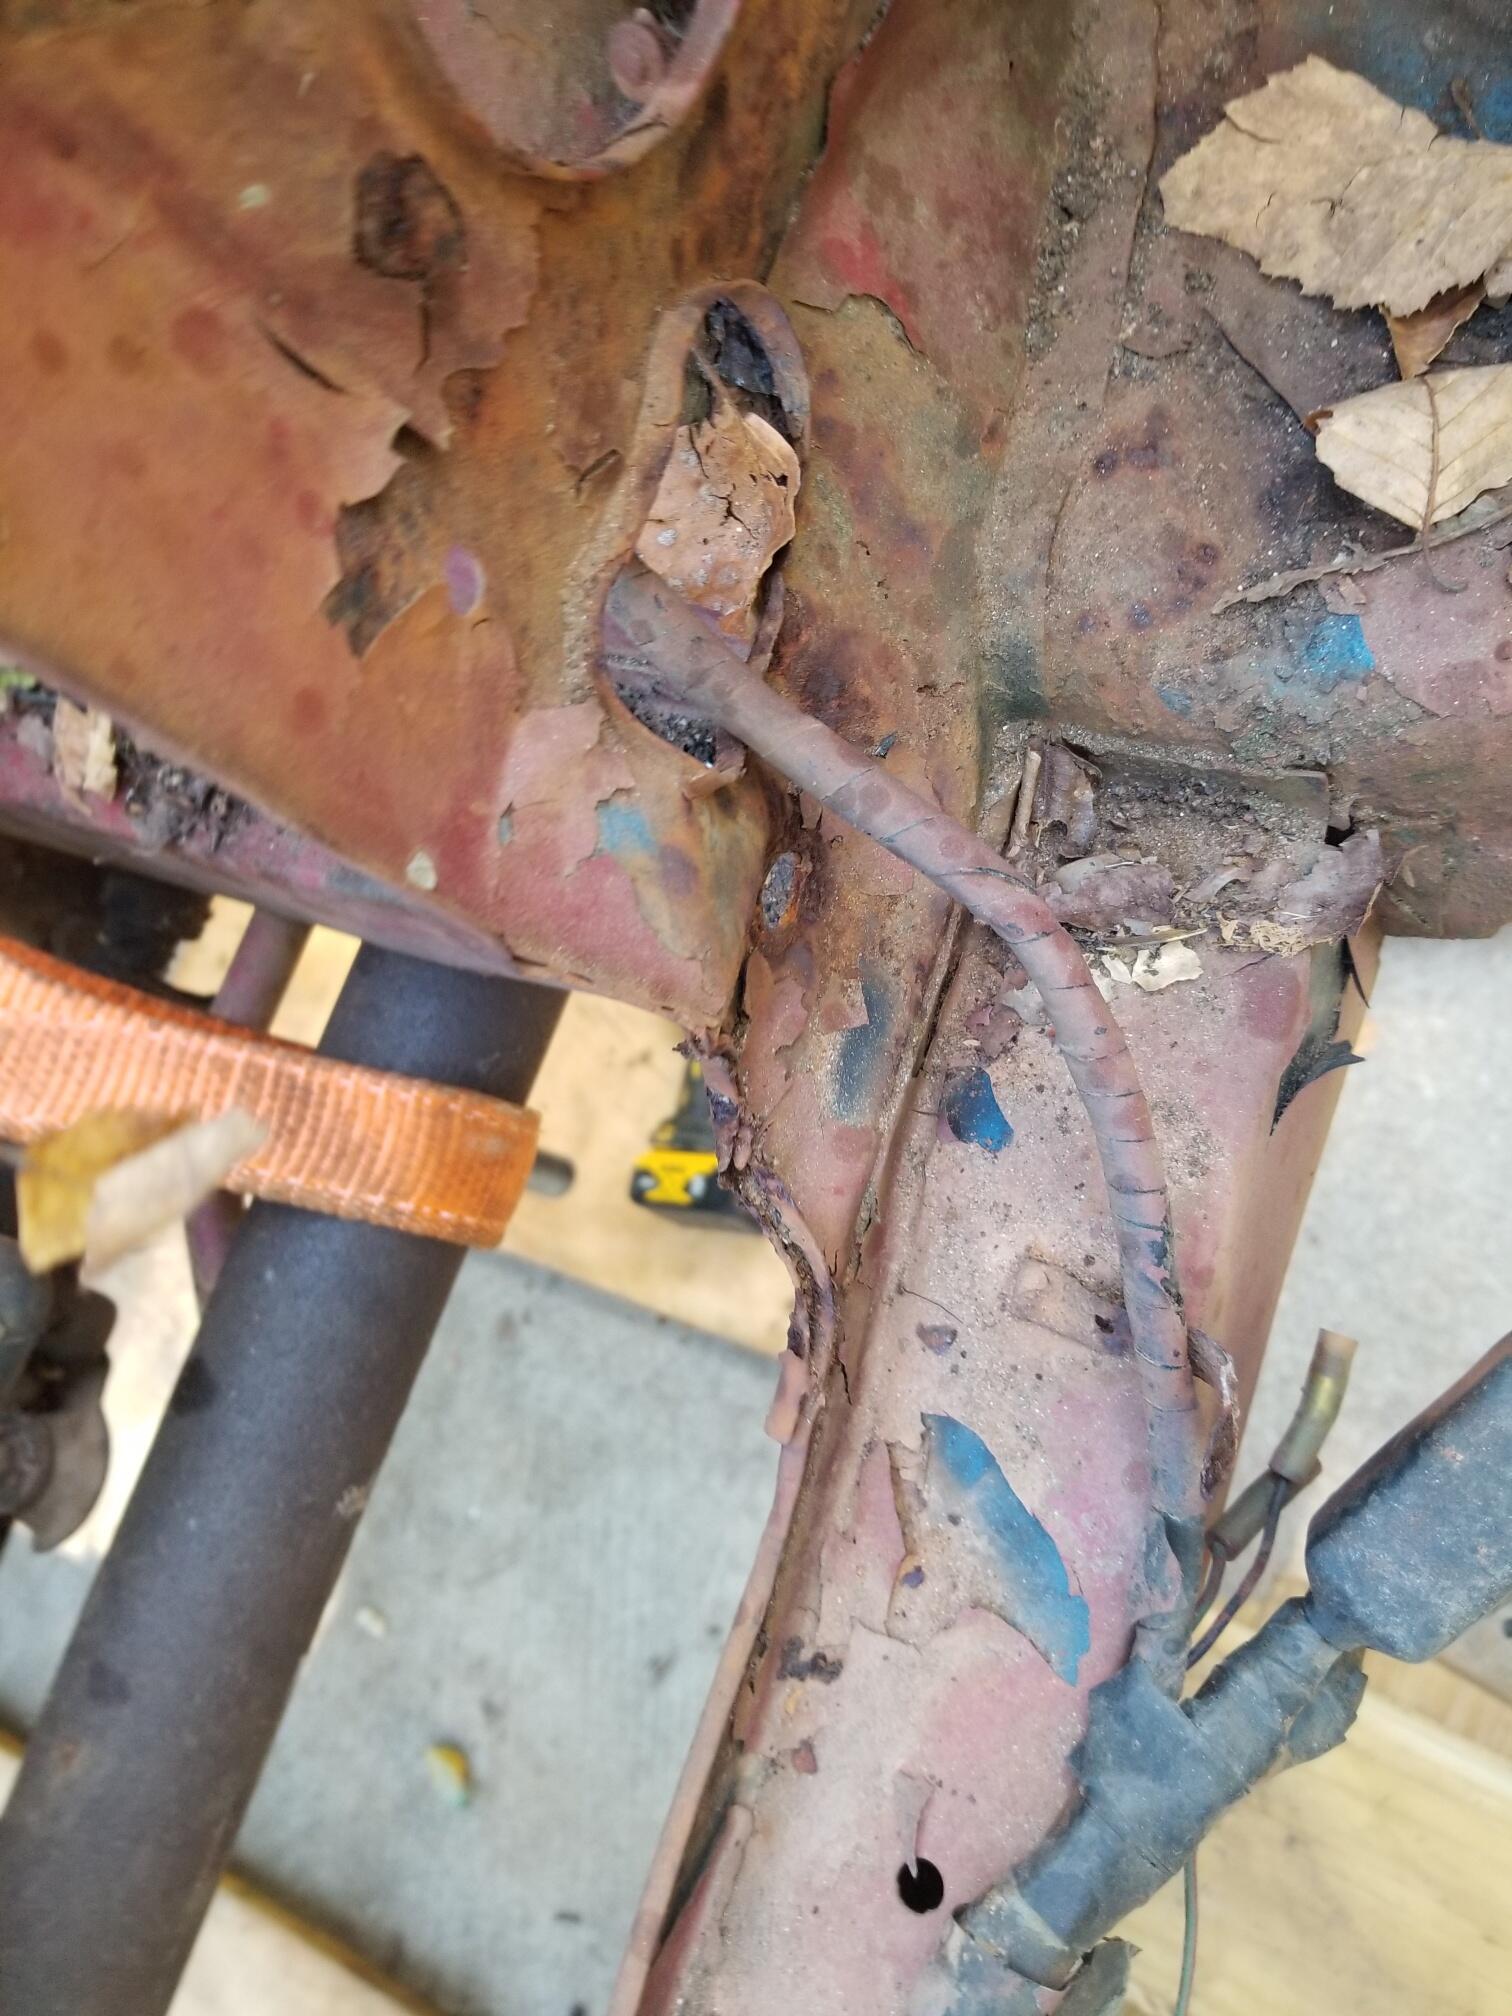
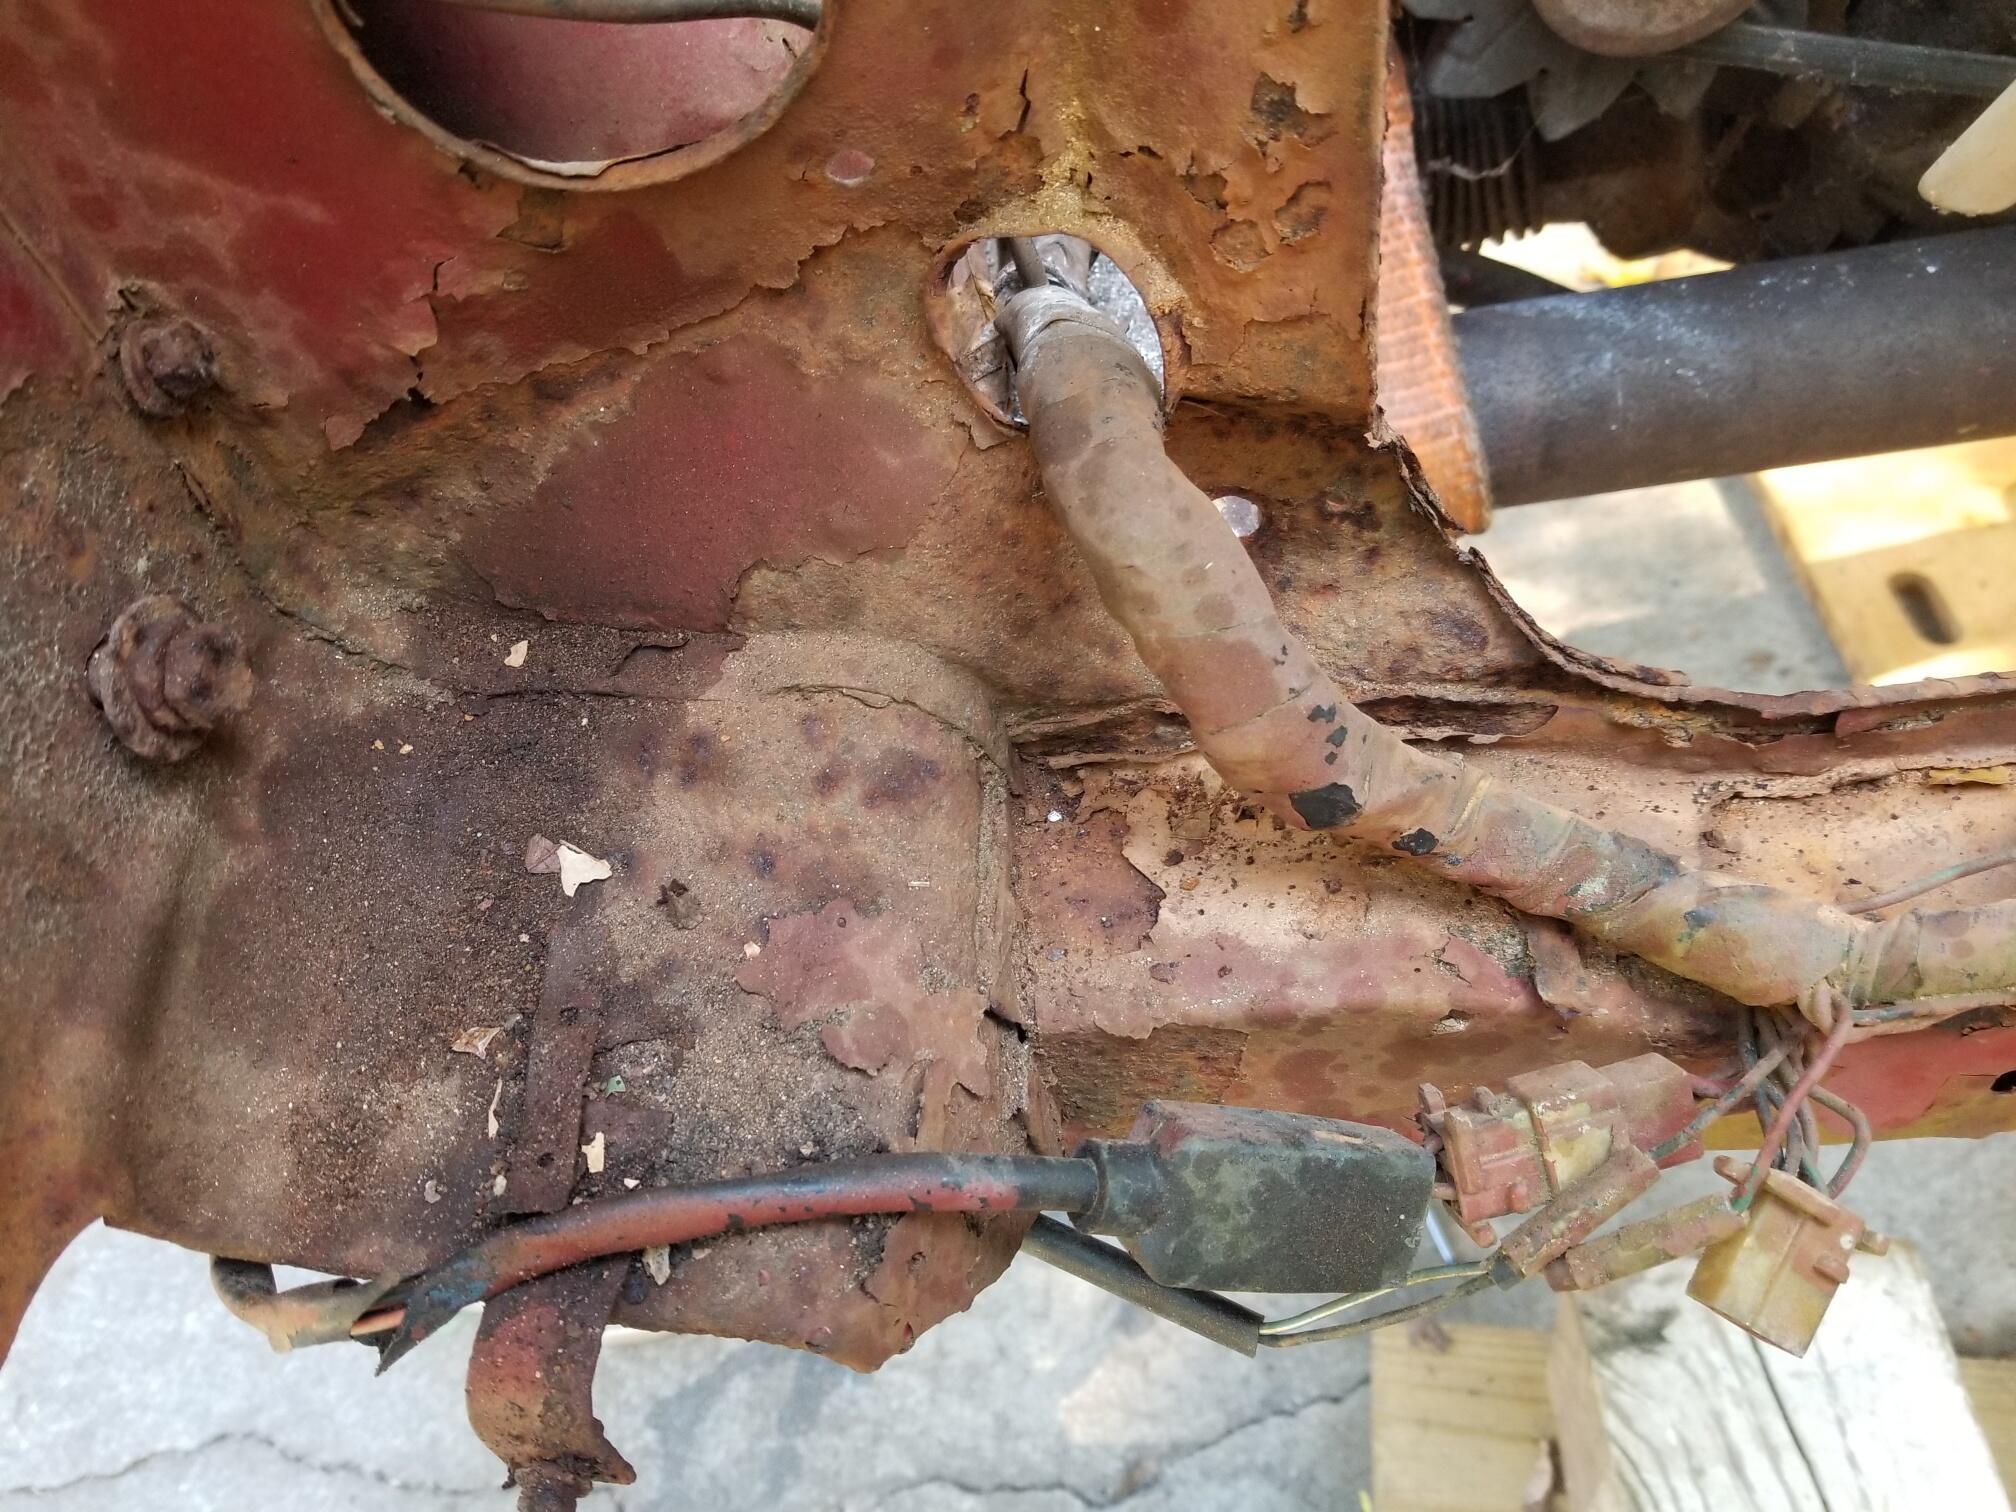
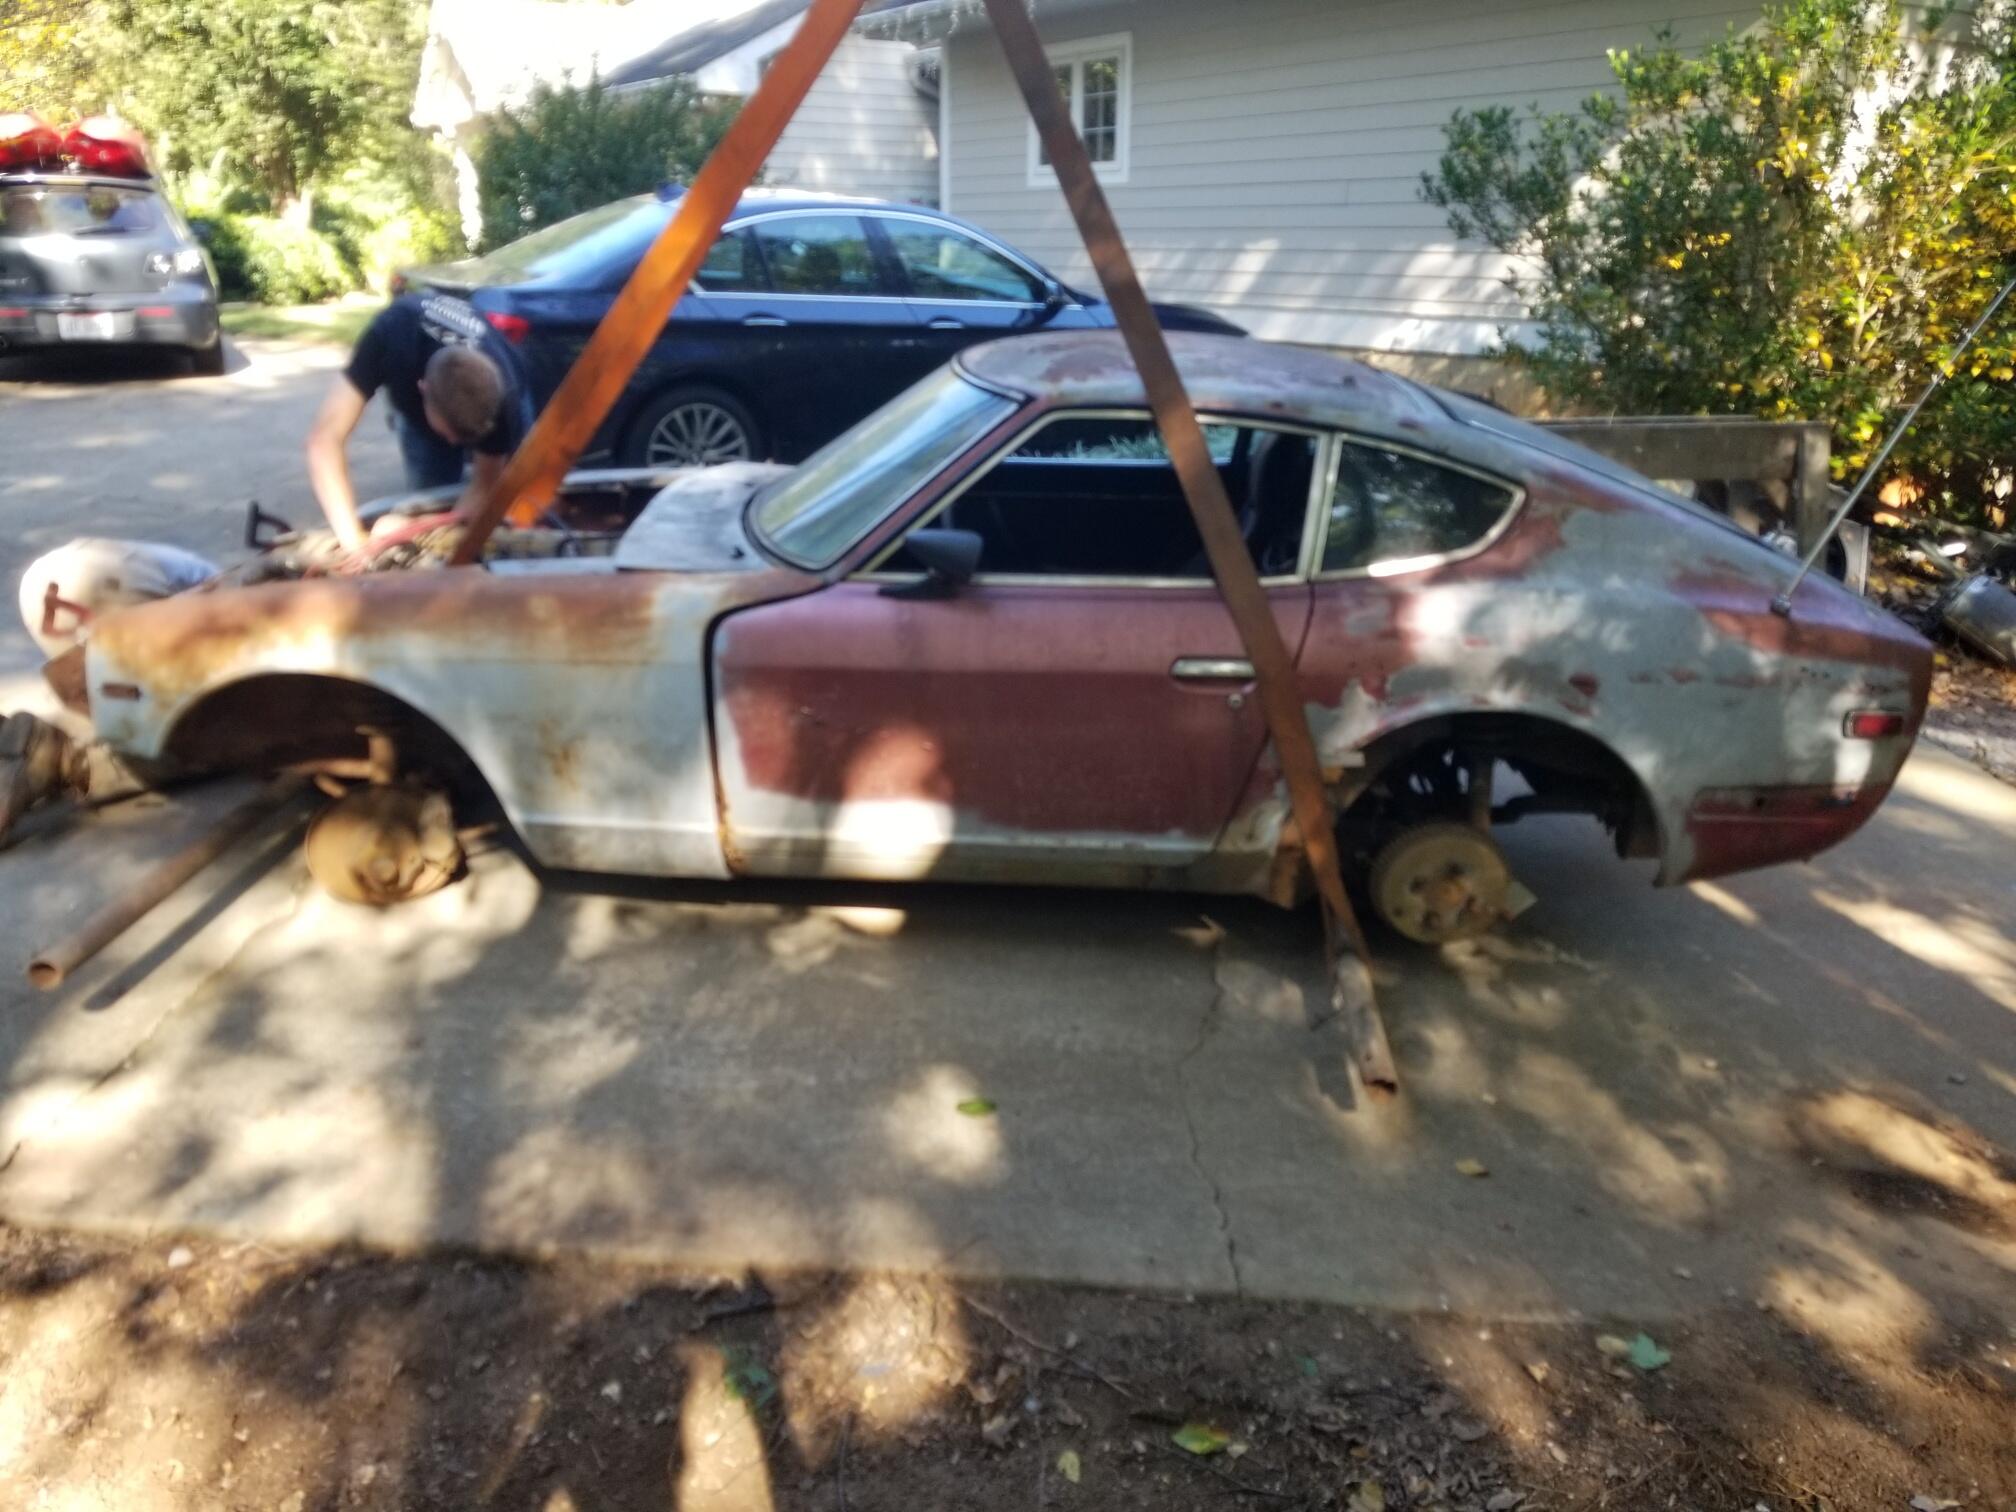
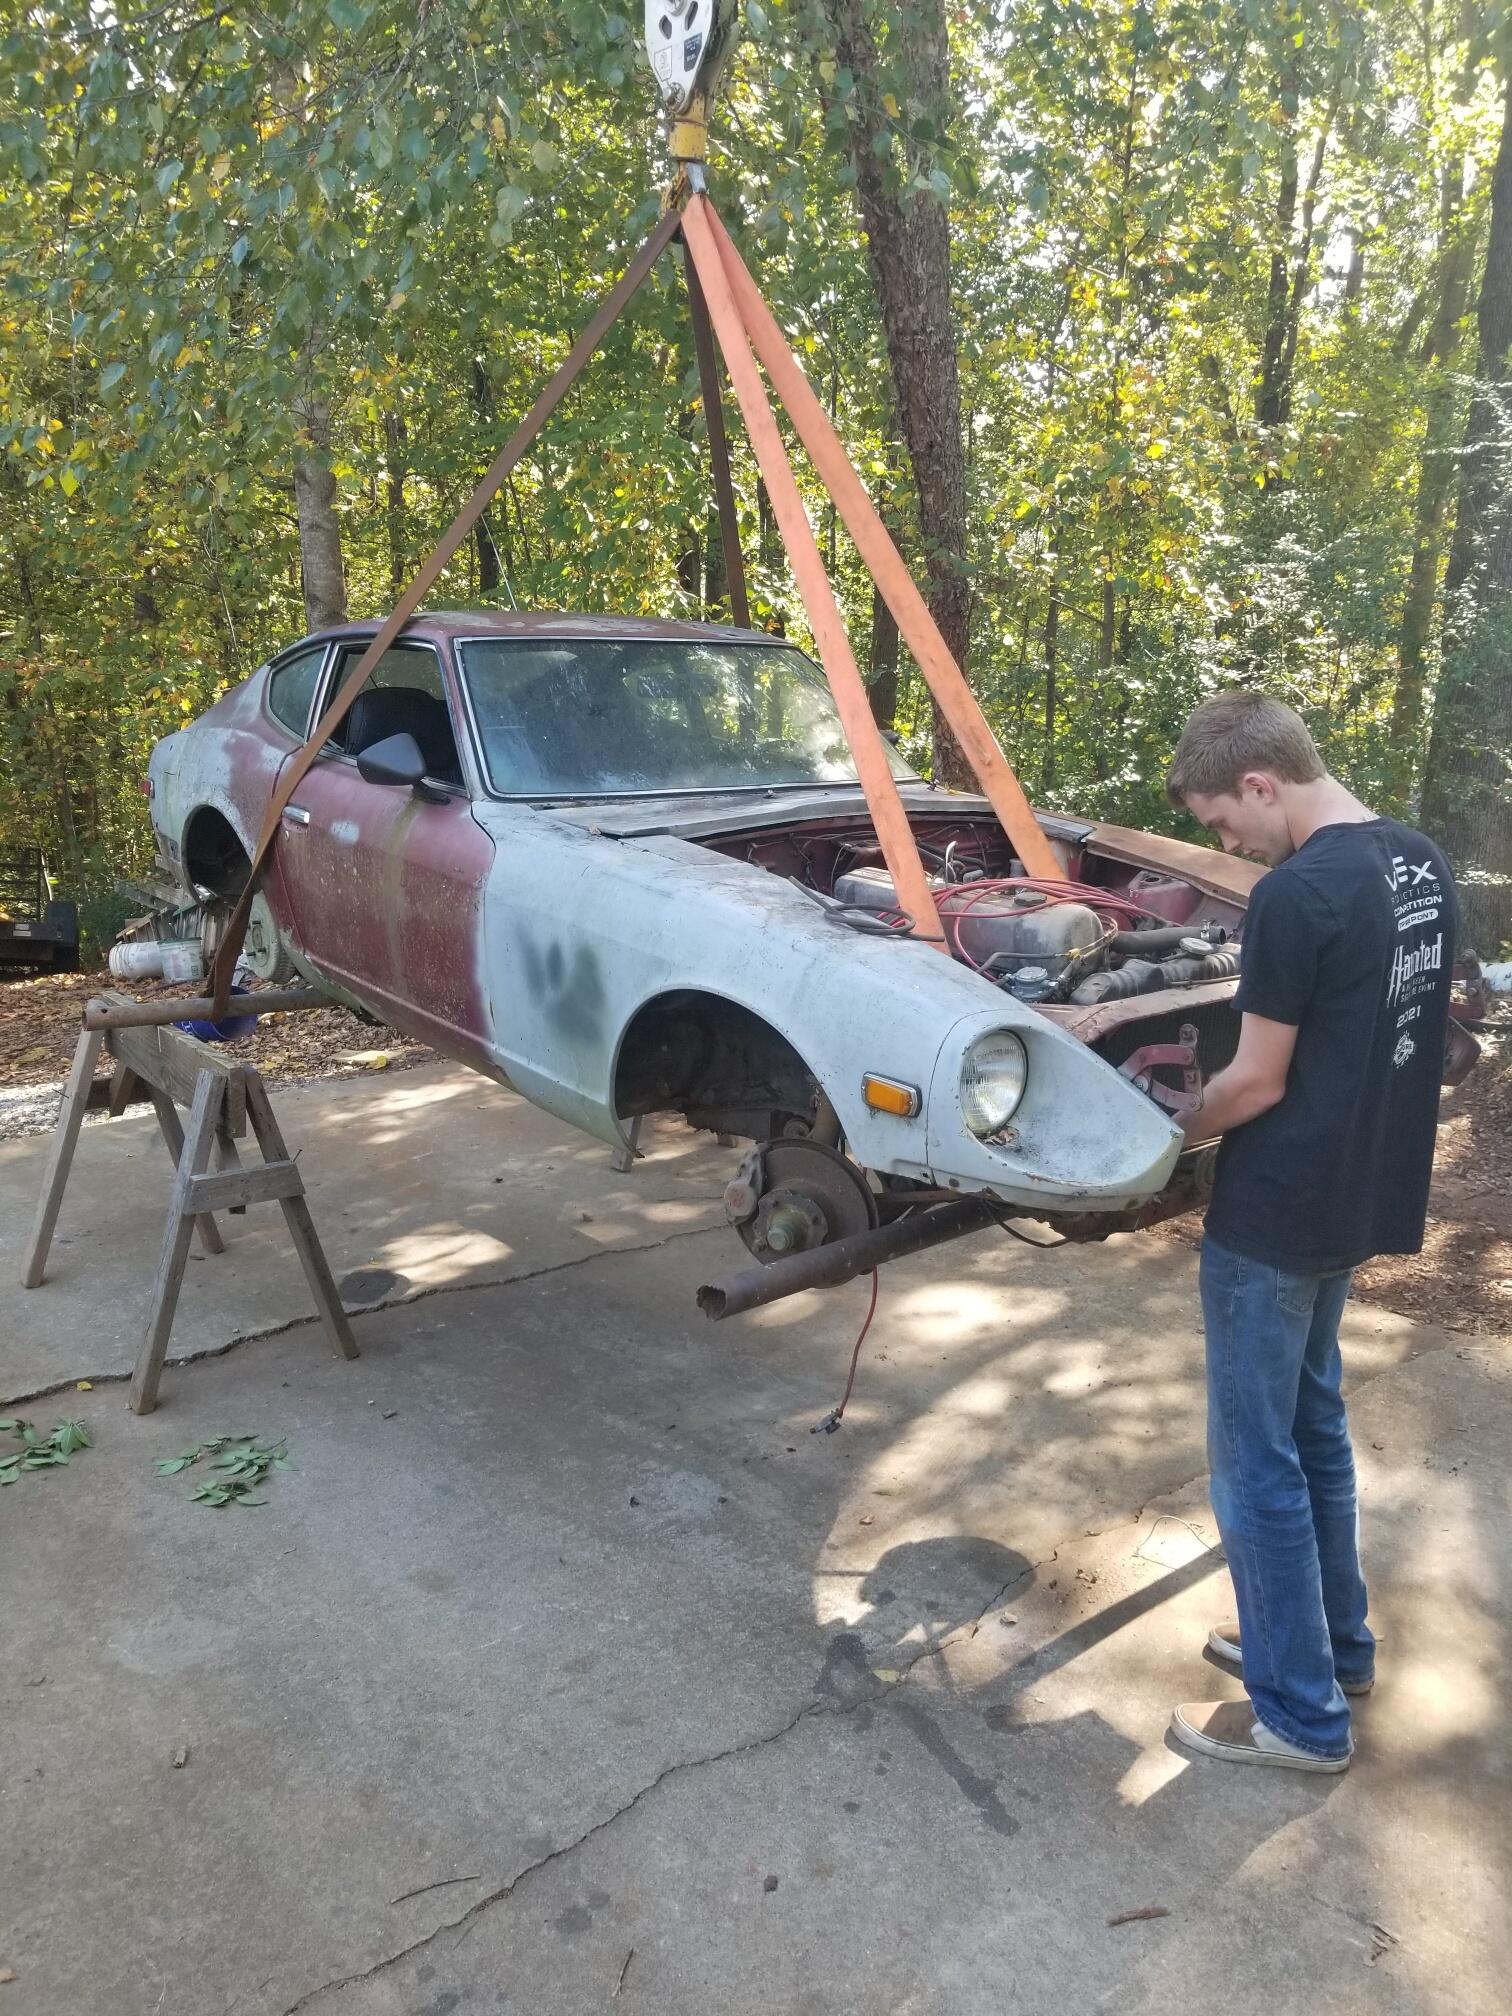
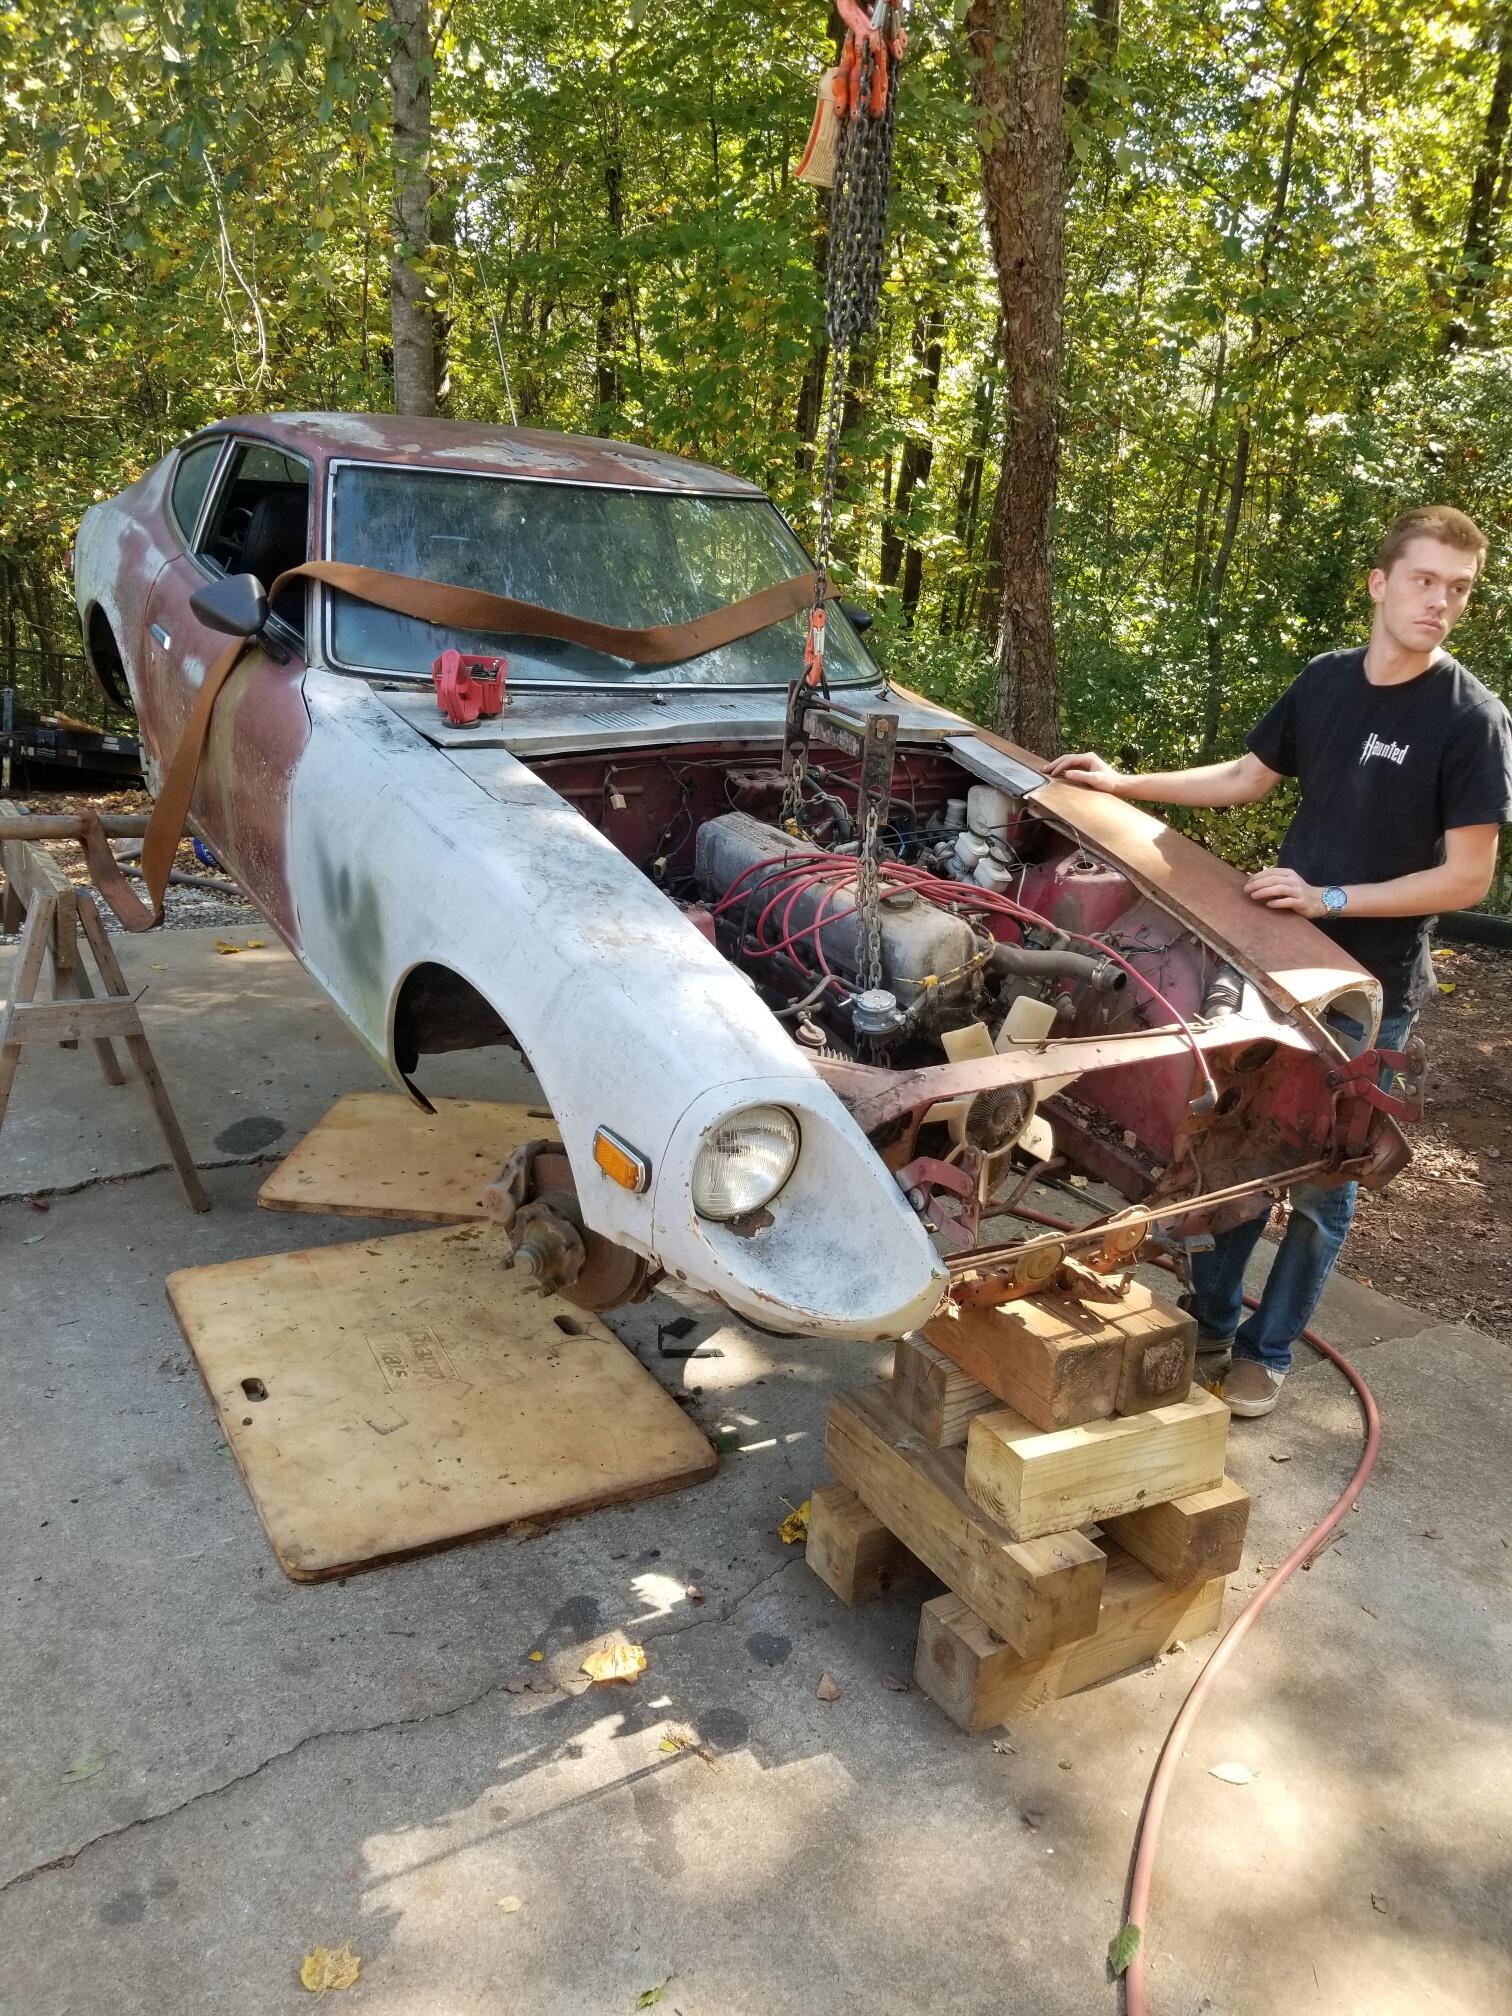
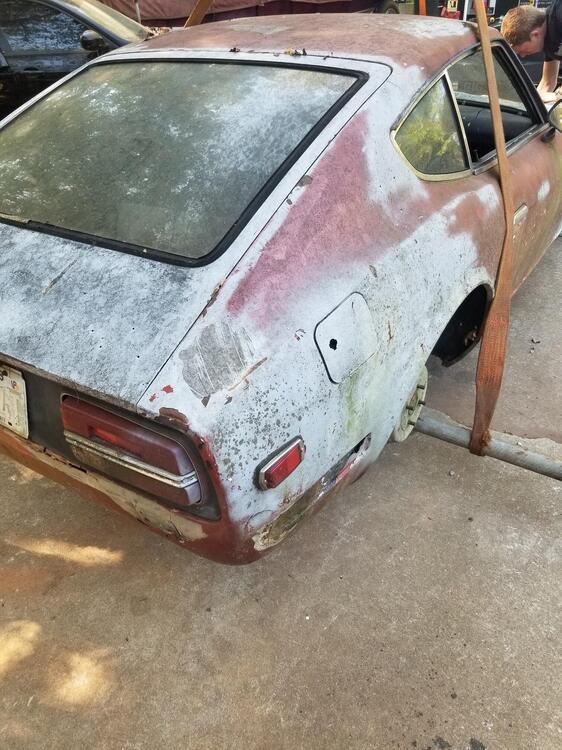
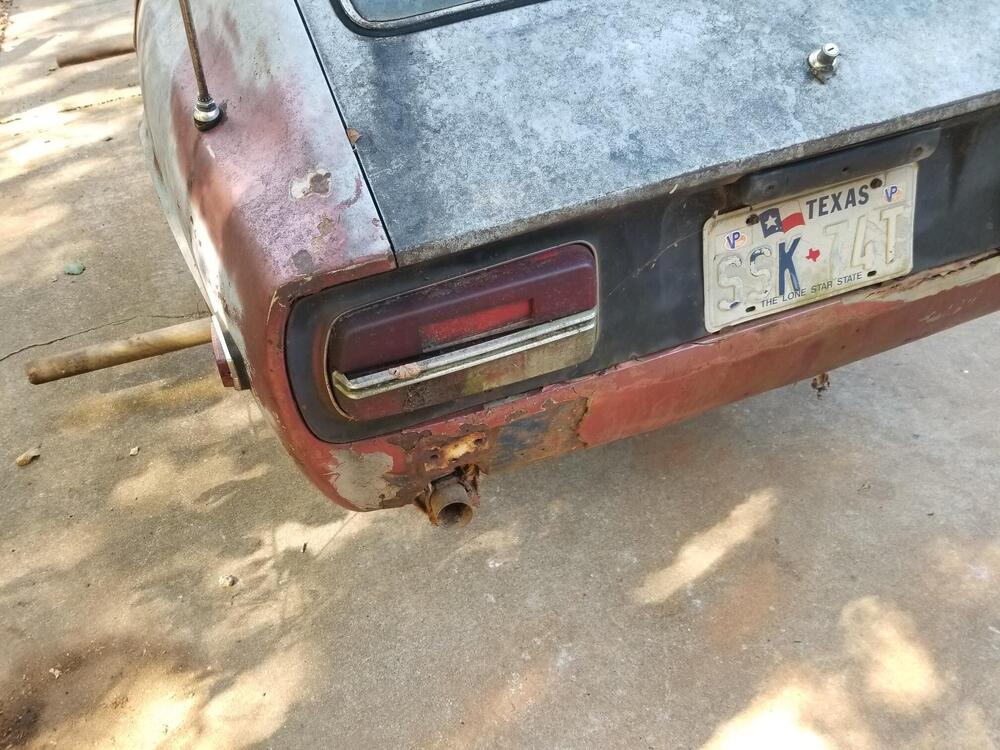
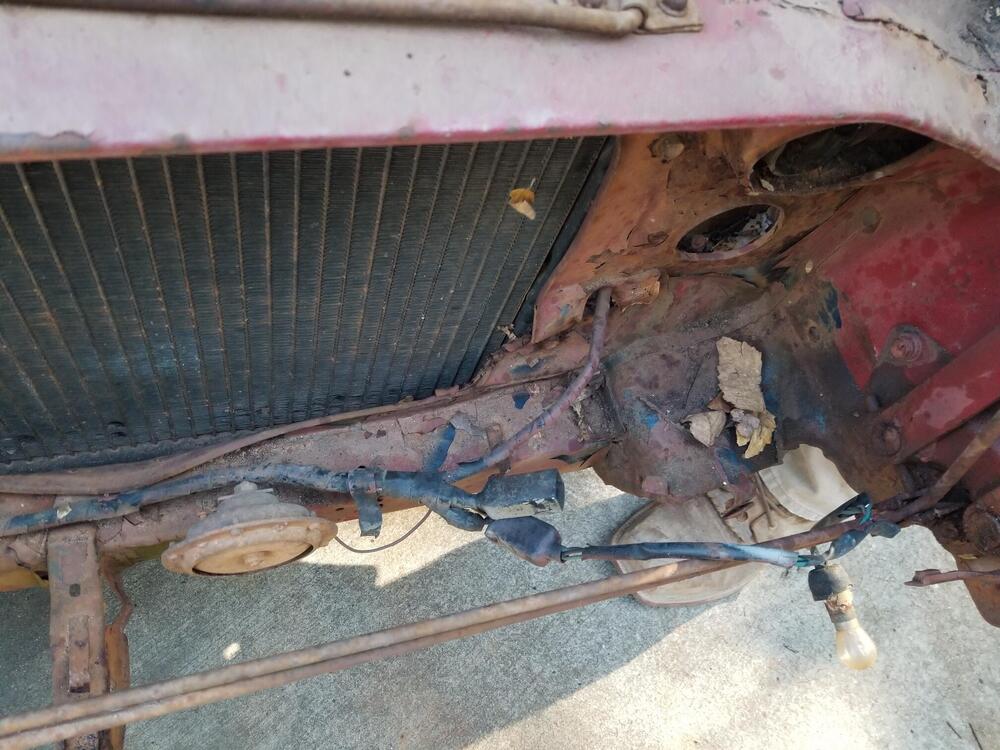
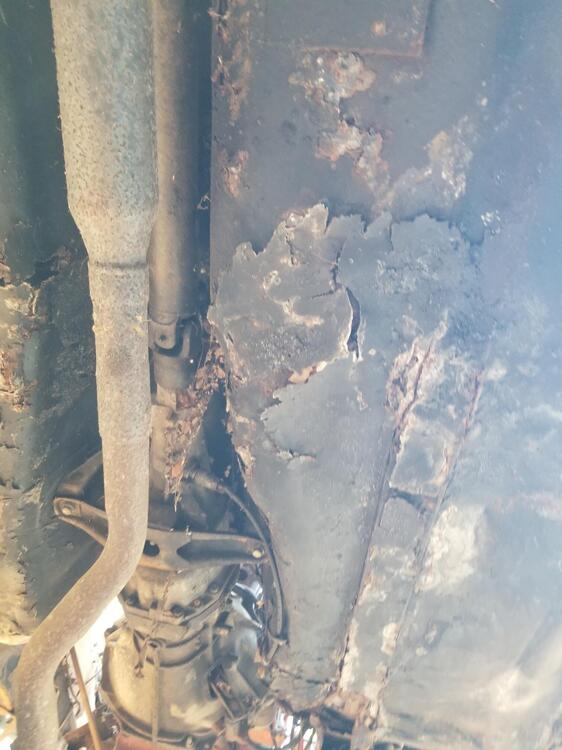
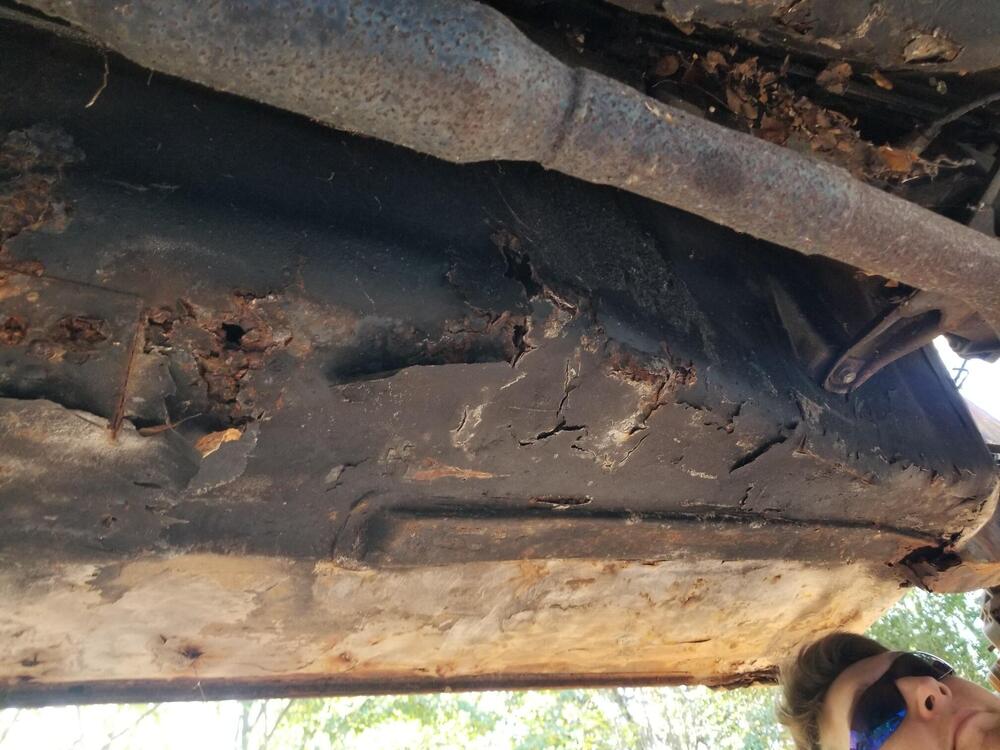
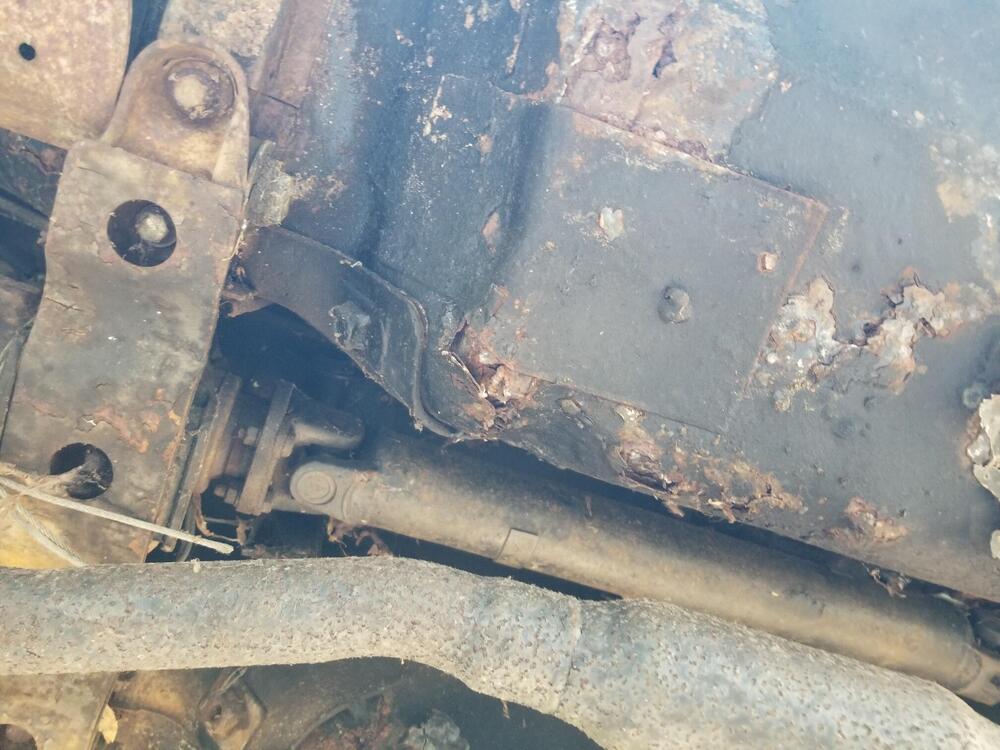
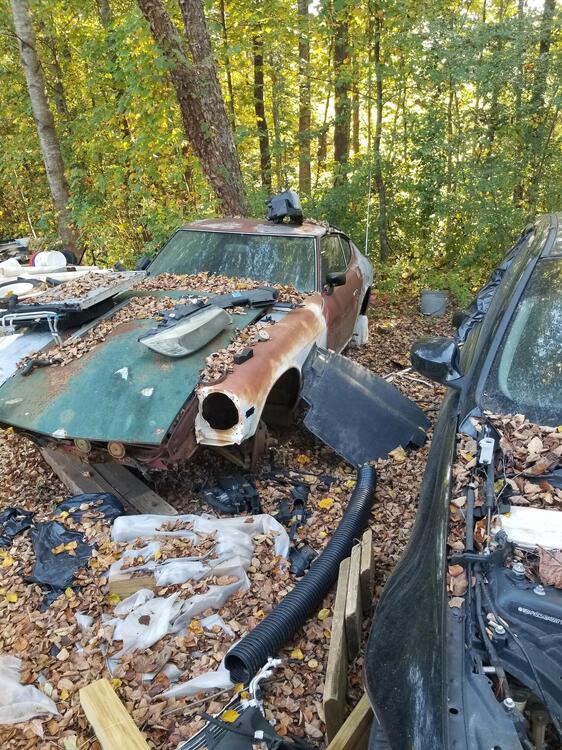
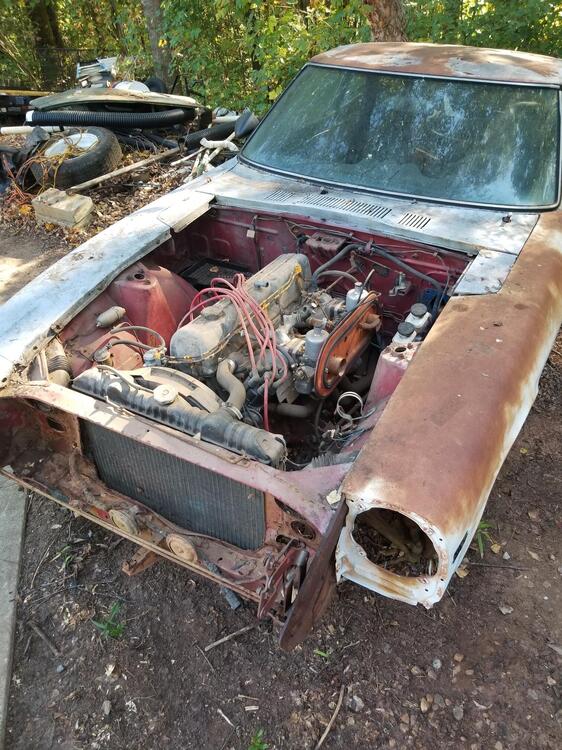
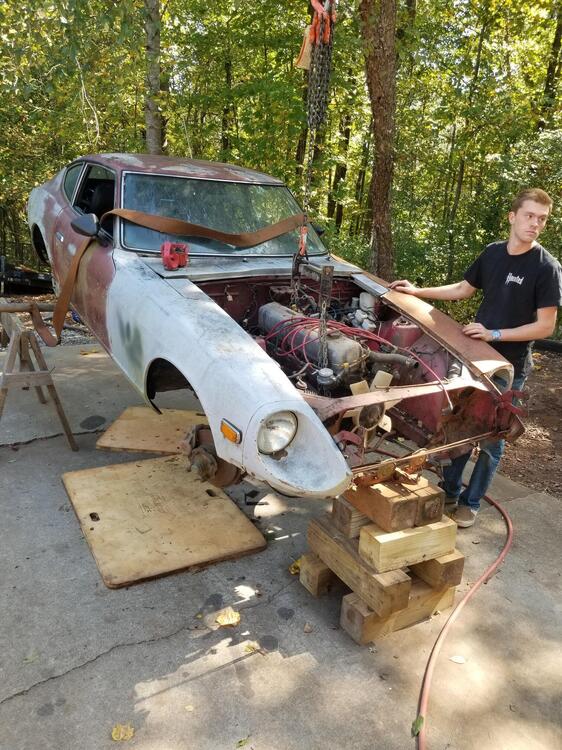
This car will need the "works" if I save it. Full floors, front frame rails, radiator support, quarters, rockers, doglegs, rear valance and slam panel. I would like to save it if I can but it really needs to be moved into a drier environment under a roof. Hopefully next year if I get Lily running, I can rearrange and move this under the roof near the shop
-
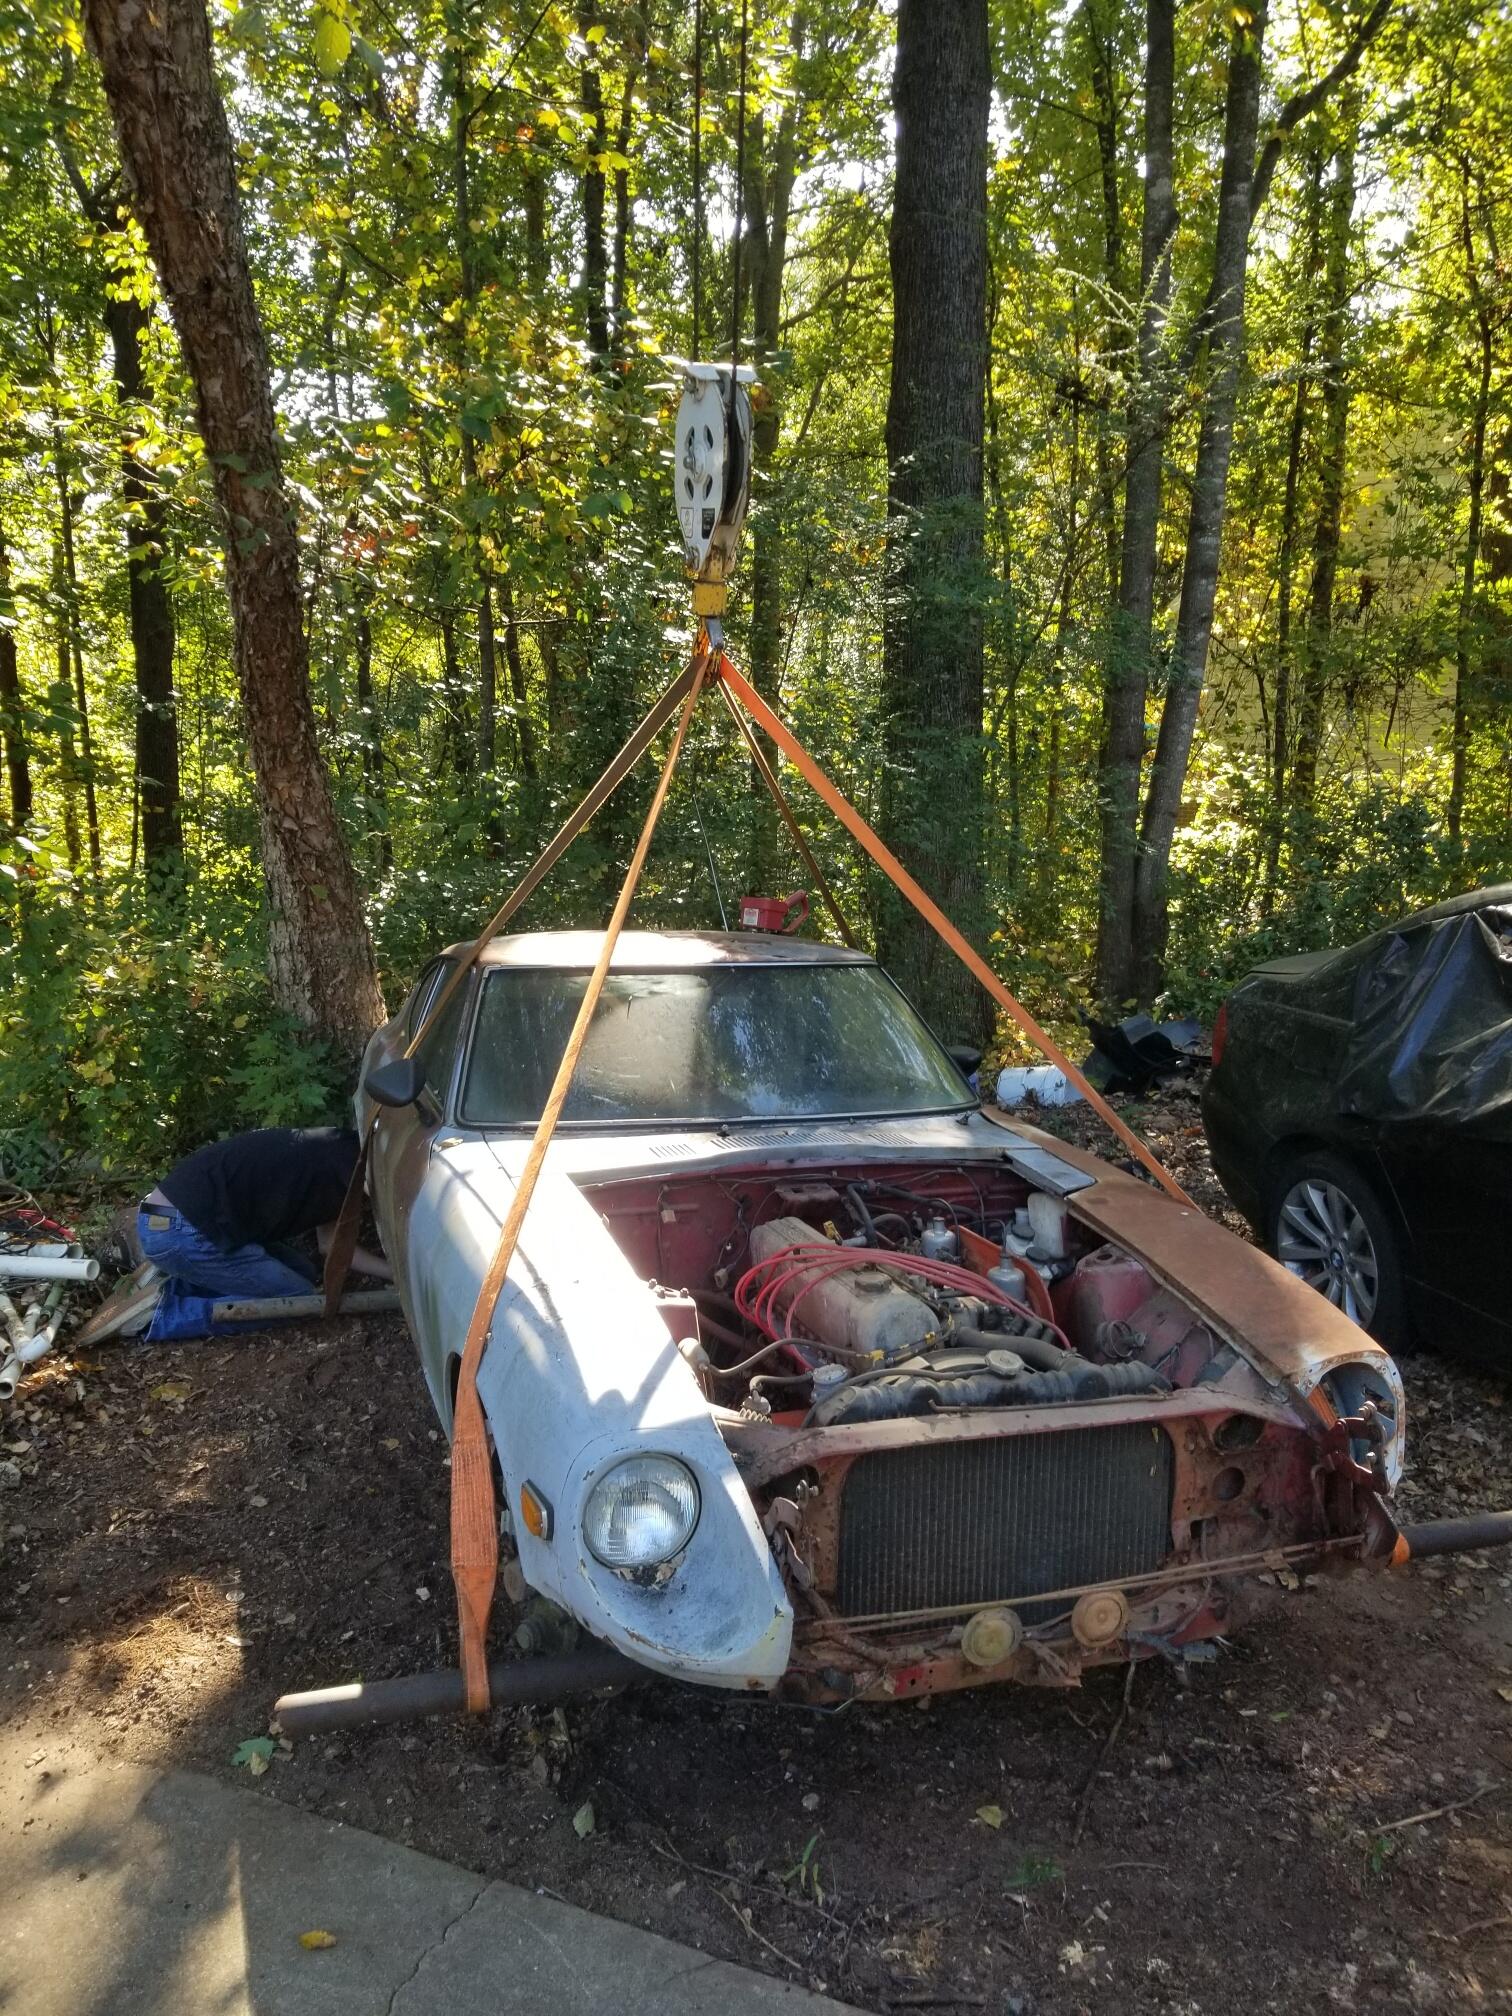
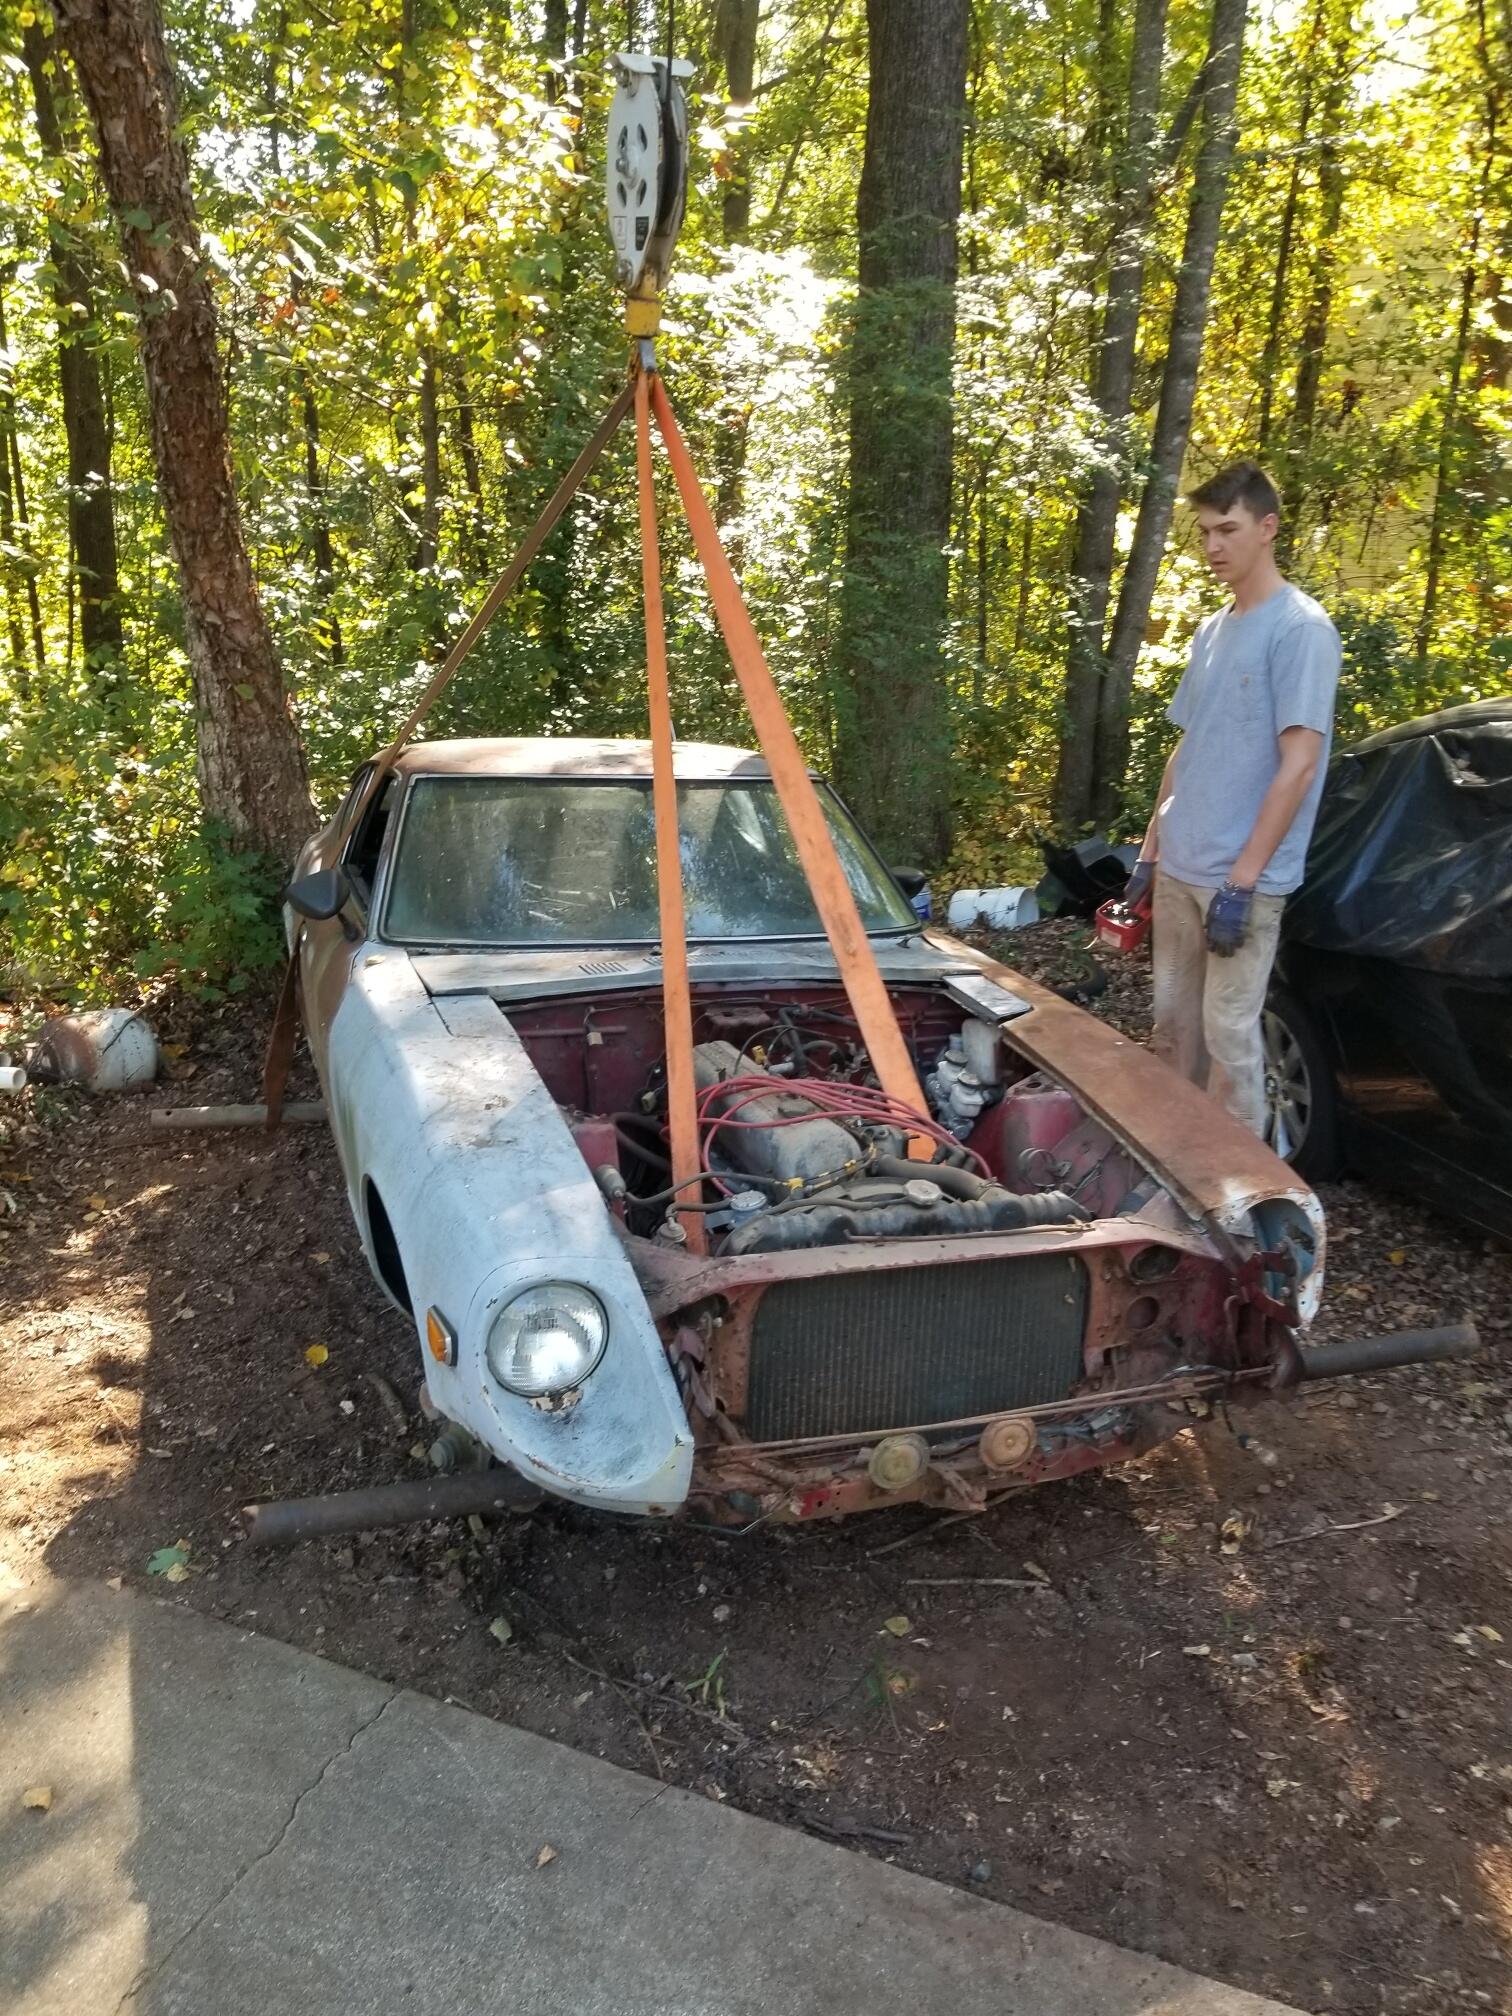
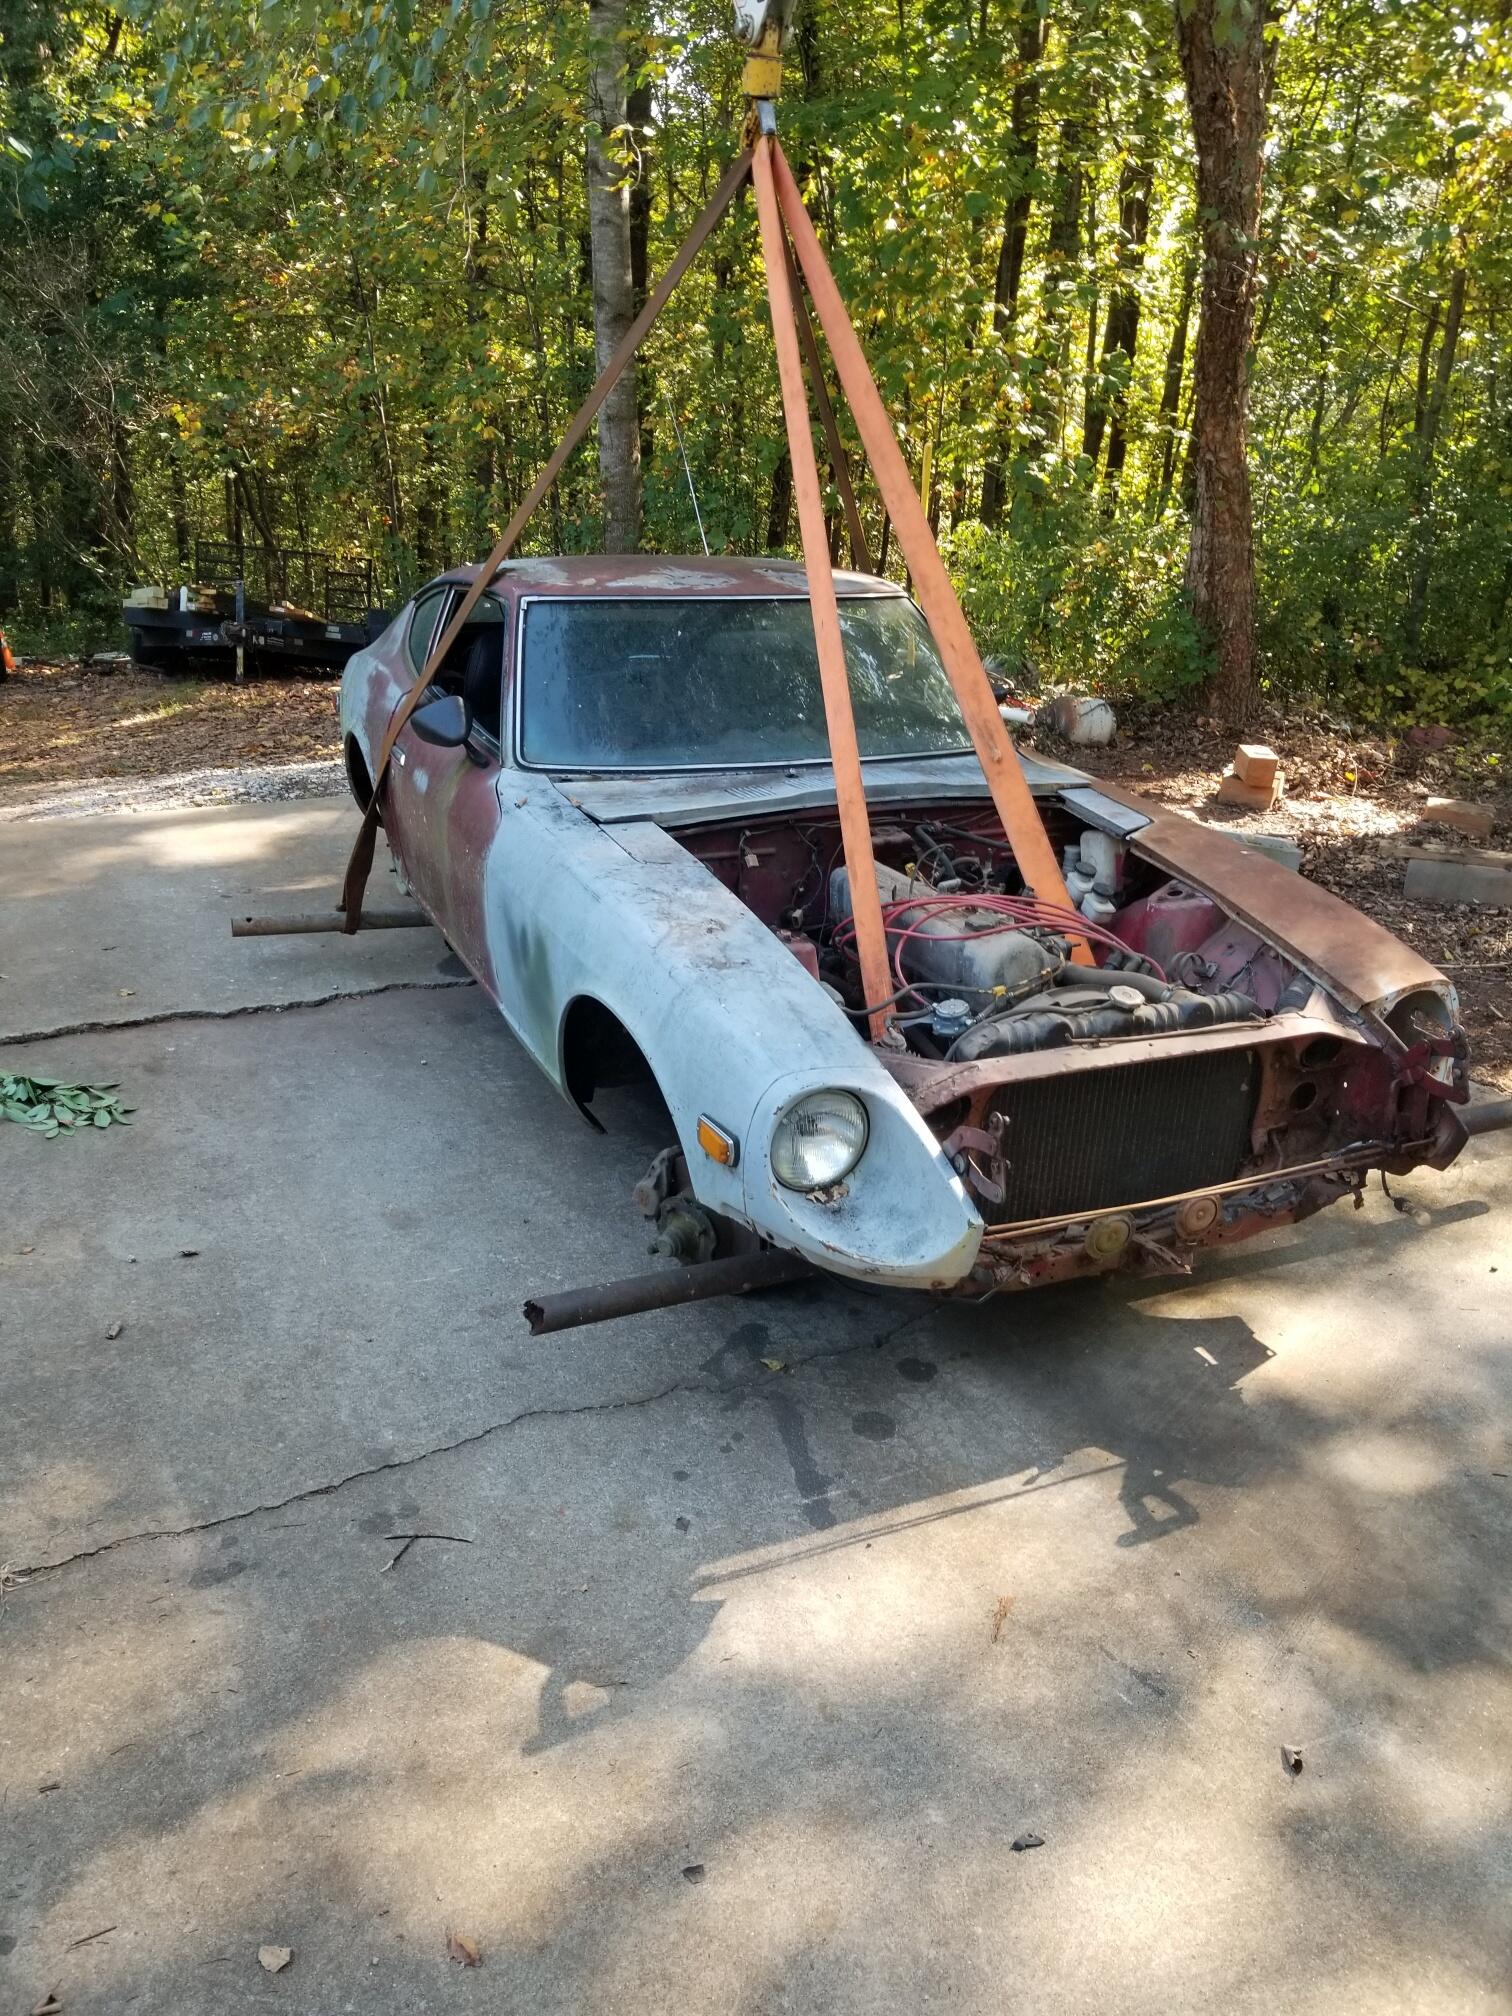
Here are some pictures of the general condition of the car


-
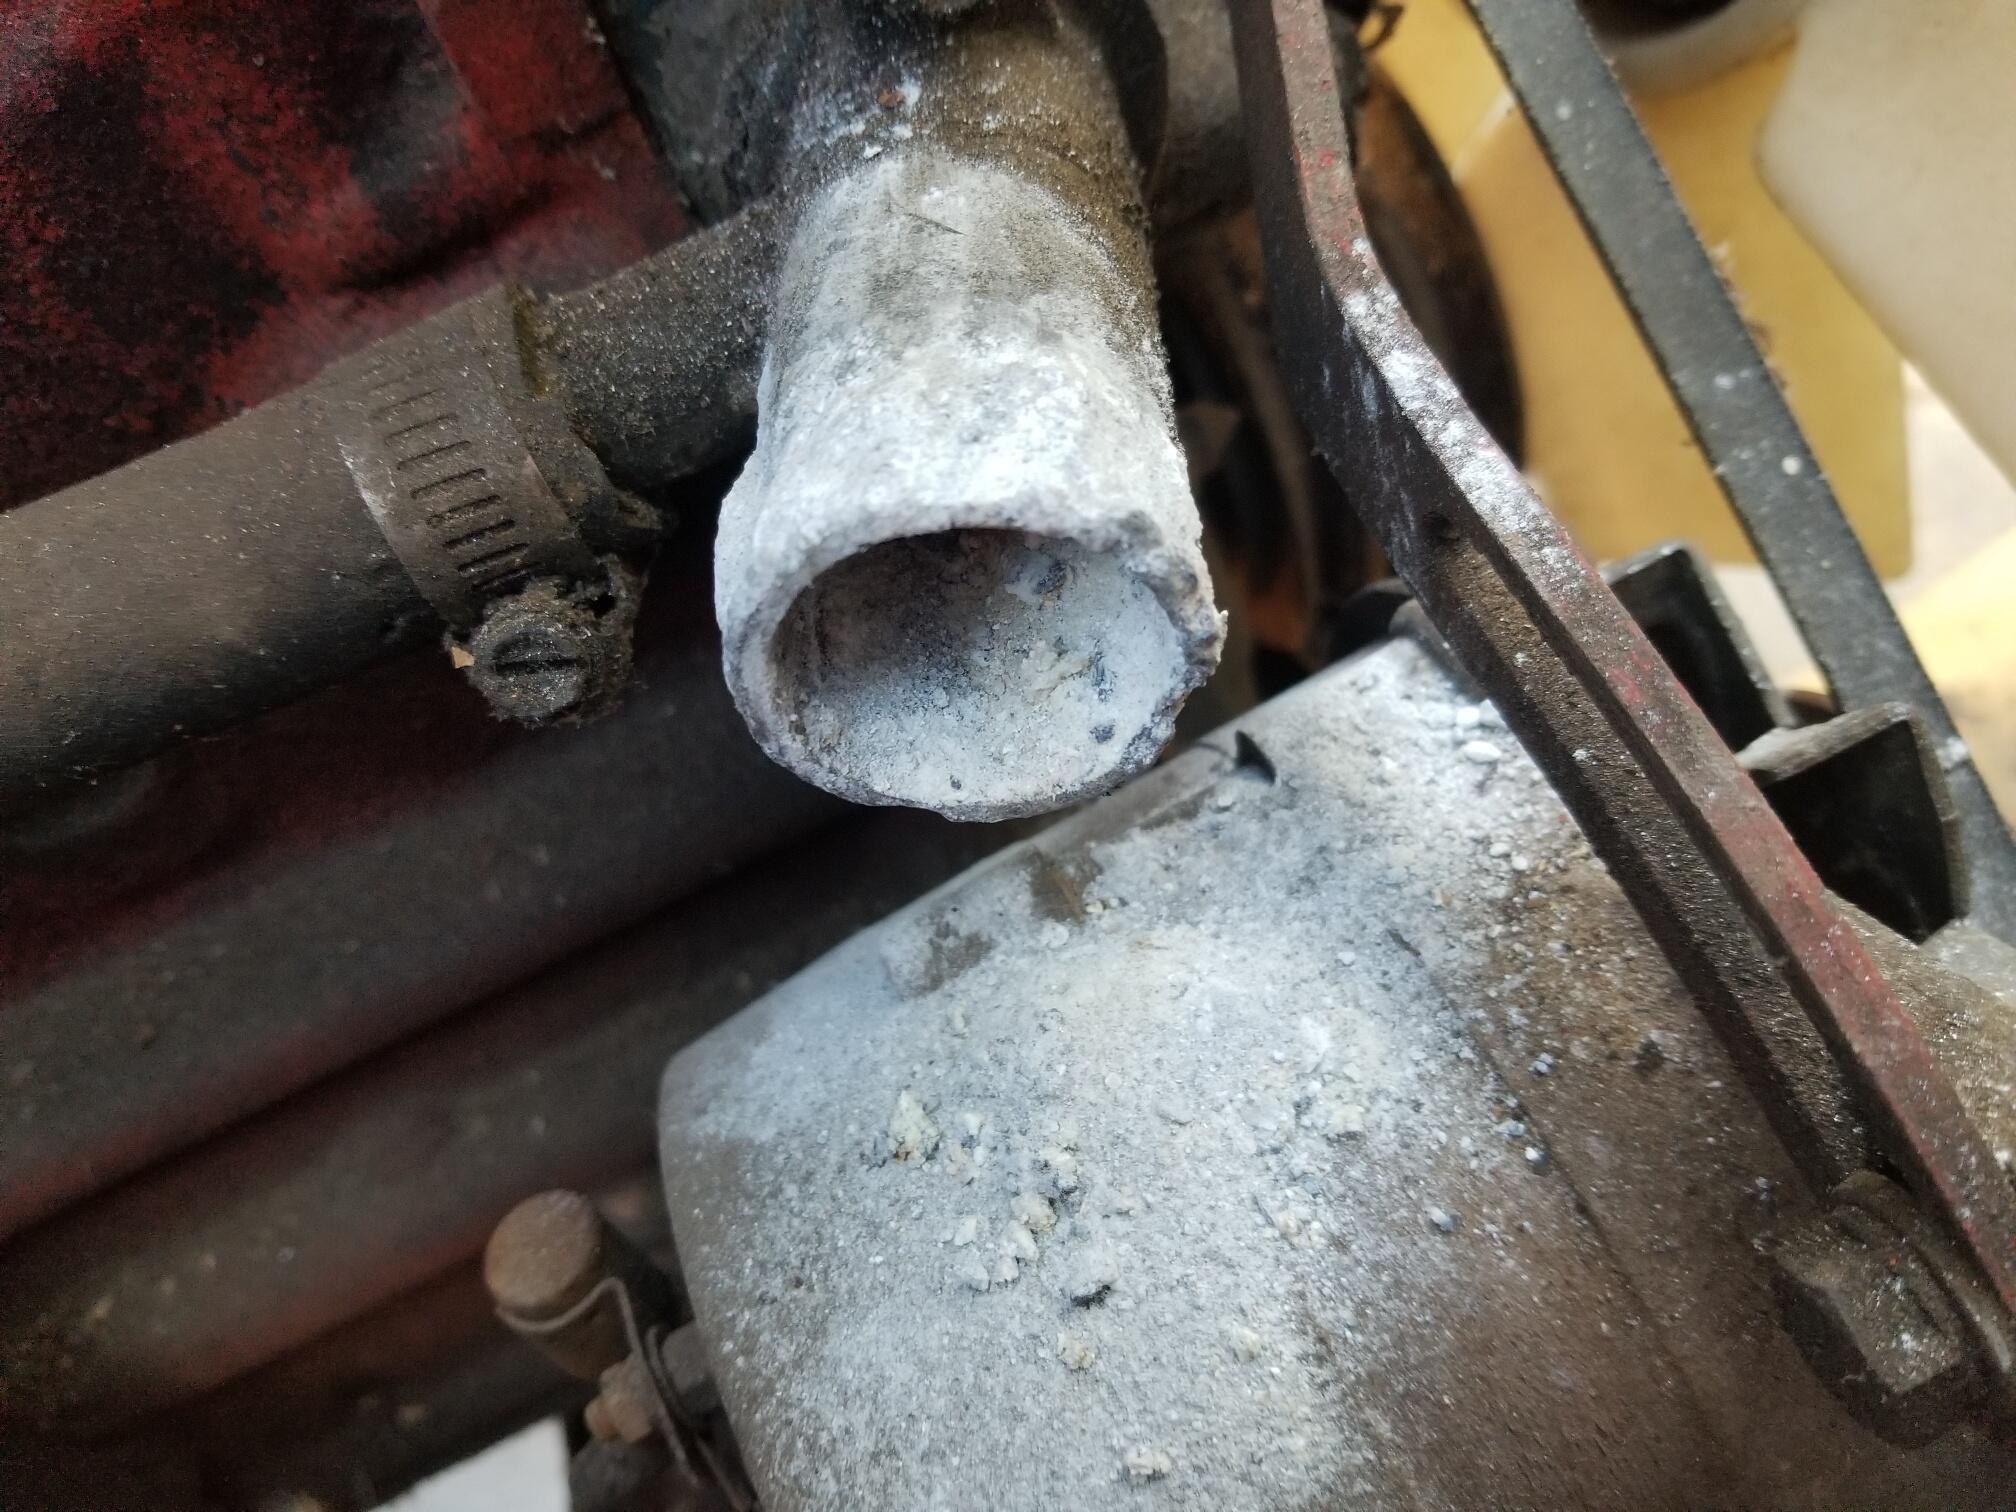
So I wanted to be sure the motor was still viable. So I hooked it up to a battery sitting on a trailer and spun it over with a remote starter switch. It spun freely with no plugs in it. So then I wanted to try to fire it over. It didn't have any carbs or exhaust on it. I messed with it for a while. Tried three different coils and two distributors called SteveJ to make sure I knew what I was doing. I then put the matchbox dizzy back in and got it to run on ether. I have a set of Ztherpay carbs that are evidently from 2011 that still look surprisingly good. They were on this engine and I will clean them up and reuse them for now 20231007_172650_447749883773934.mp4 It lives!!!
-
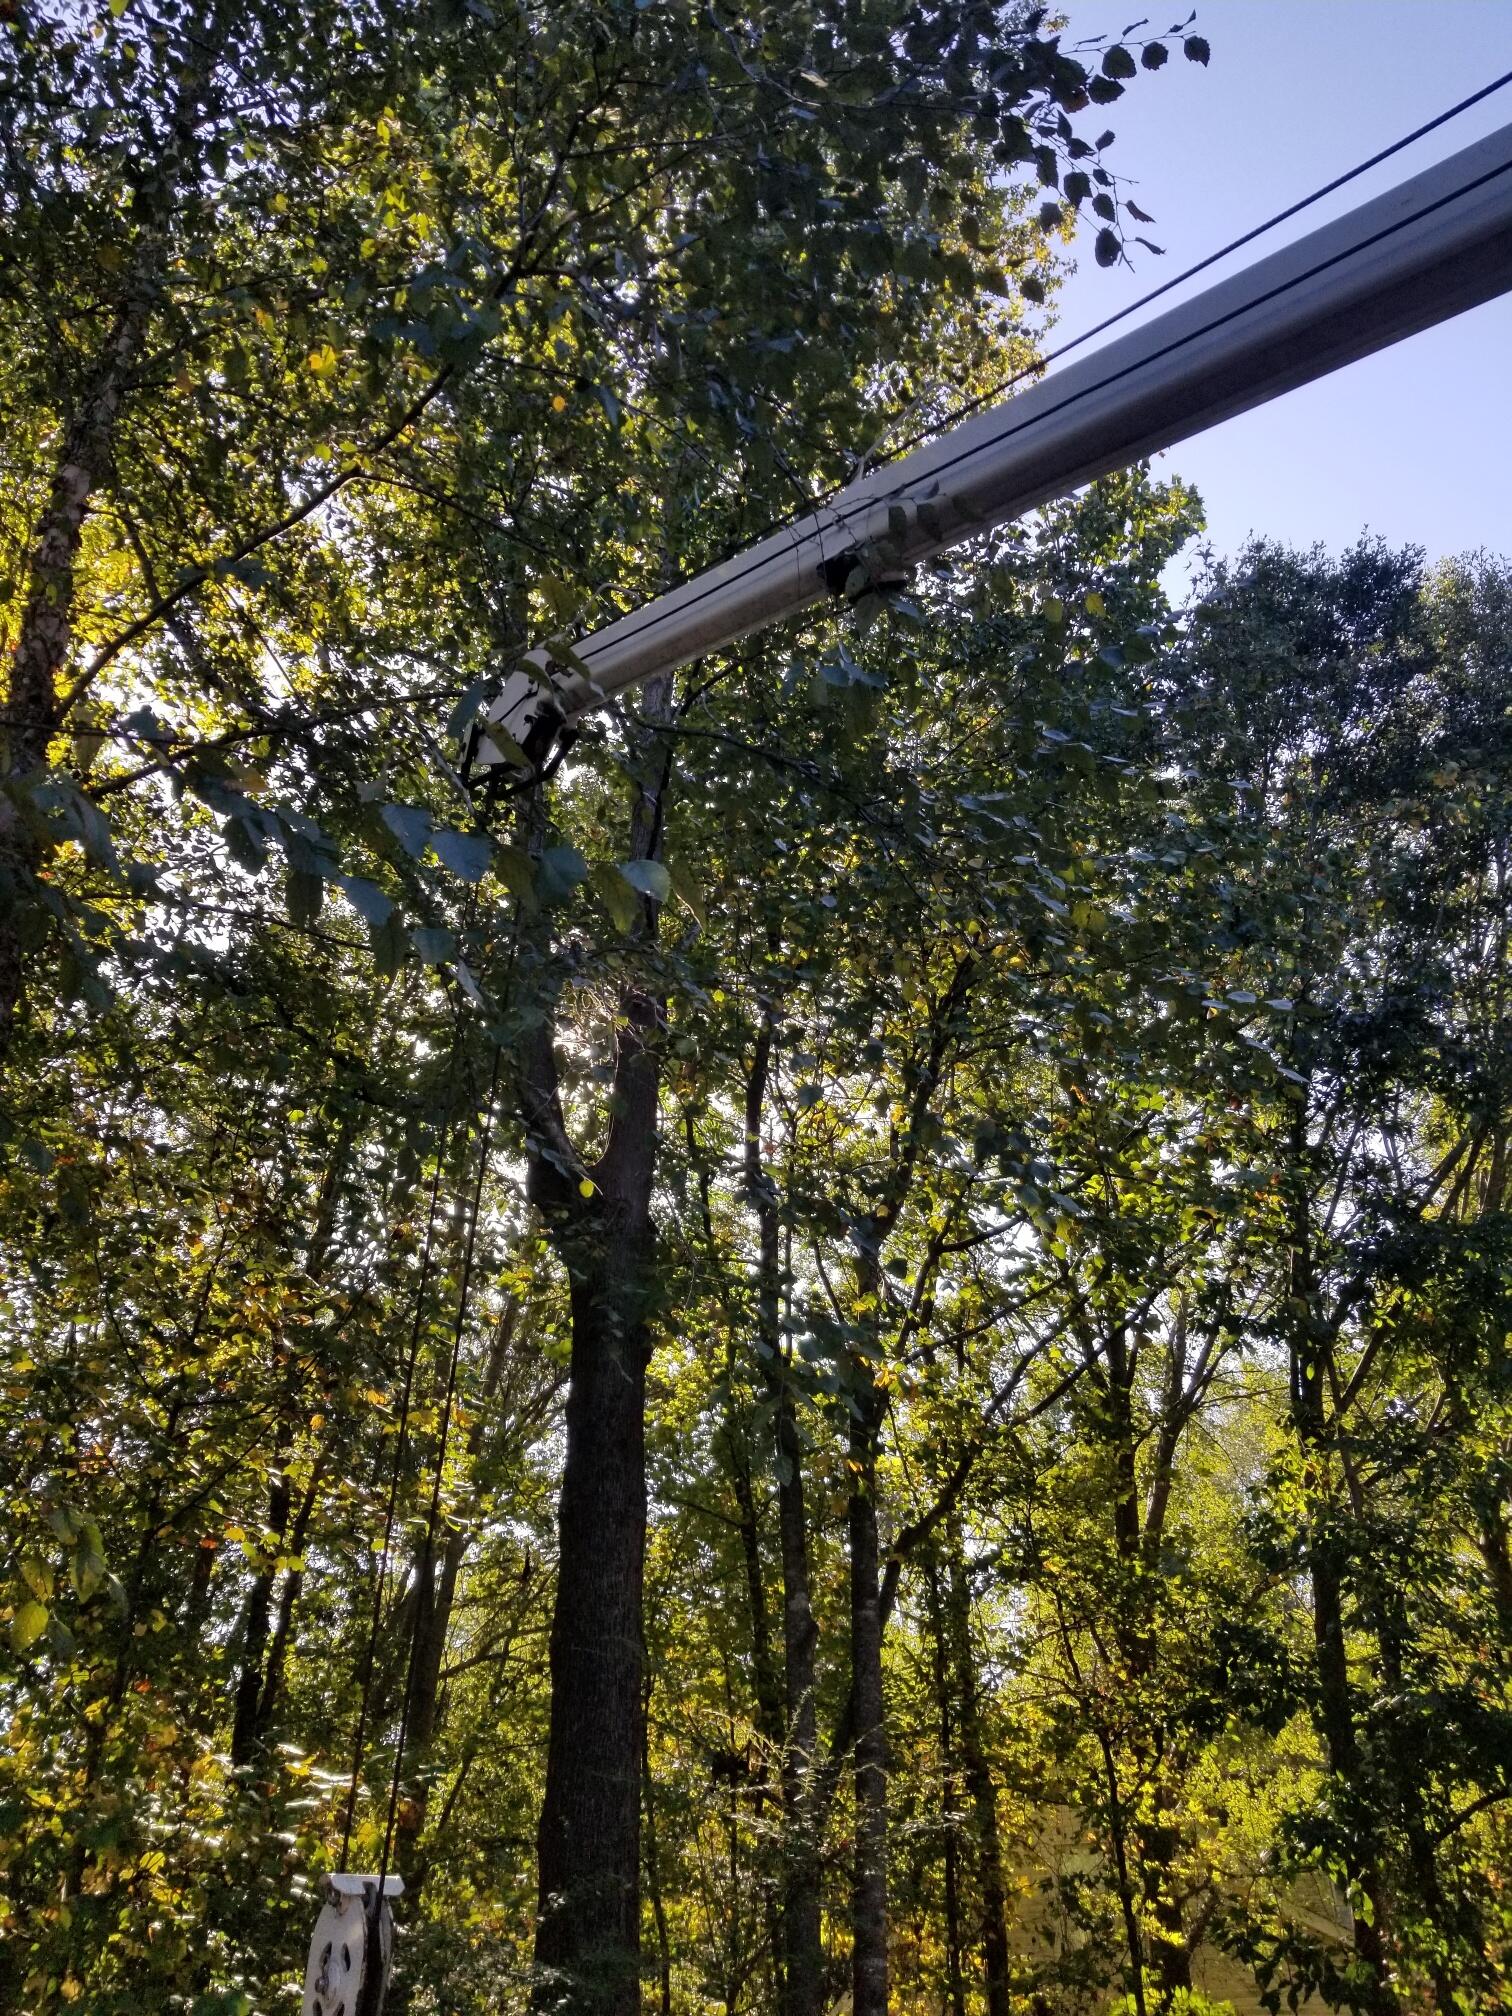
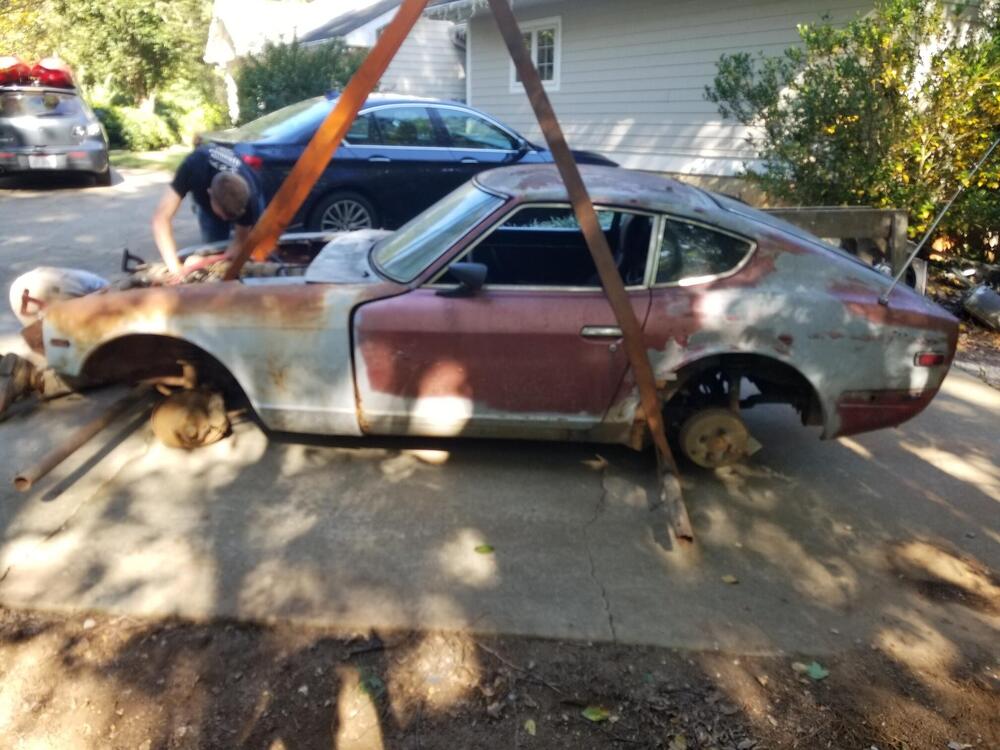
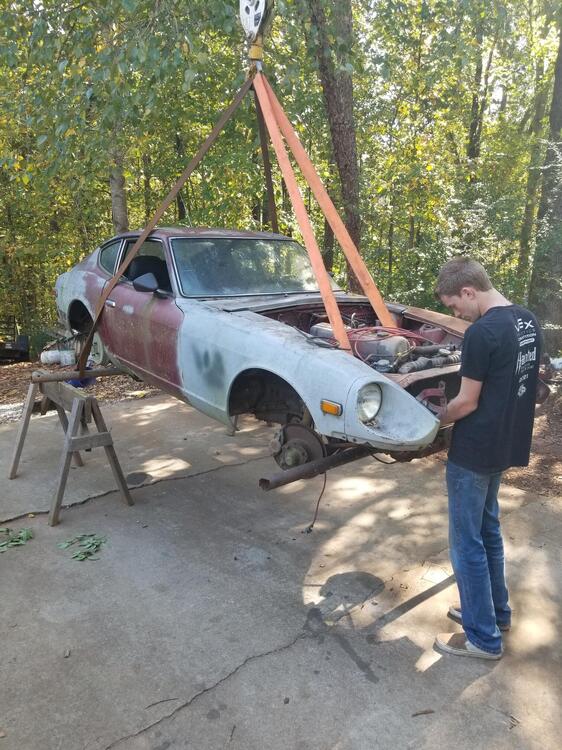
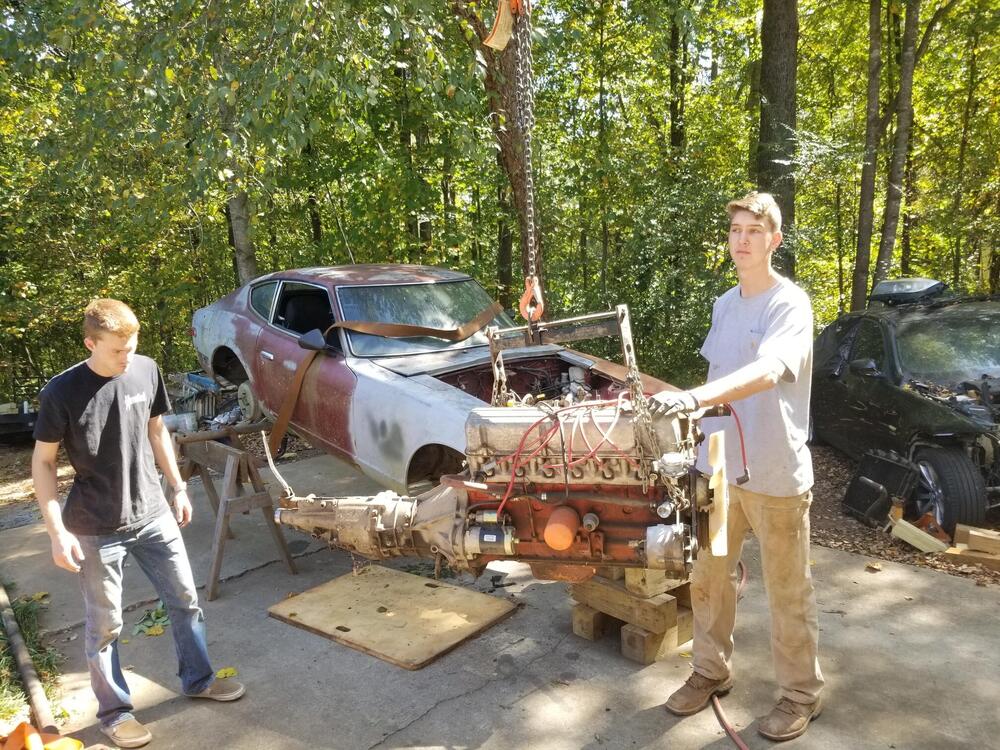
So this is another car that has been sitting around at our places for decades. It was my daily driver in about 1992. I rebuilt the engine in high school and it has a five speed that I installed at some point. It has gotten very rusty over the years. I am planning on trying to save it at some point now that a great many more good body panels are available now, if I live long enough. I decided that I would pull the drive train and use it in Lily for the time being to get her running and then down the road I will probably go L28eT, but after Zcon 2024. So that is what we did today Surrounded by BMW parts and parts cars Added some pipes underneath and some lifting straps Had to move the front straps to the inside to protect the fenders O Our engine hoist 😉 Tipped it down on some blocks and used a power ratchet on the leveler. Didn't have any issues even with the shifter still in the transmission. It was going to be a pain to get out so we just left it.


-
-
@the_tool_man Did you see that^^^
-
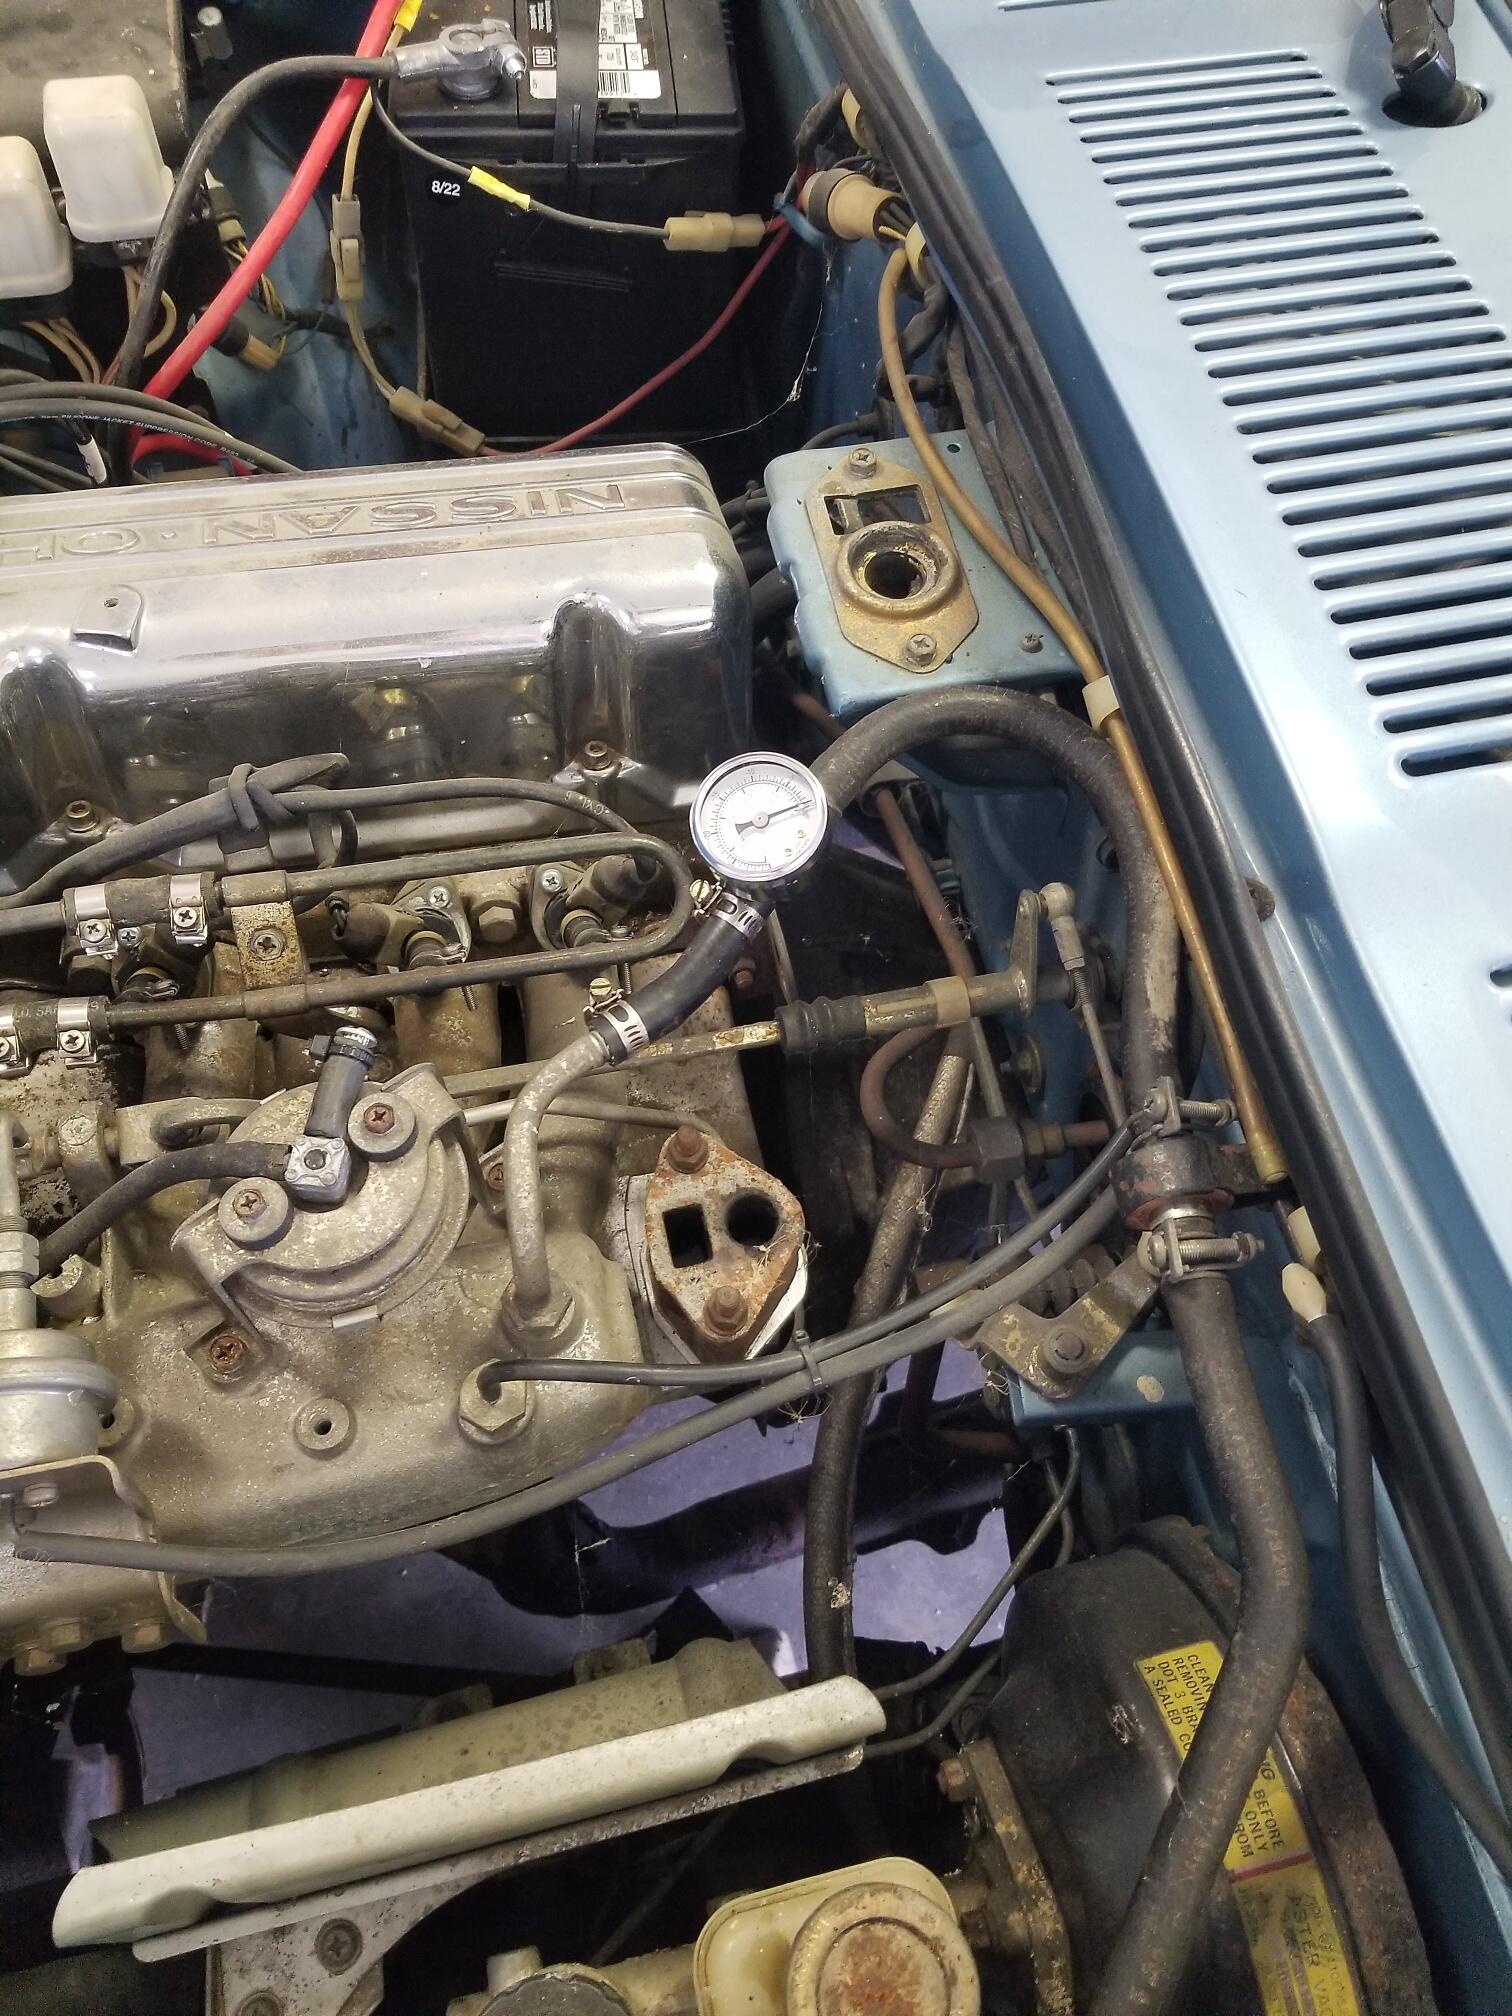
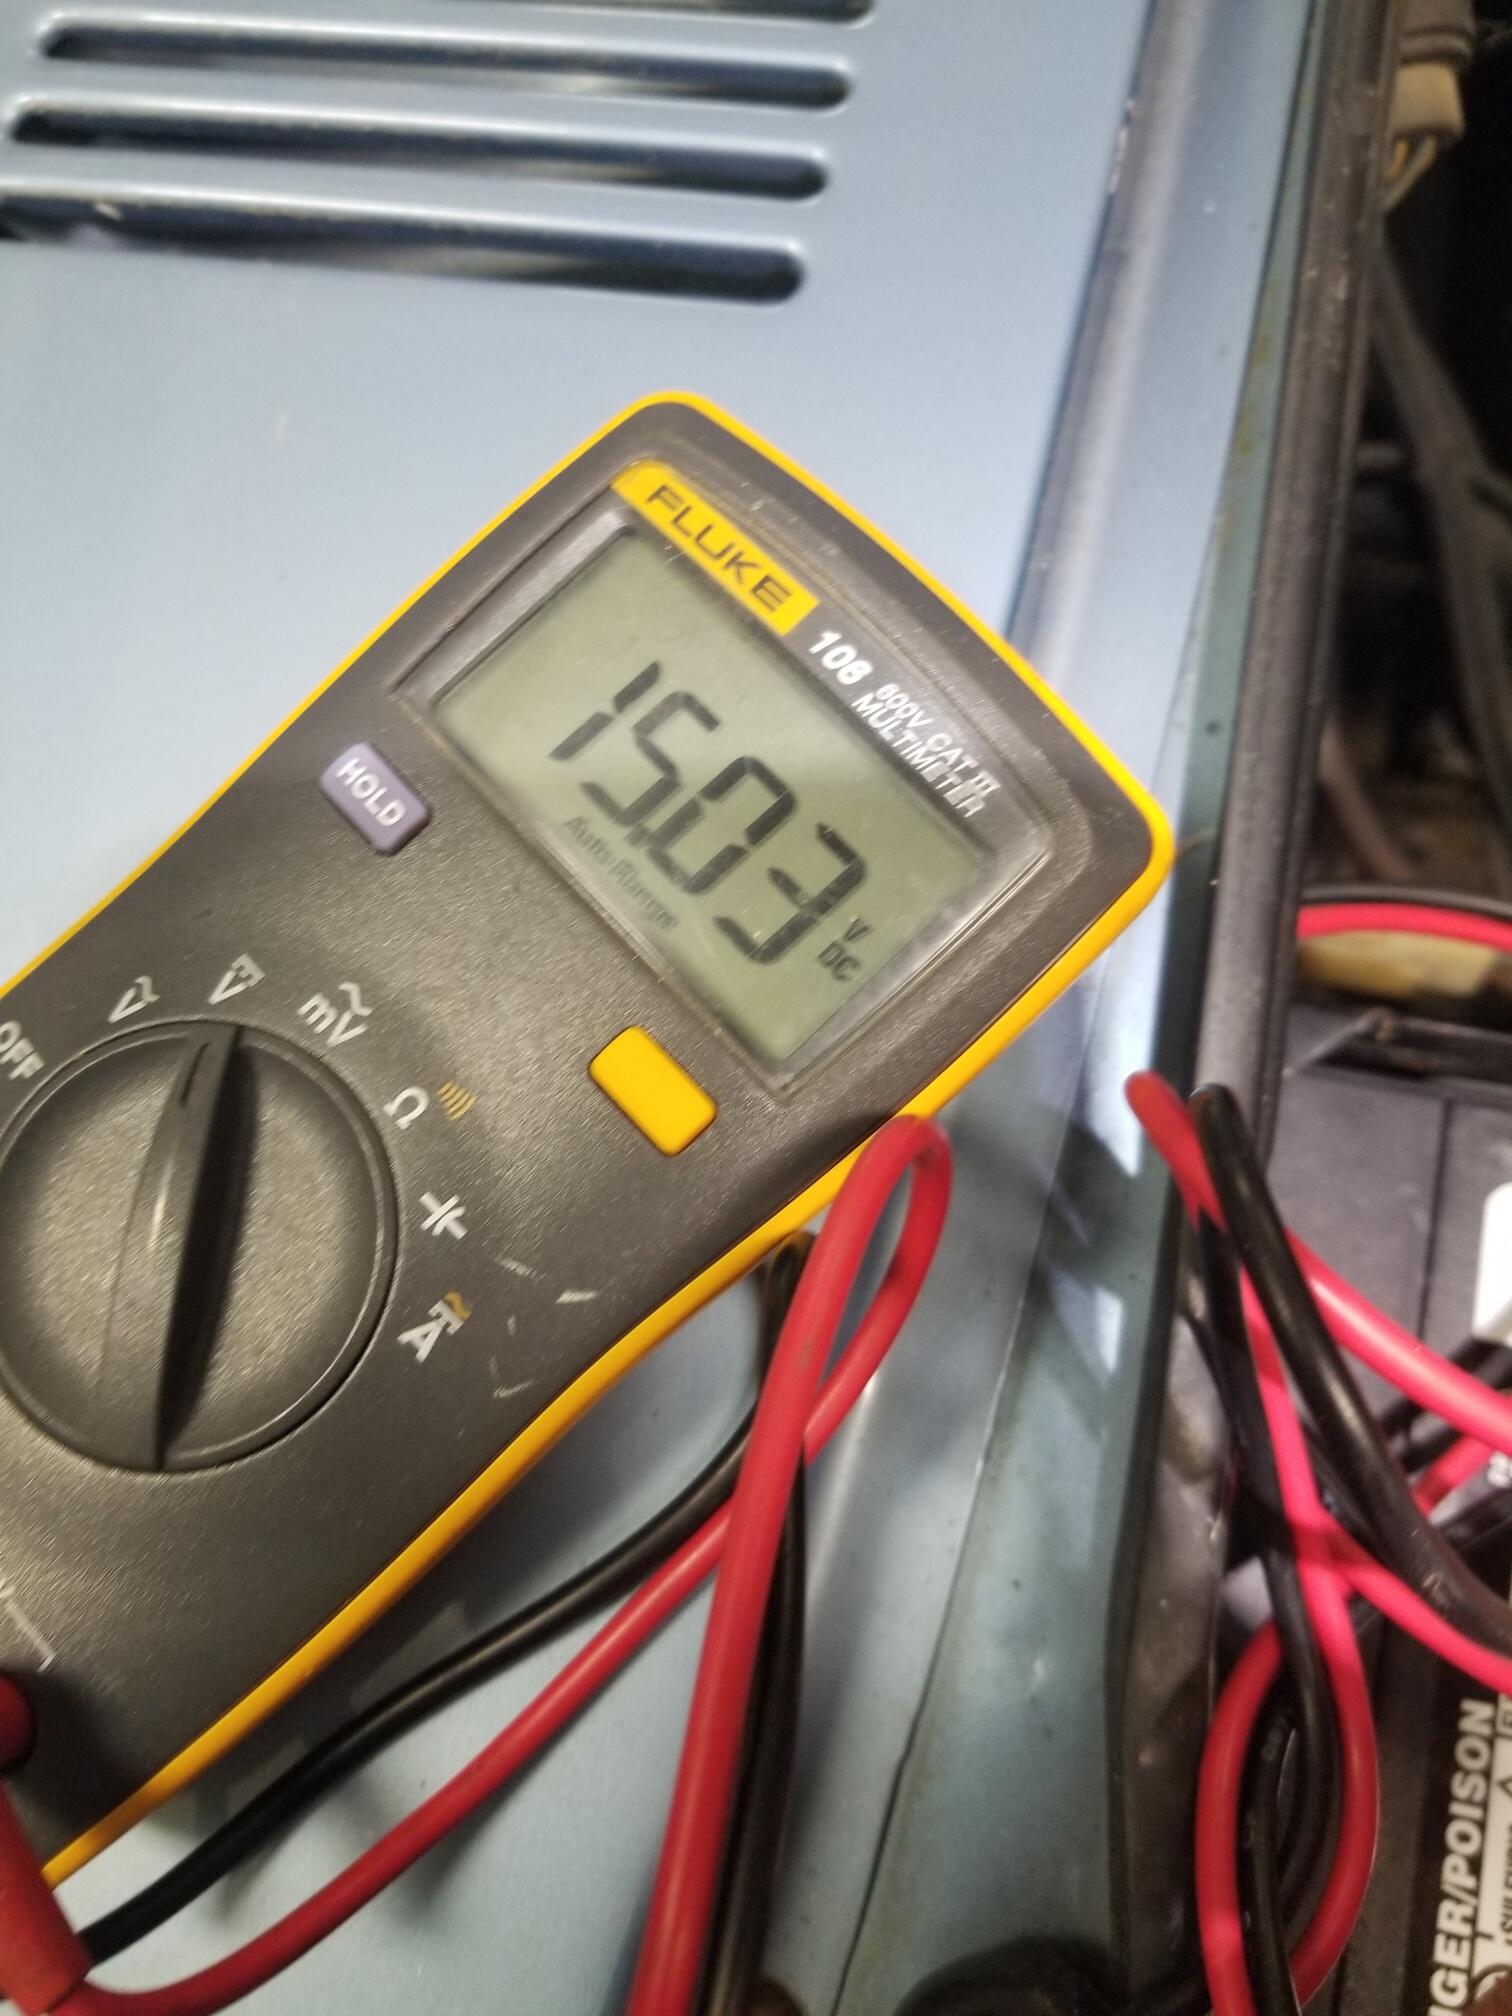
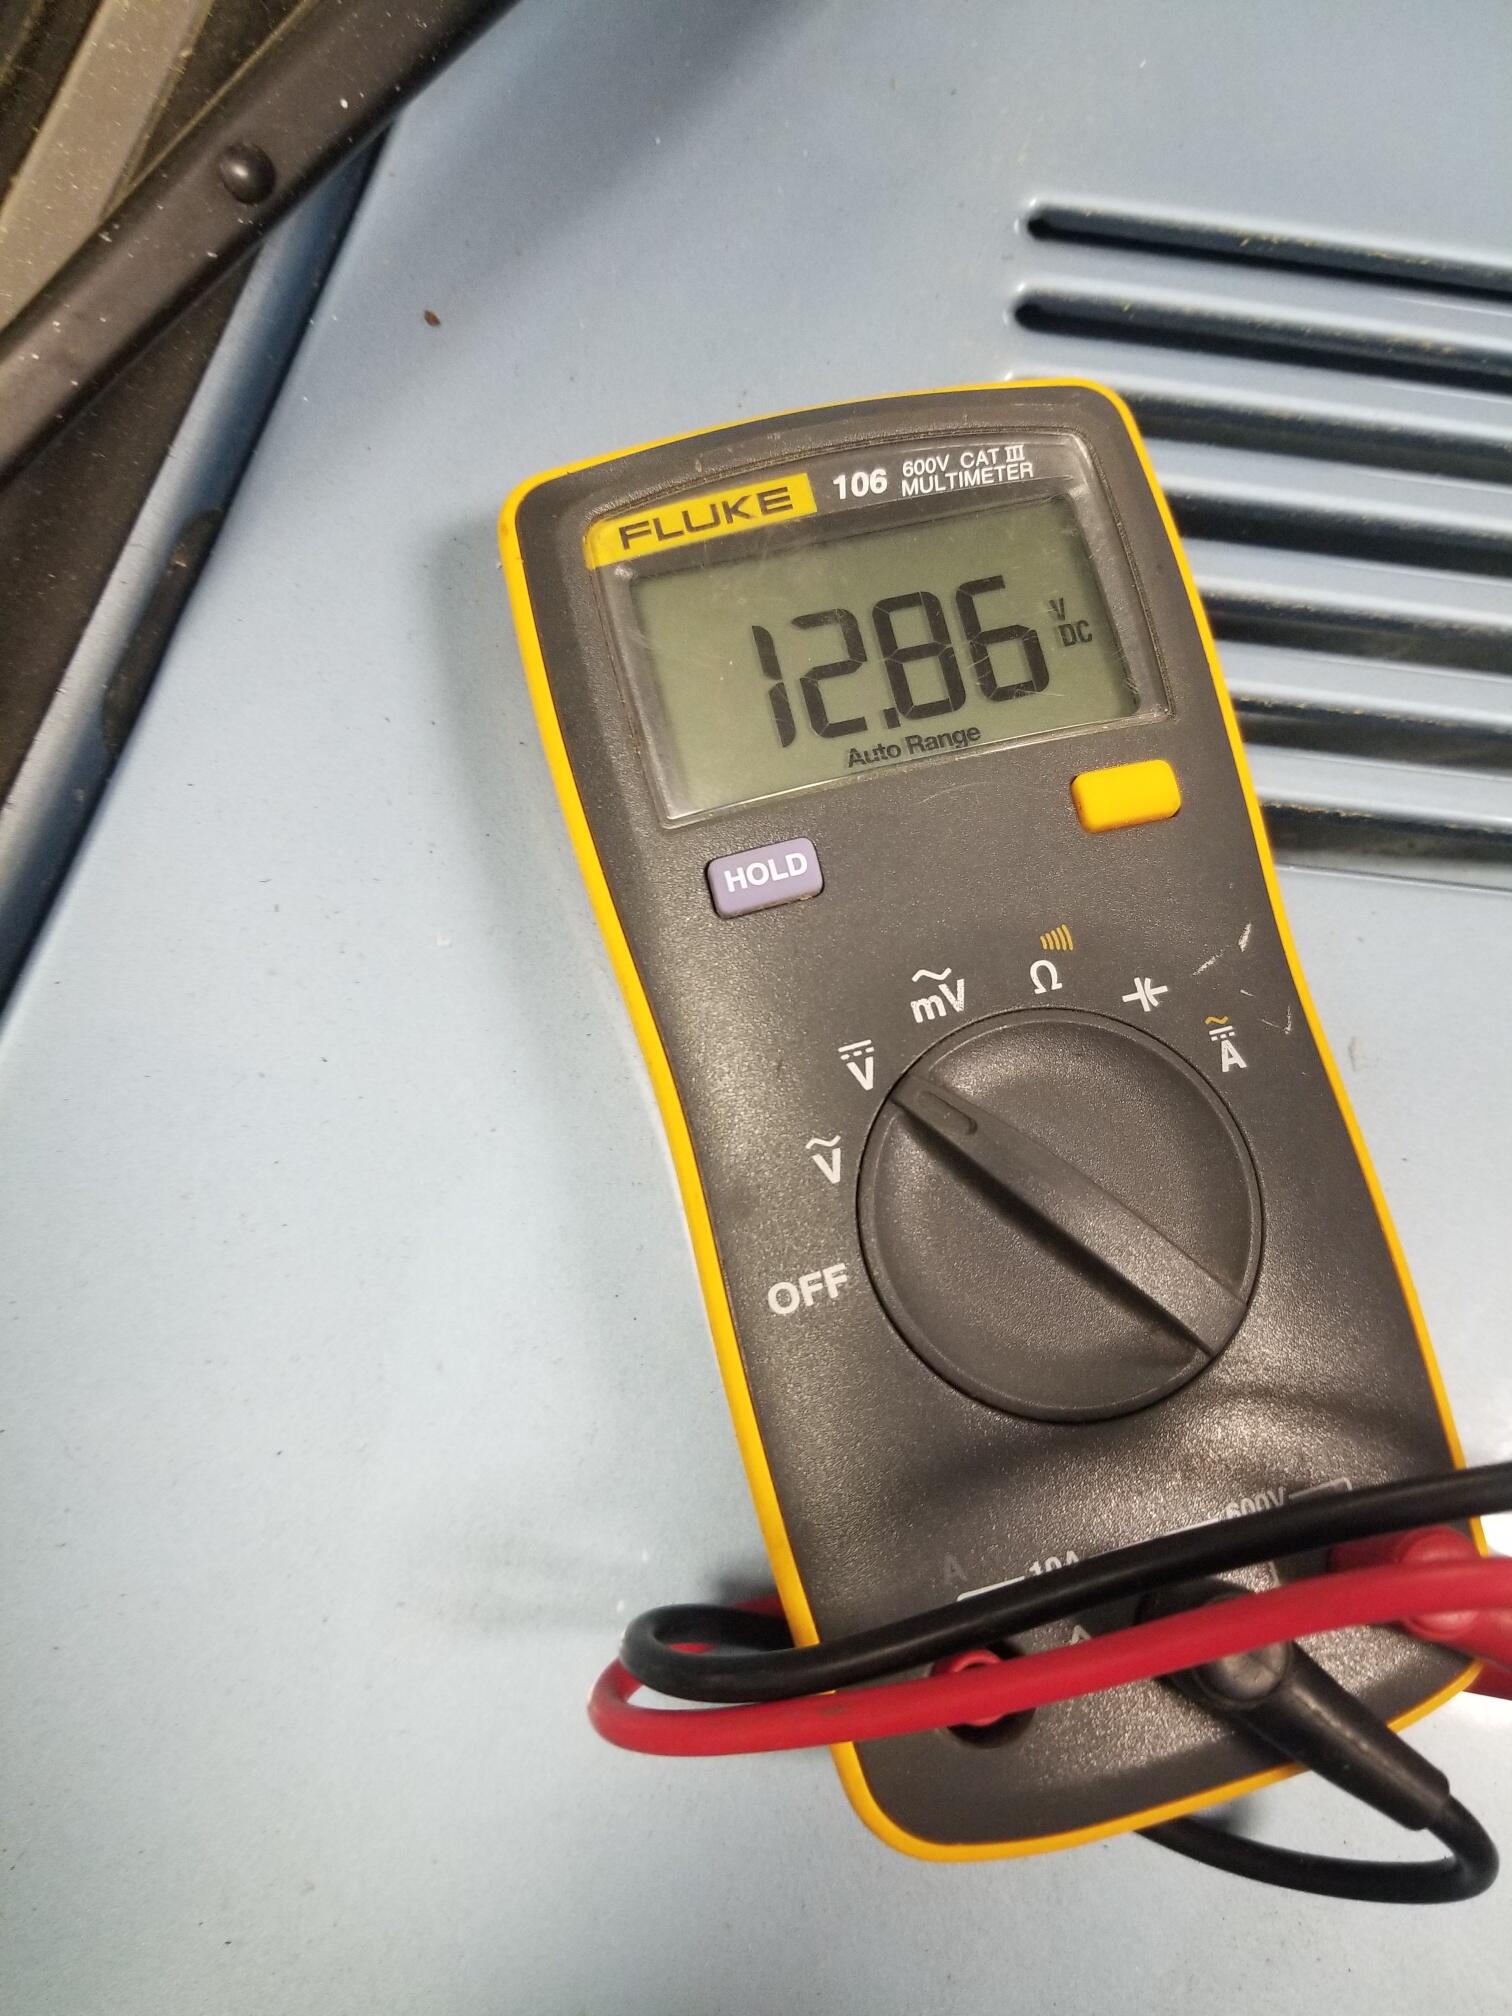
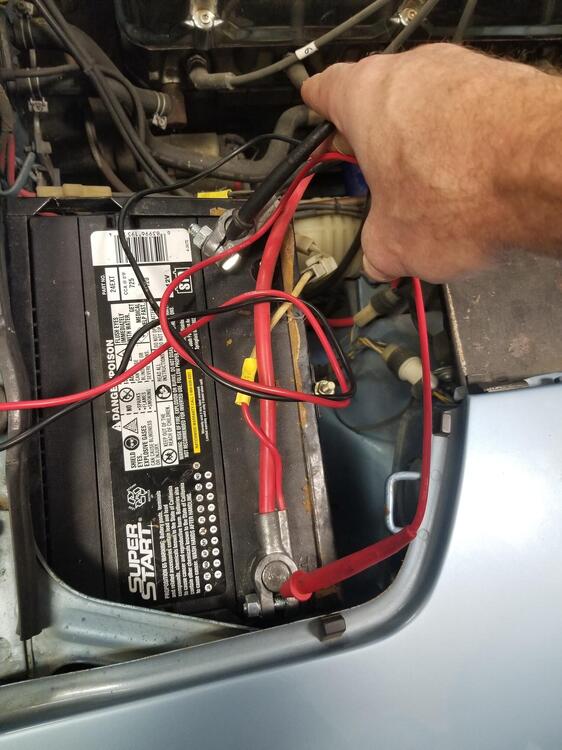
@Zed Head Thanks for the chart. It does appear we were just inside spec when I took that pic but it had been over 15.8V for 20 minutes or so before that. We were probably in the low 70s or high 60s F. Maybe some of that is just lack of use. Is the 280z regulator serviceable or adjustable?
-
-
I can not locate a regulator I think switching to the frontier alternator would be good just for on the road maintenance issues and parts availability
-
Maybe you have a local datsun facebook group that could possibly help
-
On another note, if your alternator is still externally regulated, You aught to see if you can source a voltage regulator locally. Both options on rockauto are out of stock. That would be a cheap first shot at the high voltage I might have one laying around somewhere ...
-
I understand, but I know some of these devices aren't easily blocked off because of how they're designed. I want to be sure that that method is perfectly executed and does not present an opportunity to internally bypass. I was under the impression that vacuum should be higher than that but that could be a units of measure issue again?
-
I love those pictures!! Especially the detailed pictures of the proper bolt head details
-
Not Datsun but an interesting article. I believe we are seeing this in the Datsun market too. I wonder if the peak is actually over for these other marques and possibly over for Datsun too? https://www.zerohedge.com/markets/56-rare-white-porsches-head-auction-while-signs-classic-bubble-bursting-seen-rm-sothebys
-
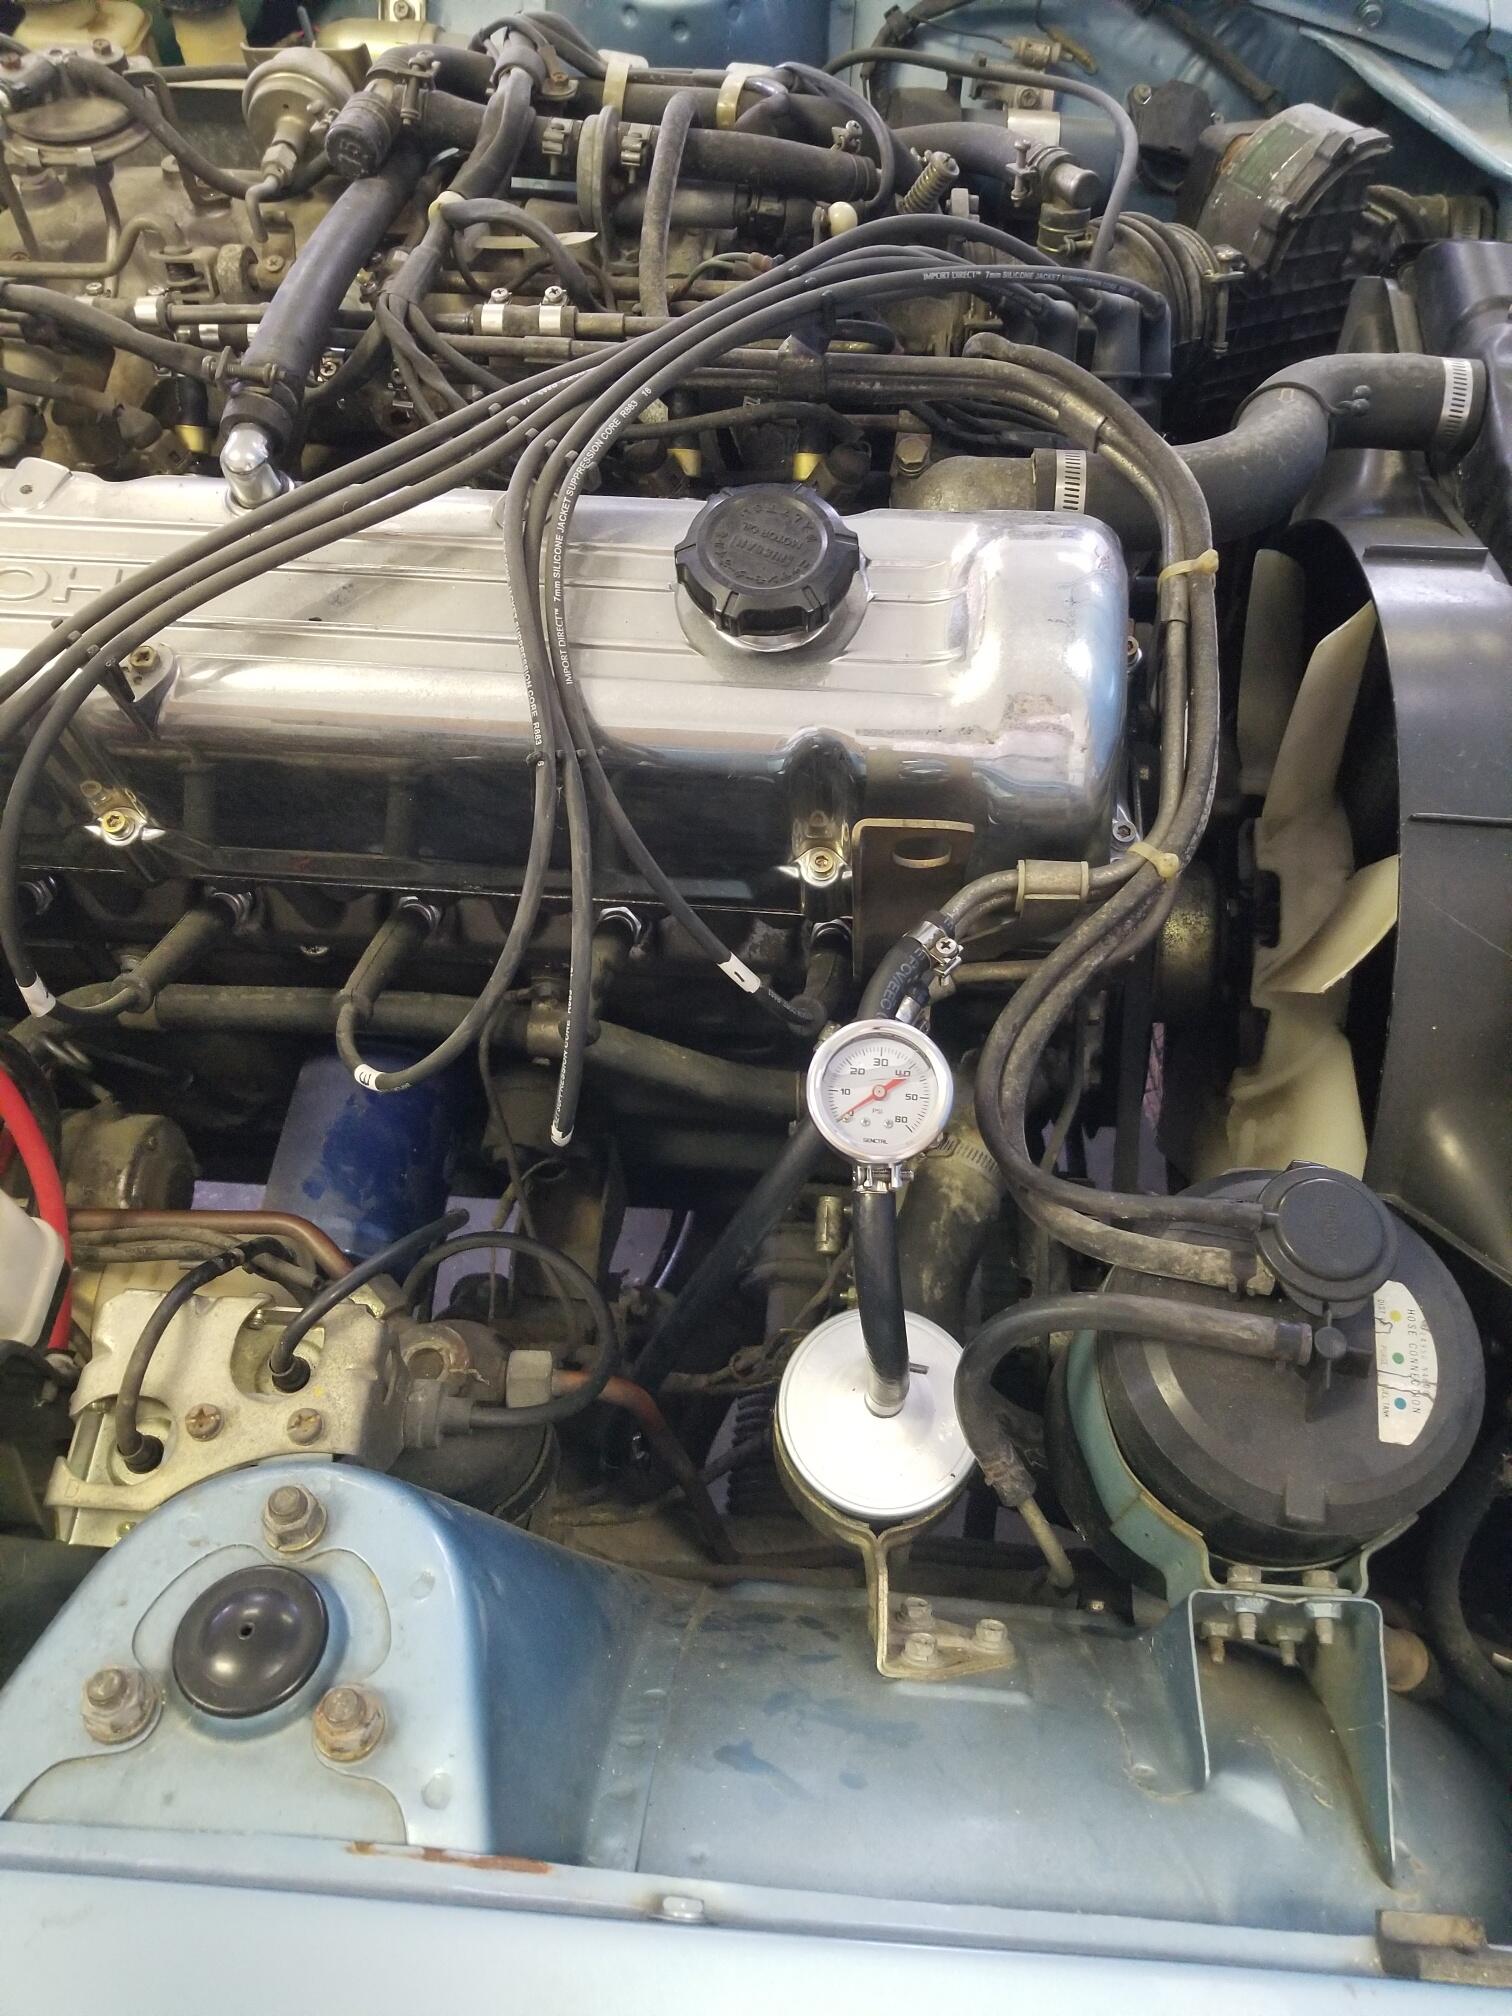
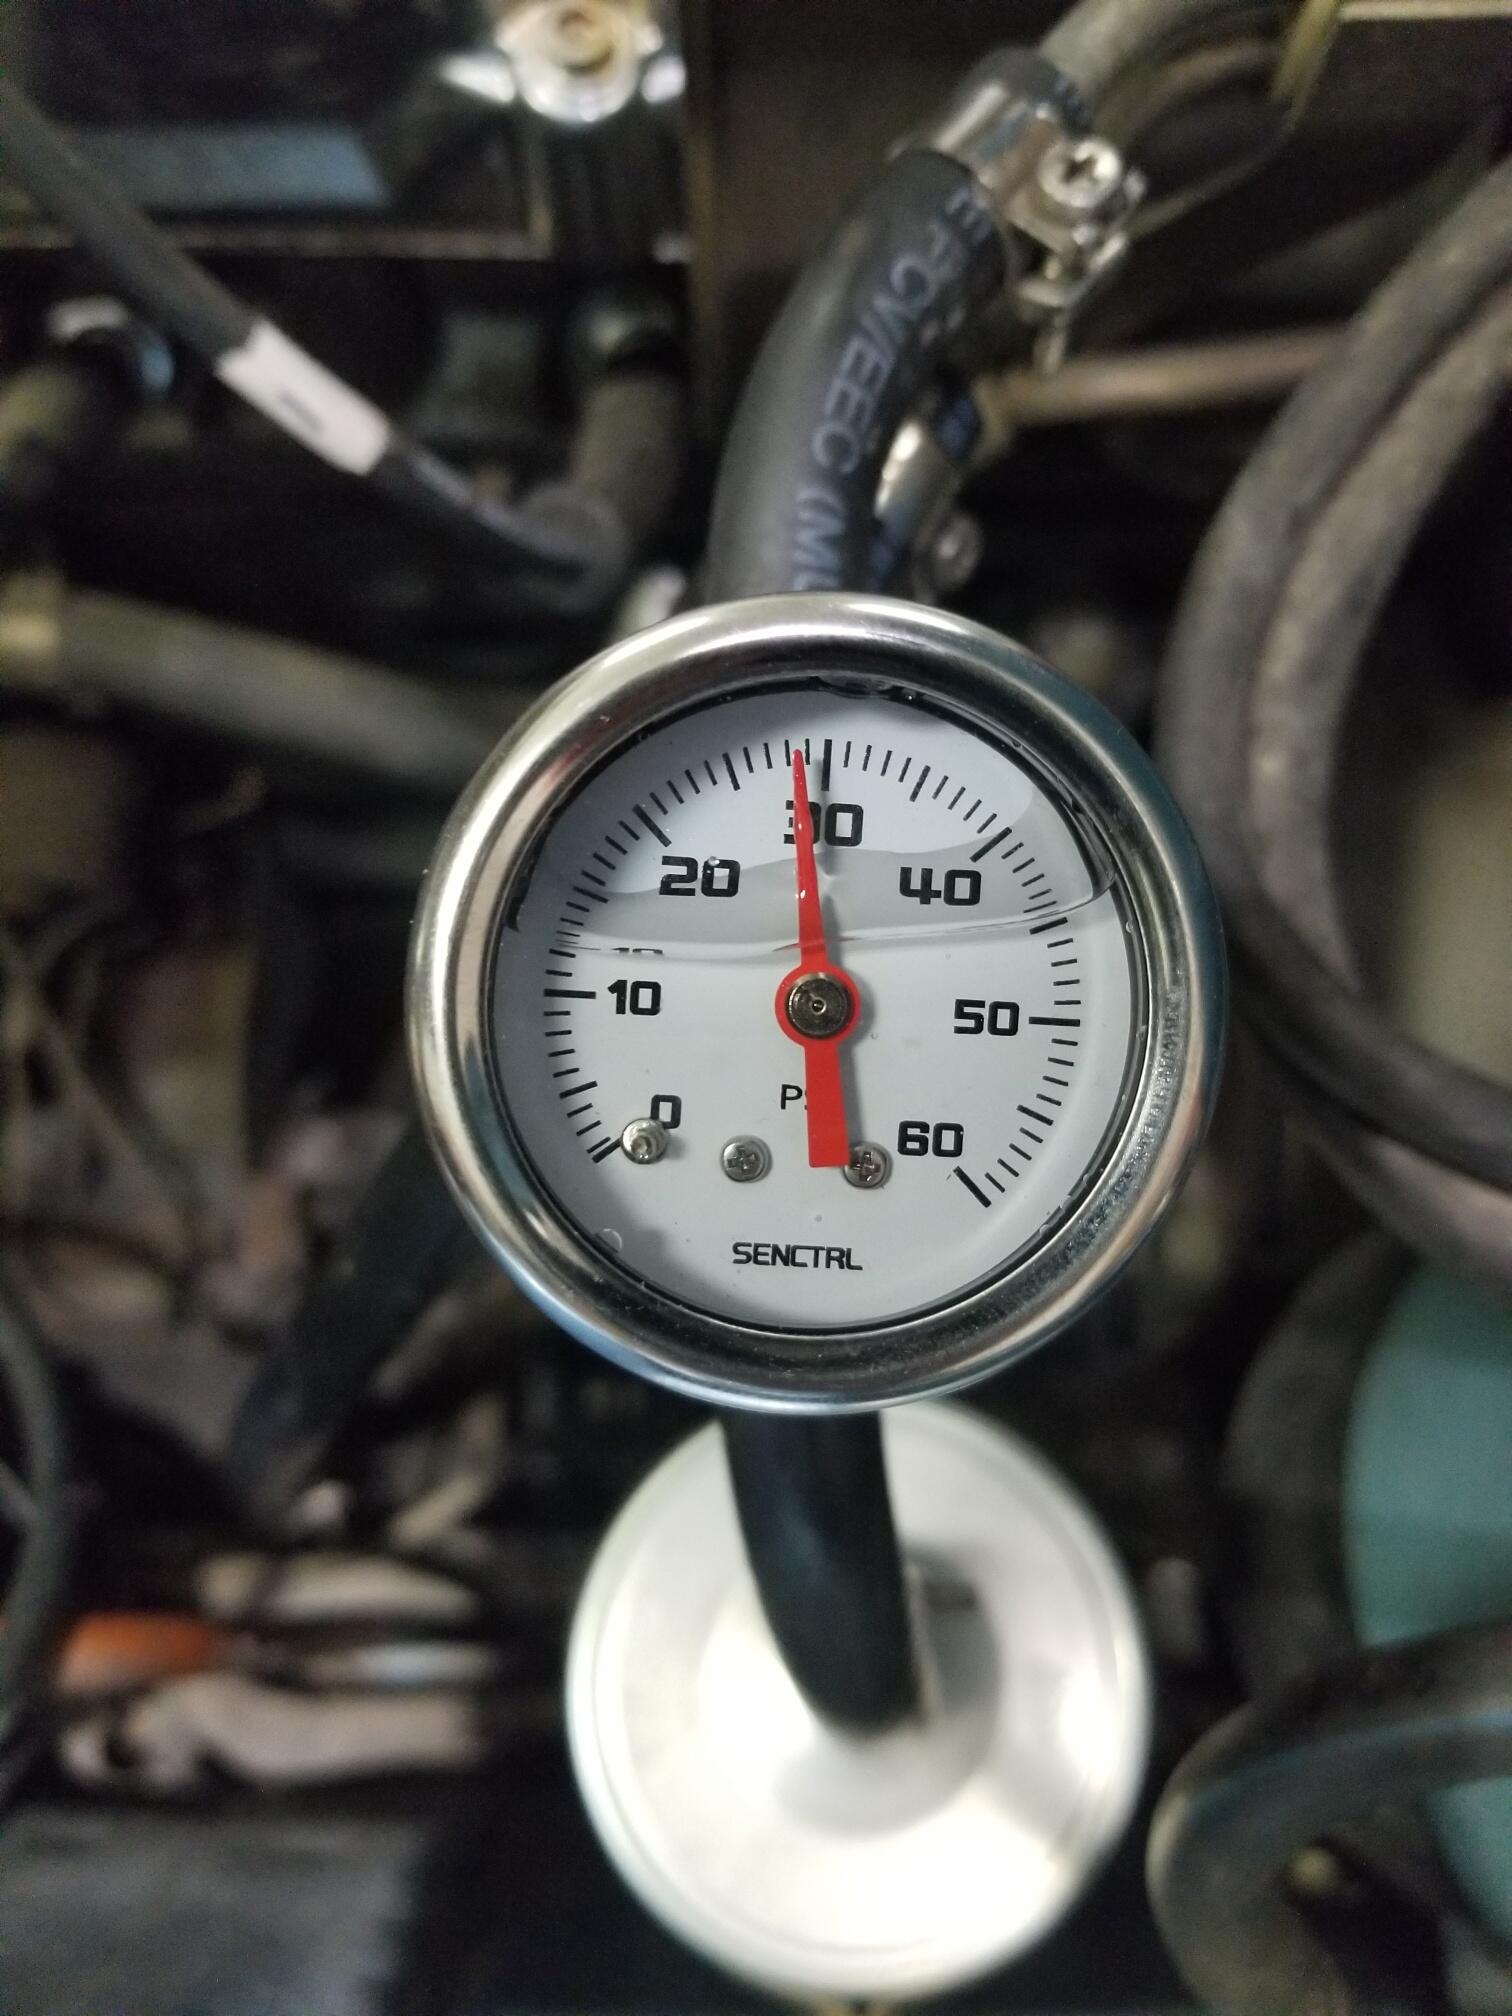
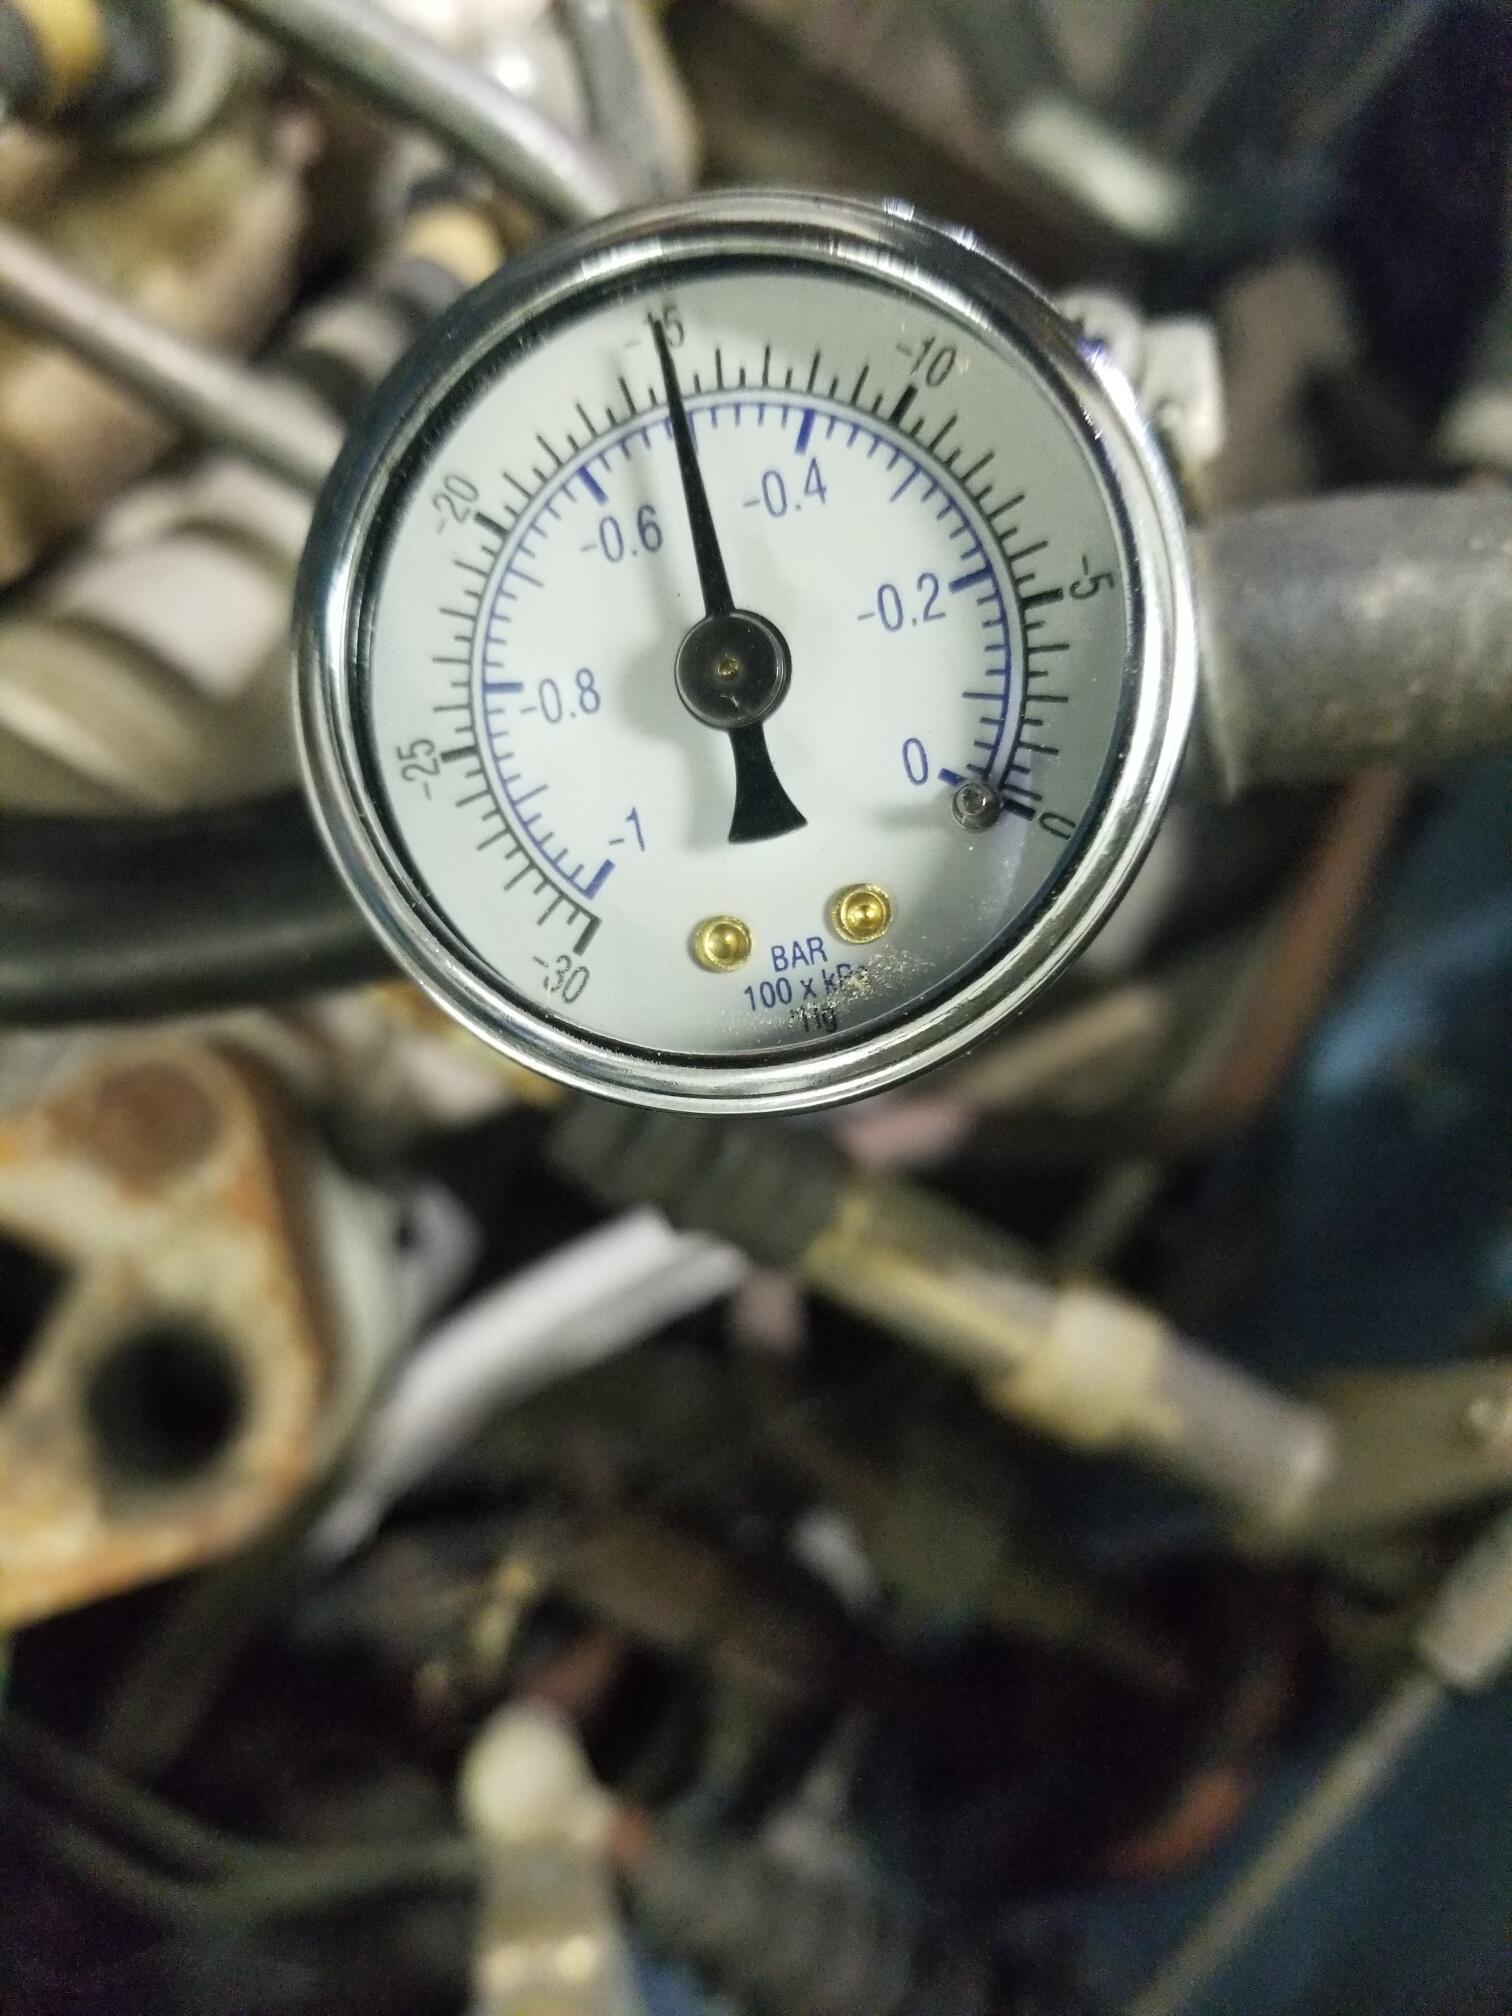
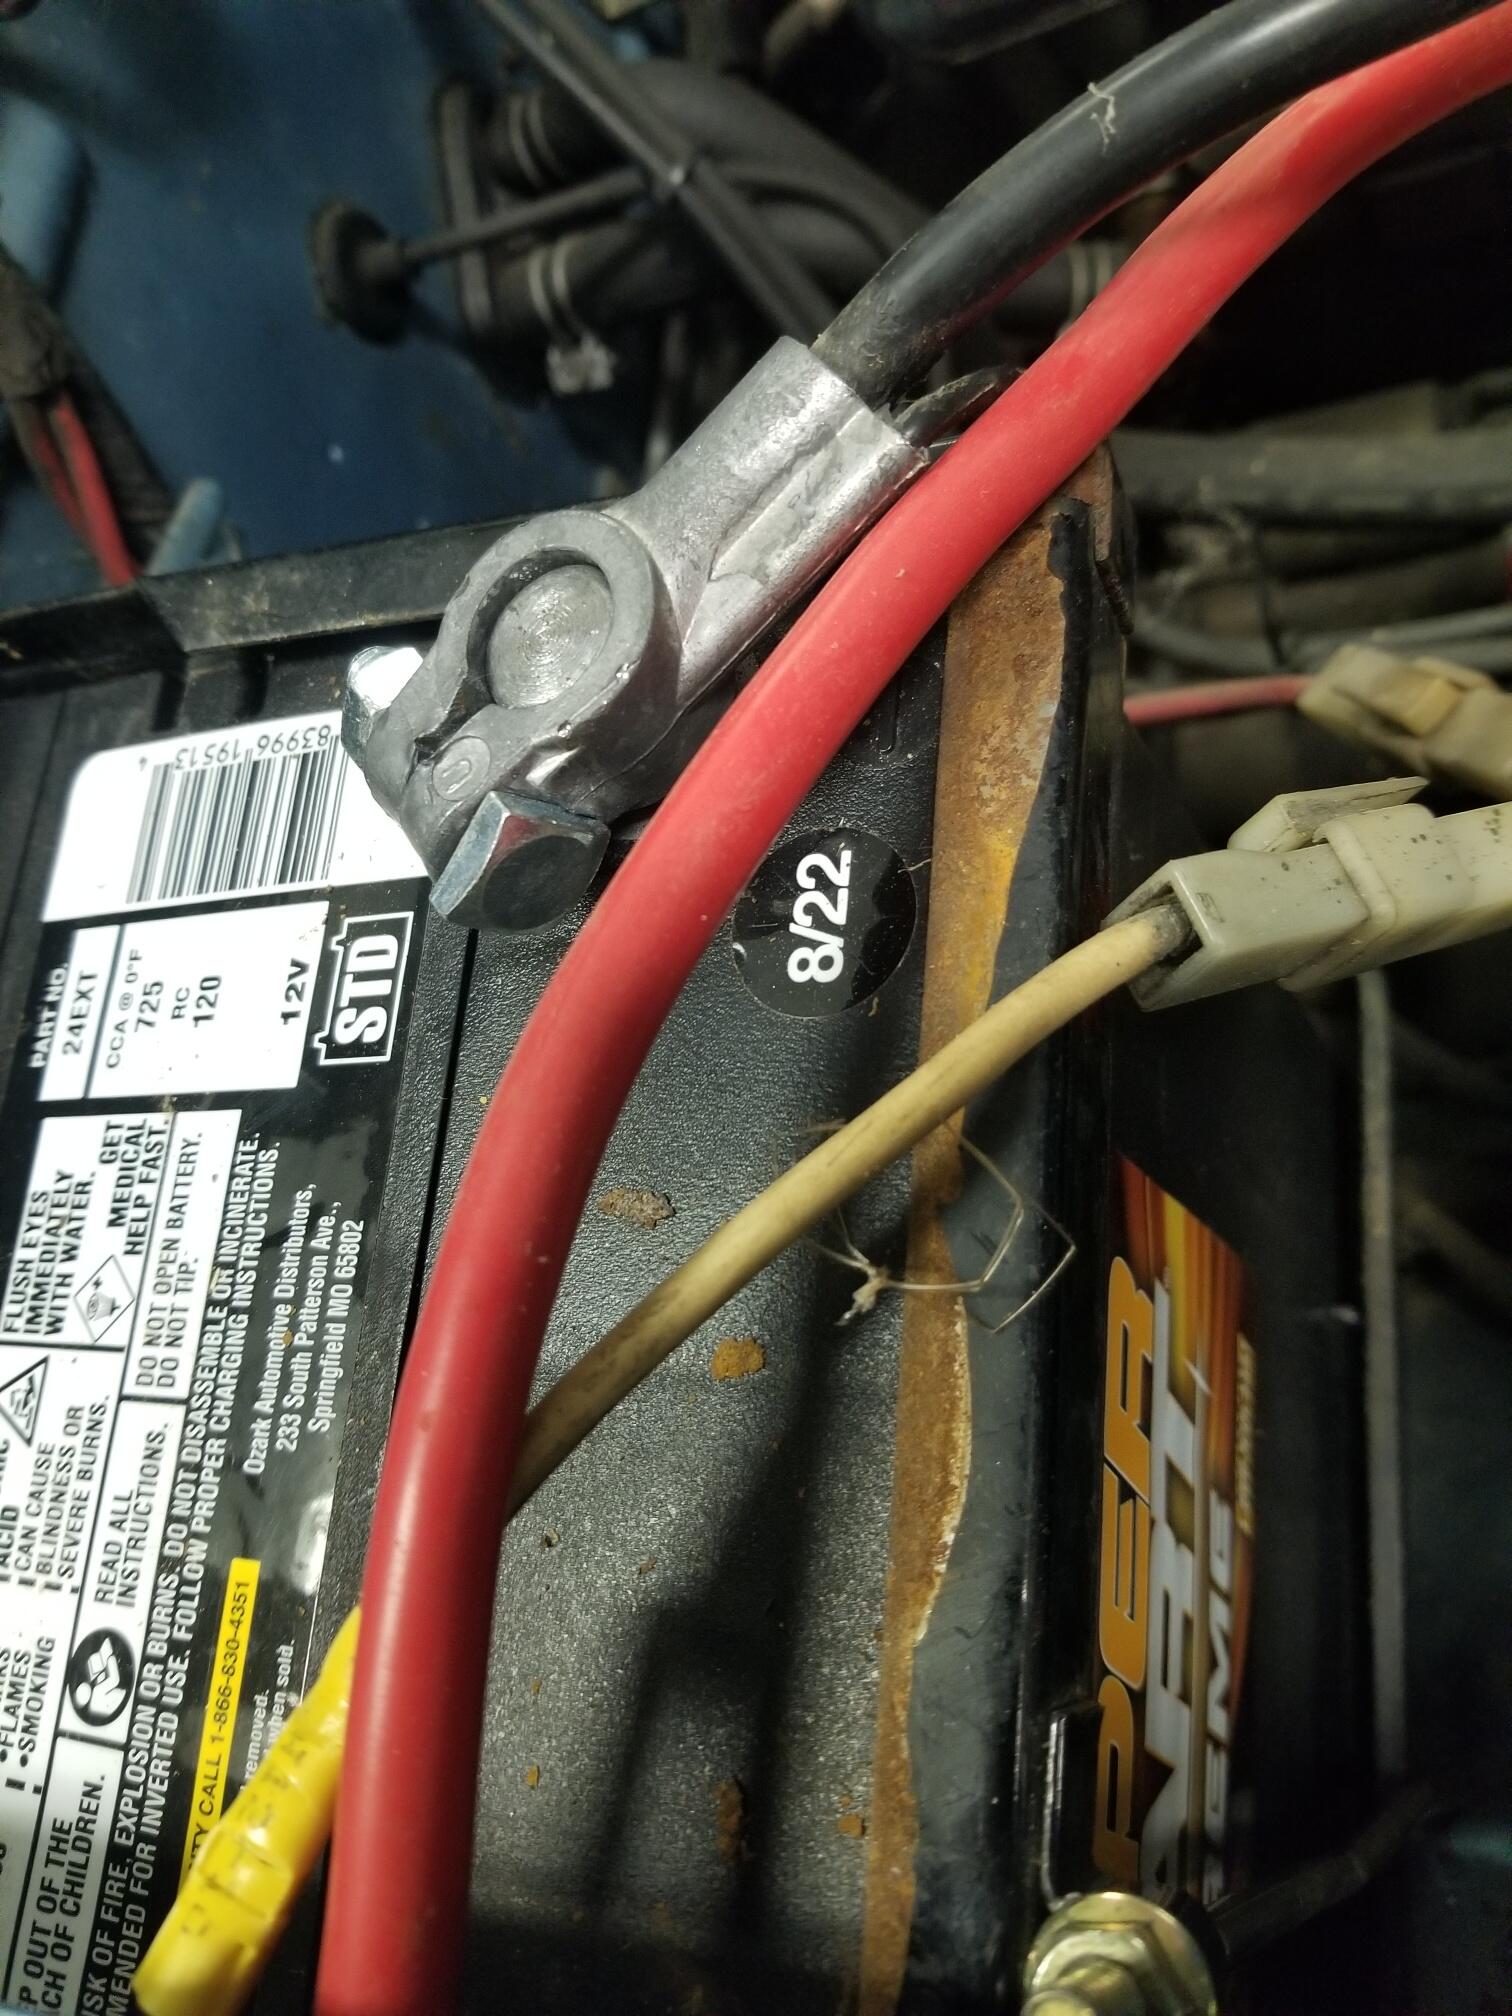
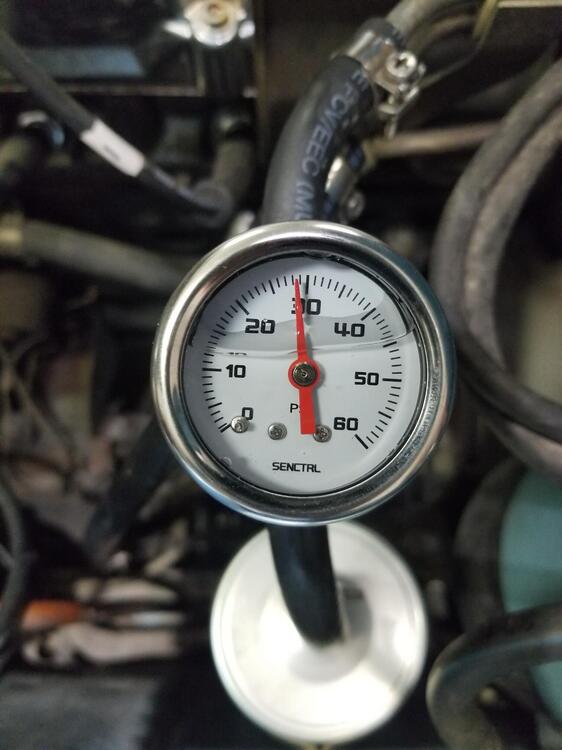
So here is where we're at. I rigged up a temporary fuel tank with a 5 gallon gas can in the hatch. It's only got a gallon or two in it. The car starts and runs ok but here is the fuel pressure while warming up and the the vacuum gauge that is plumbed in before the brake booster check valve It was my understanding that the vacuum to fuel pressure reduction should be 1:1?? we are seeing more like 1:2. Should this fuel pressure be 21-22Psi with 15... Never mind, I think I figured it out. His vacuum gauge is not reading Psi!!! It's reading Hg. 0.5 bar is about 7psi. We had a static fuel pressure of about 35 psi in the start position with the solenoid disconnected. So that looks pretty good from that standpoint. Which is good and bad. It seems our fuel pressure is regulating properly but our vacuum seems really low. Best places to start? I know he has block off the EGR. How do I verify that it is actually properly blocked? Also @SteveJ Battery is August 2022 At idle Just after shut off. Where to start??


-
Thanks Kats I assure you, your English is far superior to my Japanese! 😁
-
I'm torn on whether to drive the fuel lower or dilute it. I think I would add some premium to what you have. Maybe 1:1 or so. That way maybe you could make some longer trips. How are the hydraulics?
-
I don't know enough about 3d printing to know how well that would work as a solution
-
@nix240z Insulators might make another good offering?
-
-
I have found when the metal is as heavily pitted as that is, there will be more holes when you get rid of all the rust. I would get it really clean and then make some small metal patches that took care of most of the really thin areas
-
What were your solutions?
-
Can you mark up one of your pictures to elaborate on your changes if you were to do over?
-
You could contact these guys https://www.dellortoshop.com/contents/en-us/d624_Mikuni_PHH_Carburetor_Parts.html Or http://www.mikunipower.com/phh01.htm Or Wolfcreek, I'm not sure of their current status after the previous owners passing (??) https://www.wolfcreekracing.com/index.php?option=com_content&view=category&layout=blog&id=33&Itemid=23 I think I would start at Wolfcreek ...
-
I think the $3770 offer was the best it's gonna do. I would probably contact that bidder and see if I could work something out...