


jfa.series1
 Subscriber
-
Joined
-
Last visited
Everything posted by jfa.series1
-
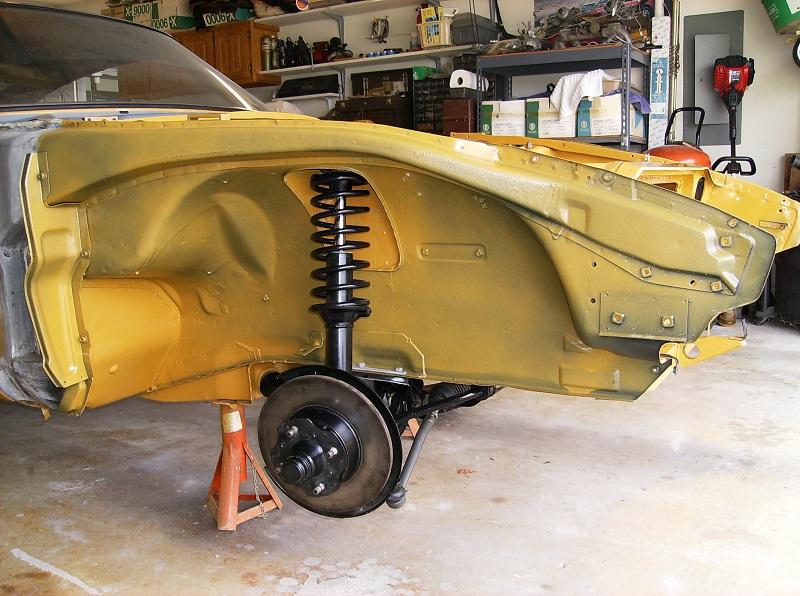
 I sprayed the front wheel wells with truck bed liner, then followed up with a light dusting of color. No problems with paint adhesion. I avoided the spraying bed liner in the shock towers as I did not want to provide a place for dirt, moisture, ...etc. to begin a build-up. The towers were done with POR-15 topped by brush-on color. Jim
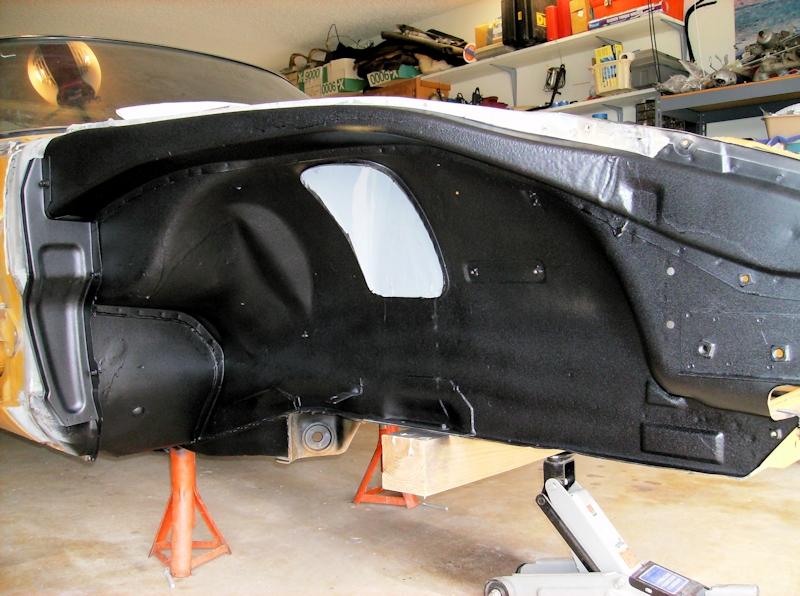
-
I'm just hoping to be able to stick around to celebrate my own 50 year anniversary in a couple of years.
-
Probably not the best kept secret but today I spotted a Facebook post on the Middle Tennessee Z Club page. A member was answering a question about Z ATTACK occurring in 2019, this was the answer: "Z ATTACKS were staged at Nissan HQ in Franklin in 2012, 2014 and 2017. We're skipping 2019 so we can help with ZCON in 2020, which will be the 50th anniversary of the Z and will be at Nissan." You heard it here first!
-
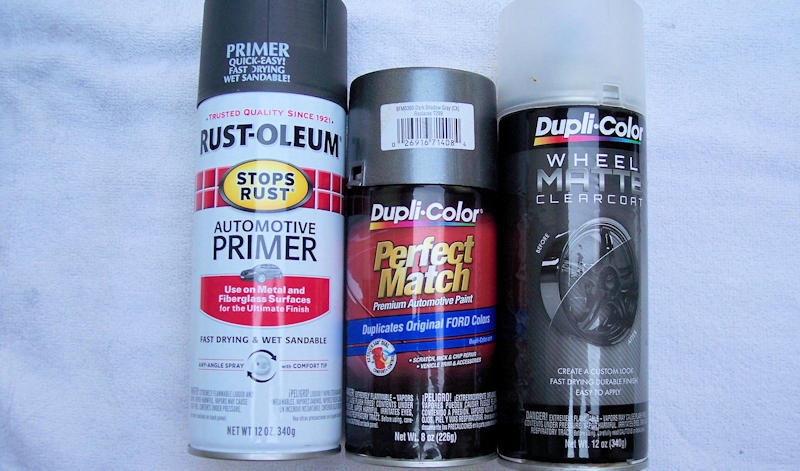
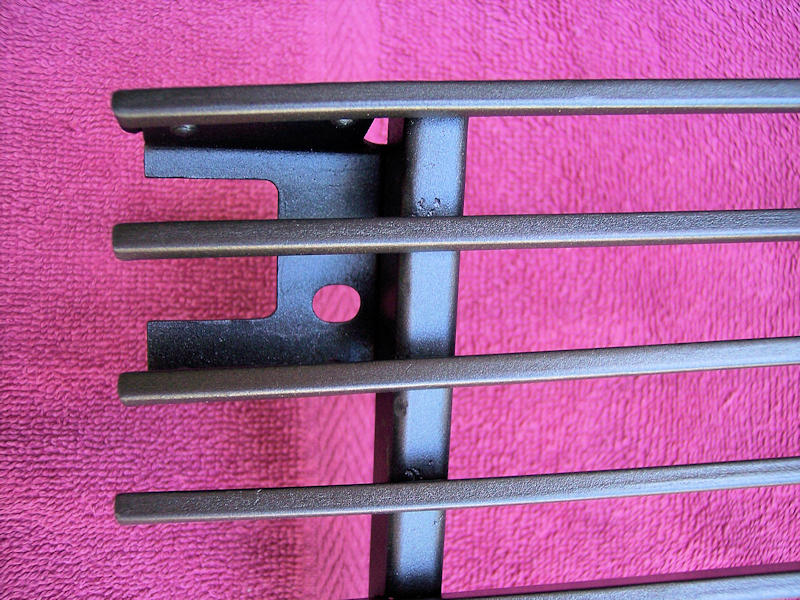
Other than primer of your choice, I use a process developed by one of our forum members: Duplicolor BFM0360 FORD DARK SHADOW GRAY, topped by Duplicolor HWP106 WHEEL MATTE CLEARCOAT. Here's a closeup pic of a grill I've done to show the color.
-
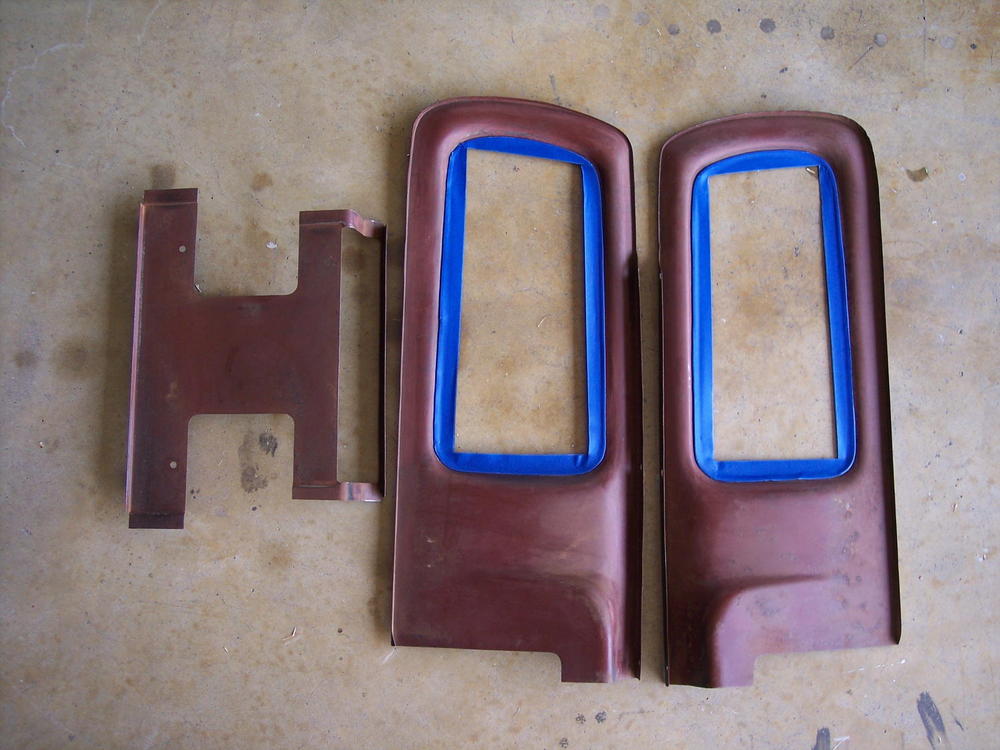
That rear valance is looking a bit like FrankenZ with all that stitching! I've always been too chicken to try and remove the stainless trim on the rear finisher. I choose to blue tape it for my refinish work. Two sets completed and on the shelf now.
-
I'm not a body guy but it might be that when you removed the rear panels it released some tension that resulted from the collision.
-
Pretty awesome work! Clearly time-consuming and often frustrating.
-
WOW - that's a pretty impressive group of friends you're hangin' with! Great pic, thanks for sharing.
-
Many thanks for the referral. I'll get it passed along to my buddy.
-
Still looking. @Hardway @Mike W Jeff or Mike - any possibilities in your area? Thanks, Jim
-
You really want the torsion bars in place to help you manage the hood weight. Getting the hood down is a process of adjusting the hood hinges. You might want to consider removing the grill for the process but its not absolutely required. Loosen the bolts holding the hinges to the body so the hinges can float a bit. Lower the hood fully but not latched, then push down on the hood front to get the hinges to settle into position, hold it there and tighten the bolts (that's why having the grill out helps). This is your up/down adjustment for the hood. The bolts that secure the hinges to the hood are your fore-and-aft and side-to-side adjustment to align it with the fenders. Hope this helps.
-
Thanks for the response. So as not to interrupt the holiday, I'll give you a call tomorrow if OK.
-
A friend is looking for a 240Z roller or shell (260Z/280Z need not apply) to convert to a track car. Drivetrain and interior not required but the body must be complete. Any leads in a roughly 300 mile radius of Dallas would be appreciated. You can PM me with details. Thanks, Jim
-
PM sent.
-
Great looking little car, can't wait to see more pics. Clearly your Datsun addiction is spreading.
-
Fixin' and y'all - two great words in our proud Texas vocabulary.
-
Mark, The catalog shows no changes to regulators, locks, or other parts during the switch from early to later 260Z: http://www.carpartsmanual.com/datsuns30/Datsun-Z-Index/Body-260Z-280Z/2-Seater/Door-Lock-Regulator-Handle
-
From the online parts catalog for 260Z/280Z: RH 80700-N3400 to 7607, superseded by 80700-N4400 eff. 7608 LH 80701-N3400 to 7607, superseded by 80700-N4400 eff. 7608 The comment by @Mark Maras is spot on regarding the part # change You are correct that the 240Z regulators are a different P/N. BTW - my limited experience with regulators shows the P/N is usually stamped on the part.
-
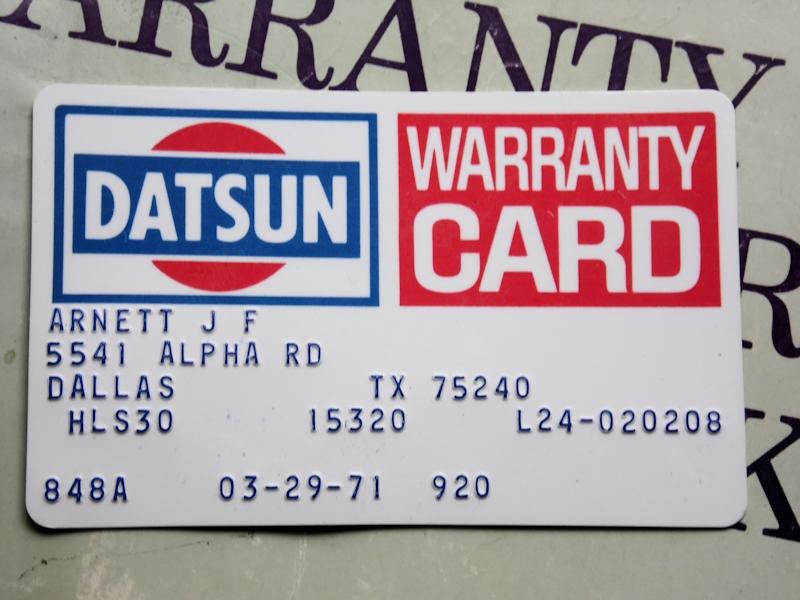
Nissan "generally" observed month 08 for the start of most model year changes, emphasis on "generally". Titleing cars is left to the states so we find some of the earliest 1969 production cars built in month 10 titled as 1969 models and others as 1970 models. Your 10/70 build was most likely titled as a '71, I would expect your search thru the papers will confirm the actual detail. That is a great car, congratulations.
-
Uncontrolled pop-ups are a big irritation with me. ABC is a big offender. They think every text story has to have a video ad and then video clip at the beginning. As soon as I scroll past it, a small pop-up video box appears at the lower right to continue the presentation. Then I have to kill that box to read the story without distraction.
-
Of course we are. Texas is a very big area, care to refine your location a bit more specific?
-
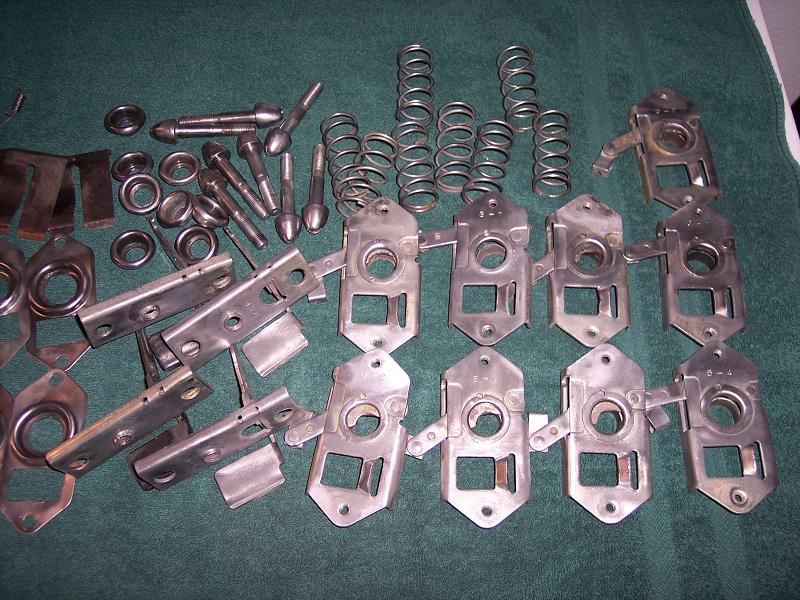
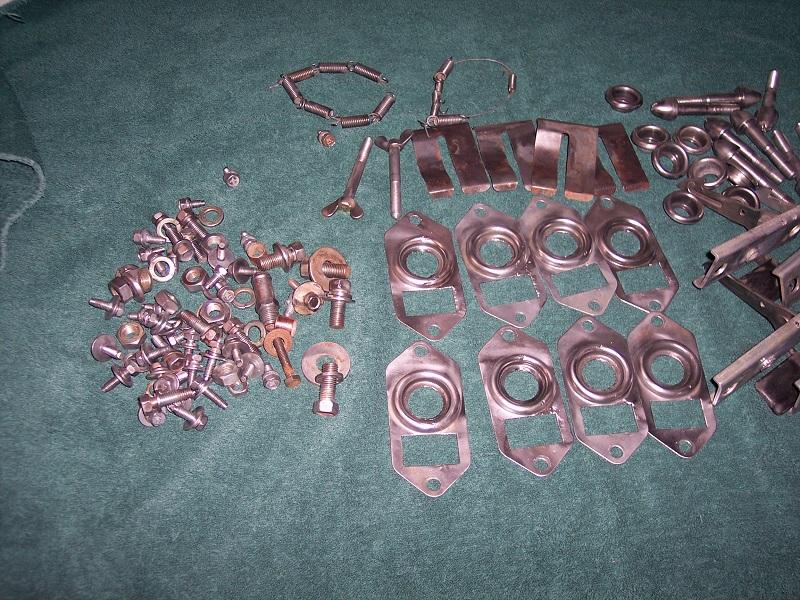
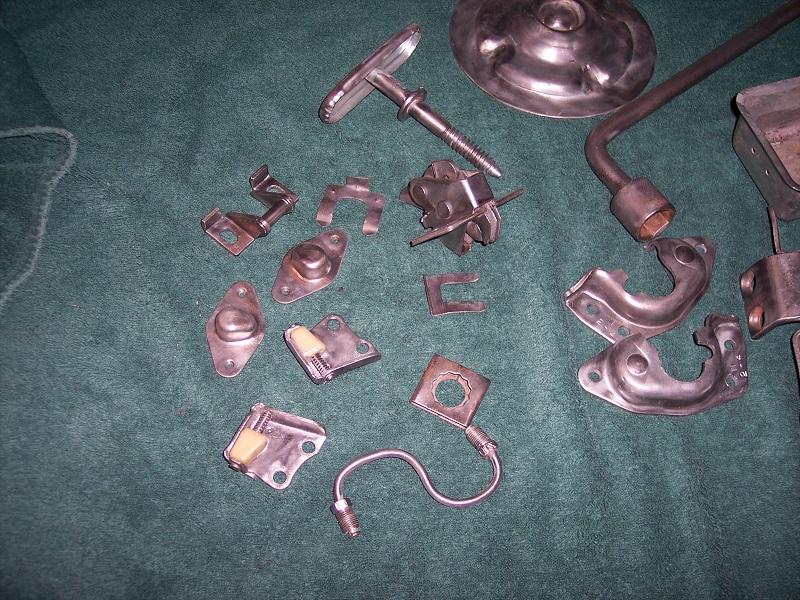
Everything in the first two pics will be yellow zinc - not cad. The second two pics will get clear zinc. What... you don't have enough bits already??? I'm experimenting with rebuilding the sidemarker electrical fittings so no final verdict yet. The nylon items sometimes come back with a white crust that can be scraped clean - there's really no option with parts that are mfg. this way.
-
Did I hear someone mention plating prep?
-
For the rear deck carpet, the clue is in the stitching. The soft/looped part of the Velcro is stitched to the underside of the carpet, thus the hard/hooks part of the Velcro is glued to the deck metal. To the best of my knowledge, this is the only Velcro application in the carpet set. Footwell carpets were secured with firewall snaps and hooks at the rear. Behind the seat carpet was unsecured.
-
That definitely sounds like a partially blocked fuel rail. I suggest removing it from the car and back flushing it with whatever pressure you can apply - perhaps an aerosol brake cleaner product. I'd start at the rear carb port, block the front carb port, and have a wire inserted in the supply port to break up any material that arrives. Then block the rear carb port, repeat the process for the front carb port. If the return line is open, you'll see some output during the process - that could also be a tiny wire insert to break up anything. Check your results by applying liquid under pressure at the supply port to see if both carb ports are open. The flow guide valve under the coil only handles vapors, not a likely culprit.

