


jfa.series1
 Subscriber
-
Joined
-
Last visited
Everything posted by jfa.series1
-
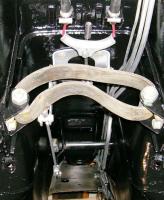
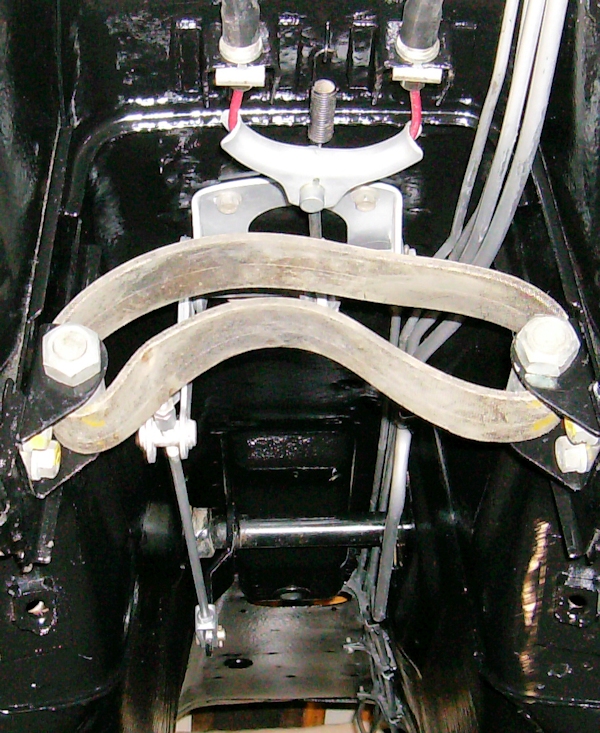
 Before ordering parts, check all areas of the ebrake cable for any signs of wear, rust, deterioration of the outer cover. Replace now if damaged. When parts in hand, get the car up on a lift. Pull the driveshaft and possibly the safety strap over the nose of the diffy to get room to work. After everything is installed but BEFORE getting the driveshaft back in, lower the car and check the ebrake handle operation and travel range. If needed, raise car and adjust the long rod, recheck ebrake handle travel. When all is feeling good, lock down all the rod connections, reinstall safety strap and driveshaft. "Drift Away" as the old song says.
 -
Hi Dave. +1 on the welcome. Tell us a bit about your ride and your plans for it.
-
"Who's the leader of the band that's made for you and me? M-I-C K-E-Y M-O-U-S-E". Sorry Lee - having a senior moment there! The pic I posted IS the unit in working order. As to the Vespa cable - a marriage of Japanese and Italian can't be all that good in this instance. The Vespa cable might not be strong enough for the load. More critical - if you run it from the ebrake handle to the yoke, it will be at an angle that will put undue pressure on one side of the ebrake cable, i.e. not balanced pressure to both sides and both wheels. My $.02 - you get what you pay for! Jim
-
Here are a couple of clubs in your area that have a great interest in S30's and can help you network in your search. The CT club is the home of Lucky 13. Connecticut Z Car Club - http://www.ctzcc.com/ Z Car Club of Rochester - http://www.zccr.net/main/index.php
-
Thread hi-jack alert!!! The recent exchange is not only off-topic, but getting into a tone that is personal, non-constructive, and inappropriate to the forum.
-
There are two rods for the ebrake - a long one from the ebrake handle, a short one for the cable yoke. Did you bust both or just one? Any pick-a-parts in your area? This will not be a typical aftermarket item, may still be available from Nissan.
-
Bryan - see post #9 above. Jim
-
Matte finishes will tend to attract and hold dirt, oil, ...etc., often will not come clean with a hose down. If opting for a rattle can job, consider a satin finish. It is pretty forgiving on the install side and will be a bit easier to maintain later.
-
$930 bid with 3 hours to go!
-
I had the same results with a few women in my life!
-
This is often a symptom of the backside of the ignition switch going out - the part with the electrical connections. Replacement does not require removal of the switch assembly from the steering column, no new ignition key, ...etc. If you have no more problems, lucky guy. If sticking returns, there are lots of posts in the forum to get you through this fairly easy fix.
-
Here's another vote for Mike and the great products and service he provides. I purchased quite a few rubber items from Mike that simply are not available elsewhere. His decal sets are awesome and he has the authentic Nissan blue engine paint.
-
Damn - those are really pretty! Unique with the chrome trim and exterior mount. Some agressive bidding going on and almost 3 days yet to run on the auction. Any speculation on where they will top out?
-
Busted link, no joy.
-
Also available directly thru Nissan Parts - check your local dealer. I paid $13.65 for five 2 years ago.
-
Don't overlook your local Nissan dealer. I am switching back to rubber bushings away from poly, I don't like the ride quality. Courtesy Nissan Parts website came up with all the bushings for the rear LCA's. The inner bushings are 55554-E4100 at $13.78 and 55555-E4100 at $11.49. Outer bushings are 55541-E4100 at $9.57. As MSA points out, they are all the same for 240-260-280Z's. Hope this helps.
-
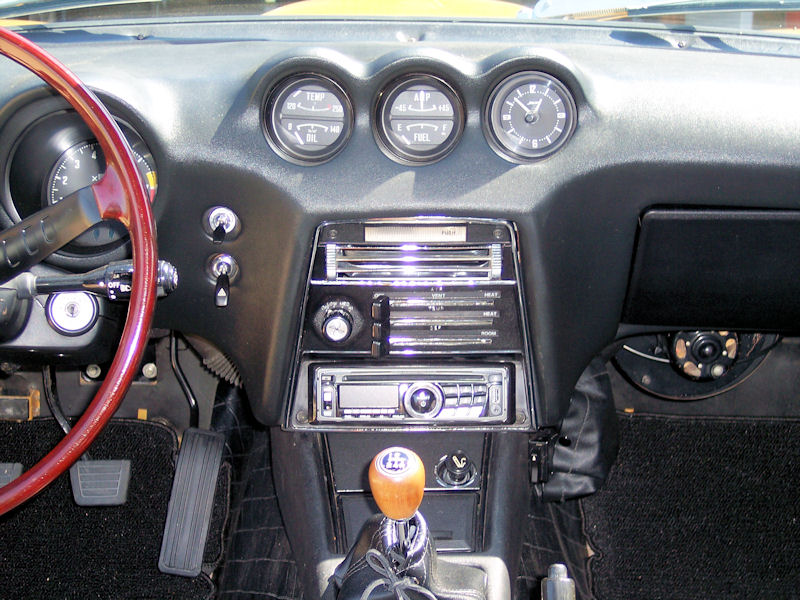
Chris - good eye for ergonomics. The switch position has never been a problem in these many years. Two reasons: 1. it is seldom used and 2. I cannot recall needing to use it while belted in and underway. Sidenote: when I restoed the car, I opted to switch out the 40 year-old belts for the Wesco roadster-style 3-point belts with retractor. The retractor end mounted nicely where the shoulder belt attached with no interior mods. Very comfortable and convenient. On the extra dash switch above the hazard light switch. While I had the dash out I located the factory wiring for fog lamps and installed a toggle switch as a future investment should I later want to add fog or driving lights (with a proper relay of course!). Thanks for your comments. Jim
-
When I first saw my car over 41 years ago on the dealer's showroom floor, they had yanked the stock AM radio and installed an 8-track unit (GAG!). The antenna switch had been relocated to the side of the console with a couple of small self-threading screws where it resides today. Oh yes, I had the 8-track yanked in favor of a Datsun AM/FM unit - but even that unit did not have the slider switch for the antenna. On the side of the console, the antenna switch is pretty well out of sight yet easy to locate and operate - in the picture, it is just to the right of the lighter.

-
Thanks for posting the link to the article. Reading on down thru all the thread comments, it is refreshing to see all the positive statements about the Z. The fans of our cars are far more widespread than we might ever imagine.
-
Here's B.B. King with "The Thrill Is Gone". Not every car is a "forever car", I agree with Arne: sometimes you just have to move on. Good luck with the new ride.
Ben, This is essentially Excel on-line. Go to the row where your car should be and perform an insert - example: if you should be between 10 and 11, go to 11 and click on the row # to select the entire row. Next, right click and select insert row. You will get a new row to enter your data. Be sure to enter your new row in the correct sequence of VIN #'s. Don't depend on someone sorting the file for you. All new entries and changes are auto-saved. Let us know how it works for you. Jim
Learning at the knee of the master.
To the best of my knowledge, this is not part of Carl Beck's IZCC.
They are SS and can respond well to buffing with jeweler's polish. You will likely end up with a brighter finish than factory original so if restoring to "as delivered", this is not a good solution for concours judging. I buffed out all my stainless frames, drip rails, and front & hatch gasket inserts and am very pleased with the appearance. Jim
Important Information
By using this site, you agree to our Privacy Policy and Guidelines. We have placed cookies on your device to help make this website better. You can adjust your cookie settings, otherwise we'll assume you're okay to continue.