jfa.series1
 Subscriber
-
Joined
-
Last visited
Everything posted by jfa.series1
-
 I think the original plug wires were black as you suggest. I now have a NGK set, a transparent blue/green. I did not purchase braided hoses since my car is a resto-mod, not restored to as-delivered or to concourse standards.
 -
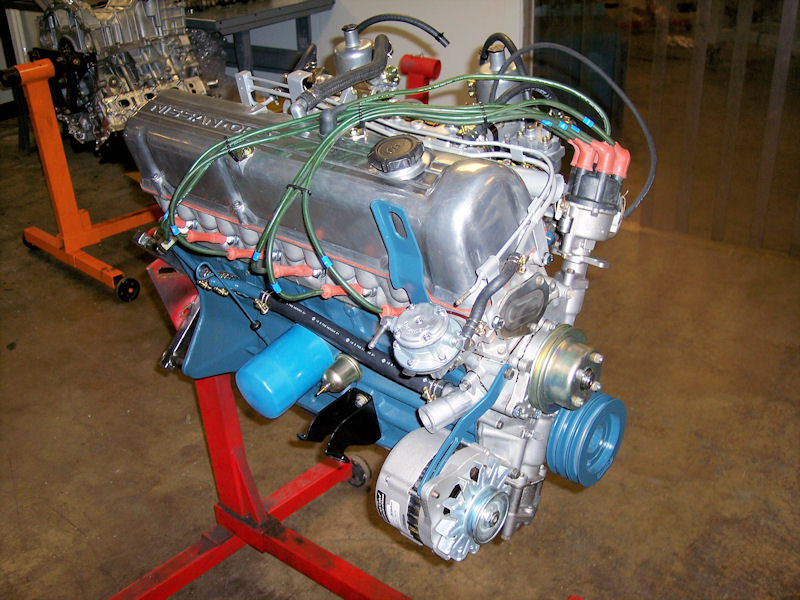
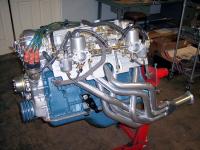
Hank, Here are a couple of pics of my engine just before it was installed. As to colors of fasteners, it is pretty easy: all fasteners forward of the firewall are done in yellow zinc (or cadmium if you want to spend more $). All fasteners behind the firewall are white/clear zinc. This also includes door locks, hatch hardware, ...etc. There are at least two incorrect OE color items on my engine: the fuel rail was yellow zinc OE, I painted it silver to match the hydraulic and fuel lines. The carb heat shield was probably yellow zinc OE also, I did it in silver HT. My carbs/linkage/intakes were done by Z Therapy, all emissions pieces removed. Jim

-
Franco, I'm using my car as a guide on this, a '71 240Z. Photo 3-copia is for a condenser that is part of the voltage regulator. Photo 2-copia two holes are correct Photo 1-copia not correct! There should be a green/white wire coming from the harness that attaches to the ballast resistor. A black wire with female spade connector goes to the (-) on the coil, a black/white wire with female spade connector goes to (+) on the coil. You should also have a condenser attached to the (+). Photo 0-copia this is a ground wire to the body. Look for a hole in the inner fender just above the hold-down for the wiring harness Hope this helps. Jim
-
The sale was picked up by a popular British tabloid. http://www.thesun.co.uk/sol/homepage/news/4672415/Dad-uses-sexy-photos-daughter-sell-cars.html
-
She must be a biker babe - and a twenty-footer at that, not much of an assist in my estimation. At least she didn't climb into the engine bay.
-
Drawing on my own recent "been there, done that" experience, the lock component doe not have to come off the steering column to replace the electrical component. The electrical switch is attached to the back side of the lock with two screws. Get the covers off and trace the wiring to the plug on the switch. It typically involves a bit of contortionist work in the floorboard to see the screws but everything is accessible, if a bit tricky. A screwdriver with a magnetic bit is a great help in getting it back together.
-
Here is a recent thread that thoroughly covers your question: http://www.classiczcars.com/forums/thread47334.html
-
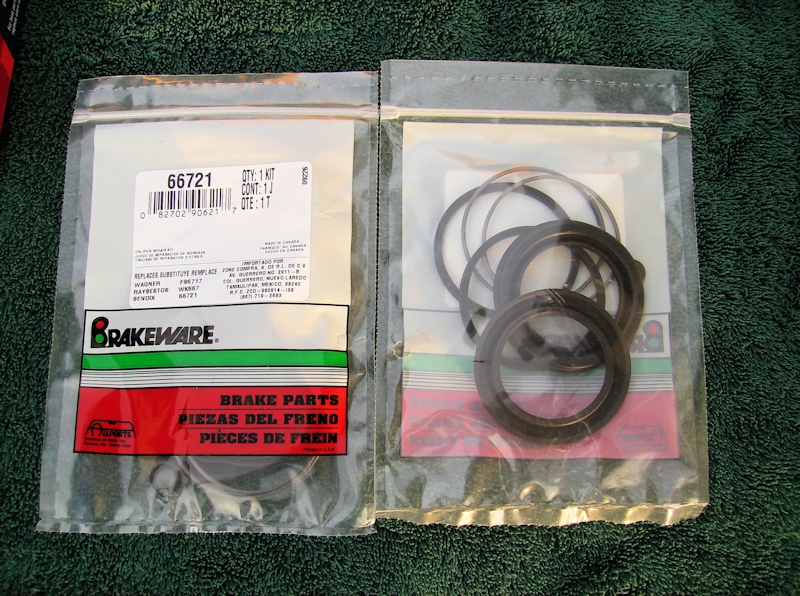
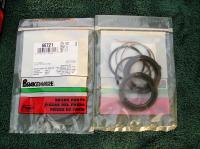
Here is the kit I used to rebuild my calipers, it does contain the o-ring seals for the two halves of the caliper assembly if you choose to split them. The kit fits all S-30's and is available from Auto Zone, RockAuto, perhaps others. It is on closeout at RockAuto right now for $2.20 each (1 caliper). Google "Brakeware 66721" to locate them.
-
I ordered these and installed them on my car, also lowered and with 16" wheels. I wasn't too crazy about the extreme downward position of the LCA and pulled them off. These may be better suited to a car that is tracked. I did not have them for many years, no regrets now.
-
Welcome aboard - you have met the basic membership requirement by posting pics. Looks like a nice find, enjoy the ride!
-
Excellent! 7 layers of paint probably deserved the use of a paint can opener. Presumably you did not "bend the hell out of them".
-
When I insured my car with Hagerty last year, they said they would underwrite up to $25k valuation based on photos. Any valuation over $25k would require a formal appraisal. There was no discussion of upper limits of coverage.
-
I still can't find where she is hiding the cheese!
-
A bit more difficult to find but another size option is a 185/75-14. It is virtually the same diameter as the original tire.
-
The folks at Z Therapy probably have it (or dozens of them!). Check with Bruce Palmer.
-
Here you go. http://www.retrosoundusa.com/products/details/id/63
-
Chase, Innovative work. Keep the updates and procedure details coming, looking forward to seeing some results in person at the next club meeting. Jim.
-
Steve, I see you are driving a 280Z. No such beastie on my 240, must be a design change/improvement for your later model car, possibly due to bumper revisions. Jim
-
Steve, Are you referring to the openings in the radiator support where the wiring harness comes out into the grill area? If so, I don't think there is a "grommet" for those edges. I took some small i.d. vacuum hose, split it lengthwise, glued it to the edges to form a protective grommet. Pics available if this is your subject area. Jim
-
Pretty little car and some very serious work done on it.
-
Big cohones!!! What a POS.
-
Which Z Barn? I recall seeing on another site that one in the NE(?) was shutting down. It looks like the one in TN is still in business. http://www.zbarn.com/index.html
-
Based on my recent experience, the trim installs from front to back and rolls on to the body from top to bottom. Removal is the reverse - start at the back and work it loose with a gentle roll/twist upwards and out a bit as you move forward. Patience is a virtue!!! A small piece of wood like a 1/4" dowel can be slid or gently tapped along under the trim to help lift it. Did I say patience is a virtue?
-
That little gem attracted 51 bids and sold for $14,600. Pretty durn good money, great news for ongoing (growing?) interest in the Datsun brand old vehicles.
-
Member Thorsten Link lives in Germany, has imported a Z and got it thru the regulatory process. Here is his profile link, you might contact him for info and assistance. http://www.classiczcars.com/forums/member22294.html