


kully 560
Community Member
-
Joined
-
Last visited
Everything posted by kully 560
-
thanks I did get them out but when I changed to led they will not light because of the low power draw . any why to bypass the dimmer?
-
I am trying to change the bulbs on the speedo meter and the tach meter and I have a dash cover, so I can't remove the guage. but I removed the center dash where the flip down light is and removed the heater flex hose. and now can reach the sockets but do they just pull out or twist out? thanks
-
with my auto tranny in drive it does shift quick from 1st -2nd gear, it is when going from 2nd -3rd gear with light throttle its lazy. now with more throttle the lazy shift is gone. these trannys also shift from 1st -2nd gear quite fast like about 7-9 mph into 2nd gear. I would like it to stretch out a little further if this shift kit would do that. but now if I whale the car and want the rpms to reach 5500 I would need to shift manually. I have been having a problem with this tranny in the last 2 months that the rear tail shaft seal is leaking tranny oil. I did change the seal twice and resealed the drive shaft yoke which helped. but it still drips several drops of oil when I park the car in the garage overnight. the transmission store it my town thinks it could be the inner tail shaft seal or possible a clog vent. but if it is the inner seal the tranny will have to come out to remove the tail shaft and change the inner seal. that is why if the tranny has to be taken out, I might as well install the kit. but I also don't want to build too much pressure and have another leak also. I can't find out how much more pressure we are talking about. I would ask the shop owner, but they closed this week for a vacation.
-
I did see the utube video, but it was only pictures. I did read some were that the holes in the valve body had to be installed or made bigger, but I did not see that in the utube pictures. I will have to do more looking on that forum for some more info. I am a little nervous about the holes because once that is done, I can't go back. tim did say that the kit is now for the 3 speeds jatco trannys. he does offer a little softer spring like I guess a stage 2 vs a stage 3 spring. now the reason I am looking for more info is because I really do not want real hard shifting. he did suggest the stage 3 for a street car but would like to here from other folks that did the install . thanks for the info . kully
-
thank you for the info, I will check on that site
-
I was just thinking of installing a shift kit in my 280zx automatic tranny and see that a person in Australia has them for sale. has anybody installed a shift kit and how do you like it. I can't find any reviews online. thanks
-
yes, the connection at the top of the filler neck does drain into the reservoir tank! I was hoping it was not clogged for you. maybe the line is plugged from the water-rust. but like I was saying I can't draw vacuum from front to back until the car is hot, that I can't understand. I am glad that it looks like your problem is solved!!
-
I do not know why I can't blow back to the vapor tank also from where the canister is at all on my 260z. [hot or cold] but I can only suck air when after the car was just driven. I did check for pressure at the gas cap, and I do not have any at all. I know you are not running the canister, but you think the line is plugged? I guess what I am saying is mine seems to not flow back from the canister at all anytime. but when the car is hot it will flow air from the vapor tank to the canister. [only when hot] now in the fsm it only shows an orifice in the line from vapor tank to canister not a 1-way valve. did you happen to try on the gas filler neck just below the gas cap and blow air back to the vapor tank? I am also trying to understand this flow thing that I have as compared to yours. it seems that mine is working correctly and only flows when needed. I never looked into the top of the vapor tank to see if there is a build in check valve for a 1- way vapor flow. I am looking forward to the results from when you cut the line. that should tell all.
-
if this helps, this morning I removed the vent line from the vapor tank, and I could not suck any air through the line. I guess because the car sat overnight, so today I drive the car and when I turned off the engine, I removed the vapor line at the canister and was able to suck air through the line.
-
I seem to remember some were way back then, that I also did want to get rid of the carbon canister. I was told never to do that because for a reason I can't remember that the car will never run right. as far as fuel pumps goes. I use a low- pressure carter at the back of the car with no pressure regulator on the return line and I have 3.42 lbs at the carbs. try to keep thing simple.
-
I have a 1974 260z and I check the fsm-ef32 and ef33. on my car the vent line from the vapor tank above the fuel tank goes to the front canister on the passenger side. there is an orifice built into the hard steel line that when I removed the hose from the canister, I can't blow back to the vapor tank but can suck air from there. I believe that will stop pressure going back to the vapor tank/ fuel tank .
-
I have a 74 and no check valve, and no pressure at all. it could be a clog return lineI have been though several electric fans setups, and I did try the relay with a several brand cooling switchs at several times and they are not at all accurate. if you look in the electrical section on this site I did just install a davies craig fan controller with great success. I at one time use a flex-a lite 14" fan with the old radiator and now with the new champion radiator I have a 13" spal fan. the spal fan has a lot more air flow then the other fan . [power]I just installed this controller today and works great with the electric fan. I installed the sensor in the thermostat cover, I did install the controller in a weatherproof plastic box in the engine compartment. this model came with the 1/4" npt sensor and also the radiator probe sensor. I only used the 1/4" npt sensor. it will turn on at your set temp and then off 5 degrees lower.it does seem off by 6 degrees, as I have it set at 183 degrees for on and off is 178 degrees. that is comparing with a digital thermometer in the top of the radiator. it can be adjusted from 110 degrees to 230 degrees by 1 degree increments. I can see when the water pump is at full flow in the top of the radiator and that seems to be 183 degrees with a 180 Nissan thermostat. I also install the override switch to manual turn on the fan. it seems to have the same ratings but more user reviews then digital dakota . it is also made down under . I drove the car today and the temps were in the lower 70s and the fan never turn on unless I sat idling for 3-4 minutes after a long drive. it seems to be doing what it was designed to do. hopes this help anybody looking for a decent fan controller.


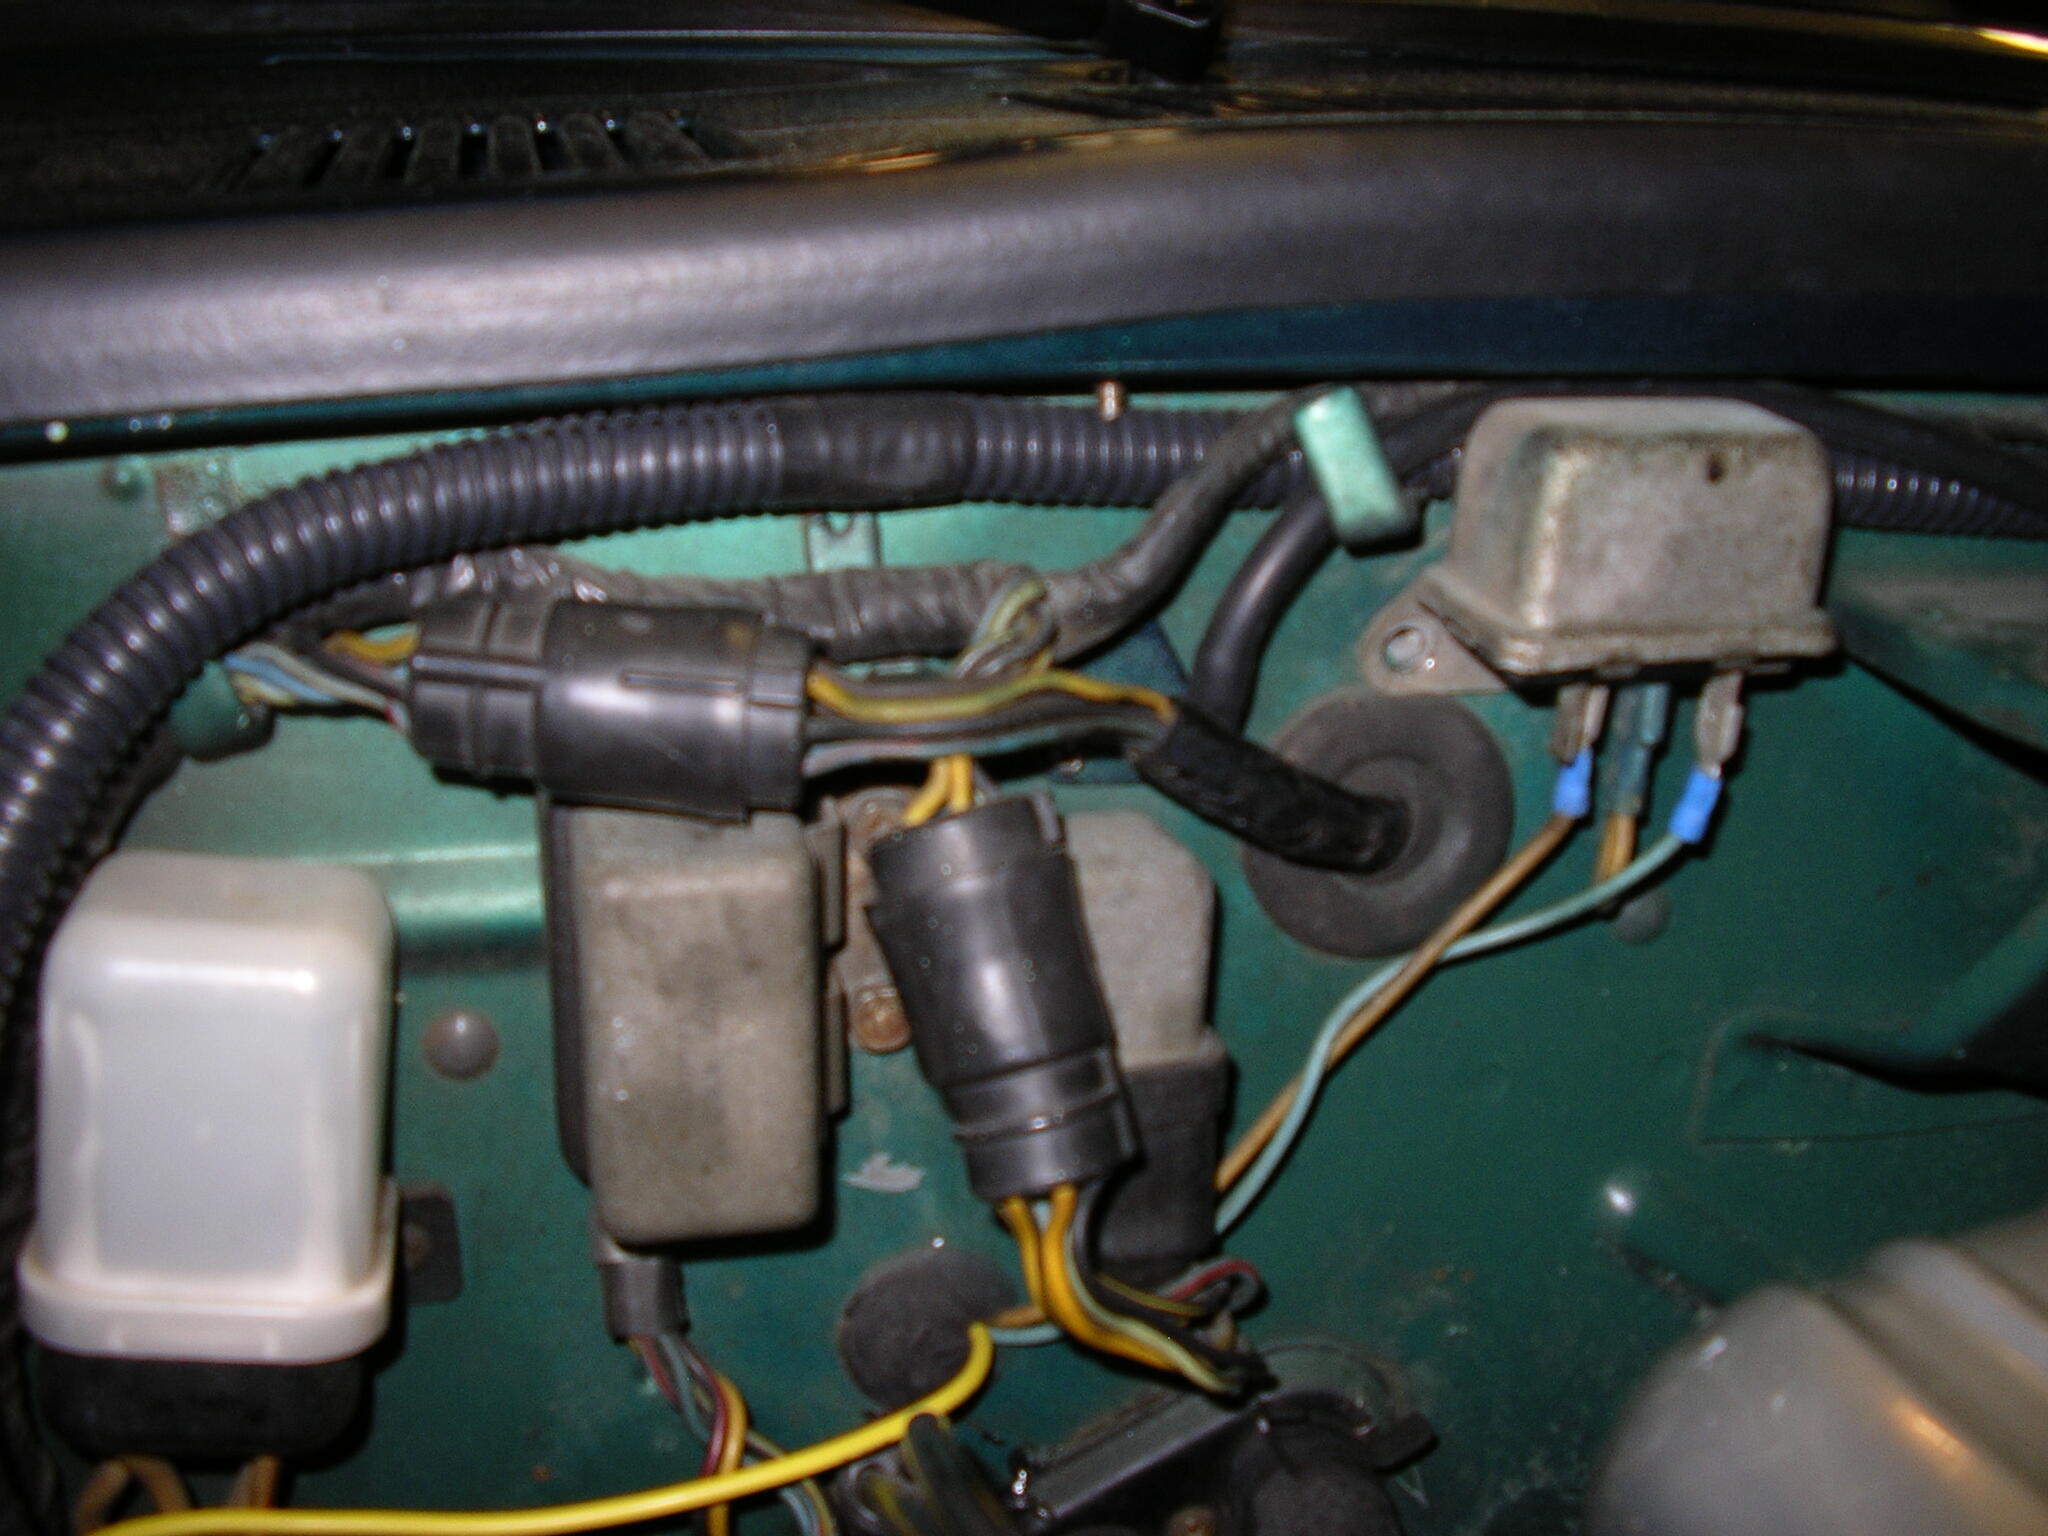
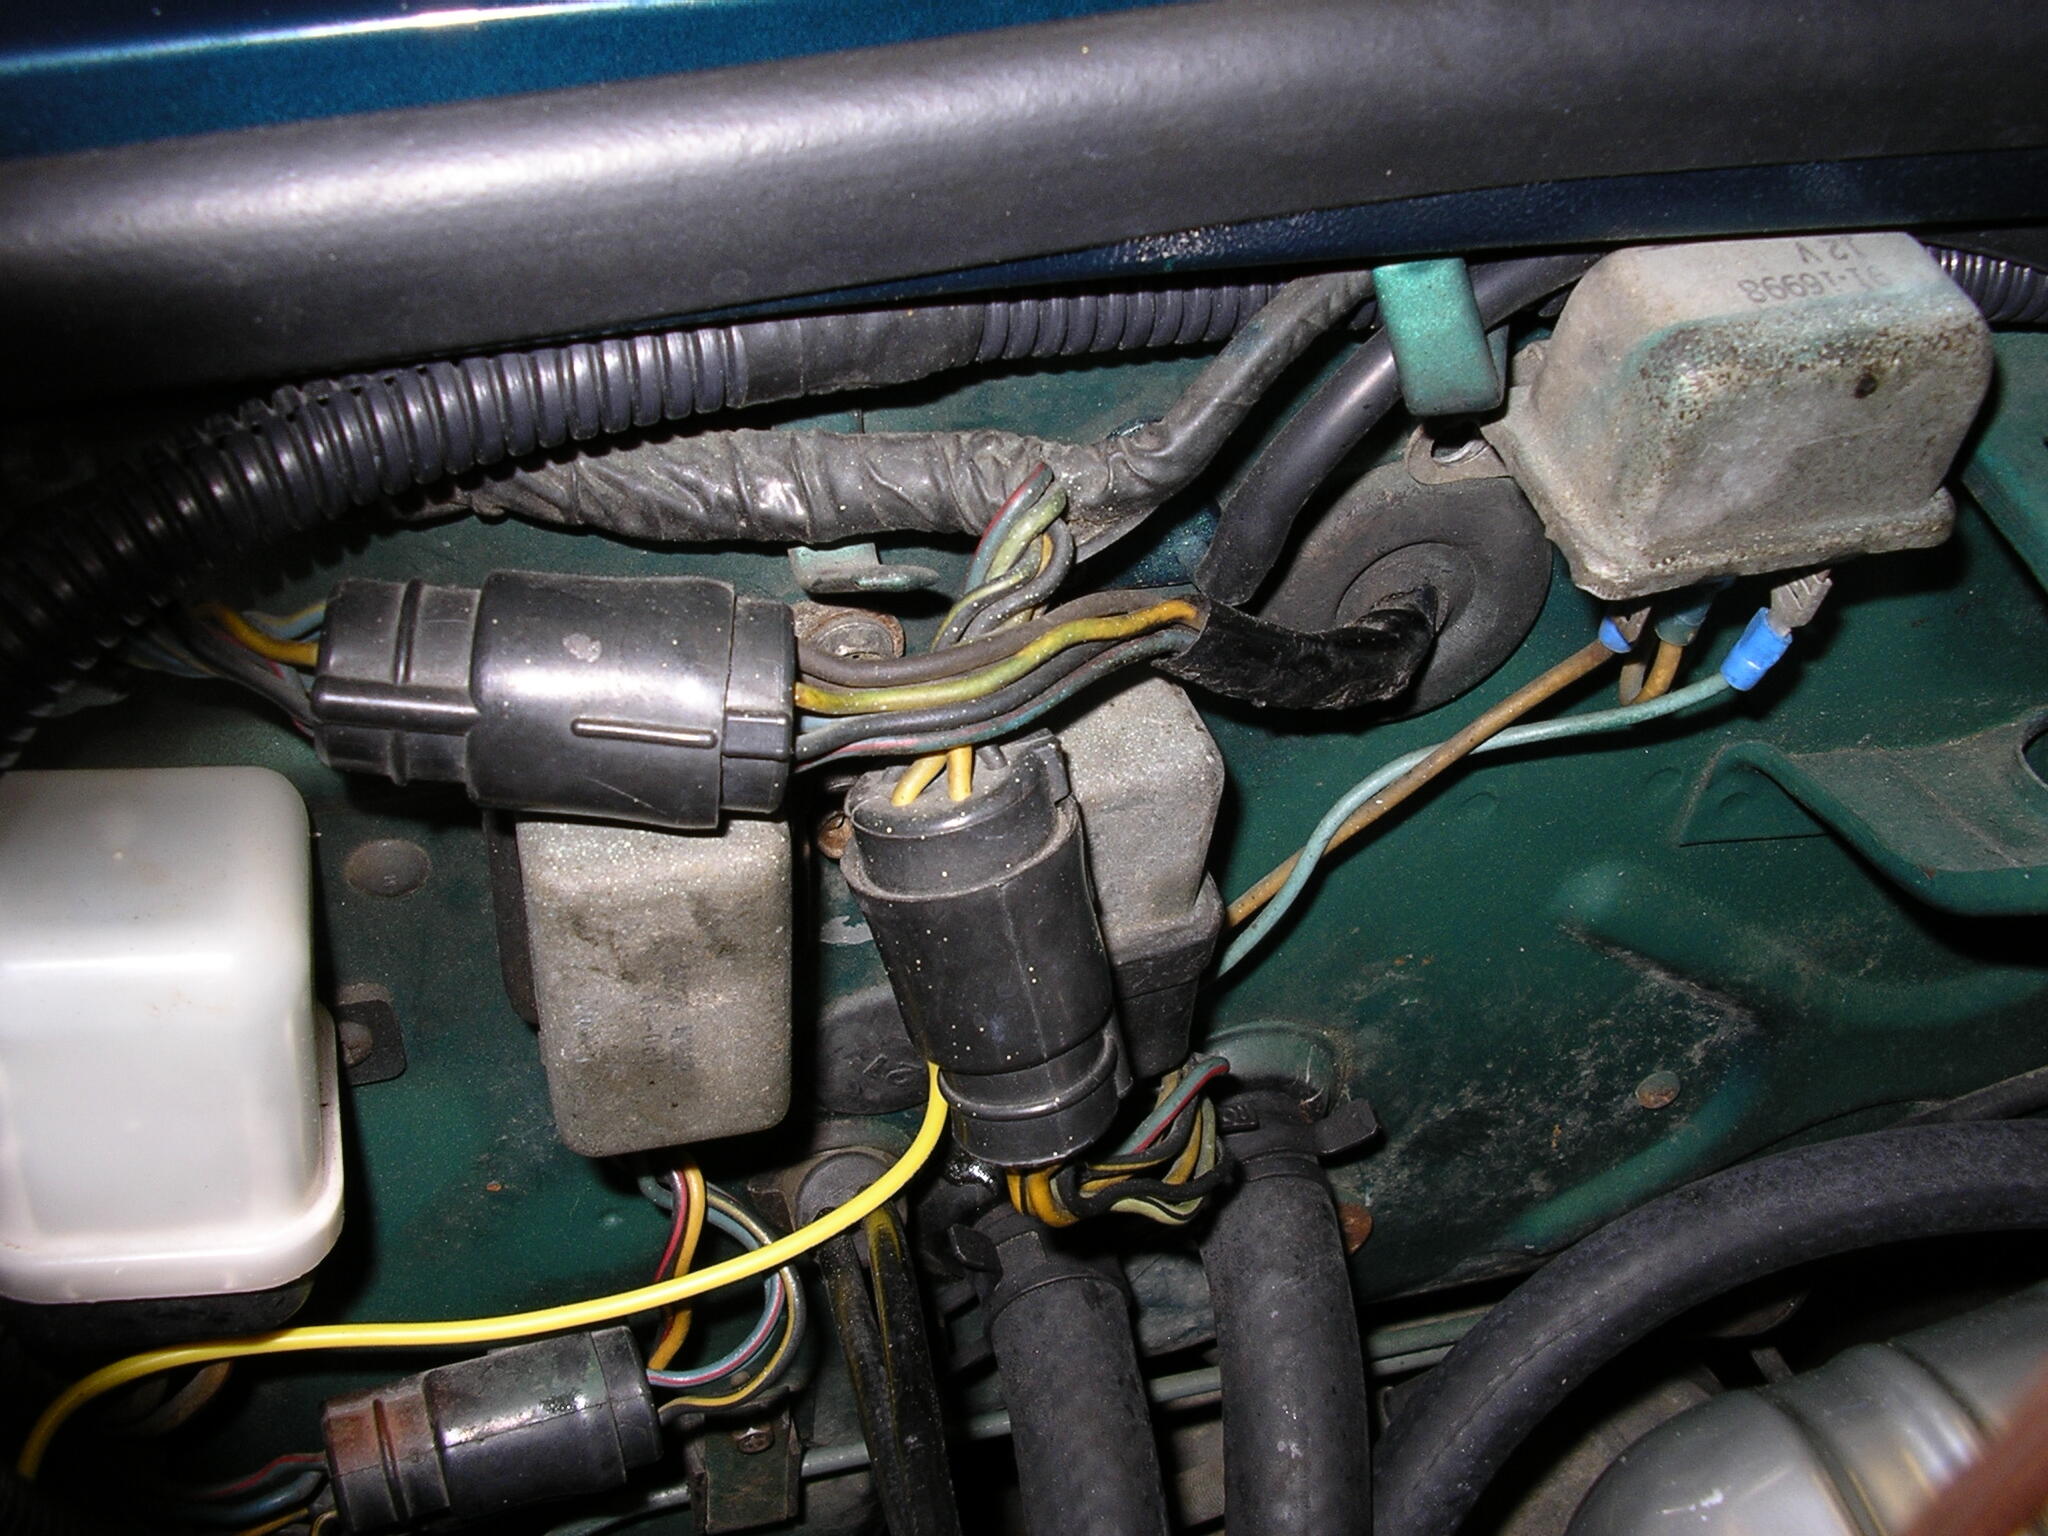
 I think the one on the left is the interlock relay but the other 2 are unknow
 I am now looking to clean up the engine bay, and I have what looks like 3 relays mounted on the firewall. they are behind the glove box. the car is an early 1974 datsun 260z. I would like to get rid of them if they are not need. thanks
nice thanks for the photoslooks good what are you going to control with the switchhere is a pictured of the 2 gang rocker switch . captain obvious how did you make out with the same project?
I am now looking to clean up the engine bay, and I have what looks like 3 relays mounted on the firewall. they are behind the glove box. the car is an early 1974 datsun 260z. I would like to get rid of them if they are not need. thanks
nice thanks for the photoslooks good what are you going to control with the switchhere is a pictured of the 2 gang rocker switch . captain obvious how did you make out with the same project?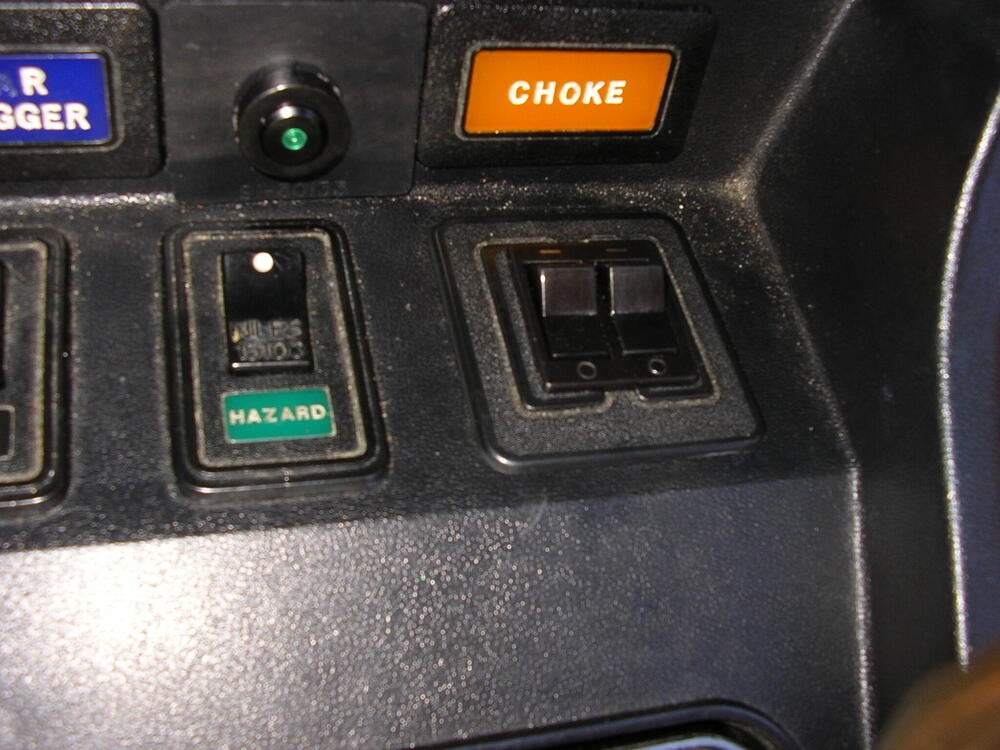
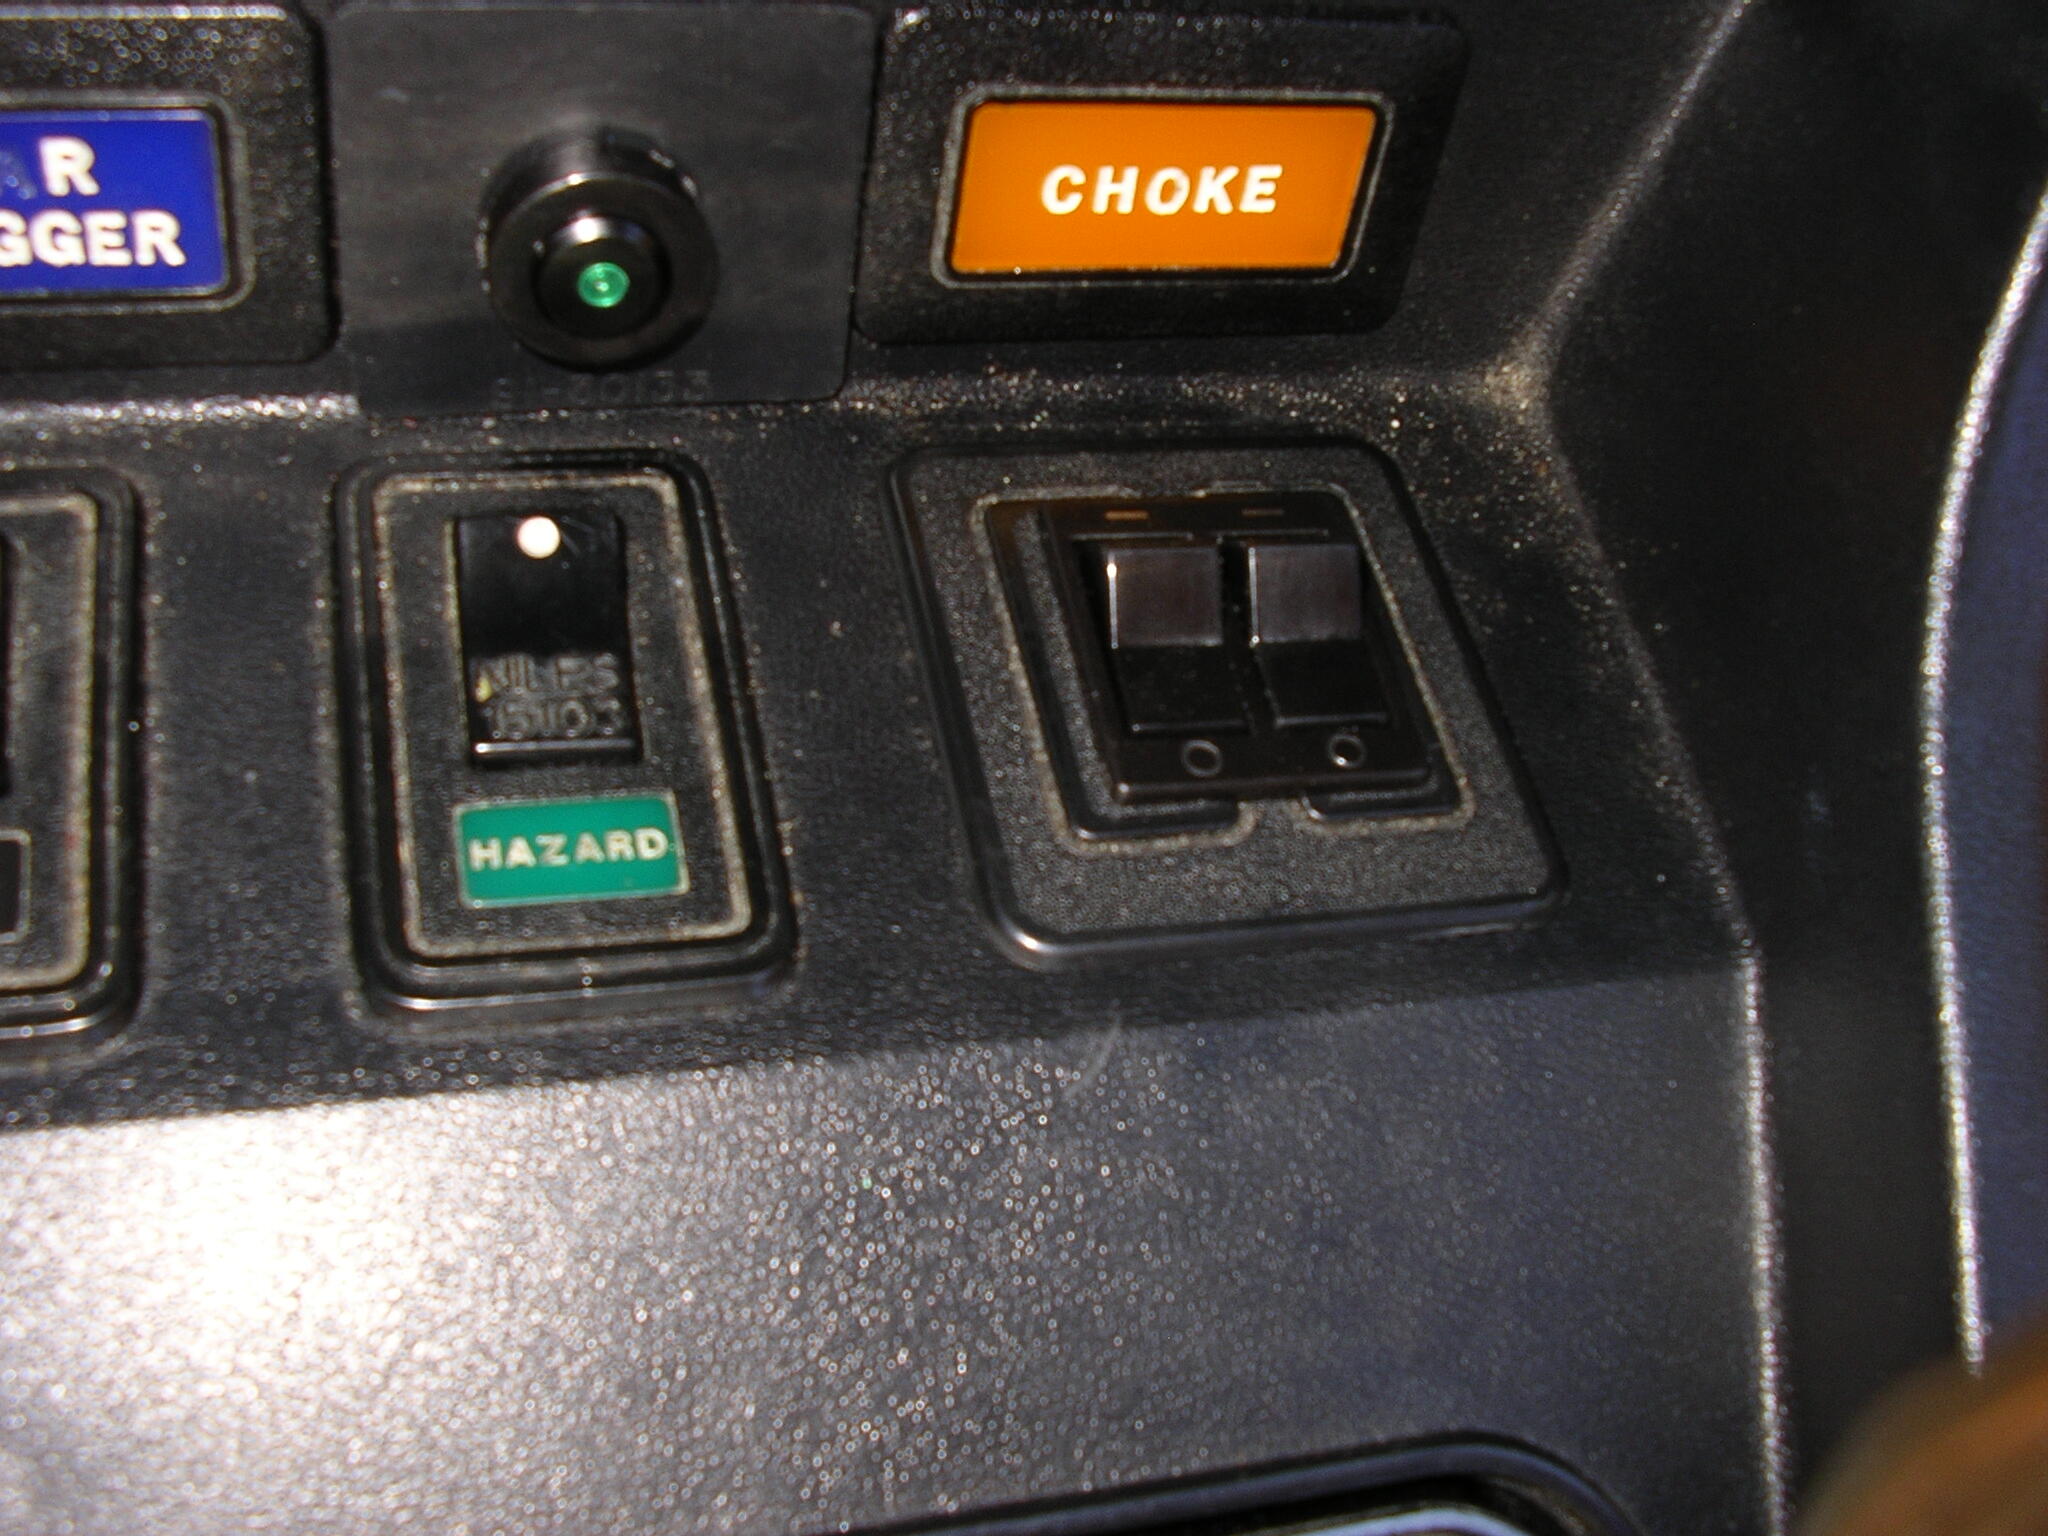
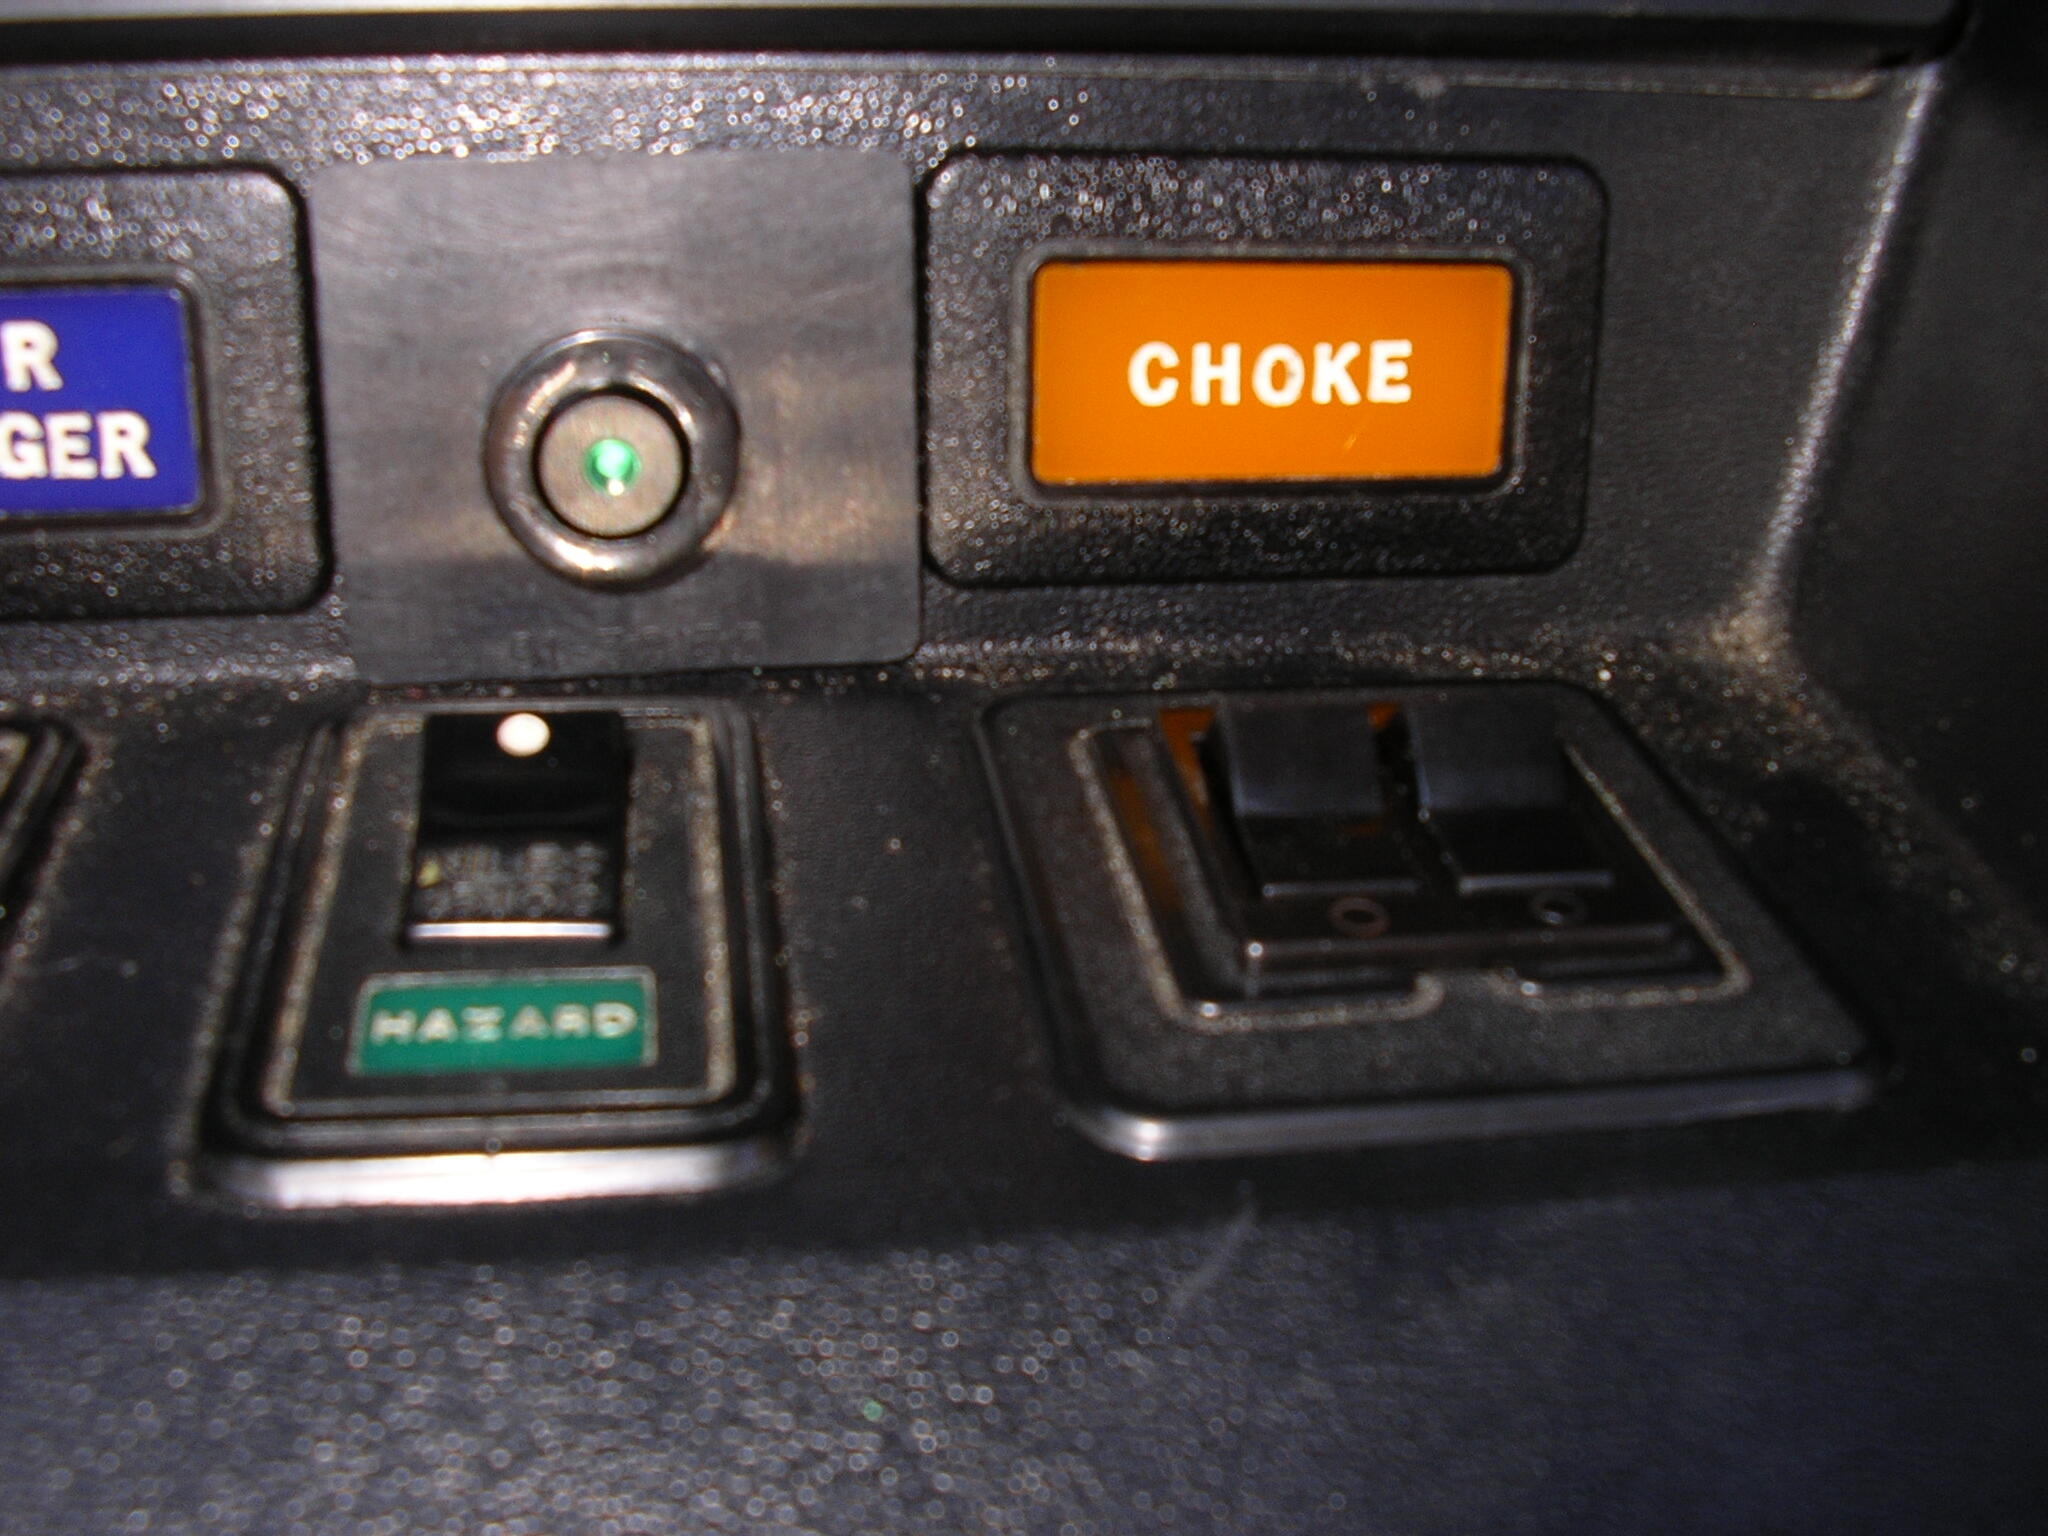
 yes, I think they look great to. I also see you have to hole between the rear defogger and the seat belts light. I plan to install a small led pilot in that location to let me know the cooling fan is running. I am planning to wire it off of the manual bypass switch for the fan.I think cutting the hole should be no problem with patience. the switch does have over lapping sides for the clips to hold and I will probably beef up the oem plate from the underside with a plastic plate. maybe cut down on the clips [shorter]and glue the bottom plate on to the oem plate before cutting for switch size. it was all that I could find in that size for a 2 gang switch, the rest well full size or single mini switches. I thought about the round rocker switch but if this 2 gang is done right it might look the best for what is out there to buy.thanks for the help zed head, I hope I did it the right way!I chased for years with the same problem. I also did the Technototytunning tension rods and there front adjustable lower control arms . mine was more of speeds around 65mph was the worst. the only shake I get now is when the car sits to long [ like 1-2 months sitting ] then I will need to warm up the tires for 2-3 miles then it is perfect. the tires must get a flat spot after sitting for a while. as I found out any thing that shakes or has play will effect it. I spent several years chasing that problem, changing and replacing all those parts until 1 day I was under the car and saw that little bubble of under coating down under the drivers seat. it was a 6" x6" rust starting and weaken the floor board. since I change that whole floor board things are perfect now. but like you ever part I changed was for the better and I can not tell you how many alignments and balancing jobs I had done . do not give up you will find it and then you will say $^!# that was it .well, I have been looking around captain obvious and found a 2 gang rocker switches panel mounted. the web site is parts express and the product # is 069-226. they are rated 12v/125v at 10amp.so for 12v purpose I would have no problem with them controlling relays. I did measure the console in the car where the blank plate is. it looks close to removing the 2 raised portions that represent each switch. that would give it a cleaner look and the rockers are black with white symbols. I am going to order 2, 1 for a spare as they are on clearance and they are the only switches I can find molded together and mini size. let me know what you think .


Important Information
By using this site, you agree to our Privacy Policy and Guidelines. We have placed cookies on your device to help make this website better. You can adjust your cookie settings, otherwise we'll assume you're okay to continue.