


Leaderboard
-
inline6
 Subscriber
 4Points1,282Posts
 -
Patcon
Subscriber4Points11,142Posts -
jfa.series1
Subscriber3Points2,733Posts -
motorman7
Subscriber3Points2,228Posts


Popular Content
Showing content with the highest reputation on 11/16/2024 in all areas
-
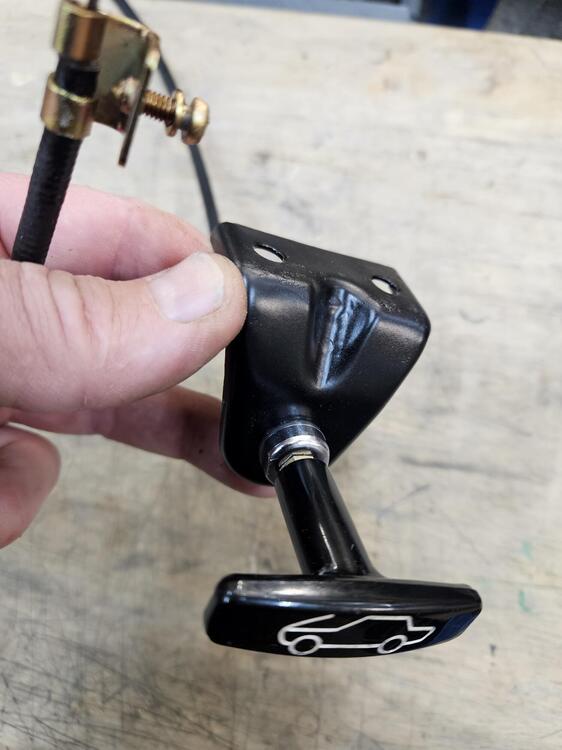
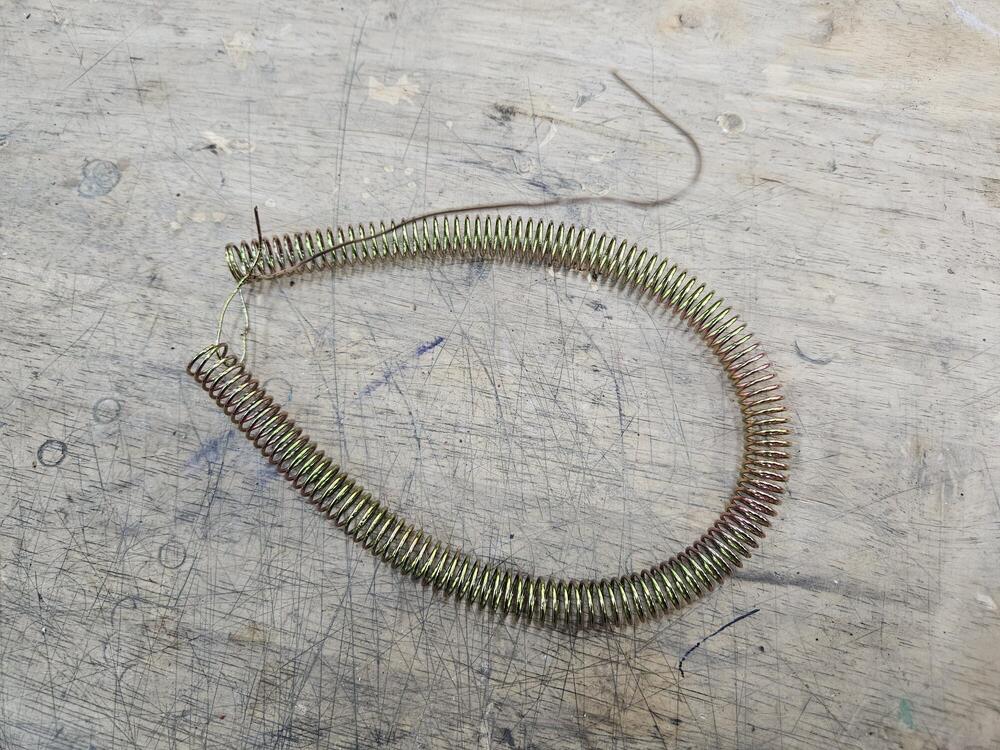
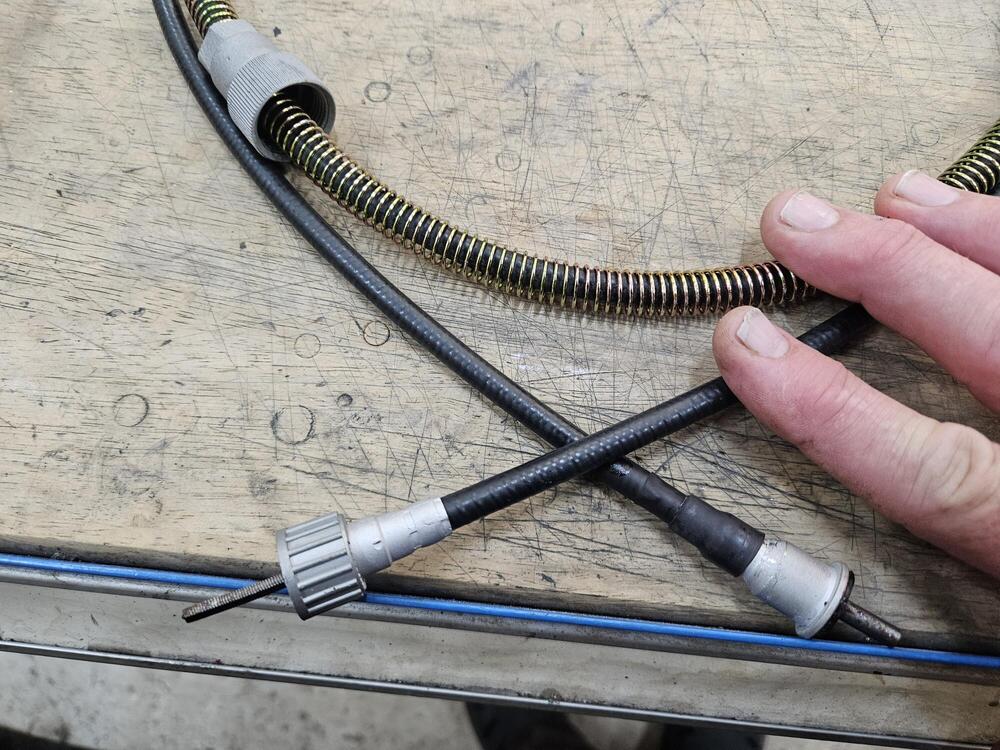
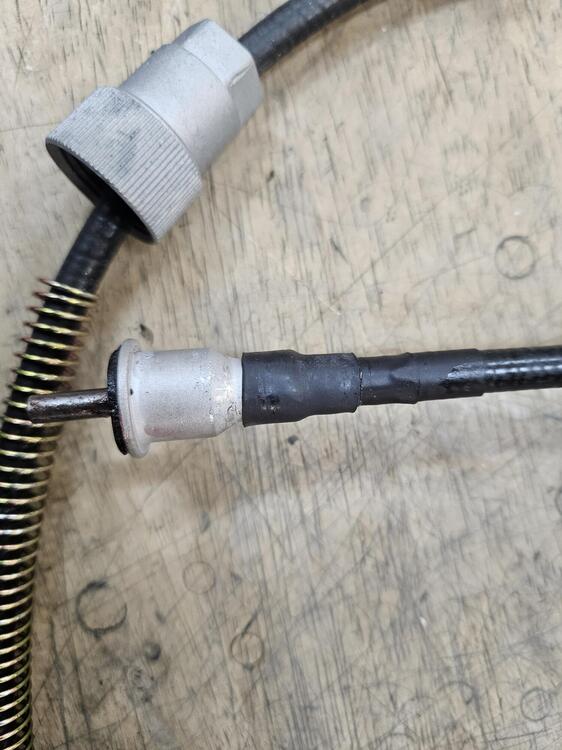
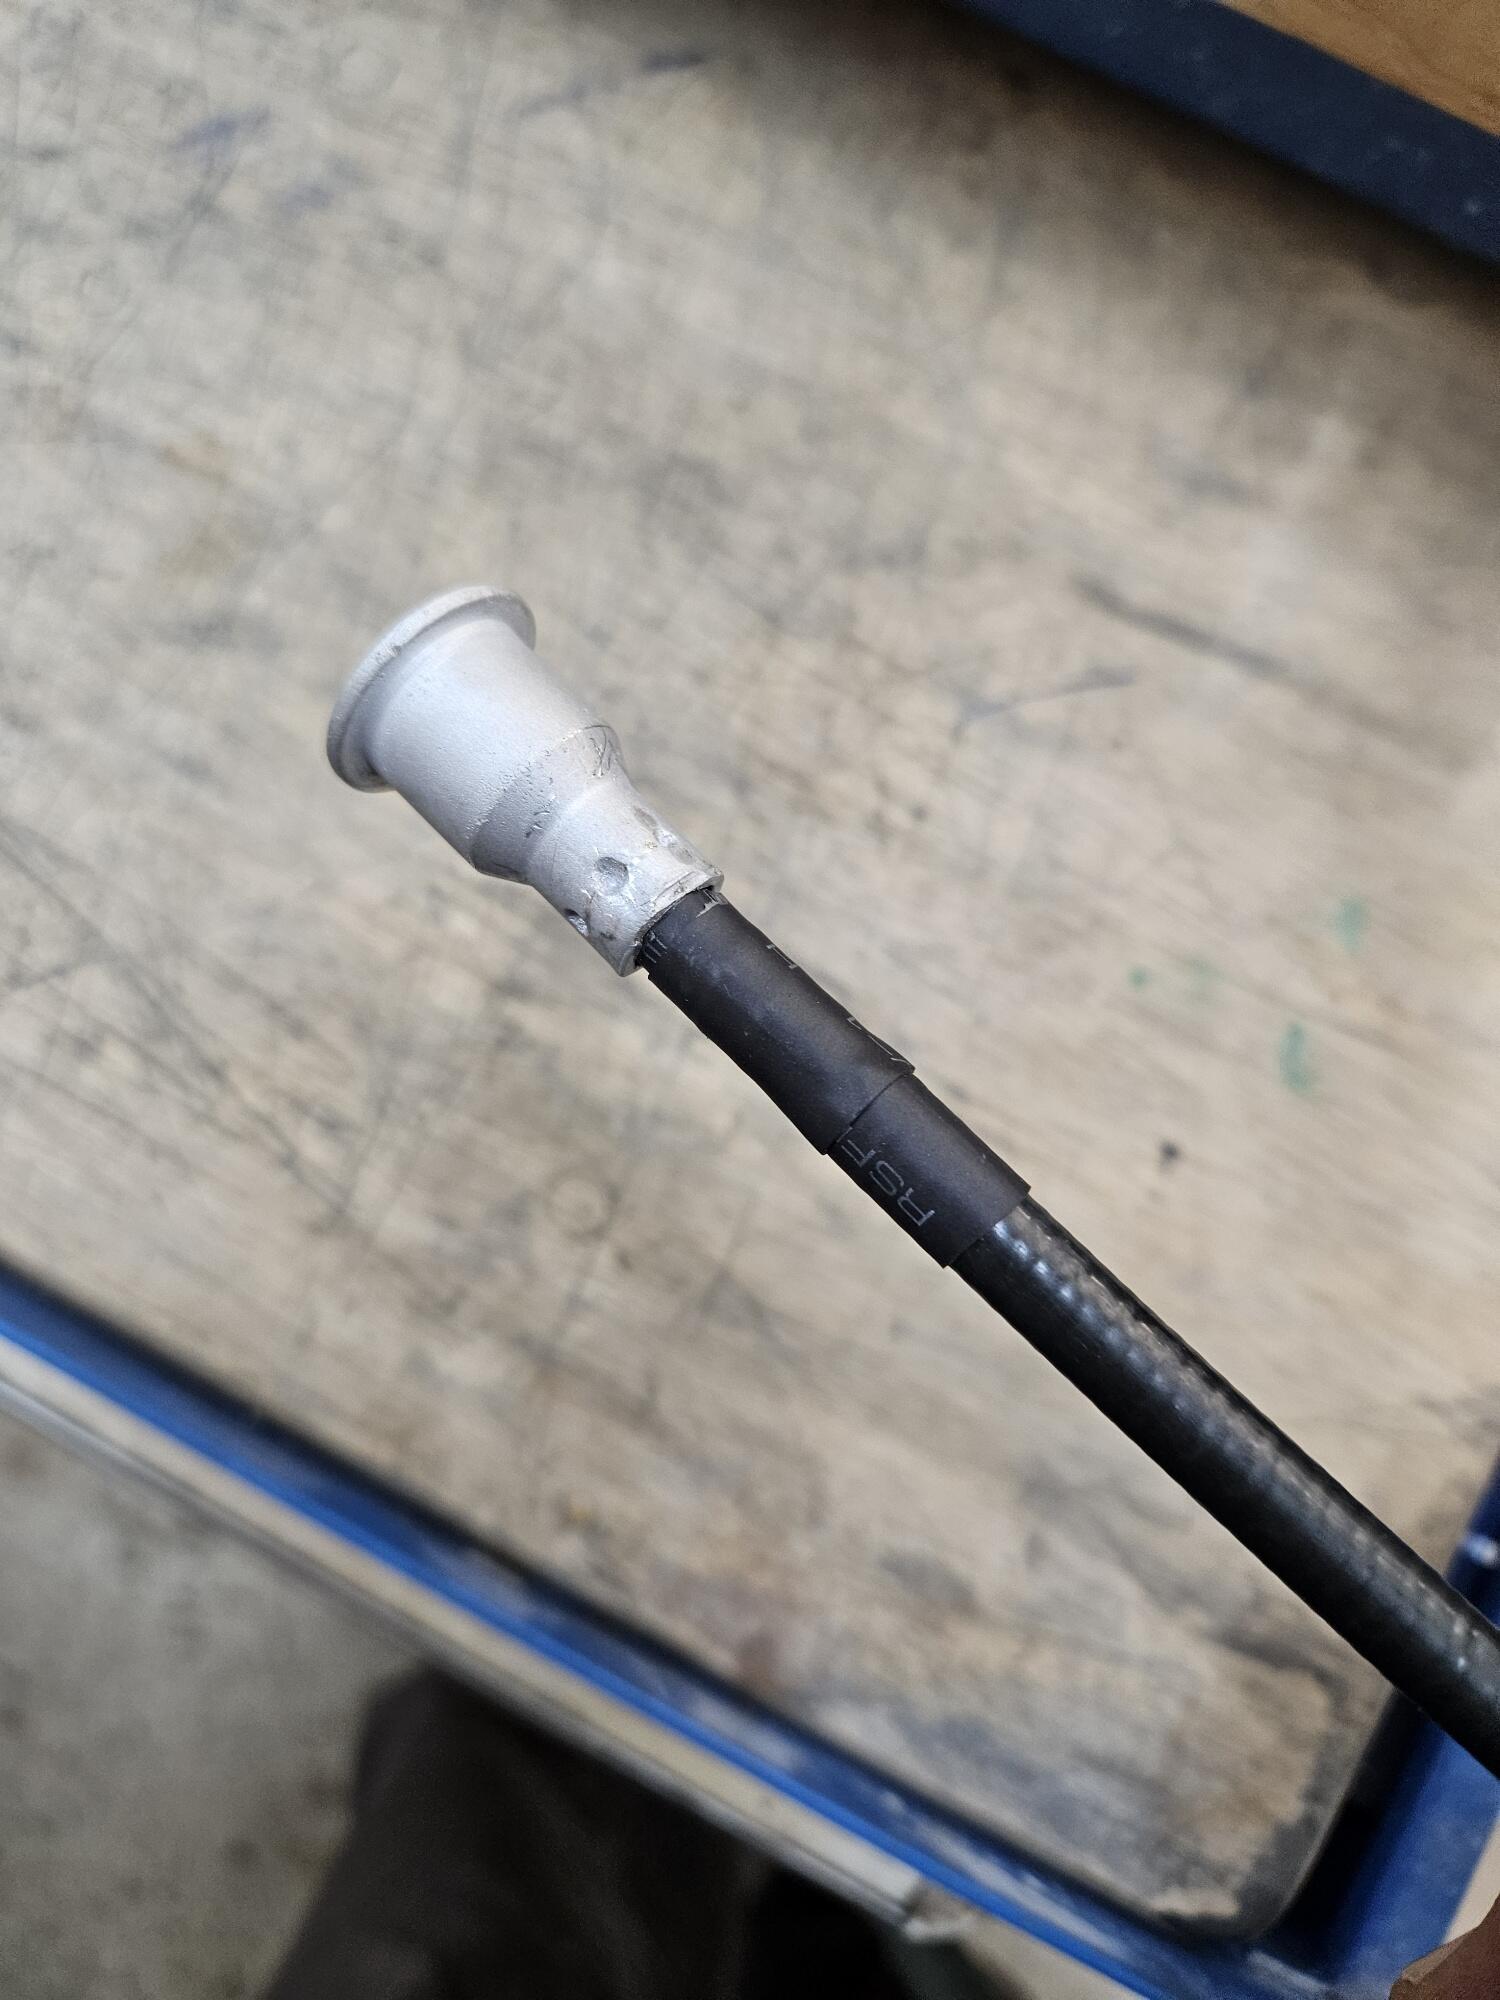
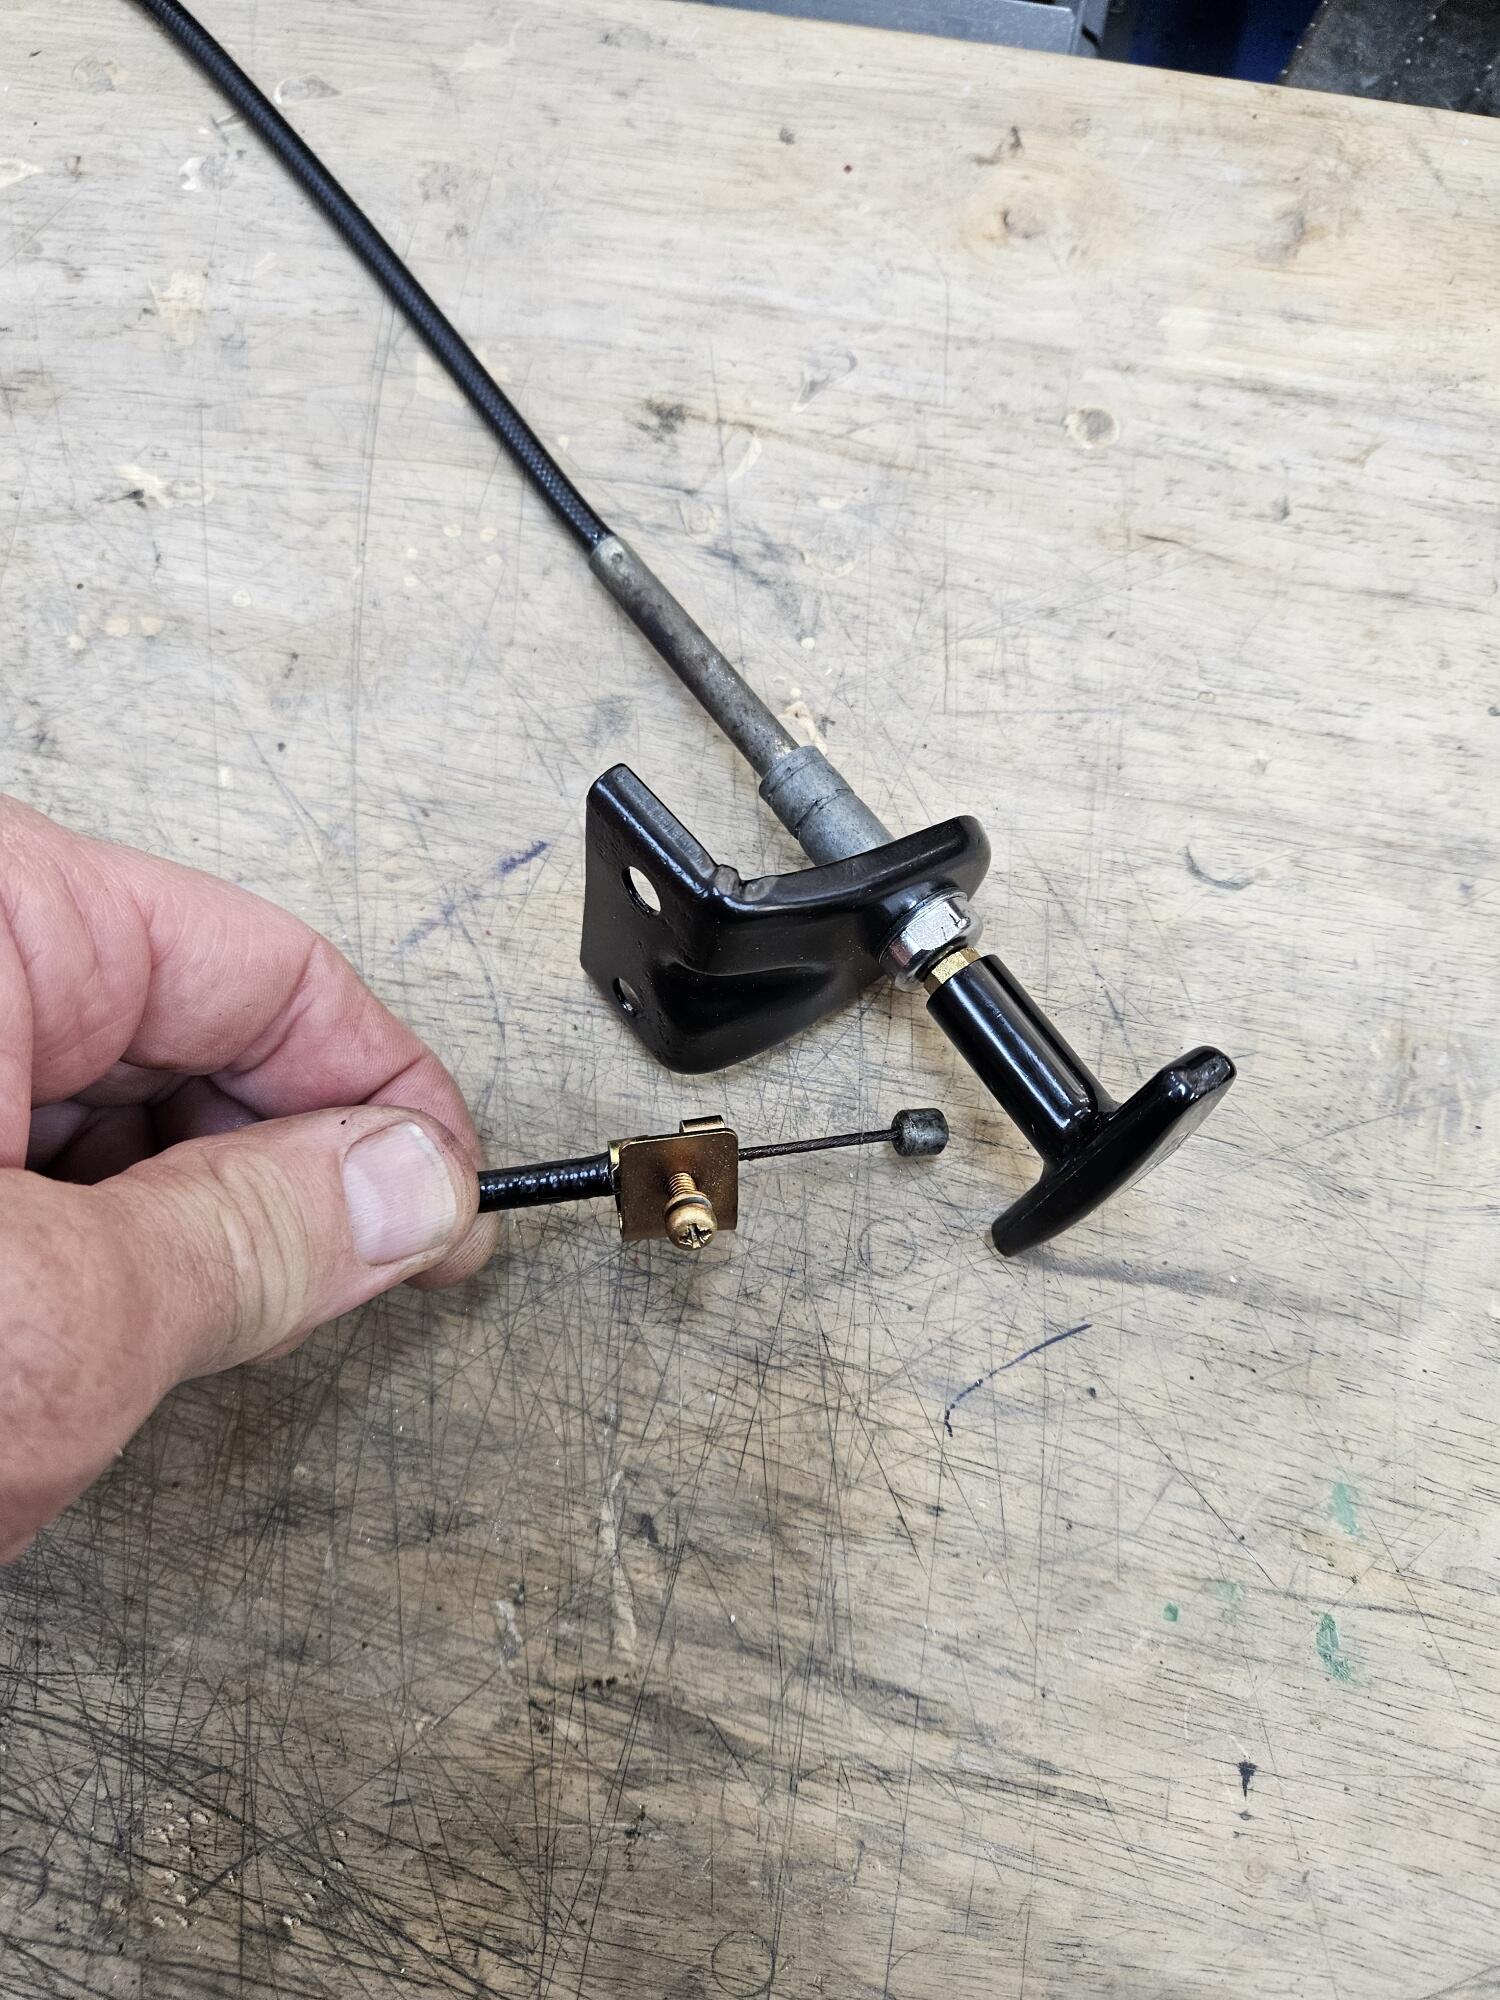
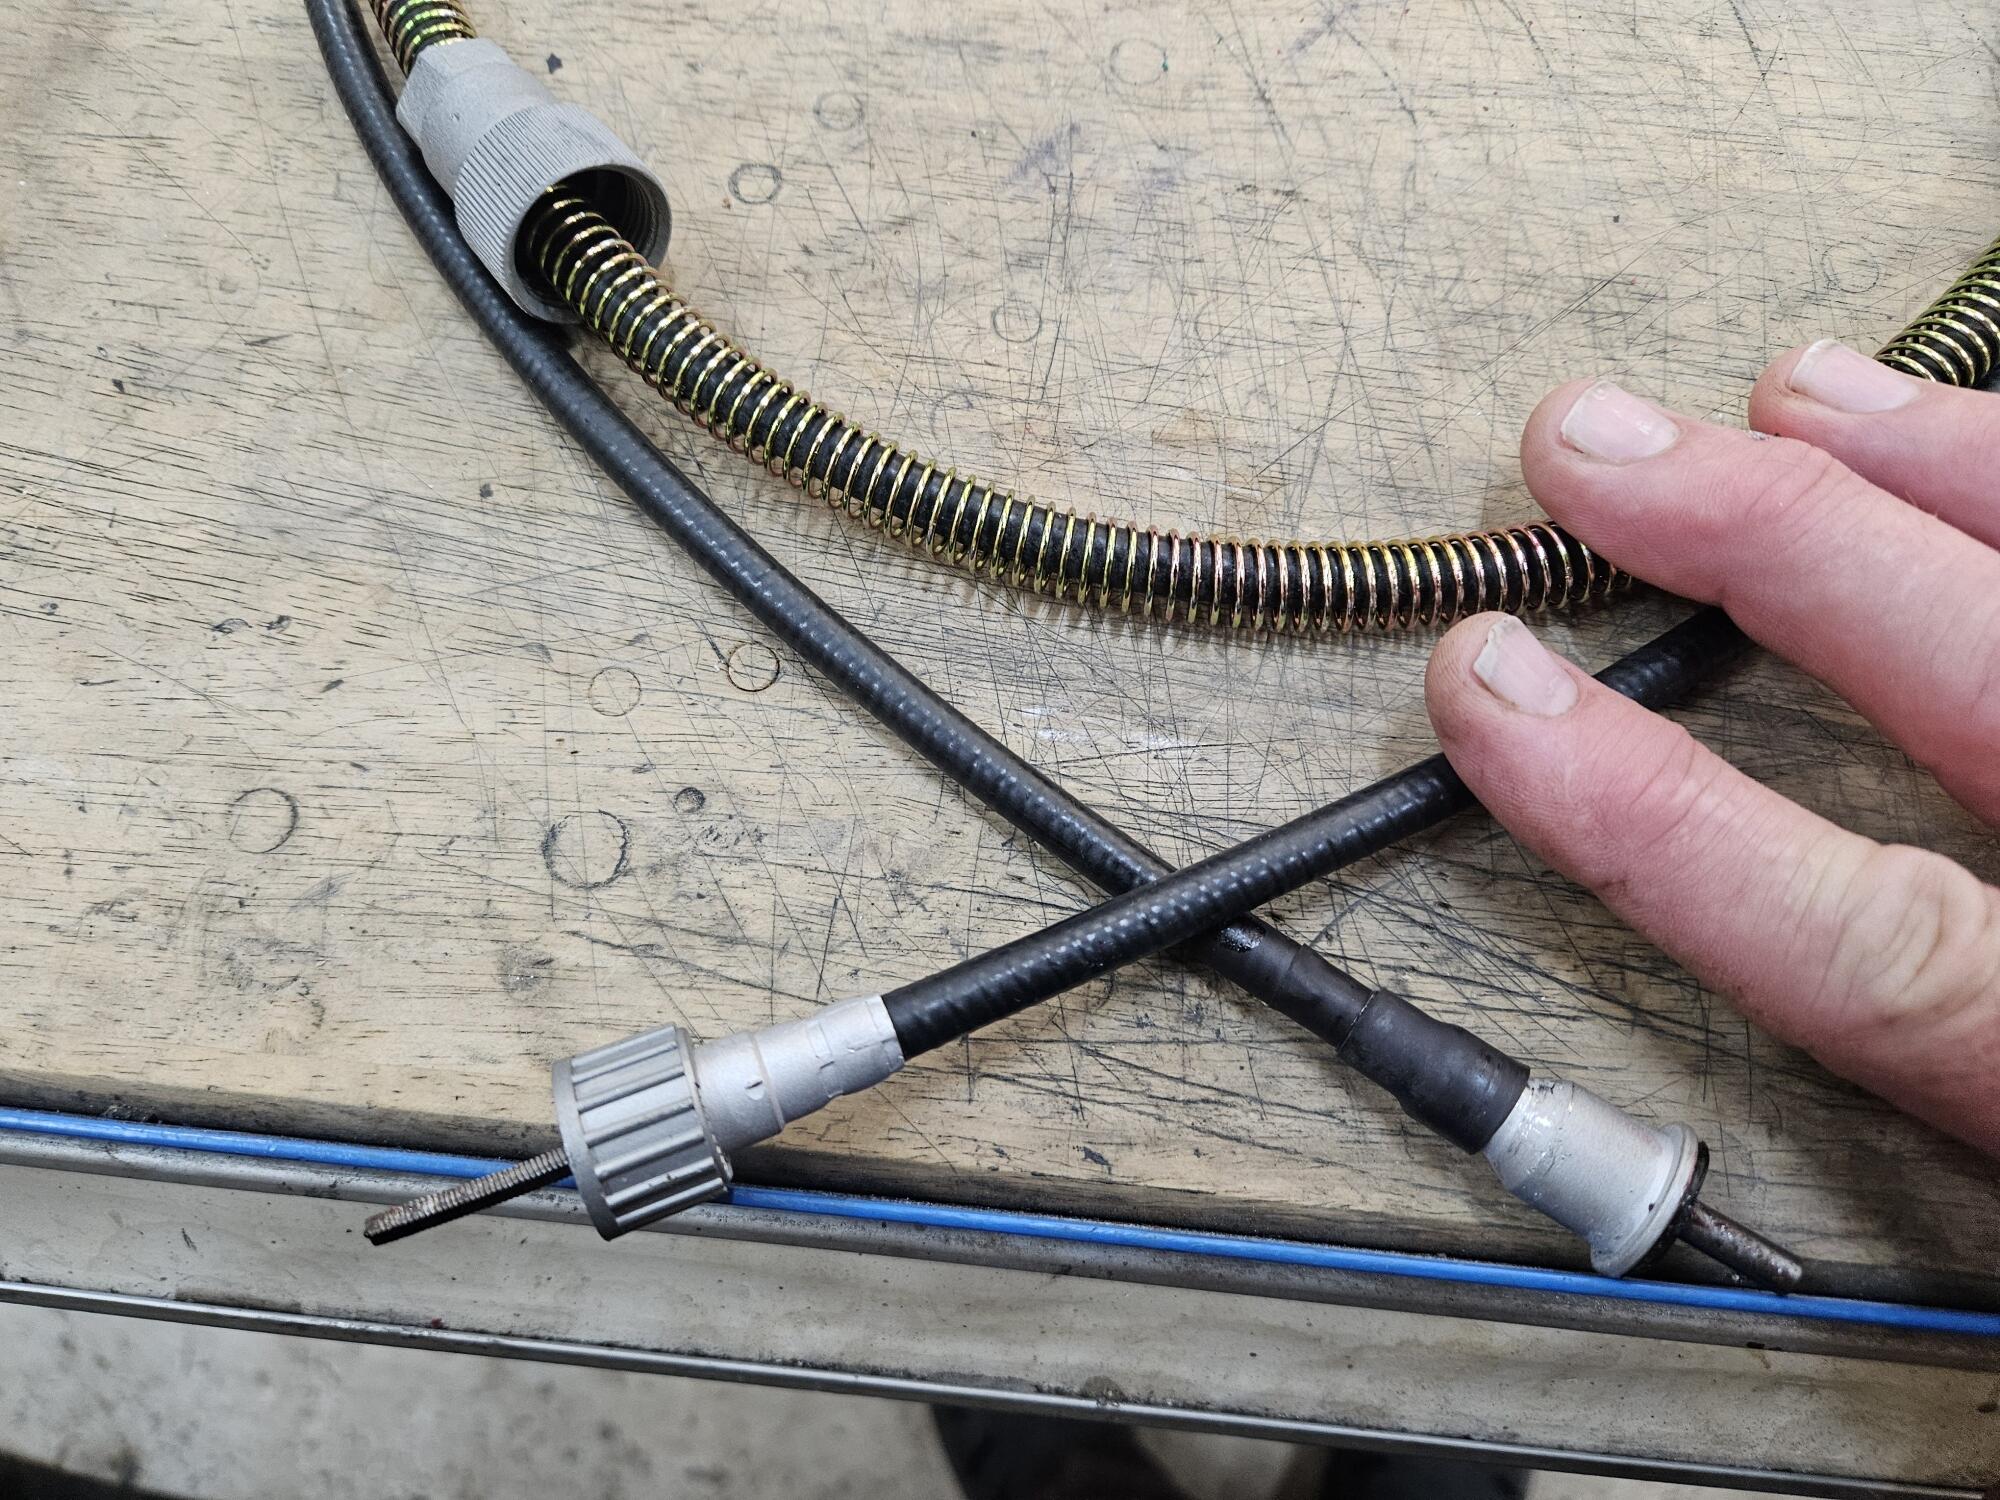
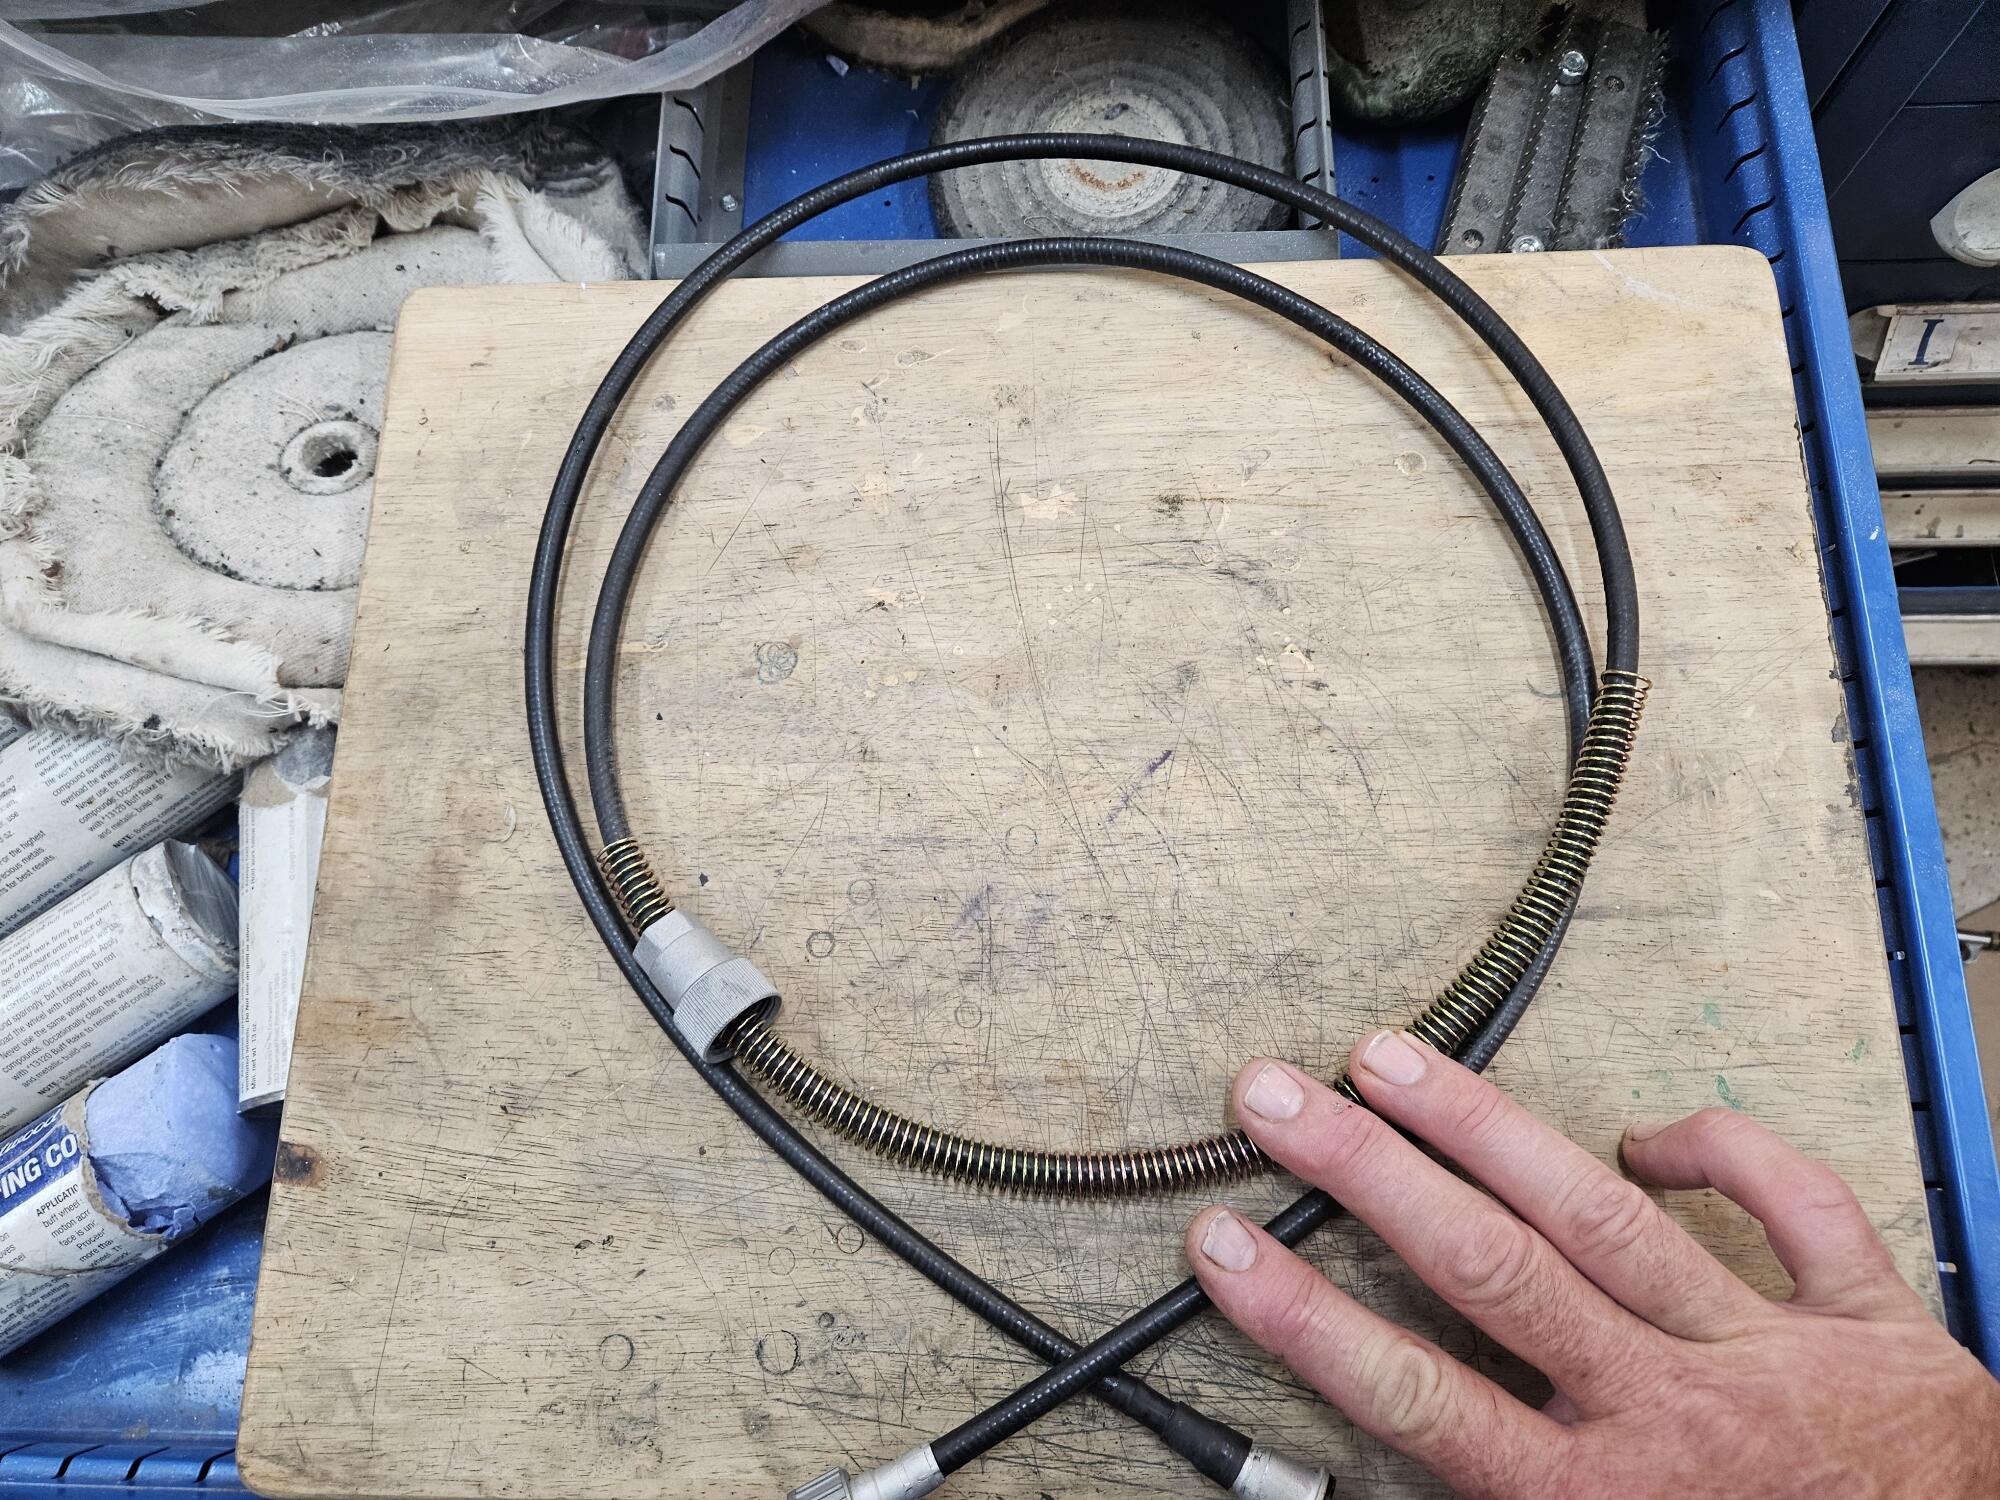
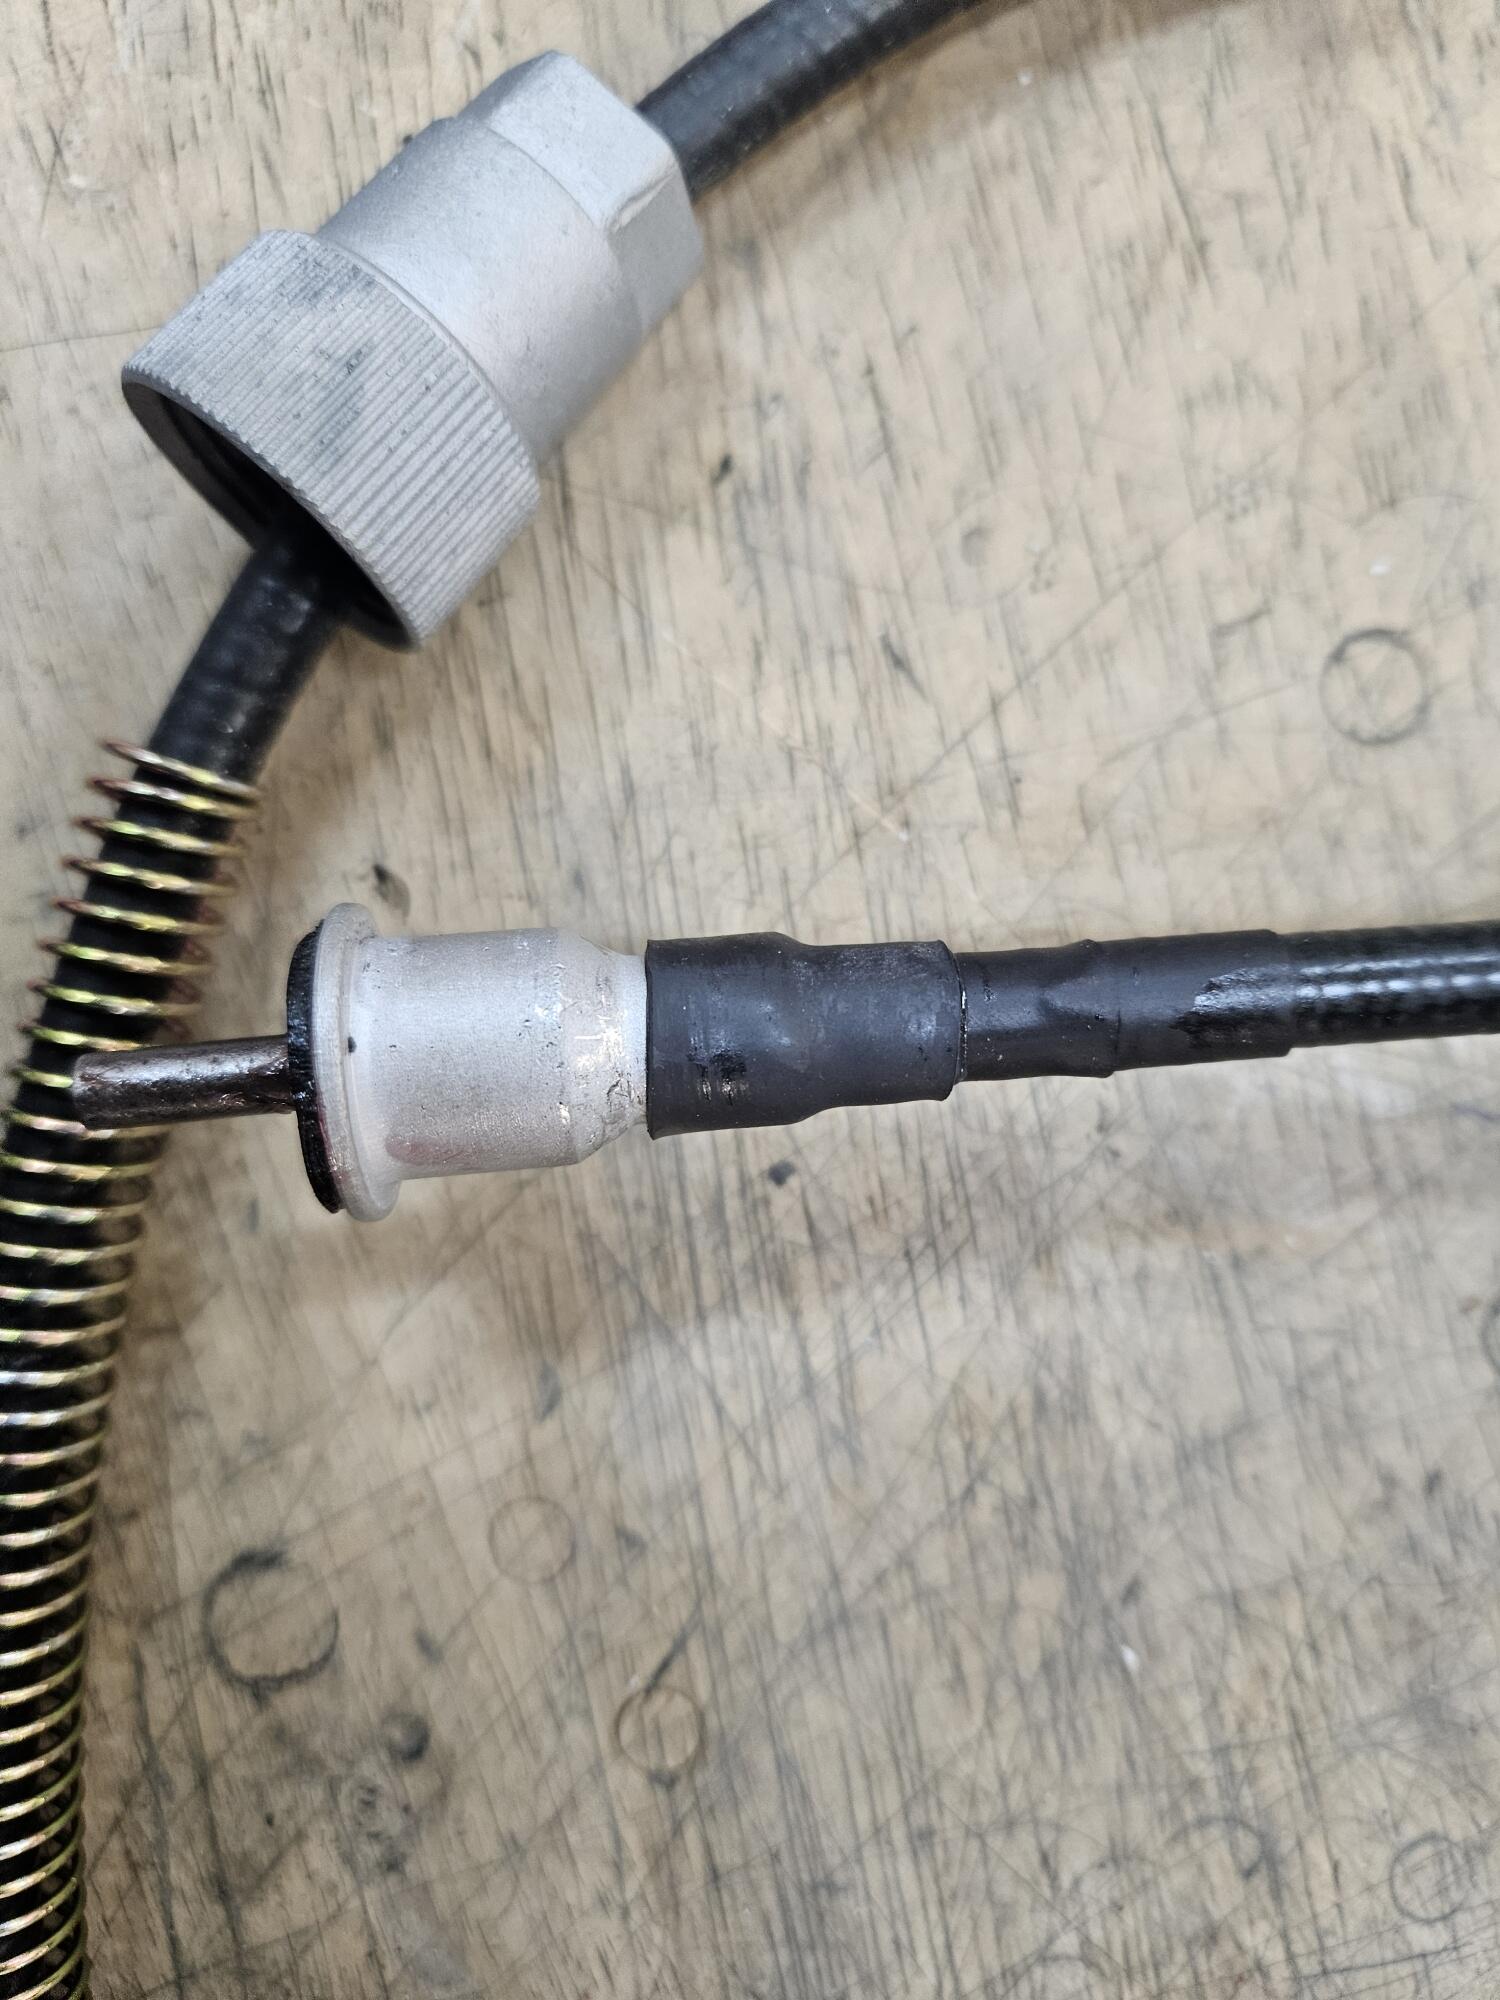
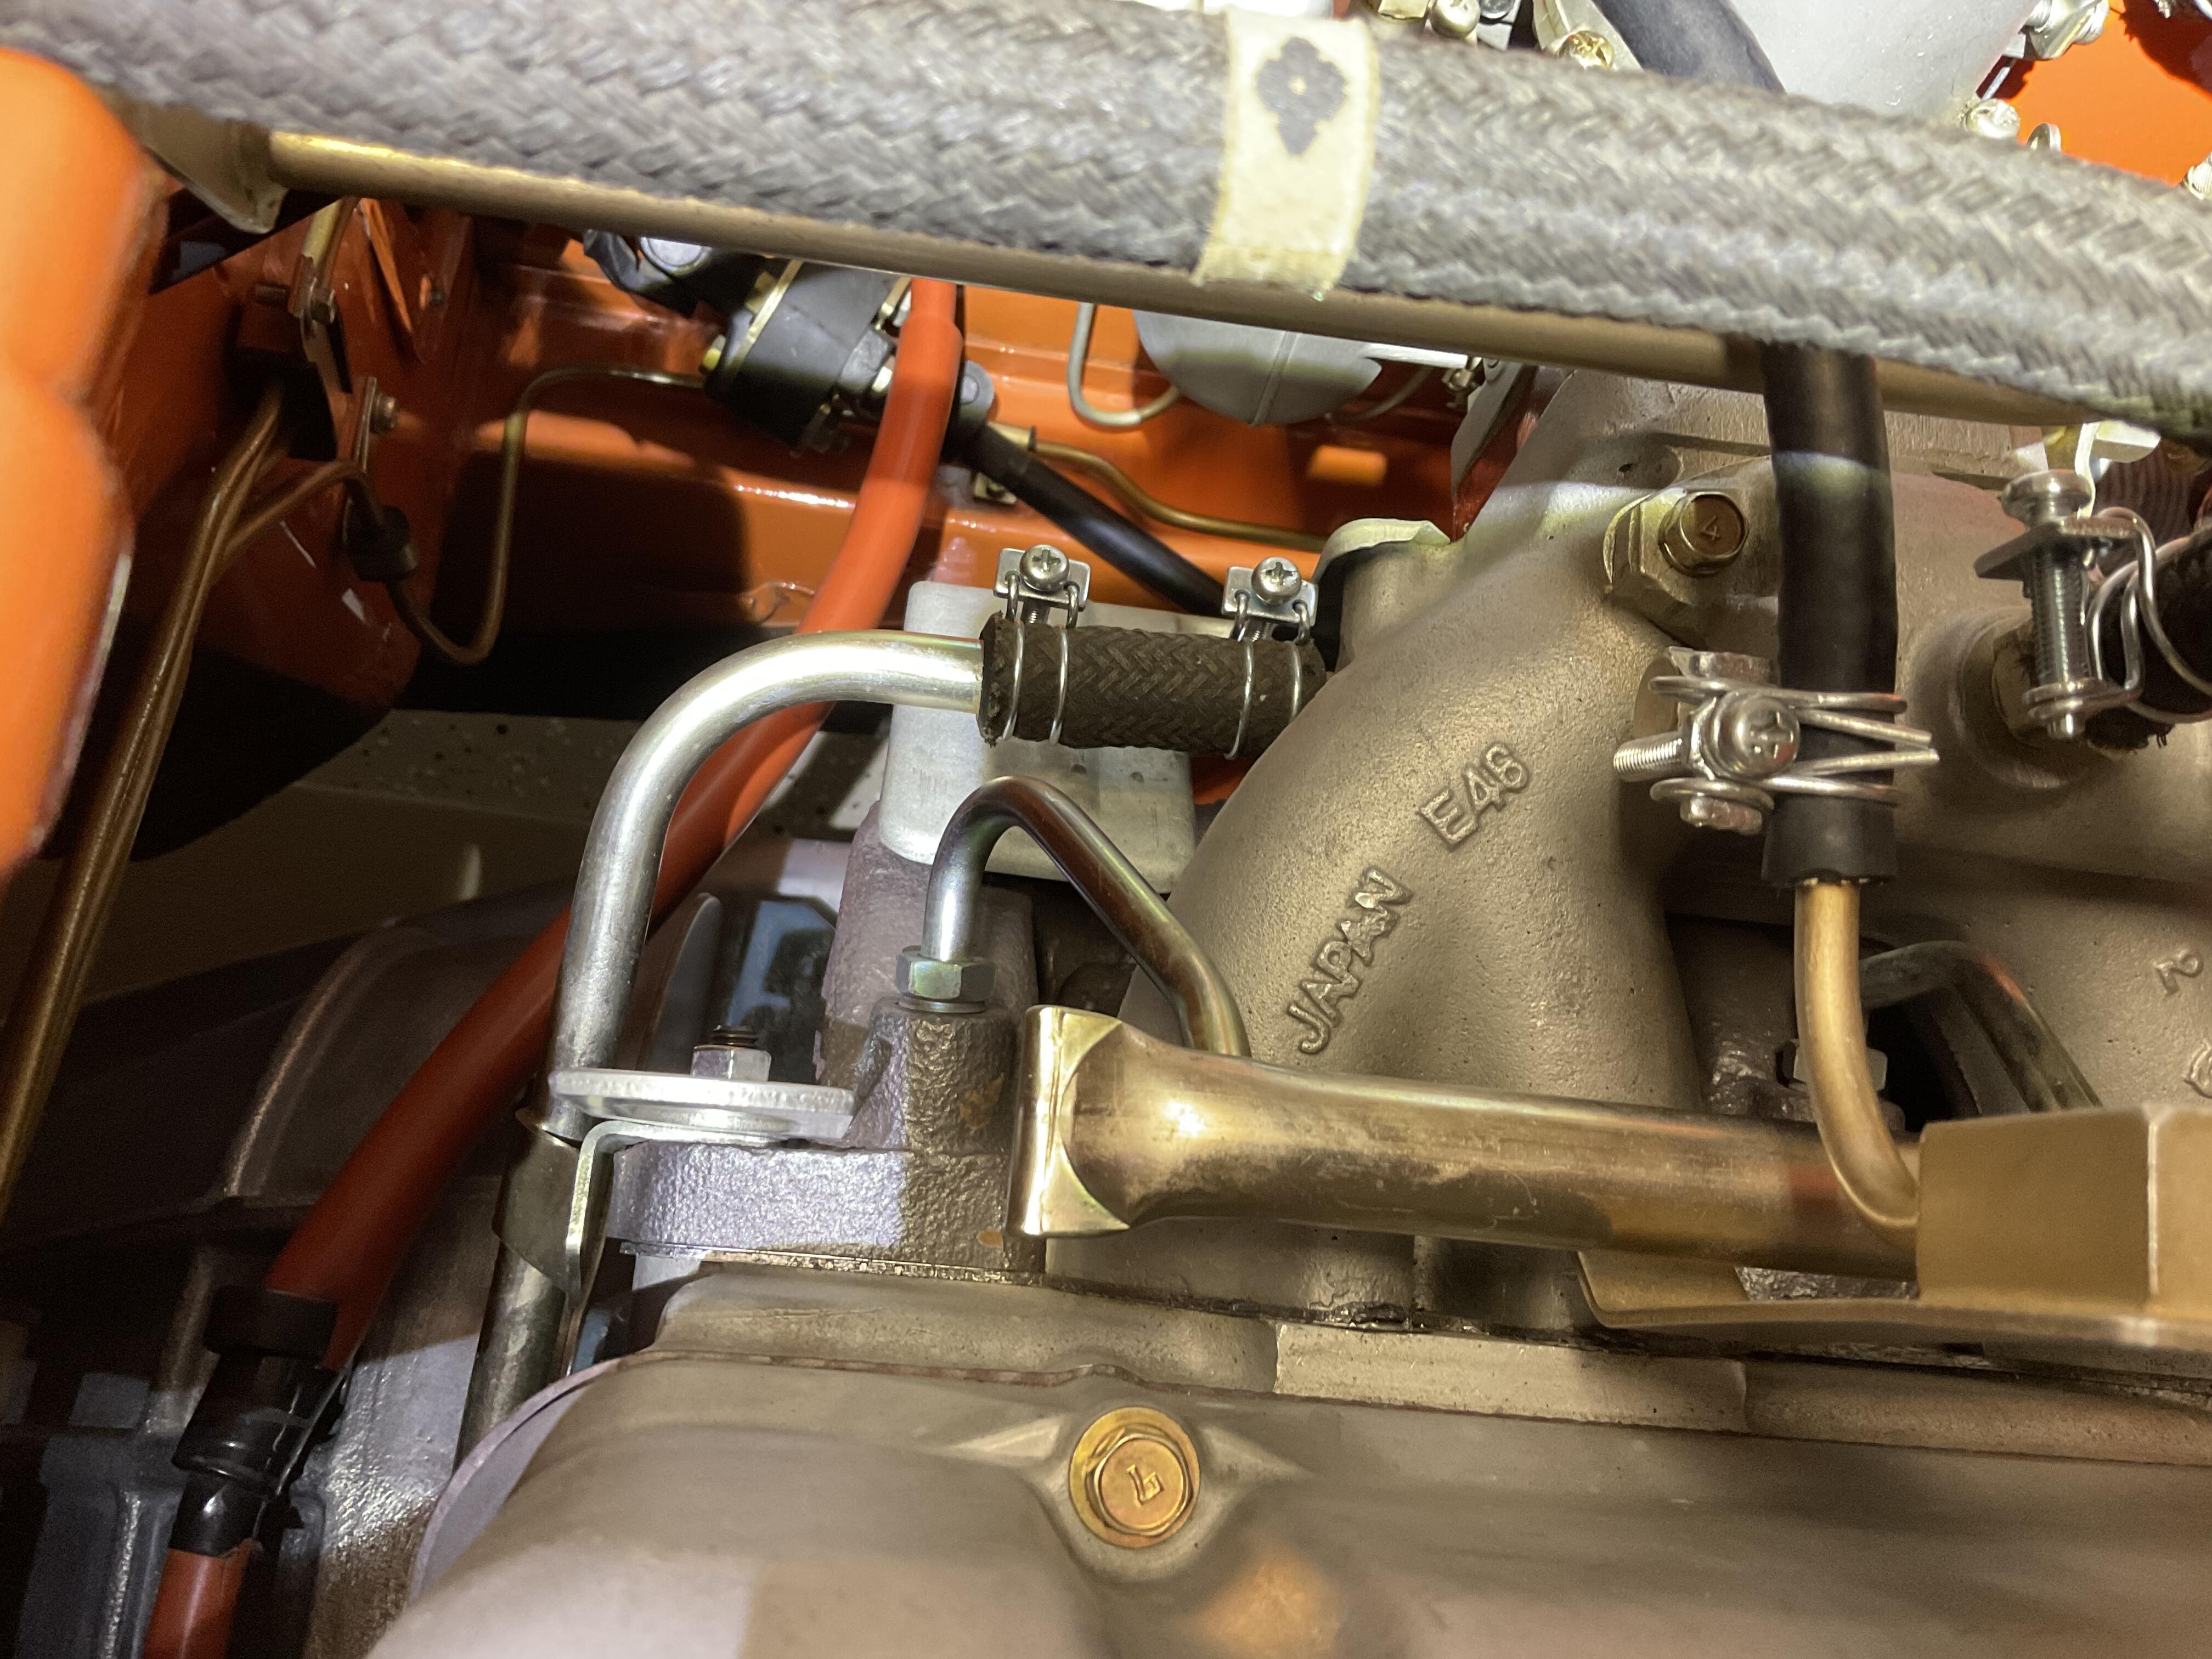
3 pointsI got into the shop one night this week. Worked on the clutch master, speedo cable and the hood release. I plated some parts last weekend for these items Here is the finished hood release When I took the end off the speedo cable, that allowed me to remove the spring and replate it Then I added heat shrink to the end where the jacket was missing and restaked it Then added a piece on the outside that is self sealing heat shrink All of the aluminum ends were bead blasted at really low pressure to clean them up. I did not put the cable jacket in the bead blaster though. You would never get it cleaned out! Finished cable


 3 points
 -
2 pointsShawn McNally is who I am planning on going with here in Boise. Customsbymiguel was my body guy in San Diego.2 points
-
2 points
-
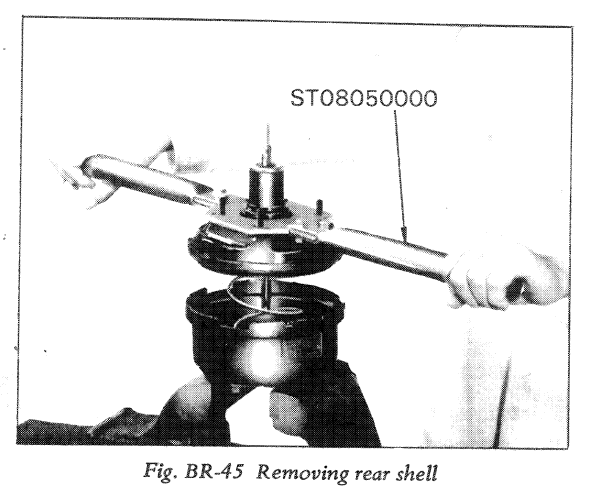
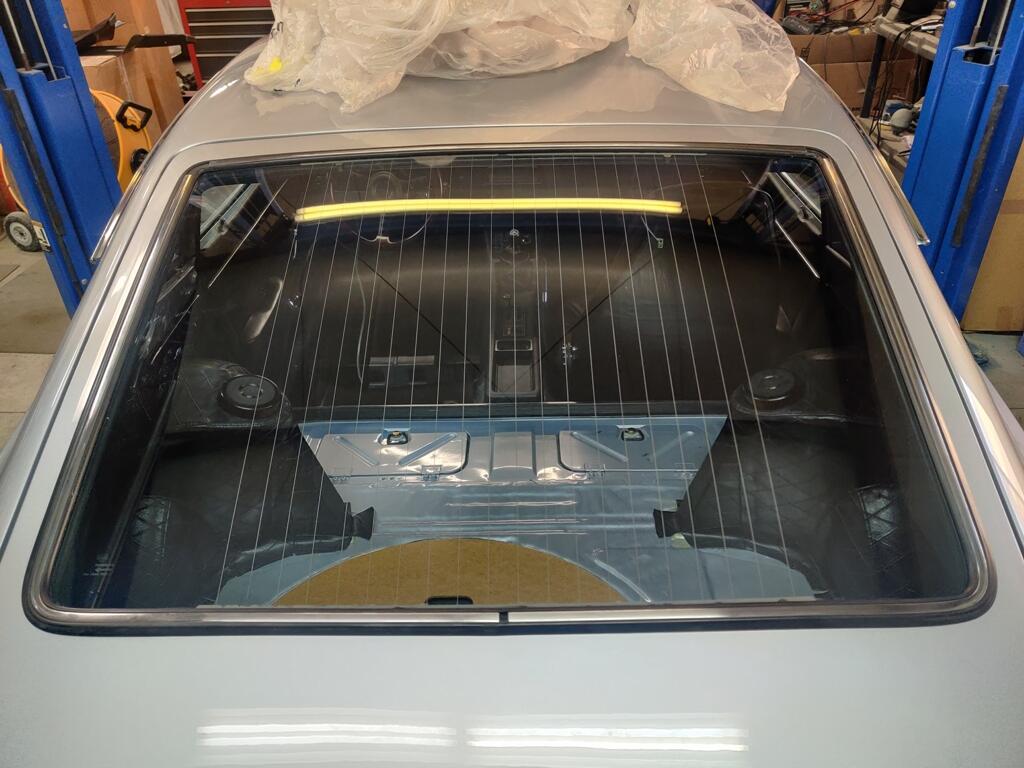
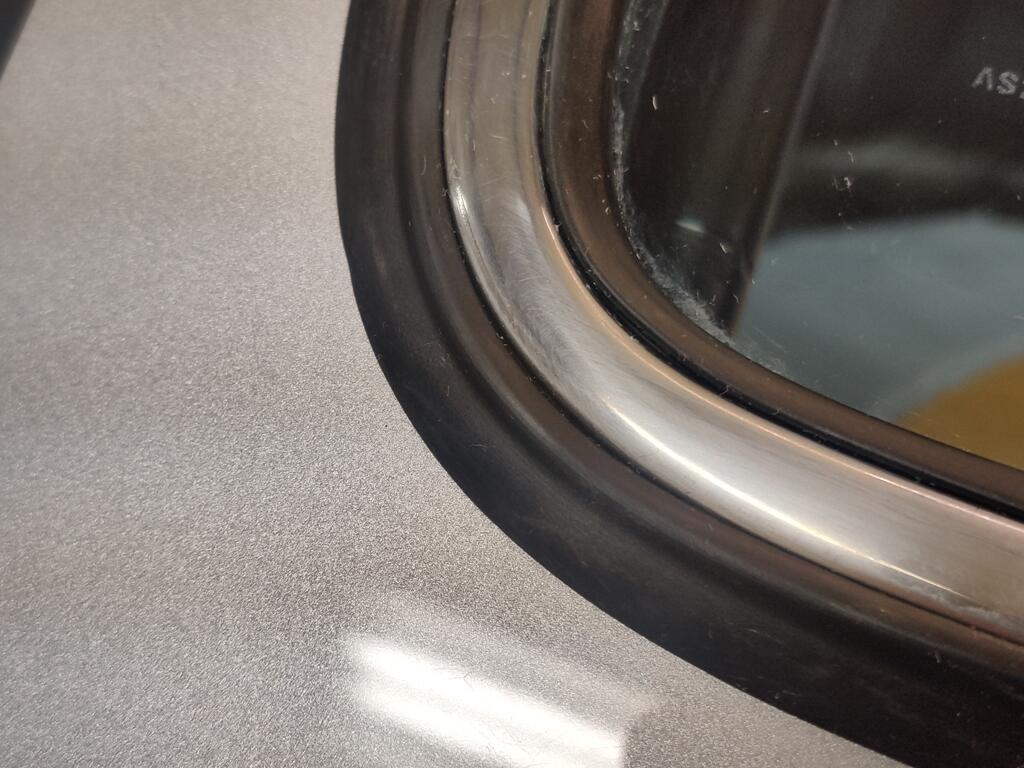
With the assistance of a helper, I was able to install the hatch glass again last night, this time with the stainless trim already installed in the gasket. The hardest part was getting the outer edge of the seal to seat against the outside of the hatch surface, when pulling the cord to start bringing the seal lip over and to the inside surface of the pinch weld flange. I started pulling the cord in the middle of the bottom side. With the stainless trim installed, the outside edge of the seal wants to tuck down inside the hatch glass opening instead of being pushed outward to lay flat on the outer surface. To solve, you need to push/pull the hatch glass/weather strip assembly downward toward and against the bottom of the opening. If you do not, the glass will want to move away from the bottom side and as you pull the rope, the outside edge of the weather strip will tuck inside outer edge of the opening (the part where the outside surface of the hatch turns 90 degree downwards to create the flange for the hatch glass. After a couple of false starts, where I had to put the glass back on a work surface and put the rope back into the groove, we understood that we needed to keep the glass tightly against the bottom edge as I pulled the rope to bring the inner lip of the seal into the inside of the weld flange. Pulling the rope around to each side and up each side equally, and then across the top, there were no issues. We found that for the top edge, pushing on the outside of the glass (to press it into the window opening) worked better as I pulled the rope for that side (fourth, and last, in the order that I went in). This time, there are no cuts or nicks in the rubber seal at all. For some reason, this factory seal had a bunch of gummy stuff all over it, perhaps to assist with installation, if I am guessing. It seemed a lot more flexible that the other one that I destroyed. Perhaps it was much newer than the previous one I used. I still need to remove that with adhesive remover, and when I do so, the stainless trim won't look dull like it does now. Today, I plan to work on making a copy of brake booster tool ST08050000 so I can get my brake booster apart to start rebuilding it.


 2 points
 -
2 points
-
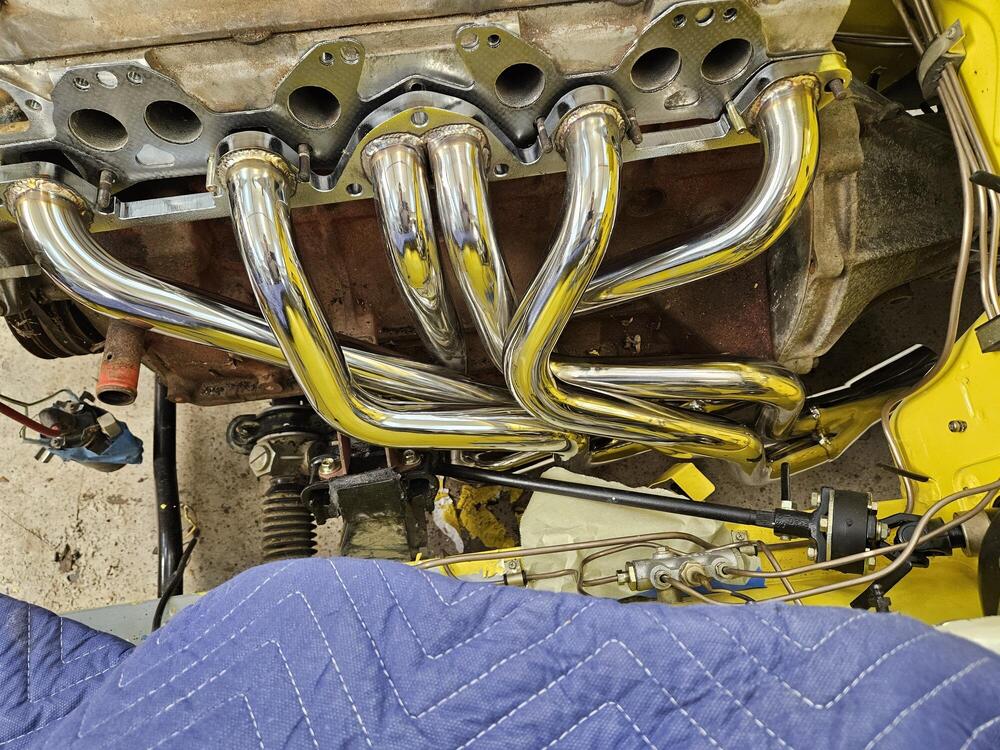
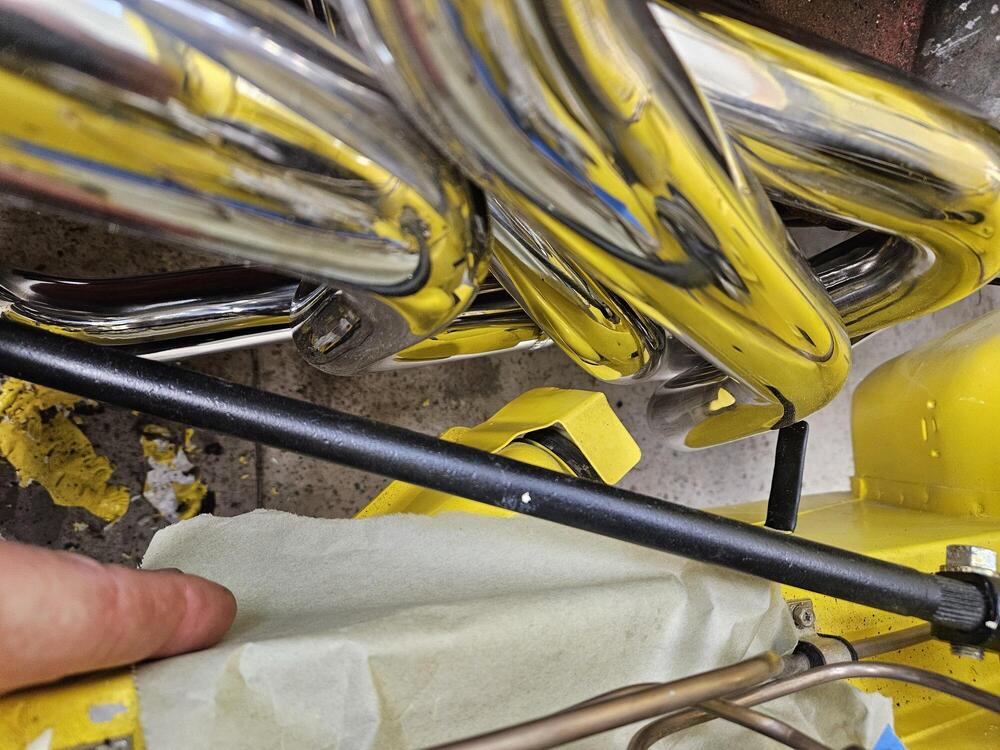
2 points2 pointsI have talked with Shawn several times here at some of the local car shows and he comes highly recommended. I will stop by his shop early this week for a final review before transporting the shell.1 point1 point1 pointI also got the header into the engine bay yesterday. It will go in but it's a snug fit!
 1 point


Important Information
By using this site, you agree to our Privacy Policy and Guidelines. We have placed cookies on your device to help make this website better. You can adjust your cookie settings, otherwise we'll assume you're okay to continue.