Leaderboard
-
conedodger
Free Member9Points12,513Posts -
JDMjunkies.ch
Free Member2Points637Posts -
dspillman
 Subscriber
 2Points445Posts
 -
HS30-H
Free Member2Points5,509Posts


Popular Content
Showing content with the highest reputation on 11/07/2024 in Posts
-
Damn, you have good eyes 🙂 Haha, yeah i didn't have any high expectations either. But the fact that it was officially Nissan approved made me have some hope that it's maybe better than some of the other books. Nevertheless. it will end up in my "junk" section of Z-books (which is the Majority of those books, tbh). Funny enough Flo asked the guys at Nissan germany for some press info regarding the Z and got some clearly wrongly-labelled photos from their archives). I guess this book was proof read (or not) by Nissan USA and hot any historian at NMC in JP. I keep buying and reading these books for fun's sake, but always take them with a big pinch of salt.2 points
-
I think you can already guess what I'm going to say about this, Nils. It's not good... There are so, so many misconceptions, examples of bad takes and plain old mistakes I find it amazing that it had any editing, proof-reading or fact checking at all. Who was looking over the author's shoulder in all this? Taking just the two pages 118 & 119 open above, I can count no less than twenty clear mistakes. Extraordinary. Even the photos are wrong! The photo of a "432R" bottom right actually shows an owner-modified 432. The photo caption and description for the car top left mixes up specs for an S130-series car (it calls it a "280Z-L", says it has "ventilated discs in the front and discs in the rear"). The photo actually shows a 1977 S31 Fairlady Z-T model. The photo comes from Nissan's press office and the car itself is part of Nissan's Heritage Collection at Zama. How can simple facts become so confused via official sources? It's one thing for a book like this to get written and published, but what I can't understand is how it has been endorsed by Nissan themselves. It's such a disappointment. In fact the foreword was written by Mr Hiroshi Tamura. A massive contrast with a generation of true engineers like Uemura san and his colleagues, and perhaps as good a symbol of Nissan's current situation as any. Meh.2 points
-
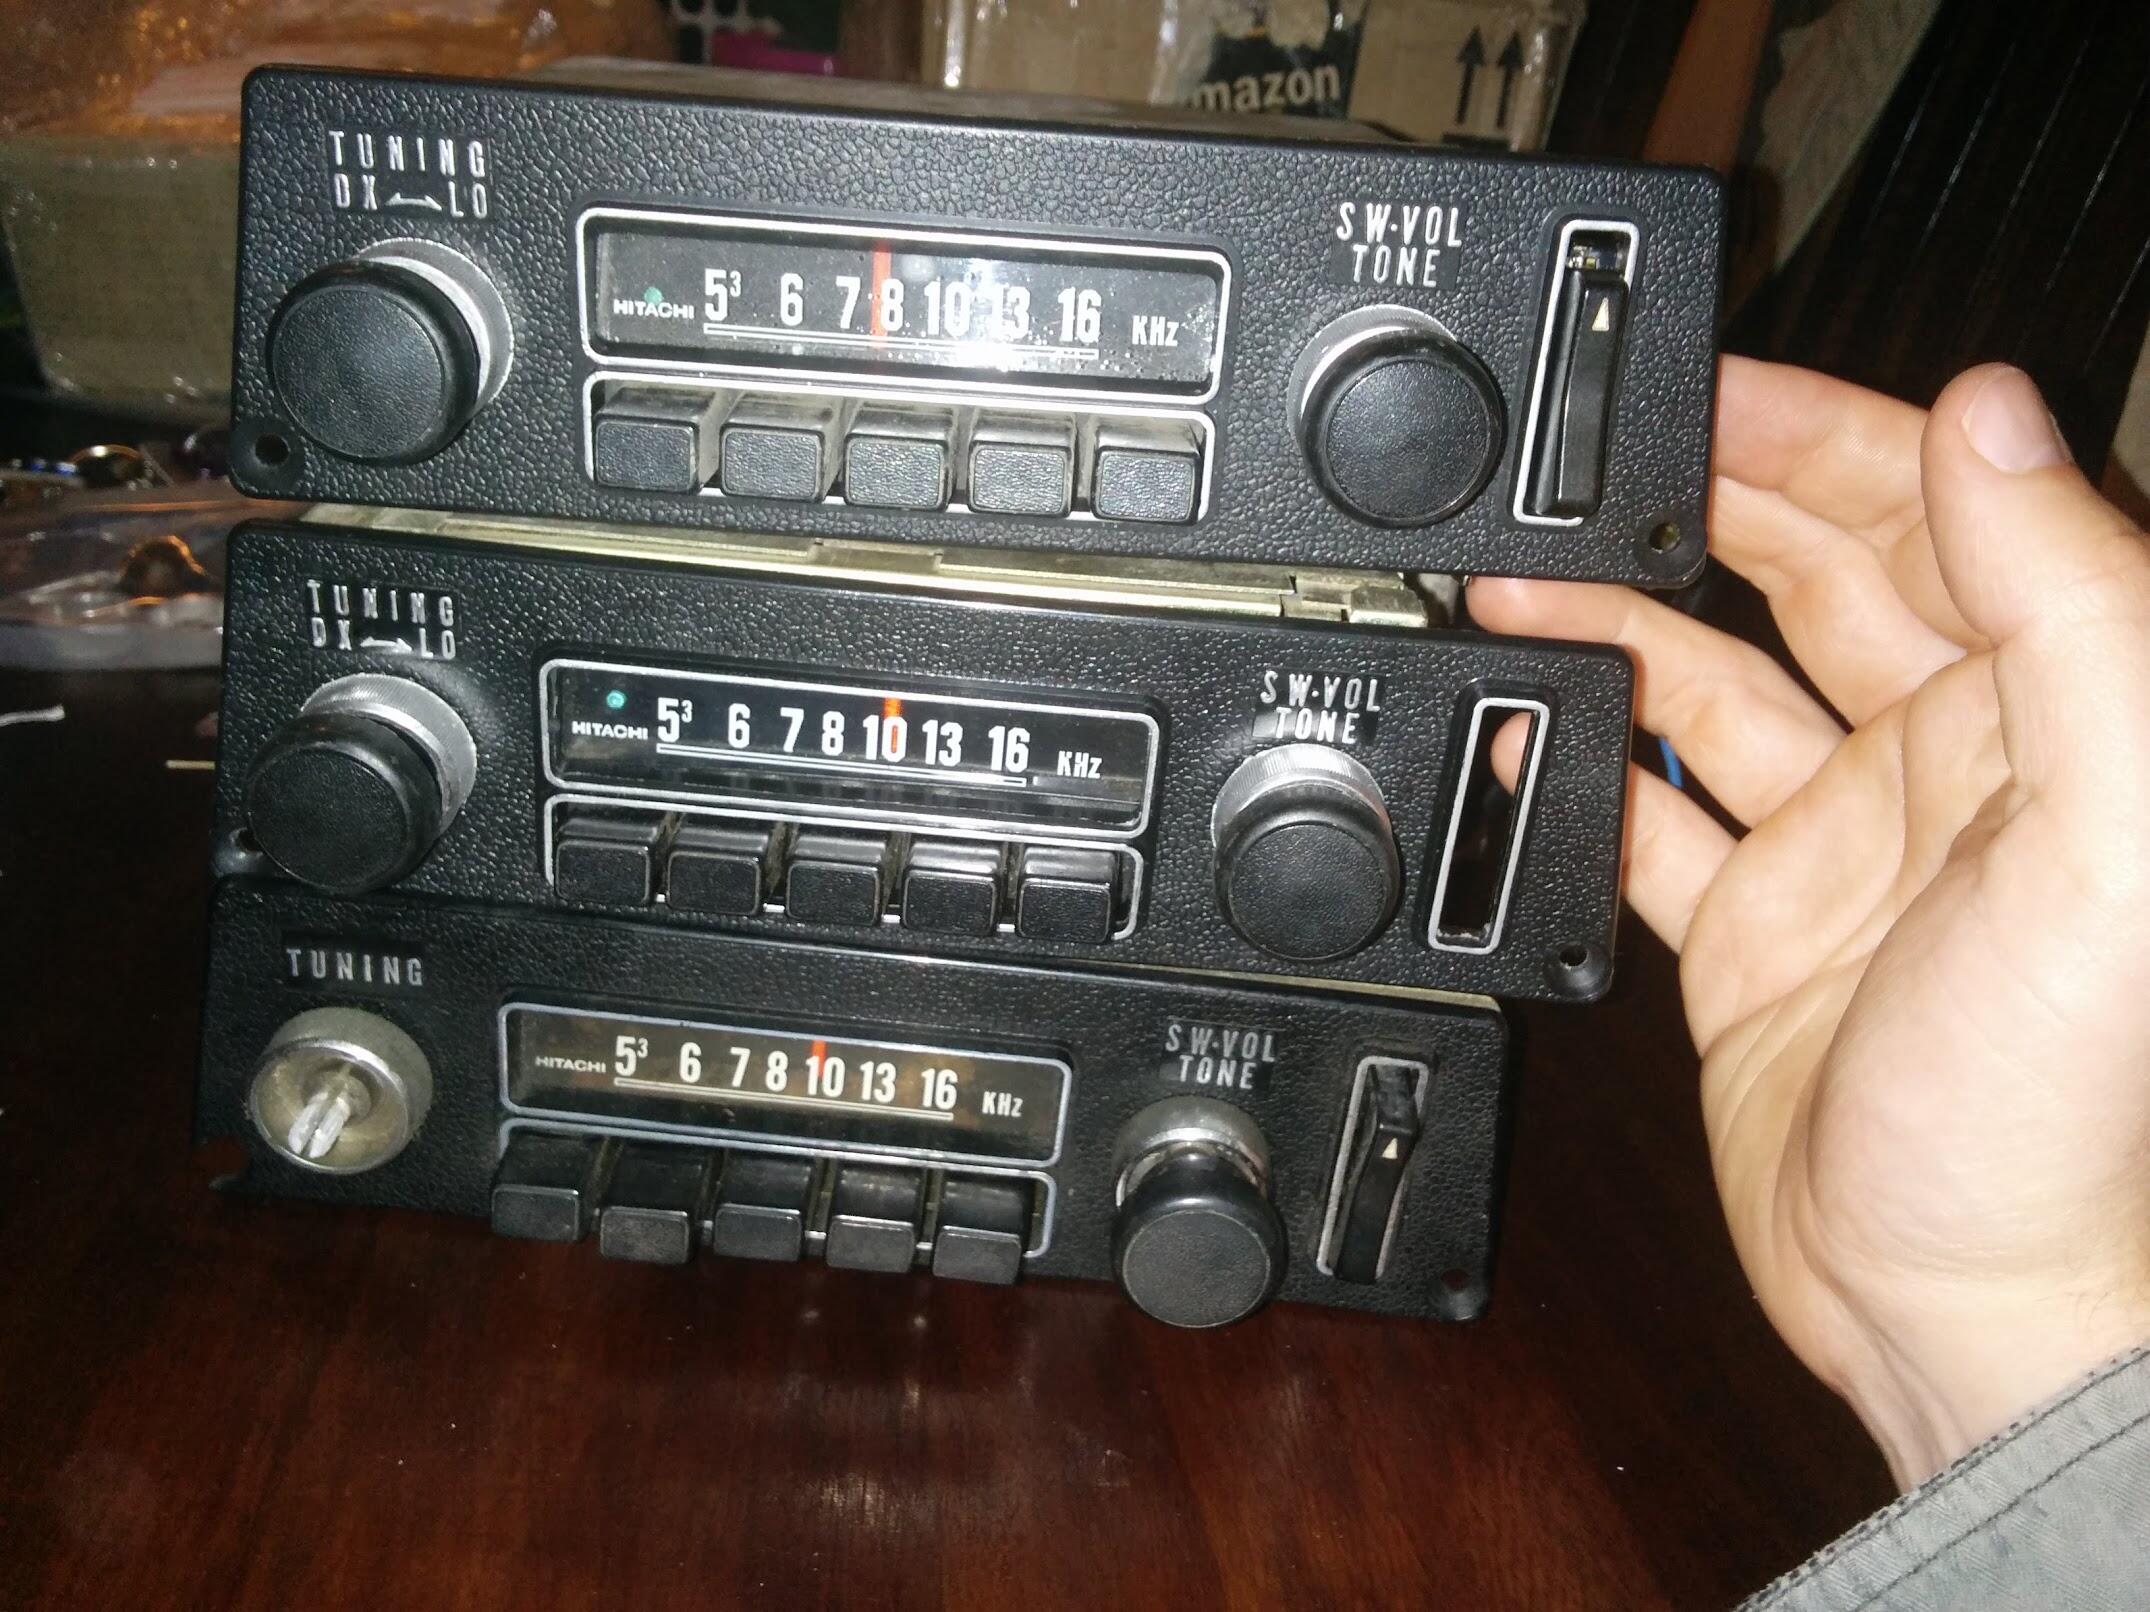
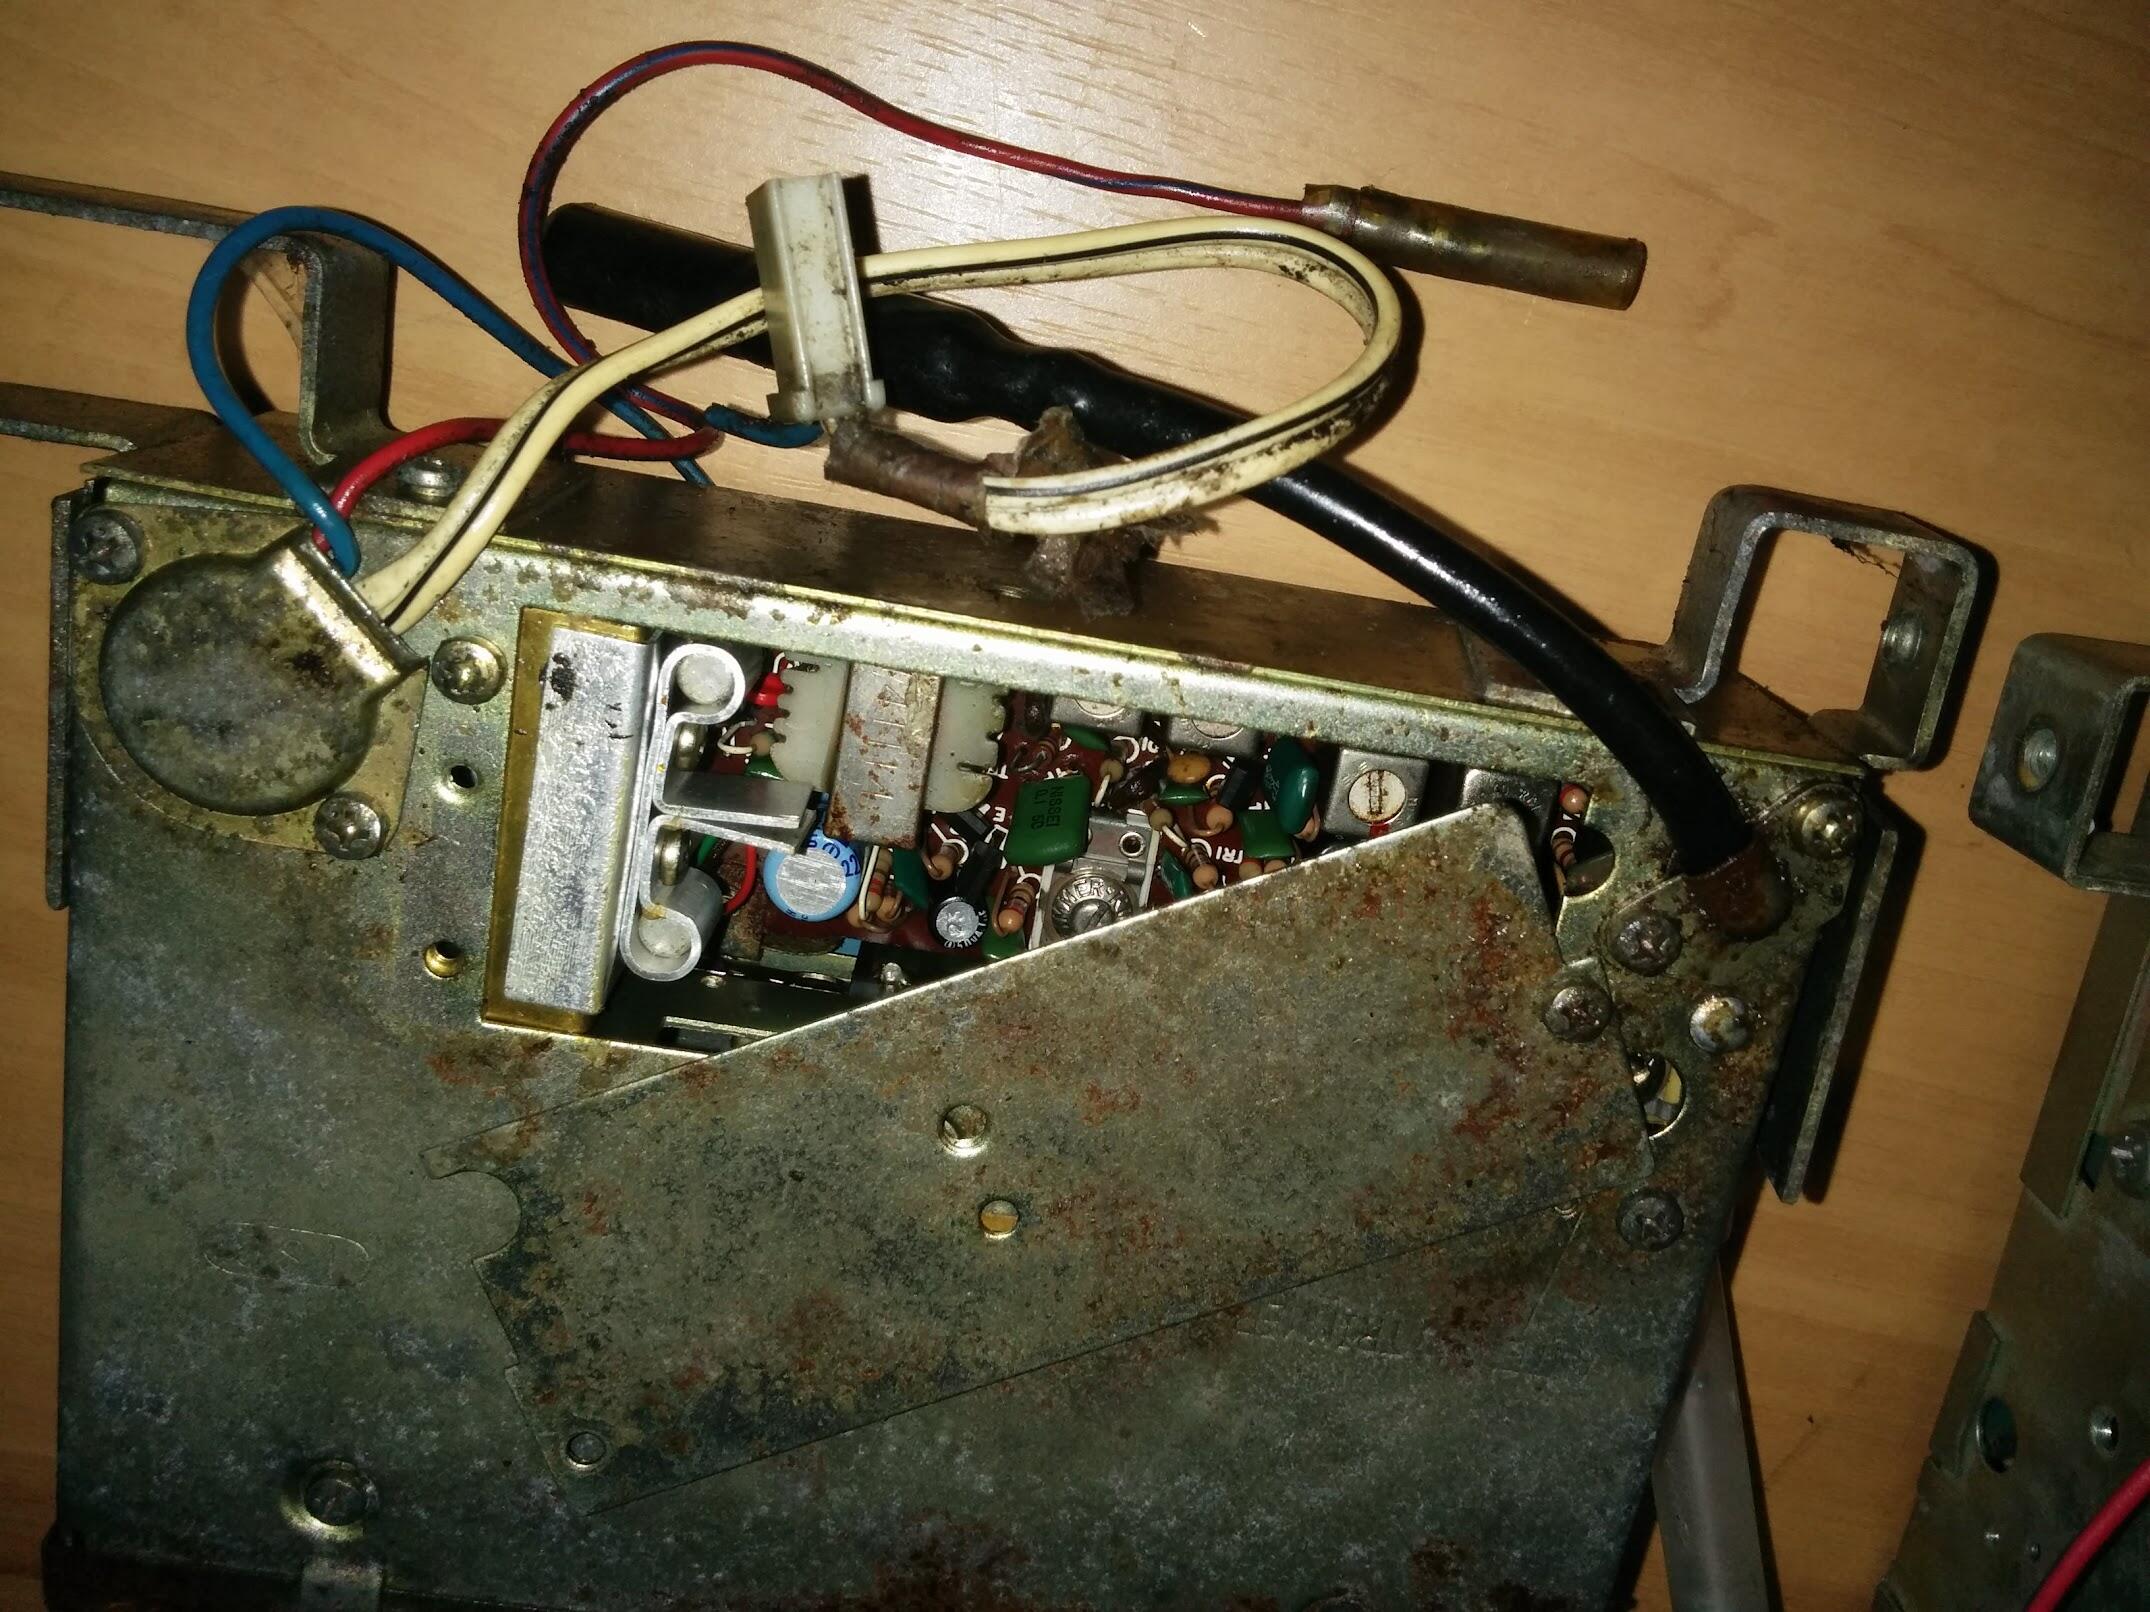
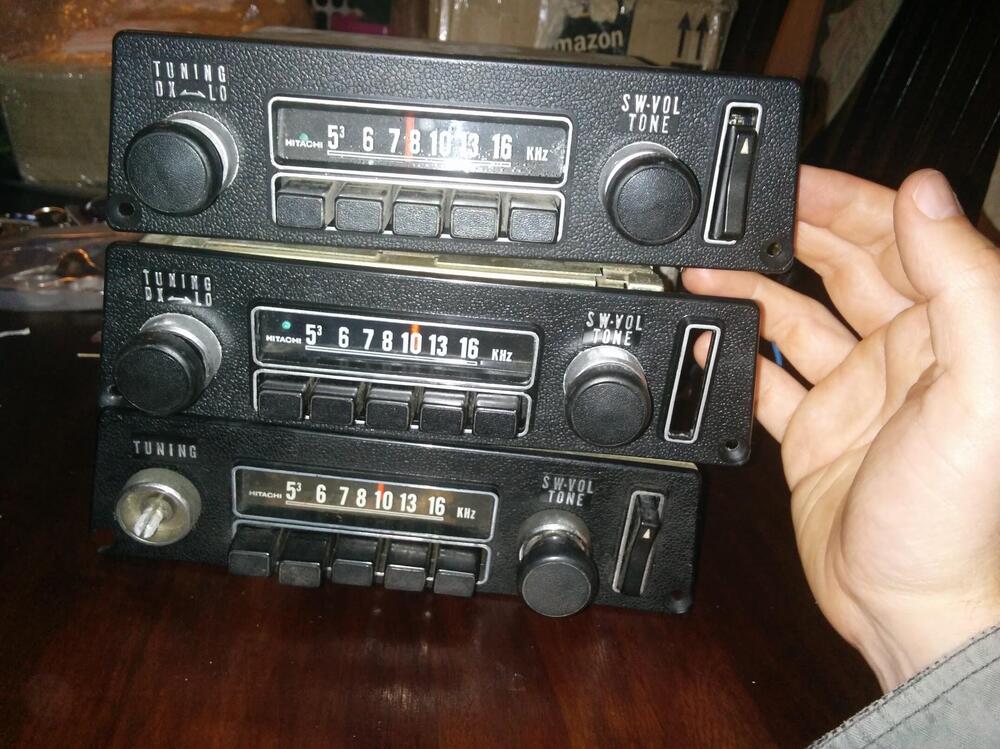
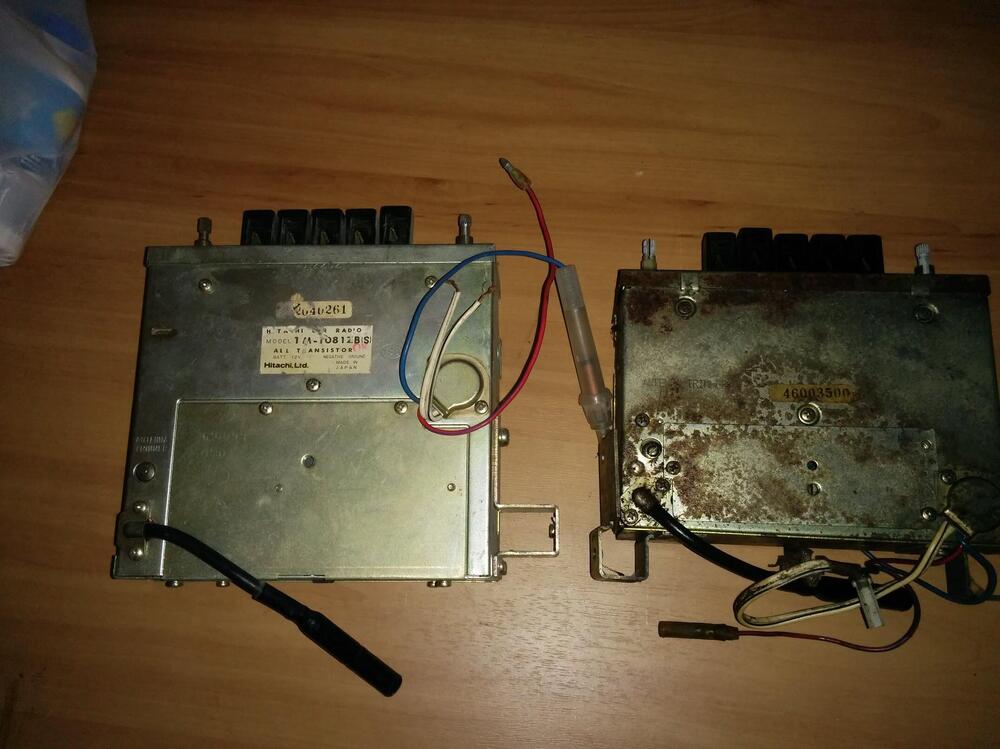
Thank you for that information Gavin, digesting evidence and coming up with Nissan intentions for a “press car” without written records is hard to make it make sense 50 years later…. The combination of the red dot radio,and the captured nut for the flat hood bumper at first glance to me was a glaring contradiction. Was there a red dot rear view mirror on the hs30-00004 car. But all of these items could have been added or modified in the past 50 years as well. It is a special car no matter what…. A known z parts specialist nudged me gently,asking me if my hls30-00051 had the proper red dot radio…. Well, just not familiar with the early RDR. Looking through my am radios 1 of 5 happened to have red dot instead of the green dot…… Surprised to have this “rare” item in my stash.

 2 points
 -
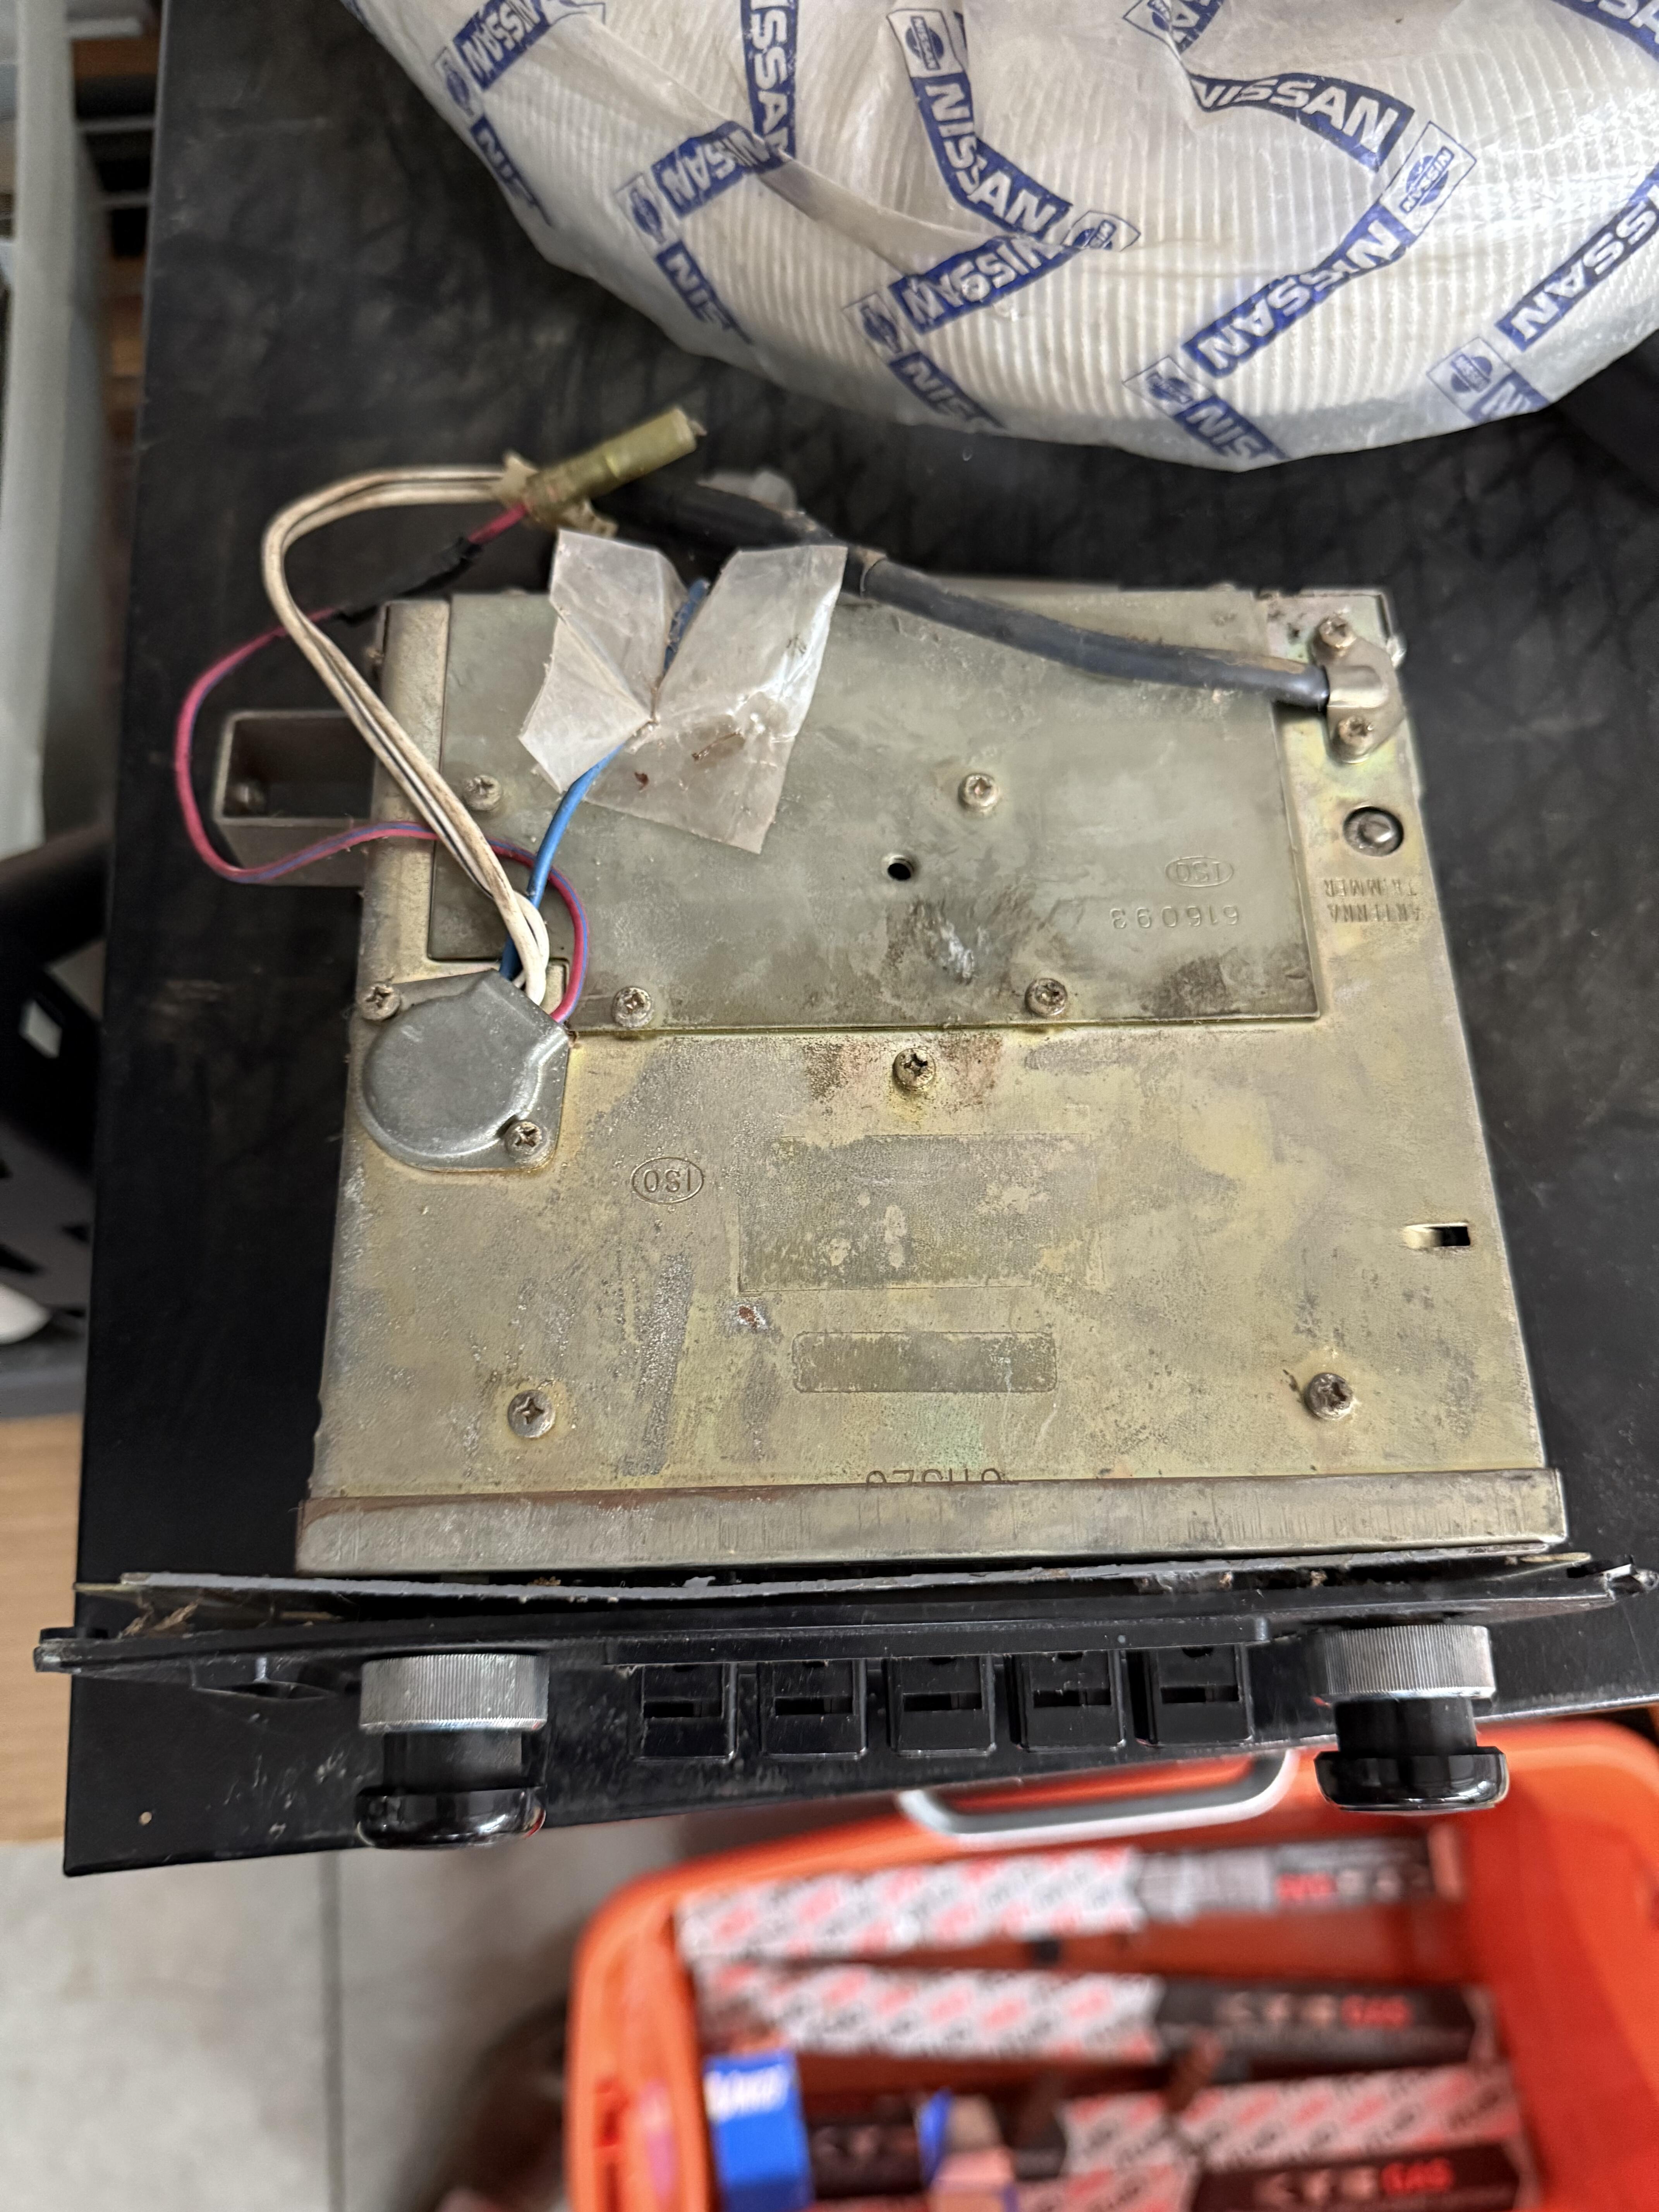
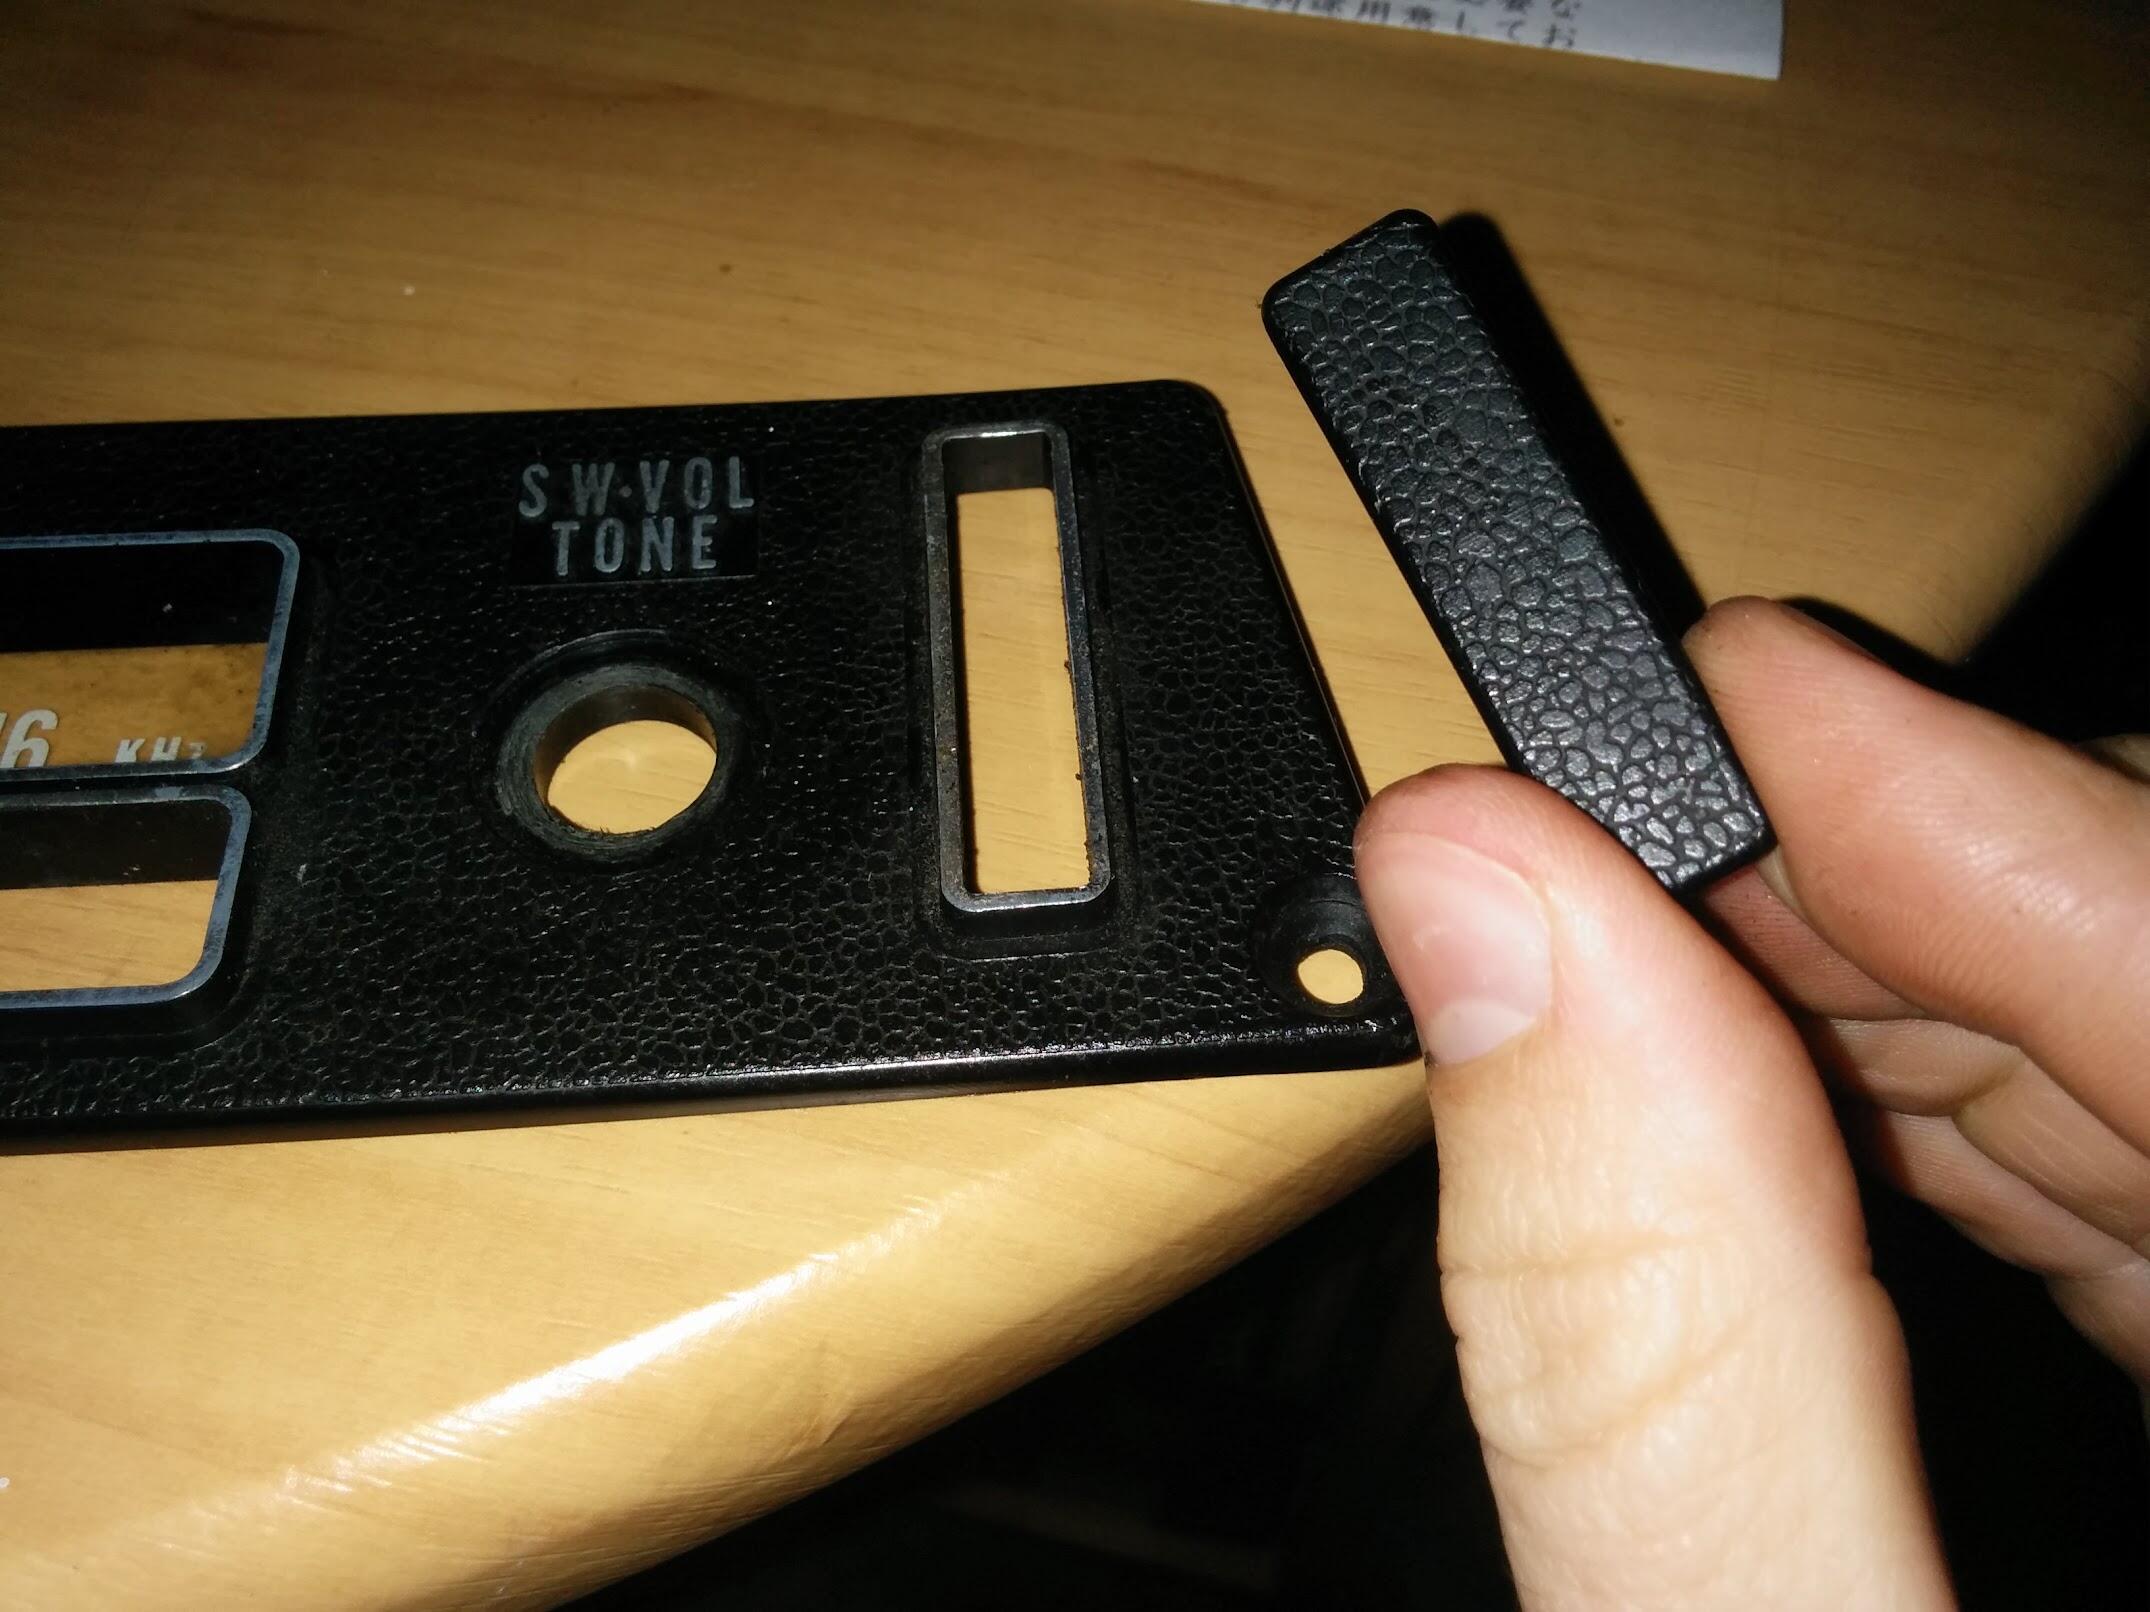
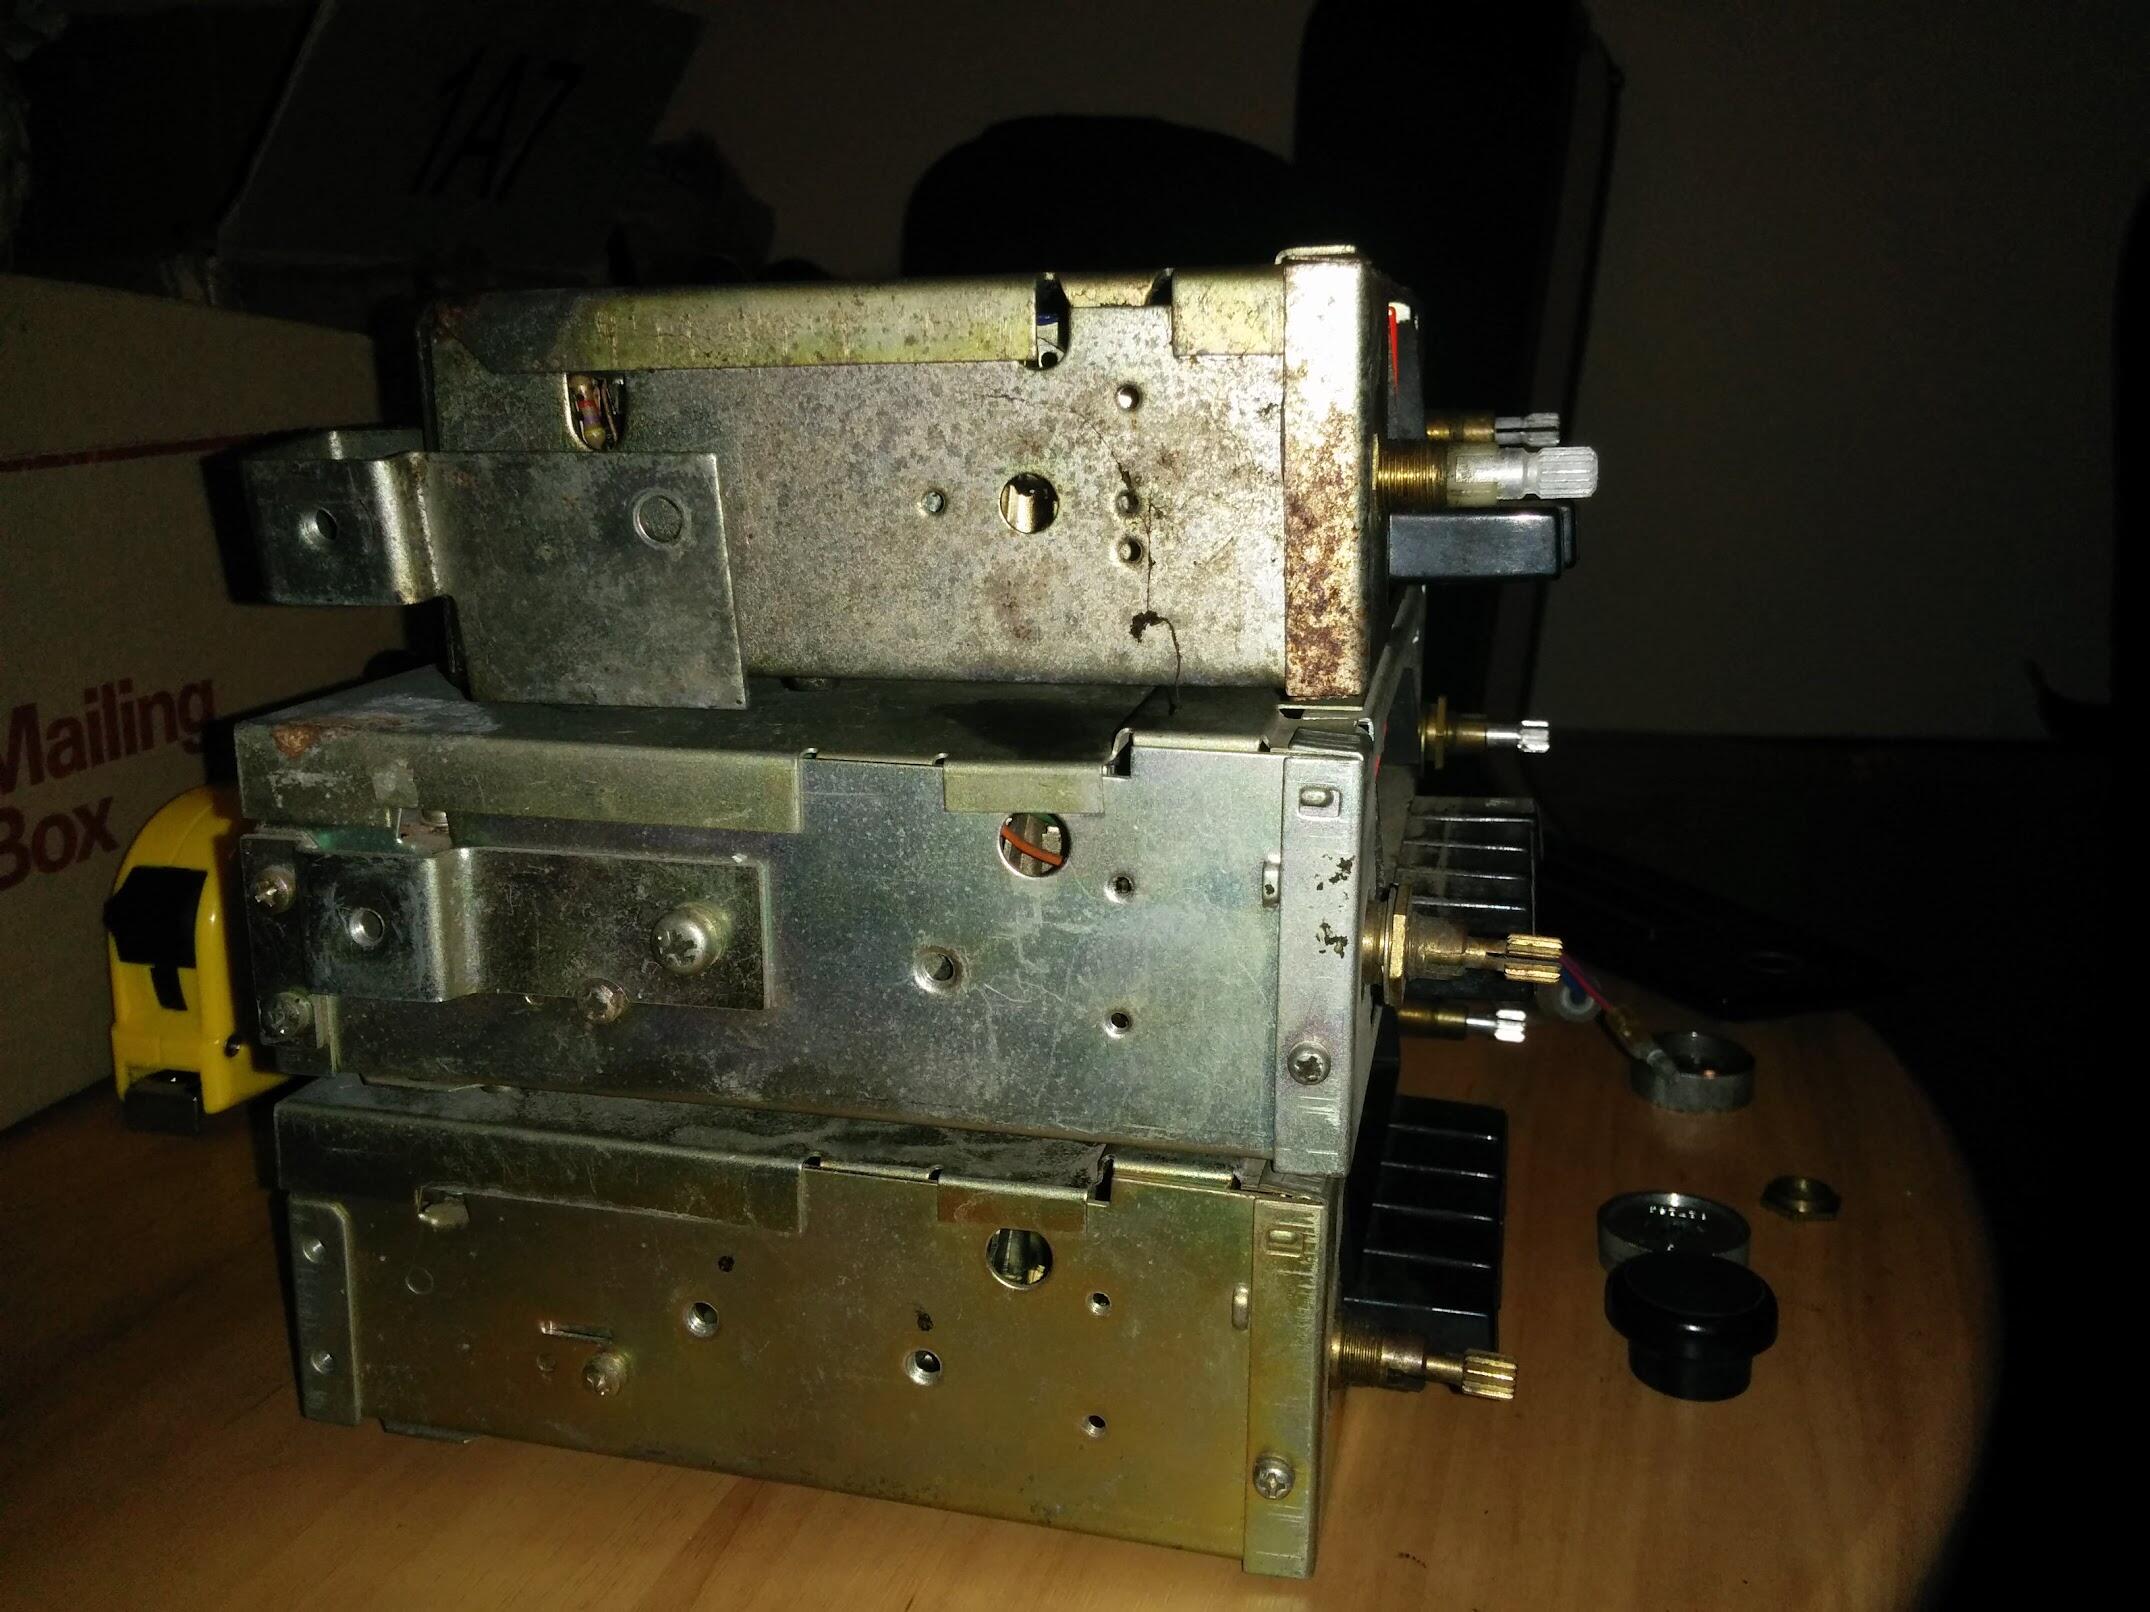
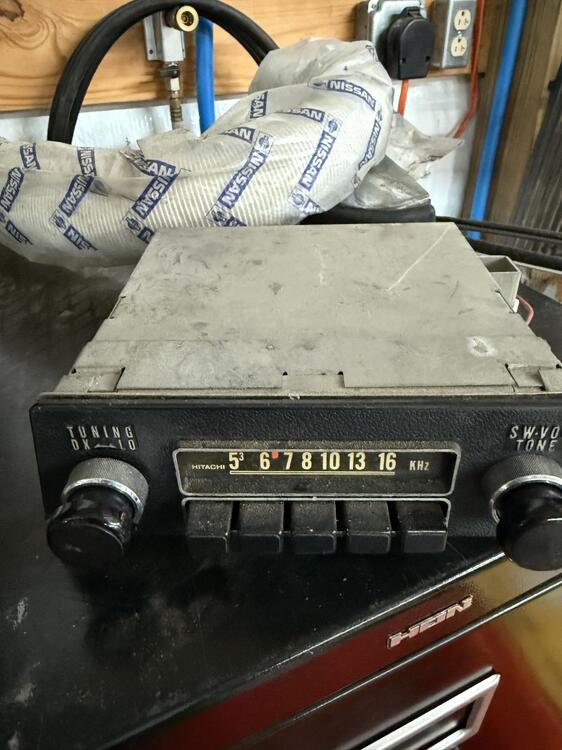
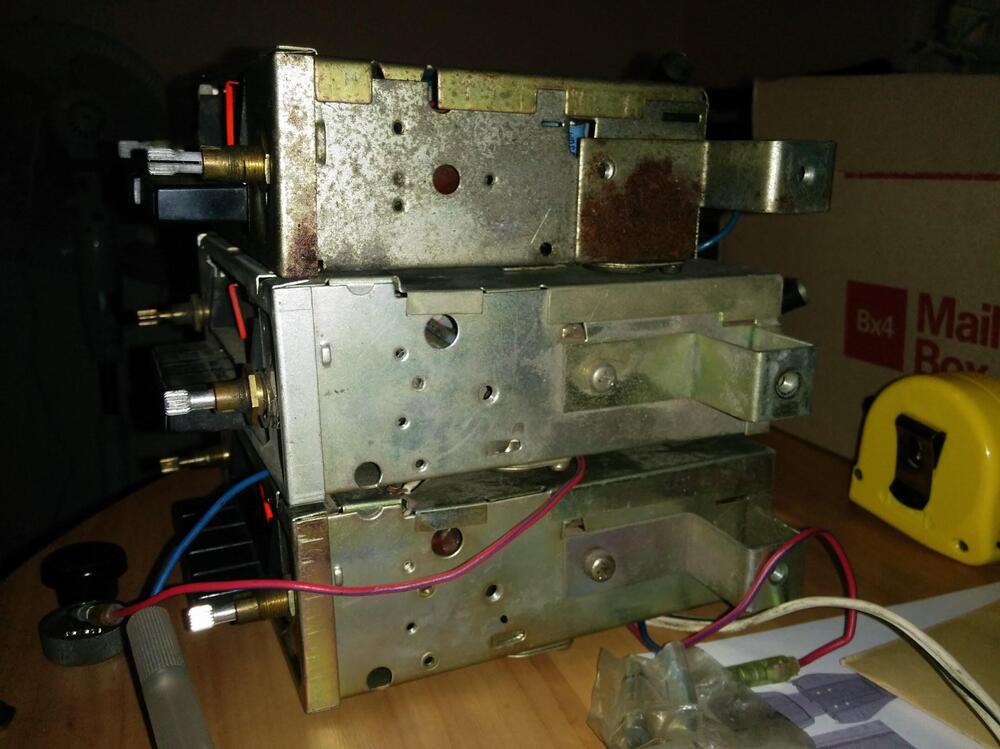
So HS30 0004 also doesn't have the power antenna, it has the blanking plate over the antenna switch. Originally I thought it had a Fairlady Z-S spec face plate, but I actually have an example of 1 of those radios. See radio at the bottom of this stack. Note it just has "TUNING" above the left hand knob. It has an antenna switch in that photo only because I removed the blanking plate and put 1 behind it. (so ignore that factor). There is a few physical differences between the Z-S radio and the regular TM-1018ZB(S) radios (with auto-seek and power antenna switch). The smaller radio is the Z-S radio (I bought it from Yahoo! Auctions Japan) - not knowing exactly what it was at the time. But back to HS30 0004 - it's appears to me at least that the car was exported to Australia before the final details of the AU Market cars had been fully settled. Much the same as what happened when the newer Z's launched here (370z) etc.., we got some low VIN # cars around the launch of the 370z which were intended to be returned to Japan and a fellow member on the Auszcar forums snapped a photo of the low VIN # car when they saw it (I can't find it now). But I believe the early cars were returned to Japan and likely destroyed thereafter. HS30 0004 was possibly intended to go back to Japan, but perhaps it never did for whatever reasons. Hence it has some subtle differences compared to other HS30's I've seen over the years. FWIW - I've never seen HS30 0005 through to HS30 00011 documented anywhere! But I know that HS30 00012 was sold into PNG Papua New Guinea (now in Australia) and HS30 00016 was in New Zealand originally (now also in Australia) and HS30 00021 was in South Africa (with a Datsun Dealer for some years). Which to me indicates these low VIN # cars were sent out as press cars to various HS30 (export RHD markets). So I am guessing those other low VIN # cars were possibly sent to other RHD markets, but since they have not yet surfaced anywhere, perhaps it's the case that they ended up back in Japan and destroyed by Nissan? Or were sold to the public but ended up in wrecking yards and crushed? And back to radios and red dots. I have about 10 early AM radios I collected over the years, 9 of them have the green dot, and 1 of them has the red dot. I recall @katsand I discussed the red dot and what it meant, but I don't think we ever came to a solid conclusion. My guess is that my red dot radio (which I got off eBay North America) was from an early 69 build 240z, but I have no way to validate that.


 2 points
 -
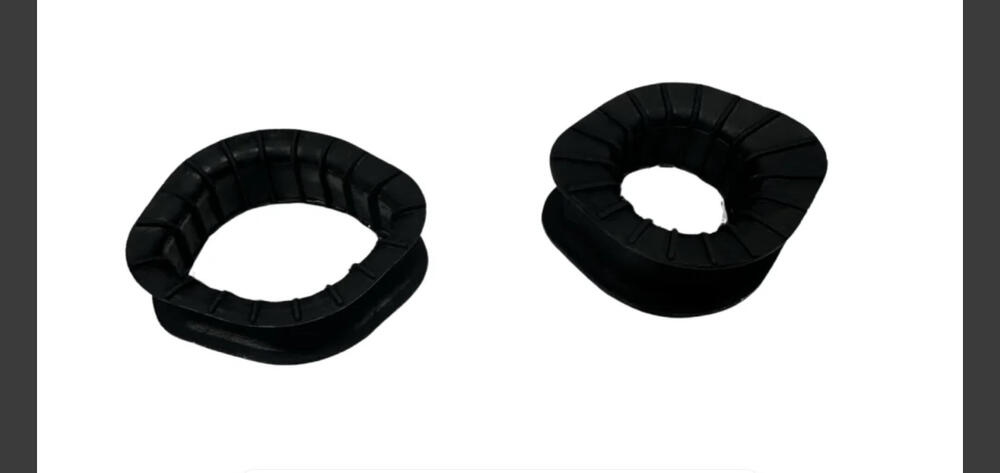
All, I am looking to replace the steering rack bushings on my 1970 240Z and found the Resurrected Classics Link offering. They are advertised as rubber, fitting the 240Z, 260Z, and 280Z. Has anyone installed this set on their 240Z? If so, how is the fitment and durability? Thanks, Keith
 1 point
 -
I have a set of them. I bought their whole kit to check it out. Especially the long un-available moose-stash bar bushings. The rack bushings feel very “Stock” in my hand. I have not installed them yet.1 point
-
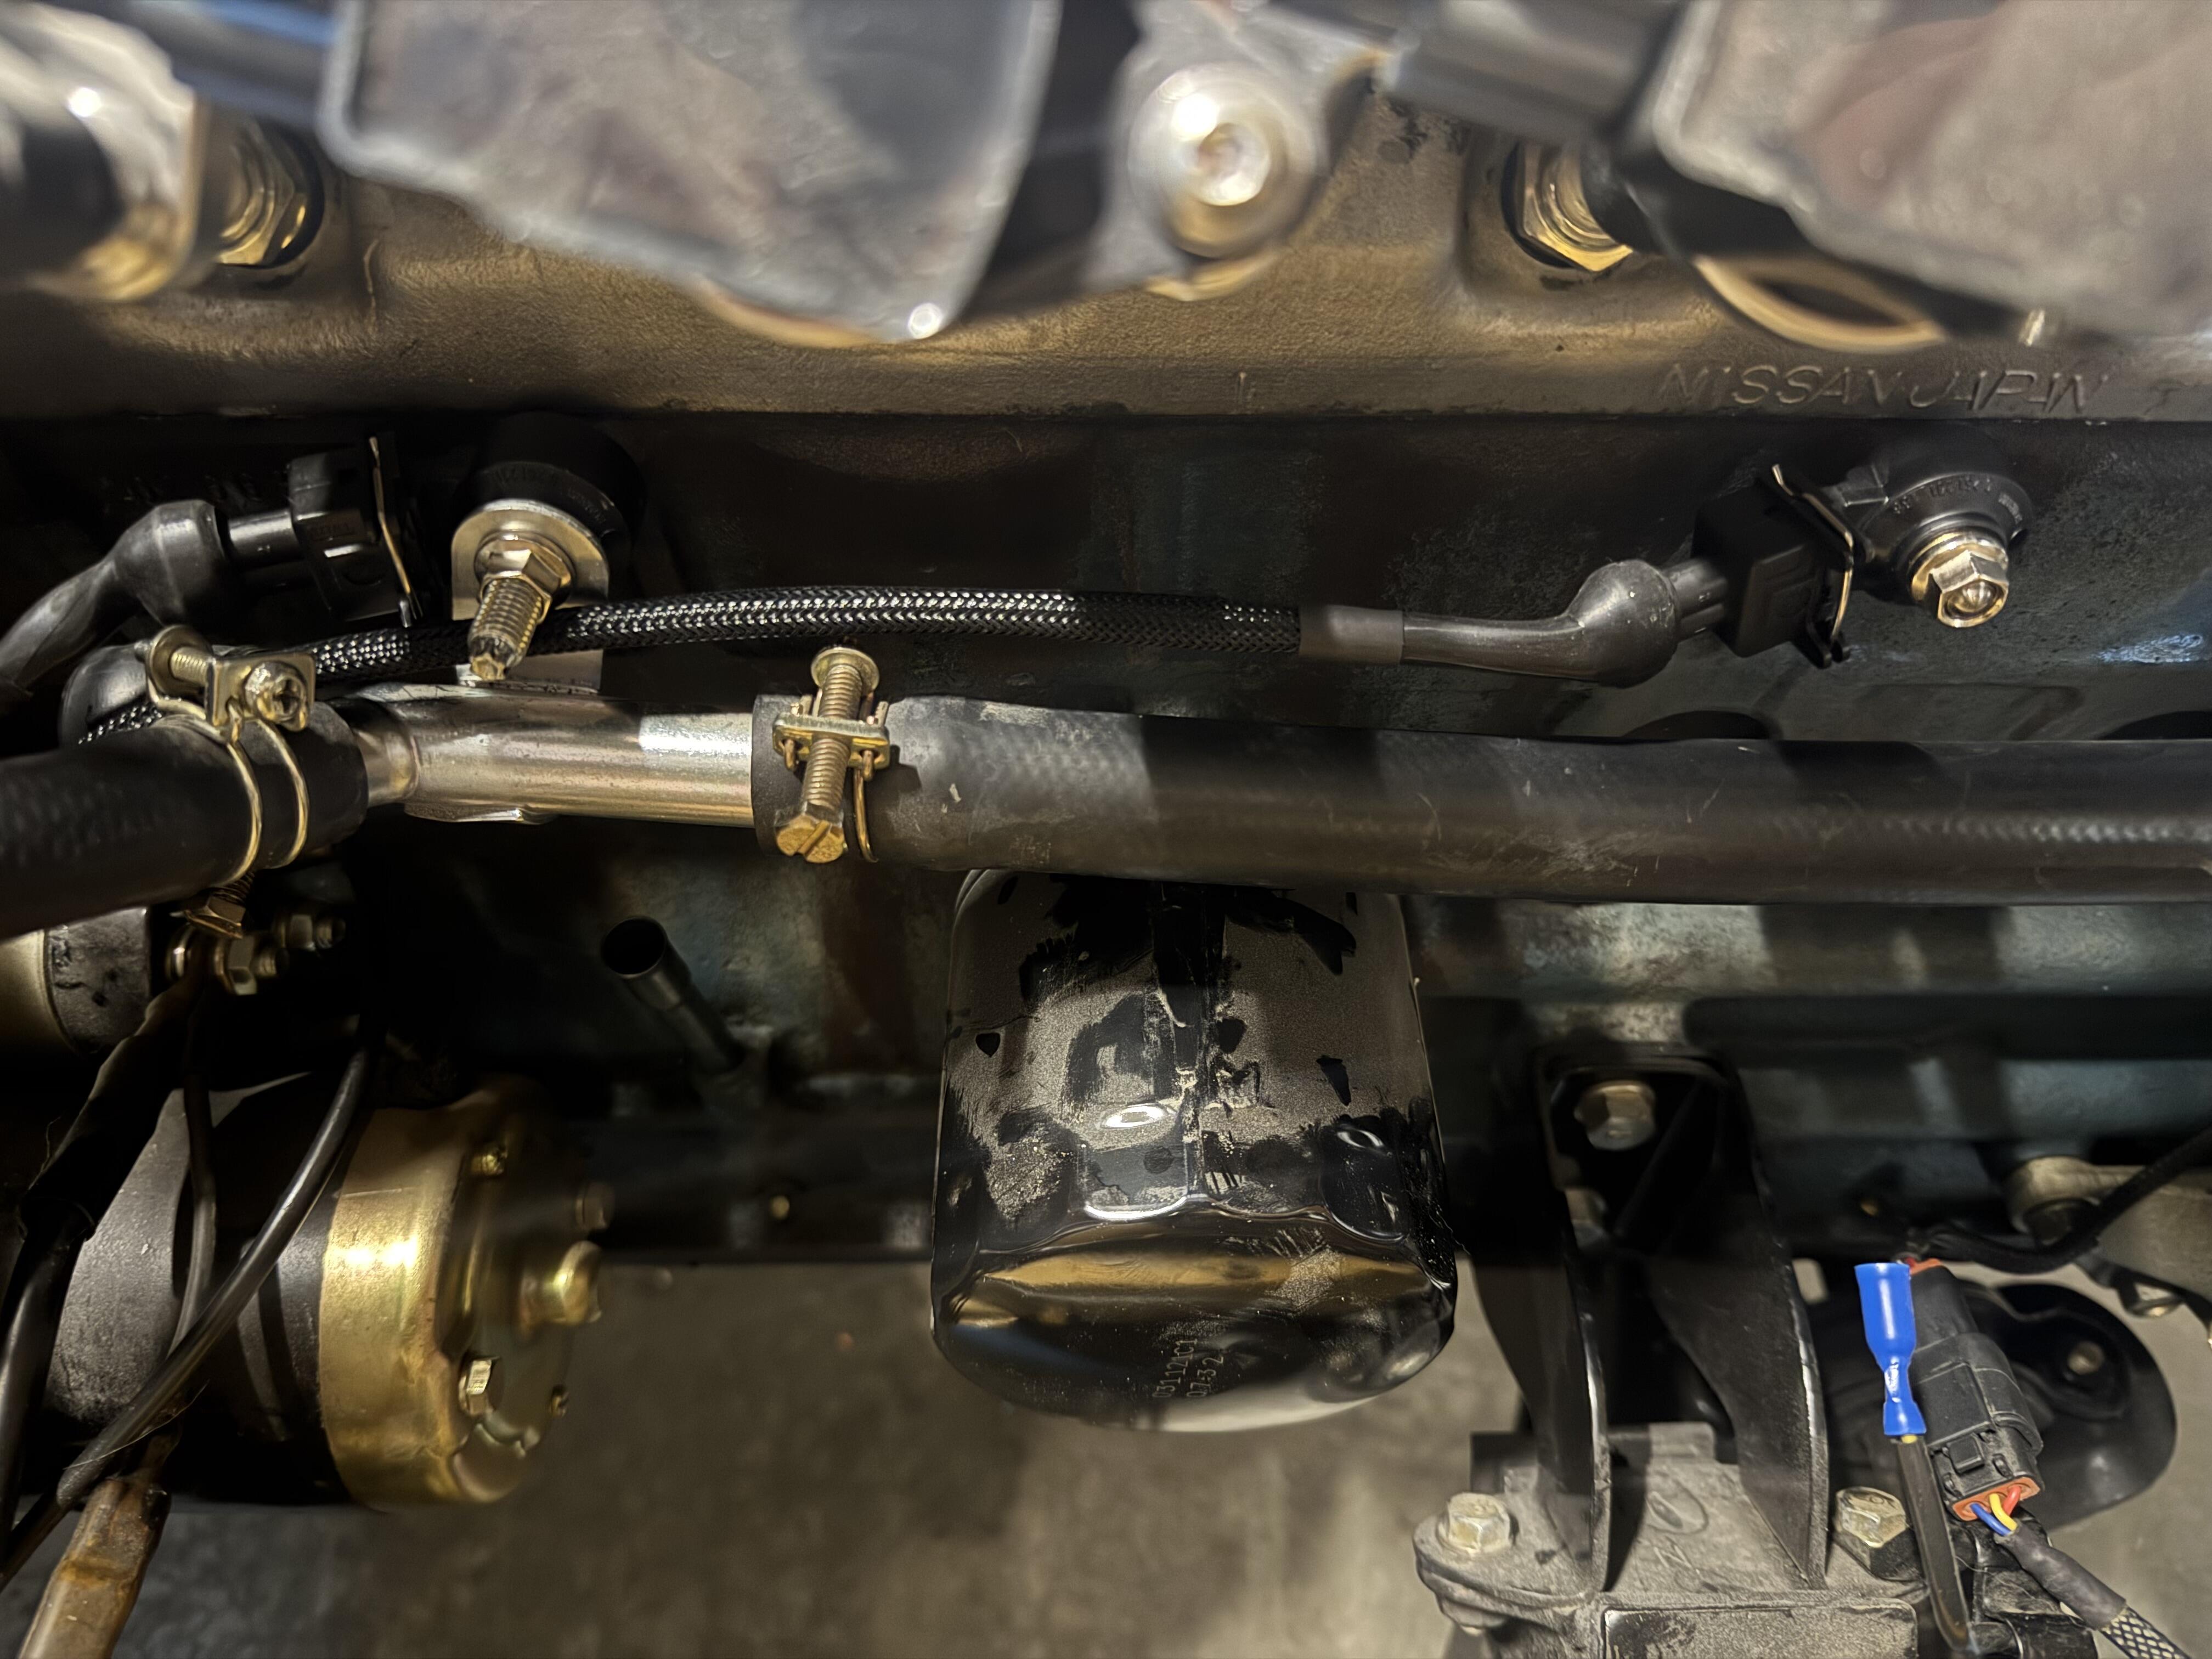
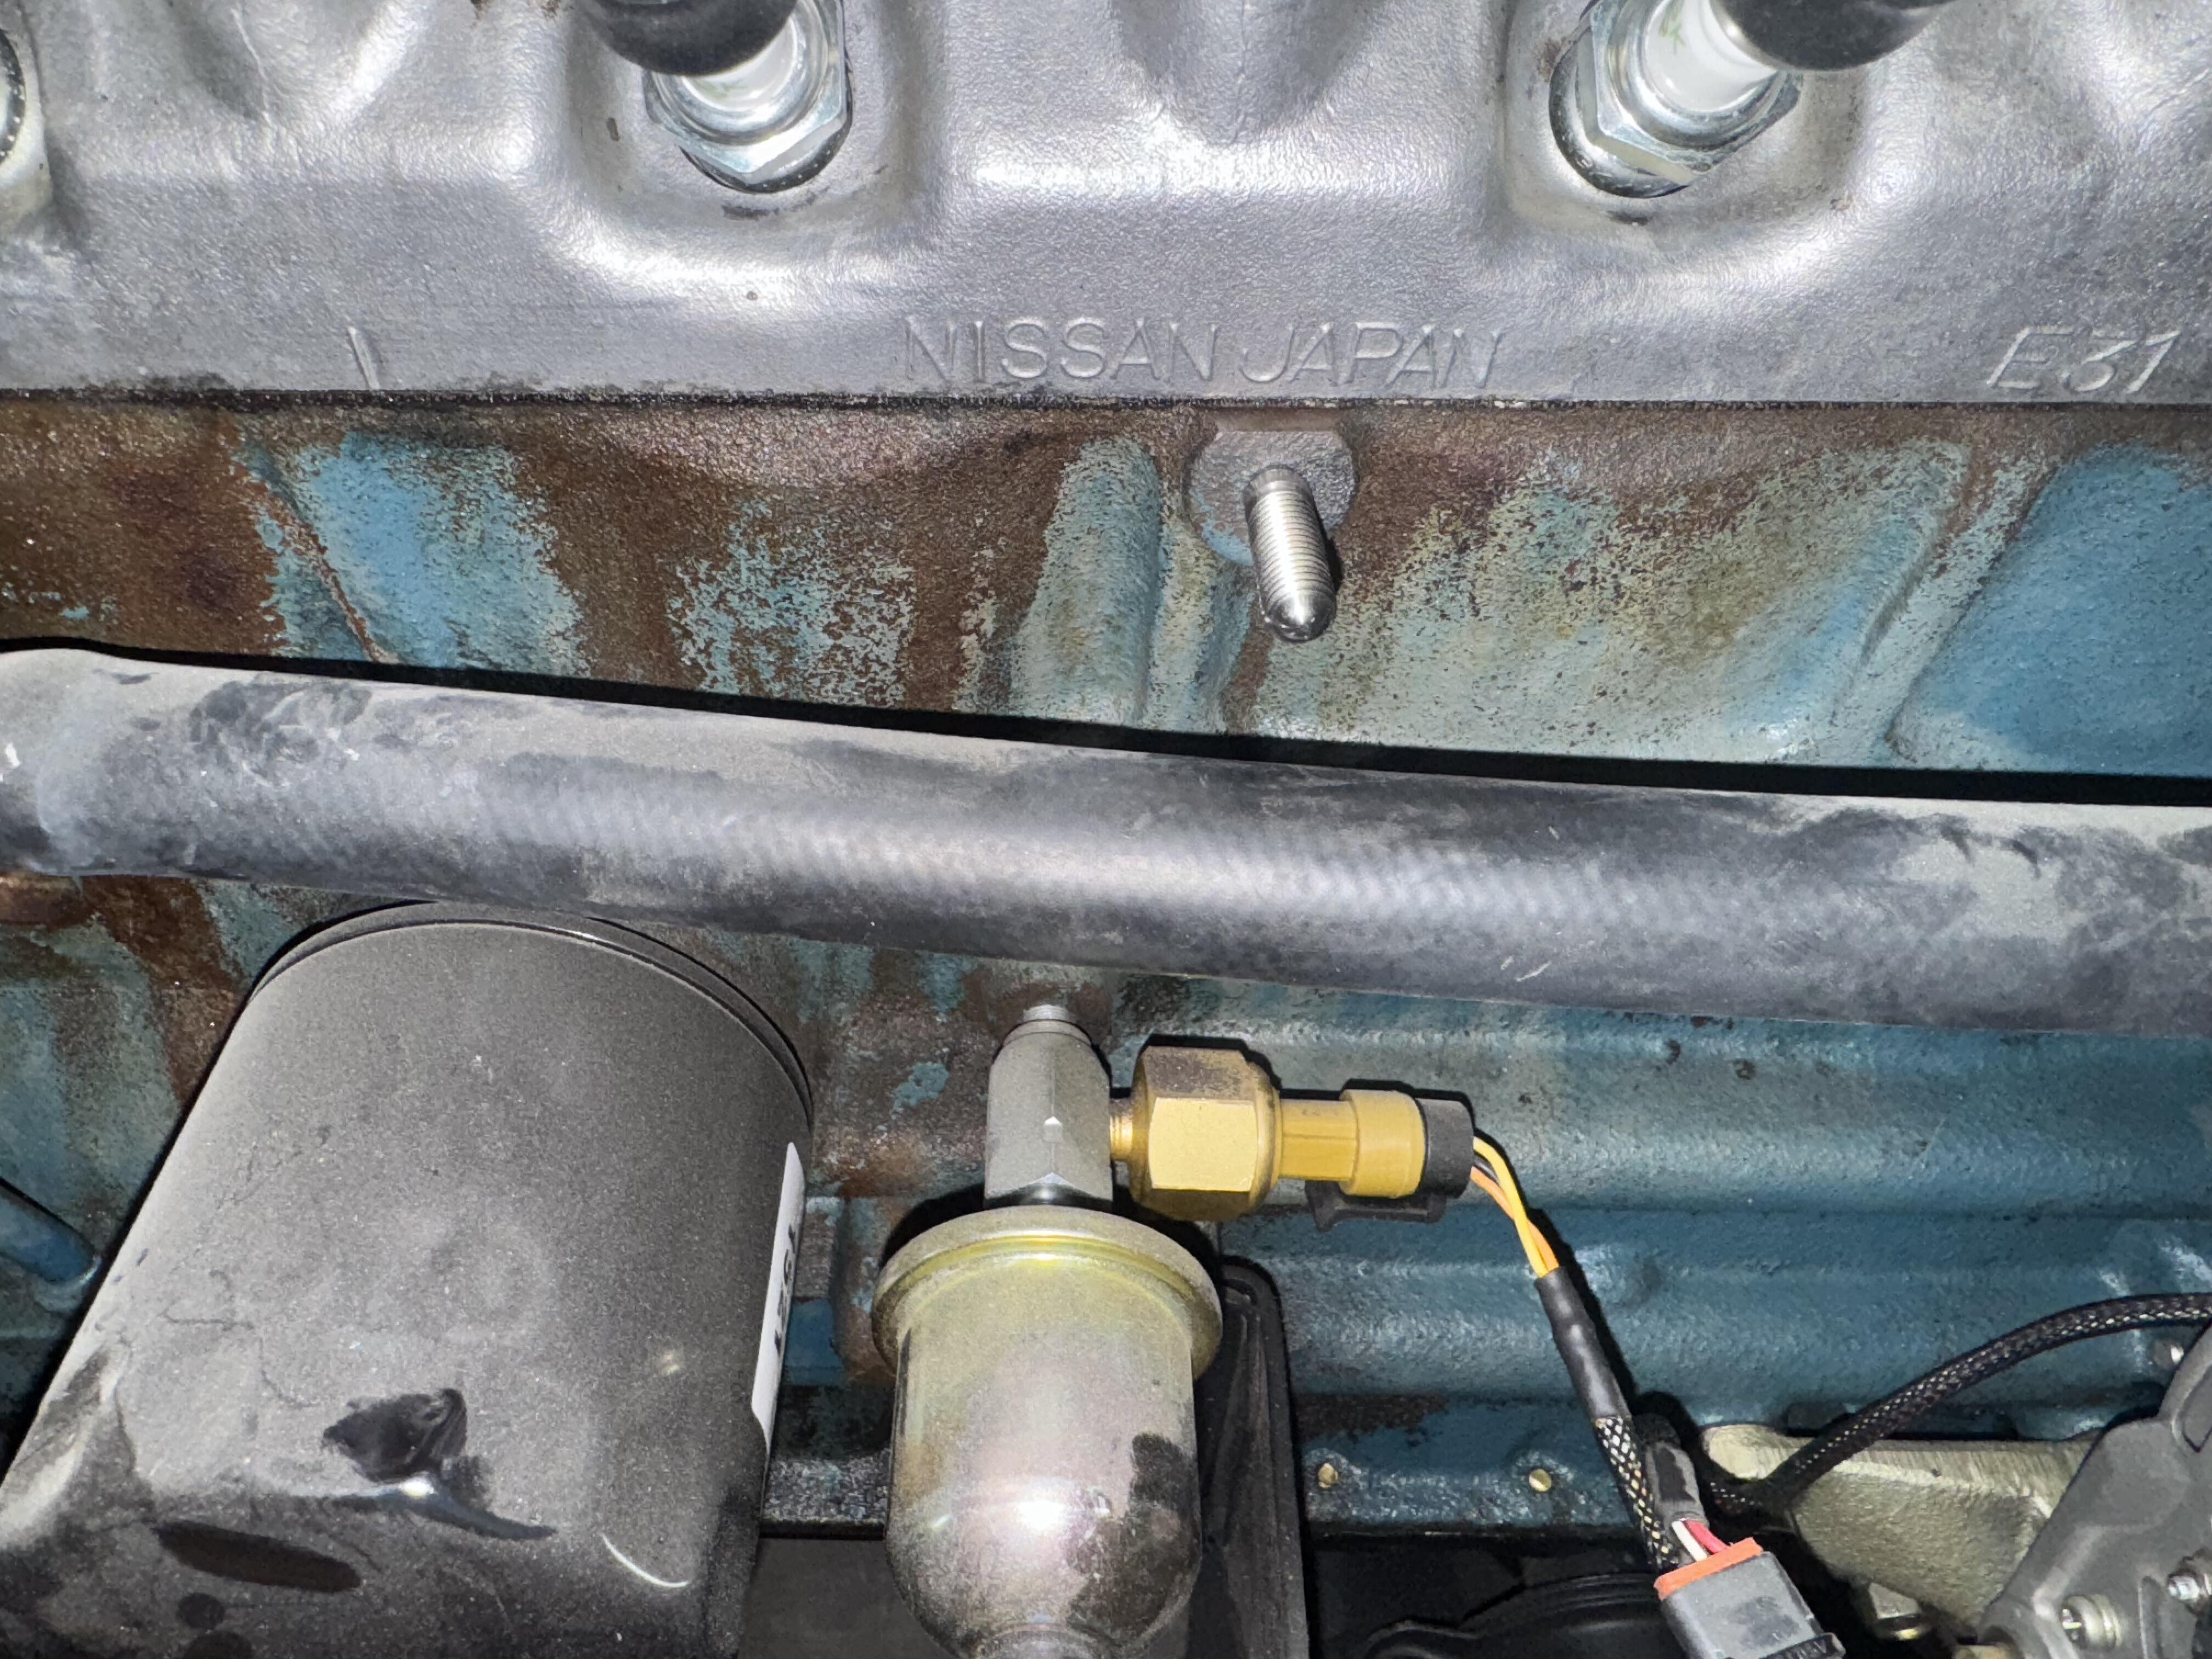
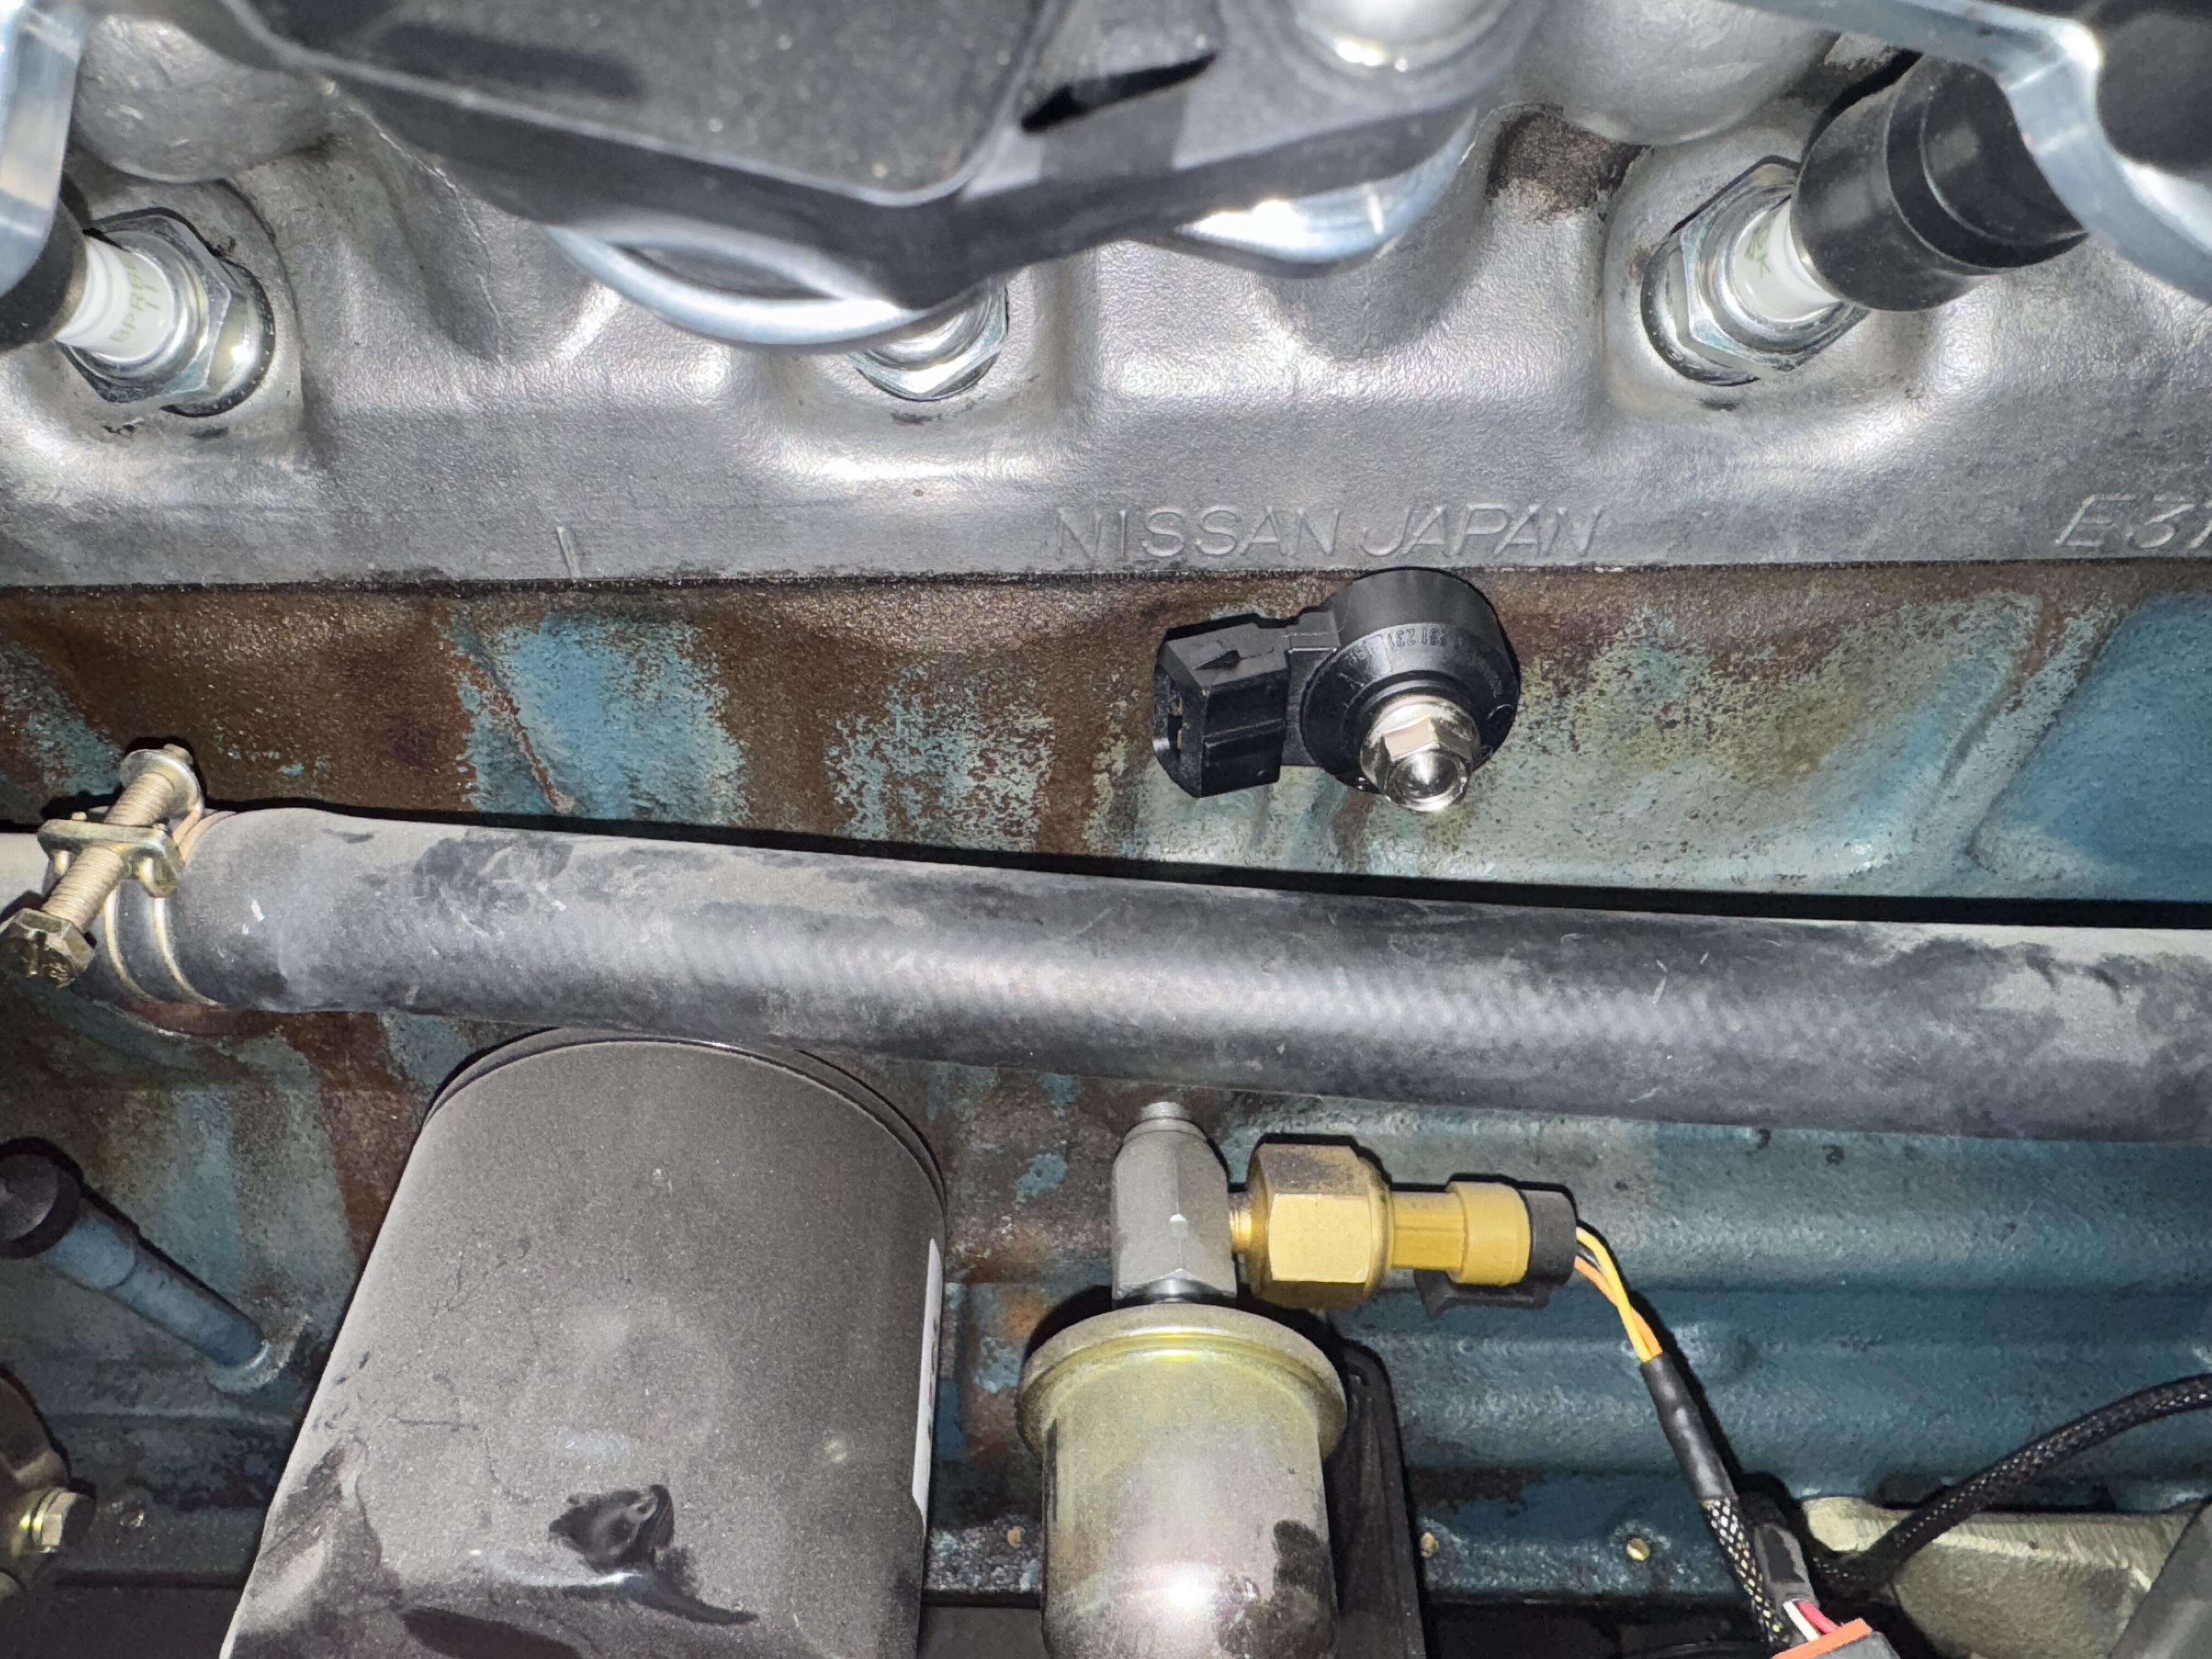
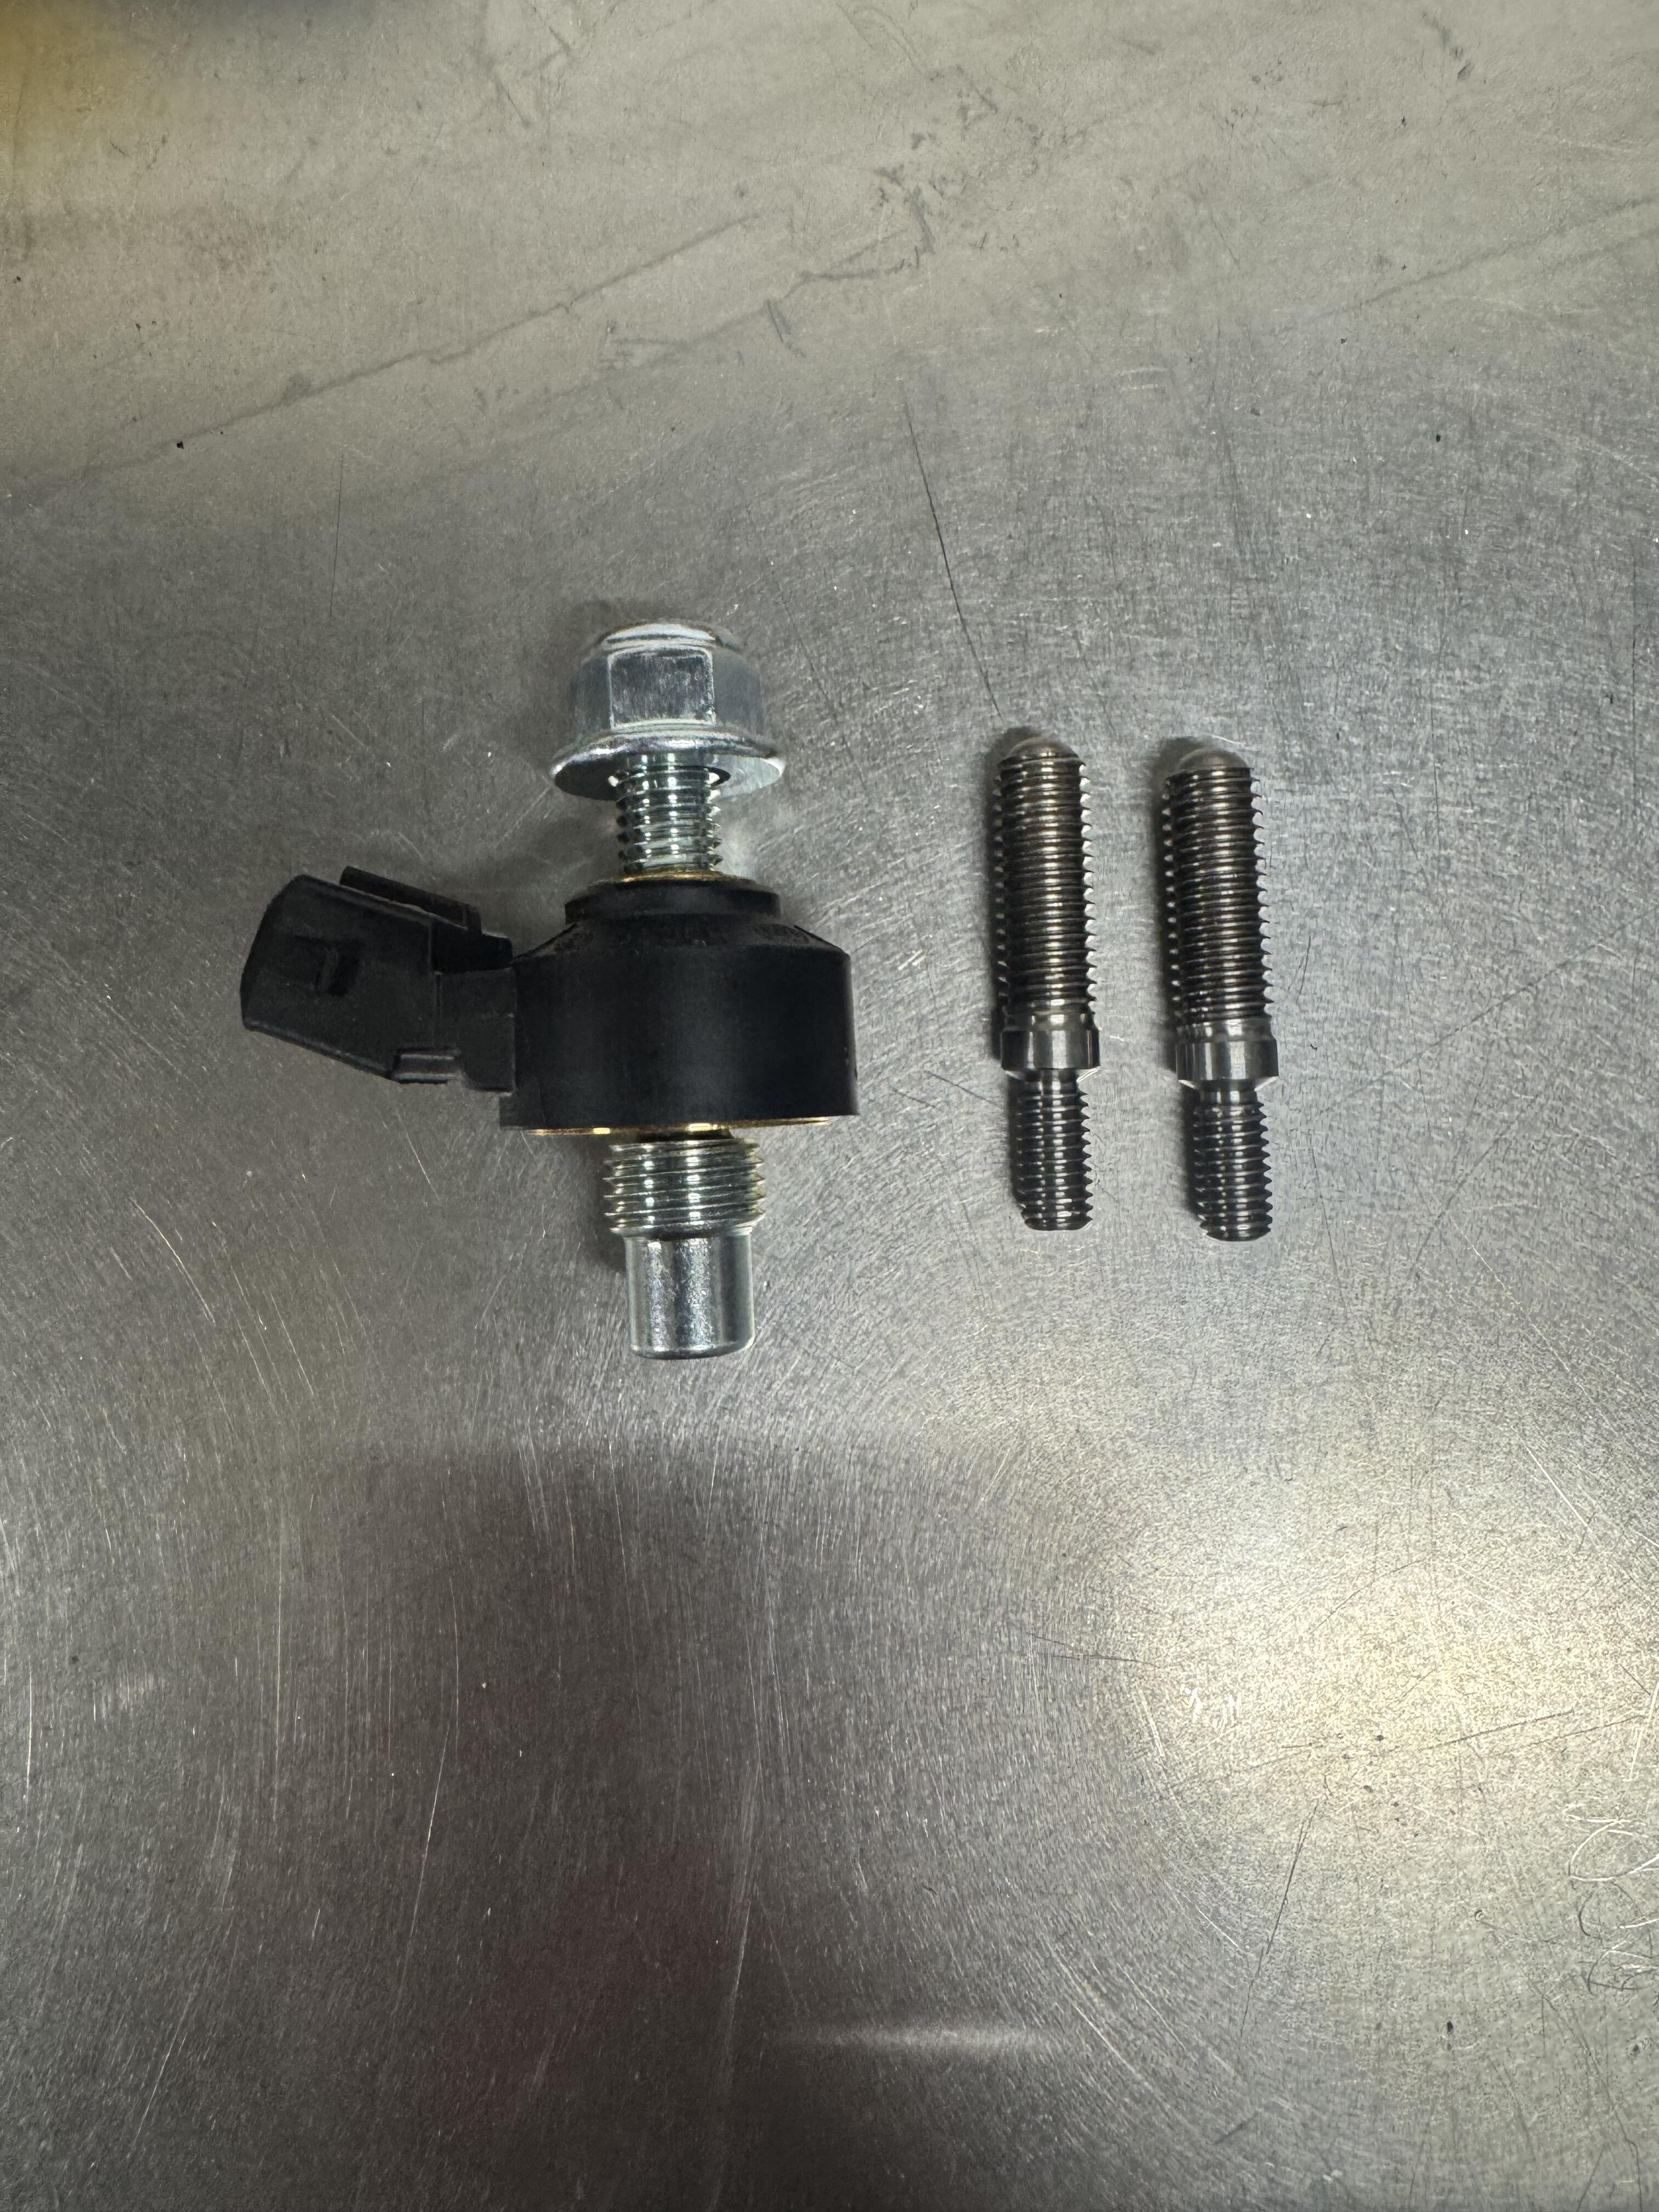
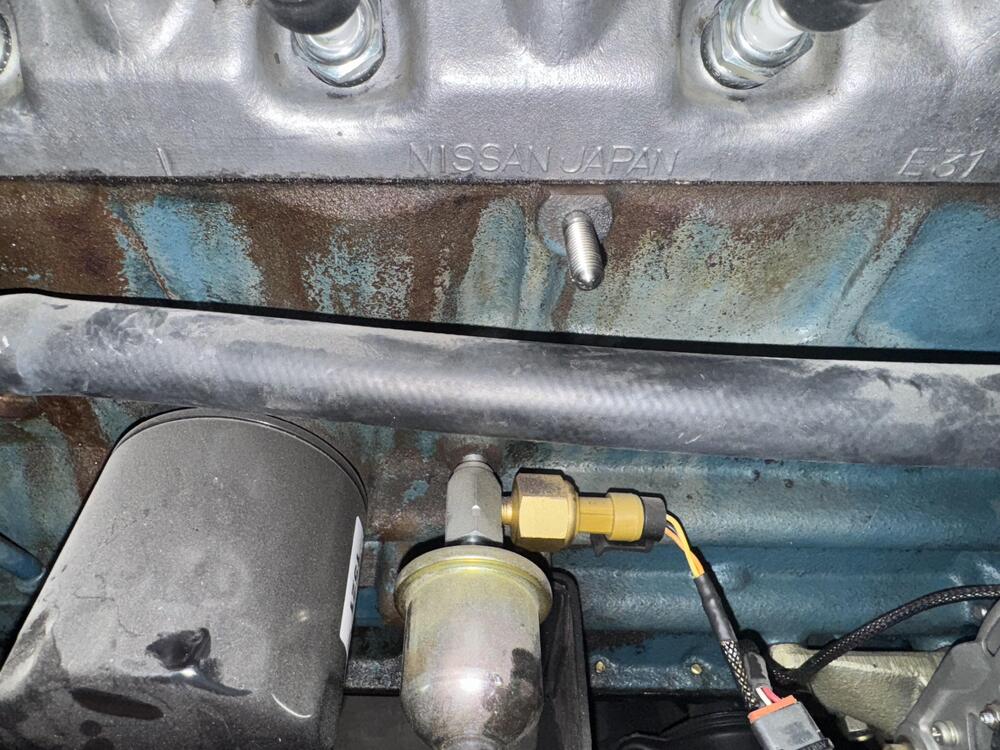
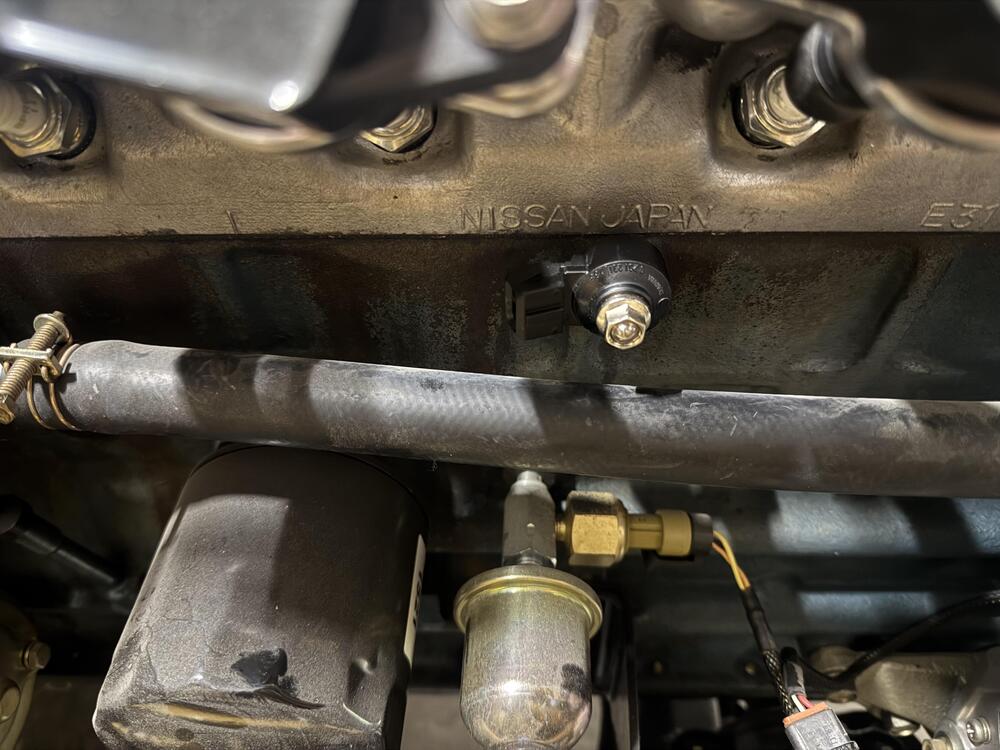
1 pointDual L6 knock sensors using the stock block m6 hot water pipe mounts. They are actually about perfectly placed! These are just ti prototype. I am designing my own and will be adding them to the things I make and sell.


 1 point
 -
So sorry for that! I had real concerns about that after you installed it without the trim, but I was hoping you would be successful. The last few things I have attempted in the shop have been very frustrating. So I feel your pain. You are making great progress though and it's a beautiful car! Just a little more and you'll be ready for Zcon 20251 point
-
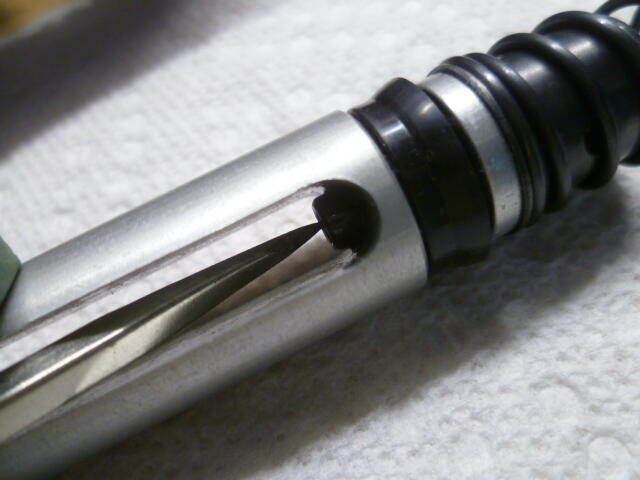
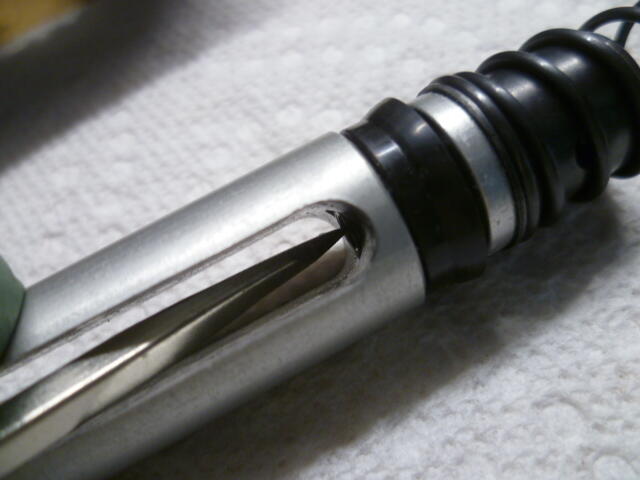
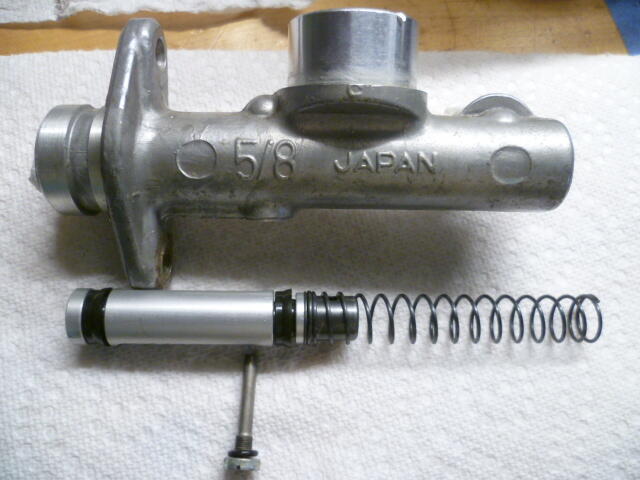
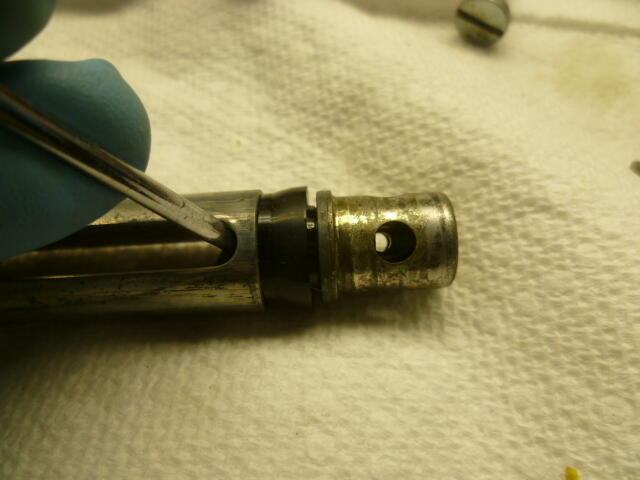
1 pointI posted some pics in that other thread detailing the valve in the brake master cylinder. The later clutch master cylinder is the same concept. Here's a couple pics. Looks like this: This screw cuts across the master inside and opens the valve when the clutch master is at rest: Opening the valve with the tip of a screwdriver: You can see daylight through the valve when it is pushed open:

 1 point
 -
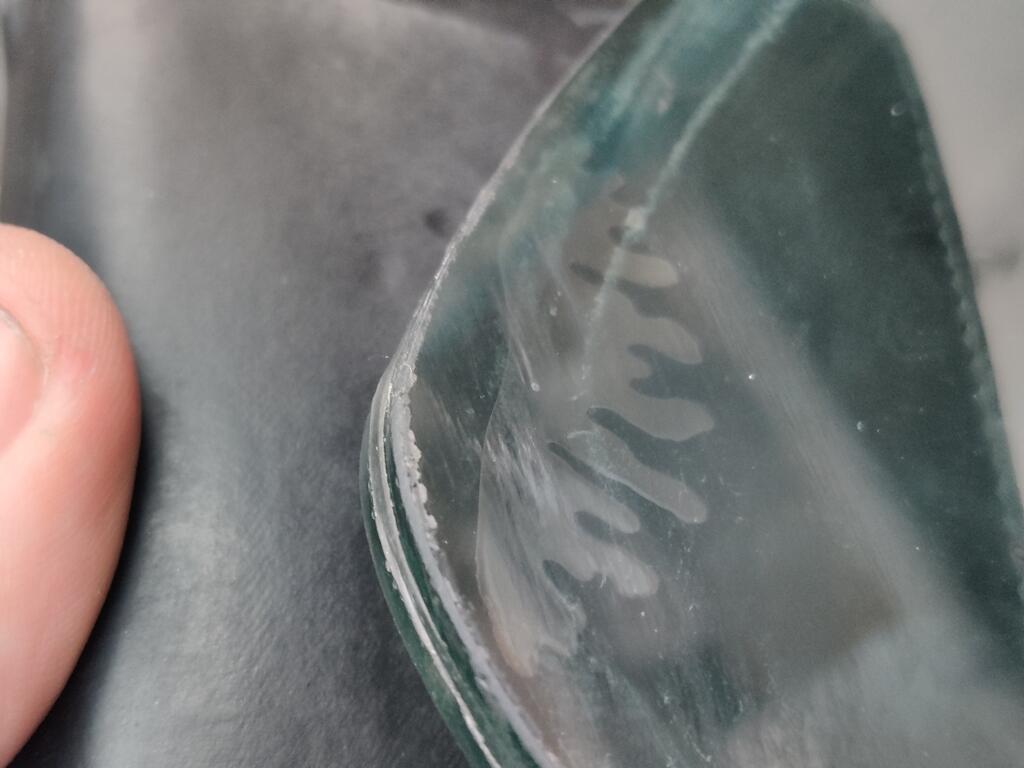
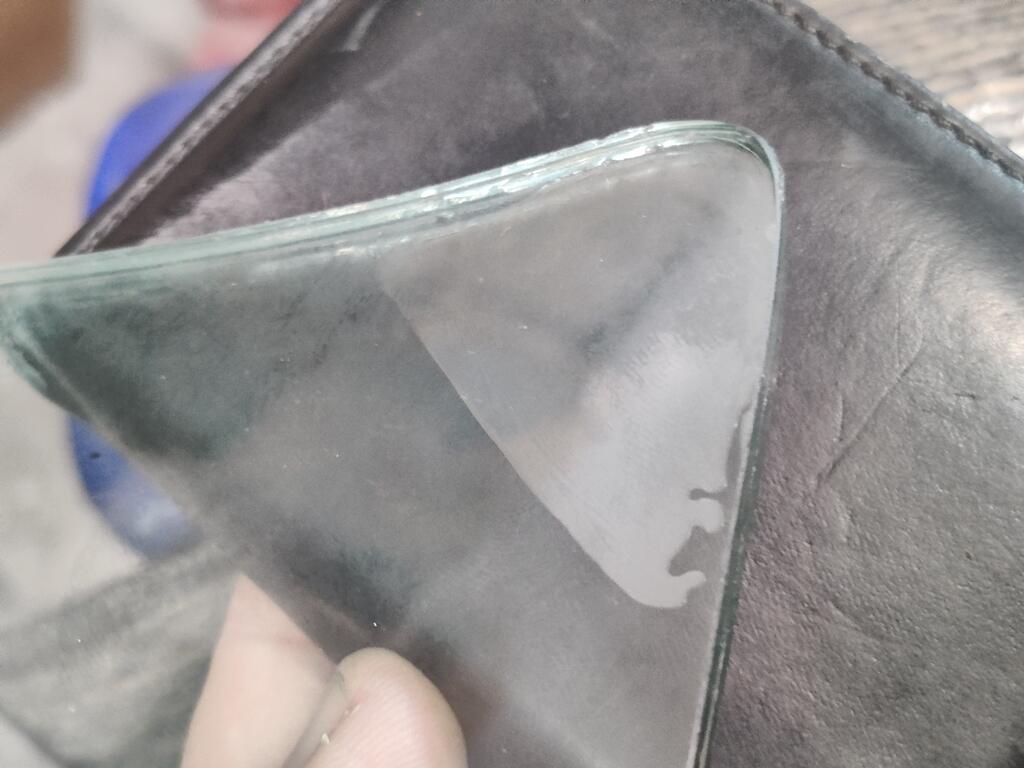
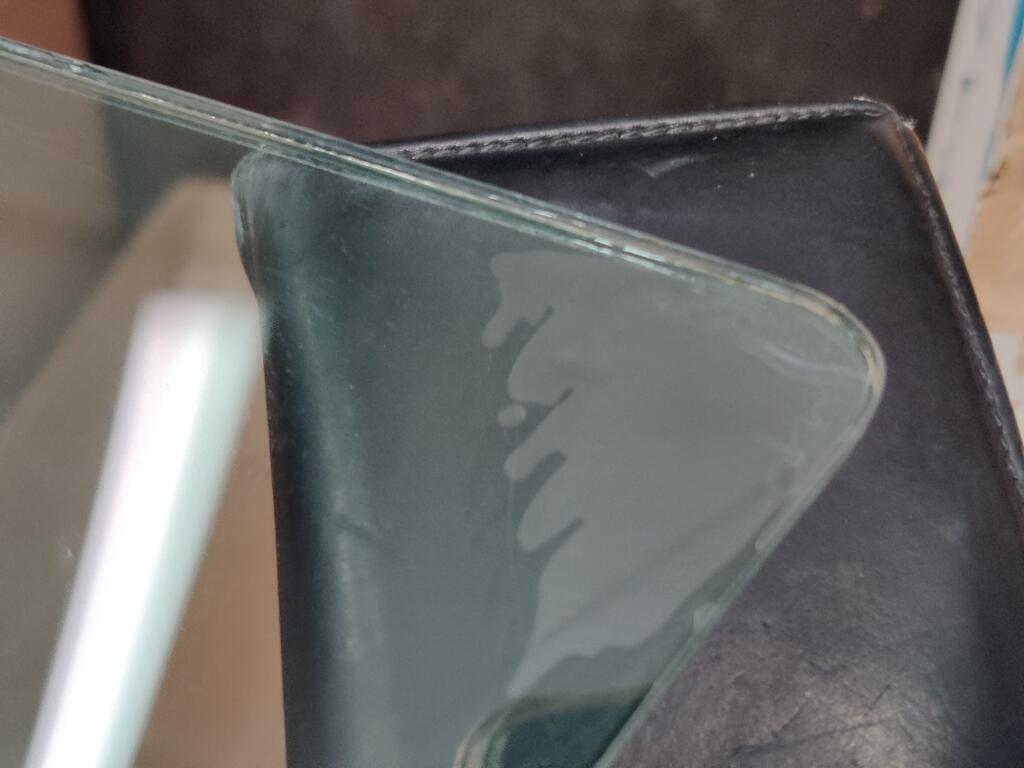
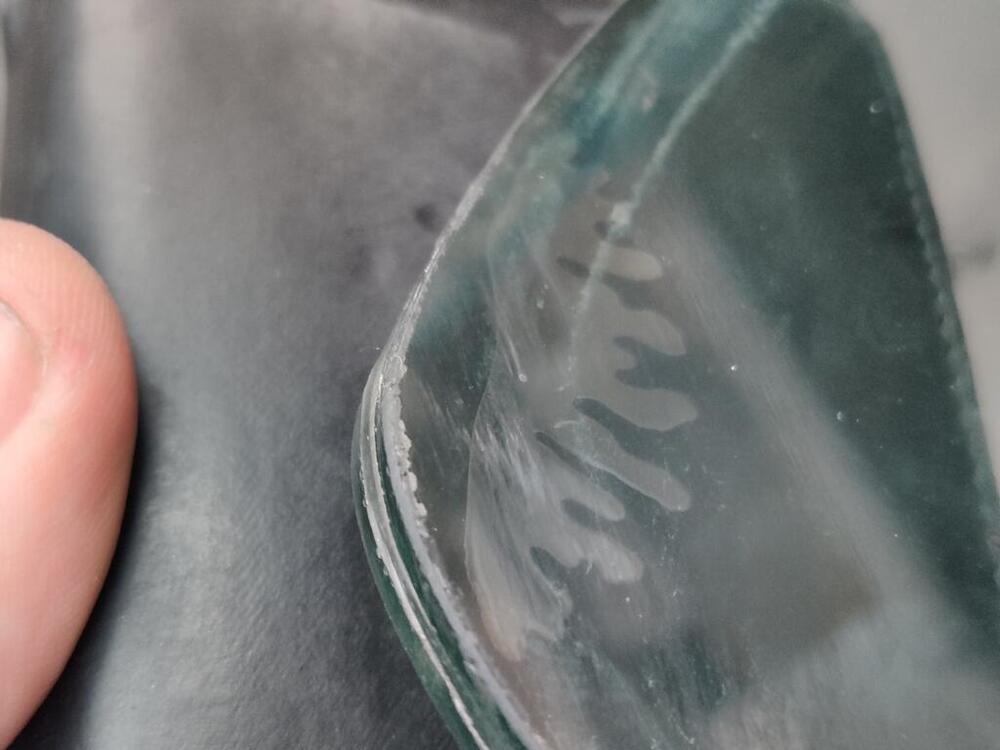
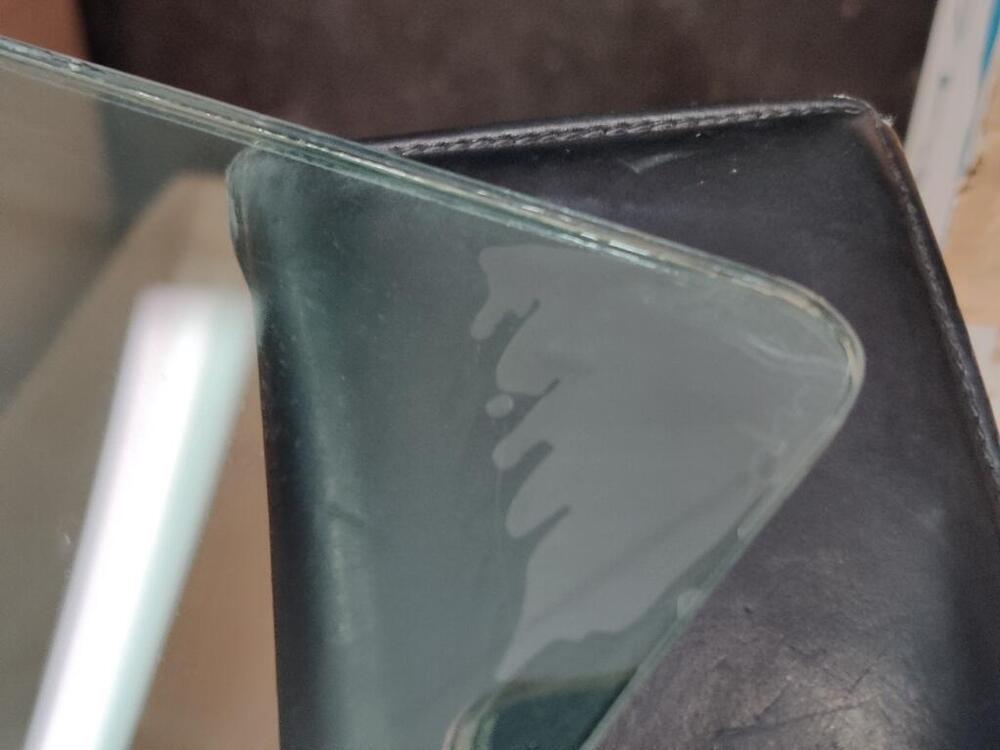
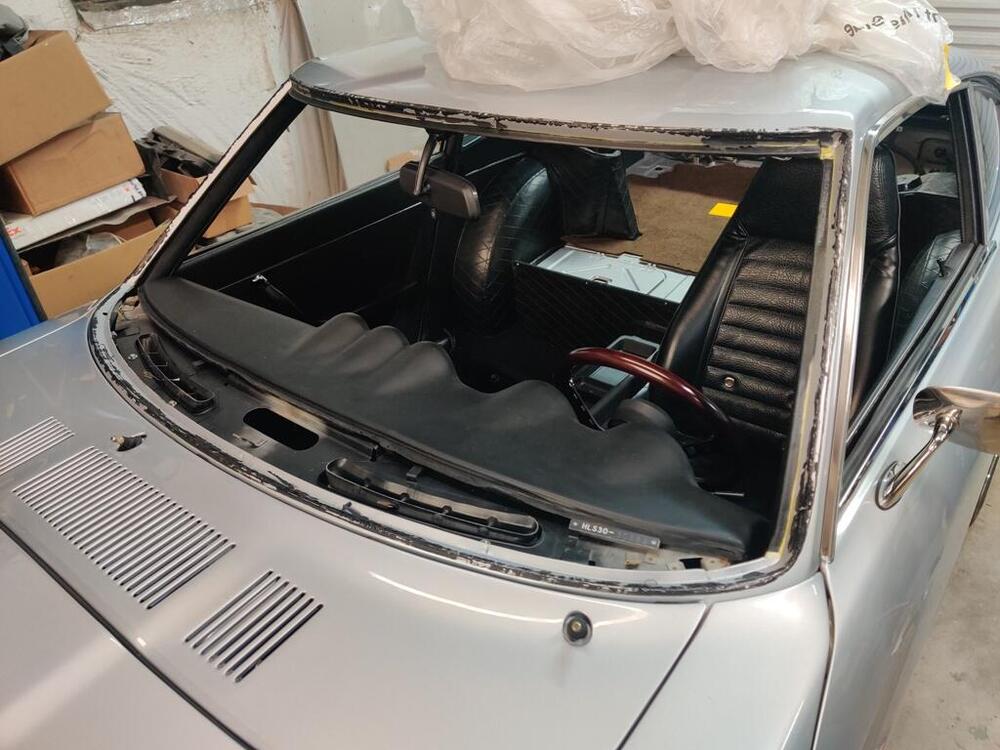
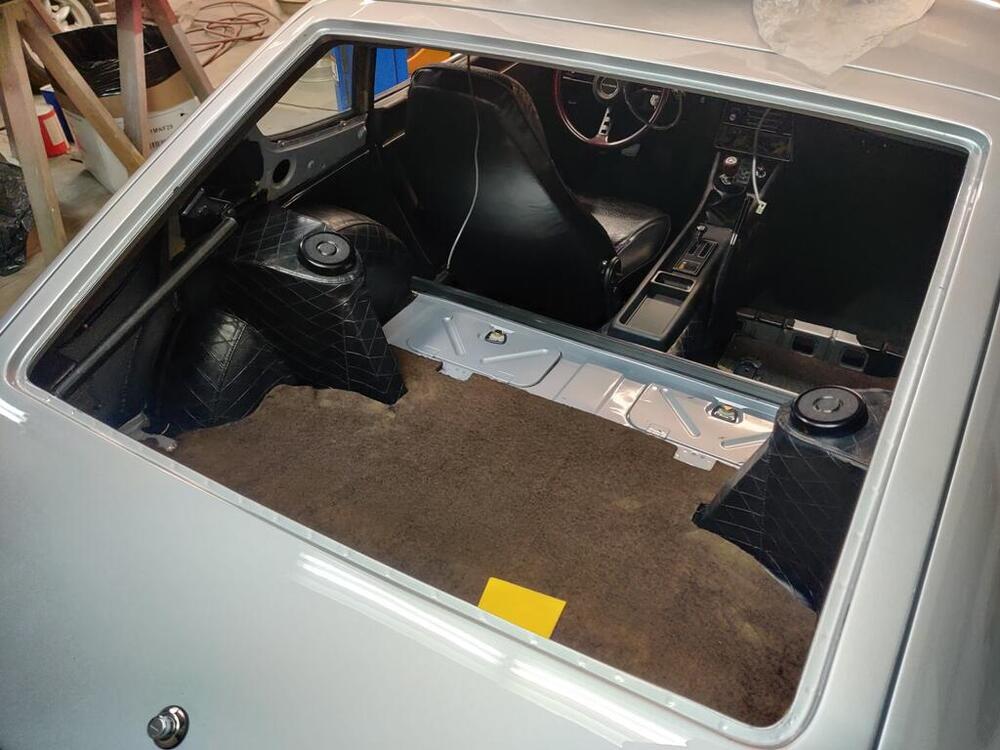
Thanks to all who responded! In other news, a friend from VA visited this past weekend, and we tried tackling one of the tough jobs: installing the new stainless trim in the windshield gasket. I bought a tool from Lisle to assist and some Precision lube. We gave it a go... and even with two "car guys" being extremely careful, we sliced the gasket in many places (and I sliced myself in three places) trying to install it. I am concluding that it is impossible to install the stainless trim after installing the windshield in the car without cutting the gasket to shreds. It may be possible with an aftermarket windshield gasket, but it is certainly not with an old NOS one. So, while he was here, we then cut up the NOS gaskets for the windshield and the hatch to get the glass out. The urethane adhesive I used didn't do an especially good job of gluing the gaskets to the body - this I am thankful for. It did, however, do an especially good job of sticking to the body. So, it is a bitch to get off the car. One positive thing I guess: after install the windshield weeks ago, I noticed that in 3 of the 4 corners of the windshield, the two pieces of glass (front and back) started delaminating. With the windshield out, I may be able to repair that. Or, I may just try to source another windshield. Just to round this out, I recommend that you never install the glass without putting the stainless trim in the grooves of the gasket first. Out of all the work I have done on the car, installing the stainless trim on already installed gaskets is easily the hardest and most frustrating thing I have attempted. Removing the urethane adhesive from the body of the car is up there as well. I started removing the adhesive the rear hatch panel, and than part of the windshield. But I have a blister forming on my thumb, so I will take a break from that. I have gone backwards more than forwards this time.

 0 points