Leaderboard
-
conedodger
Free Member18Points12,513Posts -
motorman7
 Subscriber
 7Points2,228Posts
 -
Captain Obvious
Free Member3Points10,081Posts -
Patcon
Subscriber2Points11,142Posts


Popular Content
Showing content with the highest reputation on 11/04/2024 in Posts
-
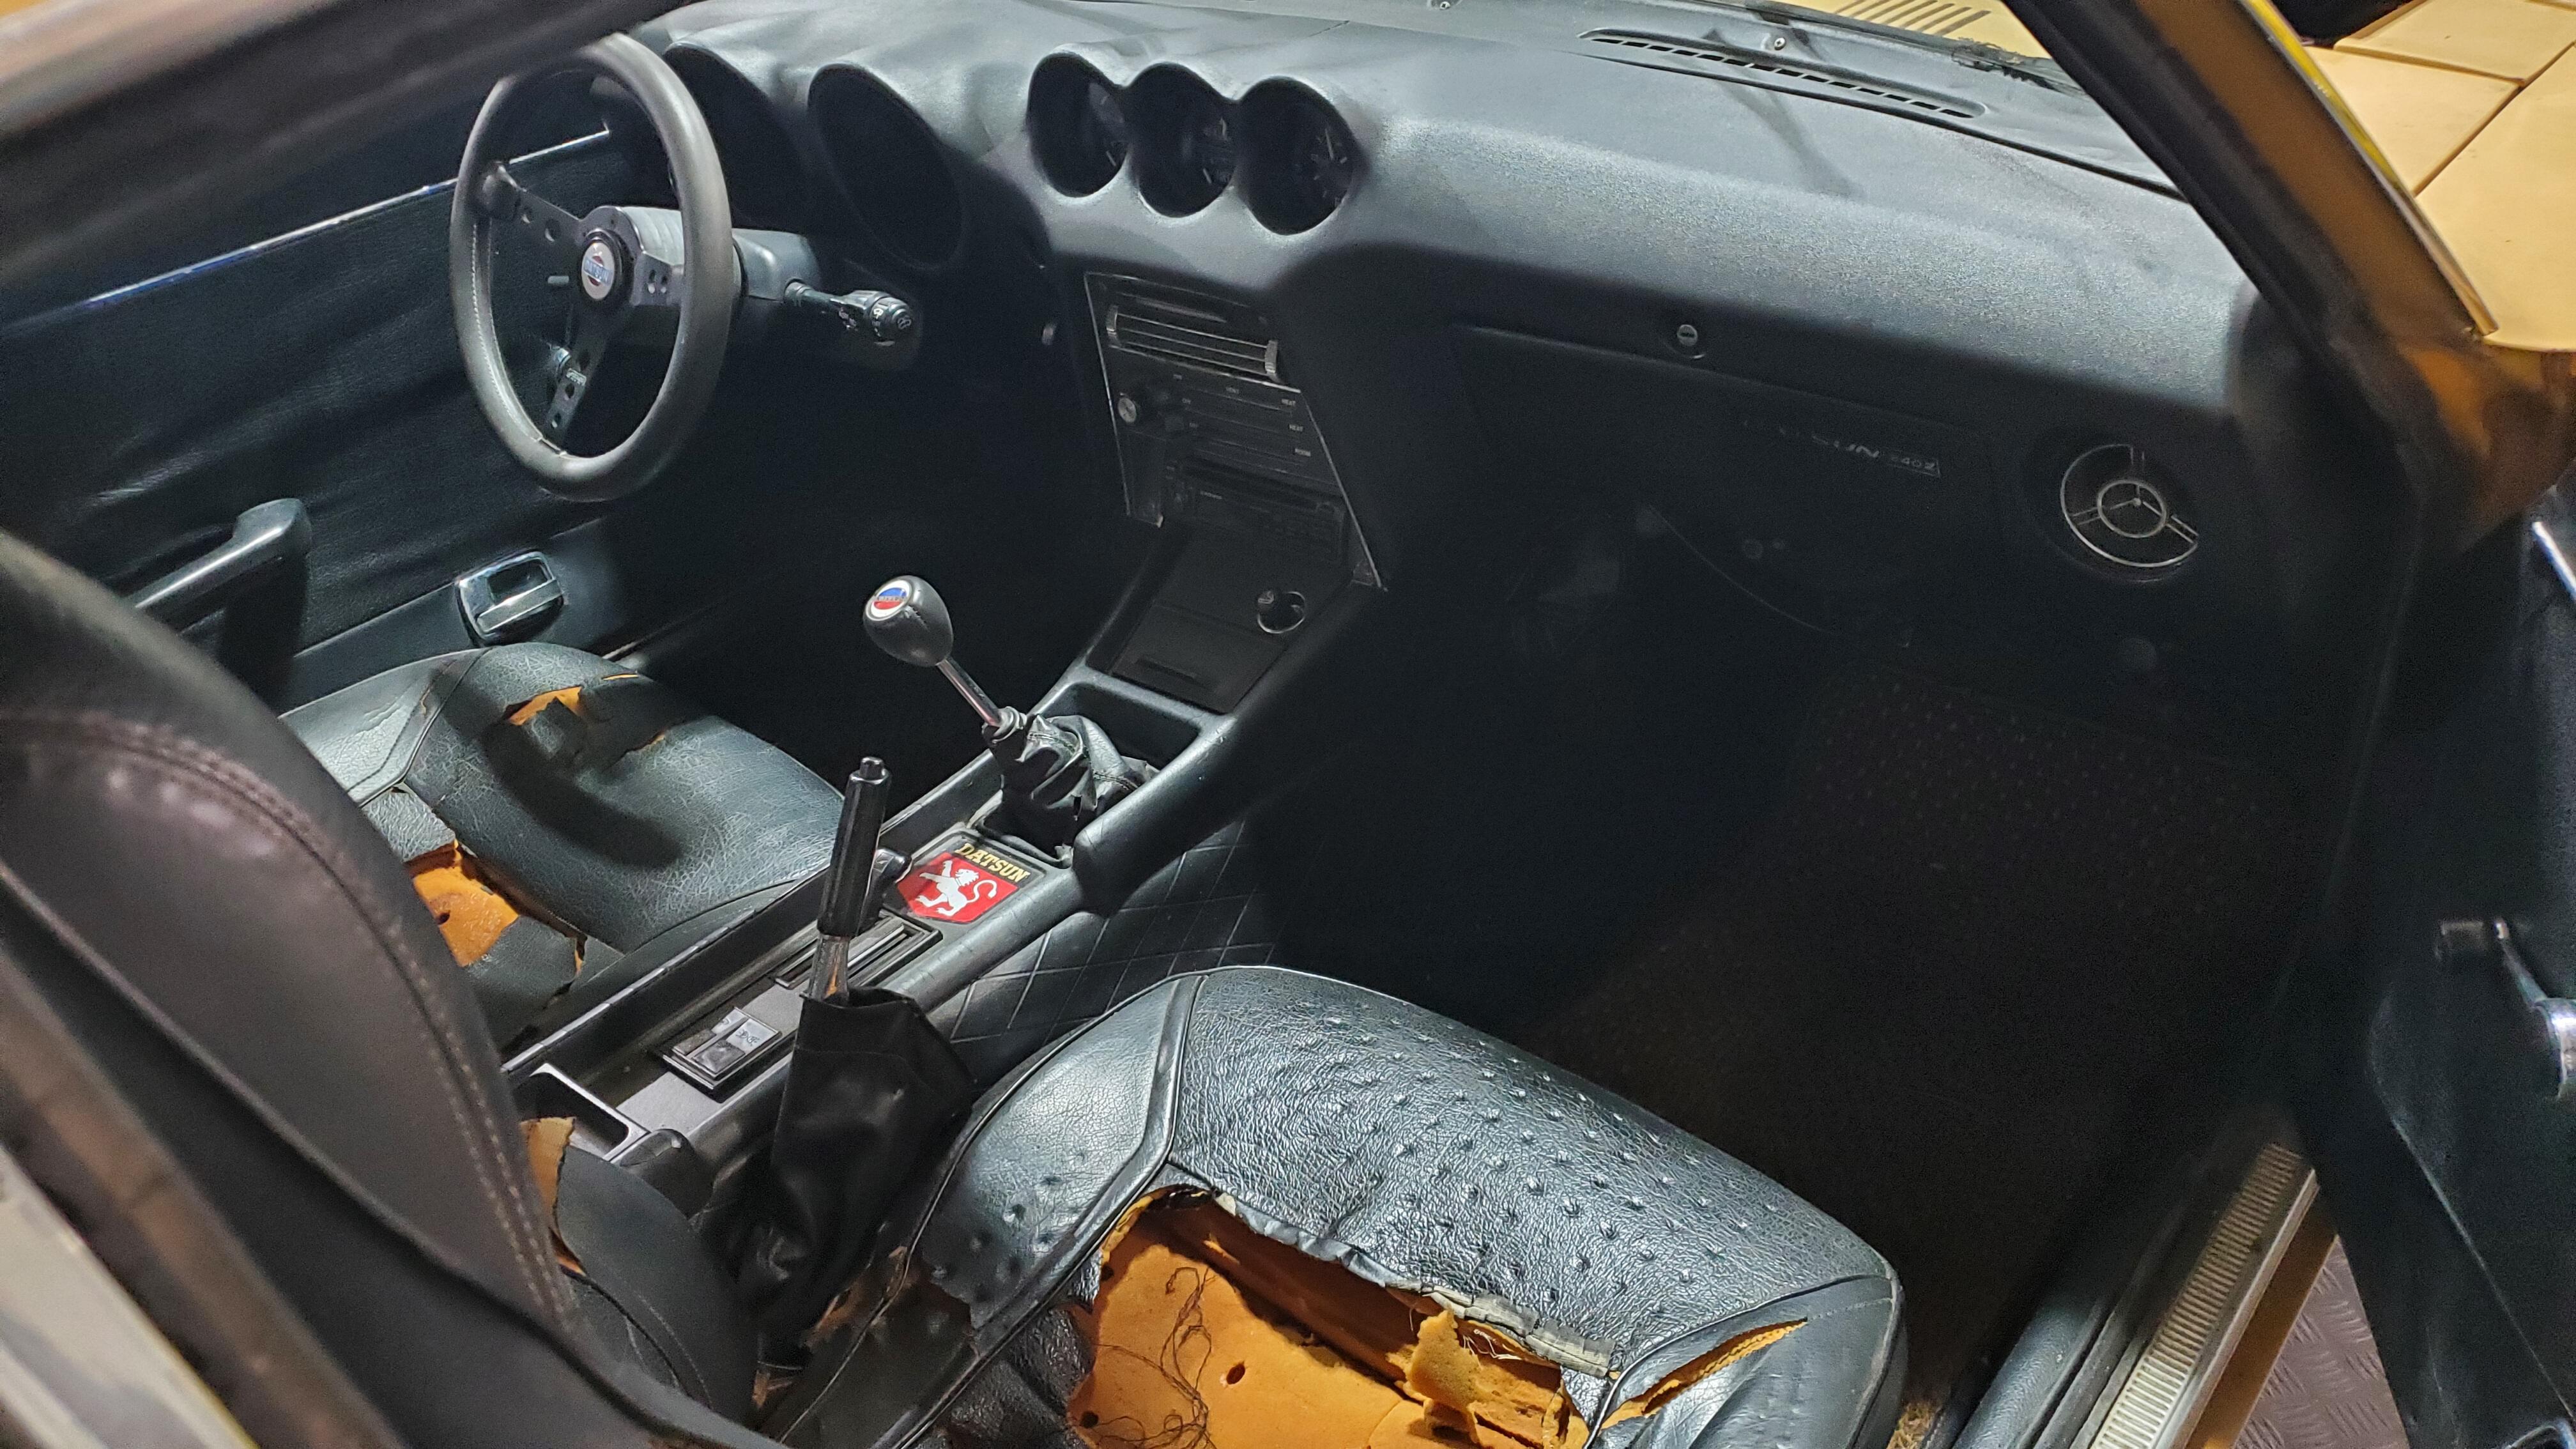
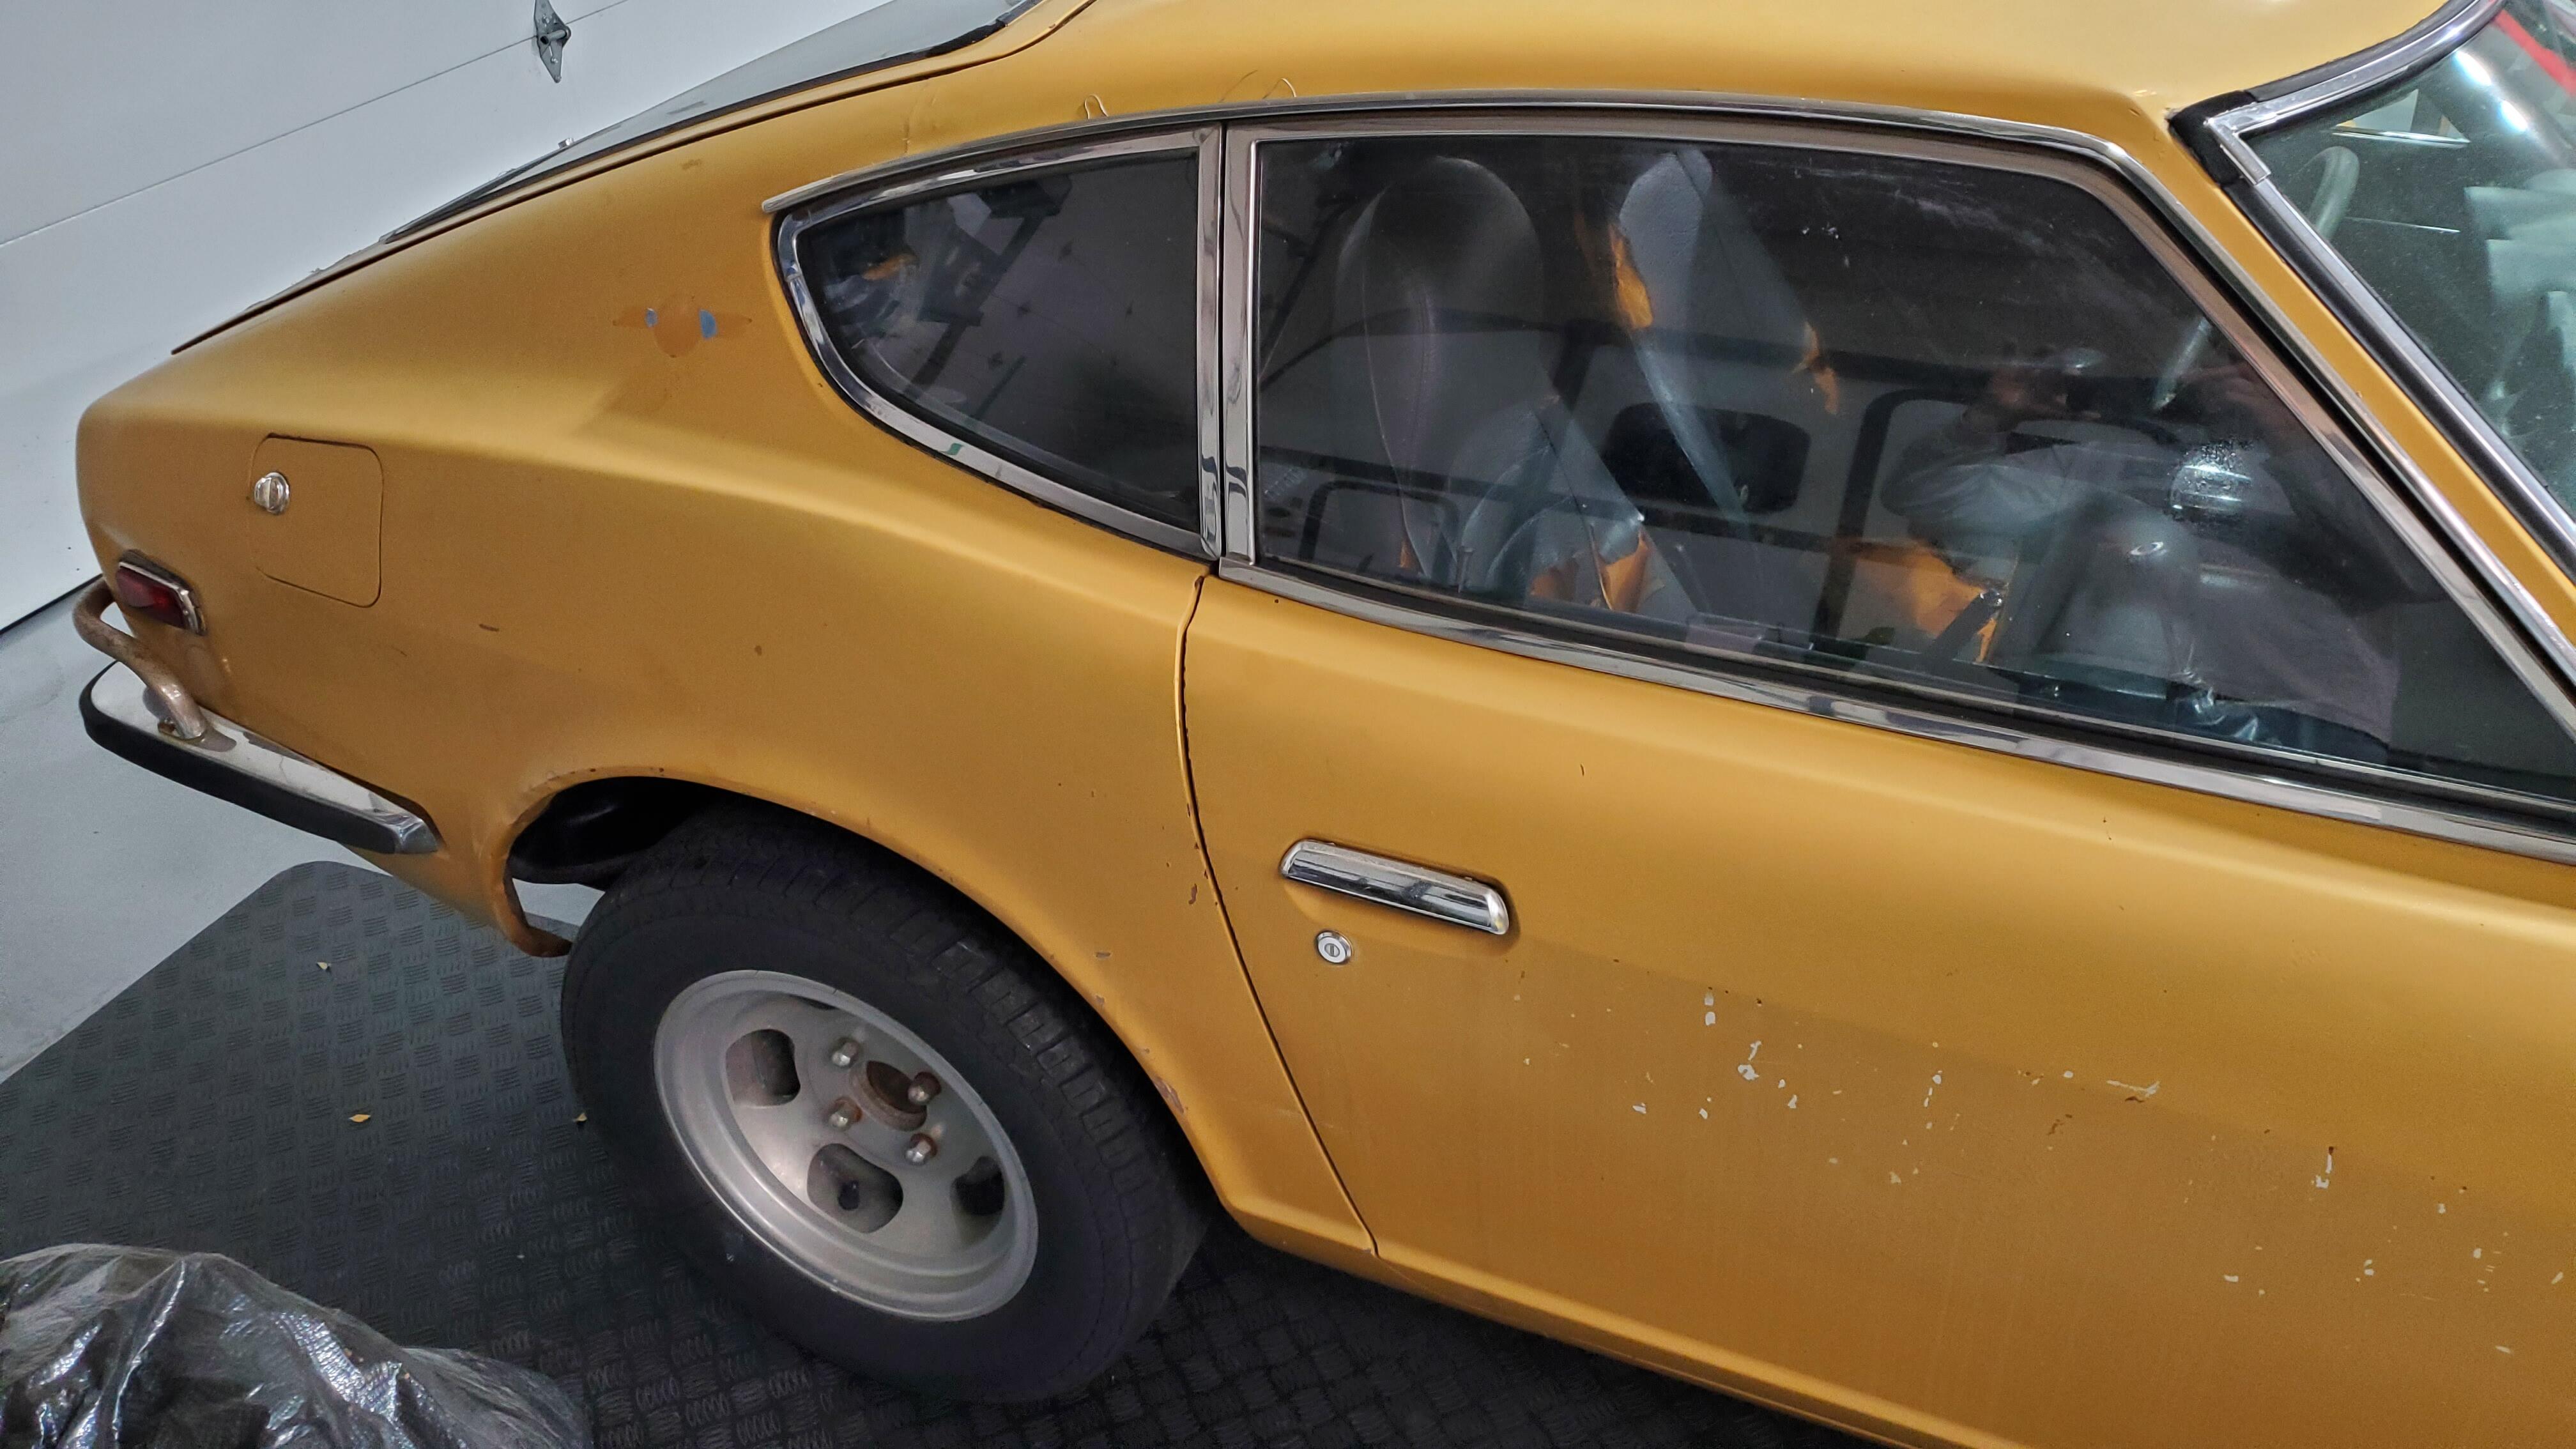
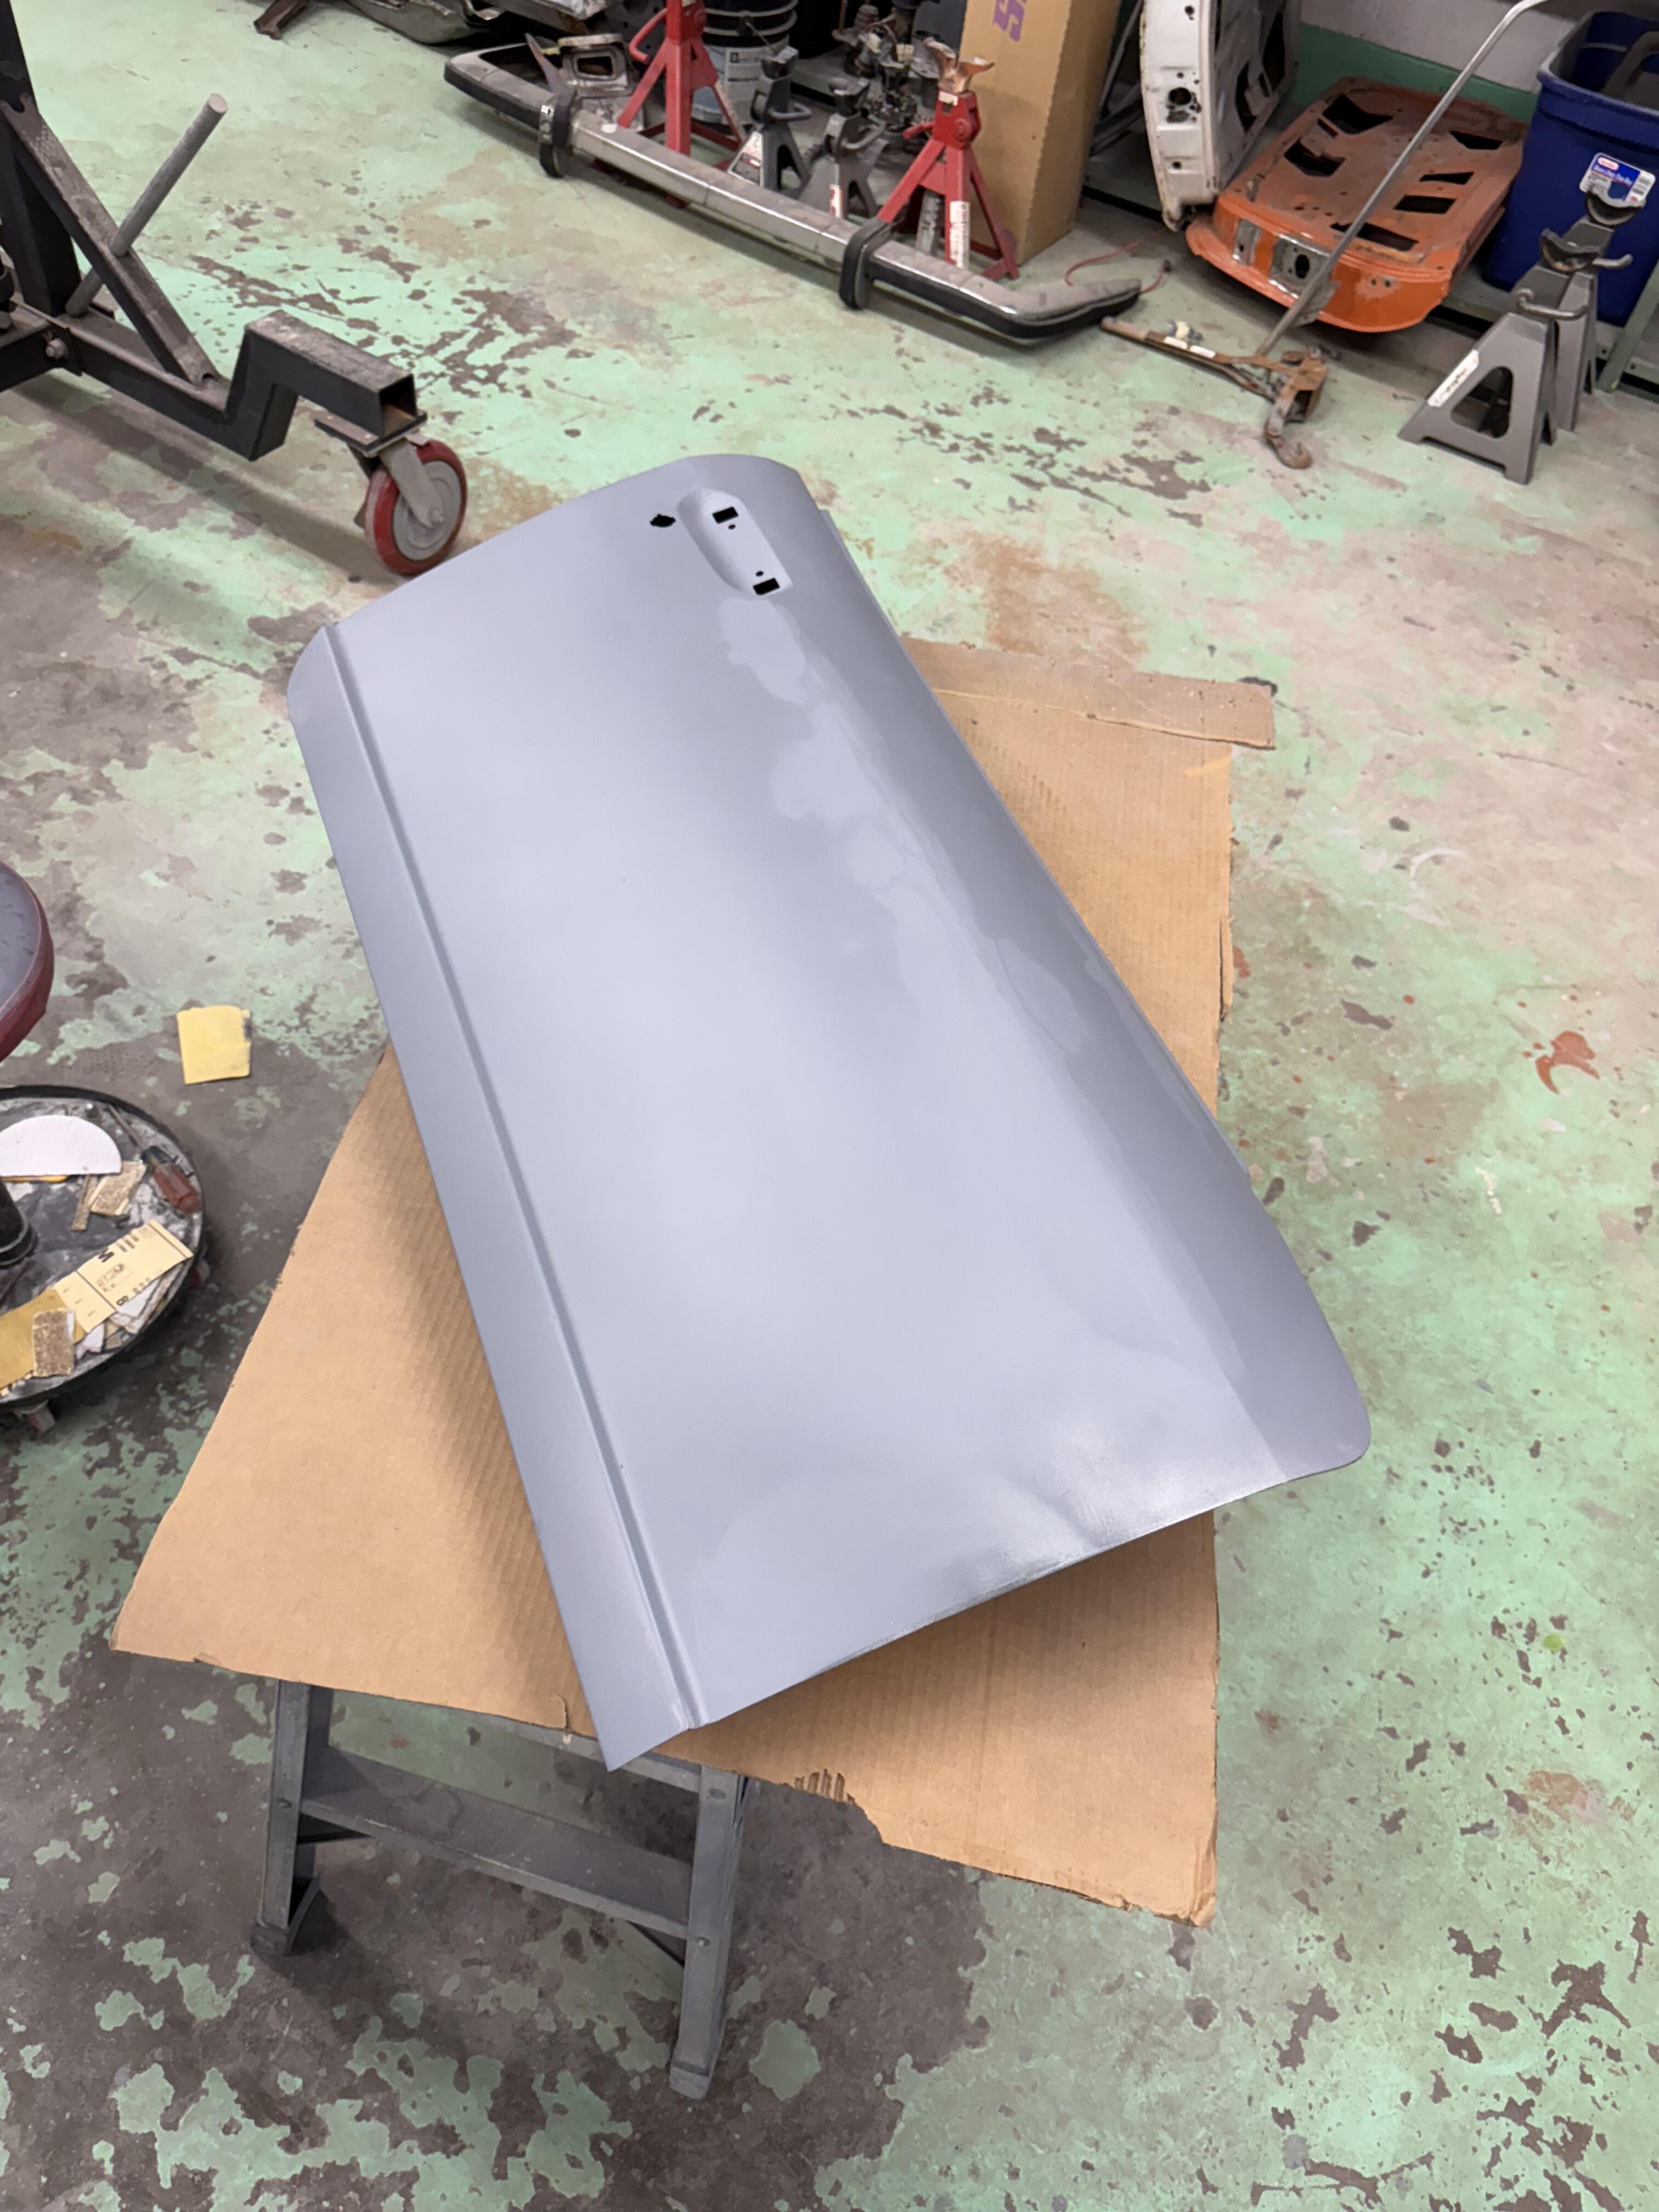
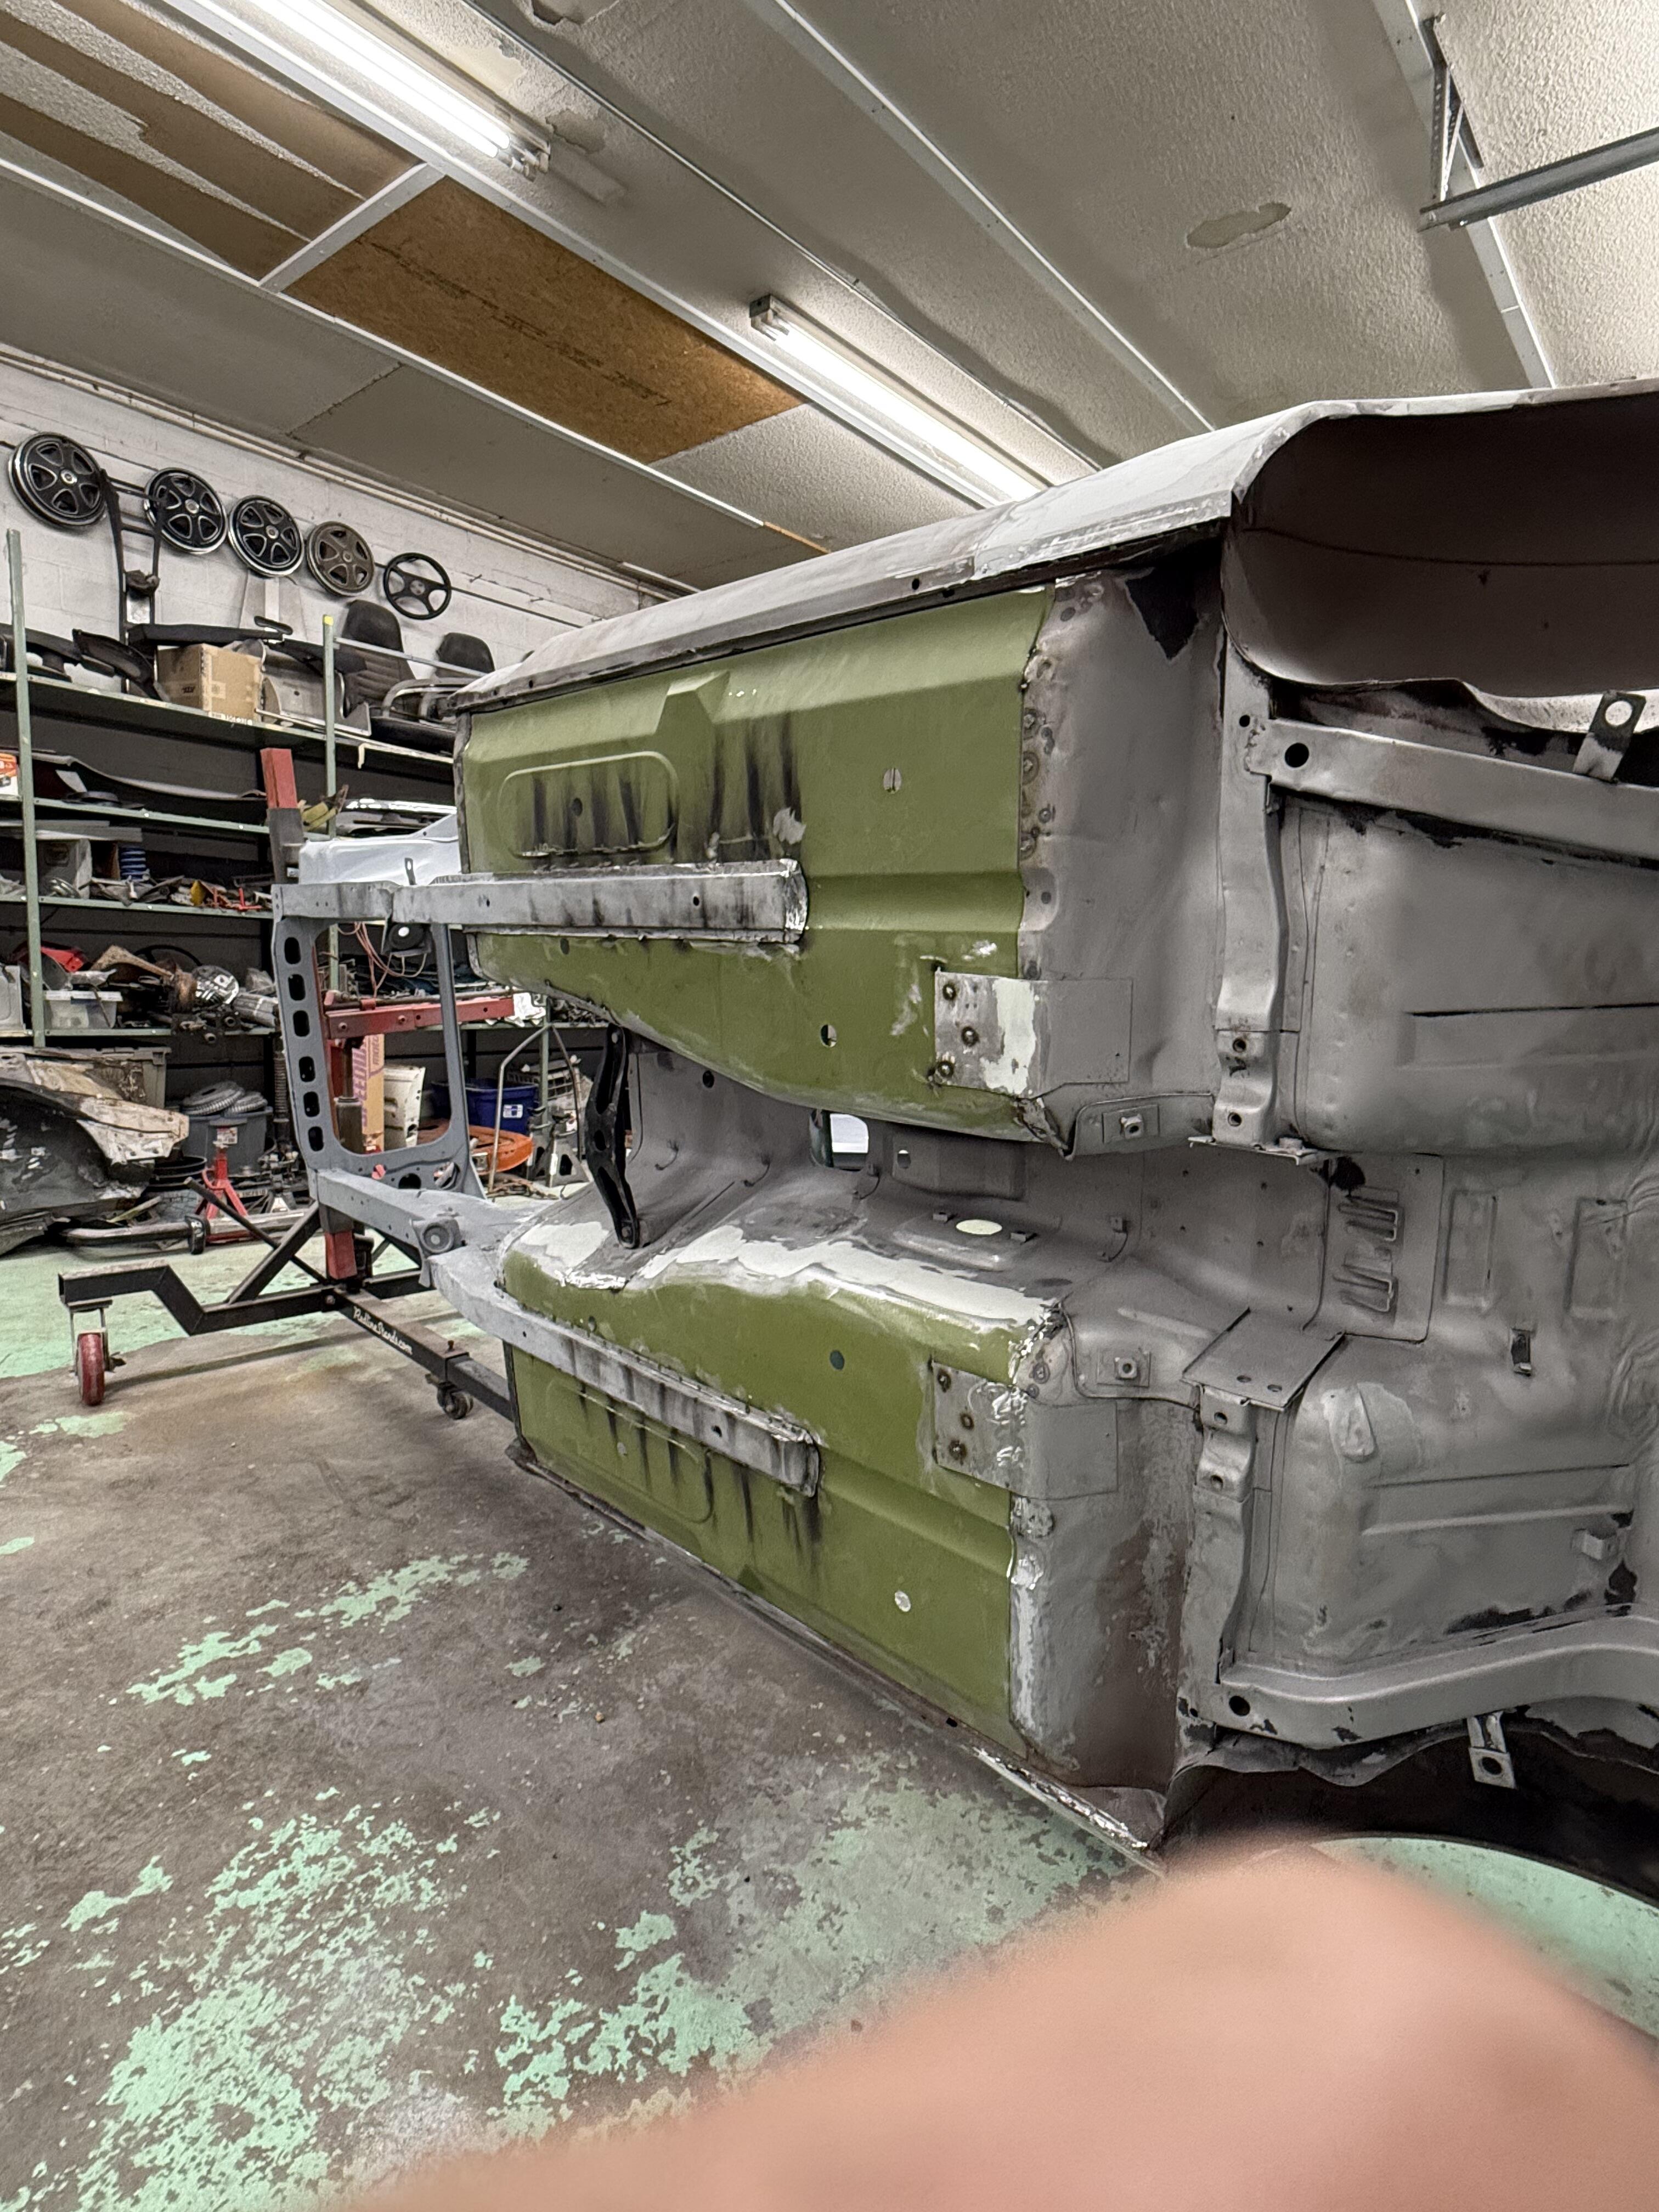
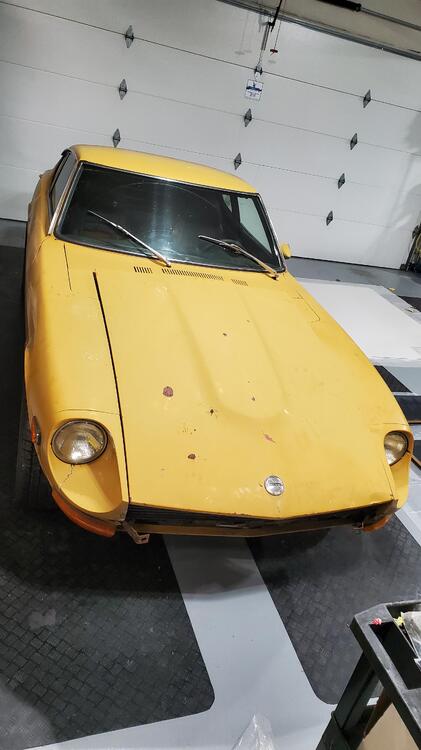
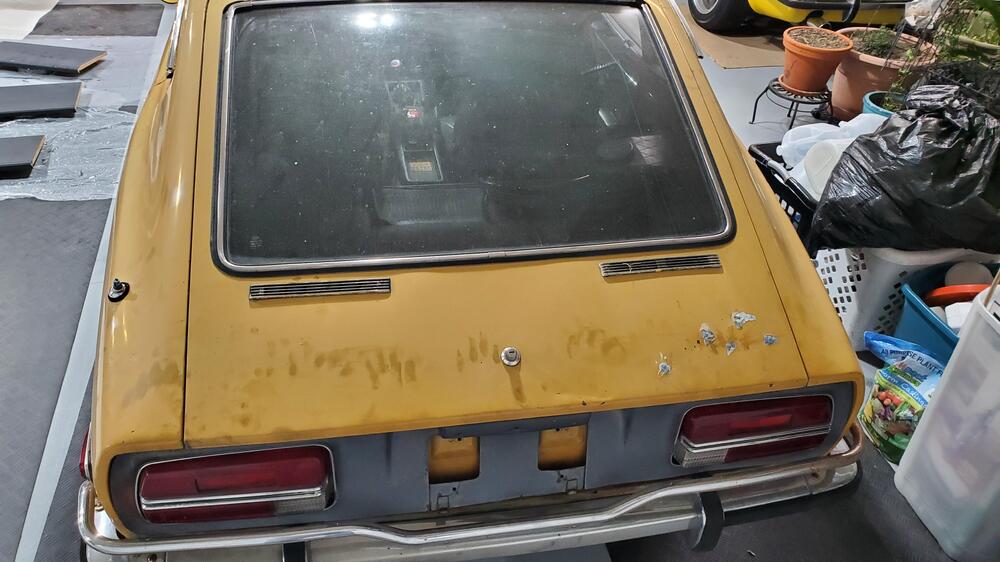
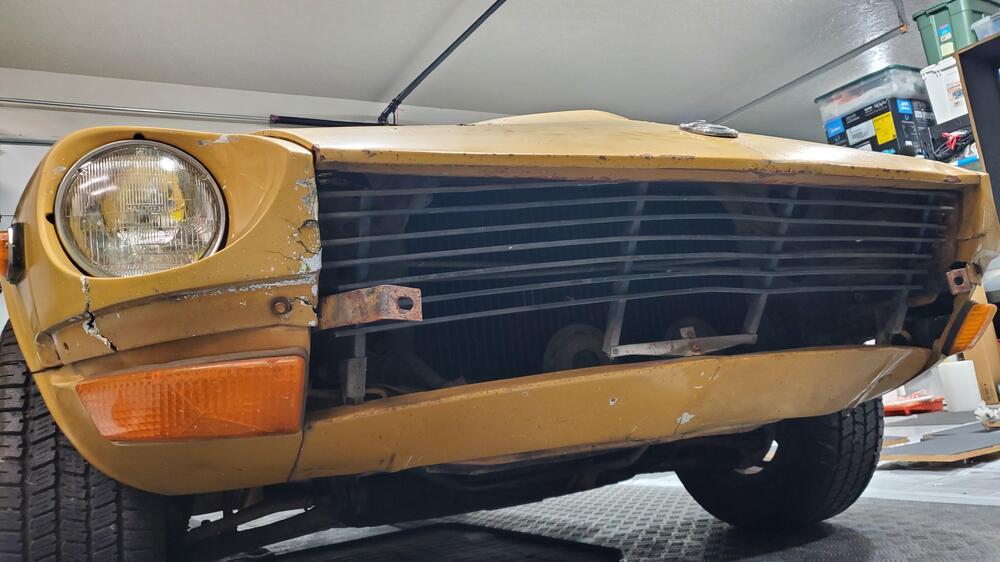
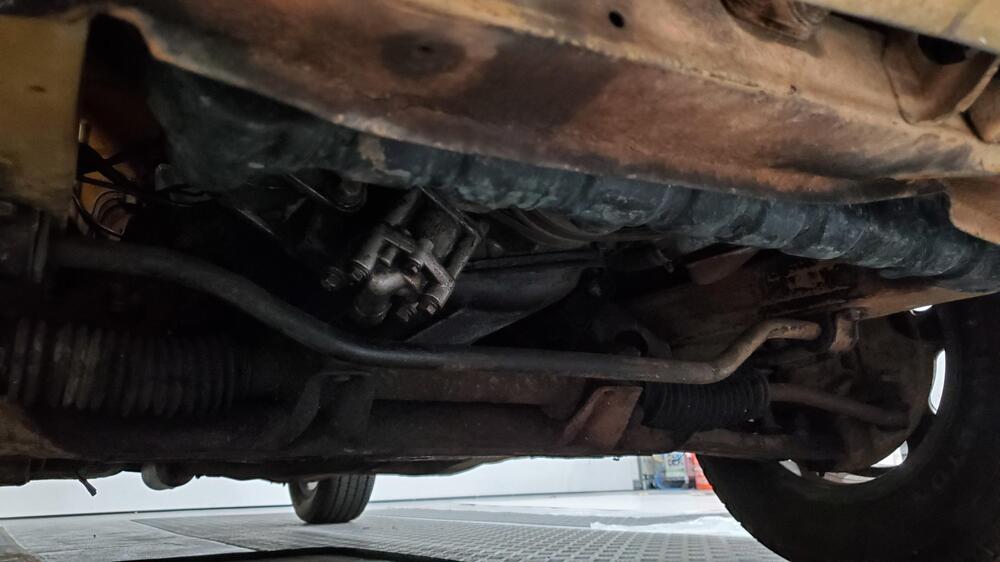
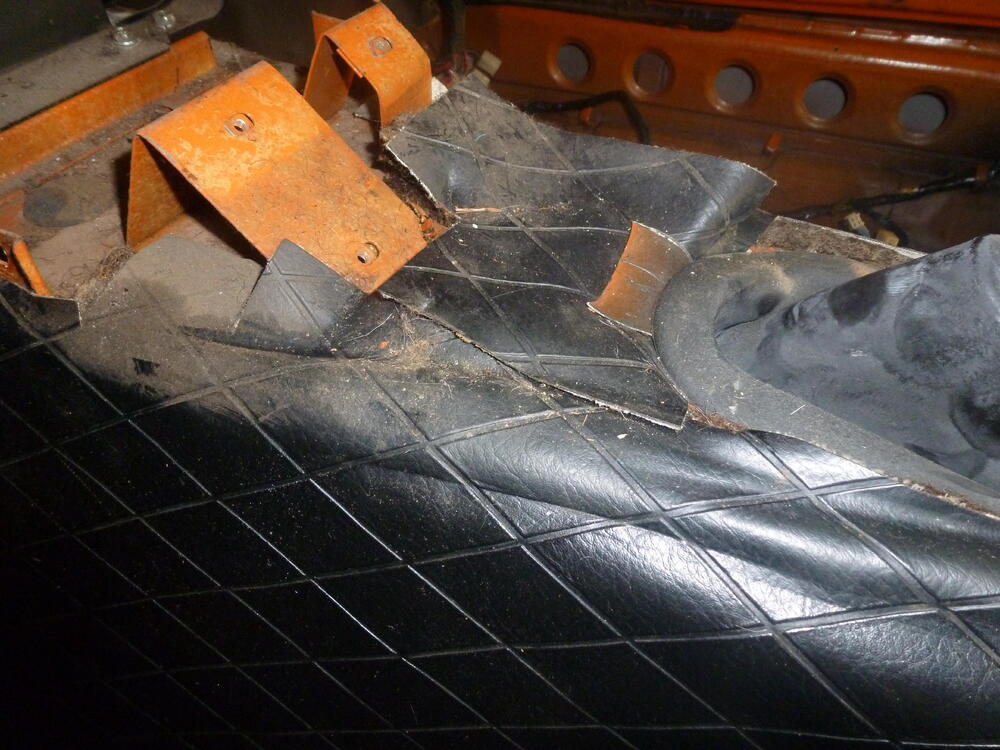
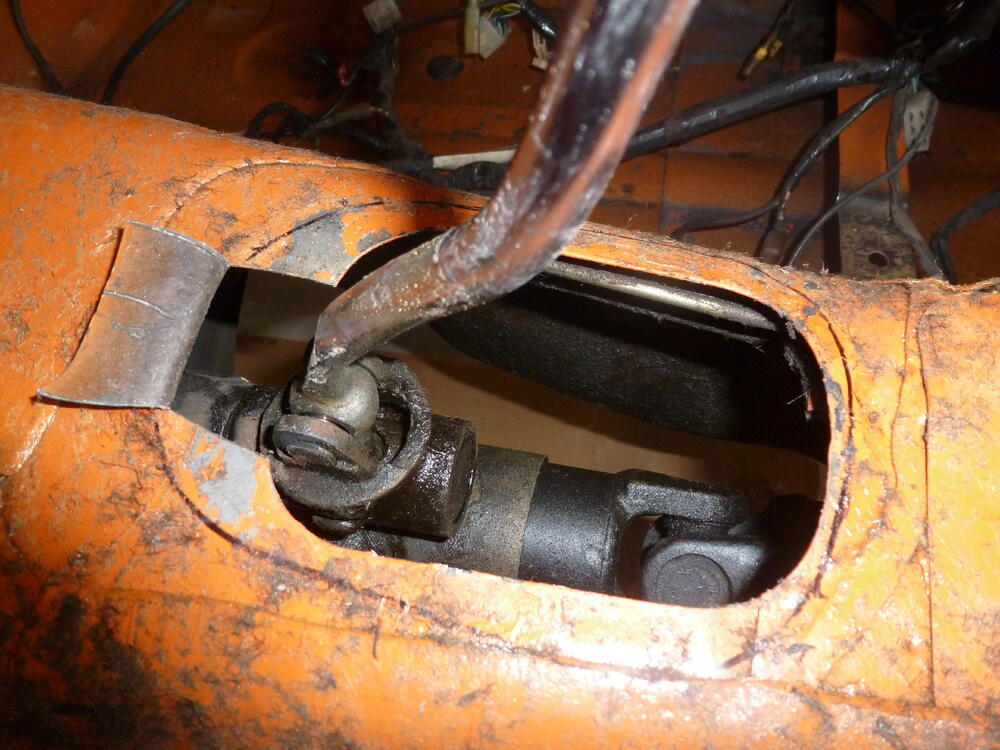
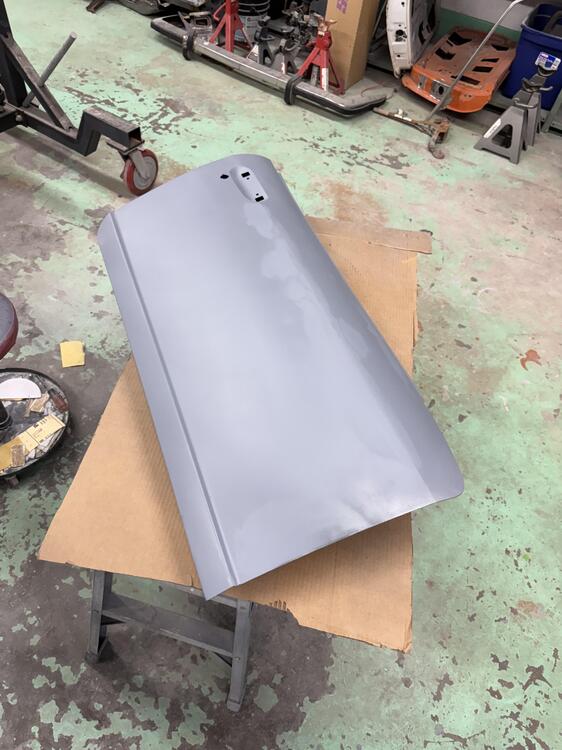
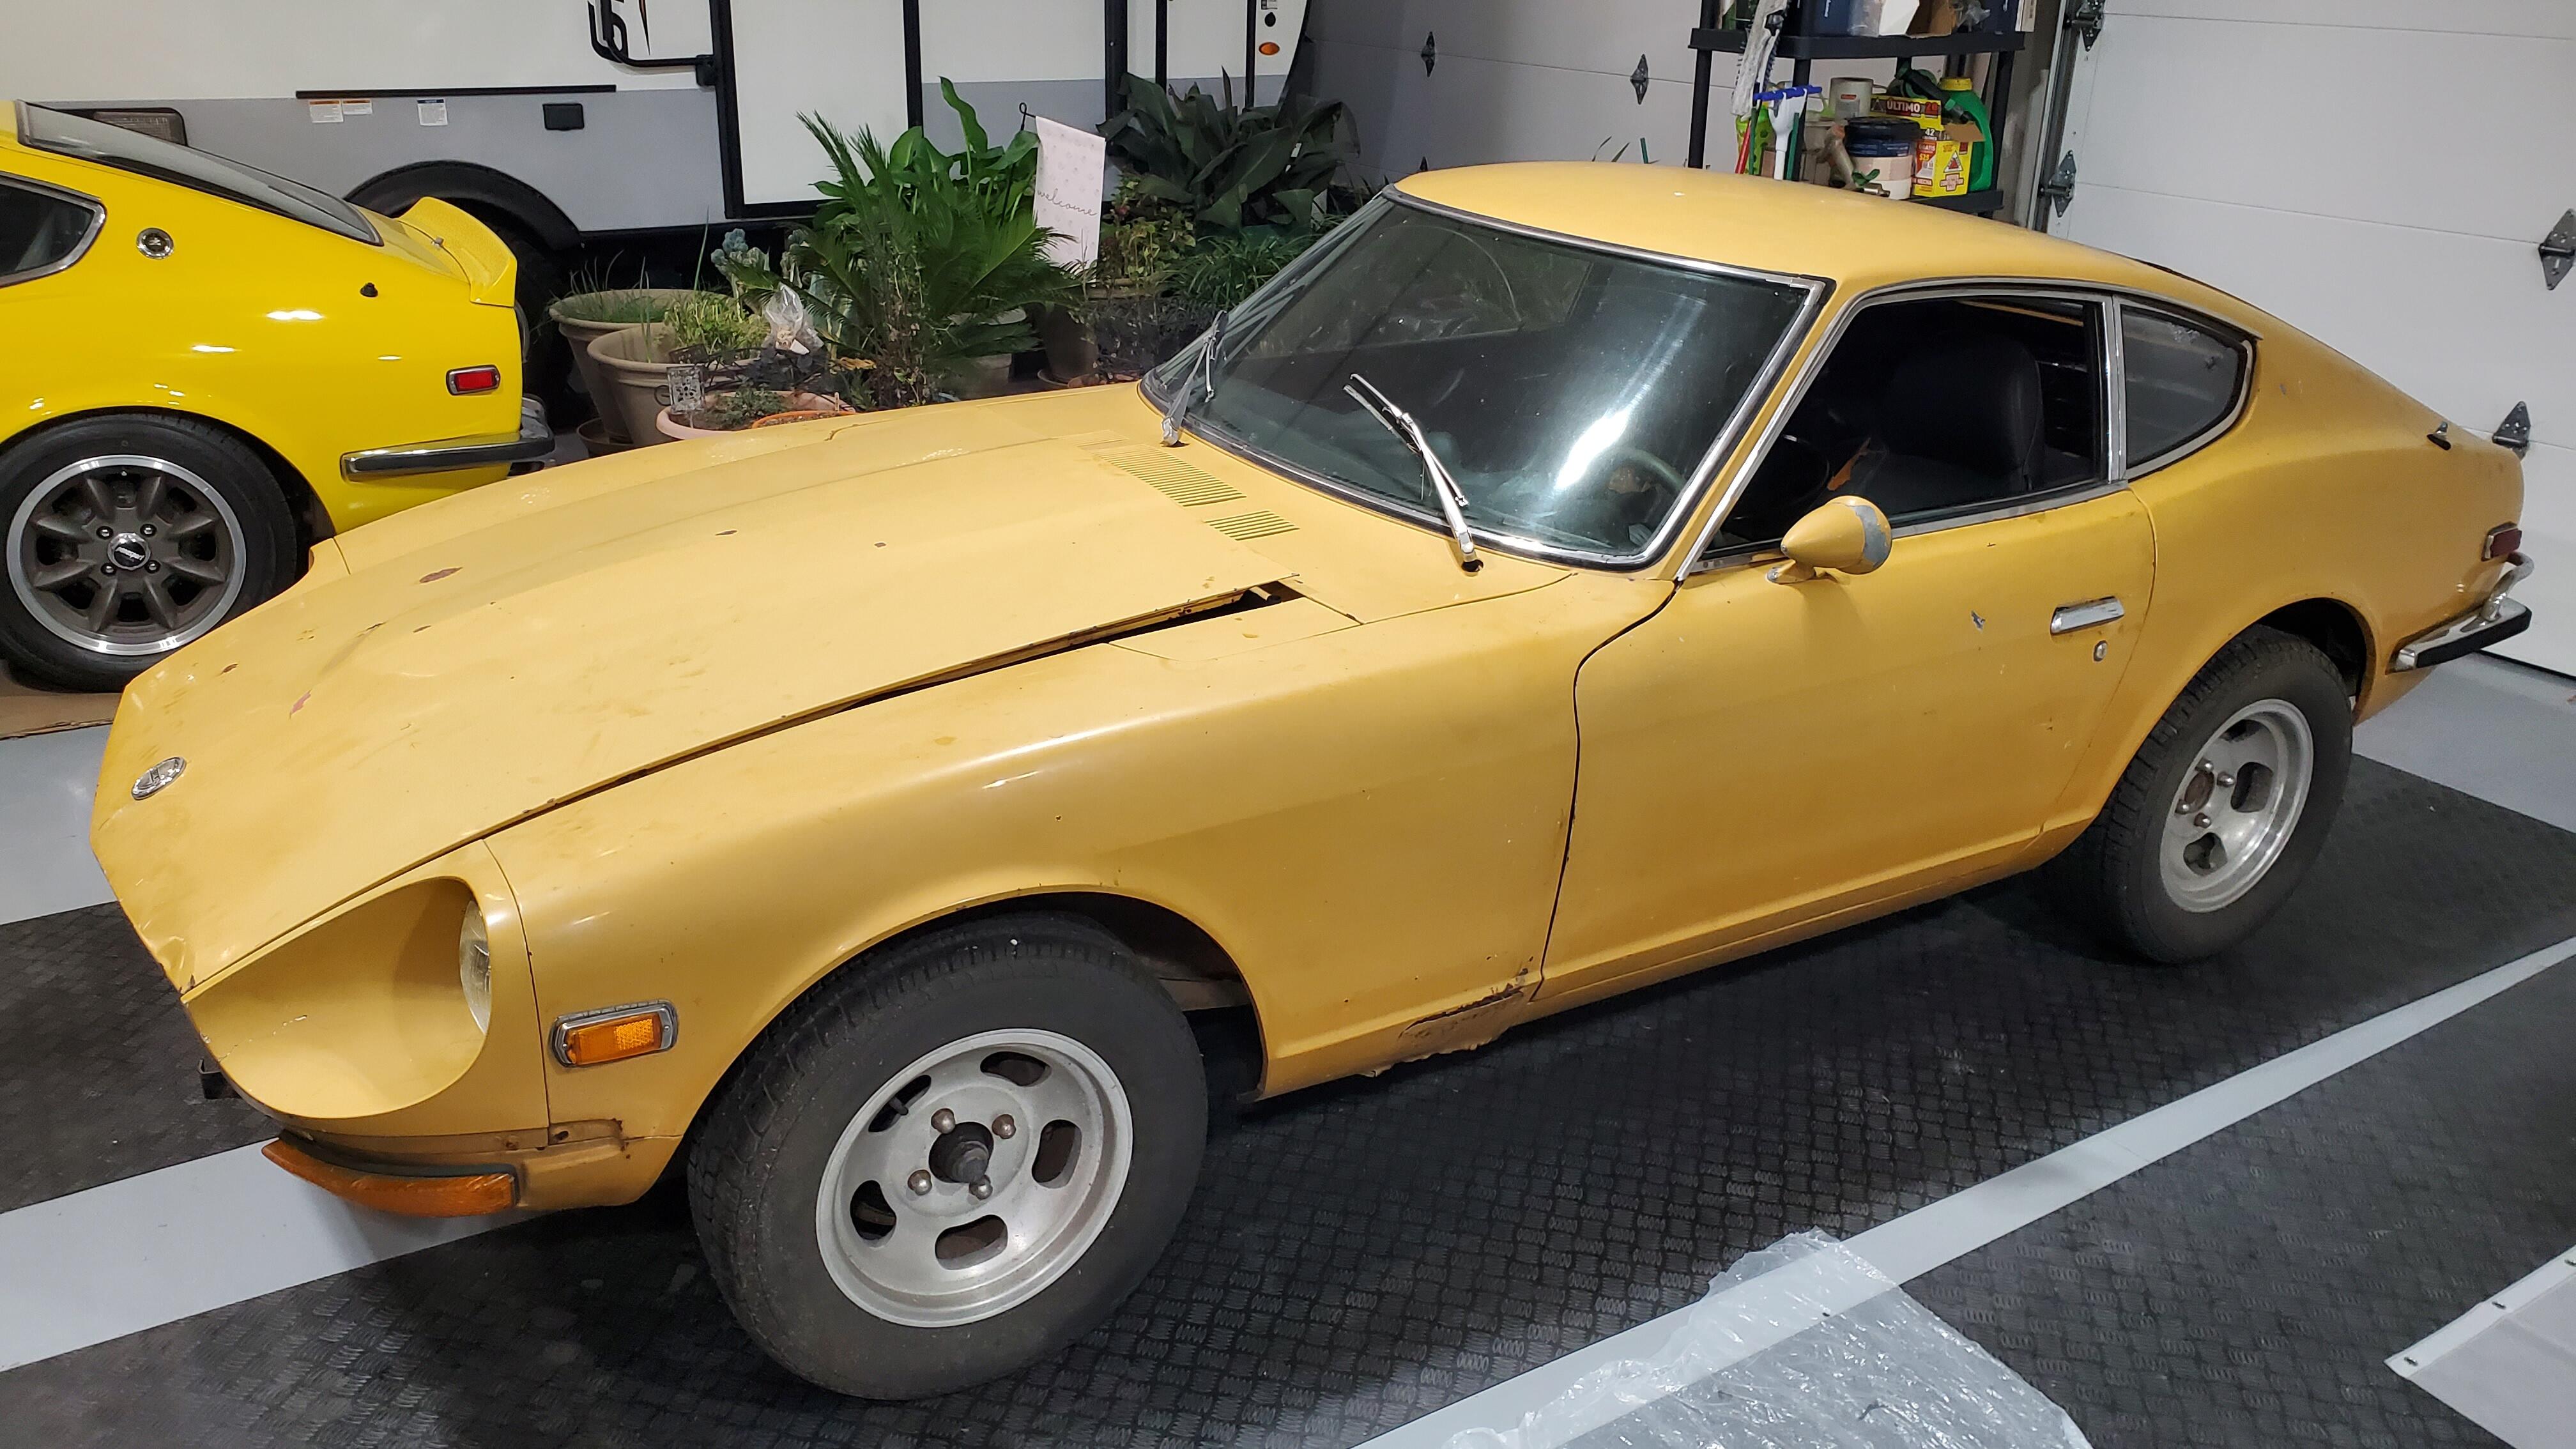
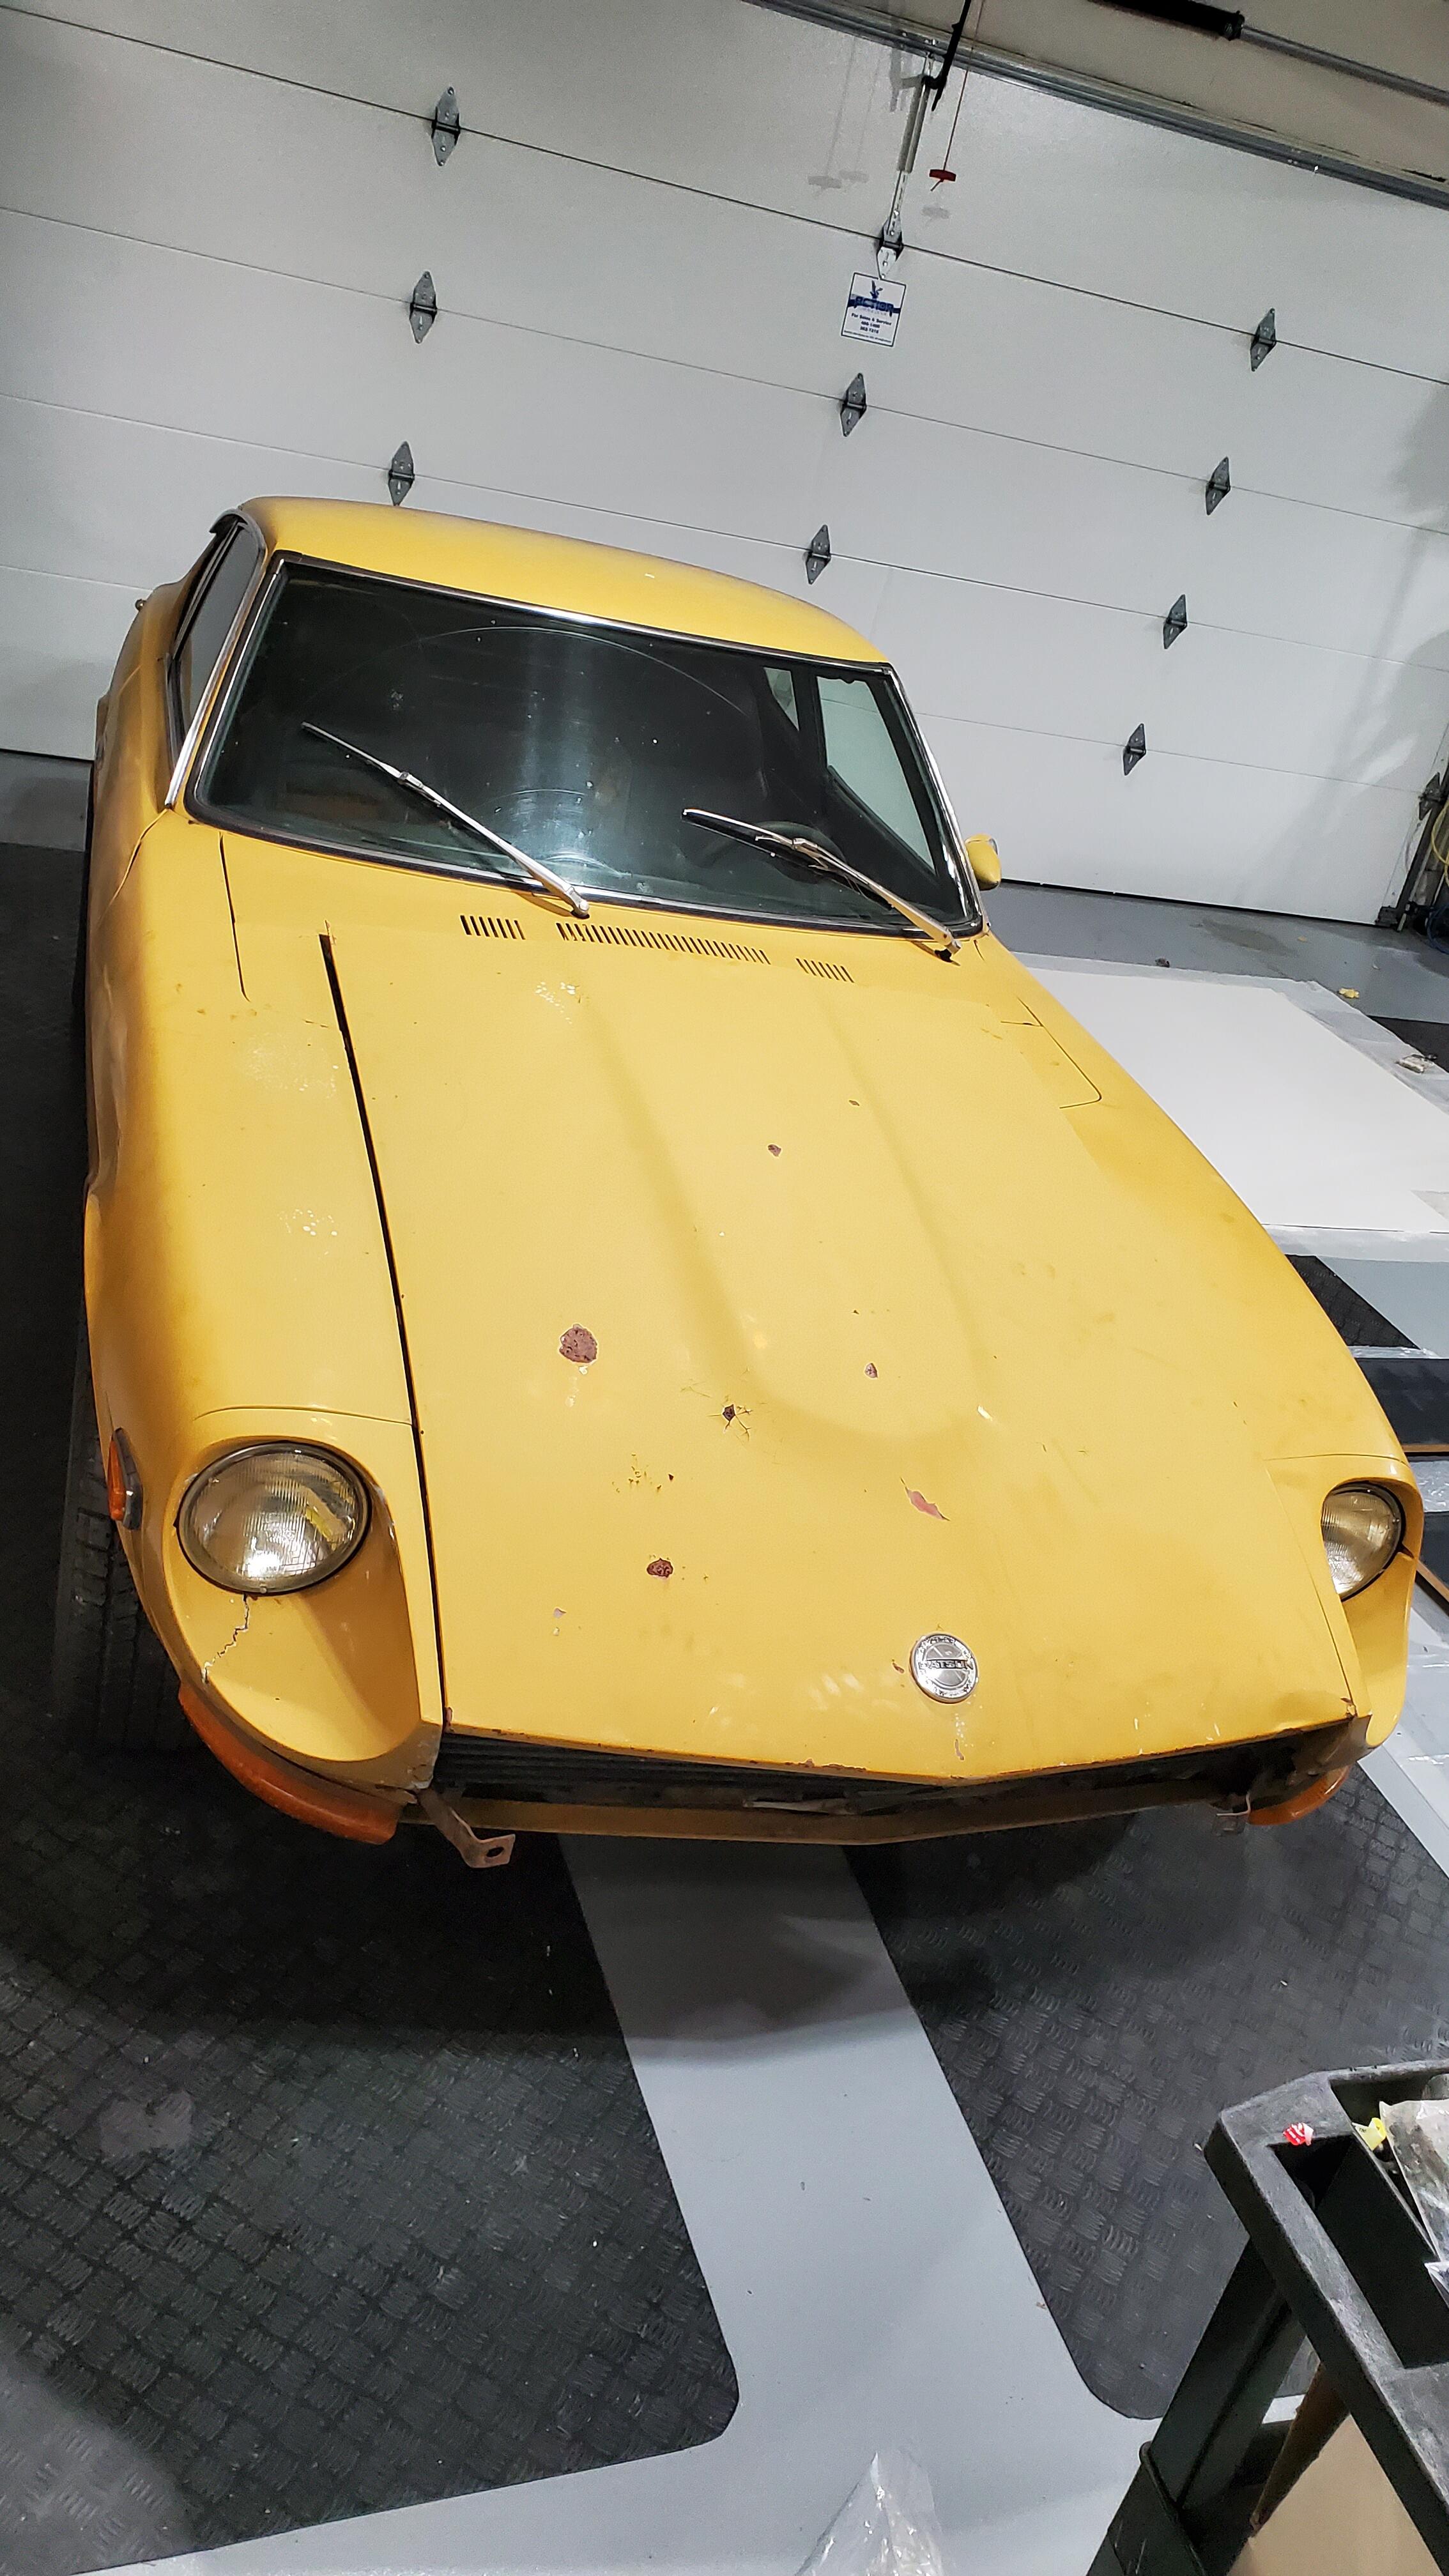
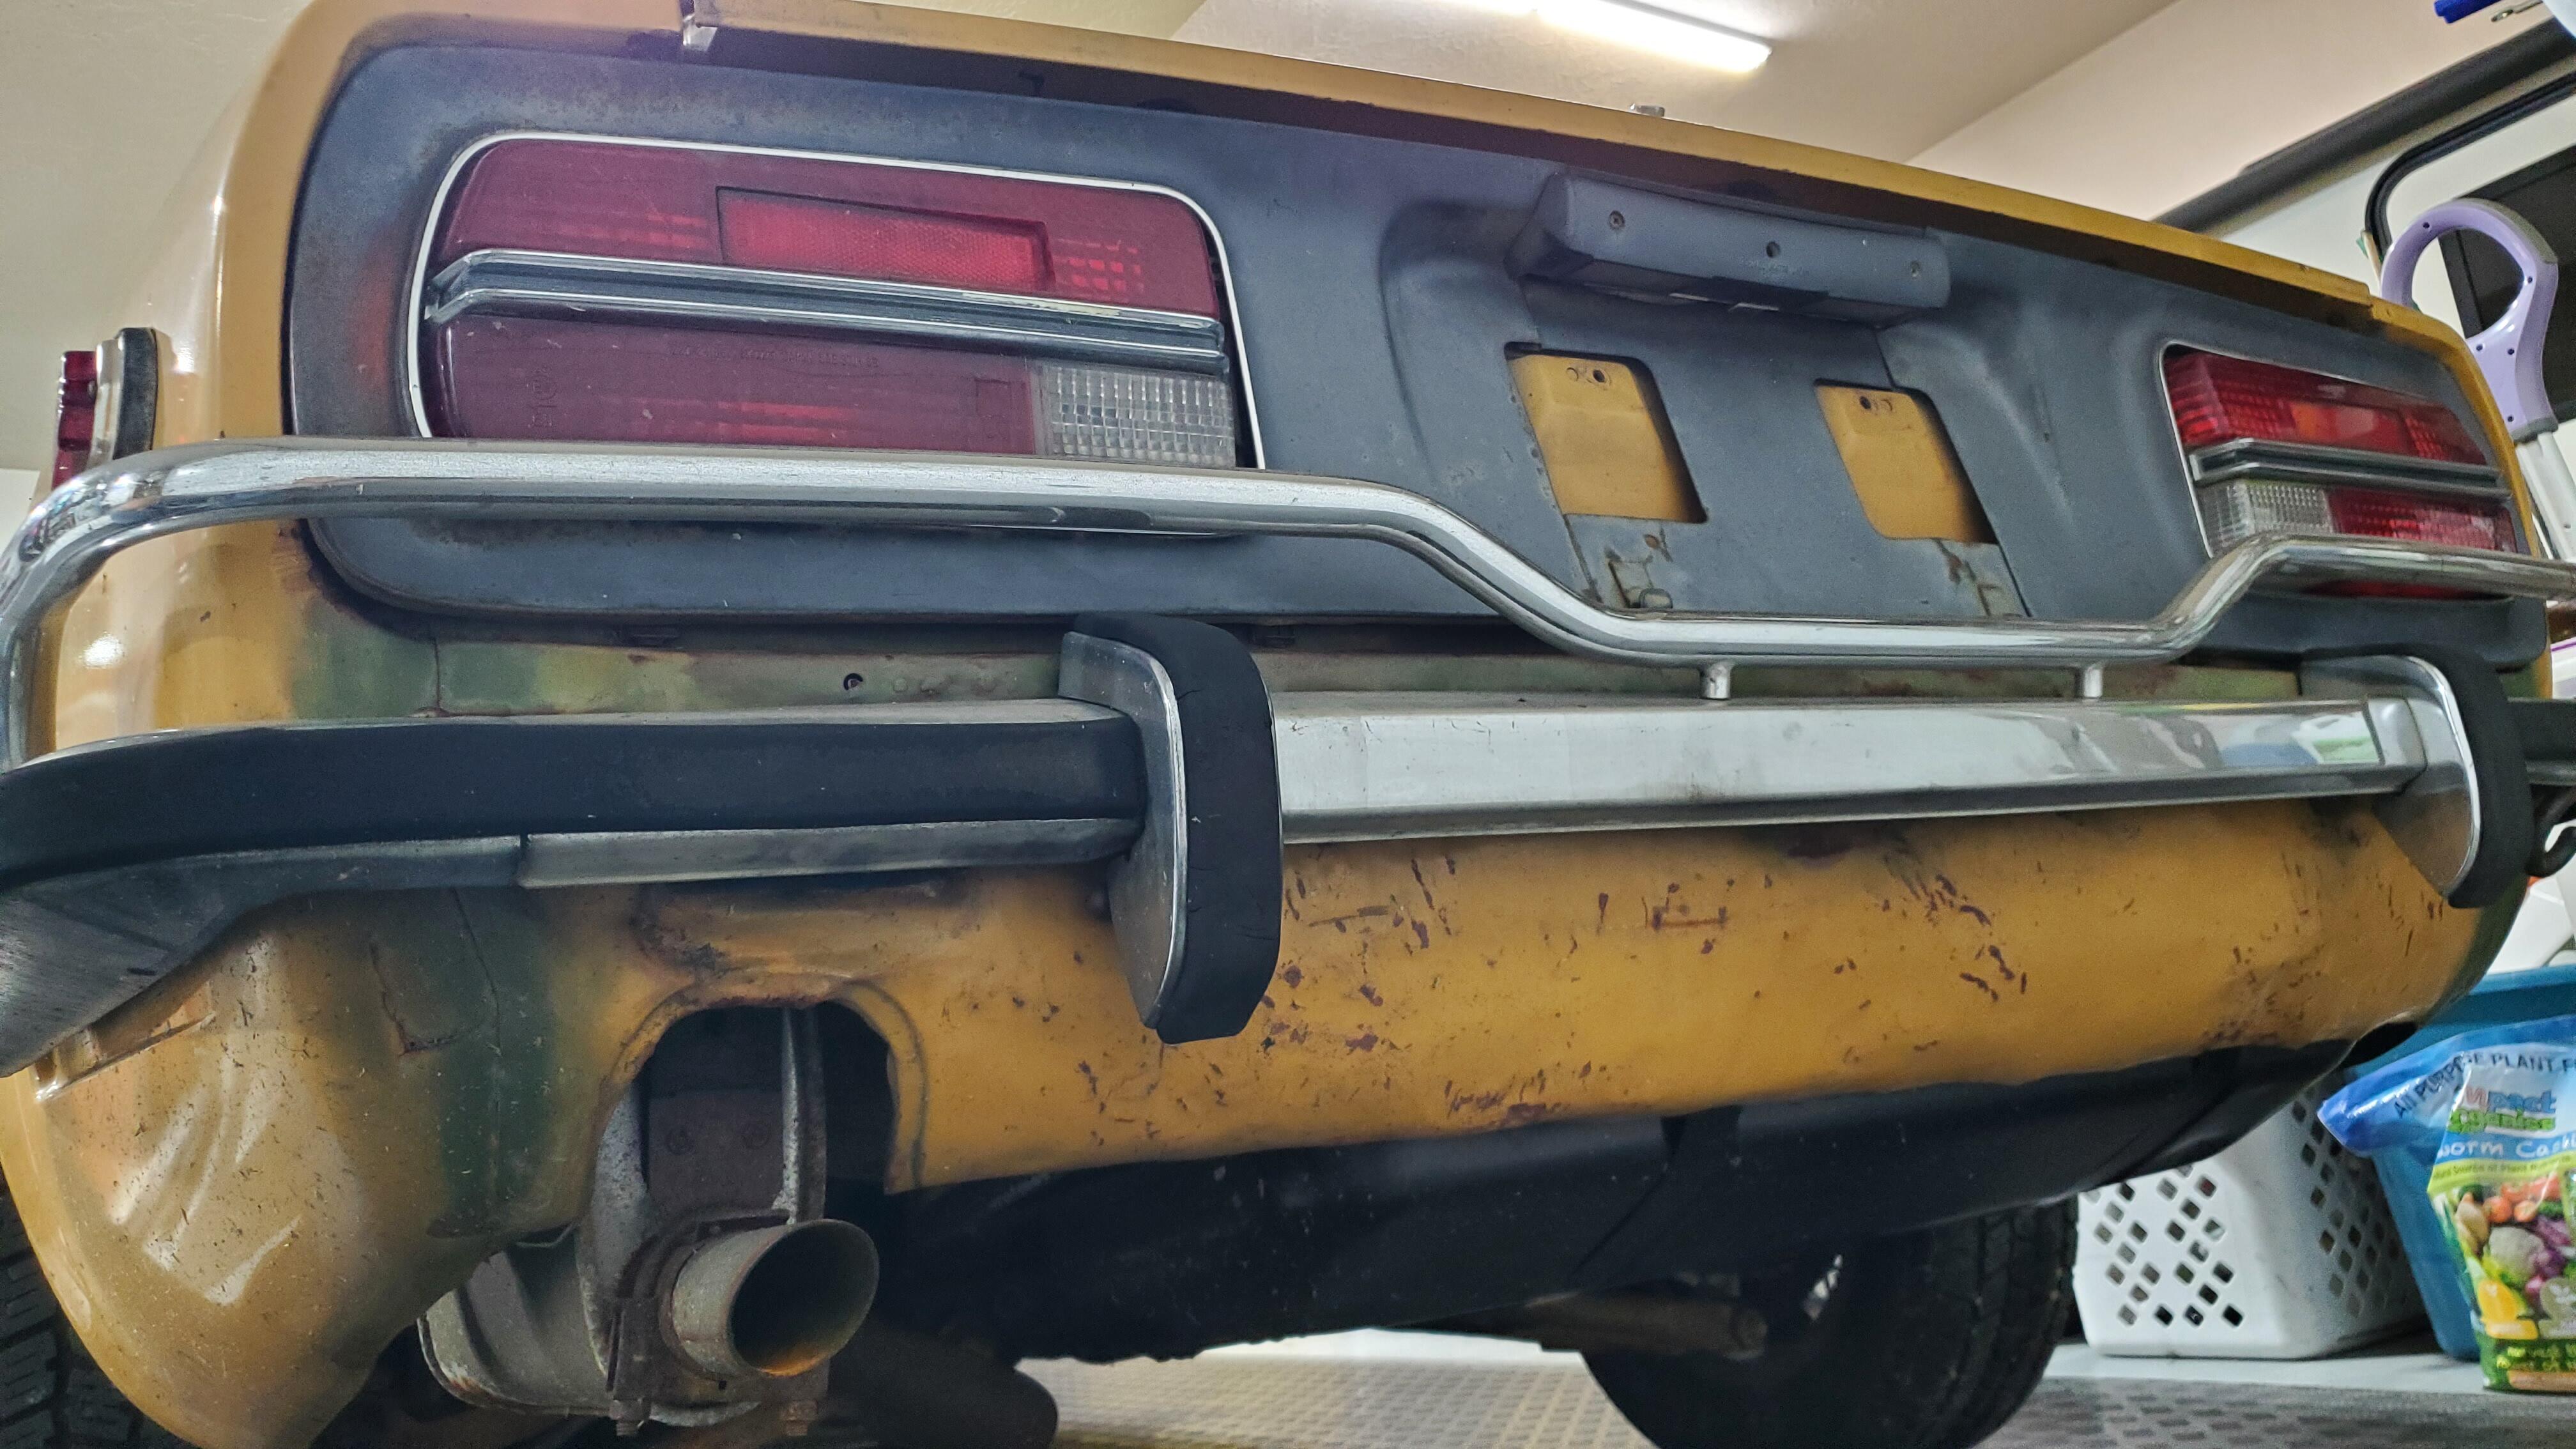
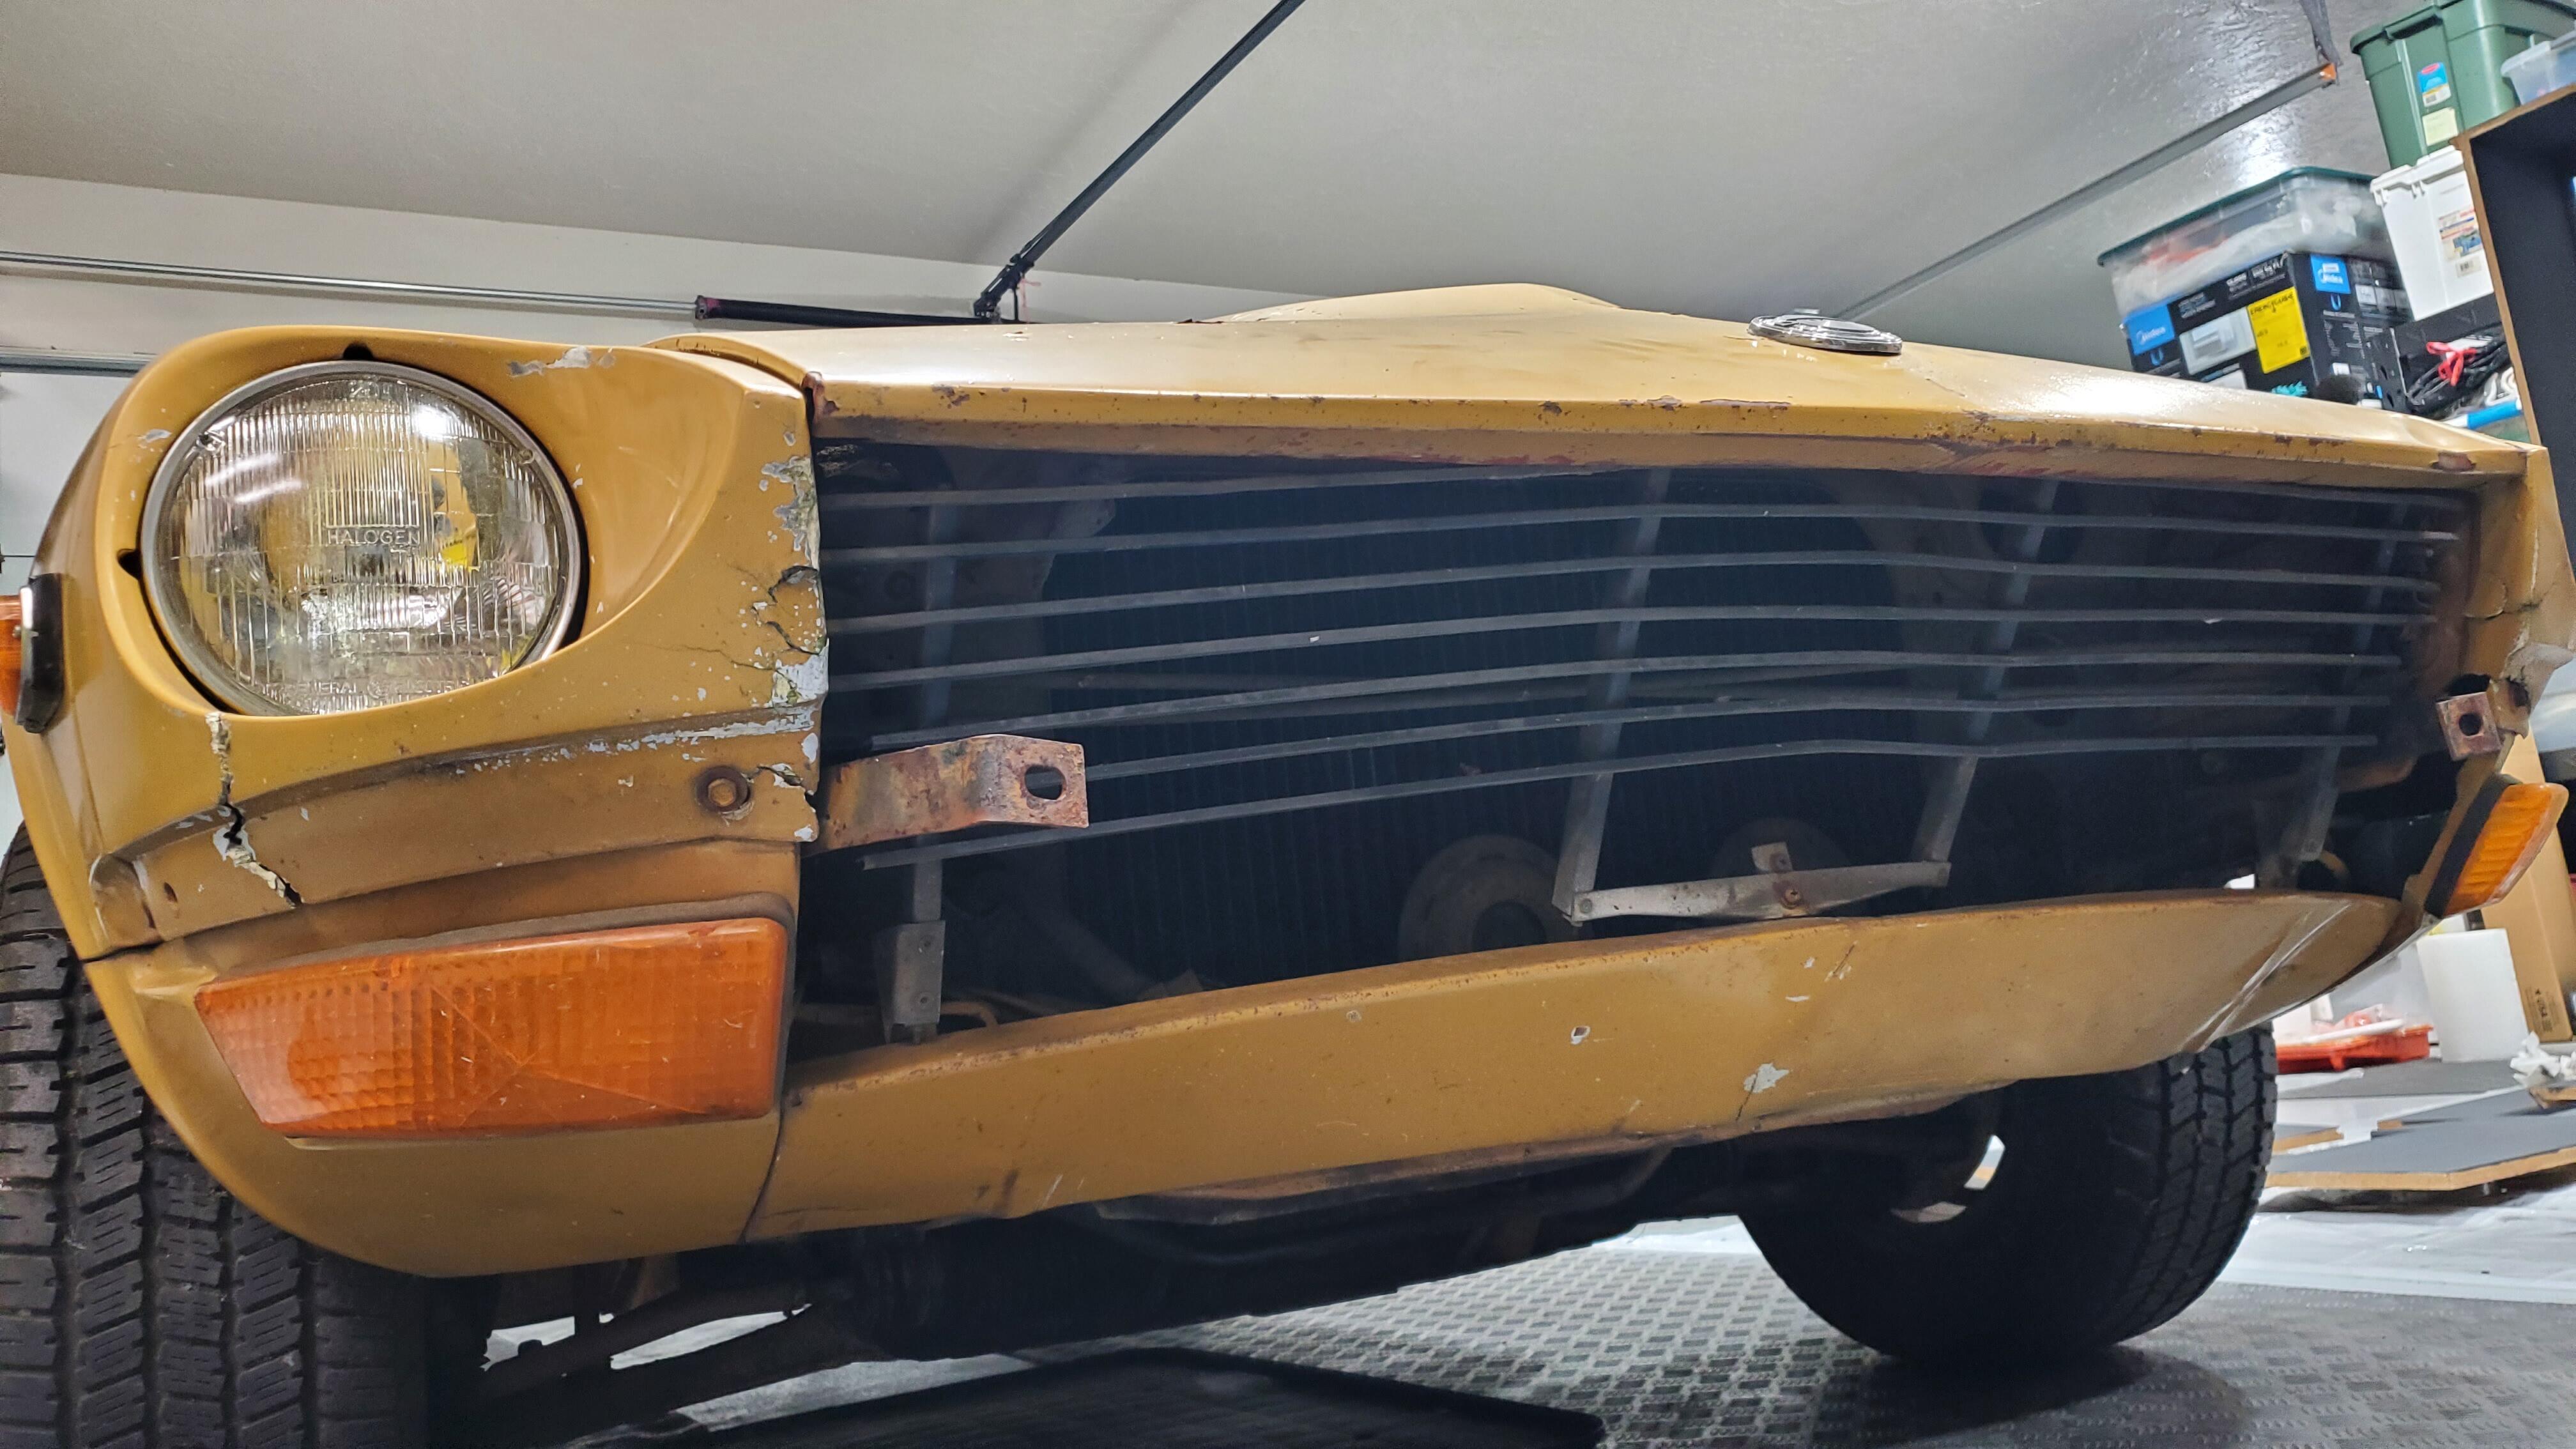
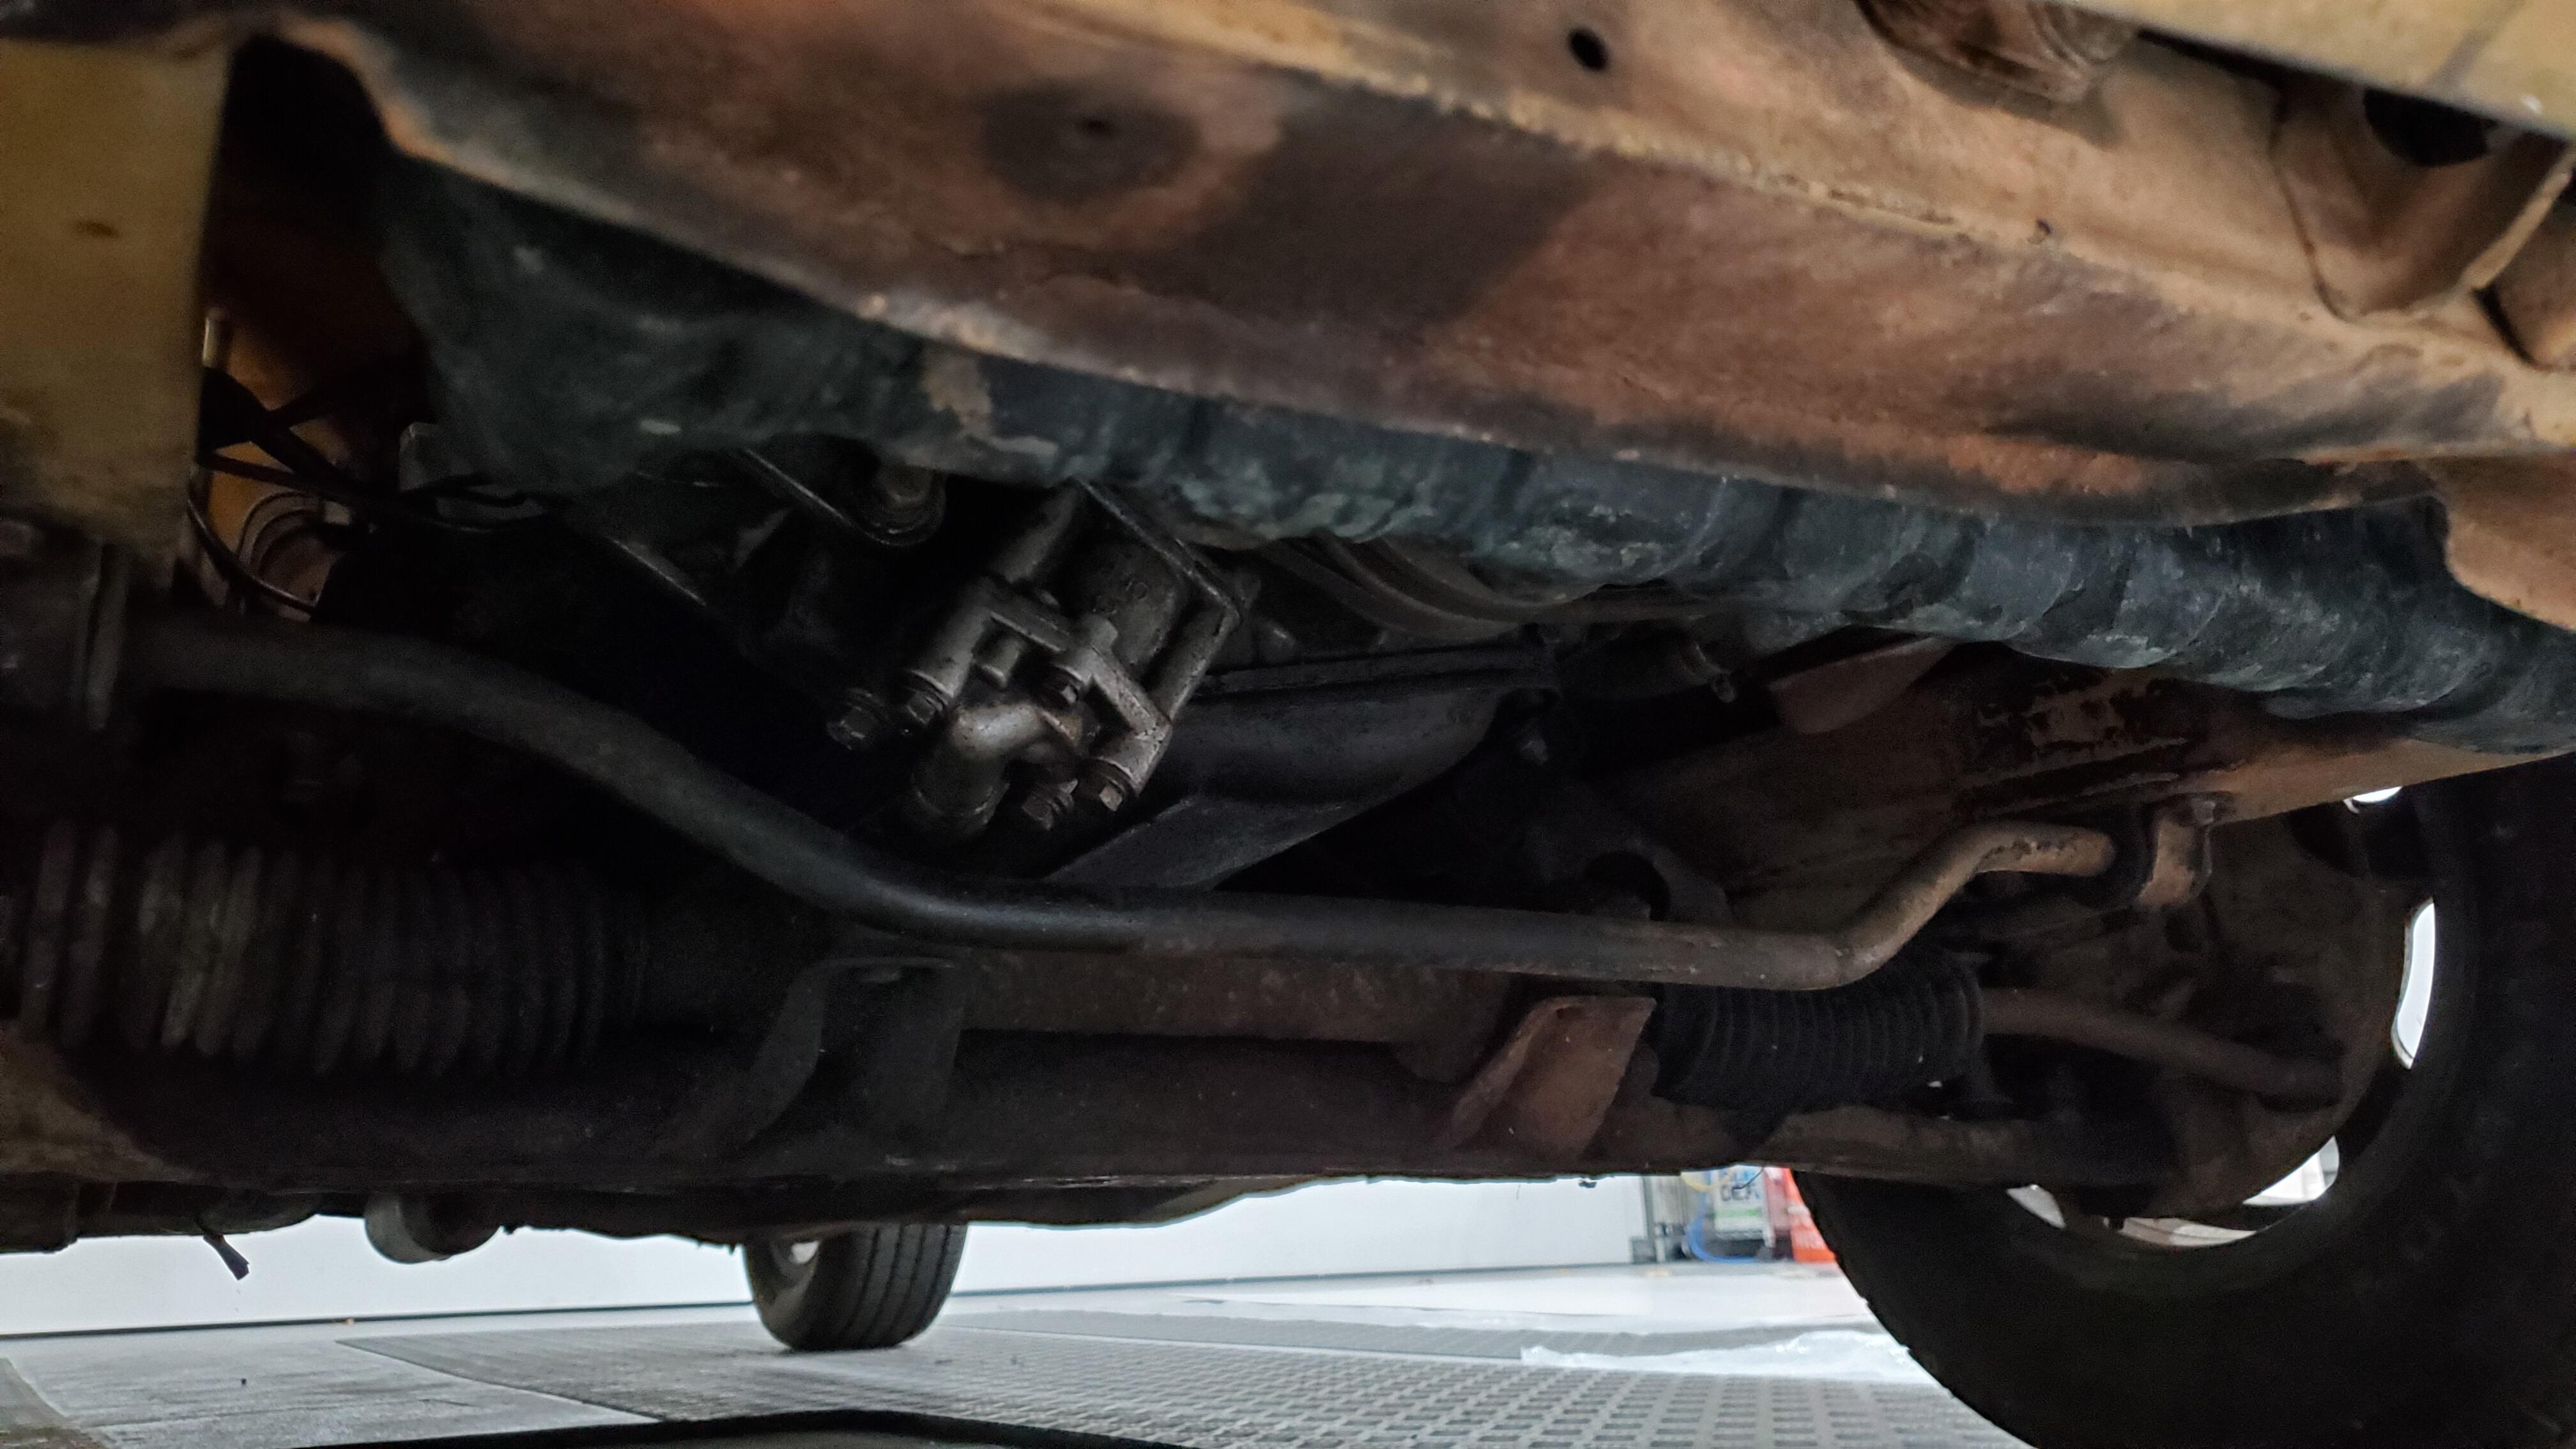
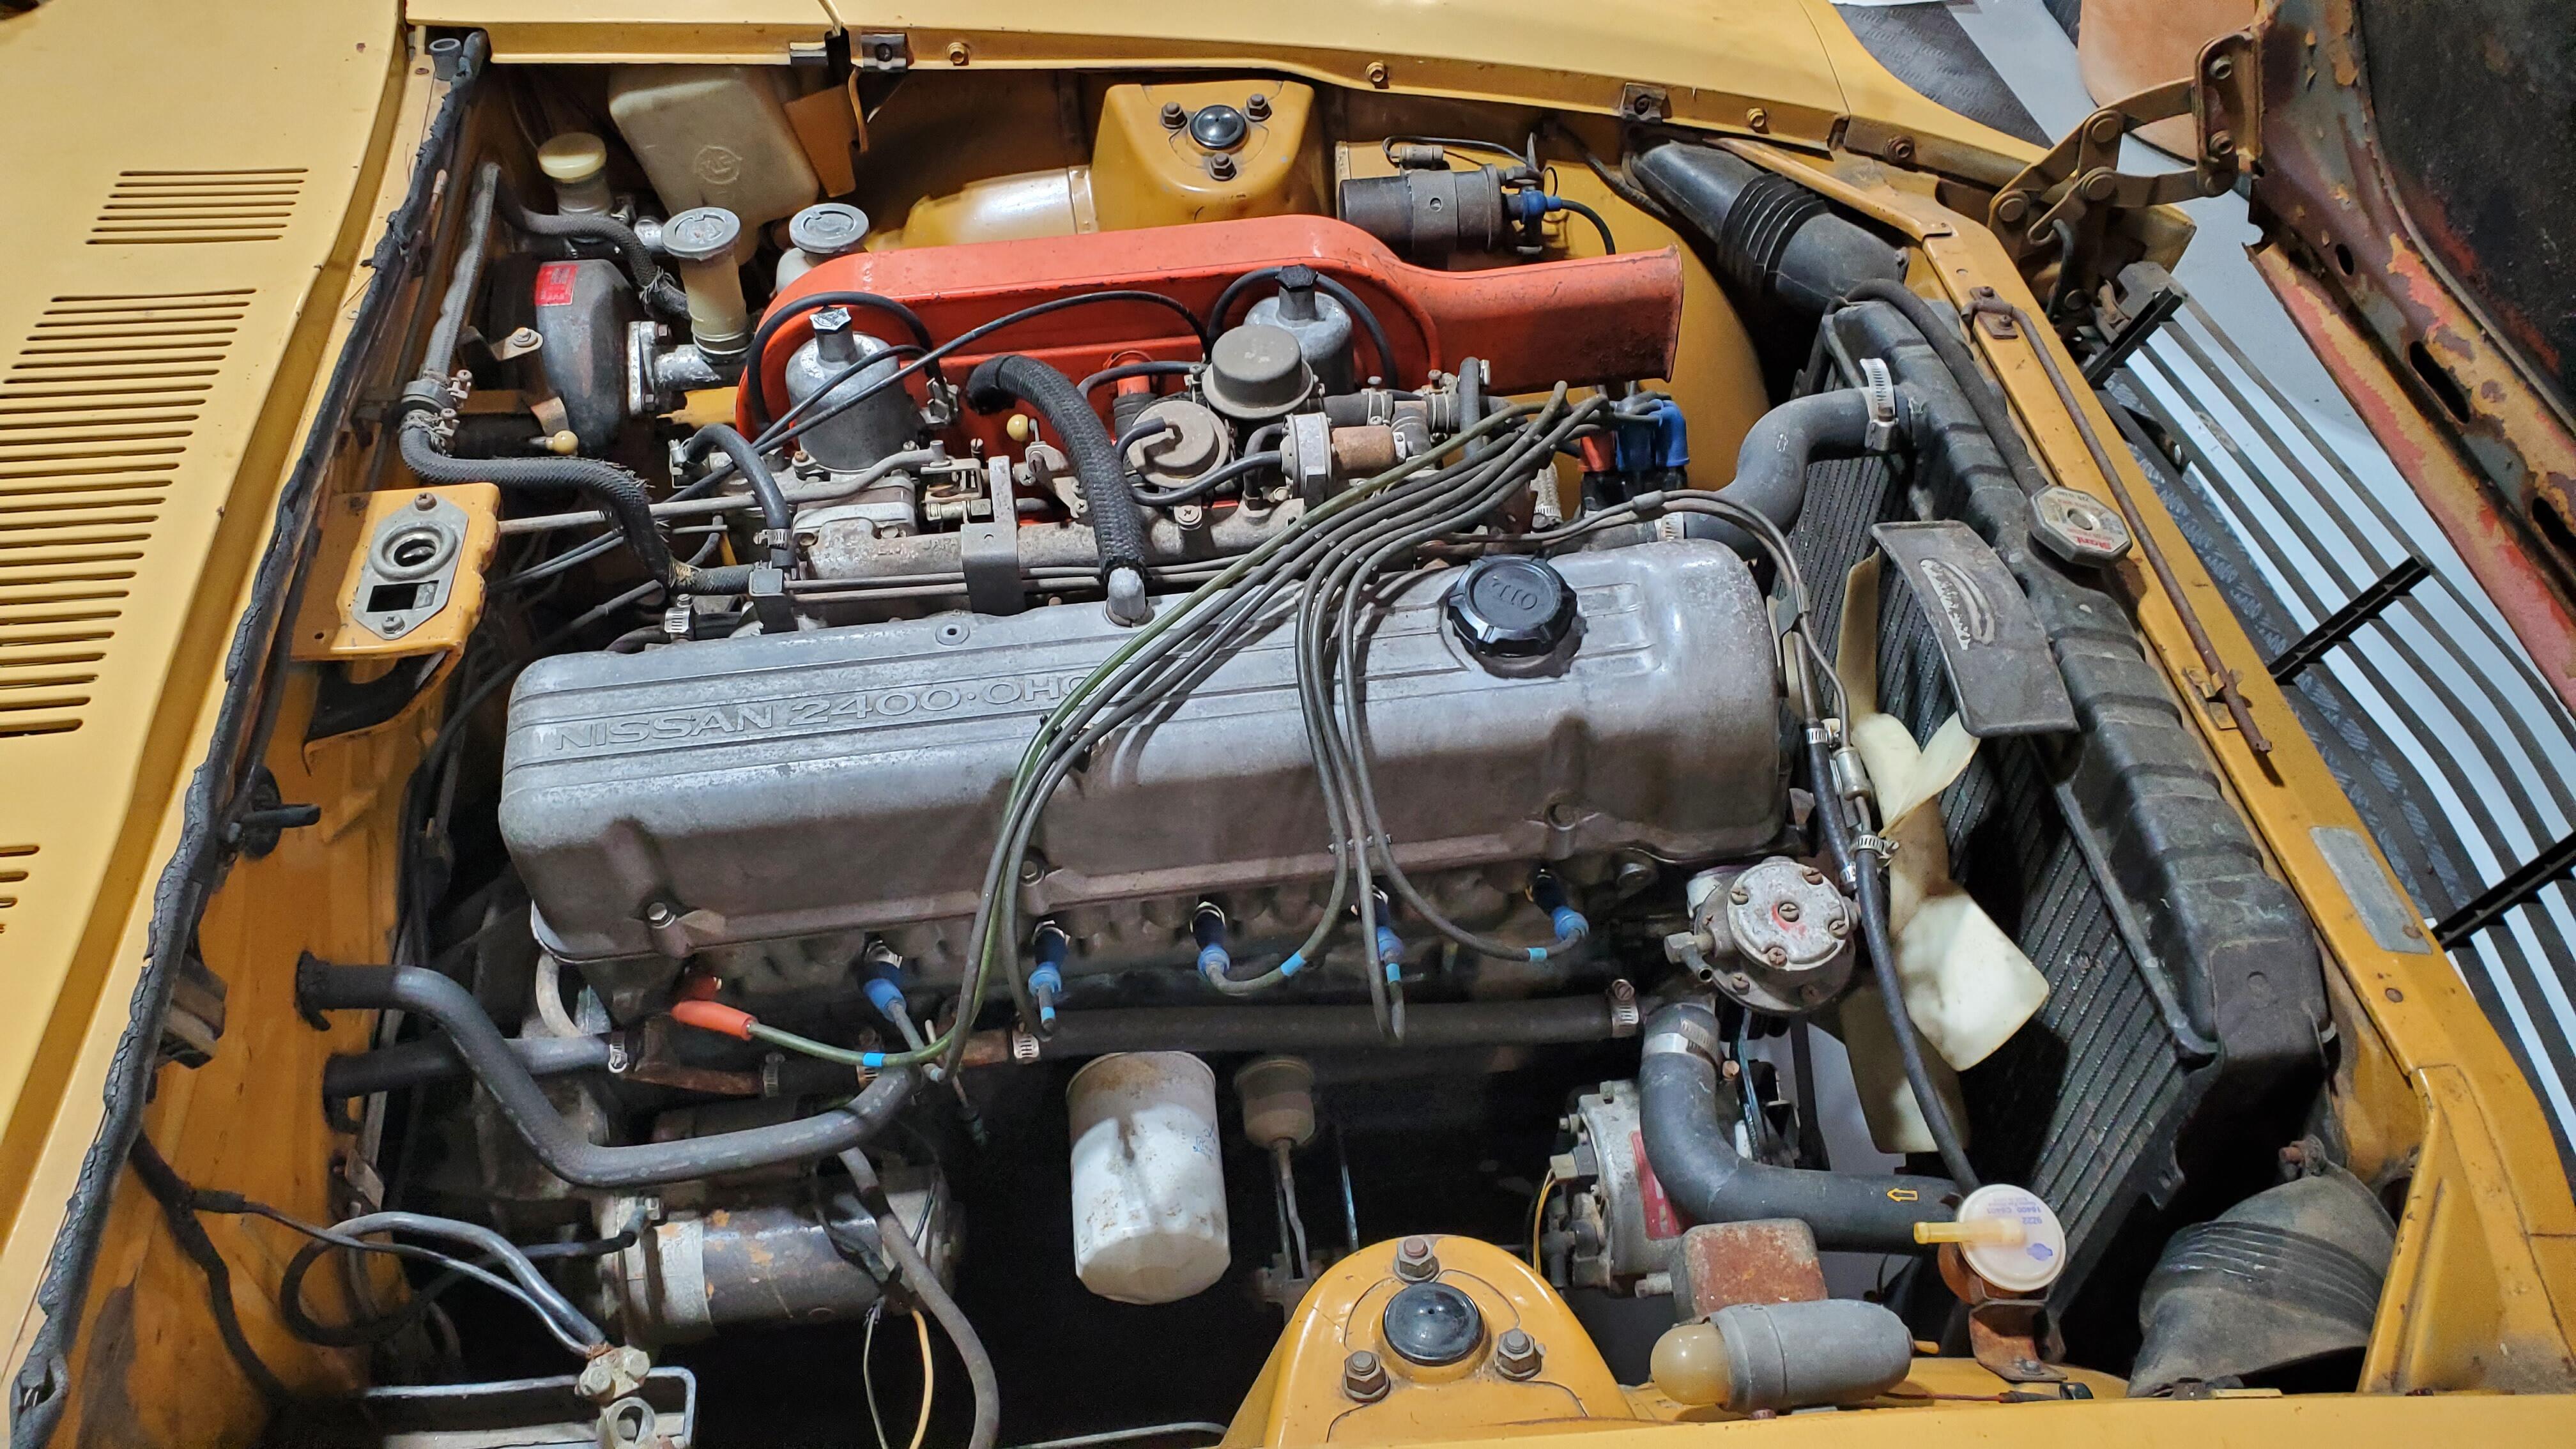
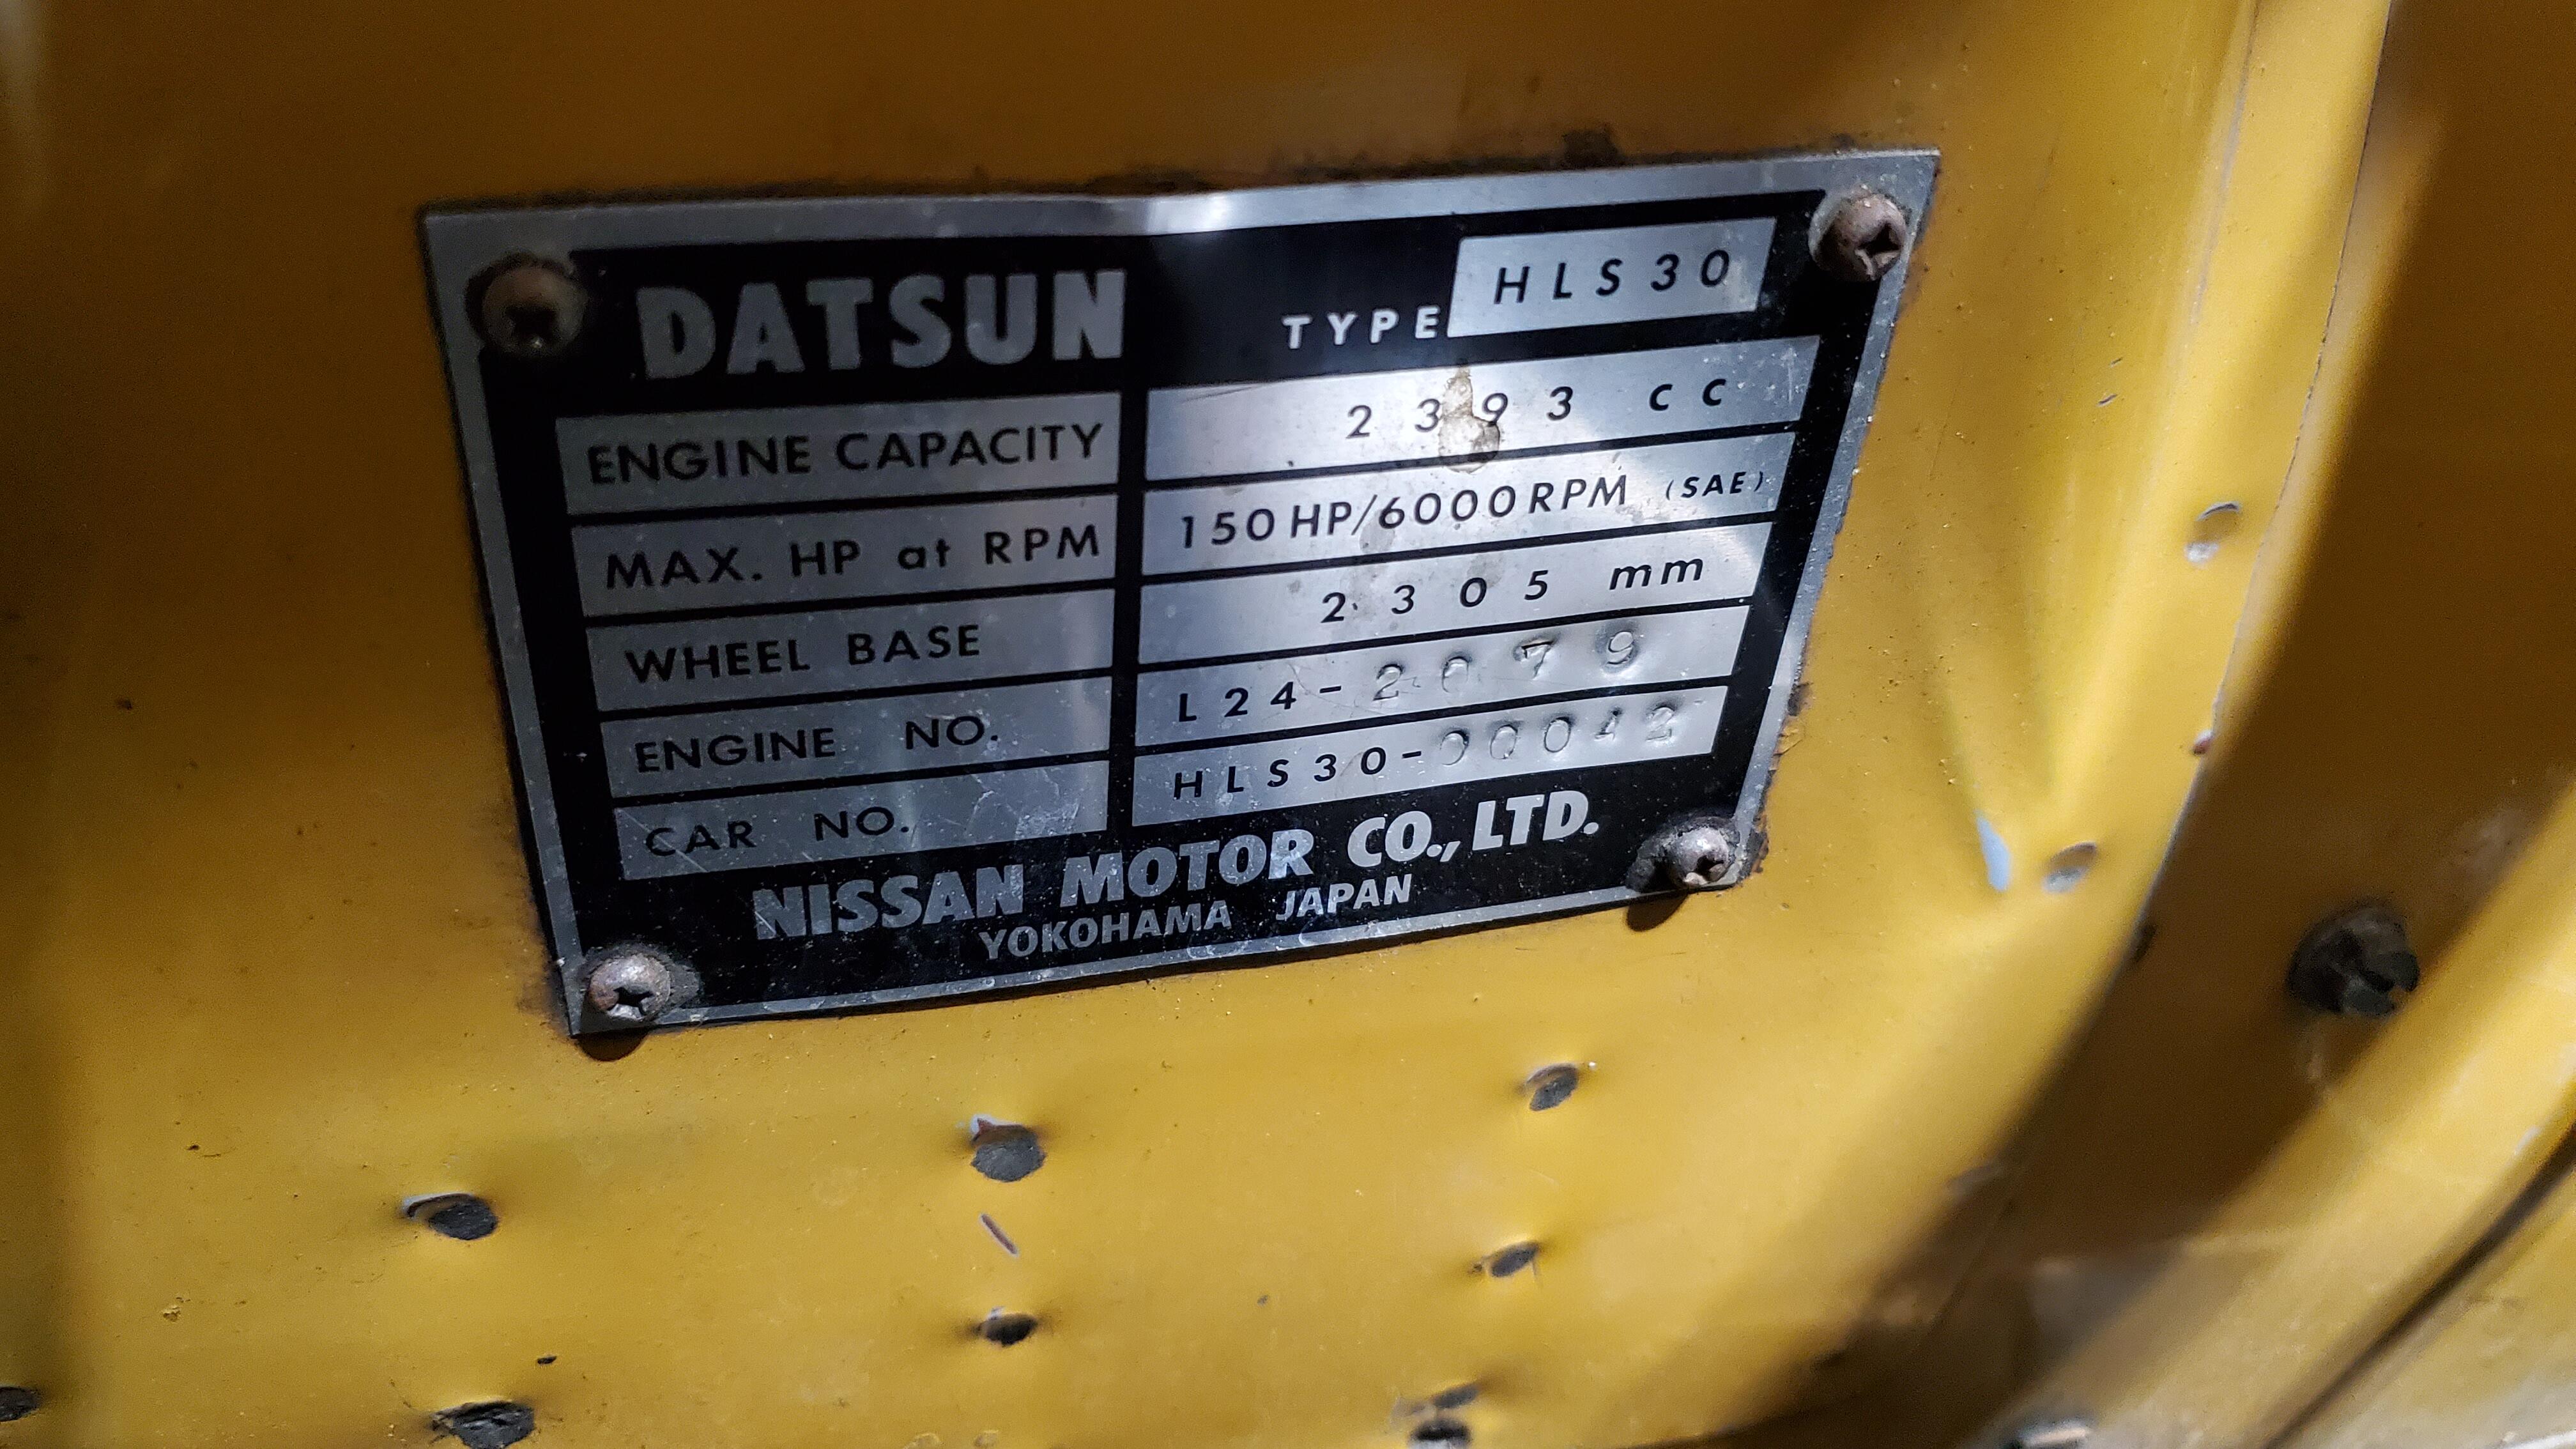
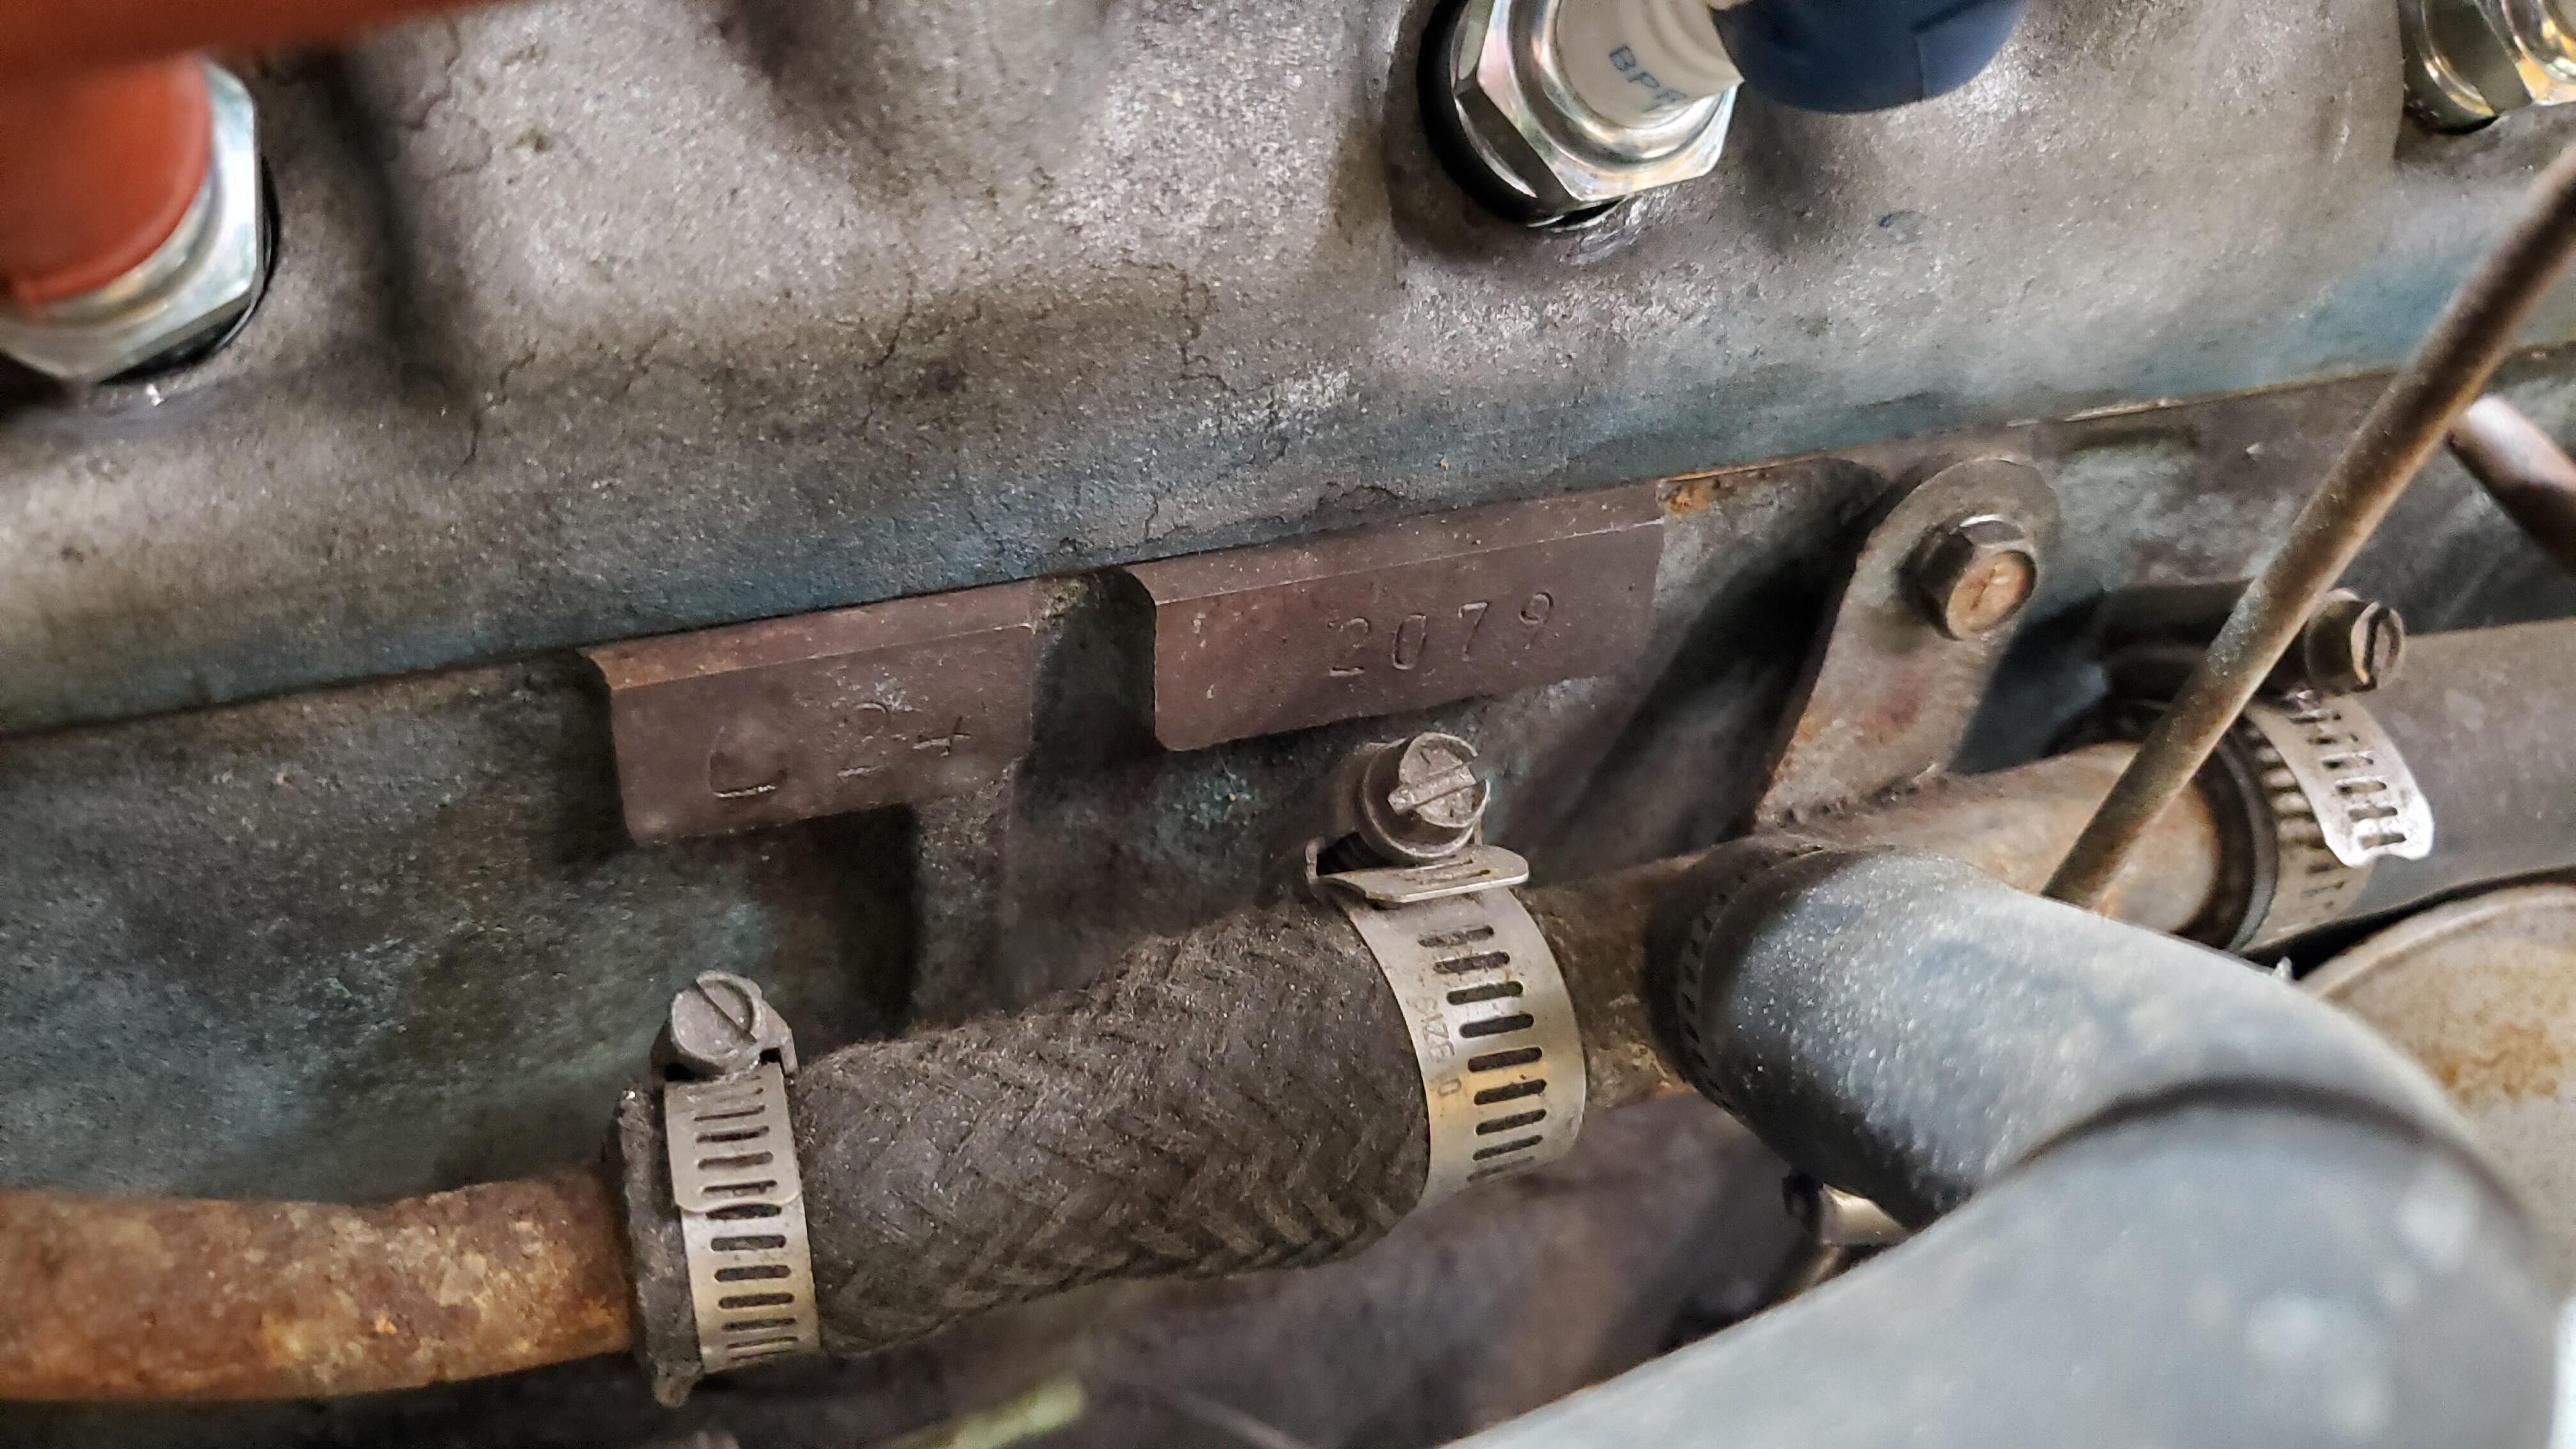
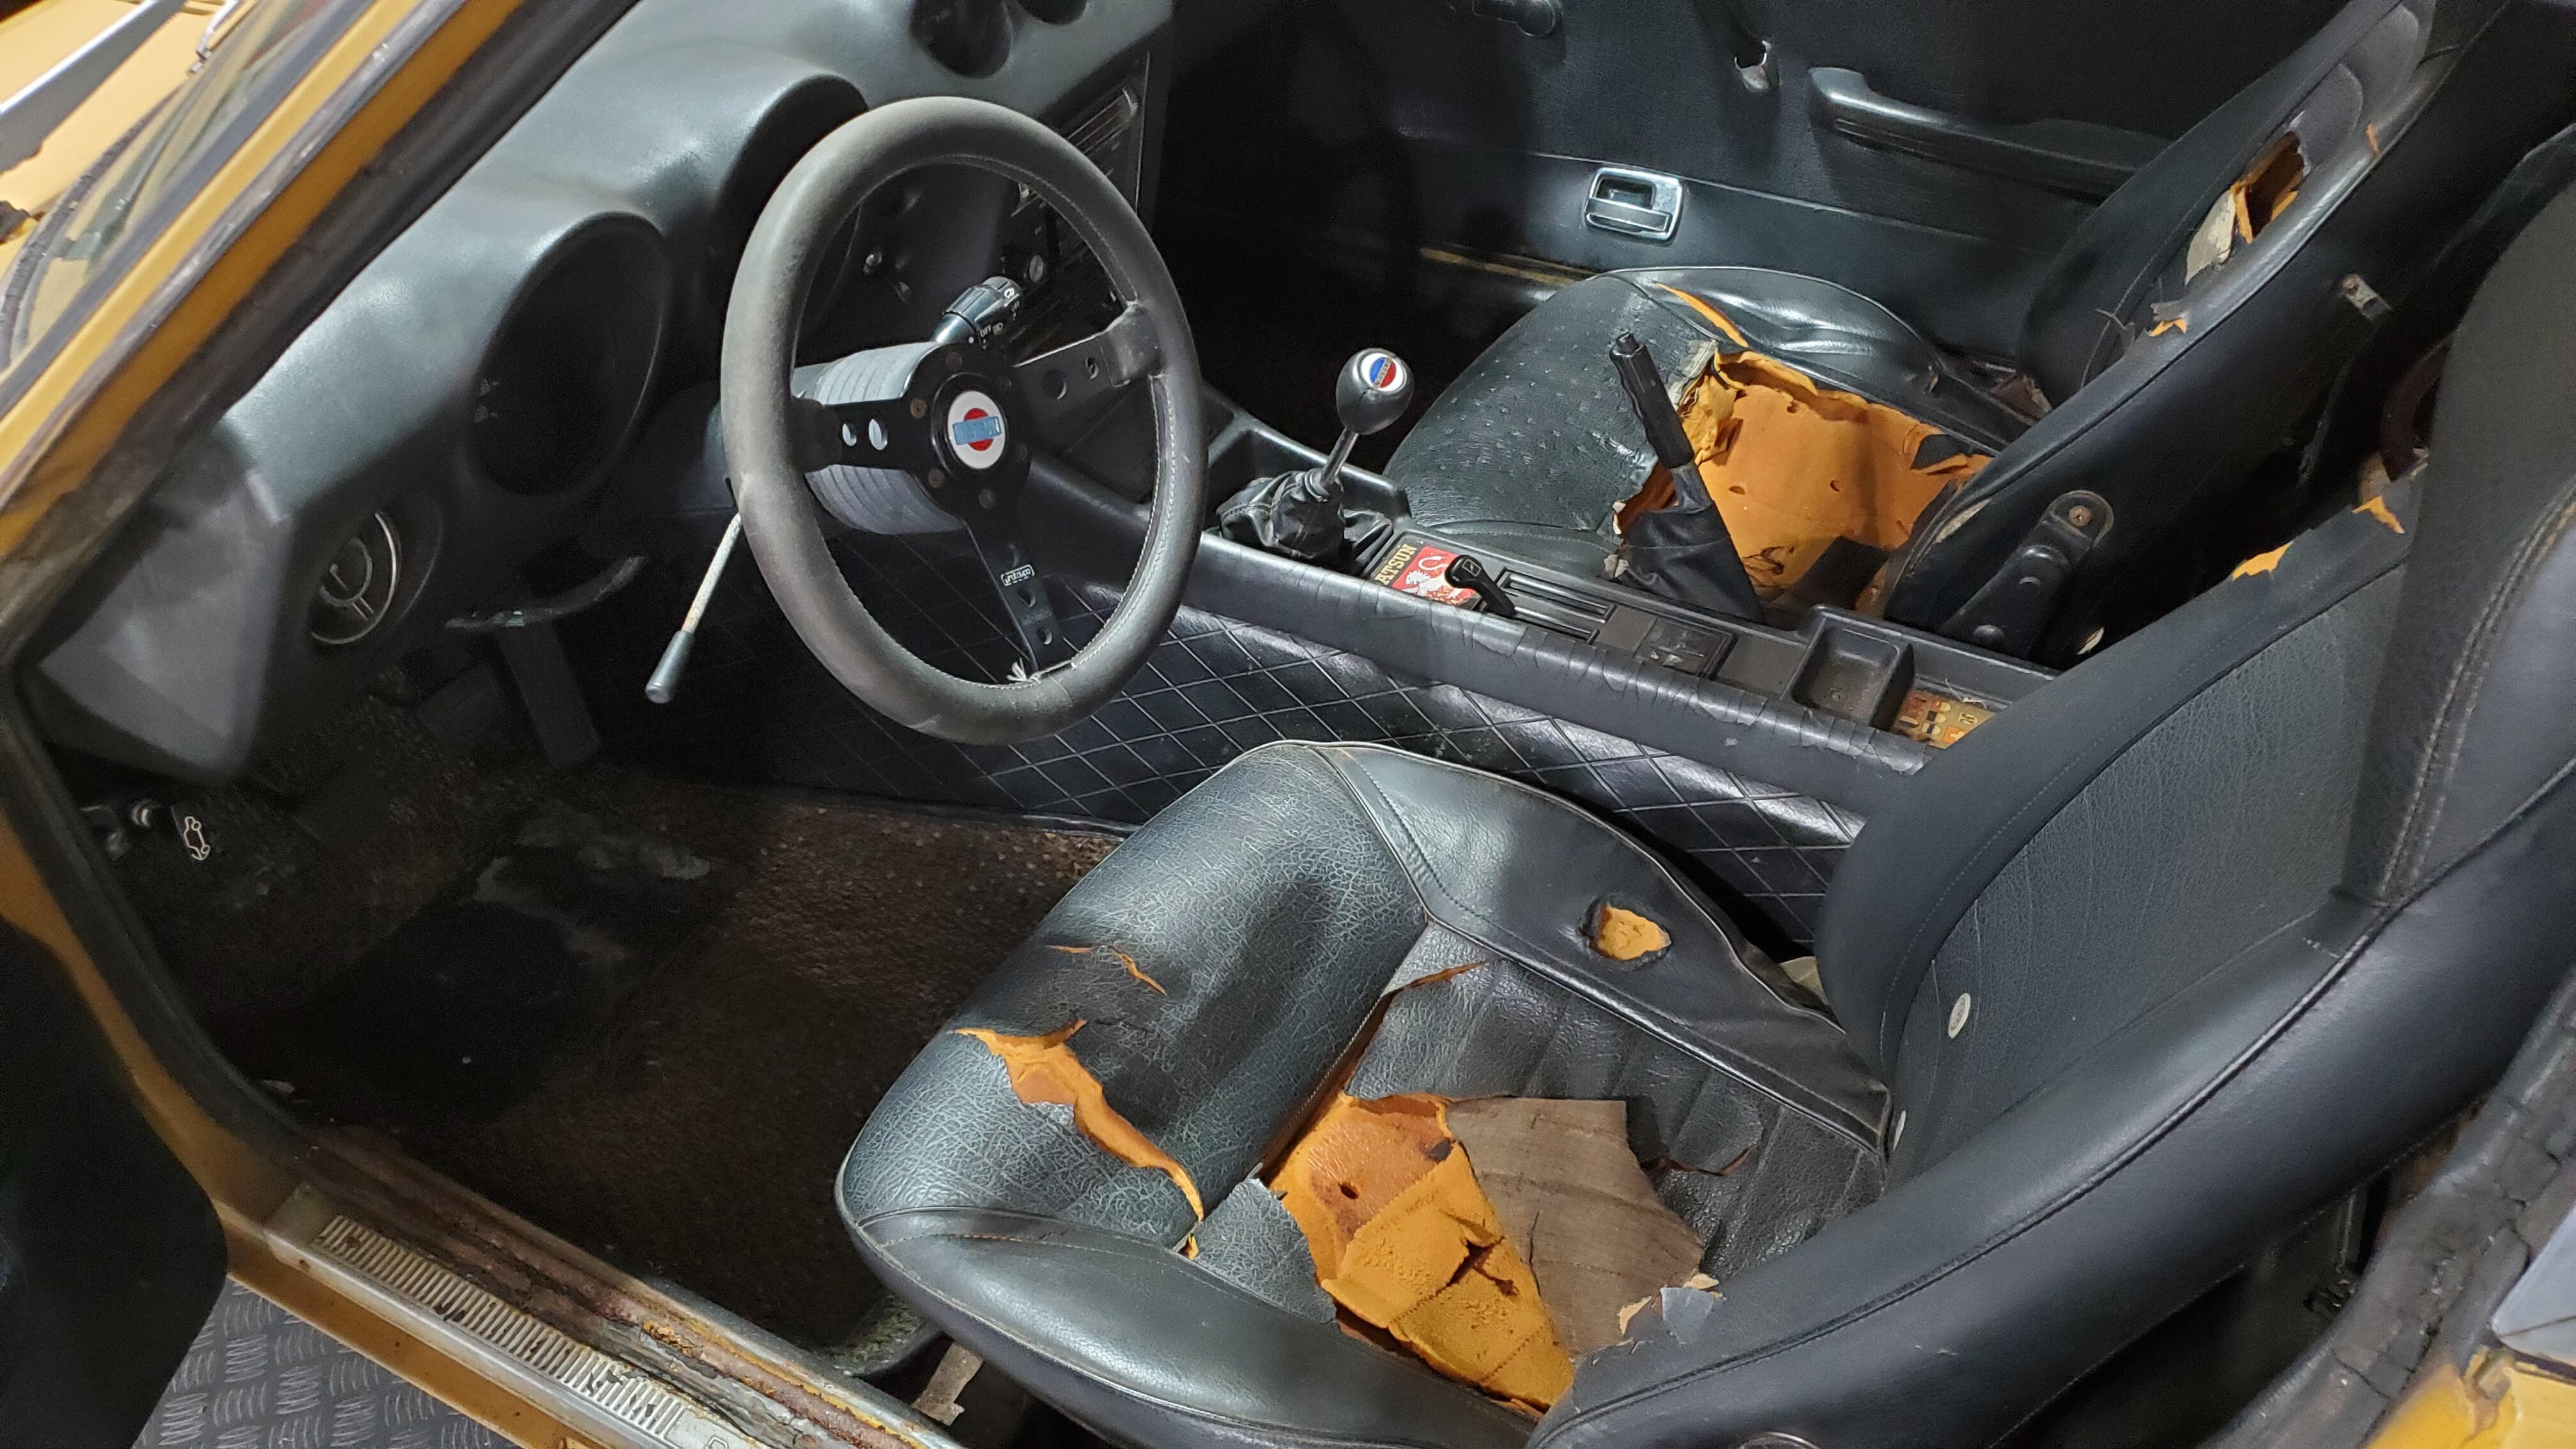
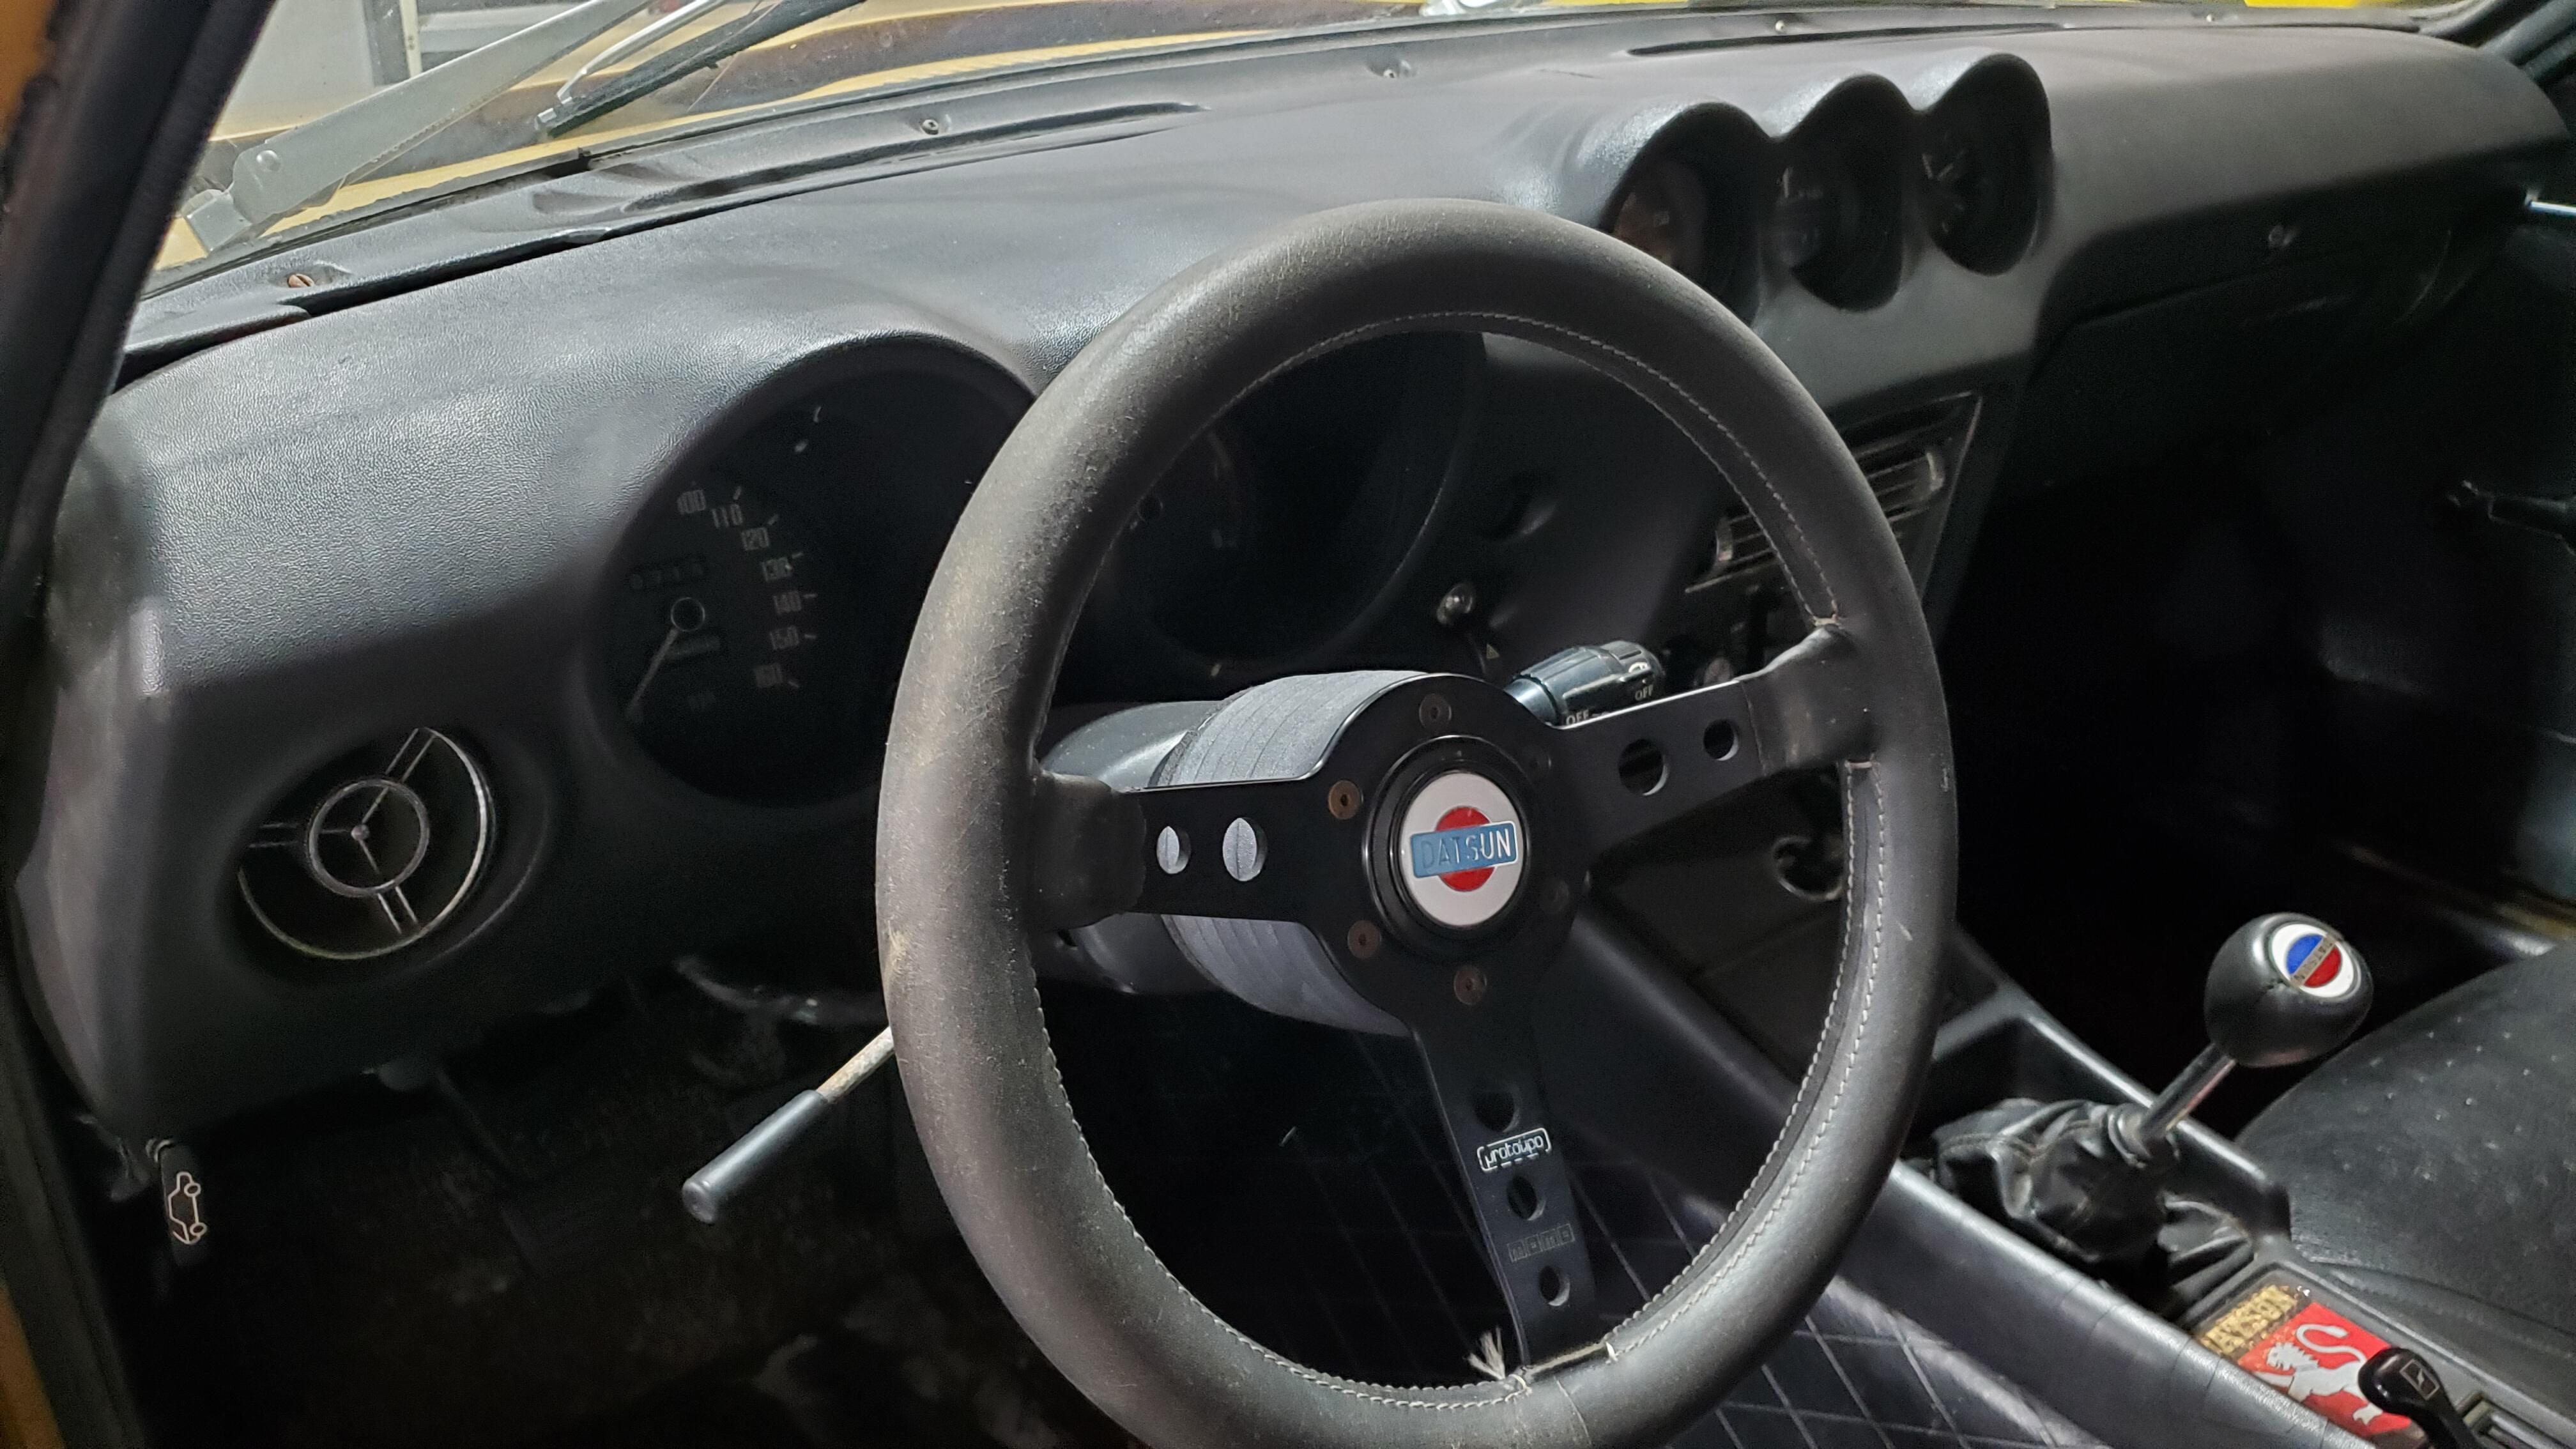
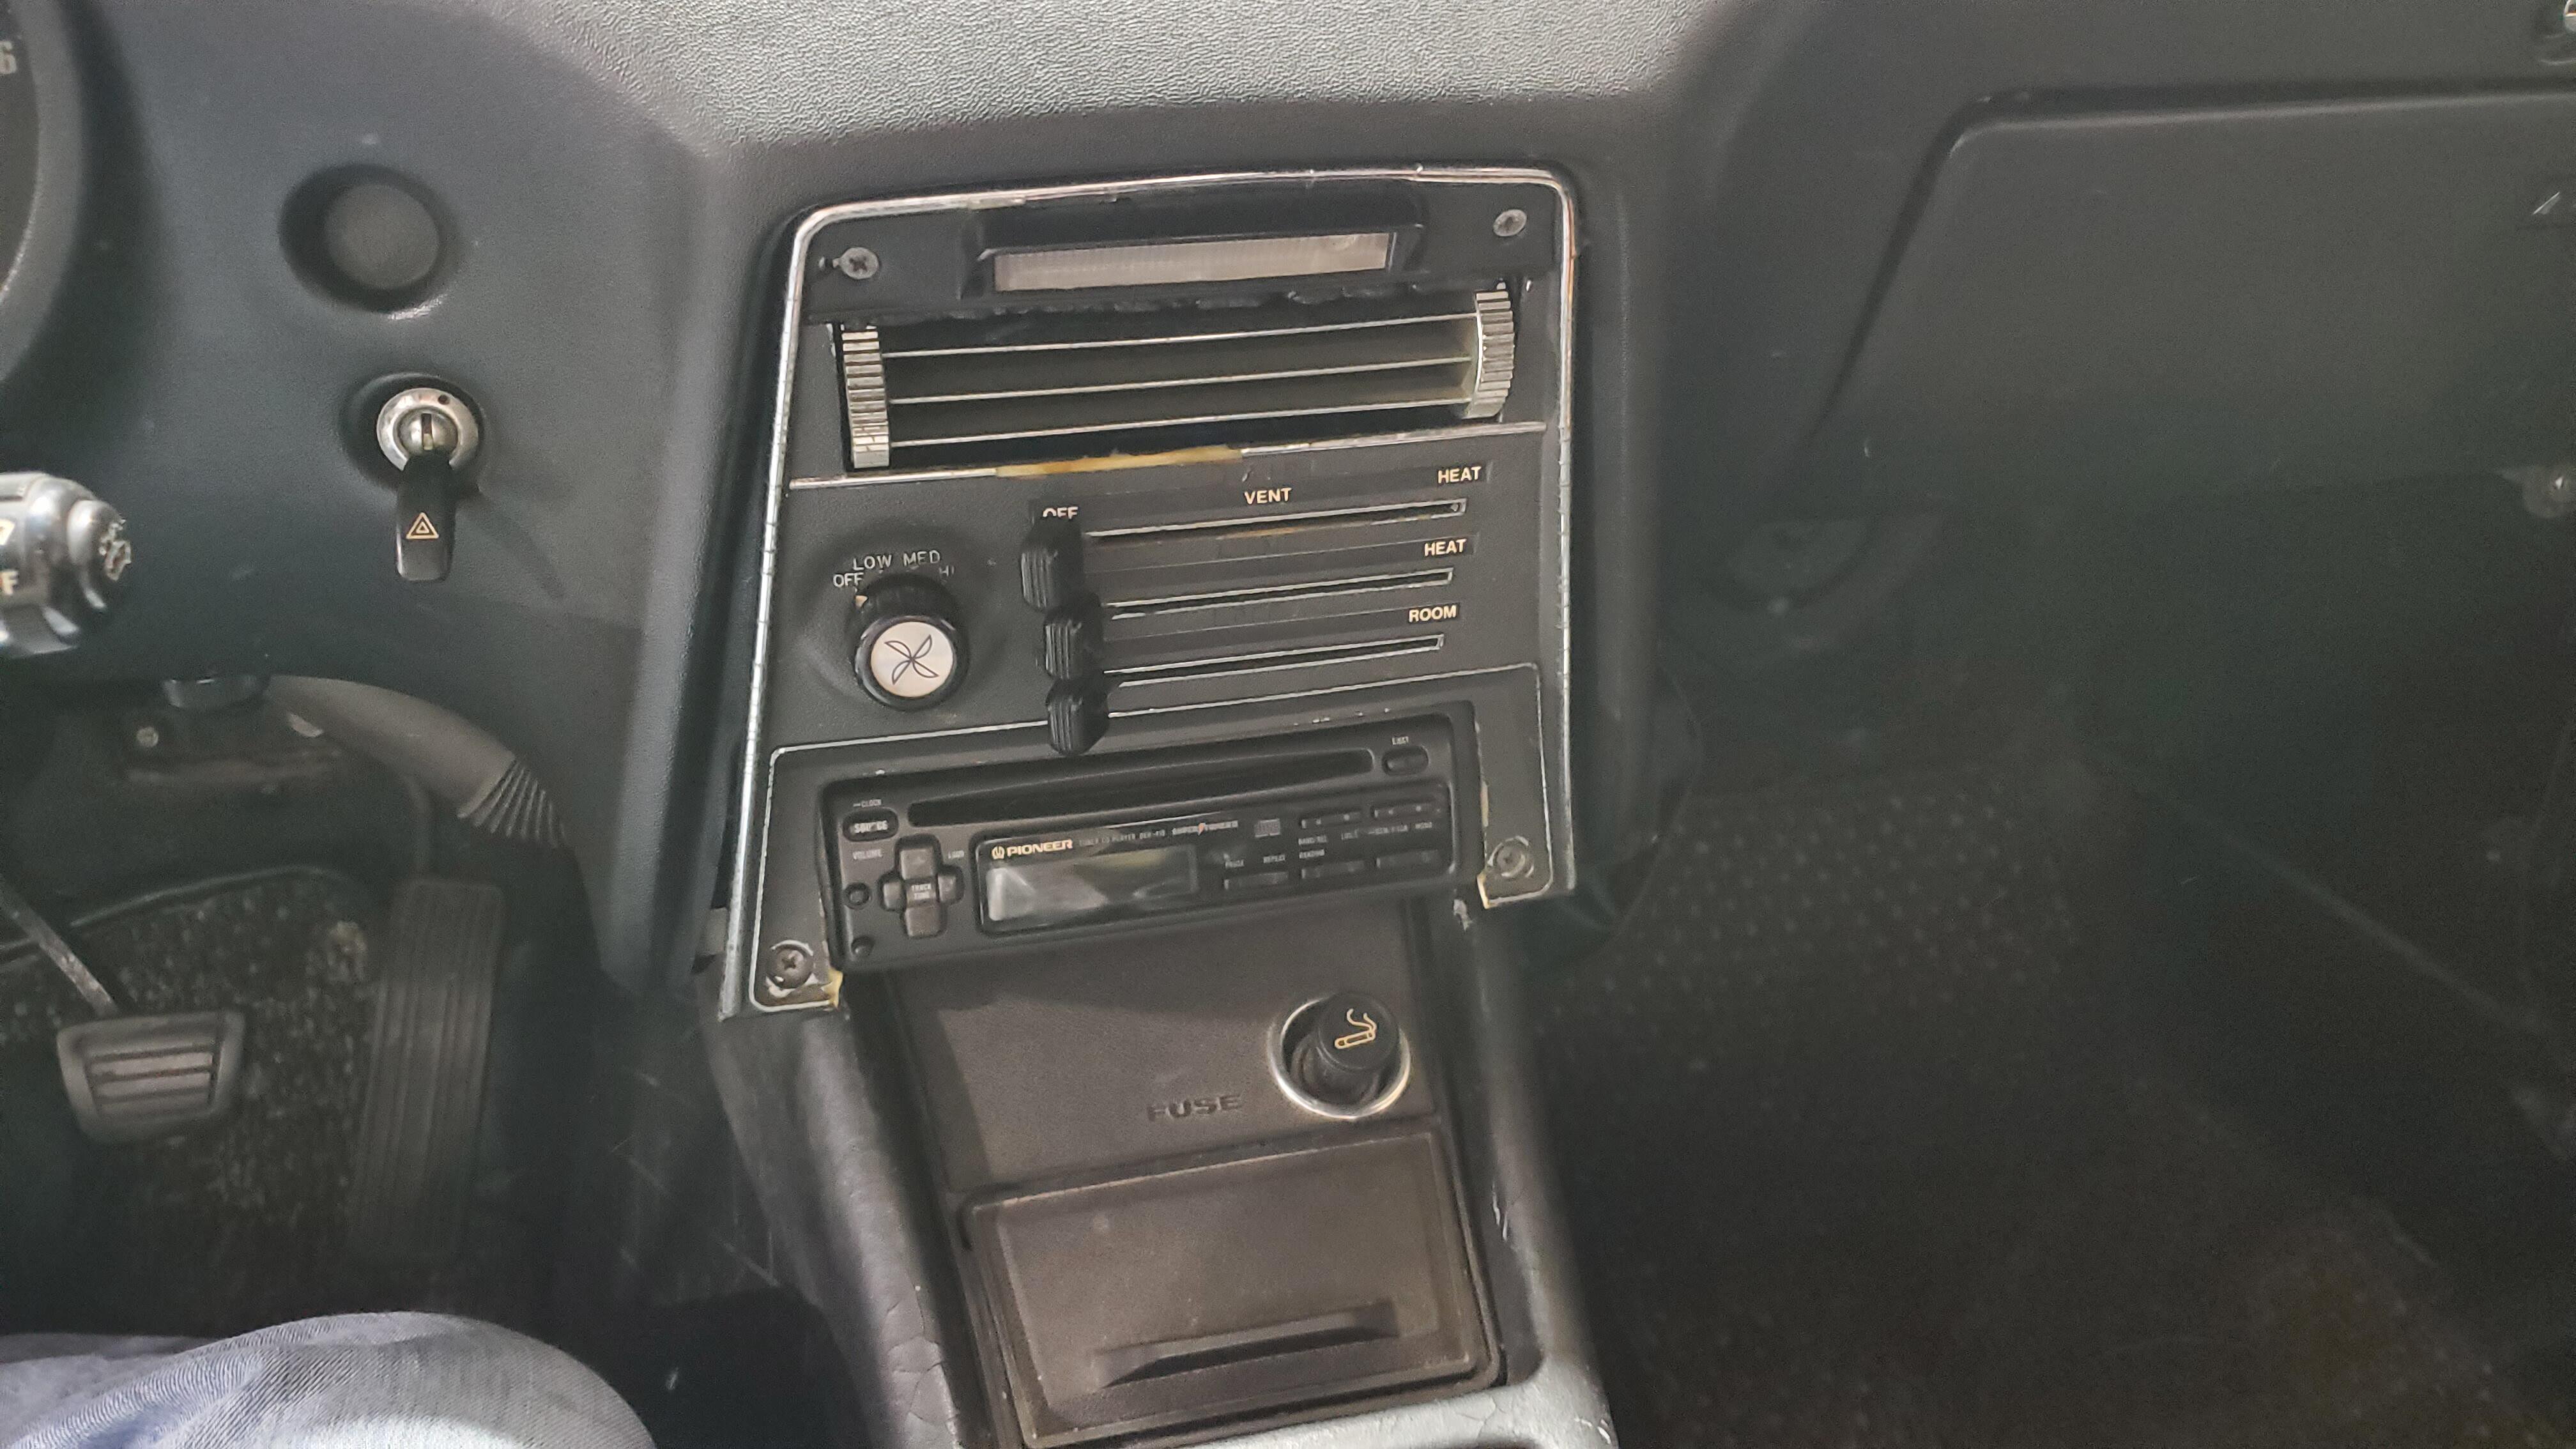
5 pointsHLS30-00042 arrived this afternoon for a complete restoration. Boy, this an early one, complete with the original clear rear window. It's a little beat up, but most of the parts are there. I own HLS30-02614 in the same color, so by the time I am finished they should be looking like twins. The motor runs, which is great, but it will undergo a complete rebuild. Amazingly, the head still has the overspray on the lower portion, which is pretty rare to see. I will see if the machine shop can leave that intact. There are still a few wire clamps in there and the owner has a metal fan (and a number of other key parts), so we should be able to get the engine bay looking like the original. Looks like the hood has been replaced by a later series that was orange. The drivers side door may have been replaced as well, as there appears to be blue paint under the Safari Gold re-spray. Also, the rear panel under the rear bumper is pretty beat up and front bumper is missing. We will need to get one of those. Rear bumper looks to be in pretty good shape. Both headlight buckets are fiberglass and cracked. Both fenders are pretty rusted out in the standard places. Rear hatch panel is also rusted out (as usual) and will need to be replaced by the body shop. The interior will need to be completely restored as most items are severely cracked or worn. The original dash has just one crack in the middle unfortunately. Not sure if that is repairable, I will have to look into that as the single crack is about 2 inches long. The seats have the original vinyl material which is cool, but not usable obviously (from the pics). So the plan here is to completely strip the car over the next two weeks and get the body to the body shop ASAP as that is typically the long pole in the process. I am estimating about 6 months for the body shop to complete all its work. While the body is out, I will send the block and head to the machine shop to get that all in order for me to re-build. All the undercarriage parts will be sent to the powder coater, and all of the nuts and bolts will go out for re-plating. I will re-upholster the seats, clean up the wiring harnesses and replace the connector housings, and then start re-assembling items as they return from the shops so that once the body arrives, everything will be ready to assemble. I will post progress on here and pics as things move along. As always, feel free to comment.

.thumb.jpg.ec8a5efa93ff12430f99926668938dac.jpg)


.thumb.jpg.f70075449a254e1f05b51897c14e5f0e.jpg)


 5 points
 -
2 pointsThanks for the feedback. That's why I like posting here. It helps make the restoration the best it can be, especially with this early a serial number. I actually read up on the crankshaft issue this morning, which seems like it would be more of a concern if we were racing this car. More than likely, this will be more for show and my goal is to keep as much of the original parts as possible. I will have the machine shop balance the original as that is the best option. Glad you mentioned it. I will check with the owner on the paint versus powdercoating. I lean towards powdercoating due to it's better resistance to fluid damage caused by fuel and brake fluid. However, I do want to keep this as close to original as possible, so I may just go with the original paint finish. I will have the owner make the call on that one.2 points
-
1 pointI recently couldn't get my clutch to bleed (just after I couldn't get my brakes to bleed), and the problem was the little slider valve found on the piston assembly. No pictures, but the little valve for the clutch master cylinder is much easier to get to than the one on the brake master cylinder. it has a little spring on it. Should be easier to disassemble and make sure it is not sticking.1 point
-
I thought about powder coating the suspension pieces and opted to go back to the original paint finish for authenticity reasons. I would encourage you to try to stay to the "original restored" side of your project rather than replacement items and "over-restored" finishes. For instance the crankshaft comment. Just have the machine shop balance the original. You are going to find that the early original pieces are very unique. I see you have an early gas door knob.1 point
-
1 pointAnd that clutch M/C is the later type. You can do a kinda-sorta bench bleed of the clutch master by loosening the flare nut on the outlet and just let it gravity bleed into a rag. If fluid doesn't flow, I suspect it's a problem with the linkage. If you loosen the nuts that hold the clutch master onto the firewall, does it a) push away from the firewall, b) remain pulled tight against the firewall, or c) it's kinda neutral? It should be neutral with a tiny bit of slop in the linkage. If it pushes away, you need more play in the linkage and may not be opening the internal valve.1 point
-
1 pointWell if you are simply looking for a test, I would do something like this: Hit the brakes and confirm that the rears are locked up. Let off the brakes and confirm that the rears are still tight. Reach behind a rear caliper and loosen the flare nut. Let some fluid bleed out. If the rears relax when the fluid bleeds out, then you were holding pressure. If they don't relax, then it's probably something in the caliper itself that's sticking. And if the rears DO relax, I would repeat the test, but this time let some fluid bleed out from the flare nut on the underside of the master cylinder. That will help identify where along the path the issue is. If it's holding pressure, I would expect it to be right there at the master cyl. And if that is the case, I might be able to help walk you through removing the check valve.1 point
-
This picture reminds me that my Z432 has interesting spot welding. The welder might have been ‘on the job training’ I am sure! PS30-00087 (mine is 00088) has perfect welding for both strut towers, I checked it before. Moreover, my Z432’s left strut tower has perfect welding. Quality control must have been a top issue always, workers at Nissan Shatai became getting better and better then finally reached 6000 S30 cars per month of production in late 1971. Enigines too, according to Nissan 40th Anniversary book (published by Nissan) it says after 1972 assembly line for engine head was fully automated to achieve more accuracy and efficiency. L-series was mass production model of course. Kats
 1 point
 -
That'll be a valuable car when it's done, even in this soft market!1 point
-
1 pointJust because you are using a later master cylinder, I wouldn't assume it doesn't have check valves. In fact, I would stand by my original belief that there is one. Let me put it a different way... Every master cylinder (70-83) I've messed with has some sort of check valve built into it. Some of them do more "checking" than others, but all of them had some sort of device inside that either stopped, or at least slowed down, the fluid back into the master. Some of them had a "residual pressure" valve built into them that would hold some small amount of pressure (couple psi) in the lines, and some of them had a device that did not HOLD any pressure, but would allow much faster flow OUT of the master than back INTO the master. Does that make sense?1 point
-
1 pointThere are like five different throw out bearing collars with different stack heights. Lots of variables. Best practice is to dry stack the pressure plate, bearing and collar on the bench and measure the new parts for stack height.1 point
-
Looks like tin snips and Vice Grips for the body, which is fine, and unfortunately a grinder on the shift lever. I thought the original owner told me (over 22 years ago when I bought it) that the dealer did it, and I have a bunch of dealer and 3rd party receipts from him. I found a receipt with an "R&R transmission" line item along with clutch and flywheel work done in 1989 by a 3rd party performance shop in California that cost just over $600 USD total for all work... parts, labor and fluids (says $150 of it was clutch and flywheel). Was a transmission swap in '89, parts and labor, really only $450?
 1 point
 -
1 pointFinally some good news.. She’s running after much quality time. Thanks to all for the tips. It’s been a few decades since I’ve had to work on electrical issues.. Pretty sure I over complicated this. -The distributor shaft/rotor turns fine, no issues there. -Yes, hot wiring the coil does bypass, everything else, (should have figured that out earlier). Still getting good spark at points, but only intermittent spark to plug. - Ground/short, unknown. Started from scratch this morning, rechecked everything. Found the following: after swapping out the 2nd coil, I had reversed the coil wires (blk +, blk/wh -)🤬. This caused a couple of hrs of wasted time. Remote starting still seemed to get good spark at points, still got Intermittent spark at plug. Swapped out main coil/dist lead, and replaced points, car fired and started. Put everything back together, turned key car started right up. So it appears the replacement coil was bad, and possibly bad points or dist lead. The removed points look fine.. Will test coil and dist lead. Still a bit puzzled what the cause was.1 point
-
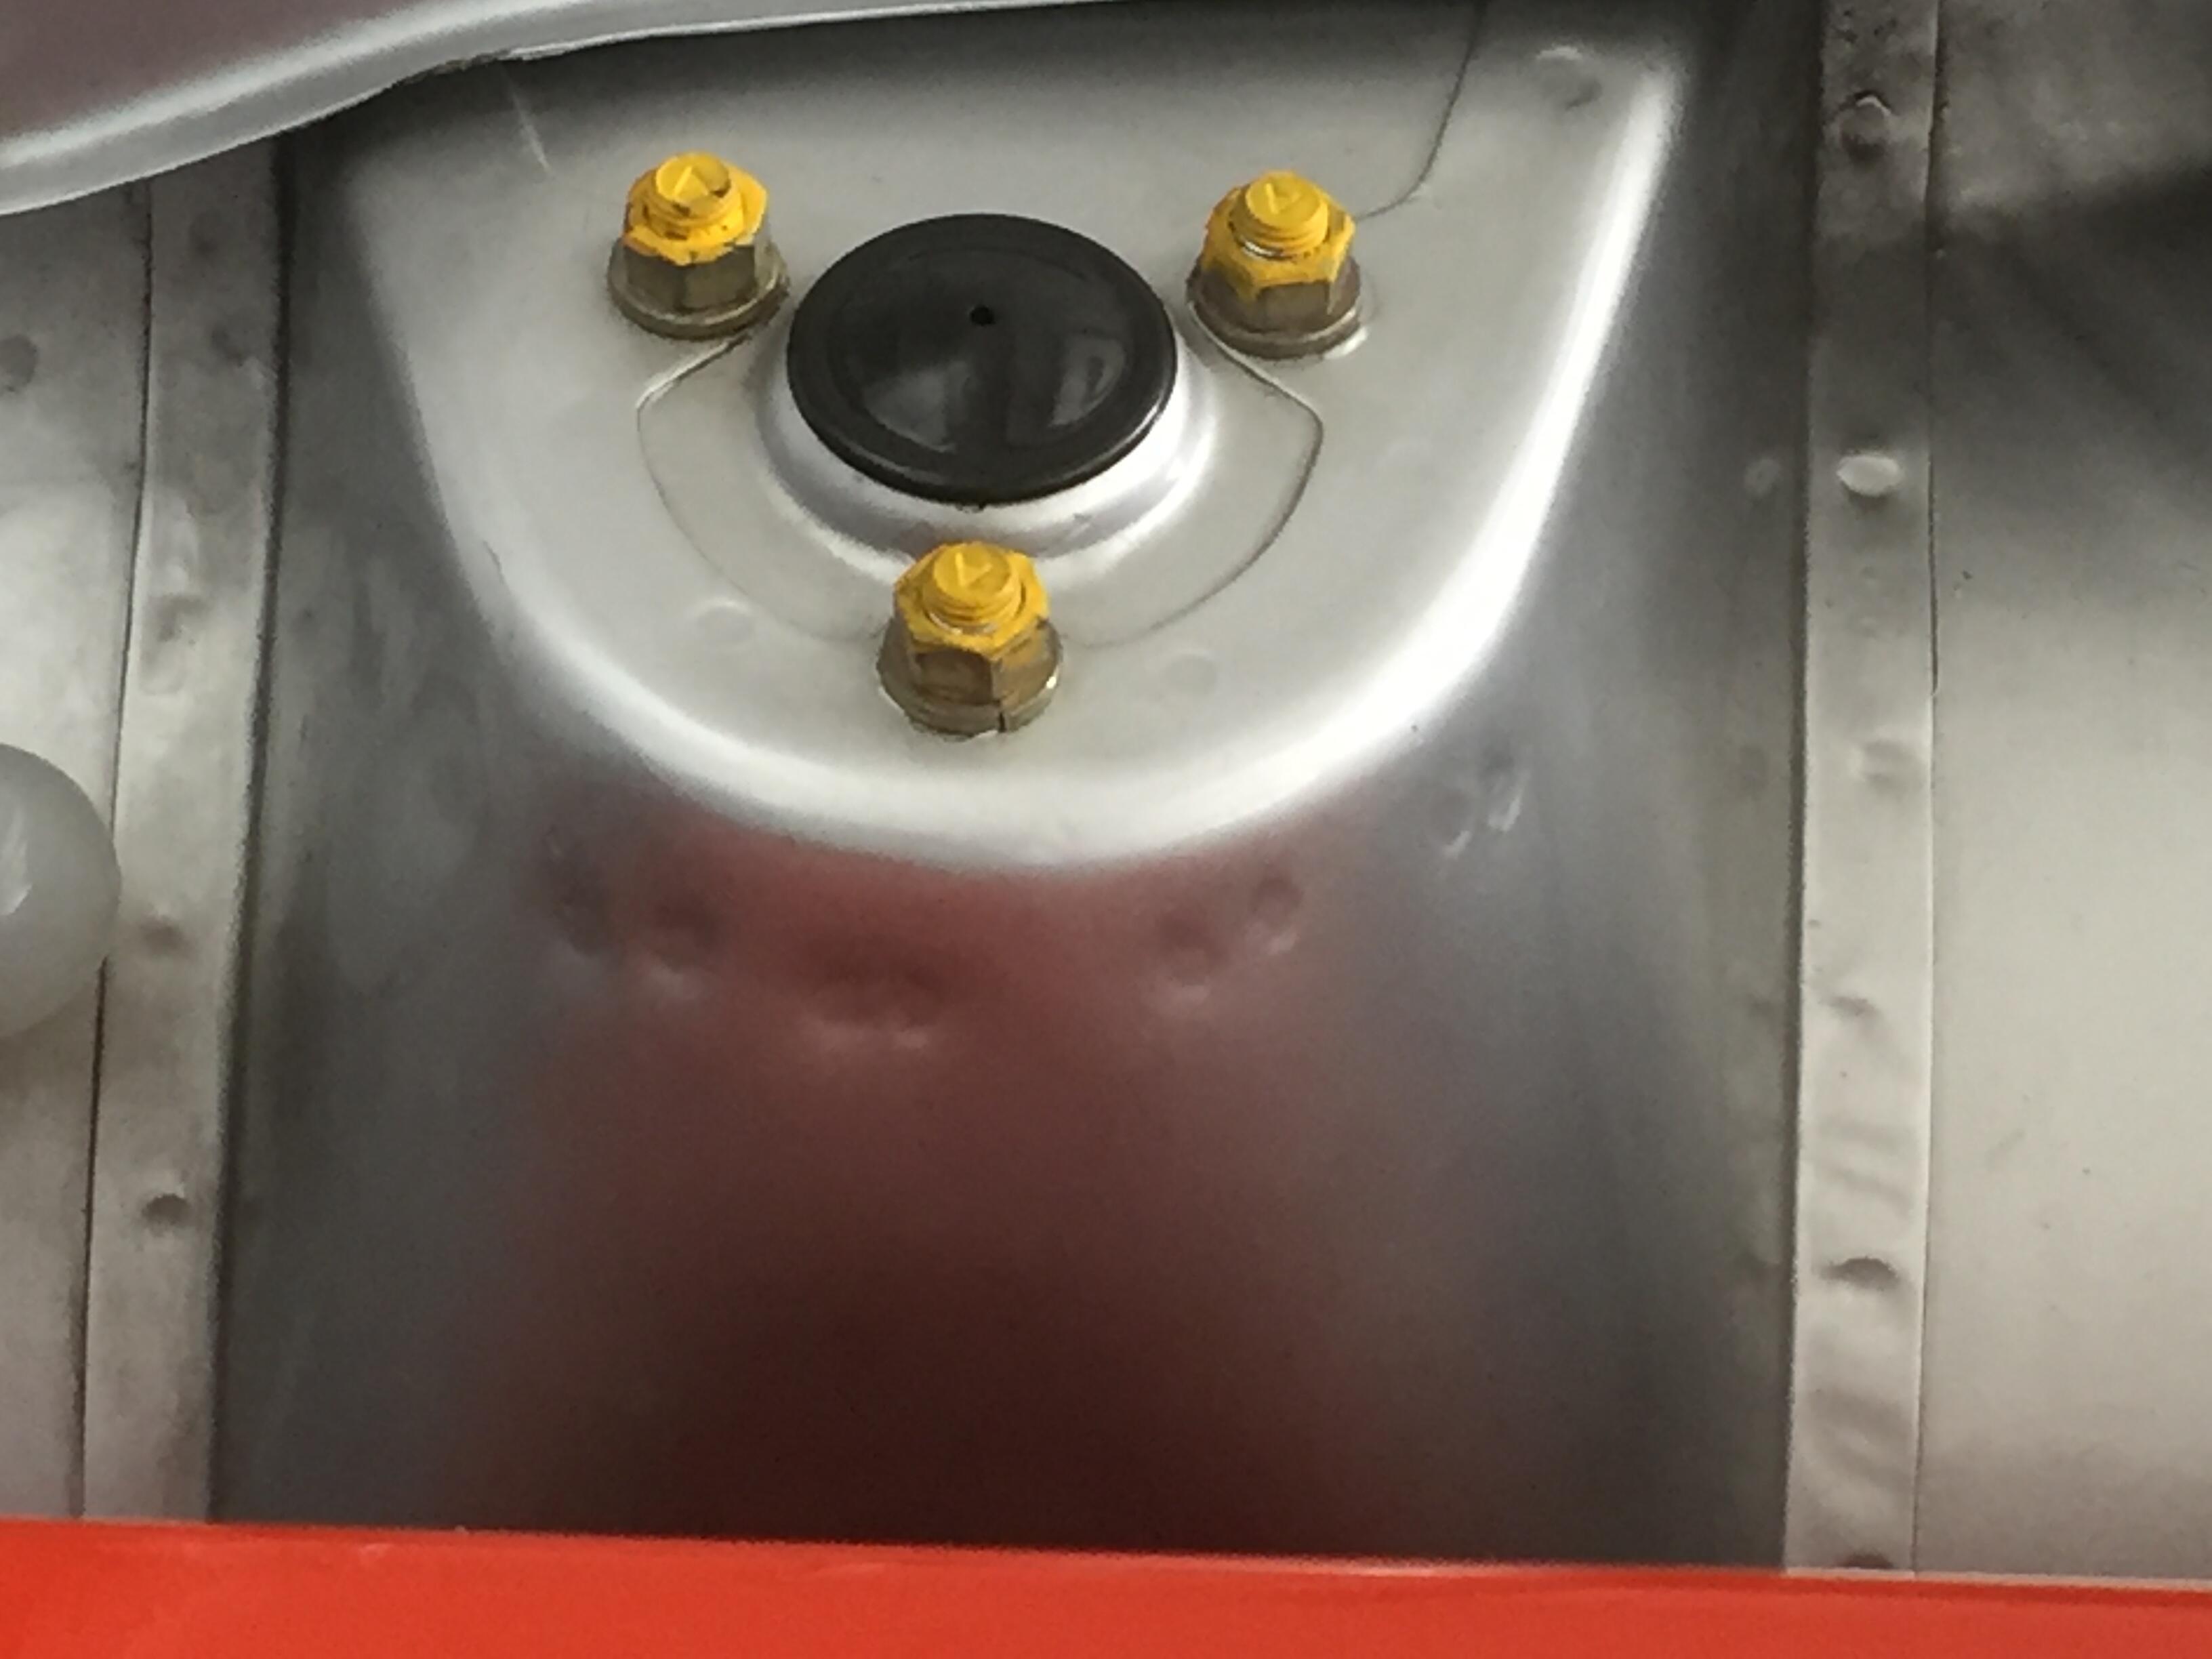
Really happy how gas inlet area turned out after blasting. Just clean and reseal.

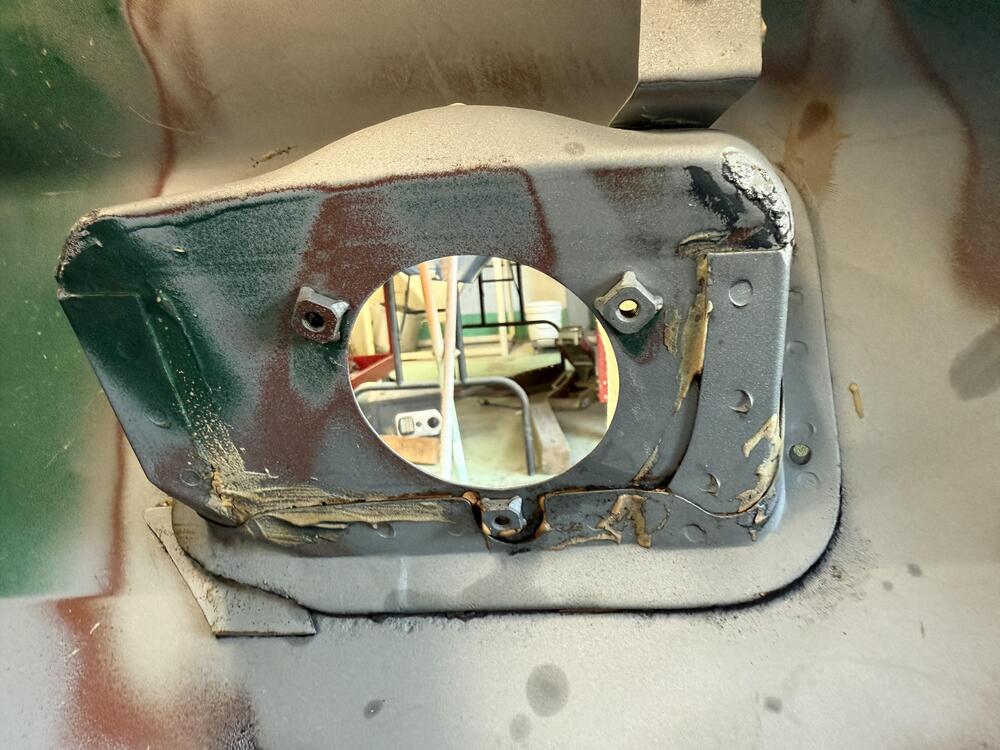
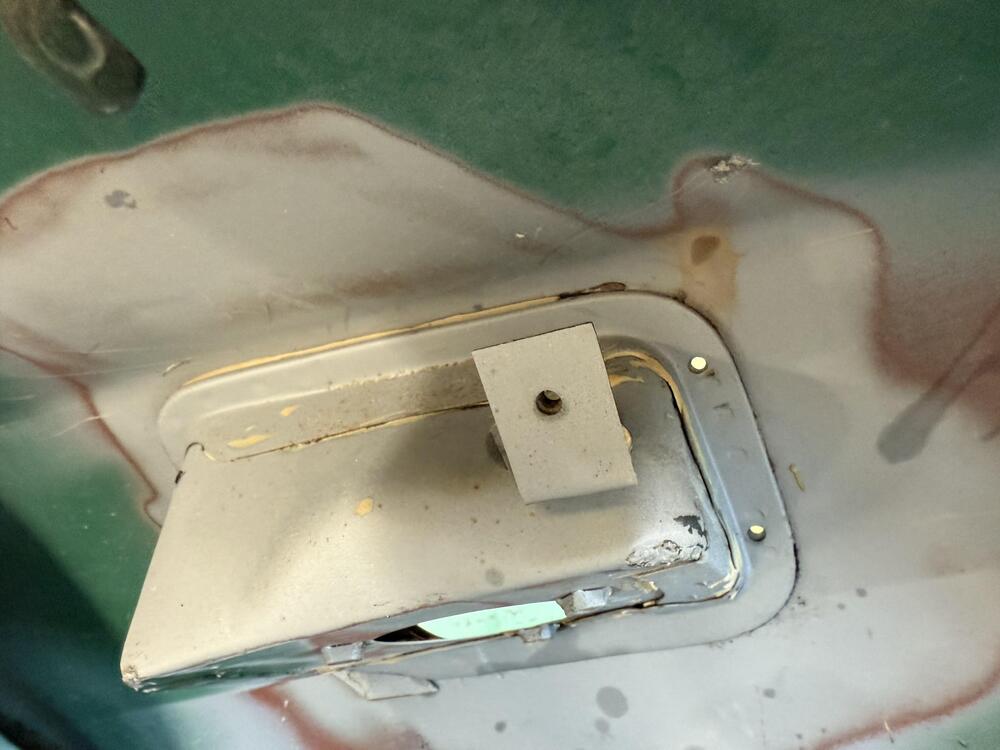
 1 point
.jpg.7a2f7c357dbc52666ce8378fa42c539c.jpg)

.jpg.25e7254580c386d76ba76d6b61934dd0.jpg)