Leaderboard
-
inline6
 Subscriber
 7Points1,282Posts
 -
w3wilkes
Free Member5Points972Posts -
JDMjunkies.ch
Free Member4Points637Posts -
conedodger
Free Member3Points12,513Posts


Popular Content
Showing content with the highest reputation on 09/15/2024 in all areas
-
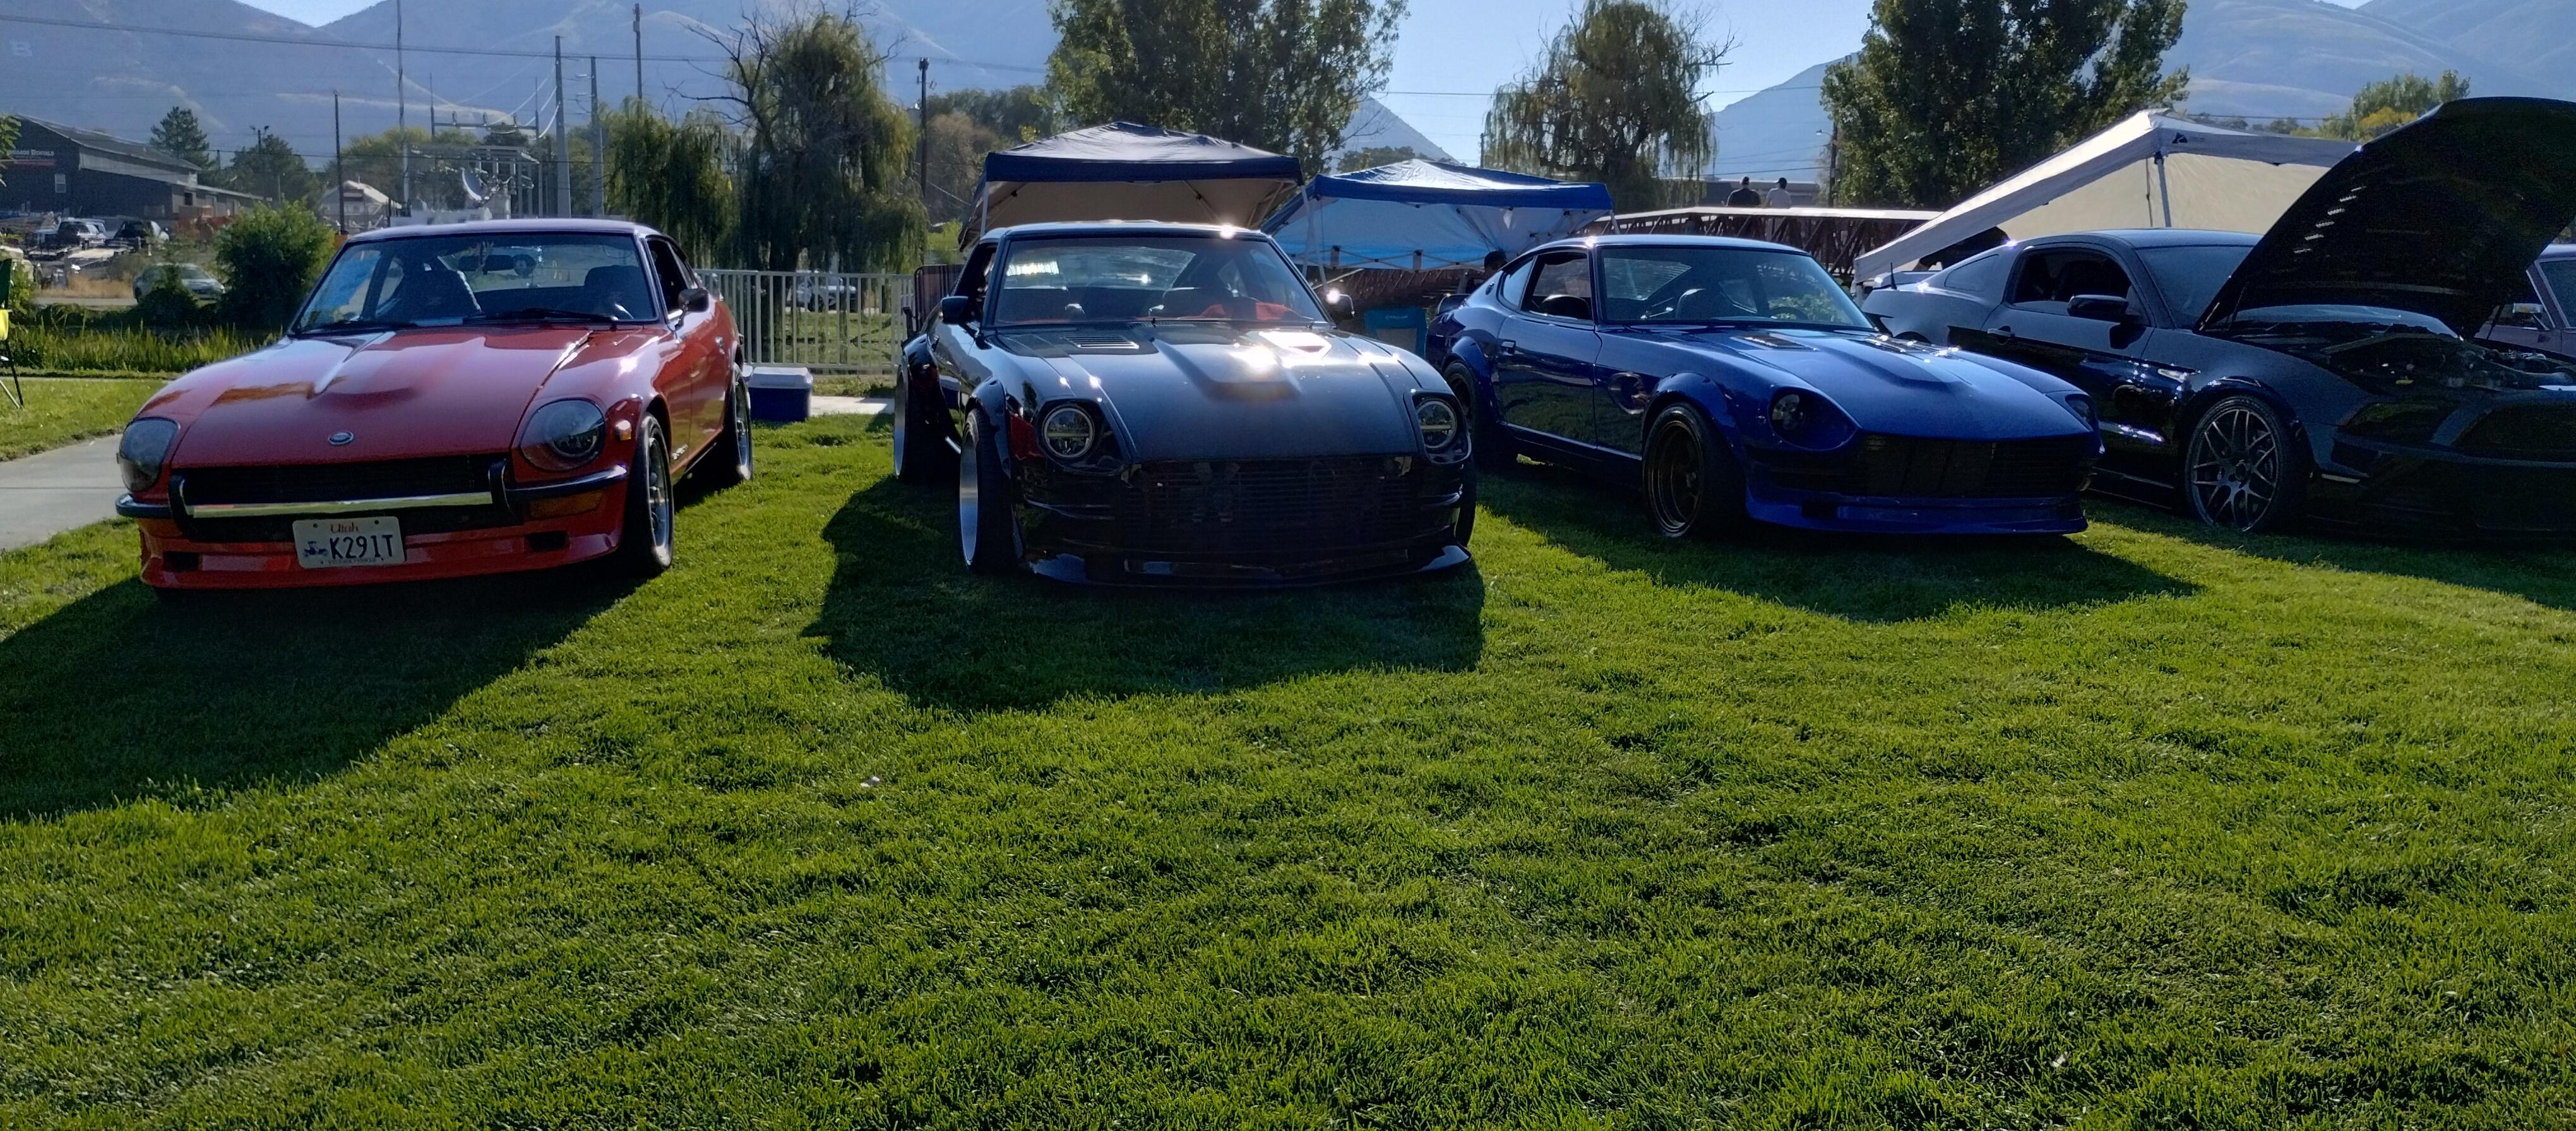
5 pointsBrigham City, Utah, Sept. 7, 2024 - 1,070 cars. I found I had relatives/in-laws with Z's, we were the only Z's except for a 370Z that was with the tuner cars. The ZX is an original turbo car and the 280Z has a LS under the hood. Different generations, we had a blast and I'm old enough to be their grampa. Funny, one kid about 12-13 walks by and says "look, Jaguars".
 5 points
 -
I think today is "start up day". I have a rather short list of items to complete before I turn the key and see what happens: Add coolant Complete electrical hook up of the Pertronix unit at the coil Install fuel hose on the fuel return line of the fuel rail Repair oil pressure sender wire/connector Remove oil pump and prime engine with oil (using drill and custom made shaft to drive oil pump) Add SAE 20 oil to the carburetors Check torque on cam sprocket bolt Check torque on crankshaft pully bolt Heat engine oil in the pan Install valve cover Add two more gallons of fuel4 points
-
3 pointsZCON will be back in Nashville next year. I believe the ZCCA is doing Nashville as a 5 year rotation going forward.3 points
-
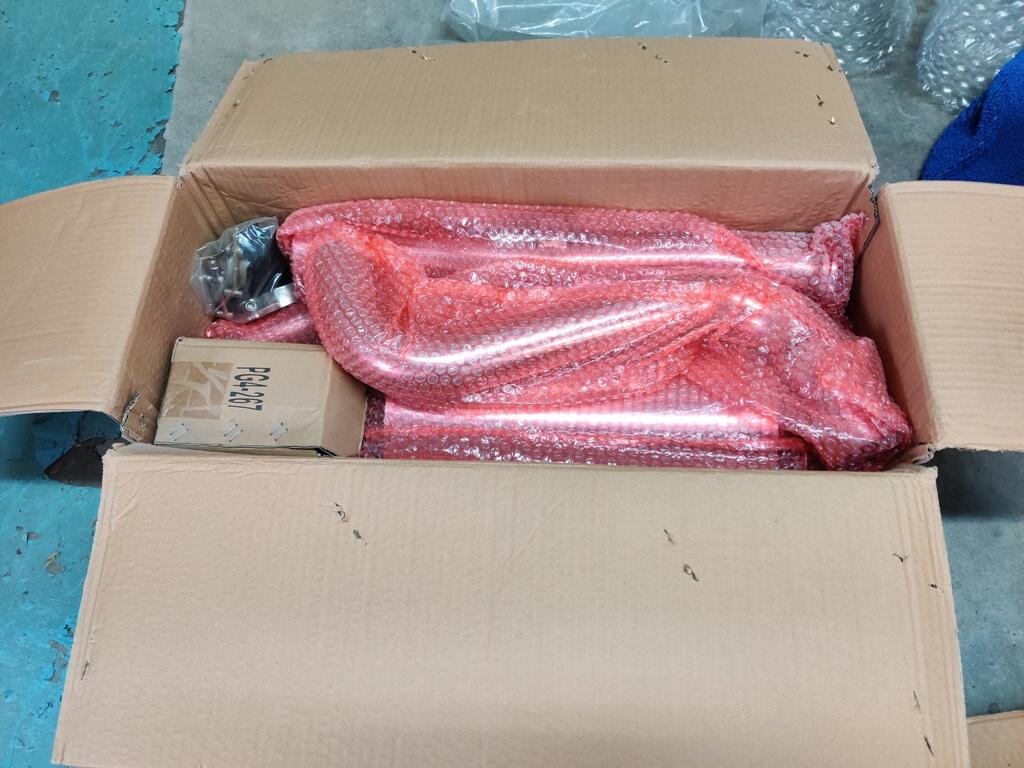
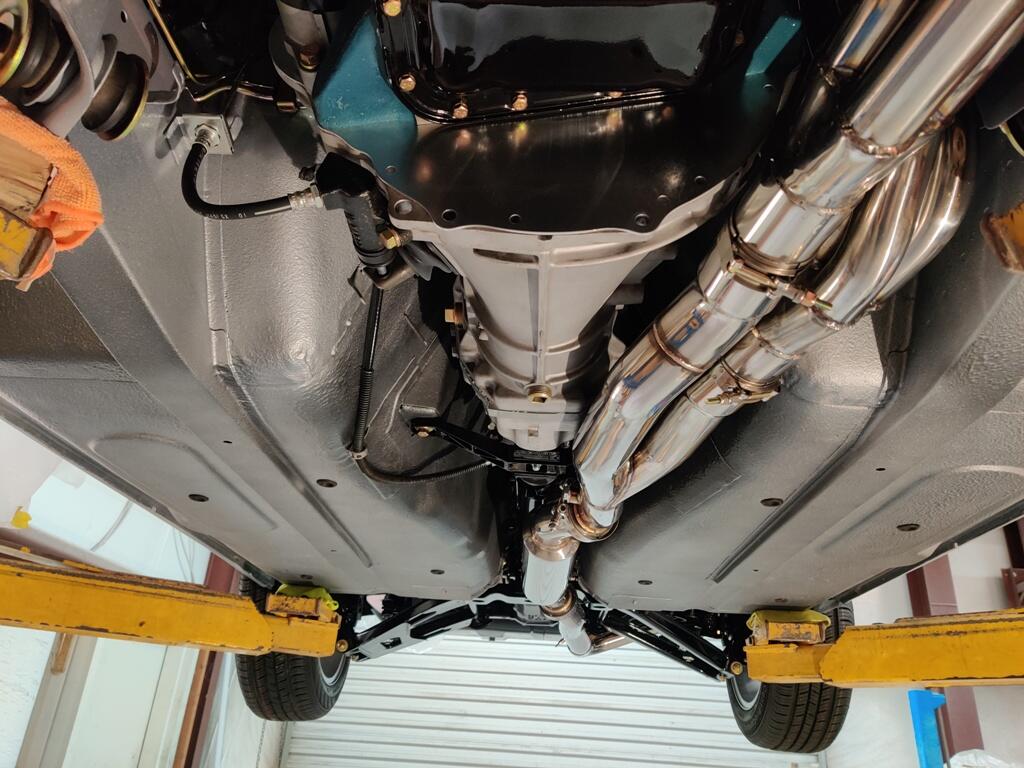
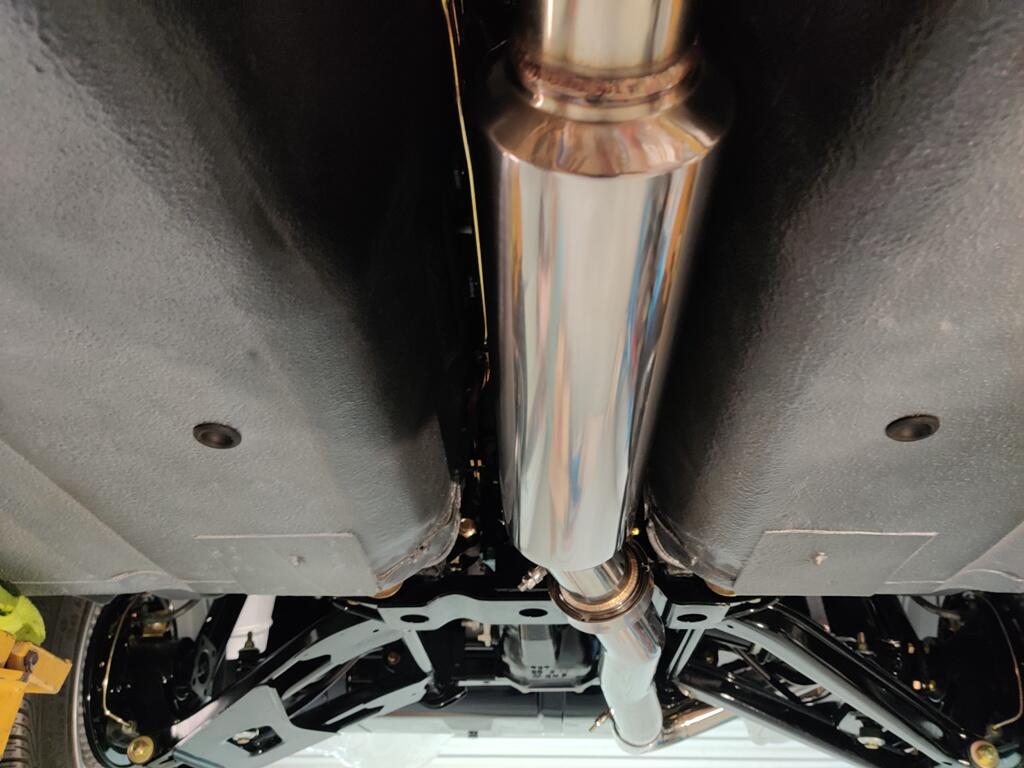
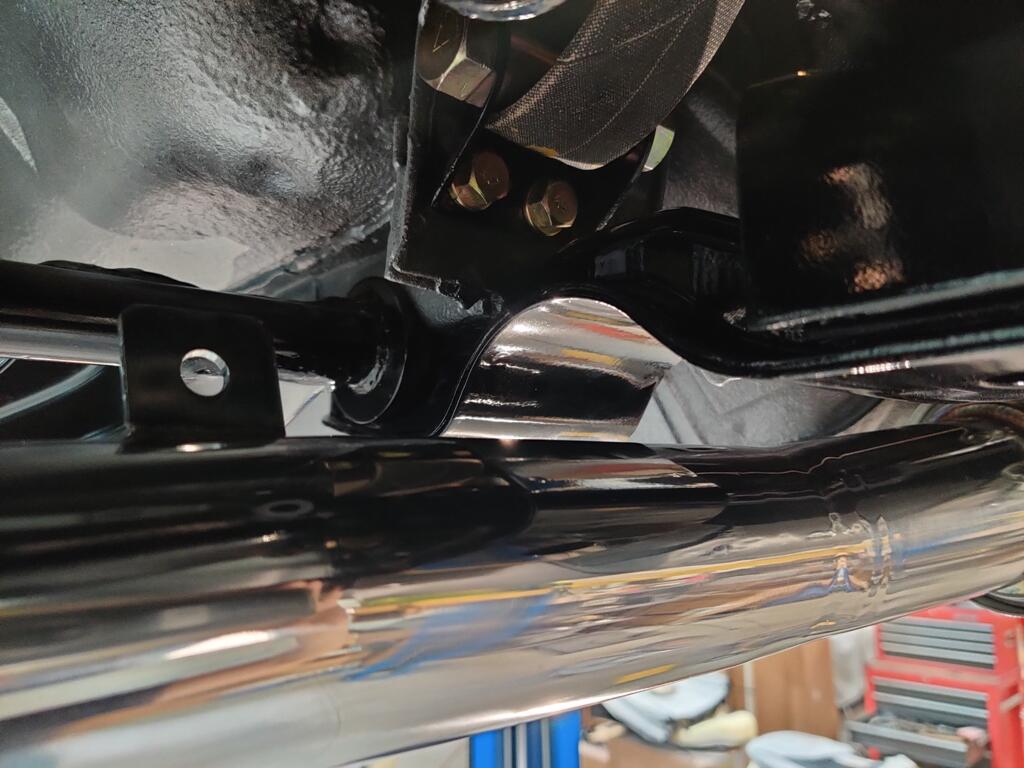
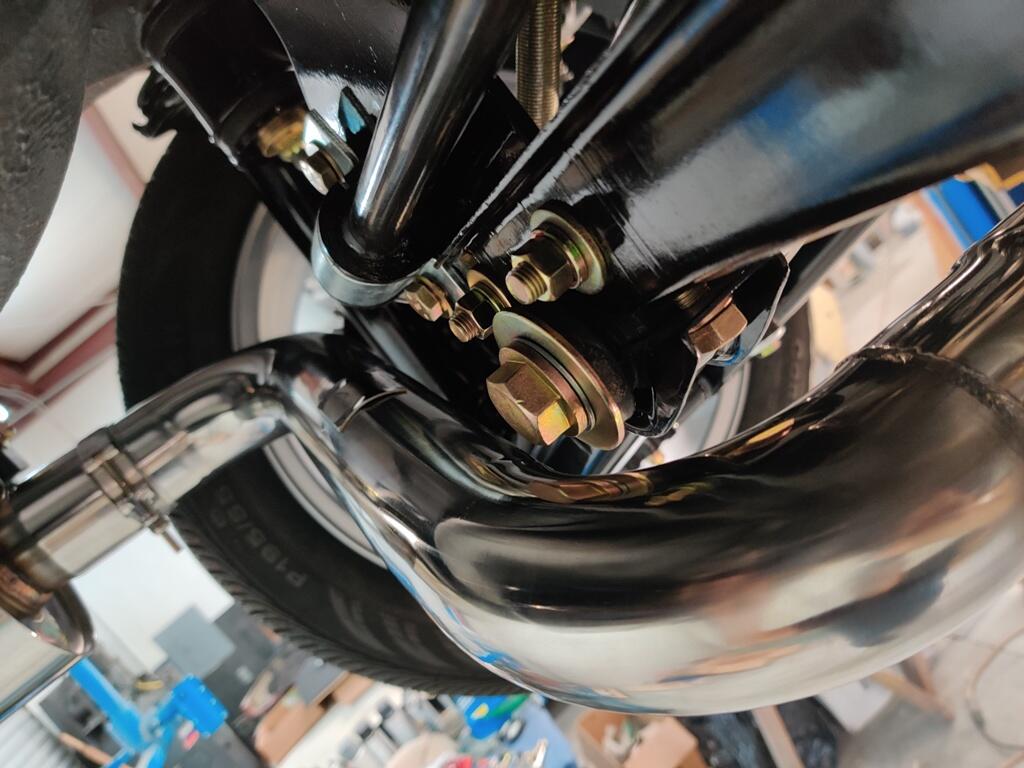
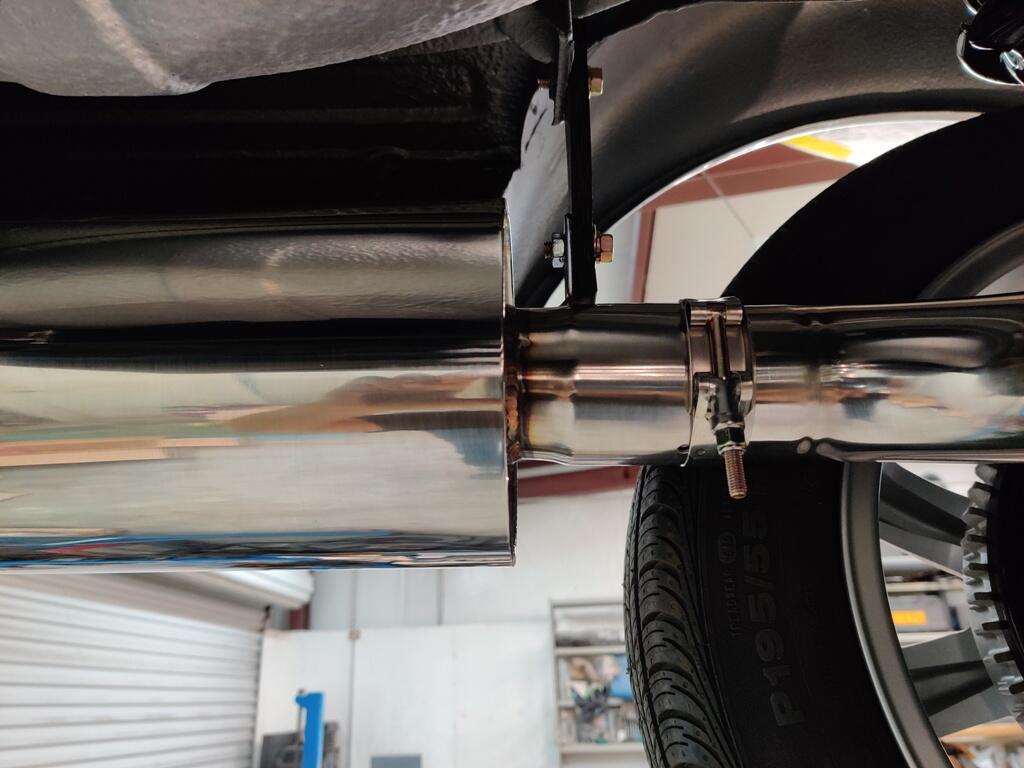
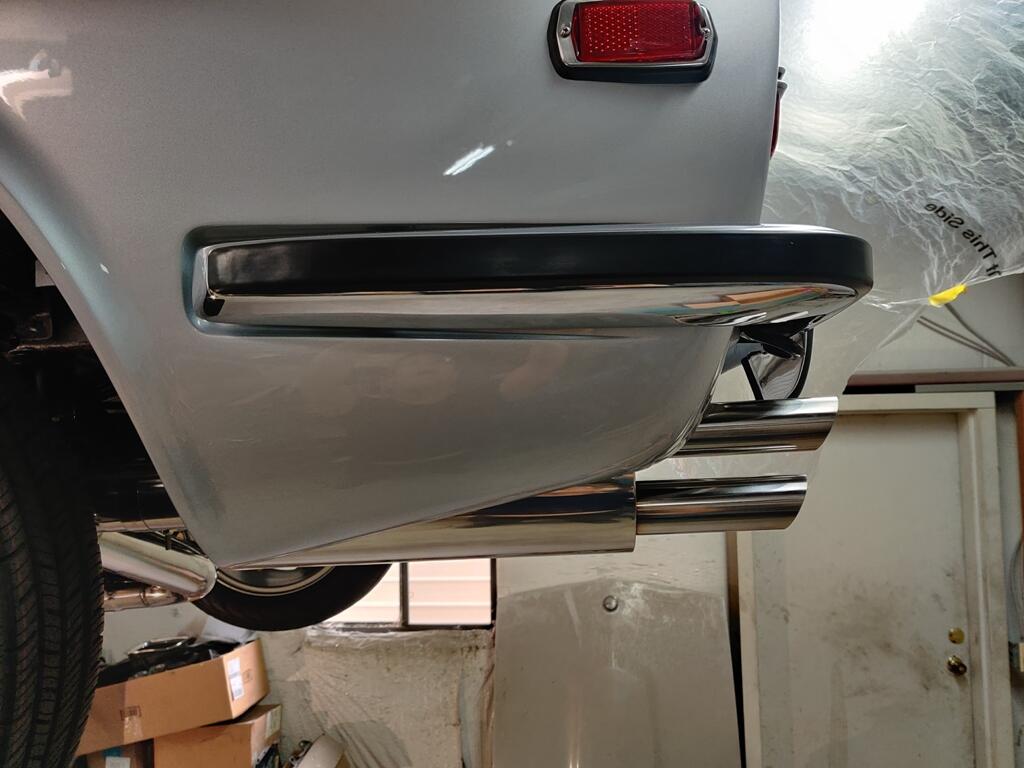
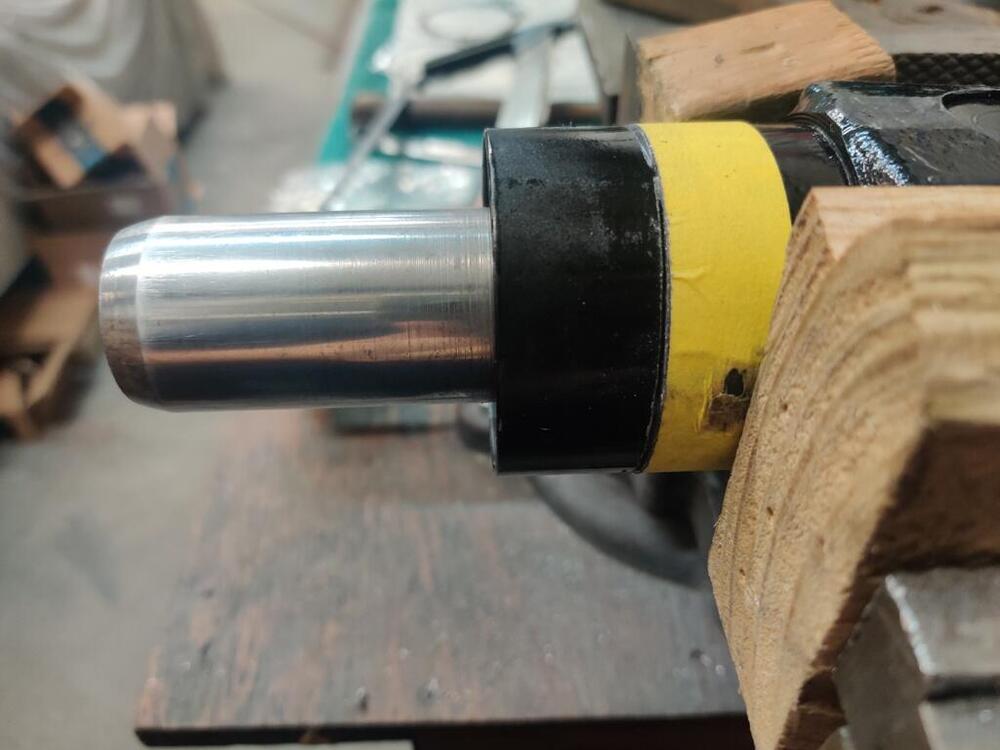
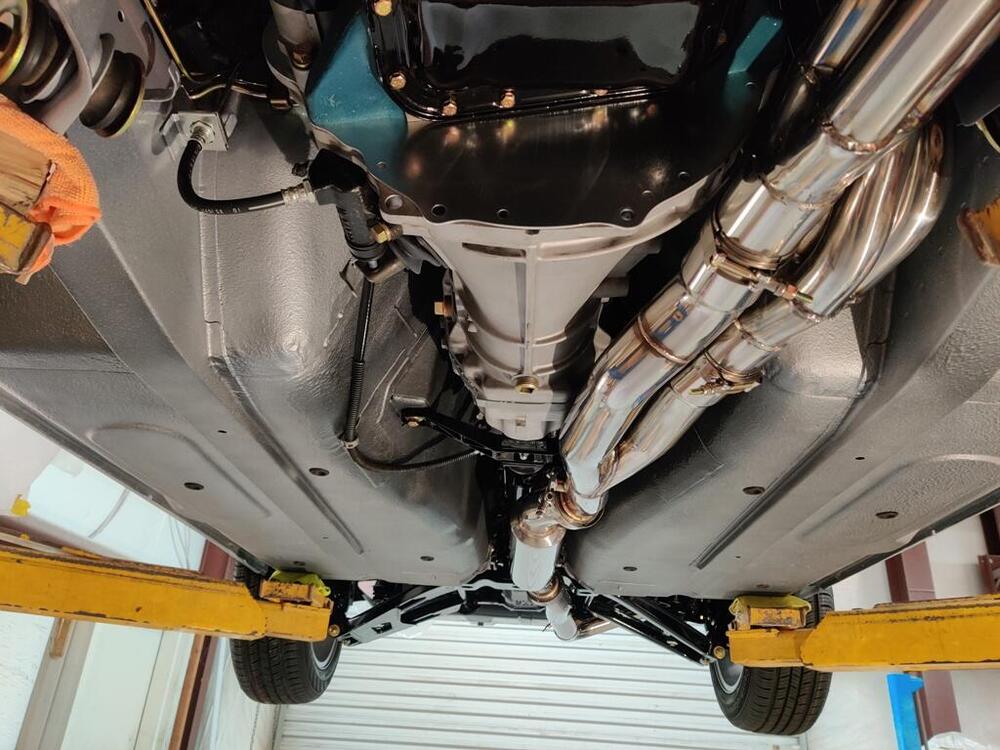
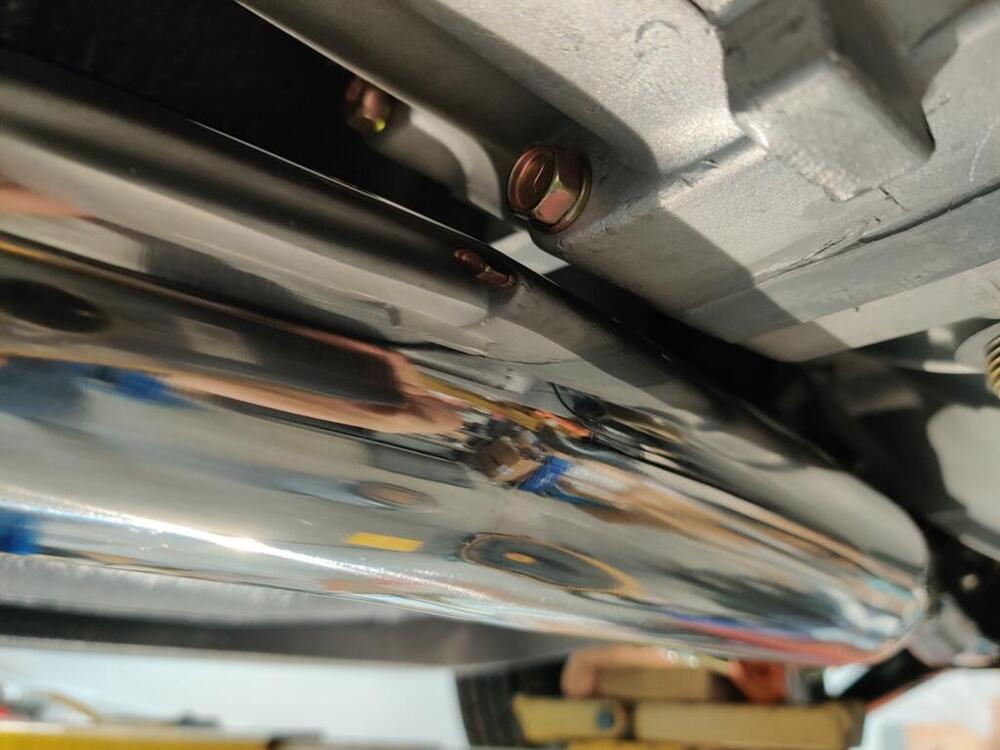
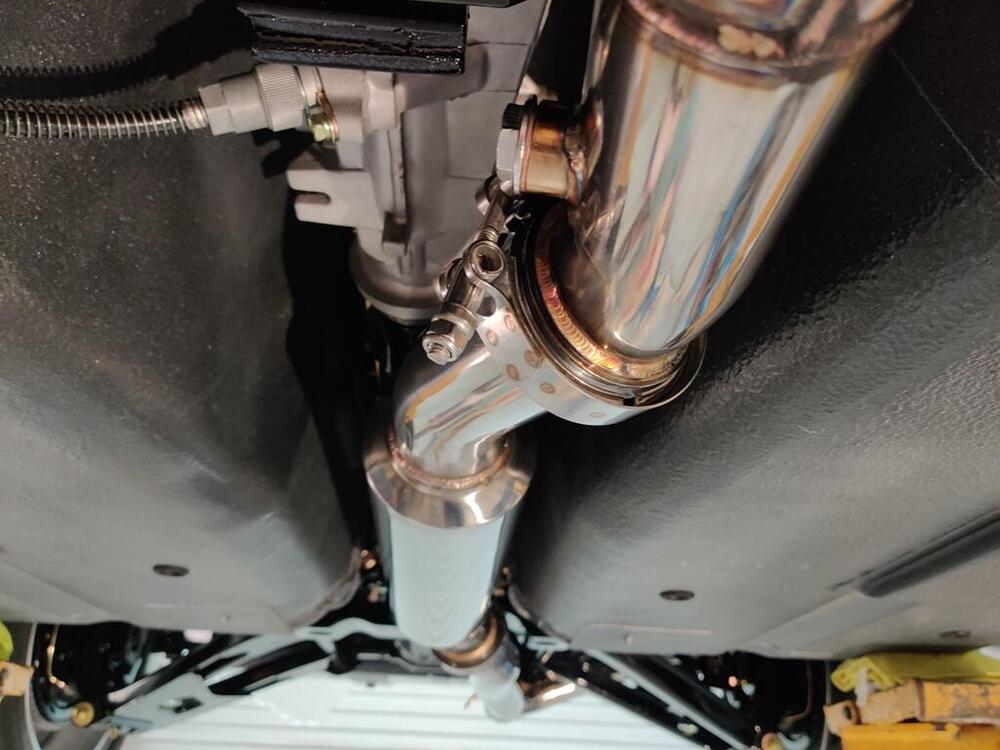
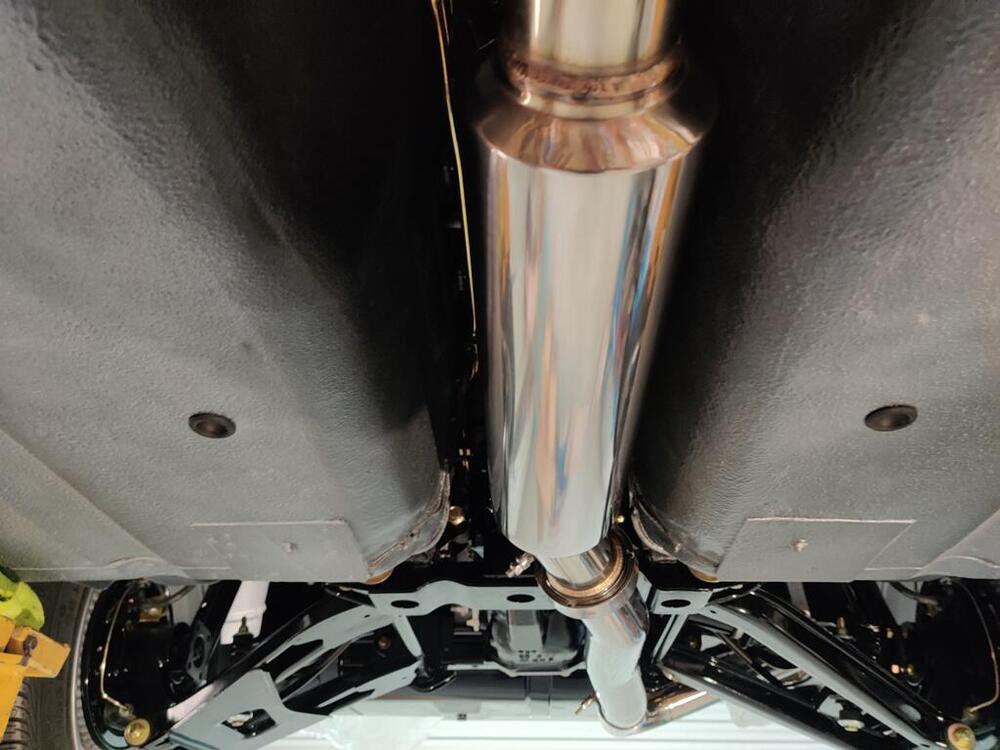
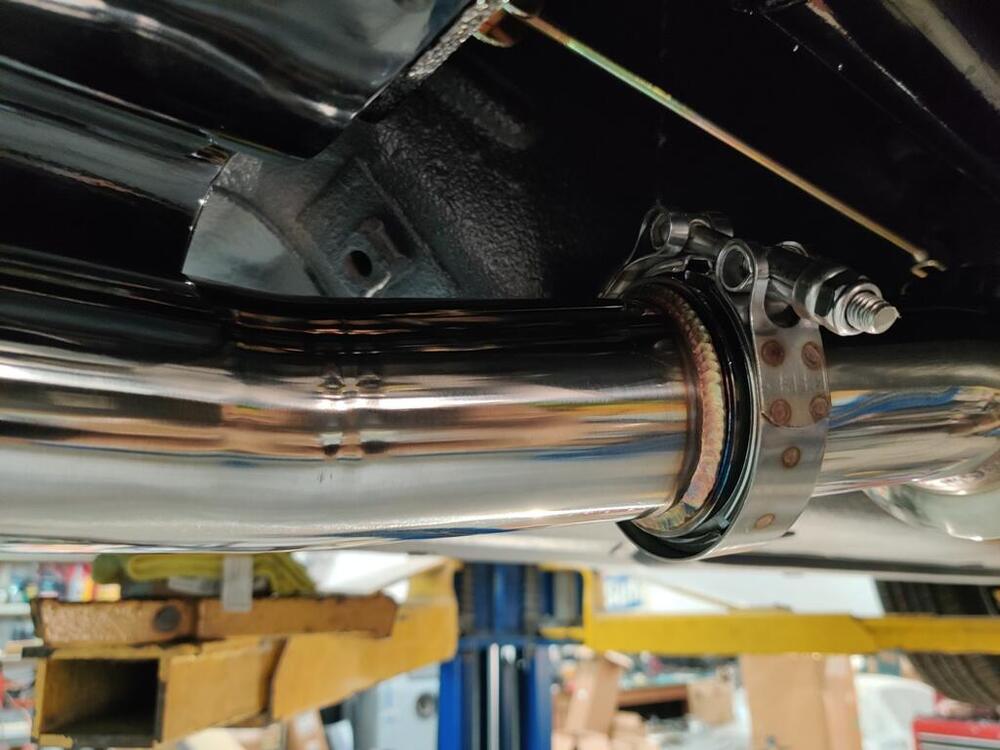
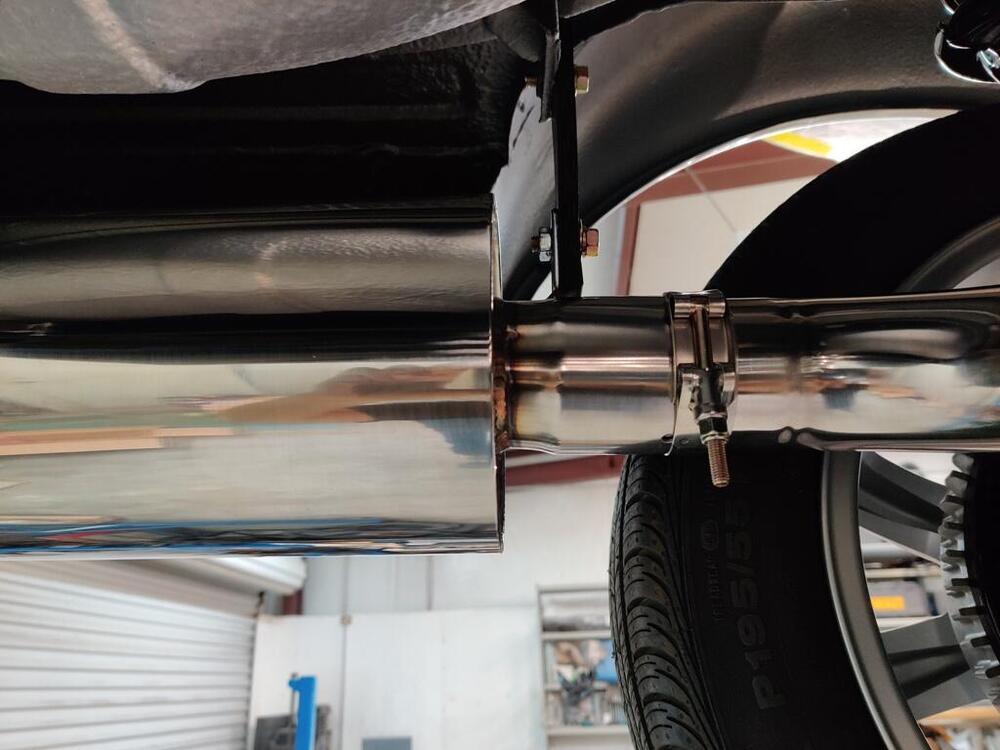
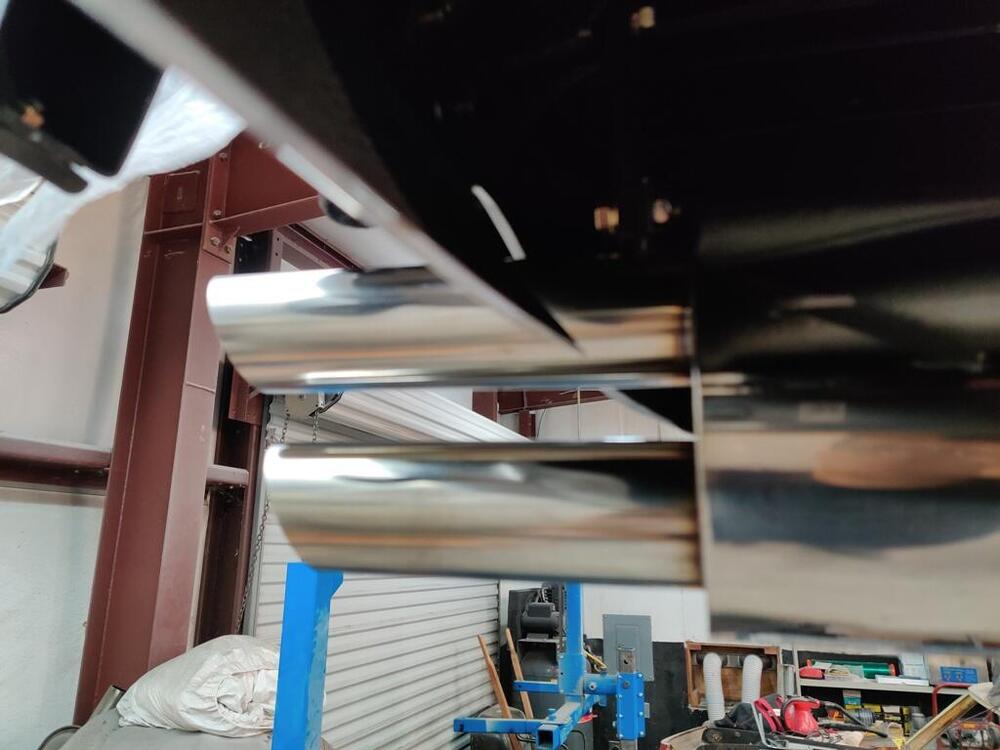
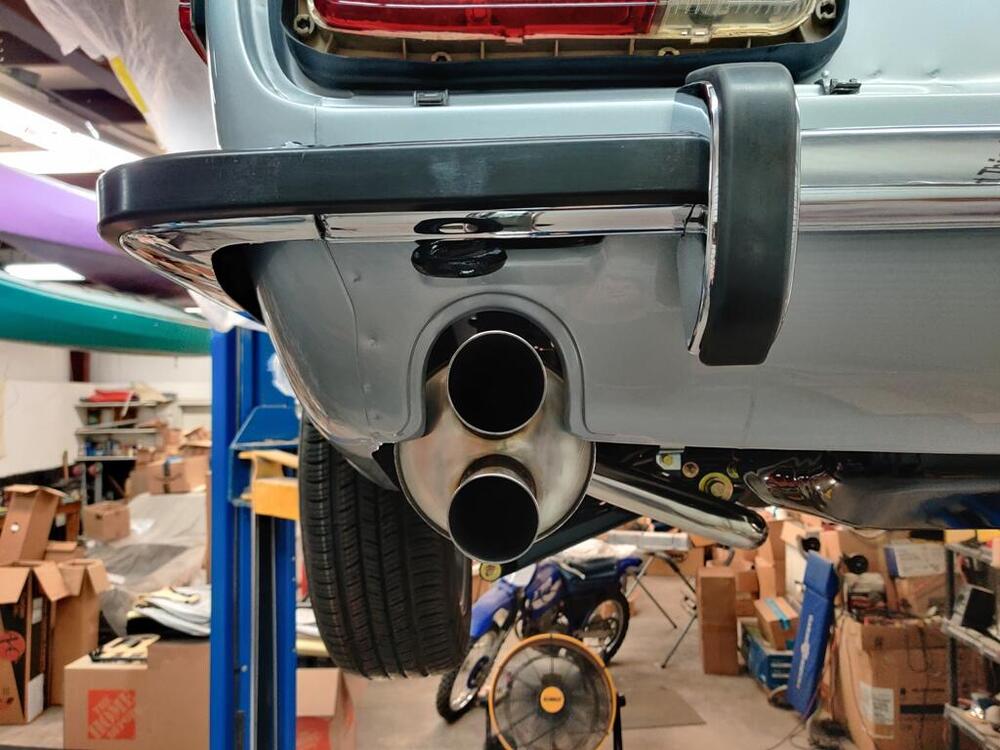
The driveshaft was delivered to me by FedEx today. During attempted installation, I found that I had to remove some of the original shield. I did this manually with a hacksaw, removing a linear inch of the shield. I measured and ran a piece of tape around the shield to mark where to cut. The remainder of the shield is of a slightly smaller diameter than the shield that is pressed into the tail section of the 240SX transmission. So, it slides within that shield, but with a small air gap. Assuming they removed 2 inches as I specified, I am kind of surprised at how tight the fit is. With the driveshaft installed, the front portion of the shaft (with the spines) is deeply seated inside the transmission. I will add a pic, but essentially, another 1/2 removed from the shaft would have been better. I don't understand why all the references I have found online for shortening the stock driveshaft for 240SX transmission conversion don't seem to match my situation. I confirmed I had the short (early) driveshaft. But instead of shortening by 2 inches (what I found others have done and as I asked for), I think 2.5 inches would be better. With the driveshaft in the car, I moved on to installing the Z-Story exhaust. The header was already installed, of course. So, I unboxed the rest of the parts and put them on the car. I found the fitment to be very good. There is one spot where the exhaust comes within 1/4 inch of the transmission case. However, clearance seems to be enough everywhere - I do not think there will be any rubbing. I also filled the transmission with Redline 75W90 GL4. There is a small list of things that have to be done before I can start the engine.


 3 points
 -
Found another hour to work on my car. and one thing on the to-do list was the rubber mud flaps that are installed inside the fender in below the metal mud guards. Another little detail that is missing on many cars, as they have been simply removed and not replaced on many cars over the year: Here we go: On the LH fender (Similar to the RH one). some previous owner "cleaned" the Fender emblem holes. which was a common practice back then. On the RH side i tried to drill the holes based on some measures i had previously made, but it proved to be not 100% perfect. so this time i decided to use the color stencil method by getting the approximate position marked on the fender by measures. And thenn getting the 100% correct spacing by adding oil color paint to the pins and then pressing it to the fender, like a stencil. here's the result (ignore the old marking i have made previously, they were quite wrong). After that i got my holes drilled. The 4th hole, which is slightly lower than the three mounting holes, is there from factory, and i believe it's to drain moisture that is cought behind the emblem that's why it's at the lowest point of the emblem. Also rust protection primer added. And here we go. I haven't pushed the emblem in completely, because i'd remove it again immediately. Also i will probably use the european "Datsun" instead of the "Fairlady Z" emblems. Good thing is they use the exactly same holes. Then installed the LH fender back on. the front end work is progressing slowly but steadily: Maybe it's just me, but i think the Z looks so much cooler with the original long stalk Fender mirrors: So overall i was able to tick another few tasks from my bodywork to-do list. still plenty of work, but getting there and it's fun to see some progress.3 points
-
Cool!!! I'm not sure I would add coolant until I was sure the engine ran. You can run it dry for a short time (fifteen seconds) just to make sure things work. At this stage, I would also consider the carb oil to be optional. But since it's so easy to put in and take out, it's no big deal. I would add "double and triple check that the cam timing is correct". before I spun the starter. And when you do turn the starter to prime the engine oil... I would make sure oil comes out of all of your spray bar holes. And if you're energetic, I'd run a compression test after the oil was primed and before I put the plugs in. Just to rule out surprises. After all the detail leading to this point, not much risk of any issue, but fingers crossed here just because it's a big day!!1 point
-
1 point(Sorry) The photos are not that good.......they do have a rectangular cut or hole in the top. I saw a new one in a book for 280Z's 1977-78 and it is in it but have not been able find that book again with the information in it. From the bottom you can see the rectangular cut in it better. I found a Teflon wall anchor that is so close to the original that I am slowly modifying it to replace that clip and the one that is missing. All these clips do is take the slop or play out of the door locking cylinder arm so the door lock goes up and down smoothly. Thanks Matt1 point
-
Yeah. i got a bunch of books again, from vairous sources. The top left (lower one in the next photo) is a french book generally about "heroic" japanese cars from 1960 to 1975 and has it's own chapter about the Z-variants. Nothing new, but nicely written with plenty of photos. My french is quite limited so i don't understand everything, but anyway. i found it for two bucks online, so i had to have it. Same for the upper one in the following picture. A german book about japanese cars from 1912 to 1992, it is less a book about certain cars, but more about Automotive Companies, and the industrial history in general in Japan. and also has a broad section of facts and figures about many, many cars. I still have to read it, but it makes a pretty good impression on the first glimpse. The bottom right is the October 1974 Service bulletin issue 216 "hints in servicing the Nissan Air conditionier. which i will use to update some details in the big S30 Aircon Knowledge post soon, which i released recently. And then i got the Japanese Z-4 Service Bulletin from October 1971, which introduces the HS30 Models and mentions changes of the S30 and PS30 models. Obviously it has some details about the HS30 cars including the G-Nose HS30-H models, but also some other details which are useful for upcoming knowledge posts which i'm working on.1 point