Leaderboard
-
Patcon
 Subscriber
 6Points11,142Posts
 -
Captain Obvious
Free Member5Points10,081Posts -
conedodger
Free Member4Points12,513Posts -

Paulytunes
Subscriber4Points107Posts


Popular Content
Showing content with the highest reputation on 07/01/2024 in Posts
-
So not the triumphant update that I was hoping to write this evening, but I did get closer to resolving my fueling issues. I'm pretty sure I have said it before, but I do absolutely love this site and all the helpful members. I was able to obtain a Nissan fuel pump and damper from a fellow member here that no longer needed the setup. This made me extremely happy, as I want to keep my 280Z as close to stock as possible, and I did discover a problem with my damper. I installed the new-to-me fuel pump on Friday and was able to test start the car on Saturday. It only took a few seconds to start! After warming up, a few throttle pushes to redline, and I had no more hesitation, and fuel supply pressure was right where it was supposed to be around ~35-36 PSIG. I think my whole neighborhood heard my shouts of jubilation. I then went to the rear of the car to check for leaks and found a steady stream dripping from above the fuel pump and into my bucket. I shut the car off and found my damper to be leaking. Luckily, I had the replacement one on hand, so I had to disassemble everything and install the other damper. I suspect my existing damper was on its way out, and the increased pressure from the factory pump (remember the aftermarket one that was installed by a PO registered around 12 PSIG less than OEM) blew a seal or something out? Anyway, everything is back together, but I am now waiting on an appropriate fuel line clamp at the pump discharge (PO used the wrong type and all the spare correct ones I have are too small), which should be here tomorrow.4 points
-
View Advert Distributor replacement magnet Reproduction Matchbox Distributor replacement magnet 22158S6700 22158-S6700. Greeting all. Great news, after a year and a half of design and testing I have finally finished my latest project. I now have for sale replacement distributor magnets for all matchbox Datsun distributors. This is the magnet that most people find broken when they do a distributor repair. The original magnets become brittle and stick to the stator and usually break in multiple pieces when you pull the stator off. The magnet has become NLA (no longer available) from Nissan. I purchased about 30 of them a couple of years ago and sold them and tried to order more and they were all gone. I thought that finding the material to make a reproduction magnet would be pretty EZ.....not! The issue is that most flexible magnet material is not magnetized correctly and has very poor magnetism retention and the material is not suitable for hi temperatures. The material will loose its magnetism and the material will degrade when exposed to temperatures over 150°. After contacting all of the big magnet experts I was running out of hope and that is when Captain Obvious contacted me and we talked about what I was attempting to accomplish and he suggested a place I had not contacted. After contacting this company, I was able to purchase a material that is the same thickness and has a temperature rating of 250° and has the correct polarity needed to generate the induced voltage to trigger the ICM. The sample that was sent to me was cut out and tested in all 3 of my Z cars and I then sent it to Captain Obvious for some in depth bench testing for signal strength and quality. The results of the bench testing were great. This replacement material actually generates a higher signal strength at both idle and hi RPM ranges. Peak voltage at idle for an OEM magnet was 1.28v. Peak voltage with my reproduction is 1.68v, that is a 25% increase in induced voltage signal strength going to the ICM to trigger the coil. Peak voltages at 2500 rpm for an OEM magnet was 2.96v. Peak voltage with my reproduction magnet is 4.00v. That is also a 25% increase in signal strength. With the higher signal strength, extremely hi temperature rating and an exact copy of the design my reproduction magnet is a great option when rebuilding your distributor. Couple this with my improved breaker plate bearing retainer and you will have many years of reliability from your distributor. Here is a couple of pictures of an NOS Nissan magnet next to my reproduction magnet. I challenge you to tell me which is which. I had to mark them to tell the difference. A huge thank you to Captain Obvious! Offered by: kickstand80 Date 06/30/2024 Price $35 Category Parts for Sale2 points
-
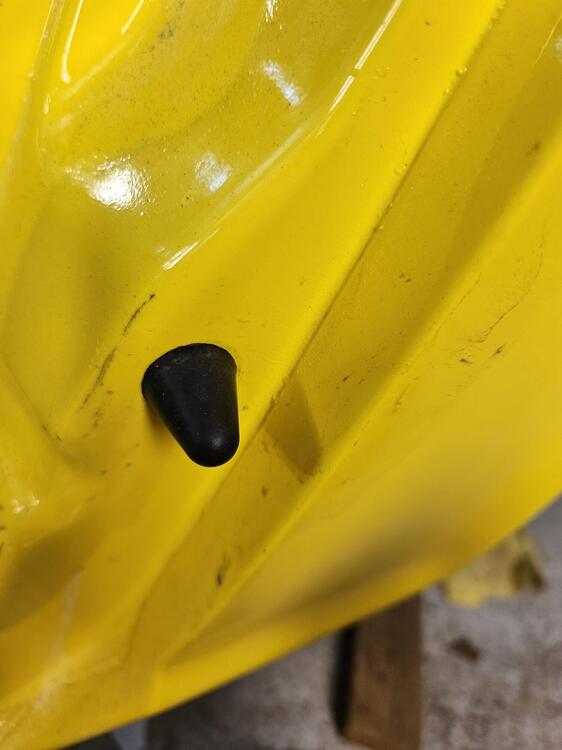
2 pointsSheet metal screws hold it down. In the US cars, that ring was used starting for the 1972 model. The 70-71 models which have a different transmission, utilize a different shift boot and do not utilize that oval ring.2 points
-
2 pointsWhat he said. In fact, I wouldn't even deal with a tank... I'd just fill up the float bowls with a piece of tubing and a funnel. Round tops will run the engine for 30-60 seconds before the bowls get sucked empty. I would hope that your carbs would be in the same ballpark.2 points
-
2 points
-
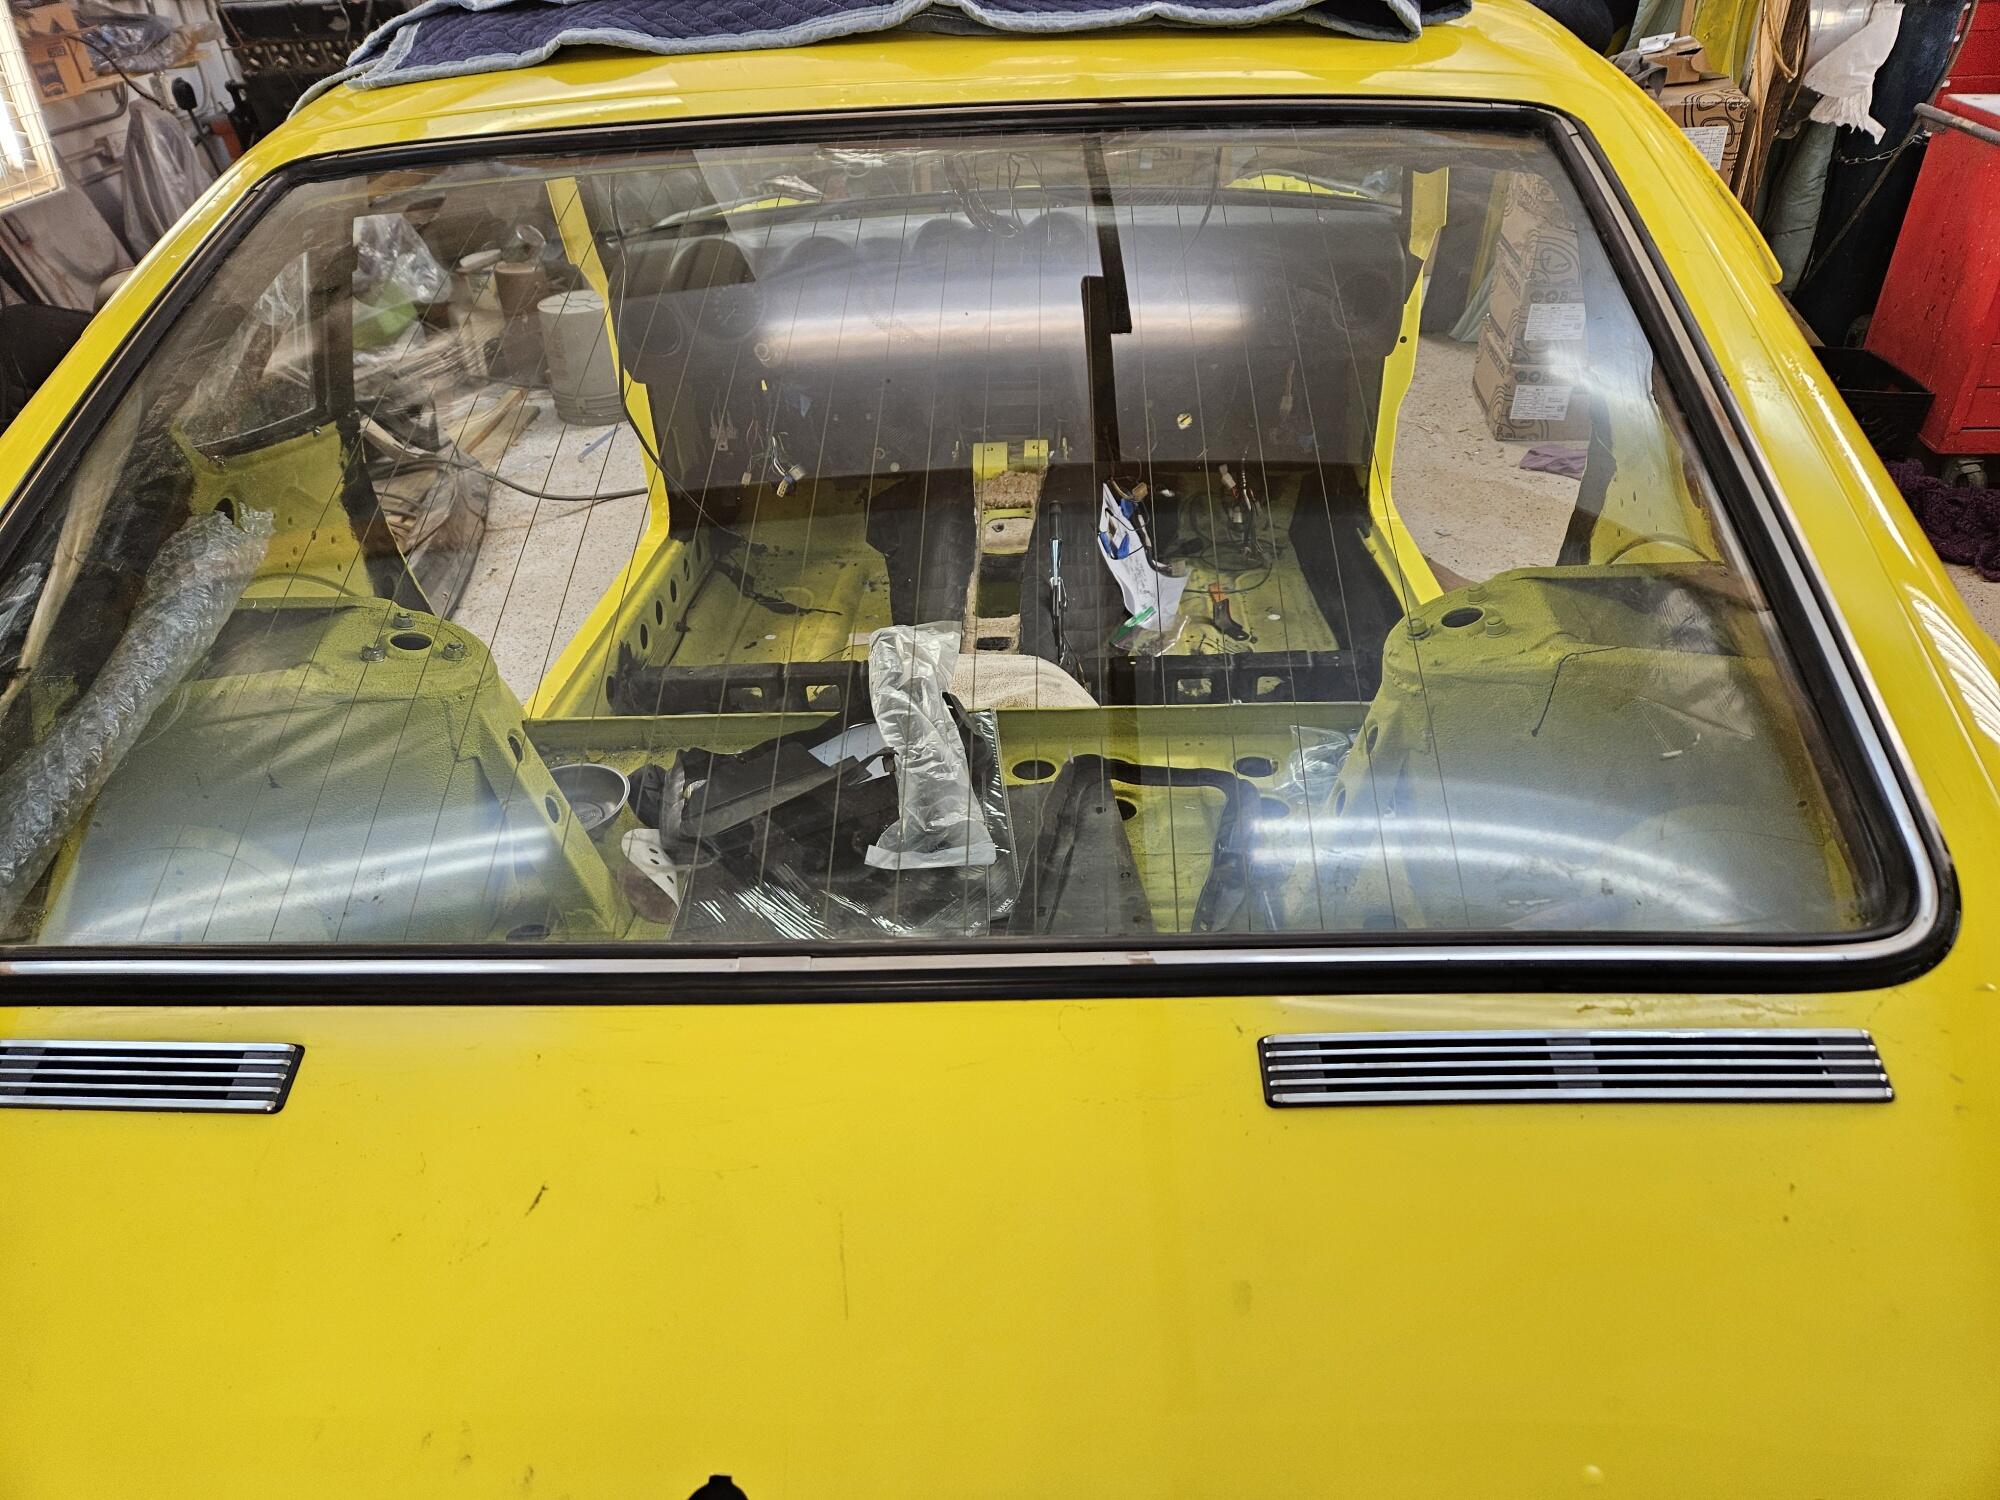
2 pointsEven though I may take the quarter glass out sometime in the future, I went ahead and put the lower seals on. I lined the notch up pretty close to the inner lower edge of the quarter window I got the hatch glass in. I started but Cody had to help me get it the rest of the way in. My hands were cramping bad by the end trying to keep the glass squeezed down so the seal would lip over. Actually it is a little lower in the hatch then I would want. I started the string at the top edge. It might be better to start it at the bottom edge I also got the door bumpers in. I trimmed the excess paint out of the holes first and then I put them in. Soapy water on the first one and a small flat blade screwdriver. I used silicone grease on the second one and that seemed easier overall.


 2 points
 -
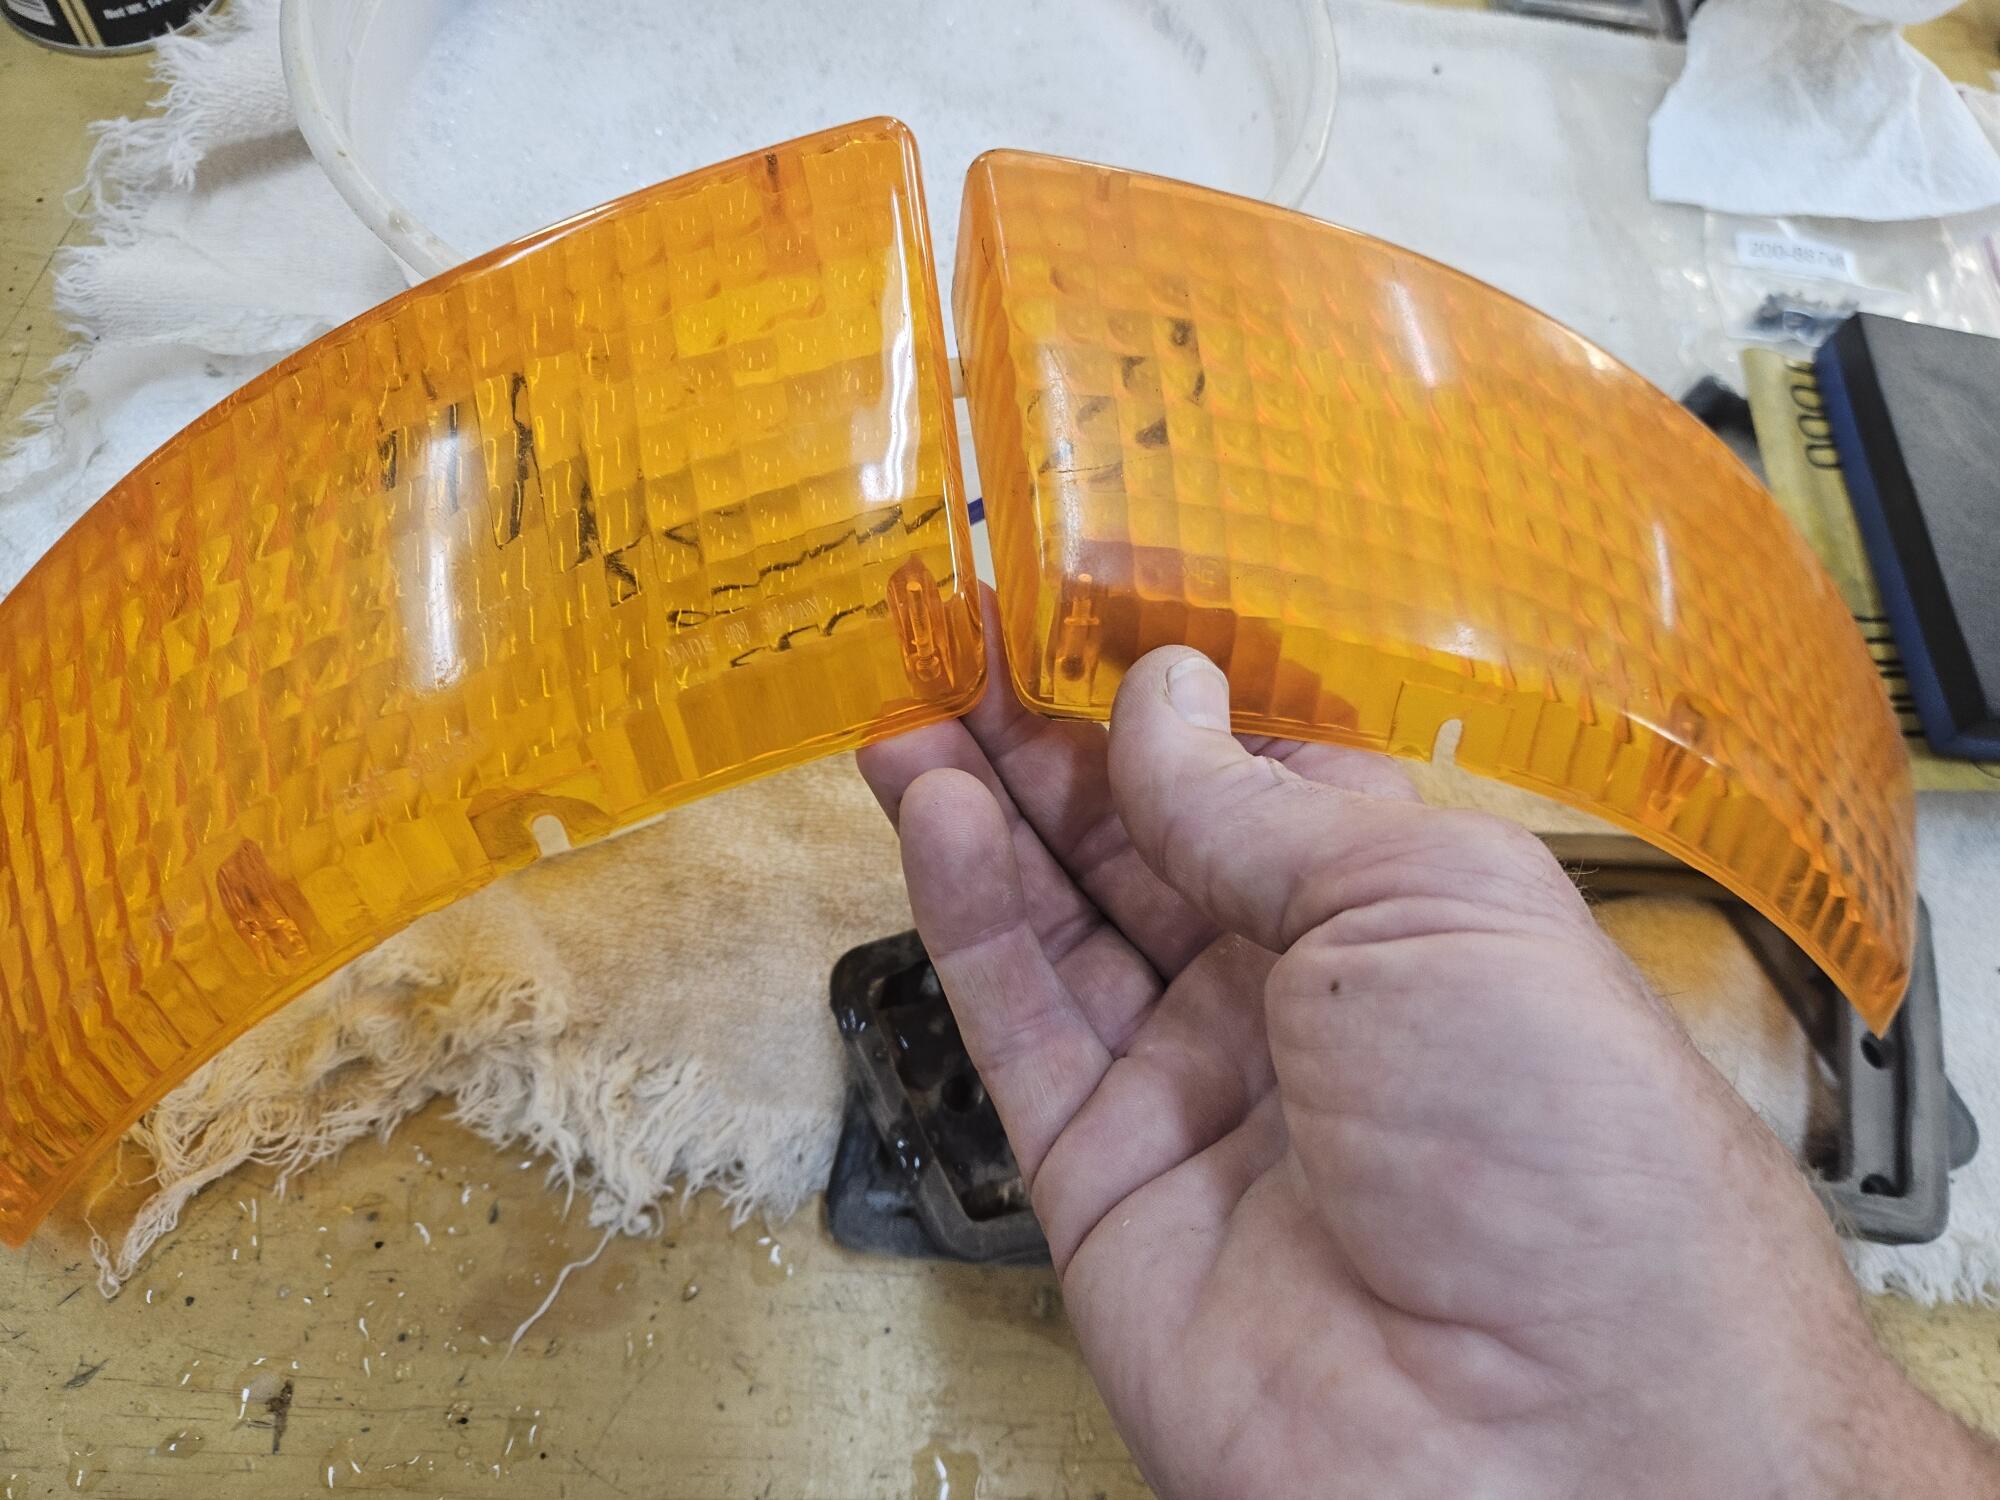
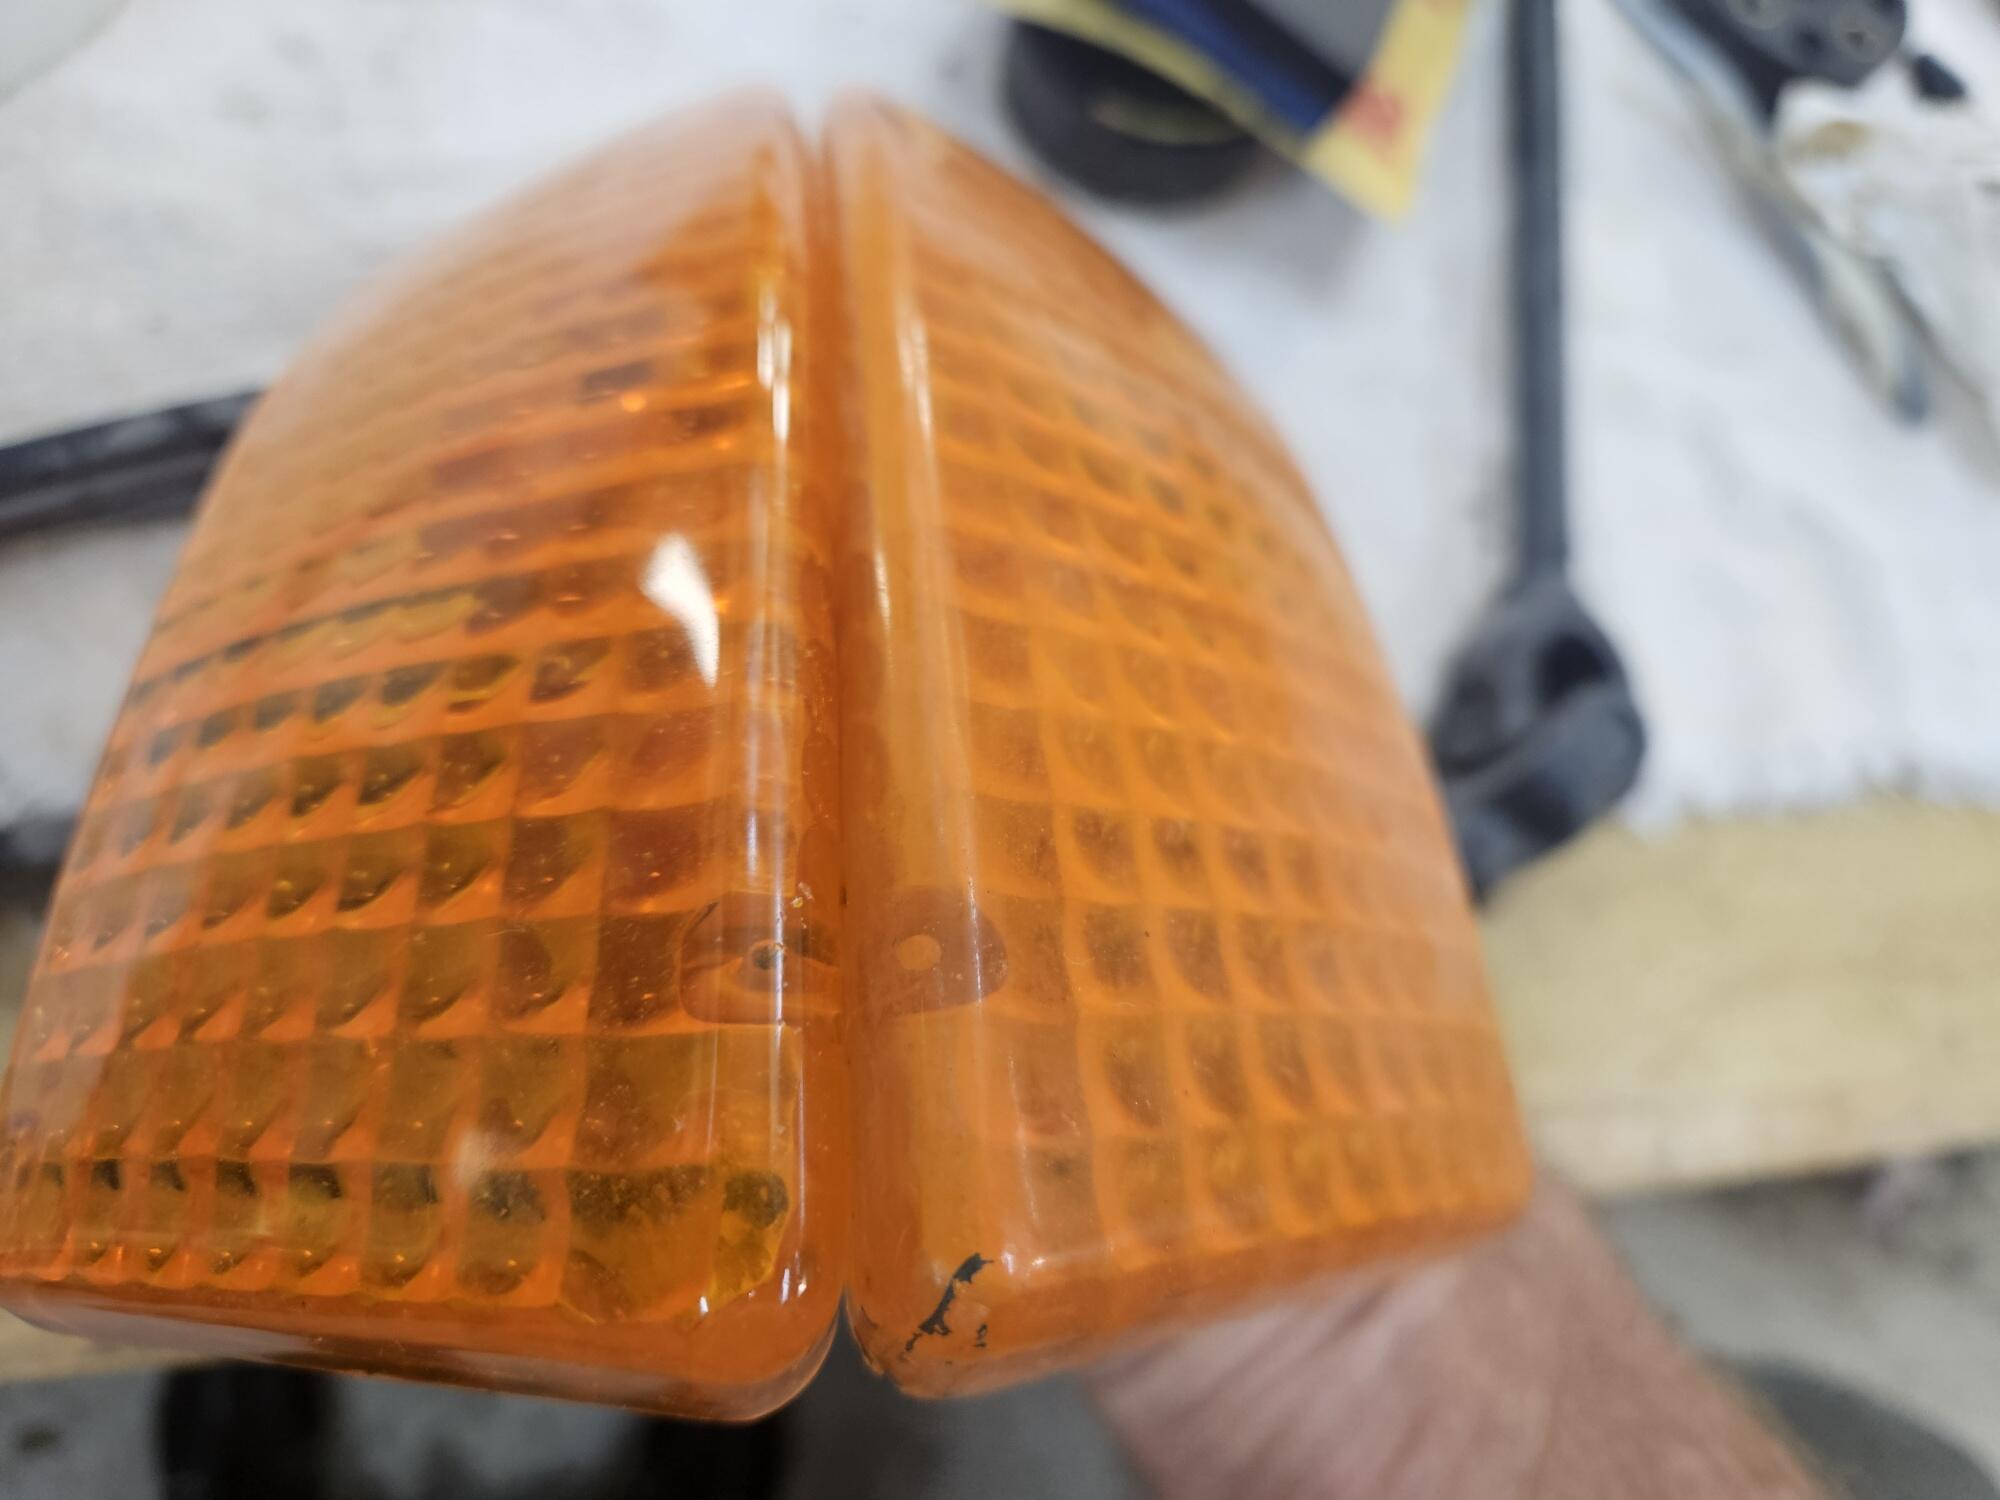
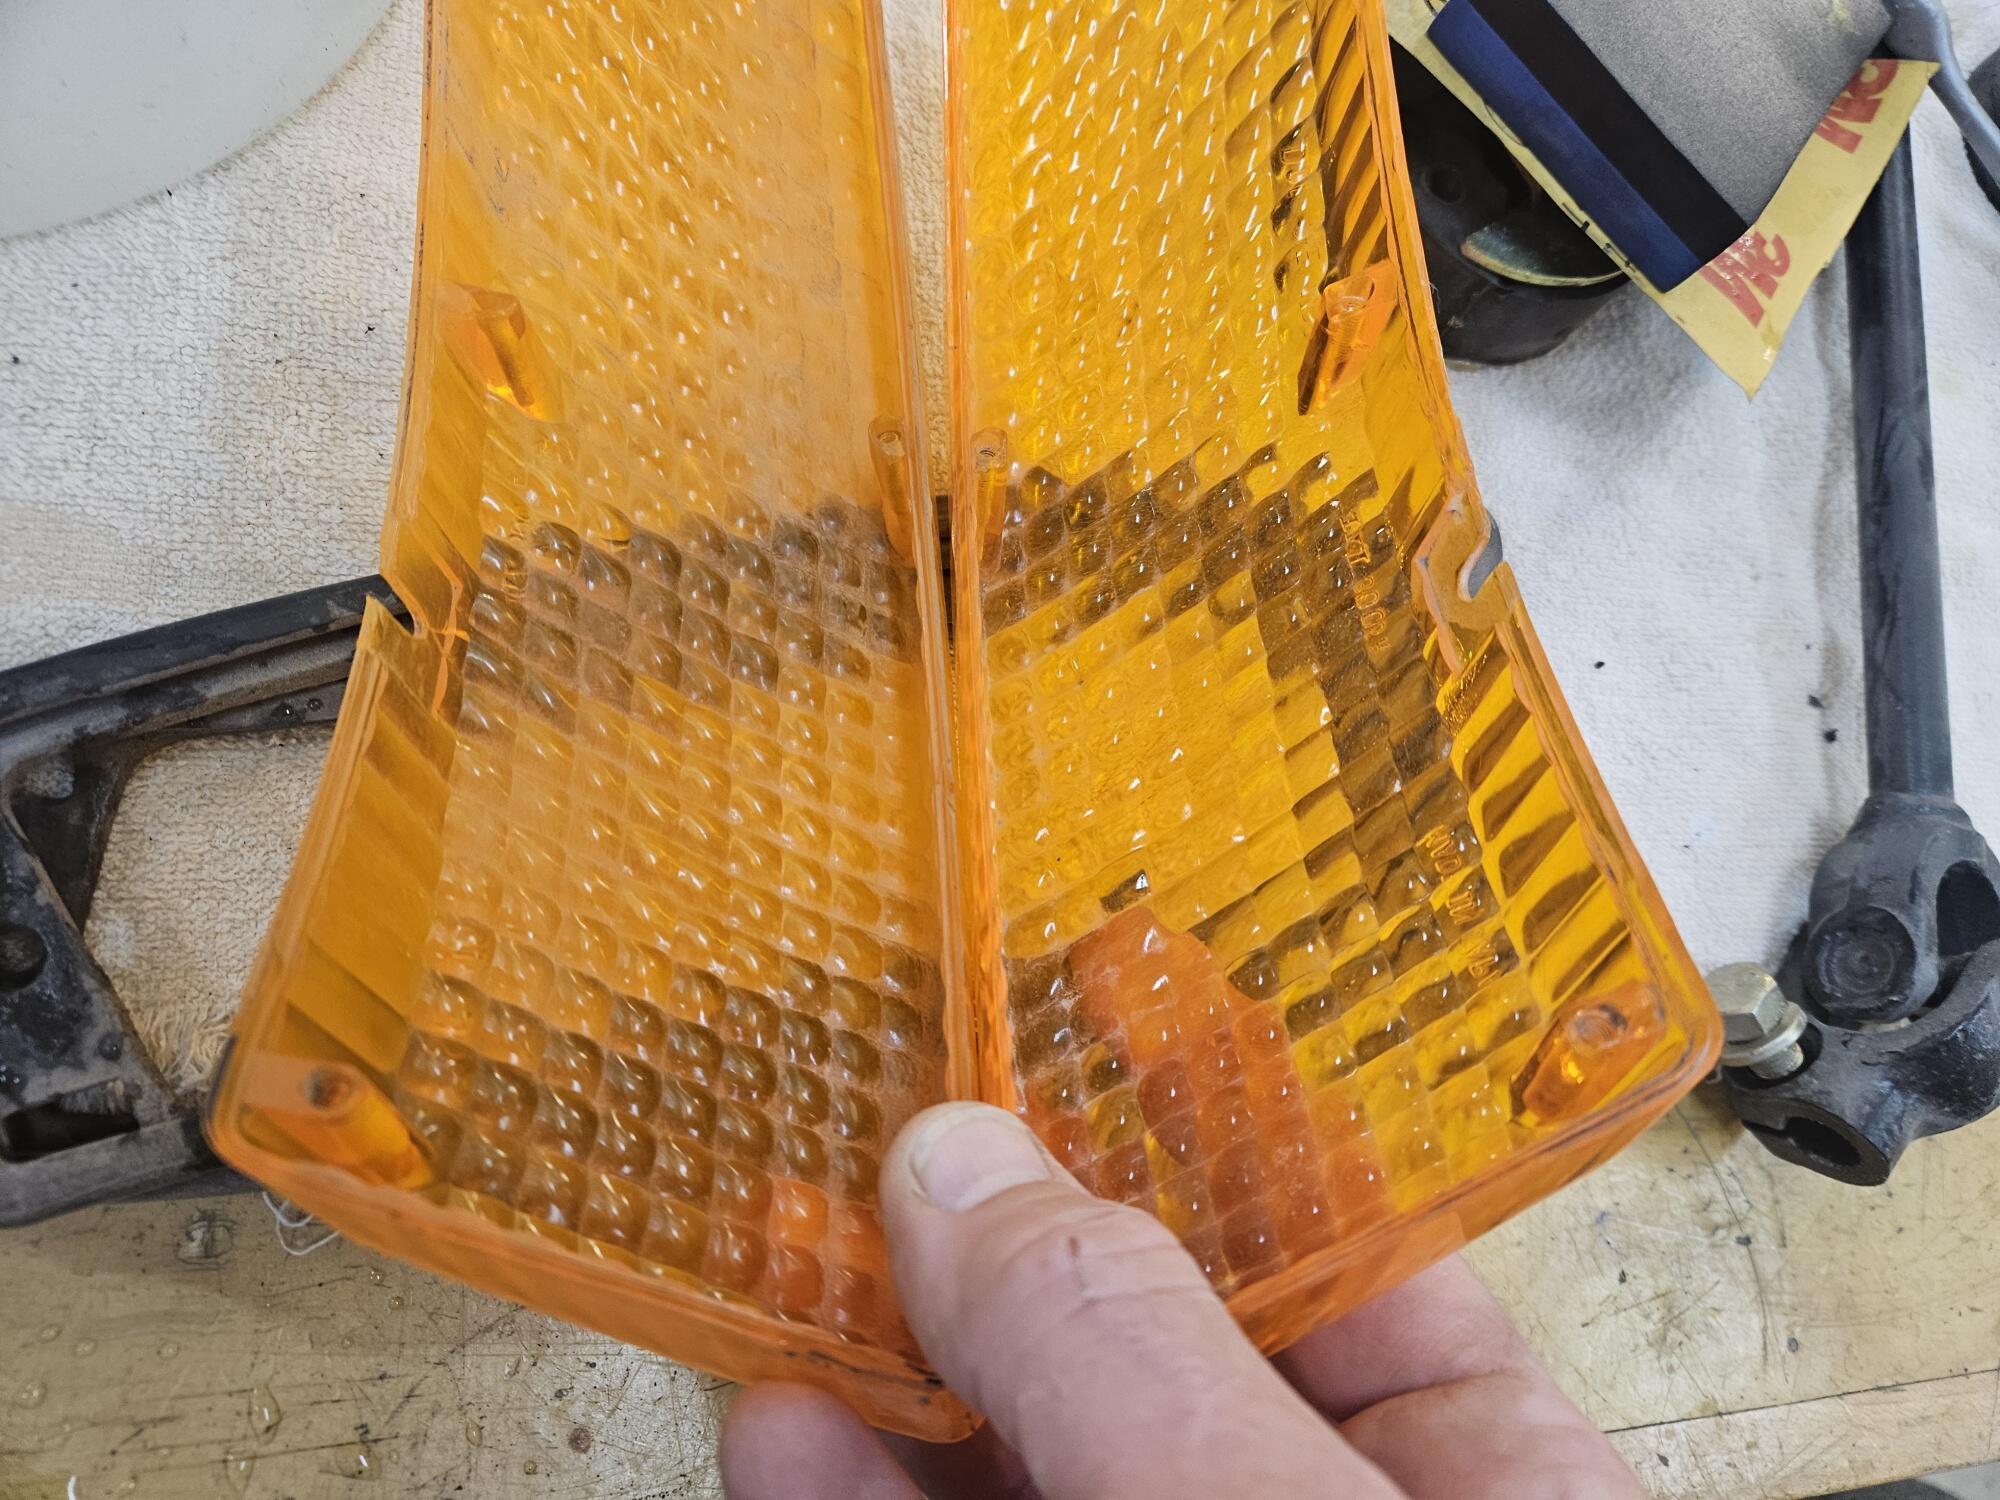
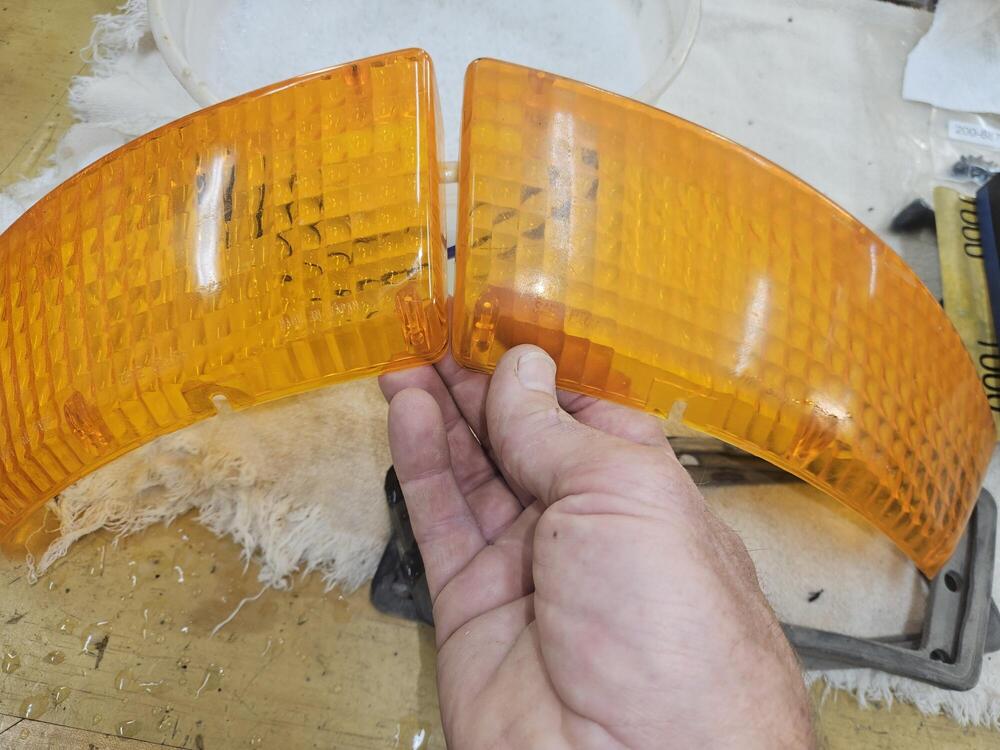
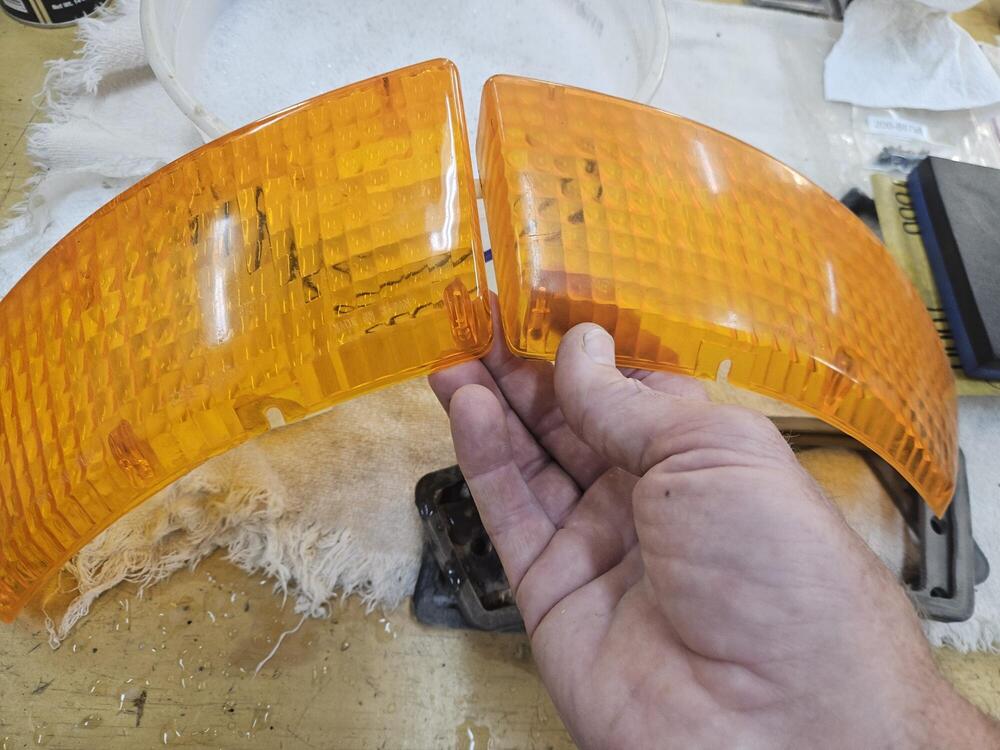
2 pointsI polished a set of lenses for the front turn signals. I also found a set of front turn gaskets to clean up

 2 points
 -
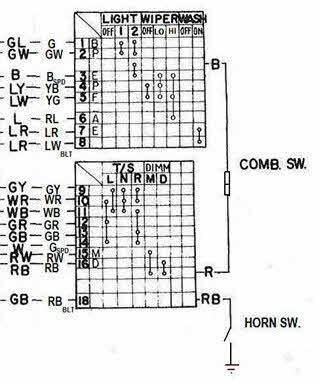
2 pointsWhile I'm at it, here's my edit of the mini-schematic for the Combination Switch, corrected to reflect what I found in the actual layout of the wiring and contacts in the Combination Switch installed in my 4/70 car. I started with the mini-schematic that was part of large wiring diagram included with my car's Owners Manual ("20-Mar-1970 - 030300 - OM0E-0S30U2") and then made corrections... Note on the left side of the diagram that I have two columns of wiring colours: The left column indicates the colour of the wiring on the vehicle side of the Combo Switch connector. The right column indicates the colour of the wiring on the Switch side of the connector. 'SPD' = spade-type wiring connector 'BLT' = bullet-style wiring connector
 2 points
 -
1 pointSorry for my poor English skill, I was trying to say the same like you. The only thing I would like to tell you is there is no difference between Japanese S30 and all the other export S30 in terms of the opening of the tunnel. I don’t know what kind of 5 speed Patcon is going to install, so all I can say for now is if it is a FS5C71A then he doesn’t need to cut the tunnel. FS5C71B or FS5W71B, he needs to cut the tunnel like you said. Kats1 point
-
1 point
-
1 pointMy thought process was a temp tank close by, especially if it's close to fender level, makes it easy to prime the fuel pump and verify it's functioning1 point
-
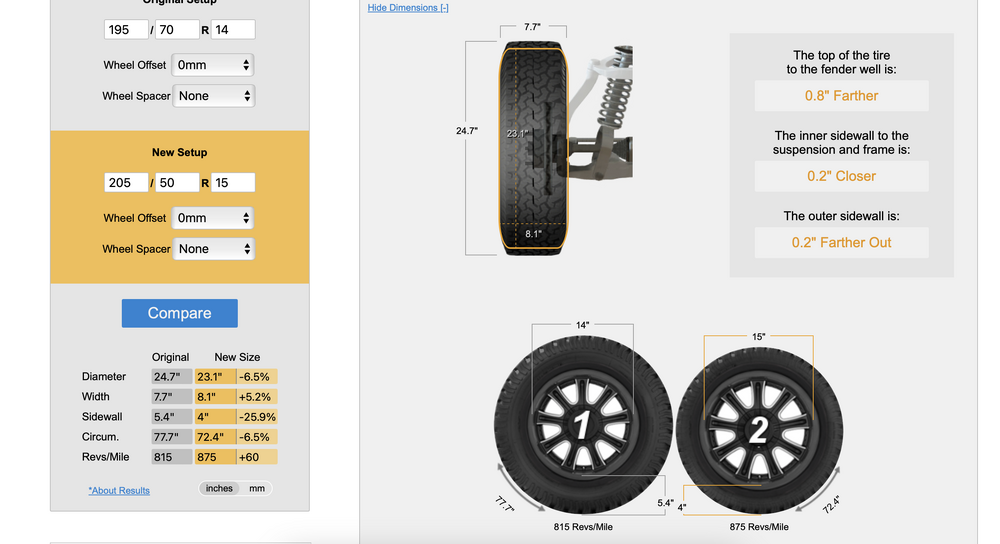
1 pointI had to go find the tire size I used, and look up the OE size - for some reason I didn't document either. I don't recall the spare being full size though - I discarded it not long after getting the car. The problem with most wheels (such as the Honda suggestion) is that the offset for FWD is not going to clear big brakes, I believe Searching for a spare also brought up a range of other 15" wheels I wouldn't mind - I liked the Rota's I had on my X1/9 - that brand has a 4 spoke 4x114.3 - but it's 15x8 - I don't know if that will clear the strut tube. I really don't need another set of wheels & tires to play with right now...
 1 point
 -
1 pointHmmm... Try one. It might be OK. The diameter should be fine. The only thing that might be an issue is the width, but in theory, you're less than .400 inches wider than stock. Maybe you're looking at a non-problem!1 point
-
1 pointHi Patcon, Are you going to put the automatic transmission back to the car? If so, you just don’t need the metal ring. Just bolt the base plate for the automatic shifter on to the opening of the tunnel. The opening shape and size, and location is just the same as the opening for F4W71A/FS5C71A. This is also true for the late 1971 model and later. Even when Z got the new center console for F4W71B/FS5C71B the opening for the automatic transmission remains the same as F4W71A/FS5C71A. I think Nissan was cleaver to utilize and minimize the cost and labor at the production line. Or if you are going to put an F4W71B or an FS5C71B, you need the ring to bolt on the tunnel. Great work, a lot of progress! Kats1 point
-
1 pointThe wiring work is getting inspected, and I've barely even started.
 1 point
 -
View Advert Datsun/Nissan factory publications for sale After more than 53 years of service to the Z car world I closed my shop in Jan. I have more than 41 factory service manuals and year end service bulletin compilation manuals that I would like to sell. Thank you, Mike Advertiser zspert Date 06/30/2024 Price $300 Category Parts for Sale1 point
-
1 pointSeveral years ago, I worked with your #2 schematic ("Datsun Factory Parts are fully warranted to give utmost satisfaction") and then added editing comments, using the wiring, connections, and devices in my car (unmolested 4/70 240Z) as my primary guide. See attachment #1. Back in 2015, CZCC member @EuroDat (Chas) did a beautiful job of creating a full-colour wiring schematic based on the specs for MY-1970 USA-Cda cars (see attachment #2). It addresses most of the issues that I identified in my own review. S30 Wiring Schematic - 70 240Z - B&W - 70 Owners Manual - Comments added for errors 7.pdf S30 Wiring Schematic - 70 240Z - Colour - Eurodat.pdf1 point
-
Congratulations on finishing your teaching career. I retired from teaching 14 years ago and every June I like to watch this video.1 point
-
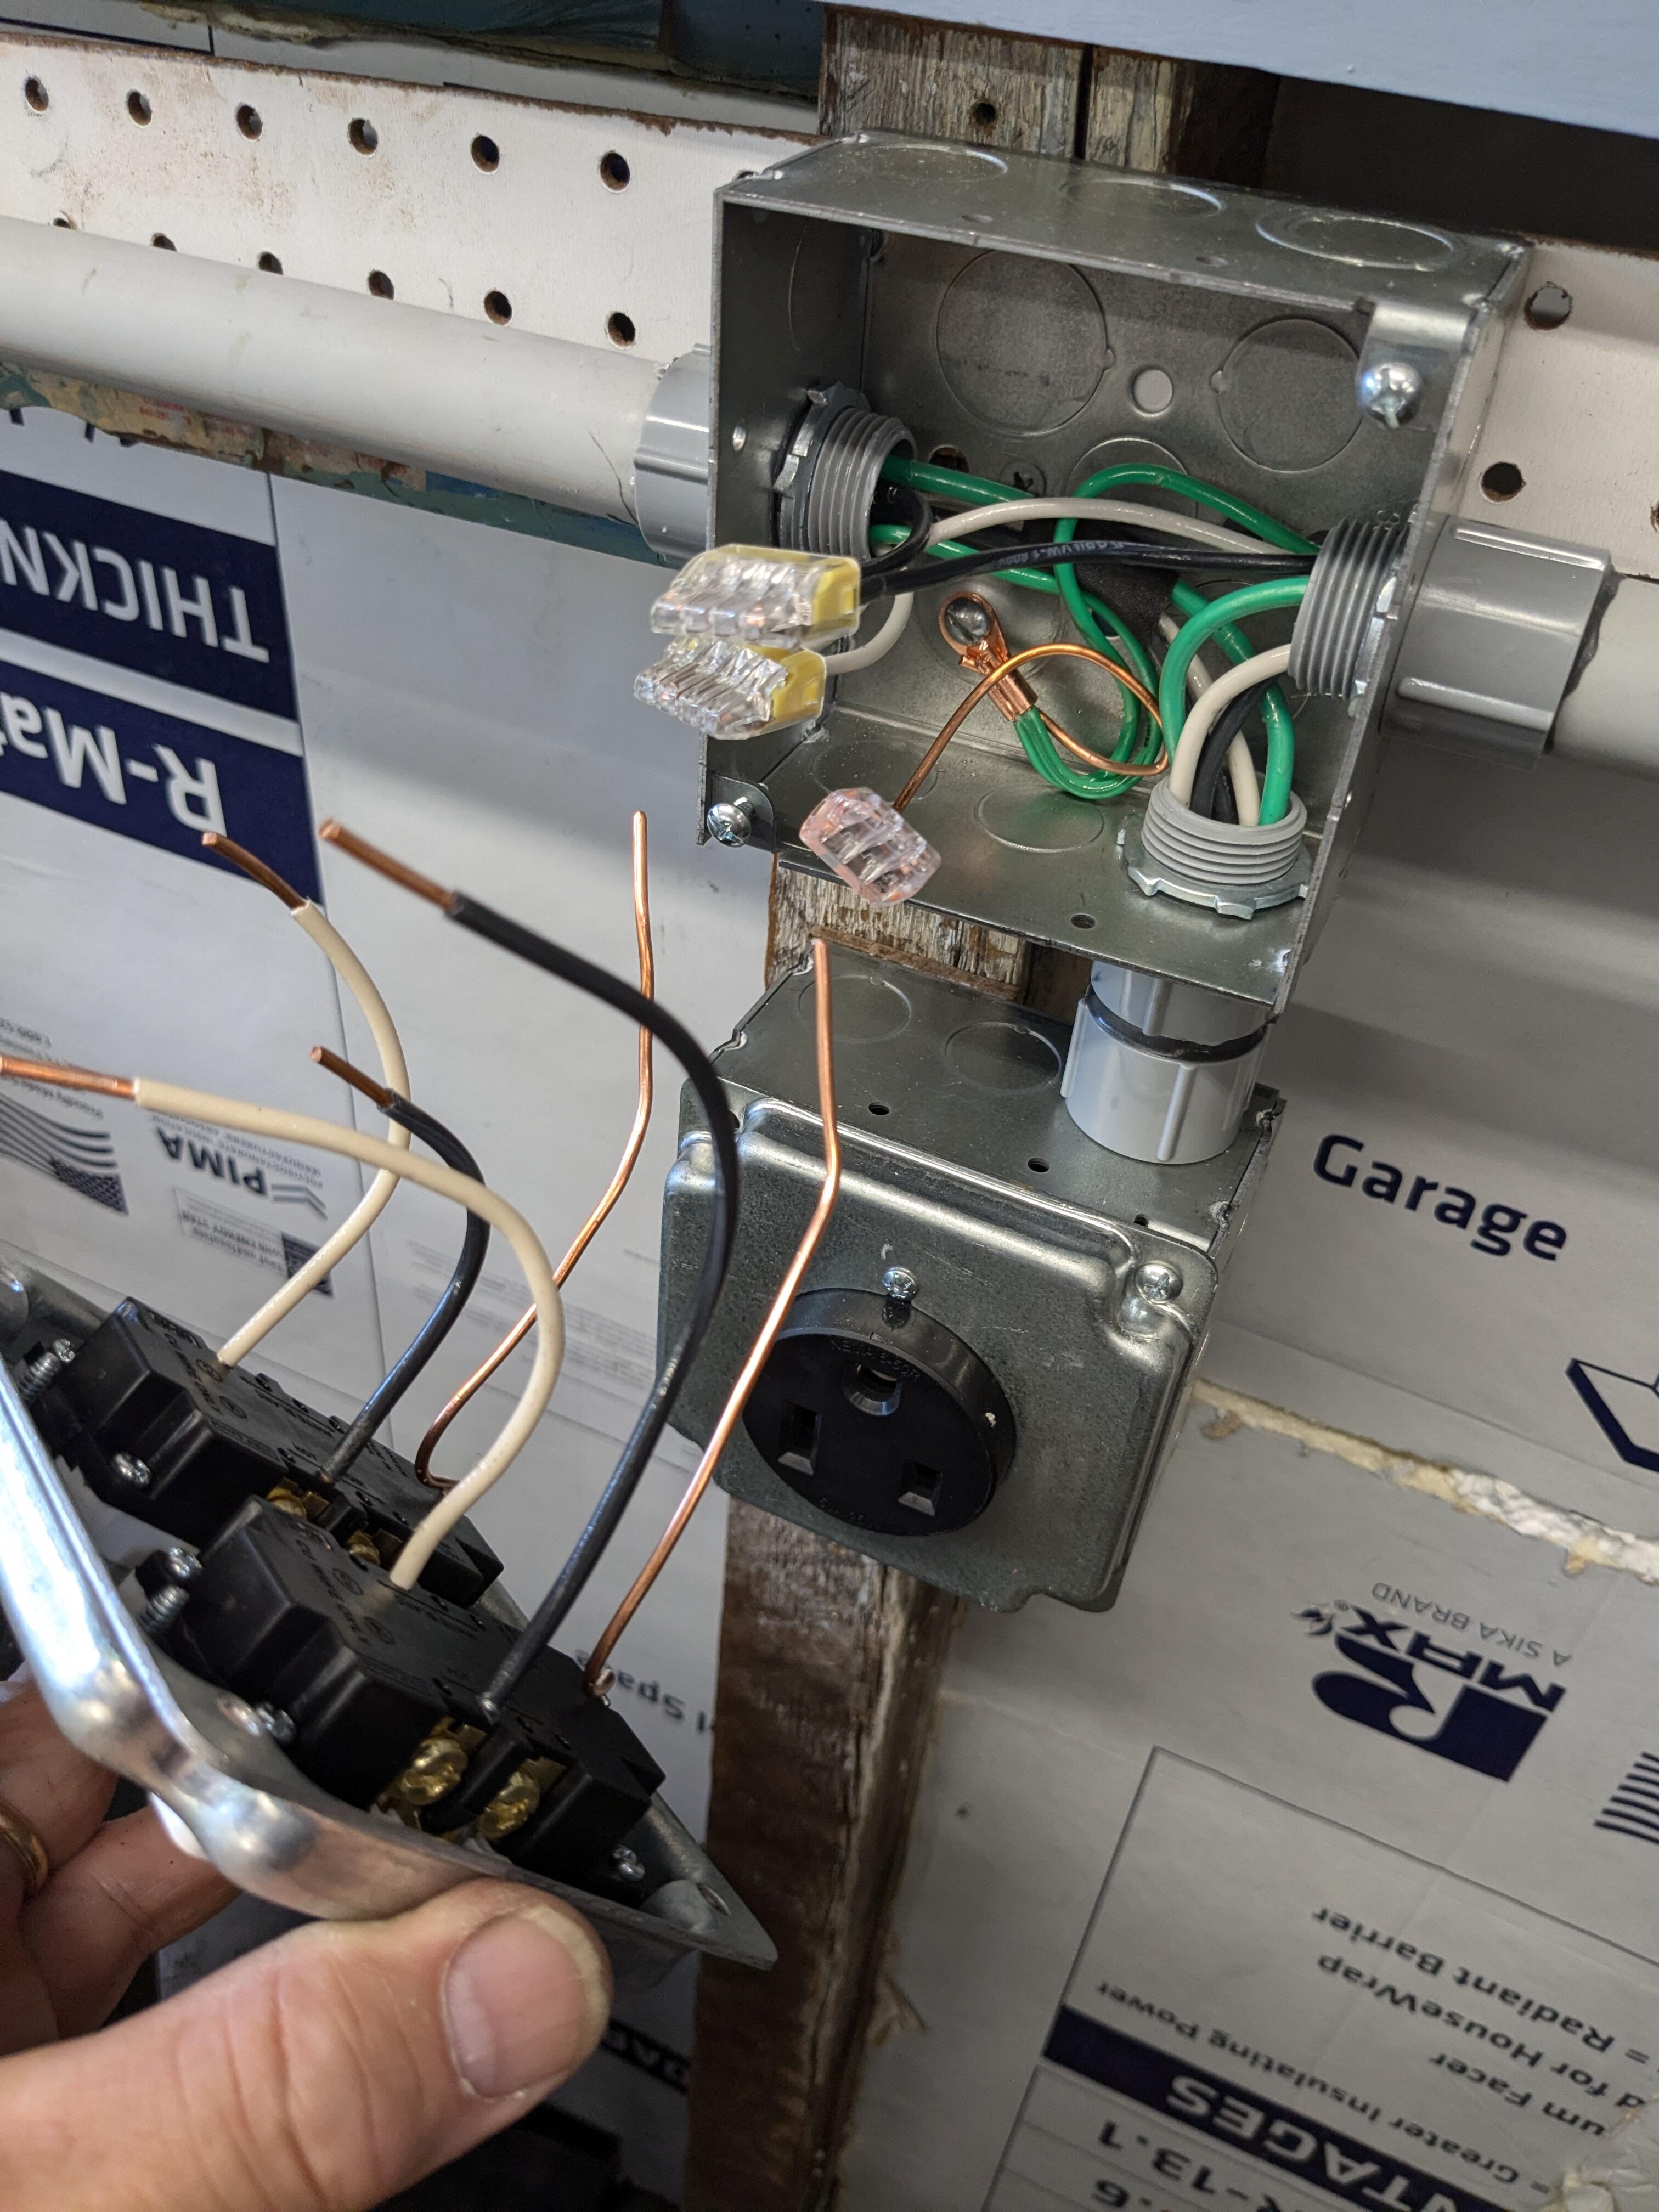
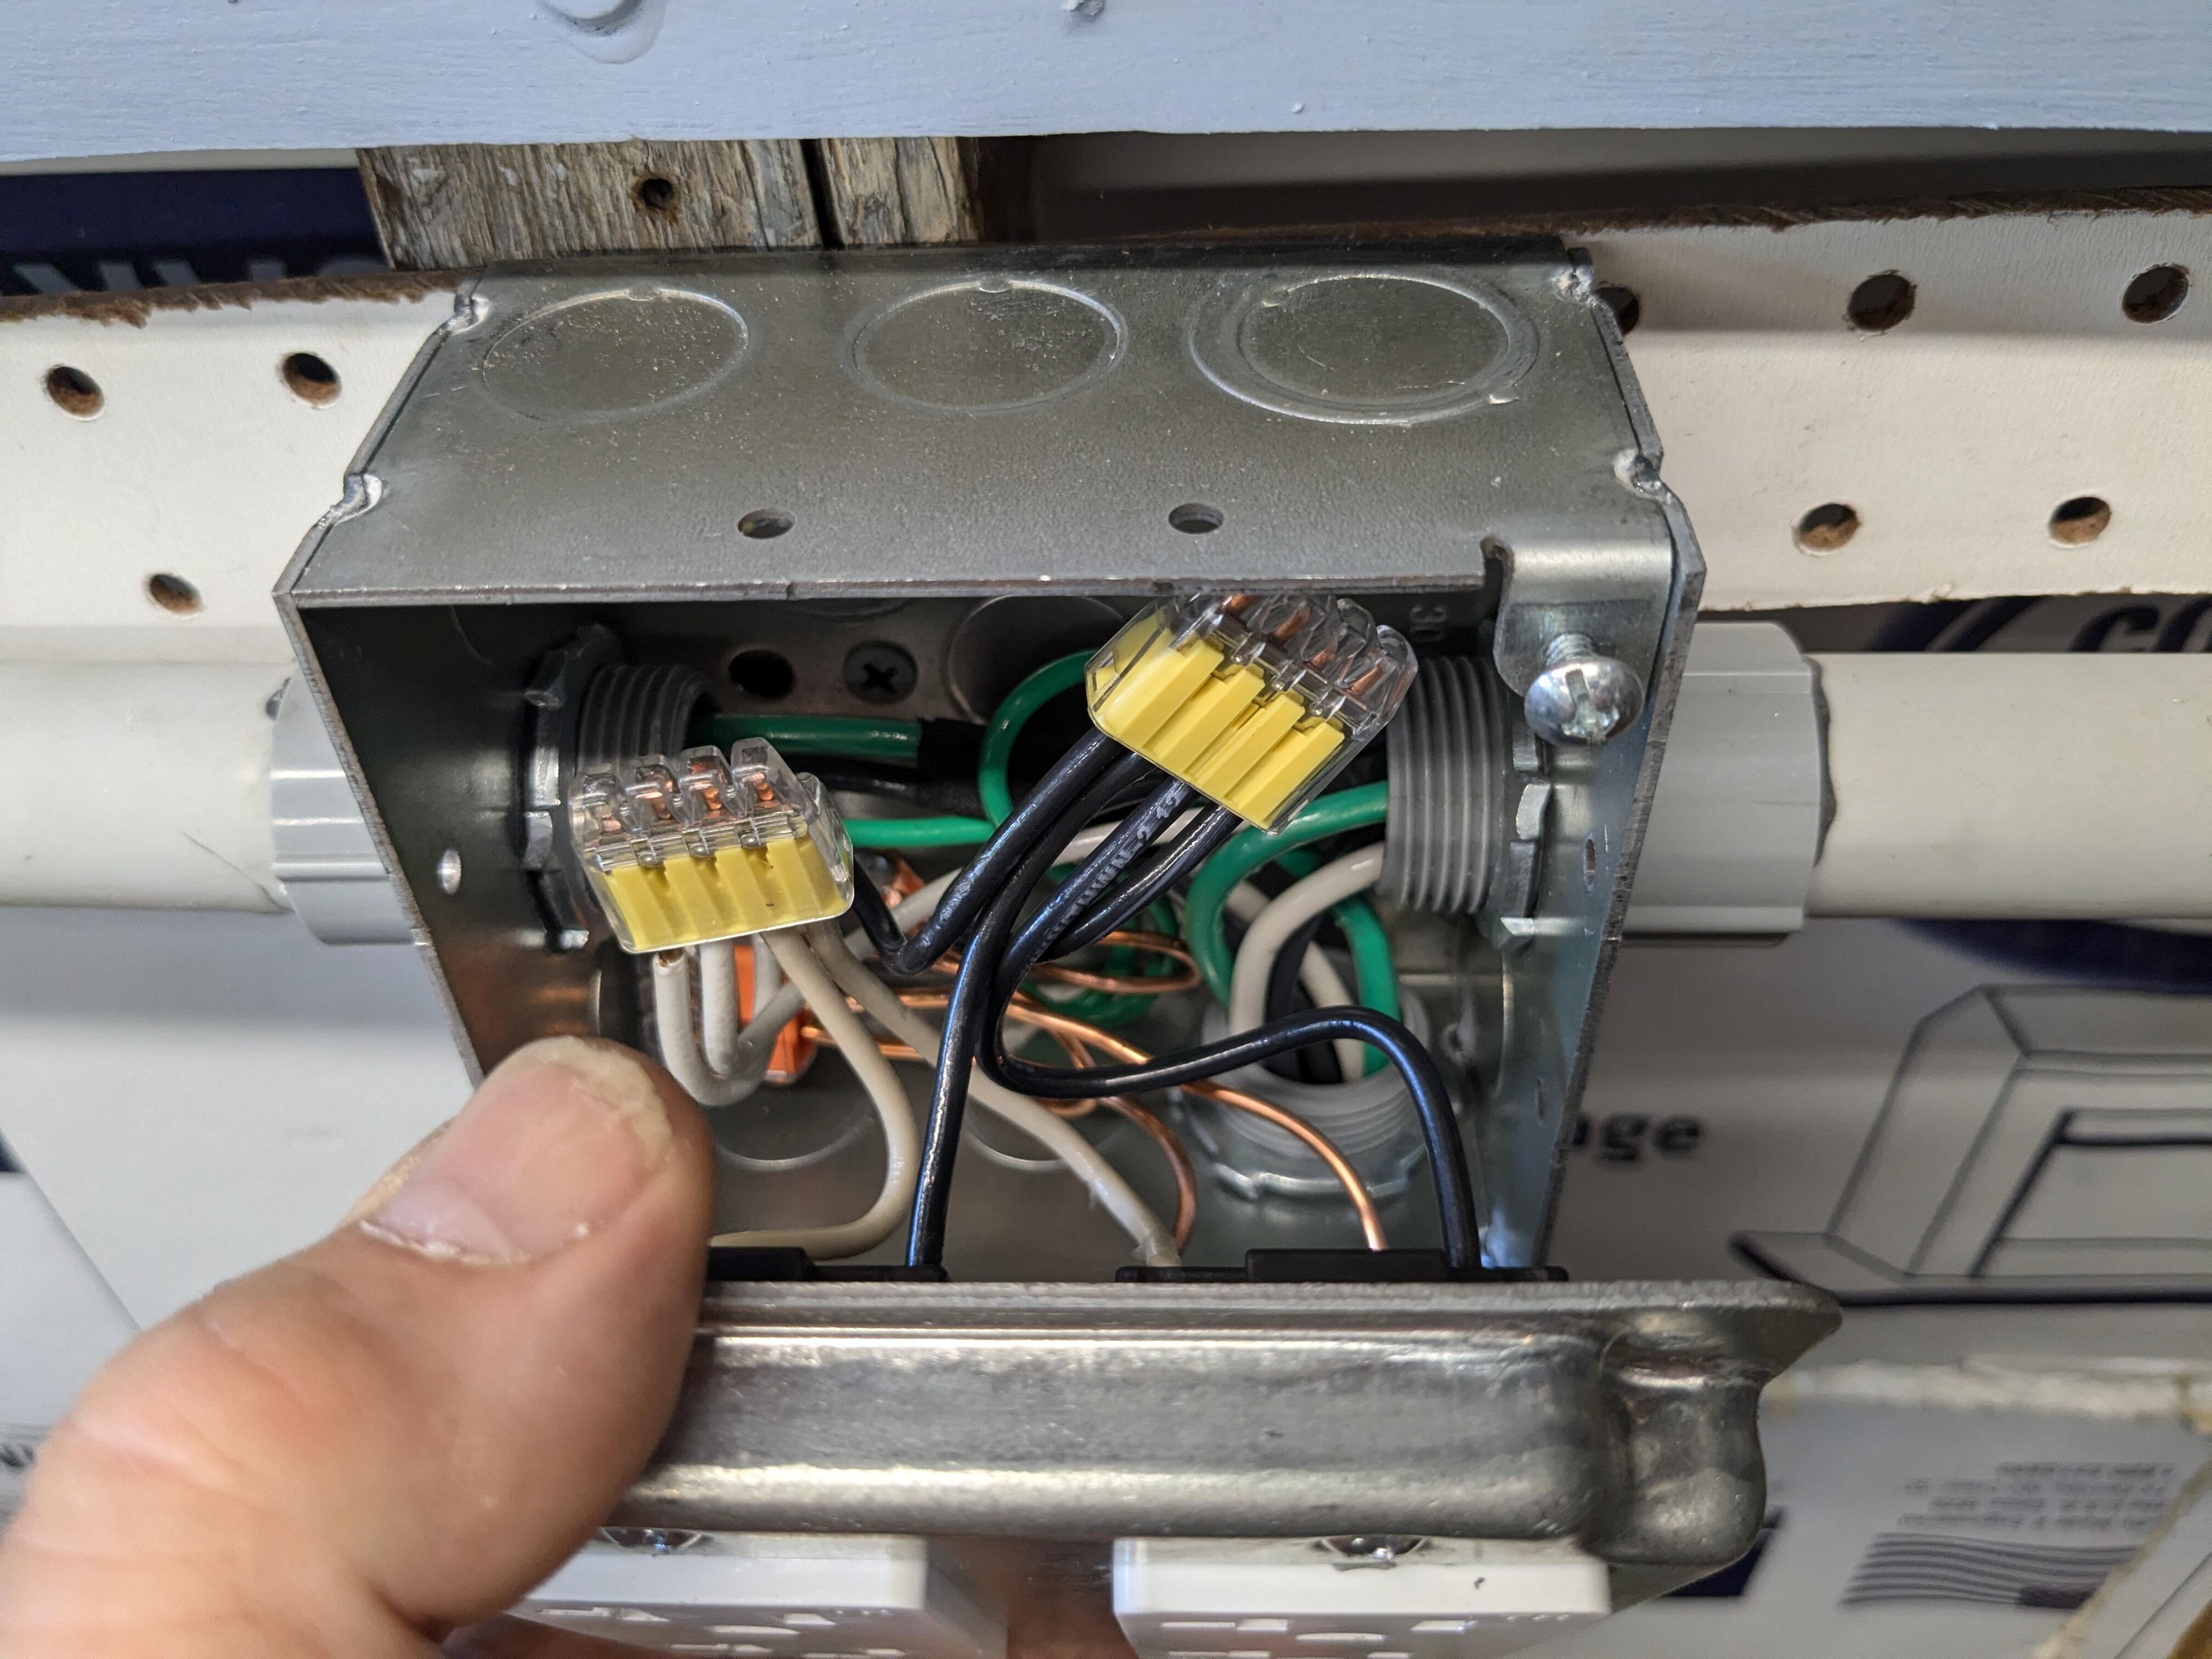
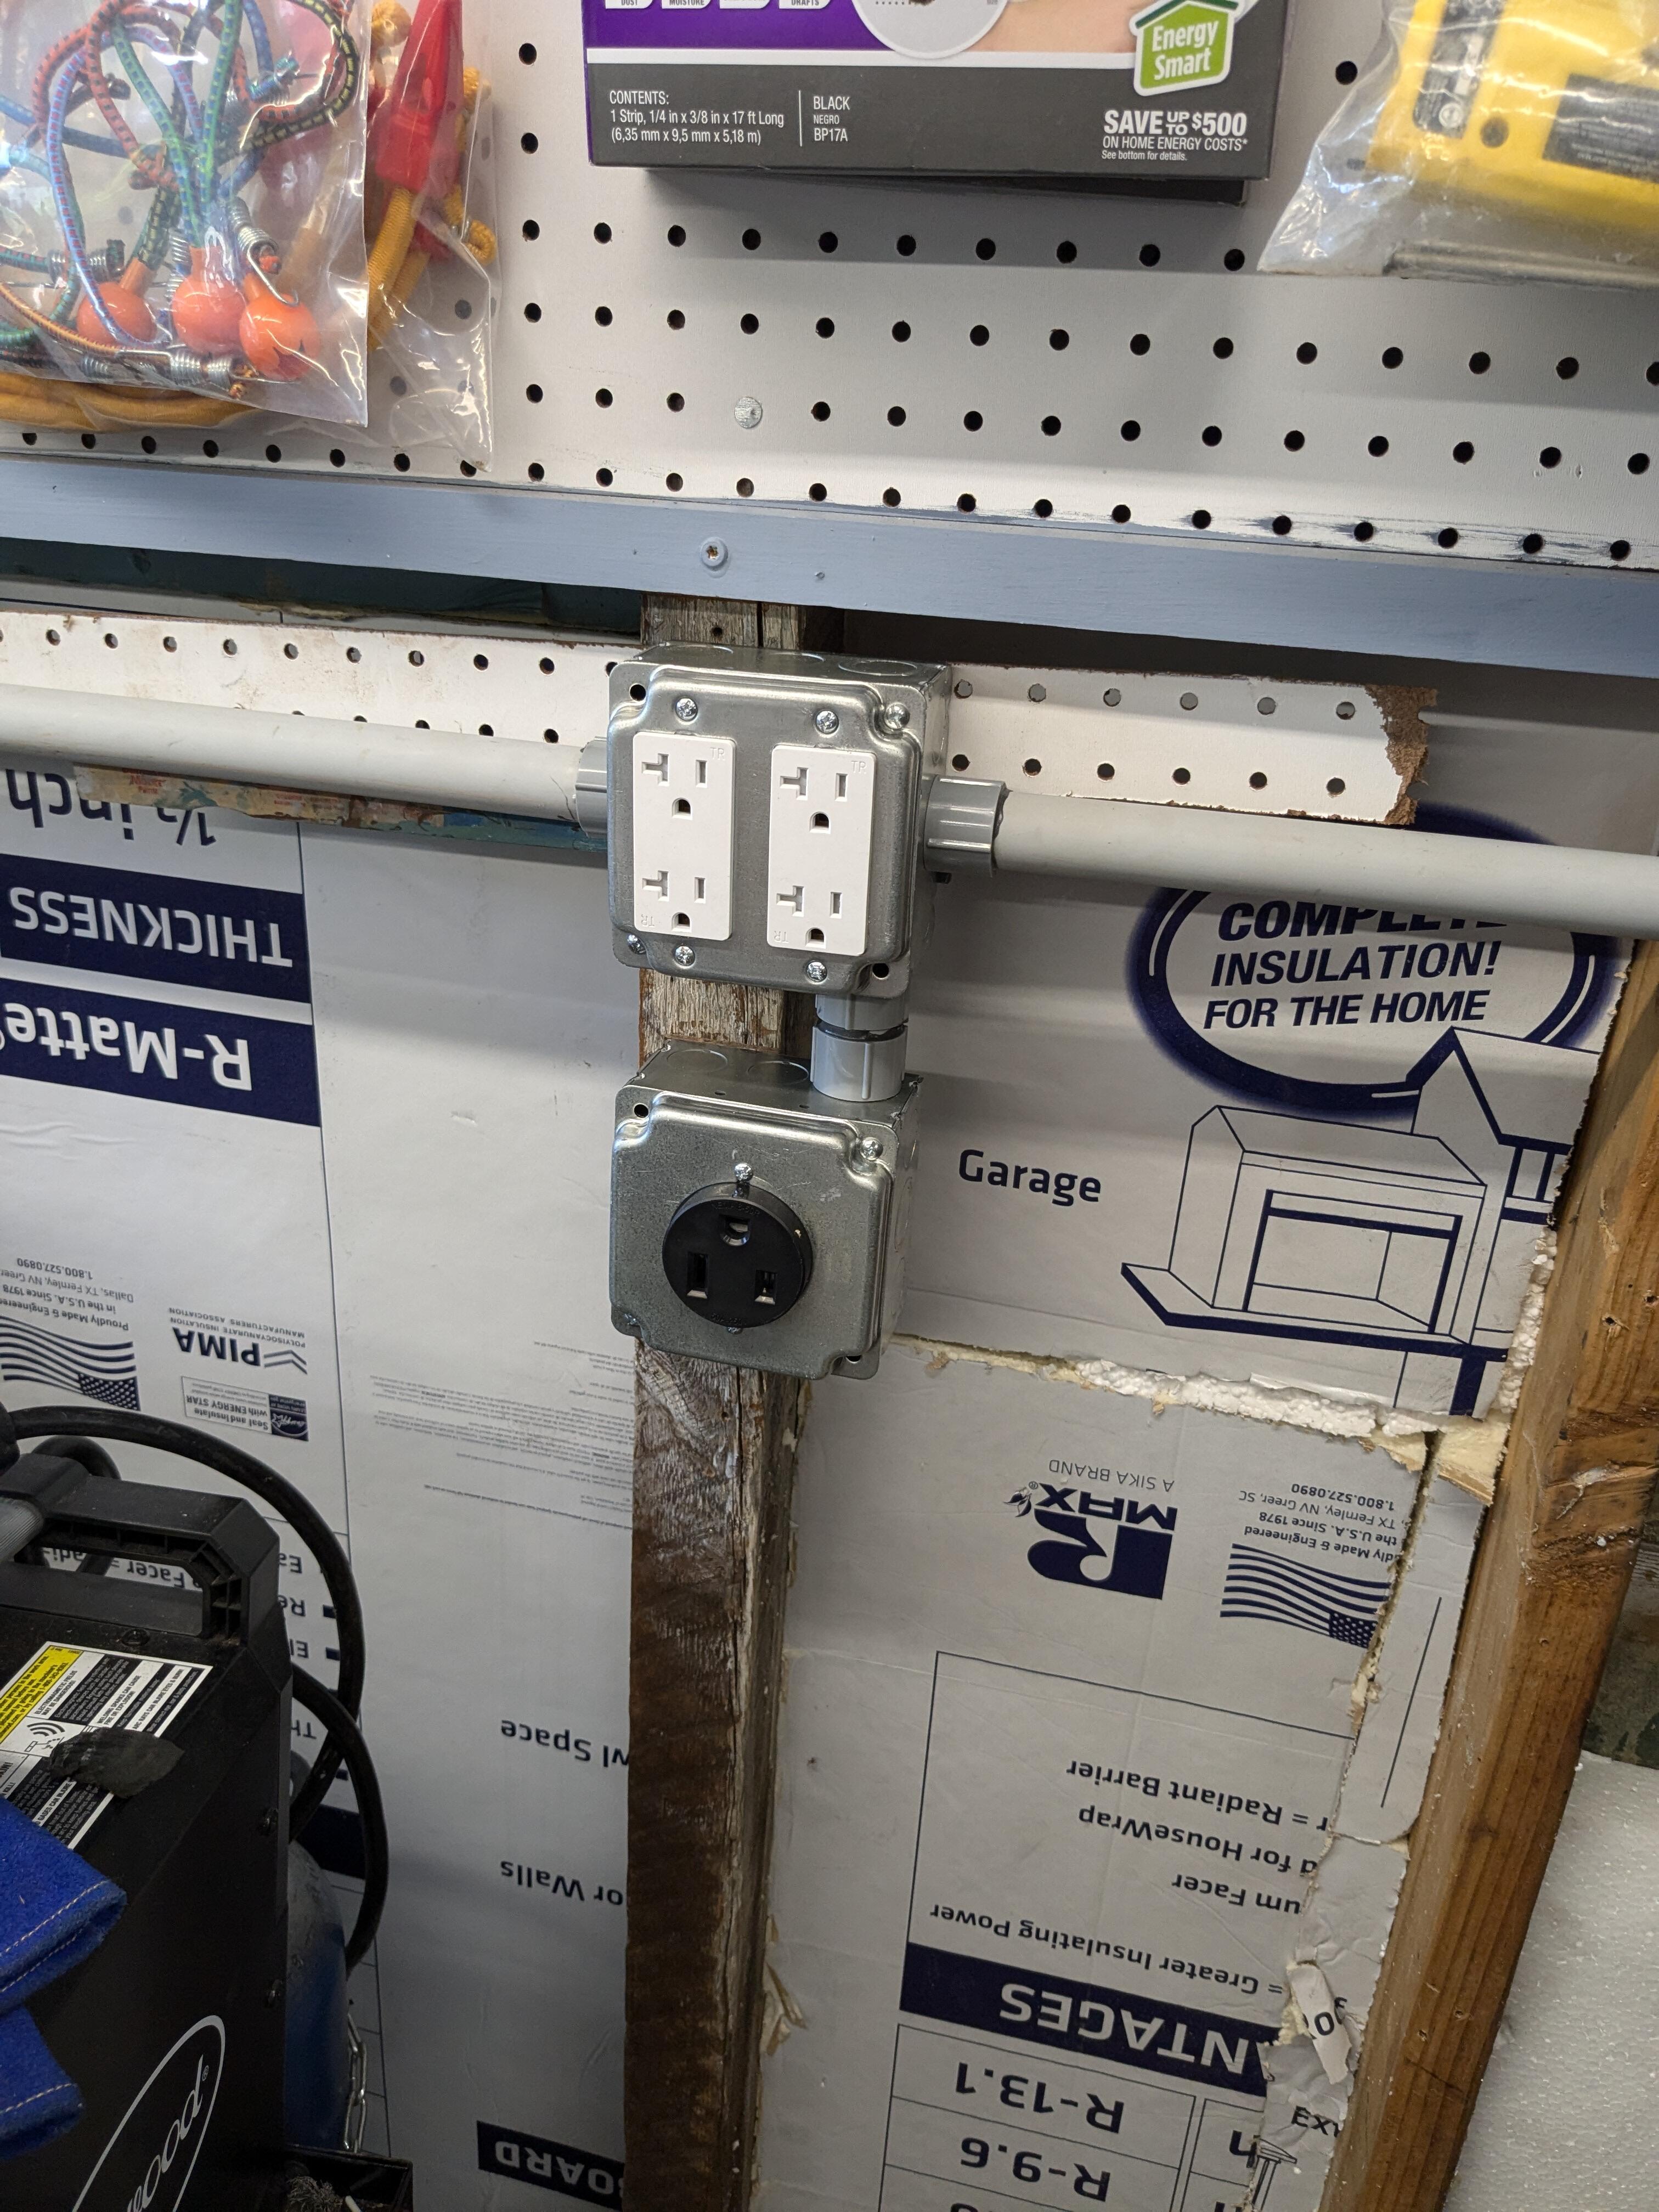
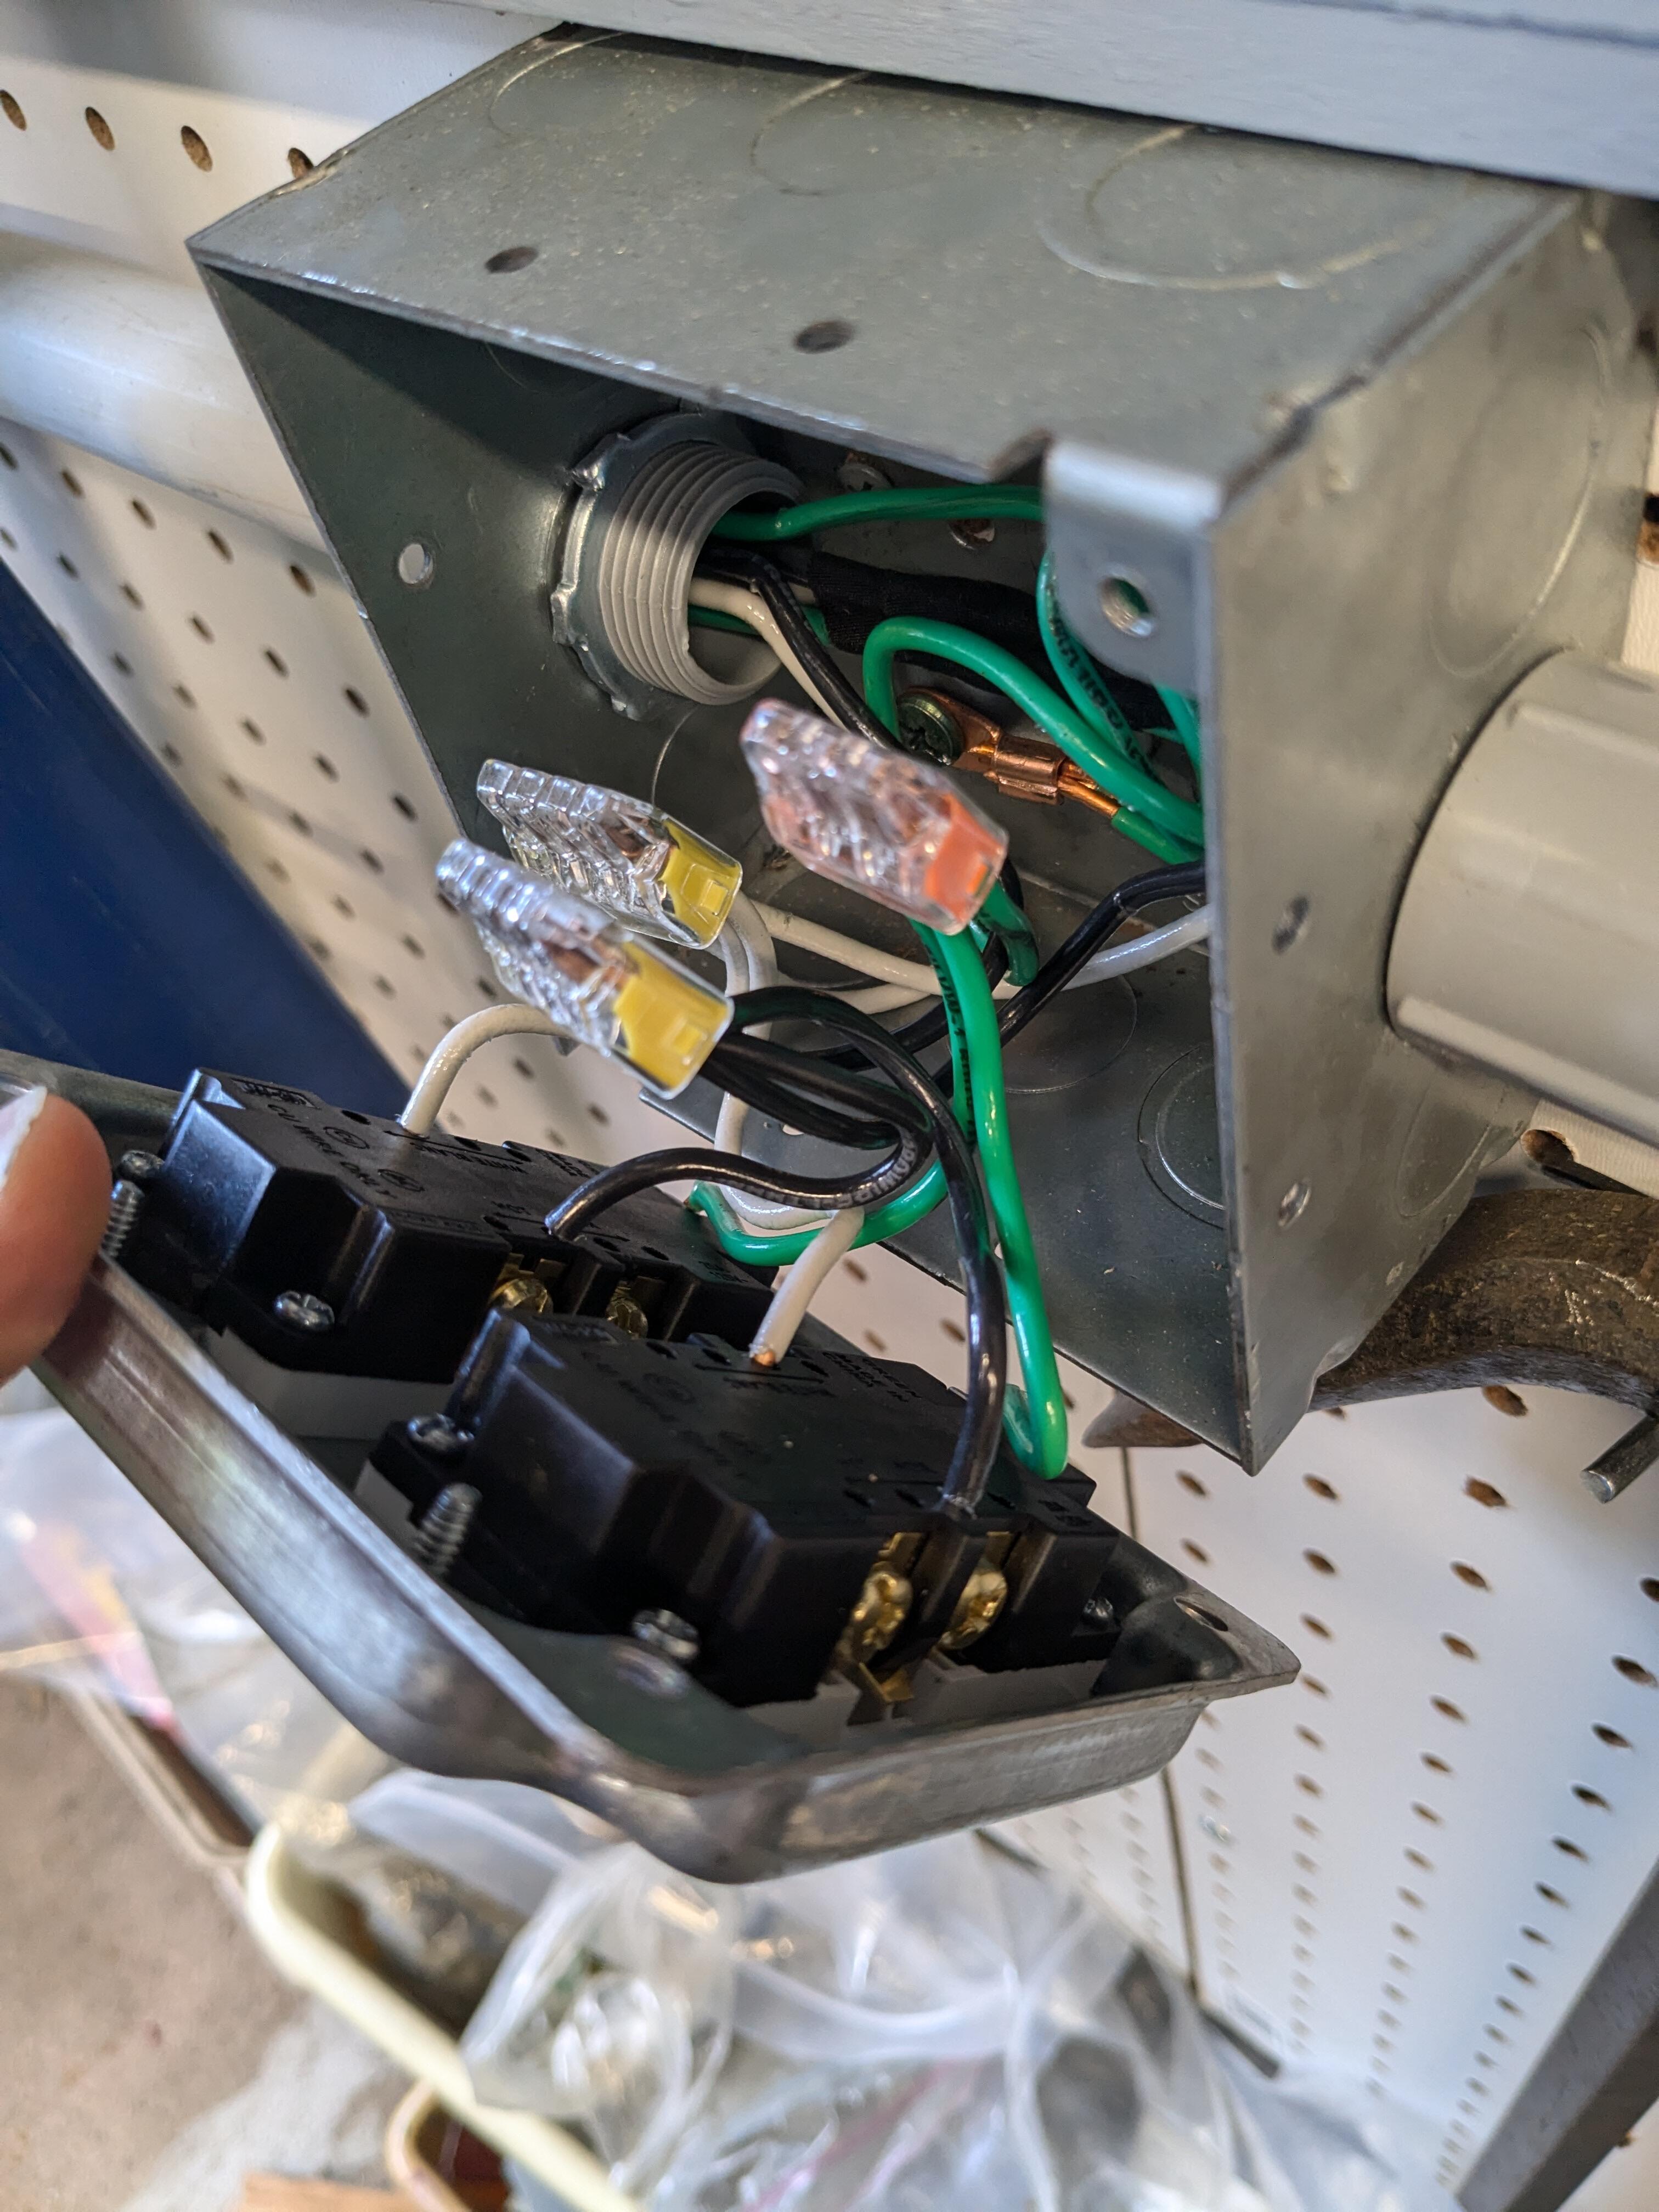
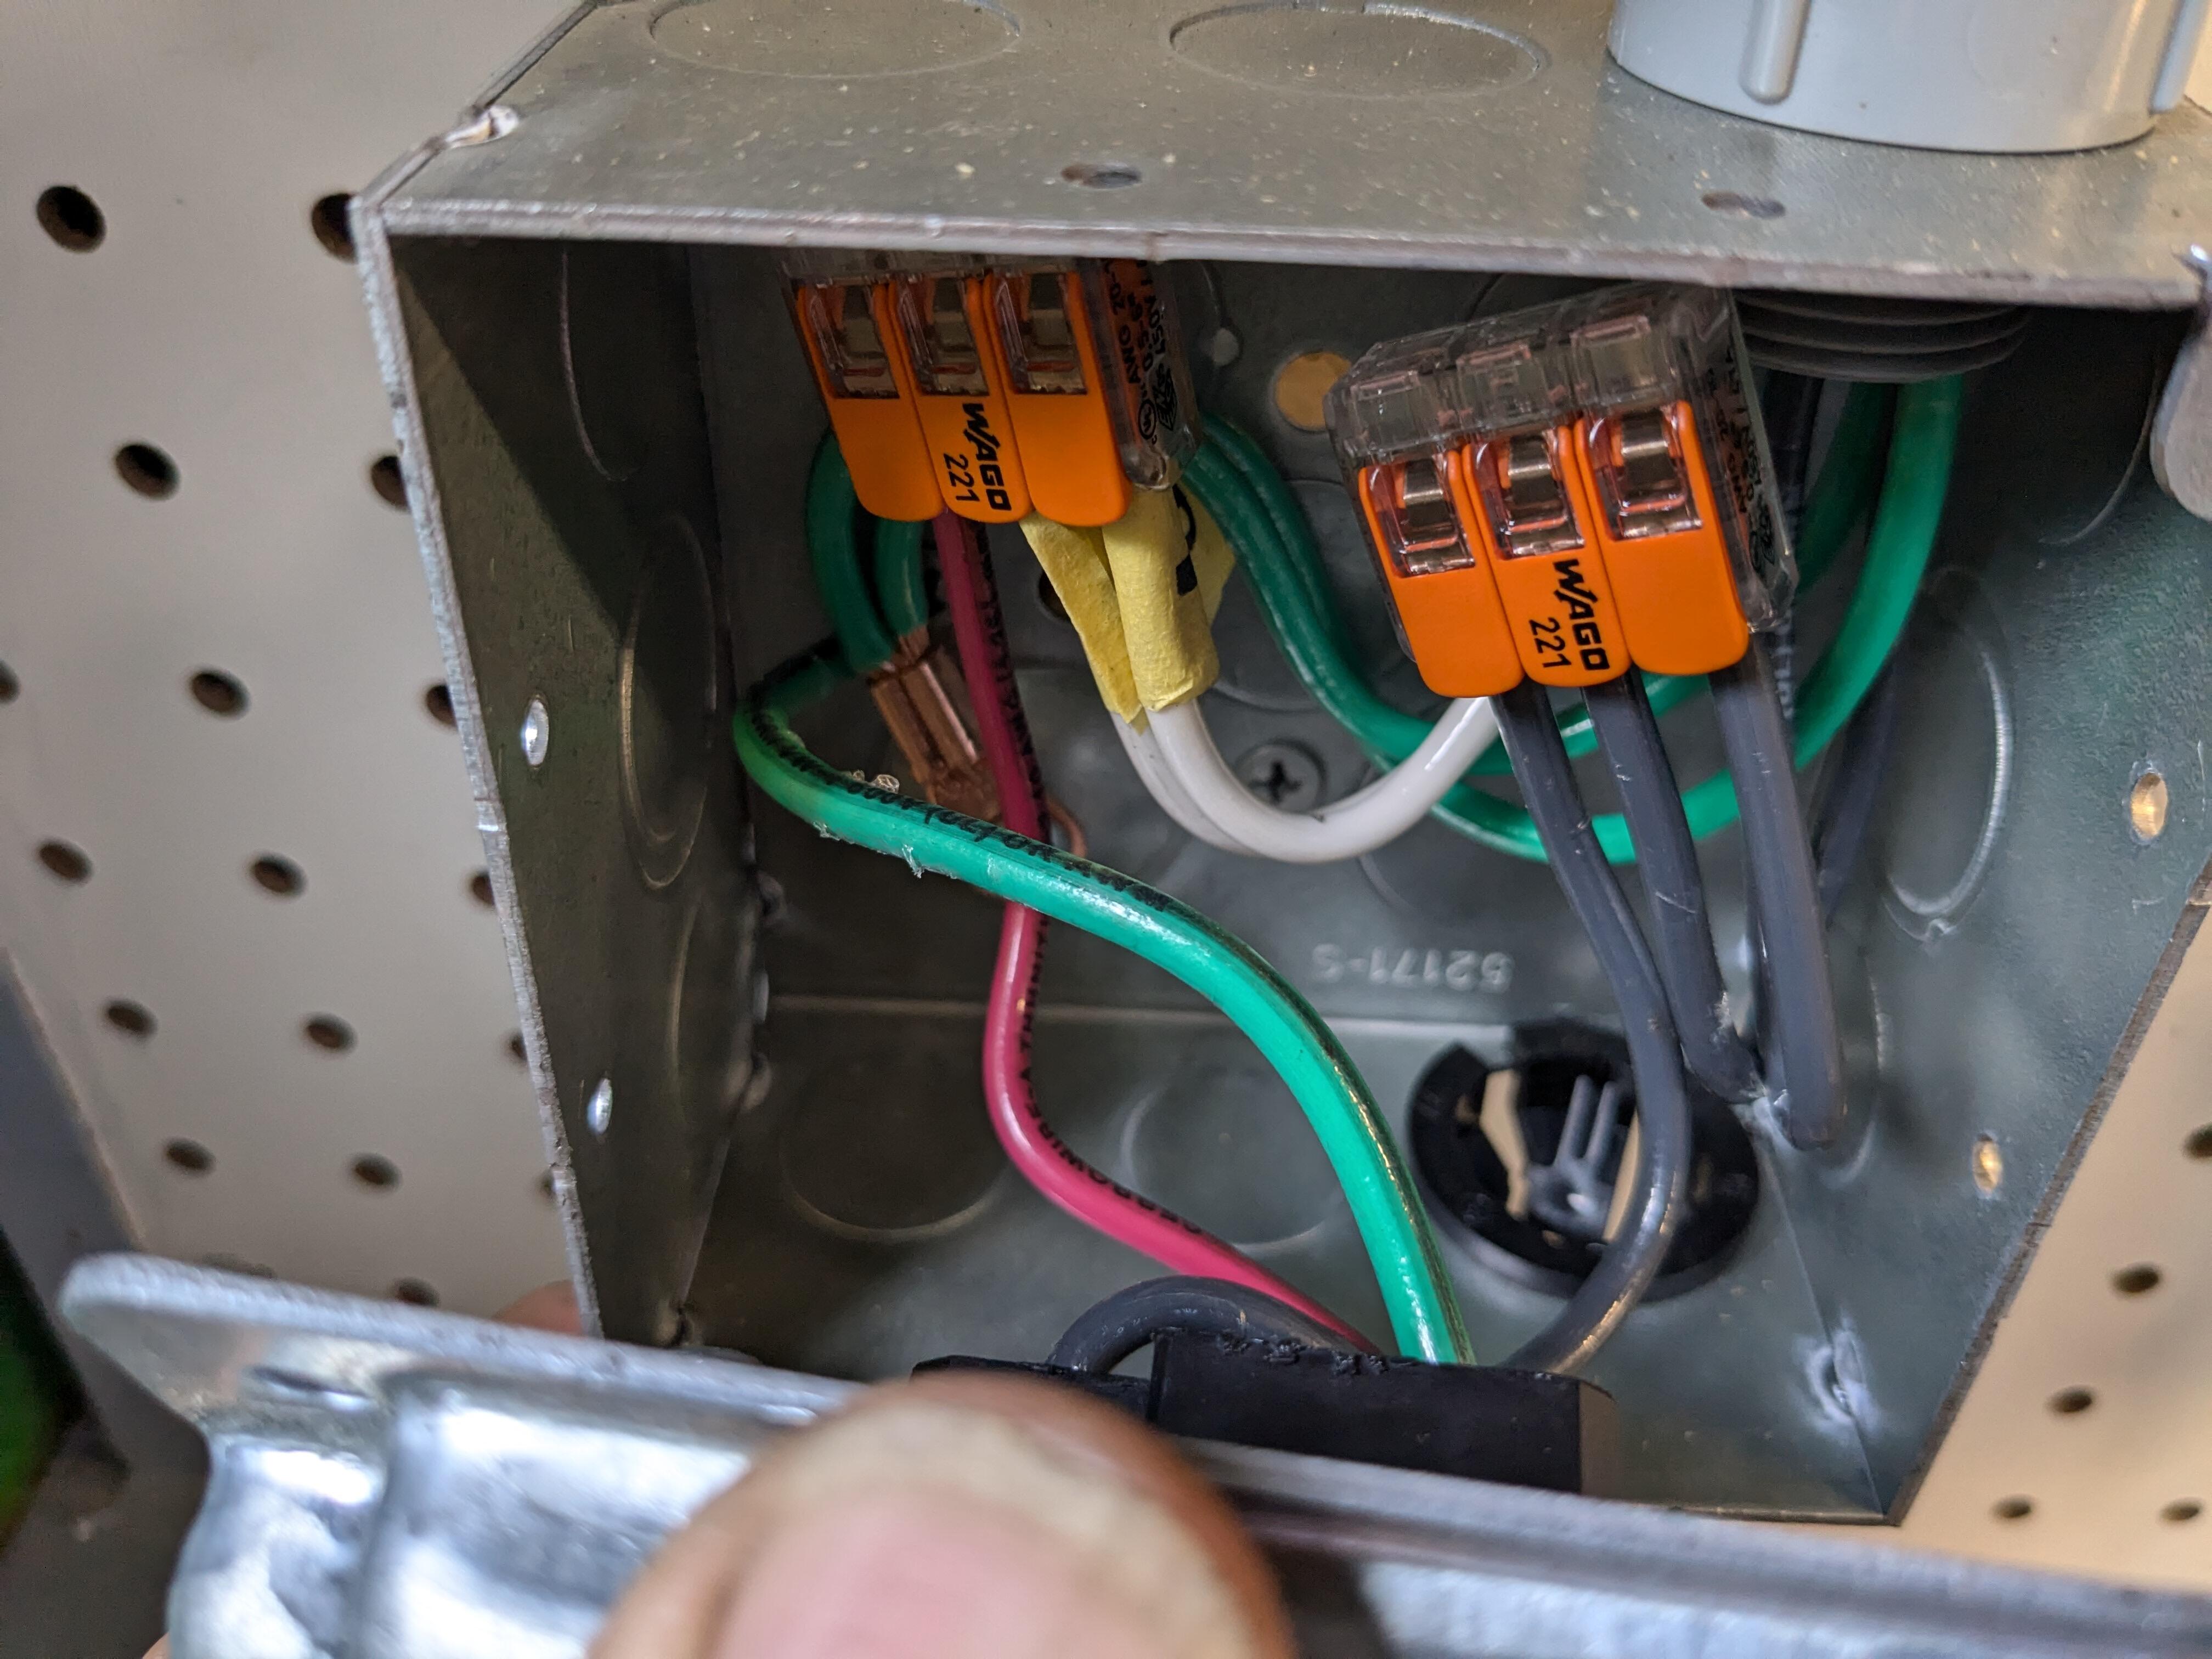
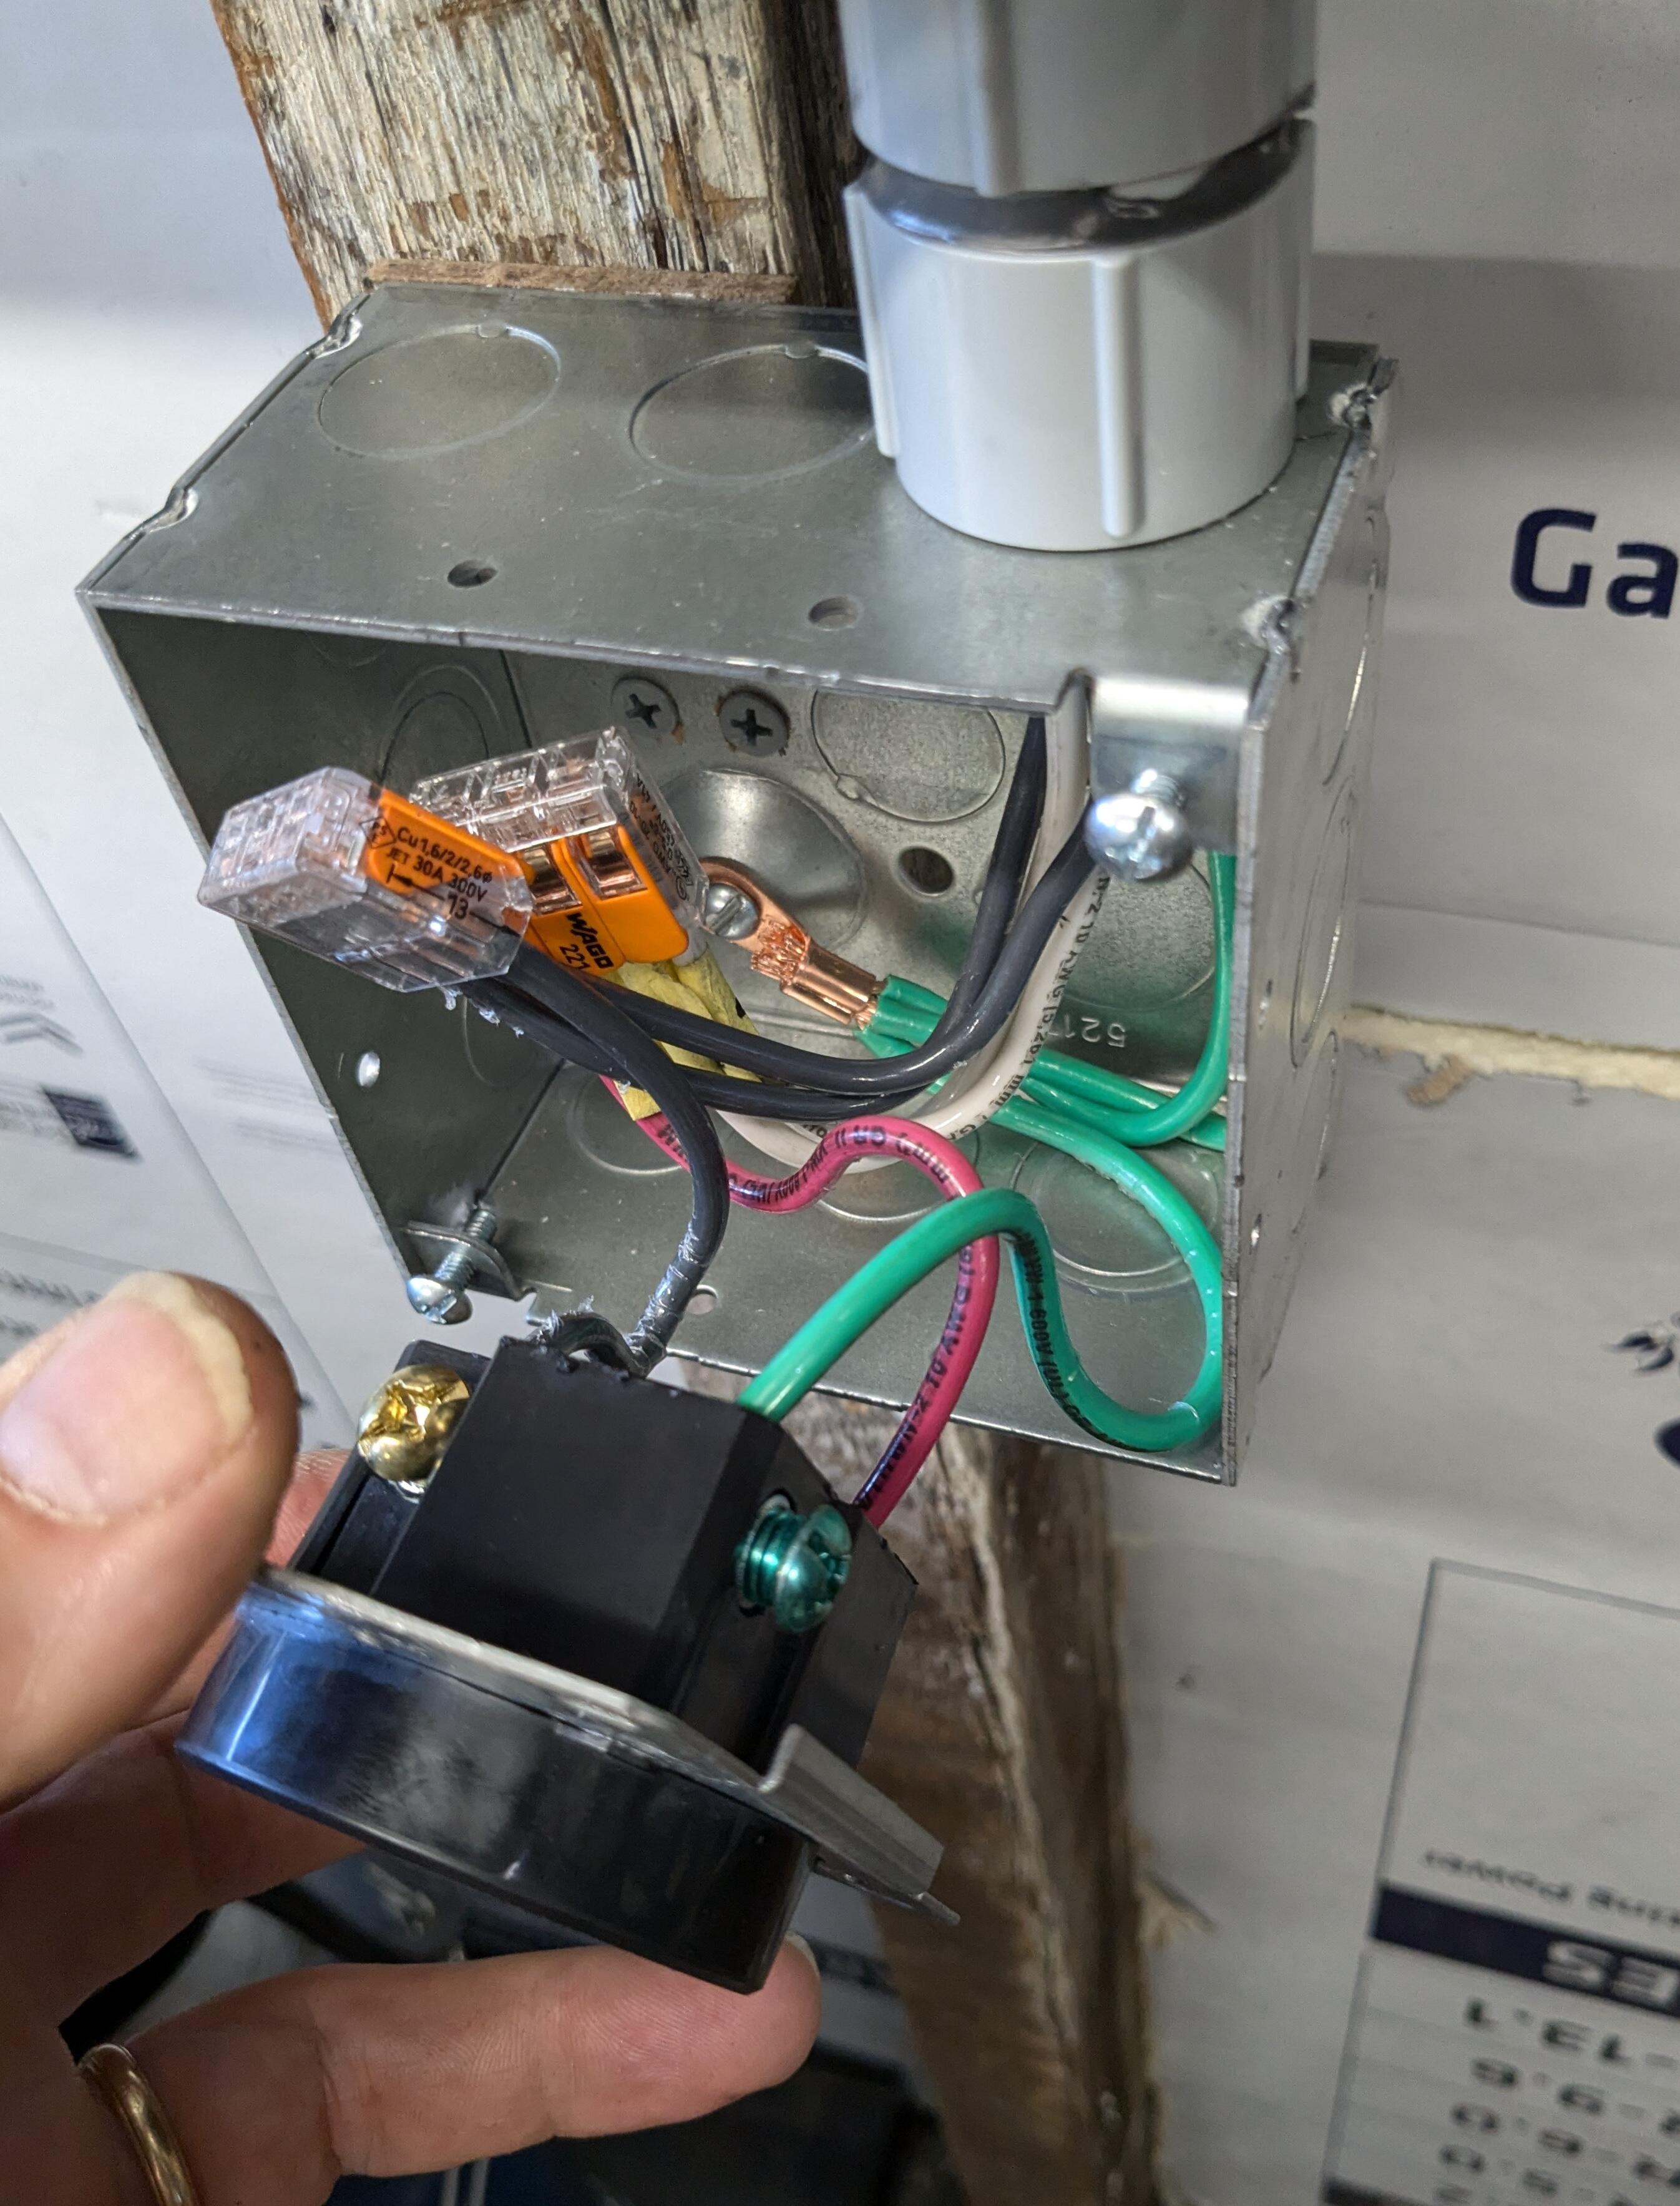
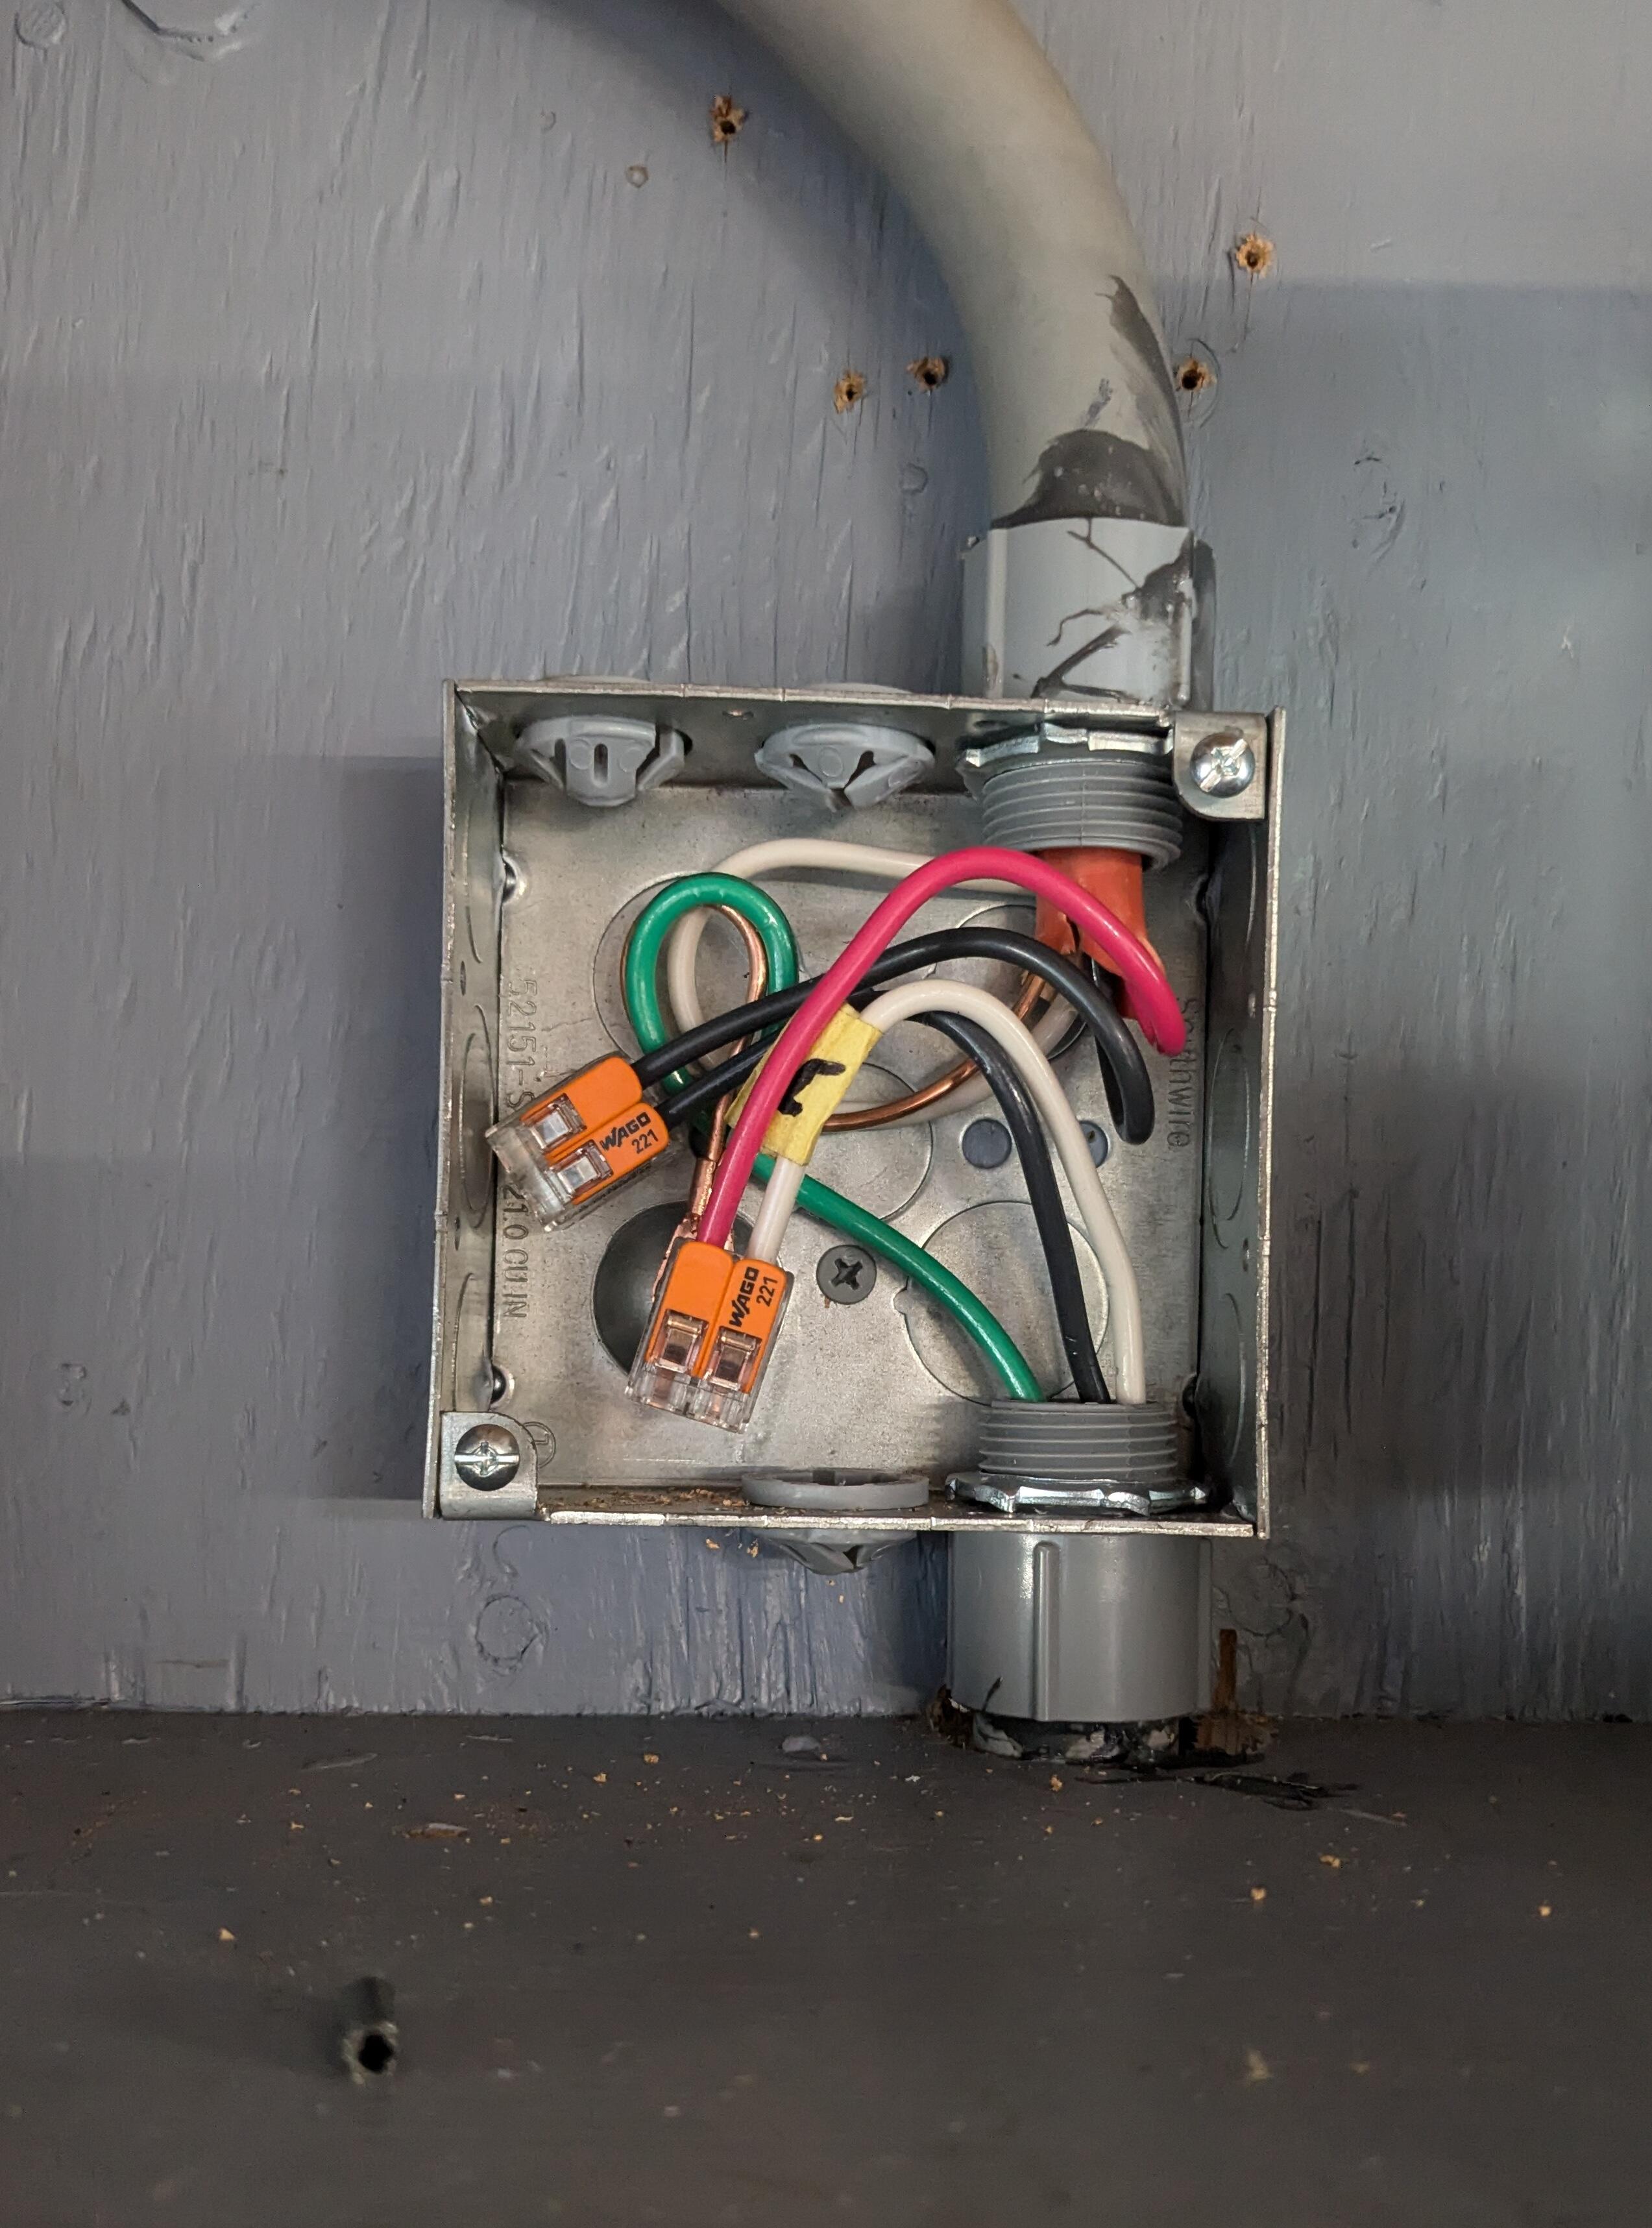
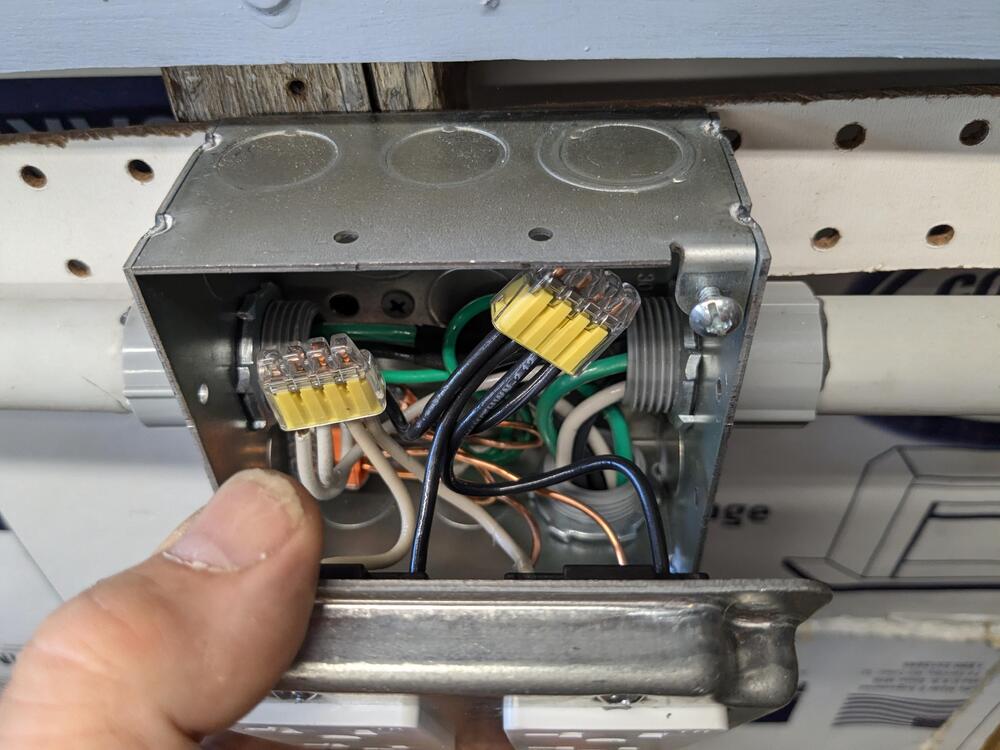
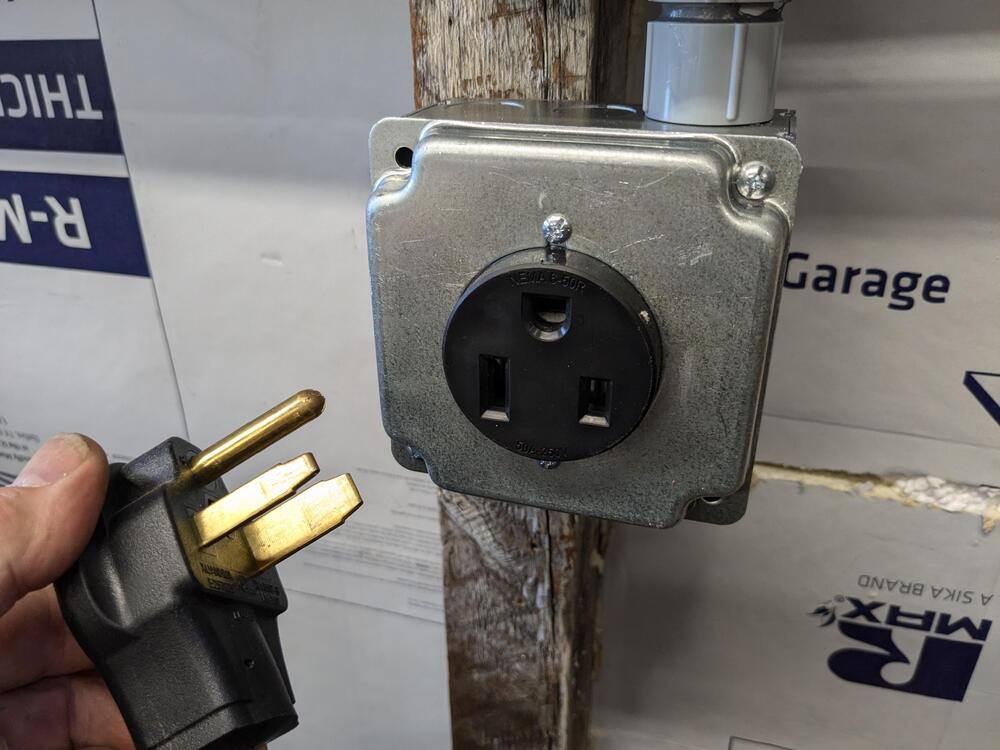
Today was the last day of my teaching career. I'm officially retired 🤪 Got a little wiring on the south wall - finished up the wiring of the 240 & 120 receptacles Used crimp eyelets for the grounds wired each receptacle separately rather than bridging them 12AWG for the 20A receptacles Made sure they were the right version 240V outlet this time 10AWG for the 240V 10WGA Junction that feeds the East center post receptacle


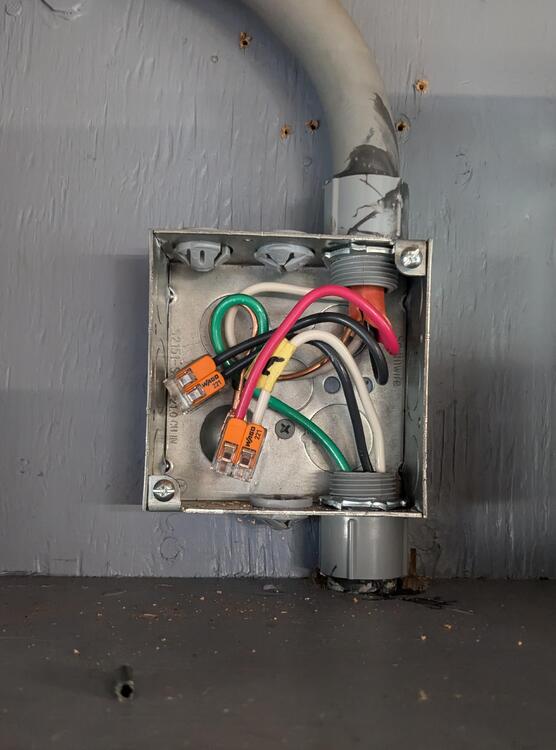 1 point