Leaderboard
-
Captain Obvious
Free Member8Points10,081Posts -
grannyknot
Free Member6Points5,158Posts -
dspillman
 Subscriber
 5Points445Posts
 -

Zed Head
Free Member5Points19,236Posts


Popular Content
Showing content with the highest reputation on 04/30/2024 in Posts
-
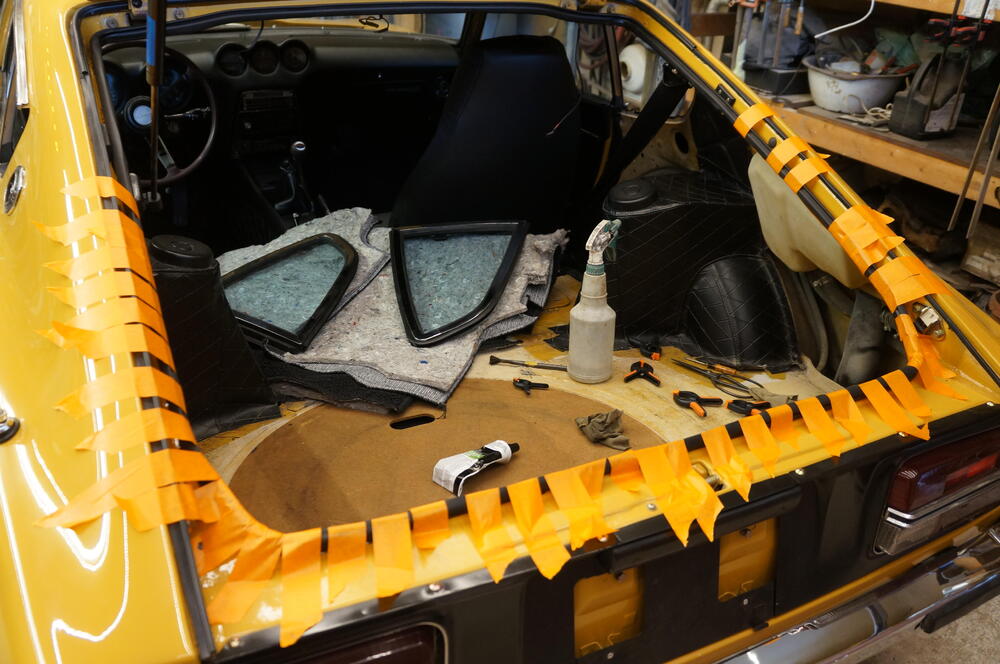
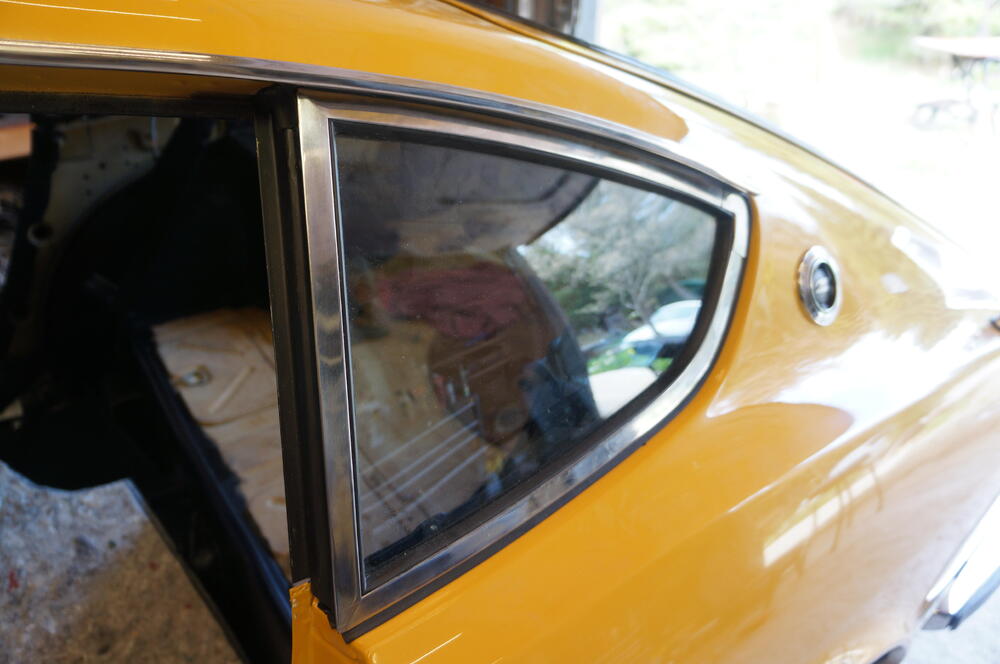
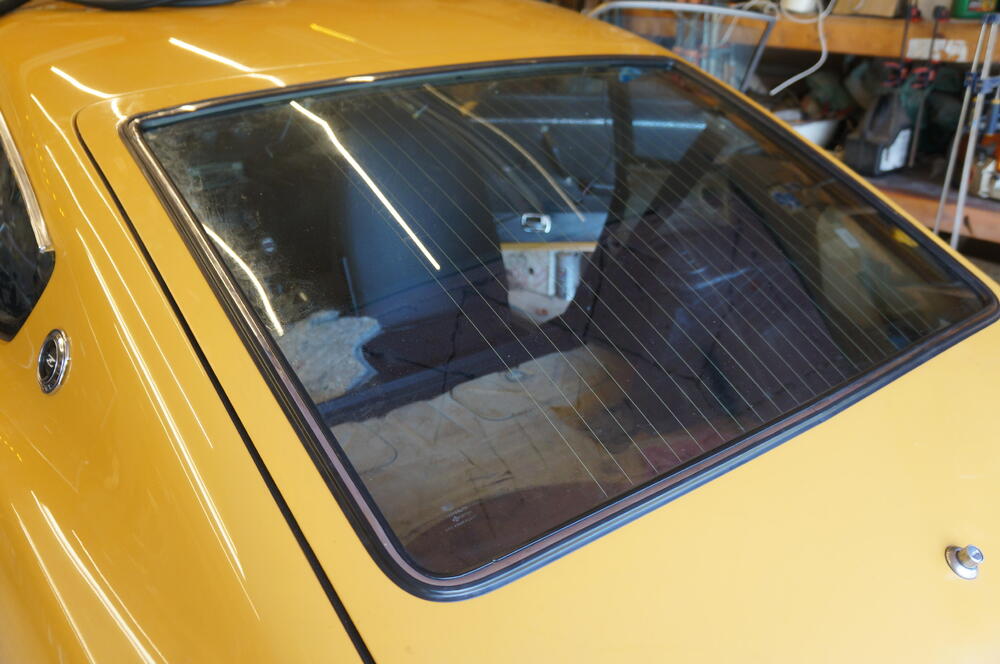
4 pointsI got the rest of the inner hatch seal done yesterday, Dave came over this afternoon and we installed the hatch glass and quarter windows. Dave finished up the drivers seat so all that is left is to paint the chin spoiler/ install and get an exhaust system on it and she is ready for the road.


 4 points
 -
3 points
-
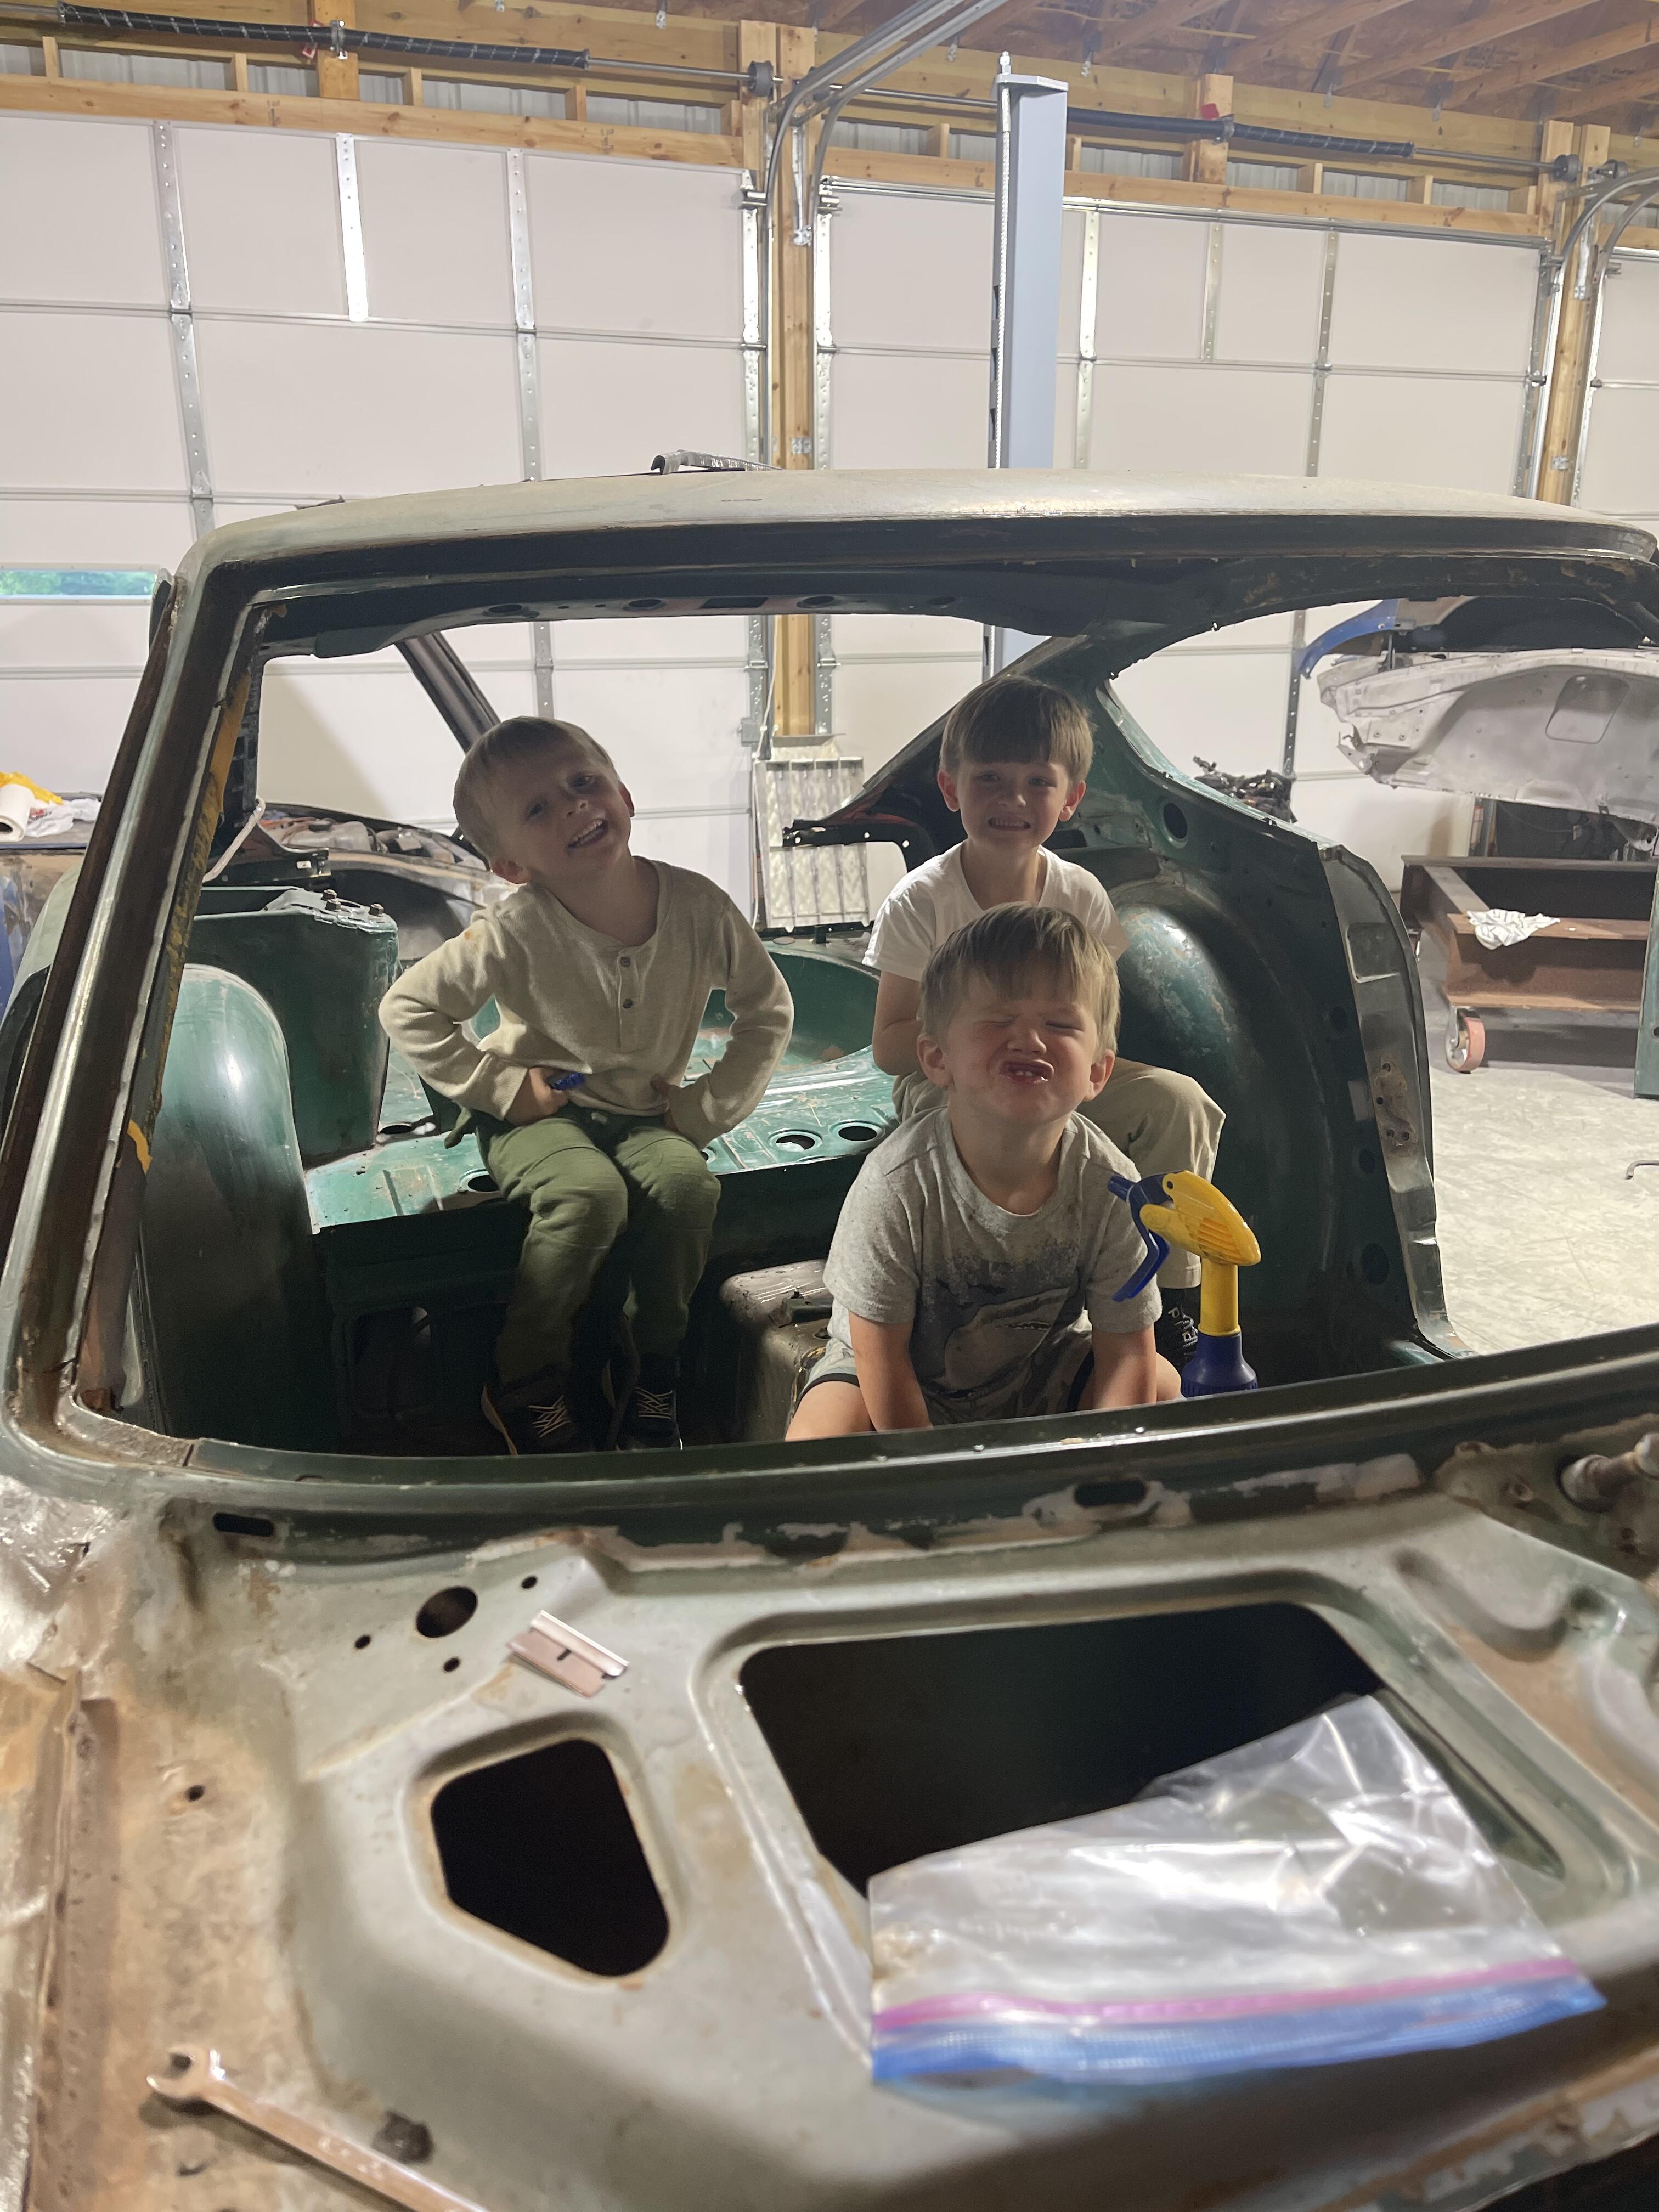
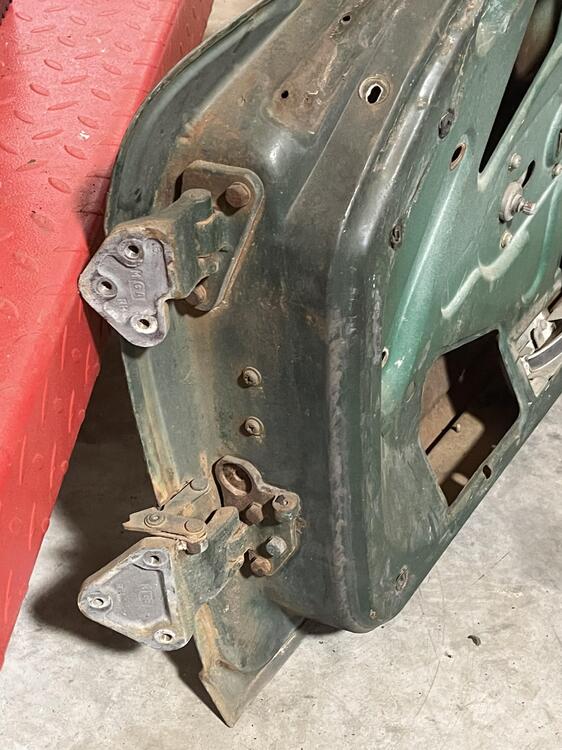
Pulled doors/hinges today from the body, doors are quite nice, original door passenger side will need some repair, but shouldn’t be that difficult to repair…… Hinge attachment point at body is in great shape on both sides. Have plenty of help from 3 of the grandkids!!!

 3 points
 -
2 pointsAs long as you can adjust the distributor position to get the ignition timing correct (as checked with a timing light), the real clocking of the pump and distributor does not really matter. In other words... If you can get the ignition timing correct, the clocking does not really need to be corrected.2 points
-
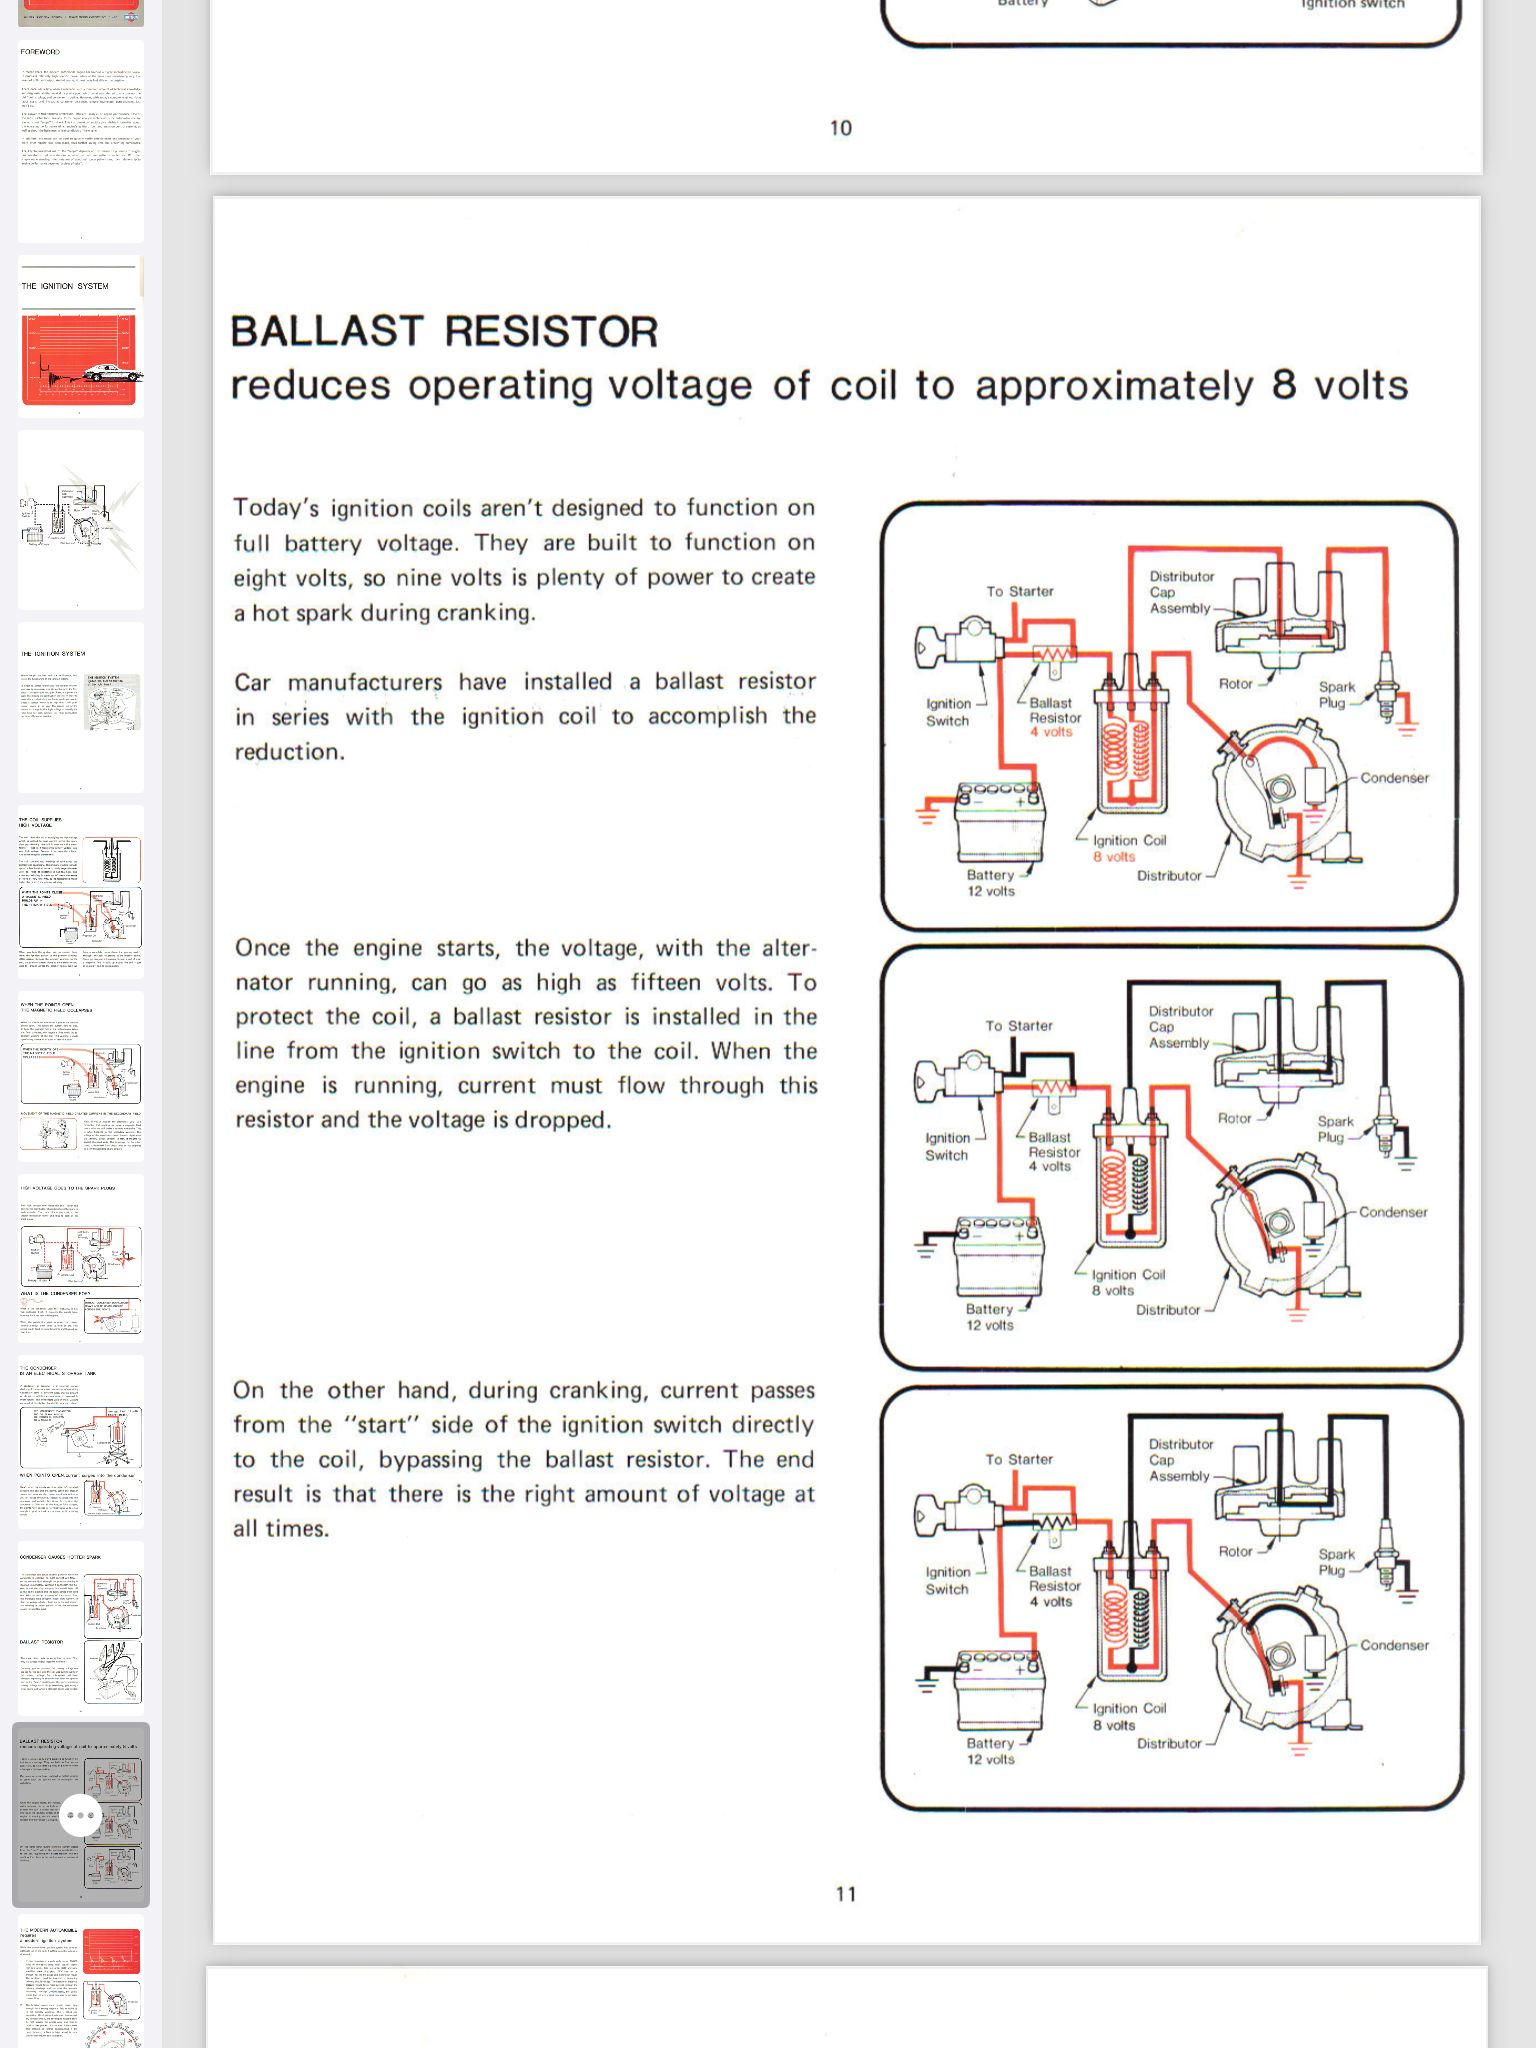
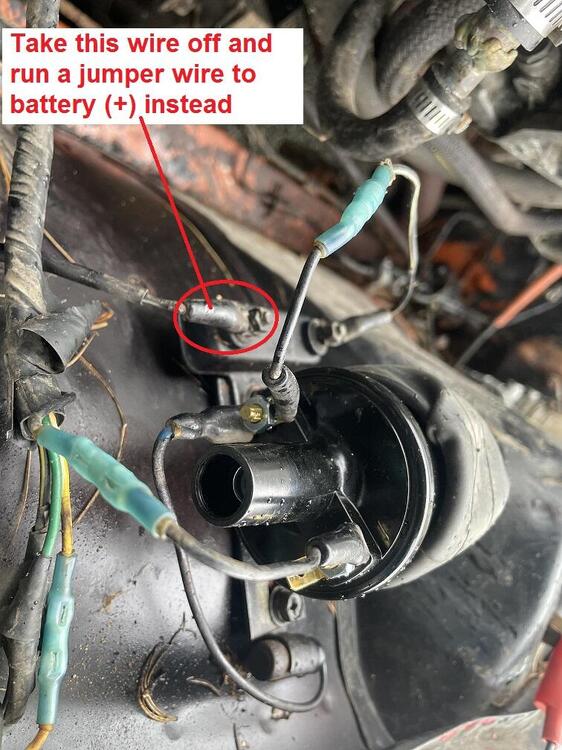
2 pointsThe 240s run the ignition signal THRU the tach, so no... The car (in stock wired configuration) will not spark unless the tach is connected. If you want to hotwire the system and bypass the tach and much of the original wiring, try this... Take the wire off the front side of the ballast resistor. Run a jumper wire from that front end of the ballast directly to that "+" battery terminal. Crank the car and see if you get a spark. If you get a spark, your points are working correctly and the problem is elsewhere. Here's a pic of what I'm talking about:
 2 points
 -
There's lots of discussion and photos available on this site concerning the Z's early and late hinge designs. The early design was a little crude (articulating 'leaves' or 'blades', with a spring that supplied a bit of resistance when closing the door) and lacked any type of provision for stabilizing the door in a partly-open position. More critically, the leaves could go over-centre if the door was forcefully thrown open by a gust of wind (I believe that the spring would pop out in the process, too). Once this happens, there's no convenient way to get the leaves to reverse back over centre. Any attempts at strong-arming the door to get it closed again would bend the leaves. The later hinge design works pretty well, although lack of maintenance (lubrication) will cause the roller pin to wear out prematurely. There's a thread here on the site that details the rebuilding process for the later-style hinges.2 points
-
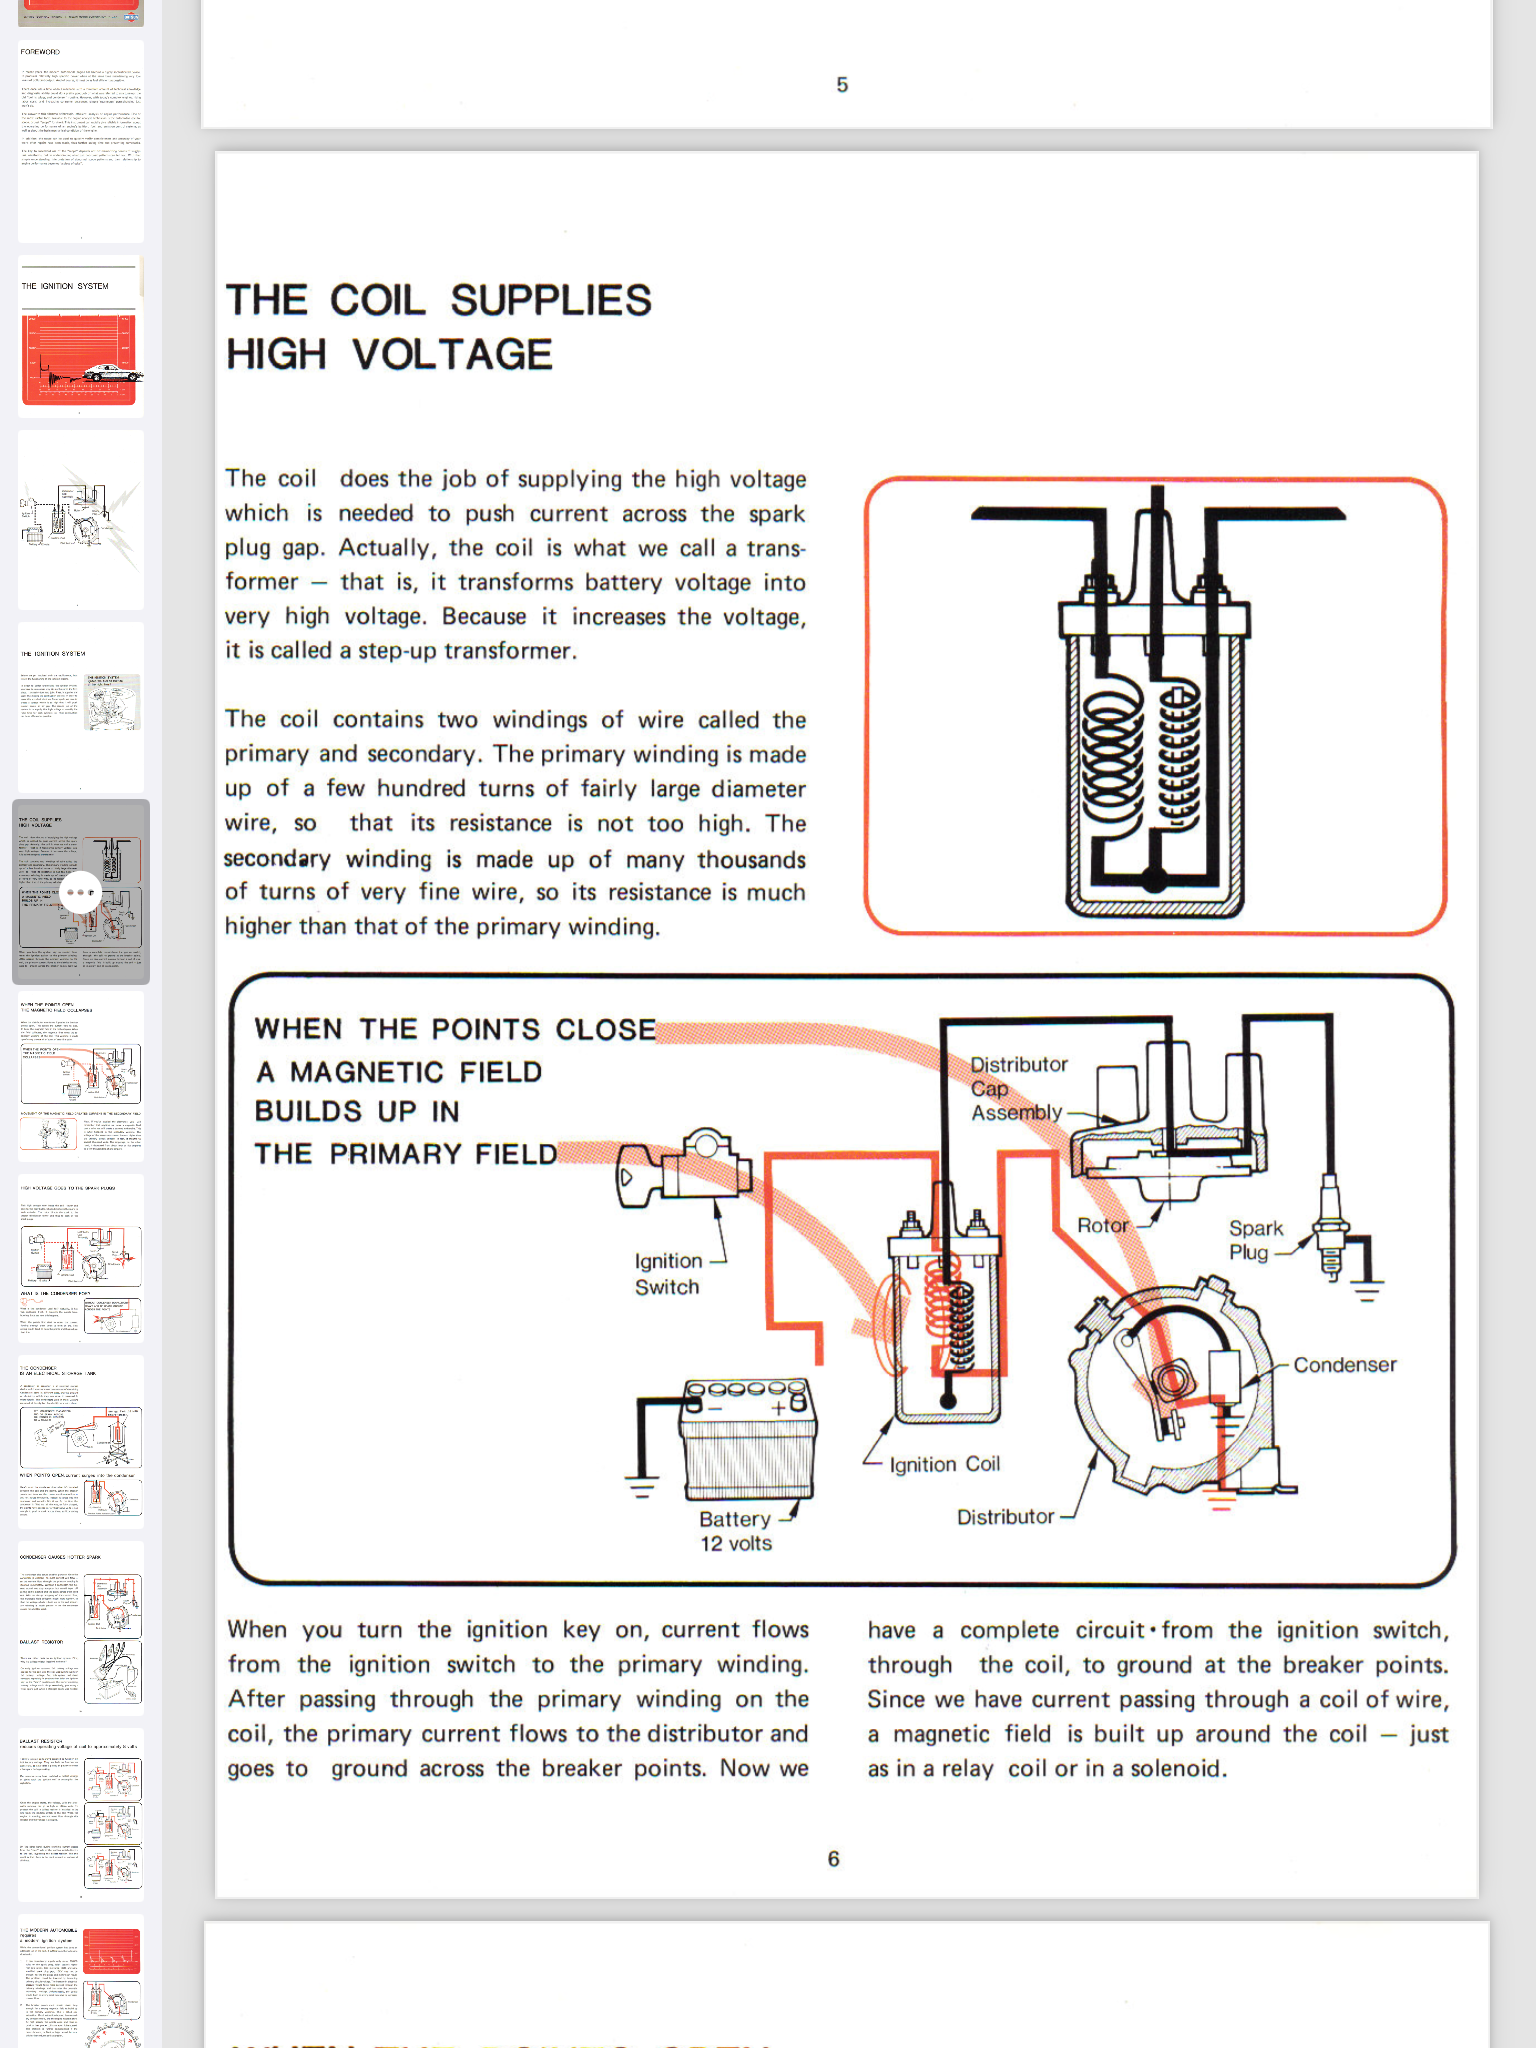
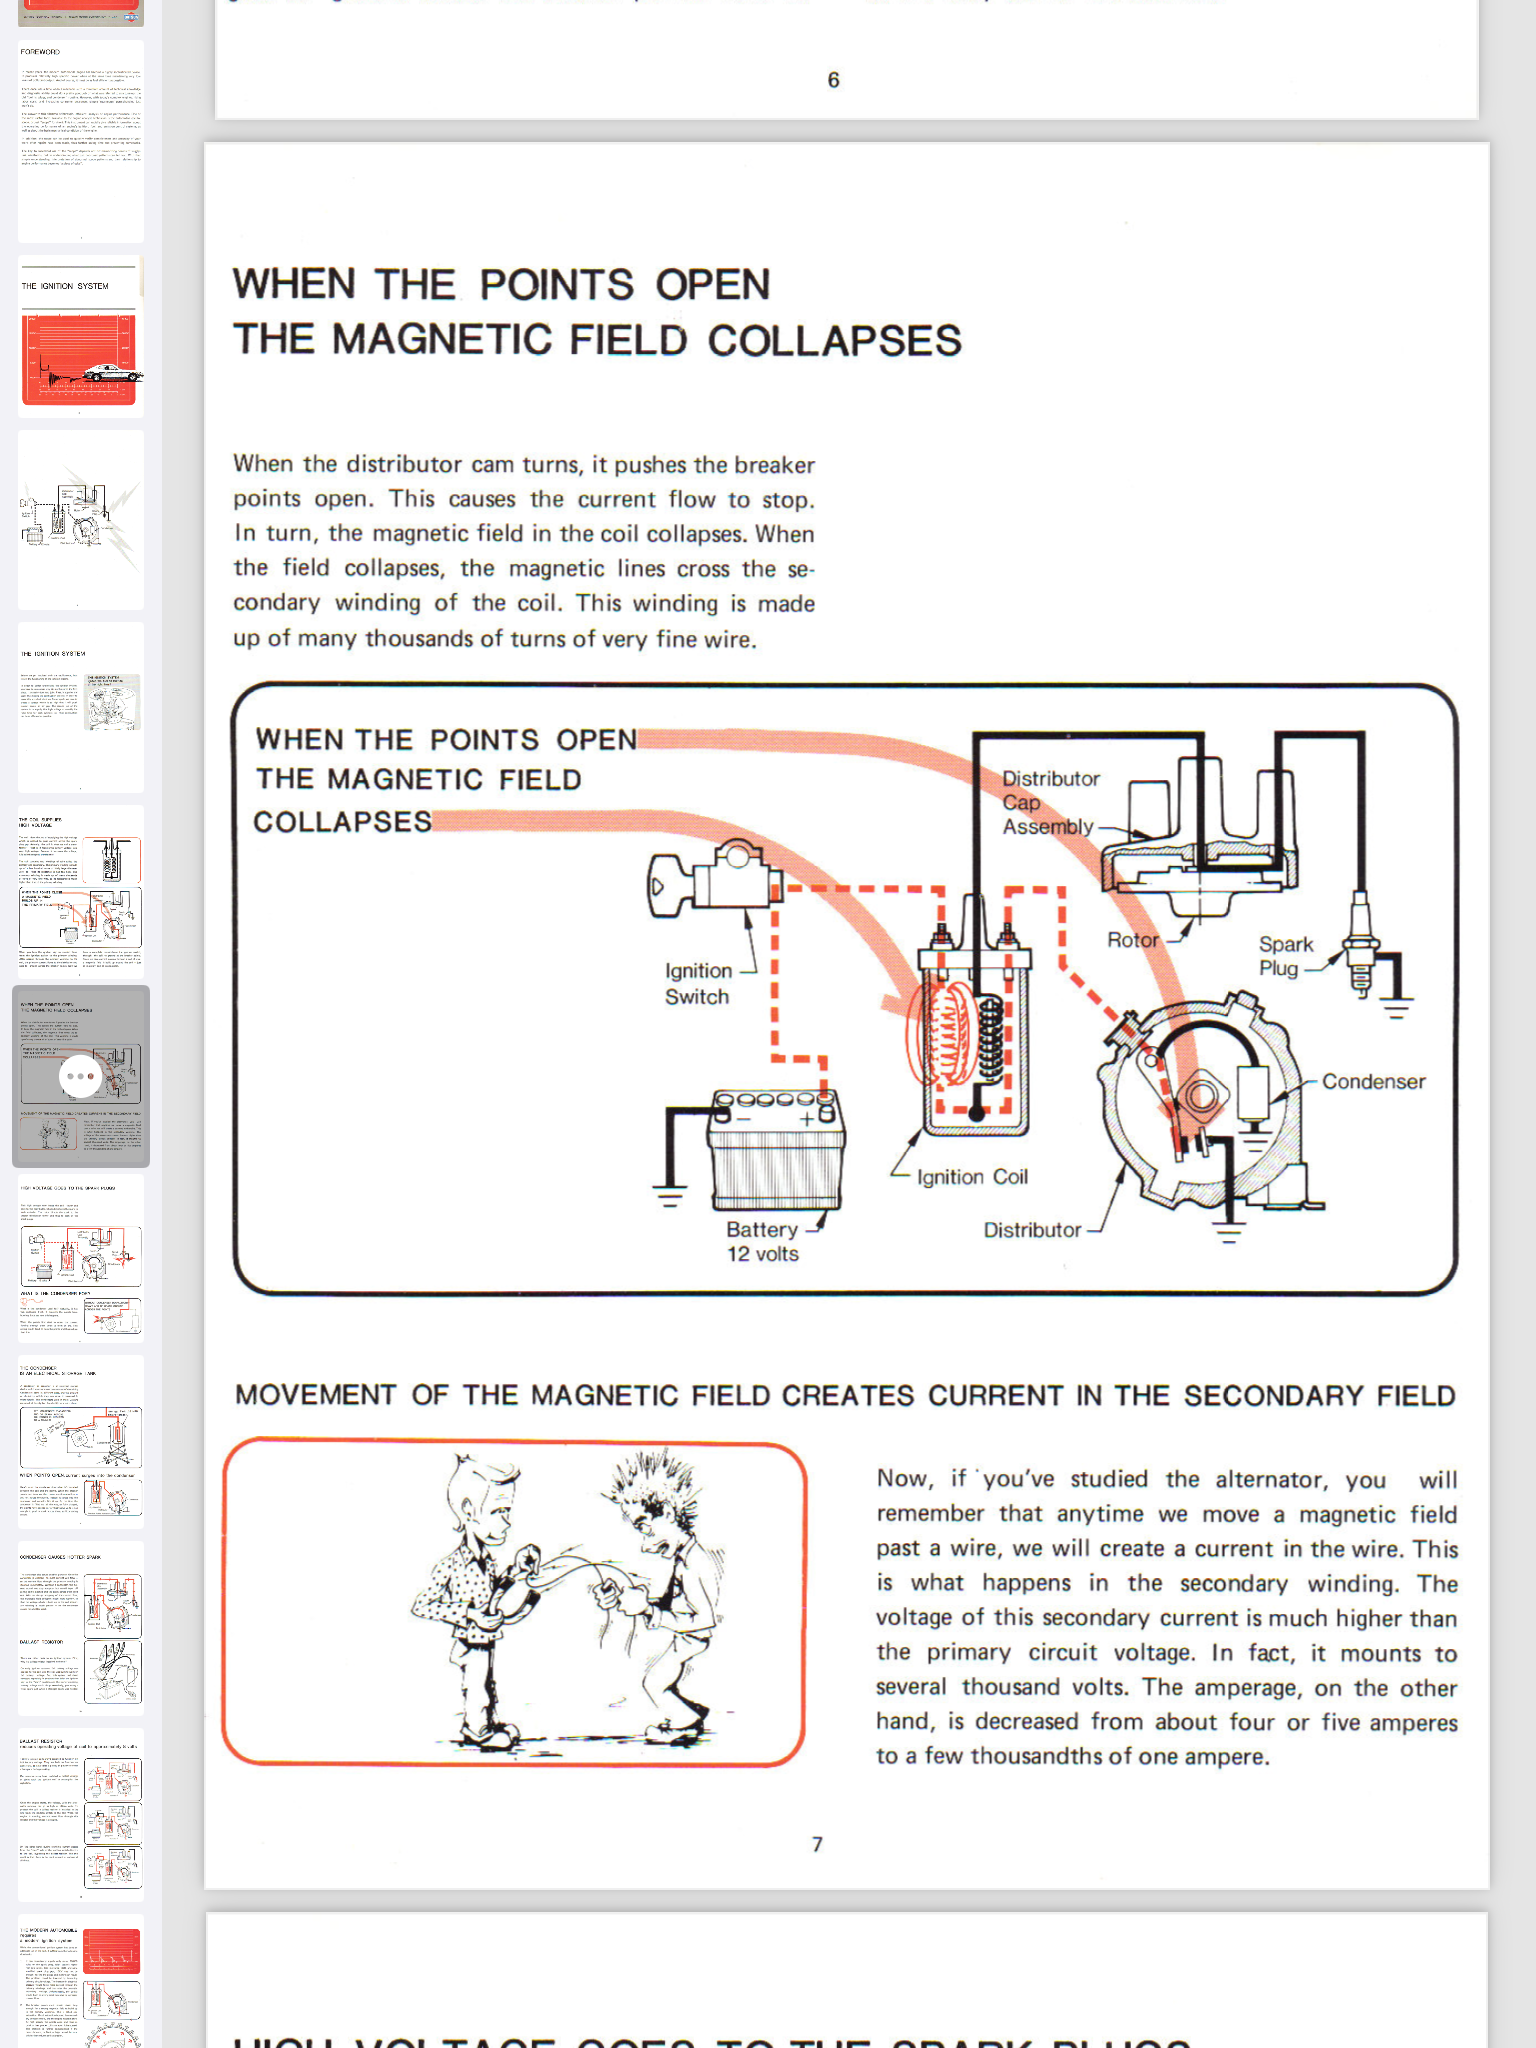
2 pointsYou cannot use a meter to measure the high voltage coming out of the centre post on a coil, read what Yarb/ Zedhead are saying as to how to test it, they are trying to help you. Maybe study the pages it might help you.


 2 points
 -
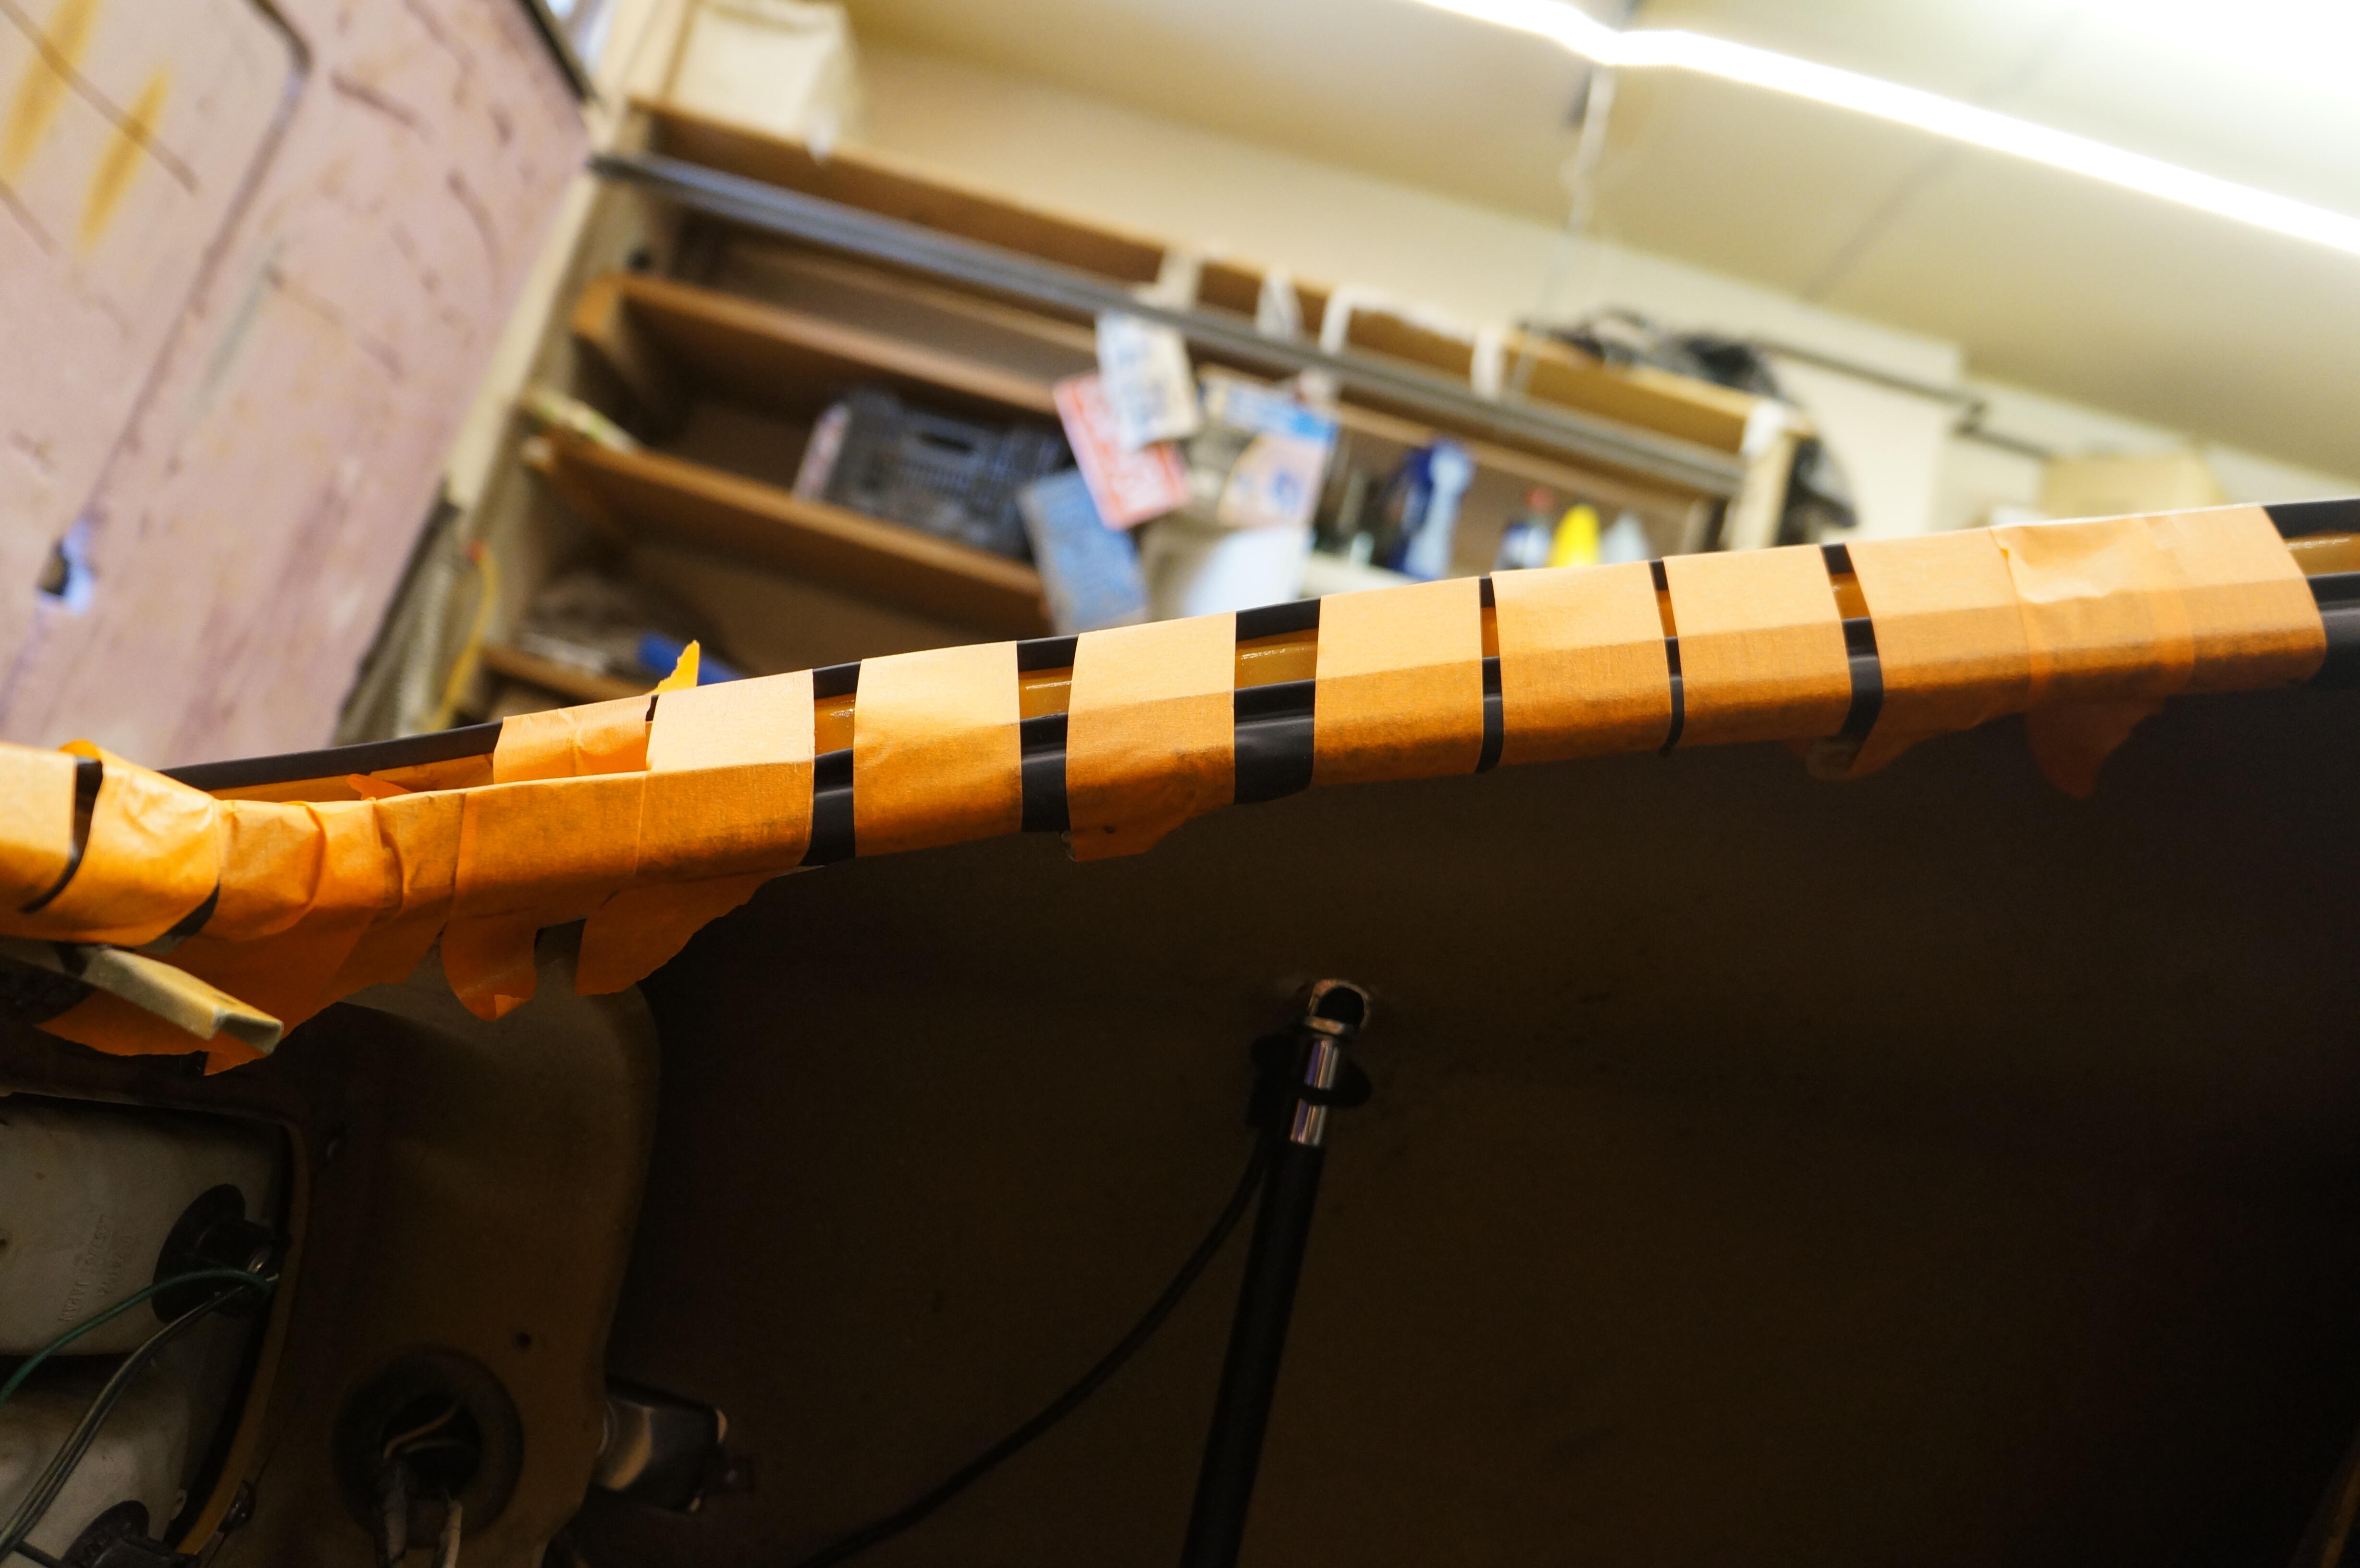
No “booger beads” up the drip rail…… spot welds from the lead filler and foward. Couple of quick pictures with naked drip rails….. One car has obviously been aggressively sand blasted to the point of removing the lead in the process. “ it was purchased this way”. Gray car with lead still in place, and visible where the joint is and the feathering of the lead smooth each direction. Orange car can also just make out where the lead sits, and where spot welds in the drip rail IMG_7461.MOV IMG_7462.MOV begin foward of the lead cosmetic patch.
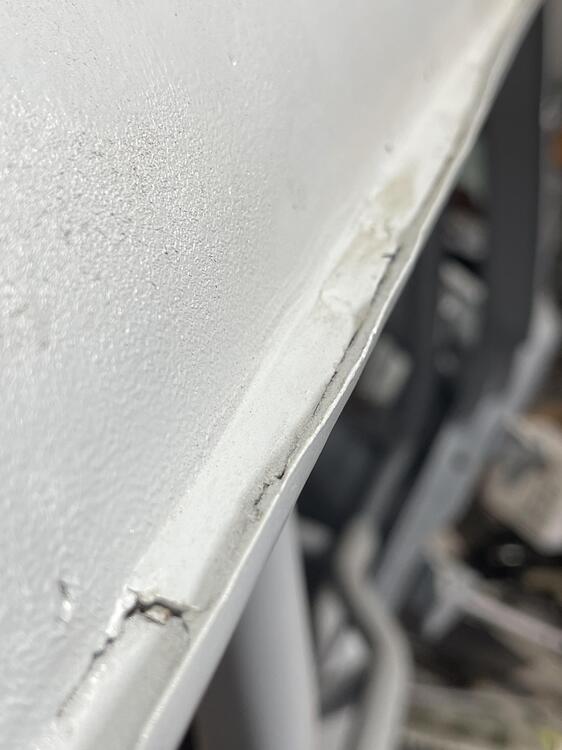

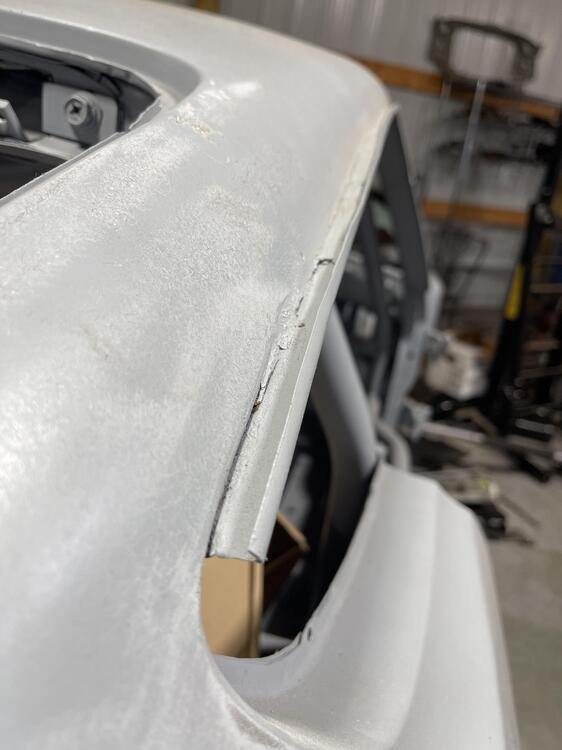 2 points
 -
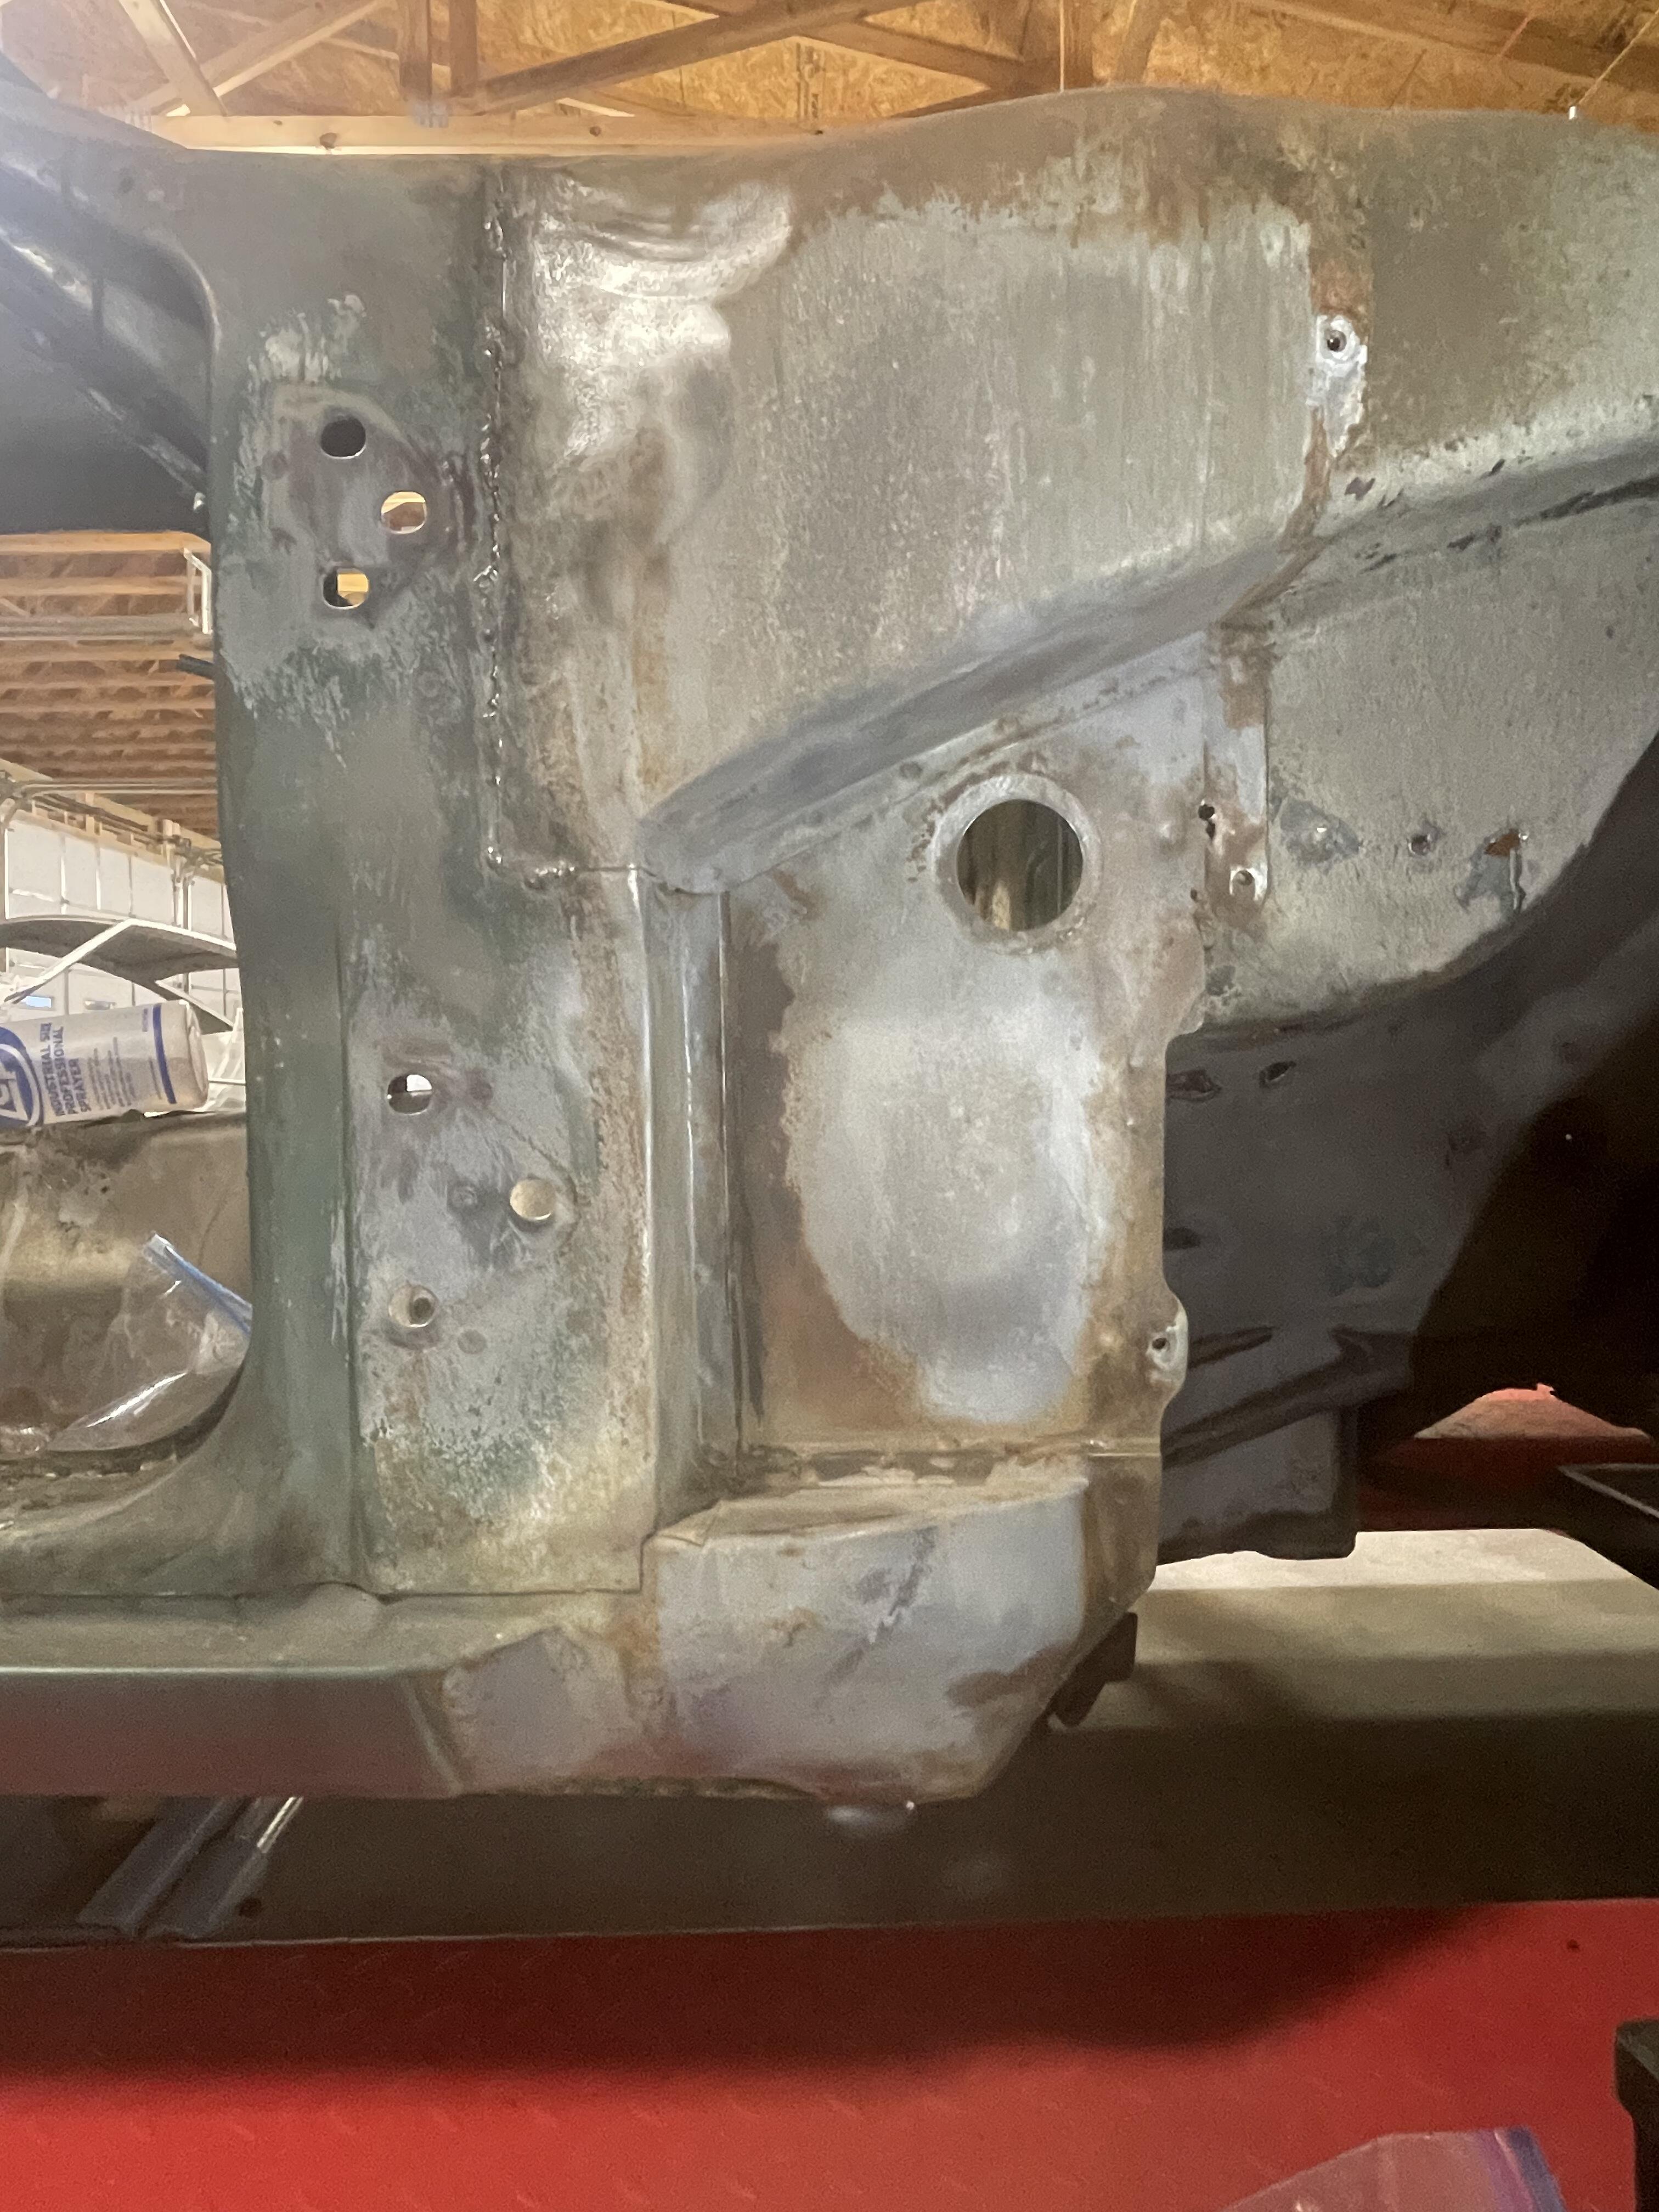
2 pointsIf you leave it, it will continue to rust, if you spray it with rust paint it will be hidden but continue to rust, same with oil or wax sprays. The easiest way to get rid of the rust is make up a dunk tank or bath with 2x4's and a waterproof tarp that is deep enough to cover the rust. Then fill the dunk tank with a solution of water, citric acid and table salt and drop the hatch into it. Citric acid is available on Amazon, you only a 1 pound, let the hatch sit for 24hrs pull it out and rinse it with a garden hose, if it needs more time throw it back in for another day.2 points
-
1 pointThis has probably been mentioned already somewhere but I just stumbled across it on the Datsun Spirit web site. A new cylinder head for the L6. Can't find many fine details about how it differs from the factory casting. Some comments about combustion chamber volume and port shape. The Stage 5 engine - https://www.datsunspirit.com/engines The link from the DS page. You'll need the ability to read Japanese or Google Translate - http://www.pams-japan.com/30cafe/project.php Some video links. They seem to be focused on maximum noise. Drag racing.
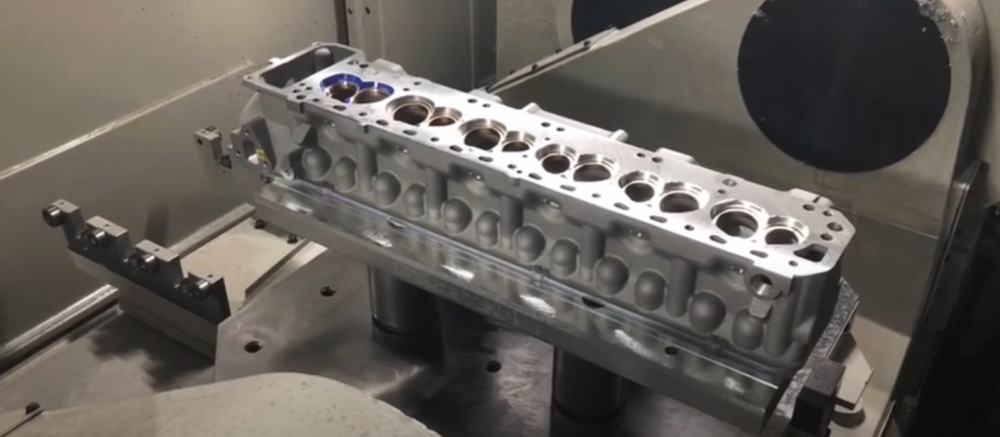 1 point
 -
1 pointHere's the translated text from their page. :Let's create your ideal L-shaped tuned head using today's latest technology. At the beginning of 2021, such a project suddenly started. The L-type 6-cylinder engine has been loved both domestically and internationally for about 50 years. Throughout its long history to this day, there are many wonderful tuning menus that can be said to be the fruit of the wisdom left behind by our predecessors. The standard L6 with its turnflow and 2-valve design is a low-power engine that cannot be said to be suitable for a sports car, but once it is tuned, it transforms into a different engine that pumps out over 100 to 120 PS per liter. It has hidden potential. However, in order to achieve the ultimate L-type mechanical tune, several hurdles had to be overcome. I think it's safe to say that the two things that we found most problematic were the shaping part after argon welding was applied to the combustion chamber, and the port polishing that expanded the capacity to the maximum. They have the risk of thermal distortion of the head body due to argon welding to the combustion chamber, and trouble of penetrating the water jacket during port polishing and enlargement, and there are only a few tuners who can complete the process, and it takes years to complete the process. There was also the problem that it required a long period of time. In addition, the number of N42 heads in excellent condition has decreased year by year, making them valuable items, and the fact that it has become difficult to secure bass heads is one reason why the hurdles to tuning have become more difficult. If so, we would like to achieve the ideal combustion chamber shape and volume from the beginning, as well as the ideal port diameter and shape, while also providing sufficient port wall margin and optimizing the water jacket for cooling. If such a head could be designed and manufactured from scratch, wouldn't it be possible to free yourself from the depression mentioned above? This delusion, which could be described as a pipe dream, was just a pipe dream until the L Head project members gathered together. Here, we will briefly introduce the key points from the inception of the project to the completion of the head, and we hope that you will warmly watch over us as this grand delusion takes shape."1 point
-
I would unplug the bulb and test for voltage at the socket. If there's good voltage its probably the bulb. If there's no voltage it's somewhere else.1 point
-
1 pointAny more details about your setup? Just for fun. They make several different levels of engine. Gear ratios and RPM would be good to know also. https://www.datsunspirit.com/engines1 point
-
Thanks @zed2. Those seat brackets sure are clean and shiny!!1 point
-
Nice photo. Boy in the front is making engine noises, right?1 point
-
You also will not have the metal stantion welded to the firewall with the rubber bumper attached for the clutch pedal.1 point
-
Remove the tach pull it out and reach through the whole. A lot of work without testing the harness wiring IMO.1 point
-
Water pump is fine. I had removed the dome light fuse and thats it didnt work. Now its back in commission.1 point
-
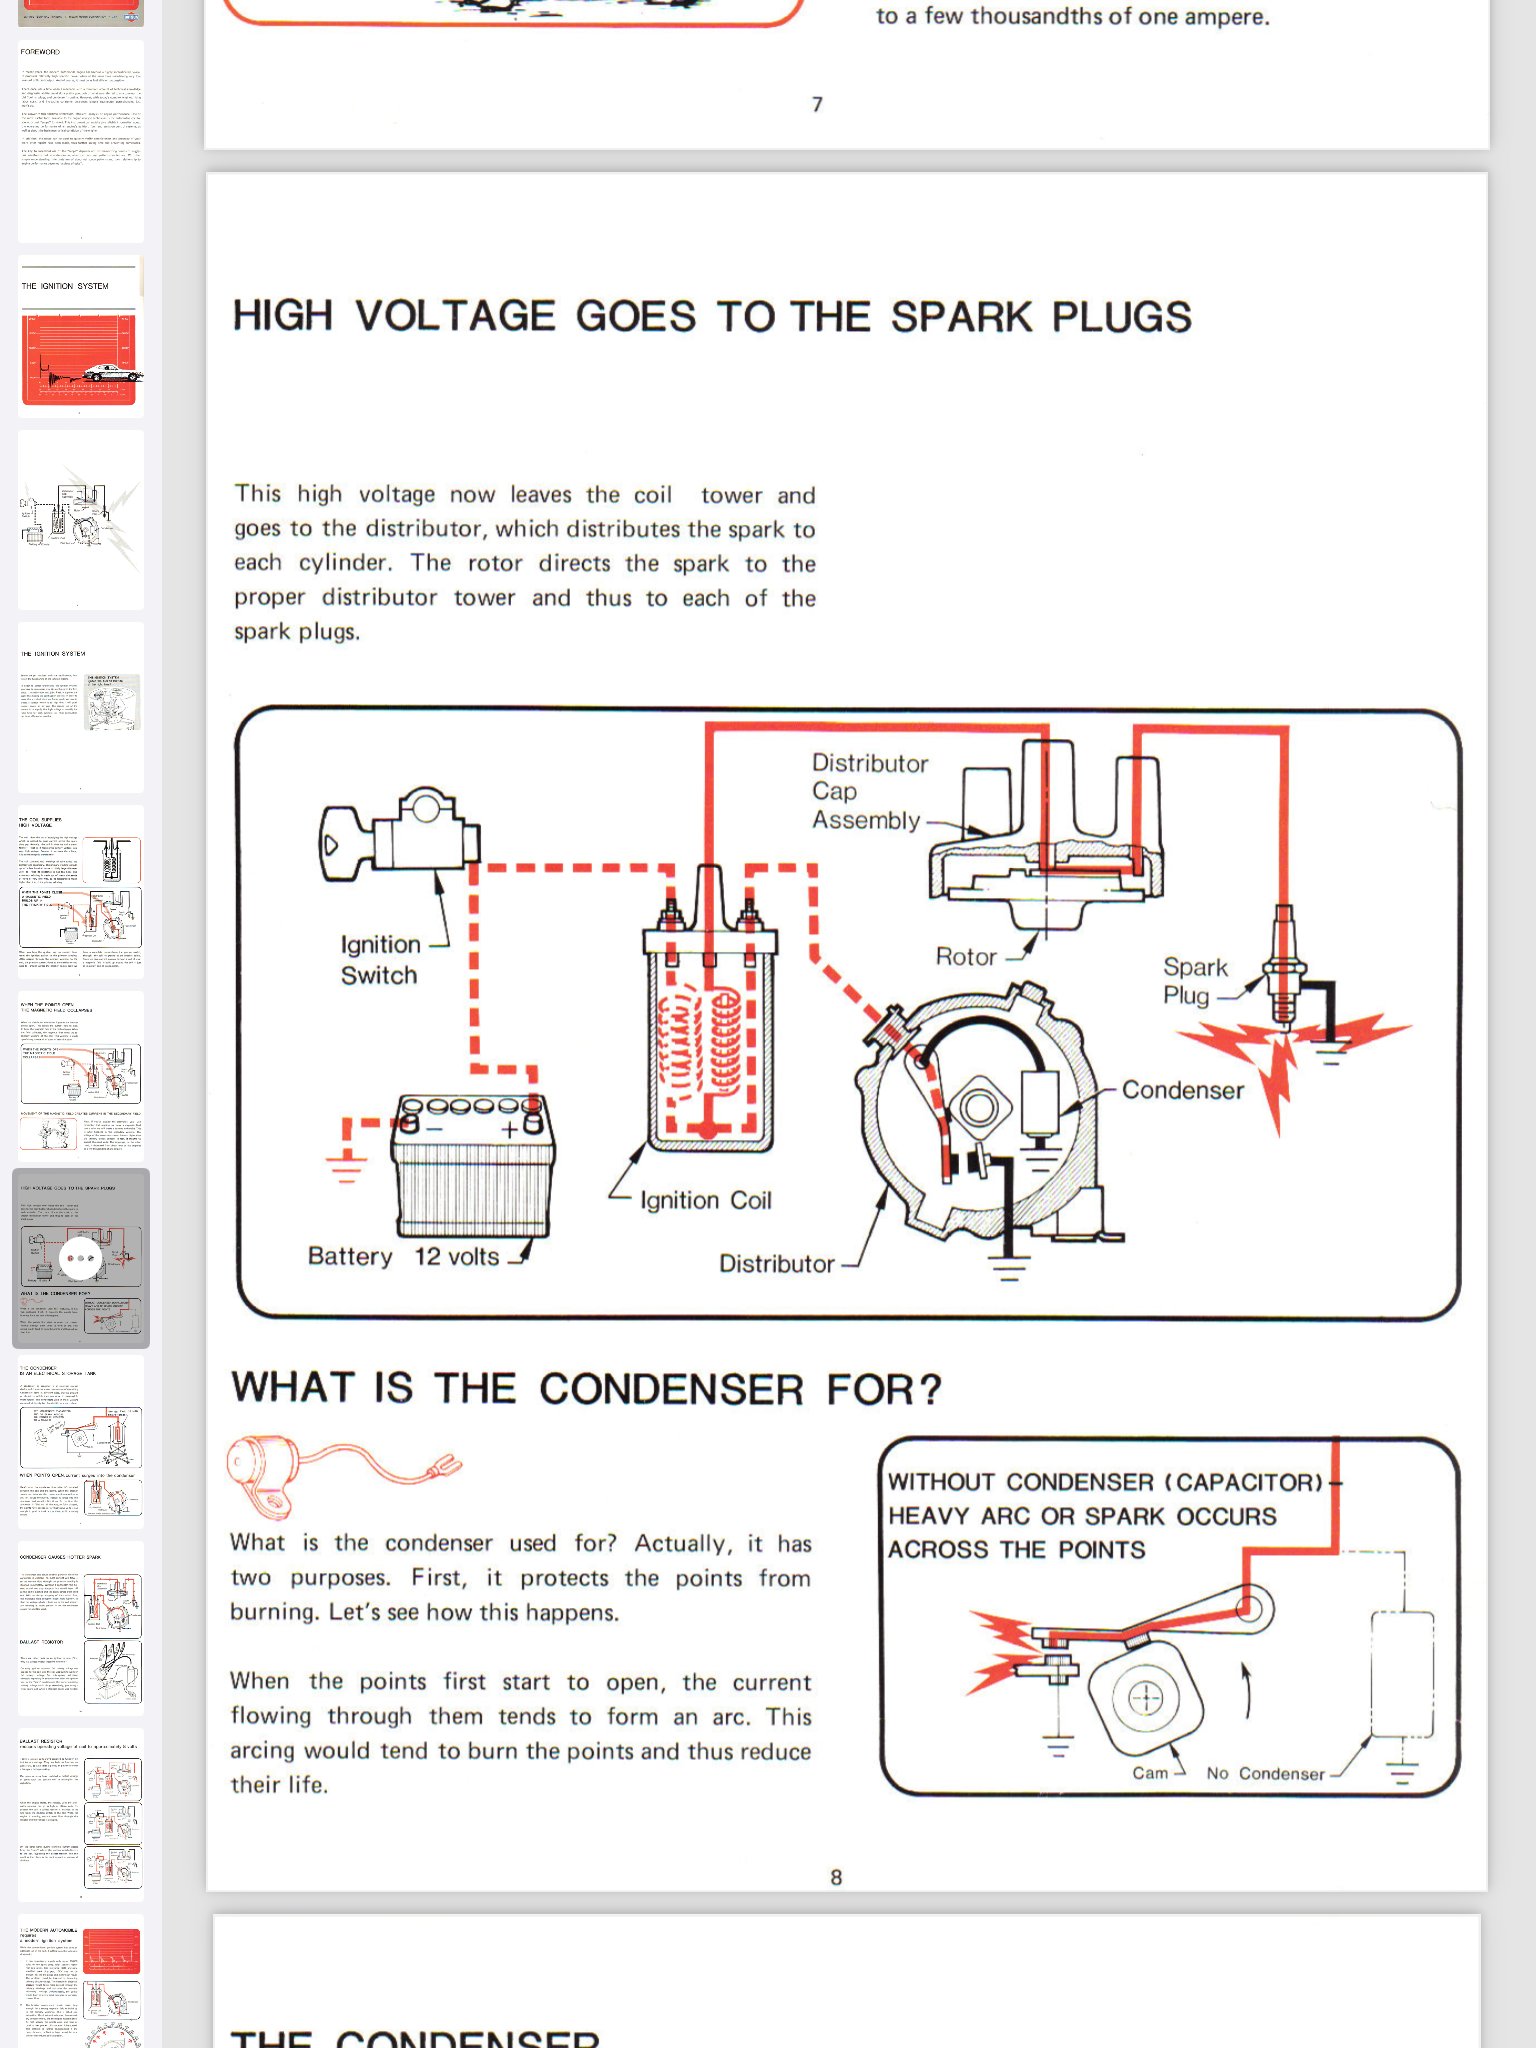
1 pointPull the wire from the distributor, set it close to a ground point, have somebody turn the ley to Start while you watch the gap. You should see a spark. A meter is the wrong tool for a spark test. Your distributor connection is obviously different than in this Youtube short. top of the cap instead of underneath, but you can figure it out. We all just need to hear from you that you've done this and nothing happened or somethng happened. We need something concrete to understand about what you're working on. It is a very common and well-known spark test procedure.1 point
-
1 pointHave you read the electrical section in the FSM? There aren’t simple answers for a car that hasn’t run in a very long time. You have to get educated with the system and follow the trouble shooting listed in the FSM. It can be numerous issues contributing to this. According to the experience level makes a huge difference. A test light isn’t the the answer alone. Grab an DVM and start taking ohm and voltage measurements per the FSM. Make notes as you go to eliminate possible defects etc. Step by Step it’s a very simple ignition system.1 point
-
1 pointIf "power" is coming out of the center wire of the coil - that is "spark". You're still not describing where, exactly, you are looking when you say "no spark". When testing just the coil and points you should remove the center wire from the top of the distributor cap, leave it connected to the coil, and do your spark test. Place the end of the wire close to a grounding point, like the intake manifold, close but with a small gap for the spark to jump. Then do whatever you're doing to look for spark, spinning the engine or opening and closing the points by hand. The spark from the coil passes to the center of the distributor cap and is picked up by each spark plug wire electrode as the rotor turns inside the cap.
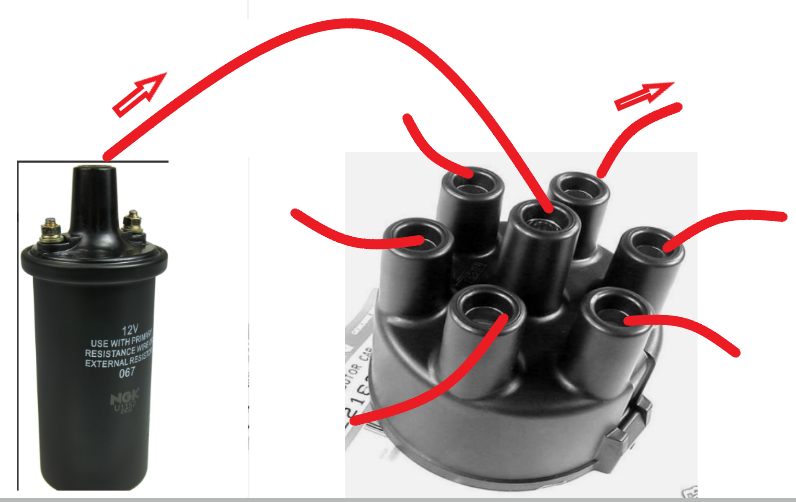 1 point
 -
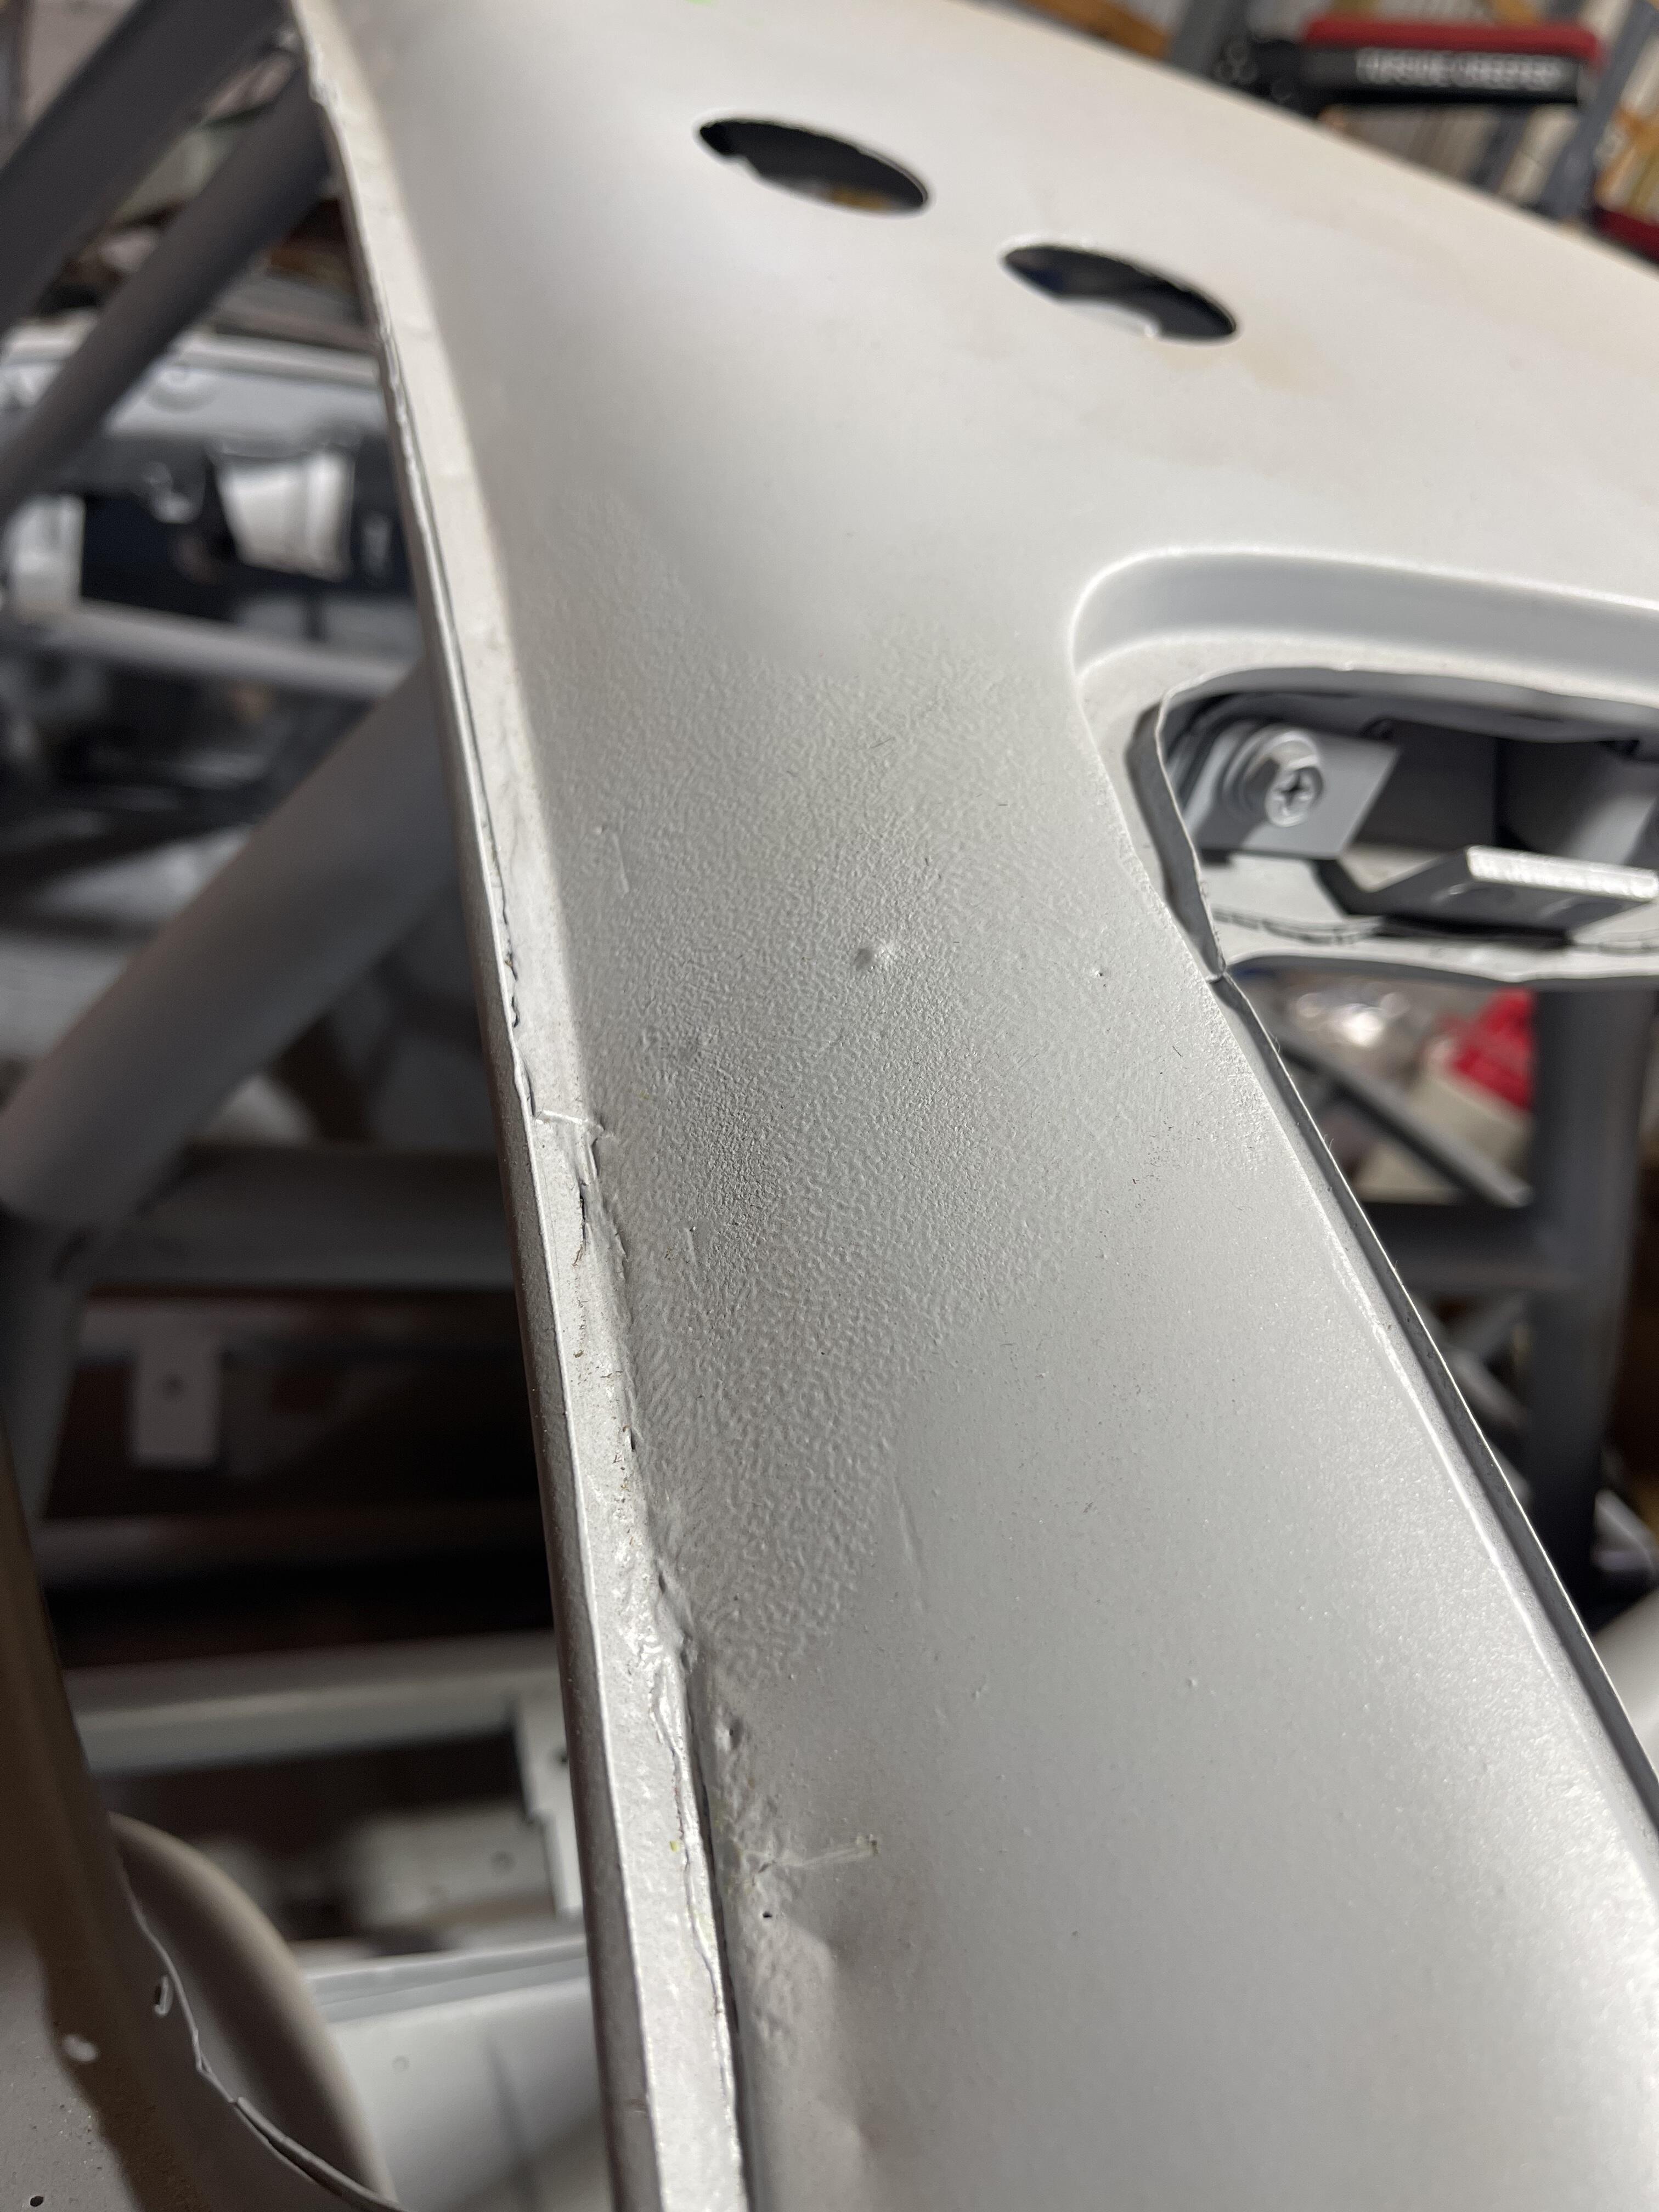
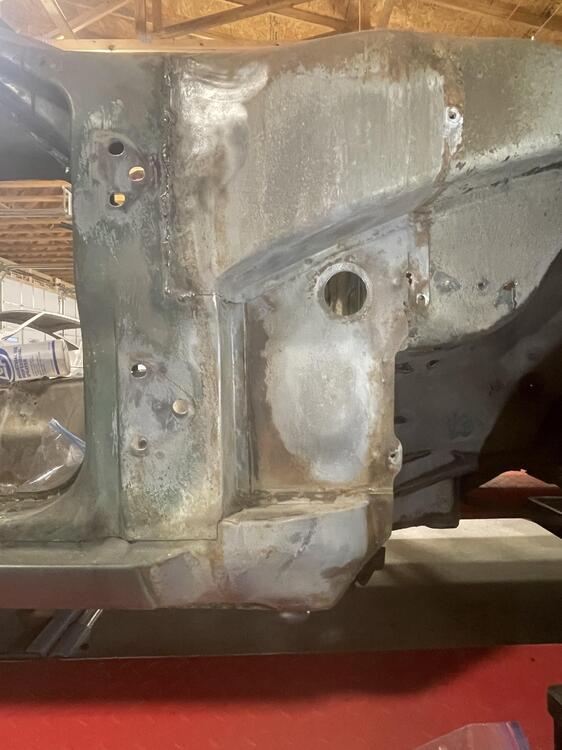
1 pointLooking at the pic from the top side I don’t see why it would be so difficult to weld. Use lower heat to minimize burn through and allow cool down in between passes.1 point