Leaderboard
-
Captain Obvious
Free Member6Points10,081Posts -
grannyknot
Free Member4Points5,158Posts -
HusseinHolland
Free Member3Points1,031Posts -
inline6
 Subscriber
 3Points1,282Posts


Popular Content
Showing content with the highest reputation on 09/23/2023 in Posts
-
With 3 coats you have lots of thickness to "guild the lily" if you felt like it, given the smoothness of the surface you have, you could start blocking with 1500 grit and work down to 3000, then a final cut/buff. The result would sharpen the edges of the reflection to a true mirror image. If you ever got the showcar/trailer queen bug that would be the next step. Personally I don't think I would want to risk it if the car was mine, it is already many times better than anything Nissan ever put out. Looking forward to the fully assembled photos!4 points
-
3 pointsI suspect this is a vendor production line issue: think of a process where the pieces of glass are all oriented in the same fashion i.e. leading edge forward, irrespective of curvature. The etching process would always be presented with the same corner in the same position and only one etching line would be required. If the right side glass was to be etched on the outside a second etching line would be required for the reverse orientation of the glass. Work simplification, think W.E. Deming in Japan.3 points
-
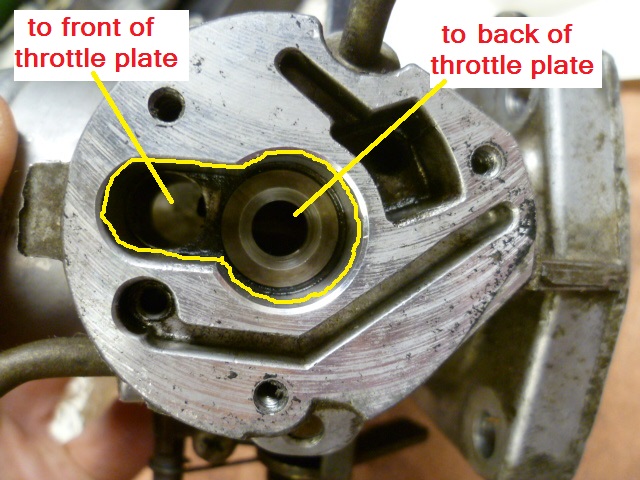
Yeah, sorry. For some reason I thought the modifications you made under the throttle body took that into account. I've just been so awestruck with your productiveness and the scale of the prolific improvements that you've been making. I must have been blinded by the bling somewhere else. On edit... You said "I'll remove the plate I made & plug the front side port." Make sure you plug the correct side. If I understand your idle air controller plumbing*, you want to plug the high vacuum side of the throttle plate and use the low vacuum side for your idle air supply. So I'm not sure what you meant by "front side port", but I'm just bringing it up to make sure you think about it. * (which is not guaranteed)3 points
-
Three on the exterior and two on the jambs and back sides.3 points
-
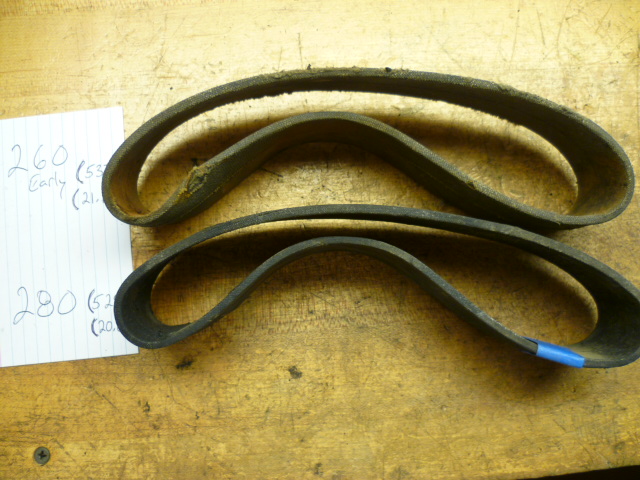
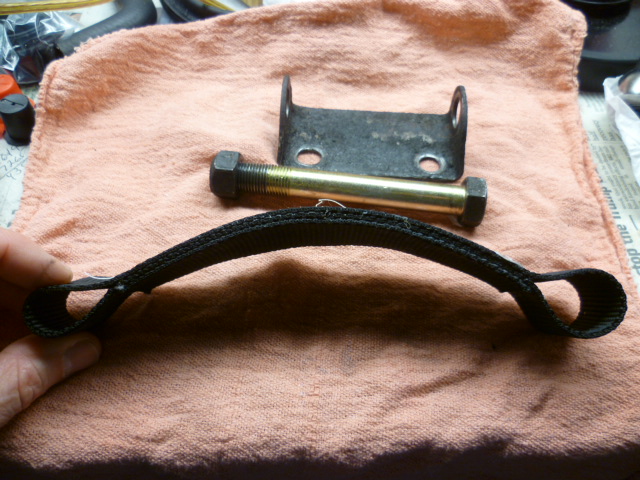
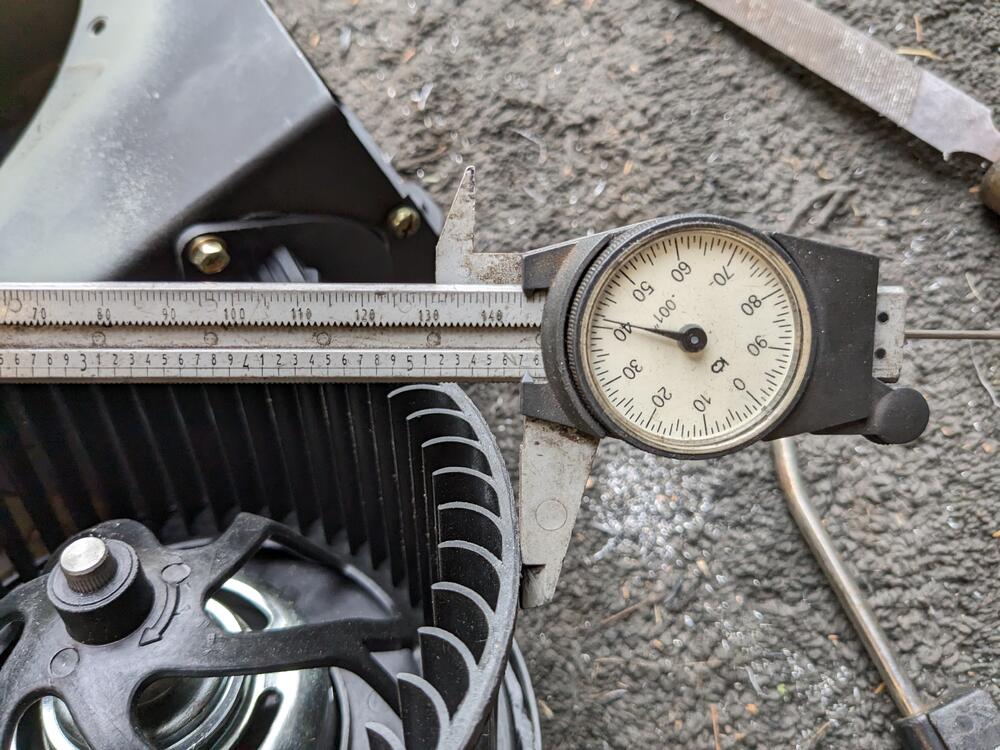
2 pointsAll the pics are dead, but here's a thread I put together a bunch of years ago about my diff strap project: https://www.classiczcars.com/forums/topic/55955-my-new-diff-mount-and-strap-project/ And here's a couple of the pics that don't show up in that thread anymore. Here's the older and newer side by side: I found early strap to be 537mm and the later strap to be a little shorter at 529: And here's what I ended up making for my car. I used heavy duty nylon web strap and made my own:


 2 points
 -
2 pointsSomething I’ve run into more times than not is Sellers assume that what they are advertising fits the entire series. I’m sure there is not a lot of research going on before running the add.2 points
-
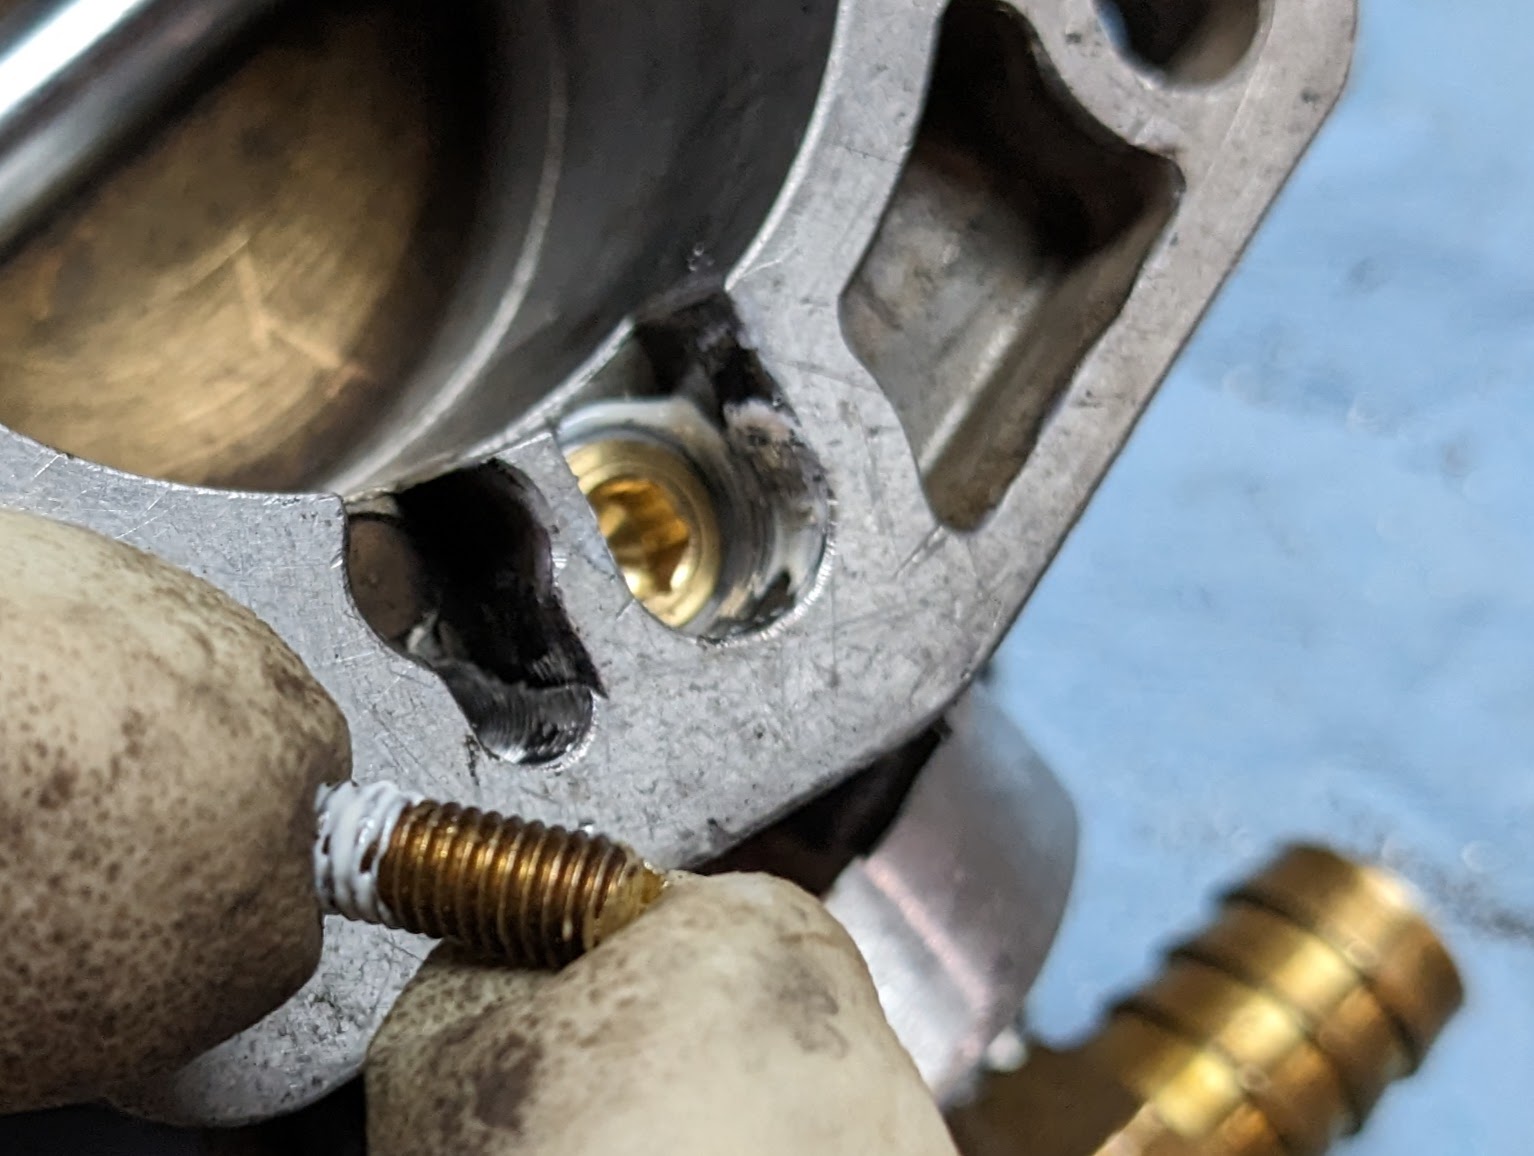
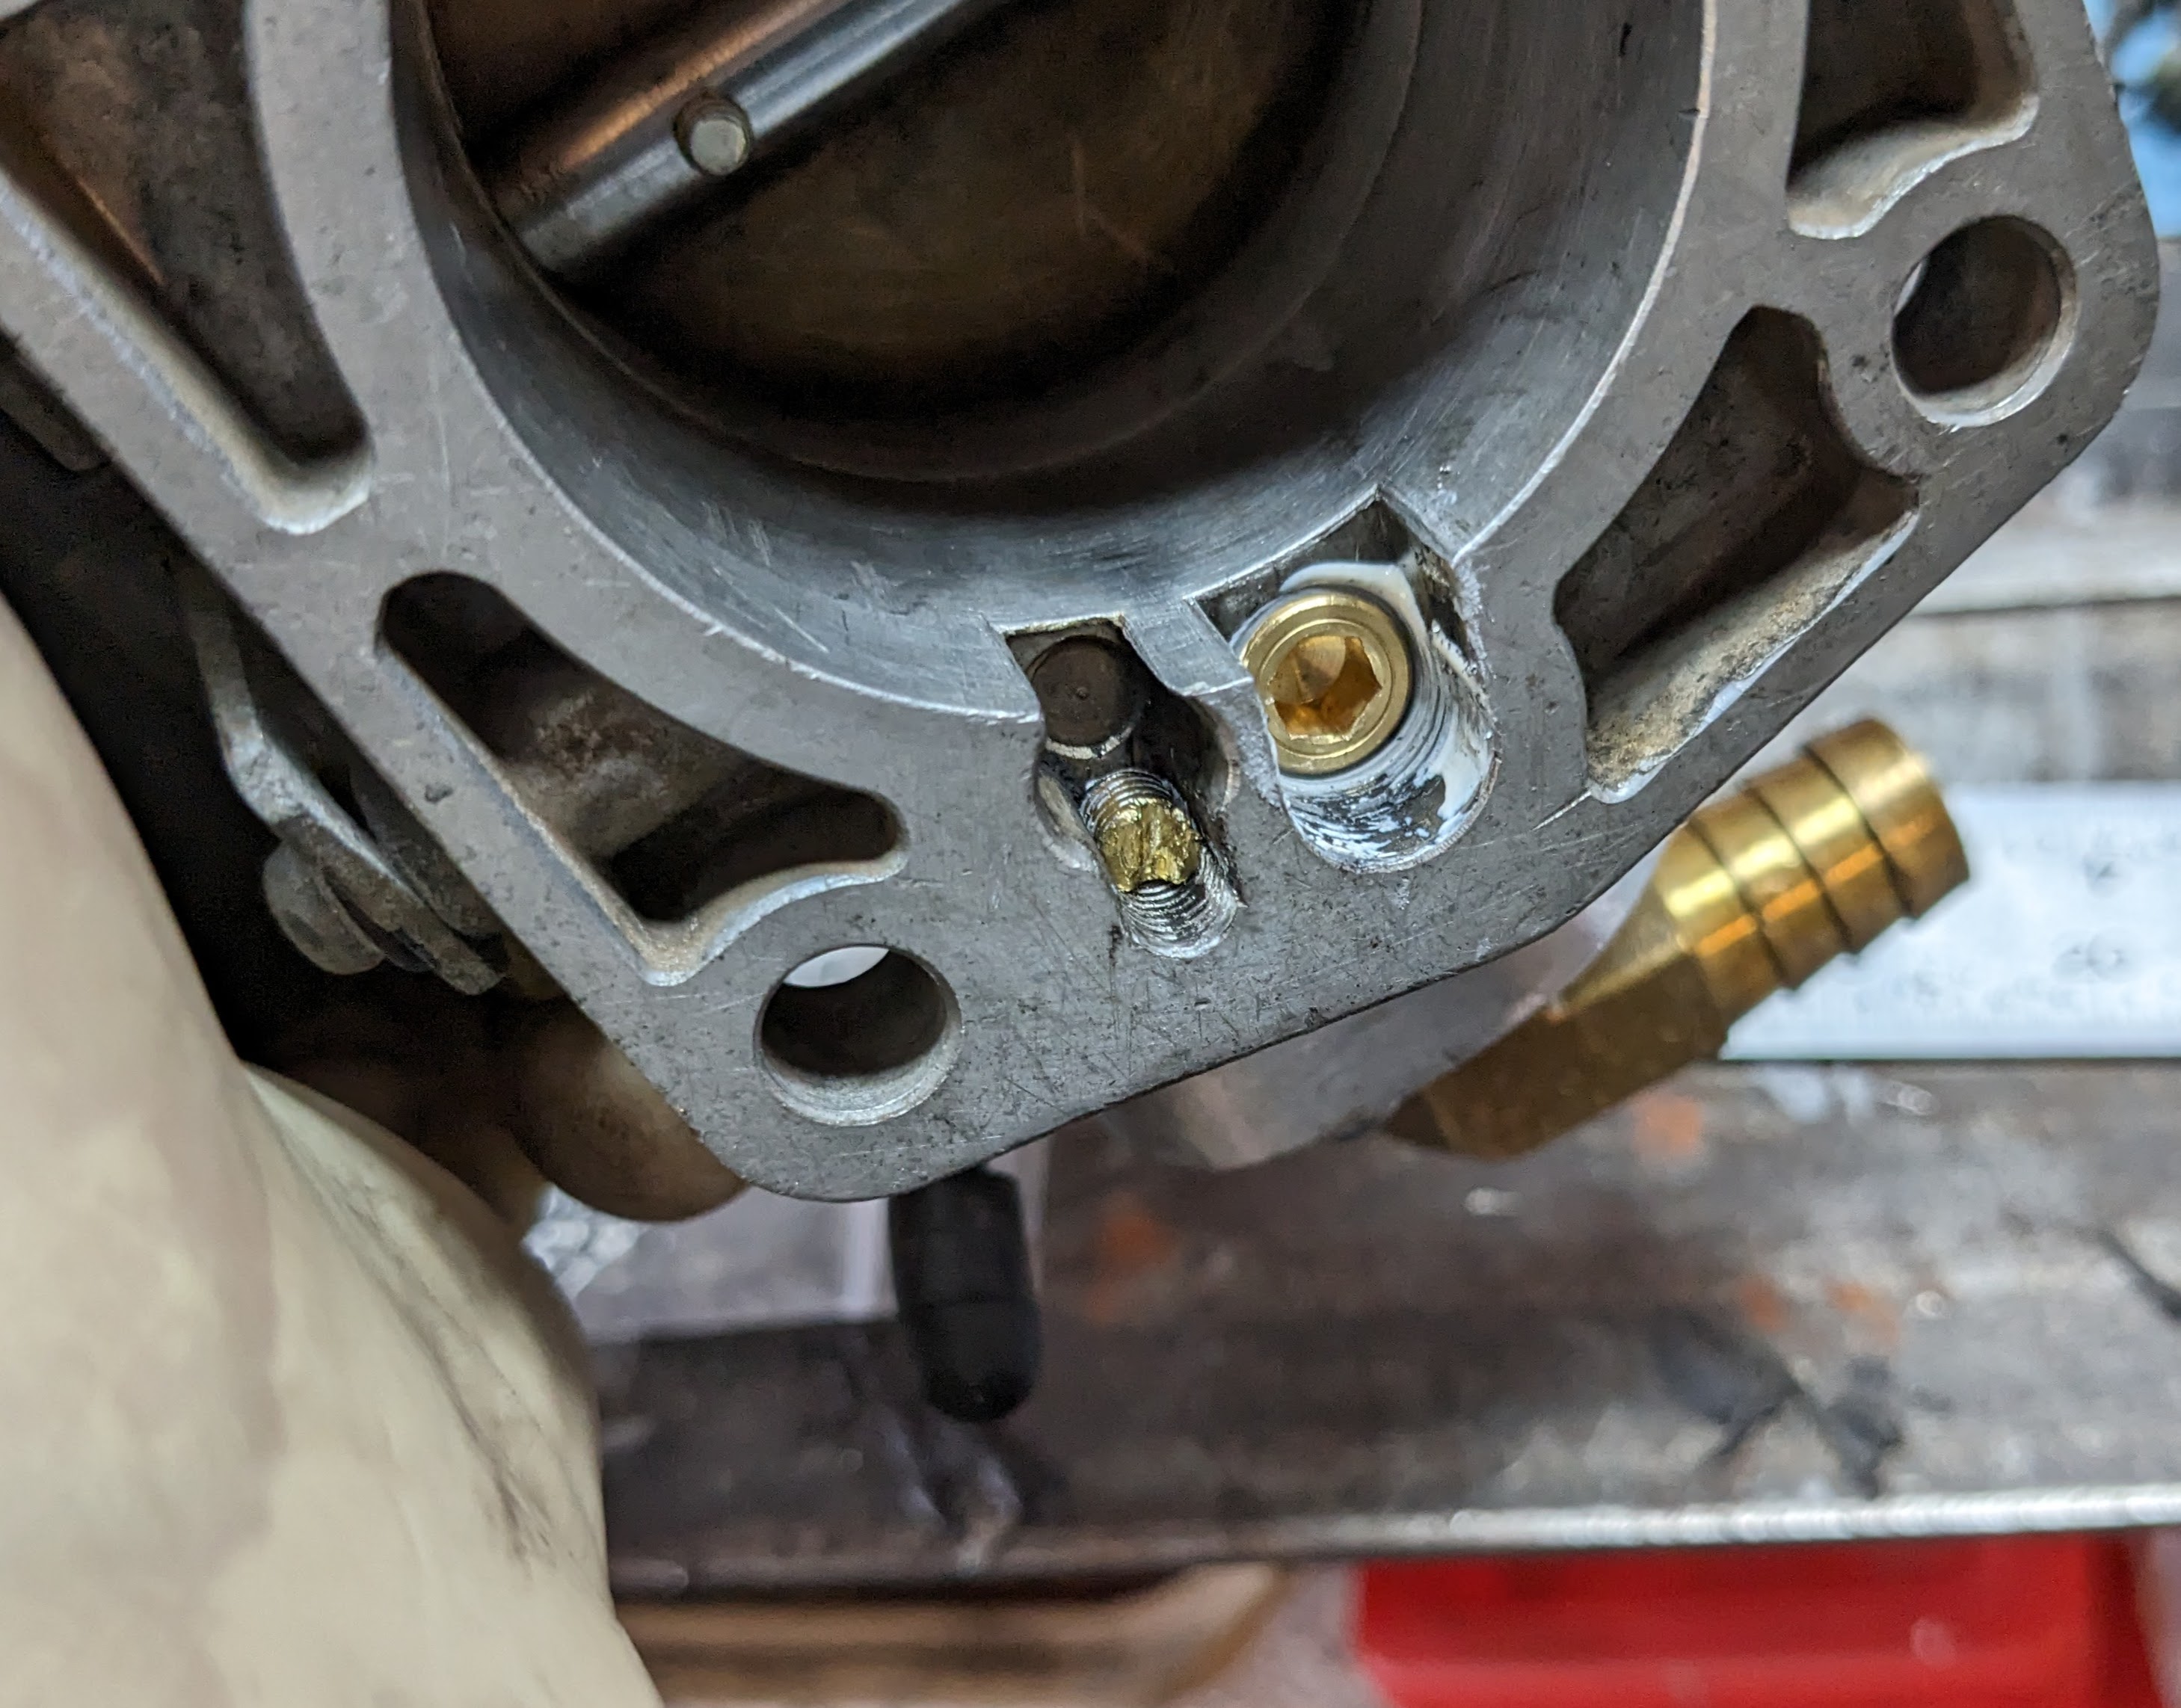
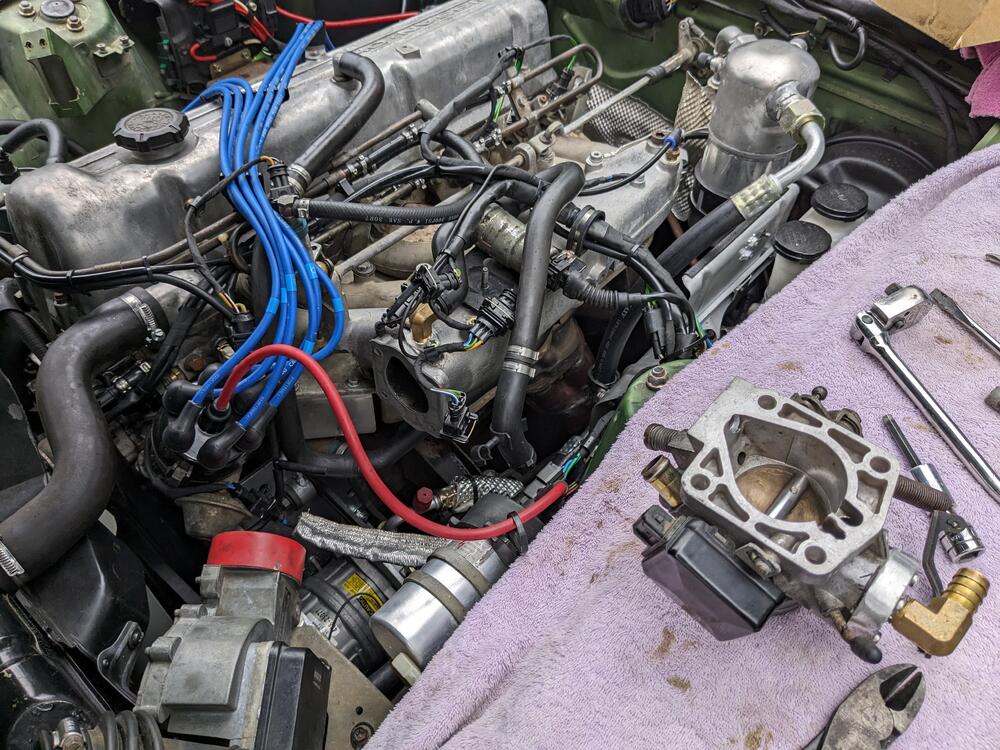
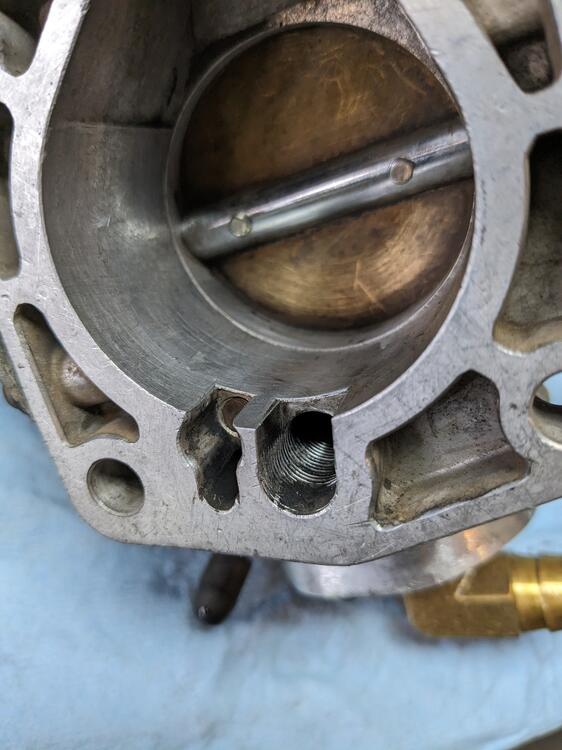
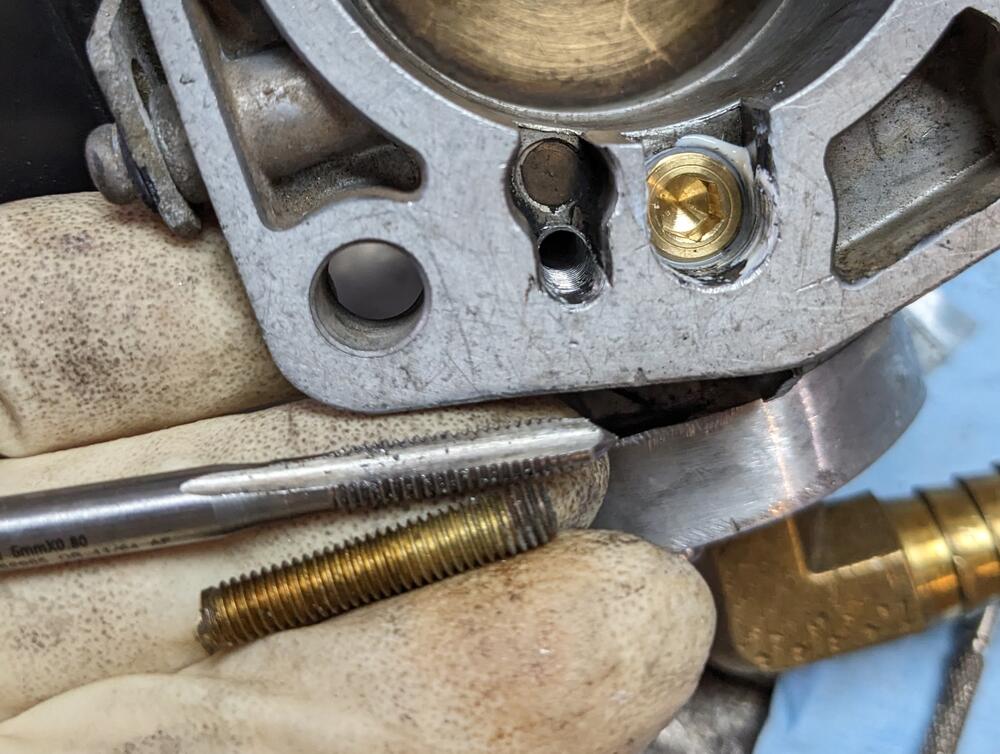
OK - so I had a break in the rain this morning, so I was able to remove the TB during one clear patch, address the ports I hadn't closed off, then get it back on during another break in the rain Larger port I tapped with 1/8" NPT thread sealant on plug tapped smaller port with M5x1, used the snapped off stud from the ignition ballast to make a plug done Back in. Ran the motor - don't have the tach installed, however the rpm's felt much more in line. A little low perhaps, so I ran it to normal op so I could check the base setting. With CIS, the easy way to do that is close off the low vacuum tube from TB to the IACV. It stalled out, so base was too low. Opened the idle thumbscrew a couple turns (I had completely bottomed it out) & got the idle what felt around 750. Releasing the tube, the idle motor cycles & the idle rises to what feels like 850-900 range. I will set it more accurately once the tach is in, but it feels good. Motor revs freely & returns to idle.


 1 point
 -
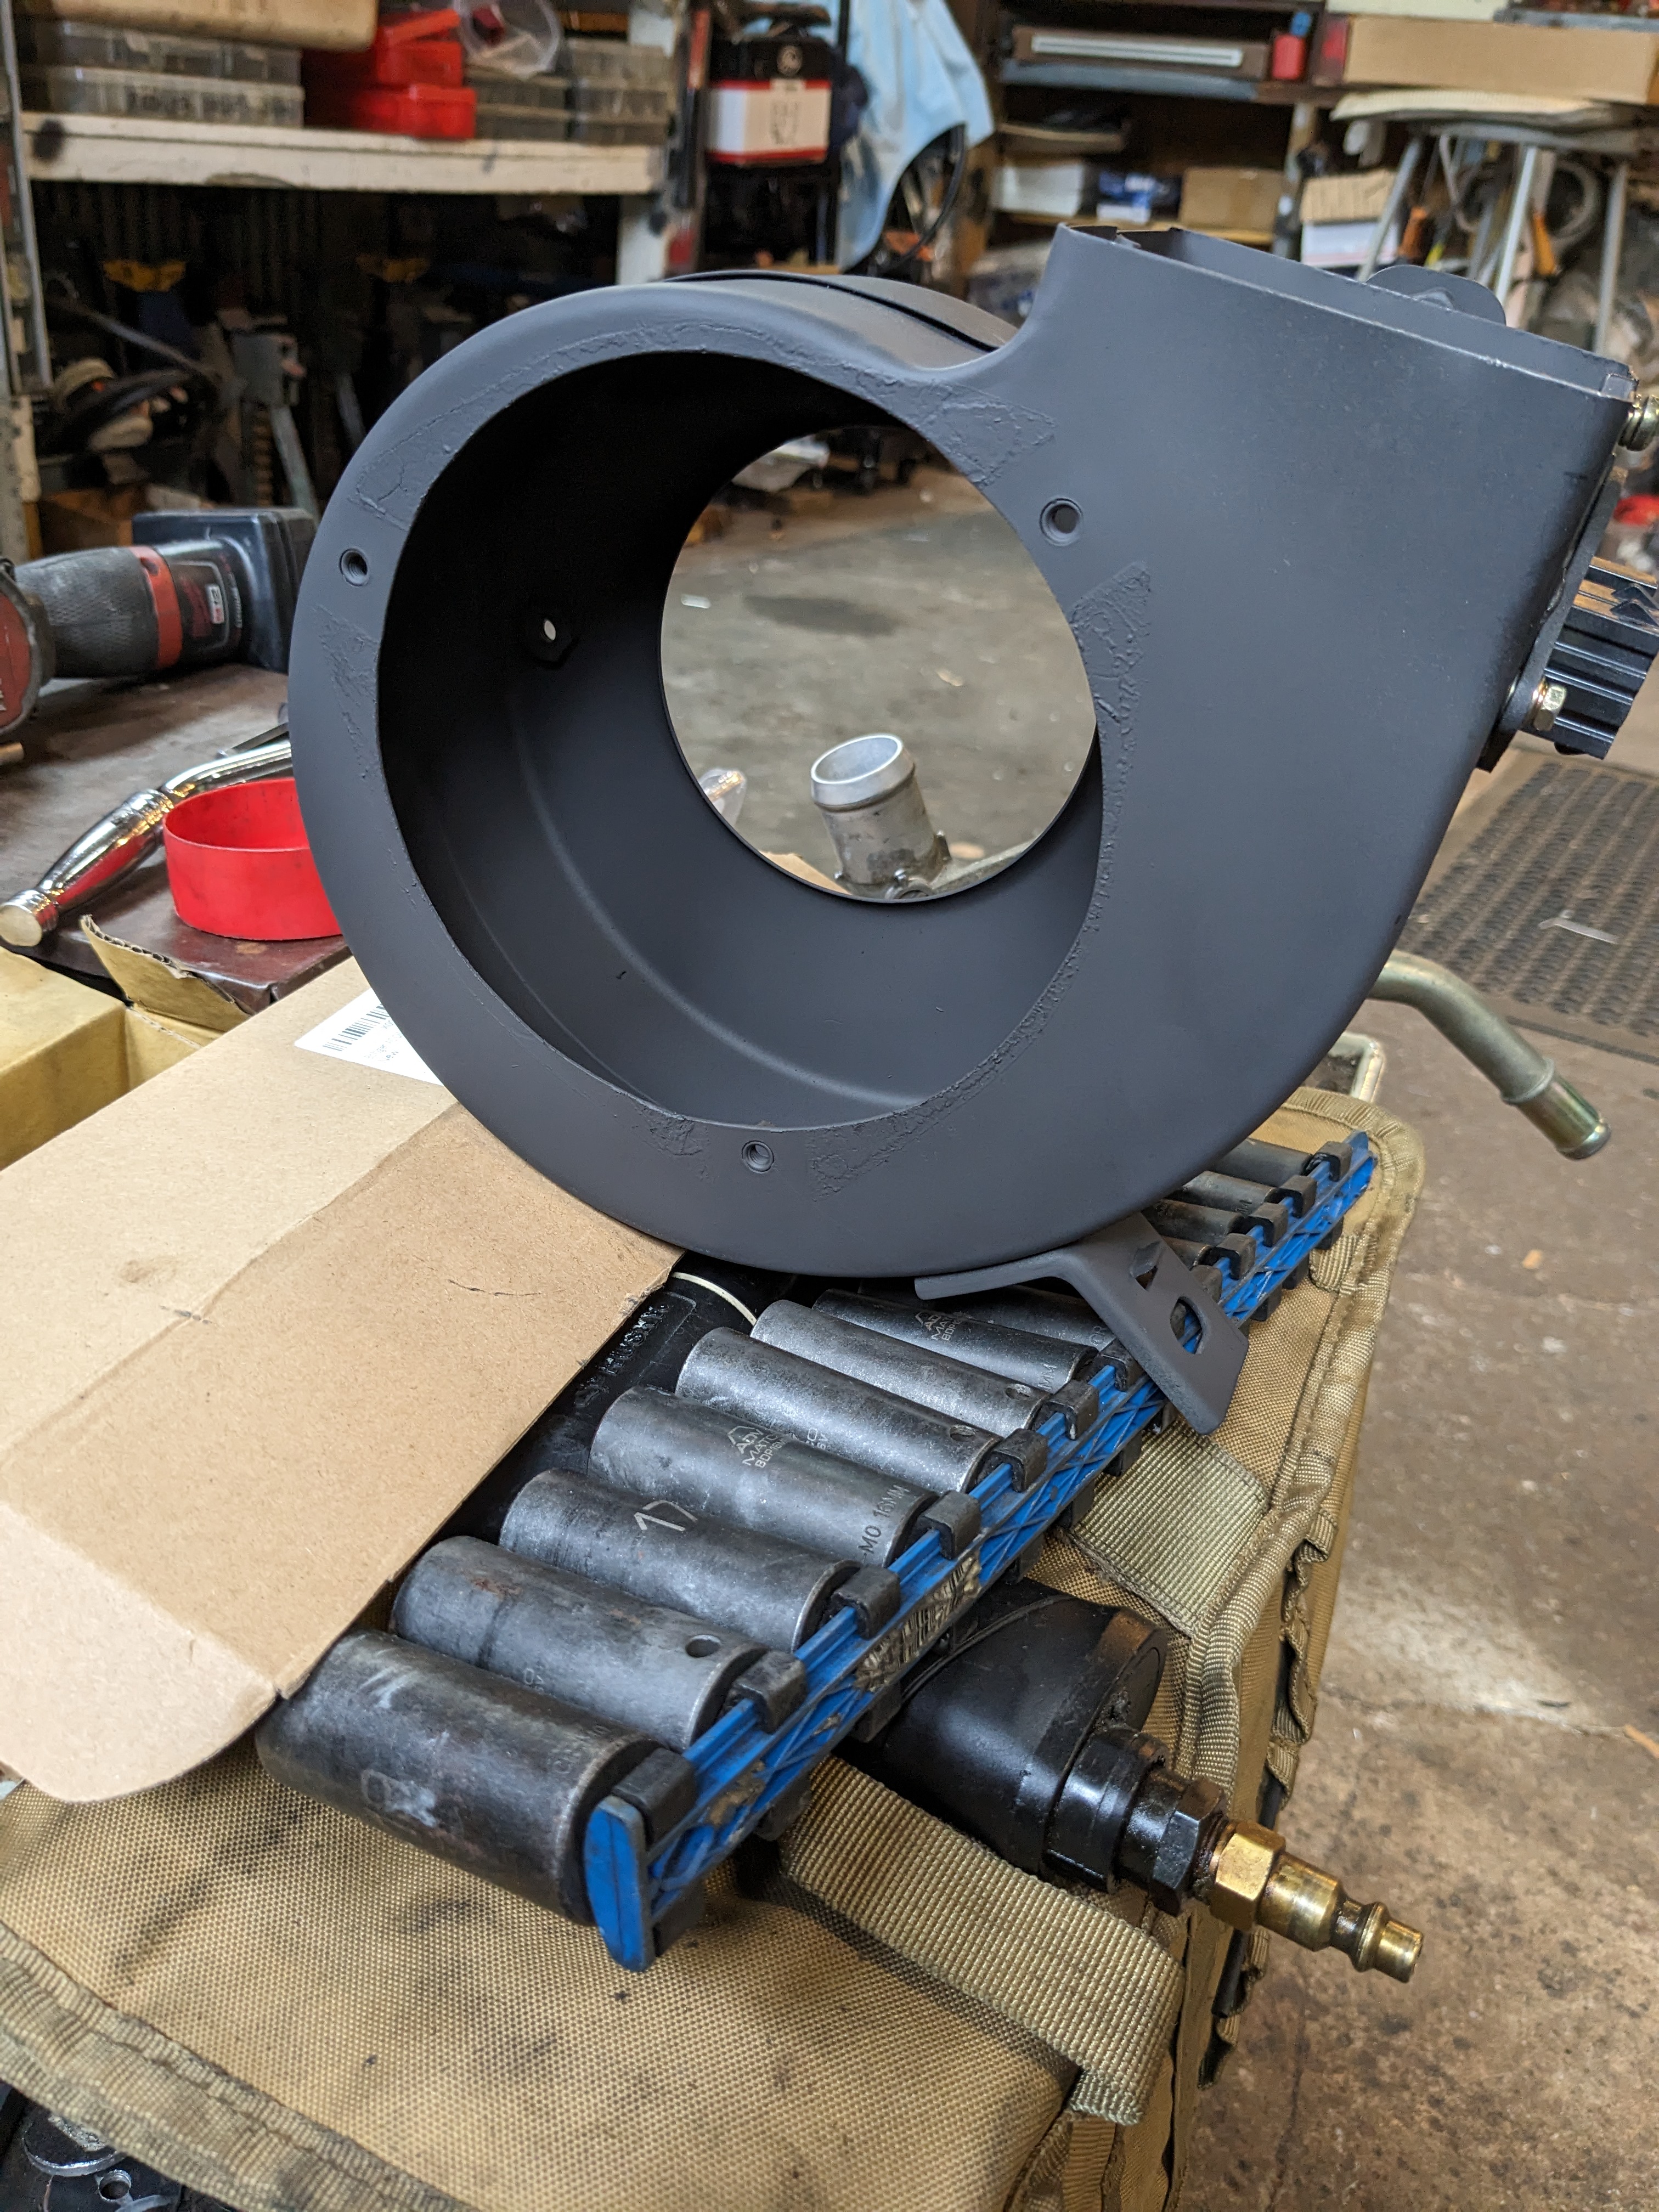
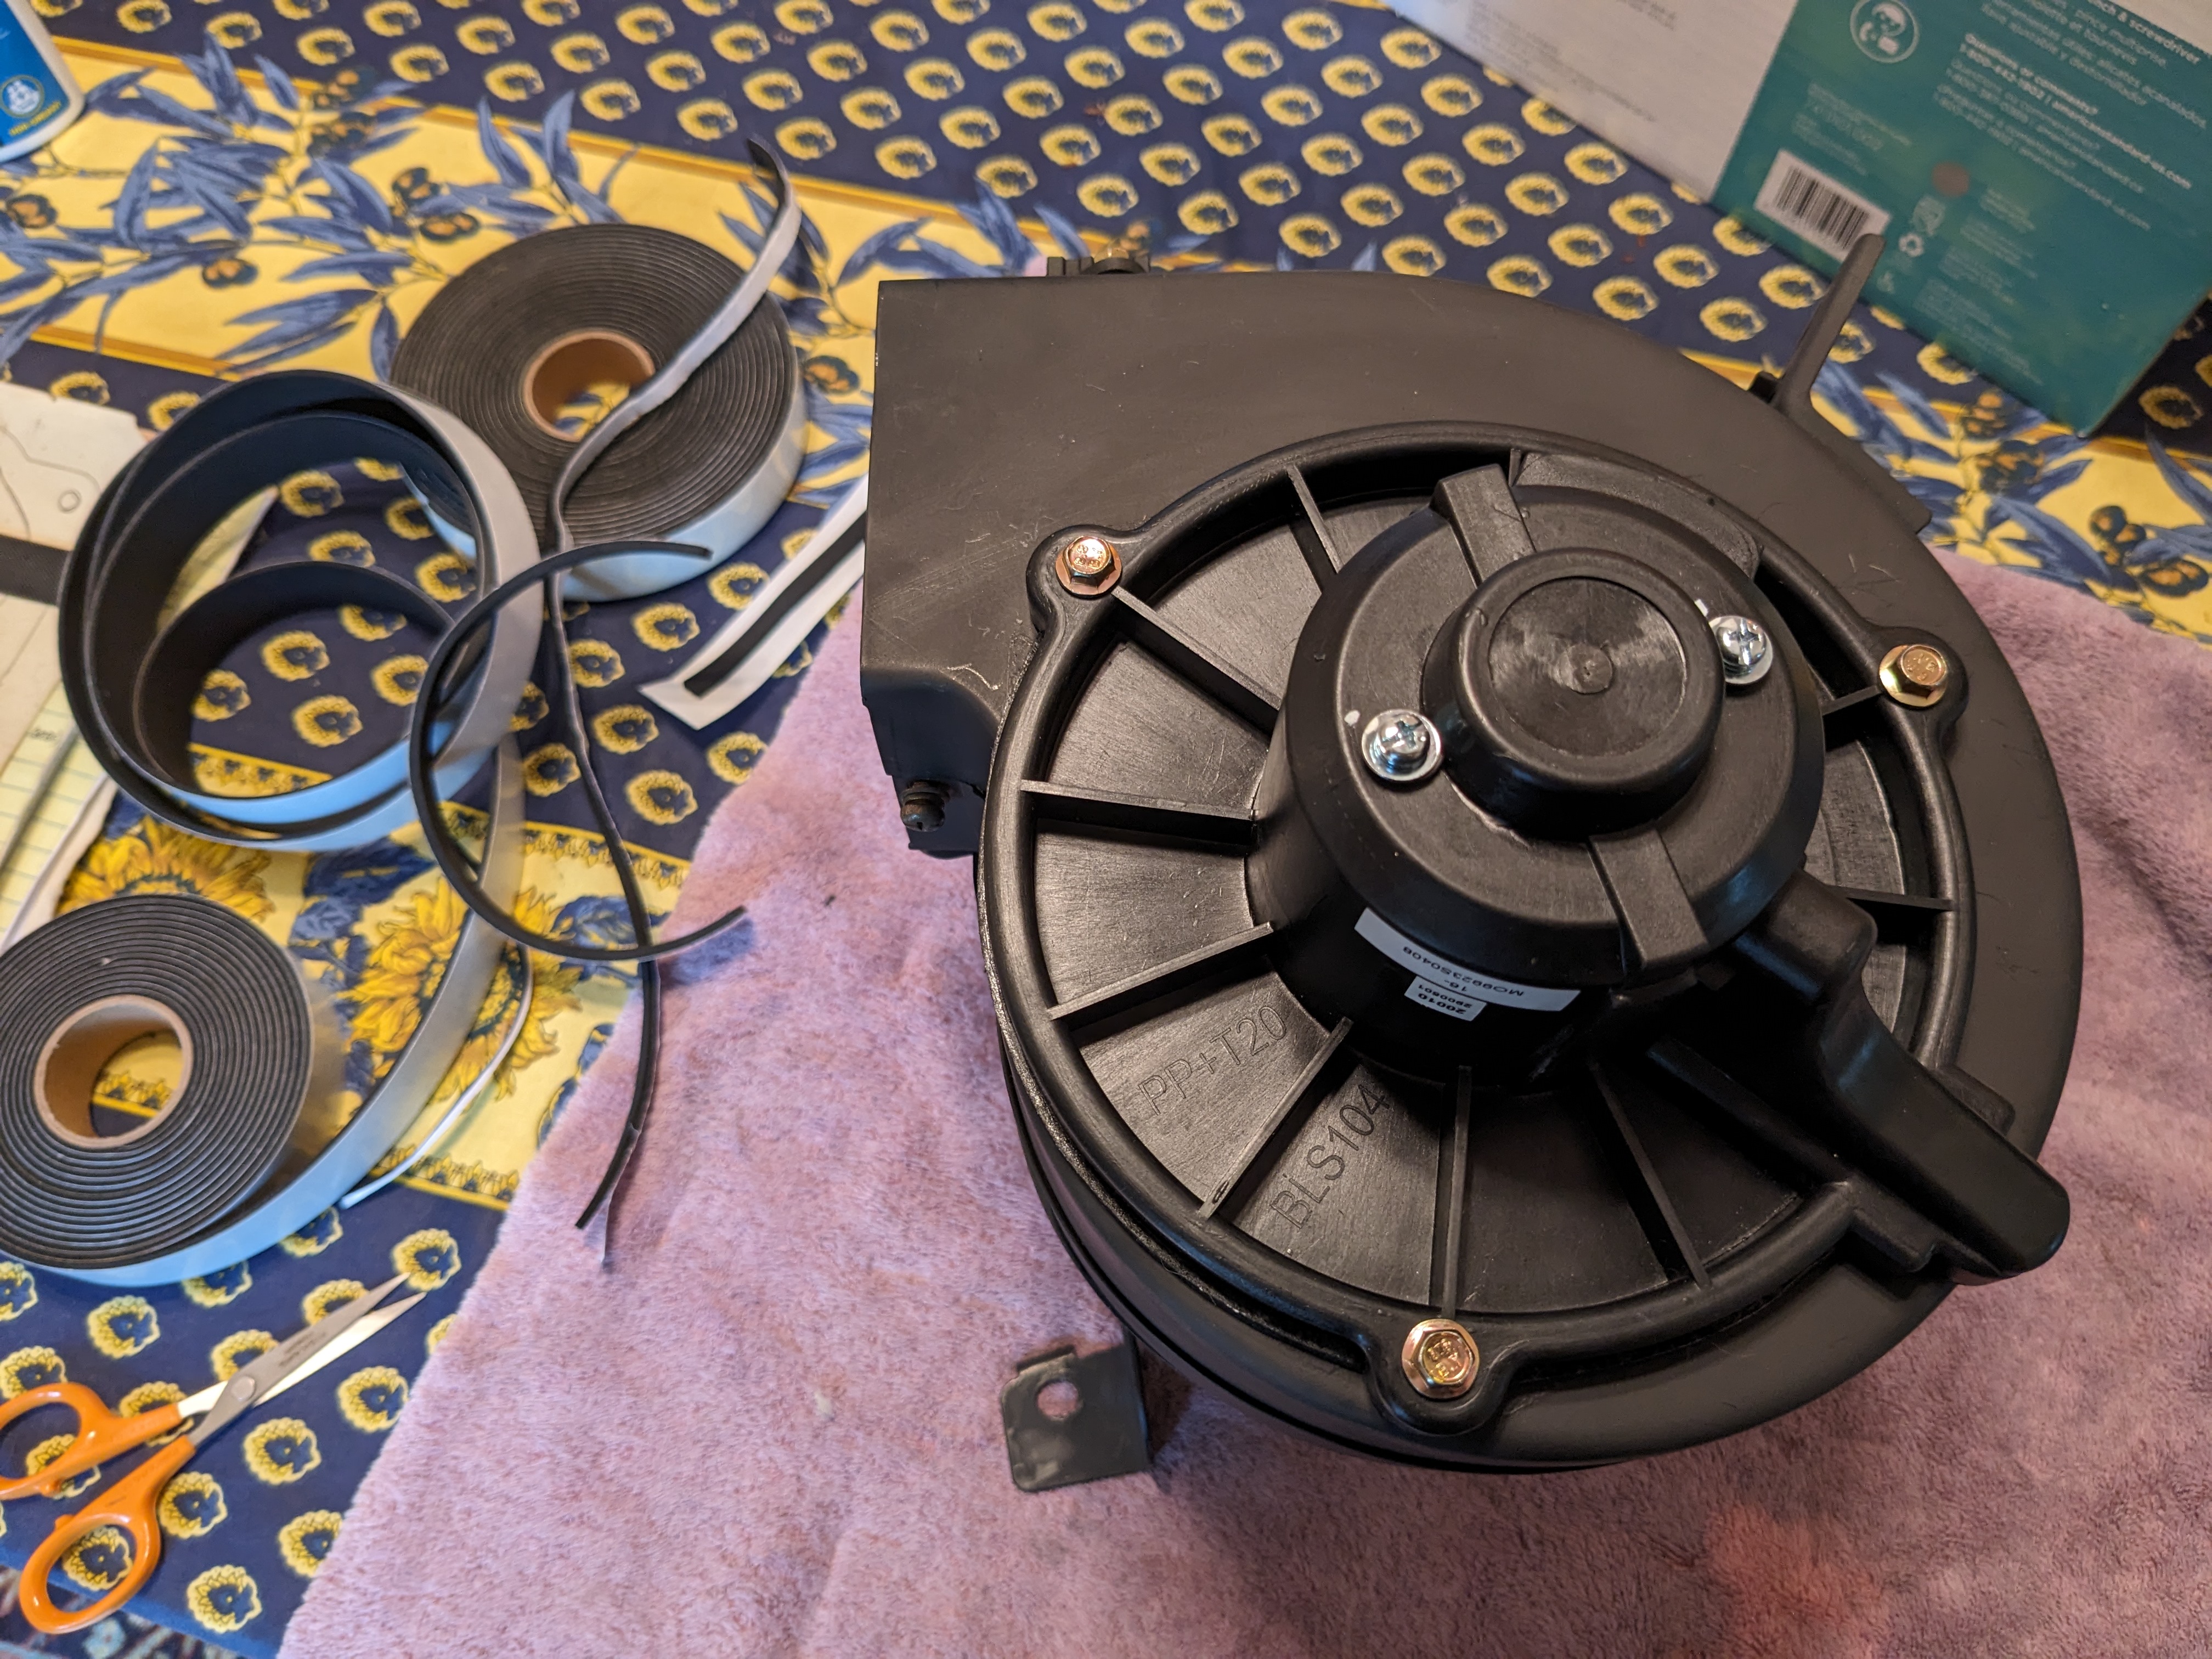
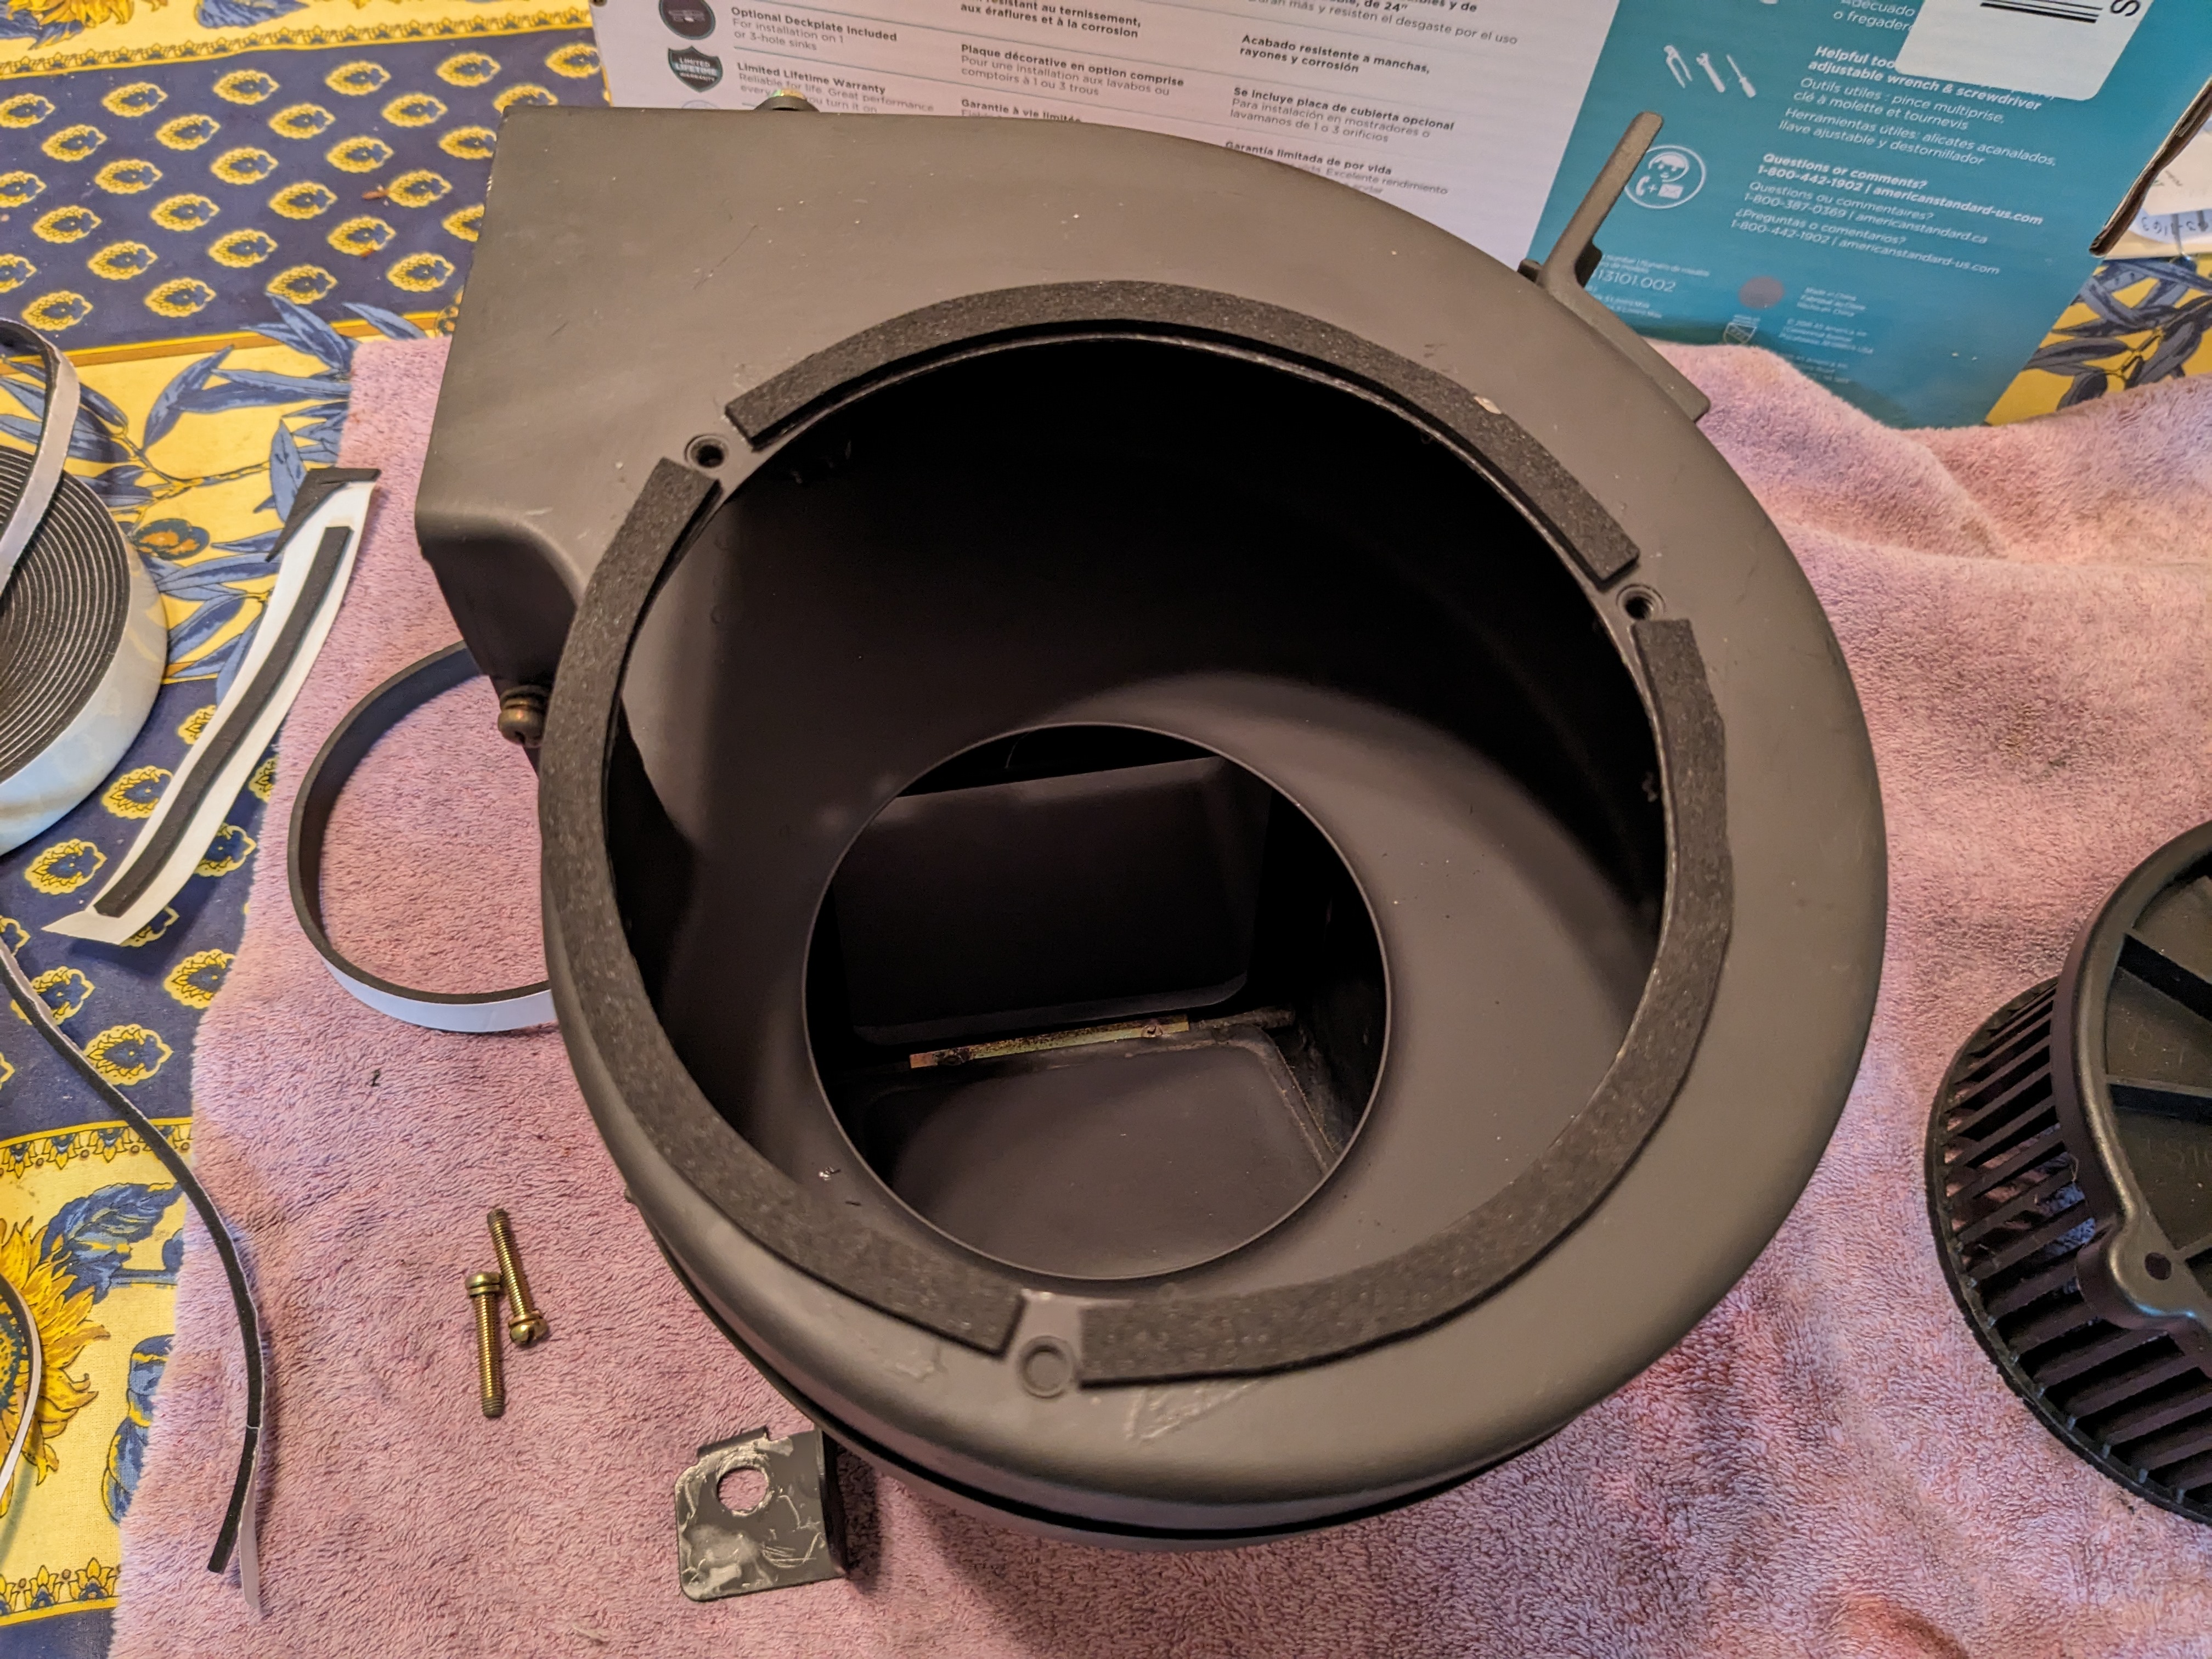
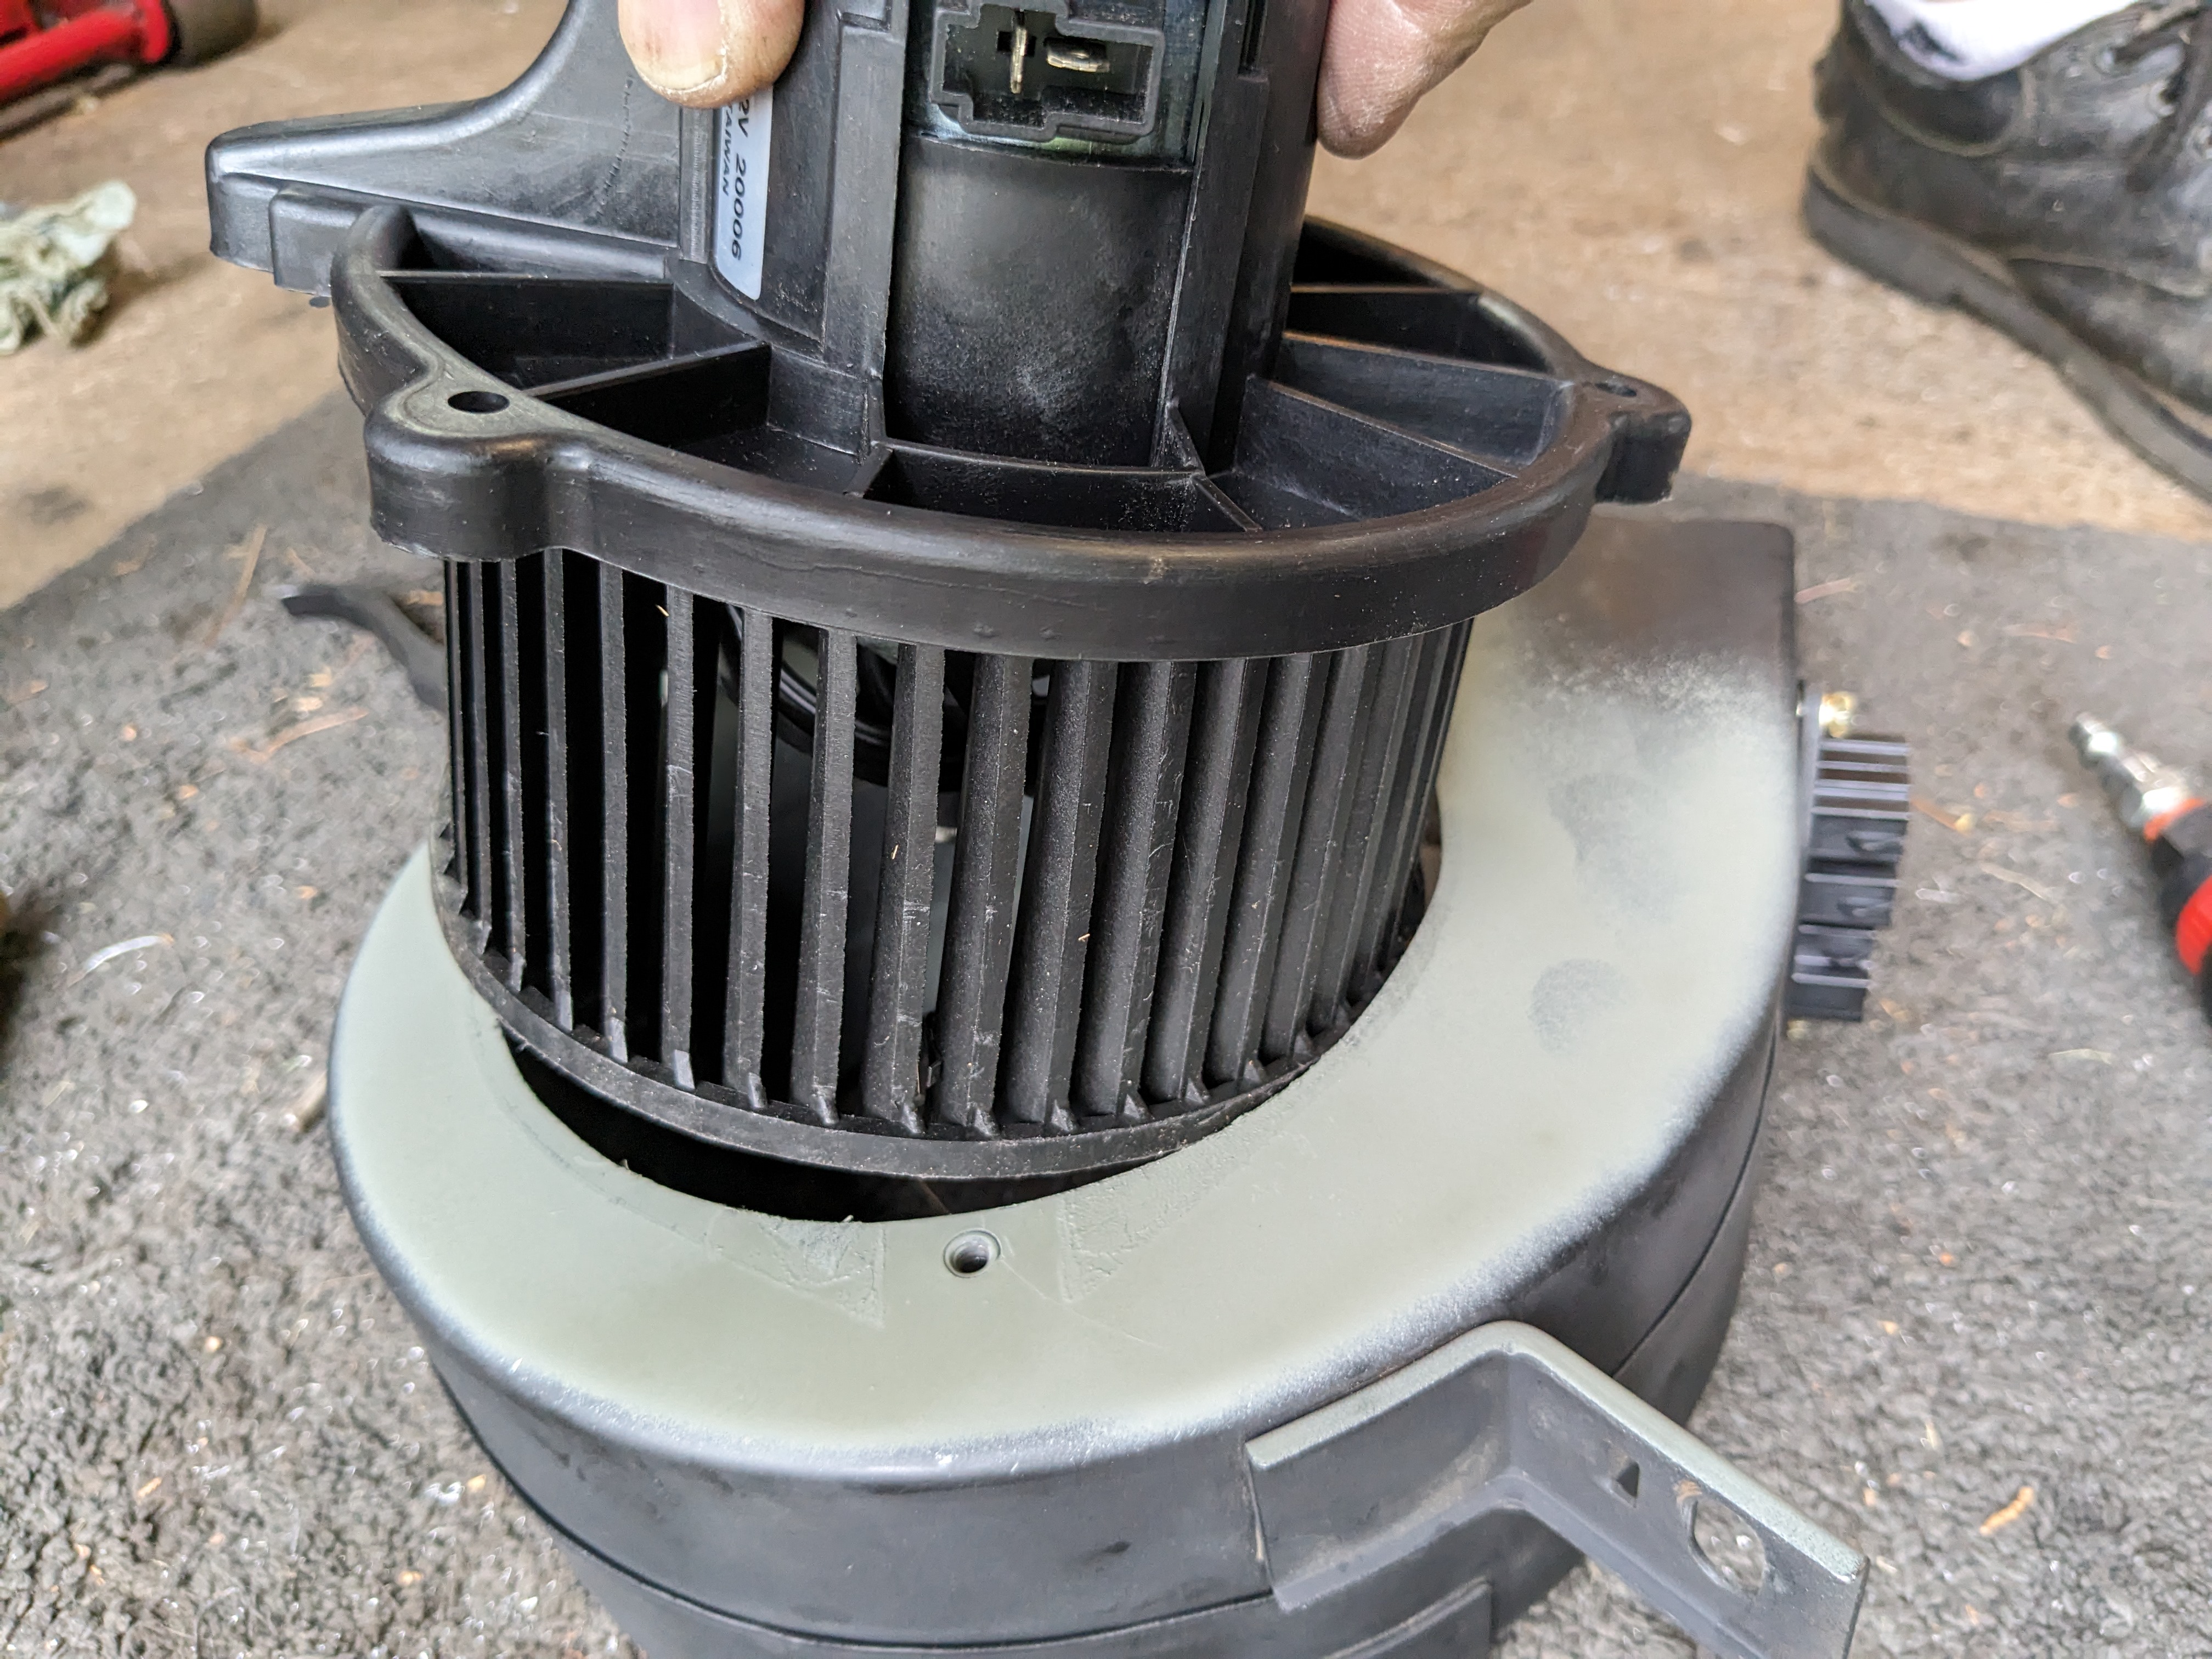
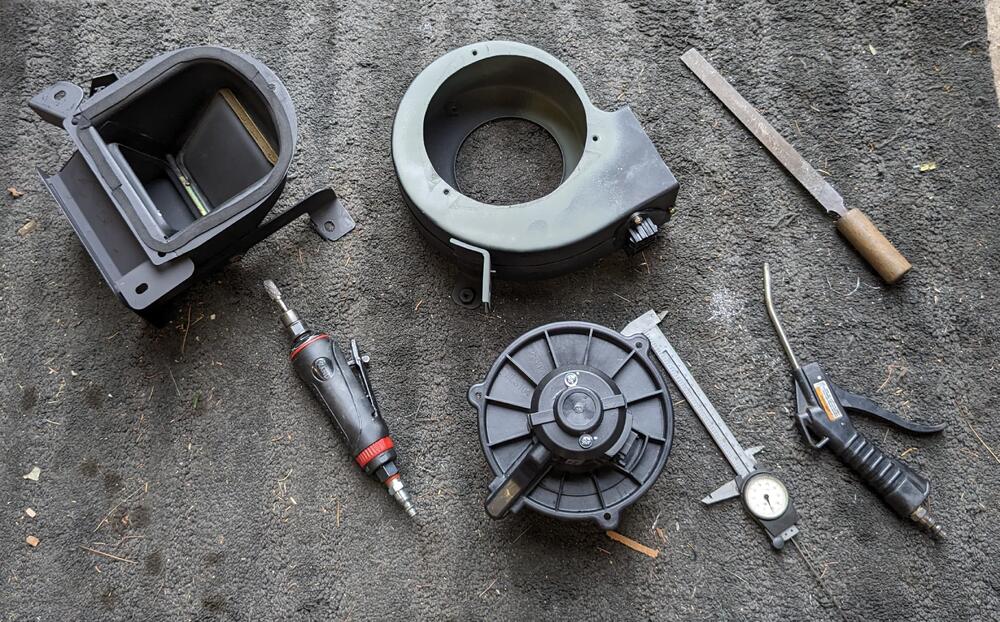
prepped & painted The blower needs a cushion - I put closed cell foam on the housing first - that didn't work so I transferred it to the lip of the blower motor outer flange The stock bolts were too long now, so I switched to shorter M5 hardware. Bolts line up with stock holes, no mod to casing required squirrel cage offset


 1 point
 -
1 point
-
1 point
-
Sorry, I wasn't paying enough attention. On the 280, you can't just slap a plate on the bottom to block off the BCDD. If you do that, you'll have a huge passageway around your throttle plate:
 1 point
 -
Nice, That was a good tip someone brought up on the forum. What a fantastic resource we have here. Nice work friend.1 point
-
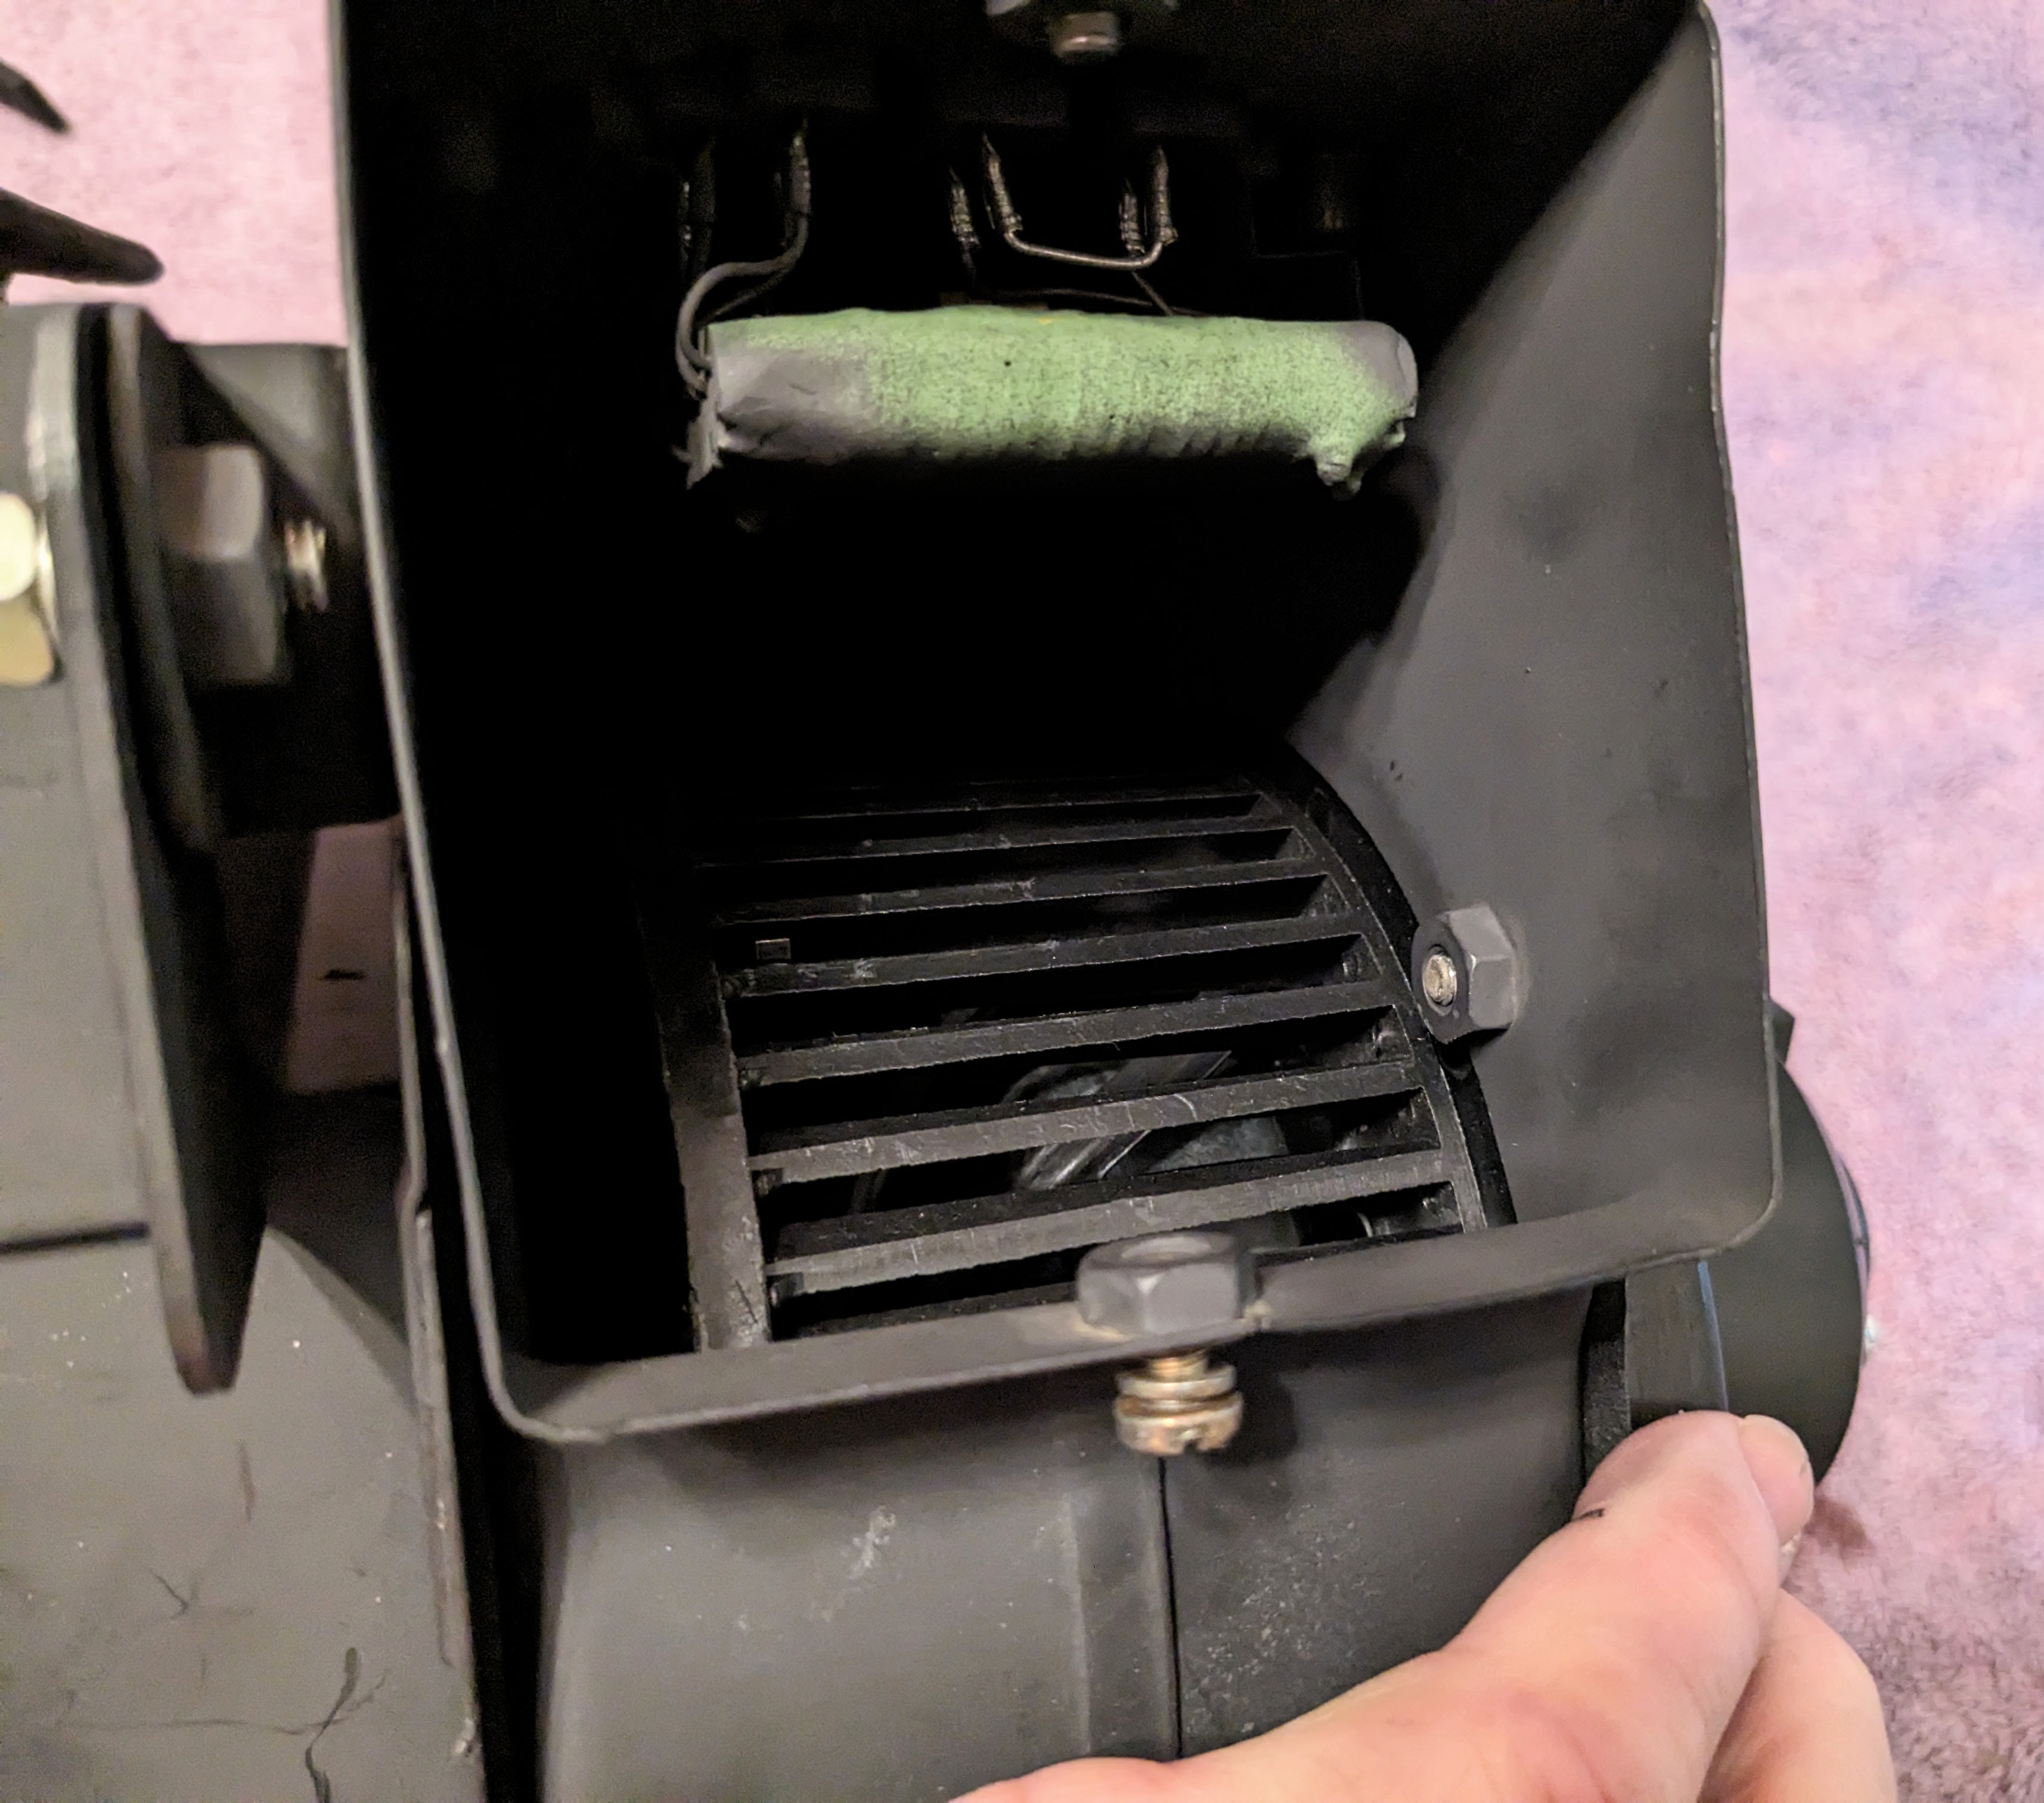
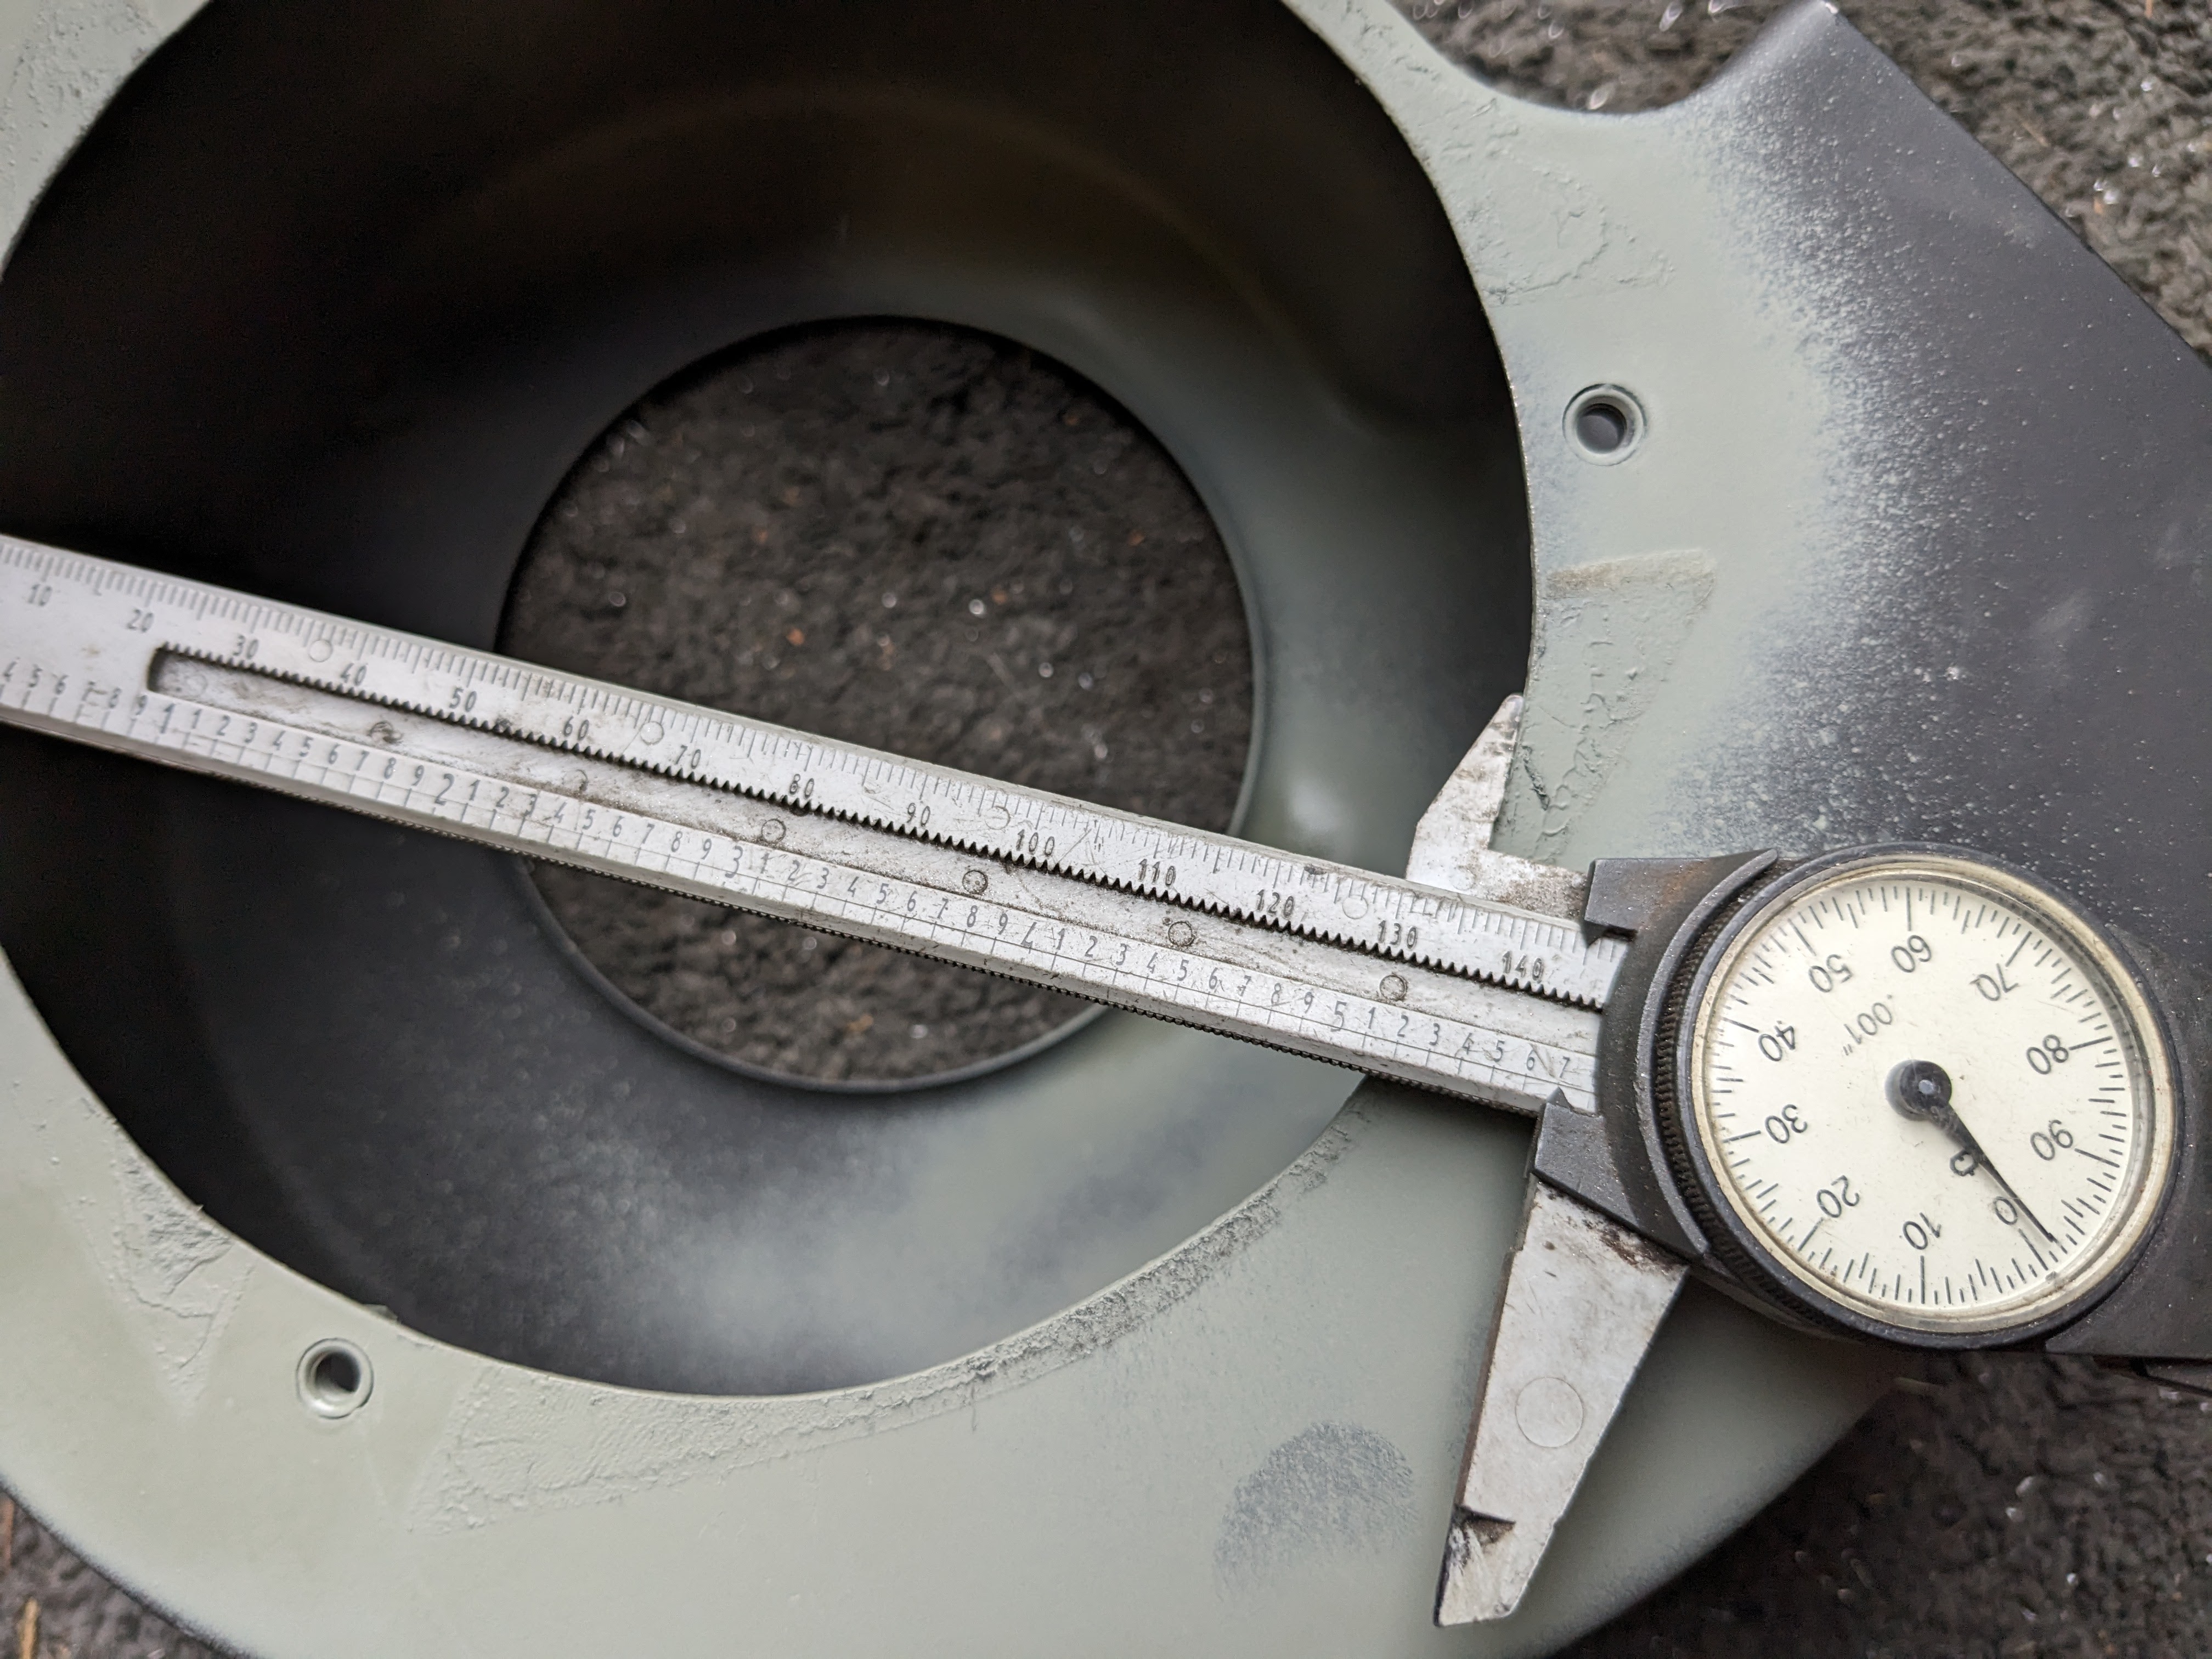
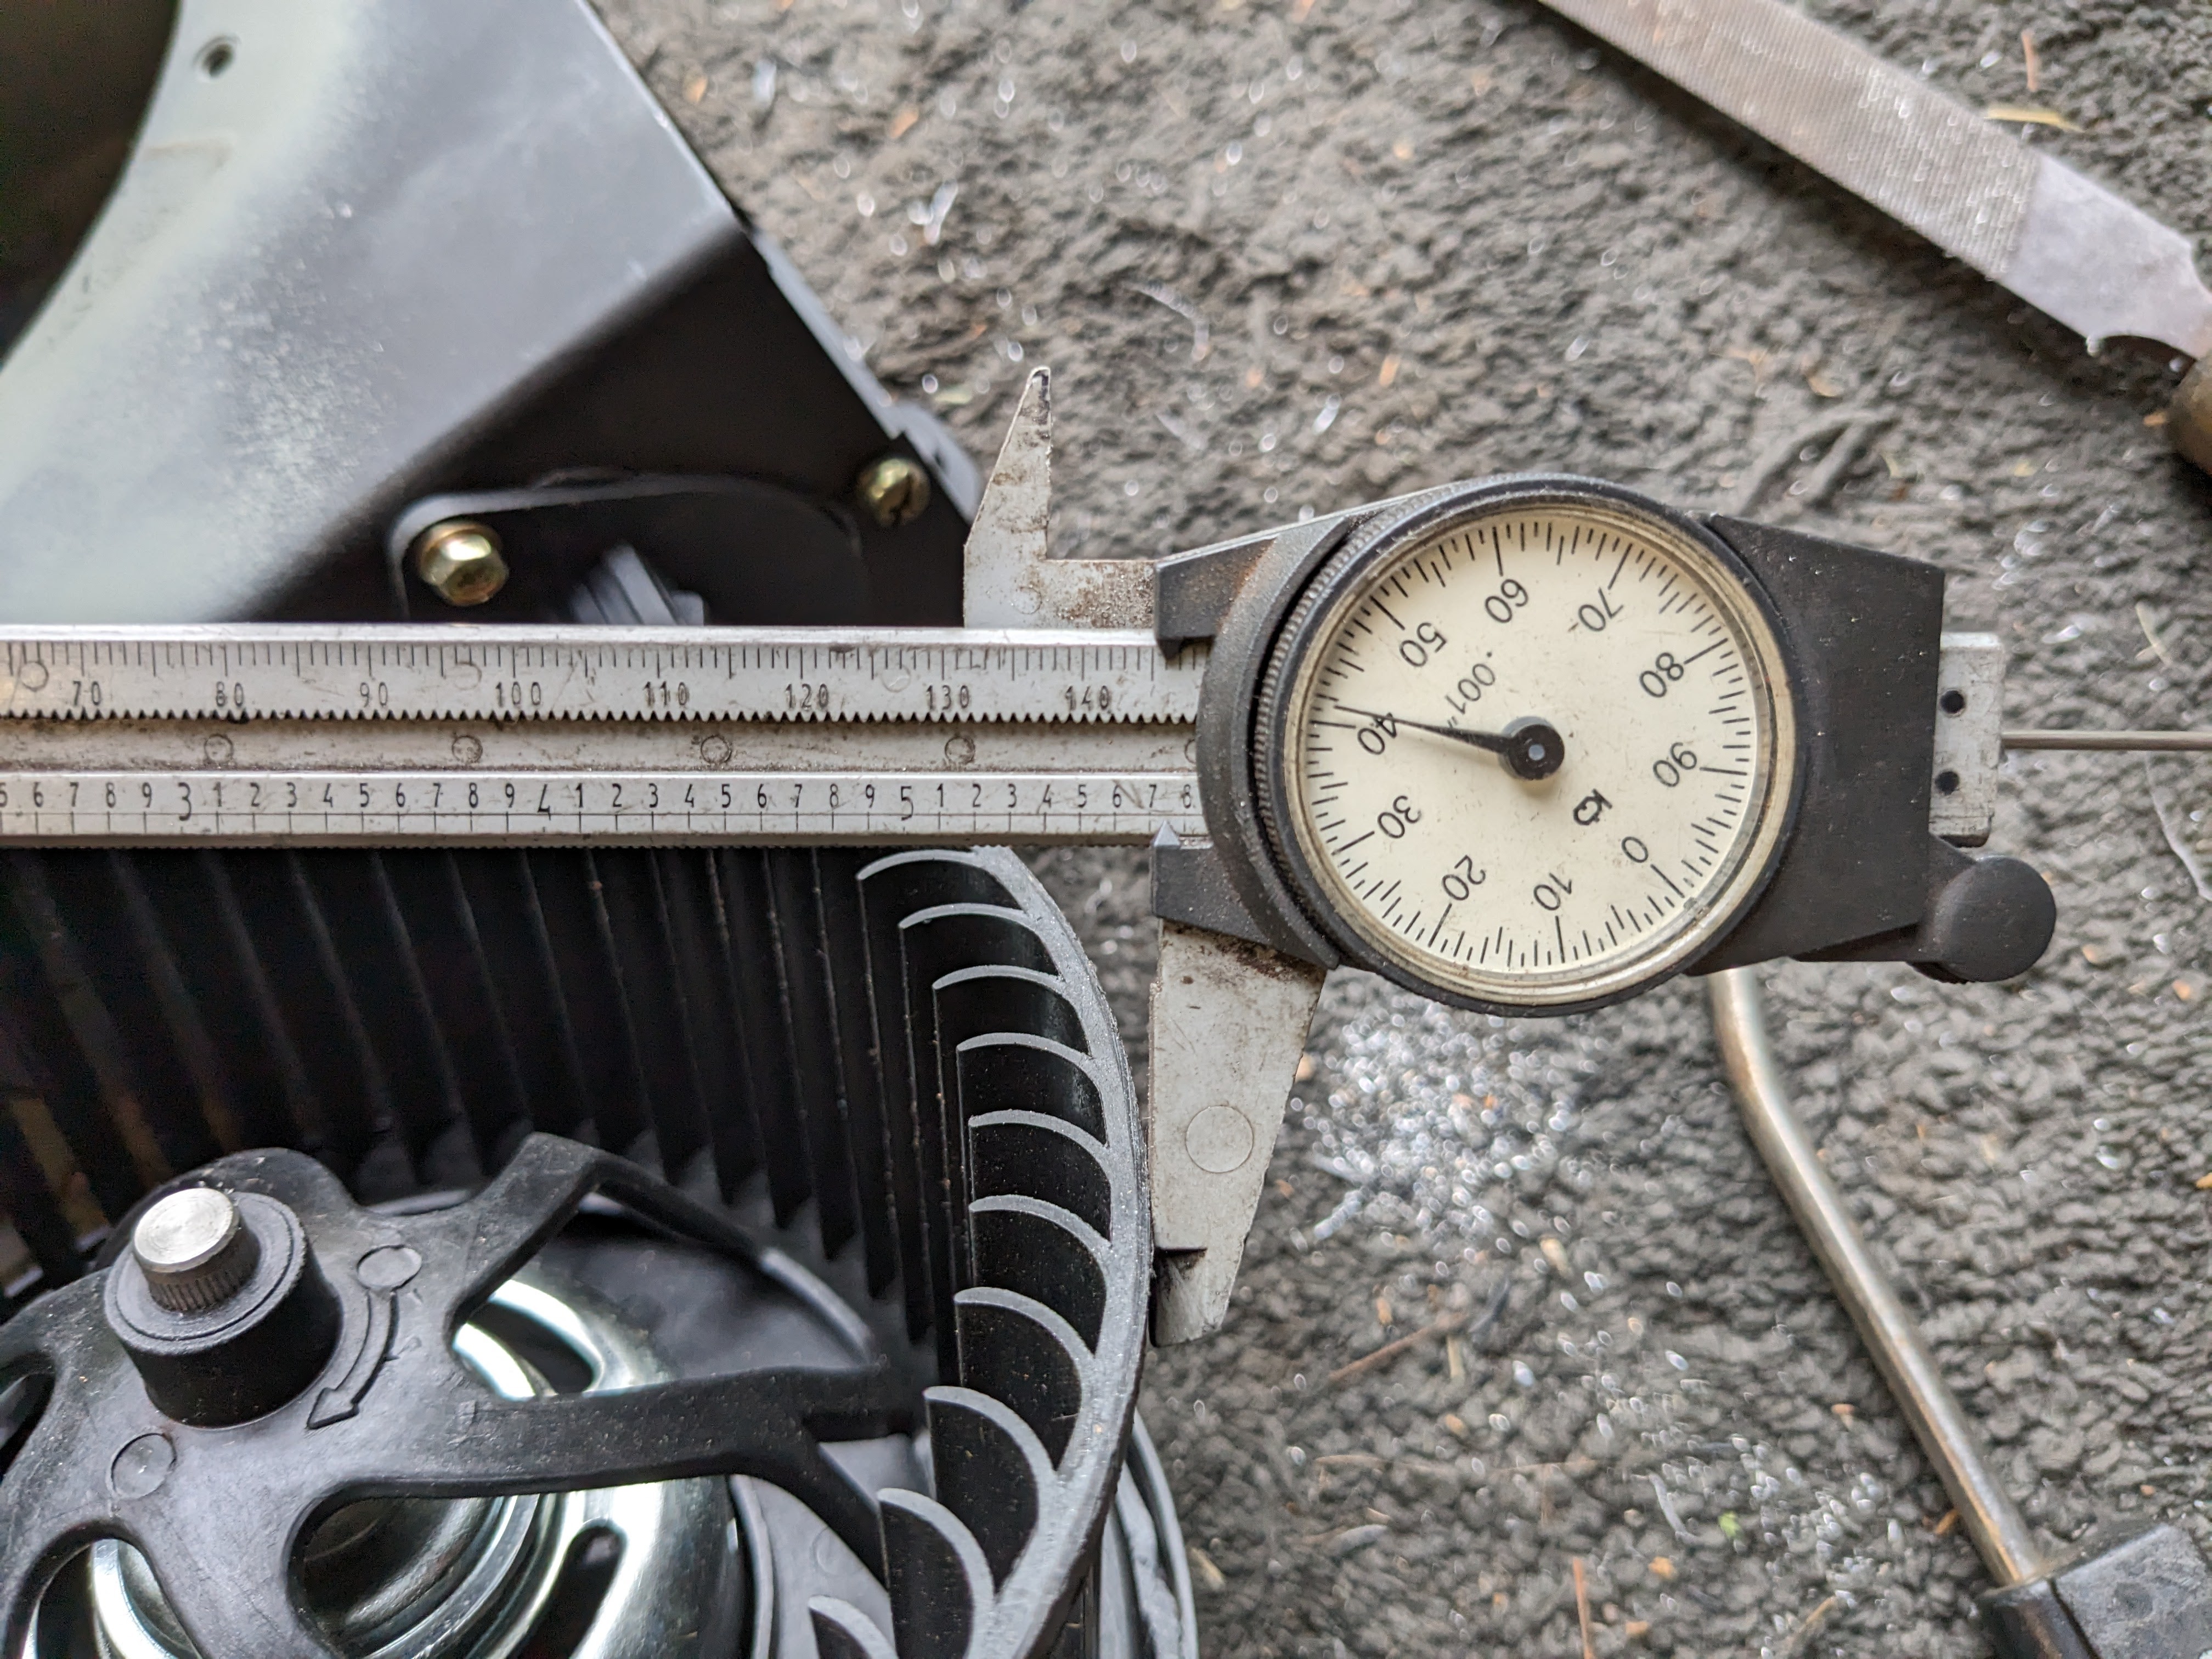
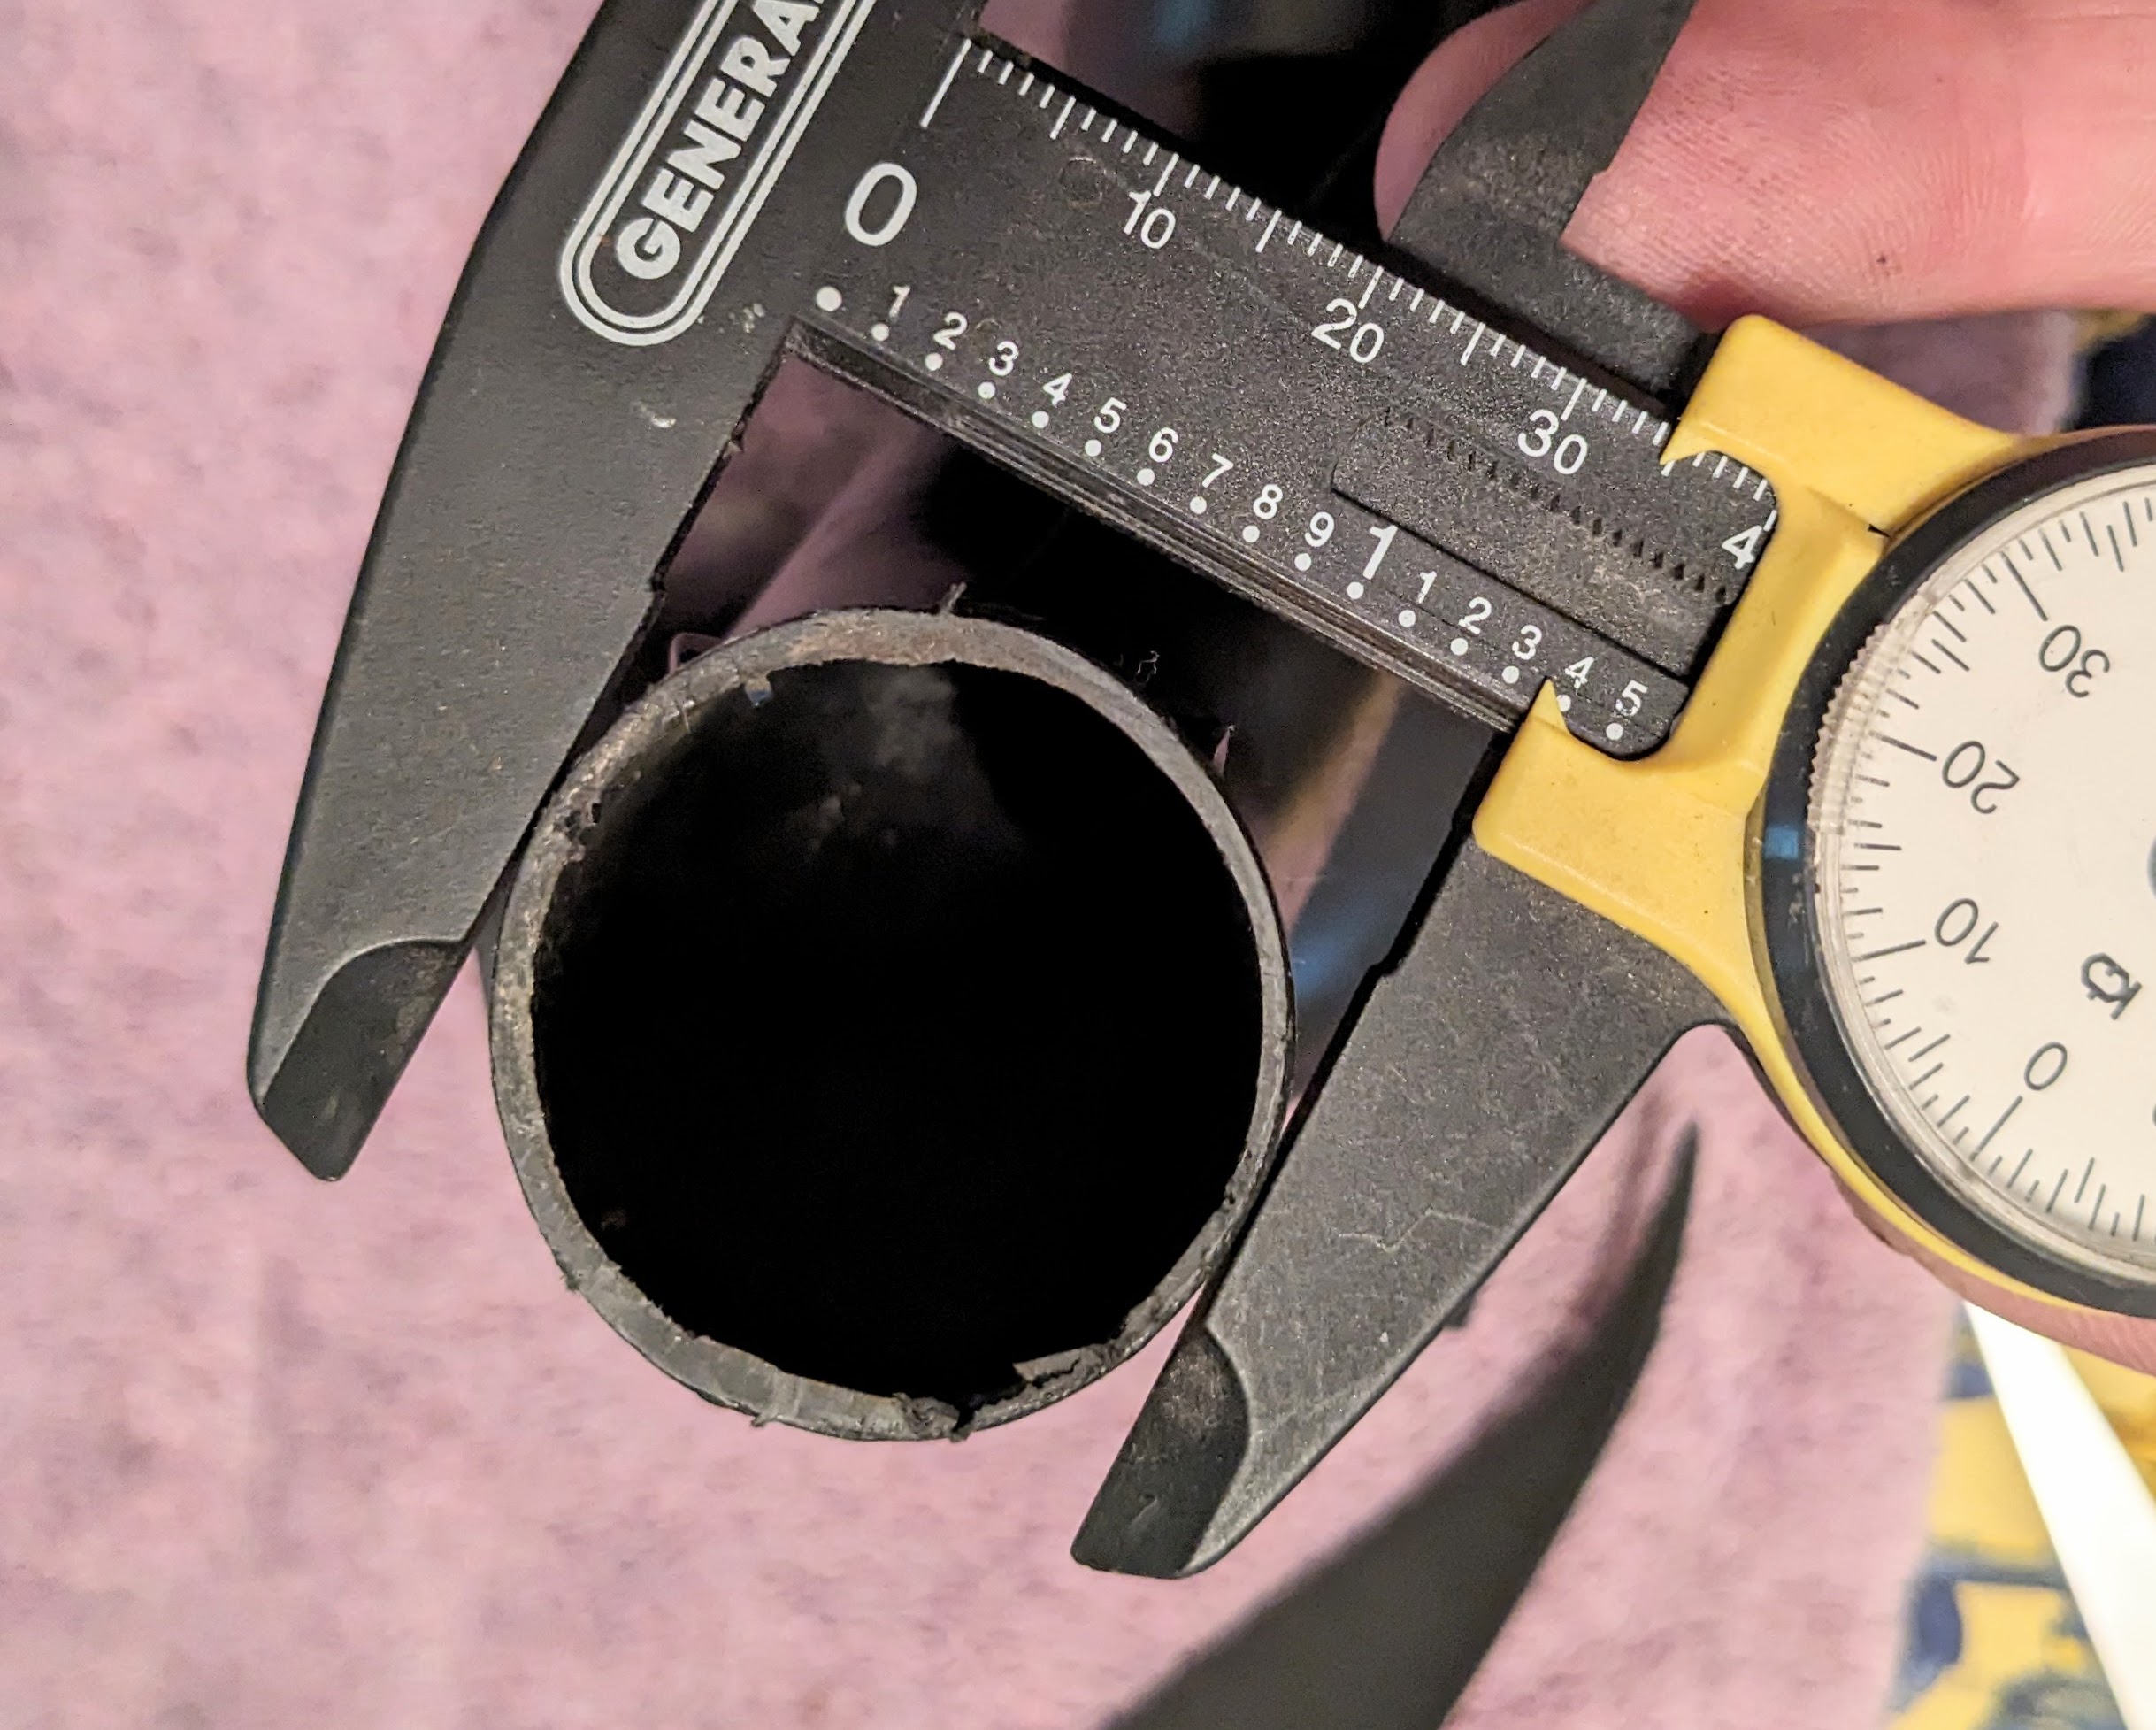
Modded mine today - enlarged hole carefully with die-grinder & half round file to clean it up. Went to 5.7" Fan cage can be angled in place 5.75" cage OD

 1 point
 -
1 pointFor @Yarb, I will be documenting and de-pinning the connectors to get the grommet on the harness. I'm not cutting anything I don't have to cut.1 point
-
Well, you don't want the original motor OR the original squirrel cage. That's the point. With the Kia blower both are an upgrade. I've never seen a Kiz squirrel cage quite like the one you've pictured though... The stock foam spacers have to be removed. I've done a few of these swaps since I did mine originally and I've ALWAYS had to trim the hole in the blower box to accept the Kia squirrel cage. If you do it properly, all the stock material can go back if anyone decides to return the blower to factory parts. Note that the mount holes on the blower may not line up exactly either, but they're close and plastic so it's easy to modify. As I've said a BUNCH of times: The stock duct system in the Z SUCKS! The Kia blower helps because it uses brute force to increase the airflow. (I also have the great fortune to have the Hayhurst designed Ultra Heaven Center Ductwork replacement, so I have incredible airflow, but he never produced these for sale...) When you're trimming the hole, do it a little at a time. You're going to tilt the squirrel cage in - NOT DROP IT IN STRAIGHT - so the trimmed hole doesn't need to be a perfect circle AND/OR the exact diameter of the Kia squirrel cage. I wish I'd made a YouTube video of how I did mine... Mine was the junkyard find all those many years ago, I daily drive Goldie in Phoenix Arizona (anyone sick of hearing me say that yet?), I demand that my A/C works at it's peak (Raised in Idaho, never got used to the Arizona heat) - the Kia Blower has never failed me.1 point
-
1 point
-
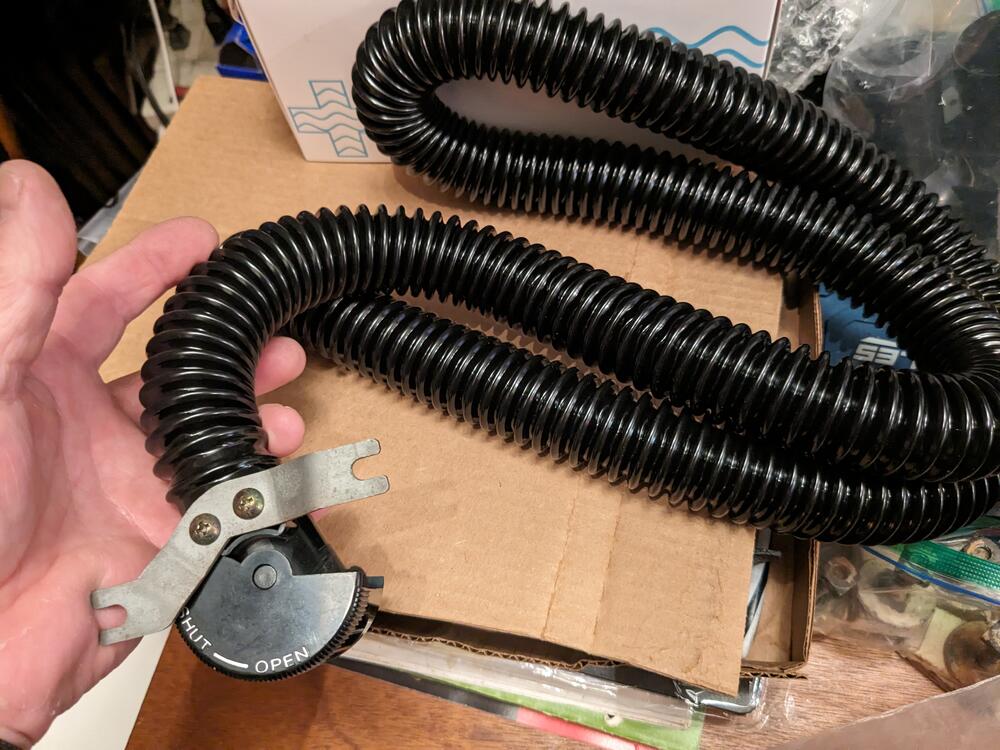
0 pointsI bought the Dayco 80165 hose based on this thread, however it doesn't fit the pass vent or either of the elbows - those are all approx 1.4" OD. The DS vent is slightly smaller ID for some reason - I was able to stretch the 1.25" Dayco hose over it, but no way it's gonna fit the other positions. EDIT - ordered Dorman 96030 1.5" hose to try
 0 points