Leaderboard
-
grannyknot
Free Member3Points5,158Posts -
AK260
Free Member3Points999Posts -
.JPG.cfcada9cf1c1b502df3f5f2f2ca3ff36.JPG)
SteveJ
Free Member3Points9,646Posts -
jfa.series1
 Subscriber
 2Points2,733Posts


Popular Content
Showing content with the highest reputation on 09/13/2023 in Posts
-
2 pointsI bought one of the capacitance meters on Amazon for $22 . I compared it with my old B&K 820 and it's very accurate. For $22 I thought it was junk , but wanted to see how good it was. Don't think I would check large power caps with it, but a vary nice unit. I check all caps before use for the simple reason I have been burnt several times. Installed what I thought was a new good cap only to find that the part was WAY out of spec.2 points
-
2 pointsAs @zclocks said, you need a meter that can read capacitance. I prefer to use my Fluke for that. However, if you don't want to spend $200 for a Fluke, you can always try a cheaper alternative like this: https://www.amazon.com/AstroAI-Multimeter-Ohmmeter-Voltmeter-Non-Contact/dp/B0842HTN8C It's just as easy as putting the meter on the capacitance setting and touching the leads to the two wires on the capacitor. By the way, having a capacitance meter can be handy for testing your home AC. I've used it to find a dead run capacitor for both of my units and a friend's unit. Having a good meter saved me a few hundred in service calls.
 2 points
 -
2 pointsThis forum, https://www.autobody101.com/forums/index.php?sid=f044bf1f351a02abe241234902095df9 is a great place to learn.2 points
-
Oooh really love the expanding the spring idea !!! In my experience the lemon juice only fails if your parts are covered in grease - so I tend to bathe the greasy stuff in thinners first. The horn didn’t need it though - but the hand brake mechanism did!!2 points
-
1 pointYeah, My OTC multimeters are from the 80's. I guess it may be time to invest in newer tech. 😄1 point
-
1 pointI checked all of the part numbers listed for the wipers on carpartsmanual.com against courtesyparts.com. All that @Patcon might need are NLA.1 point
-
The grease makes a mess of the citron/salt solution.. i can imagine that. What i do i throw the parts in a solution of washing powder (I prefer Biotex green) it cleans the part of grease and any rubber part becomes plyable again!!! I always use Biotex green to make any hard rubber soft again.. it works most of the time as long the rubber is not damaged. You do this with warm/hot 60C water and leave it in there for a week or so, sometimes look at it, clean it and some rubber parts will give a lot of black dirt from them. throw most of the old soapy water away and take some new soap and hot water once or twice in that week. You end up with a good part! Thanks for the nice reaction on the spring exspanding idea! it was my own!! If you don't do that you end up in a year or so with a spring that starts to rust because of the bad passification.1 point
-
1 pointI highly recommend you visit the POR 15 website to educate yourself on products for your repairs. As @Patcon recommended, once you remove all of the affected metal you need to neutralize any remaining surface rust. The POR product "Metal Prep" is one of those products and it leaves a protective barrier coating that is ready for your primer or other product. Here is your starting point: https://por15.com/1 point
-
1 pointIf you must use “bondo” on bare steel (don’t! Prime it first, epoxy primer is good), use the short strand fiberglass filler rather than regular light weight filler. It soaks up WAY less moisture from the air than standard bondo. Standard bondo on bare steel is the fastest way to get that steel rusty and have that bondo go byebye.1 point
-
1 pointI don't know what your body work experience is but that 1.5" rust spot will probably be 3-4 x as big once the glass is out and you start digging, if you find perforations in the metal you are going to want to cut that metal out and weld in new metal. If it is just surface rust make sure you get all of it down to bare clean metal. If you can, epoxy prime the area before you start using the filler, bondo, Evercoat,UPOL they are all good products.1 point
-
Hello chap! I don’t have an exact formula for it but suffice it to say I use a half a table spoon of salt per 1 litre. The key is to wash out the lemon juice straight away with water and dry off completely as it rusts almost immediately when it hits oxygen!! Here is what I ended up with the next day after soaking. Then I clear coated the inside to make sure it doesn’t rust. The horn does make a louder noise but as you said it needs adjusting. I need to do the 1000 grit negative connectors clean up next to ensure a decent connection. For info and interest the coil measures 1.6ohms. Which means 7.5A before contacts break and assuming a perfect square wave when it operates means it’s taking an average of c.3.25 amps. I also put the horn onto gasket paper and scalpeled out my own gasket before reassembly. Haven’t sealed it yet for obvious reasons.1 point
-
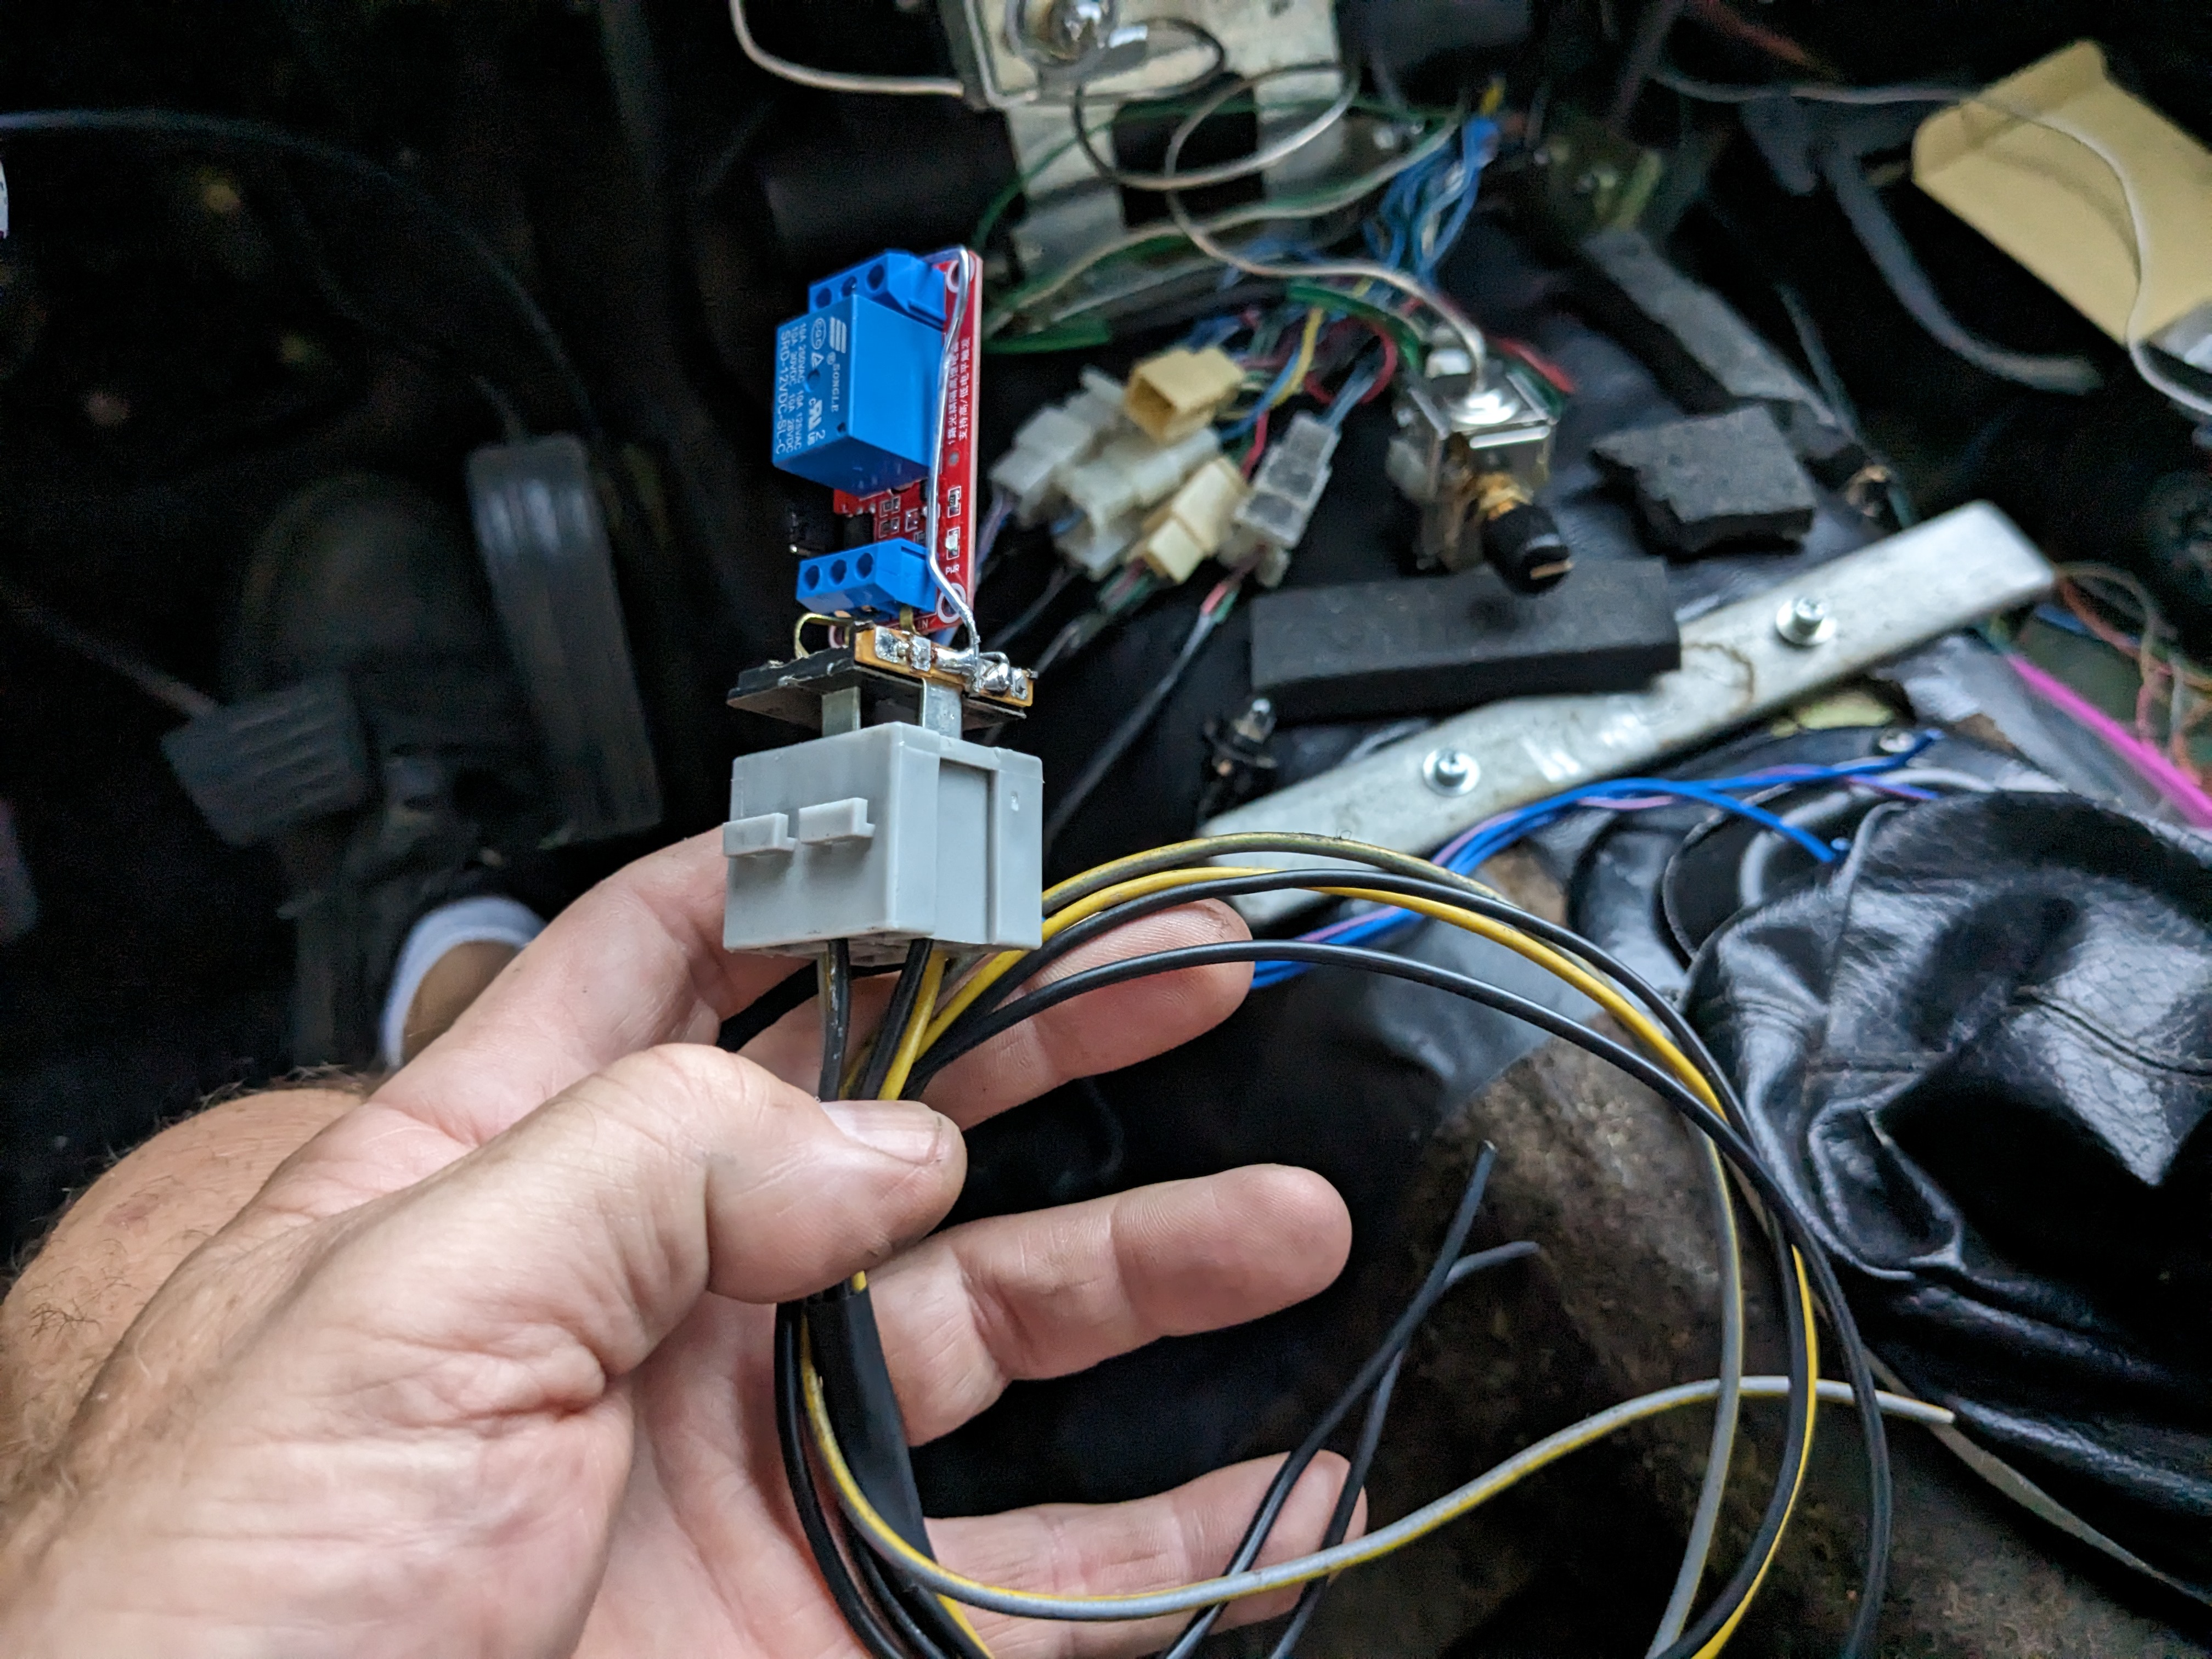
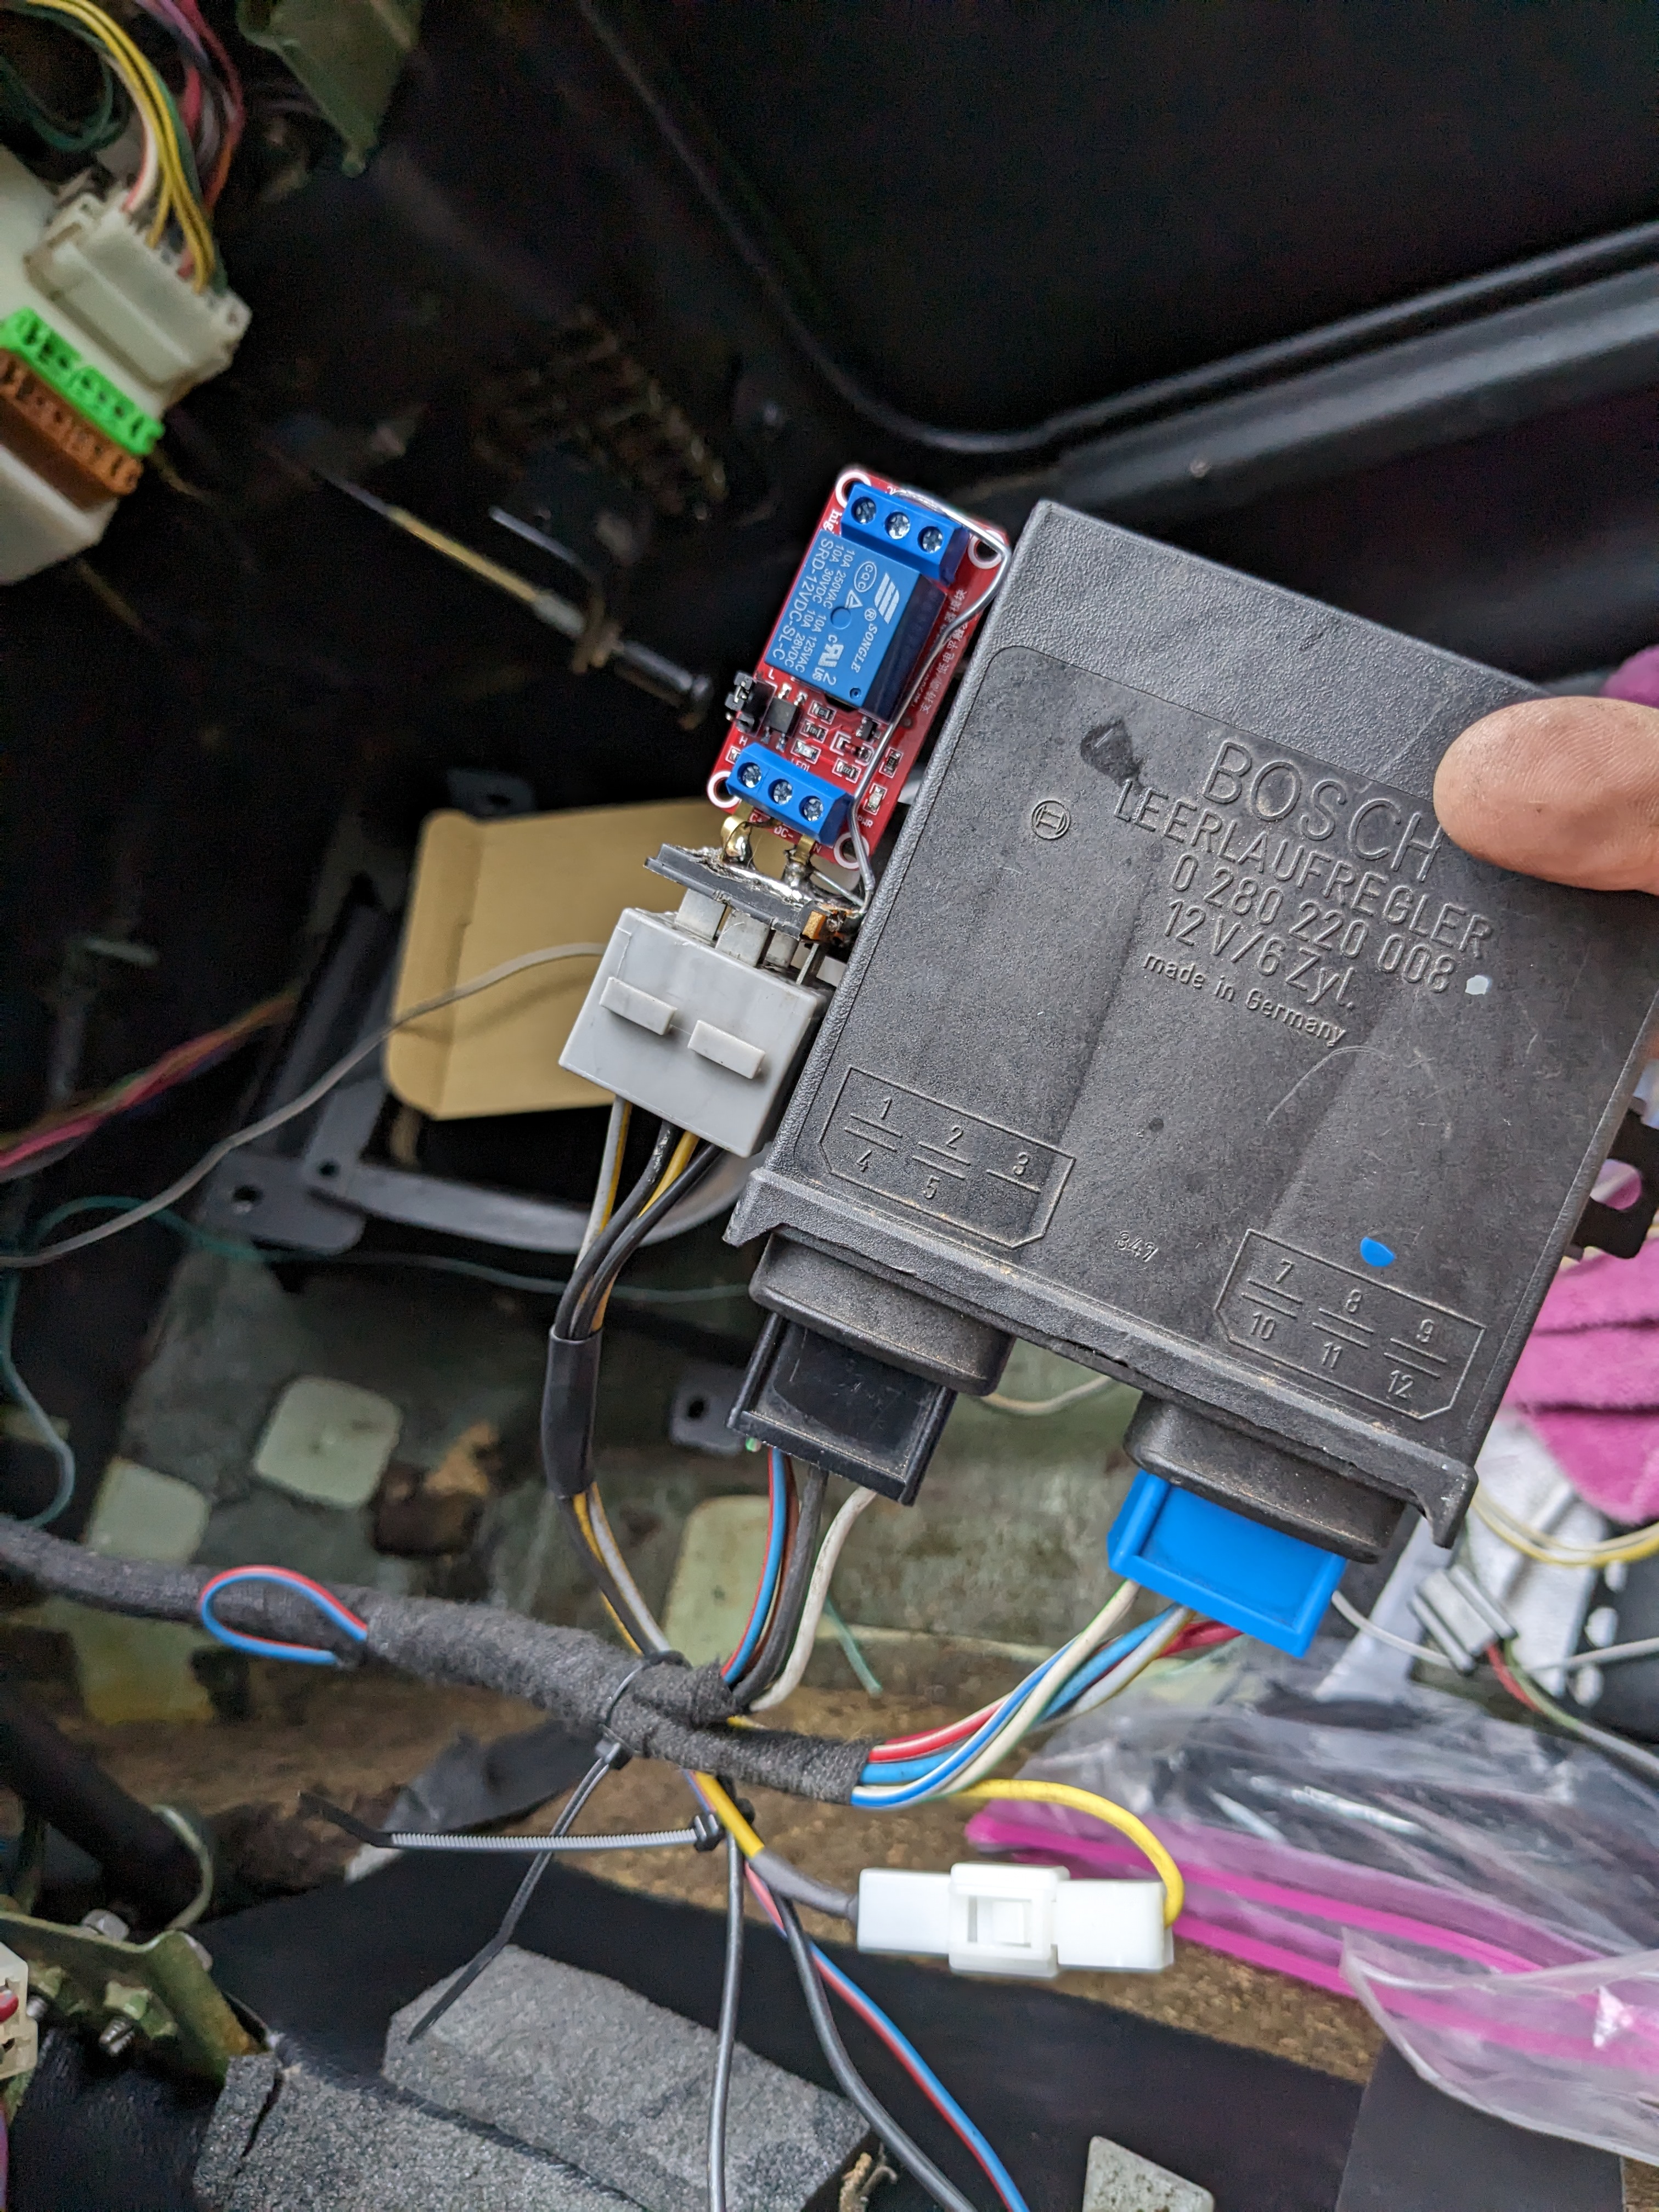
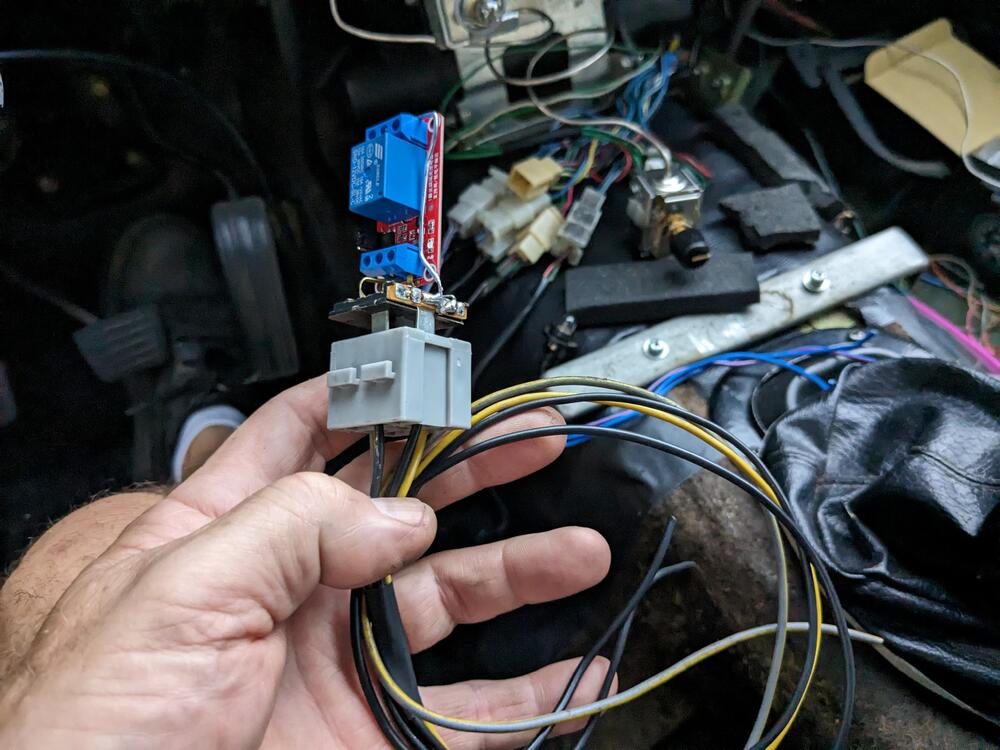
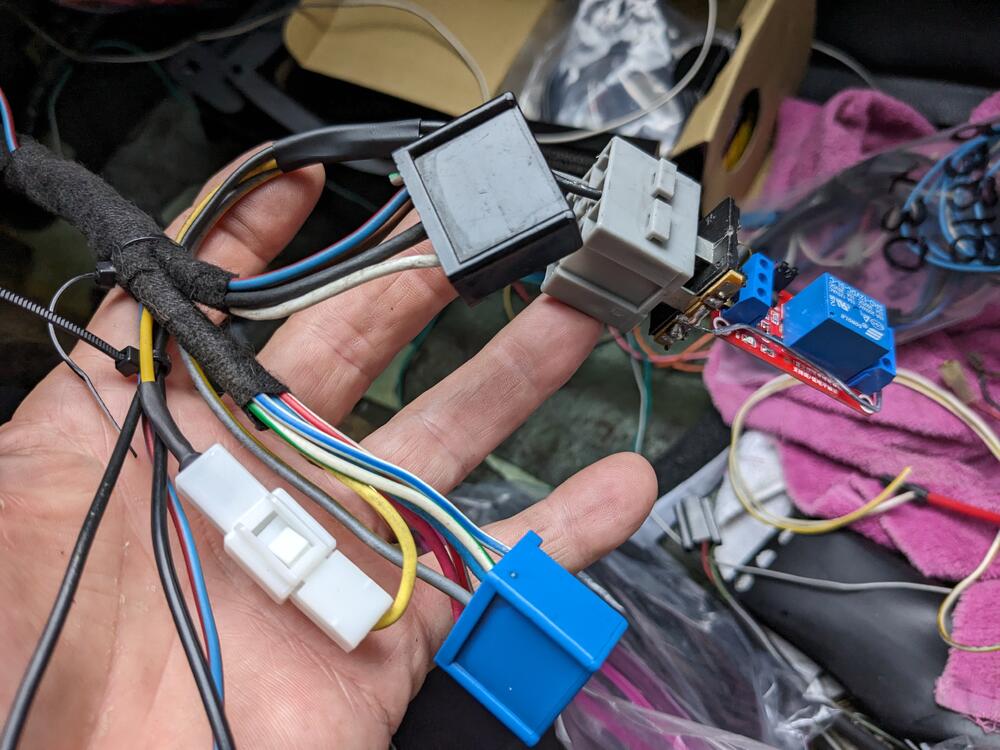
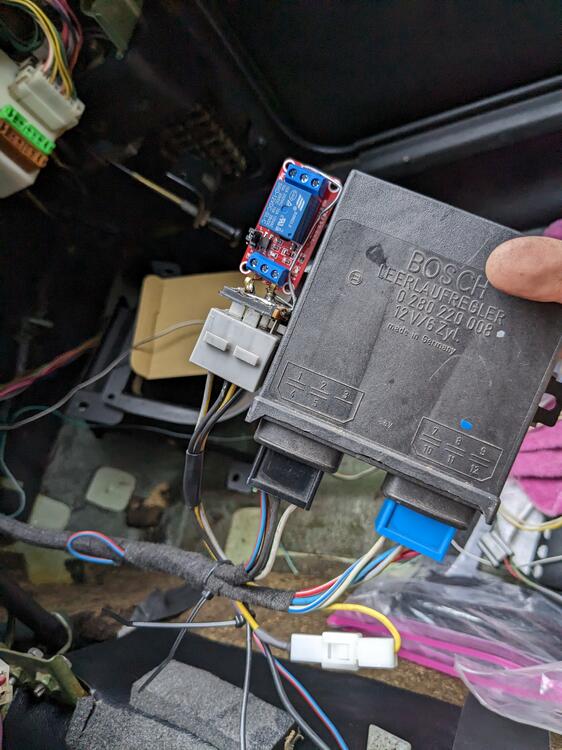
The thing is, the ECU for this is not readily available, and typically expensive if you can locate one. I'm doing it because I have the components, and my stock AAV is dead anyway. This will all only be used for a year or so, then I'm putting in a 350Z drivetrain 😁 Weather has been terrible here, so not getting much done. Did a little work on the wiring inside the cabin while it was raining harness for transistor relay for switching the stock TPS signal to the CIS module to open at idle, ground off idle. yellow wire is the signal from the TPS, so it needs to go to the relay first, then the switched leg goes back to the module it will be situated alongside the module. I will need to sleeve the relay
 1 point
 -
I think the gold plated "ring" on the front is actually supposed to be kind of an olive green. That being said, mine are like yours. BTW SteveJ has mine "tooting"...! Awesome...!1 point
-
1 pointA final observation: the inboard mounting location for the retractor is going to result in constant rubbing of the lapbelt against the side of the seat. Good luck with your project.1 point