Leaderboard
-

Av8ferg
Free Member7Points1,538Posts -
Barefootdan
Free Member3Points275Posts -
DuckManNK
Free Member3Points32Posts -
Trnelson
Free Member3Points101Posts


Popular Content
Showing content with the highest reputation on 09/09/2021 in Posts
-
5 pointsGot a bunch of stuff back from the plating company I use. 155 pieces and the cost was $100. They do a nice job. Here are some of them. Sent from my iPhone using Tapatalk5 points
-
3 pointsIt got brazed. It's back in the car. I was making a shopping list and just said eff it. Required more effort to delete it than fix it.3 points
-
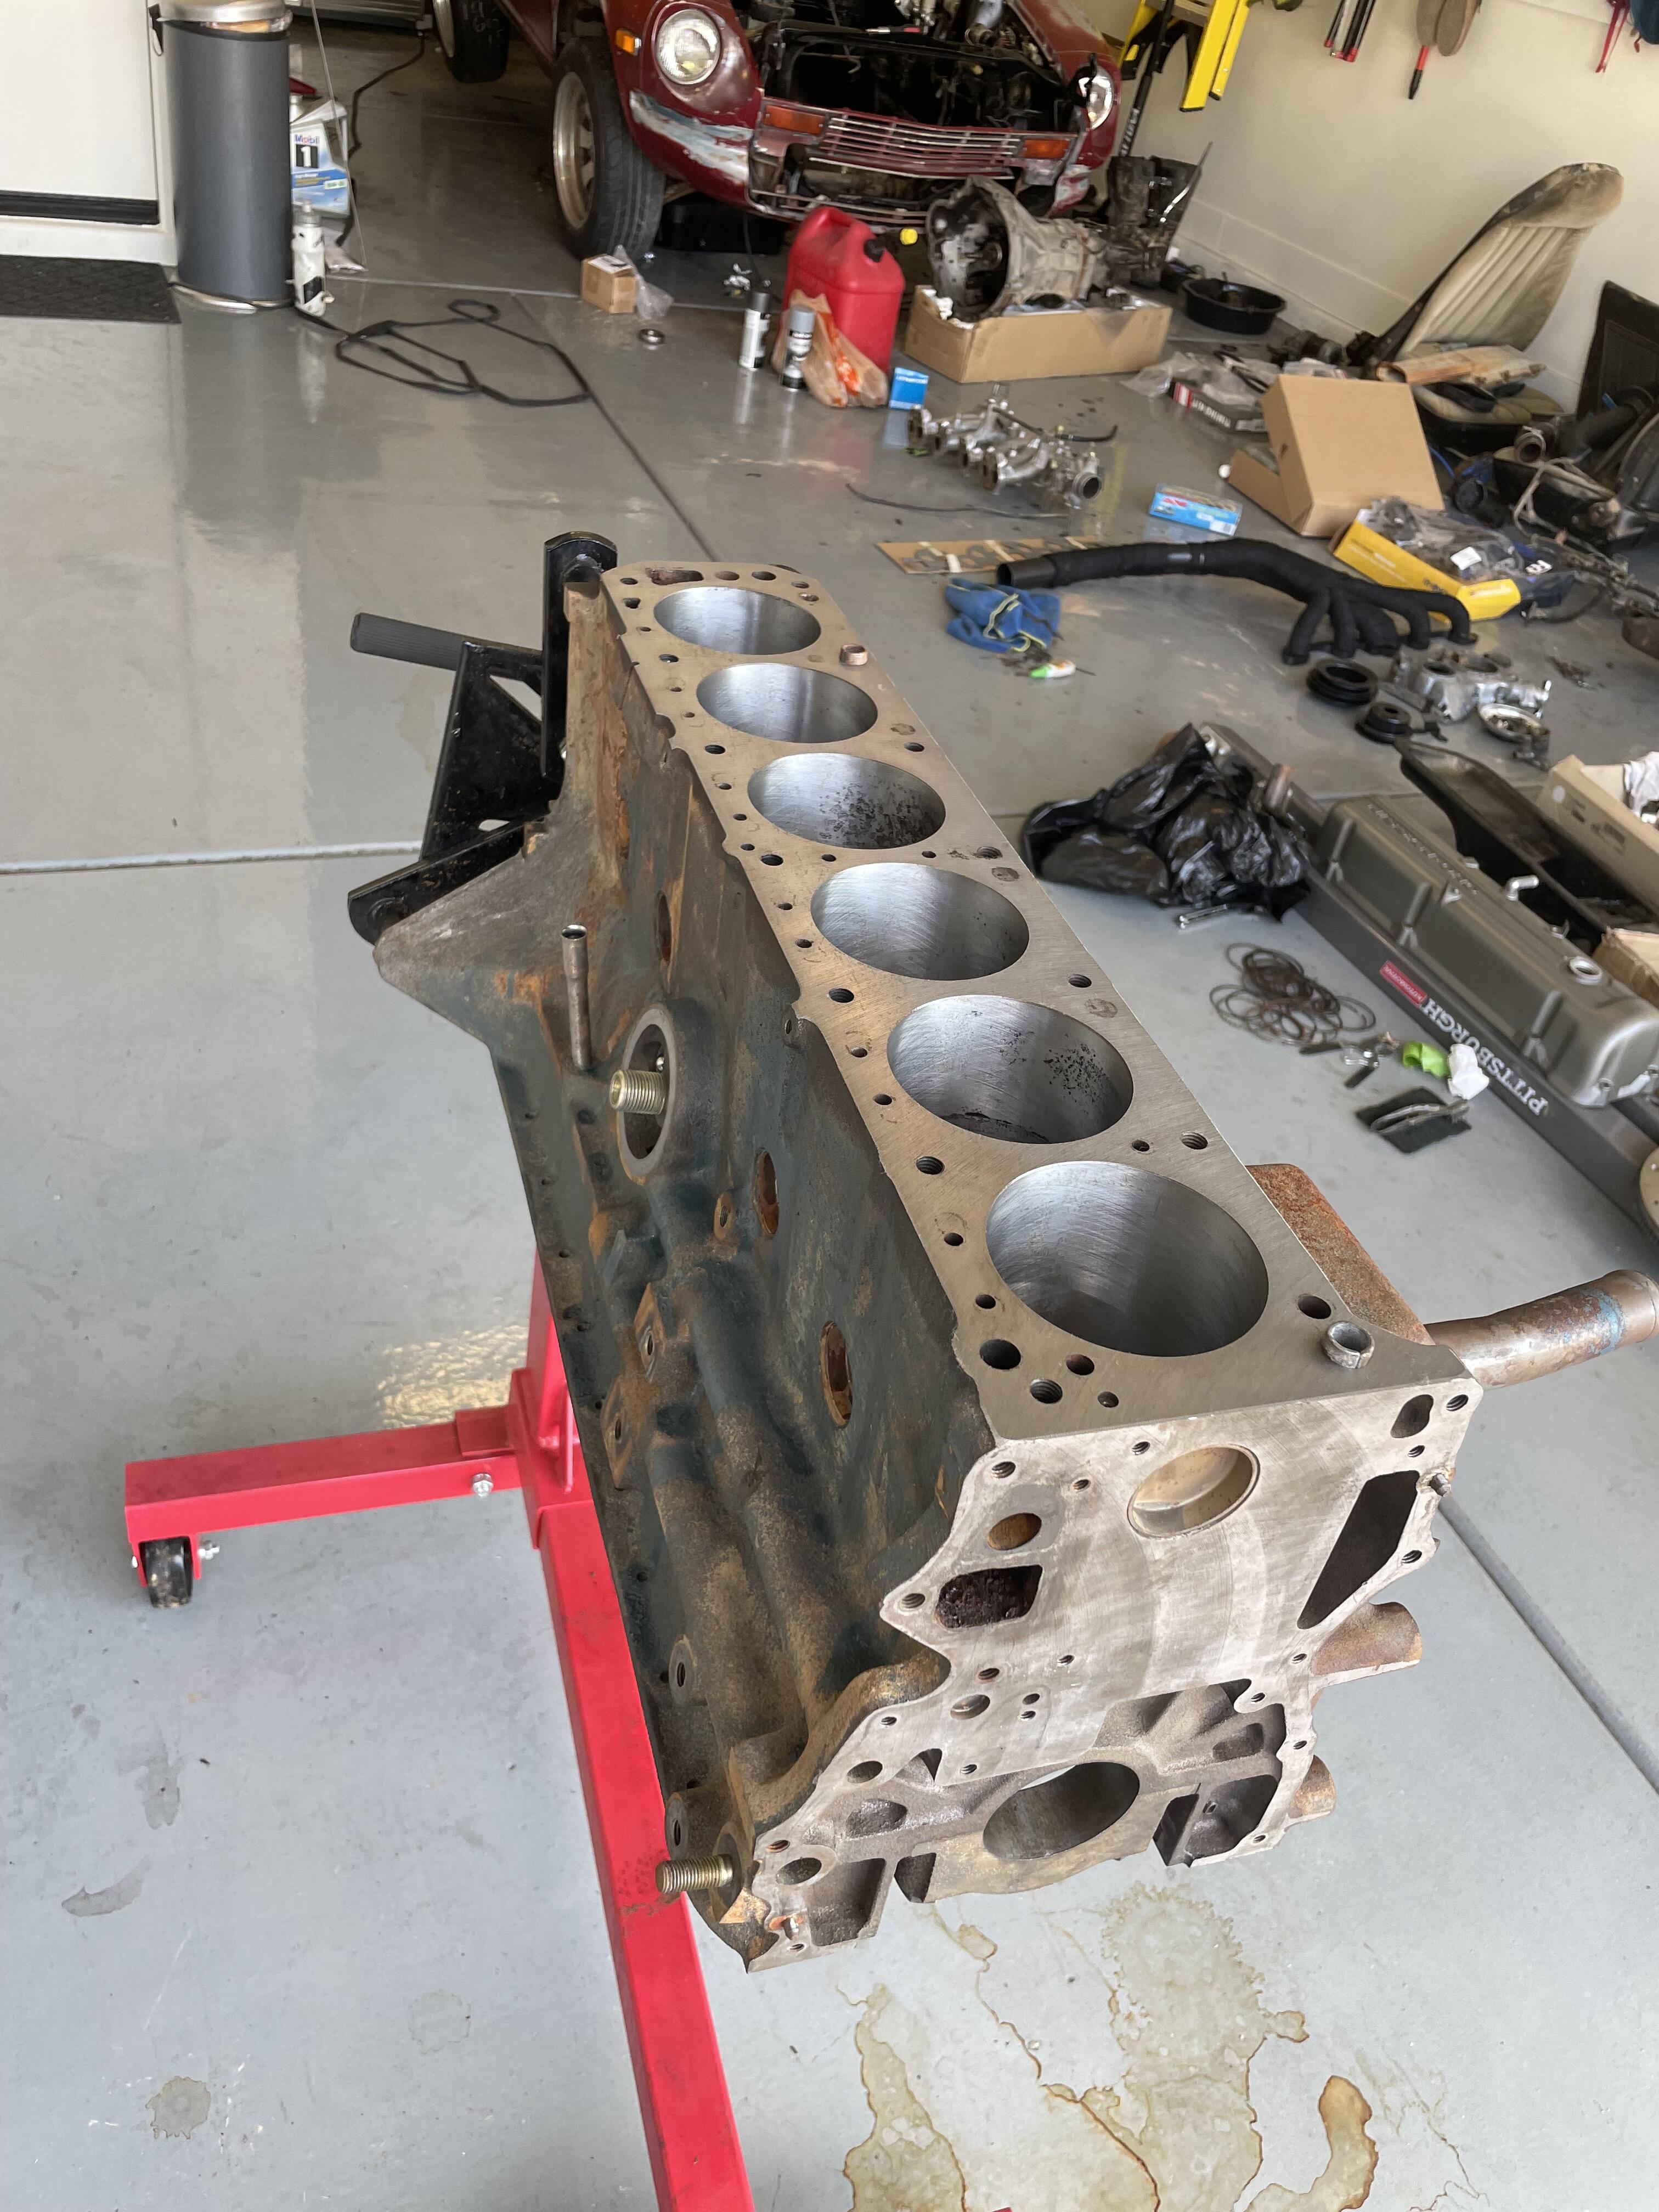
3 pointsI did that along with lapping the valves, a light port and polish, new valve seals, new valve springs etc. With everything that I did I can say yes that my oil consumption problem is gone, however it would be impossible to know what solved it. I honestly think I was leaking/ burning oil from a couple different places. The engine still ran pretty well but you could tell it was tired. Now it feels tighter, stronger and cleaner. (my wife will actually ride with me without a mask on so I got that going for me) I'm calling it a success for what I wanted to accomplish at the time. The next time I attempt a rebuild I will buy oversized pistons, rings etc and have the block bored out, crank inspected and ground if necessary. I just wanted to do everything I could on my own on this go around and keep the budget modest.3 points
-
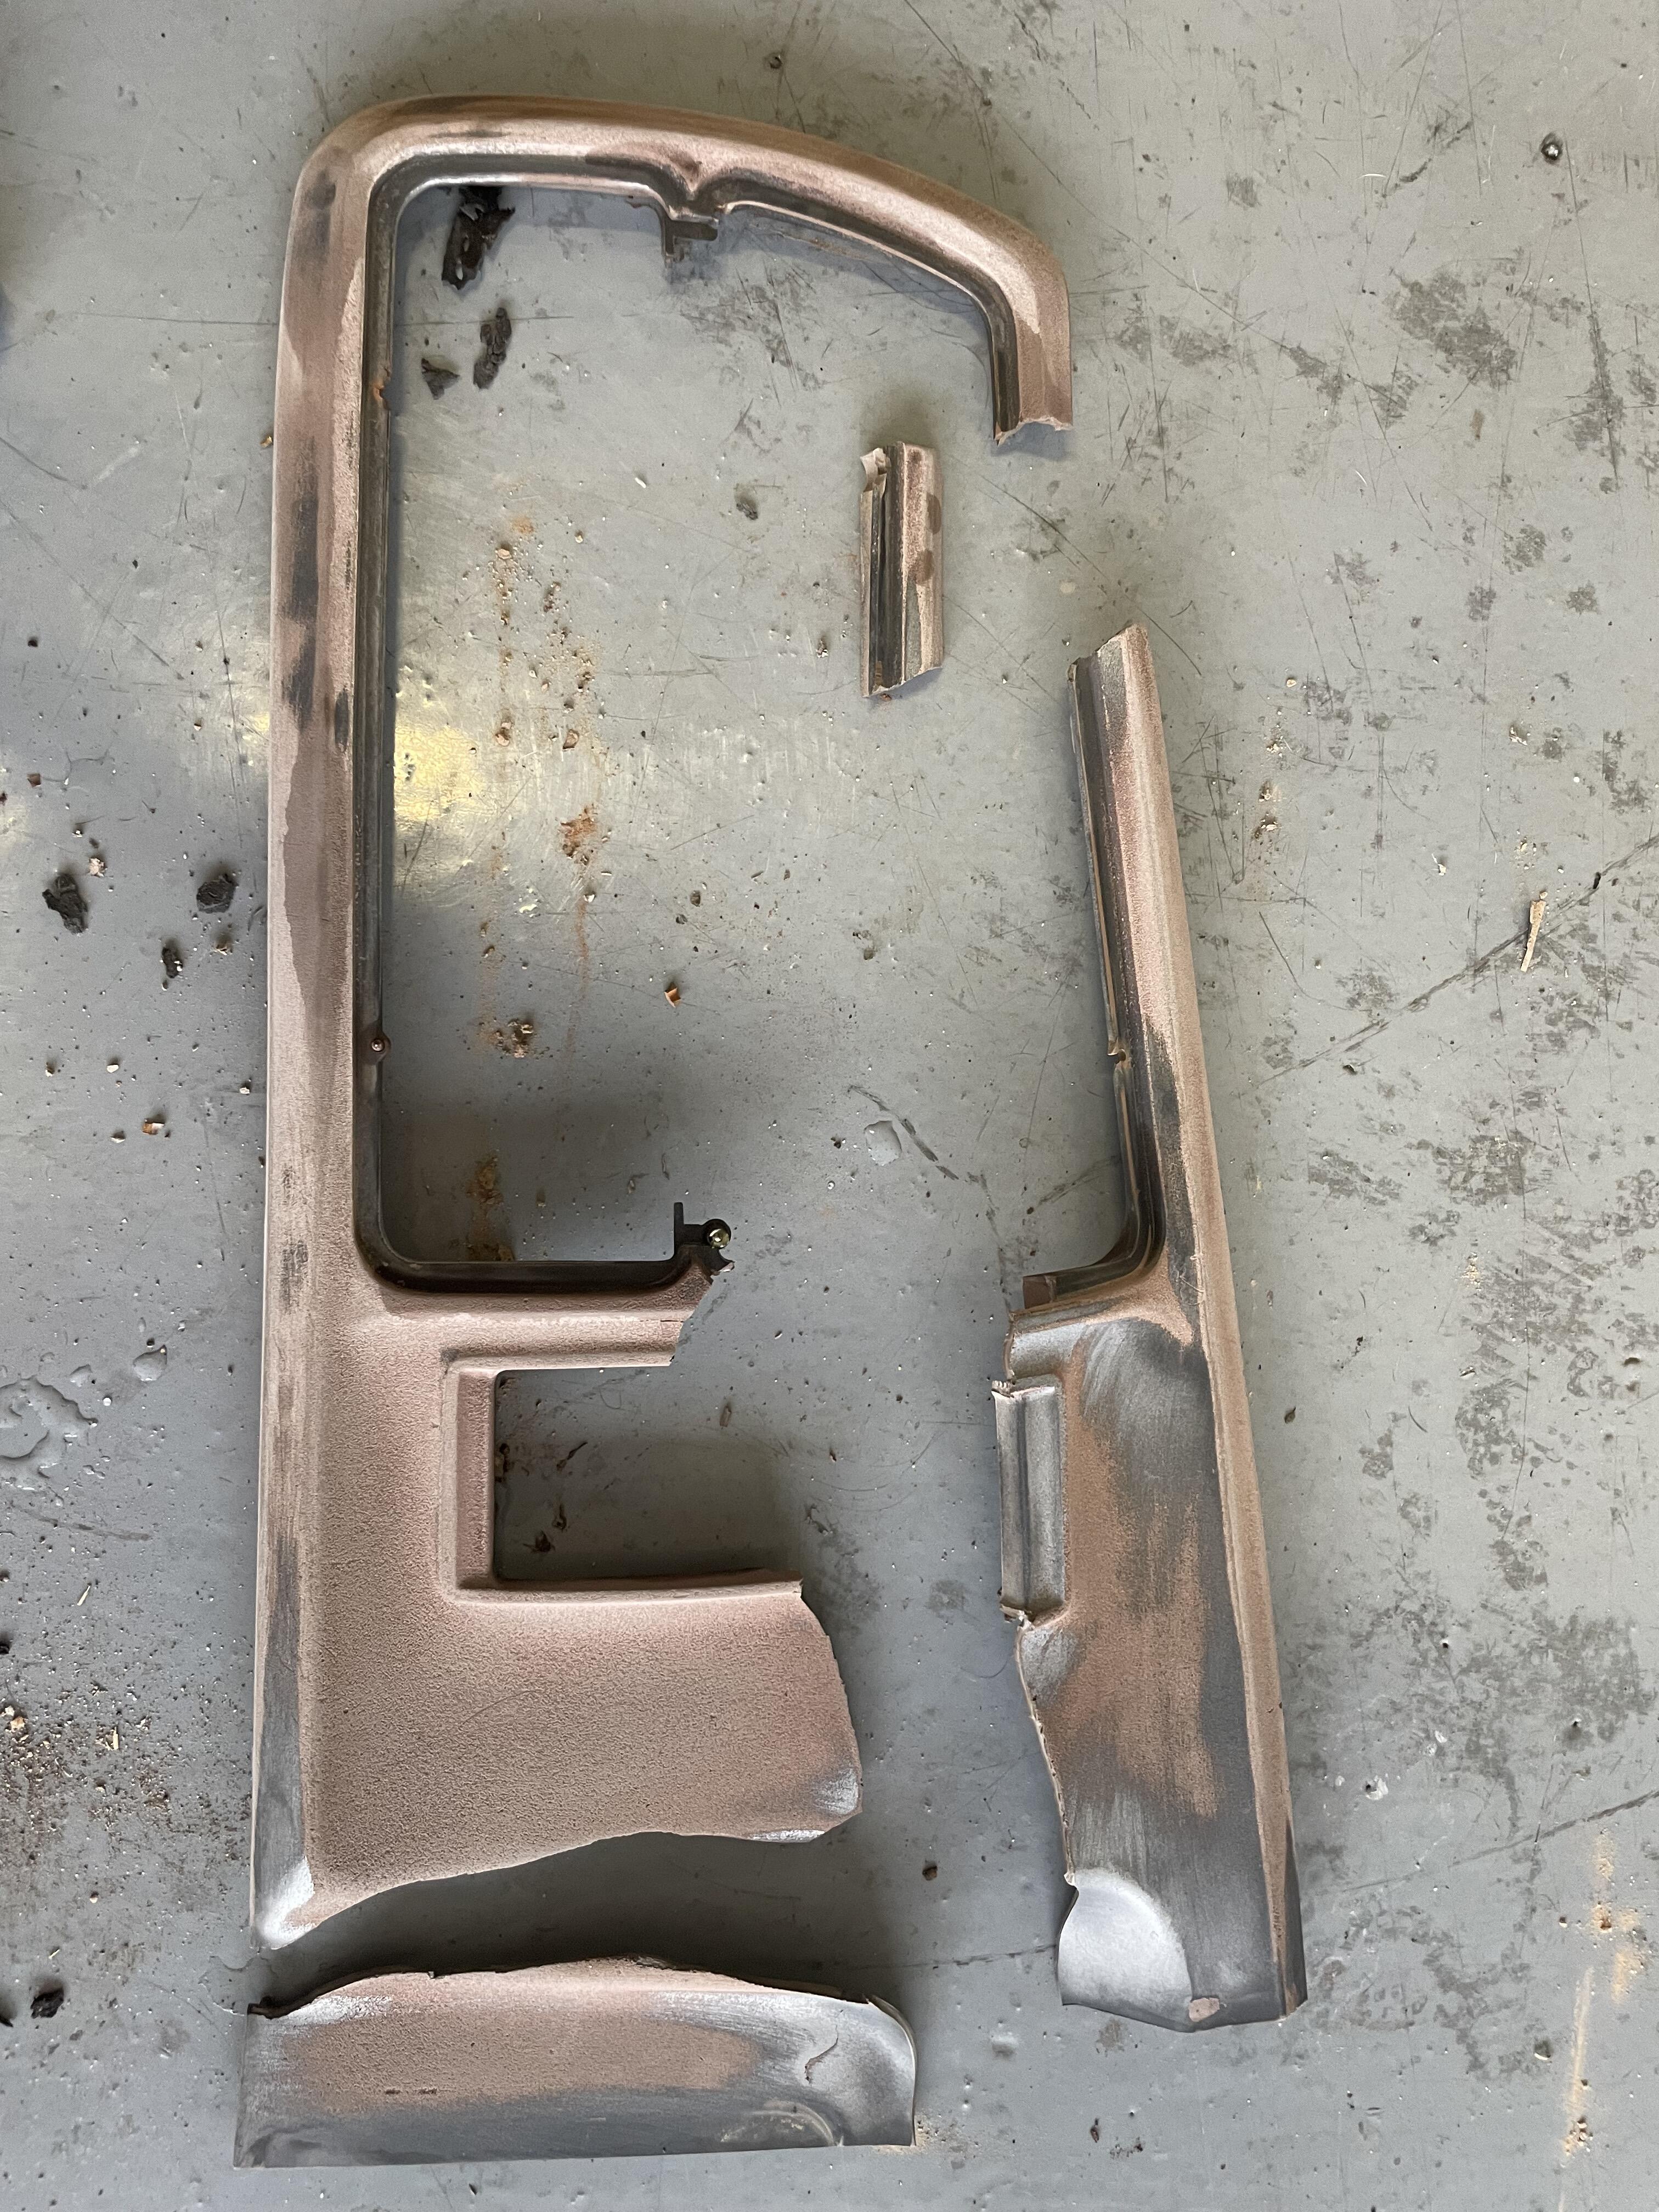
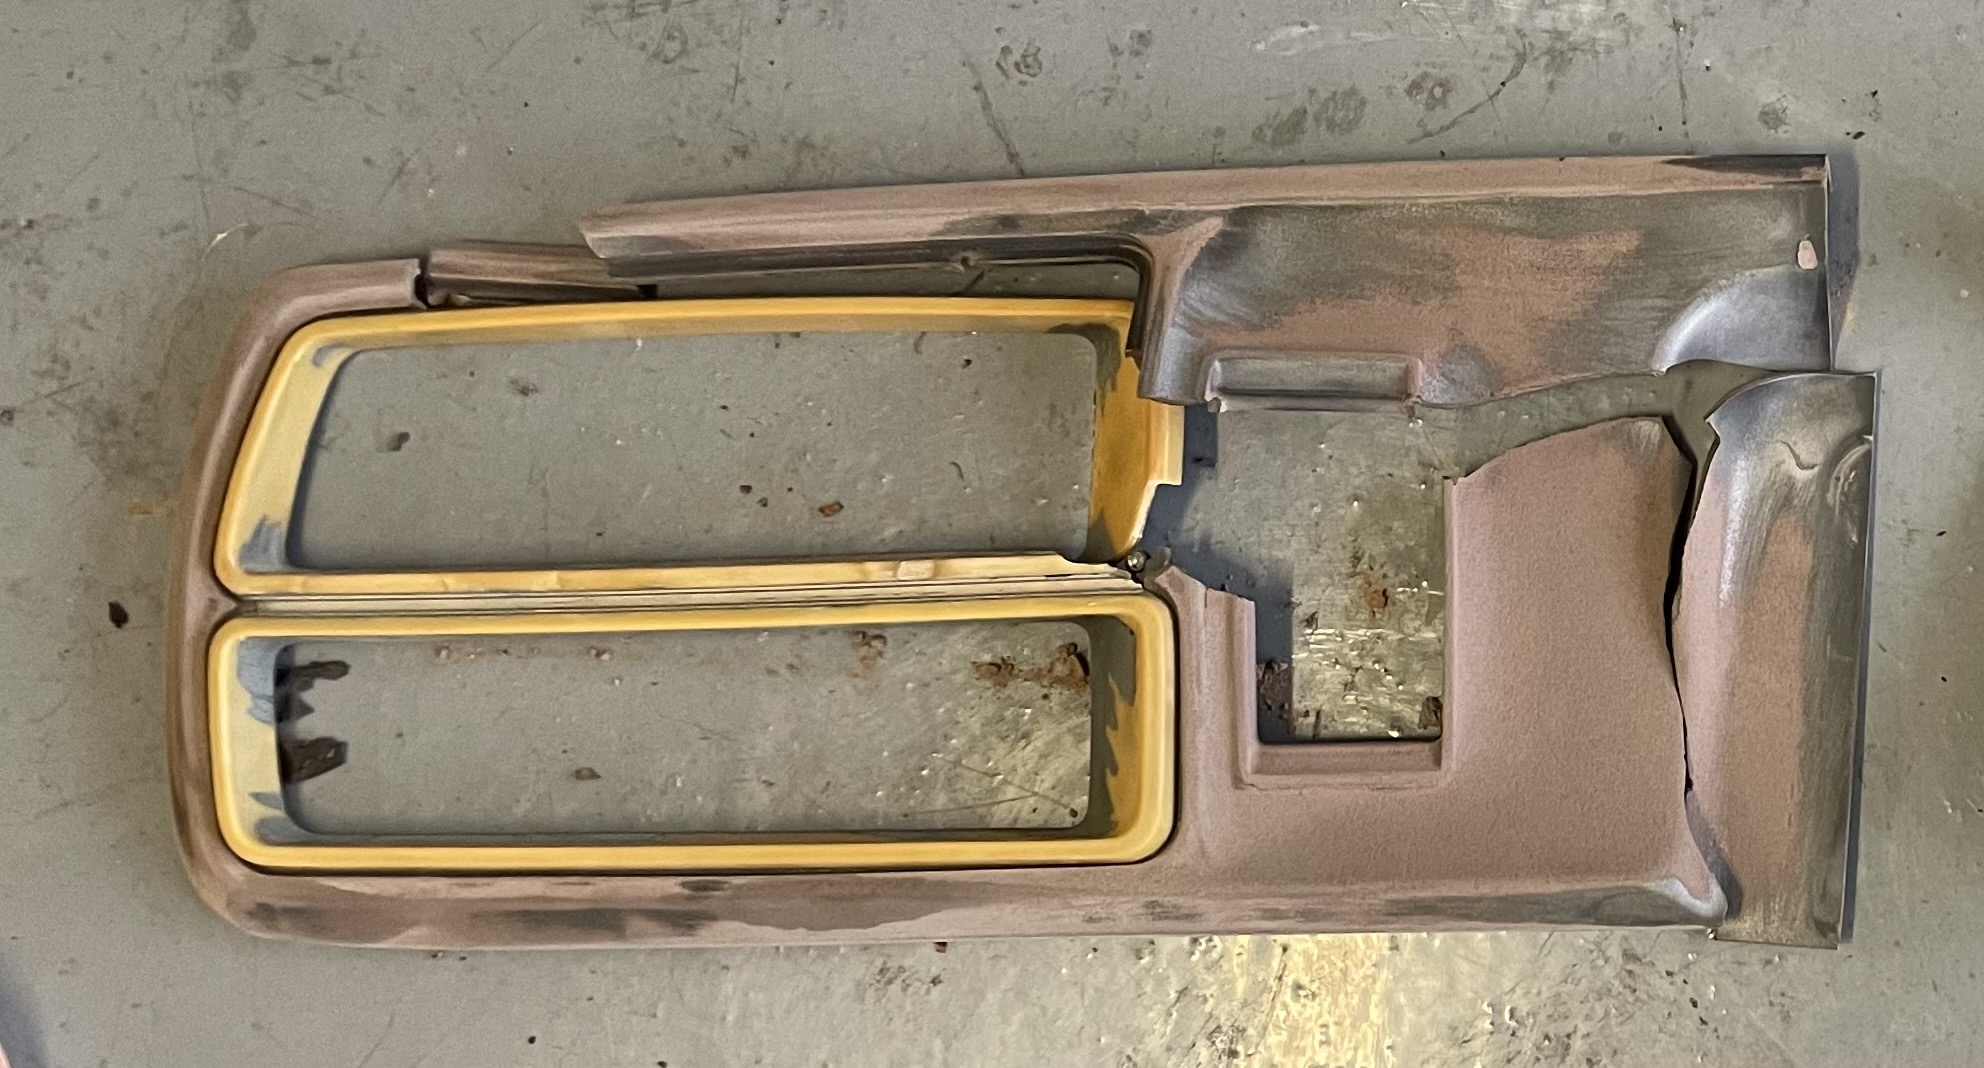
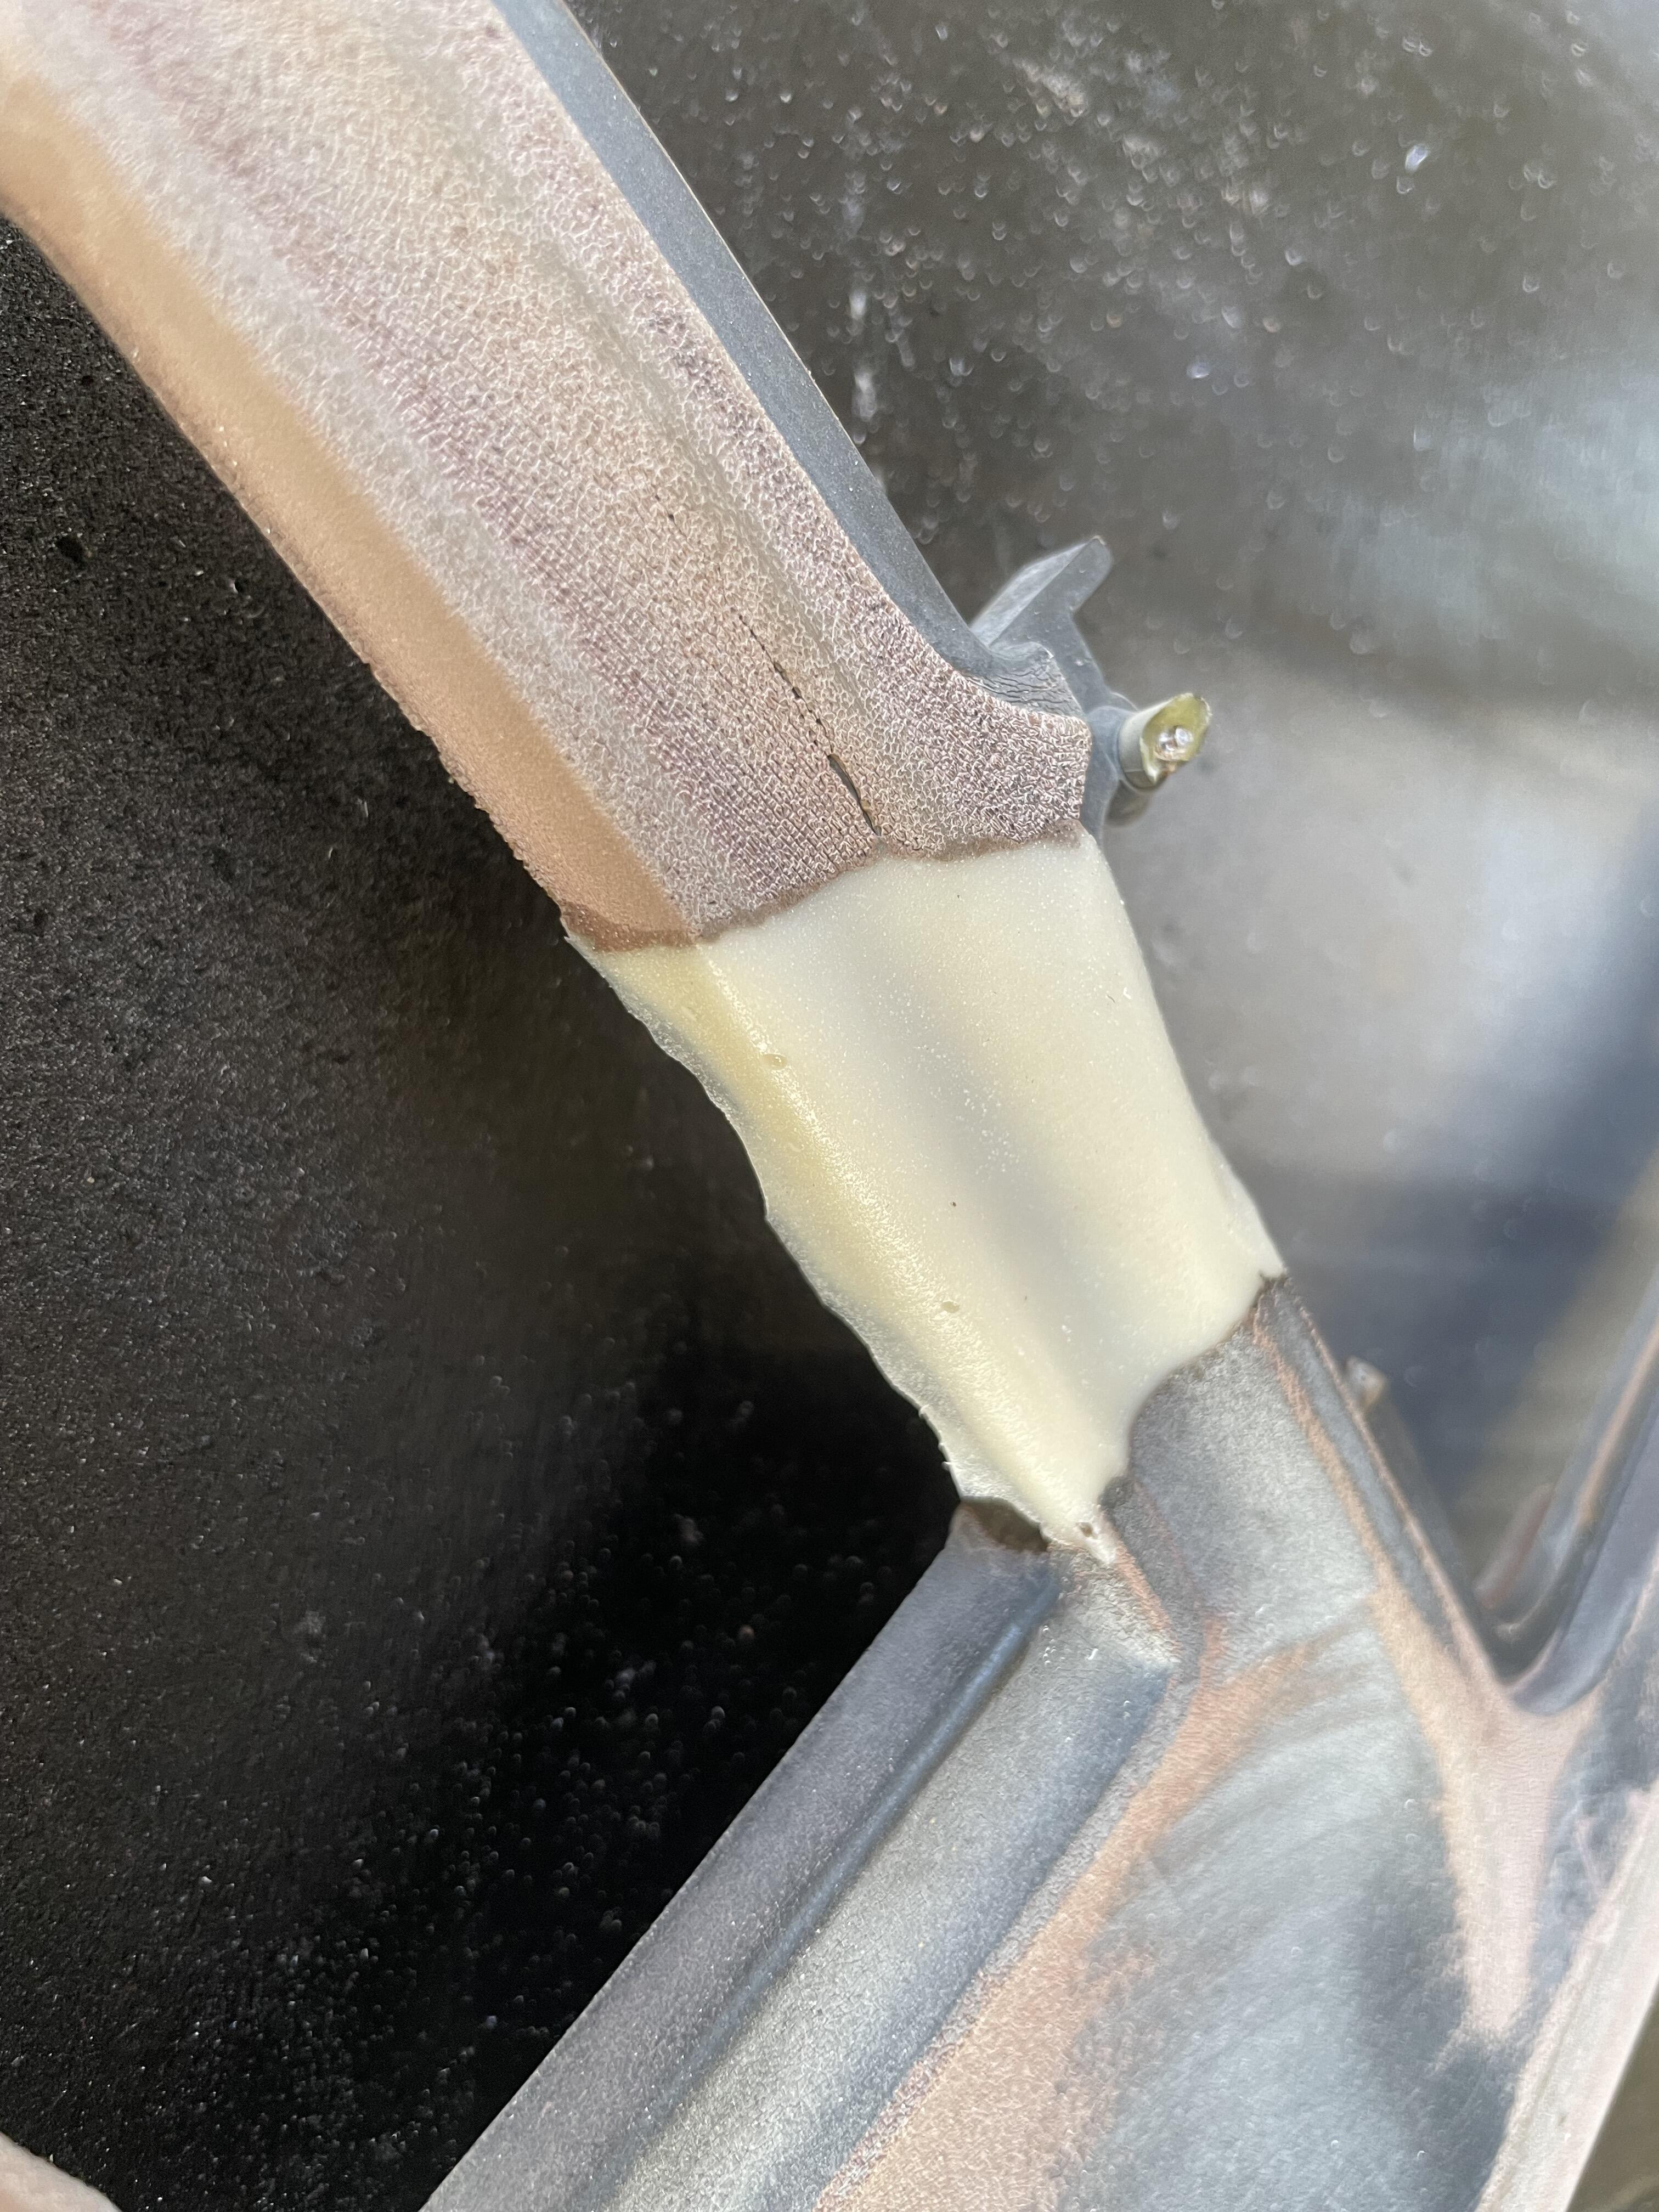
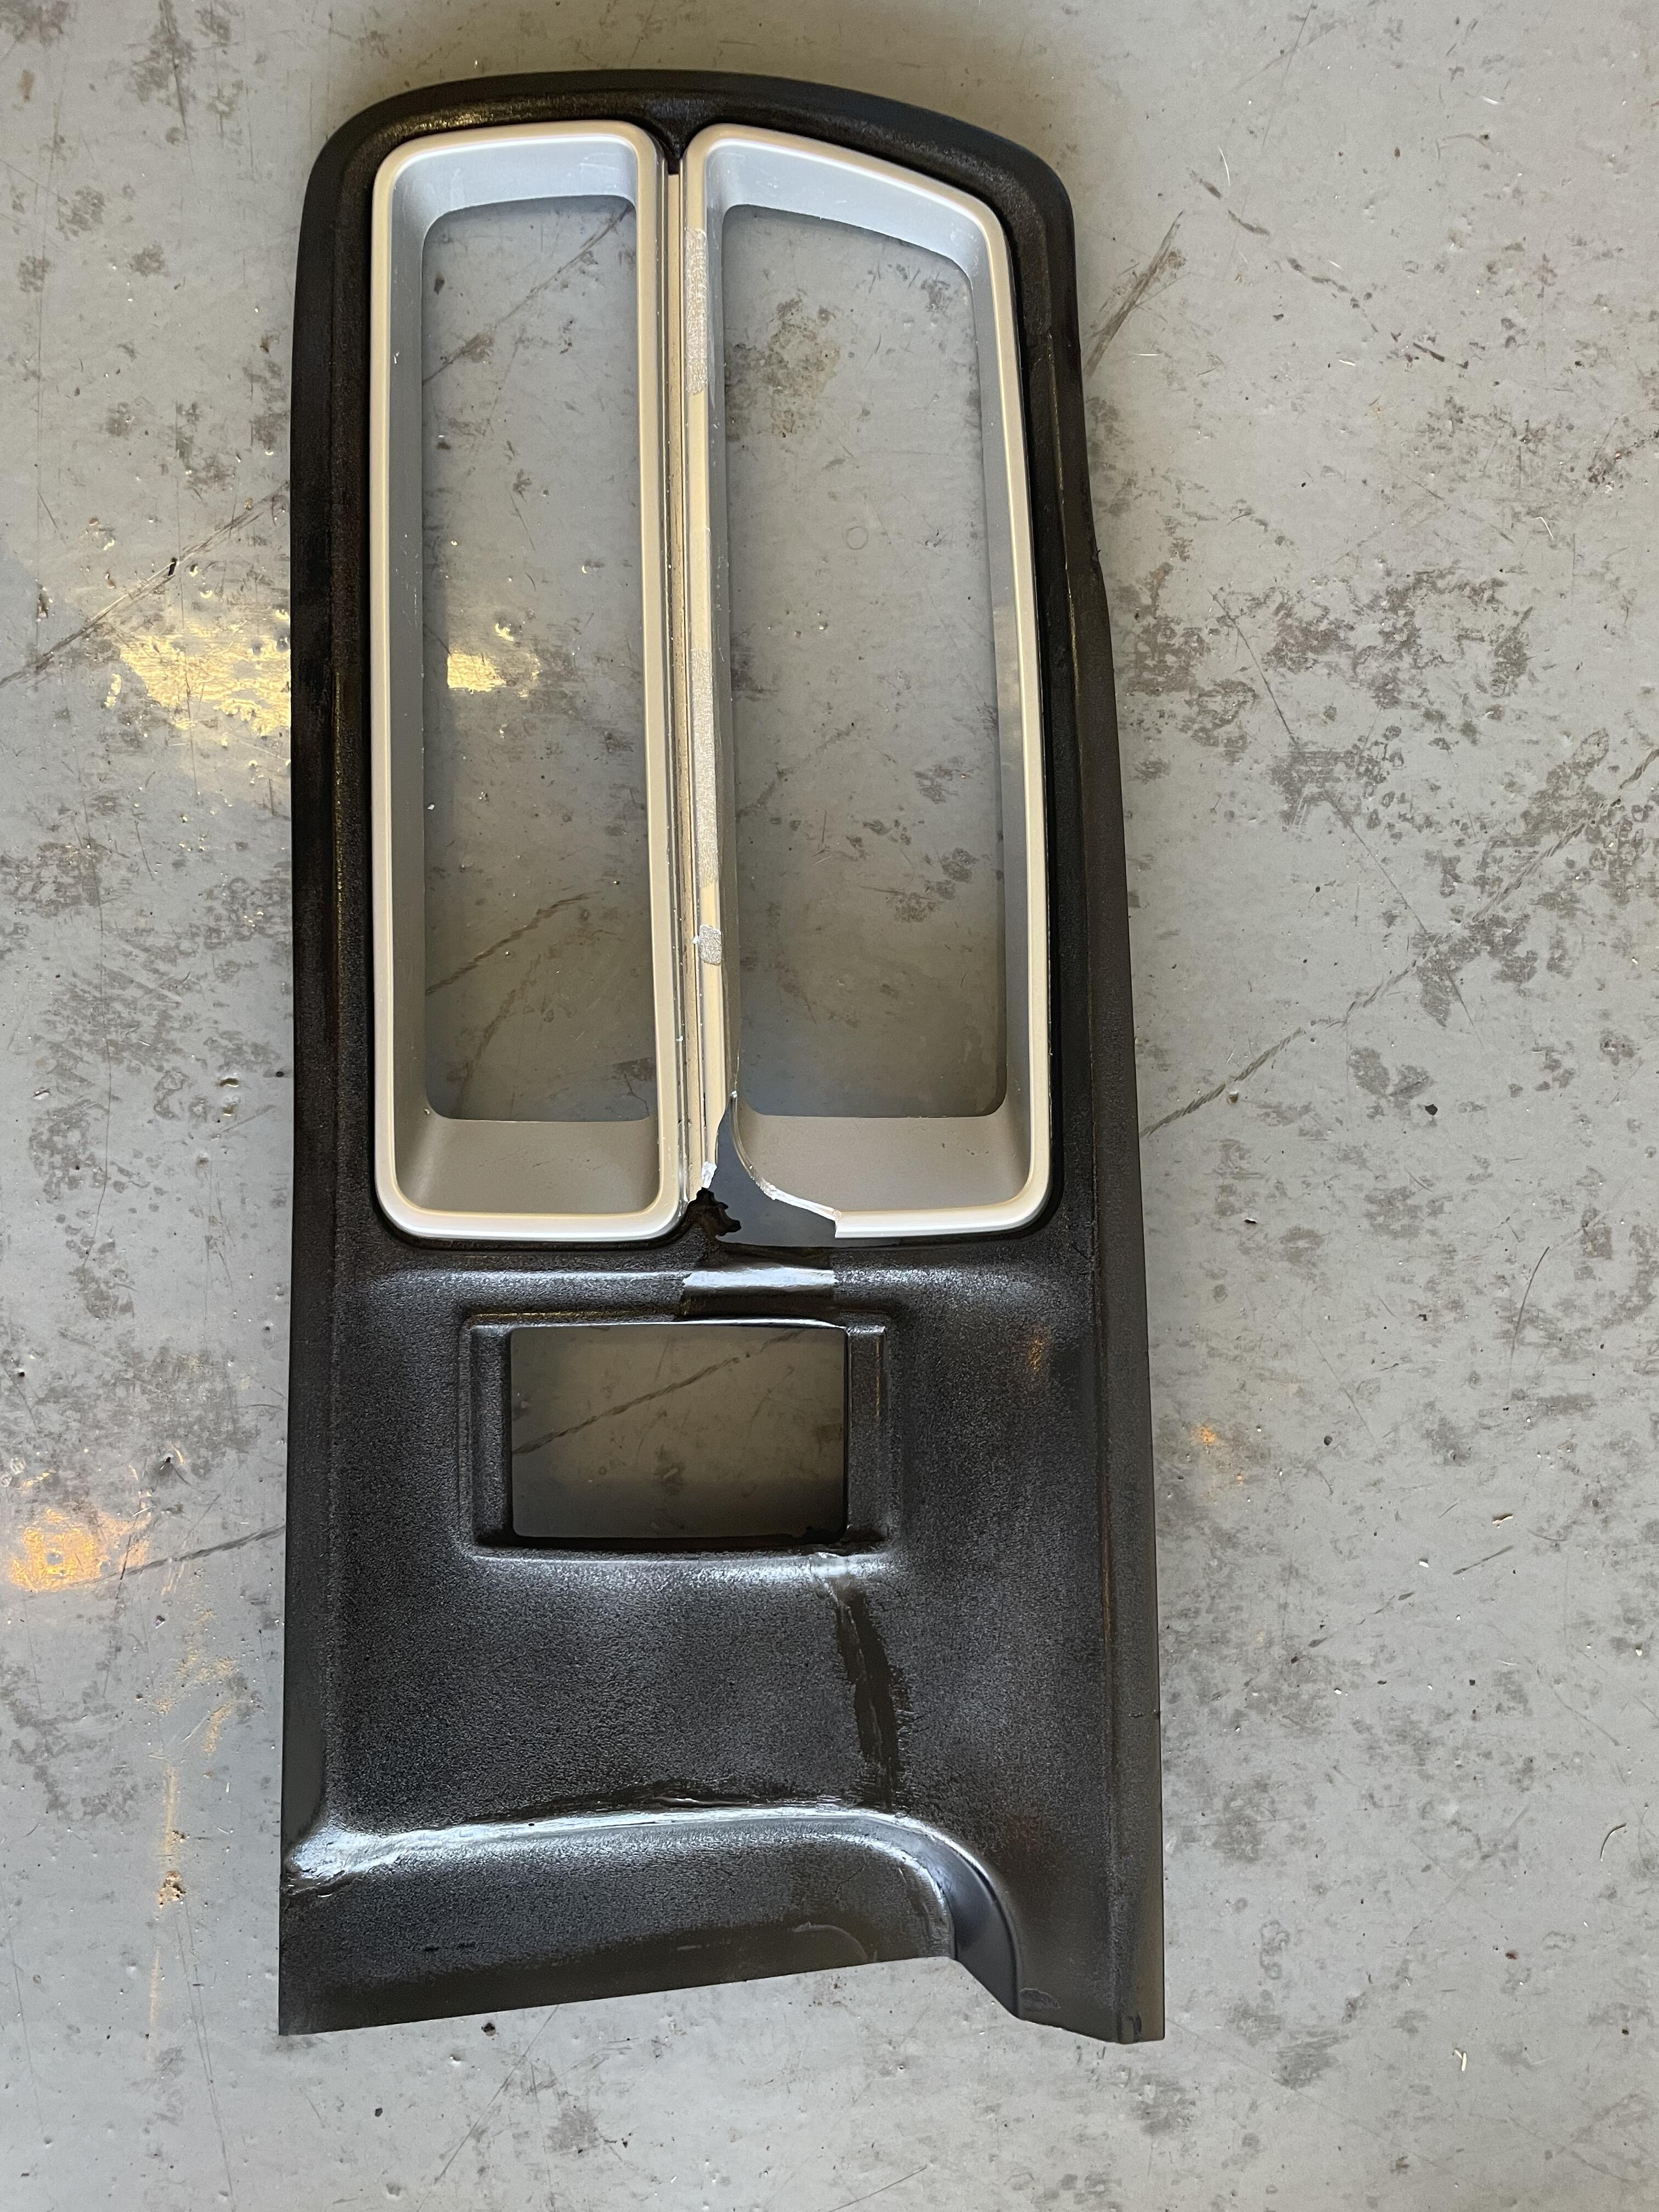
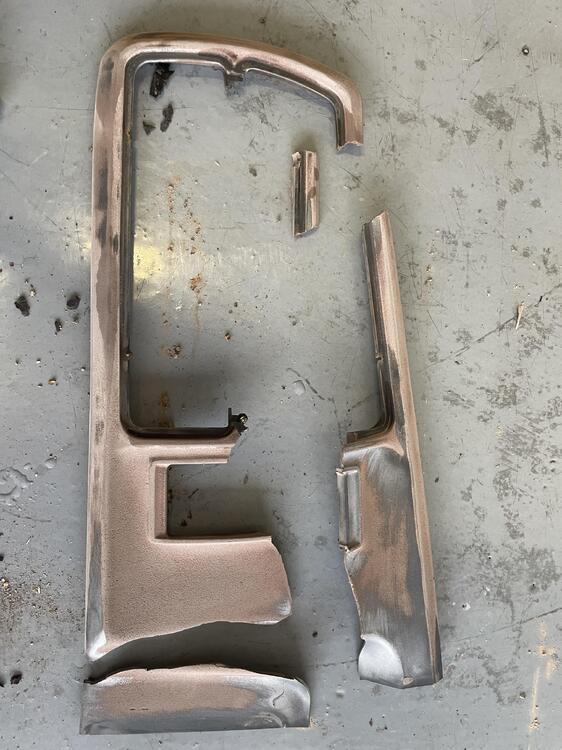
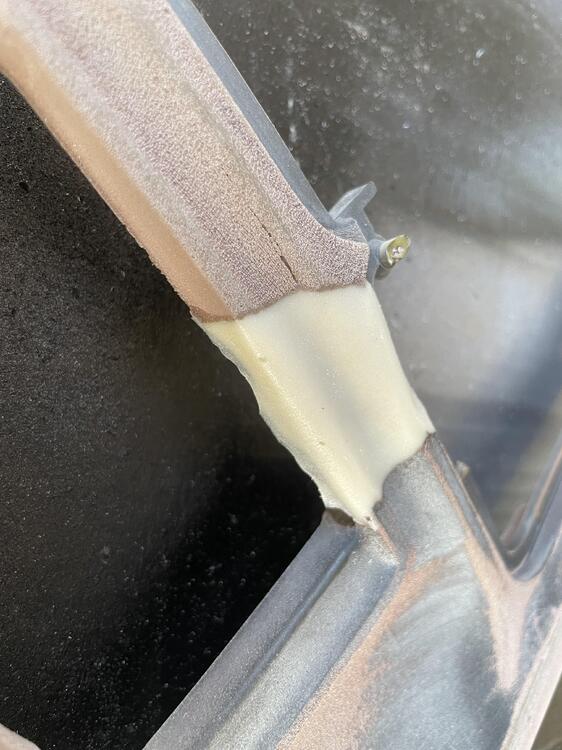
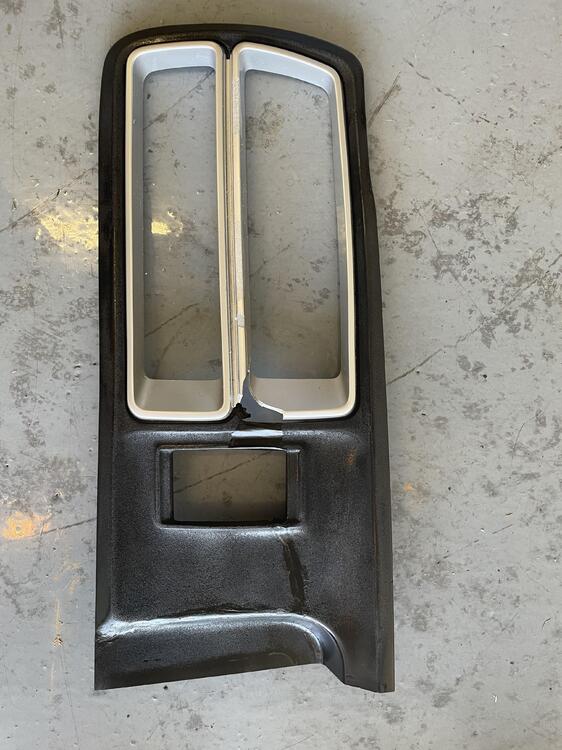
3 pointsI know, I know, I should not be working on cosmetics again! But the broken tail light surround just bugged me every time I grabbed a wrench from my tool box... The right side was in one piece, albeit chipped. The left side though, 4 pieces and missing a good chunk in places! I have never tried plastic repair and well, this probably isnt the best piece to learn on. It practically crumbles when I look at it. But I took a whack at it and I'm content with the results for now...I mean don't forget what the rest of this car looks like 😄 I started off by piecing all what I had together then using masking tape to sort of "bridge" my gaps. There were 2 good chunks missing and then a 3rd that was almost 2" long. I used a plastic bonder/filler material and let it cure over night. I was surprised on how well my bridge worked. From there I sanded down and refilled where needed. Trying my best to match the lines of the original piece. A quick coat of paint and it is looking 100x better. Unfortunately, the silver surround also has a good chunk missing but I'll leave it for now. You can clearly see in the reflections where I bonded the two pieces together. I am planning on doing another sand, using a primer, then recoating...but that is for another day. Because this beauty finally came home today 🙂 Yes there's some pitting in cylinders 2 and 4. But its not too deep and I don't mind 😄 I am just glad it is back and we can start this build!

 3 points
 -
https://www.240zforsale.com/1973-l24-4-speed-manual-in-nashua-nh/?utm_source=240ZForSale.com&utm_campaign=0d10ff9268-Featured+Seller+Ad+for+September+8th+2021&utm_medium=email&utm_term=0_77be7cc975-0d10ff9268-202452969 Not sure why people put these crazy body kits on these cars. I think it totally ruins the car. To each his own I guess but my Dad used to tell me as a kid. “You never own anything, you are just a temporary care taker” So always consider that when you decide to mod your car build an odd house or do anything that would offend future potential owners.2 points
-
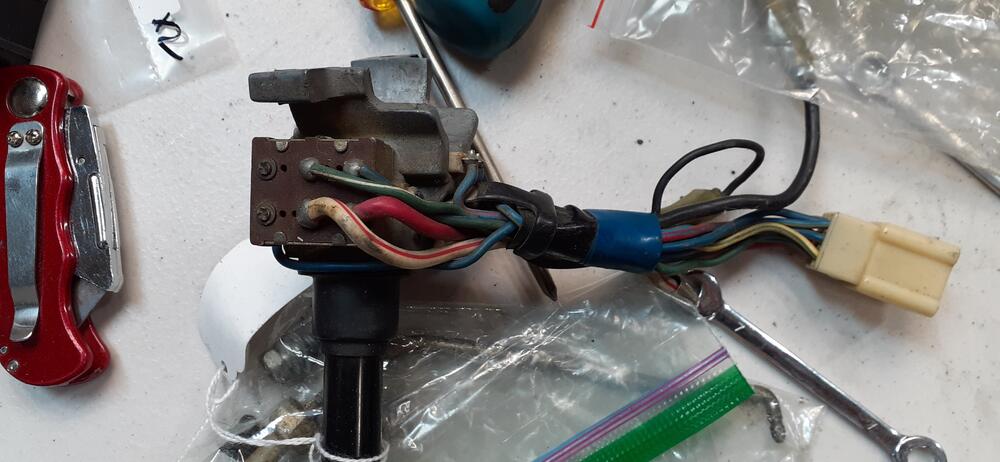
2 pointsYes, you can test. Remove the steering wheel cover. Unplug the 6 pin connector. Turn the switch from OFF to position 1 (no headlights). Check for continuity between the green/white and green/blue wires on the switch. (See photo.) Also, in the fuse box, measure voltage TO GROUND on either side of the 3rd fuse down on the right. Both sides of the fuse should have around 12VDC to ground. The 240Z fuse box is notorious for damage to this area of the fuse box. So, what can cause the parking lights not to come on? Here are some causes: The fuse is bad or improperly seated. The 6 pin connector on the switch was not plugged into the dash harness or was not plugged in correctly. One of the solder joints on the switch has gone bad. The mechanism in the switch is worn out so it is not pushing the rocker to make contact in the switch. If you cannot diagnose this yourself, you may need to send the switch to someone like myself who has the experience to diagnose and repair headlight switches.
 2 points
 -
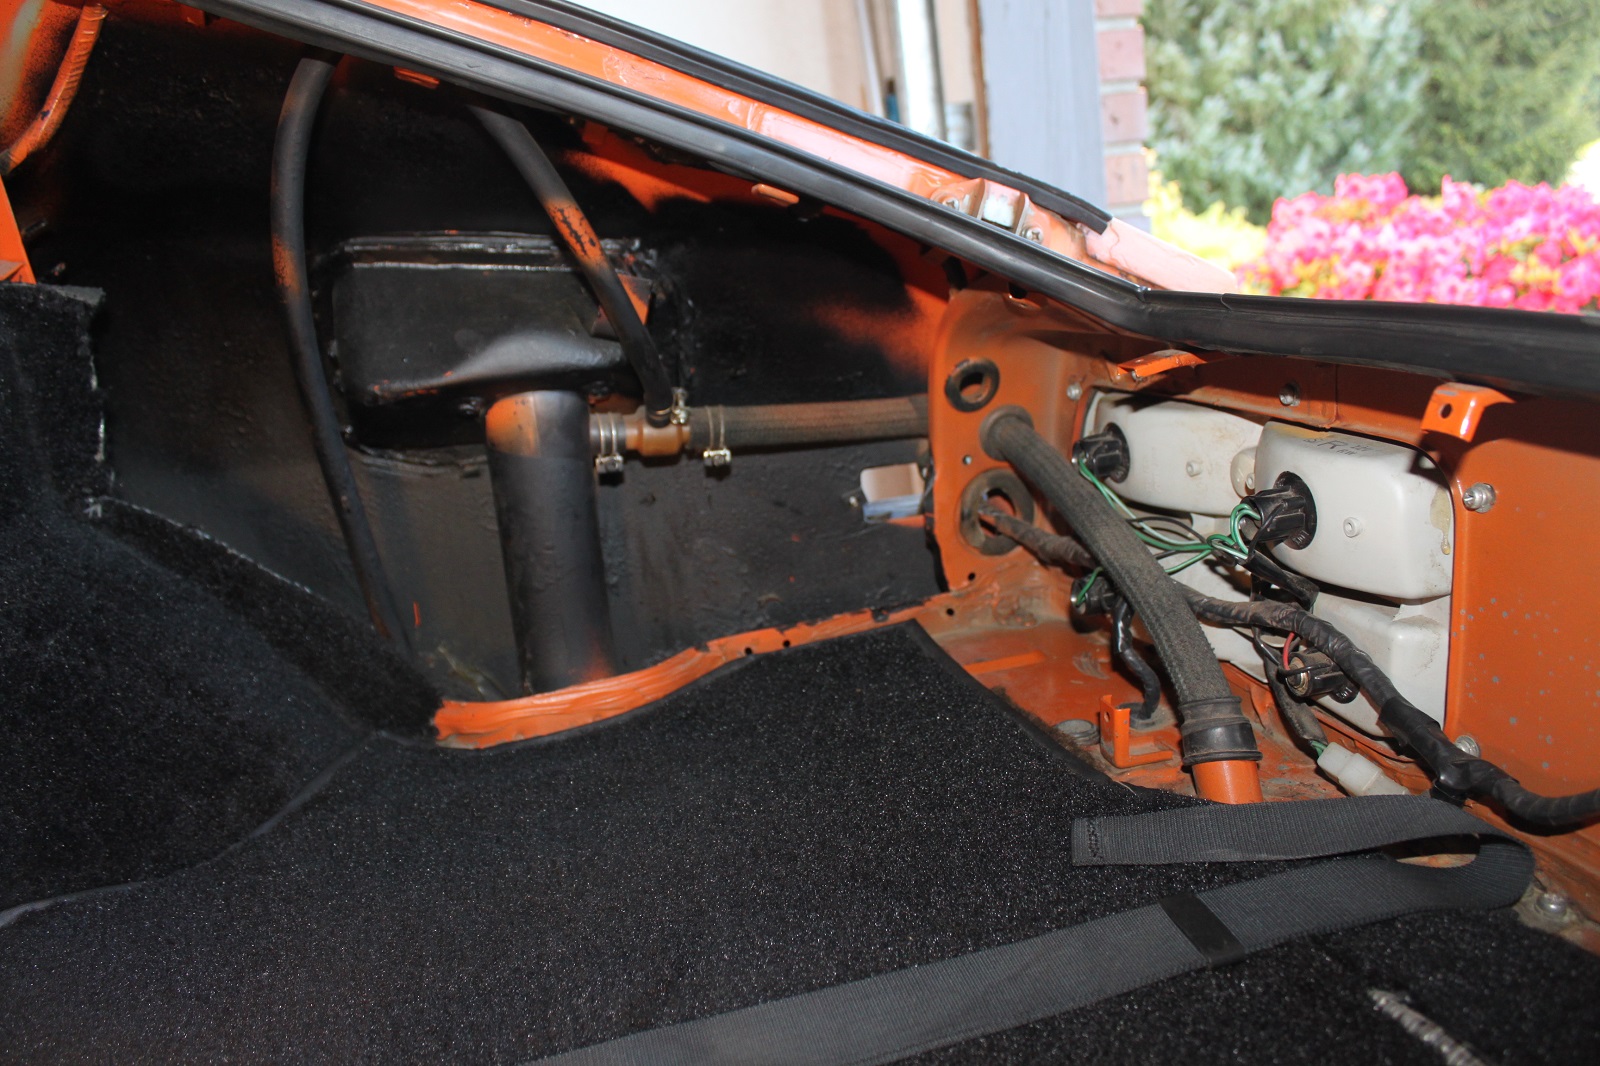
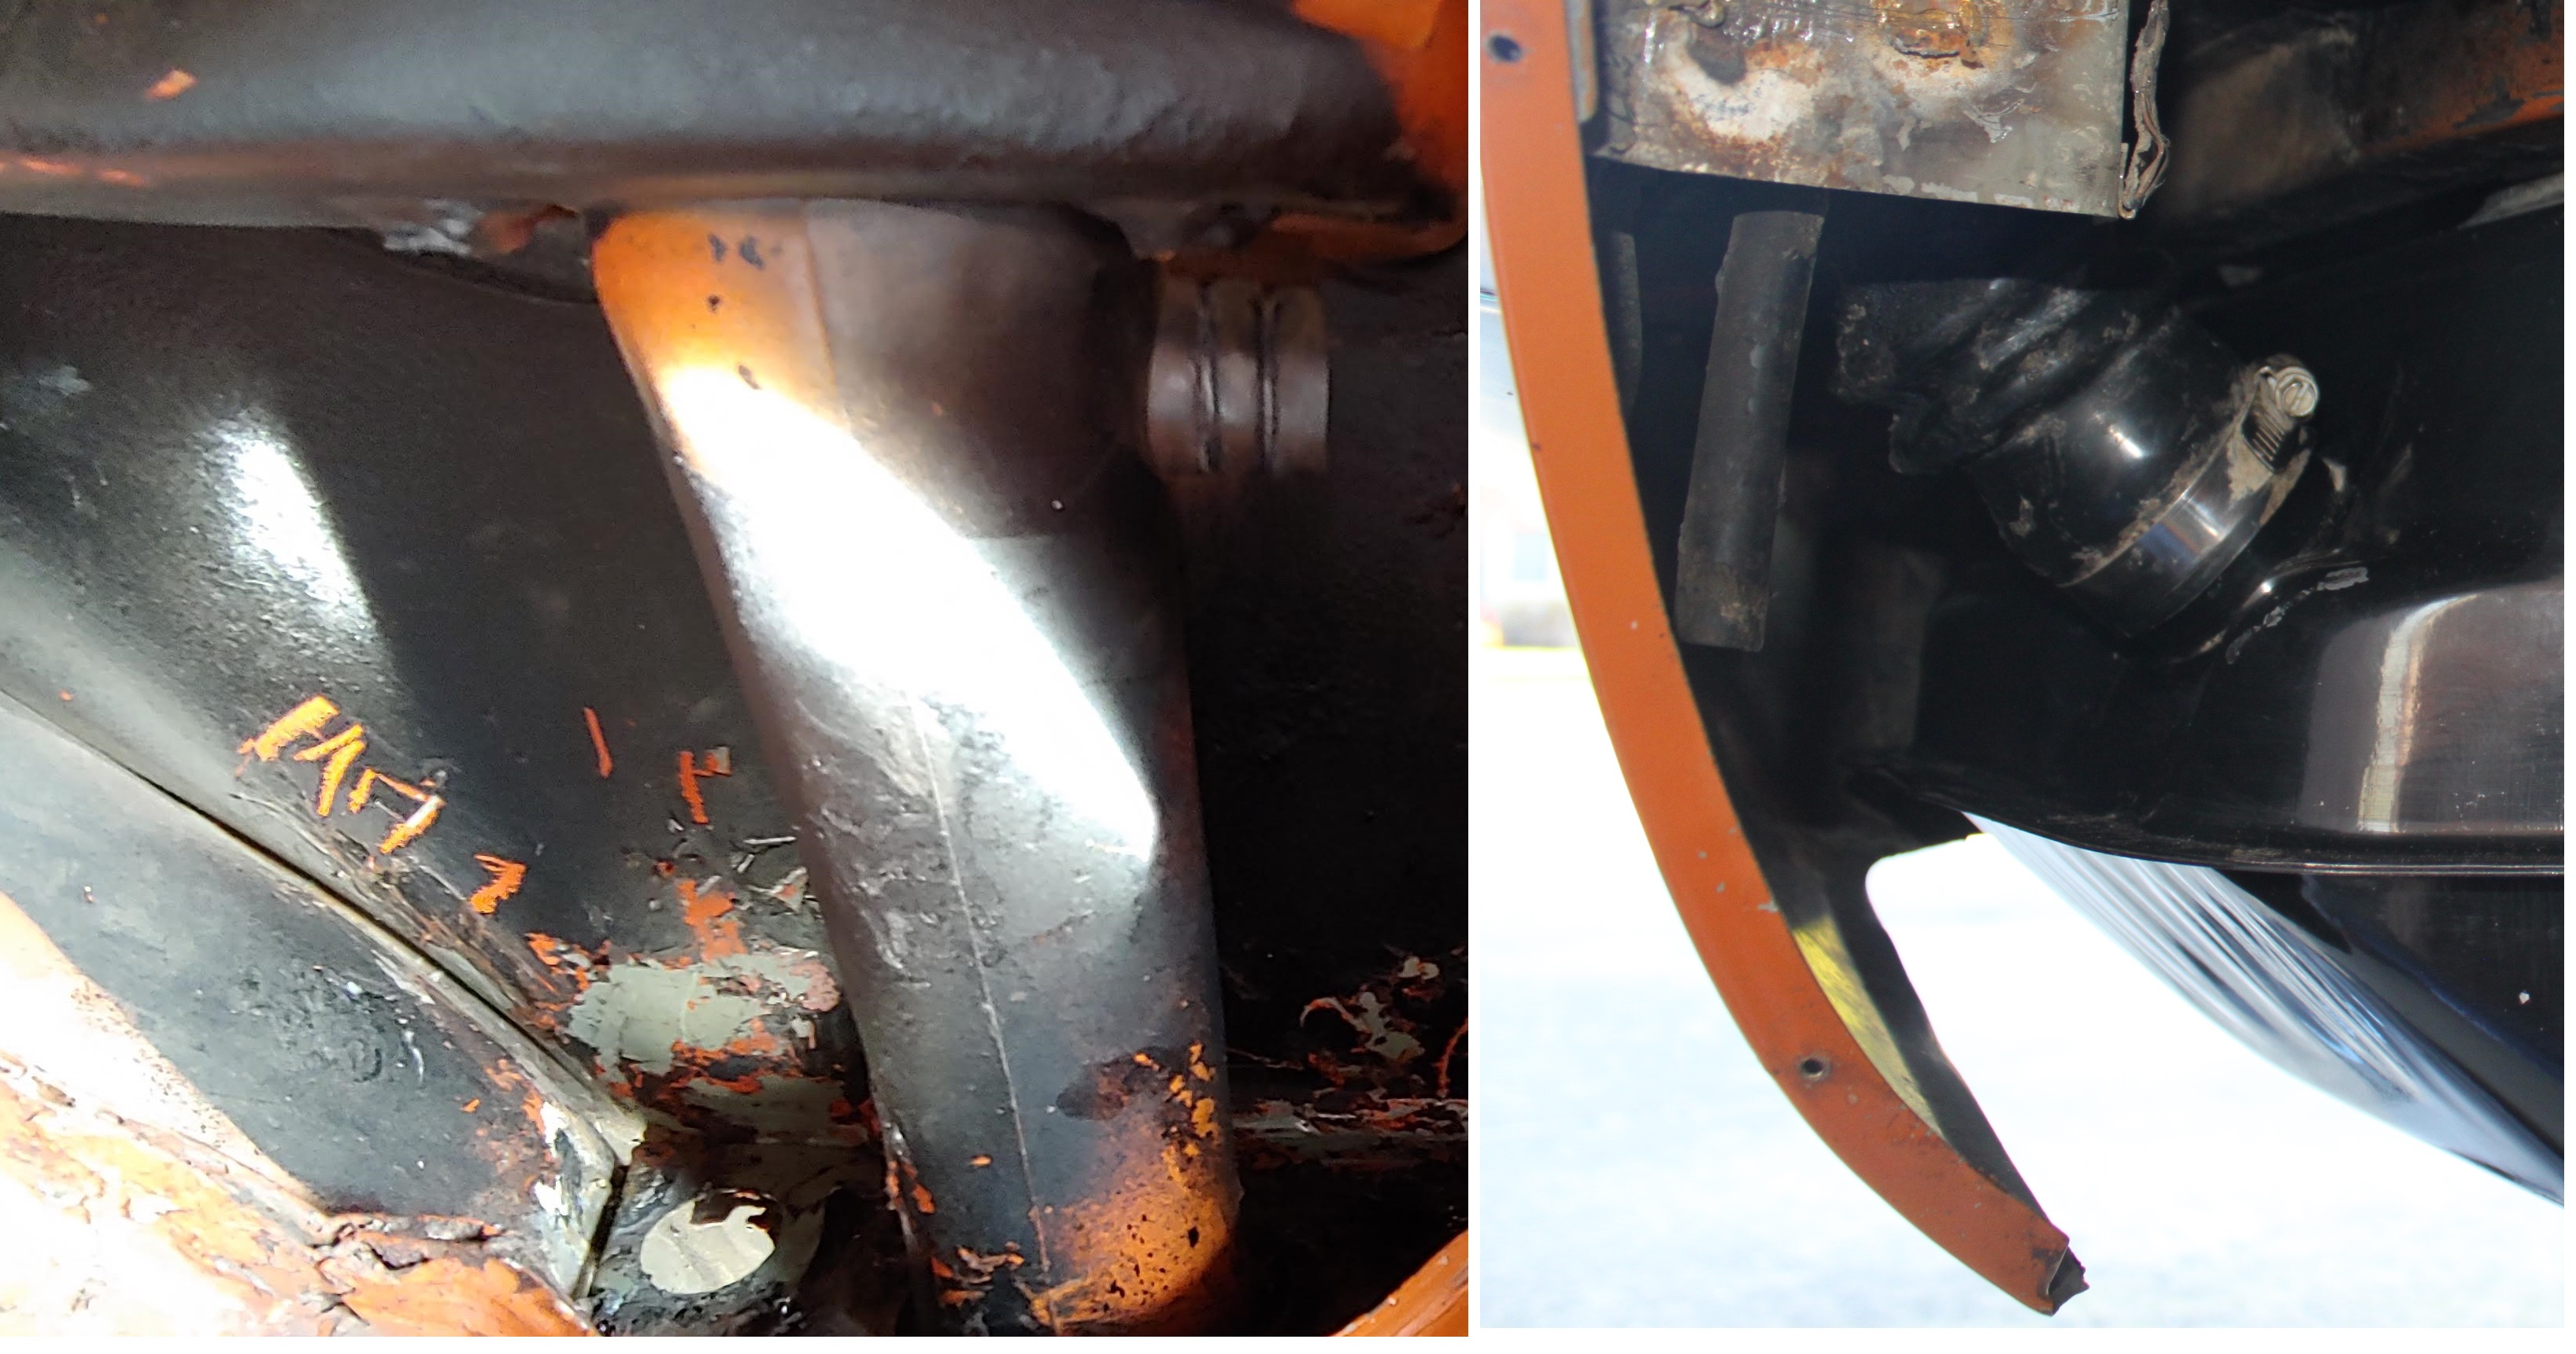
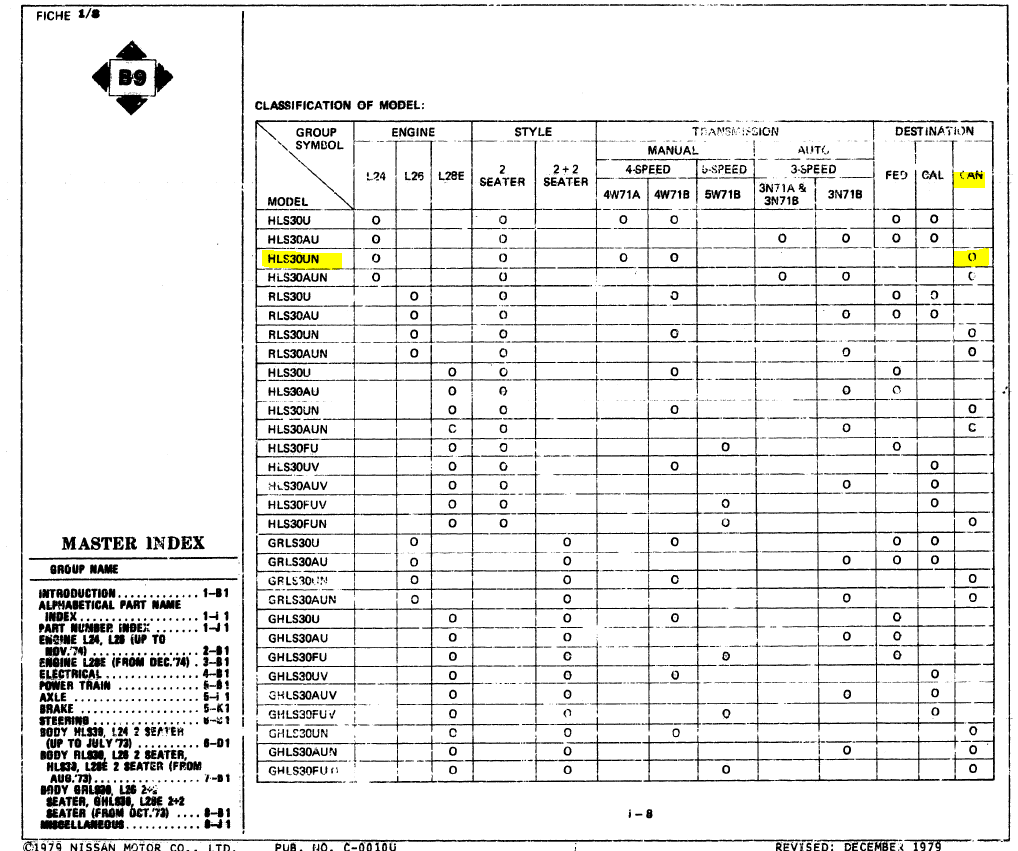
1 pointEarly Canadian market 240Z's had no vapor tank either, until about 9/70 I believe. They were known as non-emissions models, HLS30UN. Here are a couple of pictures of my 7/70 Canadian car showing the original vent hose routing without a vapor tank. The hose tee's off the tank vent hose going straight up and then loops back down going through a hole in the floor behind the plastic trim panel.


 1 point
 -
1 pointMaybe you guys don't know this but a euro 240z has no vapor tank to begin with.. When i saw the tank (in the 1990's) the first thing i did was get rid of it! A euro fill hose has one little pipe and that is connected to a single pipe on the other end top of the tank.. iirc.. see a serv.manual.1 point
-
1 pointAnother option is to just get rid of the vapor tank. http://www.zhome.com/Racing/FuelTankVaporLineMod/FuelTankVaporMod.htm1 point
-
$89K amazing and unbelievable - I looks beautiful - - HOWEVER, given the condition of the engine and engine compartment - there are enough Quality Points to deduct there alone - to knock it out of Category #1 or #2 Condition. This is most certainly NOT yet a Concours example. The Air Cleaner is correct for a Series II 1971. However none of the parts that should be bright shinny Yellow Chromated are “restored”. Brake lines, Fuel Lines, Carb. Linkages, Air Injection tubes, Fuel Rails, nuts/bolts etc. Many of the fuel/water rubber hoses are incorrect (old/worn). Non-stock/original exhaust system. Incorrect Splash Pan added Hood hinges should be body color Hood torsos bars should be black Horns are wrong color Seats are installed on the wrong side Dimond vinyl on the rear shock towers wrinkled/sloppy Metal Rivits on the Tail Light Finisher Panels? Beautiful 240Z, I’d love to have it… but market pricing realistically might be something closer to $65K - maybe a bit more with full photo. documentation of how the body work was done..1 point