Leaderboard

 Subscriber


Popular Content
Showing content with the highest reputation on 01/22/2018 in all areas
-
3 pointsI reworked the plastic replacement cap for the finishing nut last week. As you can see it has a paper thin ring that goes down into the finisher nut along with a star looking washer. It fits perfectly even with the star looking washer inside the cap. Should be available to order in the next week.
 3 points
 -
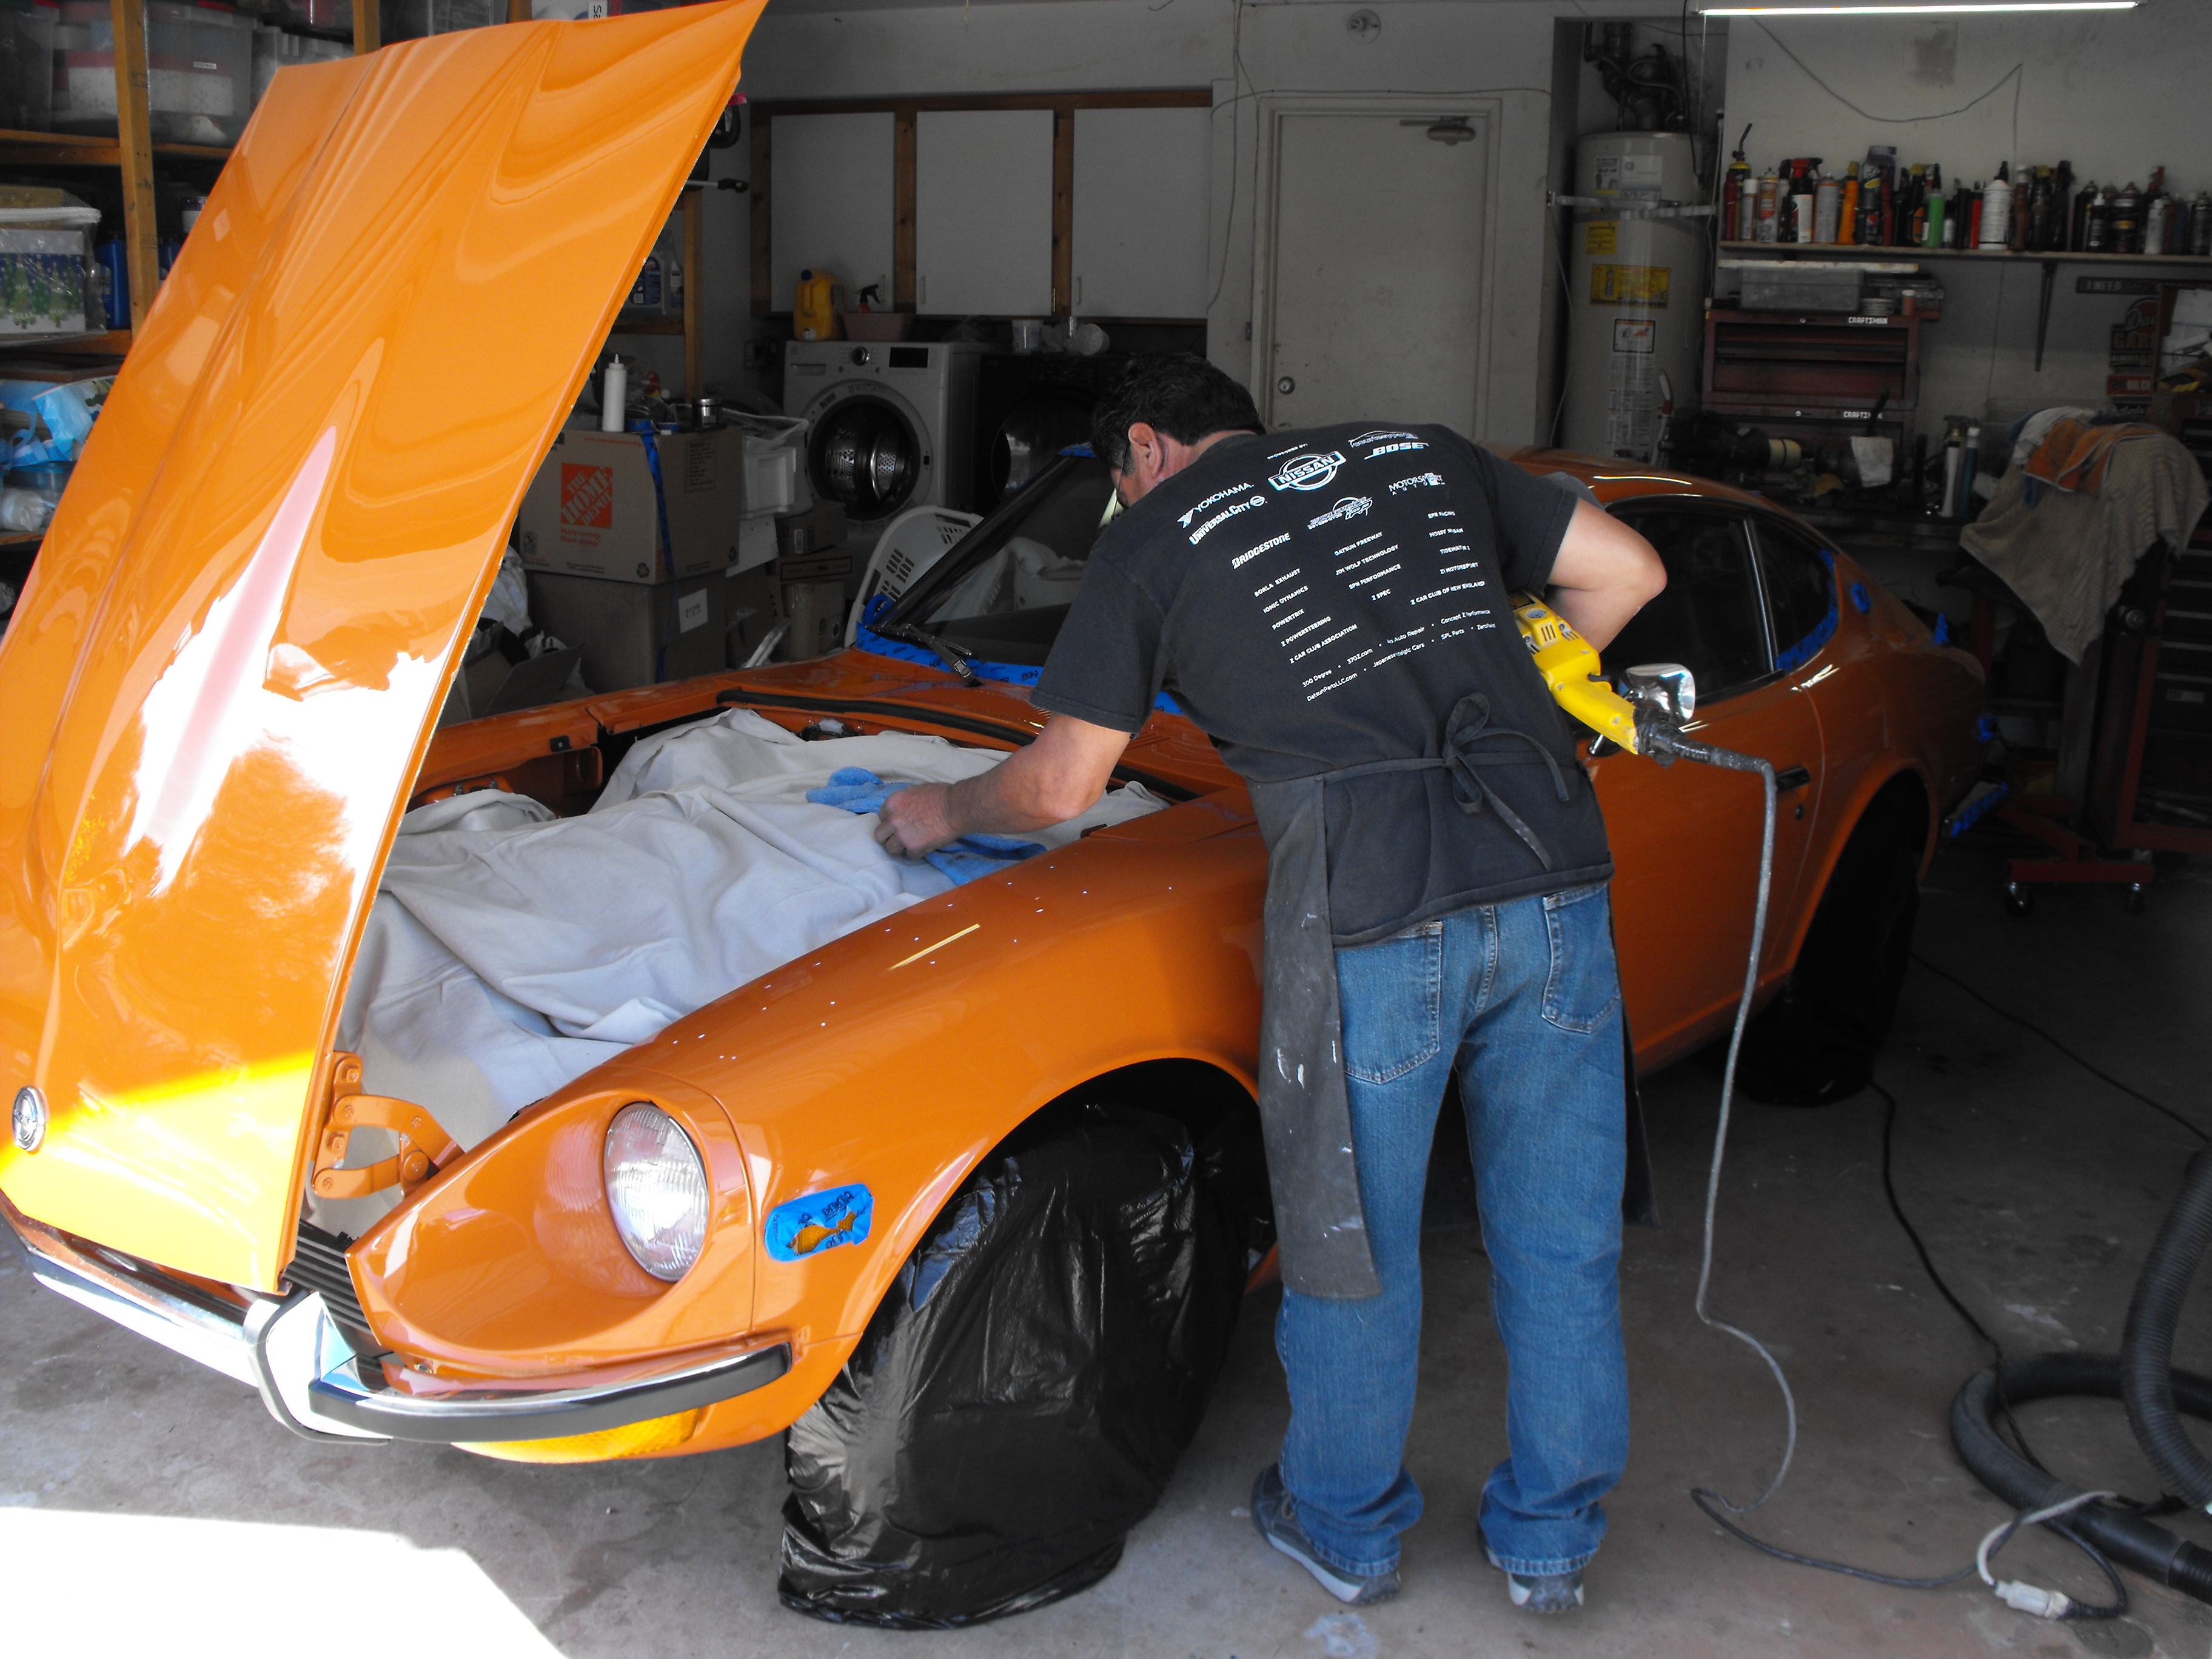
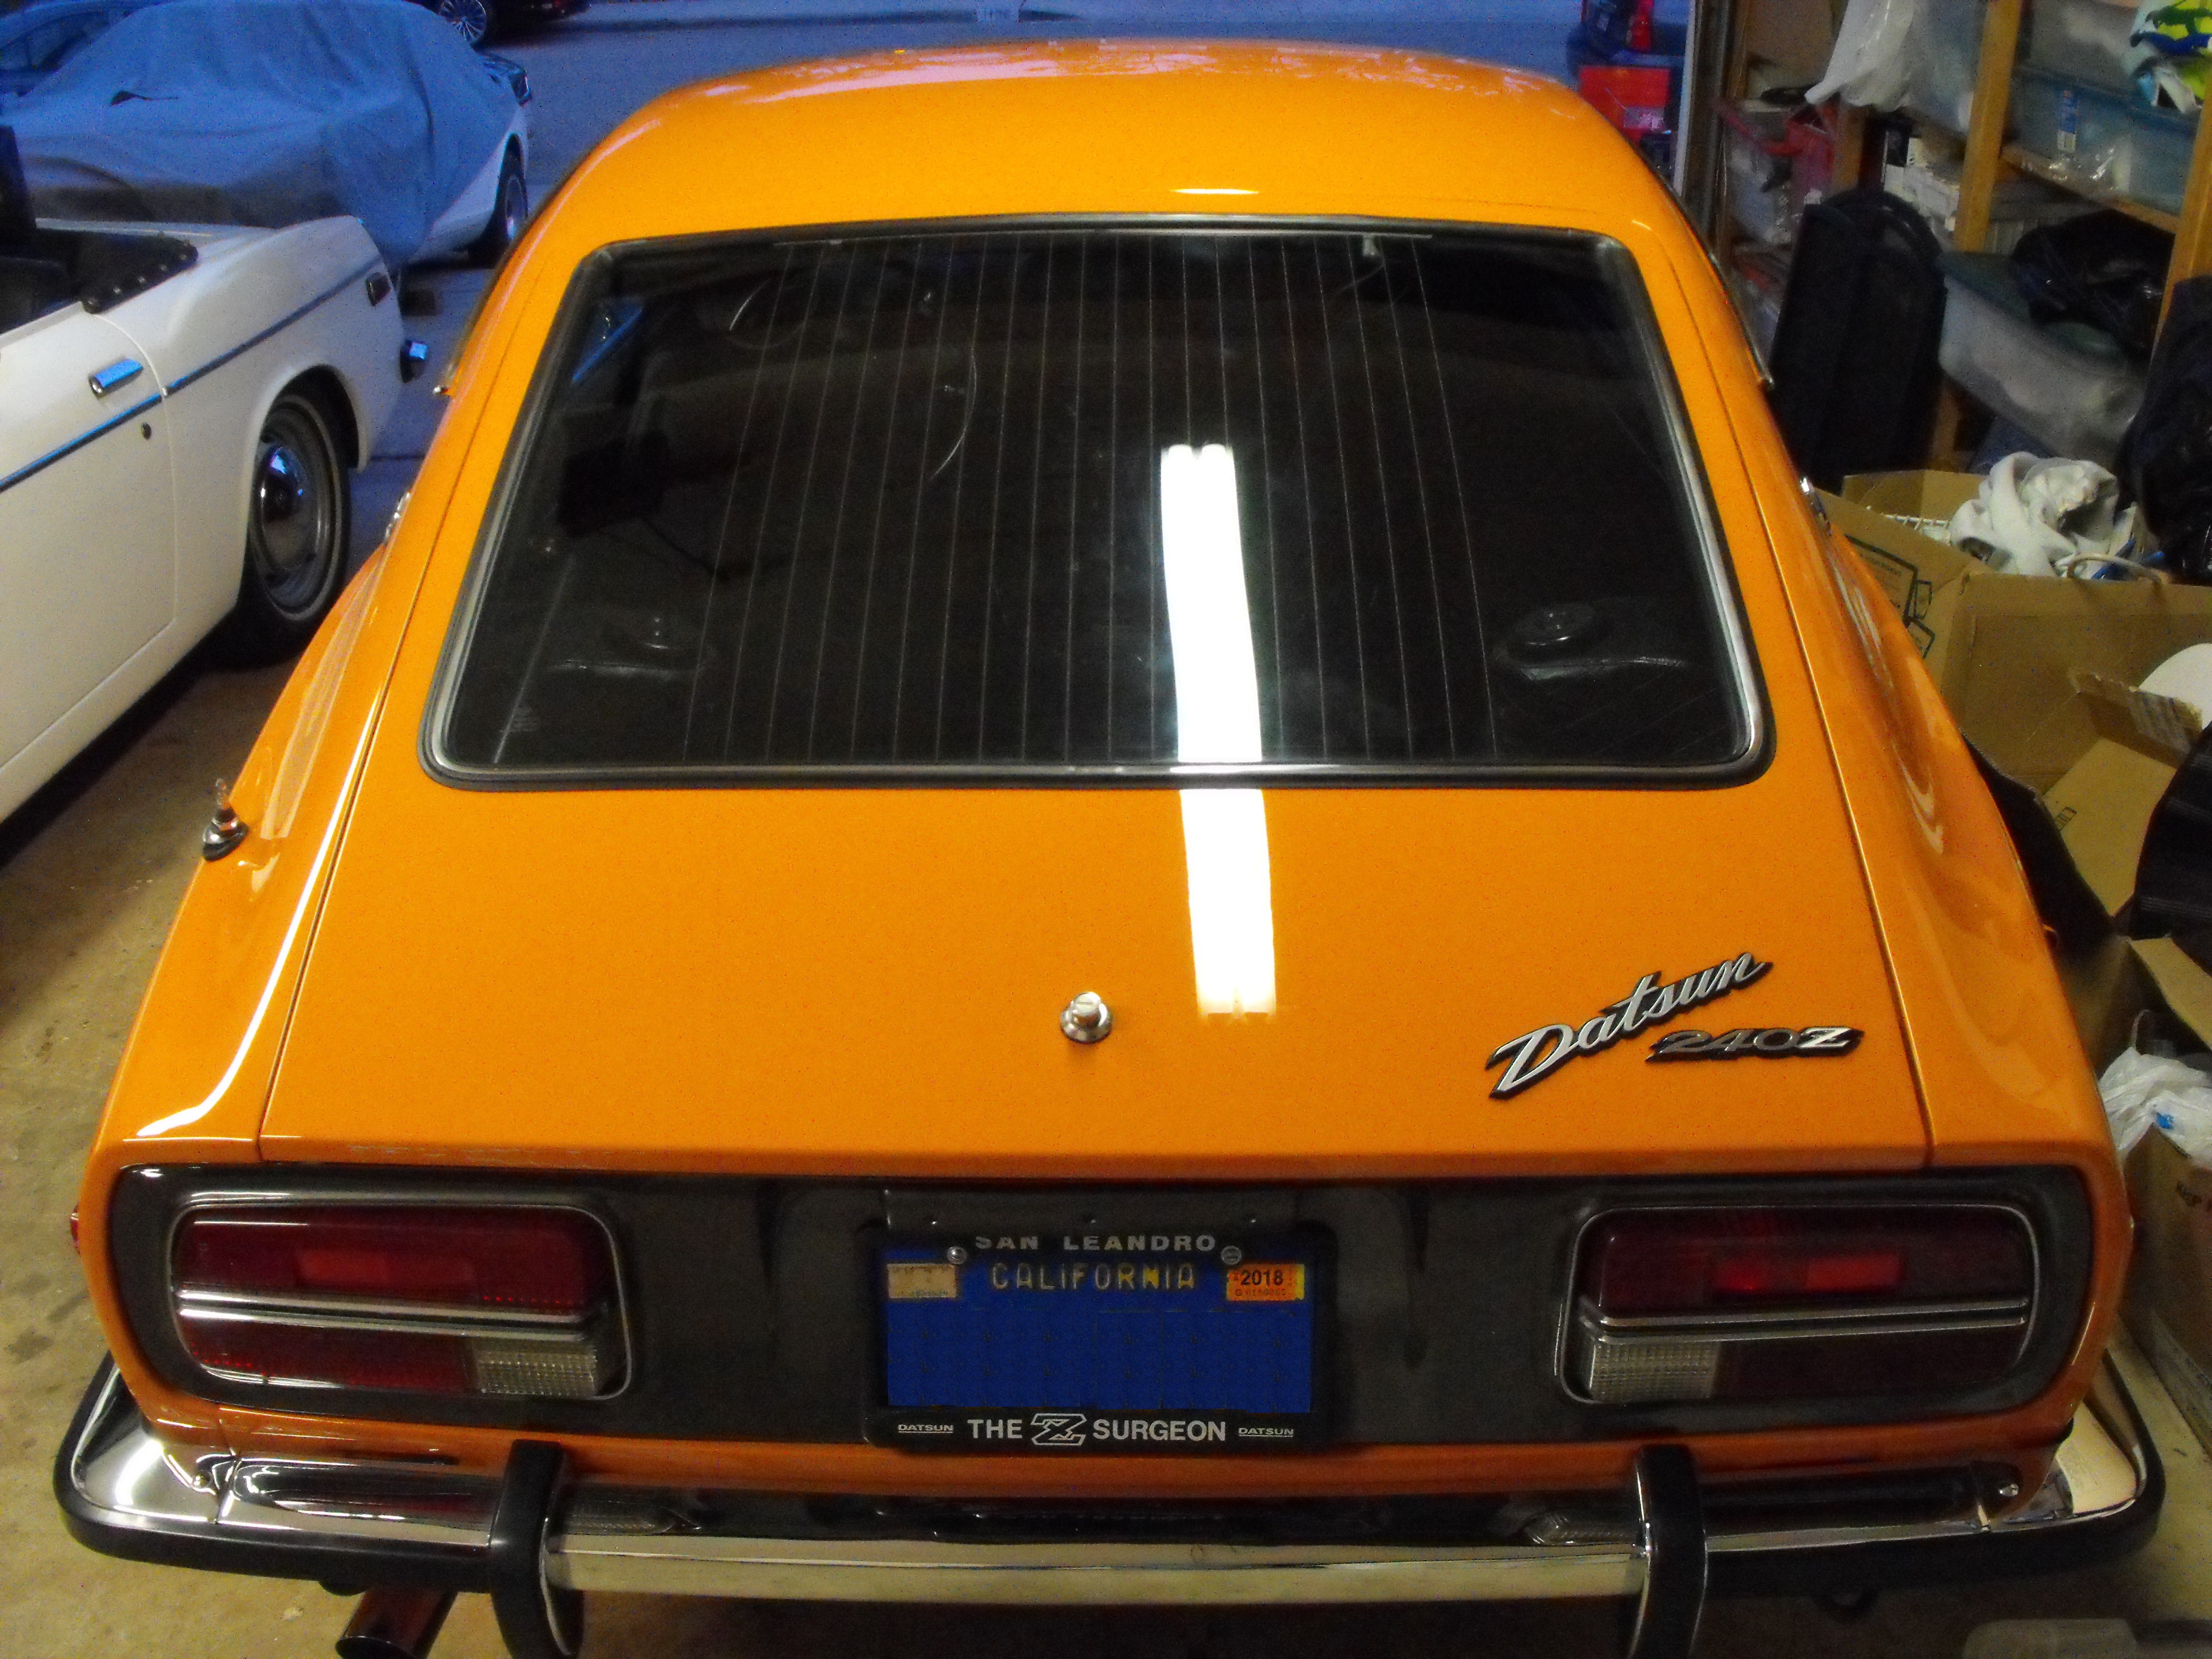
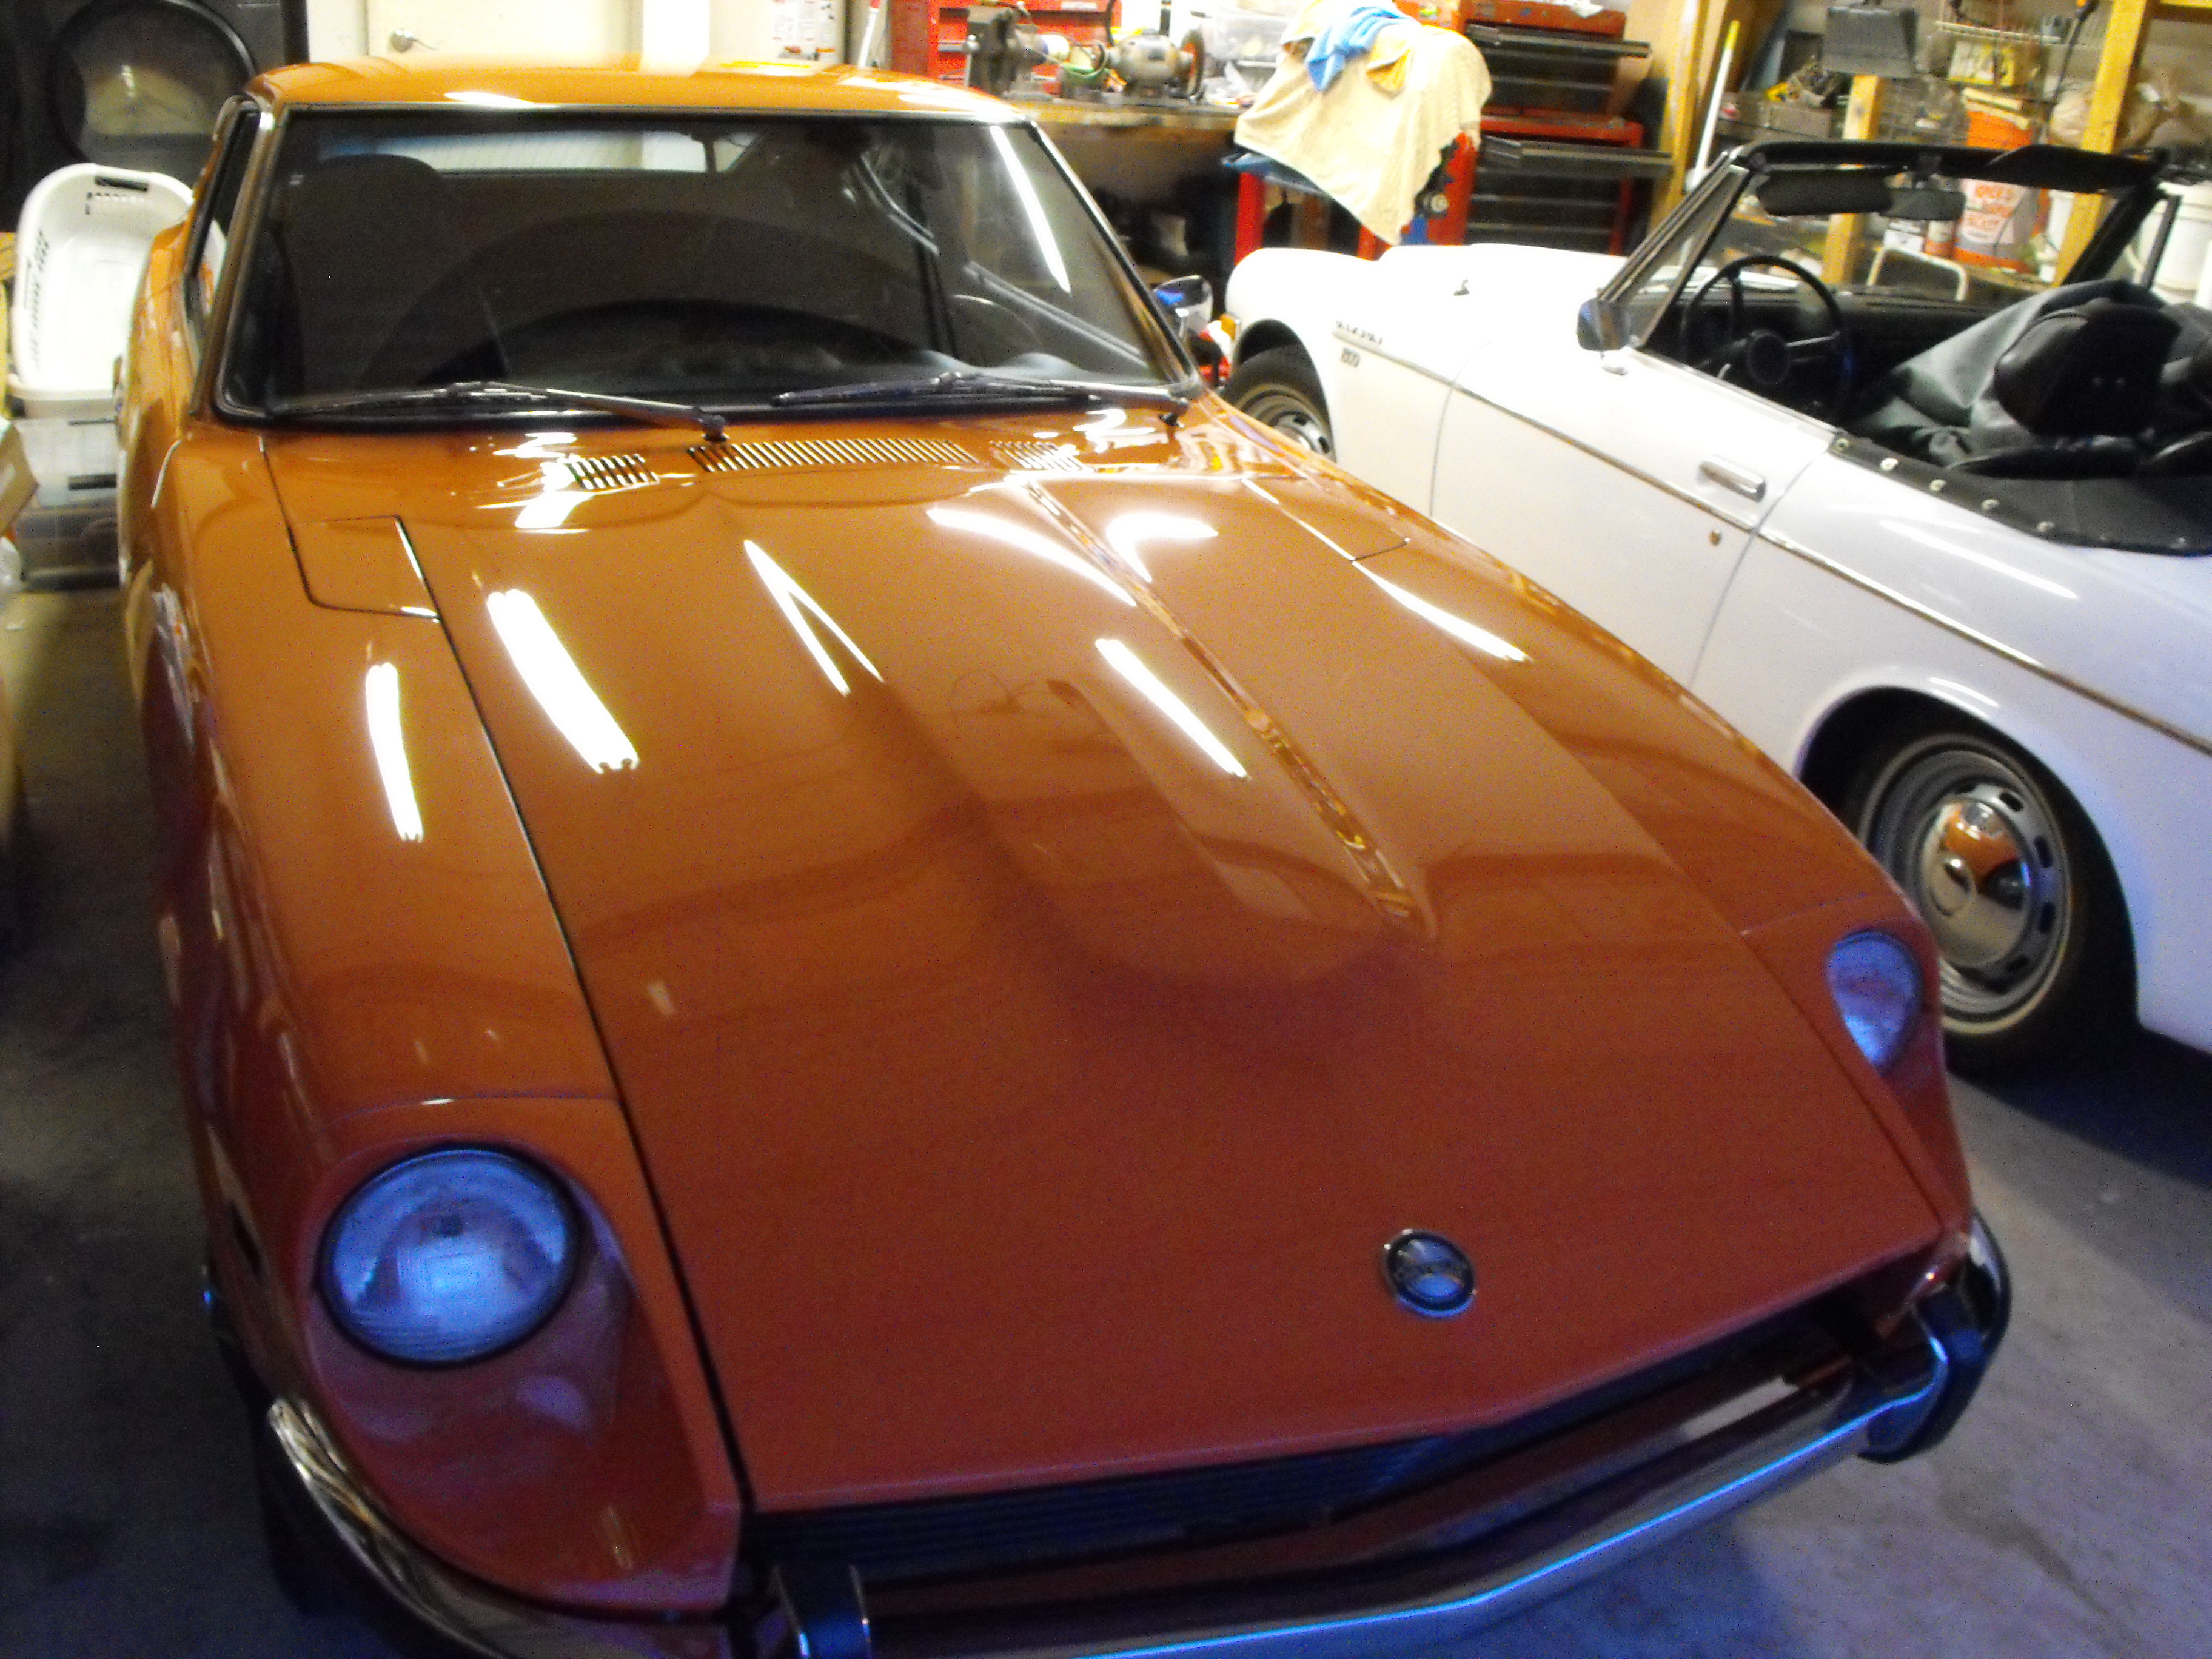
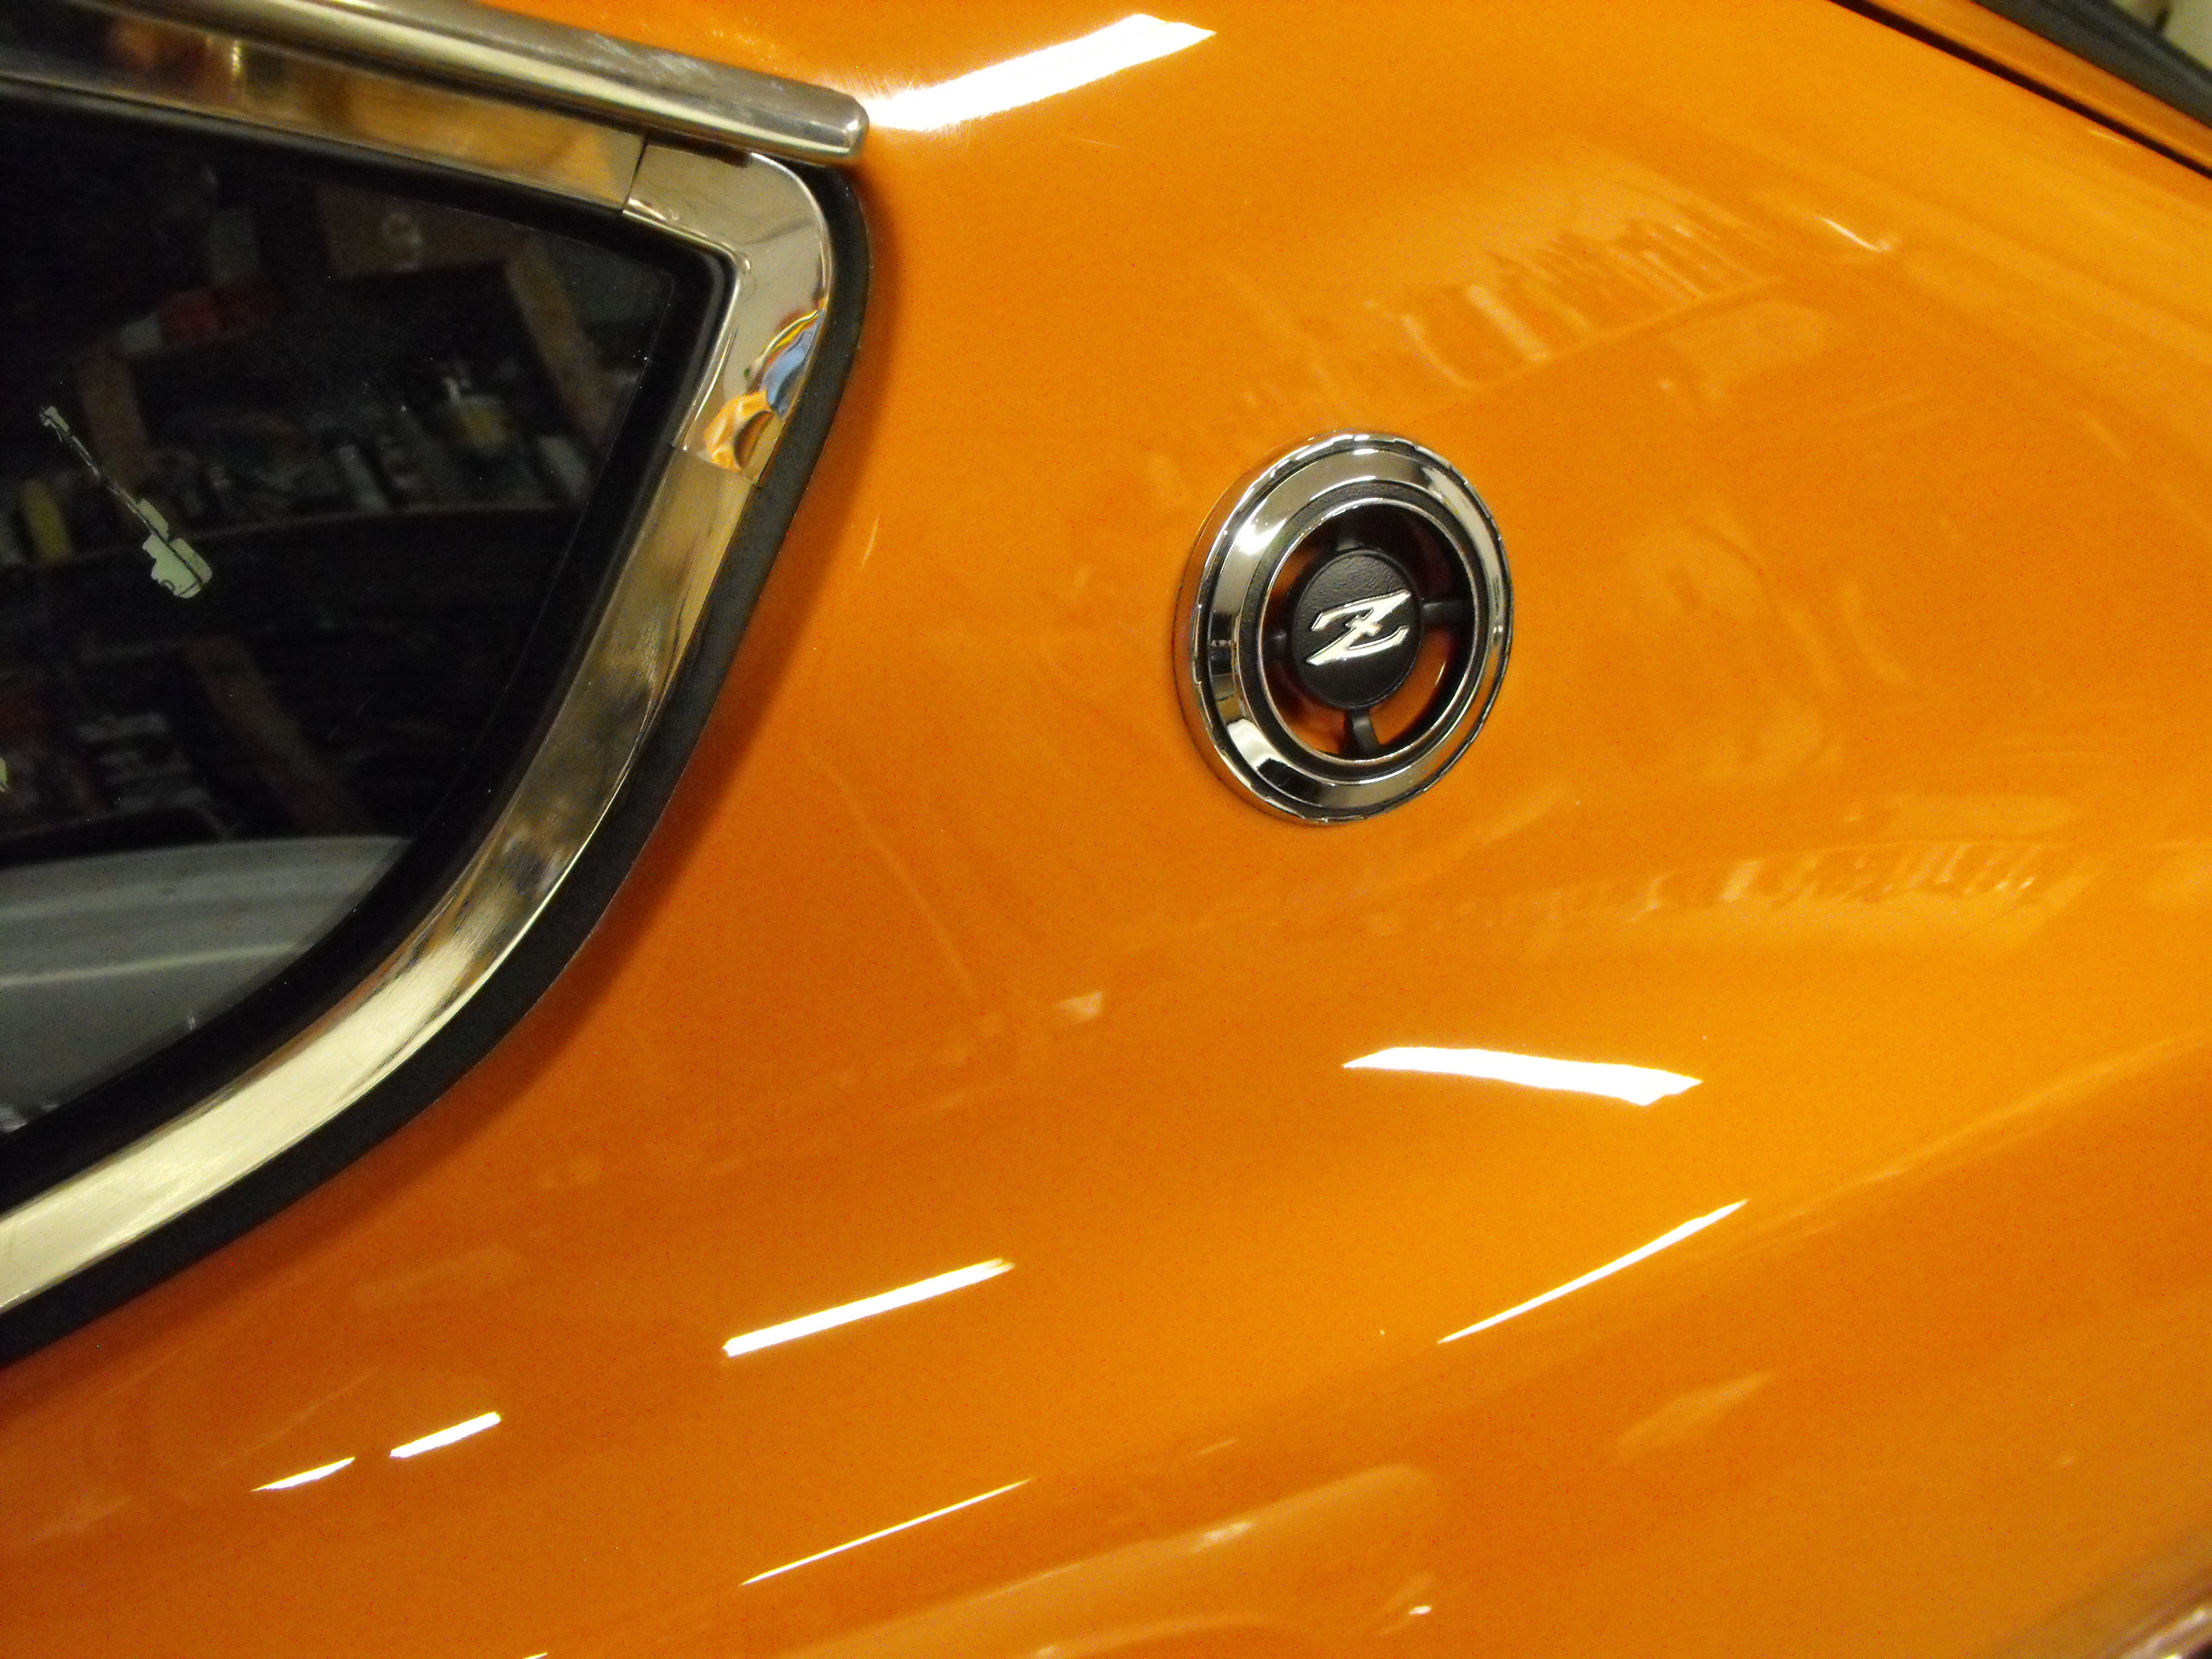
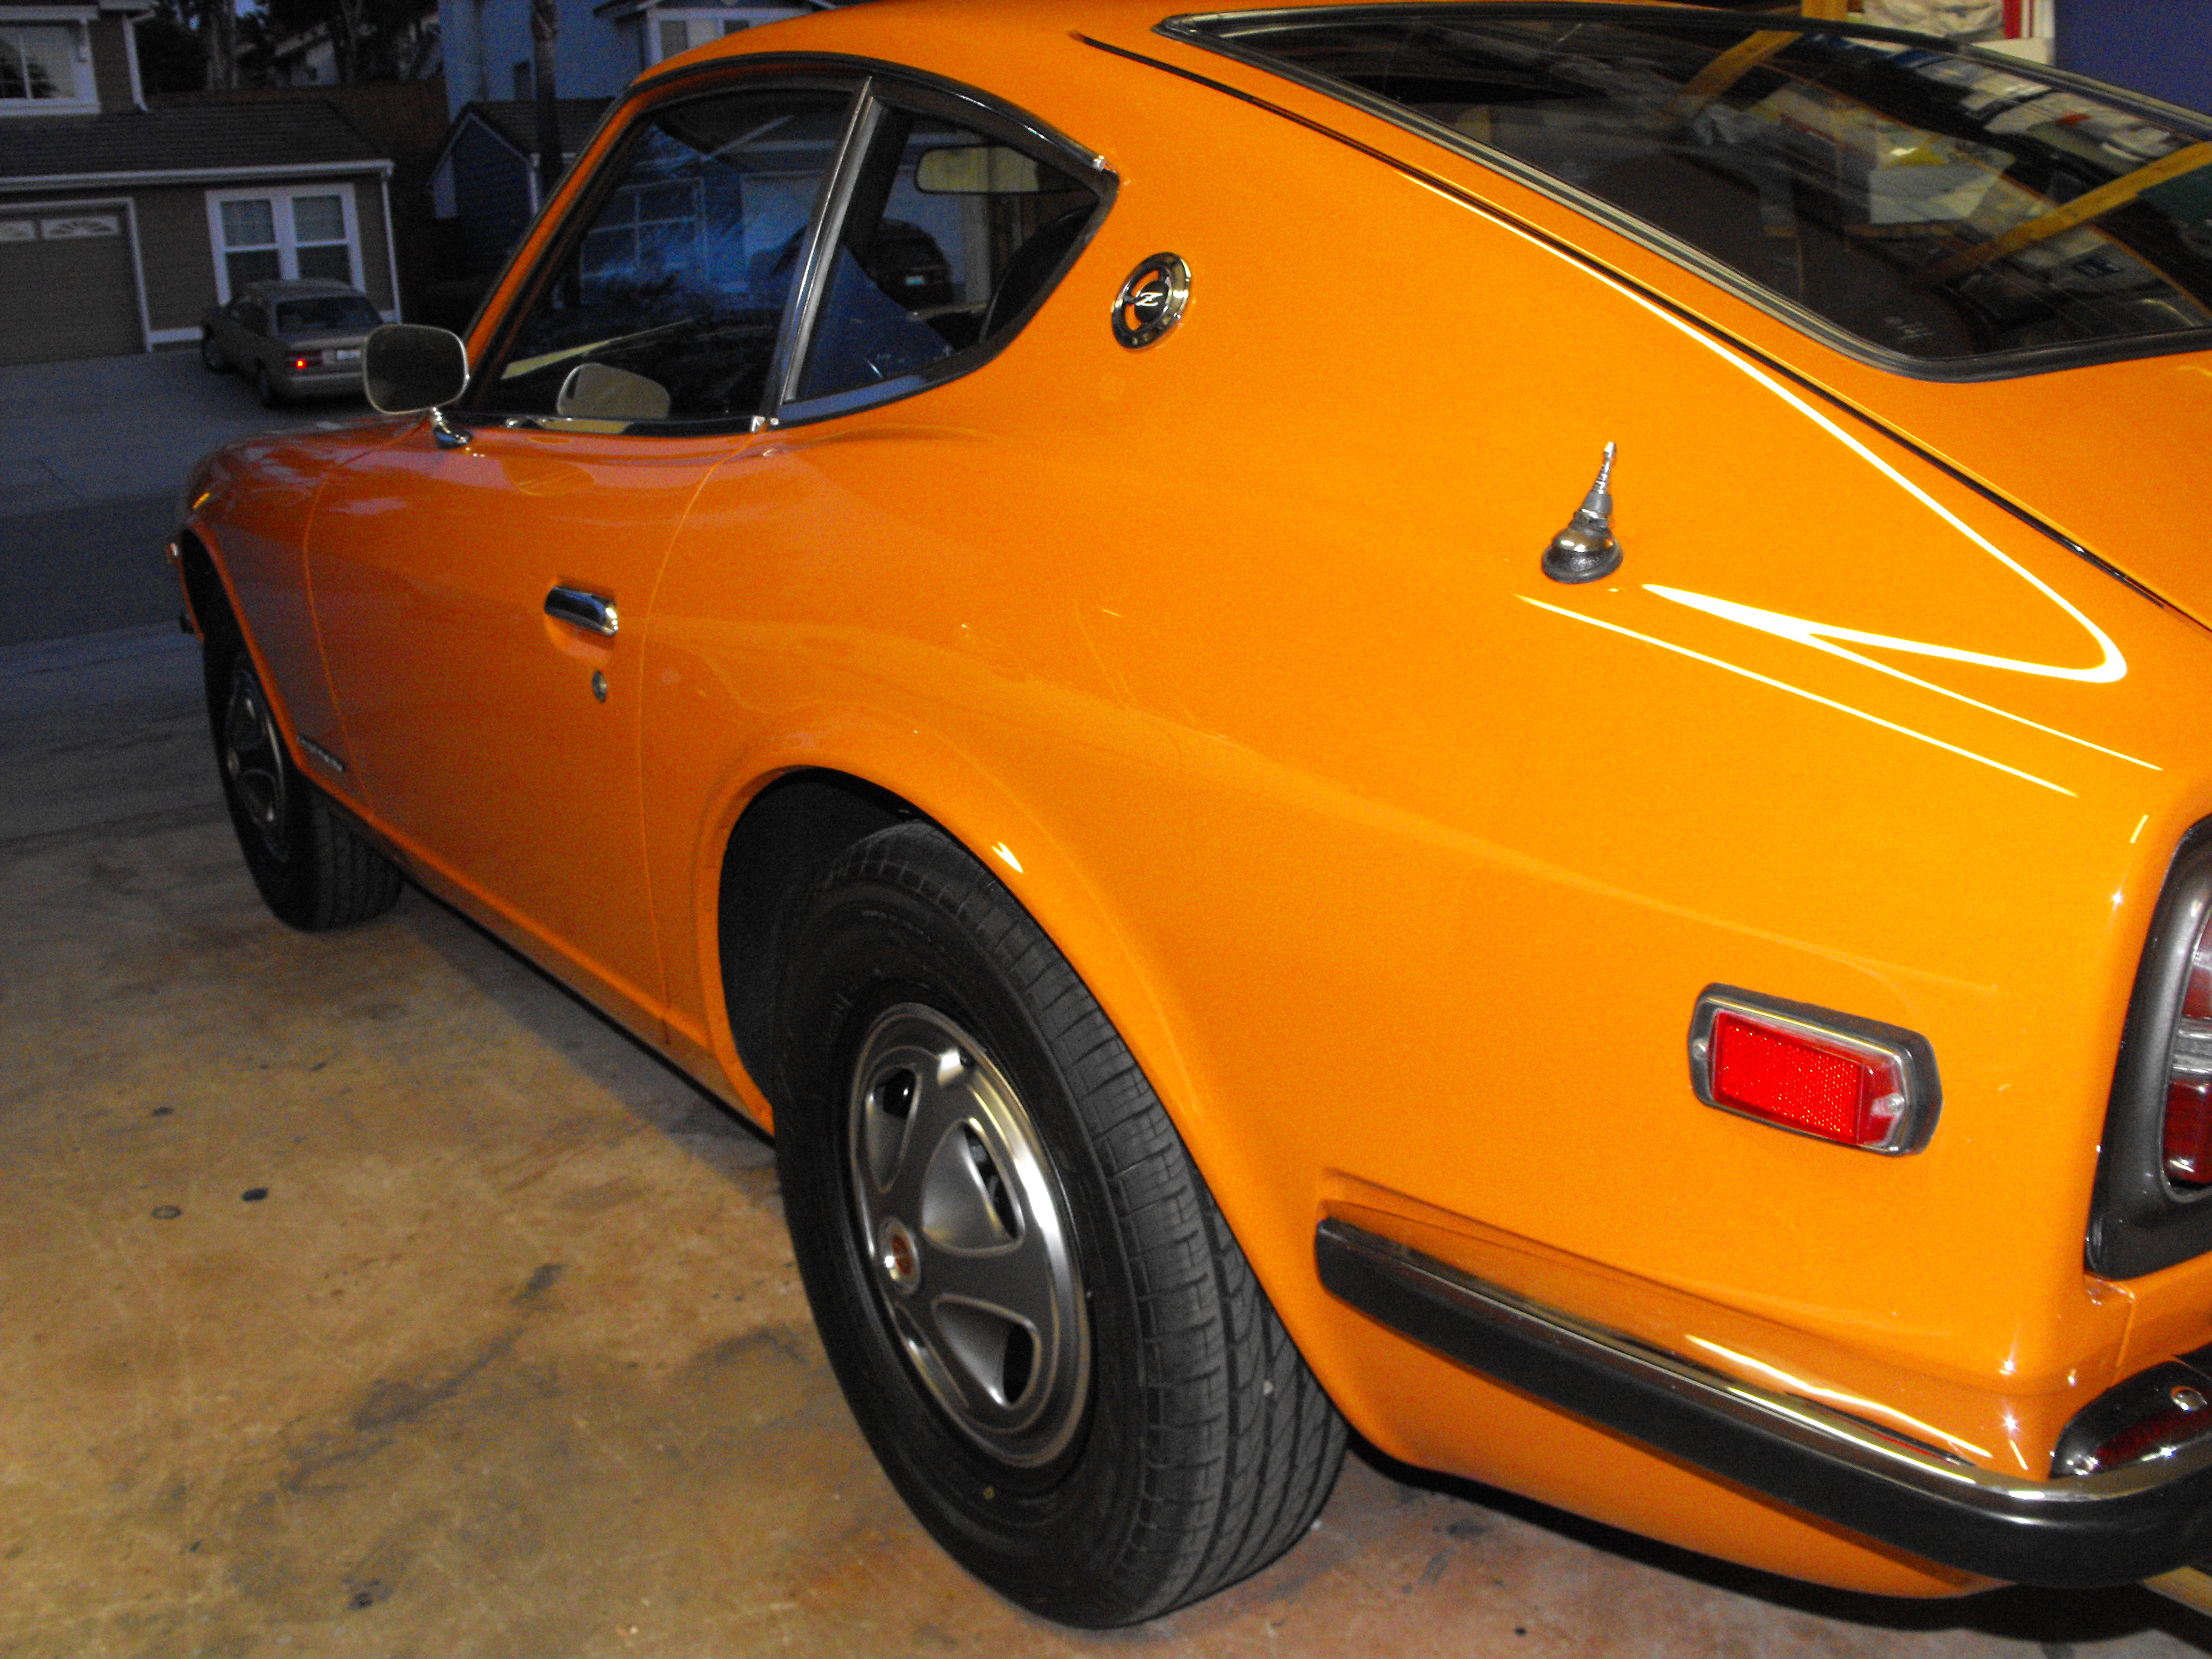
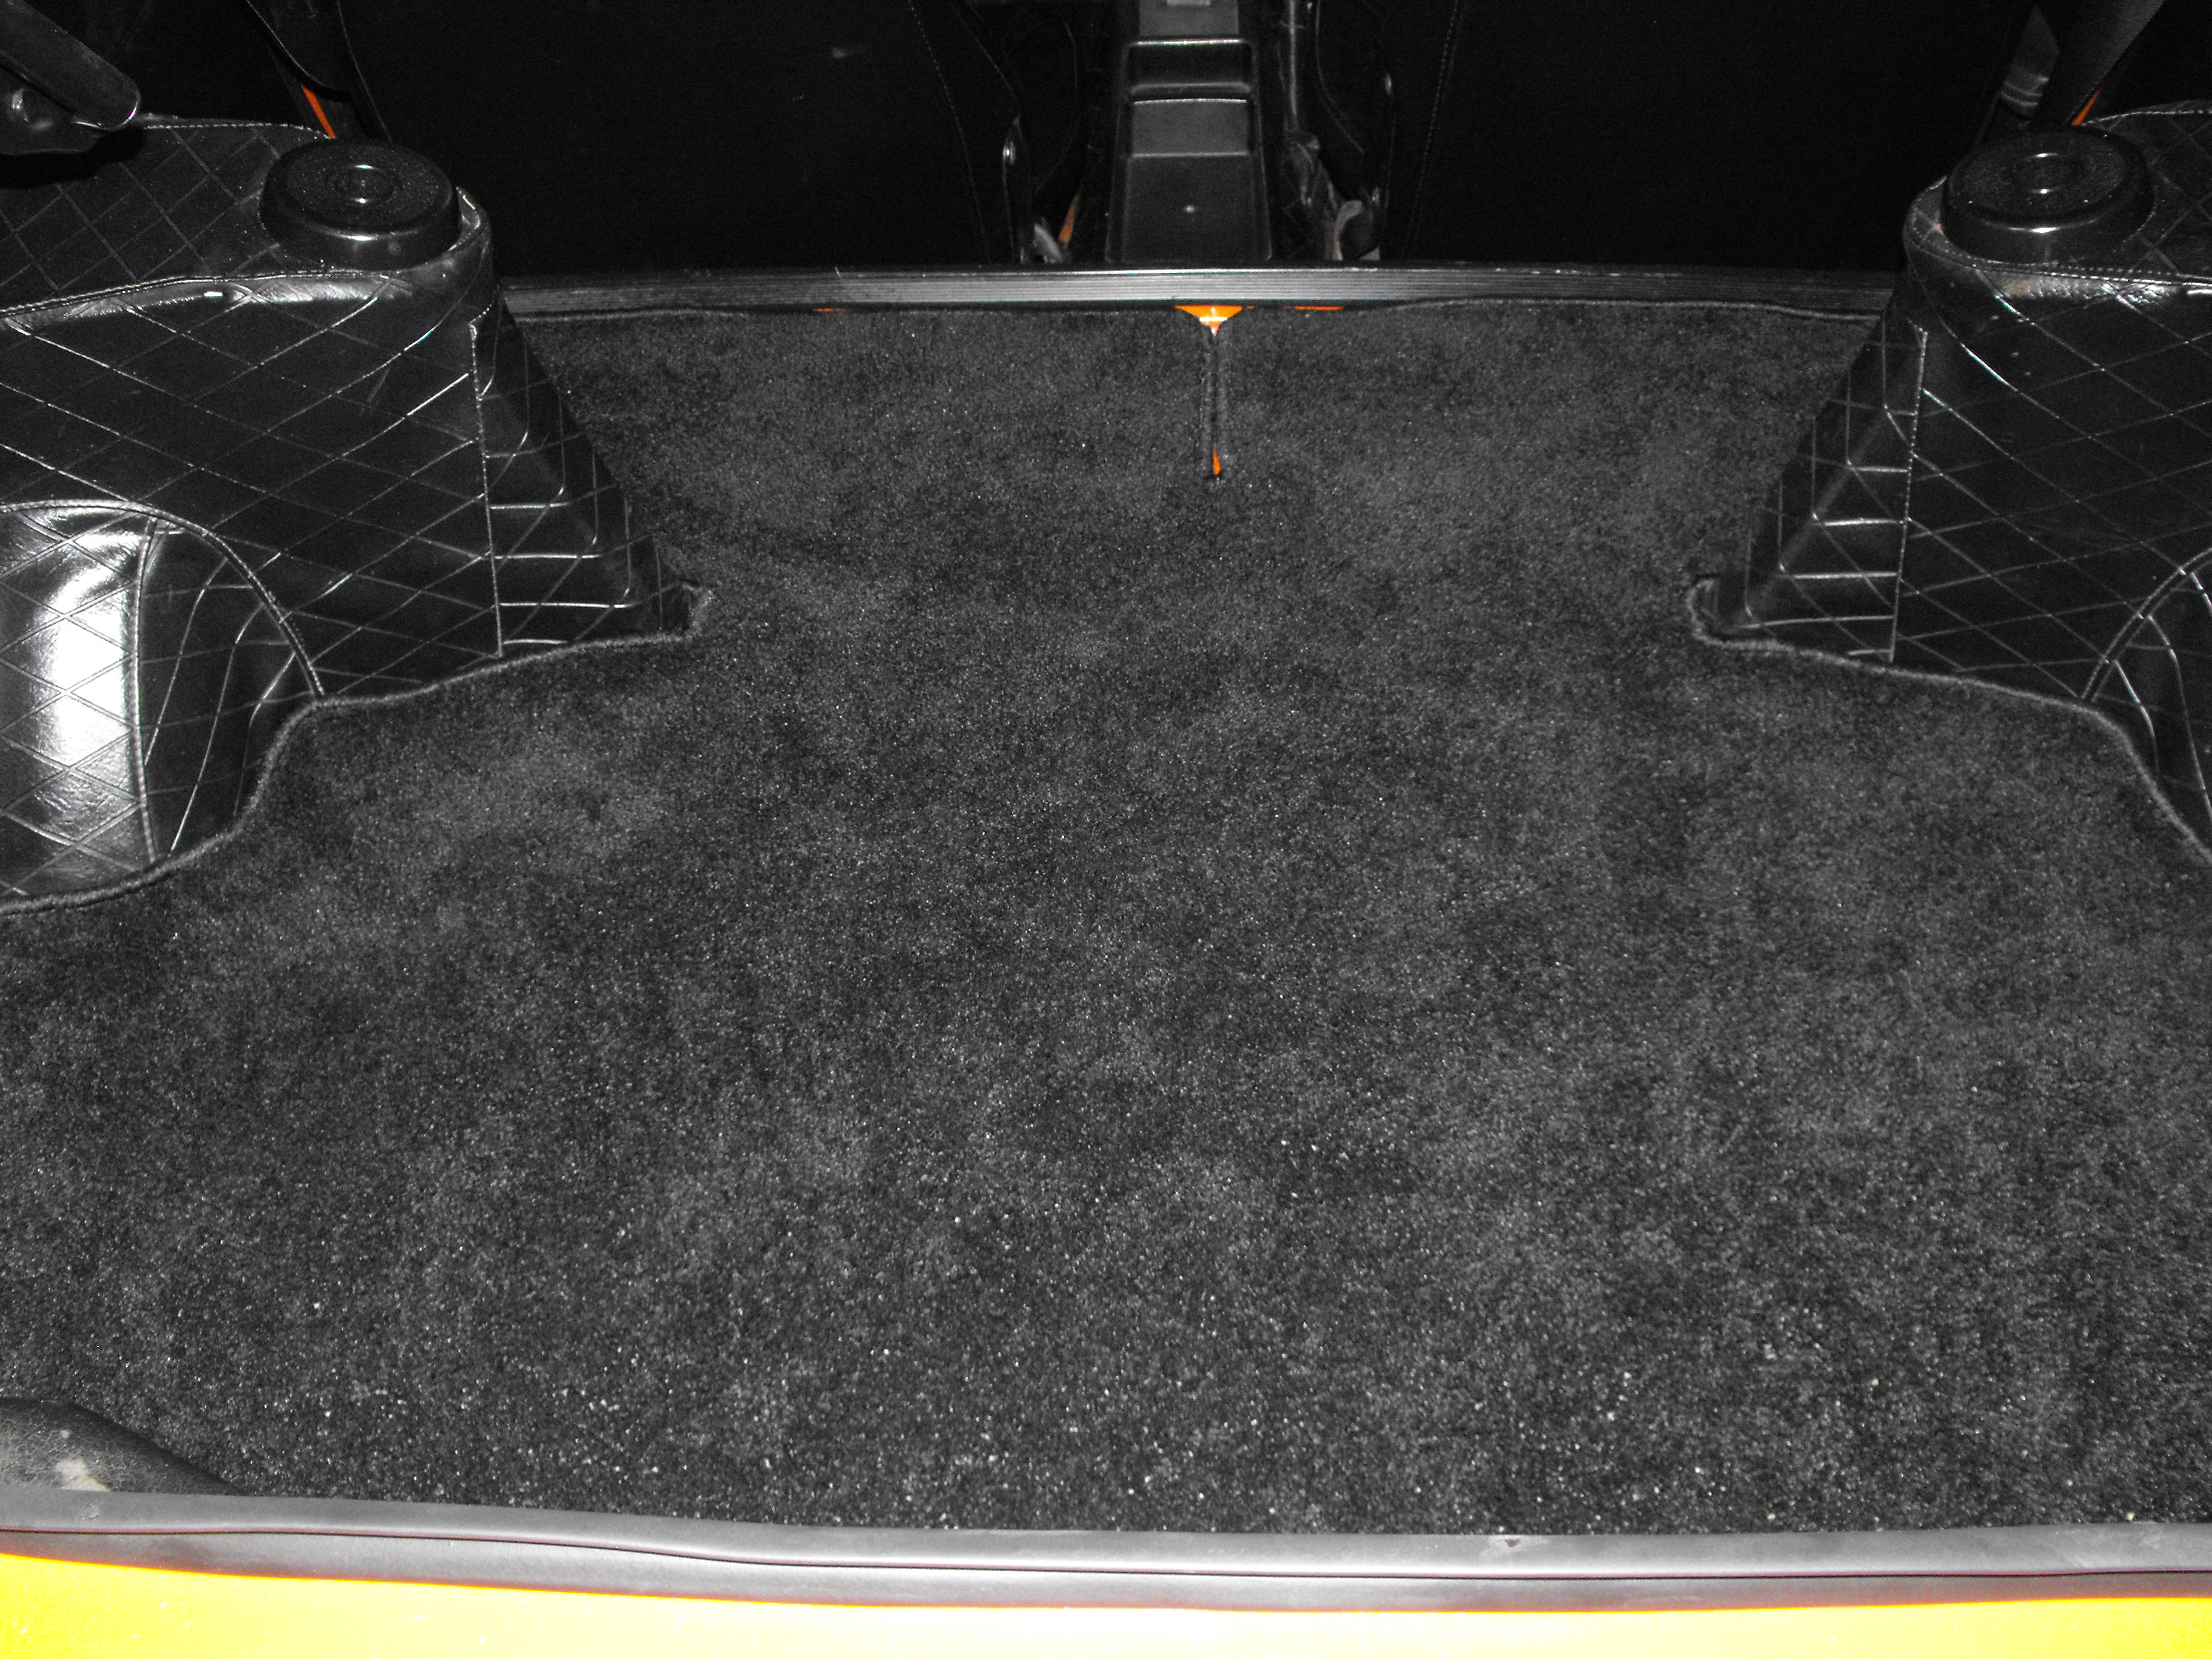
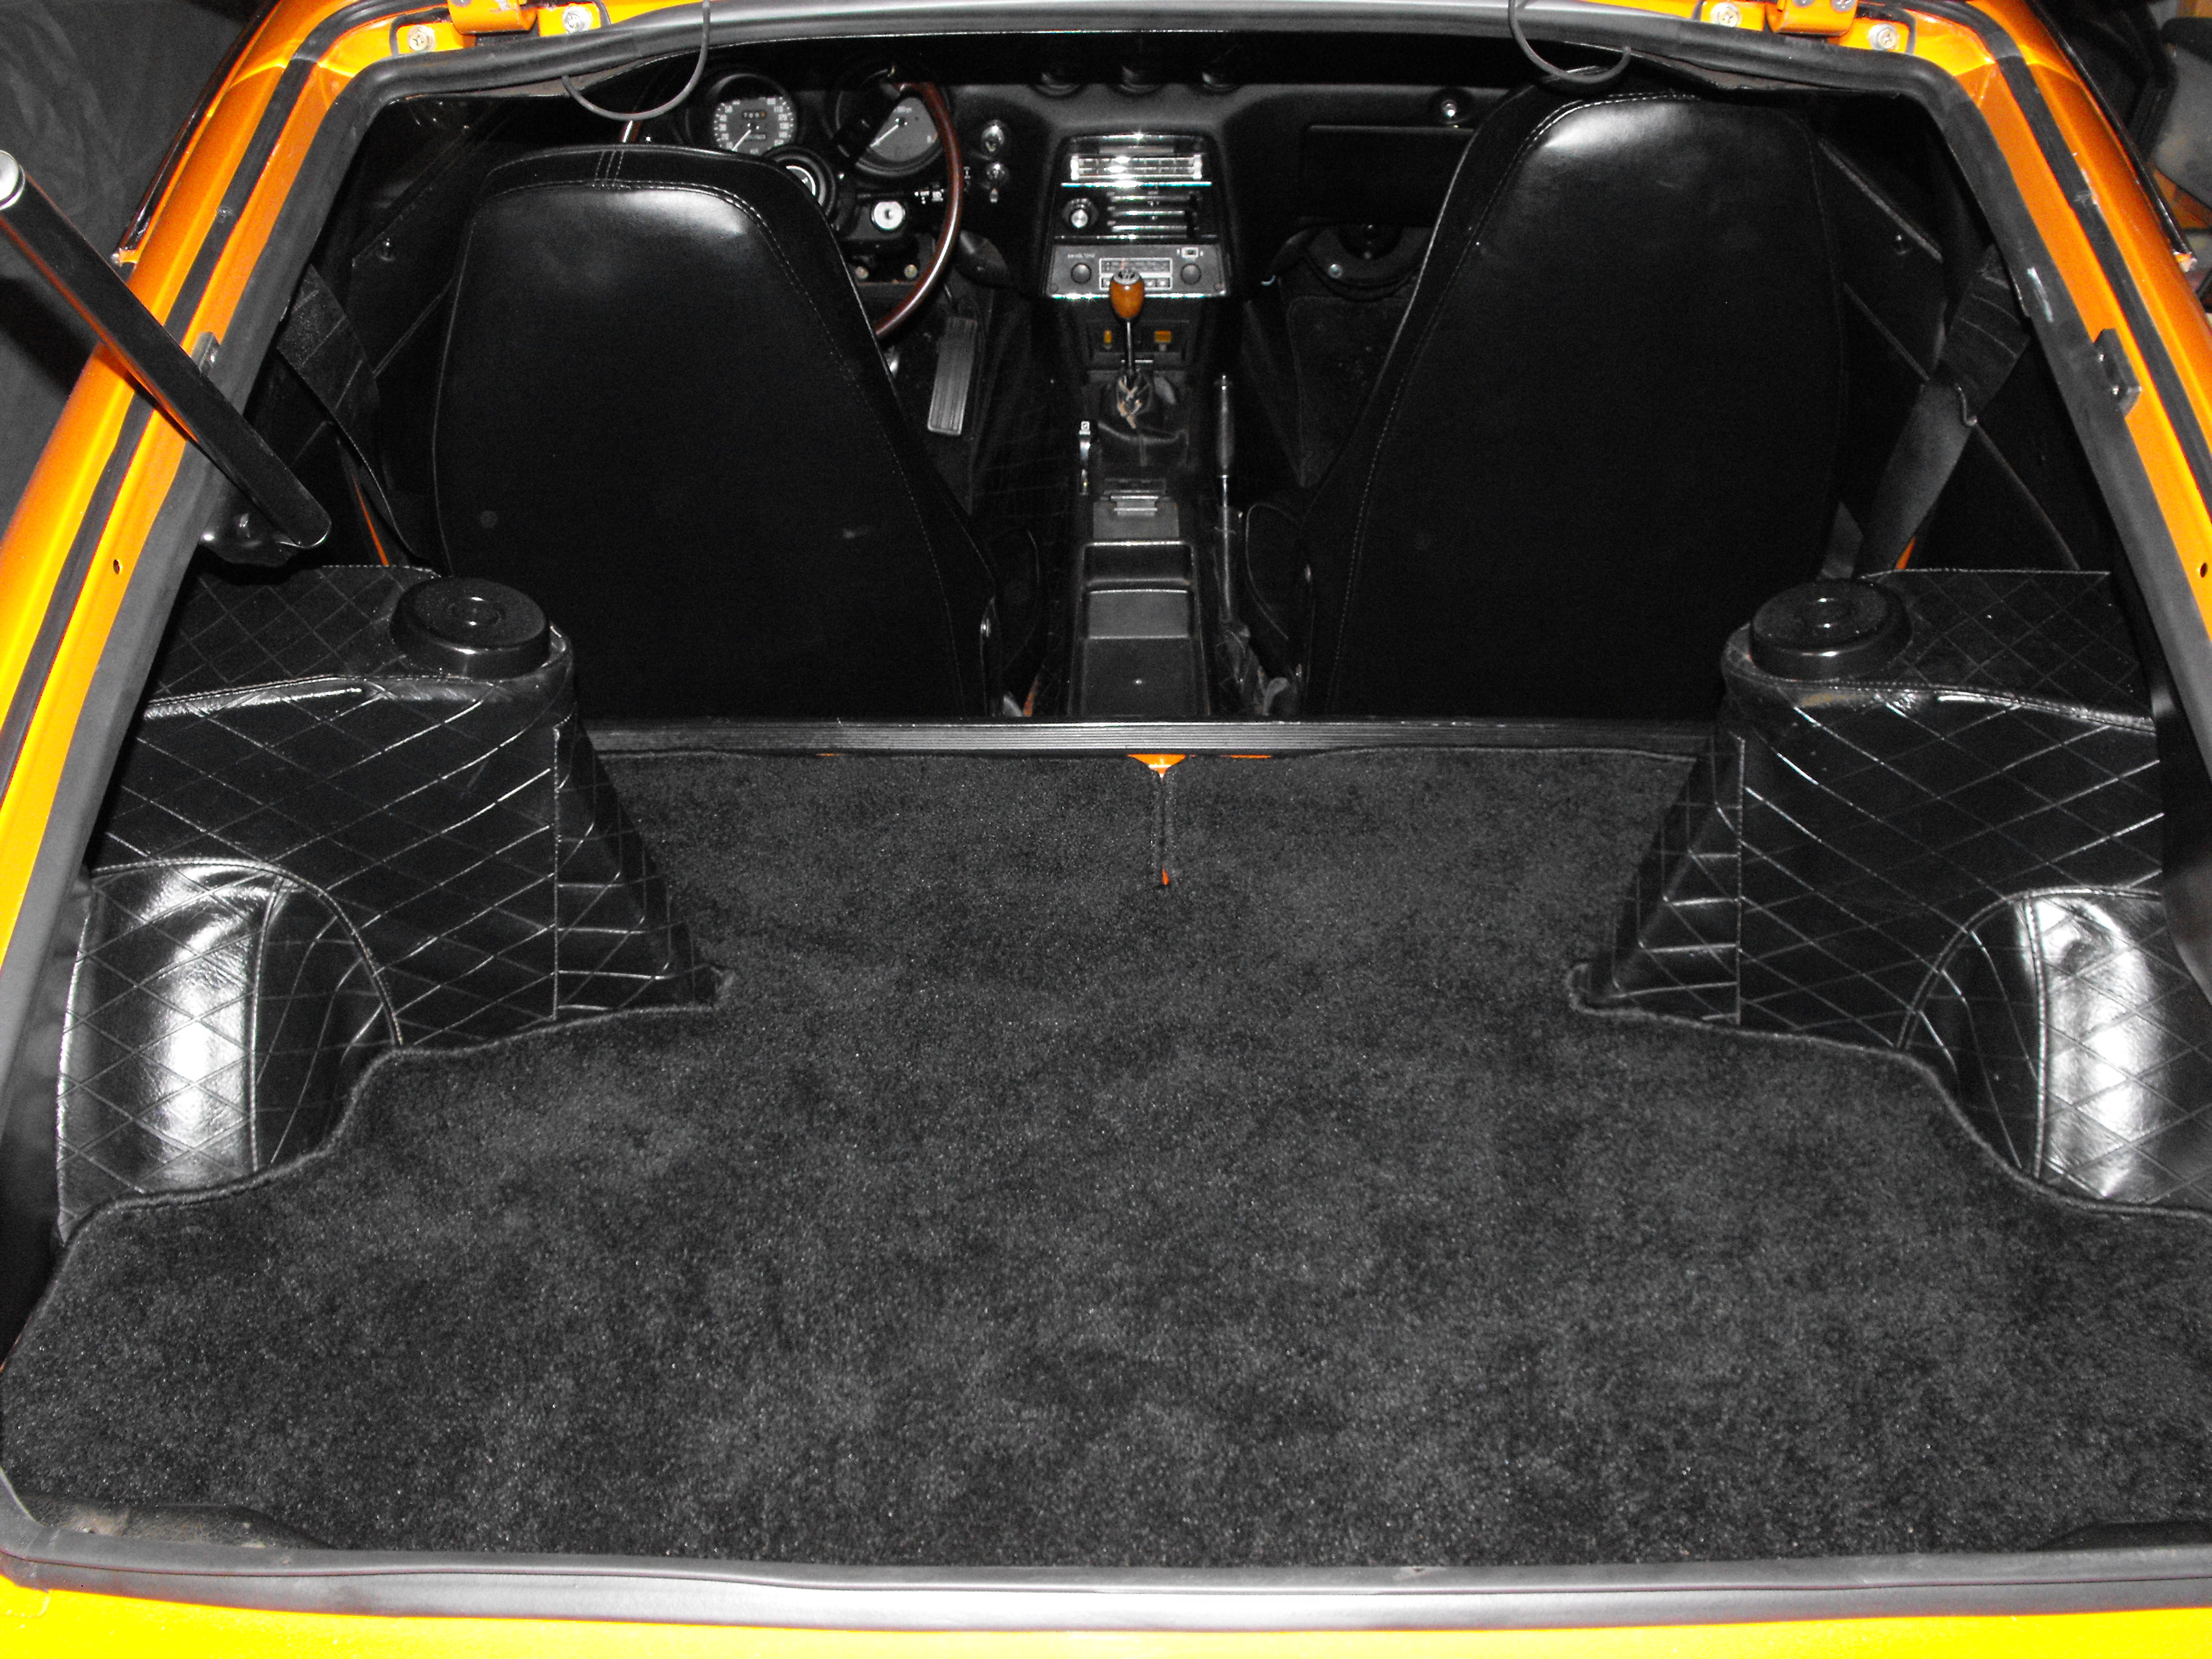
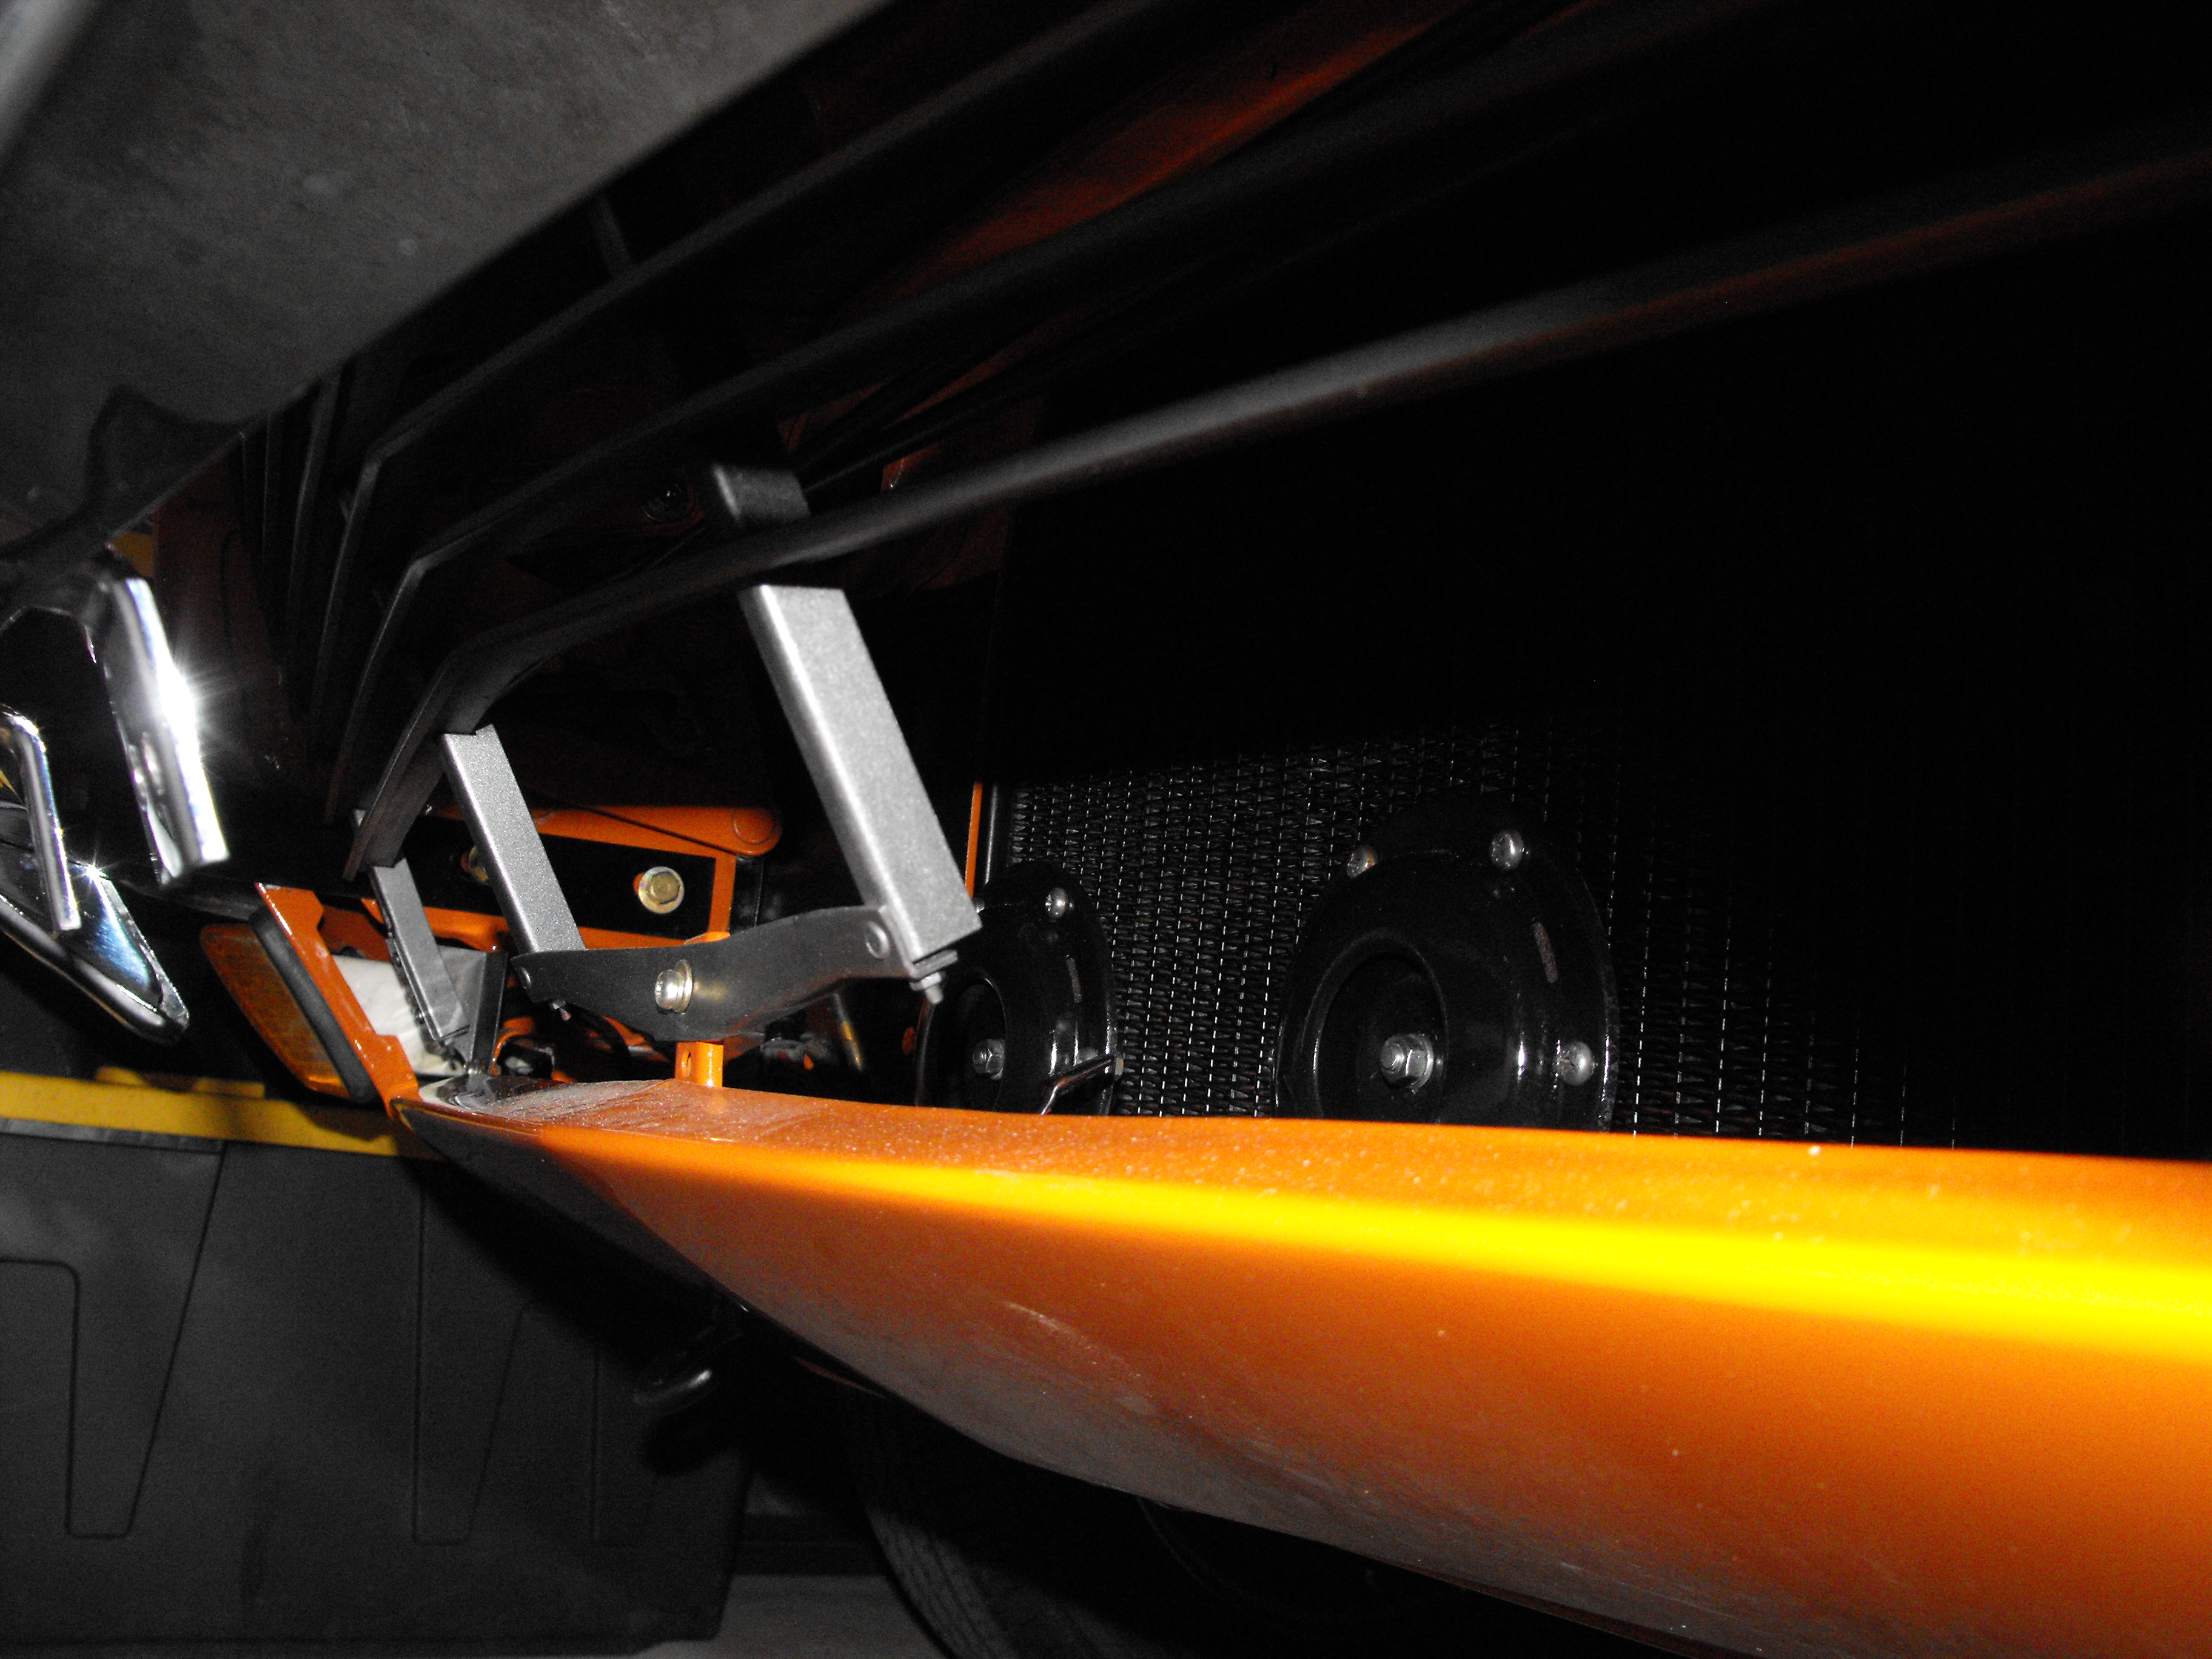
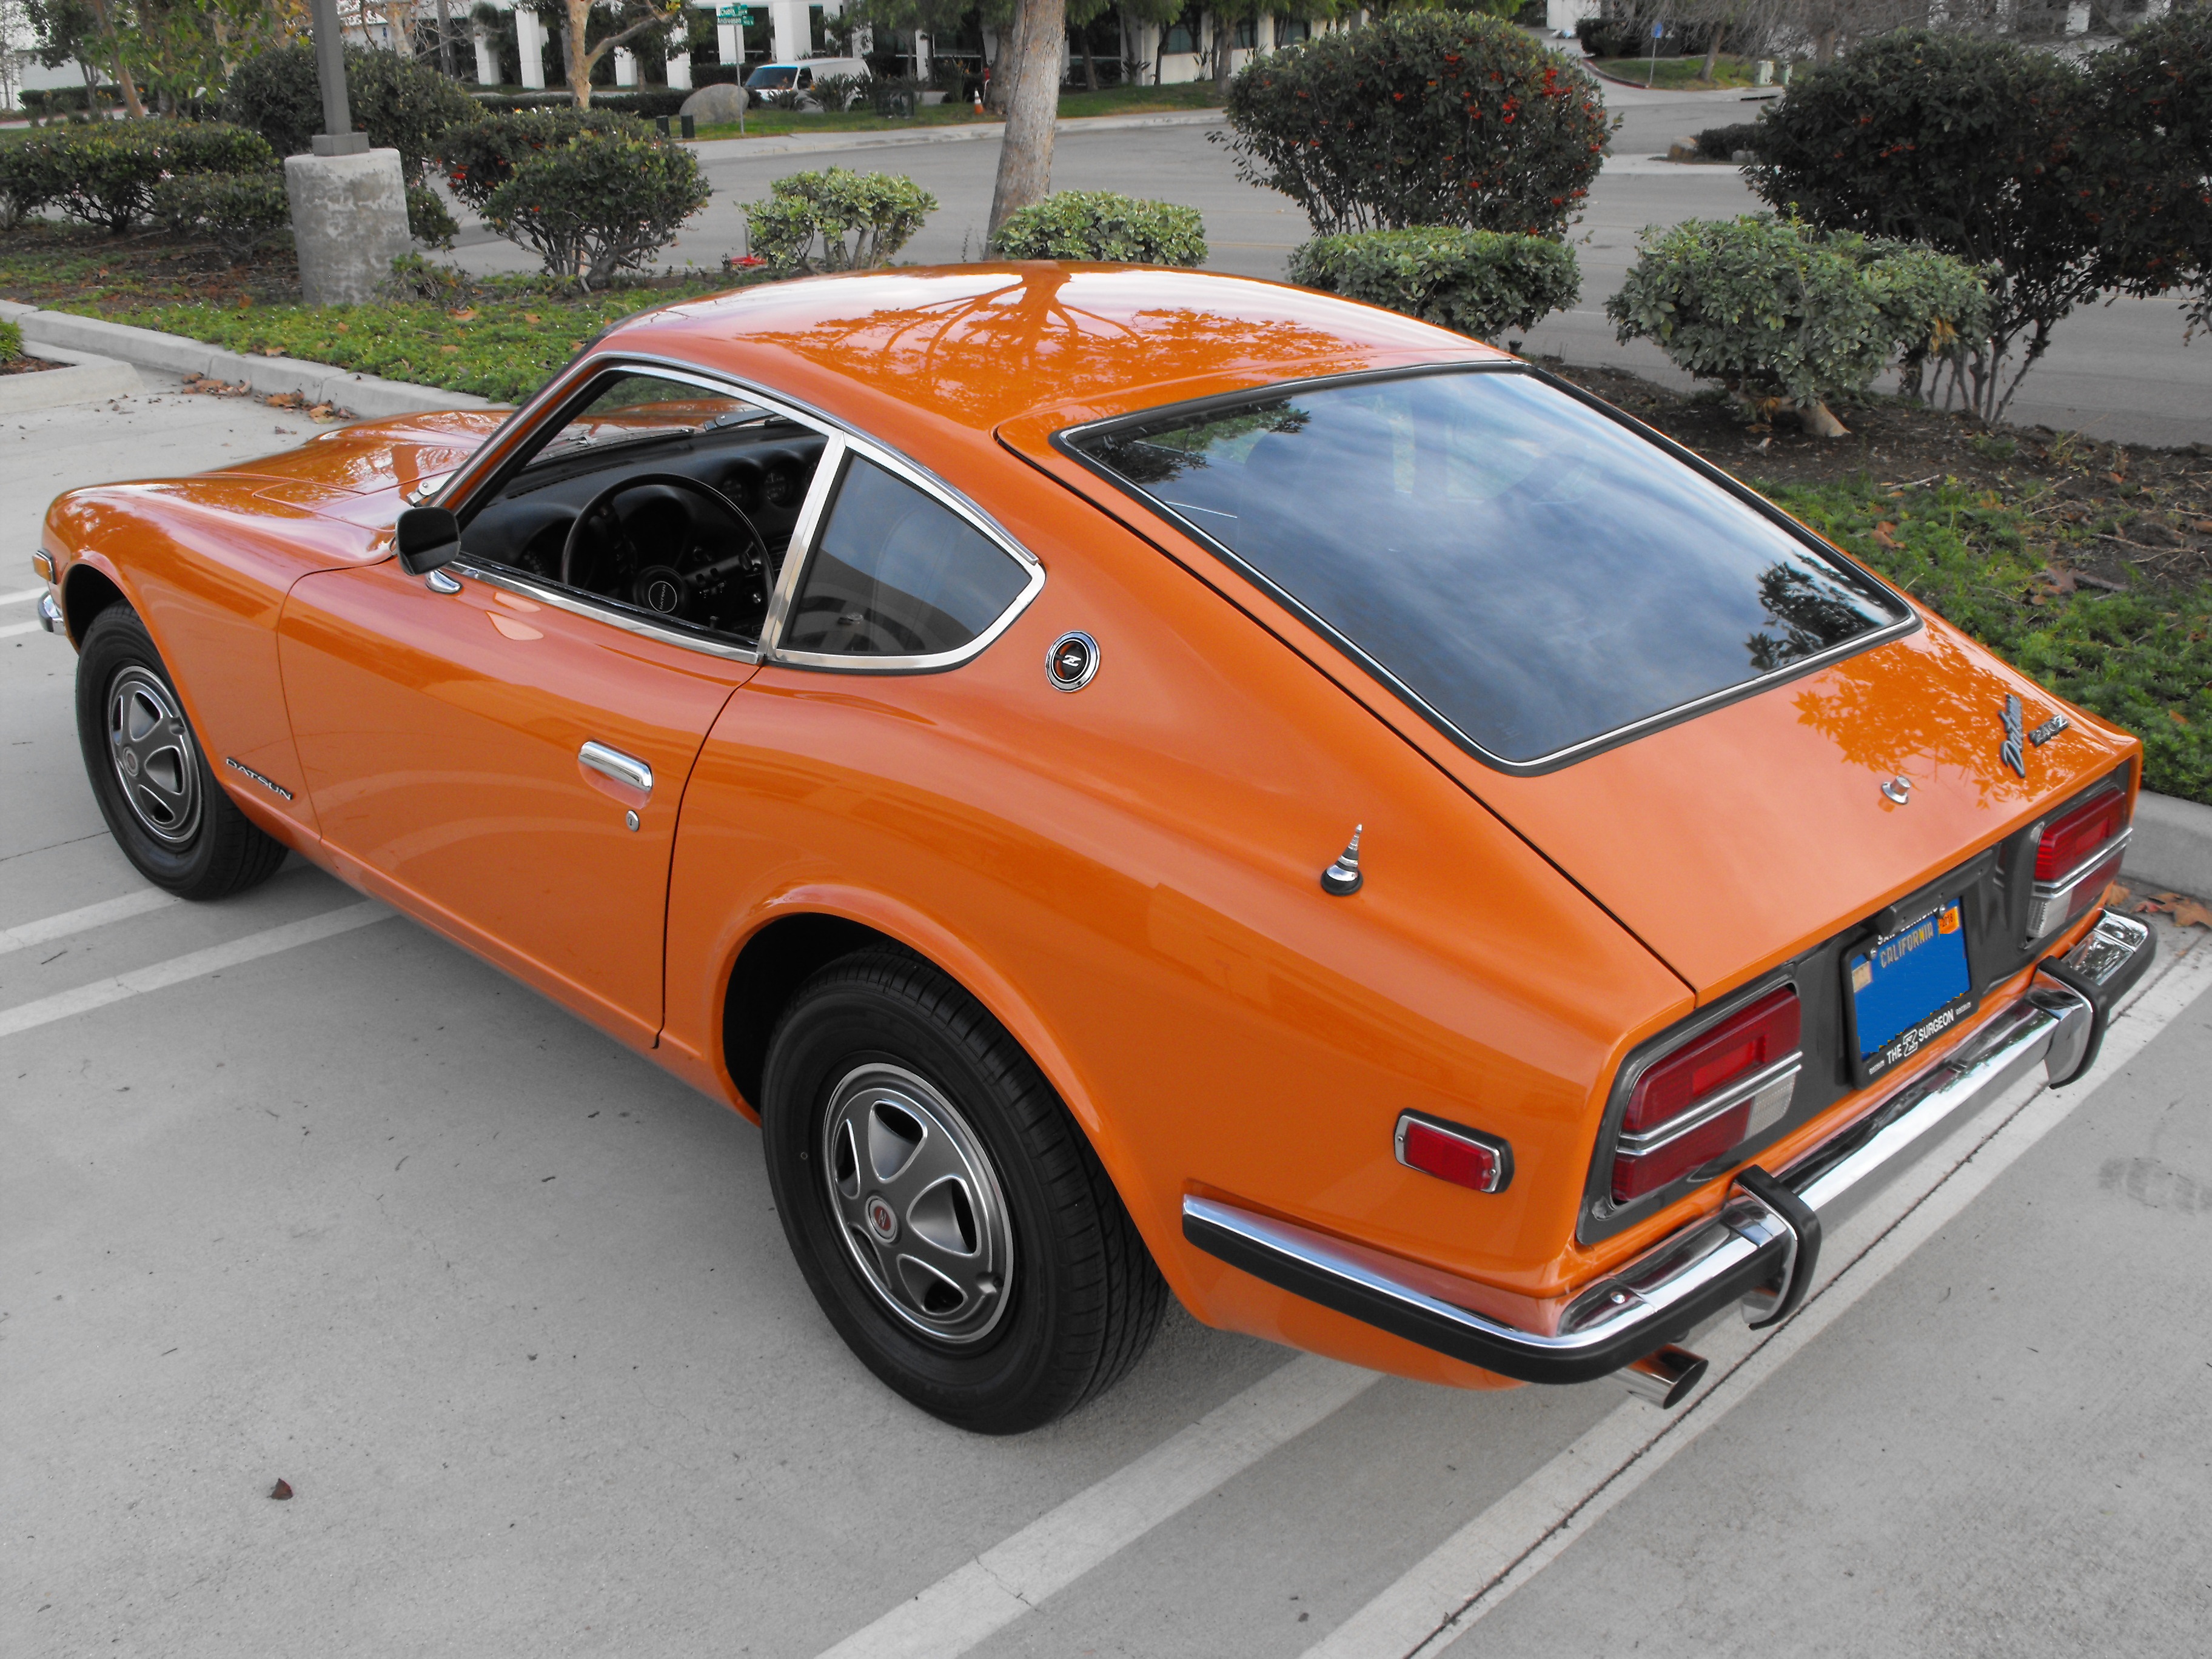
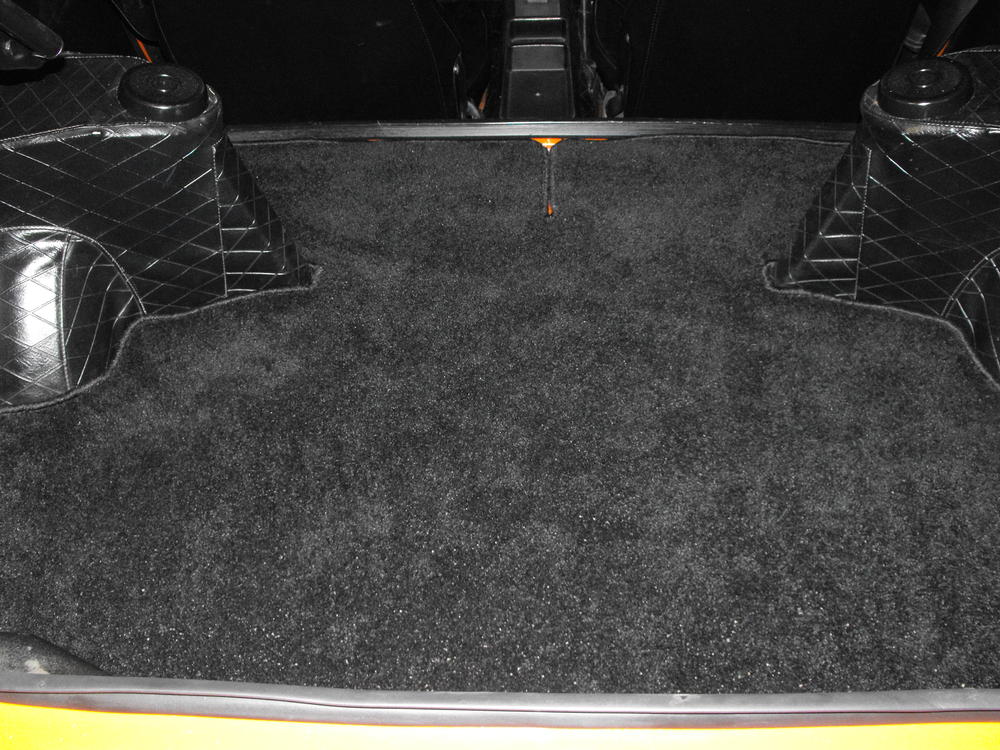
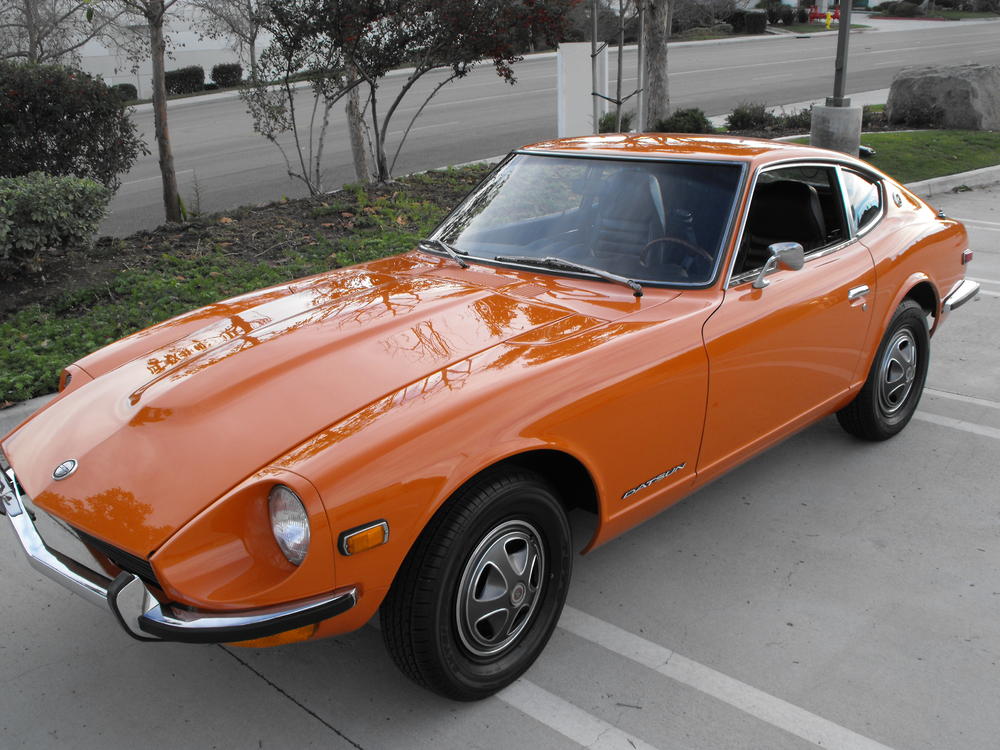
3 pointsWell, things are getting close to the end here. Still waiting on a few parts to come in and the revised center section of the exhaust to be completed then she will be about ready to go. Miguel came over today and did the final polish on the paint which actually looked pretty amazing before he even started. After about 6 hours of polishing with three different compounds and pads, the paint is absolutely incredible. Not a single scratch or swirl to be seen. There are a couple pics below, but they do not do the paint justice. I will have to wait for a nice sunny day and take some pics here to really show the quality of the paint job. While Miguel was doing the polishing, I painted the rear carpet which really looks great. I was a little skeptical of how it would look, but it really looks like new carpet. I should get the new luggage straps in from Jay in the next couple days to complete the back hatch area. It should look great once these are in. Also got the hatch plugs coming in as well. Got the horns refurbed and installed. Also put in the final fender screws and touched those up with paint to match.


 3 points
 -
2 pointsYes, this really was a tough choice. I talked with my paint guy at length about the two options. We went with the two stage in order to have a more durable finish and simpler touch-up if needed. We also wanted the paint to really shine and standout. Durability is also why most of the undercarriage is powdercoated, the underside is POR-15ed, and I put clear coat or matte coat clear over some parts (like aluminum). Otherwise, in 4 or 5 years the process needs to be repeated. Ideally, it would be nice to have the restoration look perfect for another 40-something years.2 points
-
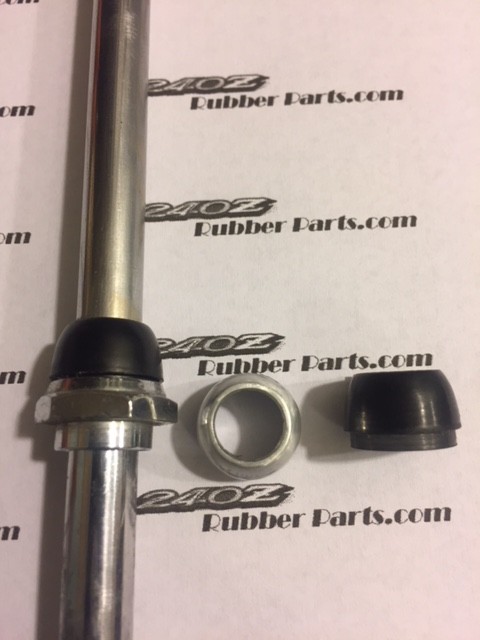
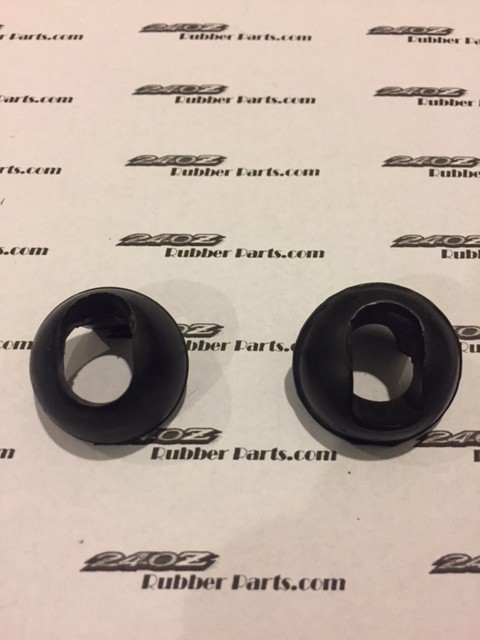
1 pointhere is what I have. The part on the right is the rubber part that goes on the lower part and should be inside the car. This is the part that my sample is not perfect but maybe this one is not so important since it is inside the car. The part on the left is the hard plastic part that goes on the outside. I have a near perfect sample of this and can do this one. I already have the antenna base seal available. http://www.240zrubberparts.com/apps/webstore/products/show/6517164 feed back welcome.
 1 point
 -
1 pointYou might just take a short try at getting the pin to move to see if it's actually stuck. Sometimes they slide right out. You could remove the locking pin and the end nuts then tap on the pin to see if it's jammed. Without removing tires, brakes, suspension, or anything else. Whether it moves or not, it also gives a chance to squirt some rust breaker in to the lock pin hole. My pins were stuck due to deformation of the locking pin hole, not rust. I used a rat tail file to knock the high spots down so the replacement pins would slide in easily.1 point
-
1 point@nix240z: Would be nice to get the rubber/plastic below that as well if available. Time takes its' toll on plastic and rubber.1 point
-
1 point@nix240z: Yes, I will pick up one as well. I would be hesitant to get a used one as I am sure the plastic is incredibly frail, like my current one. My current one is like eggshell, and is held together with super glue.1 point
-
1 pointNIX240z, looks good. Let me know when available or I can just pre-order if you prefer. JLP1 point
-
1 point@jonathanrussell Did your rebuilt proportioning valve work properly?1 point
-
I plan for on having a few dyno runs this spring/summer. I’ll circle back around once completed. Dave completed my build end of last year at 318 HP. It will be interesting to compare his dyno with a couple runs with horns and then through the airbox. The air box did choke it down some when I installed it. I did have yo open my air mix screws to regain my AFR setting at idle. I dig in s little deeper this summer with my settings Sent from my iPhone using Classic Zcar Club mobile1 point
-
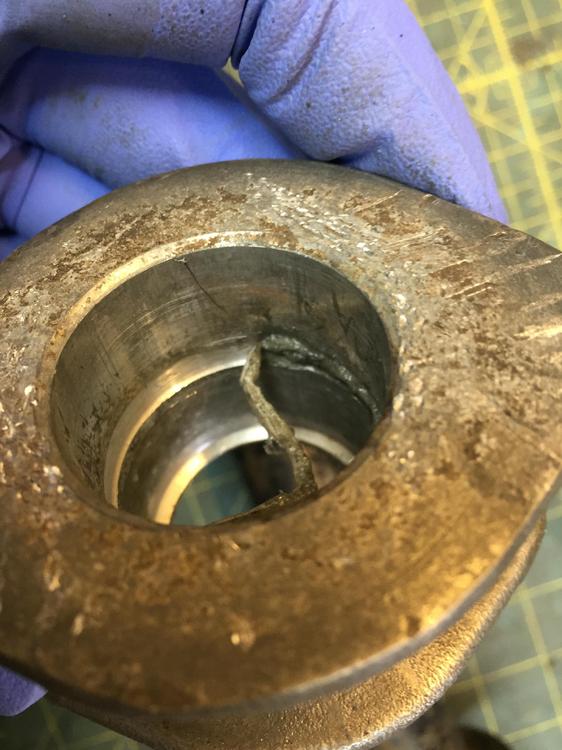
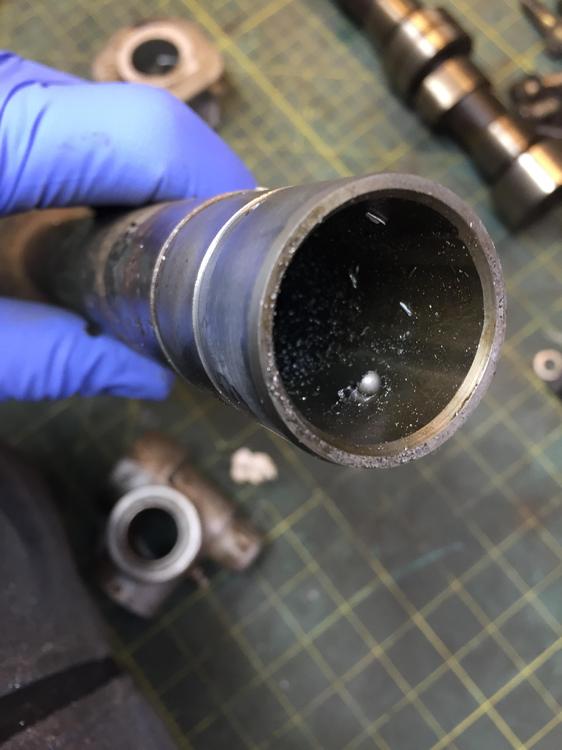
No such luck Mark, I survived. Stay put. I was repairing a broken bottom right corner of a L20B front cover. Welding (torch brasing actually) aluminum is fun. I had to build up new metal then file it back into shape. The busted out corner was long gone. PO had just put a large blob of RTV in the hole.... Sheesh Ok, I hacked it off just between the flange and the pinion housing. This is past where the end of the steel inner tube seats in the aluminum. Then I couldn't resist trying to separate the aluminum housing off of the steel tube. I drilled out the remaining metal in the two holes and heated the housing. Had the MAP torch out from doing the front cover repair. It came right off. A point of note here, as I was heating the aluminum housing to expand it, molten plastic stuff began boiling out of the two holes. Well after it came apart (easy, quite loose), it was apparent where that molten plastic came from. Both the steel tube and the inside of the housing have a groove, that was filled with that plastic stuff. Here is the picture with the remains of it in the groove after I picked at it. Here is the groove on the steel part. This leaves me a bit perplexed. I drilled through metal for sure in both holes to get to the ID. But to fill that groove with plastic, you would have to have the outer hole open to the OD and groove of the steel tube to fill it. So maybe the groove space is injection filled, then some metal is pressed in to the holes lock the two metal together. I think the plastic is a moisture seal between the two. I would have just used a dang o-ring.... The aluminum housing was not a tight fit onto the steel tube. I can tap it back on now that it's off with just a little effort. It would definitely rely on the pin/metal in those holes to prevent rotation. And here is the remains of the metal pin/plug after I drilled it out. So I suppose for Mark's Powder coating melted plastic, there may be a moisture path in or grease path out if the plastic filled groove is not full anymore. Just a little silicon at the housing/tube junction might prevent anything from going either way. No rotation prevention is likely comprimised though.
 1 point
 -
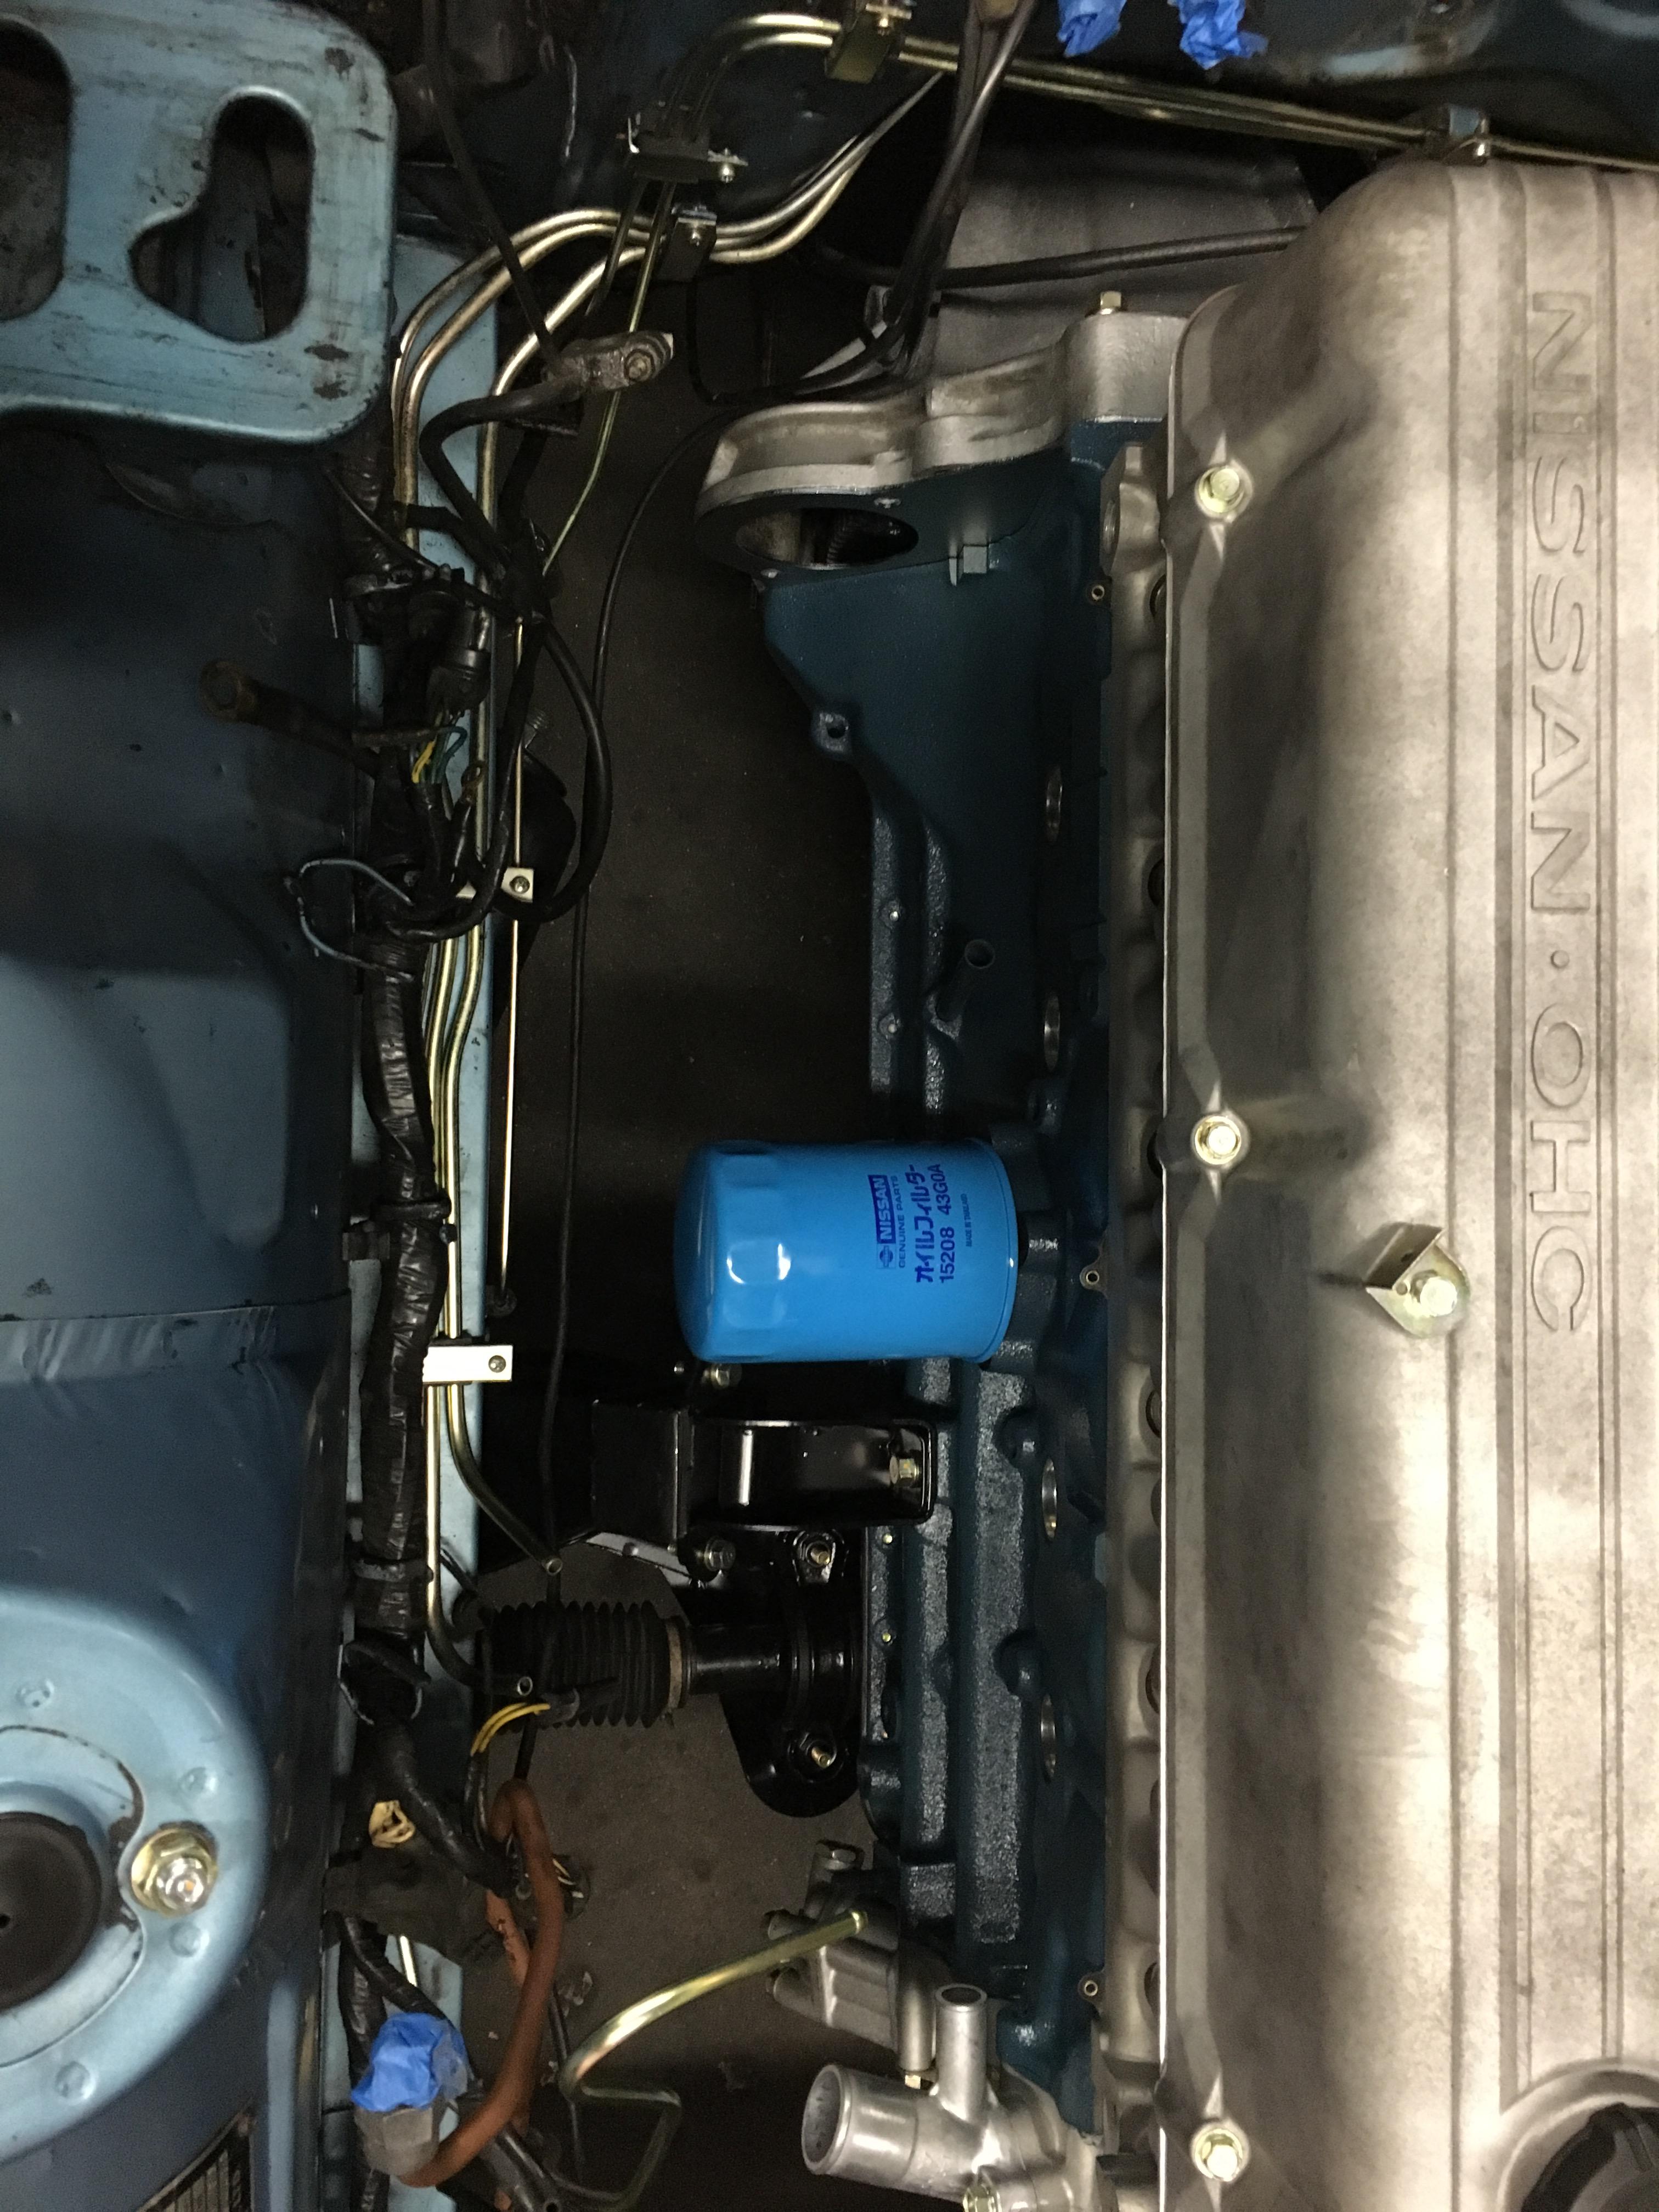
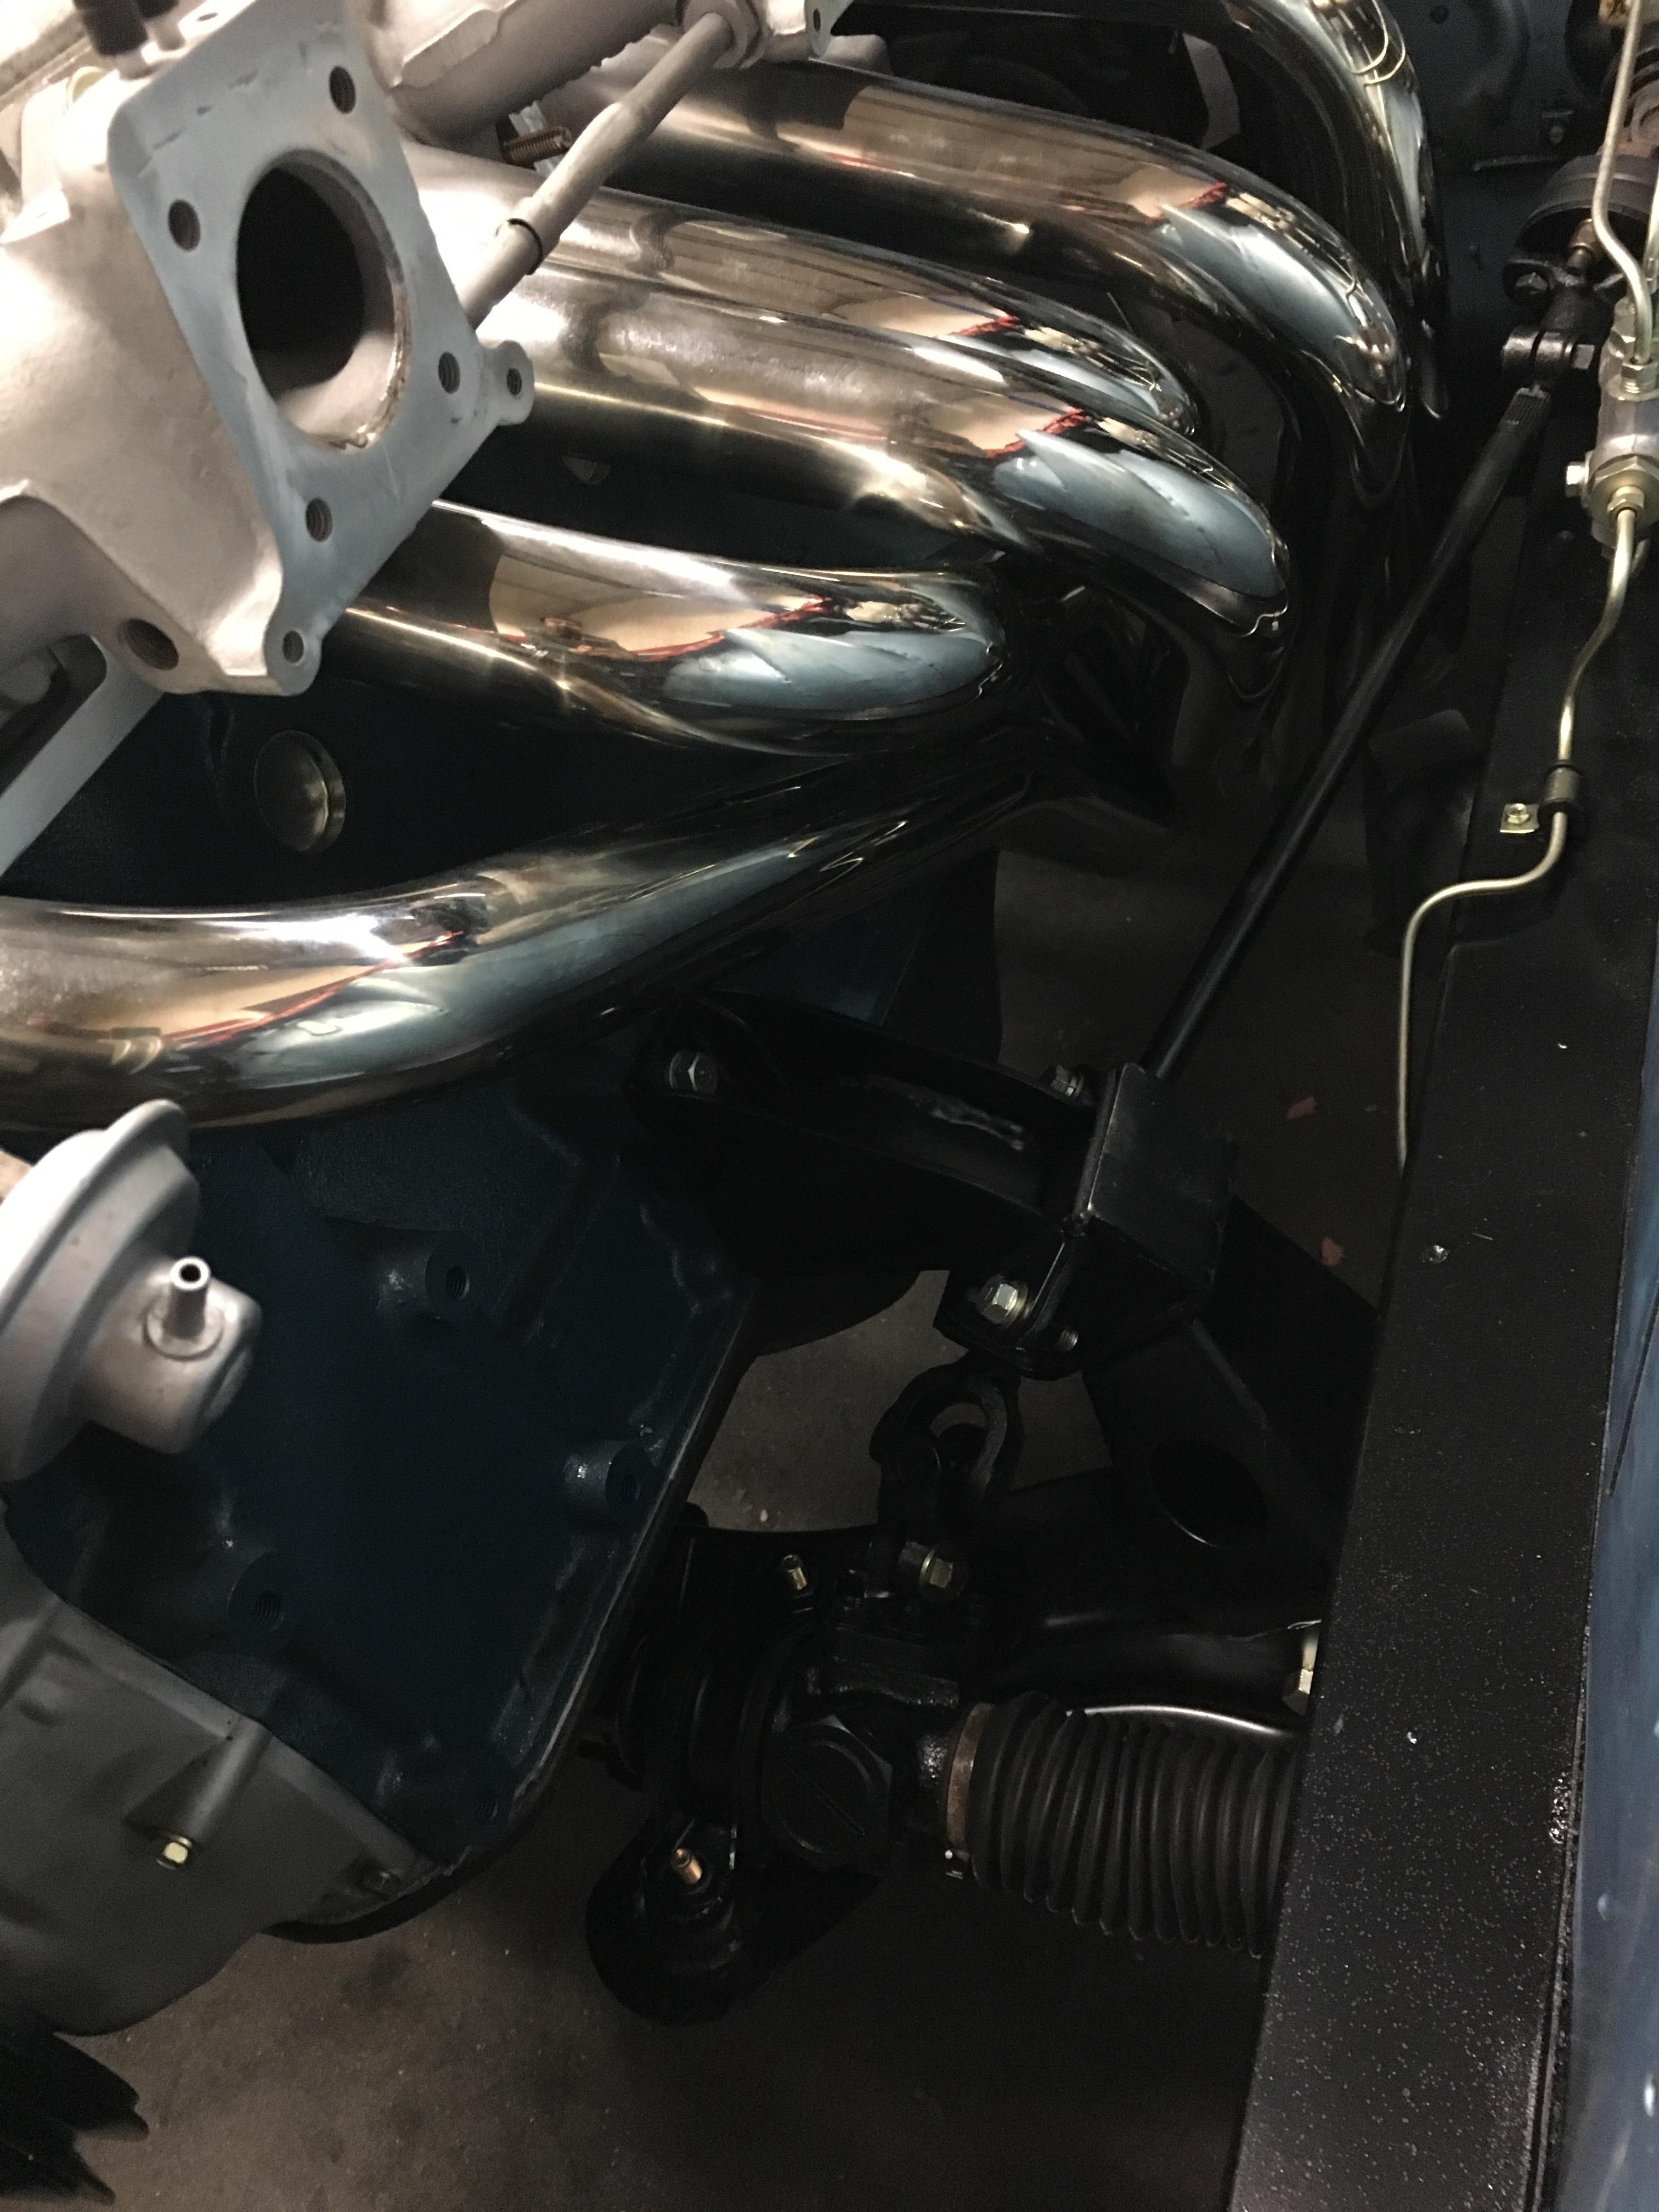
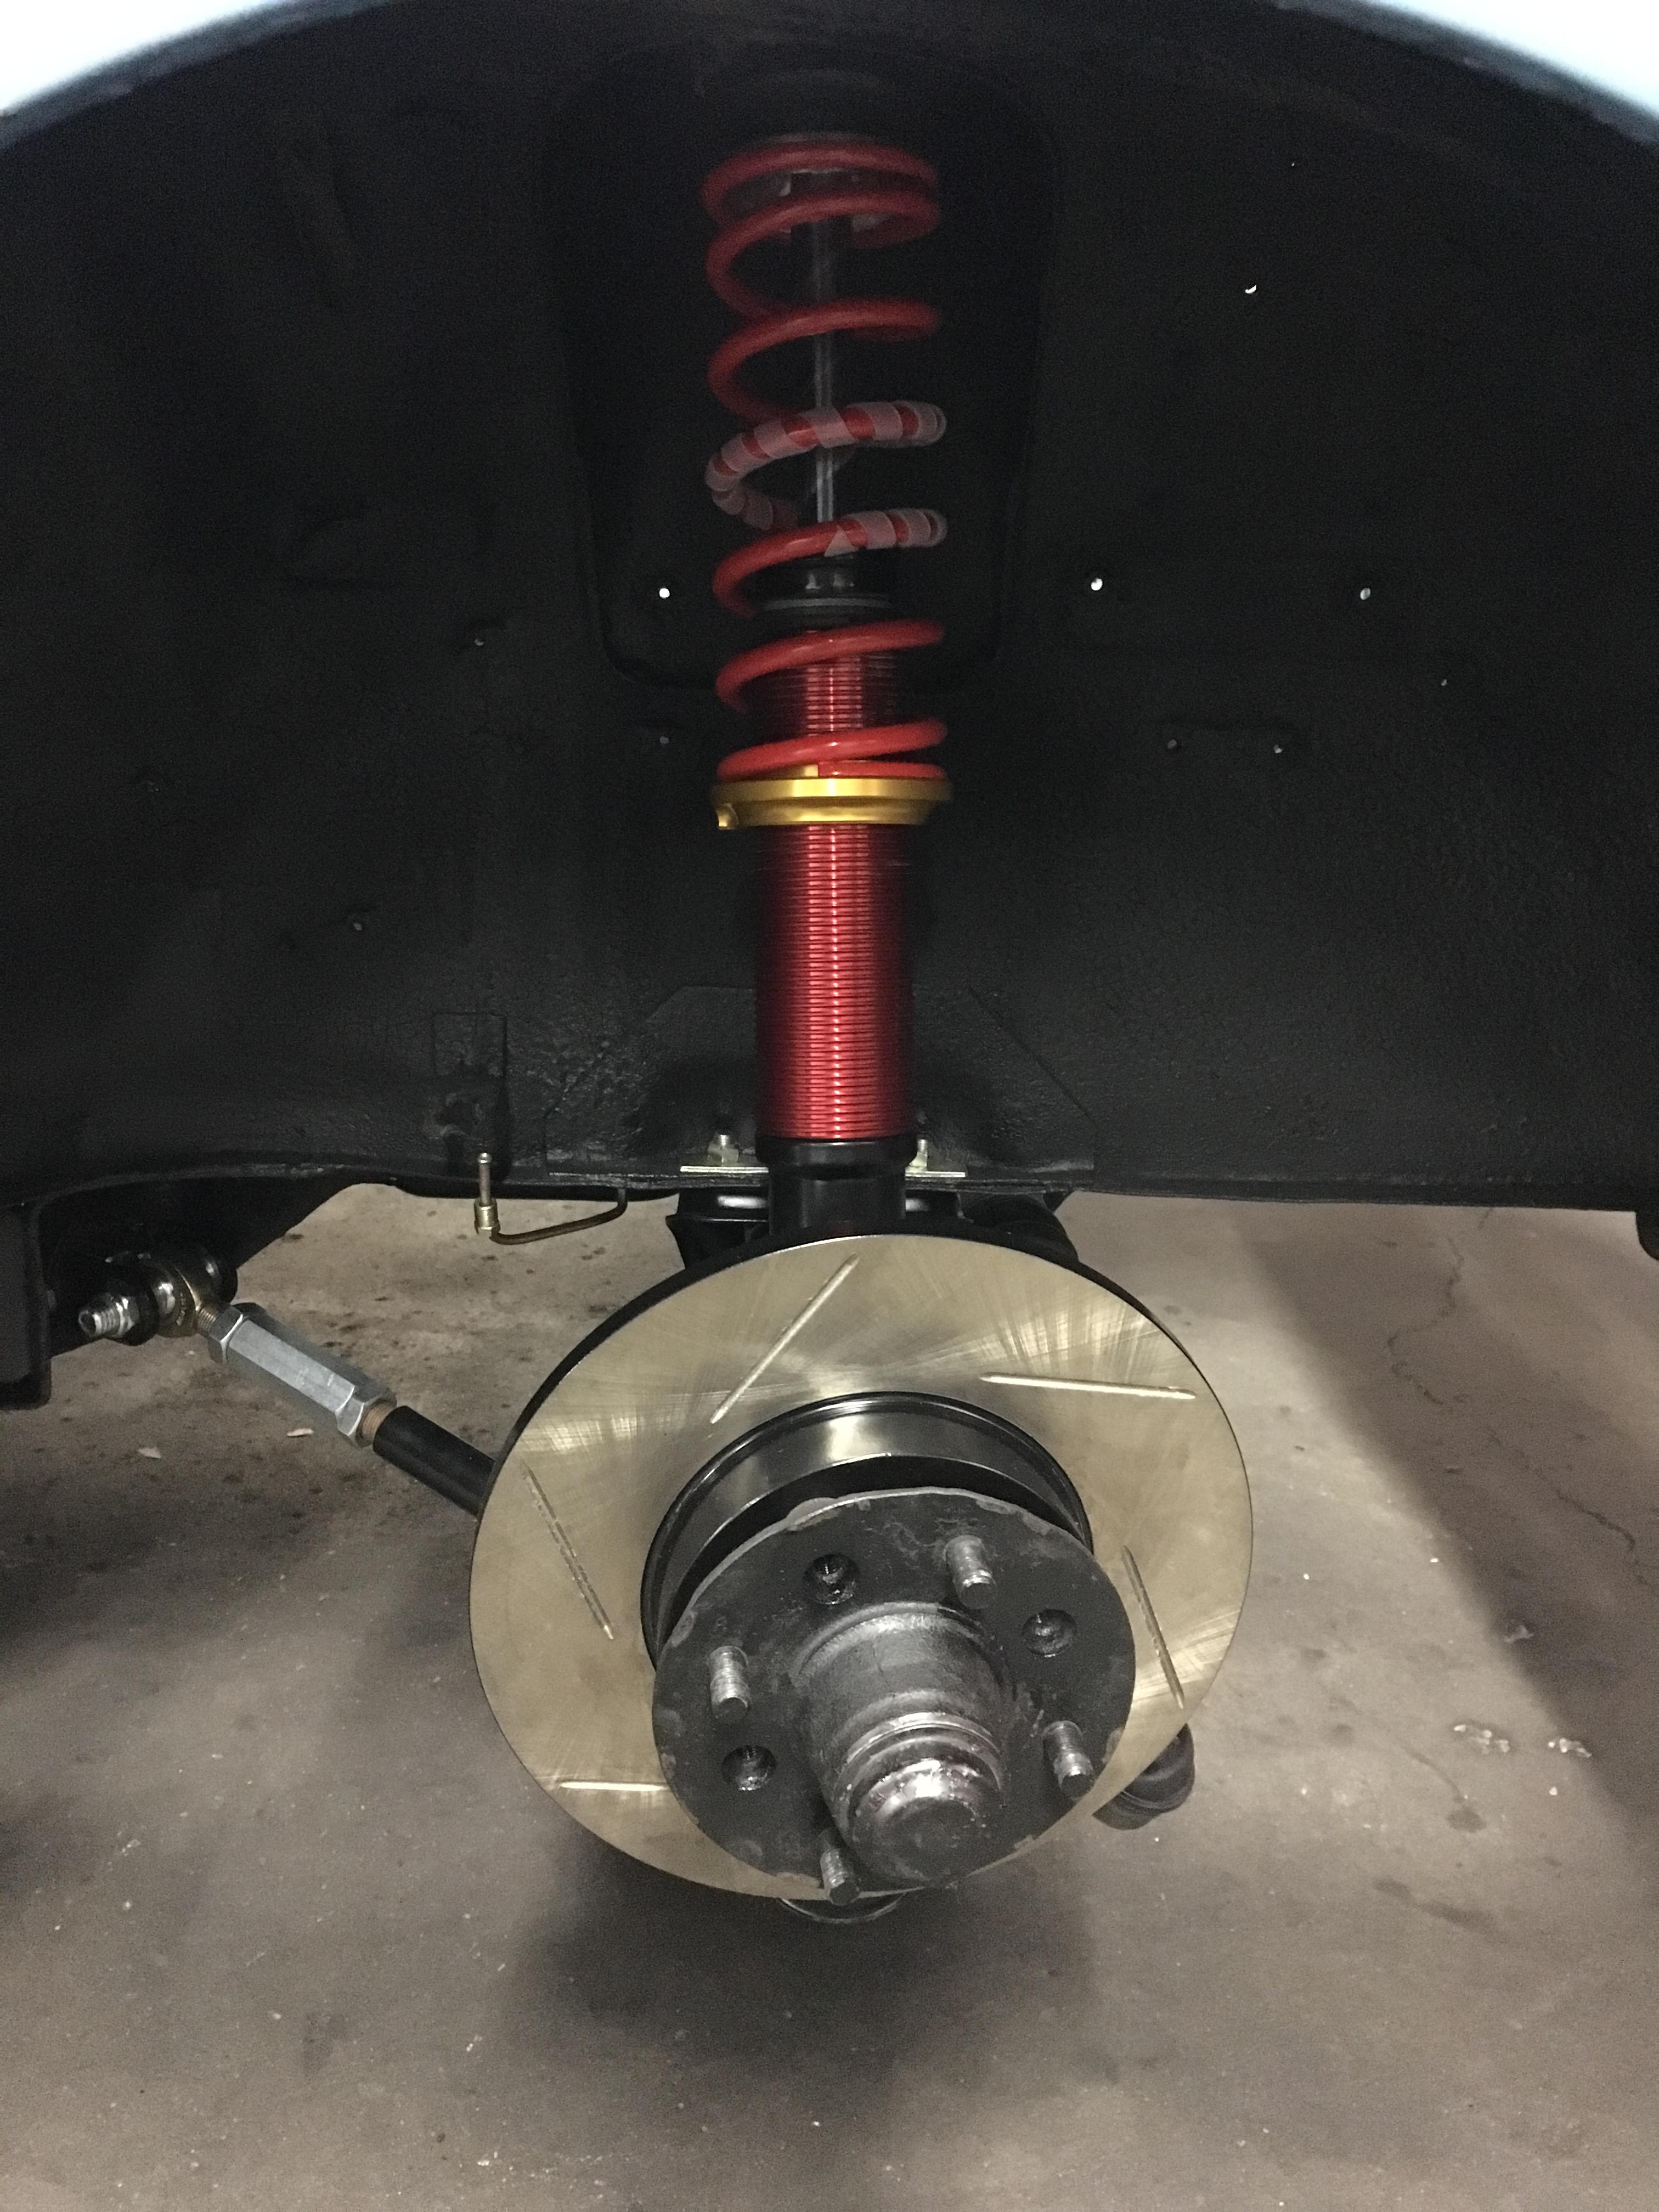
1 pointThanks siteunseen and esmit. Those comments do make a difference. I just received a couple photos from my mechanic and they are true teasers, but just look at them. The factory finish on the engine bay, the proper oil filter in the right position, the voluptuous header, the slots, the springs....I'm going to let the photos tell all. You tell me what you think. Ben


 1 point
 -
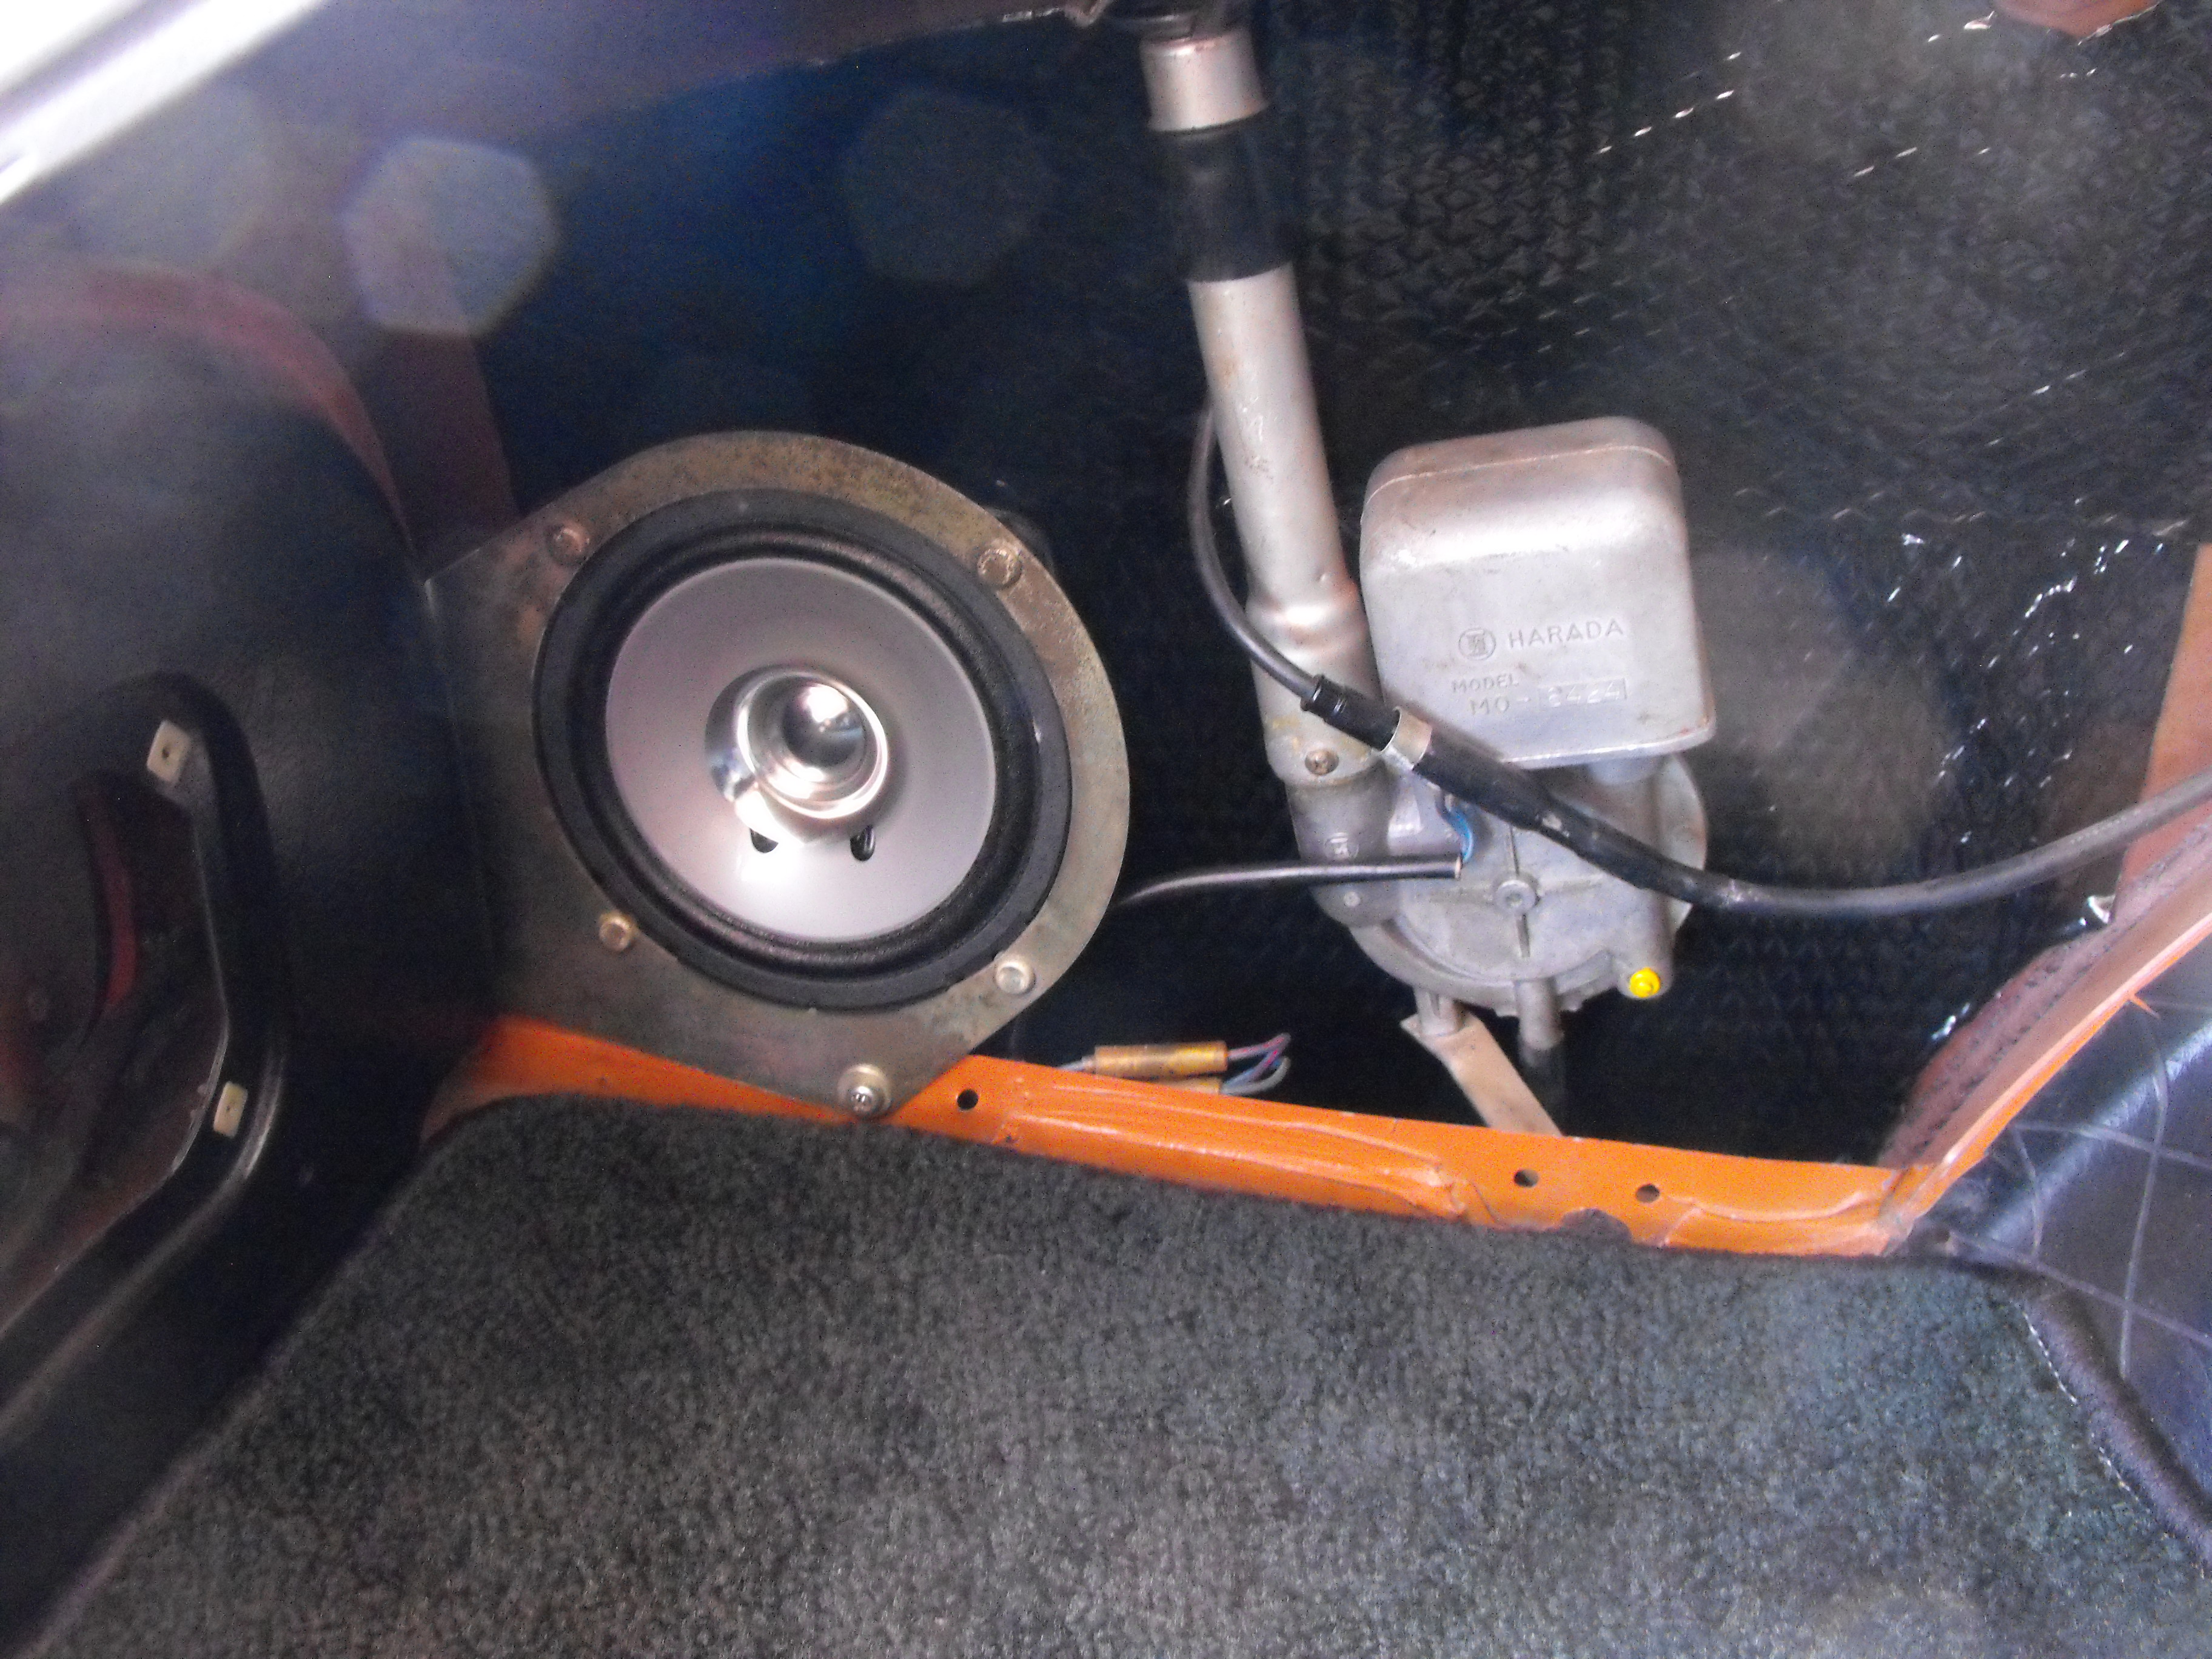
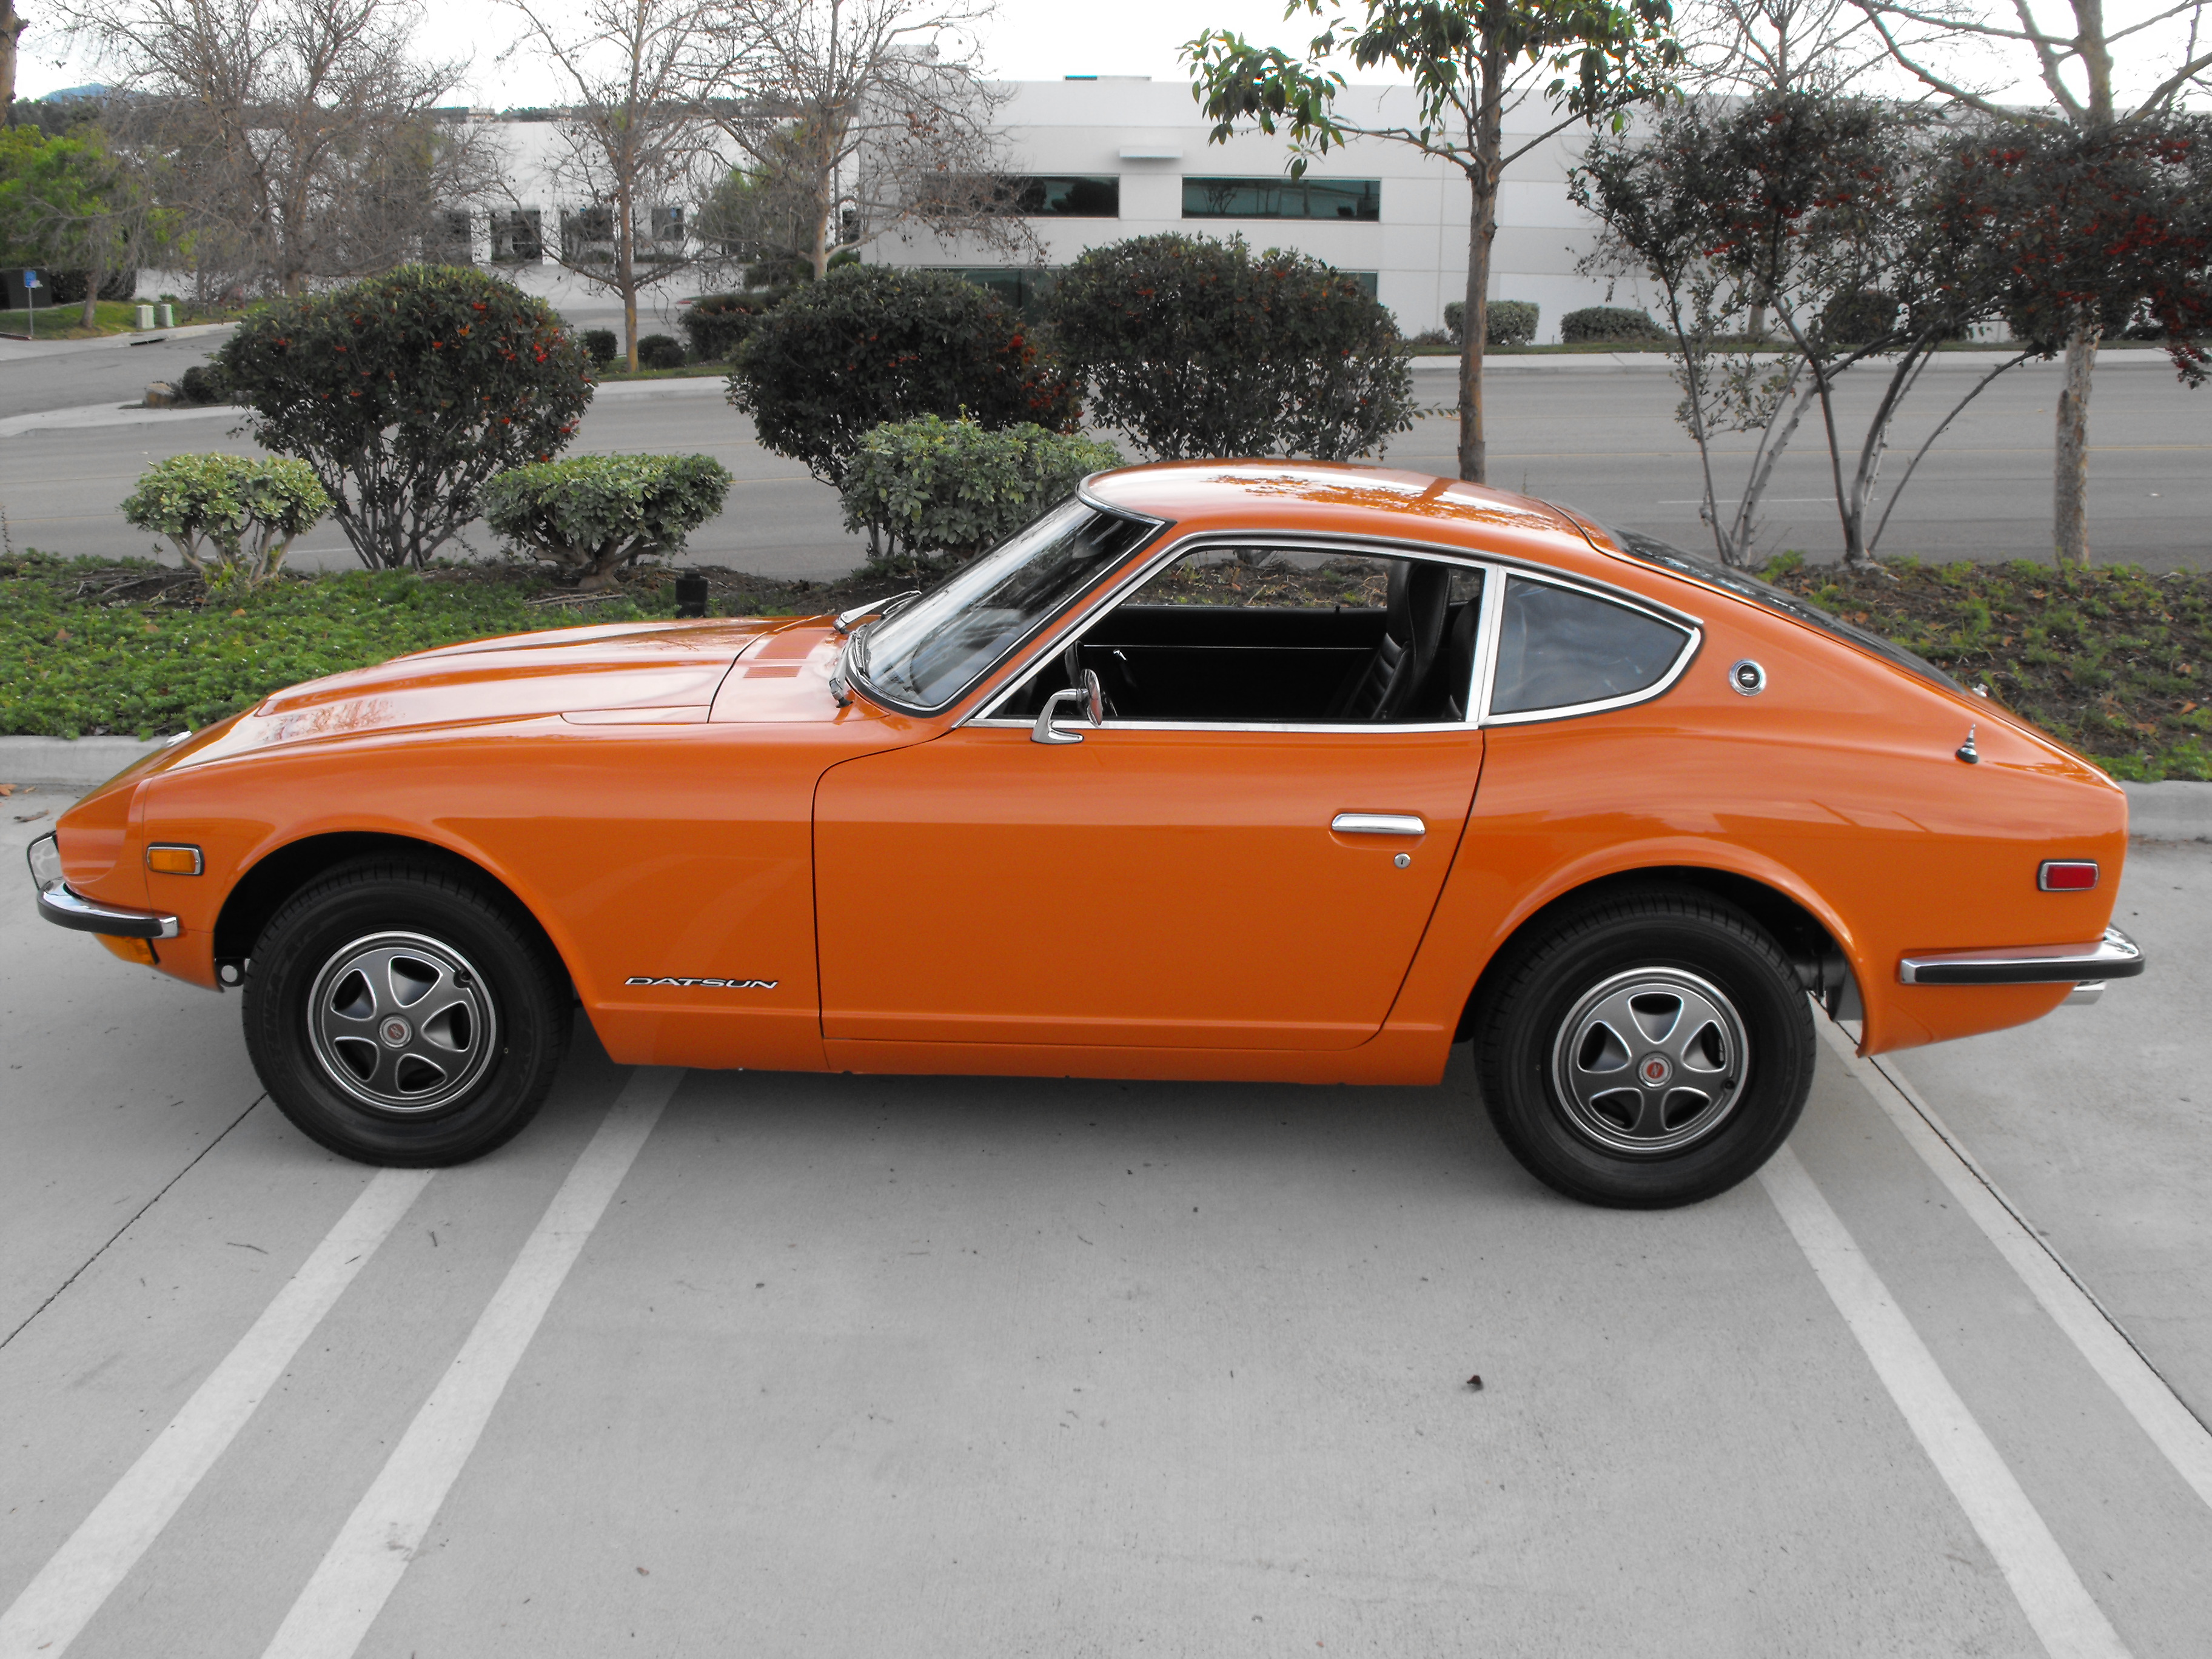
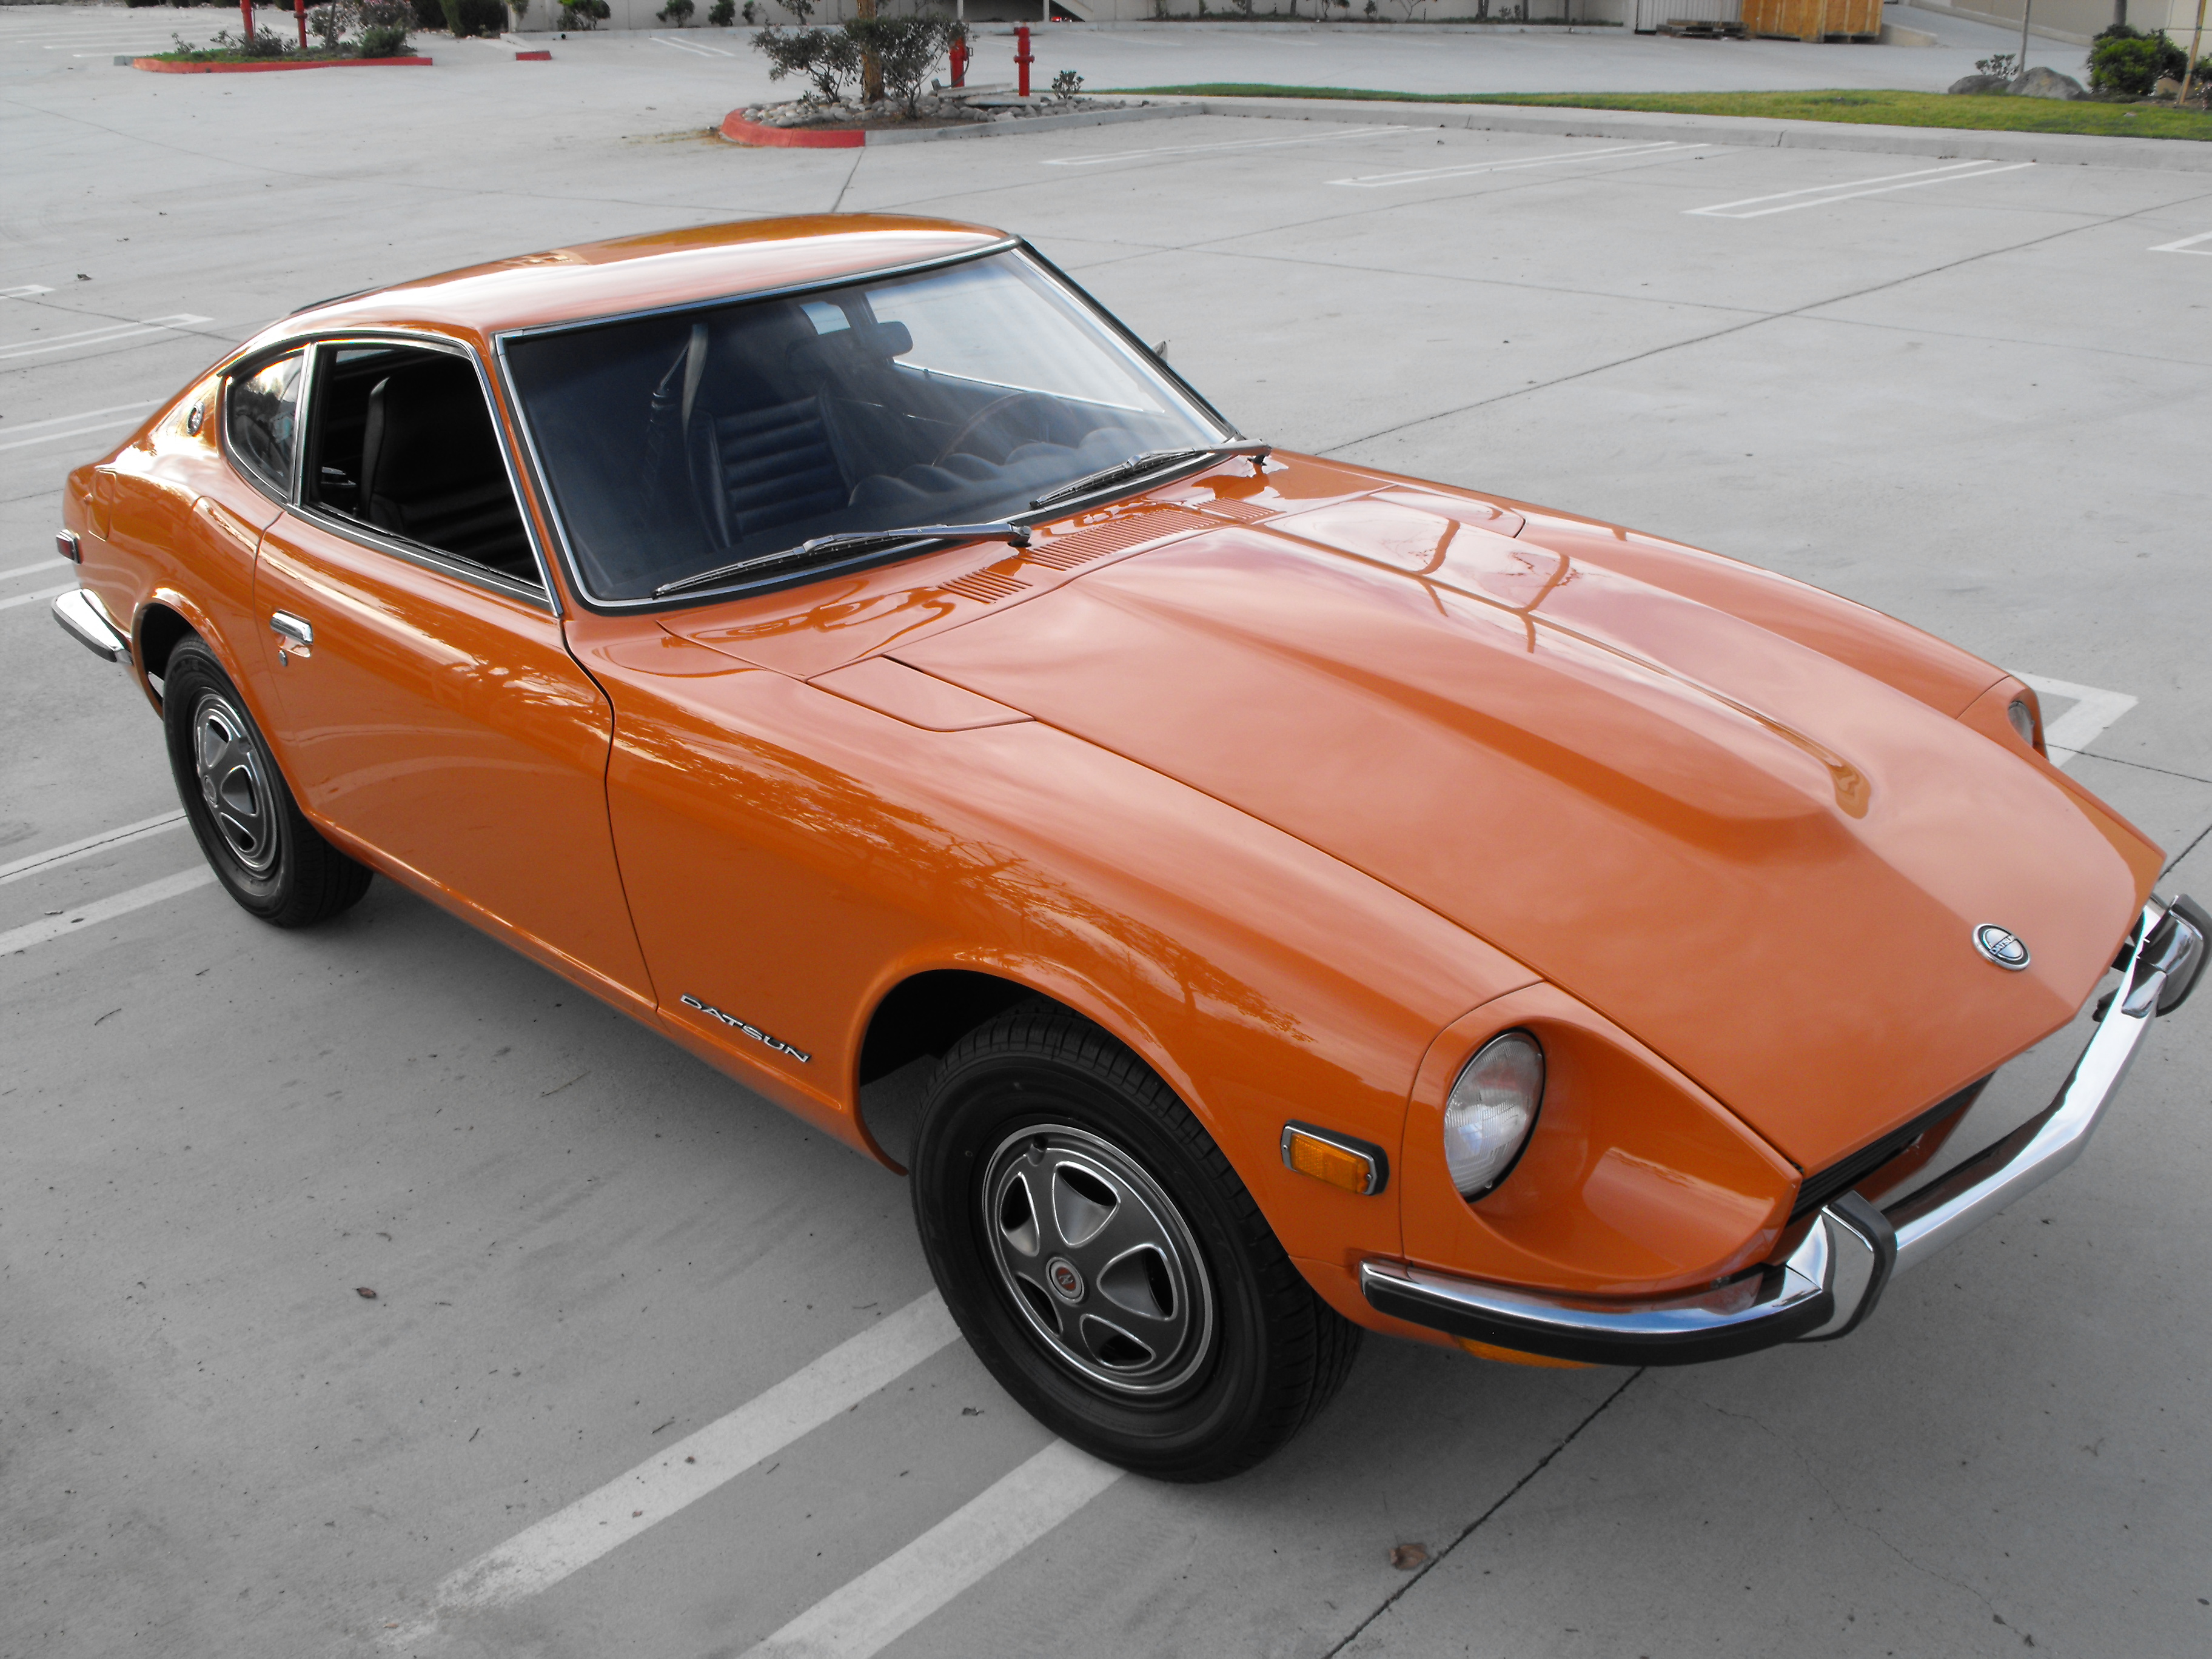
1 pointI finished the hubcaps and installed them. Also put in the new speaker. Took the car out for a small photo shoot. For some reason I thought the best conditions for photographs was with over cast skies, but I don't think that is the case here. Everything reflects off of the paint. Should have taken the photos when it was sunny..I guess. As you can tell, I am not really a skilled photographer. Anyway, here are a couple pics.


 1 point
 -
1 pointI too am where you are in many ways, children, wife, job (not my own business) but requires me being there. Like yourself the imagination keeps me going. I have often imagined rolling up at Spa Francorchamps or The Circuit De La Sarthe in mine with one of my sons. Stories like yours inspire me to keep forging ahead with mine although being able to afford ZCAR Garage is off the table for me. Good luck keep us updated.
 1 point