


Leaderboard
-
TheCrazySwede
Free Member4Points135Posts -
Captain Obvious
Free Member4Points10,081Posts -
zKars
 Subscriber
 3Points3,770Posts
 -
Pop's Z
Free Member2Points740Posts


Popular Content
Showing content with the highest reputation on 07/20/2016 in Posts
-
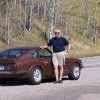
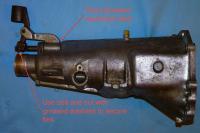
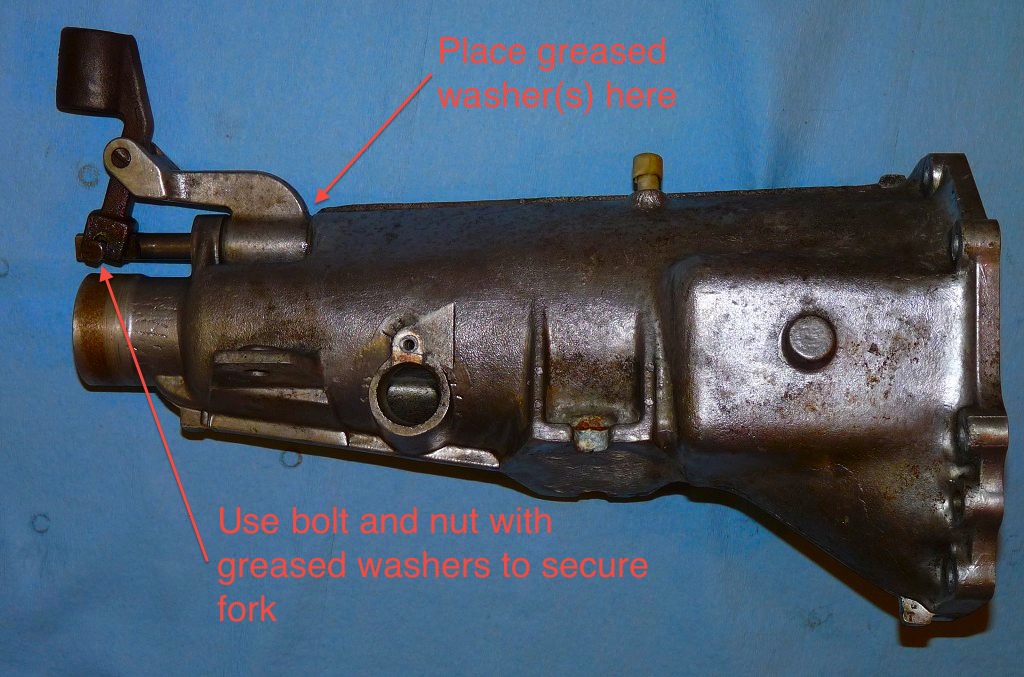
4 points4 pointsThe best (?) part of this is that there WILL be a two legged grand "daughter" coming in November too! It will be a toss up which one I'll let in the shop the most, at least for a couple years. At least the child will bring the right wrench when I ask for it...2 pointshttps://www.silverstoneauctions.com/1973-datsun-240z-works-rally-replica http://petrolicious.com/is-this-works-replica-datsun-z-rally-car-your-gravel-slinging-dream1 pointAs mentioned in my earlier threads, I recently purchased a '71 240Z with shifting issues (F4W71A 4-speed manual transmission). The transmission would not reliably shift into 3rd and the lever was so loose you had no idea what gear you were in or shifting into. Getting into reverse required slamming the lever to the right against the plastic console before pulling back. My plan was to replace the clutch disc and pressure plate and to rebuild the transmission. From the beginning I planned to drop it myself, but I called around for quotes to rebuild at shops, in part because I have never done this before. The lowest I found was about $1000 if I dropped it myself and brought it in; many shops said they couldn't/wouldn't work on something this old. I'm not doing a factory restoration so this was something I could not afford. Besides, I want to do as much work myself as possible. Let me again state that I had never rebuilt a transmission; I had never even removed one before. Due to this fact I had some trepidation about taking on this project. However, I did a lot of research before starting. AutoZone has the basic steps outlined on their website for free (requires registration on their site). The Haynes manual for the Z cars also explains the procedure and has illustrative diagrams and pictures. There's also this thread here on the forum: http://www.classiczcars.com/forums/showthread.php?42884-FS4W71A-Transmission-Assembly-Photos-%28Jan-1971-240z%29 The final clincher for me was speaking with my grandfather. He's always tinkered with cars; his first car was a 40's Packard and he's been working on them ever since. He told me that the first time he opened a transmission he was terrified, but it turned out that it actually wasn't that bad. For parts I started with the transmission rebuild kit available from AutoZone, with synchronizers. However, I must warn anyone who reads this in the future: THIS KIT IS WORTHLESS! While the synchronizers are correct, an extra fifth is included and only one of the six bearings (why? this transmission only has four) is the correct size. The single gasket included doesn't fit anywhere, but the needle bearing for the input shaft is correct. The oil seals are also correct. AutoZone was kind enough to let me keep the correct parts while issuing a refund, but I still needed the missing parts. I needed the bell housing and adapter plate gaskets, a new clutch fork dust boot (mine was hard and so it crumbled during removal) and a transmission breather (I snapped mine when trying to remove the rear extension housing). All of these parts are interchangeable with the Roadster 5-speed transmission, so I ordered them from datsunparts.com The applicable part numbers on the site are 2194 (clutch fork dust boot), 2203 (breather), and (2481) gaskets. Dean was very helpful, verified that the Roadster parts would work, and expedited my order. I would highly recommend his site and will be ordering from him again. I ordered the missing bearings by their Timken part numbers from Amazon. This was a good solution because the bearings are carried by Amazon and are thus Amazon Prime-eligible (free 2-day shipping or cheap next-day). I also wanted to replace the spring that retains the clutch fork on its ball pivot since it was worn, and it's a good idea to replace the output shaft lock tab washer whenever you remove it. These two parts were ordered from ZSpecialties. They aren't listed on their site, but if you call them up they can get a hold of them. In this manner I managed to cobble together a transmission rebuild kit. If I was to do this again I would purchase a kit from a business specializing in Z cars. While my methods may have resulted in lower monetary cost there was much hassle and wasted time. The above-listed sources detail the rebuild process step-by-step. I'll just name a few pointers for anyone in a similar situation who finds this thread in the future: - You'll need two floor jacks. A transmission jack or a large adapter plate might be helpful, but I didn't have or use either. A floor jack instead of a jack stand under the engine block will allow you to tilt the engine to make mating easier. - If the bell housing doesn't come off easily check if you missed any bolts. I missed two on my first pass; they were completely covered in friction material dust, grease, and road grime. - While everything is apart you'll want to clean it. Any bearings to be reused should be cleaned only in clean gasoline. I cleaned other interior parts and surfaces with gasoline and brake parts cleaner. My wife scrubbed the casing exterior with steel wool pot scrubbers (isn't she great?). Any surface that came in contact with water I wiped down with alcohol to ensure no moisture remained. - The adapter plate needs to be secure in order to drive out and install the shafts. While a bench-mounted vise would be easiest, I don't have one. Instead, I screwed the adapter plate to a piece of 2x4 through its bolt holes and then clamped the wood to the edge of my workbench. - Take apart the gear and shaft assembly over a container. There are a number of easily-lost parts: three detent balls and springs held in by plugs, four detent balls between the shift rods in the adapter plate, a ball under the speedometer worm gear, and a ball under the thrust washer adjacent to 1st gear. Placing these parts in labelled baggies would be wise. - Test the shifting performance of the transmission repeatedly at the various stages of re-assembly and installation. You'd hate to get it in the car only to discover a synchronizer assembly had dislodged. - The clutch pressure plate fits on the flywheel in a specific orientation. There are three dowels on the flywheel; each dowel mates to a specific hole on the plate. If the plate doesn't press on easily, rotate the plate and try again. This wasn't mentioned in any of the instructions or the clutch kit. - Before re-installing the transmission you can make a few modifications to tighten up the shifter. You can insert a greased washer next to the shifter bracket on the striker rod, and use a bolt and nut assembly with greased washers to secure the fork to the striker rod. (see attachment, original image credits to Blue's thread linked above) - It may be helpful to have an assistant hold the transmission by the shifter bracket from the cabin through the cutout in the tunnel; this will assist in getting the right tilt to mate the transmission to the engine. - The transmission should slide in easily. If not, drop the transmission, loosen the pressure plate bolts, and recenter the clutch disc with the shaft centering tool. - While re-installing the clutch slave cylinder check the dust boot on the piston and rod for cracks and tears. New slave cylinders are only $20 on Amazon. Remember to tighten up the rod so there's no play in the clutch fork. - The A-series transmission can't use the brass bushings commonly referenced to improve shifter feel. Instead, you need machined conical bushings to go in the bracket. ZSpecialties sells the appropriate bushings; I'm sure others do too. - There are two easy ways to refill the transmission (use synthetic 90-weight gear oil) without any sort of pumping device. Many stores sell a valve and tubing assembly that connects directly to the oil bottle. My wife held the bottle in the engine compartment while I directed the tubing into the fill hole. Had this not worked I also purchased a length of aquarium tubing in order to fill from the side. The transmission is now back in the car. I hit 3rd gear every time and the shifter is much tighter (some play will always exist as a result of the "monkey motion" assembly). To anyone wondering whether they can do this on their own, I would say go for it. While there were a few tense moments I learned a lot, had genuine fun in this project, and can claim something few people have done. Next weekend's project: rebuild the carburetors with a ZTherapy kit.
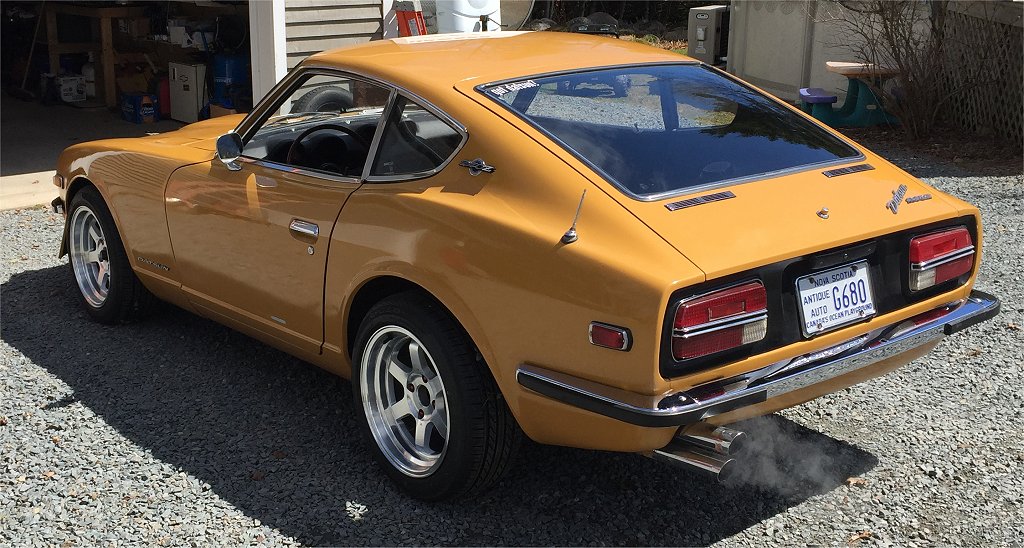
 1 pointI have sort of stayed out of this, but anyway. I don't think the question is "silly". If I owned #26 I would do all I could before I gave up and watched her burn on the side of the road (I am not trying to be insulting, I just don't like the idea of not trying), but that is sort of my personality. I have had fires in cars that were easily fought with a small fire extinguisher. I think a lot depends on what caused the fire,and what is feeding the fire. Is there an electric fuel pump, is it still running? Like SteveJ I have seen electrical fires that would be easy to deal with, versus a race car with a fuel or oil fire that pumps a lot of combustibles. Just my opinion but if the welding gloves help and they're not in the way take'em, if not, don't. We routinely use them in our fireplace and pick up glowing pieces of wood to adjust the fire. Easy on , easy off, still faster than waiting on first responders...1 pointAdvanced the cam gear to position 2. It does run better. The first thing I noticed was that the engine fired before i could even take my hand off the key!1 pointLooks to me like the question should be quantified by a few conditions. If you are driving the car, what would you do in case of fire? I believe the answer was to step away and call 911 unless you can get to it from the radiator area with a dry chem extinguisher. If you are working on the car, hood open, what would you do? In this case you should always have an extinguisher nearby so you can put out the flames. I like the idea of a fire suppression if you're really worried about it. But, rather than investing your money into something like this, why don't you spend more money on updating your engine? I have a boat, and there are many rules when it comes to fire protection with the Coast Guard. A boat fire is a serious thing, but, mostly because you can never tell what is going on inside your engine room until it's too late. In this case they recommend (but do not require) an automatic suppression system. They do require at least 1 or 2 extinguishers on board and even 3 if you have a big enough boat. The biggest concern is maintenance, which can never be ignored if you want to pass inspection. Lastly, I also think there's something to be said about the difference between smoke and fire, right? I realize the old saying is true "where there's smoke, there's fire", but, in the case of smoke, should you open your hood (with your extinguisher in hand) to investigate? Ooops, I forgot to answer the topic of this thread about gloves. I think it's a good idea to have a set of leather gloves handy in the car at all times, for many different tasks. You can get a 3 pack at Costco for around 20 bucks. I wouldn't chance it with a set of fitted maintenance gloves unless you want to have plastic melted to your skin. In any case, the level of fire is going to be the conditional element. Who has time to slap on a pair of gloves when there's a fire? If they are sitting next to the extinguisher, possibly. However, they would have to be something you can put on fast only after you pull the extinguisher pin.1 pointFor closure, here's some fresh pics of the tension rod bushings showing how the bushings should be installed. Thicker rubber sides outwards, and the washers concave in pushing towards the rubber. Smaller support washers on first and last: Here's how it should look if you're doing half-n-half with rubber and poly. Poly in the front, rubber in the back: And here's a shot of mine on the car:1 point1 pointYes, it's a recent purchase. I just bought a pair about a month ago. The photo is wrong, but the parts are right. Buy AC Delco P/N 45G25036 {#88913234} and you will receive the kit in my picture, regardless of what is in the pics on other websites. That's why it's our little secret.1 pointI agree. Making sure everything is in prime-operating condition, electrically and mechanically, would be better than investing in a lot of fire suppression equipment.1 pointI'm curious, what got you thinking about this? If there is something about your car that concerns you as being a fire hazard my opinion is that you should park the car until you can get it fixed.1 pointI can just imagine (not really) Redwing driving down the street in a summer outfit, wearing Nomex racing gloves on the way to the DairyQueen for a vanilla sundae... BTW- Since someone made the suggestion, what specification of Nomex glove would you choose?1 point1 point1 point1 pointAs far as I know the speedometer gear is tied to the final drive ratio of the differential and the tire size. I don't think that the transmission has anything to do with the selection. At least when I went from a series B 4 speed to a series B 5 speed there was no difference. I cannot drive my car now, but it seems like 2K at 70 mph is about right for the overdrive 5th.1 pointAnd to conclude this thread, here is @Zup 's center valence all done up real purdy and on the car. Thanks dude! That's my grand-dogger Ruby expressing her approval.
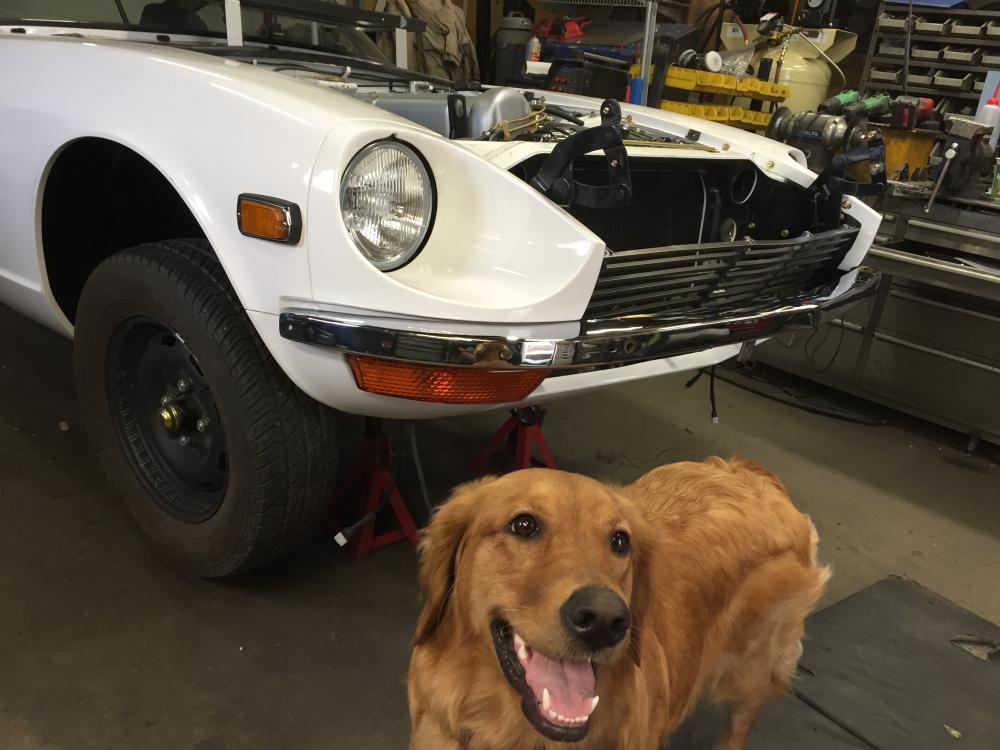 1 pointThe last two Sundays have been spent replacing the clutch due to slipping caused by a leaking rear crankshaft seal. It was a fairly minor leak, but it caused the disc to slip at higher rpms. It took two Sundays as I just can't do the physical work without stopping to rest and recuperate. Fortunately for me my friend Kenny (kens240Z) has a fully equipped shop with a lift and another pair of younger hands. Finished up yesterday and the new Centerforce works great.. Cheers, Mike1 pointI am a retired firefighter and have been on many car fires. Rule #1: Get out of the car and move away. Rule #2: call 911. Rule #3: DO NOT OPEN THE HOOD! I cannot emphasize this enough. You will let oxygen in and the fire will literally quadruple in size almost instantly, almost explosively possibly burning the crap out of you. You will not see the firefighters open the hood until they have sprayed water or foam through the radiator. Our operating guidelines required full turnout gear AND breathing apparatus for ALL car fires. If you must try to save your car and firefighting professionals are not near and you have access to a dry powder fire extinguisher, aim it through the radiator in the front of the car, but be prepared to get the hell out of the way. I have seen several small car fire scene turned into a major medical trauma by a good Samaritan opening the hood of a car on fire. Also, remember that electrical fires are the hardest ones to put out unless you have access to a CO2 or Halon extinguisher. Your life and the possibility of painful, debilitating burns are NOT worth trying to save a piece of machinery. I love my Zed, but if it's on fire I will call the pros or let it burn. Here's one more reason to let it burn: a fire in the engine room or electrical fire inside will probably end up being a total write-off anyway, so call your insurance company. Be safe people. Cheers, Mike1 pointNice front valence. One piece fiberglass or fabbed up?1 point5 or 6 cars from Eastern Canada will be there. Not sure what J and I will ride into town in.... maybe 249? Looking forward to seeing good friends!
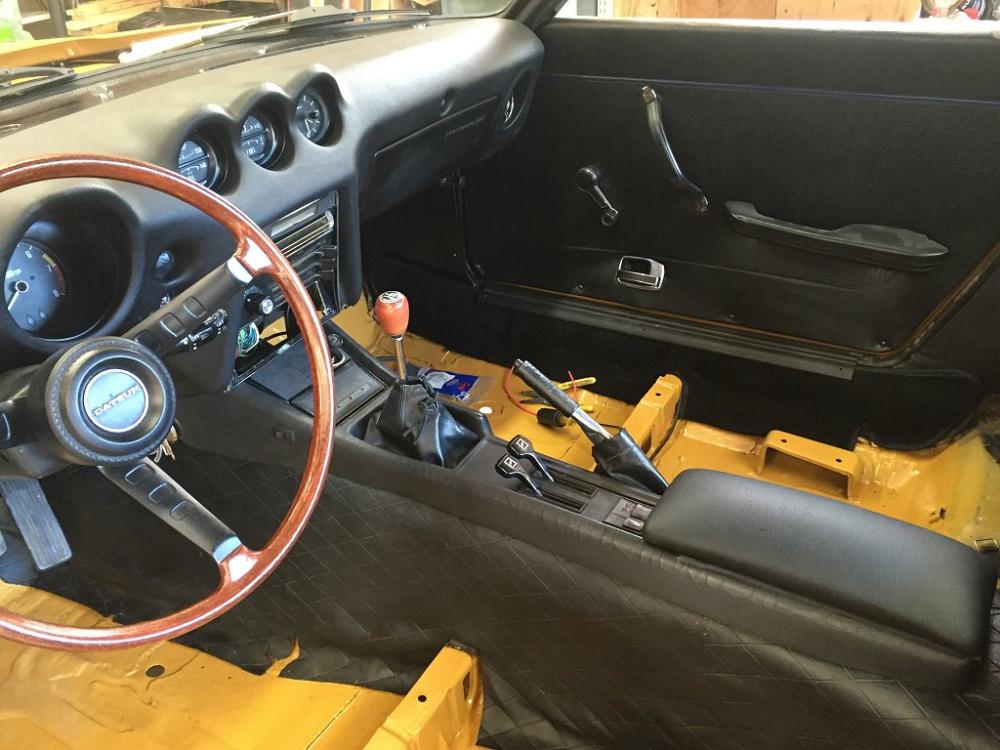
 1 point


Important Information
By using this site, you agree to our Privacy Policy and Guidelines. We have placed cookies on your device to help make this website better. You can adjust your cookie settings, otherwise we'll assume you're okay to continue.