All Activity
- Past hour
-
 9 times out of 10 the problem on 4-screws is a misaligned nozzle, particularly if the large retaining nut underneath was loosened for some reason. There is a tool to help center the nozzle. If you take the needle out of the piston you insert the tool instead, which centers the nozzle in the casting. While the tool is in the piston and the piston pushed down in the chamber, tighten the large nut in place. Once the nut is tight, remove the piston and remove the tool. Before you re-insert the needle, chuck it in a drill motor and spin it to make sure it is perfectly straight. If it is, reinsert the needle in the piston and screw the dome back on. I'll take a photo of my tool and post it here shortly.
 -
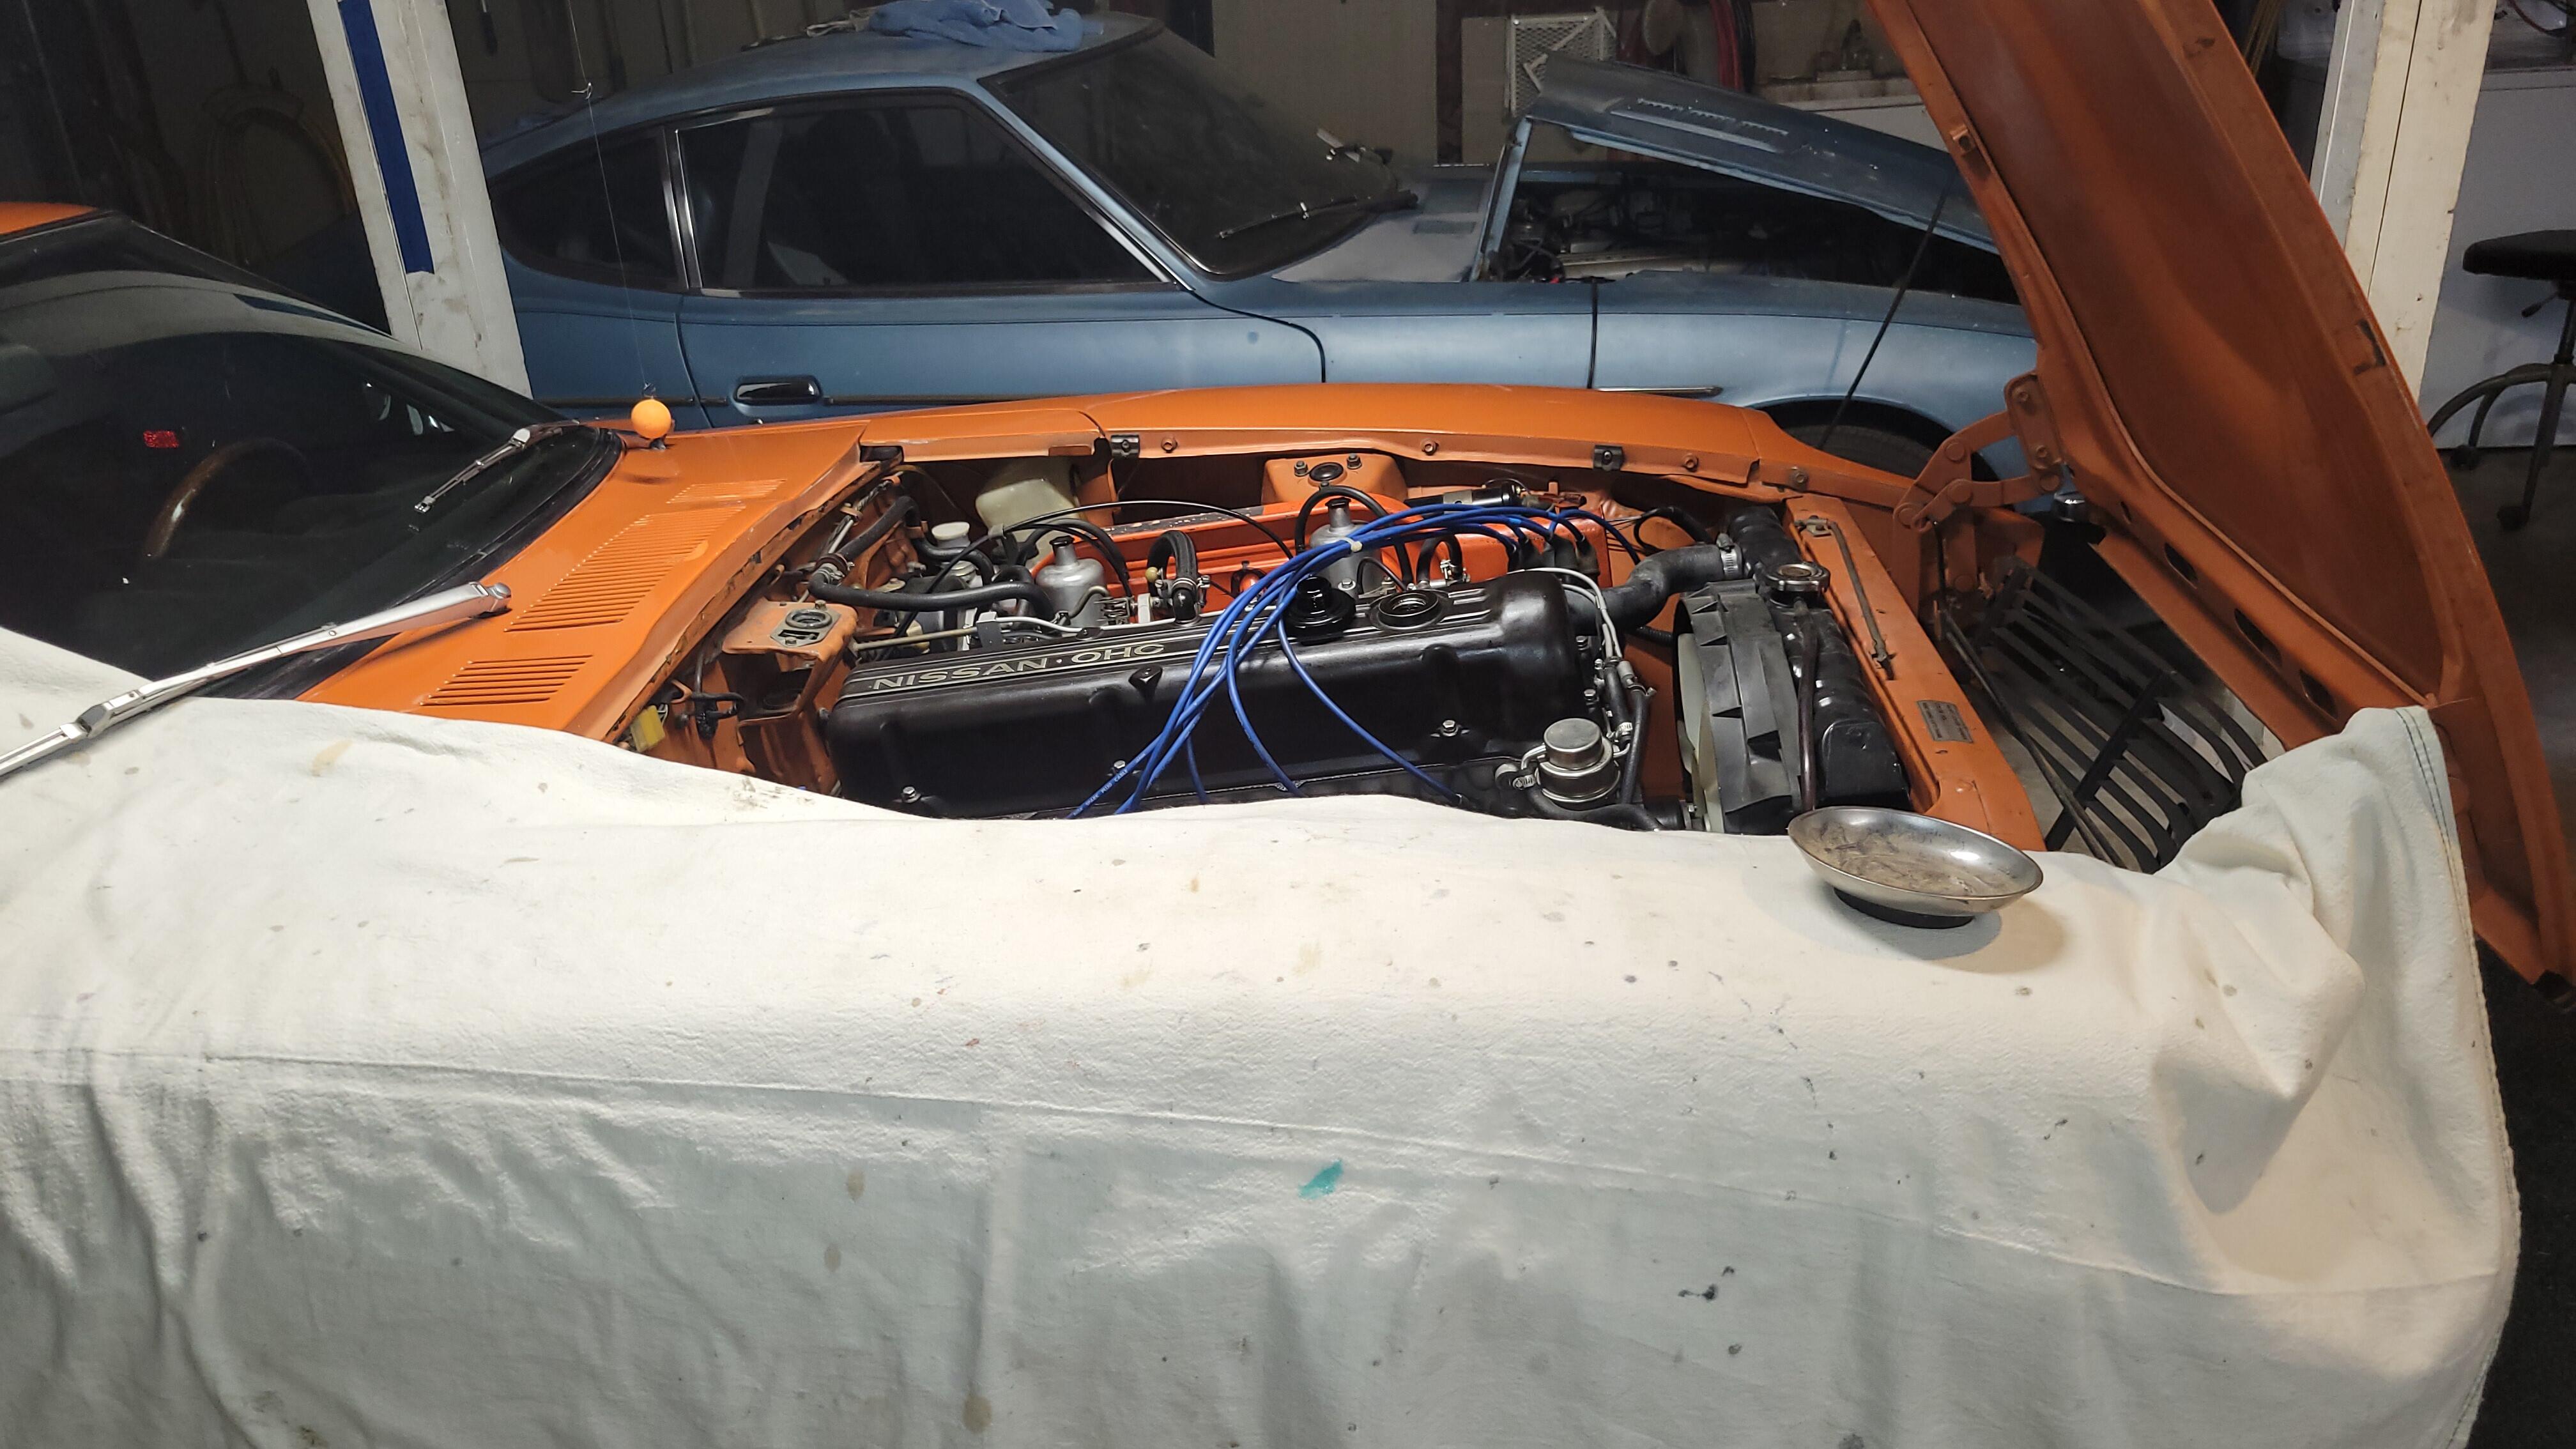
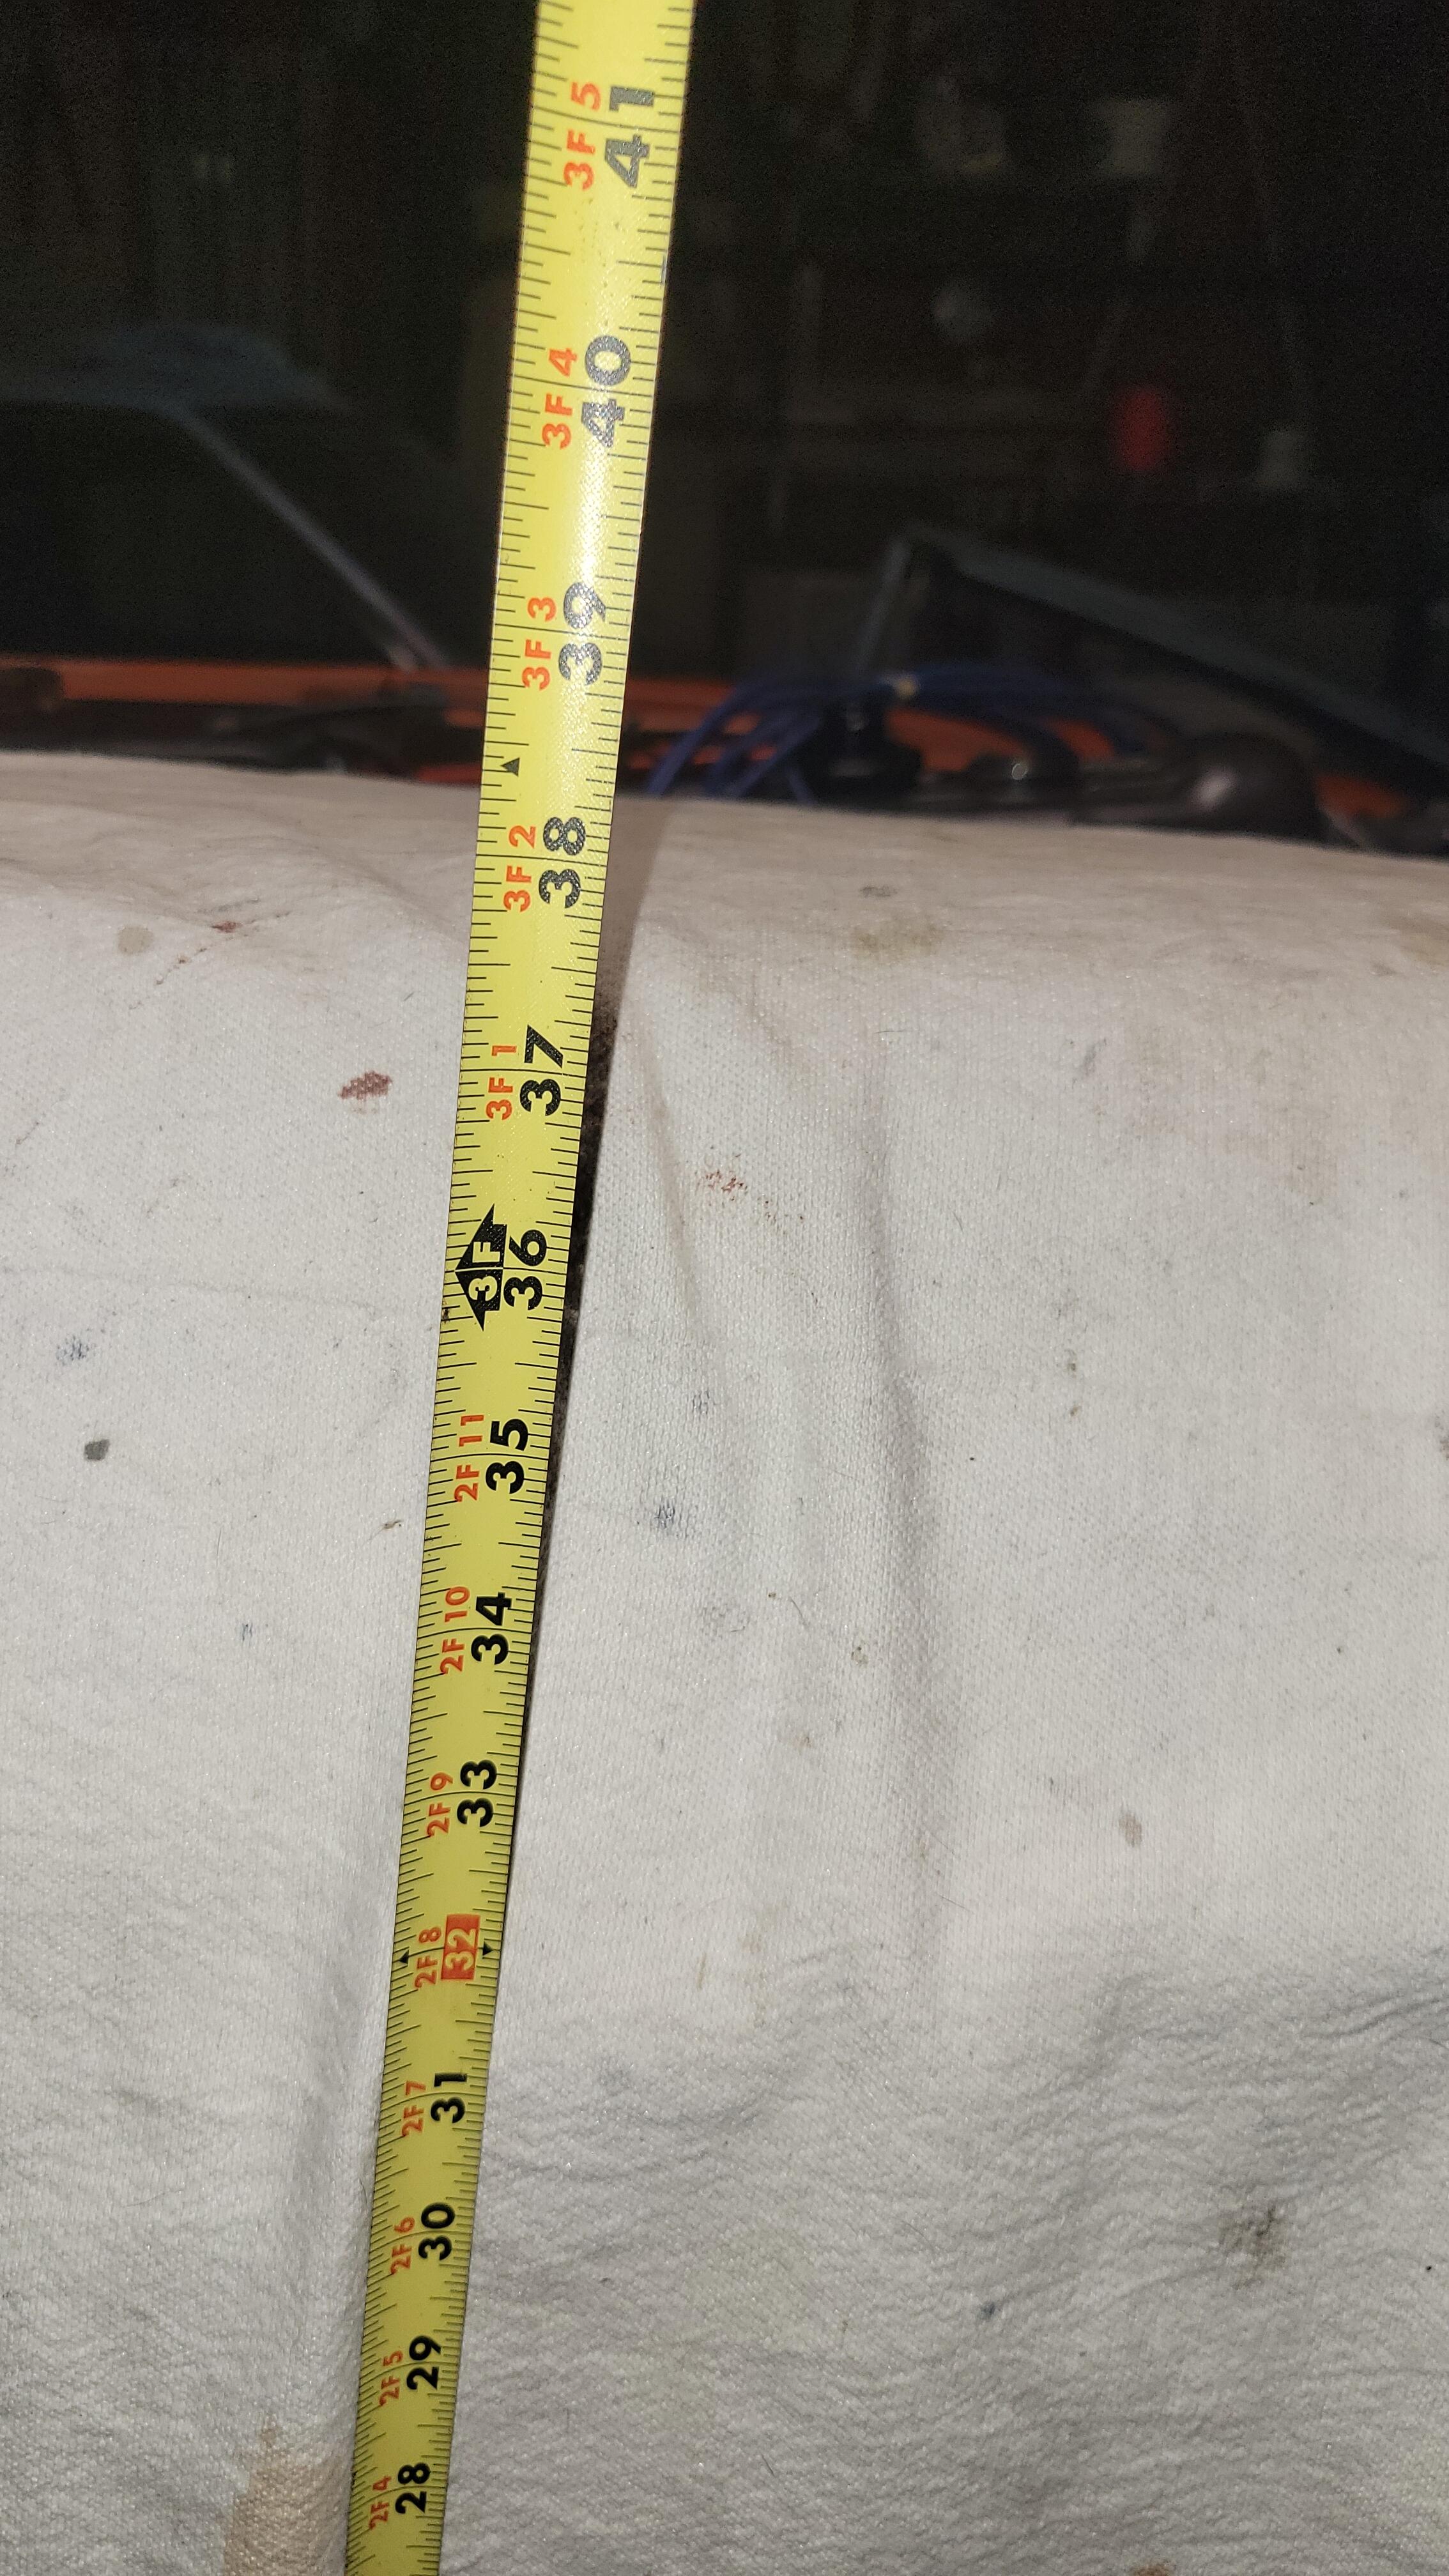
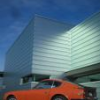
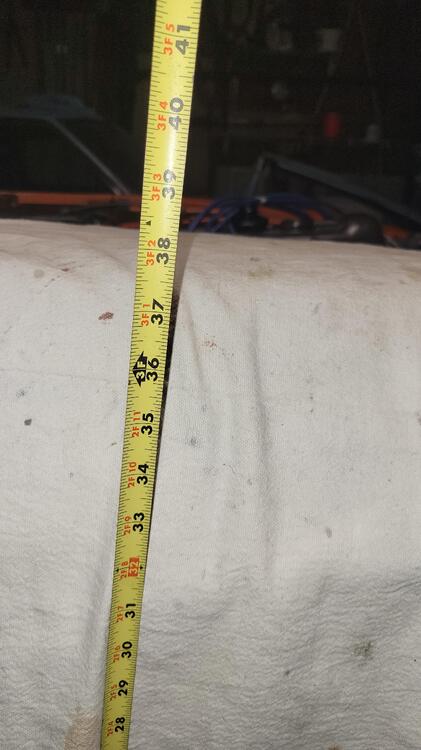
 This is for you, not your car.🙂 Something I figured out after getting older and working on these cars. You can help your back when doing all that tedious engine bay stuff by simply running it up on a set of ramps or raising it up and using jack-stands to get the motor up so you're not bending over all day. Another thing I had learn the hard way was resting my elbows on the fenders would cause dents I ended popping out with a suction cup from HarborFreight. Cover the fenders with anything like towels or paint drop cloths using magnetic bowls that hold all the fasteners. I'm about to adjust the valves on mine. I use a set of Rhino ramps to get my lowered 240 up to, looks like about 38". Just a courtesy bit of advice you probably figured out way before I did and it really helps. Have fun!


- Today
-
 I agree with @Zed Head. You can count on those being destroyed. You may get lucky with the booster. Look at the bottom of the MC and see if it has been leaking and the paint on the booster in that area will be gone with rust residue. I wouldn’t put any fluid in either. Take them off first.
 -
 Your clutch master and slave cylinders are probably corroded and have bad seals. If it's been sitting for ten years. Your brake master cylnder also, along with the rear wheel cylinders and maybe the caliper bores. It's just what happens. I would remove the brake master cylinder before trying to use it, before you squirt brake fluid in to the vacuum booster. If you're lucky the brake booster is dry and still usable. Nickels and dimes...
 -
 Very cool! I love my ZCG brake kit. The KW stuff is probably amazing, but I can't stand the purple and yellow:)
 -
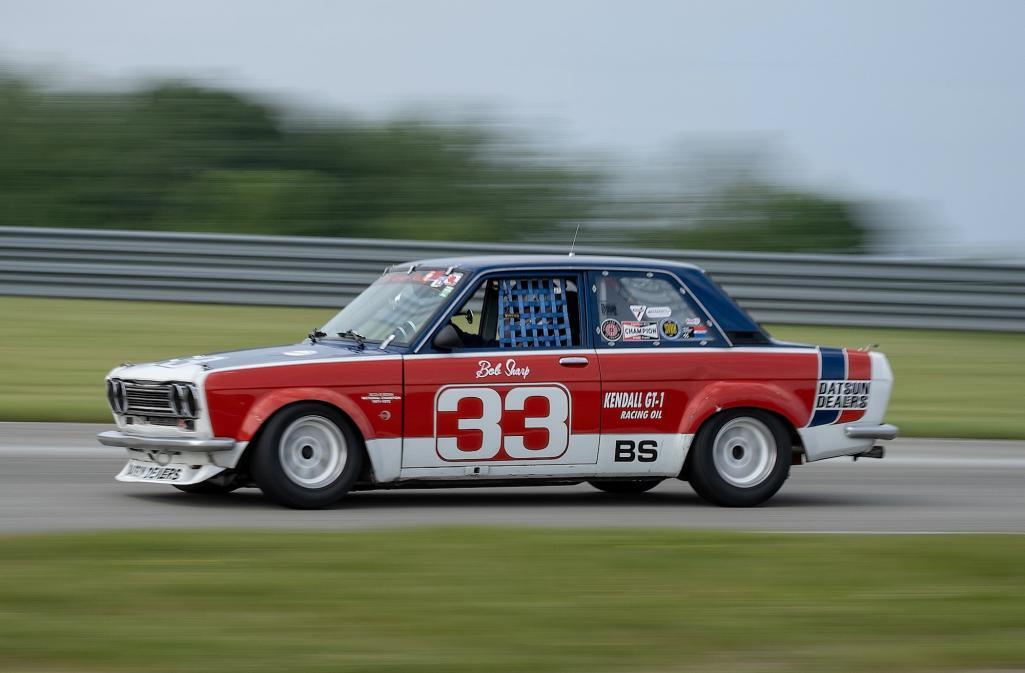
 Not racing related, but Newman and Redford, back together again… RIP Bob.
 -
 RoofsnRoots joined the community
 -
 ITS ALIVE. i decided to take off every electrical connection off and deep clean each pin. they didnt have bad corrosion but the copper had turned green where it wasnt connected for the last 20 years. I double checked each pin ohms coming through the ECU and finally got each reading within spec. Started it up and boom perfect idle. I appreciate all you're guys help. the resources and information helped a ton. now to bleed the clutch, find out why the break pedel is stuck and see if this thing can move!
 -
 You are right! Mechanic should get this engine running with pertronix ignitor module 1761, 1.5 coil and 1.5 ohm ballast.
 -
 Maybe this is the point where you decide which you want most - working tach or good running engine... Back when I learned to drive - and for years thereafter - cars didn't come with tachometers. They ran and we drove them all over the place anyway. (but, from the factory that car ran VERY WELL with a stock coil, a stock ballast resistor, a stock distributor, AND a stock tachometer. Just sayin')
 -
Okay, cool. thanks for the correction.
-
You need to read this. It will explain how the things work that you're playing with.
-
You need to read this. It will expalin how the things work that you're playing with.
-
I love the 510. Never owned one but…

-
Ill try it! See what happens. Right now we have the pertronix 1.5 coil installed with 1.5 ballast
-
I can't give up... So troubleshooting I eliminated the air idle valve for a moment because it felt like it was choking the engine too much and it not idles but rough. I also think the connection is bad with the TPS. In the attached video I am trying to make the connection solid and it starts to idle down. PXL_20250916_015703945.mp4
-
@cgsheen1 made a suggestion, Are you not willing to try it? Takes 2 minutes.
-
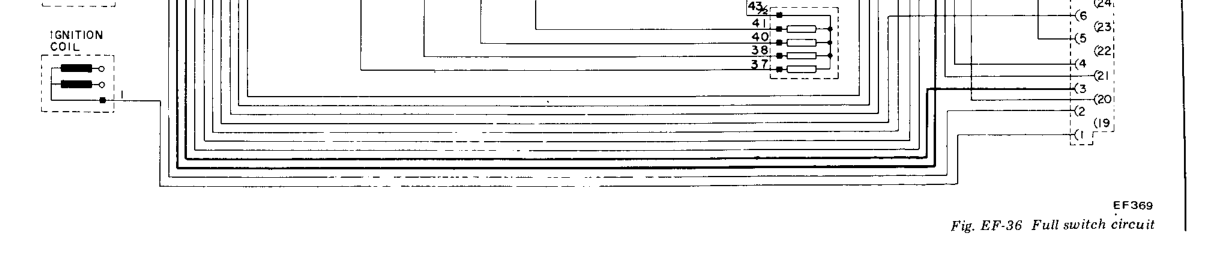
First: The ECU DOES NOT get the "tach signal" - that circuit if for the GAUGE ONLY. It is pointless to look for it. Actually the tachometer and the ECU use the same circuit for the coil discharge signal, from the coil negative terminal. It's branched. One end goes to the ignition module for spark creation, one to the tachometer for the RPM measurement, and one to the ECU pin #1 for injector timing. Every third spark the ECU squirts half the fuel "calculated" to be necessary.

-
The thing is my mechanic solved the rough idle and misfire after take off from long traffic by installing an msd blaster 2 coil replacing the pertronix 1.5 coil and 1.5 ballast resistor. The problem is the stock tach does not work with the msd coil which i believe is 0.7 ohms. Going back to the pertronix, the tach worls but the car runs bad.
-
Don't throw the parts away. They have value to somebody.
- Yesterday
-
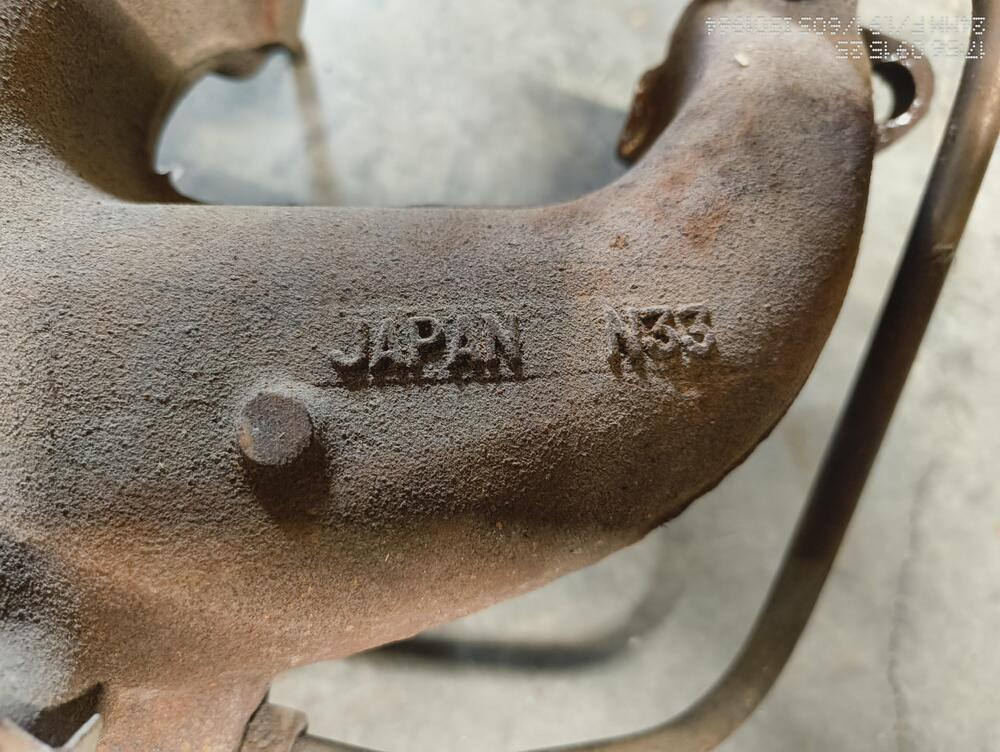
 Photos are of the original N33 exhaust manifold I removed from my 73. Replaced it with an earlier one when I went to round top carbs. I confirm you need a different downpipe. I was able to swap my 73 downpipe for an earlier one.
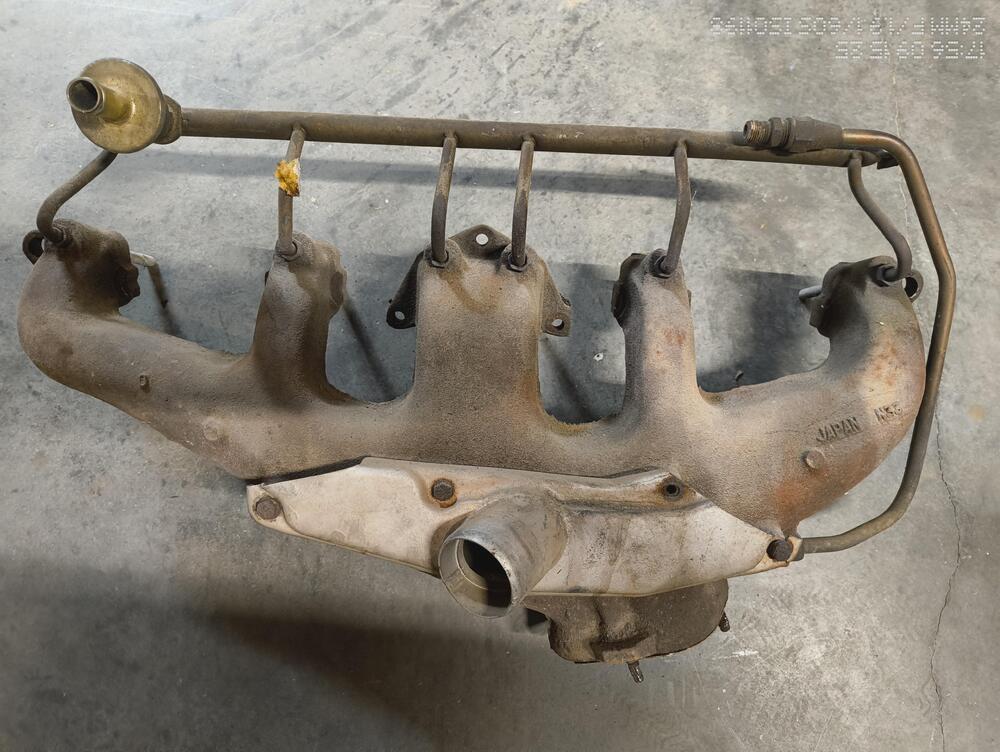
-
I think im chasing my tail on this one.... This morning i repalced a few fuel lines as 5-6 started to leak and crack from the fuel pressure. I also used some electrical cleaner to clean all the electral connectors. I started to engine and it can now run past 10 seconds without fail. not sure why. but great! the issue now is its running very poor. Rich and extremely low idle. I tried adjusting the AFM and idle adjustor but nothing is effecting it. I double checked the ECU connections and now im not seeing any ohm readings on the appropiate pins for the AFM and the TPS. I checked the TPS internals and connectivity is all there. it must be the wiring somewhere. In the end i wanted to get the engine running and it is! so thats fantastic. I think im done troubleshooting this thing and im just going to leave it as is for the moment. I plan on replacing this entire ECU/AFM & fuel system anyways with megasquirt or similar system. No need to fix this system if im going to be getting rid of it. Now its time to tear things thing down to the frame.
-
Easy test, take the ballast RESISTOR out of the equation: Take the G/W wire OFF the ballast, hook it up to the B/W that's connected to the other end of the ballast. Run the engine. Is it better? Is it worse? Don't notice a change at all? (Better: leave the ballast out - figure a good way to connect the G/W and B/W permanently cuz VOLTAGE. Worse: hook it back up the way it was. No diff: Hook it back up the way it was - if you're sure there was no change.) (I haven't said yet what I'd really recommend which is: replace all your harness wiring, especially the engine bay harness which suffers the most degradation over 50+ years of living on this Earth... Few people listen - even me - I'm just barely doing that in my own car (and it turned 50 last year).)
-
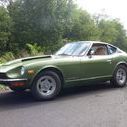
 http://www.zcarblog.com/wp-content/uploads/2025/08/July-2023-First-Drive-on-KWs-e1757565270666.jpg This is Matthew’s 1973 Datsun 240Z featuring our Z Car Garage KW Suspension. He has kept the car mostly original aside from chassis and drivetrain upgrades including a triple-carb’d L-Series, Watanabe wheels and Recaro seats. Let’s take a look at how Matthew got into Z cars… http://www.zcarblog.com/wp-content/uploads/2025/08/July-2024-Paint-Correction-2-e1757565546687.jpg Matt is from Calgary, AB and we know him through his father, Rob from many years ago. Our good friend Herbert was selling his original paint, 87k-mile 240Z and Rob noticed it on zcarblog.com leading to his acquisition. MATT: My Z car story is a family affair that began at a young age. Growing up, my parents both owned Z32 300ZX convertibles — which, incidentally, is how our connection with Z Car Garage began in 2004 when Rob and the team at Z Car Garage did a pre-purchase inspection on one of the Z32 Convertibles before being imported to Canada. We were active in a local Z car club in Calgary, Alberta, attending events with the 300ZX. At the time, the 350Z was new and exciting, and I even had a poster of one on my bedroom wall. http://www.zcarblog.com/wp-content/uploads/2017/01/phan-112117-018-e1485412969426-1024x631.jpg http://www.zcarblog.com/wp-content/uploads/2021/01/PXL_20201221_020624527-e1611120295487.jpghttp://www.zcarblog.com/wp-content/uploads/2025/08/October-2020-Driving.jpg But to truly understand our story, it’s important to go back even further. When my dad was a teenager working at a local gas station, he fell in love with an orange 240Z with a white interior that often came through. He was 18 at the time and never forgot that car. Fast forward to 2009, when Rob from Z Car Garage called and told my dad he had to buy a 1973 240Z that had just been featured on ZcarBlog. My Dad flew down to Seattle, WA to pick up the car and drove it back to Calgary, AB. I was 15 then, and I vividly remember working on the car with my dad. We replaced the dash with an original, uncracked one, fixed a minor oil pack leak, and made lasting memories at local car shows and events. http://www.zcarblog.com/wp-content/uploads/2025/08/August-2011-18th-Birthday.jpg When I turned 18, my dad gifted me half-ownership of the Z. Unexpected circumstances forced us to sell the car in early 2012. By then, though, I had fully caught the Z car bug. I spent the next year or so searching high and low across classified ads in the U.S. and Canada, but nothing quite compared to our Z. On a whim, I posted a “wanted” ad on our local classifieds, using the most recent photo I had of the car. Then, in March 2014, I received a message that simply said: “Hello, I own your old car,”…followed by a phone number. We exchanged a few emails and calls, and they even sent me a photo of the car’s current condition (below, March 2014). http://www.zcarblog.com/wp-content/uploads/2025/08/240Z-March-2014.jpg On April 5, 2014, I picked up the car and drove it straight to my dad’s house. He didn’t know I had bought it back. I drove past the house, and he spotted it from inside. I don’t think I had even parked before he was out the door, beaming with excitement. Not only had I gotten back into a 240Z — I had brought home our 240Z, the same one we had built memories with years earlier. http://www.zcarblog.com/wp-content/uploads/2025/08/June-2014-After-Purchasing-Back.jpg From 2014 onward, the car remained largely untouched. Matt was finishing university and starting his career, and while he drove it when weather permitted, the Z mostly stayed as it was. Behind the scenes, he was always dreaming of how he’d eventually build it — period-correct modifications, all reversible, in case they ever wanted to return the car to stock. http://www.zcarblog.com/wp-content/uploads/2025/08/August-2020-NissanDatsun.jpg In 2021, he began collecting parts for the build. He started with a second set of suspension components, which allowed him to send the spindles and hubs out for the KW coilover conversion and have other parts powder-coated or zinc-plated. KW x Z Car Garage Coil-over Suspension http://www.zcarblog.com/wp-content/uploads/2025/08/477795897_1011115091063663_8033328159812275787_n.jpg Our Z Car Garage KW Suspension is available in limited quantities. These coil-overs offer game-changing performance suitable for street, track and daily-driving for your S30 Datsun Z car. View the suspension installed on Sung Kang’s RB26DETT-powered Datsun 240Z, Larry Chen’s SR20DET-Powered Datsun 240Z, James’ turbocharged L-series powered Datsun 240Z, Mrs. Butters, our Series 1 shop 240z and more client cars HERE. For more information on ordering and pricing please contact RobATzcargarage.com. http://www.zcarblog.com/wp-content/uploads/2025/08/IMG_6502.jpg http://www.zcarblog.com/wp-content/uploads/2025/08/481184467_1024485623059943_4520335096885803442_n.jpghttp://www.zcarblog.com/wp-content/uploads/2025/08/480235492_1011115124396993_2250652587135409969_n.jpg http://www.zcarblog.com/wp-content/uploads/2025/08/IMG_8079.jpg MATT: I first came across KW’s Classic segment on their Instagram page in 2021, which featured the 240Z platform. A few years later, I reached out to KW and learned that Z Car Garage would be the exclusive dealer for the kit. Given my family’s long-standing history with Z Car Garage, it was an easy decision to contact Rob and place an order. http://www.zcarblog.com/wp-content/uploads/2025/08/July-2024-KW-Endless.jpg The installation was straightforward, though slightly more involved than on a modern car due to the need to install bearings into the hubs. I also opted for the KW adjustable top hats, as I planned to run 16×8 +0 Watanabe wheels and wanted to avoid rolling the fenders in order to preserve the car’s originality. The first drive revealed a night-and-day difference compared to the stock suspension—firm, yet compliant enough to maintain comfort for street driving. Although Z Car Garage ships the KWs with a recommended out-of-the-box setup, we ended up softening the settings slightly to better suit the rougher roads in Calgary, Alberta, which are no match for the smoother roads in California. http://www.zcarblog.com/wp-content/uploads/2025/08/KW-First-Install.jpg http://www.zcarblog.com/wp-content/uploads/2025/08/Rear-Underside-1.jpg In the corners, the car feels extremely planted, with excellent turn-in and feedback. With my current setup, the grip provided by the suspension and tires far exceeds the car’s power output, making it an absolute joy to drive and toss around in corners. Before installing the KWs, I drove more conservatively, hesitant to push the car too hard. Now, with the upgraded suspension, my confidence—especially in corners and at higher speeds—has grown significantly, allowing me to truly enjoy the full potential of my Z car. http://www.zcarblog.com/wp-content/uploads/2025/08/240Z-May-2025-1.jpg It took a couple of years to gather everything, but with the help of a good friend — who also happens to own the local performance shop, VEX Performance in Calgary — the build finally started coming together in July 2023. We removed the old suspension and replaced it with freshly powder-coated components and, of course, the KW suspension. The engine bay was cleaned and prepped for the new Fujitsubo exhaust and triple Weber setup. http://www.zcarblog.com/wp-content/uploads/2025/09/IMG_6118.jpghttp://www.zcarblog.com/wp-content/uploads/2025/09/IMG_6101.jpg http://www.zcarblog.com/wp-content/uploads/2025/08/240Z-R34-GTR-e1757565636237.jpg But the moment it all came together was when the car was lowered onto the ground, sitting on its new Watanabe wheels. That’s when it hit me — a rush of emotion. The same Z my dad bought in 2009, the one I brought home in 2014, had finally become the car I’d dreamed of for years. http://www.zcarblog.com/wp-content/uploads/2025/08/240Z-May-2025-2-e1757565521969.jpg Thanks for your support Matt! We love that you are building and enjoying your dream Z car! What’s next? MATT: As of 2025, the Z is exactly how I envisioned it. I take it to local Cars and Coffee events, car shows, and the occasional late-night meet. As for future plans — they’re still up in the air. I’ve considered going EFI, or maybe even an OS Giken TC24 build someday. But for now, I plan to Enjoy the Ride. http://www.zcarblog.com/wp-content/uploads/2025/08/August-2023-Passenger-Priness.jpg Build Sheet: Engine/Drivetrain Triple Weber DCOE40 Kameari Exhaust Sheild ITG Air Filter w/ Carbon Backing Plate Fujitsubo Super Ex Header Fujitsubo Legalis R Exhaust Koyo Radiator Malpassi FP Regulator Nismo Fuel Pump STI R180 3.54 LSD http://www.zcarblog.com/wp-content/uploads/2025/08/August-2023-Car-Show-Debut.jpg Suspension KW V3 Coilovers w/ Camber Plates Endless Front BBK T3 Rear Control Arms T3 Front Tension Rods ST F/R Swaybars 280ZX Rear Disc Brake Conversion SuperPro Bushing Kit Wheels/Tires Watanabe R Type 16×8 ET 0 Watanabe Electron Lock Nuts Continental ExtremeContact 225/50R16 Interior Recaro Classic LX http://www.zcarblog.com/wp-content/uploads/2025/08/Septemeber-2023-Local-Zs--e1757565477500.jpg View the full article
 -
 Hi Site Been a while….not sure, but whatever adds .080 inches….if they are .040 inches, 2 would do. Don’t hesitate to call Eiji….tell him you’re my cousin and if wants to keep eating steak at our house, he needs to be nice! 🤪 He’ll sell you the right stuff.
 -
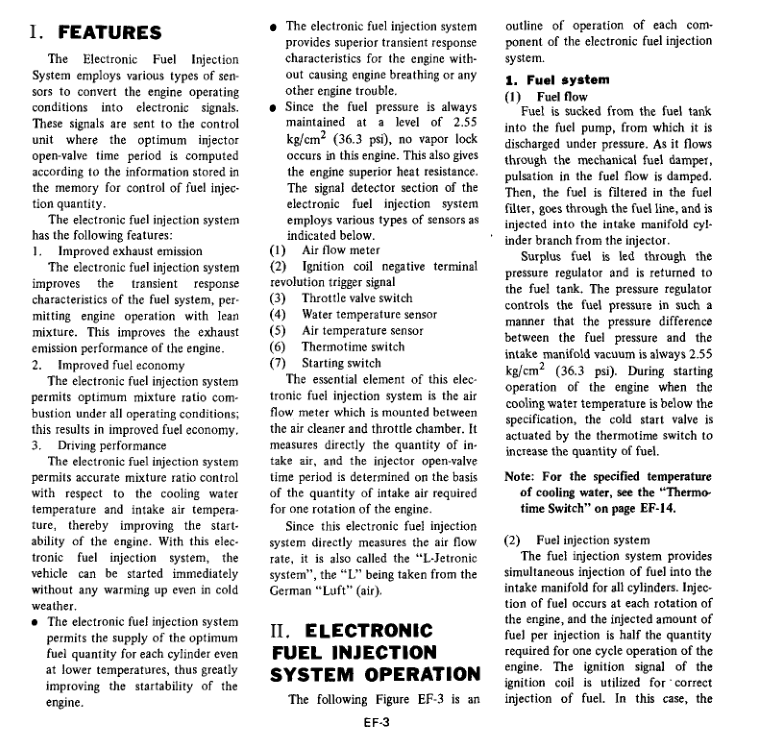
O.P., you should probably pull a spark plug or six and see if (how much) they are sooted up. The Fuel Pressure Regulator (FPR) on an EFI engine is "vacuum referenced" or Manifold Absolute Pressure (MAP) referenced. Meaning it has a hose connection to the intake manifold. The FPR is supposed to maintain a fairly constant fuel pressure differential with the manifold pressure. Nissan uses 2.5 BAR or 36.3 PSI as the required differential. That means WITH the engine NOT RUNNING and fuel pump RUNNING the pressure to the fuel rail and injectors should ~36.3 PSI. When the engine IS running, the FPR will SUBTRACT the manifold pressure while under VACUUM or ADD the manifold pressure if under boost (positive manifold pressure). You don't need to consider boost. But, say you have 10 PSI of VACUUM while the engine is running at idle, your pressure at the fuel rail and injectors should be ~26.3 PSI (36.3 - 10 PSI). First: The ECU DOES NOT get the "tach signal" - that circuit if for the GAUGE ONLY. It is pointless to look for it. The Electronic Ignition Module figures out when to send a signal for the coil to fire - it gets the information from the distributor electronics (pretty sure - I haven't handled the original Bosch L-Jetronic for a blue moon...) Second: Have you tried operating the engine WITHOUT the cold start valve? Disconnected from wiring and/or fuel? (IS your engine only running on the cold start fuel??)