All Activity
- Past hour
-
 Damn, but that body metal is THICK at that location. I estimate it at 3 mm. Pretty near took all the life out of my Harbor Freight step drill bit.😊
 -
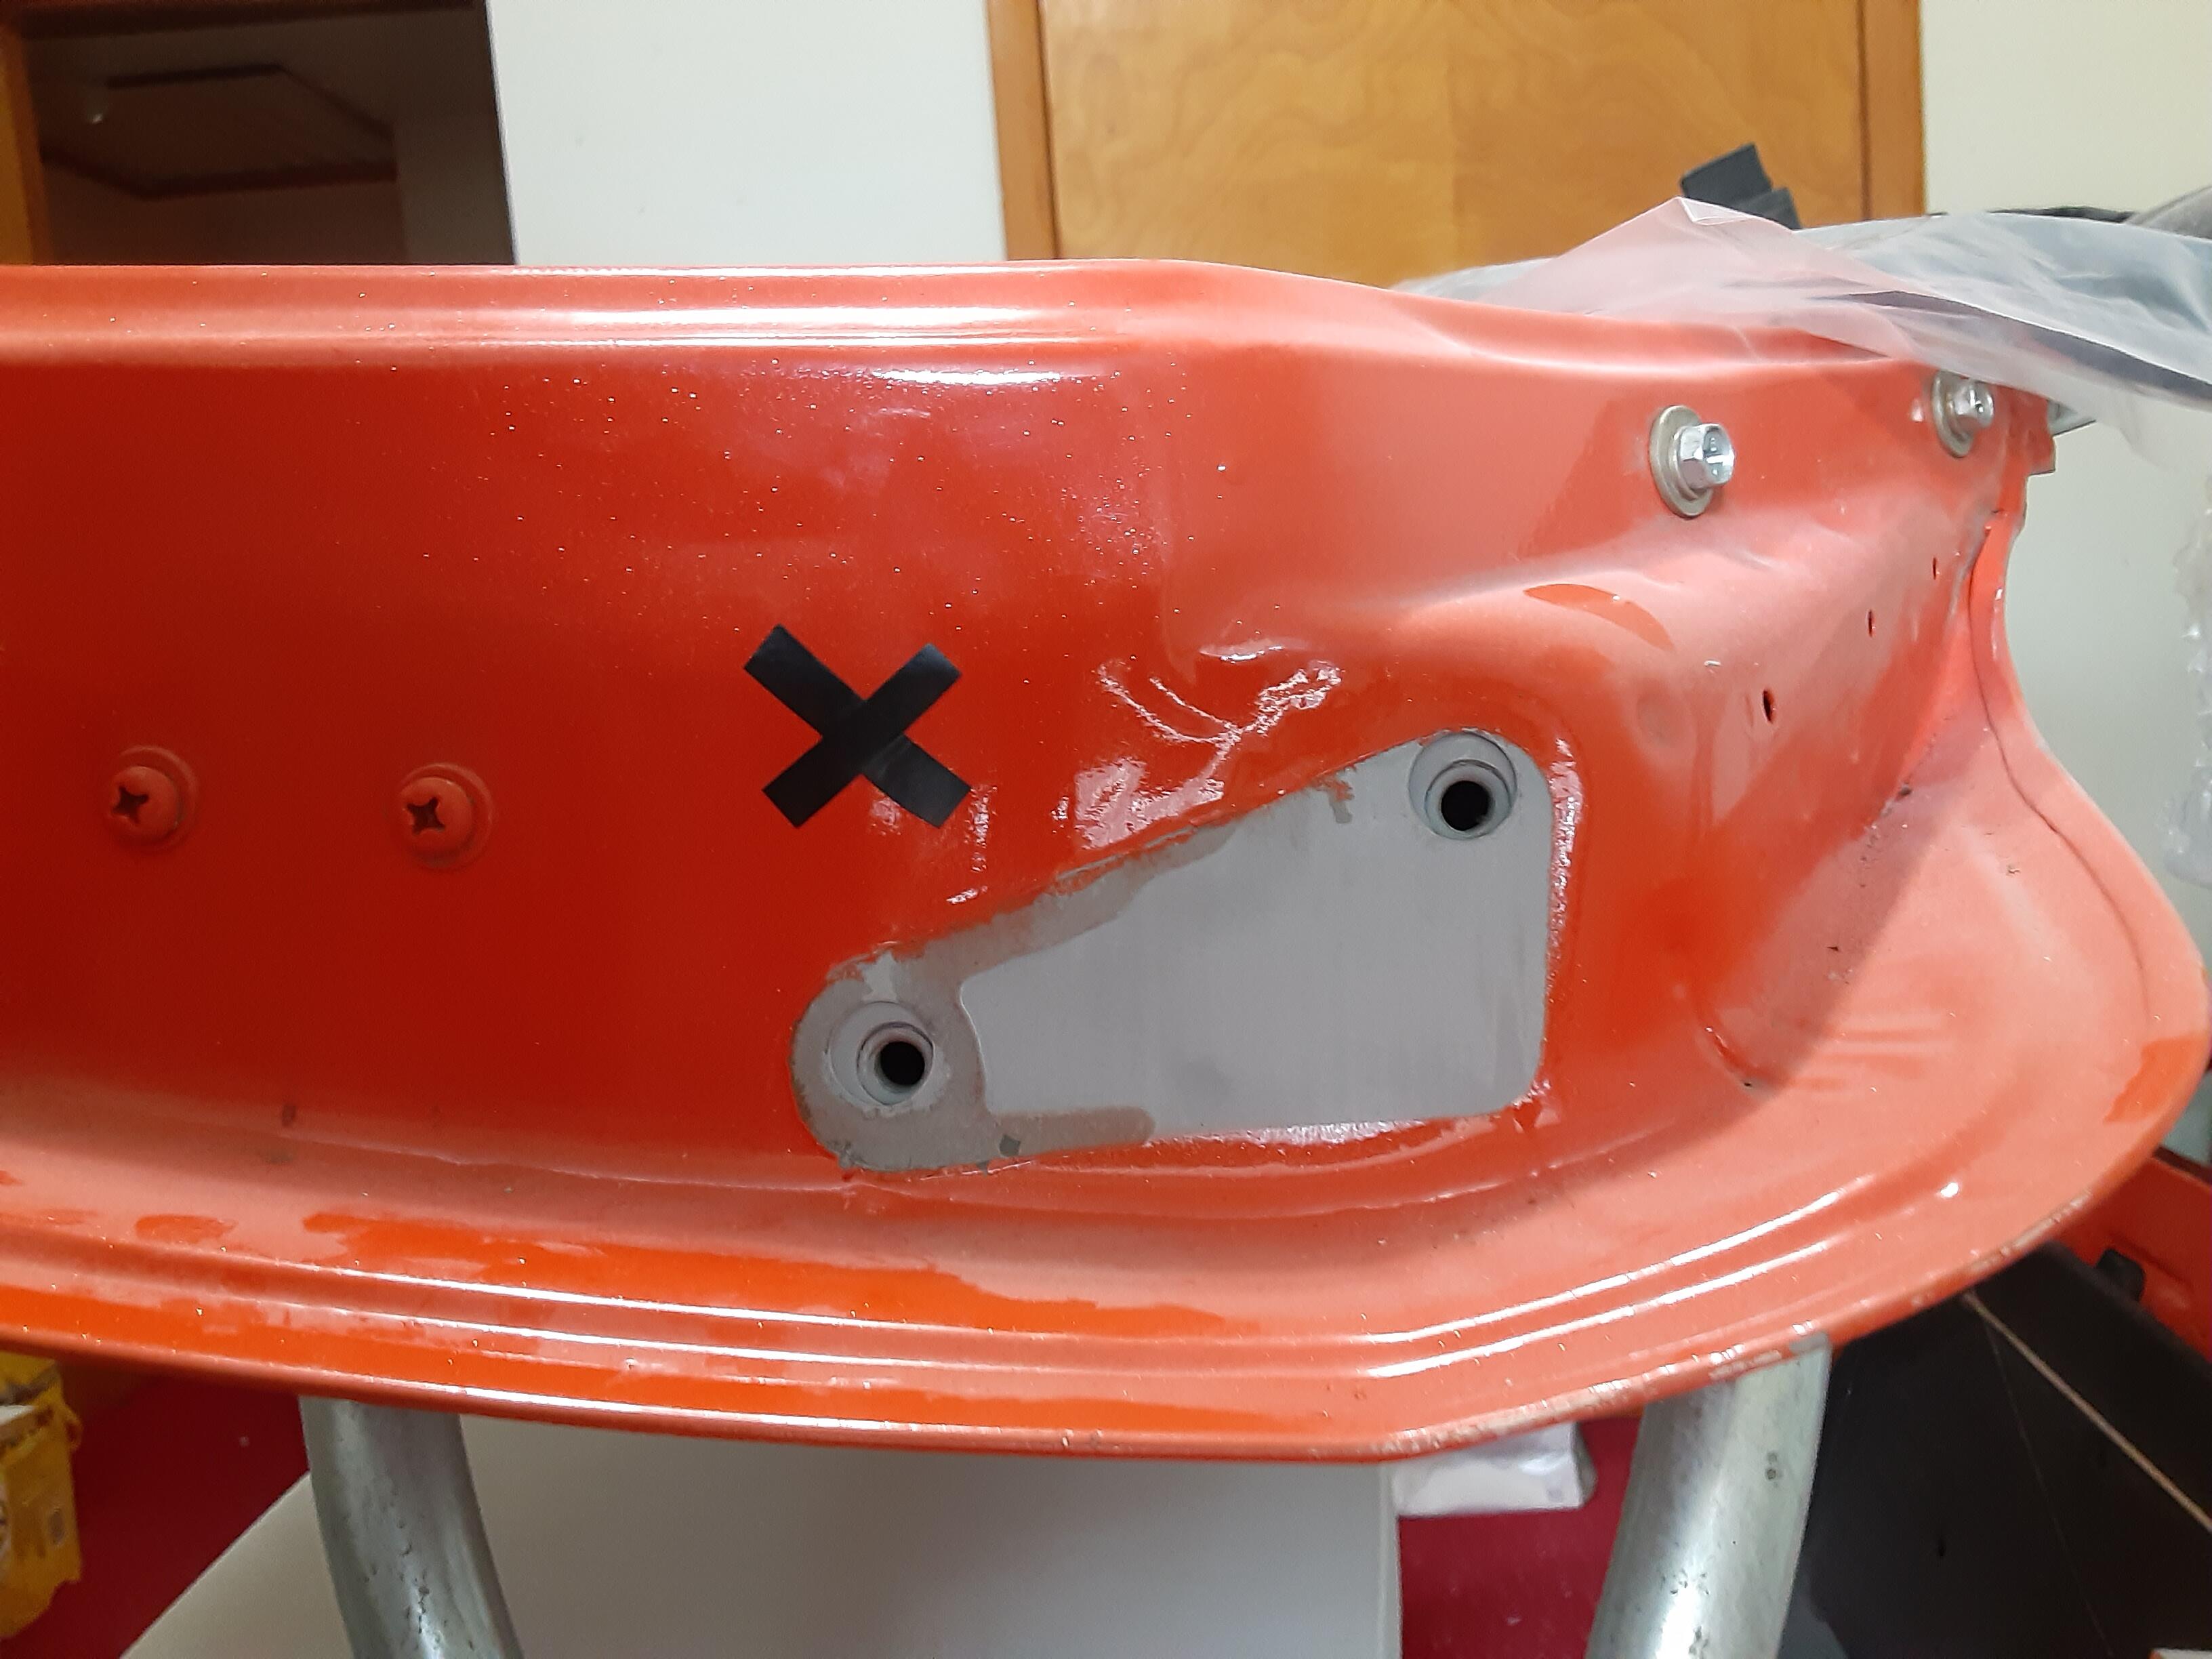
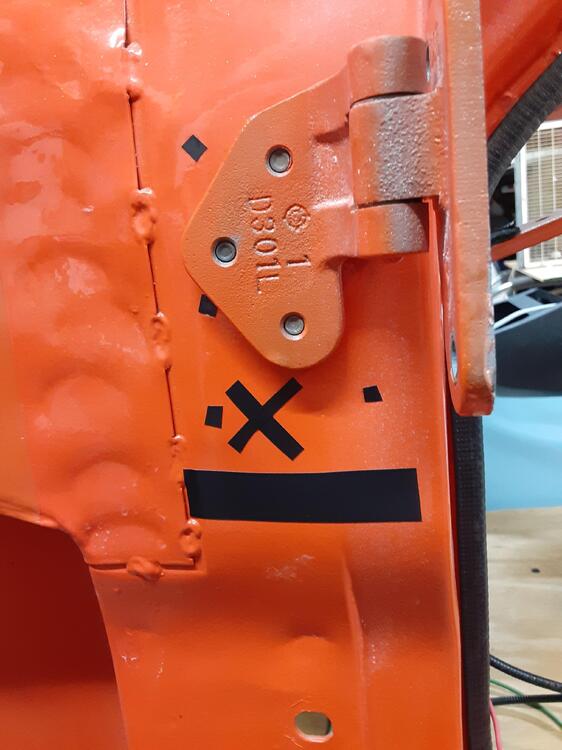
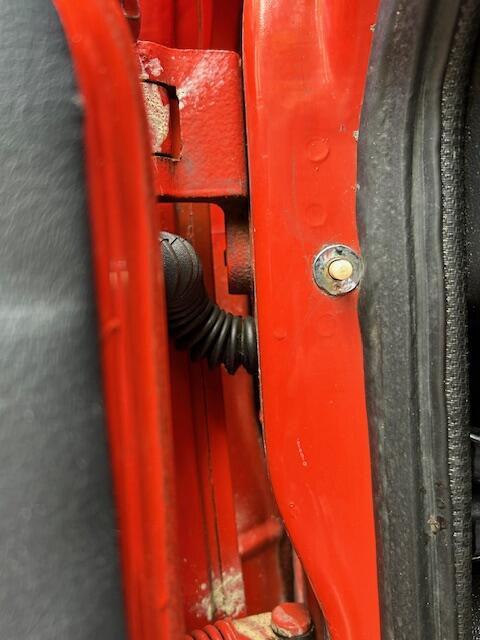
Thanks for those pix, SteveE, as they are very helpful. Judging from its relationship with the door jamb light switch position, it looks to me like you drilled into the lower part of the upper door hinge recess on the body side. I measured the bottom of that recess to be roughly 55 mm below the center of the lowest bolt securing the hinge to the body. In my photo below I've marked spot welds with small "dots" of black electrical tape and the bottom of the recess with the horizontal piece of tape. And the "X", you ask? That's where I'm going to center the 3/4" hole for the bootie, which pair should be arriving tomorrow. As for the hole in the door, it looks like yours is at the same height at the lower door hinge bolt. From feeling around inside my door, that's where there's just a single thickness of metal (immediately below it feels like there's a double thickness). So my drill point there is also marked with an "X".

- Today
-
 We'll call this " The Battle of the Bulge". What caused it?
 -
 More options: https://www.amazon.com/Harness-Wiring-Rubber-Sleeve-Dust-Proof/dp/B0DPSSGQM3/ref=sr_1_3?crid=2IFD08NNIUUXC&dib=eyJ2IjoiMSJ9.j6sCbuIjzN-WBnm2XXwWVu4090p00UNg2r3CNwgAFBVu9Lpb66DXNbNe_7yLAqI4vMWRl0gsNxdRcdAK9V-5dS-n5-_exNneA0CtlQFm27hcWNwAakn7syA0o6BJfeUK2eQPmD7LDR4KUk4i1u1e9-fLz4GBRraJloEbMOQi9a9O9VQGqdfo0GKMkXonZdBkHD4duo1hl7_Sb6vS8y5-yGtRl5shRUZRCjQAmJjD7V0.Qts0l3KNs3i-pKnDHJ-7Dj_thqYPP4NnJJ0nn_ue6Po&dib_tag=se&keywords=rubber%2Bbellows%2Bsleeve%2Bfor%2Bwires&qid=1758484994&sprefix=rubber%2Bbellows%2Bsleeve%2Bfor%2Bwires%2Caps%2C104&sr=8-3&th=1 https://www.amazon.com/Keep-Clean-10620-Door-Rubber/dp/B00H8JW4FK/ref=pd_sbs_d_sccl_3_5/134-8277767-9799355?pd_rd_w=O36Uk&content-id=amzn1.sym.2cd14f8d-eb5c-4042-b934-4a05eafd2874&pf_rd_p=2cd14f8d-eb5c-4042-b934-4a05eafd2874&pf_rd_r=8C2WBECPMWQVPQYRVYPN&pd_rd_wg=PgAlV&pd_rd_r=c69dac03-422a-494e-8aae-6aec3dcada49&pd_rd_i=B00H8JW4FK&psc=1 https://www.amazon.com/Megatronix-DAB-Replacement-Actuator-Flexible/dp/B0817DGHVP/ref=pd_sbs_d_sccl_4_6/134-8277767-9799355?pd_rd_w=zPpDR&content-id=amzn1.sym.2cd14f8d-eb5c-4042-b934-4a05eafd2874&pf_rd_p=2cd14f8d-eb5c-4042-b934-4a05eafd2874&pf_rd_r=BQ52F24TMDDBWQFXYEDN&pd_rd_wg=2aWdn&pd_rd_r=07eabe98-68fe-425c-b050-99f1004eeb04&pd_rd_i=B0817DGHVP&psc=1
 -
 Today I broke my back it feels like. All the things I've done to the car aren't worth a flip when I can't back out of my driveway. So today I dug up some asphalt to save my oil pan and my exhaust from The Z Store.
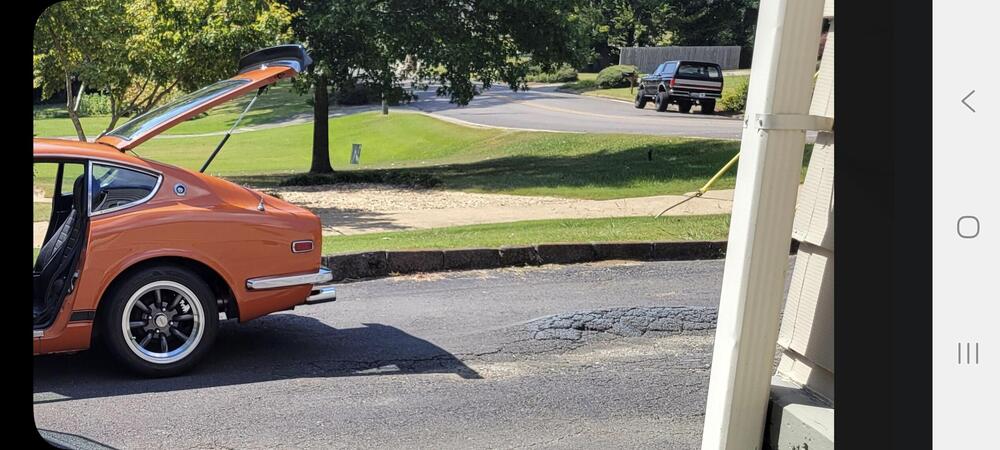
-
How much for both sides? 🤭 Kidding around. It does seem simple but I would be concerned about the length to clear the slam panel when the hatch is closed. It would be very close without breaking the extensions when you shut the hatch. ????
-
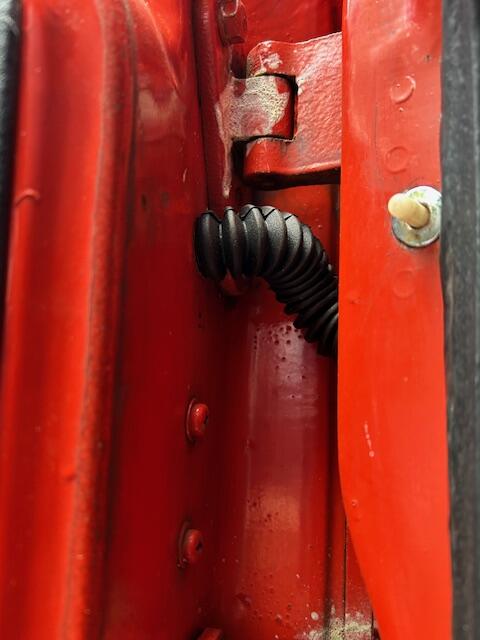
 First picture looking done from top Second picture door side Thrid picture body side The boot was a straight section about 6" long. They came from Dave many years ago. The boots have been installed for 5 or 6 years, but only used heavily for this past summer. All seems good! I have power windows and power lock wires running through them.
-
 Outstanding.
 -
 Car is running fine with the msd blaster 2 coil. Tach is working.
 -
 Even though Grannyknot made his gutter extensions out of sheet metal and welded them into place before applying his the final paint coat, you could just as easily fab up something similar and just glue them in place. Make them out of 'L'-section plastic (hobby store) to address rust concerns and paint them body colour before gluing to the hatch body sill.
 -
They wrote great songs but I can't think of any covers that were done. What a shame.
-
 Datsunman joined the community
 -
 You forgot the link!
 -
Bonus Nazareth track -
-
Here's another original plus the one that made it big. Apparently these guys are still touring.
-
SteveE: Thanks for your reply and I look forward to seeing your pix. As it turns out, I have been collaborating with Dave Irwin (Zs-ondabrain) to update the thread to which you've referred so that it can be a permanent tech article with lots of pix for the S30 community. With luck I'll get that done later this fall.
-
Seppi I have done this project. I will post some pictures tomorrow. I followed a theard by Dave Irwin (zsonthebrain)? My car is a "72" I removed the doors to drill the holes. If you can find his thread he shows where to drill. Dave provided me with the rubber boots. Steve
-
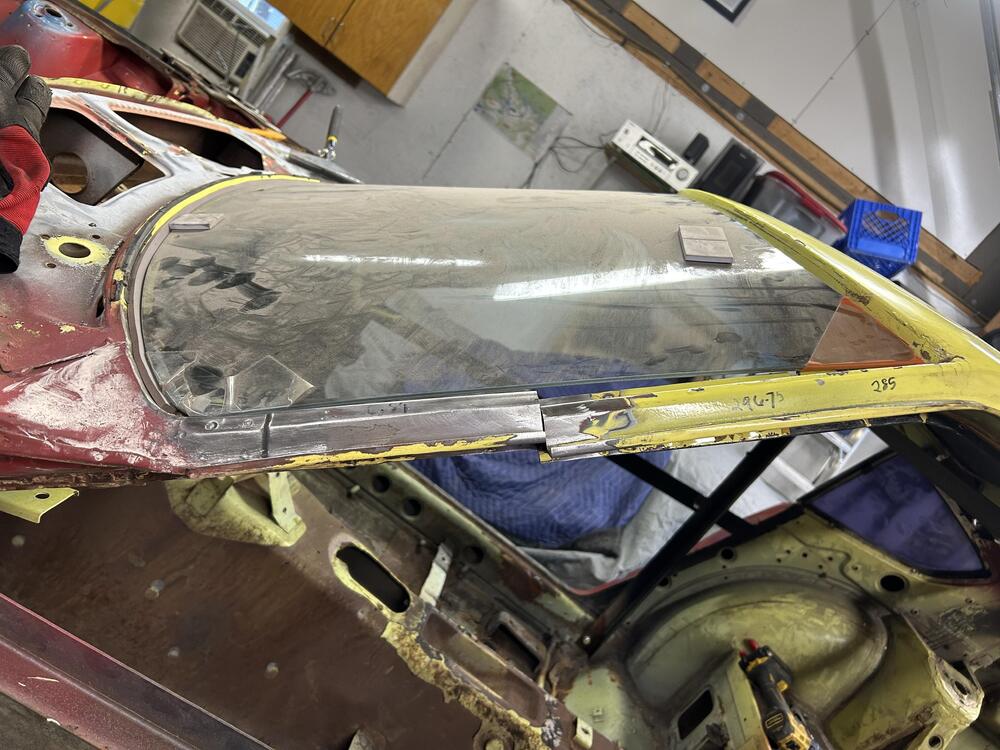
 Whether it was the best approach or not , I decided to slug/sleeve the A pillars . I felt a sizable sleeve -3” would give plenty of weld points and help keep things aligned . I had kept lots of A pillars material from where I cut these roofs up . The complex part is that the pillars taper ever so slightly . Also tough is making square cuts to match one roof to the other roof pillars . Another obstacle was I realized the drivers A pillar on my replacement roof was bent back -likely from the accident the car was in . It was a hard hit- shoving the LS2 back into the firewall . Windshield was still in the car he said . Getting the height right on the A pillars was going to be the big challenge . In the first pic of this thread you’ll see I built a support out of angle iron for the roof to sit on . I used my Z to measure from the seat bolt hole to roof line . This support also helped to have something to set the roof on while I made adjustments. Thank god these roofs are light.
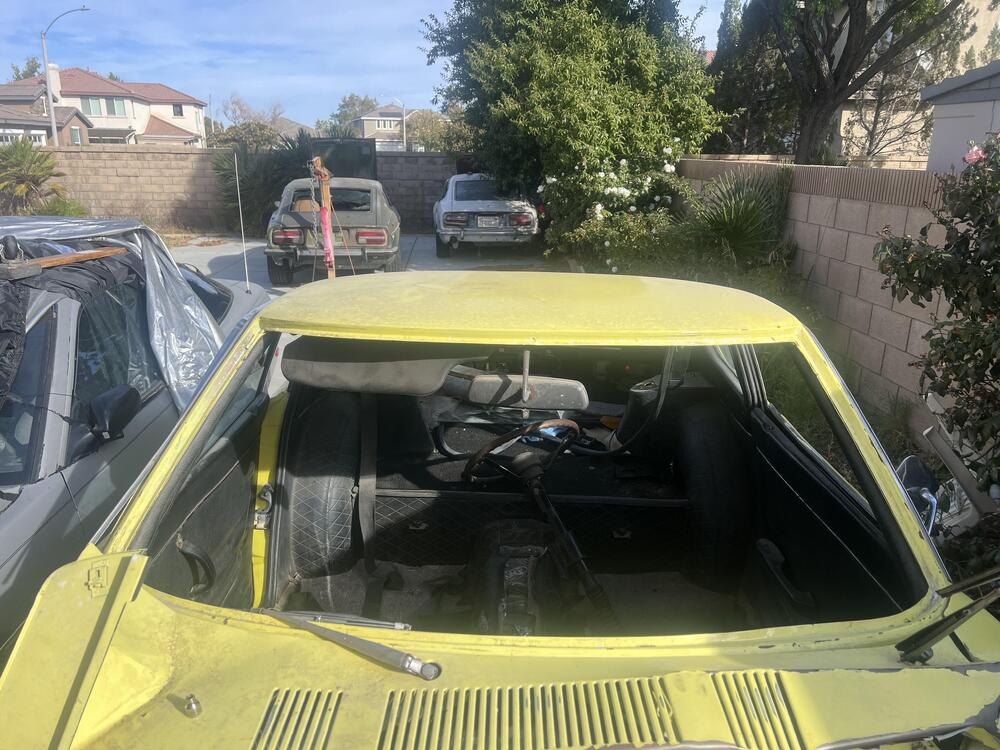
-
Well, I'm going to buy one if only to determine if it could work in an S30. The bigger issue to me is where do I drill a 3/4" hole in the chassis? There are already smaller diameter holes on both sides for the dome light door switches and there's not much room in the same body recess (for the top door hinge) to drill below those. Placing the wiring boots above the door switches would run the risk of them being smashed by the top door hinge. If they're to be placed in the lower recess for the bottom door hinge I'm probably going to have to drill through two vertical panels. Details are always a PITA.
-
Knowing the right search terms is the real trick. I did a first search and turned up the correct description and then searched with that. Some of those pieces look like plastic. Some look like rubber. I would prefer rubber if I could get it
-
Looks like it could be a good basis if it's not rusty. At that discount it might be a scam though
- Yesterday
-
 Stumbled upon this one while browsing Craigslist today. https://seattle.craigslist.org/tac/cto/d/tacoma-very-rare-1980-datsun-280zx-10th/7882710391.html
-
Thanks, Patcon. I searched Amazon and eBay but apparently was not using the correct terminology to turn up what you have found.
-
https://www.amazon.com/s?k=Power+Window+Door+Jamb+Wiring+Boots+Accordion+Style&crid=1SAUDNSLHJ5M7&sprefix=power+window+door+jamb+wiring+boots+accordion+style%2Caps%2C112&ref=nb_sb_noss https://www.amazon.com/SSN-Compatible-Street-Truck-Black/dp/B0CR68XQ6L/ref=sr_1_3?crid=2G81U9YU0FNI5&dib=eyJ2IjoiMSJ9.8fpATH9944czeb9MYItu1Le0STj2Skzrehs8O3ylkQlZWG_8mc2ITQMmIb3fVHnHydfL7yFYnJmvy08Eco2PZXf669mG9374bVw_ofqceG9s3ZxYqdQxoZ-UCOcU4h8C4V9_u25Lu67HEwluoO79kBFg37vMRXXb56L57UyorLEvzo9JwnDlrzKbUIQeGv2leVvJ_gruMz0fNGYBk_-vWQeiHE8fkAWWU2wv2hZOZ-M.n15BblK1JXL0OfrkJ43UCjifE9qWW9-FI0qXMdVCFDw&dib_tag=se&keywords=wire%2Bloom%2Bfor%2Bautomotive%2Bdoors&qid=1758401923&sprefix=wire%2Bloom%2Bfor%2Bautomotive%2Bdoors%2Caps%2C126&sr=8-3&th=1 https://www.amazon.com/Power-Window-Wiring-Boots-Accordion/dp/B0BN1QMKMZ/ref=sr_1_5?crid=2G81U9YU0FNI5&dib=eyJ2IjoiMSJ9.8fpATH9944czeb9MYItu1Le0STj2Skzrehs8O3ylkQlZWG_8mc2ITQMmIb3fVHnHydfL7yFYnJmvy08Eco2PZXf669mG9374bVw_ofqceG9s3ZxYqdQxoZ-UCOcU4h8C4V9_u25Lu67HEwluoO79kBFg37vMRXXb56L57UyorLEvzo9JwnDlrzKbUIQeGv2leVvJ_gruMz0fNGYBk_-vWQeiHE8fkAWWU2wv2hZOZ-M.n15BblK1JXL0OfrkJ43UCjifE9qWW9-FI0qXMdVCFDw&dib_tag=se&keywords=wire+loom+for+automotive+doors&qid=1758401923&sprefix=wire+loom+for+automotive+doors%2Caps%2C126&sr=8-5
-
Well just to let you know mechanic managed to make the 240z tachometer work with the MSD Blaster 2 coil which i believe is 0.7 ohms and pertronix 1711 ingitor module. I hope it doesnt burn the 1711 ignitor.
-
I'm putting power windows (one supplier option is JDMSPEED on Amazon) and may some day also add power door locks. Either way, I need to run wires into the doors. To do that, I want to make sure they are protected from getting crimped or severed during open/close operations. On my "modern" cars, each one has bespoke (don't you just love English?) rubber tubes protecting exactly these kinds of wires. So, my question to those of you who have also run window, locks or speaker wires into your S30 doors is, what protection did you provide those wires? I'm hoping the answers will be off-the-shelf items obtainable from a local dealership as I doubt the local AutoZone carries such things, but you please tell me. And, of course, any photos of your installations will be most appreciated.